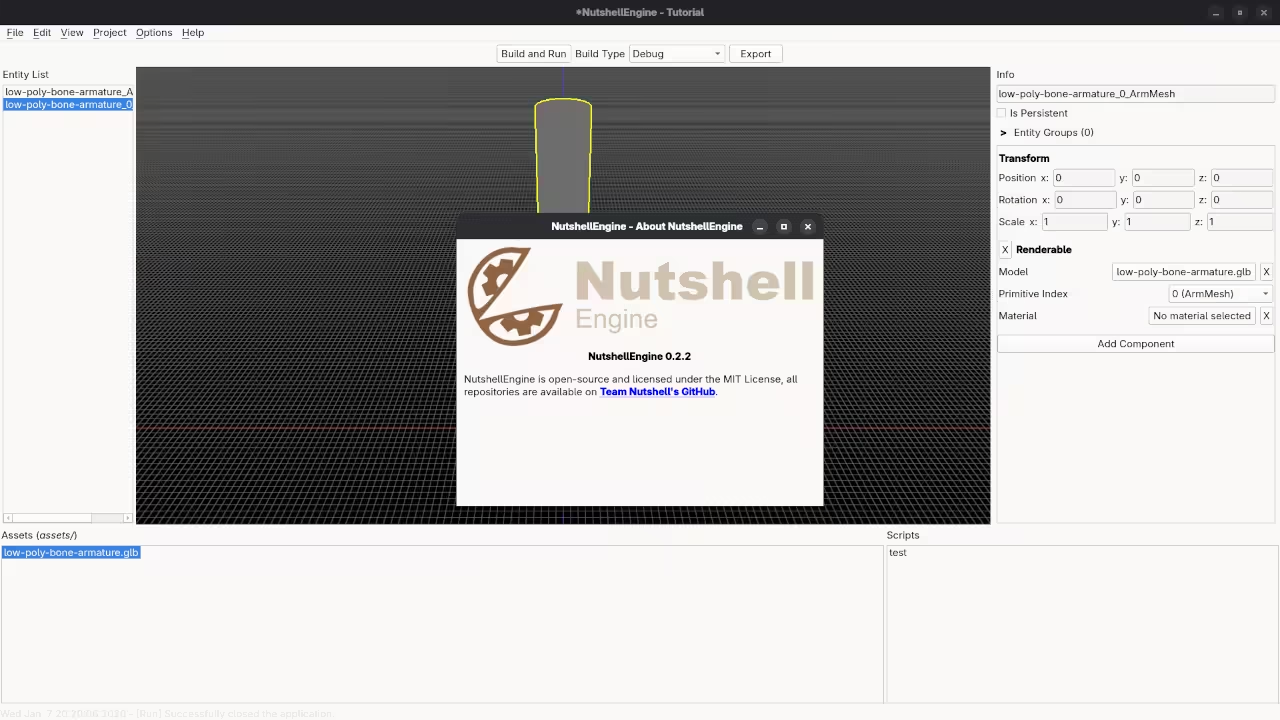
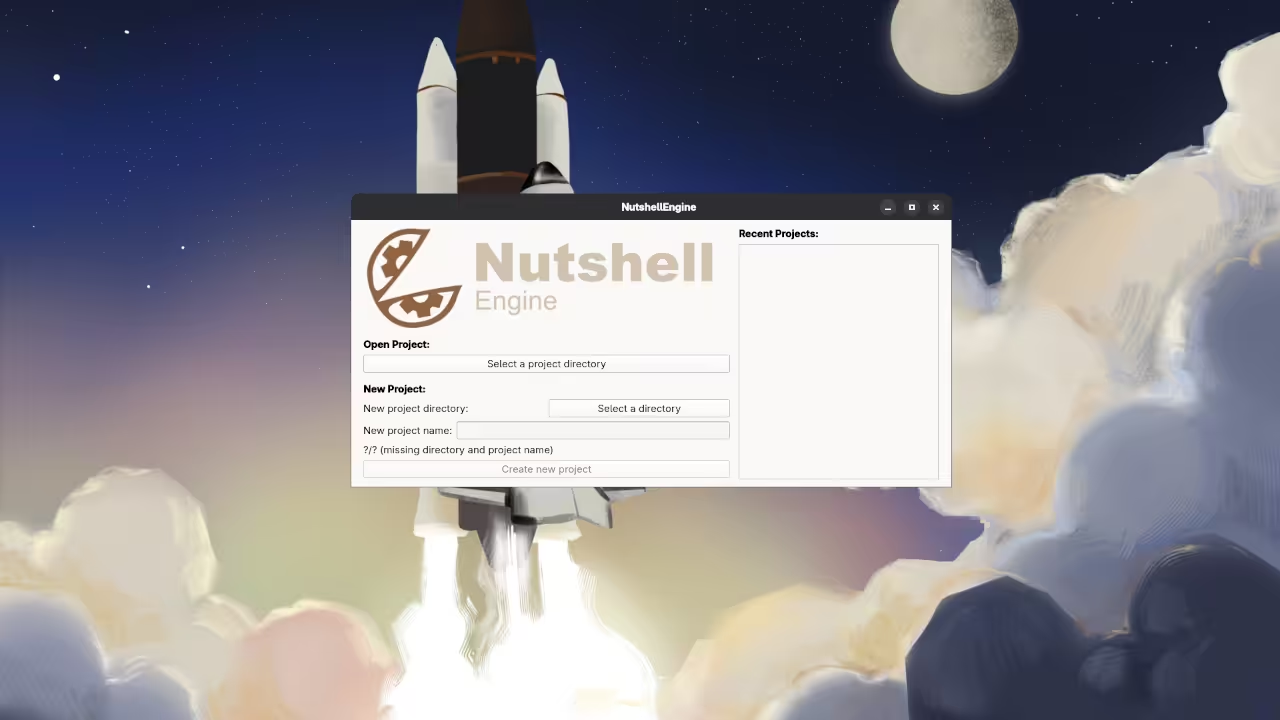
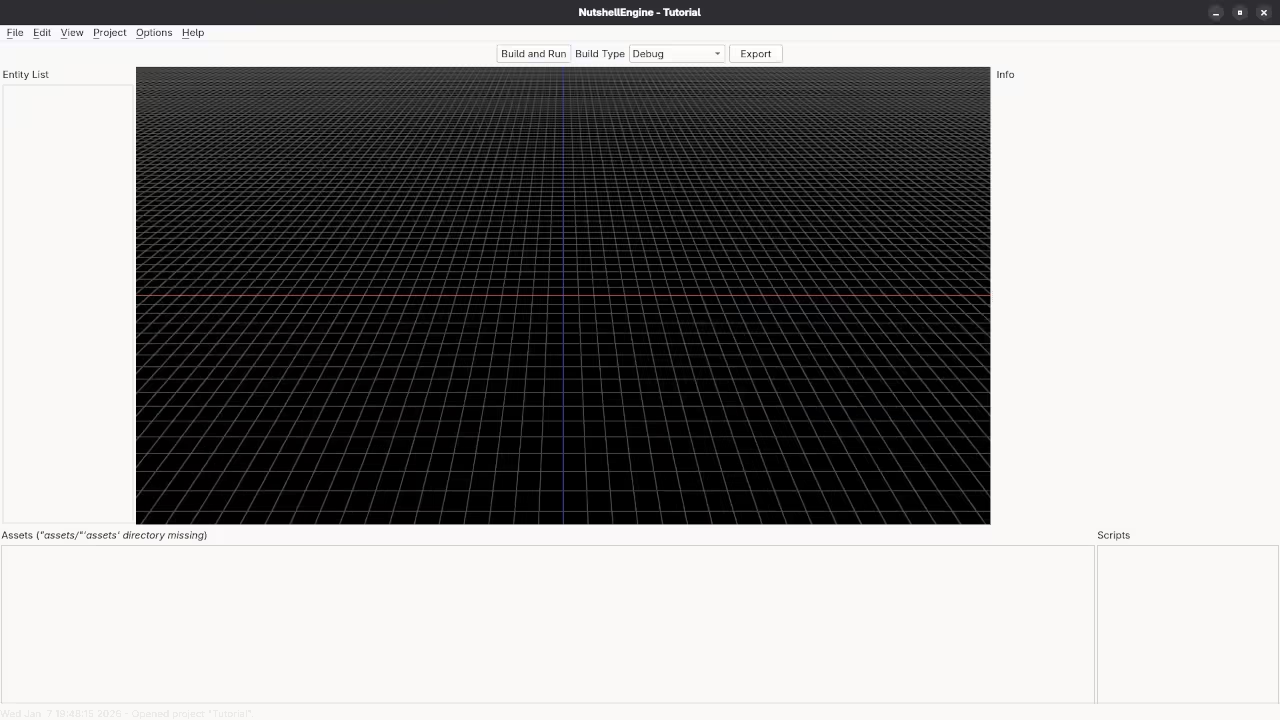
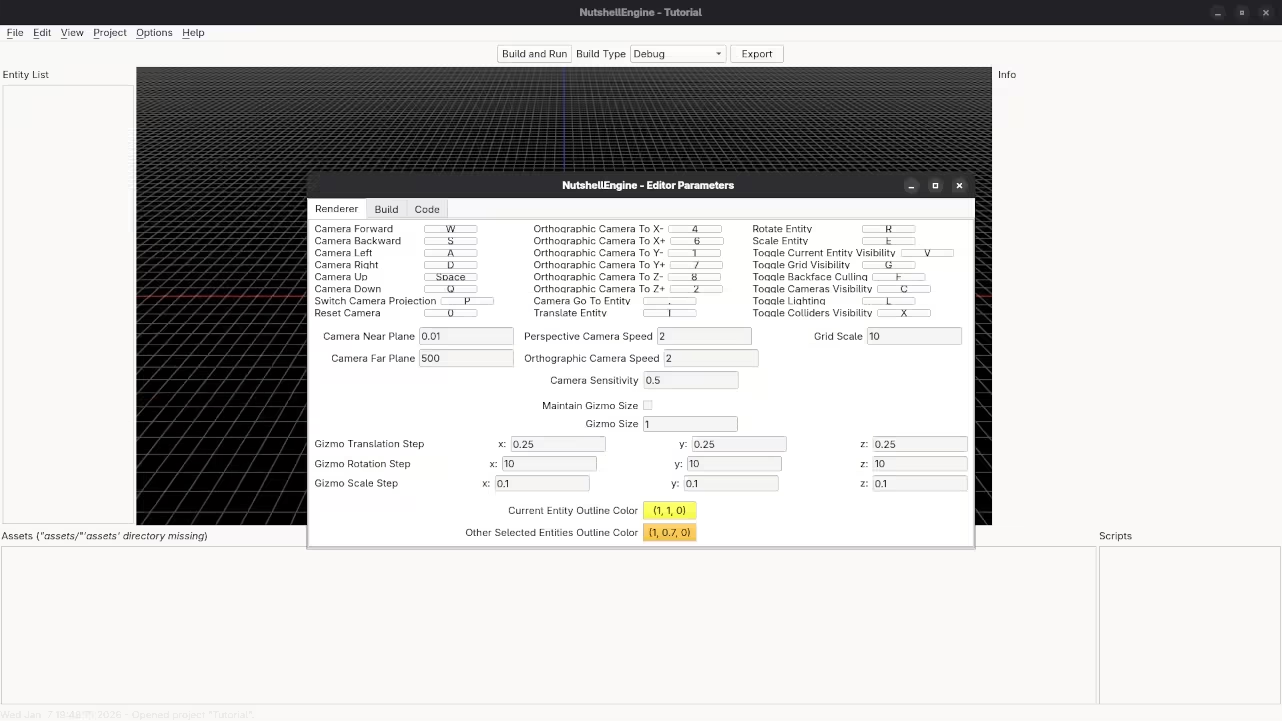
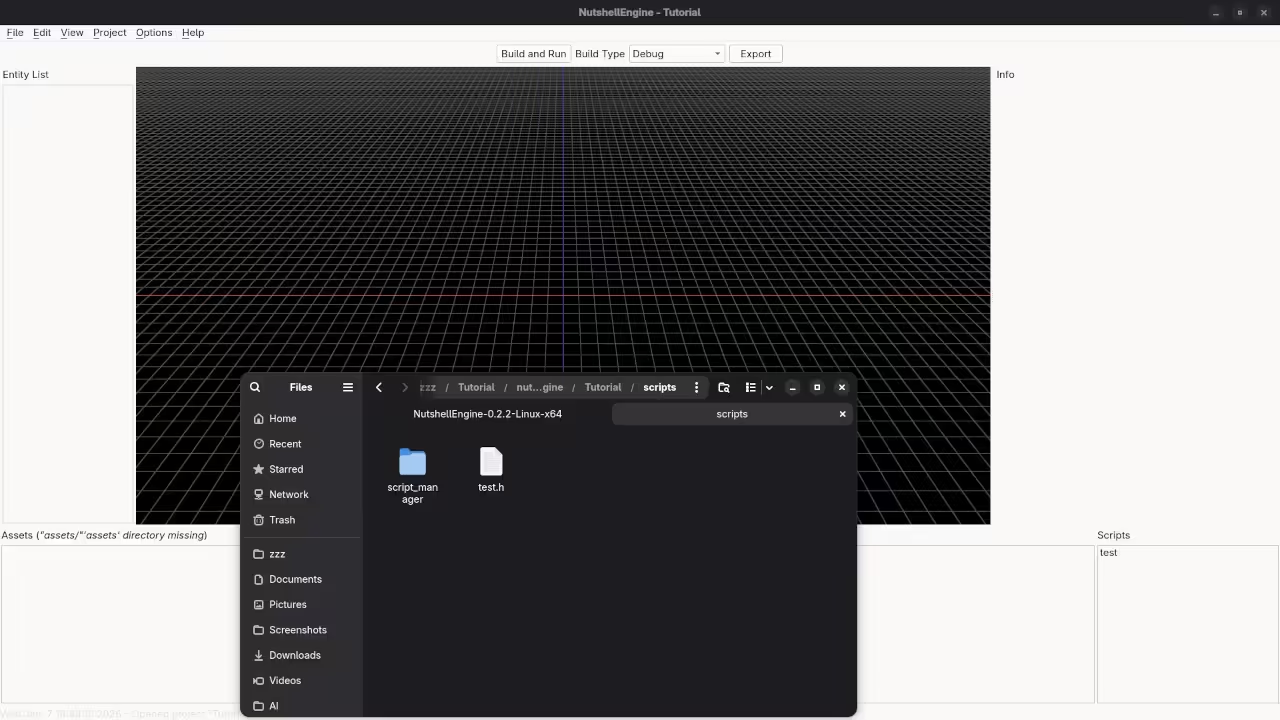
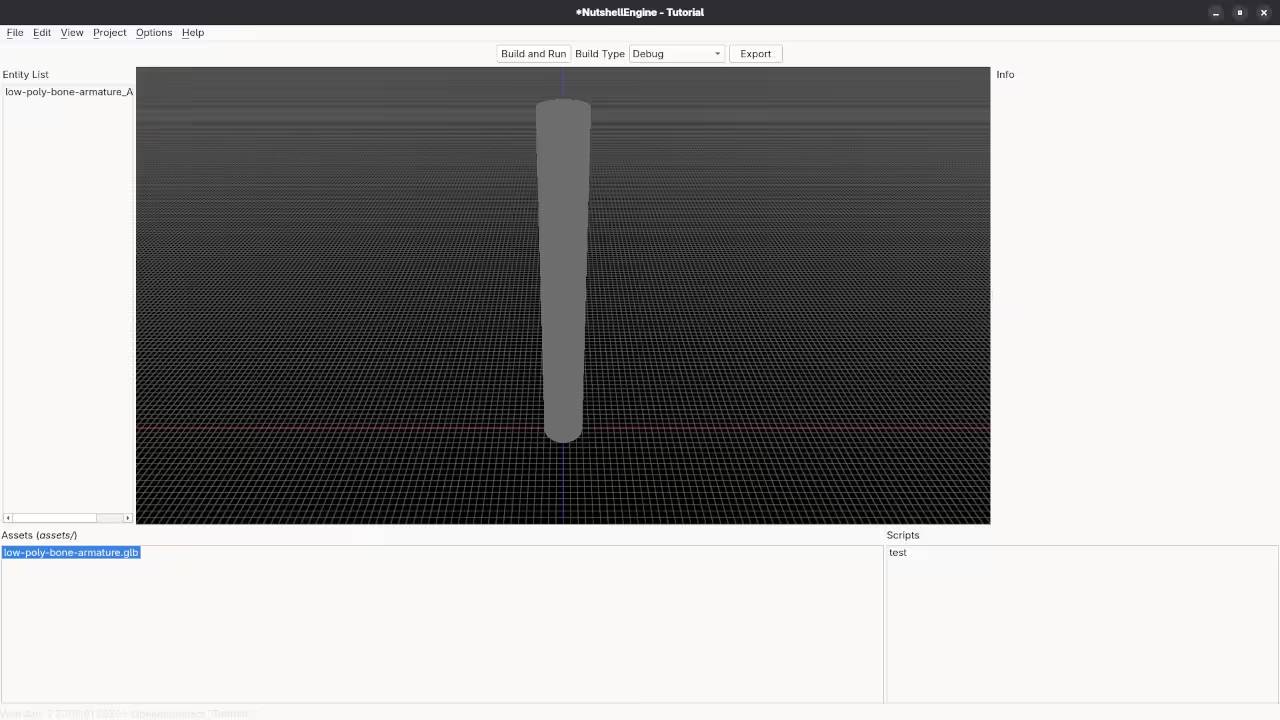
It is an exciting time to be diving into game development especially when you have the chance to peek under the hood of how a modern engine actually functions. Today I want to introduce you to a project that has been a joy to work with the NutshellEngine. There is something uniquely satisfying about seeing 3D objects come to life inside the NutshellEngine Editor and it is the perfect playground for anyone looking to understand the mechanics behind the games we love to play.
The Philosophy of Open Source Game Engines
When we talk about game engines we often get bogged down in technical jargon but the most important thing to understand about NutshellEngine is its MIT license. For you as a developer this is a massive win. It means the engine is truly open source whether you want to build the next indie hit or you are an engine developer who wants to pull the code apart to see how the gears turn you have the freedom to do so without jumping through legal hoops. It is a framework designed to empower the community.
Understanding 3D Concepts and Logic
As you start exploring the editor you will encounter some fundamental concepts that drive almost everything in 3D space. One of the most important is the 3D transform. Think of this as the GPS for every object in your game world it tells the engine exactly where an object sits which way it is facing and how big it should be. Behind the scenes the engine manages these objects using arrays which are essentially organized lists that allow the computer to keep track of hundreds or thousands of items efficiently. Understanding these lists is the secret to keeping your game running smoothly as it grows in complexity.
Installing NutshellEngine on Fedora Linux
If you are running Fedora 43 with the Gnome Desktop on Wayland you are in the perfect environment to get started. To install the engine you will first need to gather your tools via the terminal. You can install the core dependencies like Qt6 for the interface and Vulkan for the graphics by running
Once your environment is prepped you can download the source code directly from the Team Nutshell GitHub organization. You will want to clone the main repository along with the editor to get the full experience. In your terminal simply run
Once the editor launches creating your first 3D object is incredibly intuitive. You simply navigate to the Entity menu select Create and choose a primitive like a Cube. To move it you interact with the Transform gizmo in the viewport which allows you to slide your object along the X Y and Z axes in real time. I have put together a detailed walkthrough to help you see exactly how this looks in practice.
📷 Screenshots
NutshellEngine Editor Displaying New Project DialogNutshellEngine Editor Displaying Main OverviewNutshellEngine Editor Displaying ParametersNutshellEngine Editor Displaying ScriptNutshellEngine Editor Displaying GLB Model
🎬 Live YouTube Screencast
Video Displaying The Installation And Use Of NutshellEngine
In the video above I walk through the setup on Fedora and demonstrate the code being generated and reviewed in real time. It is one thing to read about C plus plus and Vulkan but seeing the logic flow from a blank script to a functioning 3D scene helps bridge the gap between theory and practice.
Experimenting with Your Code
Once you have the engine running I highly encourage you to experiment. Try a few remixes change the scale of an object in the transform settings or try to populate an array with different types of entities to see how the engine handles the load. This kind of break and fix learning is exactly how the best developers hone their craft.
Continue Learning Programming
Building projects like this is the first step but becoming a truly proficient programmer requires a rock solid foundation. If you find yourself wanting to go deeper into the logic and architecture of software I have written a series of books that break down complex programming topics into manageable lessons. I also offer comprehensive online courses designed to take you from a beginner to a confident developer. For those looking for a more personalized roadmap I am available for one on one tutorials and professional consultations to help you solve specific technical challenges or plan your next big project.
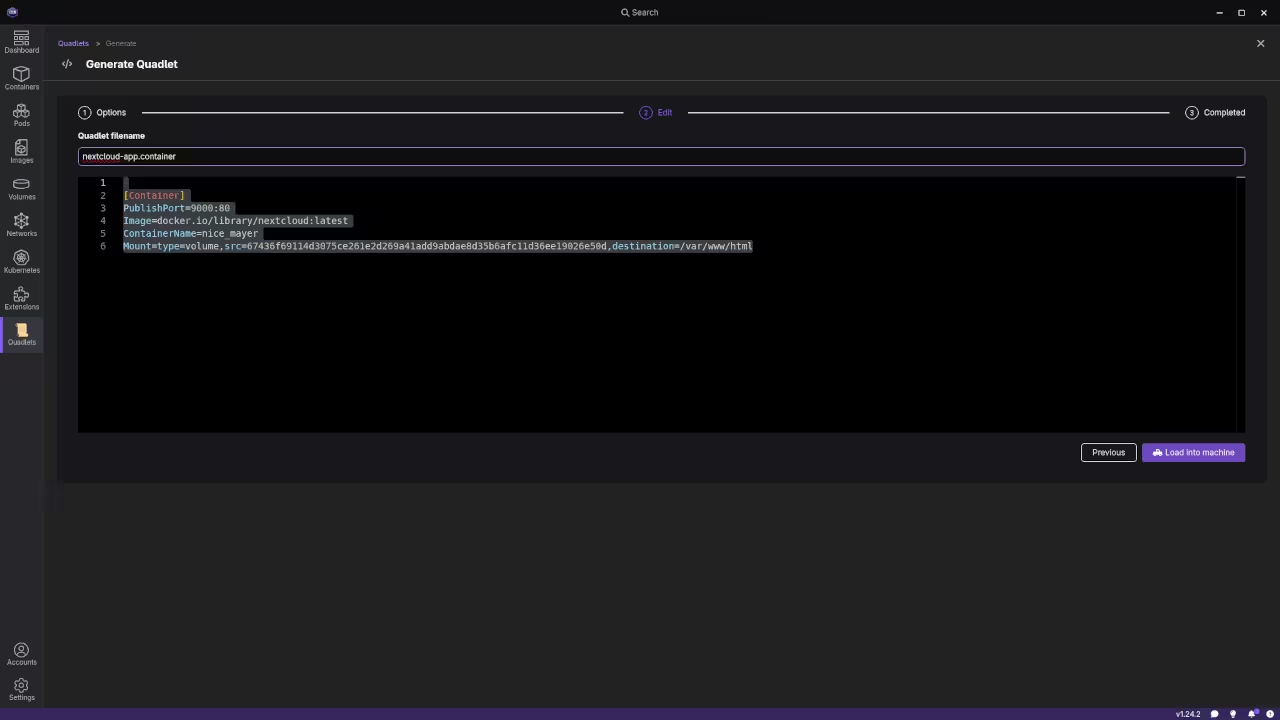
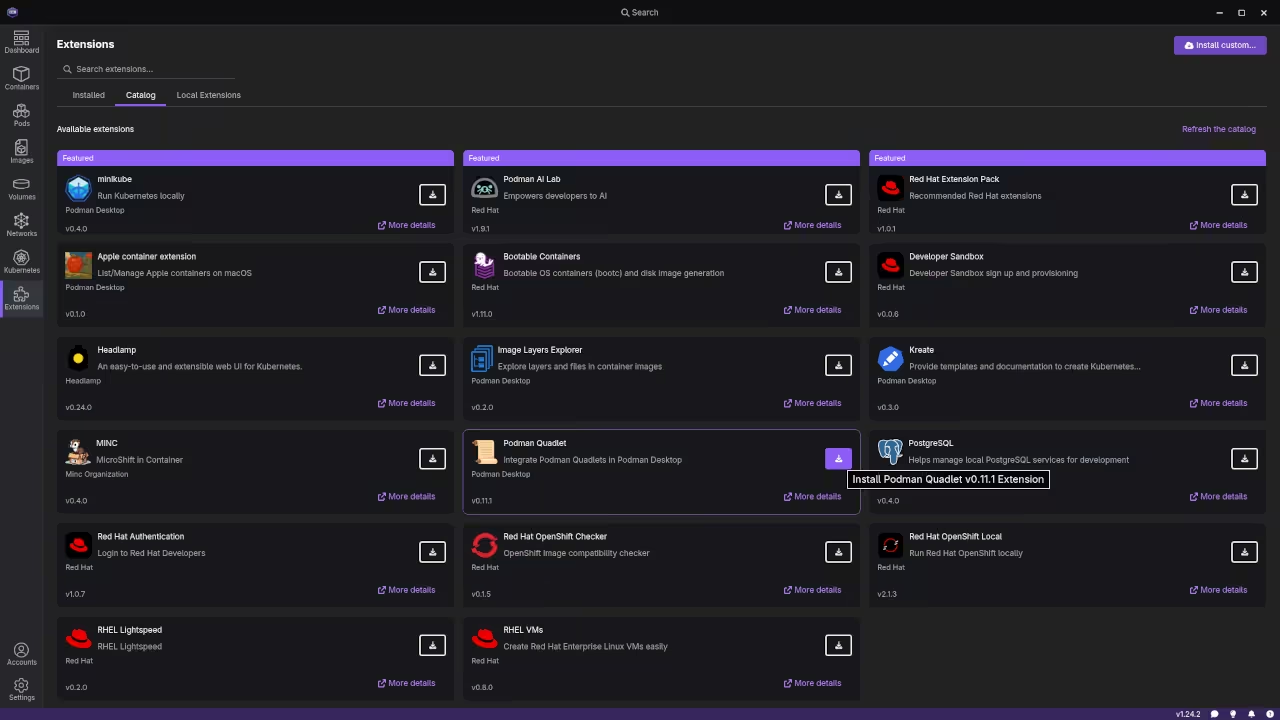
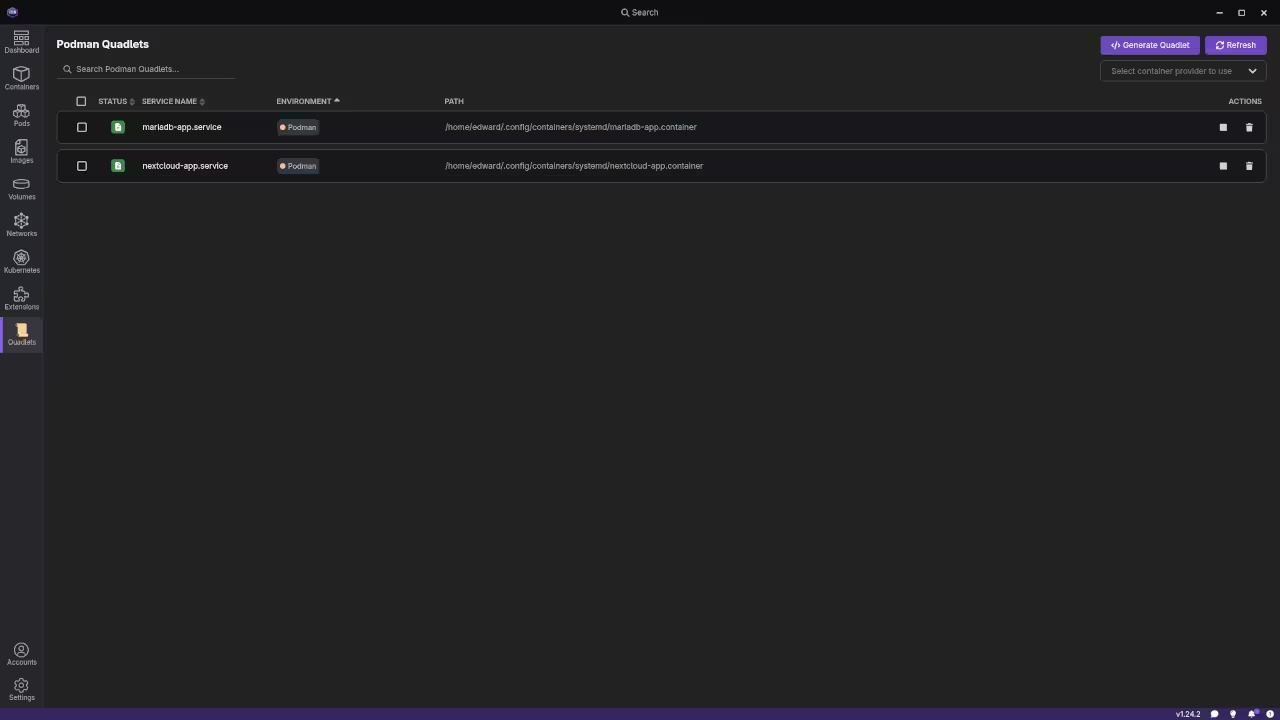
Installing Podman Desktop for Your Nextcloud Project
To follow along with our Nextcloud deployment project you first need to install Podman Desktop on your machine. This tool serves as your command center for managing containers through a user friendly interface.
Installation Steps for Fedora Linux
Since we are focusing on a robust Linux environment for our Nextcloud server Fedora is an excellent choice. Follow these simple steps to get started.
1. Enable Flatpak Support
Most modern Linux distributions use Flatpak to distribute desktop applications safely. Open your terminal and ensure Flatpak is enabled on your system.
2. Install Podman Desktop via Flathub
The easiest way to install the software is through the Flathub repository. You can find Podman Desktop by searching in your Software Center or by using the following command in your terminal.
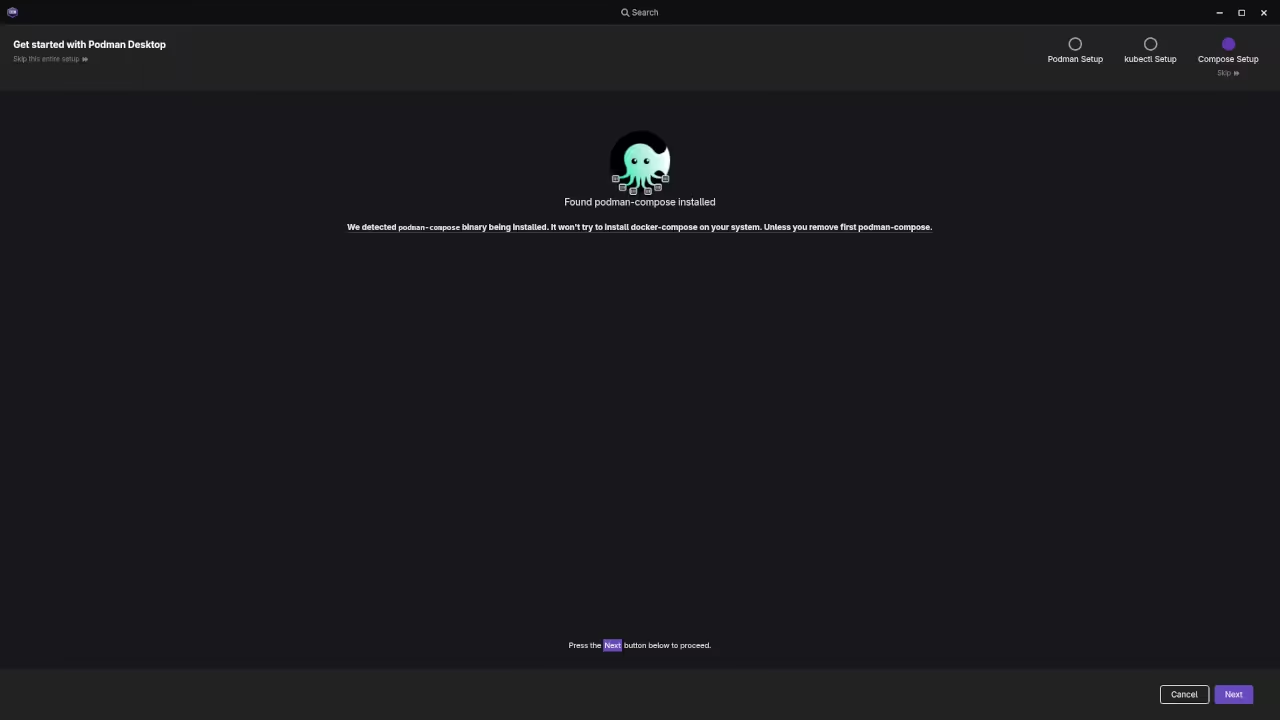
Once the installation is complete you can launch Podman Desktop from your application menu. On the first run the application will check if the Podman engine is installed on your system. If it is missing the dashboard will provide a simple button to install the necessary components for you.
Verifying the Installation
After launching the application you should see a dashboard indicating that the Podman engine is active. This confirms that your system is ready to handle the Nextcloud container and the Quadlet files we discussed earlier.
Getting Nextcloud with Podman Desktop
You do not need to be a command line expert to get started. You can pull the Nextcloud software directly through the Podman Desktop interface with a few clicks.
1. Download the Nextcloud Image
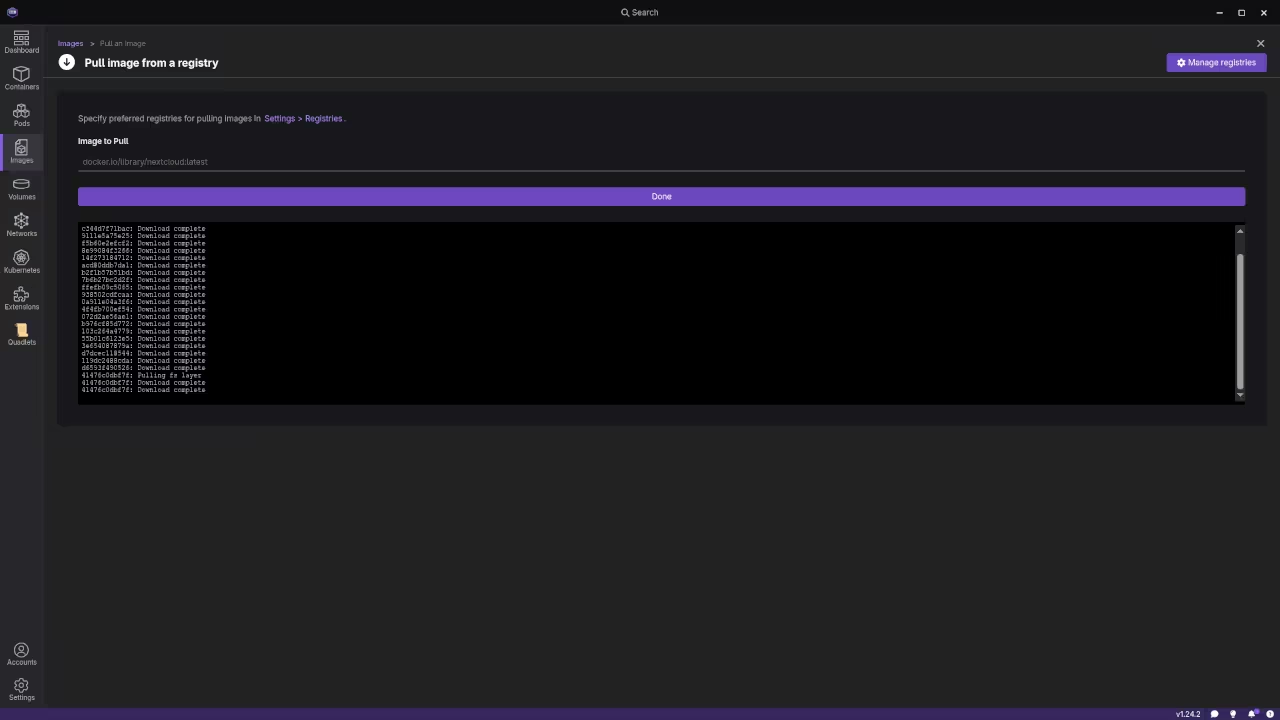
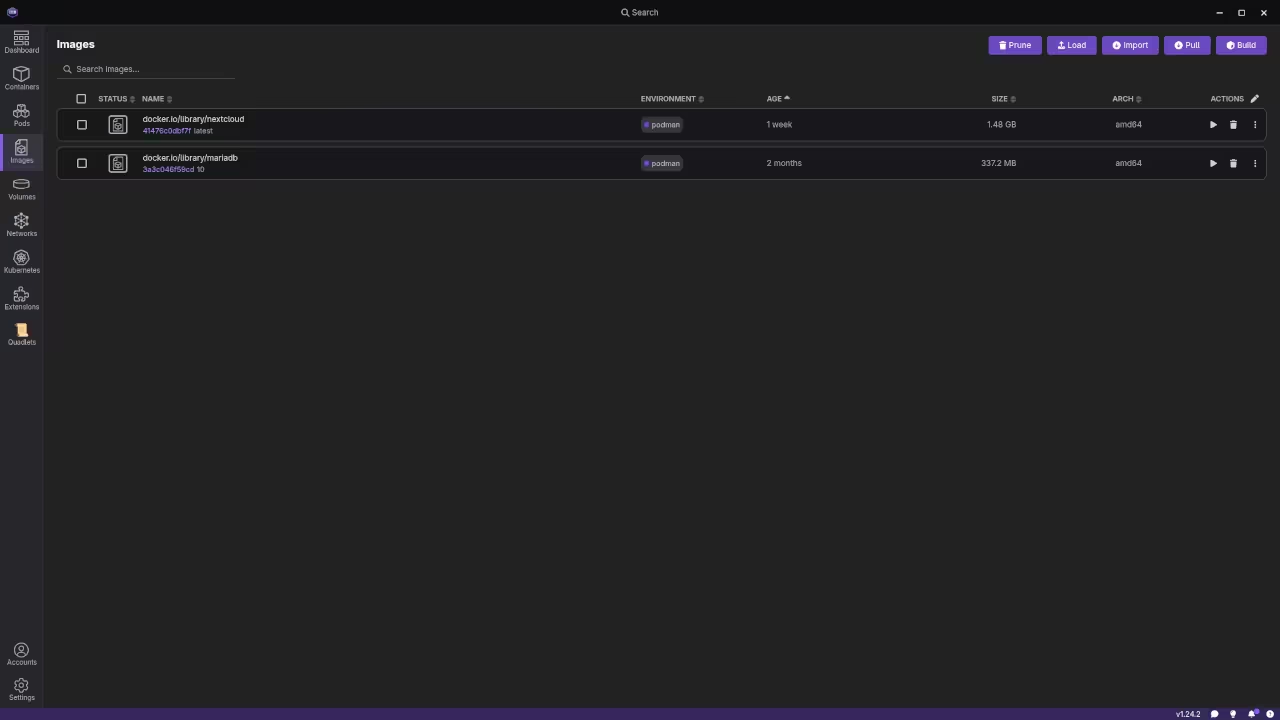
Open Podman Desktop and navigate to the Images tab on the left. Click the Pull Image button and enter docker.io/library/nextcloud:latest in the search box. This downloads the official Nextcloud package to your computer.
2. Start Your Container
Once downloaded, click the Play icon next to the Nextcloud image. In the configuration settings, find the Port Mapping section and map host port 8080 to container port 80. This tells your computer to show Nextcloud when you visit port 8080 in your browser.
3. Finalize the Setup
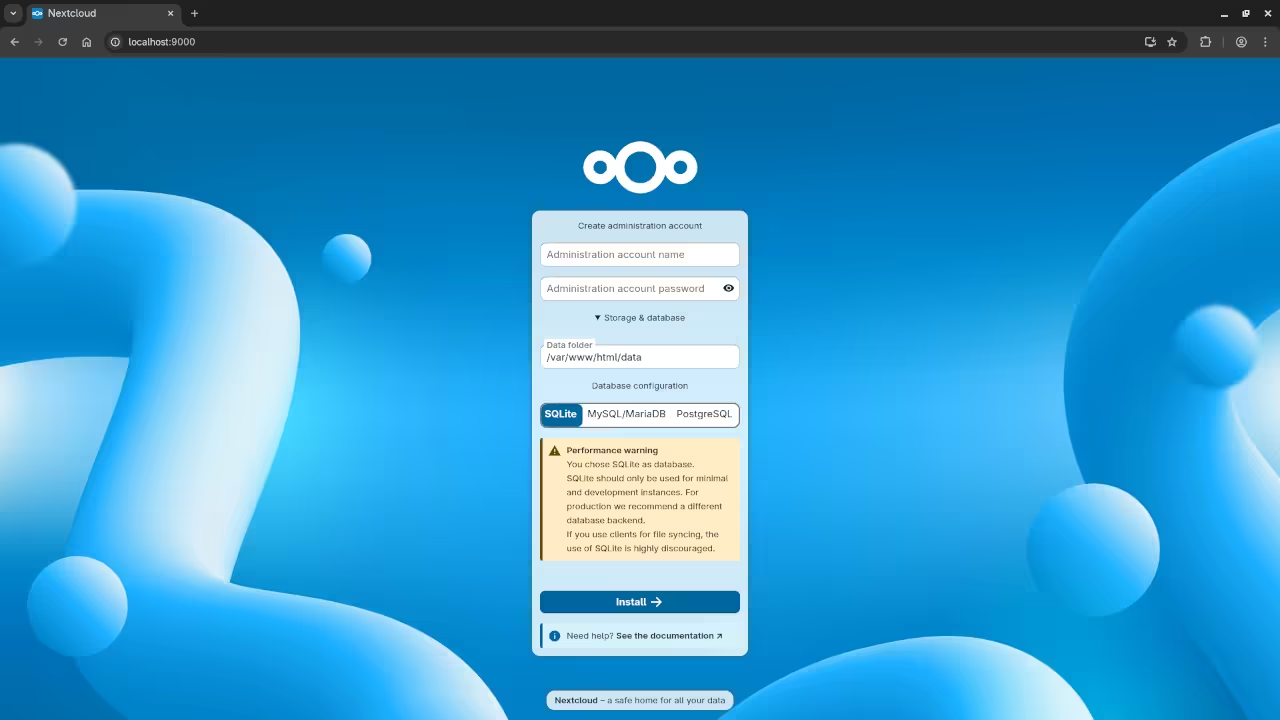
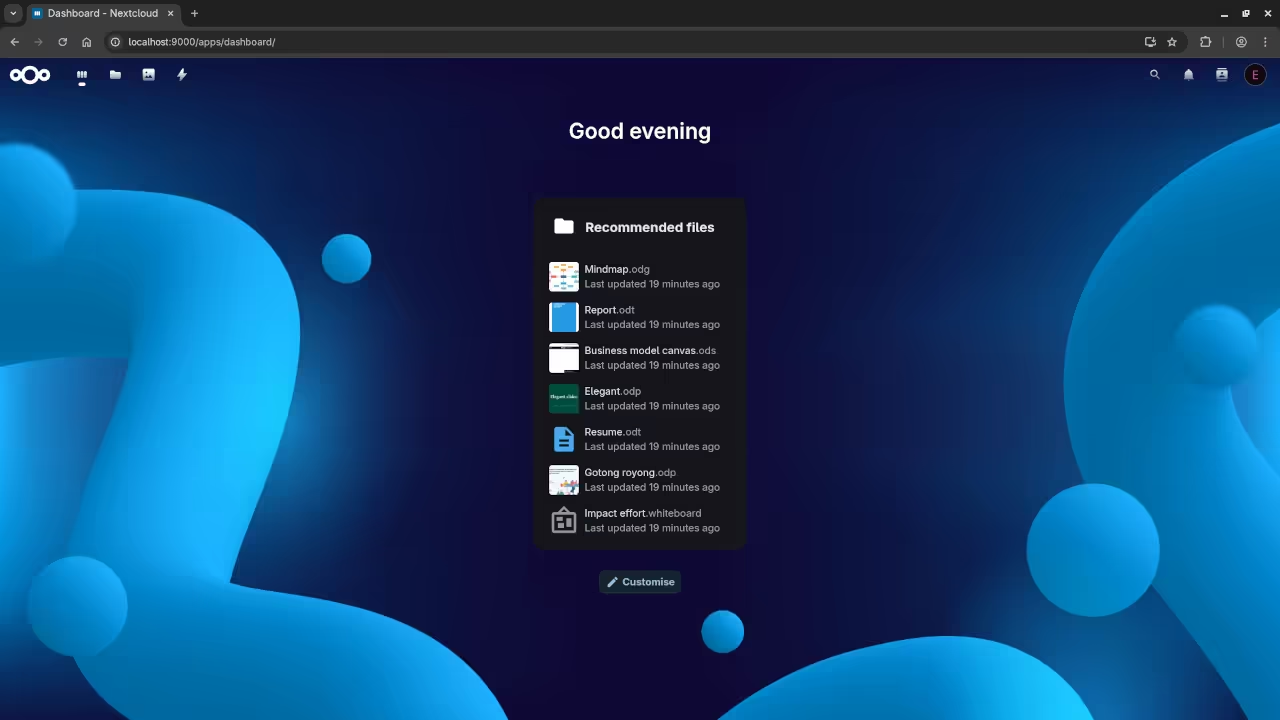
Click Start Container and wait for the status to turn green. Open your web browser and type localhost:8080 into the address bar. You will be greeted by the Nextcloud setup wizard where you can create your admin account.
Now that you have the management tools installed you are ready to view the screencast and begin your deployment.
🎬 Live YouTube Screencast
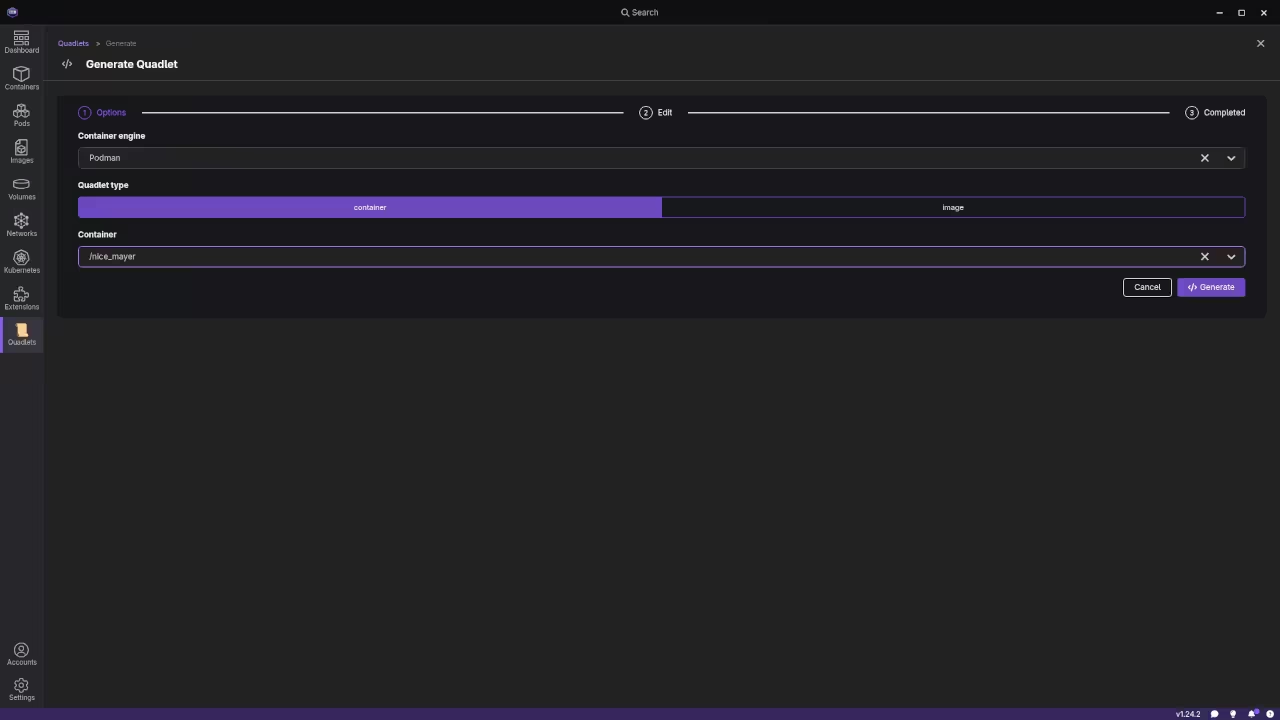
Video Displaying The Installation And Use Of Nextcloud Via Podman Desktop As Quadlet
Let Us Keep Learning Together
Building your own server environment is an empowering journey. If you would like more guidance on Linux systems or container management I offer several ways to help you succeed.
Deepen Your Knowledge: View my library of books on Amazon which break down complex technical topics into easy guides.
Structured Learning: I offer comprehensive online courses that walk you through projects step by step.
Introduction What this project is and what you will learn
Generative AI for Krita is an open source project that connects the Krita drawing application with ComfyUI. It allows you to generate and modify images using AI directly inside Krita while everything runs on your own computer.
This guide is written for beginners who are learning self hosting and want to understand how generative AI works with Krita. You will learn what the project does how the parts fit together and how to prepare for installing it on Fedora Linux.
What Generative AI for Krita does
Generative AI for Krita adds AI powered features to your normal drawing workflow. You can generate images from text improve sketches edit parts of an image or extend an image beyond its edges.
Krita stays focused on drawing and image editing. ComfyUI handles the AI processing. The plugin connects the two so they can work together smoothly.
High level overview of ComfyUI in the browser
ComfyUI is a local web application. When it is running you open it in a web browser on your own computer. Even though it uses a browser nothing is uploaded to the internet.
ComfyUI uses a visual workflow made of nodes. Each node performs one task such as loading a model or generating an image. When the workflow runs ComfyUI uses your computer hardware to generate results.
How Krita and ComfyUI work together
Krita is the place where you draw and edit images. ComfyUI is the engine that runs the AI models. The Generative AI for Krita plugin acts as a bridge between them.
When you trigger an AI action in Krita the plugin sends the image and prompt to ComfyUI. ComfyUI processes the request and sends the generated image back into Krita.
Key concepts beginners should understand
Models
Models are trained AI files that know how to generate images. They are stored and loaded by ComfyUI not by Krita.
Prompts
Prompts are text descriptions that tell the AI what to generate. Krita provides a simple interface for sending prompts to ComfyUI.
Masks and inpainting
Selections in Krita can be used as masks. Masks tell the AI which part of an image it is allowed to change.
Workflows
A workflow is the set of connected nodes inside ComfyUI. The Krita plugin includes ready to use workflows so beginners do not need to build them from scratch.
Self hosting
Self hosting means everything runs on your own computer. You control your data your models and your learning process.
Beginner friendly installation guide
The setup has three main parts. Krita ComfyUI and the Generative AI plugin. Understanding this structure makes installation much easier.
Step one Install Krita
Krita is your main drawing application. On Fedora Linux it is commonly installed using Flatpak or system packages. Make sure Krita opens correctly and you can create a canvas.
Krita does not include AI by default. The plugin will be added later.
Step two Install ComfyUI
ComfyUI runs the AI models. It requires Python and runs from its own project folder. When started it opens a local web interface in your browser.
If you can see the ComfyUI interface in your browser the installation is working.
Step three Download AI models
ComfyUI needs models to generate images. At minimum you need a Stable Diffusion checkpoint model. Models are placed into specific ComfyUI folders so they appear in the interface.
Step four Install the Generative AI for Krita plugin
It is placed into the Krita plugin directory and then enabled in Krita settings. After restarting Krita the AI panels become available.
Step five Connect Krita to ComfyUI
The plugin is configured to point to the local ComfyUI address. Once connected Krita can send images and prompts to ComfyUI and receive results back.
Step six Test a simple generation
Open a blank canvas in Krita enter a short prompt and generate an image. The result should appear directly in Krita.
Common beginner mistakes
It is normal to forget to install models forget to restart Krita or confuse where files should go. These are part of learning and easy to fix once you understand the system.
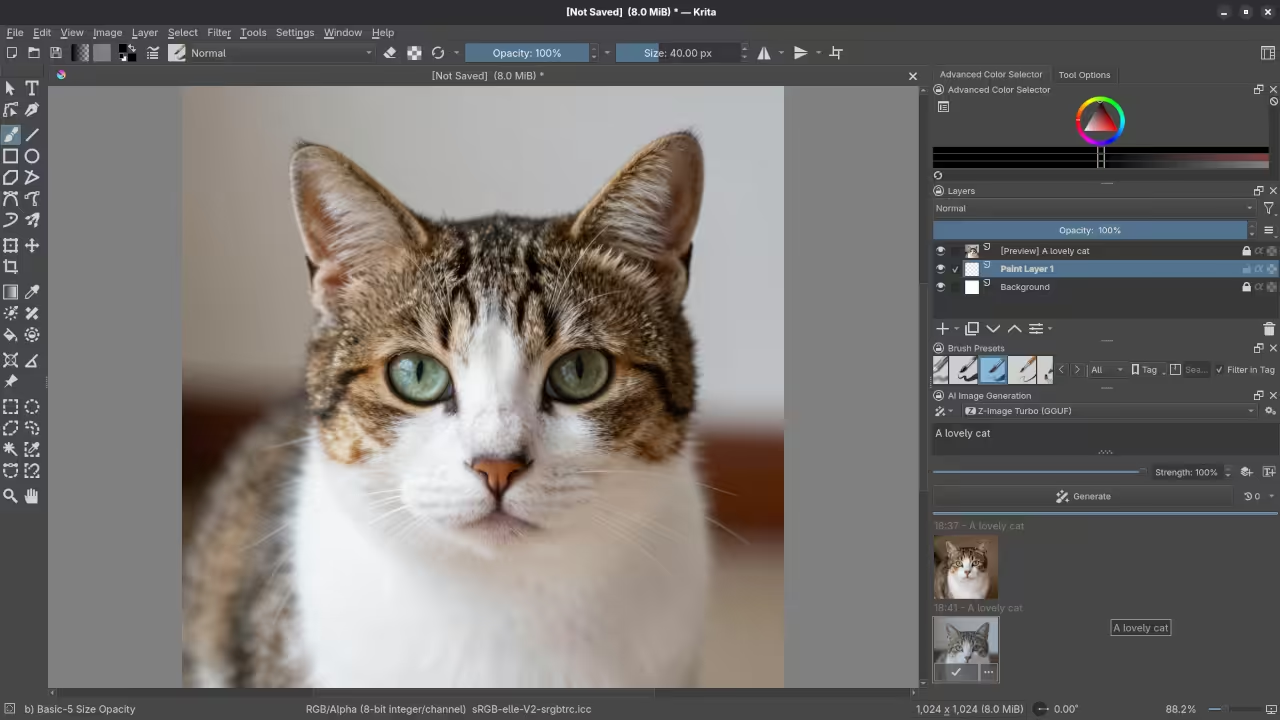
📷 Screenshots
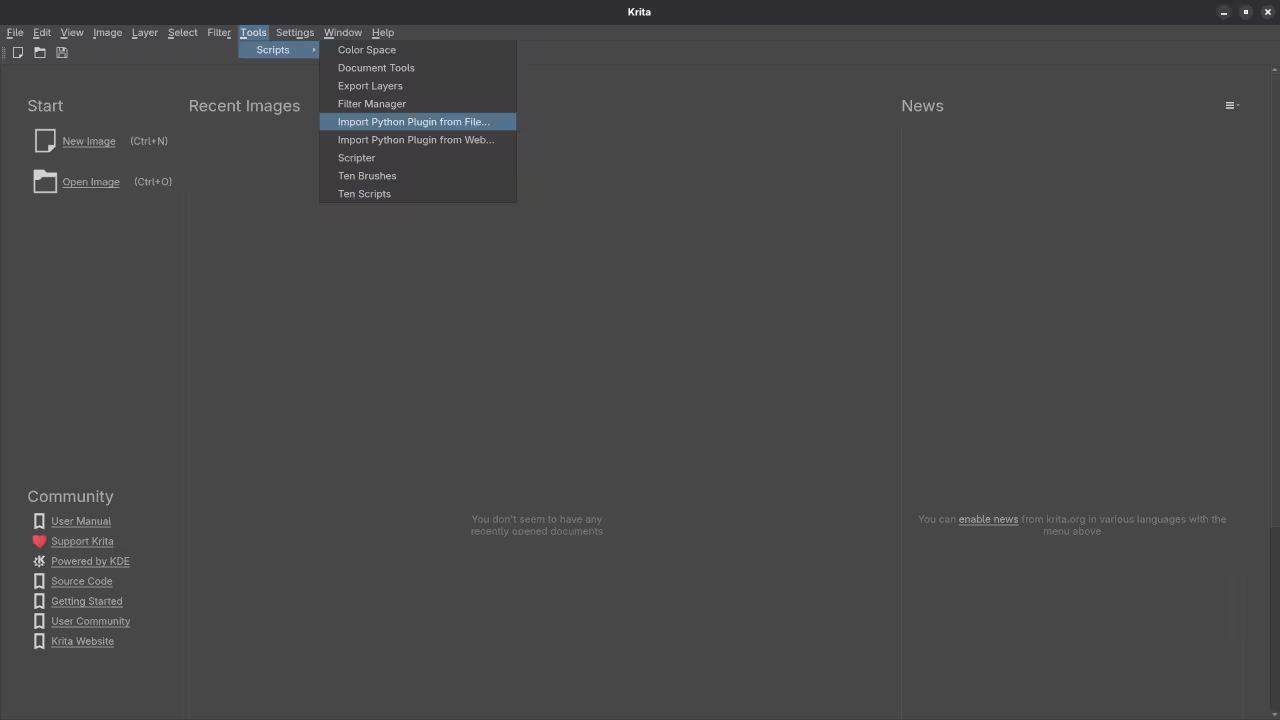
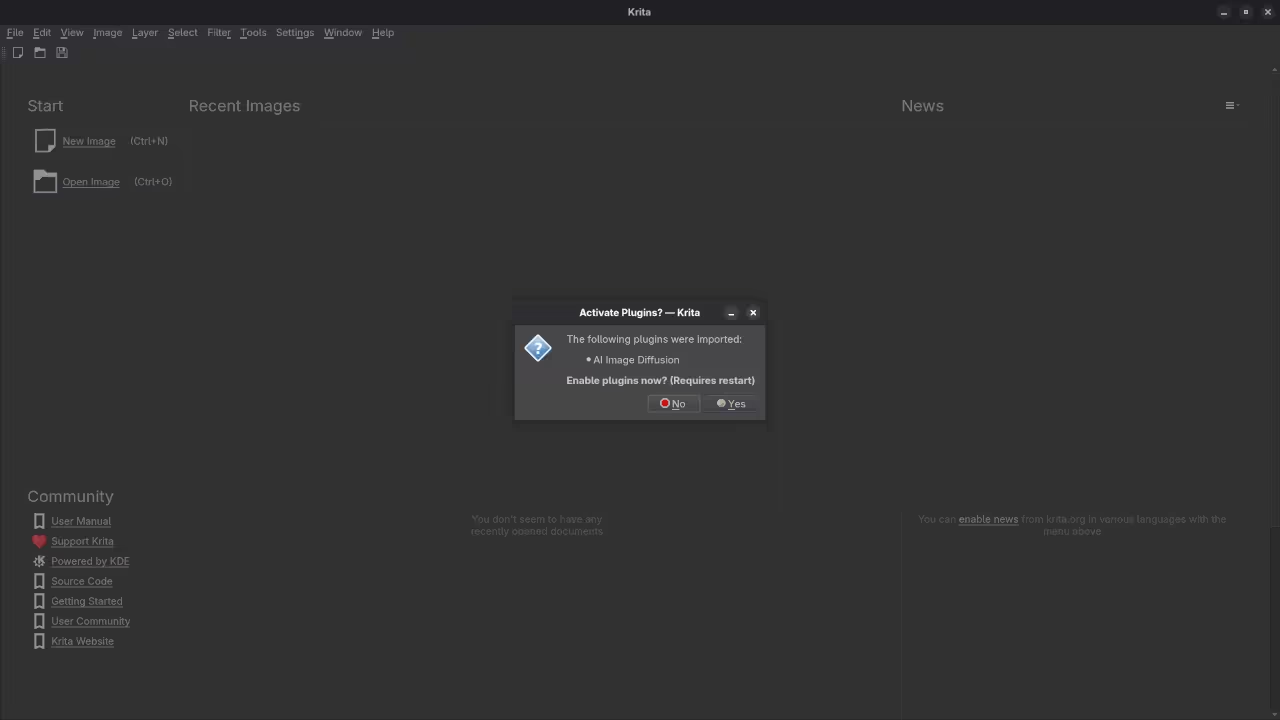
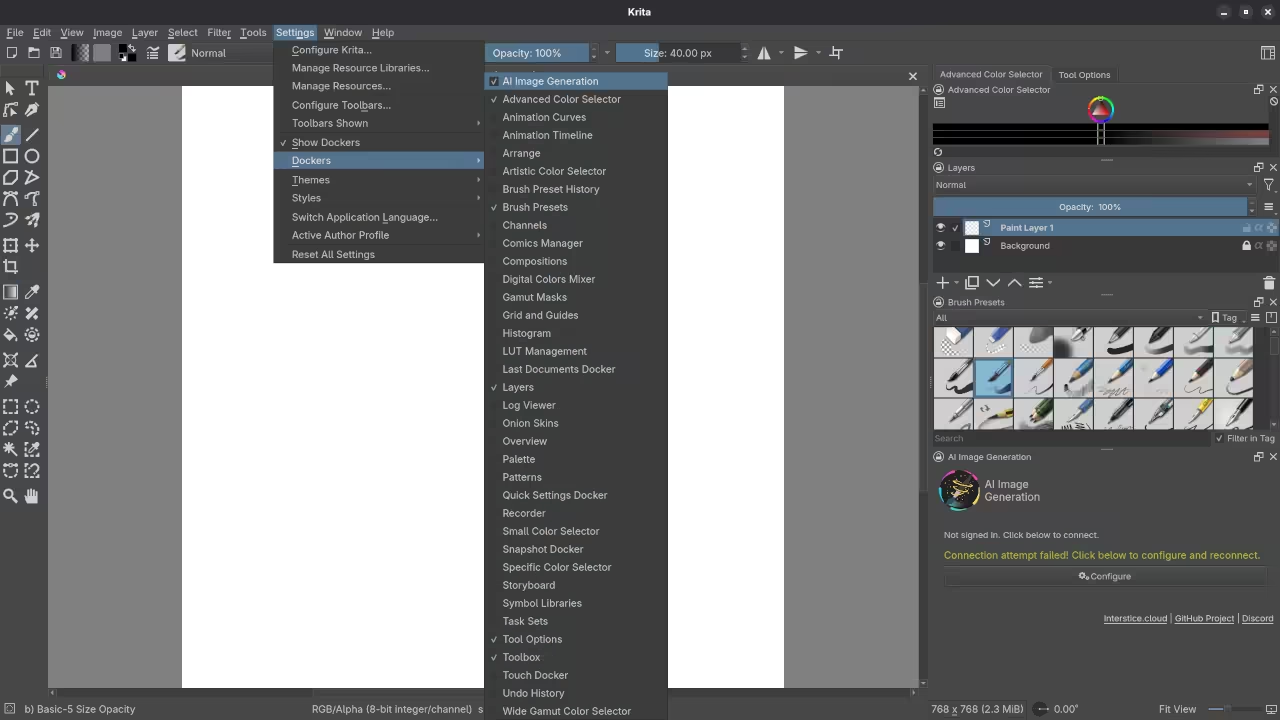
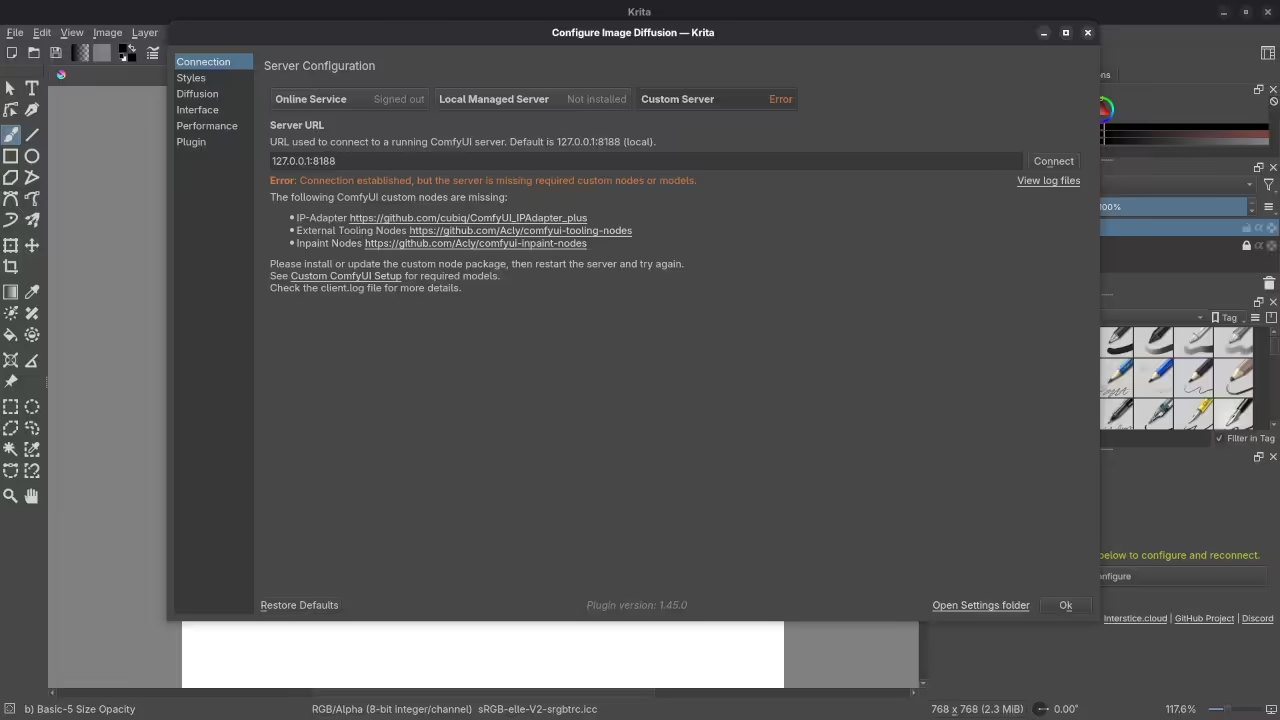
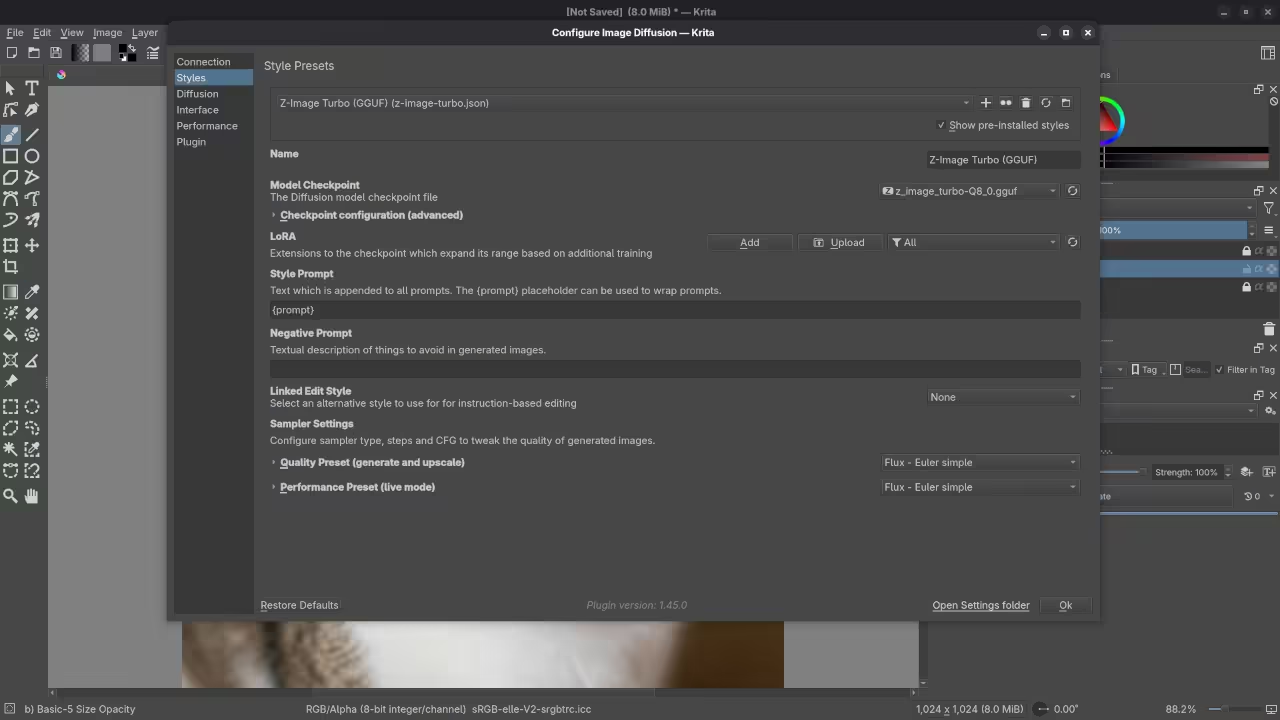
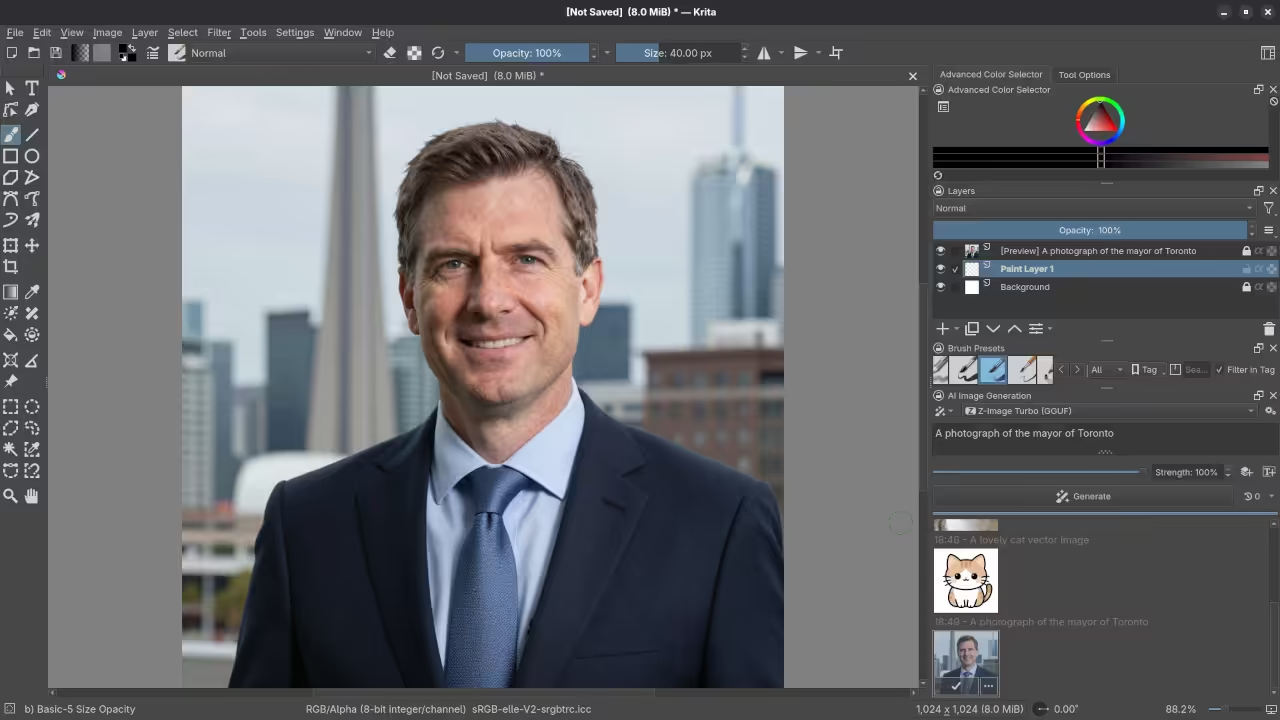
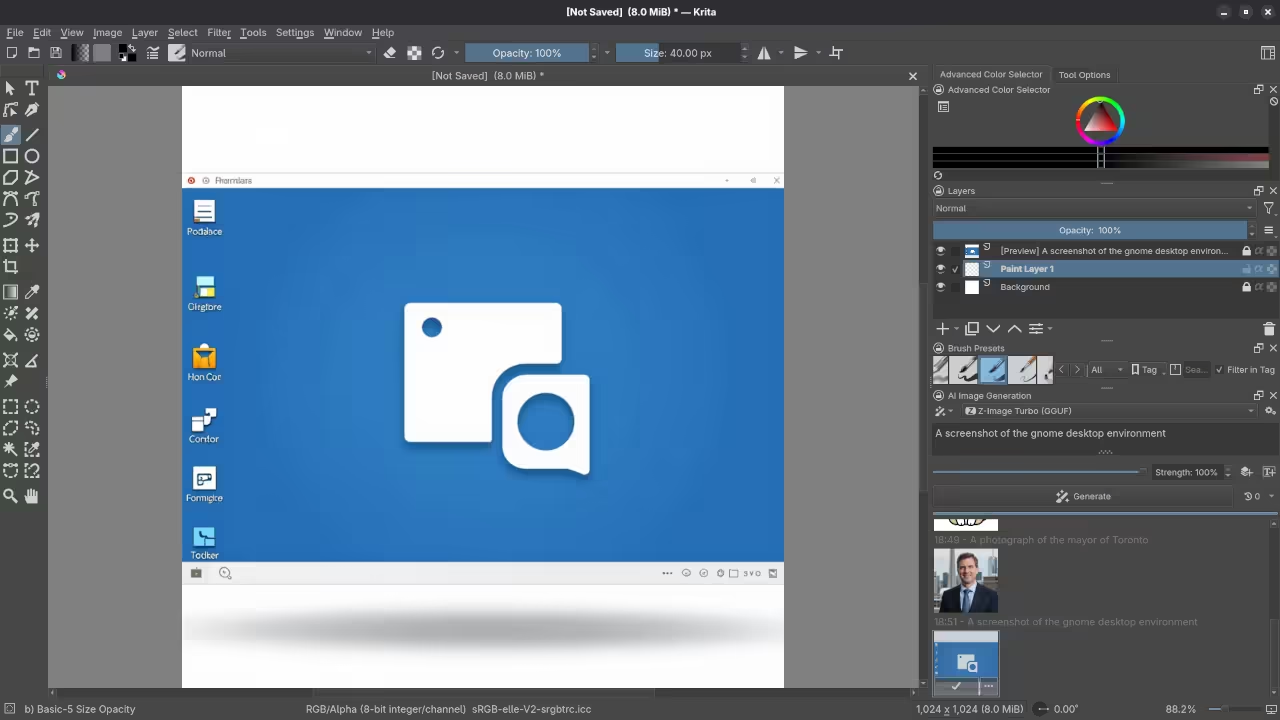
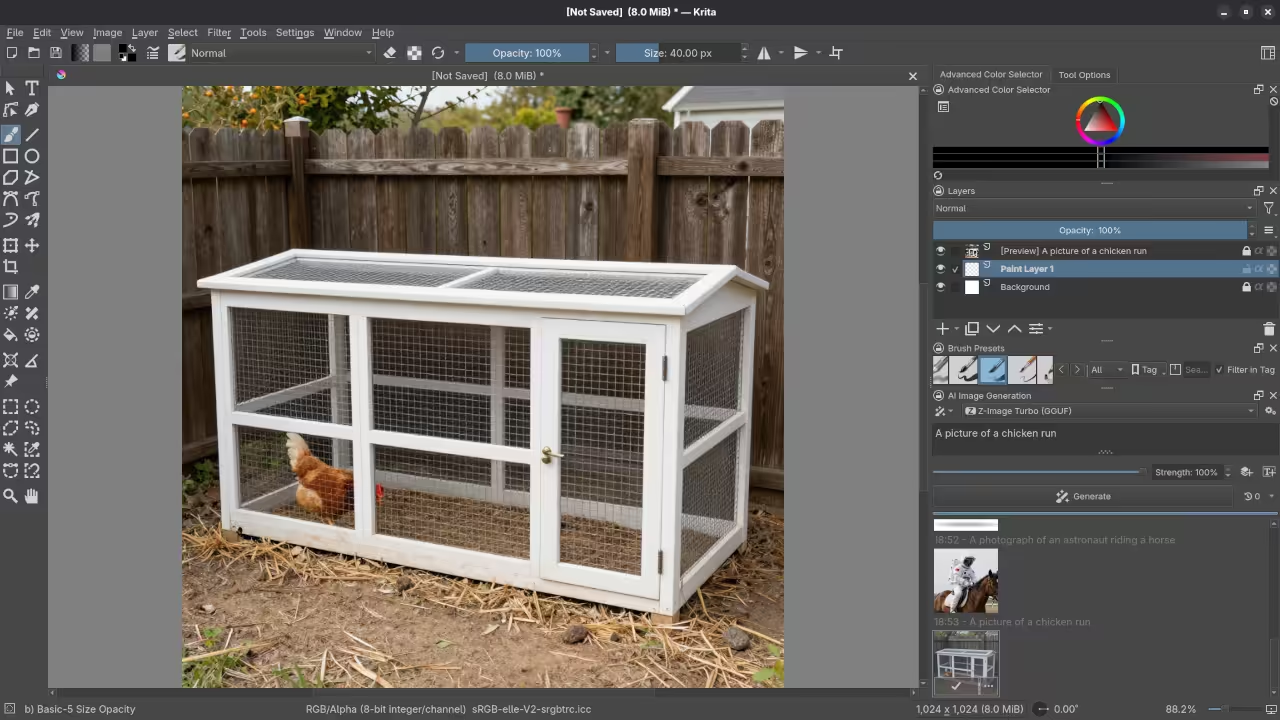
Krita Displaying Import Python Plugin Menu ItemKrita Displaying AI Image Diffusion Activate DialogKrita Displaying AI Image Diffusion Docker Menu ItemKrita Displaying AI Image Diffusion Server ConfigurationKrita Displaying AI Image Diffusion Z-Image Turbo GGUF SettingsKrita AI Image Diffusion Result For AI Generated Toronto MayorKrita AI Image Diffusion Result For AI Generated Desktop Gnome EnvironmentKrita AI Image Diffusion Result For AI Generated Horse-Riding AstronautKrita AI Image Diffusion Result For AI Generated Pen For ChickensKrita AI Image Diffusion Result For AI Generated Wristwatch CloseupKrita AI Image Diffusion Result For AI Generated Hanging Spiderweb
🎬 Live YouTube Screencast
Video Displaying The Installation And Use Of Krita AI Image Diffusion
Results:
A photograph of the mayor of Toronto
Accurately drew a photograph mishmash of past mayors of Toronto.
A screenshot of the gnome desktop environment.
Accurately drew a screenshot of an older version of the Gnome desktop environment.
A photograph of an astronaut riding a horse.
Accurately drew a photograph of an astronaut riding a horse.
A picture of a chicken run.
Accurately drew a picture of a chicken run.
A picture of a man wearing a watch.
Accurately drew a picture of a man wearing a watch.
A picture of a spider web on sockets.
Accurately drew a picture of a spider web on sockets.
Learning resources and next steps
If you want to continue learning programming self hosting and creative AI I offer several helpful resources.
Enhancing Your HTML5 Rubik’s Cube Modern Tweaks for Better Performance and Mobile Experience
In a previous article, HTML5 WebGL: Building an Interactive 3D Puzzle, we explored how to build an interactive 3D puzzle using HTML5 and WebGL with the help of Qwen3-Coder-30B-A3B-Instruct-UD-Q4_K_XL.gguf running on llama.cpp. Today we will take that project further by optimizing the code adding more visual appeal and improving mobile compatibility.
Why Optimize Your Rubik’s Cube Code
The original implementation was functional but we can make several improvements
Reduced Code Footprint By using modern JavaScript features and more efficient Three.js techniques
Improved Performance Optimizing the rendering loop and event handling
Enhanced Visuals Adding more bling with modern CSS effects
Better Mobile Experience Making the cube more touch-friendly
Key Improvements Made
1 Streamlined Three.js Implementation
The original code has been refactored to use more modern Three.js patterns
// Example of optimized cube creation
function createOptimizedCube() {
const size = 1.2;
const gap = 0.05;
const totalSize = size + gap;
// Use Array.from for cleaner cube creation
Array.from({length: 3}, (_, x) =>
Array.from({length: 3}, (_, y) =>
Array.from({length: 3}, (_, z) => {
if (x === 1 && y === 1 && z === 1) return null;
const cube = createCubePiece(x, y, z, size, totalSize);
return cube;
})
)
).flat().filter(Boolean).forEach(cube => cubeGroup.add(cube));
}
Reduced DOM Manipulation Minimized direct DOM access during animations
Optimized Event Handling Used passive event listeners where possible
Efficient Rendering Improved the animation loop to only update when necessary
Memory Management Better handling of Three.js objects to prevent memory leaks
Mobile-Specific Improvements
Larger Tap Targets Increased button sizes for easier touch interaction
Improved Gesture Recognition Better handling of touch events
Responsive Design Enhanced media queries for different screen sizes
Reduced Motion Added options to reduce animations for users who prefer less motion
Consolidated Demo
HTML5 Optimized Rubik’s Cube
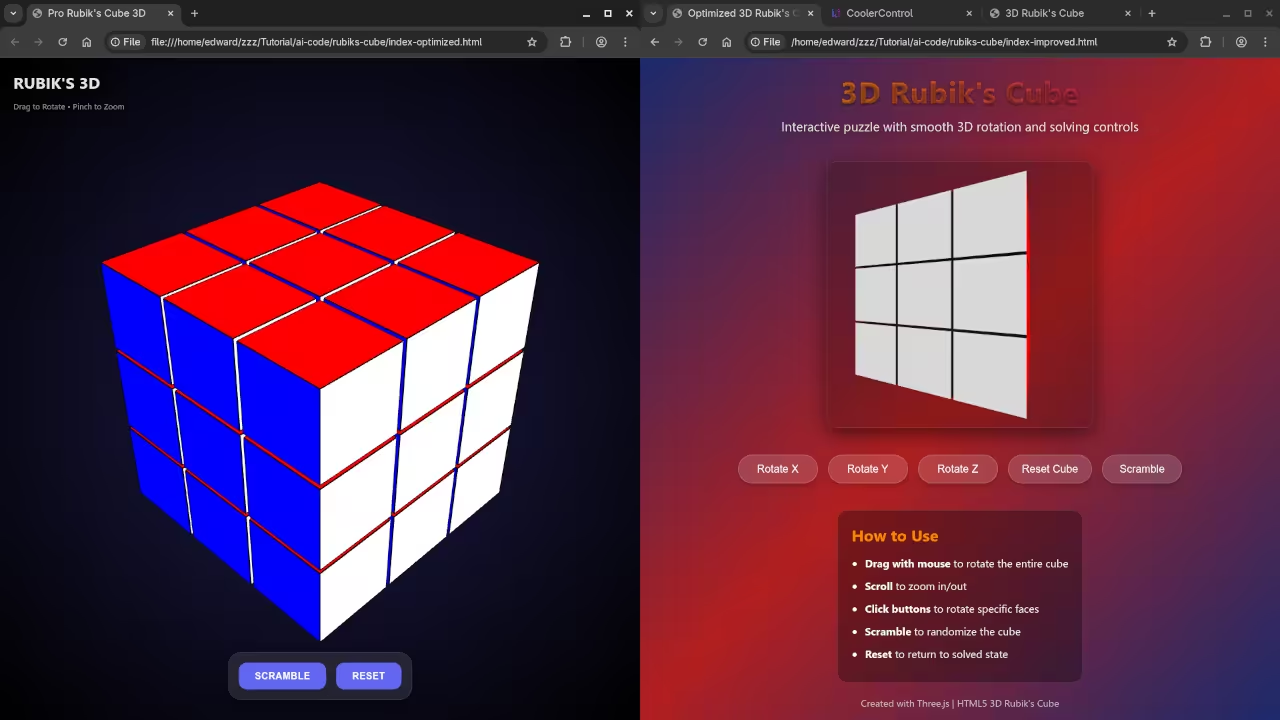
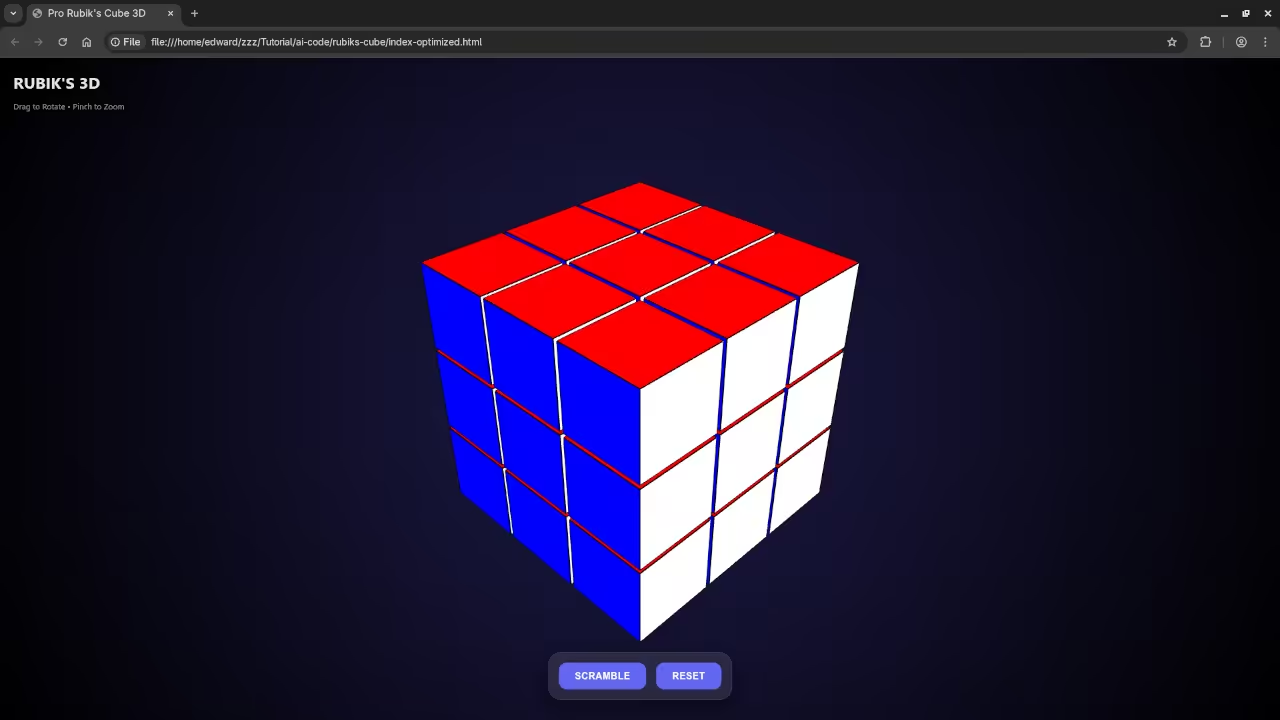
Screenshot
Web Browser Showing Original And Improved Rubik’s CubeWeb Browser Showing Improved And Optimized Rubik’s CubeWeb Web Browser Showing Optimized Rubik’s Cube Results
Live Screencast
Screencast Of Improved And Optimized Rubik’s Cube Code
Further Learning Resources
If you are interested in learning more about JavaScript and web development check out these resources
Online Course: Learning JavaScript Course A structured online course that complements the book with practical examples and exercises
One-on-One Tutoring: Need personalized help with JavaScript or web development I offer one-on-one programming tutorials to help you achieve your learning goals
Conclusion
By implementing these modern optimizations your HTML5 Rubik’s Cube will not only perform better but also provide a more engaging experience for users especially on mobile devices The combination of reduced code complexity improved performance and enhanced visuals makes this an excellent project to showcase your web development skills
What improvements would you like to see next Let me know in the comments
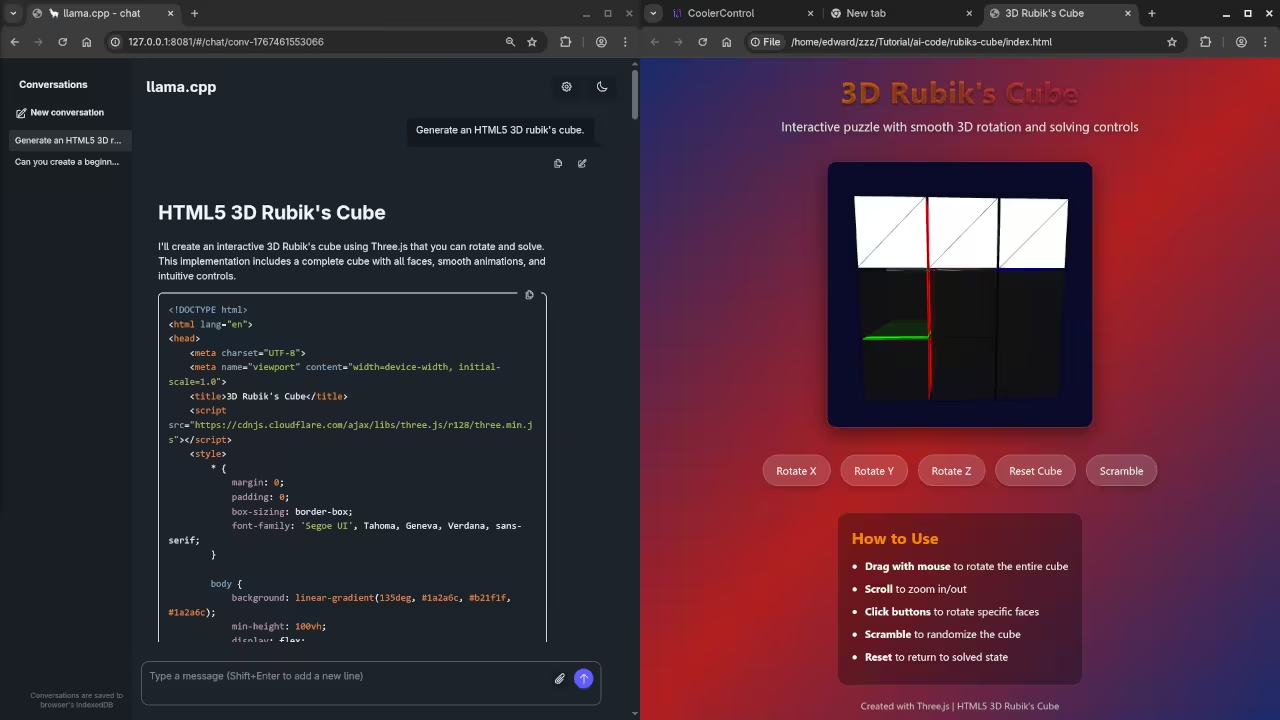
In this beginner-friendly tutorial, we will explore how to create an interactive 3D Rubik’s Cube using HTML5 and JavaScript. This project leverages the powerful Three.js library to bring a classic puzzle to life in your browser. I will walk you through the code and show you how to run it locally using Qwen3-Coder-30B-A3B-Instruct-UD-Q4_K_XL.gguf with llama.cpp.
System Requirements
To run this project, you’ll need:
AMD Ryzen 5 5600 GT CPU or equivalent
24GB of usable RAM (32GB total, with 4GB allocated for iGPU and 4GB for zram)
AMD Instinct Mi60 32GB HBM2 GPU (or any modern GPU with WebGL support)
A modern web browser
The HTML5 Rubik’s Cube Code
Here is the complete code for our 3D Rubik’s Cube. You can copy and paste this into an HTML file to run it locally:
<script src="https://cdnjs.cloudflare.com/ajax/libs/three.js/r128/three.min.js"></script>
<style>
* {
margin: 0;
padding: 0;
box-sizing: border-box;
font-family: 'Segoe UI', Tahoma, Geneva, Verdana, sans-serif;
}
body {
background: linear-gradient(135deg, #1a2a6c, #b21f1f, #1a2a6c);
min-height: 100vh;
display: flex;
flex-direction: column;
align-items: center;
justify-content: center;
padding: 20px;
color: white;
overflow: hidden;
}
.header {
text-align: center;
margin-bottom: 20px;
z-index: 10;
text-shadow: 0 2px 4px rgba(0,0,0,0.5);
}
h1 {
font-size: 2.8rem;
margin-bottom: 10px;
background: linear-gradient(to right, #ff8a00, #da1b60);
-webkit-background-clip: text;
-webkit-text-fill-color: transparent;
letter-spacing: 1px;
}
.subtitle {
font-size: 1.2rem;
opacity: 0.9;
max-width: 600px;
margin: 0 auto;
}
#cube-container {
width: 400px;
height: 400px;
margin: 20px auto;
border-radius: 15px;
box-shadow: 0 10px 30px rgba(0, 0, 0, 0.5);
overflow: hidden;
position: relative;
background: rgba(0, 0, 0, 0.2);
border: 1px solid rgba(255, 255, 255, 0.1);
}
.controls {
display: flex;
flex-wrap: wrap;
justify-content: center;
gap: 15px;
margin: 20px 0;
z-index: 10;
}
button {
background: rgba(255, 255, 255, 0.15);
border: 1px solid rgba(255, 255, 255, 0.2);
color: white;
padding: 12px 20px;
border-radius: 50px;
font-size: 1rem;
cursor: pointer;
transition: all 0.3s ease;
backdrop-filter: blur(5px);
box-shadow: 0 4px 10px rgba(0, 0, 0, 0.2);
}
button:hover {
background: rgba(255, 255, 255, 0.25);
transform: translateY(-3px);
box-shadow: 0 6px 15px rgba(0, 0, 0, 0.3);
}
.instructions {
background: rgba(0, 0, 0, 0.3);
padding: 20px;
border-radius: 15px;
max-width: 600px;
margin-top: 20px;
backdrop-filter: blur(5px);
border: 1px solid rgba(255, 255, 255, 0.1);
}
.instructions h2 {
margin-bottom: 15px;
color: #ff8a00;
}
.instructions ul {
padding-left: 20px;
}
.instructions li {
margin-bottom: 10px;
line-height: 1.5;
}
.footer {
margin-top: 20px;
text-align: center;
opacity: 0.7;
font-size: 0.9rem;
}
@media (max-width: 600px) {
#cube-container {
width: 300px;
height: 300px;
}
h1 {
font-size: 2rem;
}
}
</style>
<div class="header">
<h1>3D Rubik's Cube</h1>
<p class="subtitle">Interactive puzzle with smooth 3D rotation and solving controls</p>
</div>
<div id="cube-container"></div>
<div class="controls">
<button id="rotateX">Rotate X</button>
<button id="rotateY">Rotate Y</button>
<button id="rotateZ">Rotate Z</button>
<button id="reset">Reset Cube</button>
<button id="scramble">Scramble</button>
</div>
<div class="instructions">
<h2>How to Use</h2>
<ul>
<li><strong>Drag with mouse</strong> to rotate the entire cube</li>
<li><strong>Scroll</strong> to zoom in/out</li>
<li><strong>Click buttons</strong> to rotate specific faces</li>
<li><strong>Scramble</strong> to randomize the cube</li>
<li><strong>Reset</strong> to return to solved state</li>
</ul>
</div>
<div class="footer">
Created with Three.js | HTML5 3D Rubik's Cube
</div>
<script>
// Main Three.js code
let scene, camera, renderer, cubeGroup;
let cubes = [];
let isDragging = false;
let previousMousePosition = {
x: 0,
y: 0
};
let rotationX = 0;
let rotationY = 0;
// Initialize the scene
function init() {
// Create scene
scene = new THREE.Scene();
scene.background = new THREE.Color(0x0a0a2a);
// Create camera
camera = new THREE.PerspectiveCamera(75, 1, 0.1, 1000);
camera.position.z = 5;
// Create renderer
const container = document.getElementById('cube-container');
renderer = new THREE.WebGLRenderer({ antialias: true, alpha: true });
renderer.setSize(container.clientWidth, container.clientHeight);
container.appendChild(renderer.domElement);
// Add lighting
const ambientLight = new THREE.AmbientLight(0xffffff, 0.6);
scene.add(ambientLight);
const directionalLight = new THREE.DirectionalLight(0xffffff, 0.8);
directionalLight.position.set(1, 1, 1);
scene.add(directionalLight);
// Create the cube group
cubeGroup = new THREE.Group();
scene.add(cubeGroup);
// Create the Rubik's cube
createCube();
// Add event listeners
setupEventListeners();
// Start animation loop
animate();
}
// Create the Rubik's cube
function createCube() {
const size = 1.2;
const gap = 0.05;
const totalSize = size + gap;
// Define colors for each face (standard Rubik's cube colors)
const colors = {
front: 0xff0000, // Red
back: 0xff8800, // Orange
left: 0x00ff00, // Green
right: 0x0000ff, // Blue
top: 0xffffff, // White
bottom: 0xffff00 // Yellow
};
// Create 27 small cubes (3x3x3)
for (let x = 0; x < 3; x++) {
for (let y = 0; y < 3; y++) {
for (let z = 0; z < 3; z++) {
// Skip the center cube (invisible)
if (x === 1 && y === 1 && z === 1) continue;
const cubeGeometry = new THREE.BoxGeometry(size, size, size);
const cubeMaterial = new THREE.MeshPhongMaterial({
color: 0x111111,
shininess: 30,
transparent: true,
opacity: 0.9
});
const cube = new THREE.Mesh(cubeGeometry, cubeMaterial);
// Position the cube
cube.position.x = (x - 1) * totalSize;
cube.position.y = (y - 1) * totalSize;
cube.position.z = (z - 1) * totalSize;
// Add face materials
const materials = [];
// Front face (z = 1)
if (z === 2) {
materials.push(new THREE.MeshPhongMaterial({
color: colors.front,
shininess: 50
}));
} else {
materials.push(cubeMaterial);
}
// Back face (z = -1)
if (z === 0) {
materials.push(new THREE.MeshPhongMaterial({
color: colors.back,
shininess: 50
}));
} else {
materials.push(cubeMaterial);
}
// Left face (x = -1)
if (x === 0) {
materials.push(new THREE.MeshPhongMaterial({
color: colors.left,
shininess: 50
}));
} else {
materials.push(cubeMaterial);
}
// Right face (x = 1)
if (x === 2) {
materials.push(new THREE.MeshPhongMaterial({
color: colors.right,
shininess: 50
}));
} else {
materials.push(cubeMaterial);
}
// Top face (y = 1)
if (y === 2) {
materials.push(new THREE.MeshPhongMaterial({
color: colors.top,
shininess: 50
}));
} else {
materials.push(cubeMaterial);
}
// Bottom face (y = -1)
if (y === 0) {
materials.push(new THREE.MeshPhongMaterial({
color: colors.bottom,
shininess: 50
}));
} else {
materials.push(cubeMaterial);
}
// Apply materials to cube faces
cube.material = materials;
// Add to group
cubeGroup.add(cube);
cubes.push(cube);
}
}
}
// Add cube edges
const edgeGeometry = new THREE.BoxGeometry(size + 0.05, size + 0.05, size + 0.05);
const edgeMaterial = new THREE.MeshBasicMaterial({
color: 0x000000,
wireframe: true,
transparent: true,
opacity: 0.3
});
for (let x = 0; x < 3; x++) {
for (let y = 0; y < 3; y++) {
for (let z = 0; z < 3; z++) {
// Skip the center cube
if (x === 1 && y === 1 && z === 1) continue;
const edge = new THREE.Mesh(edgeGeometry, edgeMaterial);
edge.position.x = (x - 1) * totalSize;
edge.position.y = (y - 1) * totalSize;
edge.position.z = (z - 1) * totalSize;
cubeGroup.add(edge);
}
}
}
}
// Set up event listeners
function setupEventListeners() {
const container = document.getElementById('cube-container');
// Mouse events for rotation
container.addEventListener('mousedown', onMouseDown);
container.addEventListener('mousemove', onMouseMove);
container.addEventListener('mouseup', onMouseUp);
// Touch events for mobile
container.addEventListener('touchstart', onTouchStart);
container.addEventListener('touchmove', onTouchMove);
container.addEventListener('touchend', onTouchEnd);
// Mouse wheel for zoom
container.addEventListener('wheel', onMouseWheel);
// Button events
document.getElementById('rotateX').addEventListener('click', () => rotateCube('x'));
document.getElementById('rotateY').addEventListener('click', () => rotateCube('y'));
document.getElementById('rotateZ').addEventListener('click', () => rotateCube('z'));
document.getElementById('reset').addEventListener('click', resetCube);
document.getElementById('scramble').addEventListener('click', scrambleCube);
// Window resize
window.addEventListener('resize', onWindowResize);
}
// Mouse event handlers
function onMouseDown(event) {
isDragging = true;
previousMousePosition = {
x: event.clientX,
y: event.clientY
};
}
function onMouseMove(event) {
if (isDragging) {
const deltaX = event.clientX - previousMousePosition.x;
const deltaY = event.clientY - previousMousePosition.y;
rotationY += deltaX * 0.01;
rotationX += deltaY * 0.01;
previousMousePosition = {
x: event.clientX,
y: event.clientY
};
}
}
function onMouseUp() {
isDragging = false;
}
// Touch event handlers
function onTouchStart(event) {
isDragging = true;
previousMousePosition = {
x: event.touches[0].clientX,
y: event.touches[0].clientY
};
event.preventDefault();
}
function onTouchMove(event) {
if (isDragging) {
const deltaX = event.touches[0].clientX - previousMousePosition.x;
const deltaY = event.touches[0].clientY - previousMousePosition.y;
rotationY += deltaX * 0.01;
rotationX += deltaY * 0.01;
previousMousePosition = {
x: event.touches[0].clientX,
y: event.touches[0].clientY
};
}
event.preventDefault();
}
function onTouchEnd() {
isDragging = false;
}
// Mouse wheel for zoom
function onMouseWheel(event) {
camera.position.z += event.deltaY * 0.01;
camera.position.z = Math.min(Math.max(camera.position.z, 3), 10);
event.preventDefault();
}
// Rotate the cube
function rotateCube(axis) {
switch(axis) {
case 'x':
cubeGroup.rotation.x += Math.PI / 2;
break;
case 'y':
cubeGroup.rotation.y += Math.PI / 2;
break;
case 'z':
cubeGroup.rotation.z += Math.PI / 2;
break;
}
}
// Reset the cube
function resetCube() {
cubeGroup.rotation.set(0, 0, 0);
rotationX = 0;
rotationY = 0;
}
// Scramble the cube
function scrambleCube() {
// Simple scramble by rotating random faces
const rotations = 20;
for (let i = 0; i < rotations; i++) {
const axis = ['x', 'y', 'z'][Math.floor(Math.random() * 3)];
setTimeout(() => rotateCube(axis), i * 100);
}
}
// Handle window resize
function onWindowResize() {
const container = document.getElementById('cube-container');
camera.aspect = container.clientWidth / container.clientHeight;
camera.updateProjectionMatrix();
renderer.setSize(container.clientWidth, container.clientHeight);
}
// Animation loop
function animate() {
requestAnimationFrame(animate);
// Apply rotation from dragging
cubeGroup.rotation.x = rotationX;
cubeGroup.rotation.y = rotationY;
// Rotate slowly for demo effect
cubeGroup.rotation.y += 0.002;
renderer.render(scene, camera);
}
// Initialize the application
window.onload = init;
</script>
Running the Code Locally
To run this code locally using Qwen3-Coder-30B-A3B-Instruct-UD-Q4_K_XL.gguf with llama.cpp:
Save the complete HTML code to a file named “rubiks-cube.html”
Open the file in your preferred web browser
Interact with the 3D Rubik’s Cube using your mouse or touchscreen
Features of This Implementation
Interactive 3D cube fully rendered with Three.js
Realistic materials with proper shading for each face
Smooth controls including drag-to-rotate and scroll-to-zoom
Responsive design that works on both desktop and mobile devices
Control options for rotating specific axes, resetting, and scrambling the cube
Attractive visual design with gradient background and glass-morphism elements
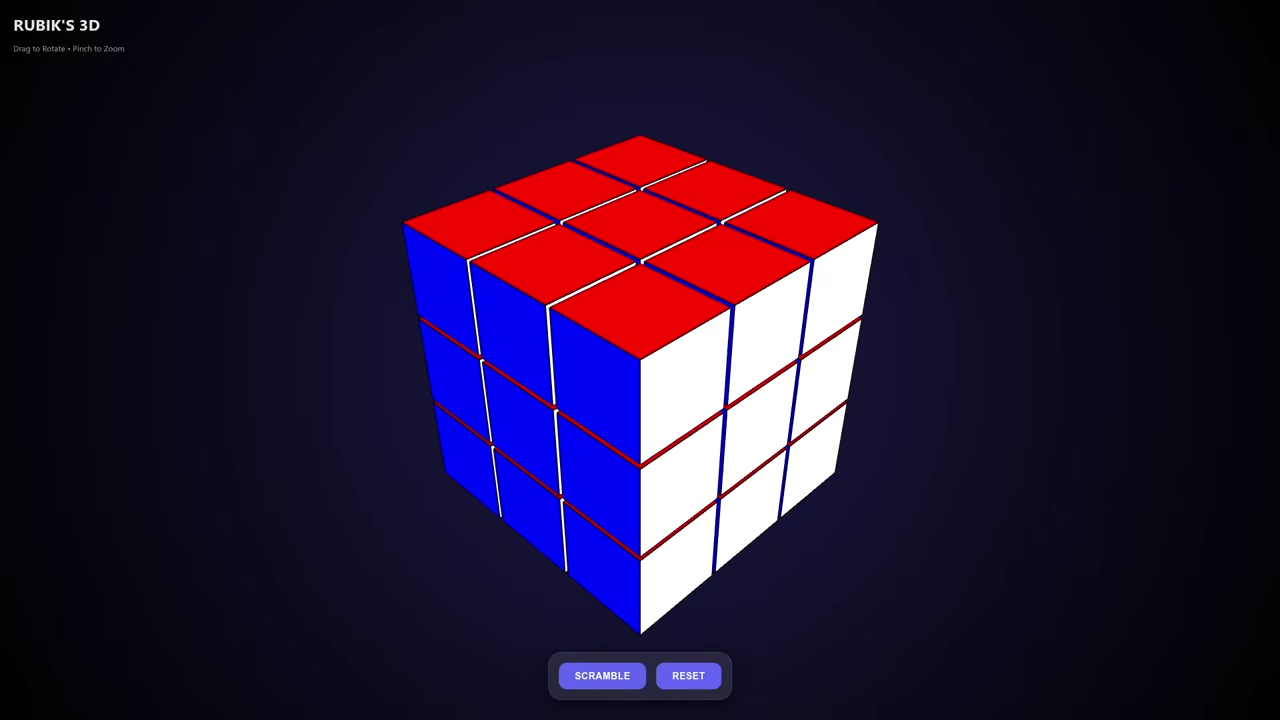
Consolidated Demo
HTML5 AI-Generated Rubik’s Cube
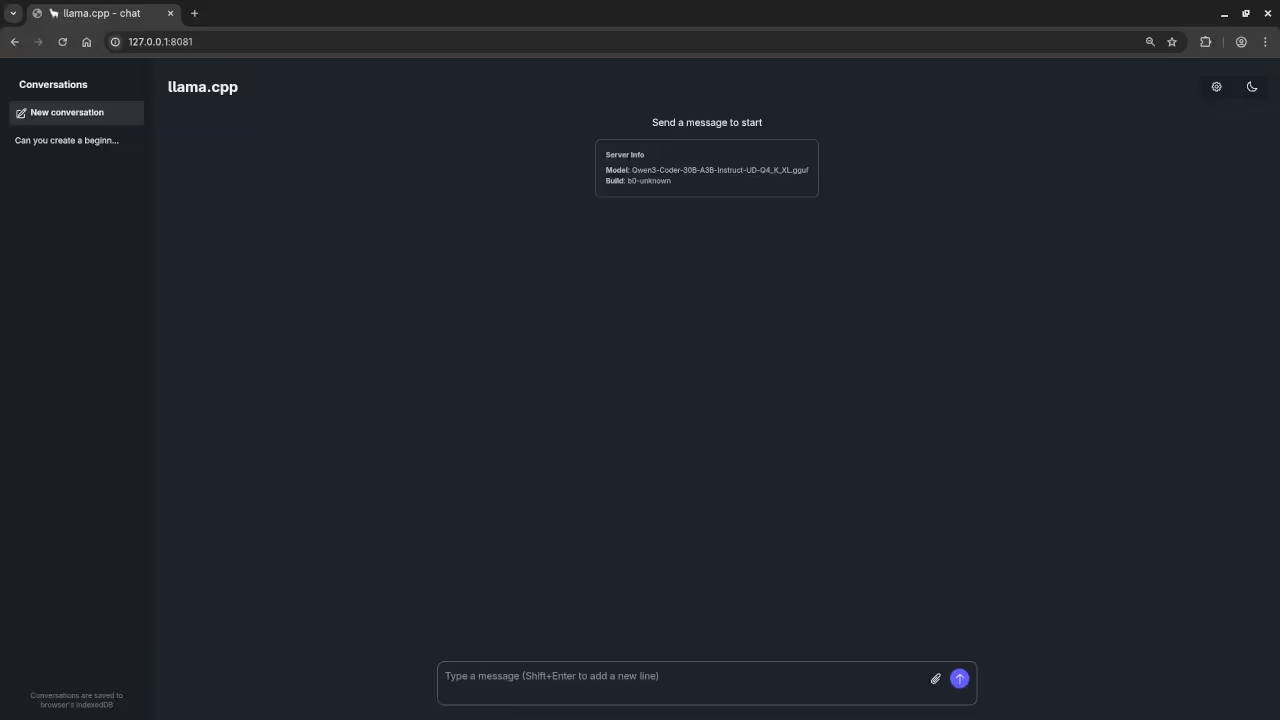
Screenshot
Web UI For llama.cpp Displaying LLM ModelWeb UI For llama.cpp Displaying LLM Model SettingsWeb UI For llama.cpp Displaying LLM Model Rubik’s Cube Results
Live Screencast
Screencast Of Qwen3-Coder-30B-A3B-Instruct-UD-Q4_K_XL.gguf Code
Learning More About JavaScript
If you’re interested in learning more about JavaScript and web development, I have several resources available:
Personalized instruction tailored to your learning style
Focus on the areas you find most challenging
Available for JavaScript and many other programming languages
Conclusion
Creating a 3D Rubik’s Cube with HTML5 and JavaScript is a fantastic way to explore 3D graphics programming in the browser. This project demonstrates how powerful web technologies have become, allowing us to create complex interactive experiences that run directly in the browser.
Try running the code on your own system and see how it performs. The combination of AMD Ryzen 5 5600 GT CPU and AMD Instinct Mi60 GPU provides excellent performance for web-based 3D graphics.
Create a Animated Snow Animation in Blender with Python and Display It in the Browser
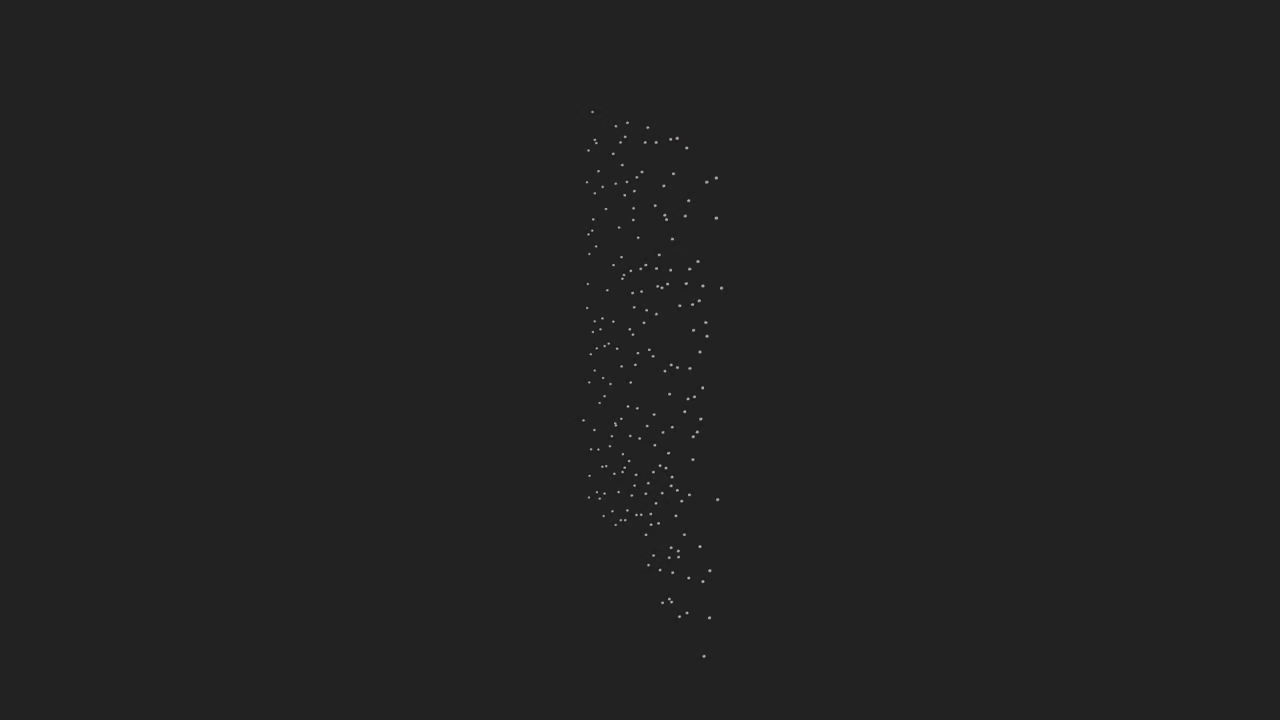
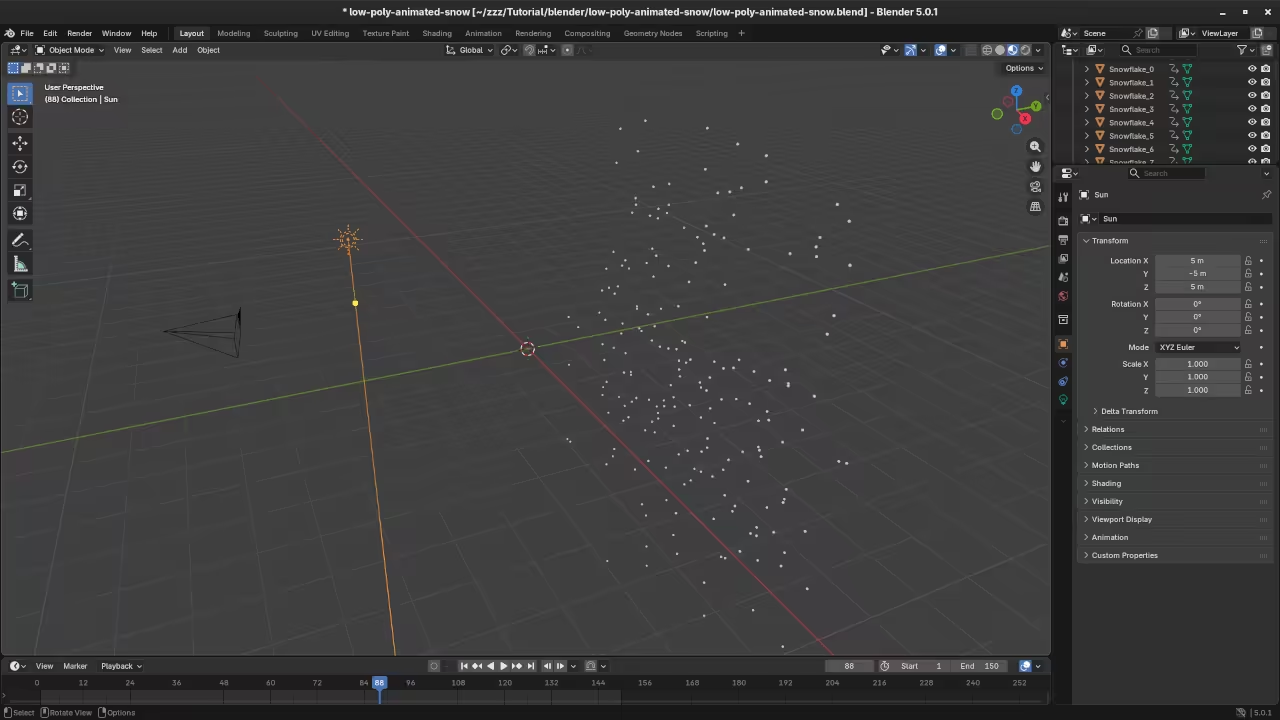
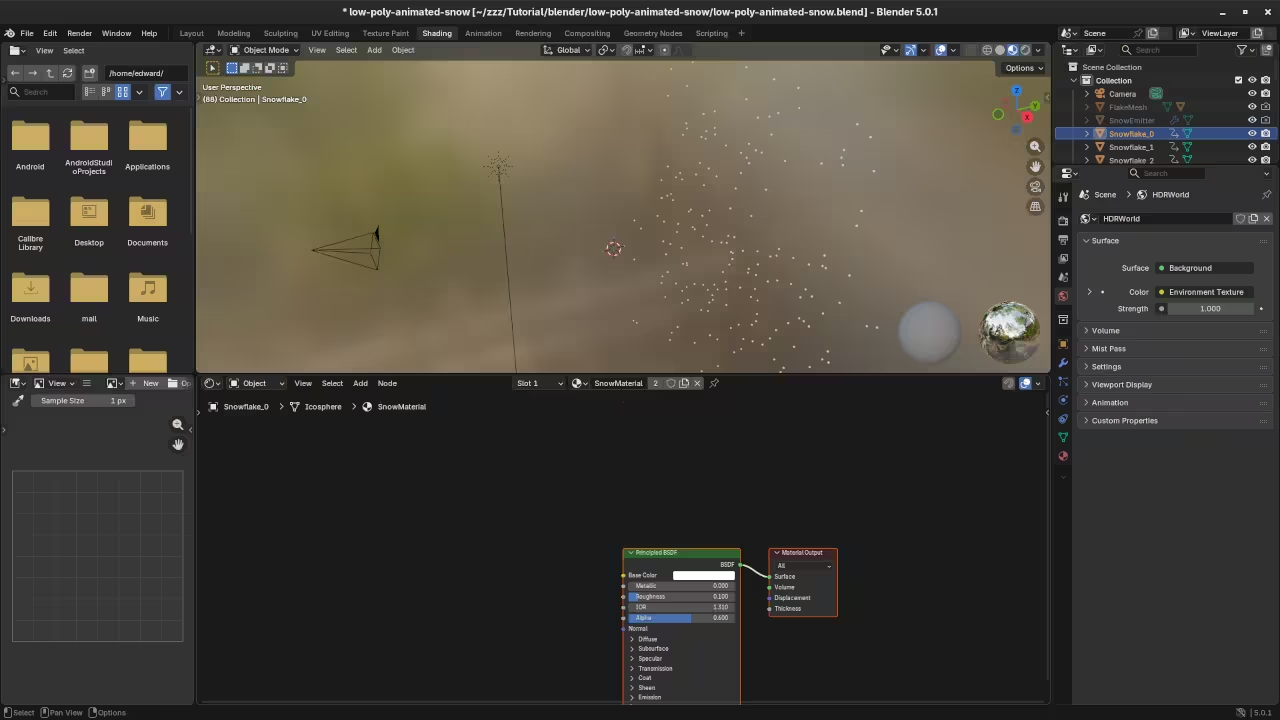
This beginner friendly tutorial shows how to generate a simple Animated Snow animation using the Blender Python API export it as a glTF model light it with the courtyard EXR HDR from Blender 5.0 and display it in a web page with model viewer You will also learn which texture HDR formats have browser support open source alternatives and how to run the Blender Python script from the command line
What you will build
A particle based snow animation with white transparent colored flakes and small handle objects
Lighting from Blender 5.0 courtyard EXR
Export to glb and display in the web with model viewer
Blender Python script and how to run it
# animated_snow.py
import bpy
import sys
import os
import math
from mathutils import Vector, Euler
# -----------------------
# Helper: parse args
# -----------------------
def get_script_args():
argv = sys.argv
if "--" in argv:
return argv[argv.index("--") + 1 :]
return []
args = get_script_args()
out_path = None
for i, a in enumerate(args):
if a in ("--output", "-o") and i + 1 < len(args):
out_path = args[i + 1]
if out_path is None:
out_path = os.path.join(os.path.expanduser("~"), "animated_snow.glb")
# -----------------------
# Clean scene
# -----------------------
bpy.ops.wm.read_factory_settings(use_empty=True)
# -----------------------
# Create emitter (plane)
# -----------------------
bpy.ops.mesh.primitive_plane_add(size=10, location=(0, 5, 0))
emitter = bpy.context.object
emitter.name = "SnowEmitter"
# rotate so normal points downwards if needed
emitter.rotation_euler = Euler((math.radians(90), 0, 0), 'XYZ')
# -----------------------
# Create flake mesh (small icosphere)
# -----------------------
bpy.ops.mesh.primitive_ico_sphere_add(subdivisions=2, radius=0.03, location=(0,0,0))
flake = bpy.context.object
flake.name = "FlakeMesh"
# Create small handle (tiny cylinder) and parent to flake as a child object for instancing demonstration
bpy.ops.mesh.primitive_cylinder_add(radius=0.005, depth=0.02, location=(0, -0.02, 0))
handle = bpy.context.object
handle.name = "FlakeHandle"
# move handle slightly relative to flake and parent
handle.parent = flake
handle.location = (0, -0.02, 0)
# -----------------------
# Create white transparent PBR material for flakes
# -----------------------
mat = bpy.data.materials.new(name="GoldMaterial")
mat.use_nodes = True
nodes = mat.node_tree.nodes
for n in nodes:
nodes.remove(n)
# Principled BSDF setup
out_node = nodes.new(type="ShaderNodeOutputMaterial")
bsdf = nodes.new(type="ShaderNodeBsdfPrincipled")
bsdf.location = (0, 0)
out_node.location = (300, 0)
mat.node_tree.links.new(bsdf.outputs['BSDF'], out_node.inputs['Surface'])
# white transparent color and metallic/roughness
bsdf.inputs['Base Color'].default_value = (0.831, 0.686, 0.215, 1.0) # approximate #D4AF37
bsdf.inputs['Metallic'].default_value = 1.0
bsdf.inputs['Roughness'].default_value = 0.25
# Assign material to flake and handle
if flake.data.materials:
flake.data.materials[0] = mat
else:
flake.data.materials.append(mat)
if handle.data.materials:
handle.data.materials[0] = mat
else:
handle.data.materials.append(mat)
# -----------------------
# Make flake collection for instancing (group)
# -----------------------
flake_collection = bpy.data.collections.new("FlakeCollection")
bpy.context.scene.collection.children.link(flake_collection)
# Unlink flake and handle from scene collection and add to flake_collection
for obj in (flake, handle):
if obj.name in bpy.context.scene.collection.objects:
bpy.context.scene.collection.objects.unlink(obj)
flake_collection.objects.link(obj)
# -----------------------
# Particle system on emitter
# -----------------------
ps = emitter.modifiers.new("SnowParticles", type='PARTICLE_SYSTEM')
psettings = ps.particle_system.settings
psettings.count = 800
psettings.frame_start = 1
psettings.frame_end = 200
psettings.lifetime = 250
psettings.emit_from = 'FACE'
psettings.physics_type = 'NEWTON'
psettings.use_emit_random = True
psettings.normal_factor = 0.0
psettings.factor_random = 0.5
psettings.gravity = 9.81 * 0.1 # lighter fall
# Use collection instancing for particles (object duplication is less flexible for many particles)
psettings.instance_collection = flake_collection
psettings.use_collection_pick_random = True
psettings.particle_size = 1.0
psettings.render_type = 'COLLECTION'
# Add some initial velocity randomness
psettings.velocity_factor_random = 0.5
psettings.tangent_factor = 0.0
# -----------------------
# World HDR (courtyard.exr)
# -----------------------
world = bpy.data.worlds.new("HDRWorld")
bpy.context.scene.world = world
world.use_nodes = True
wnodes = world.node_tree.nodes
wlinks = world.node_tree.links
# Clear default nodes
for n in list(wnodes):
wnodes.remove(n)
bg = wnodes.new(type='ShaderNodeBackground')
bg.location = (200, 0)
out = wnodes.new(type='ShaderNodeOutputWorld')
out.location = (400, 0)
wlinks.new(bg.outputs['Background'], out.inputs['Surface'])
tex_node = wnodes.new(type='ShaderNodeTexEnvironment')
tex_node.location = (0, 0)
# Try to locate courtyard.exr from known Blender data path; otherwise let user replace the path
possible_paths = []
# Common location inside Blender versions: scripts/presets or datafiles; this is not guaranteed
possible_paths.append(os.path.join(bpy.app.binary_path, "..", "share", "blender", "5.0", "datafiles", "studiolights", "world", "courtyard.exr"))
possible_paths.append(os.path.join(os.path.expanduser("~"), "courtyard.exr"))
possible_paths.append("/usr/share/blender/5.0/datafiles/studiolights/world/courtyard.exr")
possible_paths.append(os.path.join(bpy.utils.resource_path('LOCAL'), "datafiles", "studiolights", "world", "courtyard.exr"))
hdr_path = None
for p in possible_paths:
p = os.path.normpath(os.path.abspath(p))
if os.path.exists(p):
hdr_path = p
break
if hdr_path is None:
# Fallback: user must edit path or place file next to script
script_dir = os.path.dirname(os.path.realpath(__file__)) if "__file__" in globals() else os.getcwd()
candidate = os.path.join(script_dir, "courtyard.exr")
hdr_path = candidate if os.path.exists(candidate) else None
if hdr_path:
tex_node.image = bpy.data.images.load(hdr_path)
# set strength lower if too bright
bg.inputs['Strength'].default_value = 1.0
else:
print("WARNING: courtyard.exr not found automatically. Please set tex_node.image to your EXR/HDR path.")
# leave environment neutral grey
bg.inputs['Color'].default_value = (0.05, 0.05, 0.06, 1)
wlinks.new(tex_node.outputs['Color'], bg.inputs['Color'])
# -----------------------
# Scene camera and light (optional)
# -----------------------
bpy.ops.object.camera_add(location=(0, -8, 2), rotation=(math.radians(75), 0, 0))
cam = bpy.context.object
cam.name = "Camera"
bpy.context.scene.camera = cam
# add a low-intensity sun to help rim lighting (not necessary if HDR present)
bpy.ops.object.light_add(type='SUN', location=(5, -5, 5))
sun = bpy.context.object
sun.data.energy = 1.0
# -----------------------
# Timeline and baking cache
# -----------------------
bpy.context.scene.frame_start = 1
bpy.context.scene.frame_end = 250
bpy.context.scene.frame_set(1)
# Bake particles (use cache if available)
try:
psys = emitter.particle_systems[0]
cache = psys.point_cache
# clear then bake
bpy.ops.ptcache.free_bakes_all()
# baking via API is limited; ensure frames evaluated when exporting, or optionally do manual cache bake in UI
except Exception as e:
print("Could not access particle cache for baking:", e)
# -----------------------
# Export as glTF/glb
# -----------------------
# Select objects to export: emitter (with particle modifier), and collections used for instancing
for o in bpy.context.scene.objects:
o.select_set(False)
# Export requires the instanced collection objects to be present in the scene; ensure flake_collection objects are linked somewhere (they already are)
# Select emitter so the particle system is included
emitter.select_set(True)
# Also ensure camera is included for preview
cam.select_set(True)
export_dir = os.path.dirname(out_path)
if export_dir and not os.path.exists(export_dir):
os.makedirs(export_dir, exist_ok=True)
print("Exporting to:", out_path)
bpy.ops.export_scene.gltf(
filepath=out_path,
export_format='GLB', # binary
export_selected=True,
export_apply=True,
export_animations=True,
export_frames=True,
export_extras=False,
export_materials='EXPORT',
)
print("Done.")
Save the script as animated_snow.py in your project folder Then run Blender headless with the example command below Replace paths as needed
Replace environment image with a KTX2 prefiltered environment map for best PBR lighting in browsers when available
HDR EXR KTX and KTX2 support in browsers and recommendations
.hdr RGBE and .exr are common for authoring and provide high dynamic range but are not GPU optimized in browsers by default
KTX and KTX2 are container formats for GPU ready textures including compressed cubemaps and mipmaps KTX2 with Basis Universal is the most web friendly for environment maps and PBR workflows
KTX2 with Basis Universal compressions such as UASTC ETC1S provides smaller files and faster GPU sampling when the browser and GPU support the compressed formats
Browser support summary
.hdr widely used in authoring but not directly GPU optimized in browsers
.exr excellent precision for authoring not directly supported in browsers without conversion
.ktx and .ktx2 KTX2 with Basis Universal is the recommended web friendly option for environment maps in modern engines
Open source alternatives and tools
Basis Universal BasisU for creating compressed KTX2 files
ktx tools from Khronos for creating and inspecting KTX KTX2
cmft Cubemap Filtering Tool for prefiltering HDRIs into irradiance maps and specular mipmaps
tinyexr and stb image for loading EXR HDR files in build pipelines
Recommendation Keep the master HDR as courtyard EXR for Blender authoring then convert to a prefiltered KTX2 environment map using cmft plus ktx tools or the BasisU toolchain for best browser performance
Workflow tips and alternatives
Convert EXR or HDR to a prefiltered cubemap with mipmaps during your build step
Use cmft and ktx tools or BasisU to produce KTX2 files with compressed GPU ready data
If you prefer a simpler hosting route export an equirectangular JPEG or PNG and accept lower dynamic range or let the viewer generate irradiance at runtime
For maximum compatibility use the neutral environment built into model viewer or supply a low cost equirectangular image
Area for combined screenshots and embedded YouTube live screencast
Insert combined screenshots of the Blender viewport node setup particle settings and exported model preview here
Exploring Organic Maps An Open Source Navigation Solution for Your Android Device
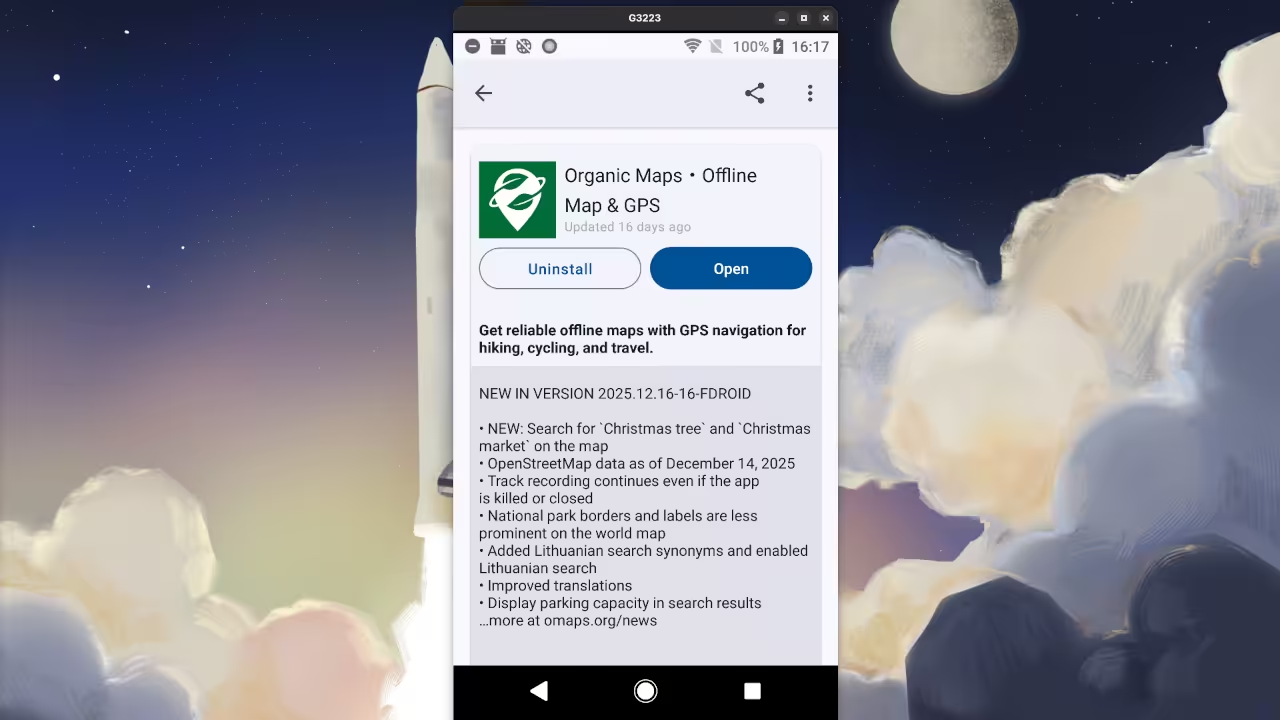
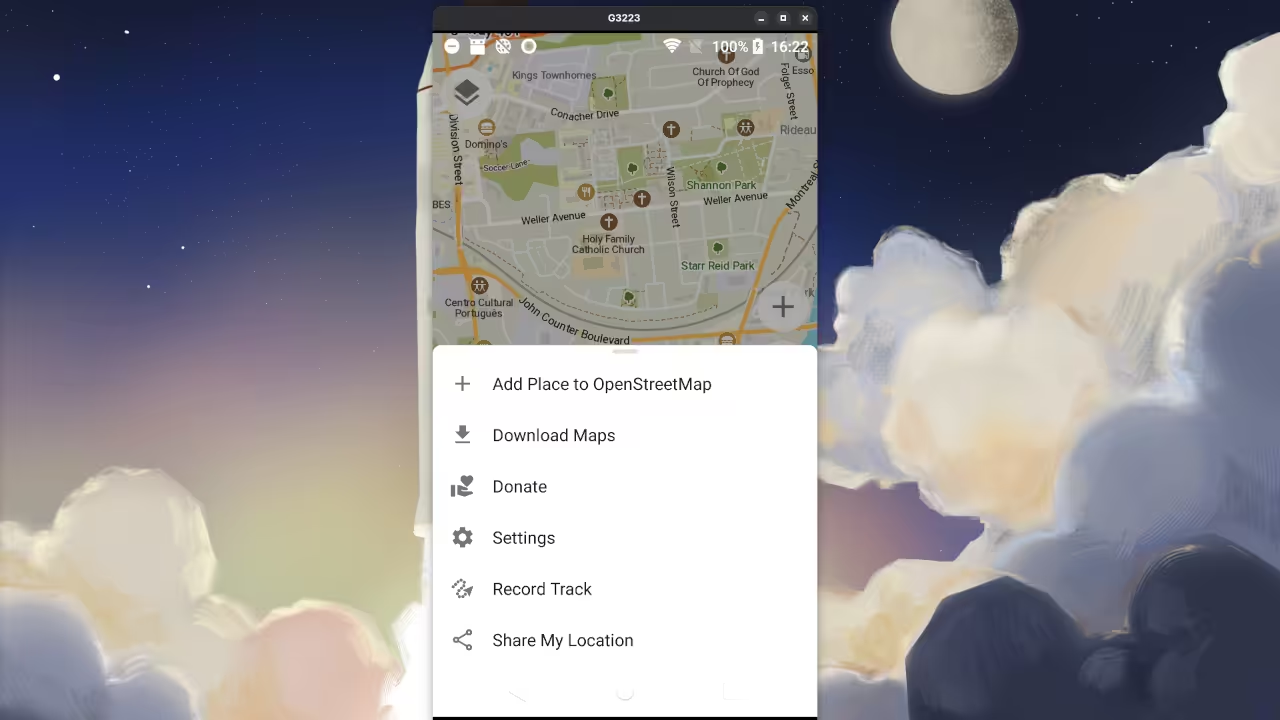
In the world of mobile navigation, there are numerous apps available, but few offer the level of customization and privacy that Organic Maps provides. Organic Maps is an open source navigation app that prioritizes user privacy and offers a range of features that make it a strong contender in the navigation app market. Lets dive into what makes Organic Maps stand out and how you can install it on your Android device, specifically the Sony Xperia XA1 Ultra.
What is Organic Maps
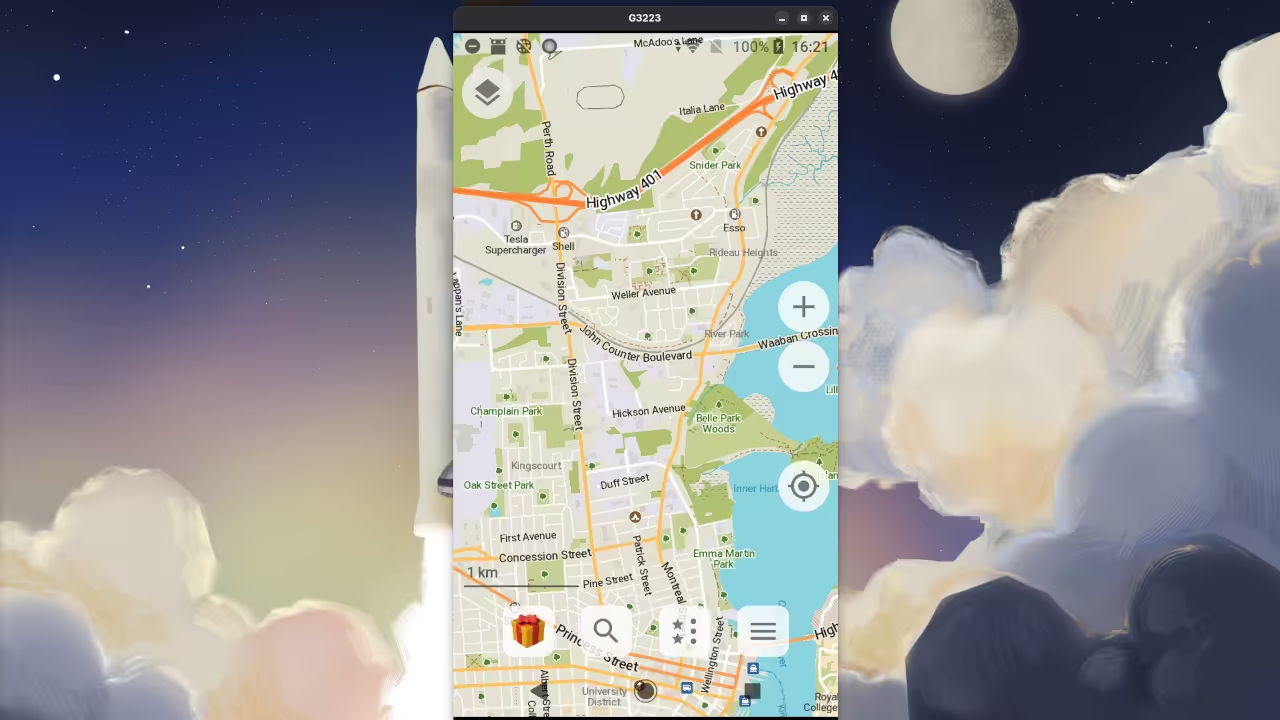
Organic Maps is an open source navigation app that provides offline maps, turn by turn navigation, and a variety of other features without compromising user privacy. Unlike many other navigation apps, Organic Maps does not track your location or collect personal data, making it a great choice for privacy conscious users.
Key Features of Organic Maps
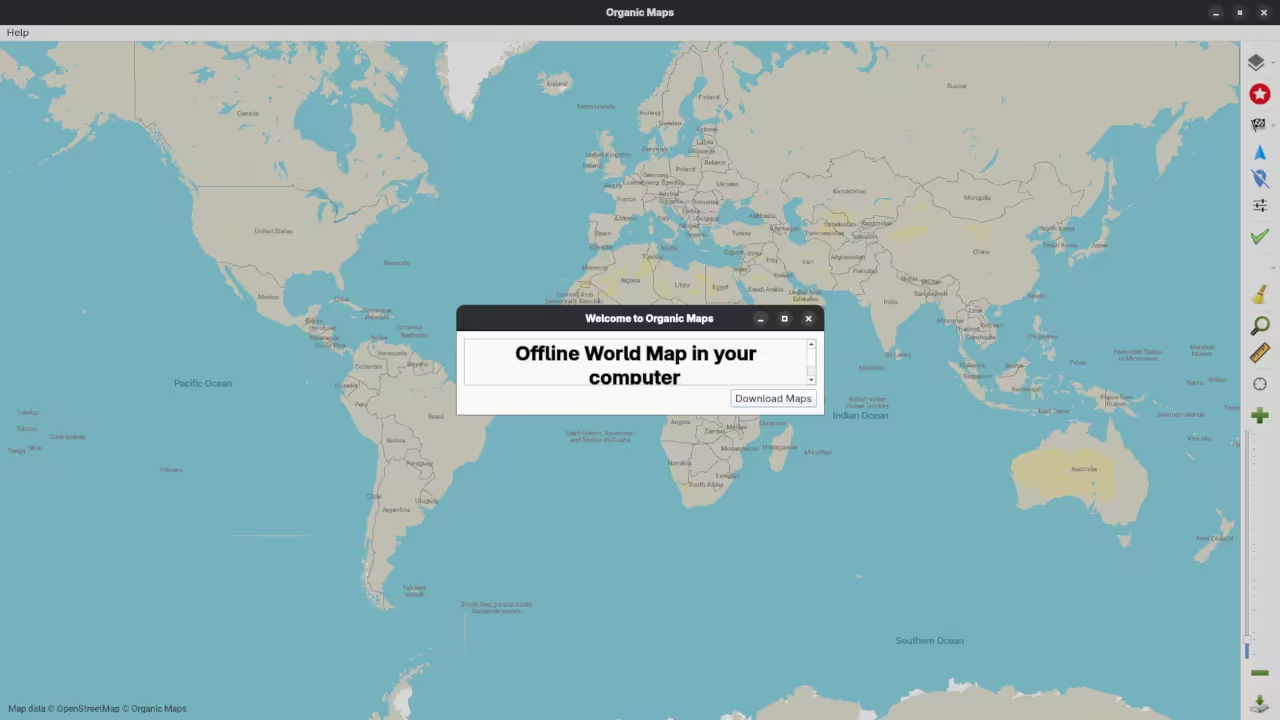
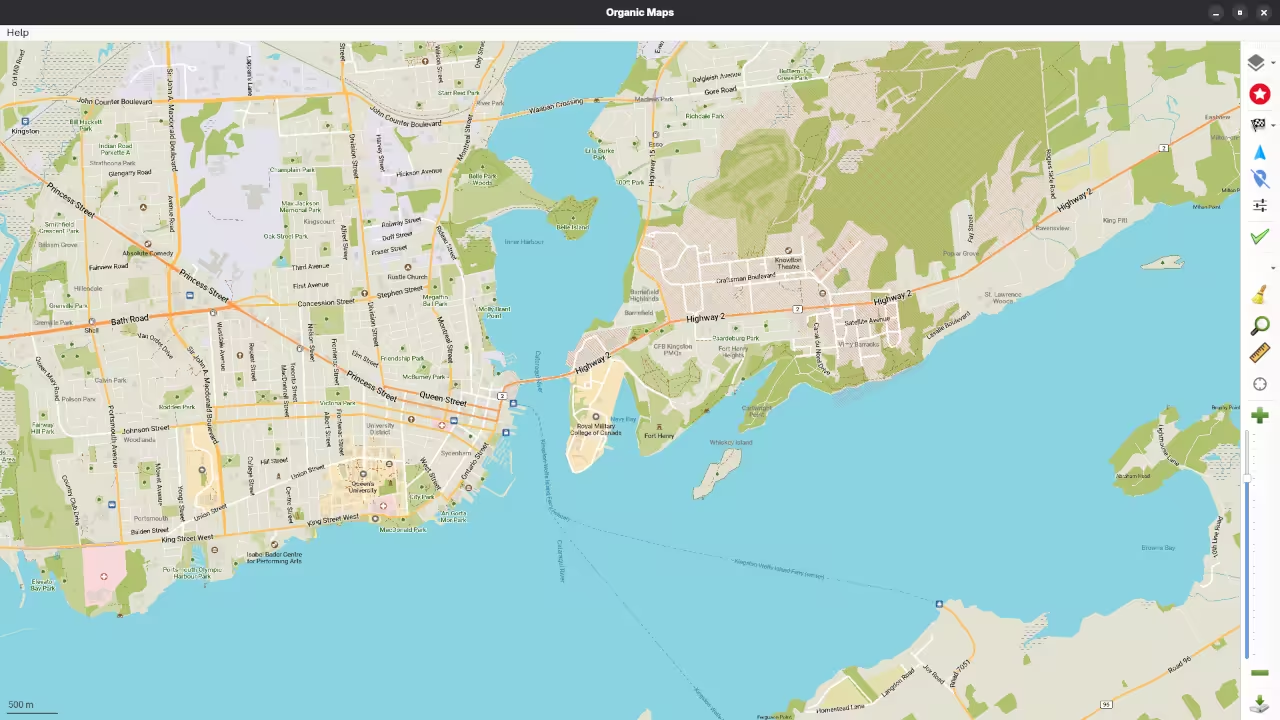
Offline Maps Download maps for offline use, ensuring you have navigation capabilities even without an internet connection.
Turn by Turn Navigation Get real time directions with voice guidance.
Privacy Focused No location tracking or data collection.
Customizable Tailor the app to your needs with various settings and options.
Open Source The source code is available for anyone to review, modify, and contribute to.
Installation Guide for Sony Xperia XA1 Ultra
The Sony Xperia XA1 Ultra comes with Android 7.0 out of the box, but it can be upgraded to Android 8.0. Heres how you can install Organic Maps on your device:
Step 1 Upgrade to Android 8.0
Backup Your Data Before upgrading, make sure to back up all your important data.
Check for Updates Go to Settings About phone System updates and check for available updates.
Install the Update Follow the on screen instructions to download and install the Android 8.0 update.
Step 2 Install Organic Maps
Enable Unknown Sources Go to Settings Security and enable the option to install apps from unknown sources.
Download the APK Visit the Organic Maps website and download the APK file for Android.
Install the APK Open the downloaded APK file and follow the installation prompts.
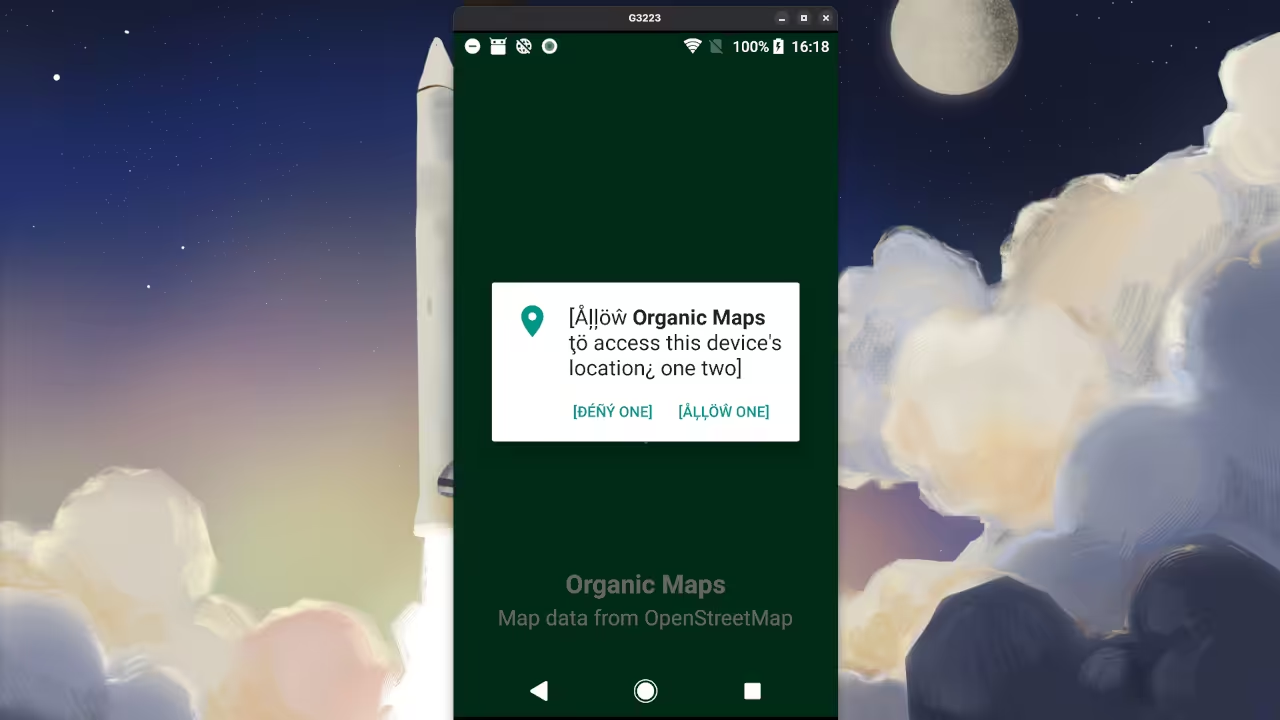
Launch Organic Maps Once installed, open the app and grant the necessary permissions.
Step 3 Configure Organic Maps
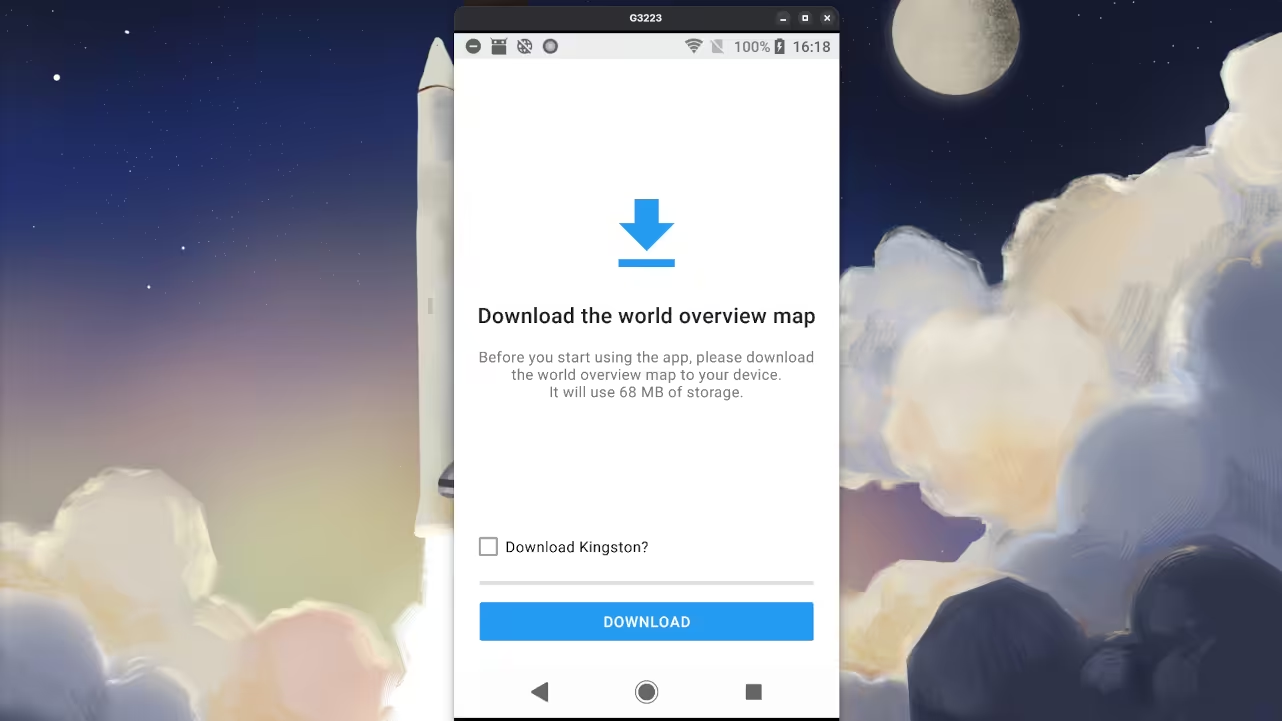
Download Maps Open the app and download the maps for the regions you plan to use.
Set Preferences Customize the app settings to suit your navigation needs.
Video Displaying The Installation And Use Of Organic Maps
Conclusion
Organic Maps is a powerful and privacy focused navigation app that offers a range of features to enhance your mobile navigation experience. Whether youre looking for offline maps, turn by turn navigation, or simply want to avoid data tracking, Organic Maps has you covered.
Additional Resources
If youre interested in learning more about programming, check out my collection of programming books on Amazon. For online programming courses, visit Ojambo Shop. If you need one on one programming tutorials or consulting services, feel free to reach out through Ojambo Contact or Ojambo Services.