
Introduction What this project is and what you will learn
Generative AI for Krita is an open source project that connects the Krita drawing application with ComfyUI. It allows you to generate and modify images using AI directly inside Krita while everything runs on your own computer.
This guide is written for beginners who are learning self hosting and want to understand how generative AI works with Krita. You will learn what the project does how the parts fit together and how to prepare for installing it on Fedora Linux.
What Generative AI for Krita does
Generative AI for Krita adds AI powered features to your normal drawing workflow. You can generate images from text improve sketches edit parts of an image or extend an image beyond its edges.
Krita stays focused on drawing and image editing. ComfyUI handles the AI processing. The plugin connects the two so they can work together smoothly.
High level overview of ComfyUI in the browser
ComfyUI is a local web application. When it is running you open it in a web browser on your own computer. Even though it uses a browser nothing is uploaded to the internet.
ComfyUI uses a visual workflow made of nodes. Each node performs one task such as loading a model or generating an image. When the workflow runs ComfyUI uses your computer hardware to generate results.
How Krita and ComfyUI work together
Krita is the place where you draw and edit images. ComfyUI is the engine that runs the AI models. The Generative AI for Krita plugin acts as a bridge between them.
When you trigger an AI action in Krita the plugin sends the image and prompt to ComfyUI. ComfyUI processes the request and sends the generated image back into Krita.
Key concepts beginners should understand
Models
Models are trained AI files that know how to generate images. They are stored and loaded by ComfyUI not by Krita.
Prompts
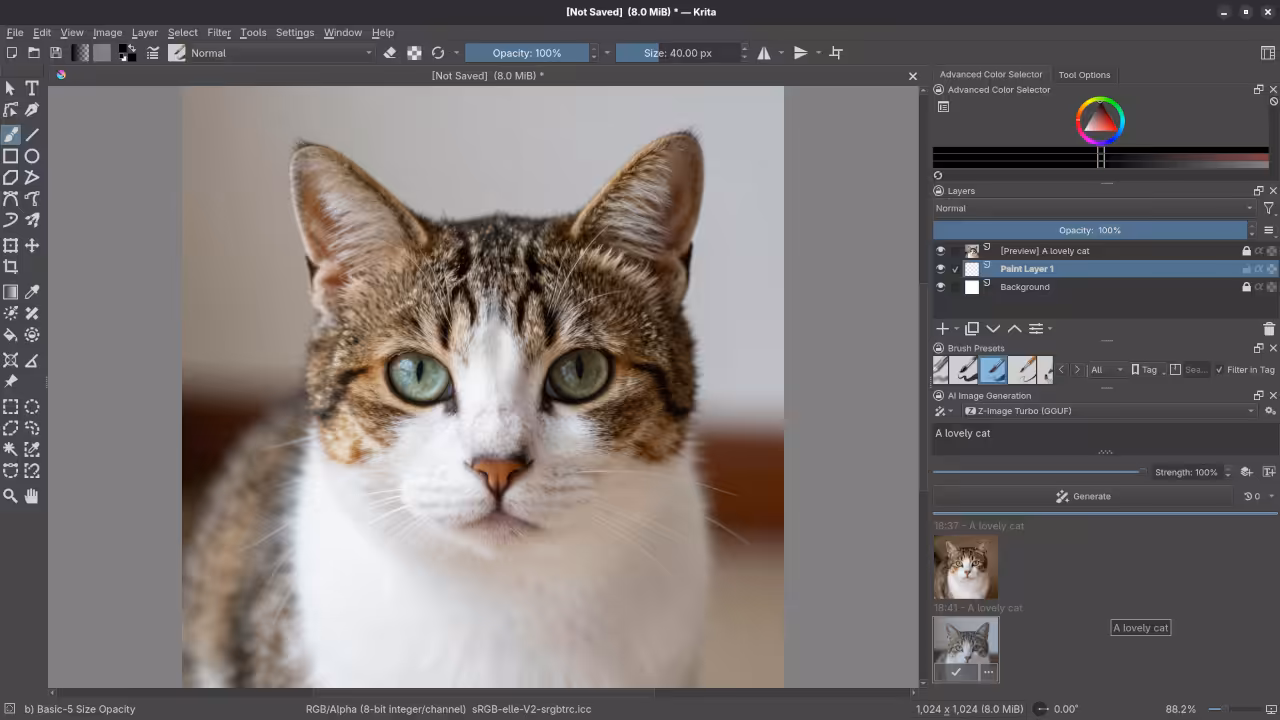
Prompts are text descriptions that tell the AI what to generate. Krita provides a simple interface for sending prompts to ComfyUI.
Masks and inpainting
Selections in Krita can be used as masks. Masks tell the AI which part of an image it is allowed to change.
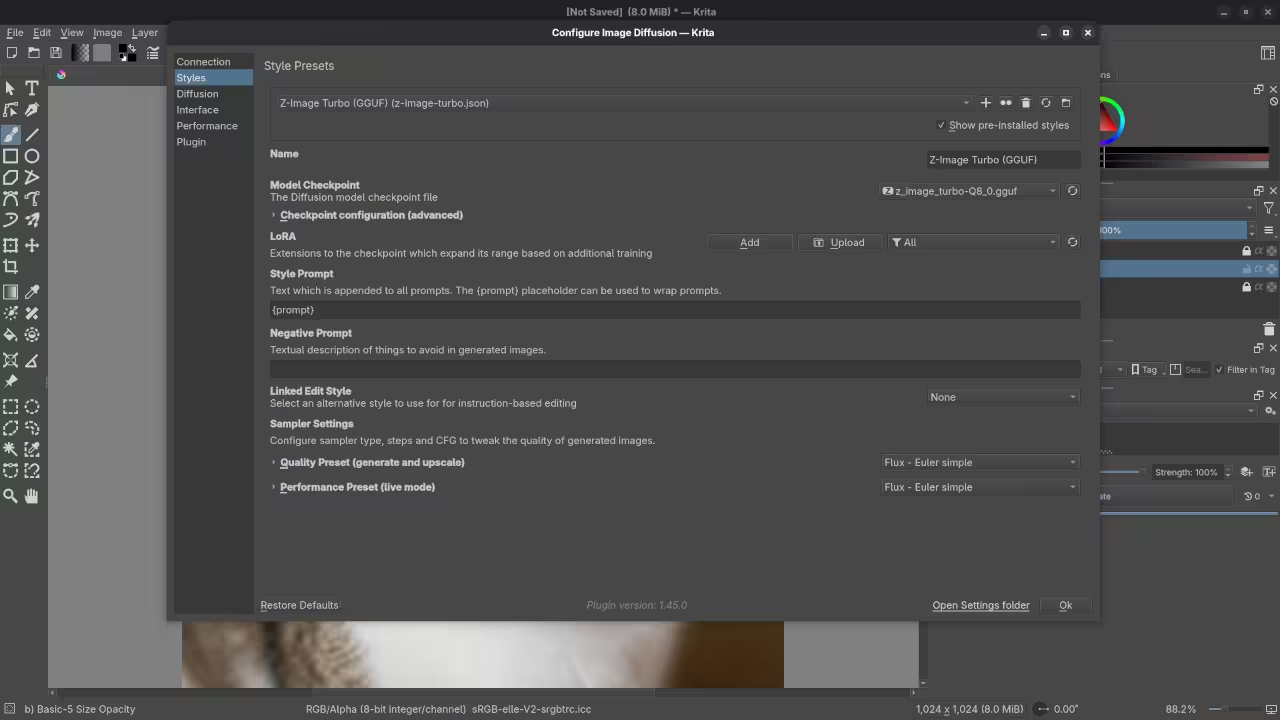
Workflows
A workflow is the set of connected nodes inside ComfyUI. The Krita plugin includes ready to use workflows so beginners do not need to build them from scratch.
Self hosting
Self hosting means everything runs on your own computer. You control your data your models and your learning process.
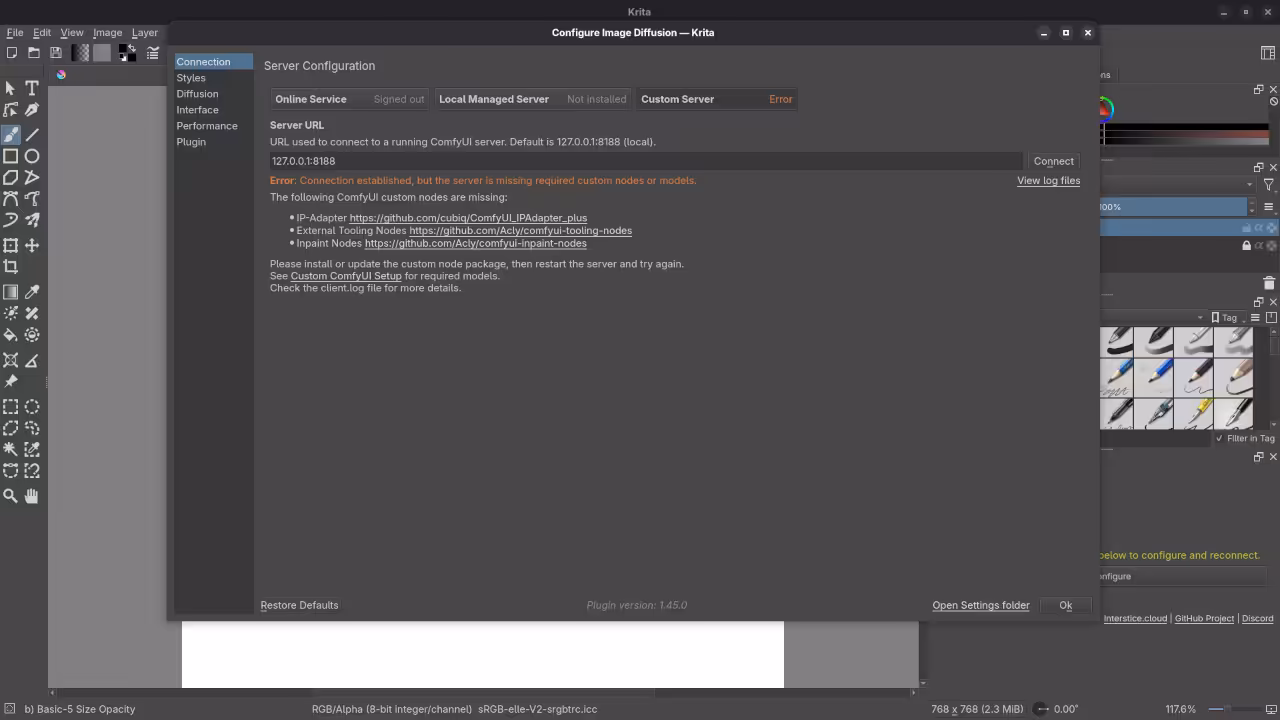
Beginner friendly installation guide
The setup has three main parts. Krita ComfyUI and the Generative AI plugin. Understanding this structure makes installation much easier.
Step one Install Krita
Krita is your main drawing application. On Fedora Linux it is commonly installed using Flatpak or system packages. Make sure Krita opens correctly and you can create a canvas.
Krita does not include AI by default. The plugin will be added later.
Step two Install ComfyUI
ComfyUI runs the AI models. It requires Python and runs from its own project folder. When started it opens a local web interface in your browser.
If you can see the ComfyUI interface in your browser the installation is working.
Step three Download AI models
ComfyUI needs models to generate images. At minimum you need a Stable Diffusion checkpoint model. Models are placed into specific ComfyUI folders so they appear in the interface.
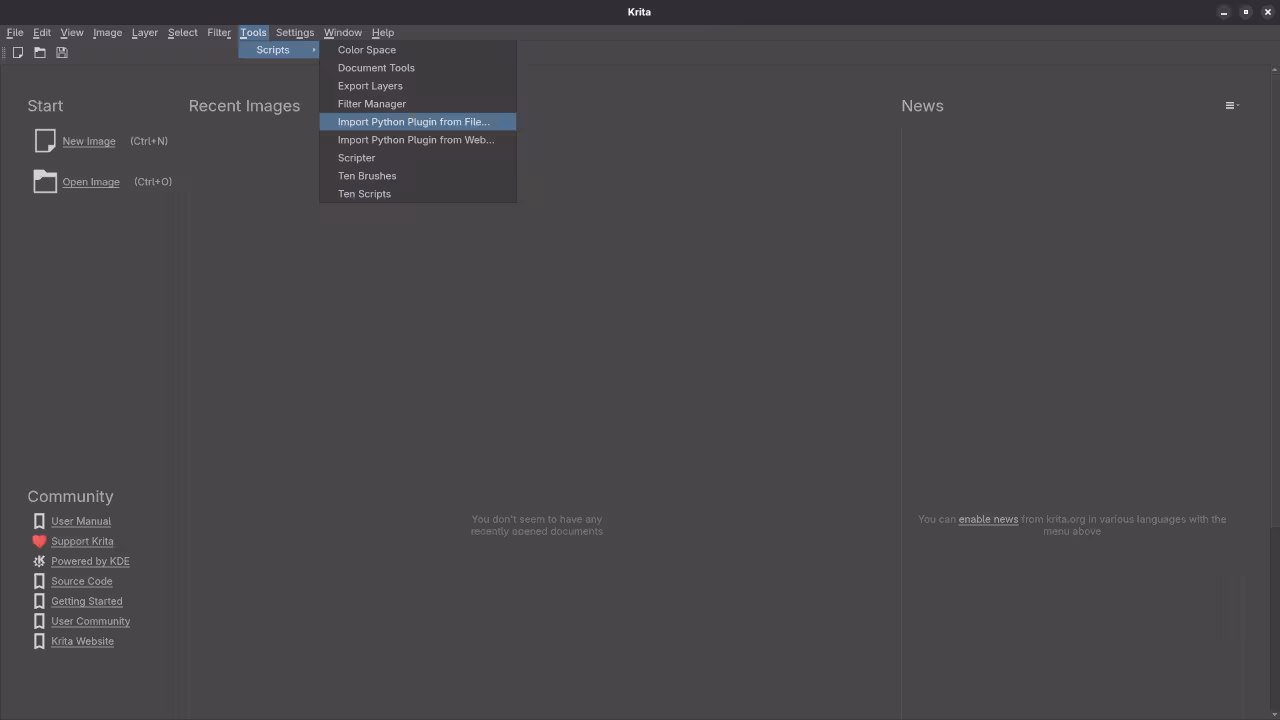
Step four Install the Generative AI for Krita plugin
The plugin is downloaded from the project repository at
https://github.com/Acly/krita-ai-diffusion
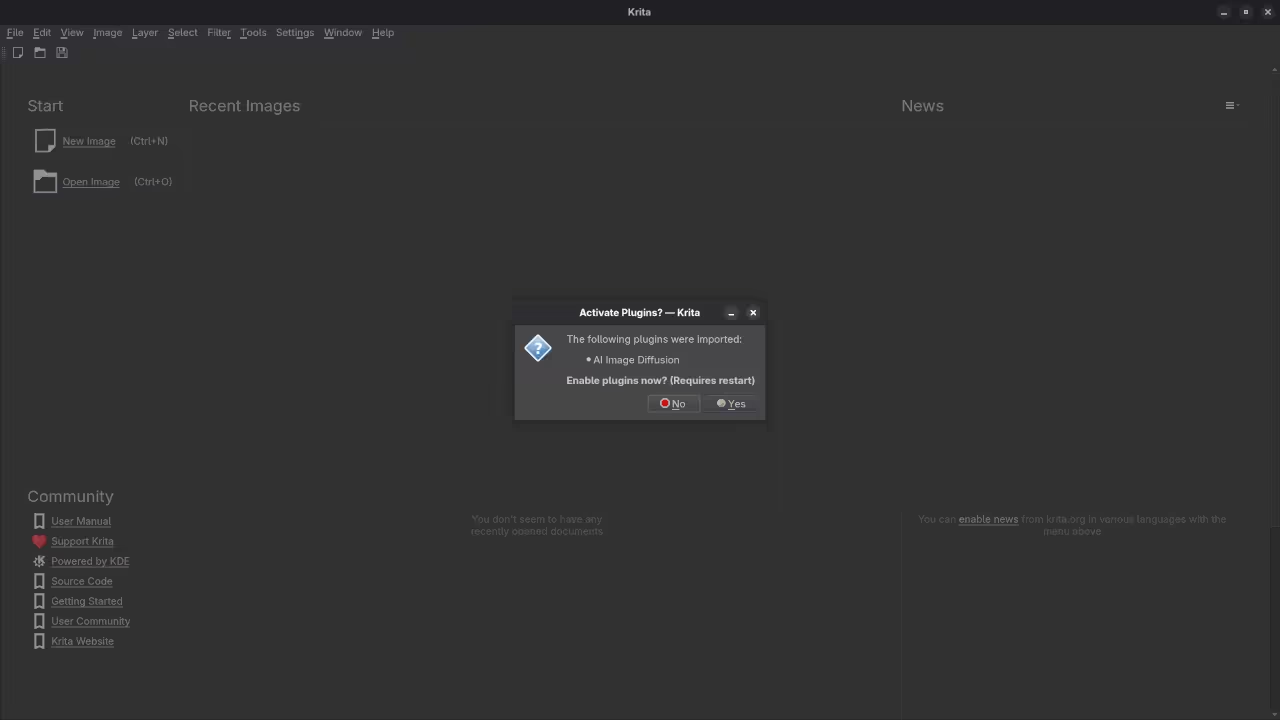
It is placed into the Krita plugin directory and then enabled in Krita settings. After restarting Krita the AI panels become available.
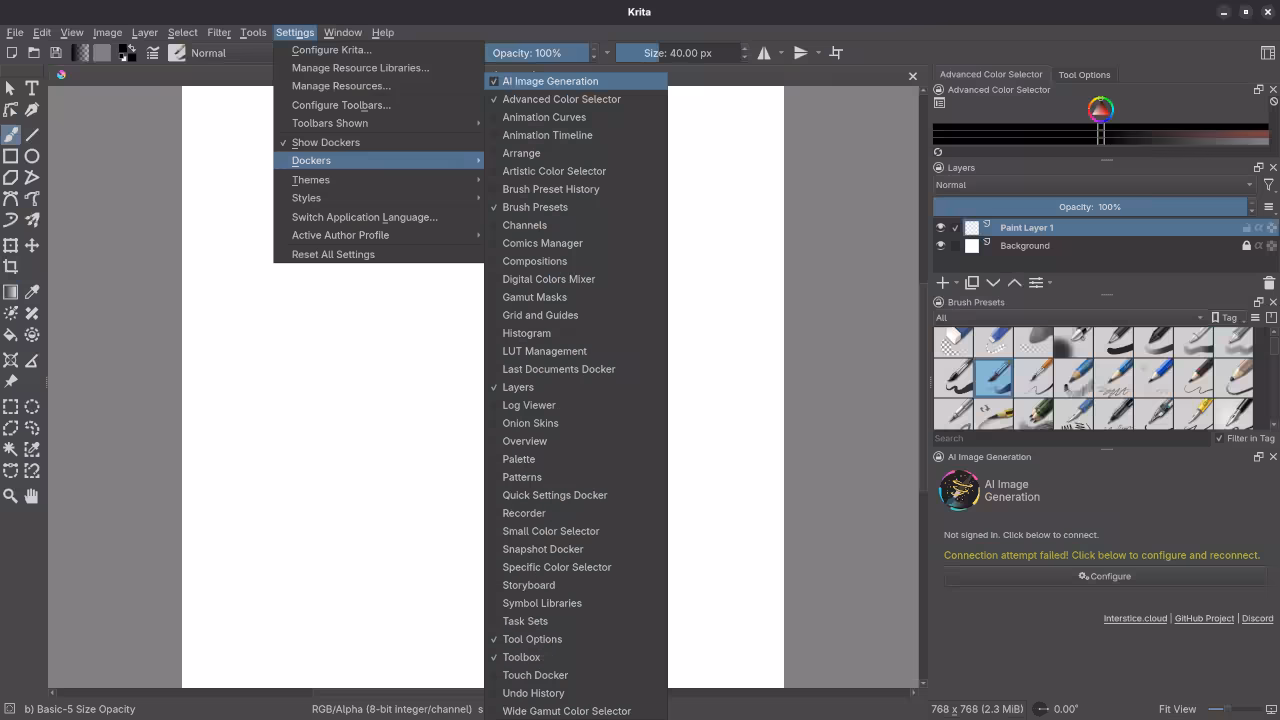
Step five Connect Krita to ComfyUI
The plugin is configured to point to the local ComfyUI address. Once connected Krita can send images and prompts to ComfyUI and receive results back.
Step six Test a simple generation
Open a blank canvas in Krita enter a short prompt and generate an image. The result should appear directly in Krita.
Common beginner mistakes
It is normal to forget to install models forget to restart Krita or confuse where files should go. These are part of learning and easy to fix once you understand the system.
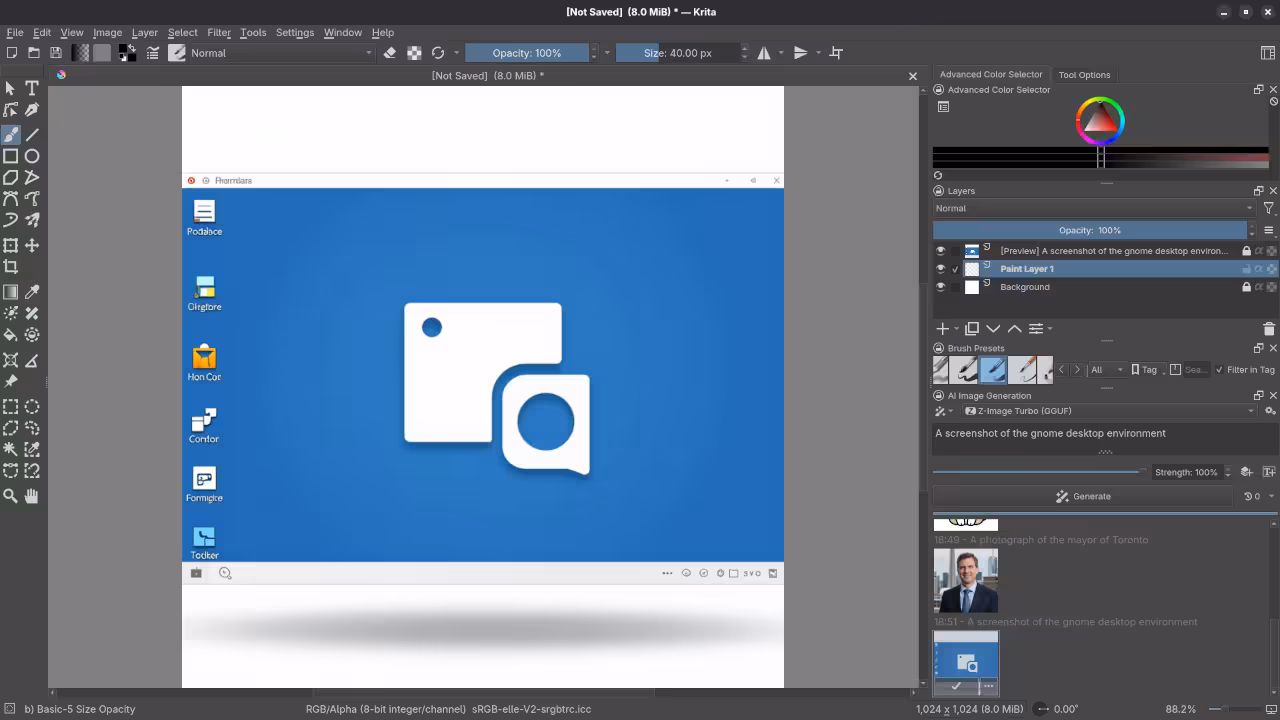
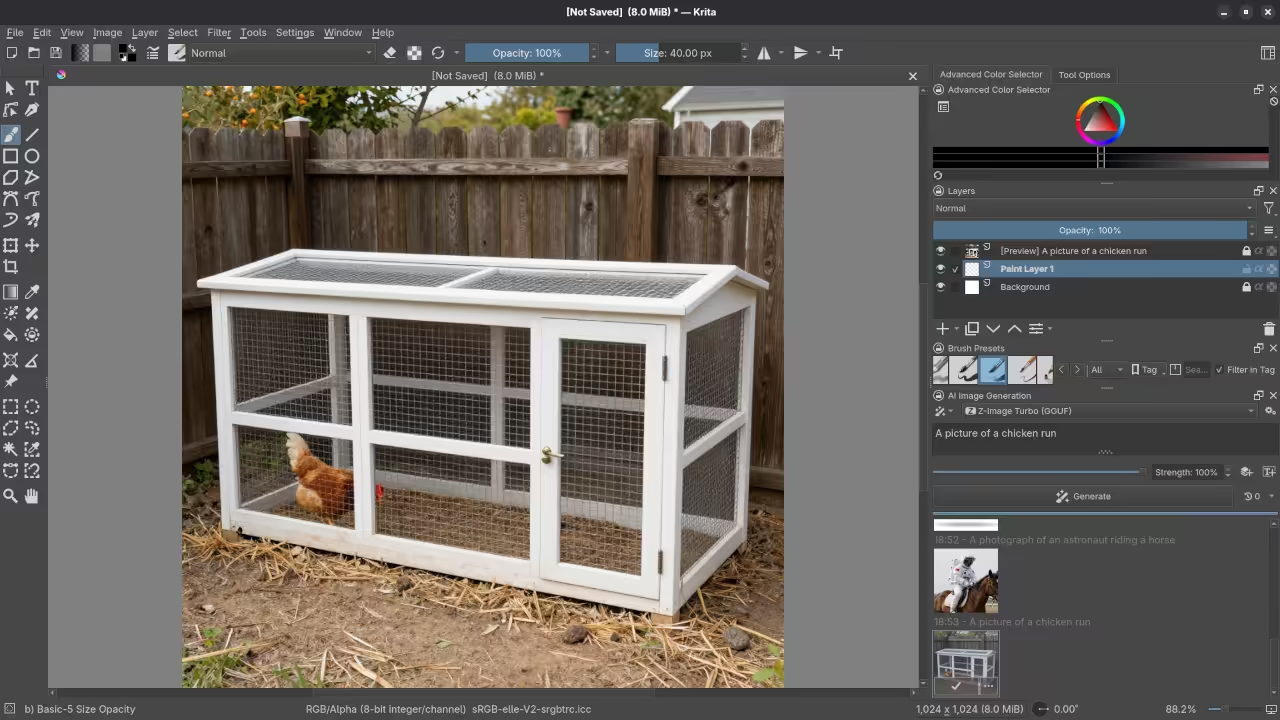
📷 Screenshots


🎬 Live YouTube Screencast
Results:
A photograph of the mayor of Toronto
Accurately drew a photograph mishmash of past mayors of Toronto.
A screenshot of the gnome desktop environment.
Accurately drew a screenshot of an older version of the Gnome desktop environment.
A photograph of an astronaut riding a horse.
Accurately drew a photograph of an astronaut riding a horse.
A picture of a chicken run.
Accurately drew a picture of a chicken run.
A picture of a man wearing a watch.
Accurately drew a picture of a man wearing a watch.
A picture of a spider web on sockets.
Accurately drew a picture of a spider web on sockets.
Learning resources and next steps
If you want to continue learning programming self hosting and creative AI I offer several helpful resources.
Books for beginners
https://www.amazon.com/stores/Edward-Ojambo/author/B0D94QM76N
Courses on programming and self hosting
https://ojamboshop.com/product-category/course
One on one programming tutorials
Consultation services
https://ojamboservices.com/contact
🚀 Recommended Resources
Disclosure: Some of the links above are referral links. I may earn a commission if you make a purchase at no extra cost to you.