Blog

  • Build A Native Android RTSP Webcam in Kotlin

    Build A Native Android RTSP Webcam in Kotlin

    How to Build a Native Android RTSP Webcam for OBS Studio Using Kotlin

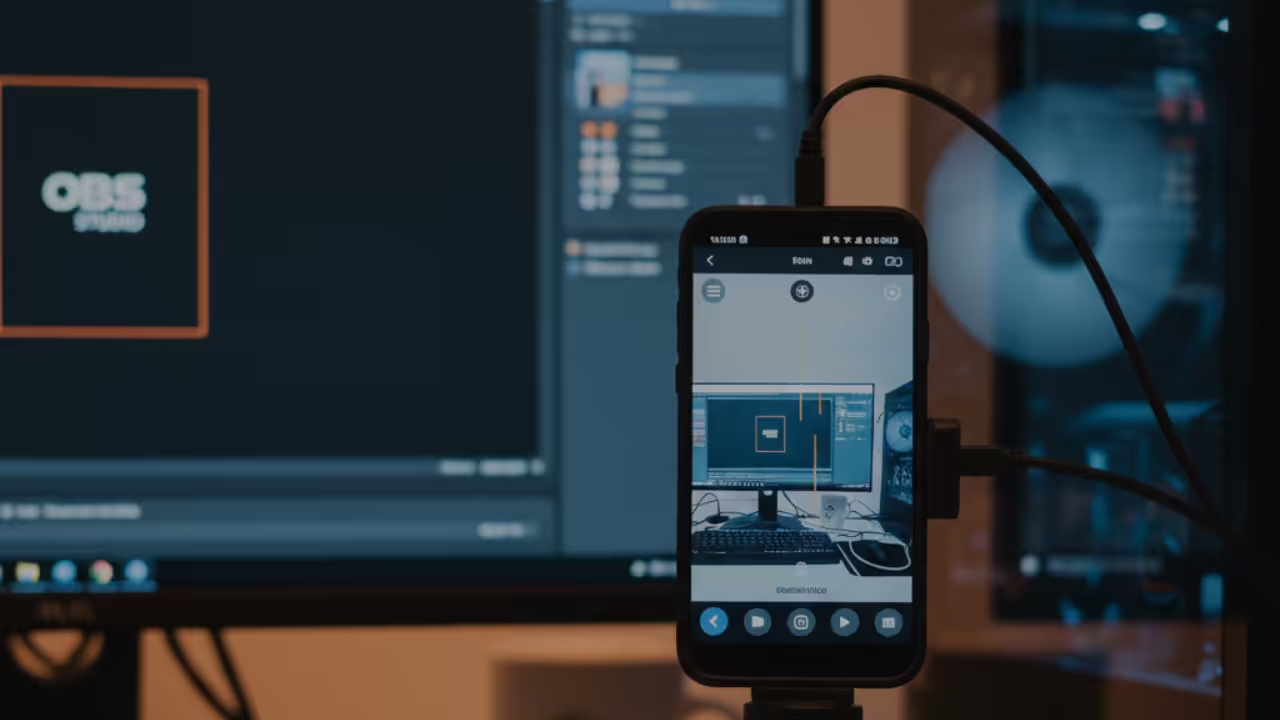
    Have you ever wanted to use your Android phone as a high quality webcam for live streaming with OBS Studio In this beginner friendly tutorial we will build a native Android RTSP webcam using Kotlin This app will leverage open source libraries to handle complex video encoding and networking while keeping the core logic entirely ad free and under your control

    We will test the app on

    • Sony Xperia XA1 Ultra supports native H264 encoding
    • Samsung Galaxy S21 FE 5G supports H264 H265 and VP9
    • Logitech HD Webcam C525 for comparison no hardware encoding

    Note While the Samsung Galaxy S21 FE can work with tools like scrcpy it is my daily driver and not appropriate for webcam use in this tutorial

    Prerequisites

    • Android Studio installed on Fedora 43
    • Basic knowledge of Kotlin
    • OBS Studio installed on your computer
    • Android device connected via USB for testing

    Optional but recommended a tripod or stable mount for your phone

    Step 1 Create a New Kotlin Project in Android Studio

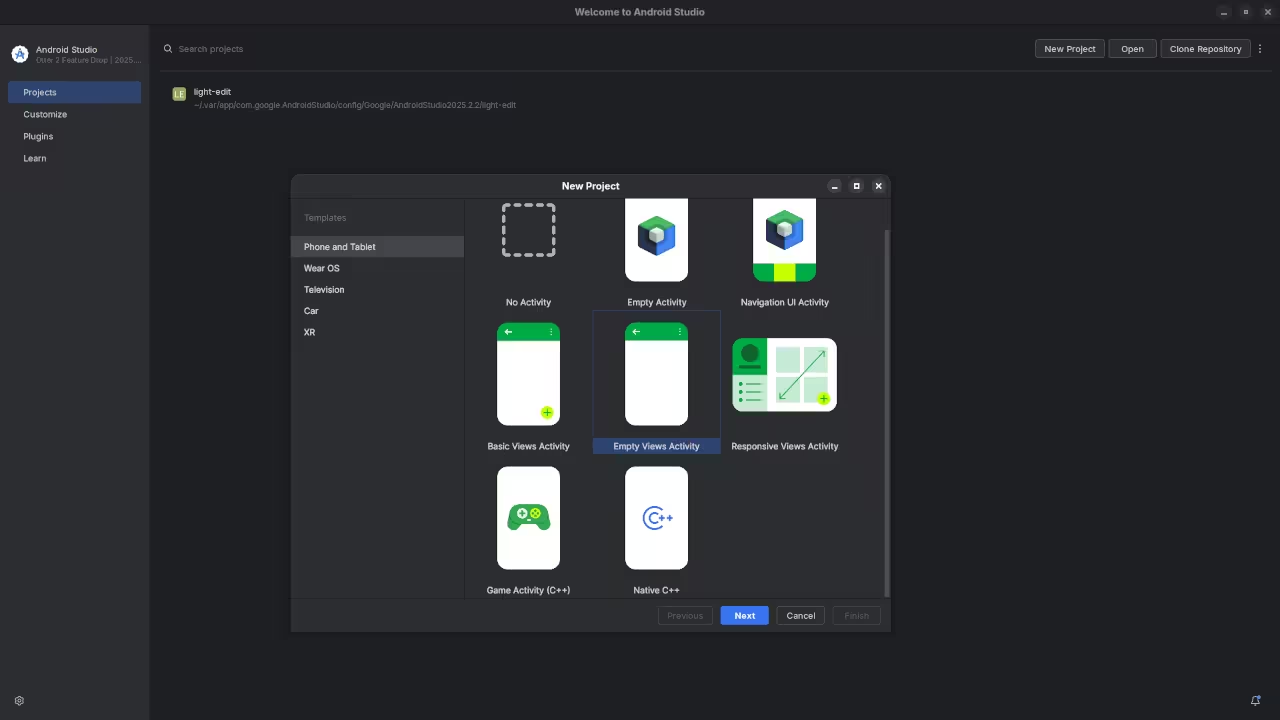
    1. Open Android Studio New Project Empty Views Activity
    2. Name your project AndroidRTSPWebcam
    3. Set Language to Kotlin Minimum SDK to 26
    4. Click Finish

    Step 2 Add Dependencies

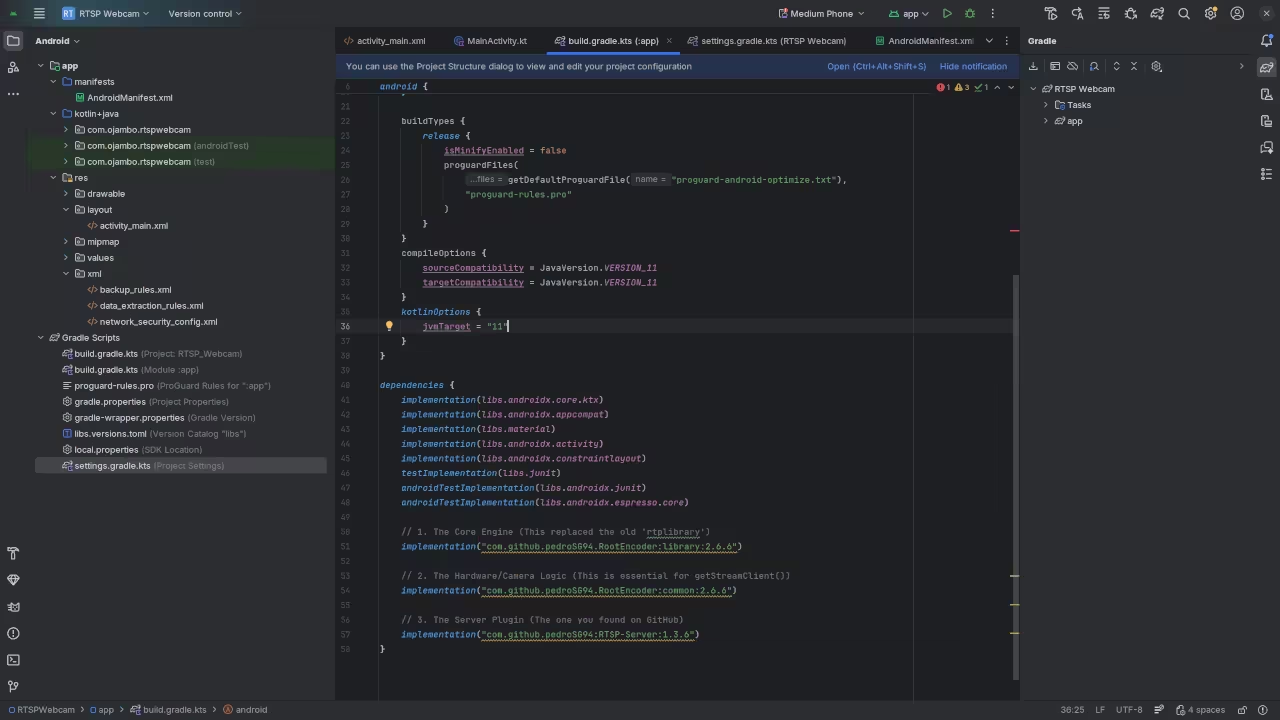
    In your build gradle module file add

    dependencies {
        implementation 'org.bytedeco:ffmpeg:5.1-1.5.7'
        implementation 'com.github.pedroSG94.rtmp-rtsp-stream-client-java:rtplibrary:2.1.8'
        implementation 'androidx.core:core-ktx:1.12.0'
    }

    These libraries handle hardware encoding and streaming protocols so you do not have to implement them from scratch

    Step 3 Implement RTSP Camera Stream


    package com.example.androidrtspwebcam
    
    import android.content.Context
    import android.util.Log
    import com.pedro.rtplibrary.rtmp.RtmpCamera2
    import com.pedro.rtplibrary.view.OpenGlView
    import net.ossrs.rtmp.ConnectCheckerRtmp
    
    class RTSPCamera(context Context private val openGlView OpenGlView) ConnectCheckerRtmp {
    
        private var rtmpCamera RtmpCamera2? = null
    
        init {
            rtmpCamera = RtmpCamera2(openGlView this)
        }
    
        fun startStream(rtspUrl String) {
            if !rtmpCamera!!.isStreaming {
                rtmpCamera!!.startStream(rtspUrl)
            }
        }
    
        fun stopStream() {
            if rtmpCamera!!.isStreaming {
                rtmpCamera!!.stopStream()
            }
        }
    
        override fun onConnectionSuccessRtmp() {
            Log.i("RTSPCamera" "Connected to RTSP server")
        }
    
        override fun onConnectionFailedRtmp(reason String) {
            Log.e("RTSPCamera" "Connection failed " + reason)
        }
    
        override fun onDisconnectRtmp() {}
        override fun onAuthErrorRtmp() {}
        override fun onAuthSuccessRtmp() {}
    }


    Step 4 Hook Up UI


    package com.example.androidrtspwebcam
    
    import android.os.Bundle
    import androidx.activity.ComponentActivity
    import com.pedro.rtplibrary.view.OpenGlView
    
    class MainActivity : ComponentActivity() {
    
        private lateinit var rtspCamera RTSPCamera
        private lateinit var openGlView OpenGlView
    
        override fun onCreate(savedInstanceState Bundle?) {
            super.onCreate(savedInstanceState)
            openGlView = OpenGlView(this)
            setContentView(openGlView)
    
            rtspCamera = RTSPCamera(this openGlView)
            val rtspUrl = "rtsp://YOUR_PC_IP:8554/live/stream"
            rtspCamera.startStream(rtspUrl)
        }
    
        override fun onDestroy() {
            super.onDestroy()
            rtspCamera.stopStream()
        }
    }


    Step 5 Test the RTSP Stream

    1. Connect your Android device via USB
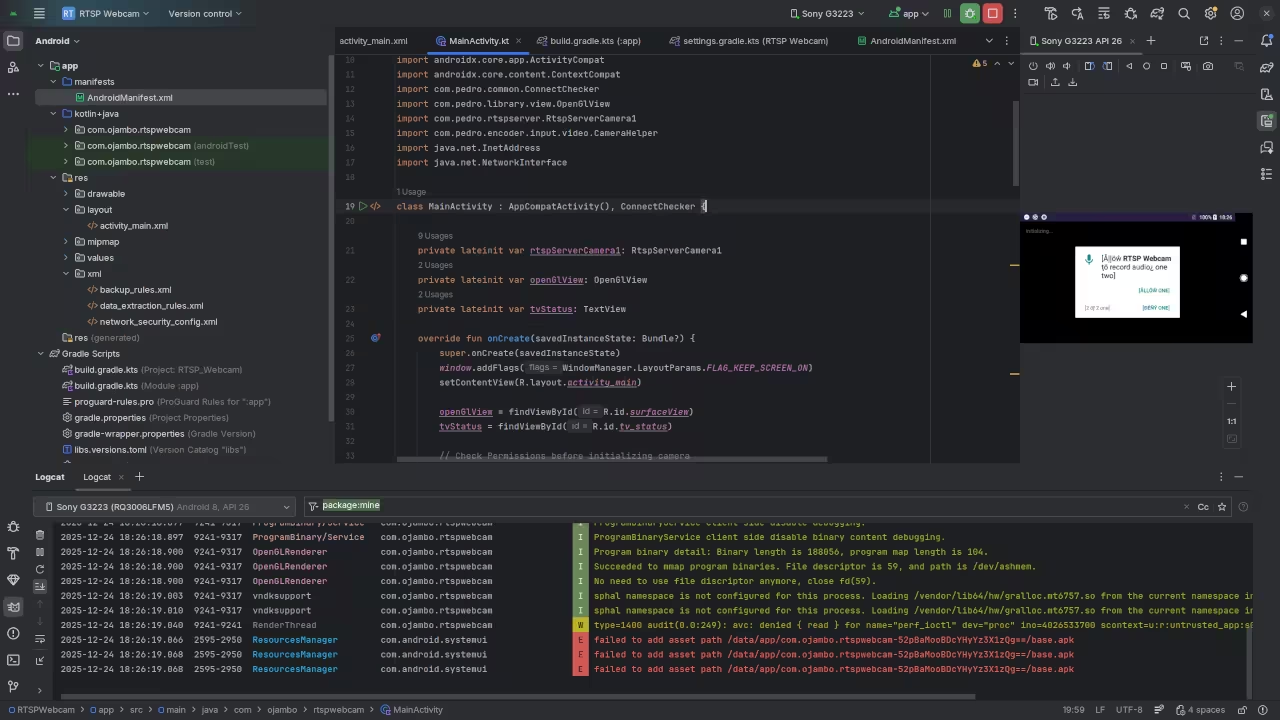
    2. Run the app from Android Studio
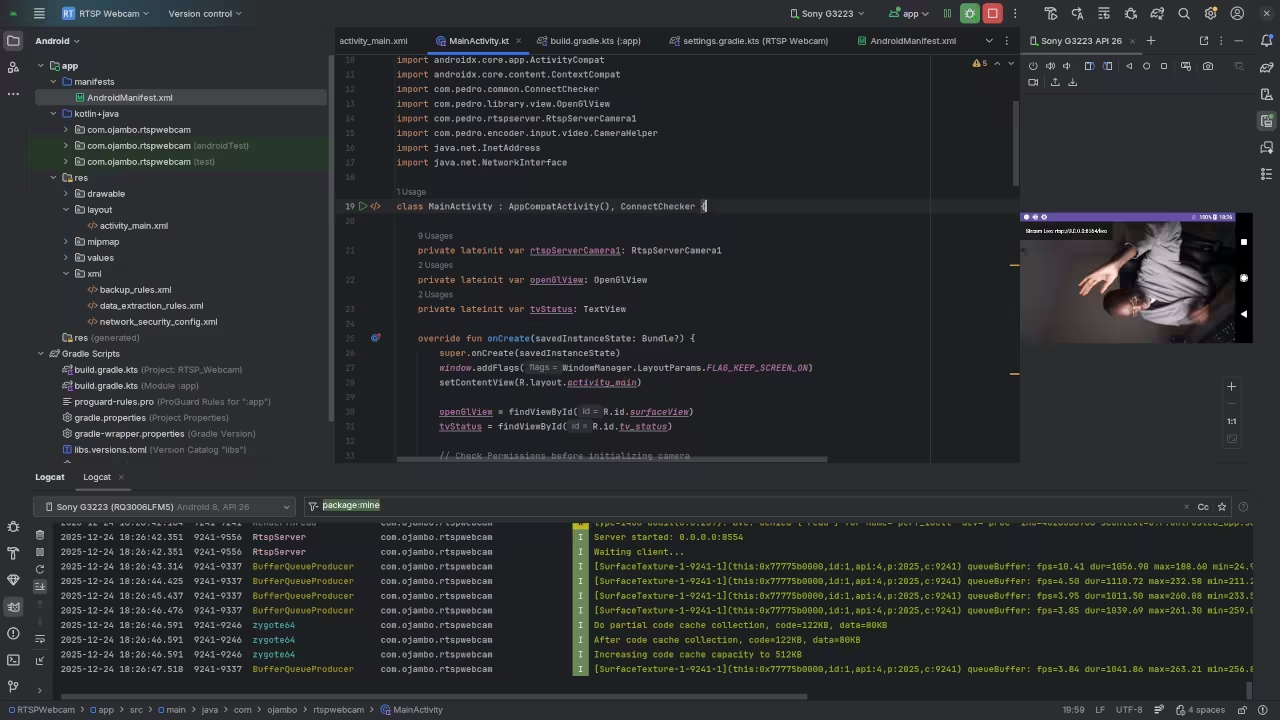
    3. Ensure the log shows Connected to RTSP server

    Step 6 Use the Stream in OBS Studio

    1. Open OBS Studio
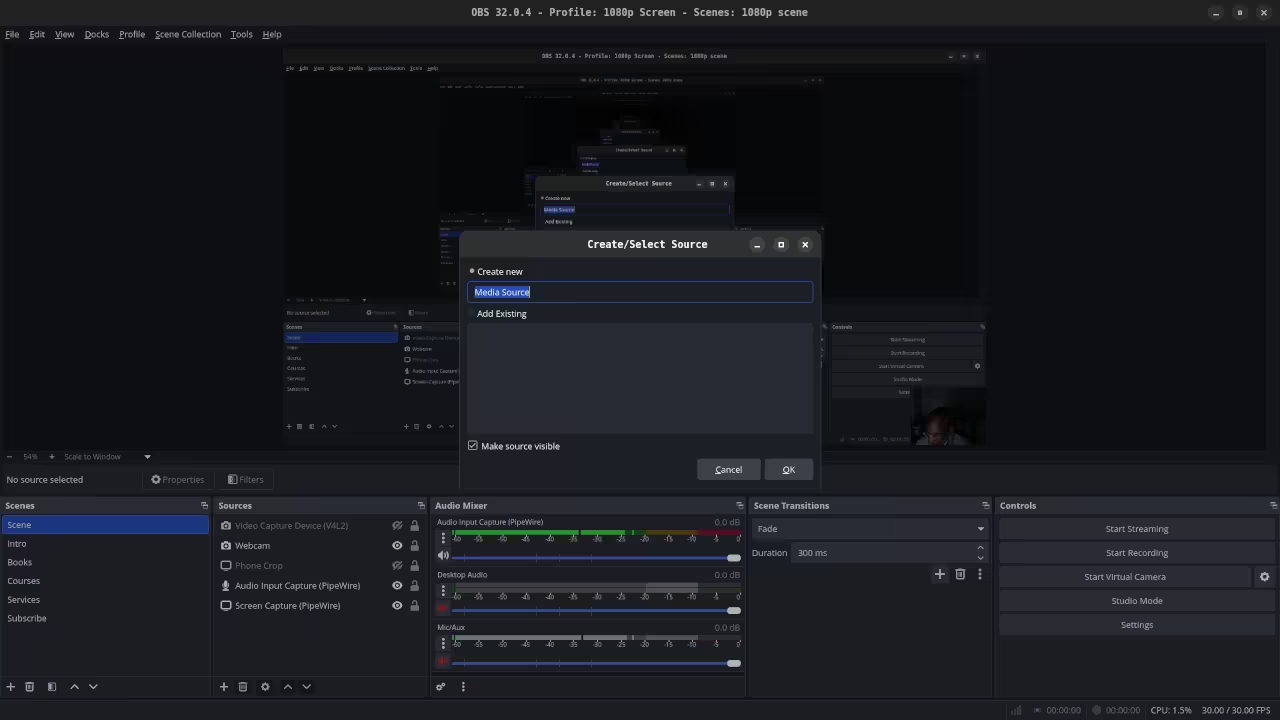
    2. Click Sources plus Media Source
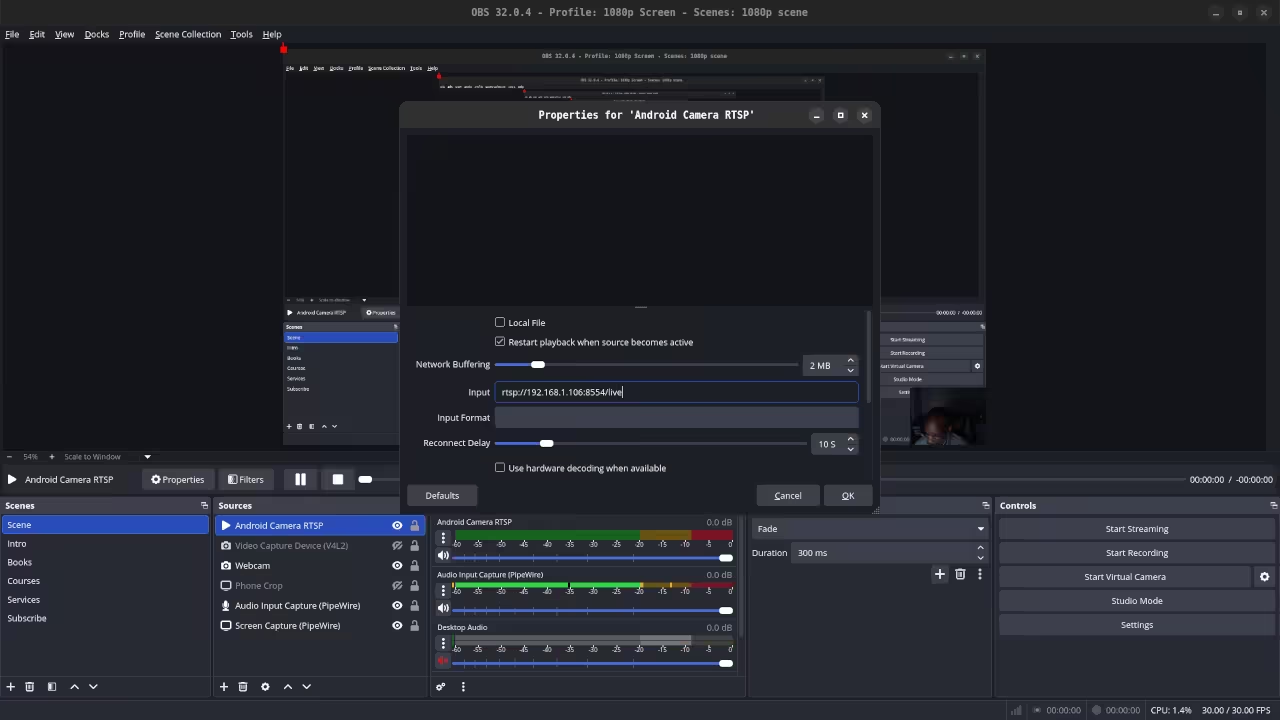
    3. Enable Input URL and enter your RTSP URL
      rtsp://YOUR_PC_IP:8554/live/stream
    4. Click OK
    5. You should now see the live feed from your Android device

    Adjust resolution and FPS in your app if needed Devices like the Galaxy S21 FE can use hardware encoding for smoother streams

    Screenshot
    Android Studio Project
    Android Studio Selecting Empty Views Activity

    Build Gradle KTS
    Android Studio Displaying Build Gradle File

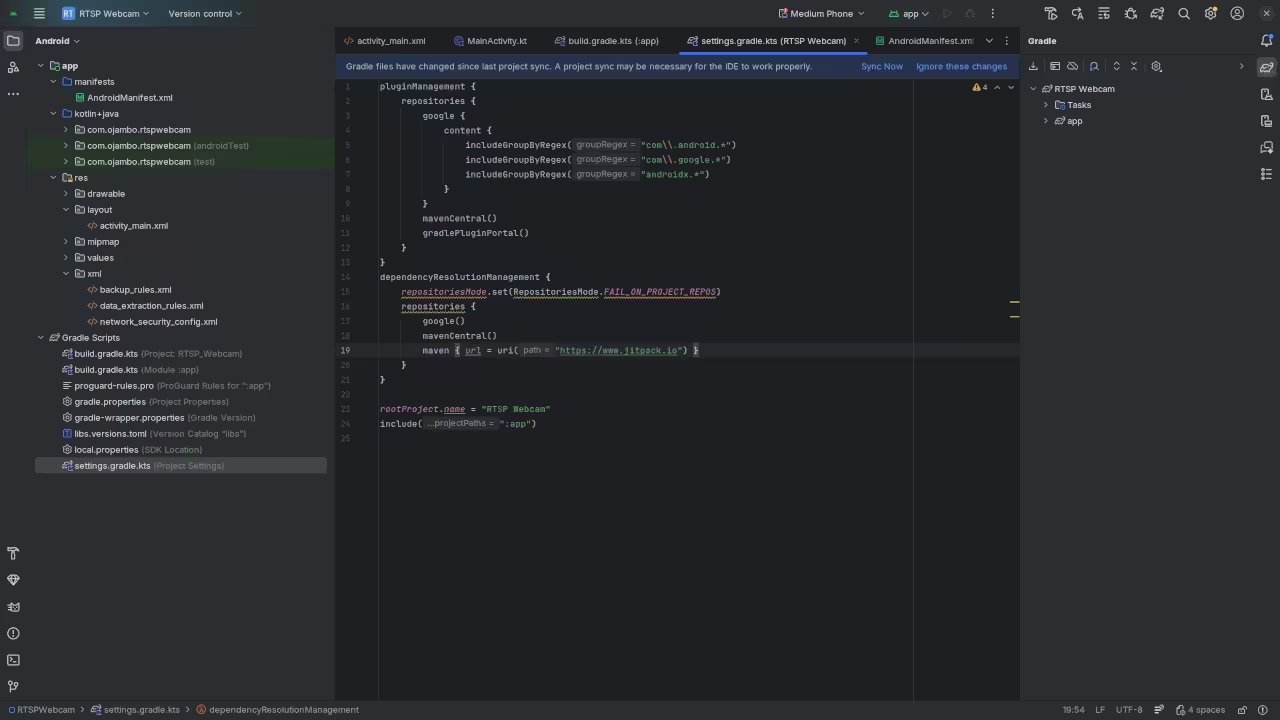
    Settings Gradle KTS
    Android Studio Displaying Settings Gradle File

    Activity Layout XML
    Android Studio Displaying Activity Layout File

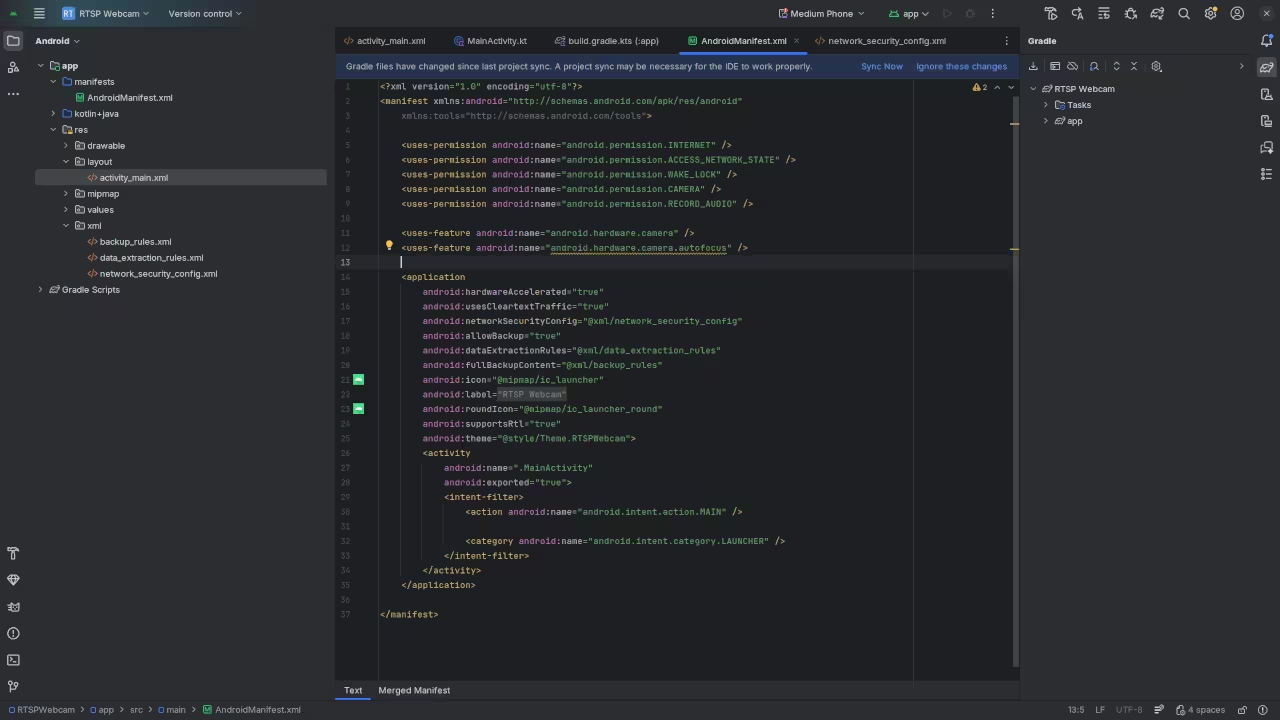
    Android Manifest XML
    Android Studio Displaying Android Manifest File

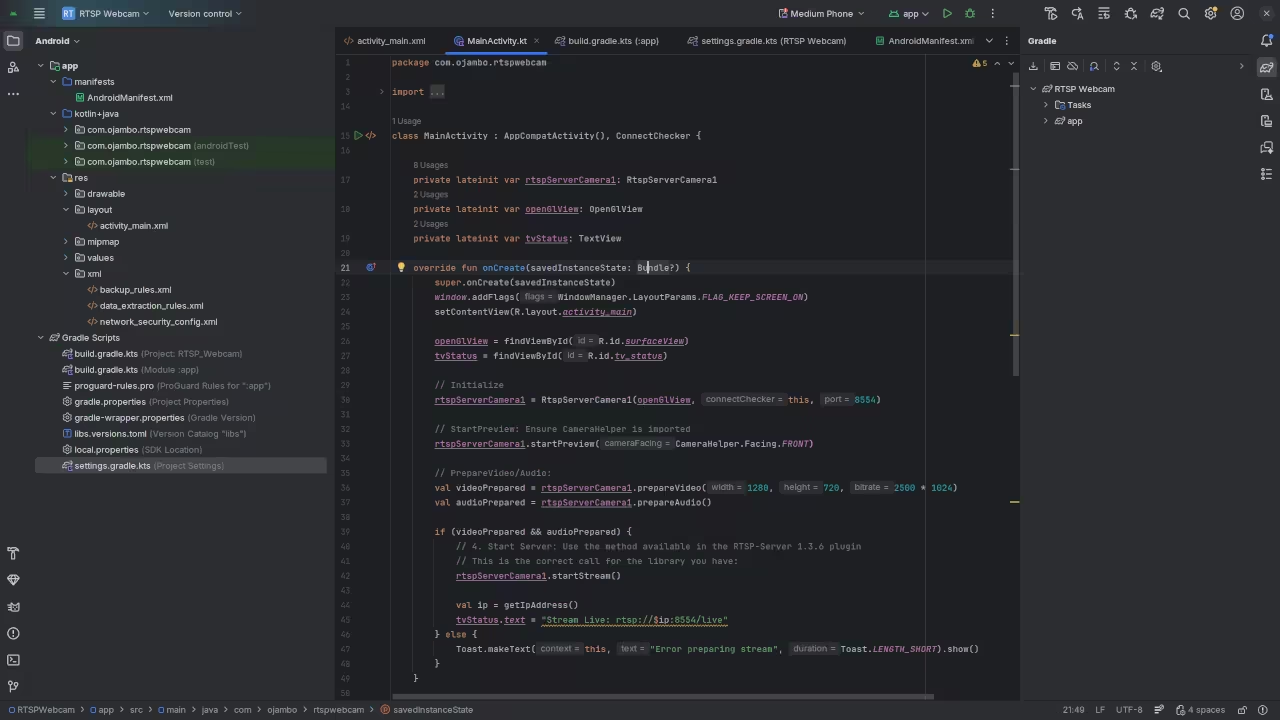
    Main Activity KT
    Android Studio Displaying Main Activity File

    Android Debug App
    Android Studio Displaying App Debug On Device

    Device Mirror RTSP
    Android Studio Displaying App RTSP IP On Device

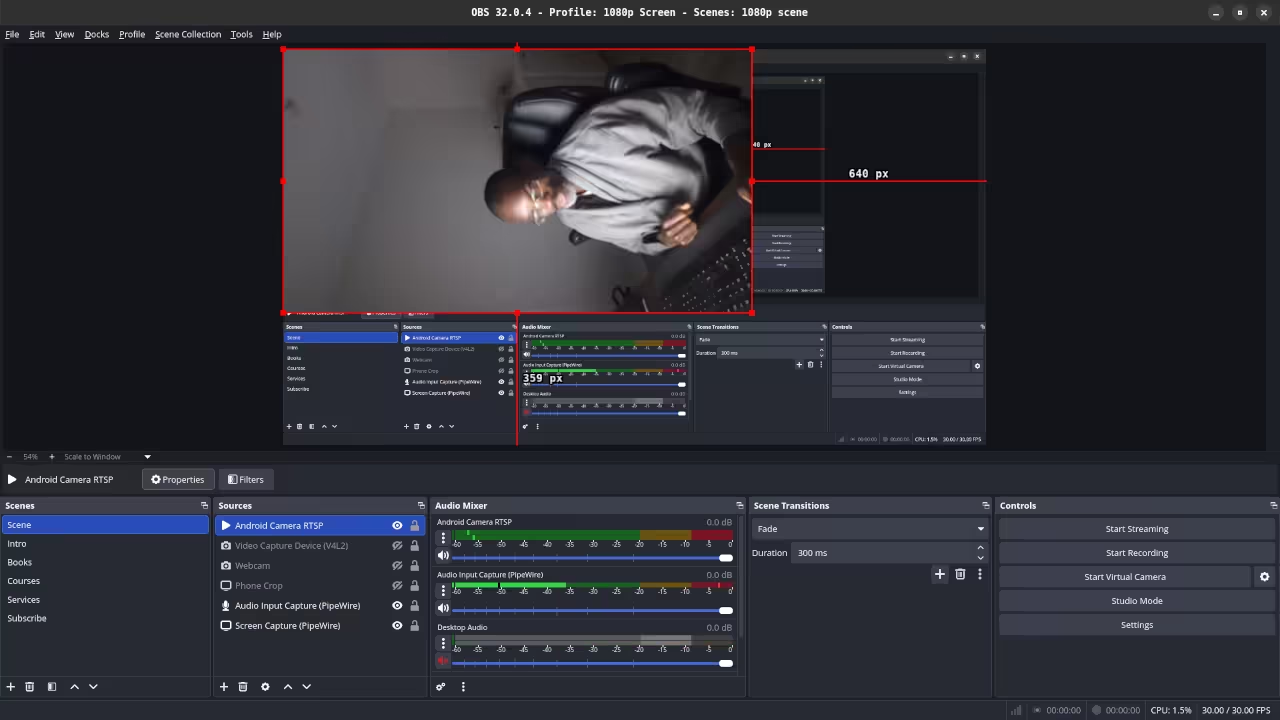
    OBS Media Source
    OBS Studio Creating A New Media Source

    Media Source Setup
    OBS Studio Setting Up RTSP Media Source

    Media Source Preview
    OBS Studio Previewing RTSP Media Source

    Live Screencast

    Screencast Of Kotlin Android RTSP Webcam

    Additional Resources

    This tutorial gives you a lightweight ad free native Android RTSP webcam you can use with OBS Studio on Fedora 43 with Gnome 49 and Wayland You can extend it for multiple devices integrate overlays or even use your Logitech webcam for testing
  • Deploying RustDesk for Team Collaboration Using Podman Quadlets And Systemd

    Deploying RustDesk for Team Collaboration Using Podman Quadlets And Systemd

    RustDesk with Podman Quadlets and systemd Integration Beginner Guide

    RustDesk is a free and open source remote desktop solution that allows secure access to computers over a local network or the internet. It is a strong alternative to proprietary remote desktop tools and gives you full control over your infrastructure.

    This beginner level guide shows how to run RustDesk using Podman and manage it with Podman Quadlets and systemd. An optional podman compose example is also included.

    Why Use RustDesk

    • Open source and community driven
    • Self hosted with full data control
    • Cross platform support
    • Lightweight and fast
    • Works well with Linux containers

    What Are Podman Quadlets

    Podman Quadlets allow containers to be managed directly by systemd using simple configuration files. This ensures services start automatically on boot and integrate cleanly with the operating system.

    Prerequisites

    • Linux system with systemd
    • Podman version 4 or newer
    • Basic terminal knowledge

    Installing RustDesk Using Podman Quadlets

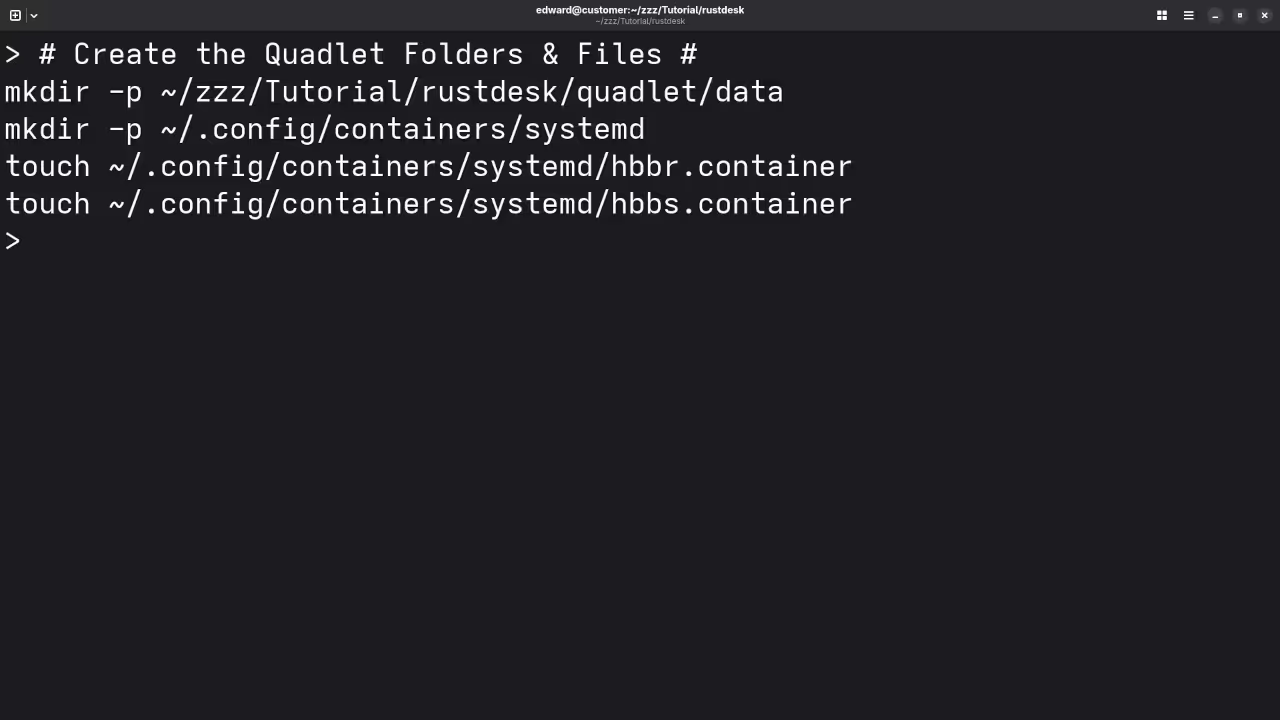
    Create the Quadlet Directory

    mkdir -p ~/.config/containers/systemd

    Create the RustDesk Quadlet File

    ~/.config/containers/systemd/rustdesk.container
    [Unit]
    Description=RustDesk Server Container
    After=network-online.target
    
    [Container]
    Image=docker.io/rustdesk/rustdesk-server:latest
    ContainerName=rustdesk
    AutoUpdate=registry
    PublishPort=21115:21115
    PublishPort=21116:21116
    PublishPort=21117:21117
    PublishPort=21118:21118
    Volume=%h/rustdesk-data:/data
    Exec=/usr/bin/hbbs -r your-domain-or-ip:21117
    
    [Service]
    Restart=always
    
    [Install]
    WantedBy=default.target

    Replace your domain or ip with your public server address.

    Enable and Start the Service

    systemctl --user daemon-reload
    systemctl --user enable --now rustdesk.service
    systemctl --user status rustdesk.service

    Optional Installation Using podman compose

    version: "3"
    
    services:
      rustdesk:
        image: rustdesk/rustdesk-server:latest
        container_name: rustdesk
        command: hbbs -r your-domain-or-ip:21117
        ports:
          - "21115:21115"
          - "21116:21116"
          - "21117:21117"
          - "21118:21118"
        volumes:
          - ./rustdesk-data:/data
        restart: always
    podman-compose up -d

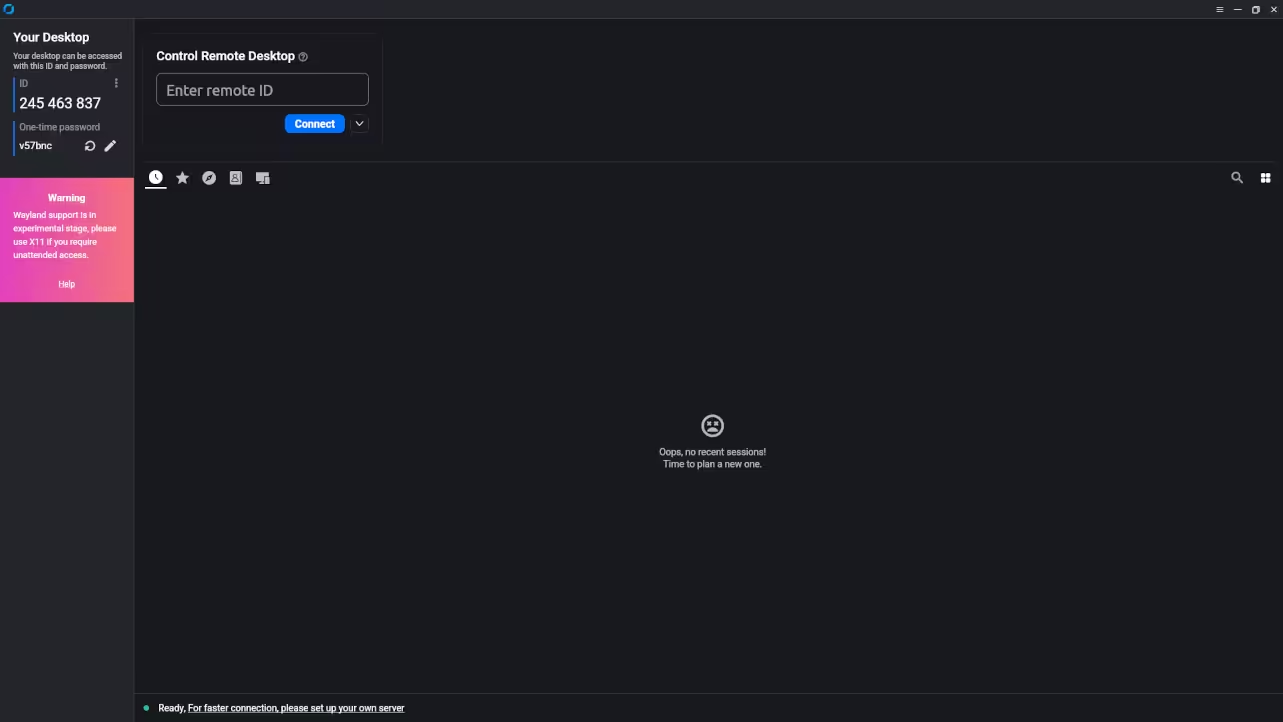
    Connecting RustDesk Clients

    Once the server is running install the RustDesk client on your device and configure it to use your custom server address.

    📷 Part 3: Screenshots

    Podman Quadlet Structure
    Rustdesk Server Podman Quadlet Structure Setup

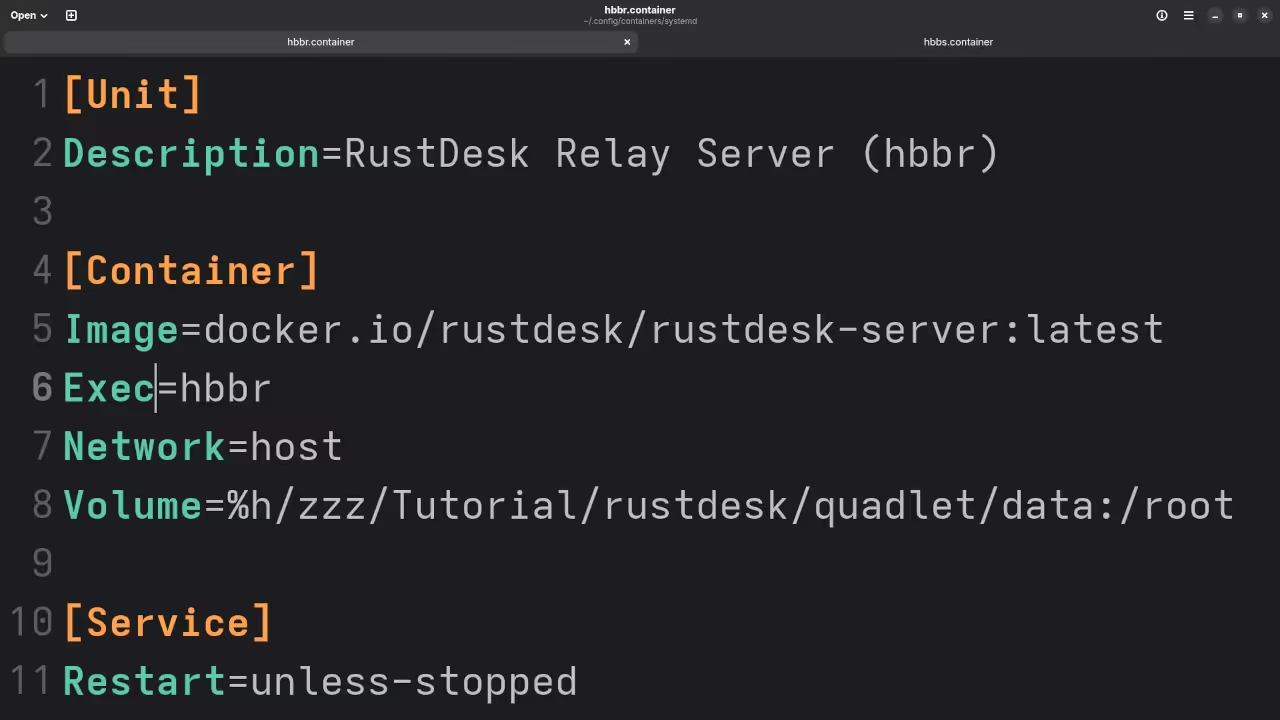
    Rustdesk Relay Server
    Gnome Text Editor Displaying Rustdesk Relay Server Container

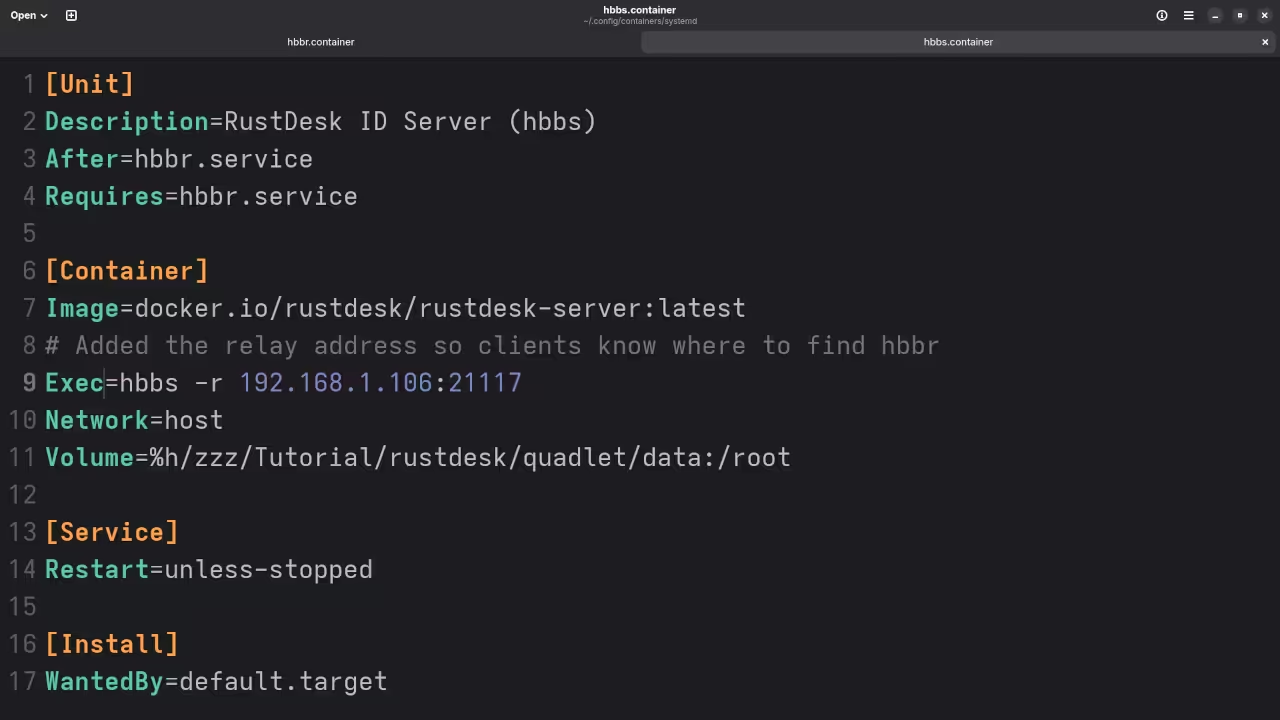
    Rustdesk Server
    Gnome Text Editor Displaying Rustdesk Server Container

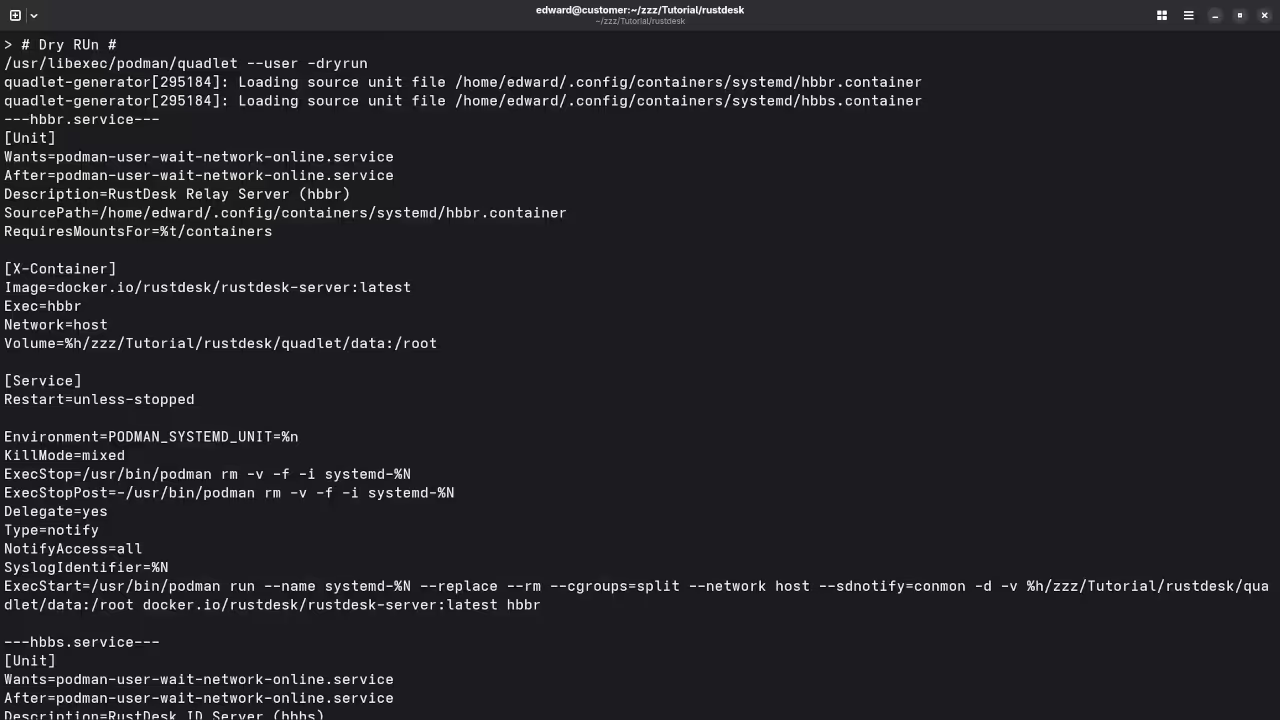
    Podman Quadlet Dry Run
    Command Line Displaying Podman Quadlet Dry Run Results

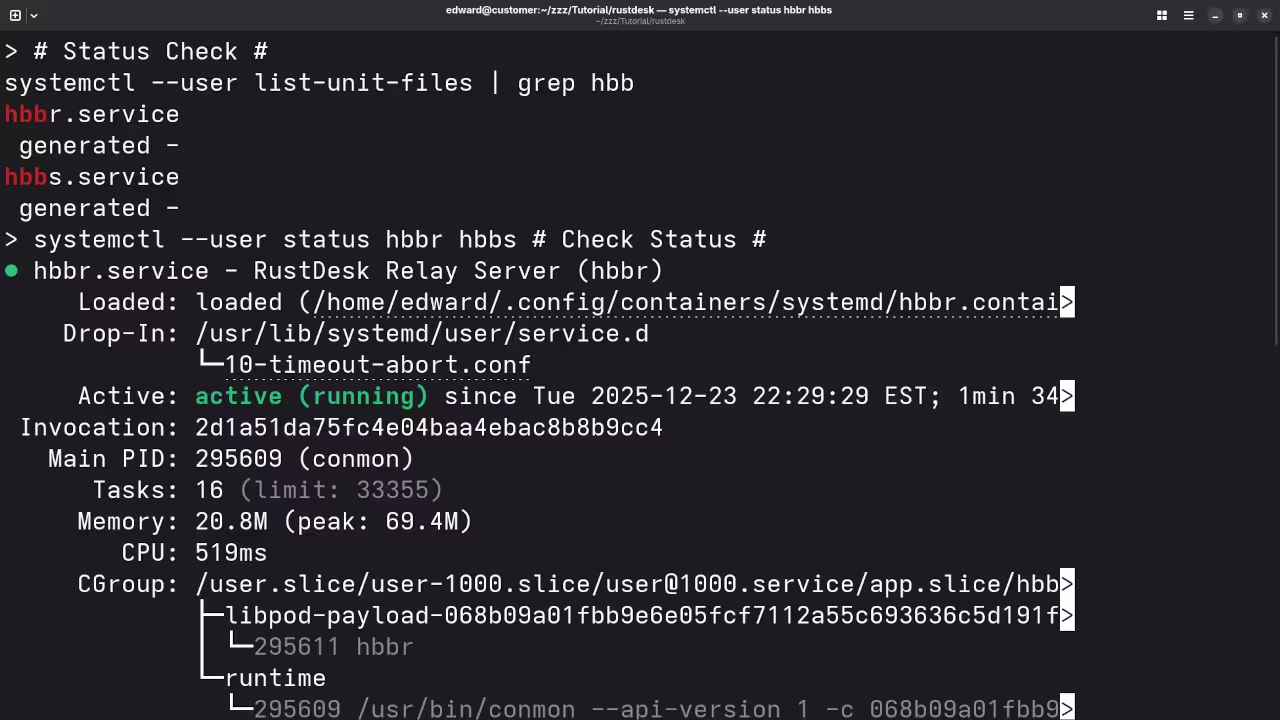
    Podman Quadlet Status
    Command Line Displaying Podman Quadlet Status Check Results

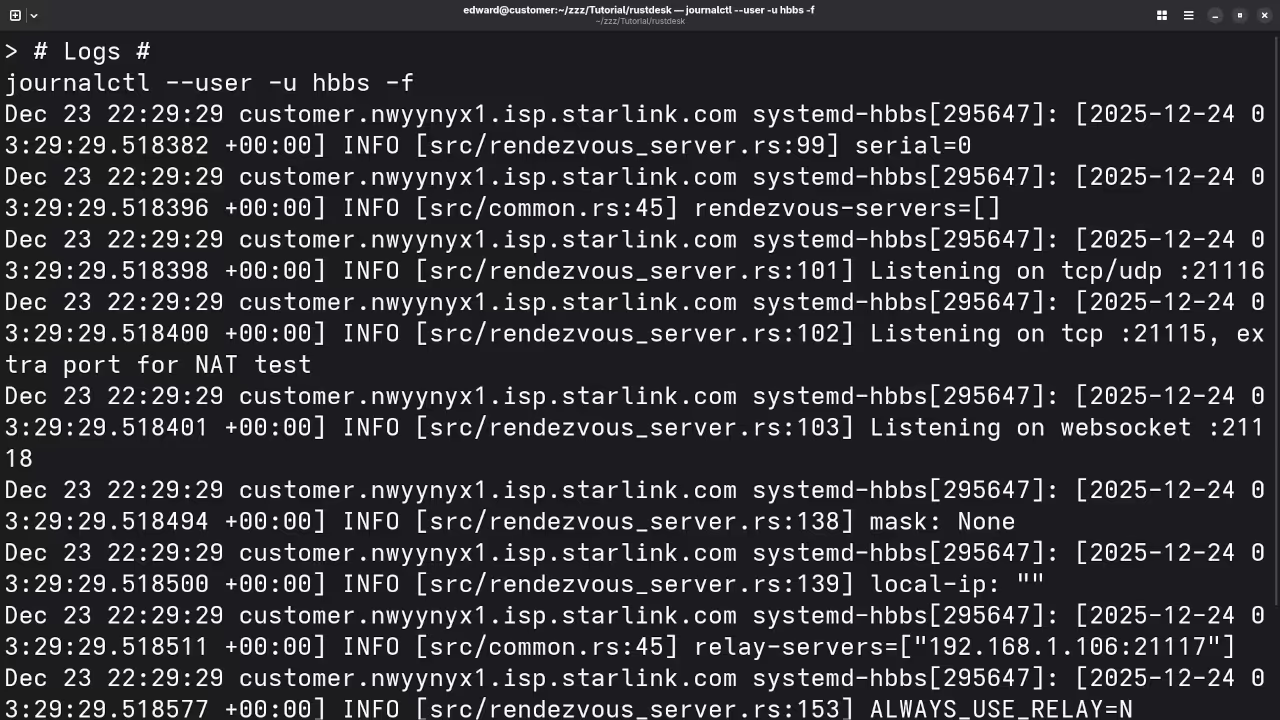
    Podman Quadlet Logs
    Command Line Displaying Podman Quadlet Log Results

    🎬 Part 4: Live YouTube Screencast

    Video Displaying The Installation And Use Of RustDesk Via Podman Quadlets

    Programming Books

    Explore my programming books on Amazon at


    Programming Courses

    Browse my programming courses at

    https://ojamboshop.com/product-category/course

    One on One Programming Tutorials

    I am available for one on one online programming tutorials at

    Contact


    RustDesk Installation and Migration Services

    If you need help installing or migrating RustDesk you can contact me at

    https://ojamboservices.com/contact

    Conclusion

    RustDesk combined with Podman Quadlets and systemd provides a clean secure and production ready remote desktop solution suitable for beginners and advanced users.

  • AMD Instinct MI60 GPU ROCM 6.3 Vs 6.4 Running ComfyUI For Z-Image-Turbo

    AMD Instinct MI60 GPU ROCM 6.3 Vs 6.4 Running ComfyUI For Z-Image-Turbo

    ComfyUI on AMD Instinct MI60 Fedora 43 ROCm 6.4 vs Fedora 42 ROCm 6.3 Comparison

    This beginner level article compares running ComfyUI with PyTorch on an AMD Instinct MI60 GPU using two Fedora Linux environments. The same hardware is used while testing Fedora Linux Workstation 43 with ROCm 6.4 and Fedora Linux Workstation 42 with ROCm 6.3. The goal is to help new users understand setup differences performance expectations and upgrade risks.

    Test System Specifications

    Hardware

    • CPU AMD Ryzen 5 5600GT 6 cores 12 threads 3.6 GHz
    • System Memory 32GB DDR4 with 24GB usable due to iGPU and zram usage
    • dGPU AMD Instinct MI60 with 32GB HBM2

    Software Environments

    • Fedora Linux Workstation 43 GNOME 49 Wayland host system
    • Fedora Linux Workstation 42 GNOME 48 Wayland running inside Distrobox
    • ComfyUI with PyTorch and ROCm

    What Is ComfyUI and Is It Open Source

    ComfyUI is an open source node based interface for Stable Diffusion and related image generation workflows. It allows users to visually connect processing steps without writing code.

    License GNU General Public License GPL v3.0. This ensures transparency community collaboration and the ability to modify and share the software.

    • Modifications: You can modify and share the software, but you must make the source code of your changes publicly available.
    • Commercial Use: You can use ComfyUI for commercial purposes, but if you distribute a modified version, it must also be under the GPL-3.0.

    Model Used z image turbo License and Restrictions

    The Z-Image-Turbo model (often used in image generation tests) is a lightweight, 6-billion parameter model optimized for fast, photorealistic results. In 2025, Z-Image-Turbo is notably released under the Apache License 2.0.

    • Commercial Use: Highly permissive for commercial applications.
    • Redistribution: Allows you to redistribute the model weights and derivative works.
    • Patent Rights: Includes an express grant of patent rights from contributors.

    Usage Restrictions

    While the Apache license is permissive, users are generally bound by ethical safety standards. Standard industry restrictions include:

    • Illegal Content: Do not generate or distribute illegal material.
    • Harmful Usage: Do not use the model for harassment, misinformation, or creating malware.
    • Privacy & Rights: Do not violate individual privacy or impersonate others without consent.

    Reusing Model Weights with extra model paths

    To avoid downloading large model files multiple times ComfyUI supports shared model paths. The extra model paths yaml file was configured with a base path so both Fedora environments use the same models.

    base_path: /home/username/ai-models

    AMD Instinct MI60 Compute Capabilities

    • FP64 7.4 TFLOPS
    • FP32 14.7 TFLOPS slower but reliable
    • FP16 29.5 TFLOPS
    • BF16 fastest and recommended
    • FP8 avoid due to limited support
    • INT8 59 TOPS
    • Q8 supported for maximum efficiency
    • Q6 to Q4 supported for higher speed with possible artifacts

    Why INT8 Can Be Slower for Video Models

    Although INT8 offers high theoretical performance the MI60 lacks modern matrix acceleration. For video generation and complex diffusion pipelines INT8 can increase memory movement and reduce effective throughput compared to FP16 or BF16.

    Fedora 42 ROCm 6.3 vs Fedora 43 ROCm 6.4

    Fedora 42 with ROCm 6.3

    • AMD Instinct MI60 officially supported
    • Stable PyTorch behavior
    • Predictable ComfyUI performance

    Fedora 43 with ROCm 6.4

    • MI60 no longer officially supported
    • Still functional with workarounds
    • Higher risk of future breakage

    Beginner Setup Installing Distrobox on Fedora

    Distrobox allows running another Linux distribution inside your current system while sharing your home directory GPU and graphical applications. It is ideal for testing Fedora 42 while keeping Fedora 43 as the main system.
    sudo dnf install distrobox podman -y

    Creating a Fedora 42 Distrobox Container

    distrobox create --name fedora42 --image fedora:42
    distrobox enter fedora42

    Installing ComfyUI Inside Fedora 42

    sudo dnf install git python3 python3 pip python3 venv -y
    git clone https://github.com/comfyanonymous/ComfyUI.git
    cd ComfyUI
    python3 -m venv venv
    source venv/bin/activate
    pip install -r requirements.txt

    PyTorch Installation Difference Host vs Distrobox

    Fedora 43 Host PyTorch from Fedora Repositories

    On the Fedora 43 host PyTorch was installed directly from Fedora repositories. This integrates cleanly with system libraries and updates through dnf.

    dnf search torch
    sudo dnf install python3-torch python3-torchvision python3-torchaudio -y

    Fedora 42 Distrobox PyTorch via Python Environment

    Inside Fedora 42 PyTorch was installed in a Python virtual environment to maintain compatibility with ROCm 6.3 and allow precise version control.

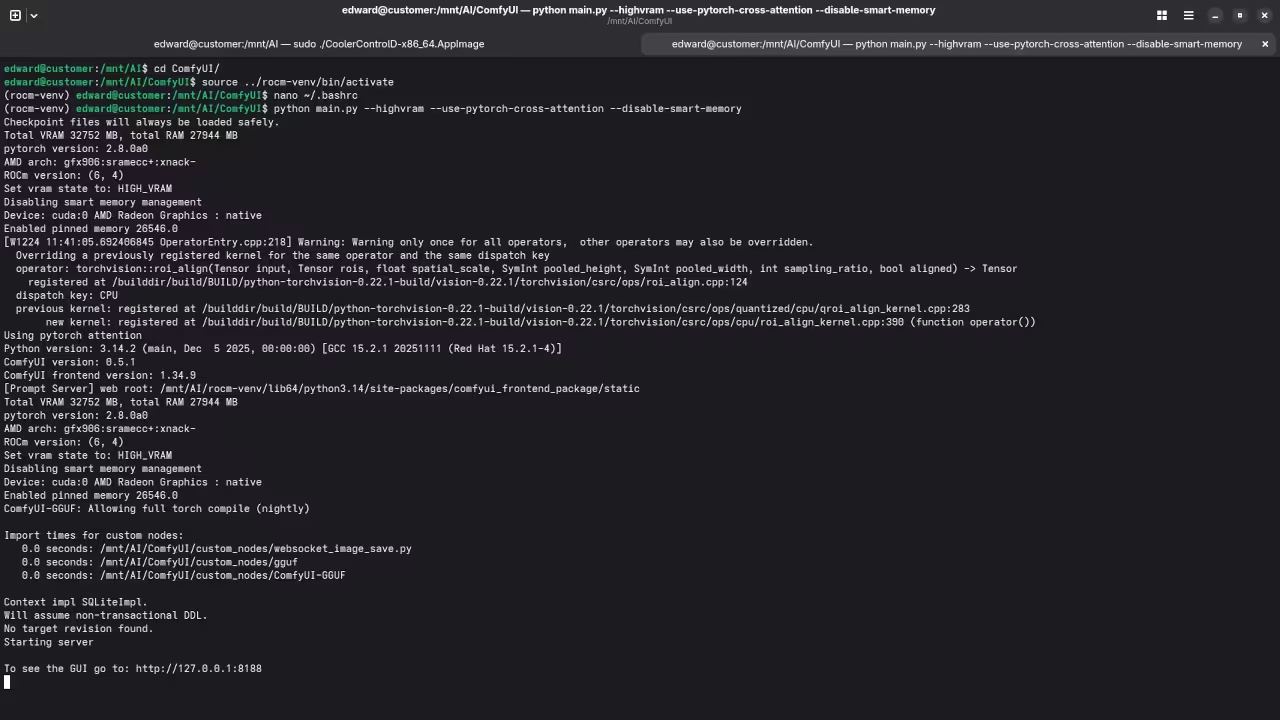
    Starting ComfyUI

    python main.py

    Open a browser at http://127.0.0.1:8188

    Screenshots and Screencast

    Here’s where you’ll find a visual walkthrough of setting up v1-5-pruned-emaonly-fp16.safetensors using ComfyUI on your local system:

    Starting ComfyUI
    Command Line Starting ComfyU Showing Full AMD Instinct MI60 Support.

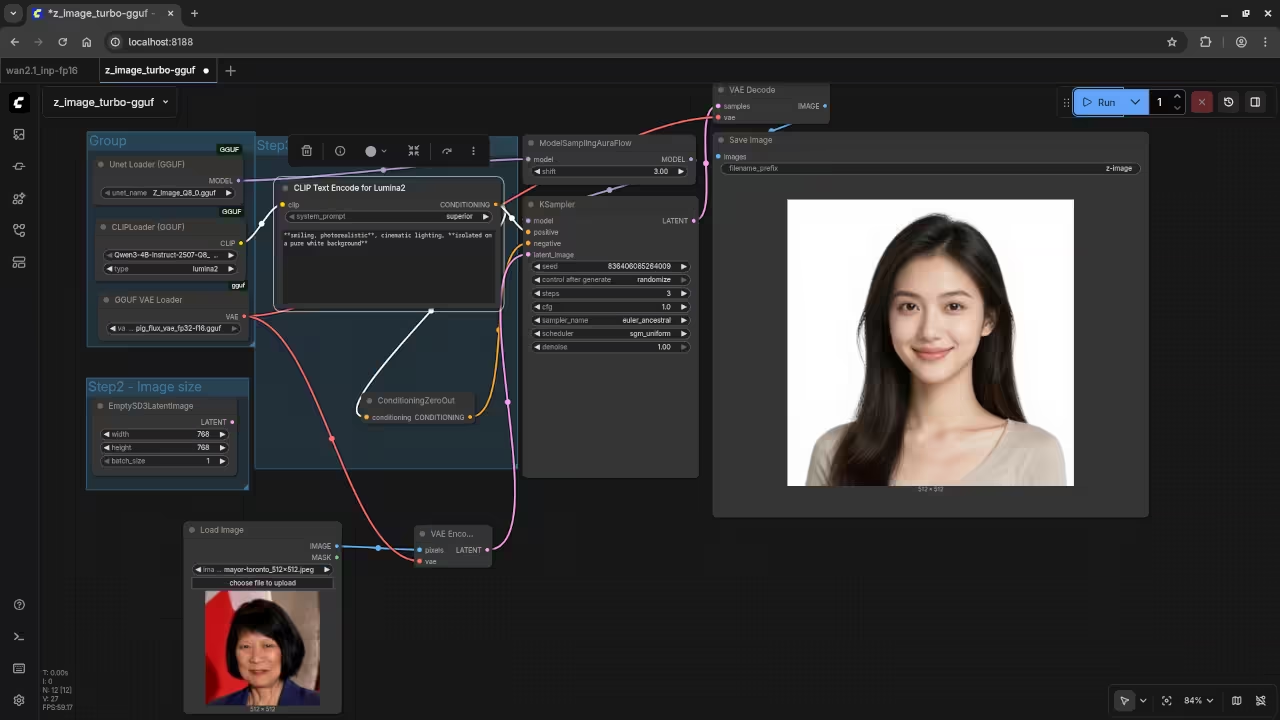
    AI Generated Mayor Of Toronto
    Web Browser ComfyUI Result For AI Generated Toronto Mayor

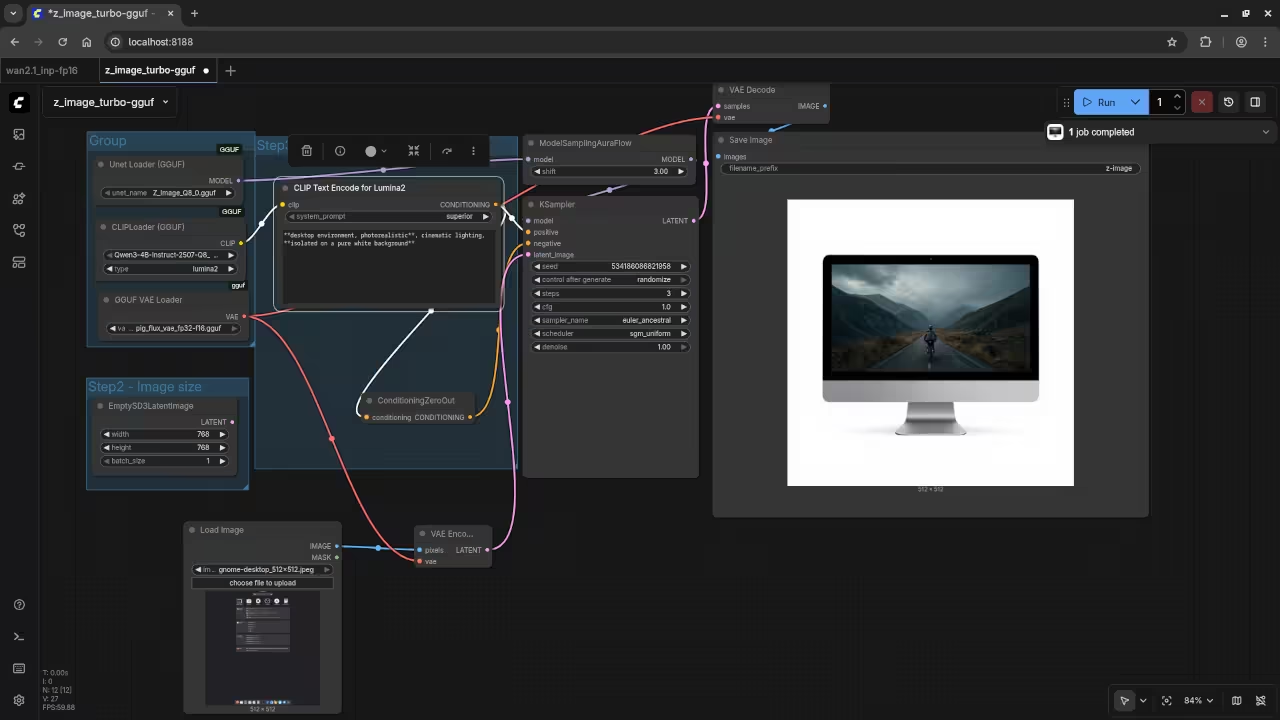
    AI Generated Gnome Desktop
    Web Browser ComfyUI Result For AI Generated Desktop Gnome Environment

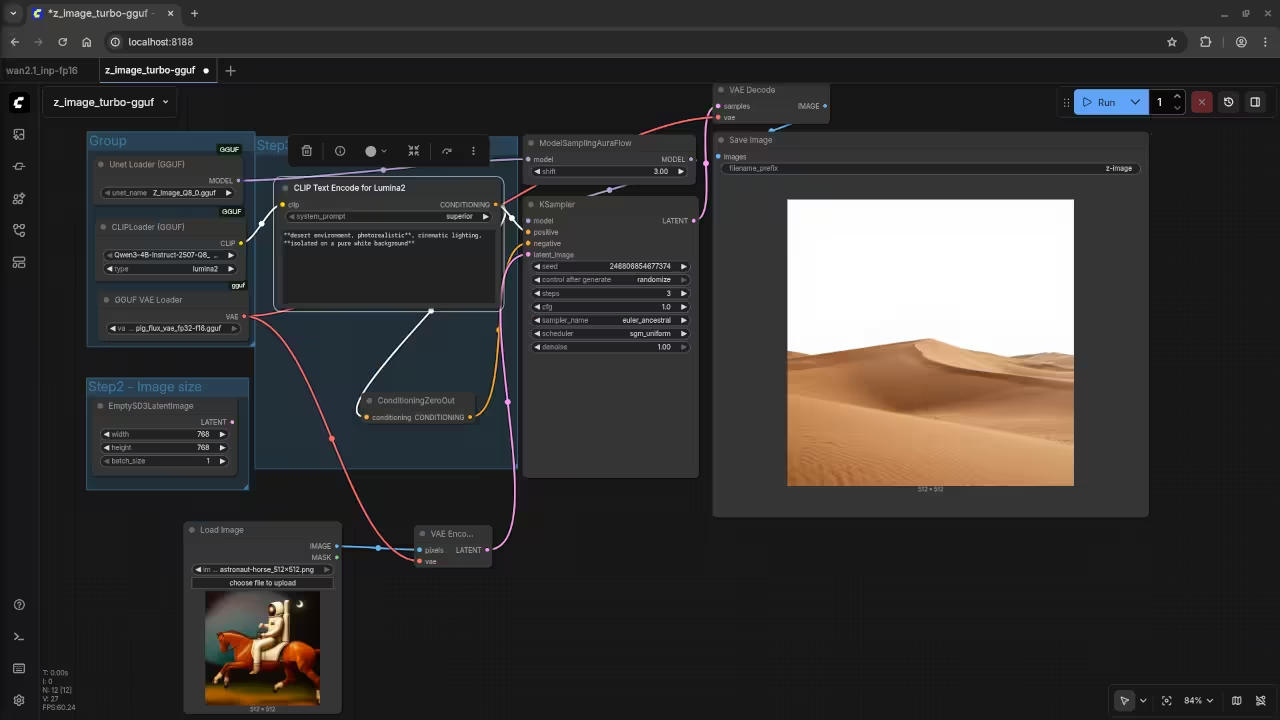
    AI Generated Astronaut Horse
    Web Browser ComfyUI Result For AI Generated Desktop Horse-Riding Astronaut

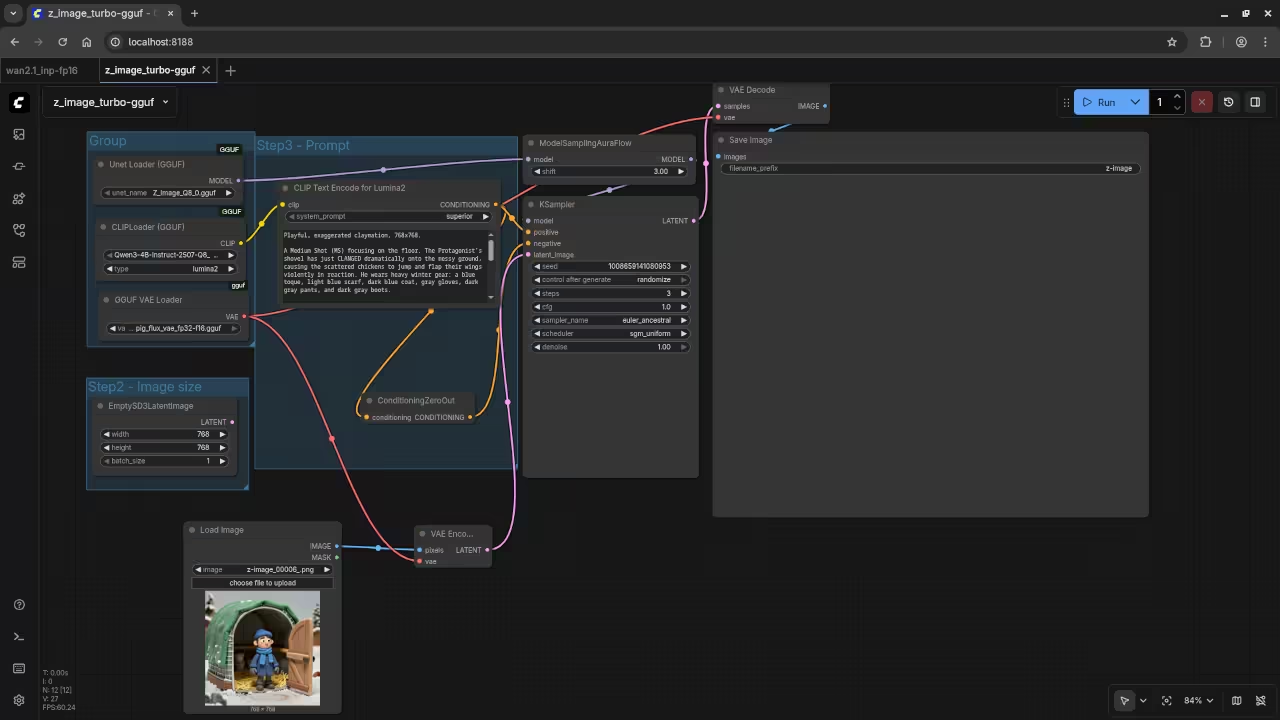
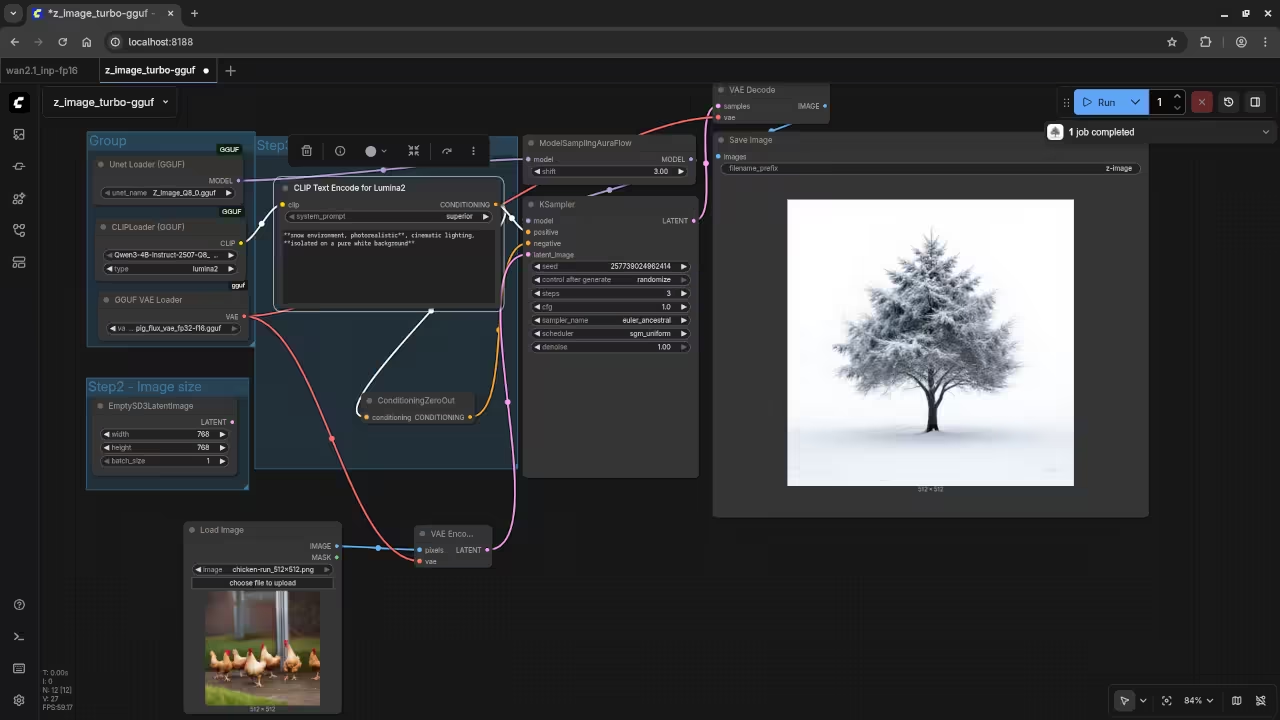
    AI Generated Chicken Run
    Web Browser ComfyUI Result For AI Generated Desktop Pen For Chickens

    AI Generated Man's Watch
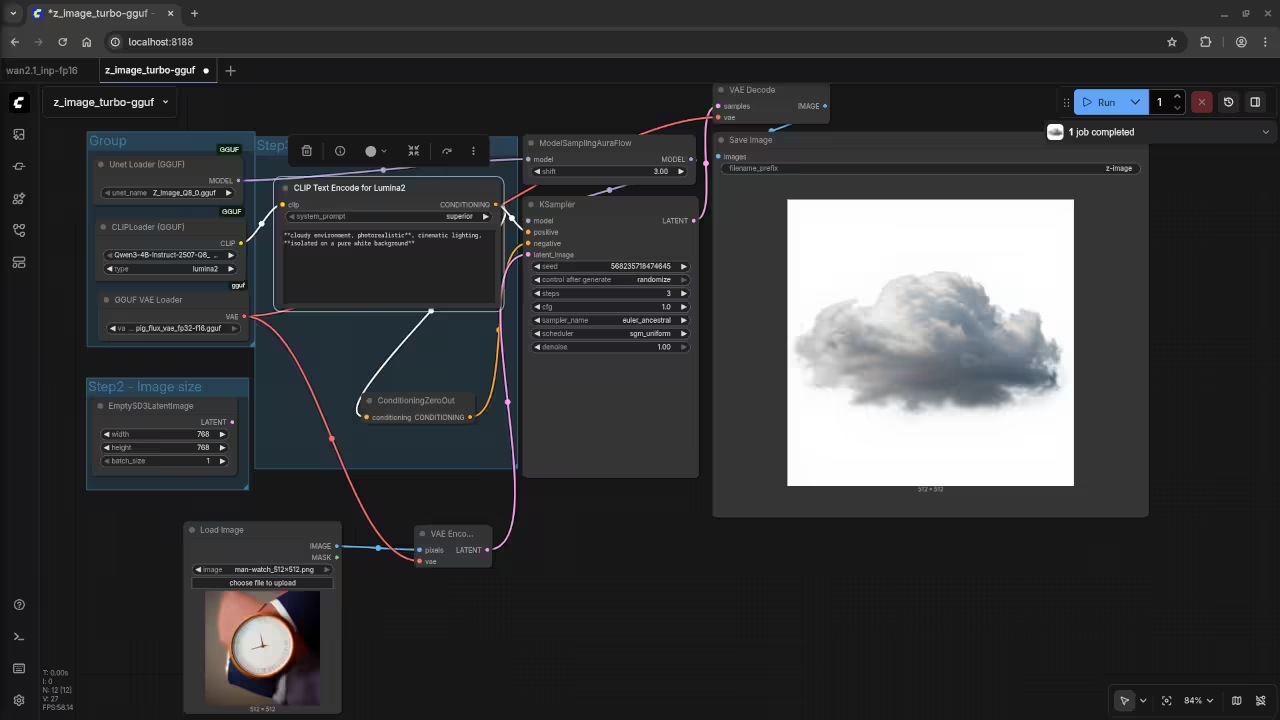
    Web Browser ComfyUI Result For AI Generated Desktop Wristwatch Closeup

    AI Generated Spider Web
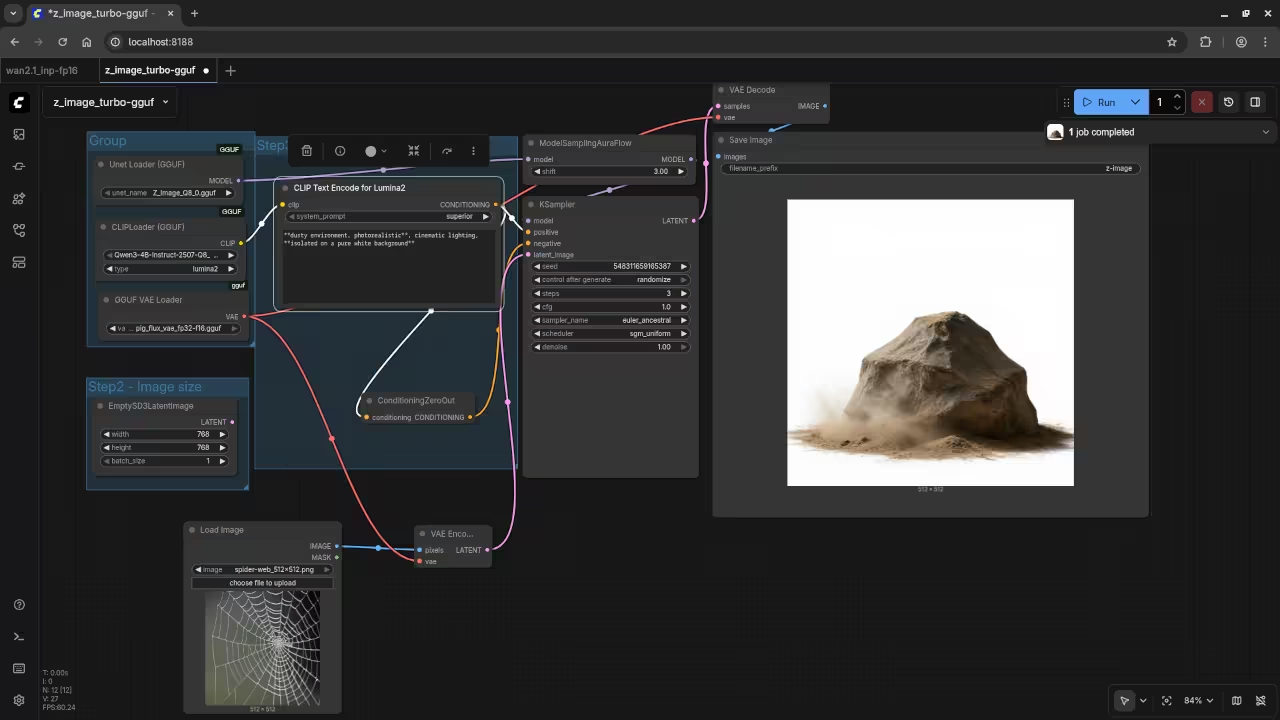
    Web Browser ComfyUI Result For AI Generated Desktop Hanging Spiderweb

    ComfyUI Prompts
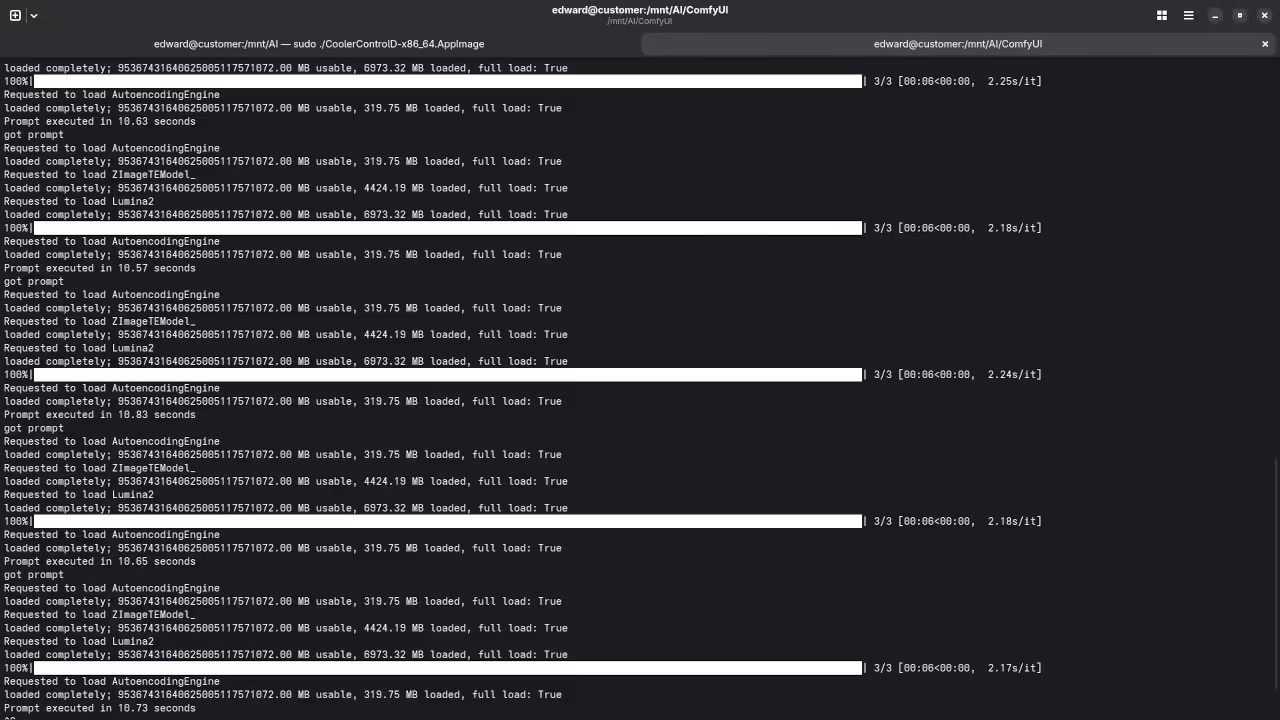
    Command Line Displaying ComfyUI Prompt Results

    Video Displaying AI Speed Tests For ROCm 6.4 And Unsupported AMD Instinct MI60 GPU

    Addendum Video ComfyUI Z-Image Turbo Q8 TAESD On AMD Instinct MI60 GPU

    Results:

    A photograph of the mayor of Toronto

    De-aged mayor of Toronto.

    A screenshot of the gnome desktop environment.

    Reimagined a screenshot of an older version of the Gnome desktop environment.

    A photograph of an astronaut riding a horse.

    Accurately drew a desert for a photograph but without an astronaut riding a horse.

    A picture of a chicken run.

    Accurately drew snow for a picture but without a chicken run.

    A picture of a man wearing a watch.

    Accurately drew cloud for a picture but without a man wearing a watch.

    A picture of a spider web on sockets.

    Accurately drew dust for a picture but without a spider web on sockets.

    Learning Resources and Services

    Book Learning Python available on Amazon


    Online course Learning Python


    https://ojamboshop.com/product/learning-python

    One on one online Python tutoring

    Contact


    ComfyUI and z image turbo installation or migration services


    https://ojamboservices.com/contact

    Conclusion

    Fedora 42 with ROCm 6.3 remains the safest choice for the AMD Instinct MI60. Fedora 43 with ROCm 6.4 offers newer system features but no longer provides official GPU support. Beginners should prioritize stability while advanced users may explore Fedora 43 with caution.

  • Review BSD Software License

    Review BSD Software License

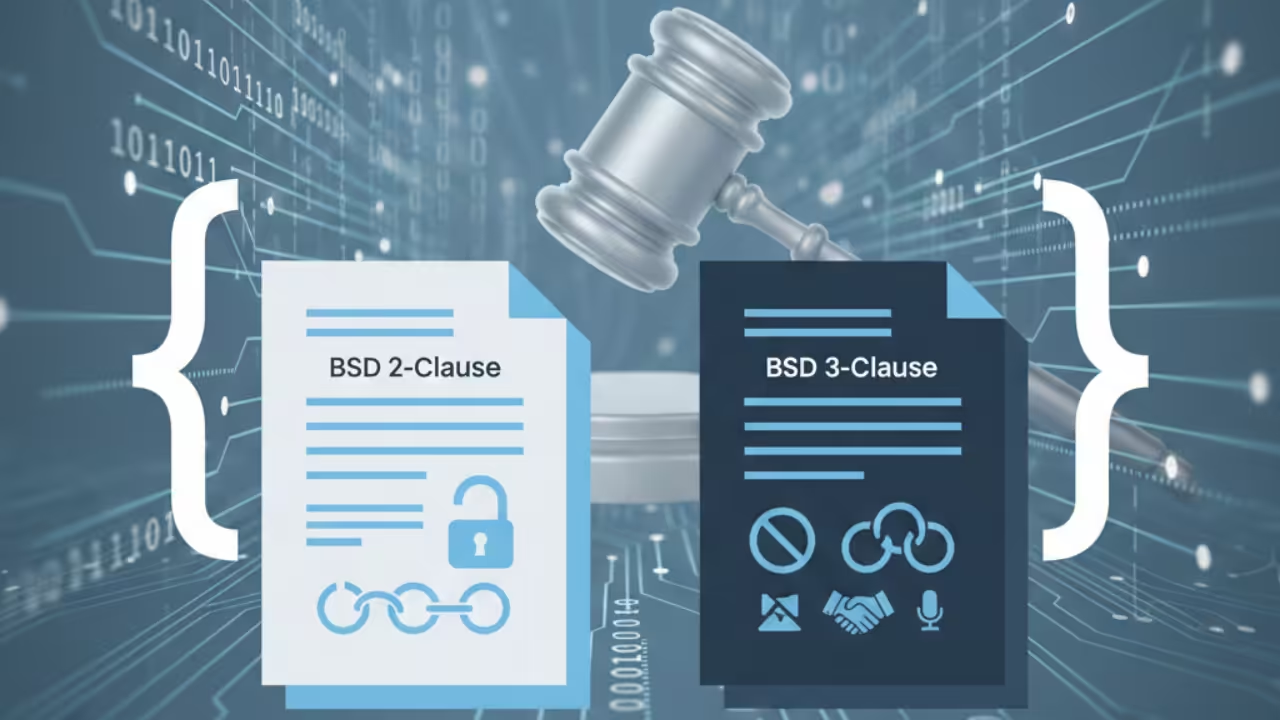
    BSD Licenses Explained 2 Clause vs 3 Clause

    The BSD Licenses 2 Clause and 3 Clause are among the most widely used permissive open source licenses. If you are a developer content creator or software user looking to understand your rights and responsibilities under these licenses this guide is for you

    The BSD Licenses are used by major projects like FreeBSD NetBSD OpenBSD and many open source libraries. They are permissive licenses meaning they give users freedom without forcing them to make their own software open source

    Lets break them down in simple terms

    What are the BSD Licenses

    The BSD Licenses originated from the University of California Berkeley. They allow you to

    • Use the software for personal educational or commercial purposes
    • Modify the source code
    • Distribute the original or modified software
    • Include the code in proprietary closed source projects

    The main difference between the two is that the 3 Clause adds a non endorsement requirement

    Key Features of the BSD Licenses

    Feature Description
    Free Use Use the software for any purpose without paying royalties
    Modification You can change the source code as needed
    Distribution You can share the software with or without changes
    License Notice You must include a copy of the BSD License in your project
    Attribution Credit the original authors
    Non Endorsement Only for 3 Clause You cannot use the original authors code to promote derived products

    Who Should Use BSD Licenses

    You should consider BSD Licenses if

    • You want to release open source software but allow it to be used in closed source or commercial products
    • You want a license that is simple permissive and business friendly
    • You want minimal restrictions while retaining attribution requirements

    BSD 2 Clause License Sample

    BSD 2-Clause License
    
    Copyright (c) [year], [fullname]
    
    Redistribution and use in source and binary forms, with or without
    modification, are permitted provided that the following conditions are met:
    
    1. Redistributions of source code must retain the above copyright notice, this
       list of conditions and the following disclaimer.
    
    2. Redistributions in binary form must reproduce the above copyright notice,
       this list of conditions and the following disclaimer in the documentation
       and/or other materials provided with the distribution.
    
    THIS SOFTWARE IS PROVIDED BY THE COPYRIGHT HOLDERS AND CONTRIBUTORS "AS IS"
    AND ANY EXPRESS OR IMPLIED WARRANTIES, INCLUDING, BUT NOT LIMITED TO, THE
    IMPLIED WARRANTIES OF MERCHANTABILITY AND FITNESS FOR A PARTICULAR PURPOSE ARE
    DISCLAIMED. IN NO EVENT SHALL THE COPYRIGHT HOLDER OR CONTRIBUTORS BE LIABLE
    FOR ANY DIRECT, INDIRECT, INCIDENTAL, SPECIAL, EXEMPLARY, OR CONSEQUENTIAL
    DAMAGES (INCLUDING, BUT NOT LIMITED TO, PROCUREMENT OF SUBSTITUTE GOODS OR
    SERVICES; LOSS OF USE, DATA, OR PROFITS; OR BUSINESS INTERRUPTION) HOWEVER
    CAUSED AND ON ANY THEORY OF LIABILITY, WHETHER IN CONTRACT, STRICT LIABILITY,
    OR TORT (INCLUDING NEGLIGENCE OR OTHERWISE) ARISING IN ANY WAY OUT OF THE USE
    OF THIS SOFTWARE, EVEN IF ADVISED OF THE POSSIBILITY OF SUCH DAMAGE.
    

    BSD 3 Clause License Sample

    BSD 3-Clause License
    
    Copyright (c) [year], [fullname]
    
    Redistribution and use in source and binary forms, with or without
    modification, are permitted provided that the following conditions are met:
    
    1. Redistributions of source code must retain the above copyright notice, this
       list of conditions and the following disclaimer.
    
    2. Redistributions in binary form must reproduce the above copyright notice,
       this list of conditions and the following disclaimer in the documentation
       and/or other materials provided with the distribution.
    
    3. Neither the name of the copyright holder nor the names of its
       contributors may be used to endorse or promote products derived from
       this software without specific prior written permission.
    
    THIS SOFTWARE IS PROVIDED BY THE COPYRIGHT HOLDERS AND CONTRIBUTORS "AS IS"
    AND ANY EXPRESS OR IMPLIED WARRANTIES, INCLUDING, BUT NOT LIMITED TO, THE
    IMPLIED WARRANTIES OF MERCHANTABILITY AND FITNESS FOR A PARTICULAR PURPOSE ARE
    DISCLAIMED. IN NO EVENT SHALL THE COPYRIGHT HOLDER OR CONTRIBUTORS BE LIABLE
    FOR ANY DIRECT, INDIRECT, INCIDENTAL, SPECIAL, EXEMPLARY, OR CONSEQUENTIAL
    DAMAGES (INCLUDING, BUT NOT LIMITED TO, PROCUREMENT OF SUBSTITUTE GOODS OR
    SERVICES; LOSS OF USE, DATA, OR PROFITS; OR BUSINESS INTERRUPTION) HOWEVER
    CAUSED AND ON ANY THEORY OF LIABILITY, WHETHER IN CONTRACT, STRICT LIABILITY,
    OR TORT (INCLUDING NEGLIGENCE OR OTHERWISE) ARISING IN ANY WAY OUT OF THE USE
    OF THIS SOFTWARE, EVEN IF ADVISED OF THE POSSIBILITY OF SUCH DAMAGE.
    

    Permissions

    • Commercial use
    • Distribution
    • Modification
    • Private use

    Conditions

    • License and copyright notice must be included
    • Non endorsement clause 3 Clause only

    Limitations

    • Liability not provided
    • Trademark not provided
    • Warranty not provided

    Screencast

    Screencast of BSD Licenses 2 Clause and 3 Clause Review

    My Thoughts on the BSD Licenses

    The BSD Licenses are clear permissive and developer friendly. The 2 Clause is perfect for maximum simplicity and freedom while the 3 Clause adds an extra layer of protection against unauthorized endorsement

    Both licenses are excellent for libraries academic projects and commercial use

    Need Help Using BSD Licenses or Software Projects

    I am available for

    • One on one online programming tutorials Contact Me
    • Custom installs updates or migrations
    • Integrating BSD Licenses into your projects
    • Consulting on custom projects Contact Me

    You can also check my resources

    Final Notes

    Understanding open source licenses does not need to be difficult. The BSD Licenses 2 Clause and 3 Clause offer freedom with minimal restrictions while protecting both authors and users. Whether you are releasing a new library plugin or web application these licenses are reliable and straightforward

    Thanks for reading and feel free to reach out if you need help applying open source licenses to your next project

  • Mastering the Art of the Bug Report: A Guide for Developers and Users

    Mastering the Art of the Bug Report: A Guide for Developers and Users

    How to File a High Quality Bug Report With Real World Examples

    Bug reports are one of the most valuable contributions users and developers can make to software projects.
    A well written bug report helps developers understand issues quickly reduces repeated questions
    and greatly increases the likelihood of a fast and accurate fix.

    In this article you will learn best practices for filing effective bug reports followed by
    real world examples from Apache NetBeans and Inkscape that show how clear reporting leads to successful resolutions.

    Why Writing a Good Bug Report Matters

    A vague statement such as the application crashed is rarely helpful.
    Developers need specific and reproducible information in order to diagnose and resolve problems.
    High quality bug reports improve software stability and strengthen collaboration between users and maintainers.

    Best Practices for Filing a Bug Report

    Check for Existing Bug Reports

    Before creating a new issue search the projects issue tracker to see if the problem has already been reported.
    This avoids duplication and may reveal existing workarounds or fixes.

    Example from Apache NetBeans
    Outdated Jcraft JSCH Library Causes Incorrect Credentials For Remote Git Repository
    View issue

    Include System Specifications

    System information helps developers determine whether a bug is platform specific.
    Always include details such as operating system application version and architecture when available.

    Explain What Happened and What Should Have Happened

    Clearly separate the actual behavior from the expected behavior.
    This allows developers to understand the problem without making assumptions.

    Example
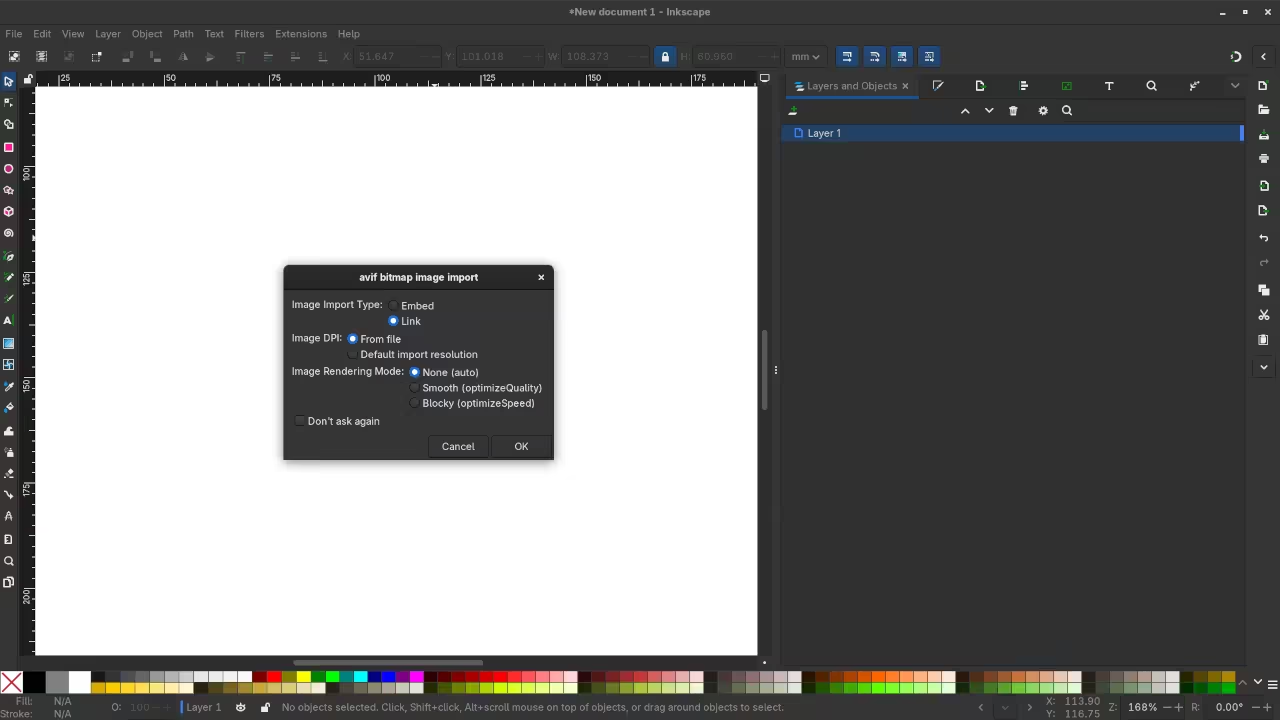
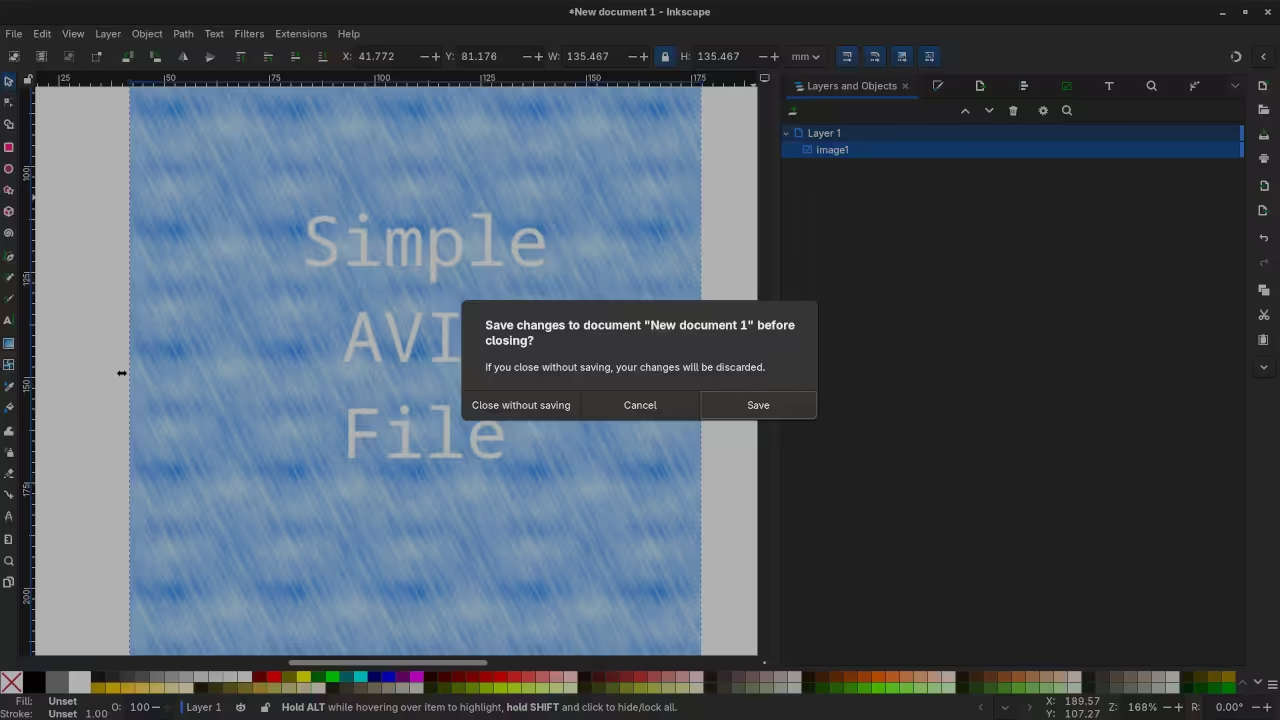
    What happened Inkscape crashes when the application is closed after opening an AVIF file
    What should have happened Inkscape should close normally without crashing

    Provide Clear Steps to Reproduce the Issue

    Reproducible steps are essential.
    Use a simple numbered list that allows anyone to recreate the issue on their system.

    Example steps
    Launch Inkscape
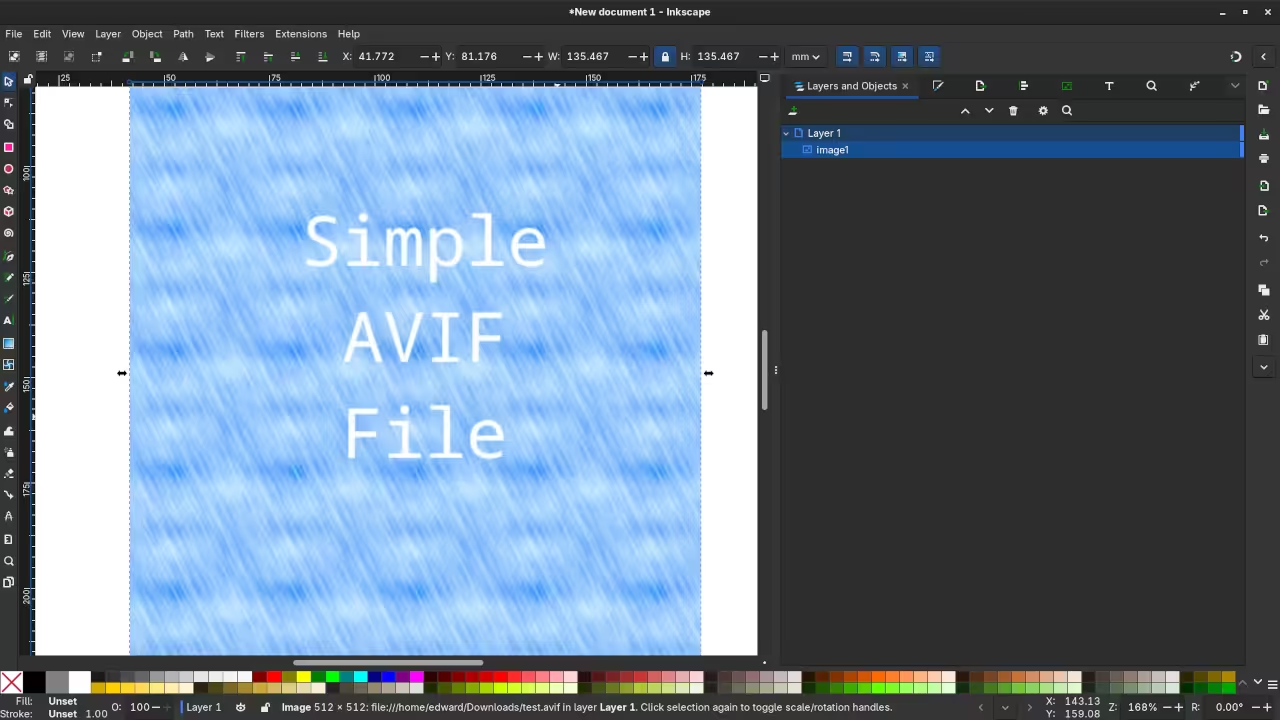
    Open an AVIF image file
    Close the file
    Exit the application

    Attach Logs Screenshots or Screen Recordings

    Visual evidence and logs can drastically reduce debugging time.
    Screenshots crash logs and short screen recordings often reveal details that text alone cannot capture.

    Demonstrated Example Inkscape AVIF Crash

    Issue title Inkscape Crashes After Closing AVIF File
    View issue

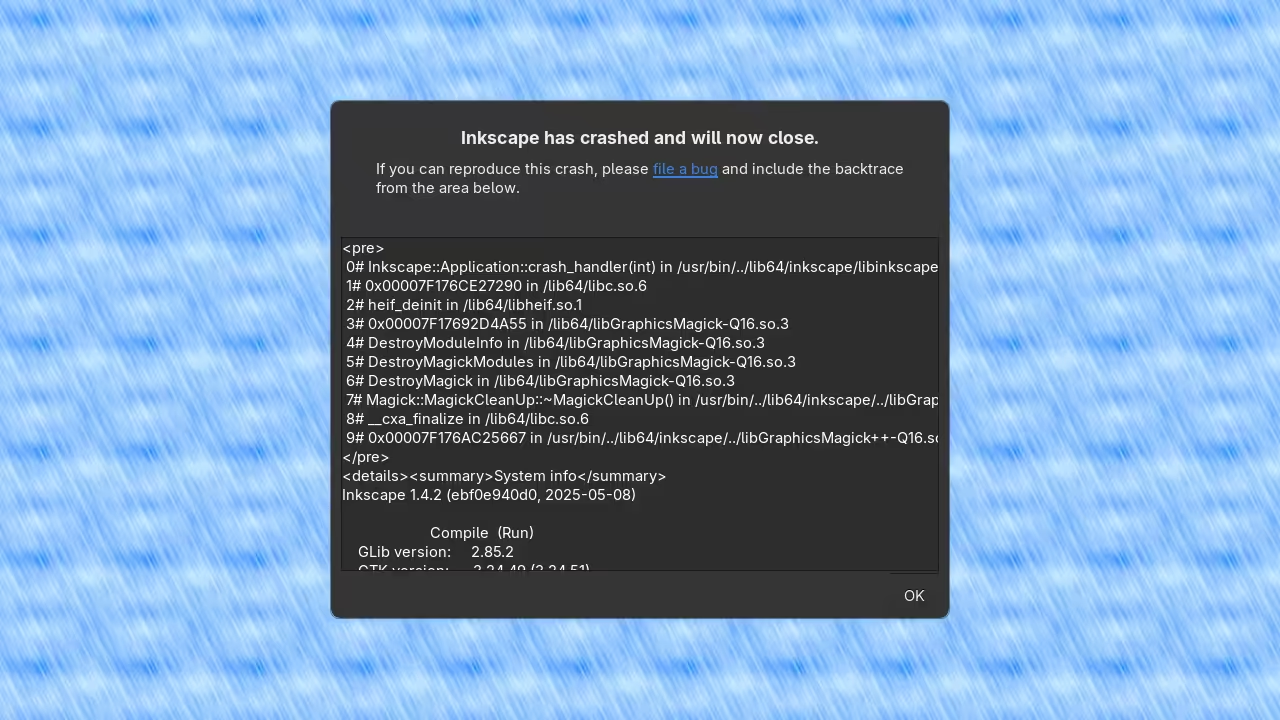
    When an AVIF file was opened and Inkscape was later closed the application would crash.
    This behavior was consistent and easy to reproduce which made investigation straightforward.

    The root cause was identified as a Magick and libheif deinitialization order problem.
    The fix was implemented and merged successfully.

    Resolution merge request
    View merge request

    Final Tips for Writing Better Bug Reports

    Focus on observable facts use precise language and follow the projects issue template when available.
    Updating a report with new findings is often just as valuable as the initial submission.

    📸 Screenshots & Screencast

    Inkscape Bitmap Import
    Inkscape AVIF Bitmap Image Import Dialog

    Inkscape Canvas Layout
    Inkscape Displaying Imported AVIF Bitmap Image

    Inkscape Save Reminder
    Inkscape Displaying Save Reminder On Close Dialog

    Inkscape Crash Dialog
    Inkscape Displaying Backtrace On Crash Dialog

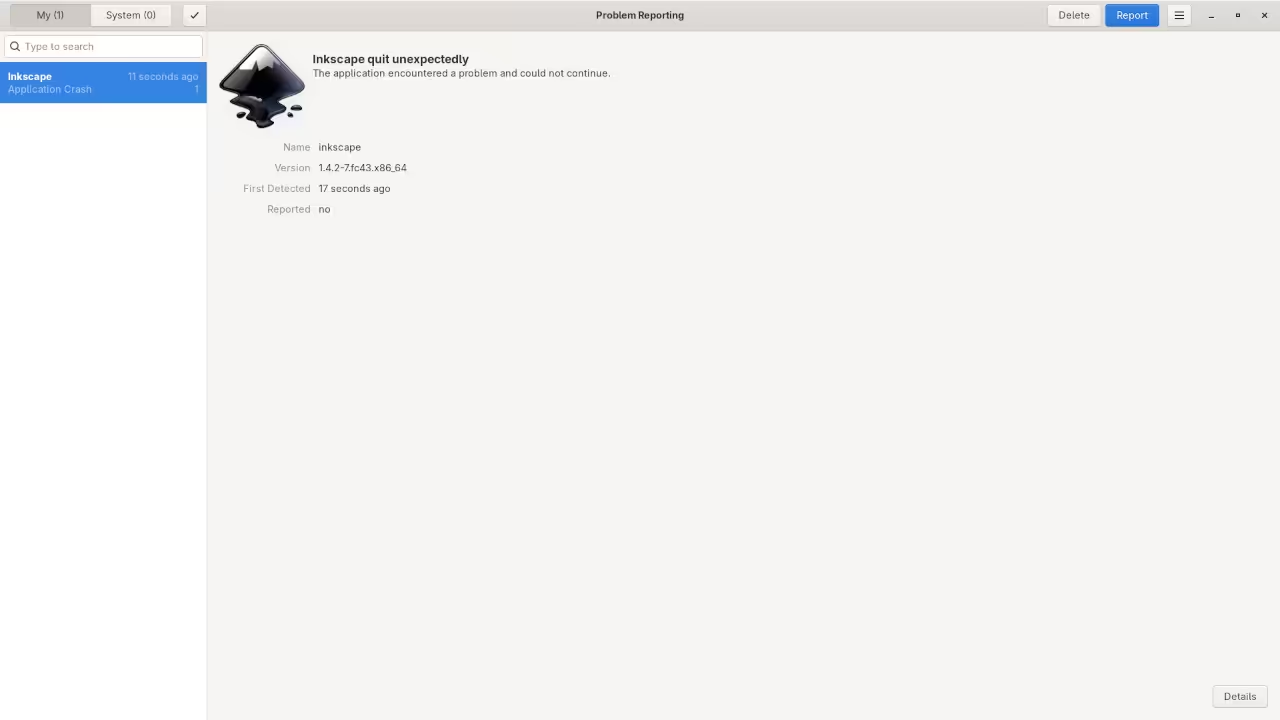
    Gnome ARBT
    Gnome Automatic Bug Reporting Tool (ABRT) Showing Inkscape

    Screencast On How To File Quality Bug Report

    Learn More and Work With Me

    Programming Books

    Level up your technical knowledge with my Programming Books on Amazon.
    These books focus on real world development debugging strategies and practical workflows.

    View books on Amazon

    Online Programming Courses

    Learn at your own pace with my Online Programming Courses.
    Each course emphasizes hands on learning practical debugging and modern development tools.

    View programming courses

    One on One Programming Tutoring

    Need personalized help with a specific project language or debugging challenge.
    I am available for One on One Programming Tutorials tailored to your goals.

    Request tutoring

    Professional Consultation Services

    I provide professional consultation services including evaluating whether tools such as Inkscape
    are the right fit for your workflow performance needs and long term goals.

    Request consultation

  • Build An HTML5 HDR Image Viewer Using Three.js

    Build An HTML5 HDR Image Viewer Using Three.js

    Building a Simple HTML5 HDR Image Viewer with Three.js

    High Dynamic Range images make it possible to display realistic lighting and environments on the web.
    In this beginner friendly article you will learn how to view an HDR image using HTML5 and Three.js.
    We will use the Courtyard EXR image included with Blender 4.5 LTS and convert it into formats that work well in web browsers.

    What Is an HDR Image

    An HDR image stores a wider range of brightness values than standard images like JPG or PNG.
    This allows scenes to look more realistic when used for environment lighting reflections and backgrounds.
    On the web HDR images are rendered using WebGL and libraries like Three.js.

    Why Use Three.js

    Three.js is a JavaScript library that simplifies WebGL.
    It provides loaders for HDR formats camera controls and rendering utilities.
    This makes it ideal for beginners who want to experiment with modern web graphics without writing low level WebGL code.

    The Courtyard EXR from Blender 4.5 LTS

    Blender ships with several environment textures including the Courtyard image.
    It is stored in the OpenEXR format which is excellent for offline rendering but not ideal for direct use in browsers.
    For the web we convert it into more efficient formats.

    HDR Formats and Browser Support

    HDR images can be stored in several formats.
    Some work better on the web than others.

    • HDR Radiance format is widely supported in Three.js and easy for beginners
    • EXR OpenEXR is high quality but large and slow in browsers
    • KTX is an older GPU texture container with limited modern use
    • KTX2 is the best choice for the web with good compression and performance

    For learning and simple demos HDR files are fine.
    For real websites KTX2 is recommended.

    Beginner Friendly Conversion Workflow

    We will convert the Courtyard EXR into HDR and then into KTX2.
    This is a normal part of web graphics development and not an advanced topic.

    Step 1 Convert EXR to HDR

    Install OpenImageIO which is free and open source.
    Then run the following command in the folder containing the EXR file.

    oiiotool courtyard.exr -o courtyard.hdr

    You now have a courtyard.hdr file that can be used directly with Three.js.

    Step 2 Convert HDR to KTX2

    Download the KTX Software tools from Khronos.
    Use the toktx command to create a web optimized KTX2 file.

    toktx --genmipmap --target_type RGBA --assign_oetf linear courtyard.ktx2 courtyard.hdr

    This produces a compact GPU friendly texture suitable for production websites.

    Simple HTML5 HDR Viewer Example

    The following example loads an HDR image and displays it as a background.
    It uses only a single HTML file and works well for beginners.


        <script type="module">
            // Use the short names defined in the importmap above
            import * as THREE from 'three';
            import { RGBELoader } from 'three/addons/loaders/RGBELoader.js';
            import { OrbitControls } from 'three/addons/controls/OrbitControls.js';
    
            const scene = new THREE.Scene();
    
            const camera = new THREE.PerspectiveCamera(
                75,
                window.innerWidth / window.innerHeight,
                0.1,
                1000
            );
            camera.position.set(0, 0, 3); // Moved back slightly to see the object
    
            const renderer = new THREE.WebGLRenderer({ antialias: true });
            renderer.setSize(window.innerWidth, window.innerHeight);
            renderer.setPixelRatio(window.devicePixelRatio);
            
            // HDR setup
            renderer.toneMapping = THREE.ACESFilmicToneMapping;
            renderer.toneMappingExposure = 1.0; 
            document.body.appendChild(renderer.domElement);
    
            const controls = new OrbitControls(camera, renderer.domElement);
            controls.enableDamping = true; // Makes movement feel smoother
    
            // Add a sphere to see the HDR reflections
            const geometry = new THREE.SphereGeometry(1, 64, 64);
            const material = new THREE.MeshStandardMaterial({ 
                metalness: 1, 
                roughness: 0 
            });
            const sphere = new THREE.Mesh(geometry, material);
            scene.add(sphere);
    
            // Load HDR
            new RGBELoader().load('courtyard.hdr', (texture) => {
                texture.mapping = THREE.EquirectangularReflectionMapping;
                scene.background = texture;
                scene.environment = texture;
            }, undefined, (err) => {
                console.error("Make sure courtyard.hdr is in the same folder and you are using a local server.", err);
            });
    
            function animate() {
                requestAnimationFrame(animate);
                controls.update();
                renderer.render(scene, camera);
            }
    
            animate();
    
            // Handle window resizing
            window.addEventListener('resize', () => {
                camera.aspect = window.innerWidth / window.innerHeight;
                camera.updateProjectionMatrix();
                renderer.setSize(window.innerWidth, window.innerHeight);
            });
        </script>


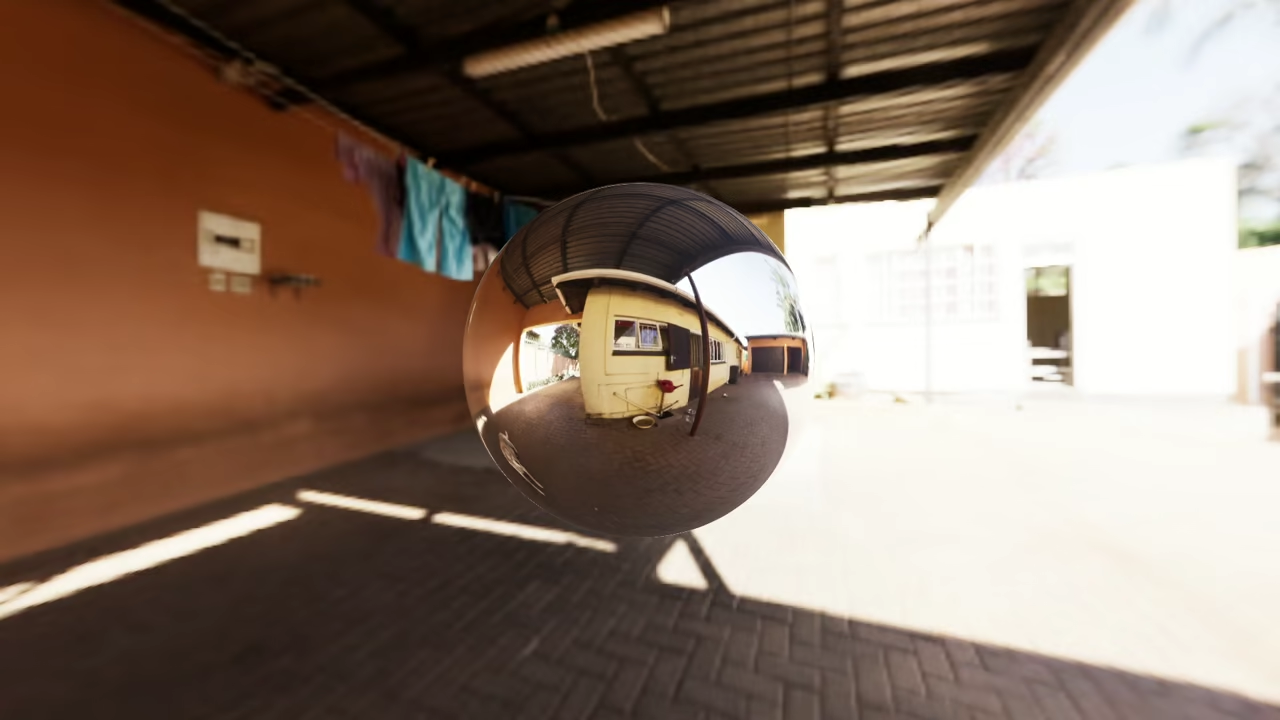
    Consolidated Demo

    HTML5 ThreeJS HDR Viewer

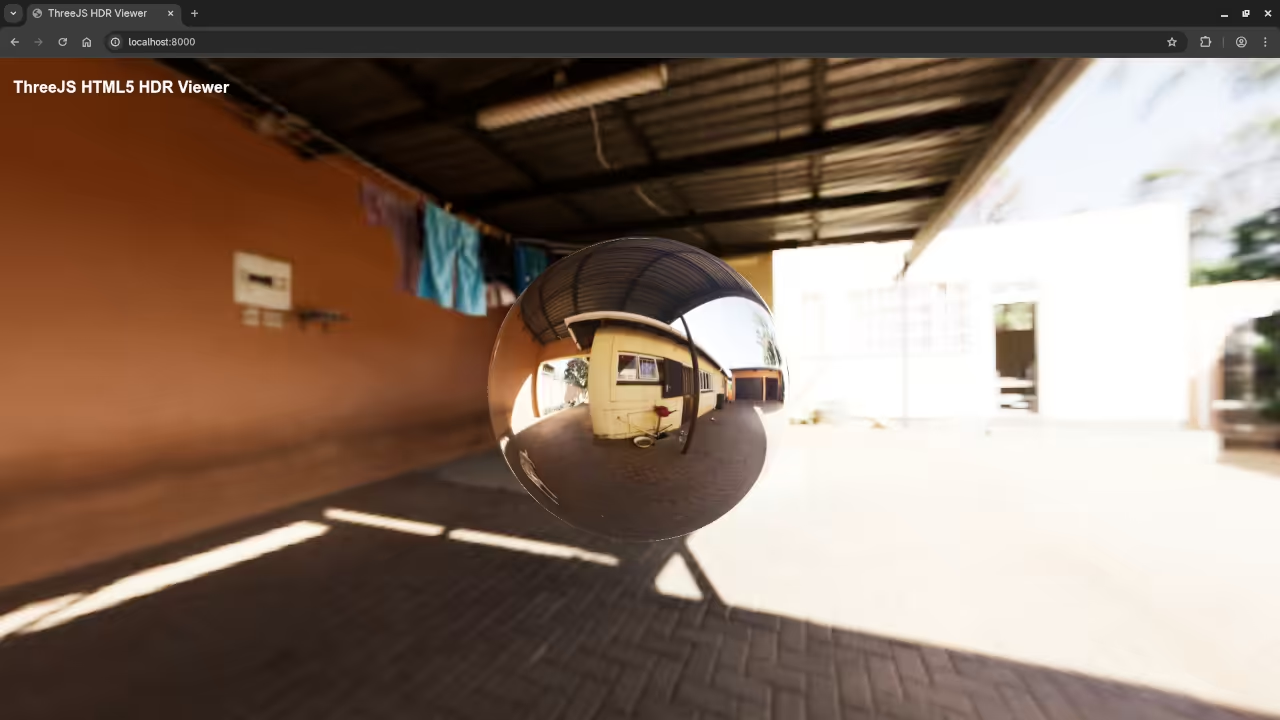
    Screenshot

    HTML5 ThreeJS HDR Viewer
    Web Browser Showing HTML5 ThreeJS HDR Viewer

    Live Screencast

    Screencast Of HTML5 ThreeJS HDR Viewer

    Learning Resources

    If you want to deepen your JavaScript knowledge check out the following resources.

    Learning JavaScript book available on Amazon


    Learning JavaScript online course


    https://ojamboshop.com/product/learning-javascript

    One on one programming tutorials including JavaScript

    Contact


    Conclusion

    Using Three.js to display HDR images in the browser is an excellent way to learn modern web graphics.
    While EXR files are perfect for Blender they should be converted for the web.
    HDR is ideal for learning and KTX2 is the best choice for real world deployment.
    With the workflow shown here beginners can confidently move from Blender assets to efficient HTML5 experiences.

  • Local AI For Blender 5.0 Python API

    Local AI For Blender 5.0 Python API


    Simple Way to Connect AI to Blender Using Ollama Python API

    Connecting local AI to Blender allows you to generate 3D scenes using natural language. This workflow uses the power of Python to bridge the gap between a Large Language Model and the Blender 3D environment. This process is entirely powered by open source software which gives you full control over your creative pipeline.

    The Open Source Stack

    All tools mentioned in this guide are free to use and distribute under their respective licenses:

    • Blender: The professional 3D suite licensed under the GNU GPL v2.
    • Ollama: The local model runner licensed under the MIT License.
    • Qwen2.5-Coder: A specialized LLM for programming licensed under the Apache 2.0 License.

    Setup Instructions

    First you must install the Ollama library into the Python environment used by Blender. Open a terminal in the Blender installation folder under the python bin directory and run the following command.

    ./python -m pip install ollama

    Next ensure you have the Qwen model running by typing ollama pull qwen2.5-coder in your terminal. This model is optimized for technical tasks and code generation.

    The Python Script

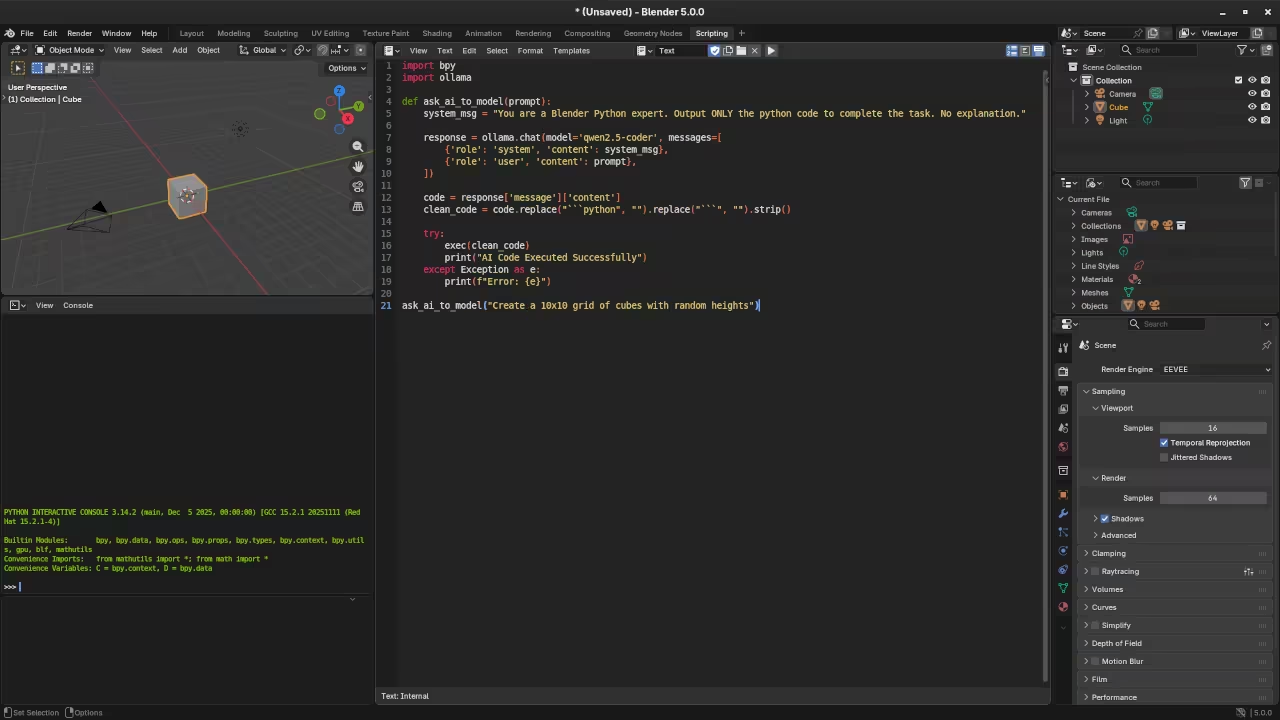
    Open the scripting tab in Blender and create a new script. Use the code below to send a request to the local API endpoint.


    import bpy
    import ollama
    
    def ask_ai_to_model(prompt):
        system_msg = "You are a Blender Python expert. Output ONLY the python code to complete the task. No explanation."
        
        response = ollama.chat(model='qwen2.5-coder', messages=[
            {'role': 'system', 'content': system_msg},
            {'role': 'user', 'content': prompt},
        ])
        
        code = response['message']['content']
        clean_code = code.replace("```python", "").replace("```", "").strip()
        
        try:
            exec(clean_code)
            print("AI Code Executed Successfully")
        except Exception as e:
            print(f"Error: {e}")
    
    ask_ai_to_model("Create a 10x10 grid of cubes with random heights")


    API Endpoints

    Ollama creates a local server on your machine that communicates via HTTP requests. Blender uses its internal Python console to send instructions to the following API endpoints:

    • Main URL: http://localhost:11434
    • Chat Endpoint: /api/chat

    📸 Screenshots & Screencast

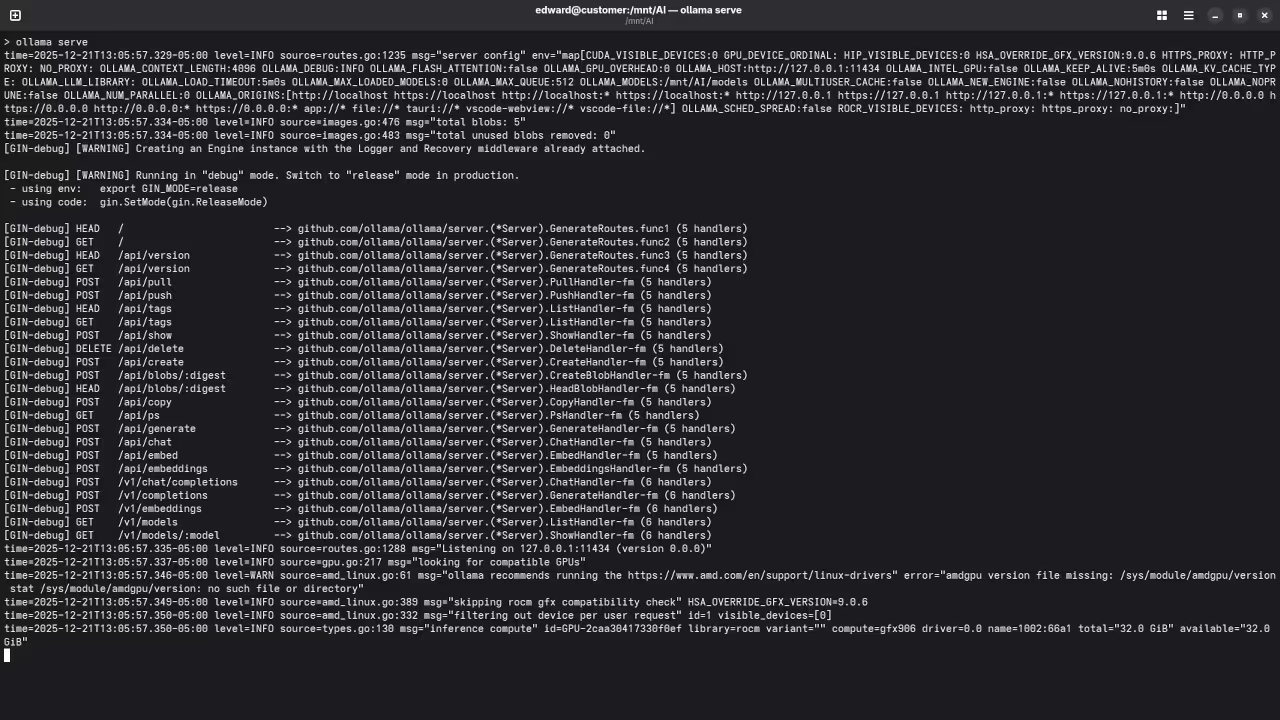
    Ollama Server
    Command Line Showing Ollama Server Running

    Ollama Module Python code
    Blender Scripting Workspace Displaying Ollama Module Python Code

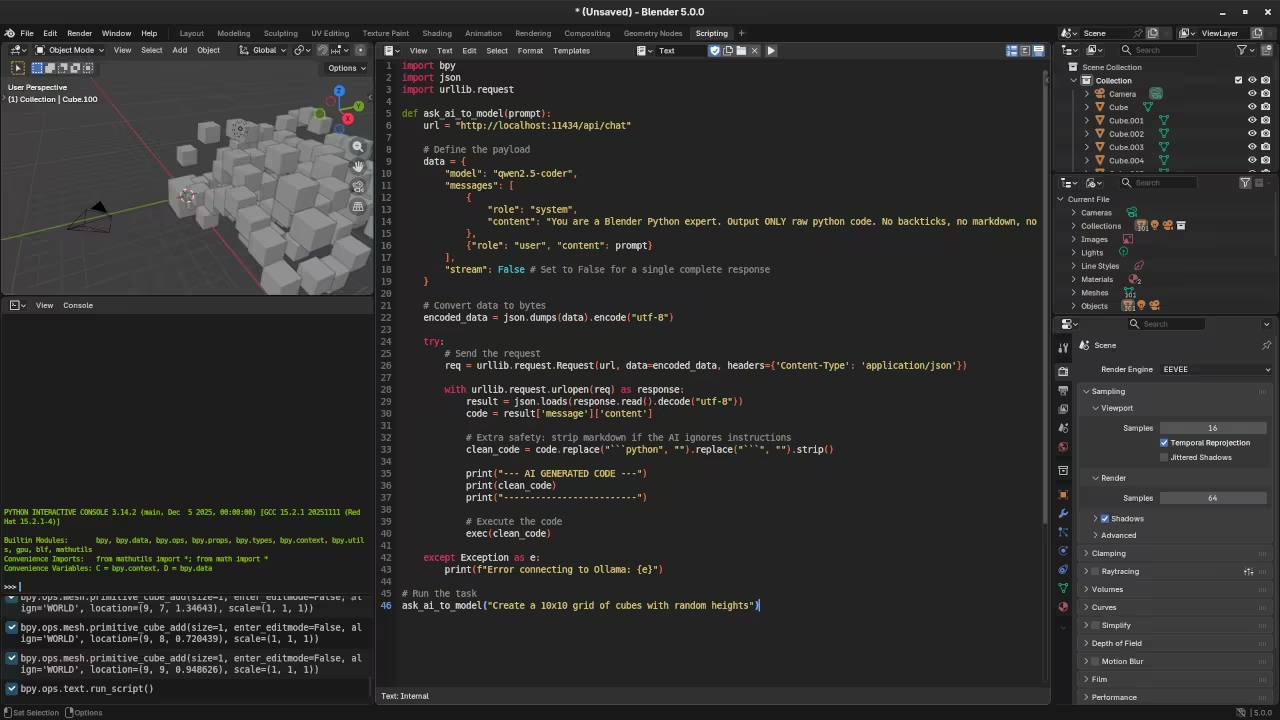
    Ollama API Python code
    Blender Scripting Workspace Displaying Ollama API Python Code

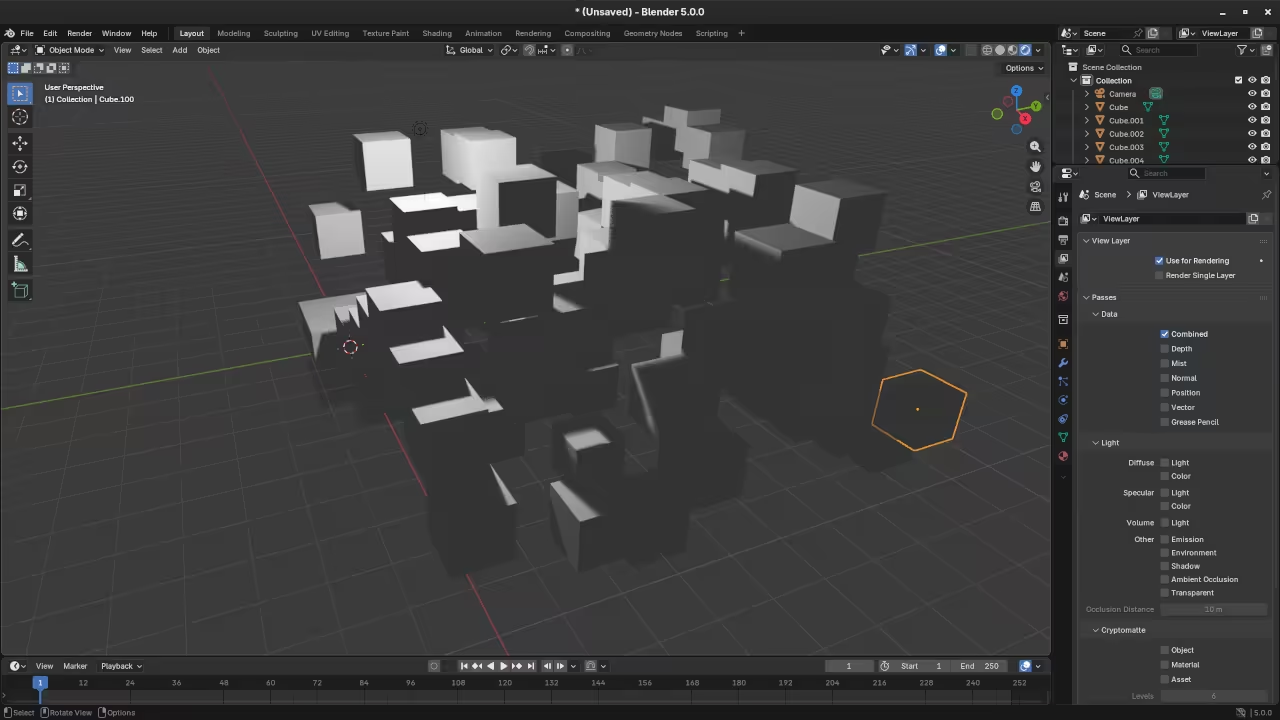
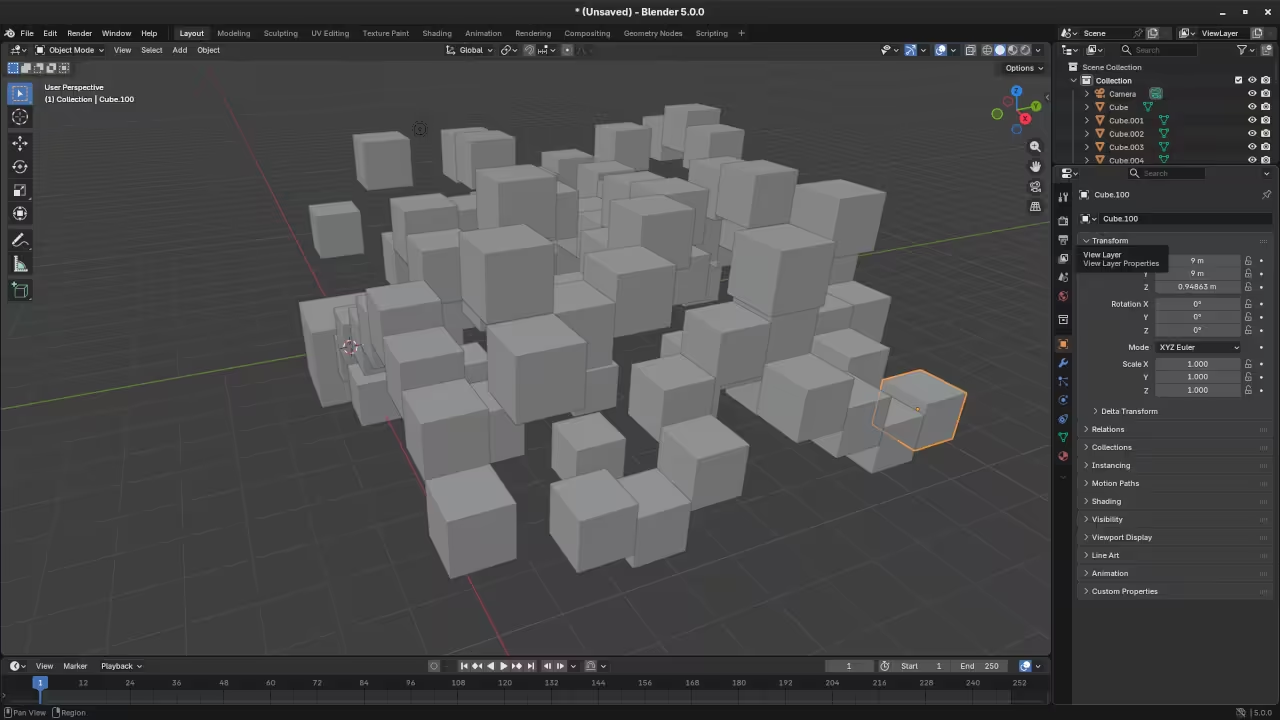
    AI Generated Results in Blender Layout
    Blender Layout Workspace Displaying AI Generated Objects

    Screencast For Blender Python API AI Generated Objects

    Resources for Learning Python and Blender

    To master these techniques you can explore detailed educational materials that cover both basic and advanced concepts:

    One on One Tutorials

    Personalized instruction is available if you require help with Python or the Blender API. You can book one on one online Python tutorials to accelerate your learning process. Visit the contact page to schedule a session.