Blog

  • Build Games in Blender 5 UPBGE on Fedora Linux

    Build Games in Blender 5 UPBGE on Fedora Linux


    Introduction

    UPBGE is a powerful game engine forked from Blender. It allows you to create games without leaving Blender.

    Modern Game Development with Blender 5

    The latest version 0.50 is now built on Blender 5. This update brings modern features like the Vulkan renderer.

    Installing UPBGE on Fedora Linux is very fast and easy. You can download the official binary directly from their site.

    Installation on Fedora Linux

    Extract the archive and run the blender executable file. No complex compilation is needed for your Fedora workstation.

    One main advantage is the unified 3D creation workflow. You model and animate assets in the same environment.

    Visual Programming and Python Scripting

    The engine uses logic bricks for visual game programming. Beginners can create interactions without writing any code today.

    You can also use Python for more advanced logic. The API is very similar to the standard Blender API.

    Physics and Performance Improvements

    Real time physics are handled by the Bullet engine. This provides high quality collisions for your indie games.

    UPBGE 0.50 supports GPU skinning for much faster animations. This helps maintain high frame rates during complex scenes.

    The project is fully open source under the GPL license. This means the engine is free to use forever.

    Workflow and Community Support

    Many developers use it for rapid prototyping of ideas. You can jump from modeling to playing instantly.

    Exporting your final game is a very simple process. You can create standalone binaries for Linux and Windows.

    Audio is handled by the Audaspace library for 3D sound. It supports high quality effects for immersive game worlds.

    Navigating your 3D scenes feels natural for Blender users. All your existing keyboard shortcuts will work perfectly here.

    The community is very active on the Blender Artists forums. You can find many tutorials and sample game files.

    Using the Vulkan renderer provides much better hardware performance. Modern GPUs can handle thousands of objects with ease.

    This engine is perfect for solo indie game developers. It reduces the need for expensive third party software.

    Mastering UPBGE will give you total creative control today. Start building your first 3D game on Fedora Linux.

    📷 Screenshots

    UPBGE Game Engine
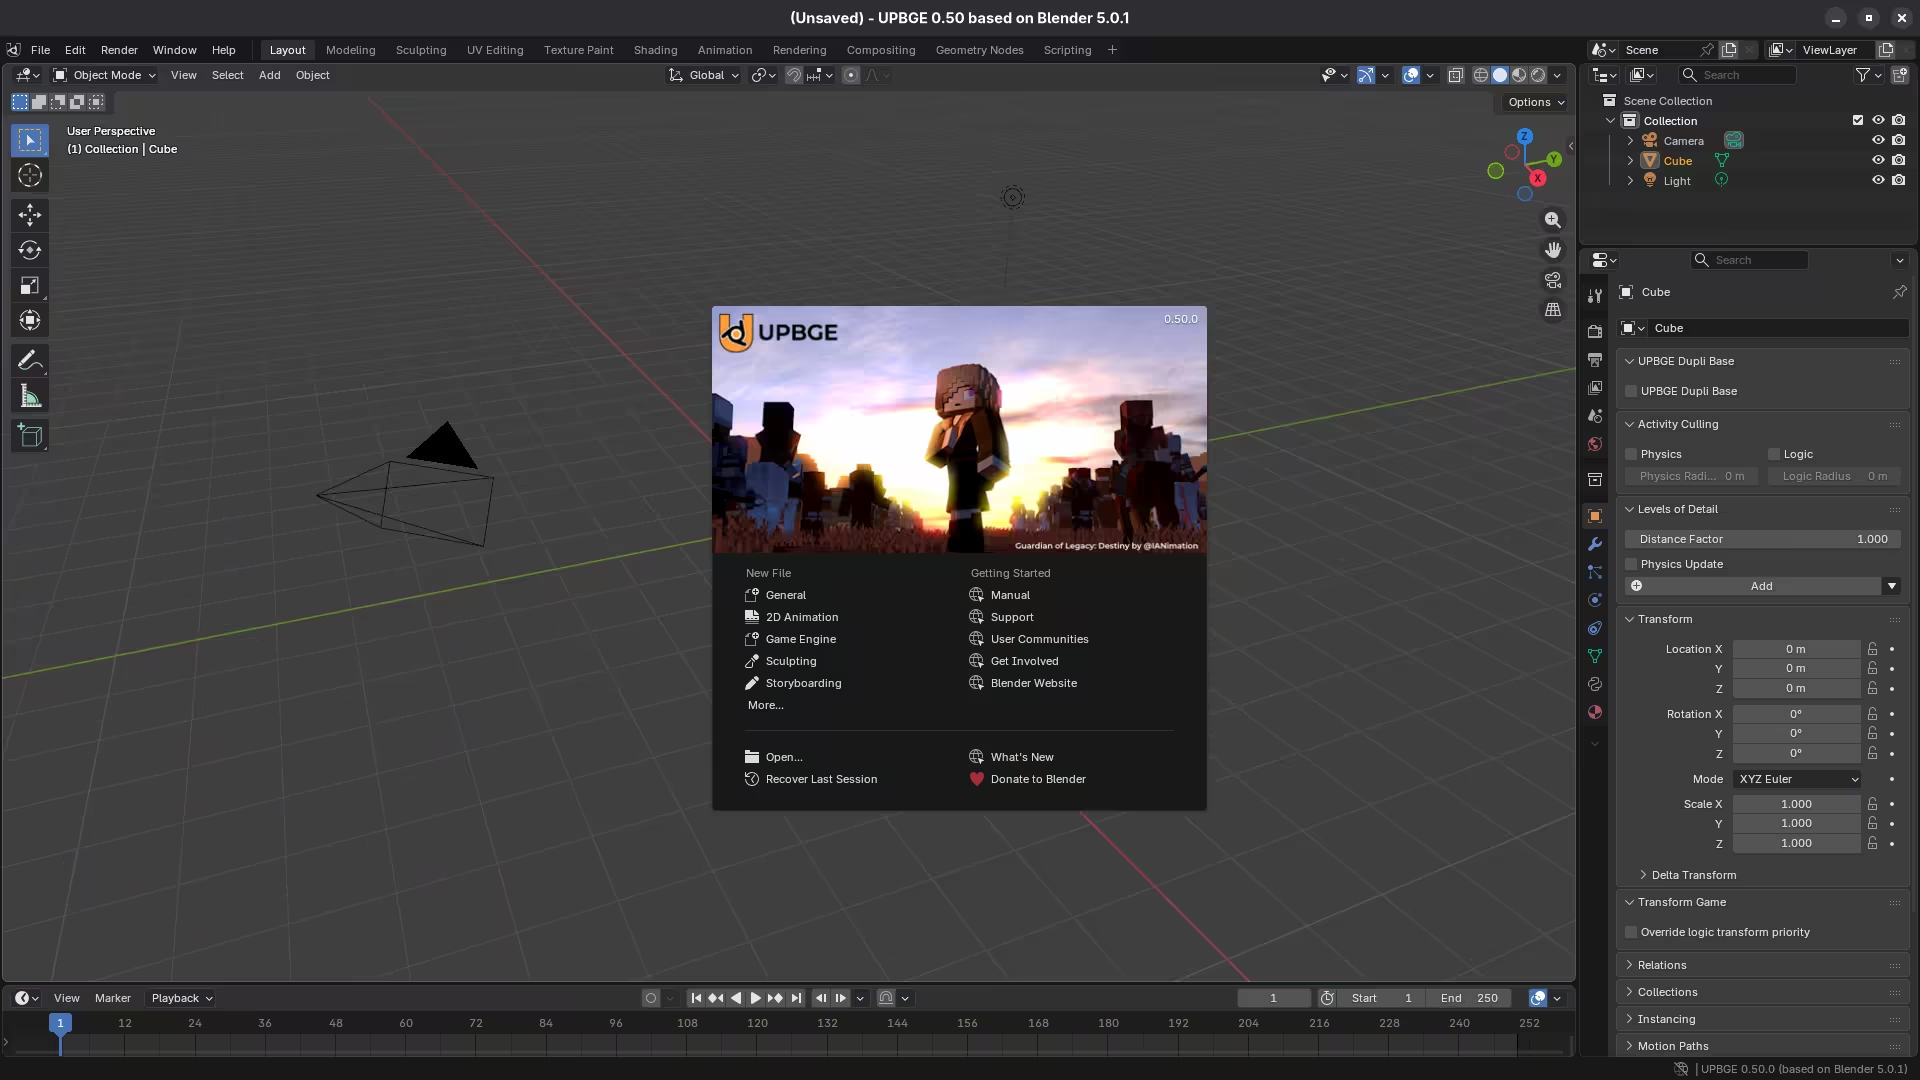
    UPBGE Game Engine Startup

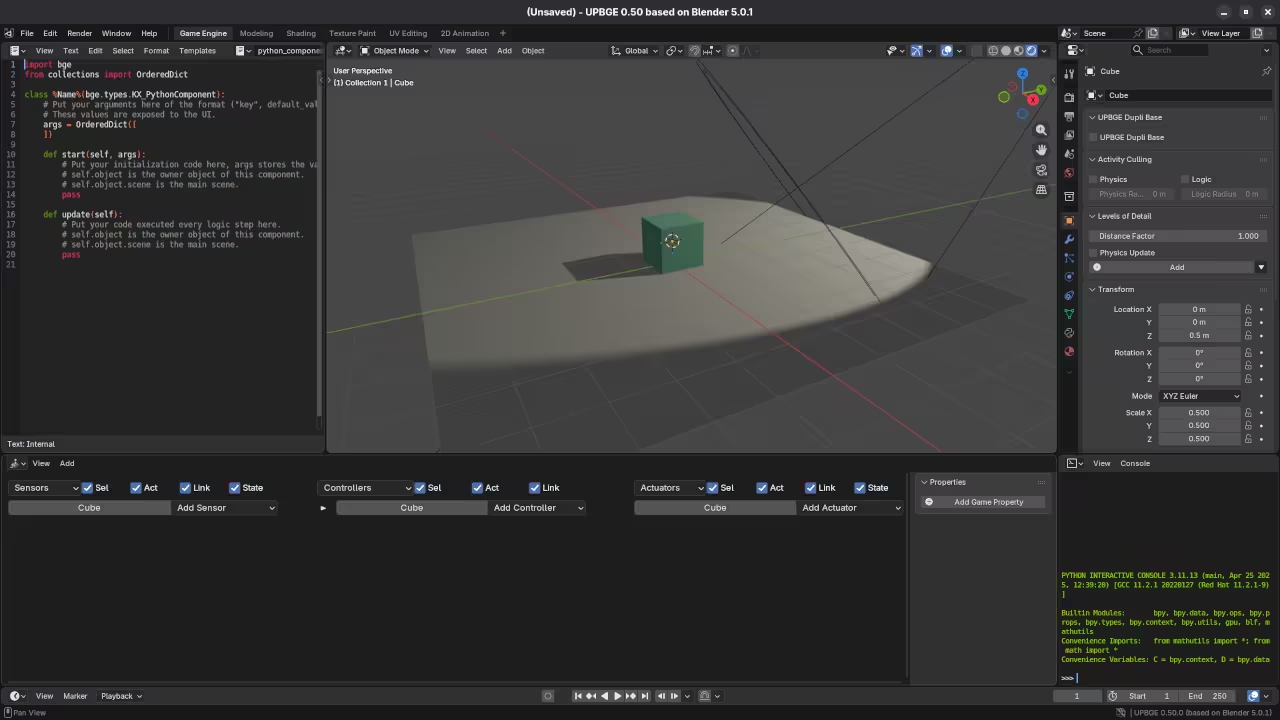
    UPBGE Default Dashboard
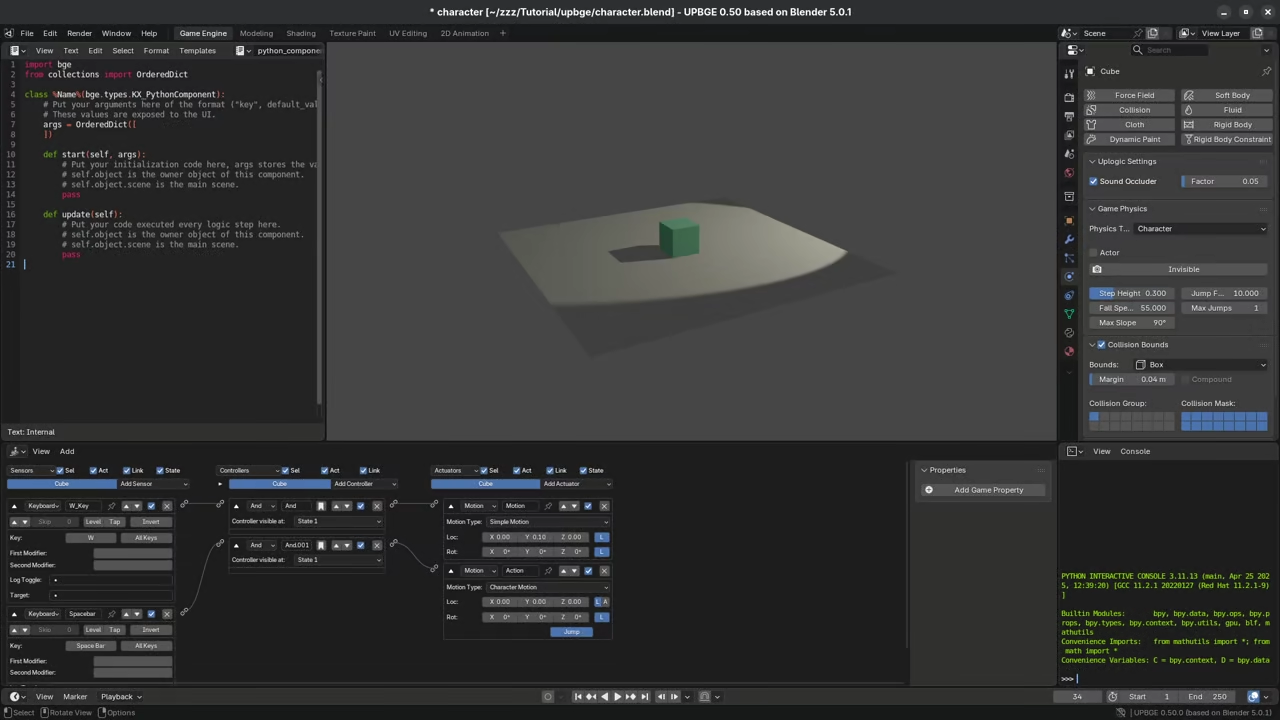
    UPBGE Game Engine Default Workspace

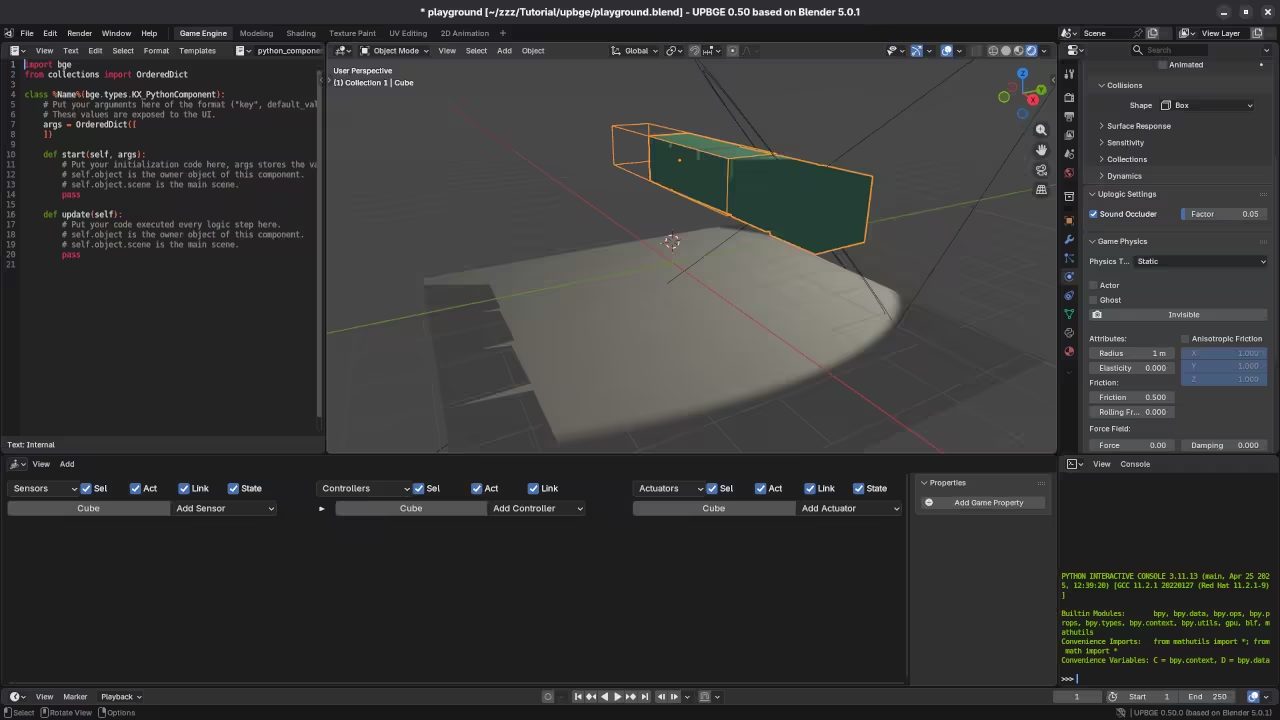
    UPBGE Array Modifier
    UPBGE Game Engine Array Modifier Applied To Cube

    🎬 Live YouTube Screencast

    Video Displaying The Installation And Use Of UPBGE Game Engine

    Take Your Skills Further

  • Build A Private Ad Blocker Using Fedora Quadlets

    Build A Private Ad Blocker Using Fedora Quadlets


    Introduction

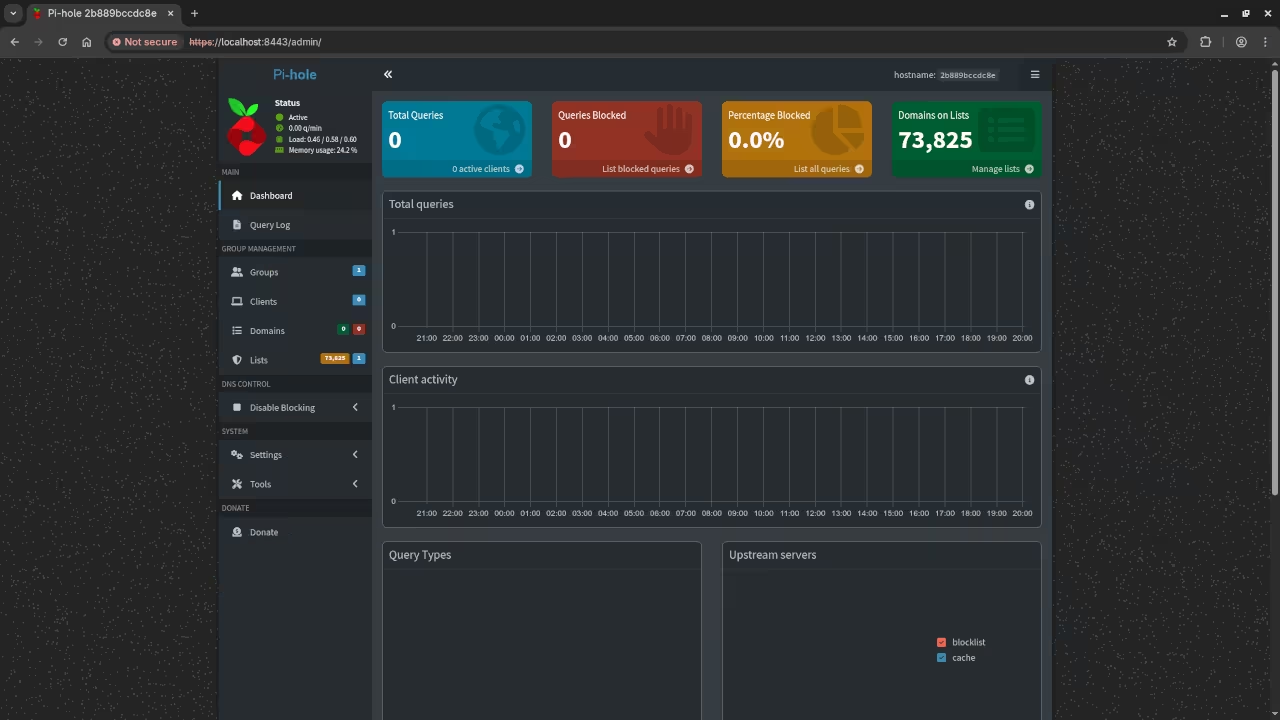
    Learn to stop ads using a Raspberry Pi. Fedora Linux makes this setup very secure.

    Getting Started with Fedora IoT

    First install Fedora IoT on your small device. The Raspberry Pi Zero W works very well.

    Understanding Quadlets for Containers

    Quadlets are a modern way to run containers. They turn container configs into systemd services.

    Prepare your Mini-PC by installing the podman package. Create a simple directory for your Quadlet files.

    Configuration and Deployment

    Write a basic container file for your blocker. Pi-hole or AdGuard Home are great choices.

    The Quadlet file manages the network and storage. Start the service using the systemctl command.

    The Quadlet Configuration Code

    Create a file named adblocker.container in the systemd directory. Use the following configuration for your service.

    [Unit]
    Description=Private Ad Blocker Container
    After=network-online.target
    
    [Container]
    Image=docker.io/adguard/adguardhome:latest
    Volume=/var/lib/adguardhome:/opt/adguardhome/work:Z
    Volume=/etc/adguardhome:/opt/adguardhome/conf:Z
    PublishPort=53:53/tcp
    PublishPort=53:53/udp
    PublishPort=3000:3000/tcp
    PublishPort=80:80/tcp
    
    [Install]
    WantedBy=multi-user.target default.target
    

    [Unit]
    Description=Pi-hole Rootless Container
    After=network-online.target
    
    [Container]
    Image=docker.io/pihole/pihole:latest
    ContainerName=pihole-rootless
    
    # DNS Ports (Redirected to high ports for rootless)
    PublishPort=5300:53/udp
    PublishPort=5300:53/tcp
    # Web/Admin Ports
    PublishPort=8080:80/tcp
    PublishPort=8443:443/tcp
    # Other requested ports
    PublishPort=1123:123/udp
    PublishPort=1067:67/udp
    
    # Environment Variables
    Environment=TZ=America/Toronto
    Environment=WEBPASSWORD=your_secure_password
    Environment=DNS1=1.1.1.1
    
    # Volume Mapping (The :Z handles Fedora's SELinux automatically)
    Volume=%h/pihole/etc-pihole:/etc/pihole:Z
    Volume=%h/pihole/etc-dnsmasq.d:/etc/dnsmasq.d:Z
    
    [Service]
    Restart=always
    
    [Install]
    WantedBy=default.target
    

    Load and Start the Service


    systemctl --user daemon-reload # Reload Daemon
    
    systemctl --user start pihole.service # Start Service
    
    systemctl --user enable pihole.service # Boot Start
    
    # Keep Running After Logo
    sudo loginctl enable-linger $USER 


    Deployment and Commands

    Reload the systemd daemon to recognize the new file. Start the service using the systemctl start command.

    Final Network Setup

    Update your router DNS to point to Pi. Every device on your network stays clean.

    You now have a private ad blocking server. Quadlets ensure your blocker starts after every reboot.

    📷 Screenshots

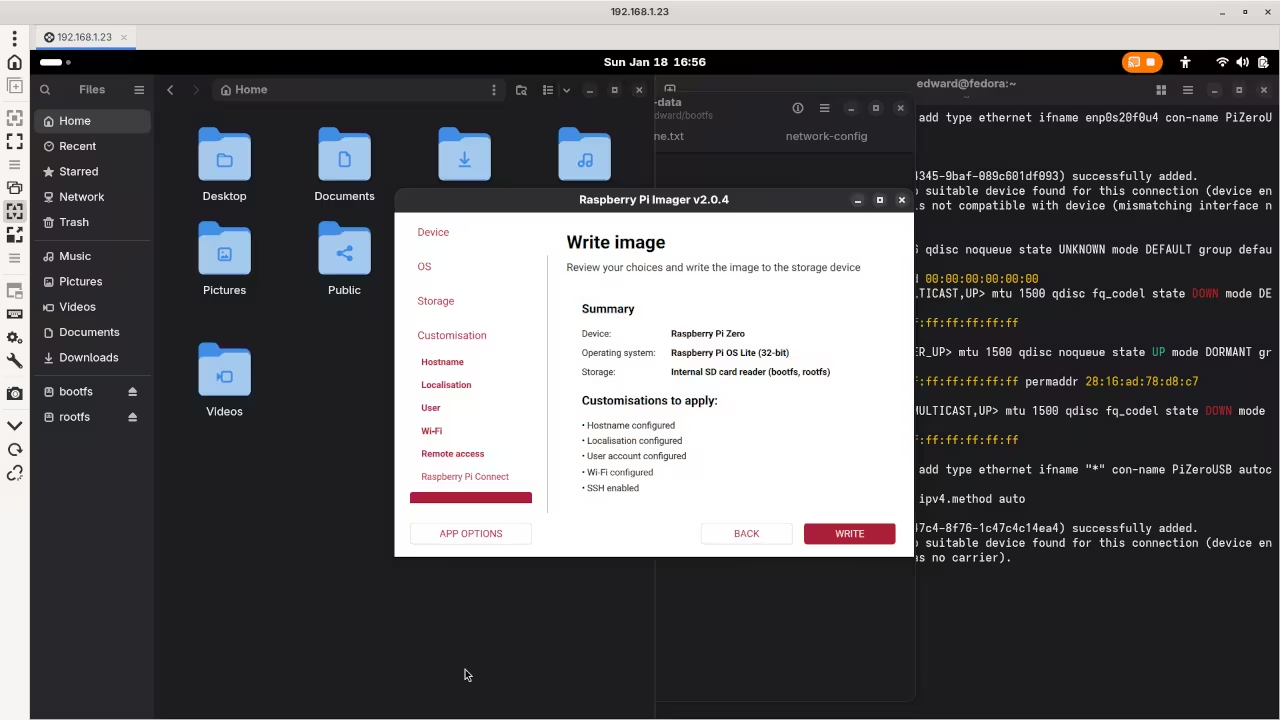
    Raspberry Pi Imager
    Raspberry Pi Imager Displaying Customisations To Apply

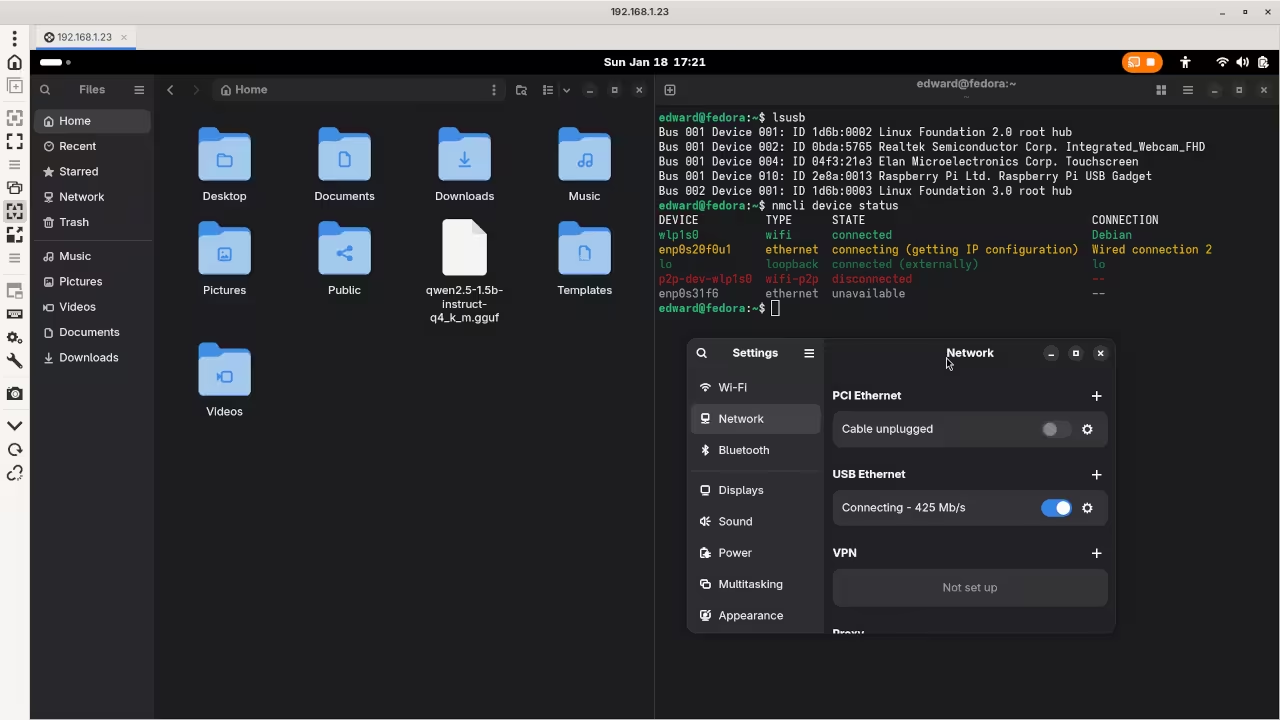
    USB Ethernet Connection
    Network Manager Displaying Raspberry Pi USB Ethernet

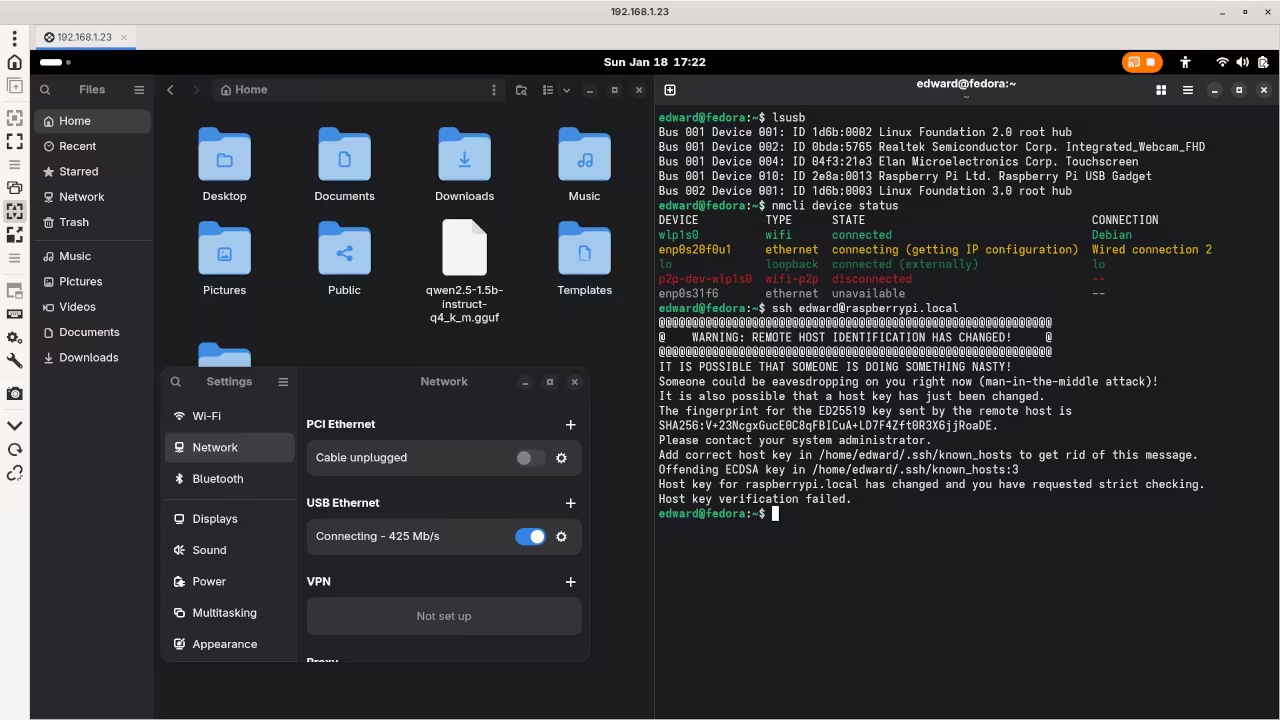
    SSH Connection Test
    Command Line Displaying Successful SSH Connection Attempt

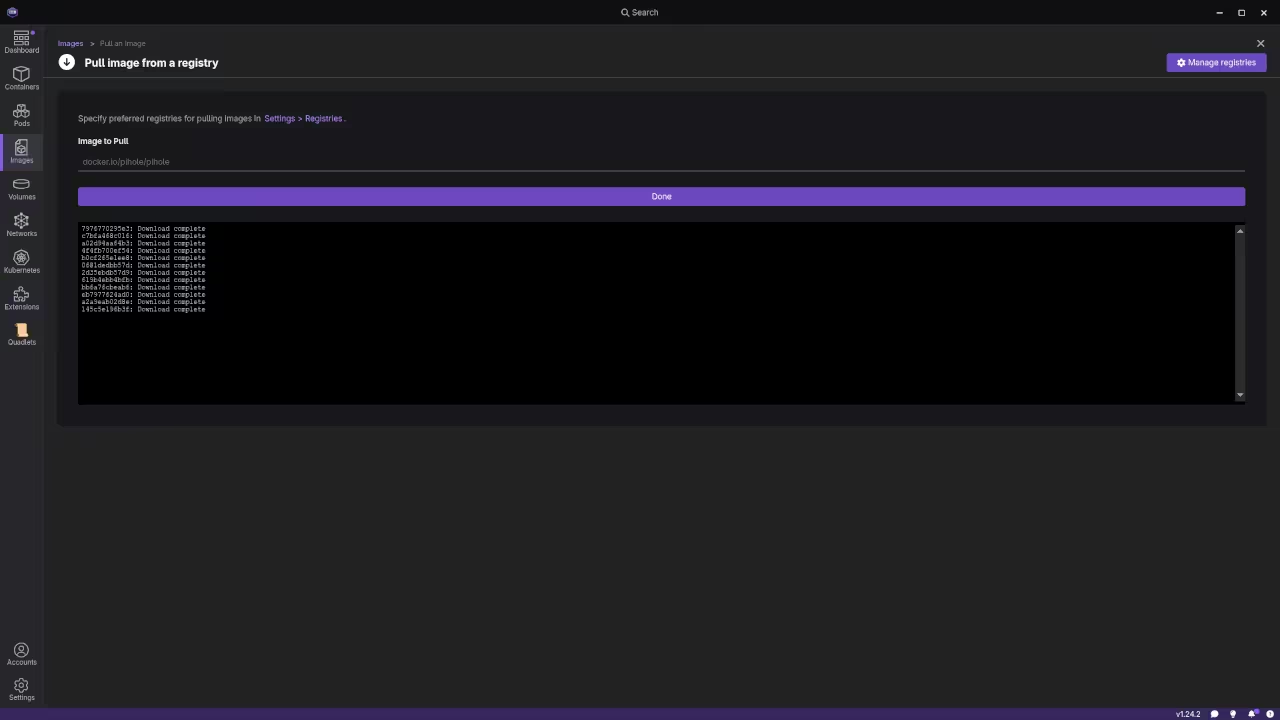
    Podman Desktop Pull
    Podman Desktop Pulling Pi-hole Image

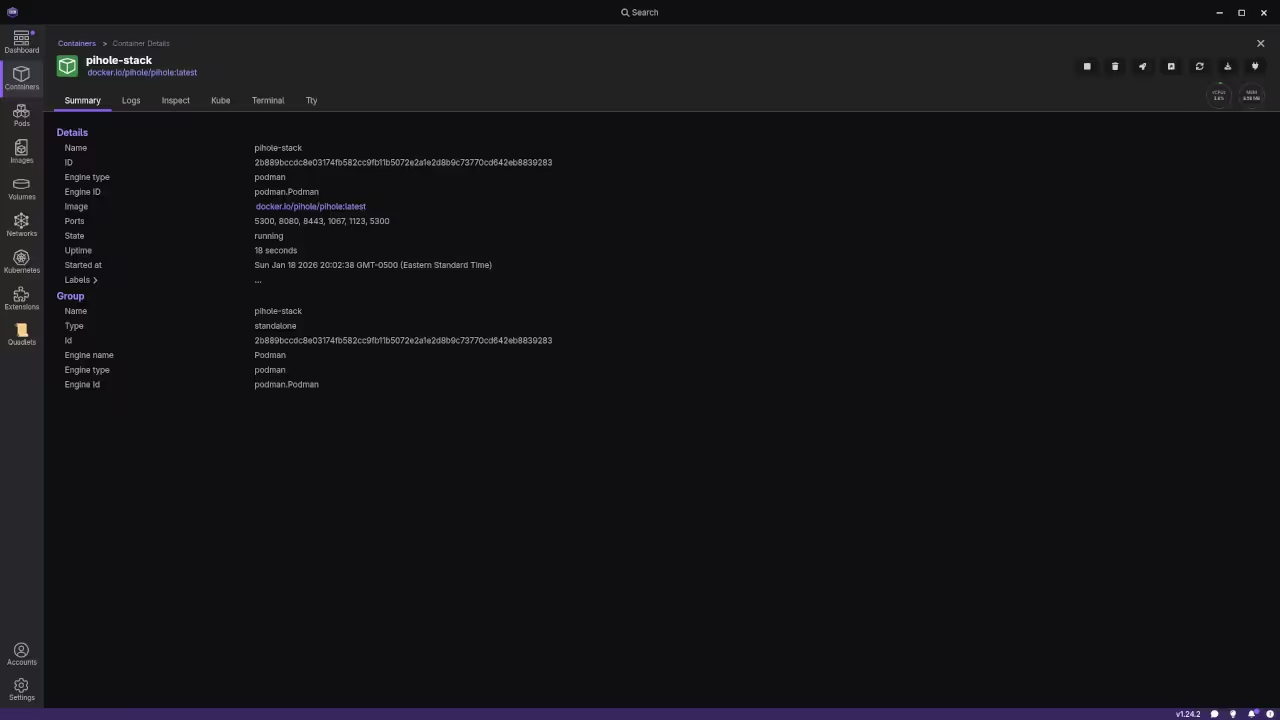
    Podman Desktop Container
    Podman Desktop Displaying Runnning Container

    Pi-hole Admin Login
    Web Browser Displaying Pi-hole Admin Login Page

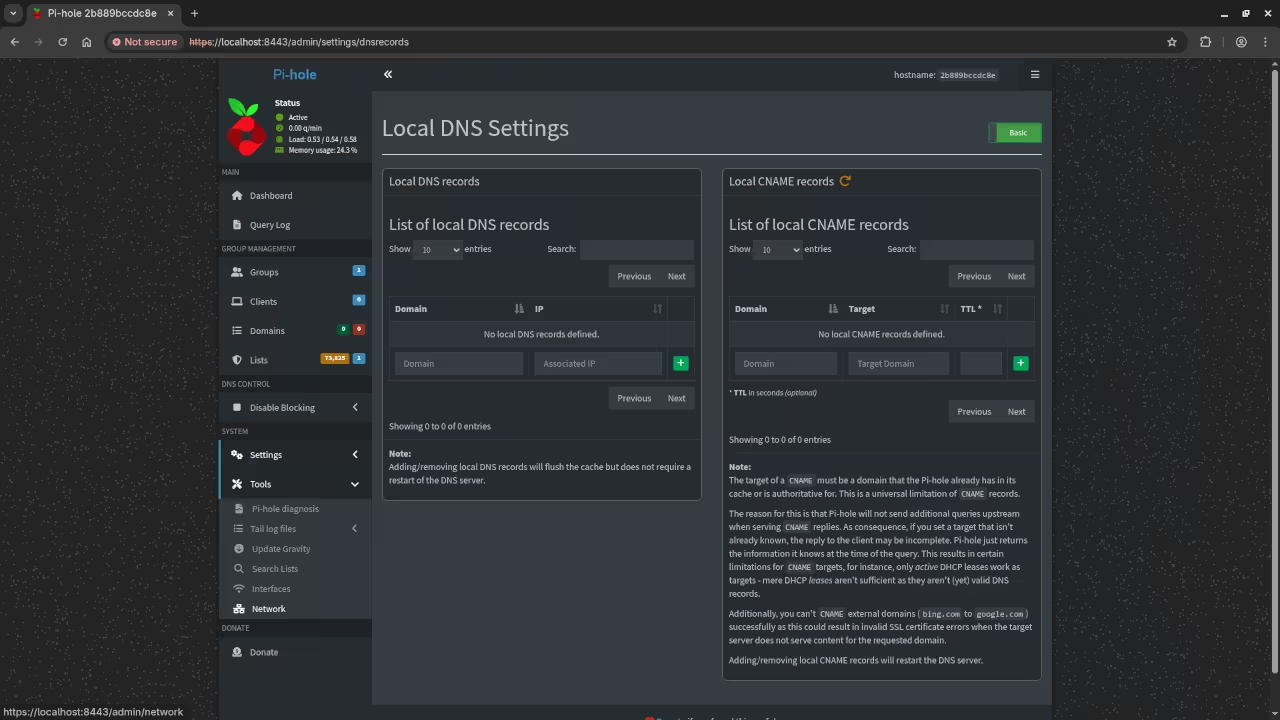
    Pi-hole DNS Settings
    Web Browser Displaying Pi-hole Local DNS Settings

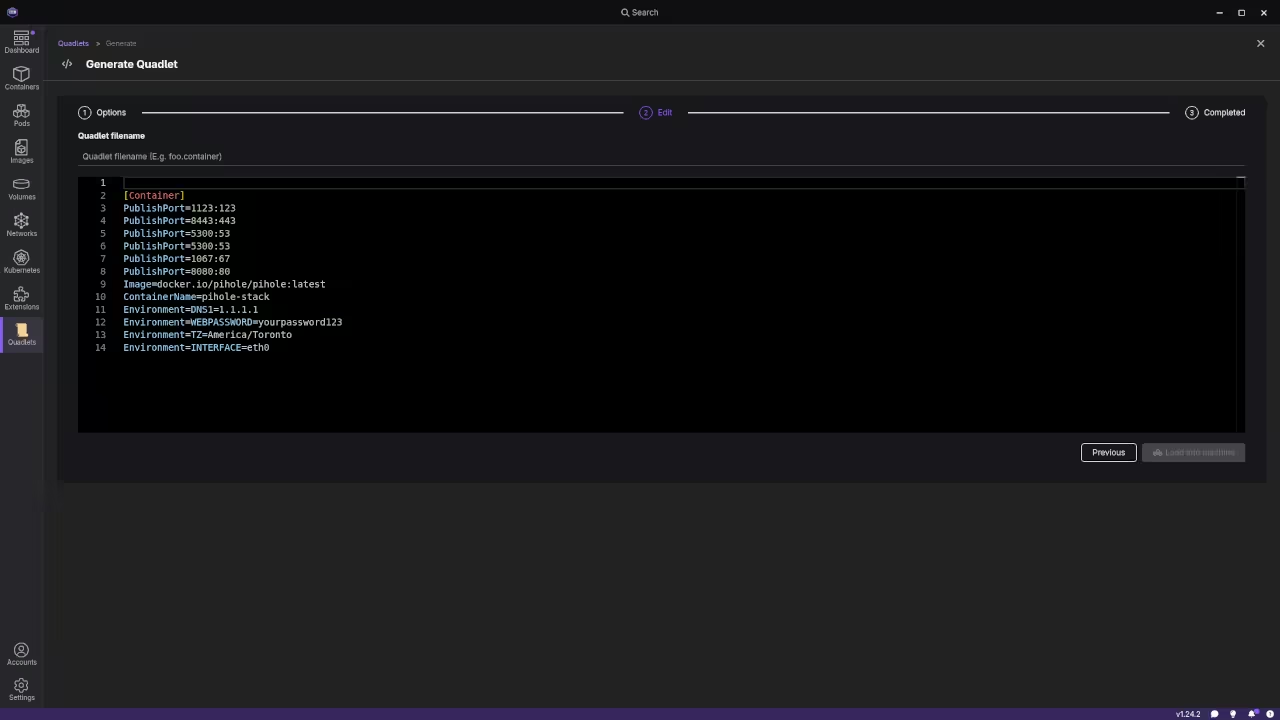
    Podman Desktop Quadlet
    Podman Desktop Displaying Quadlet File For Pi-hole

    Now that you have the management tools installed you are ready to view the screencast and begin your deployment.

    🎬 Live YouTube Screencast

    Video Displaying The Installation And Use Of Pi-hole Via Podman Desktop And Via SSH For Raspberry Pi

    Take Your Skills Further

  • Mastering Local AI on Fedora 43 Fixing ROCm Installation Errors for AMD Instinct Mi60

    Mastering Local AI on Fedora 43 Fixing ROCm Installation Errors for AMD Instinct Mi60


    Introduction

    Running large models like Wan 2.2 on Fedora 43 requires precise hardware tuning. Beginners often struggle with AMD ROCm installation errors during the setup process.

    Eliminate Site Wide Python Dependency Conflicts

    The first mistake is using the site wide Python installation. This leads to massive dependency conflicts within the Fedora ecosystem.

    Fedora updates frequently change system packages and libraries. Always use a dedicated virtual environment for every ComfyUI project.

    Create a clean virtual environment using the venv module. Run python -m venv comfy-venv to initialize the folder.

    Activate the environment before installing any pip requirements. Use source comfy-venv/bin/activate to isolate your AI workspace.

    Configure Virtual Memory and Linux Swap Files

    The second mistake is ignoring your limited system RAM. Your 32GB of physical memory is not enough for 14B models.

    The Ryzen 5600GT iGPU reserves 4GB for video processing. This leaves only 28GB for the entire Fedora operating system.

    Loading the Wan 2.2 model weights will spike memory usage. Create a 32GB swap file to prevent the OOM killer.

    Use btrfs filesystem mkswapfile for modern Fedora installations. Add the entry to /etc/fstab to enable it on boot.

    Resolve ROCm DNF No Match for Argument Errors

    The third mistake involves the ROCm 6.4 repository configuration. DNF will return no match errors if the path is wrong.

    Fedora 43 requires a specific repository file in /etc/yum.repos.d/. Check that your baseurl points to the correct ROCm version.

    Isolate the Instinct Mi60 from the Ryzen iGPU

    Hardware conflicts between the iGPU and Mi60 cause crashes. The integrated graphics can confuse the ROCm compiler scripts.

    Set the HIP_VISIBLE_DEVICES="0" variable in your launch script. This forces ComfyUI to ignore the 5600GT graphics unit.

    Why You Must Use GGUF Quantization

    Standard fp16 models are too large for 32GB VRAM. A 14B model in fp16 requires nearly 60GB of memory.

    Even fp8 models can cause fragmentation on Vega 20. The Mi60 architecture handles GGUF quants with much better stability.

    Select the Q5_K_M GGUF quantization for the best quality. This format allows the model to fit inside your VRAM.

    Advanced Startup Tweak and Custom Nodes

    Add the HSA_OVERRIDE_GFX_VERSION="9.0.6" variable to your environment. This tells ROCm to treat the Mi60 as a Vega card.

    Use the --lowvram and --force-fp16-vae flags for ComfyUI. These arguments prevent the VAE from exceeding your VRAM limit.

    Install the Sage Attention custom node for optimized sampling. This node reduces the memory footprint during the video generation.

    Use the Model Sampling Flux/Wan node for motion control. Set the shift value to 1.1 for smoother video results.

    Monitor your progress using the rocminfo command in terminal. This tool verifies that Fedora sees your hardware correctly.

    Screenshot

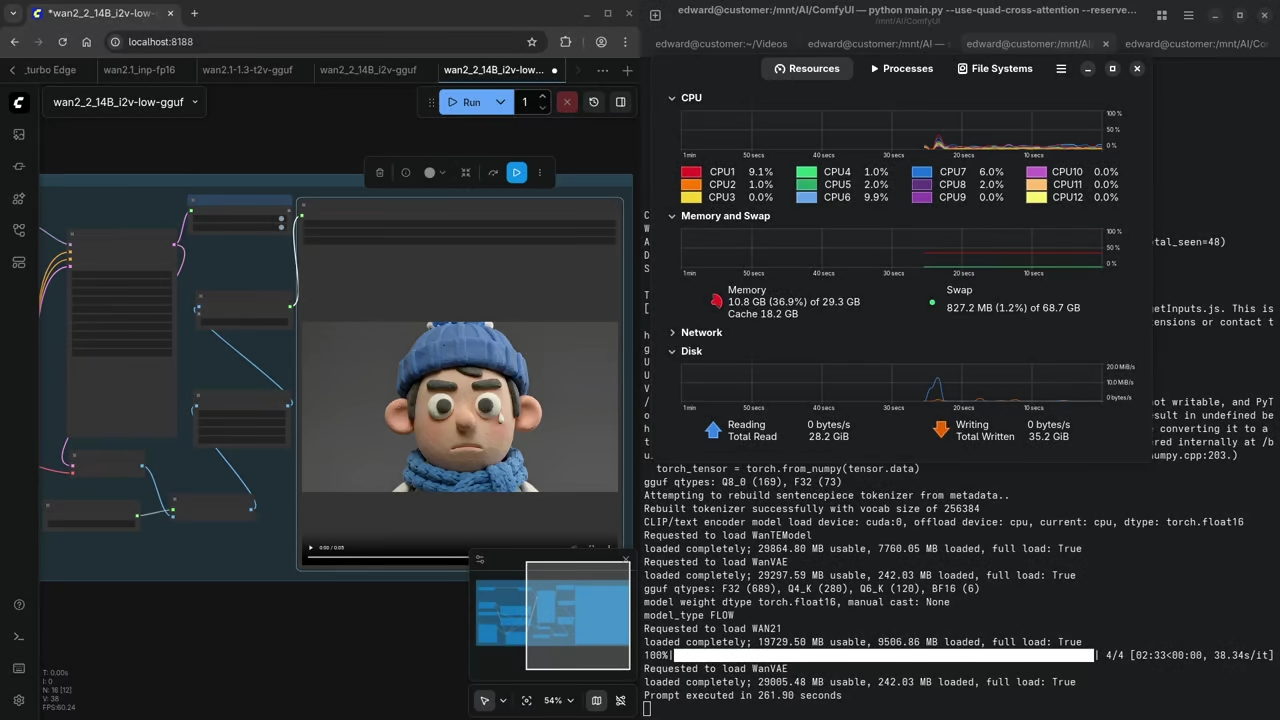
    Wan 2.2 14B ComfyUI
    Web Browser ComfyUI Displaying Wan 2.2 14B Model

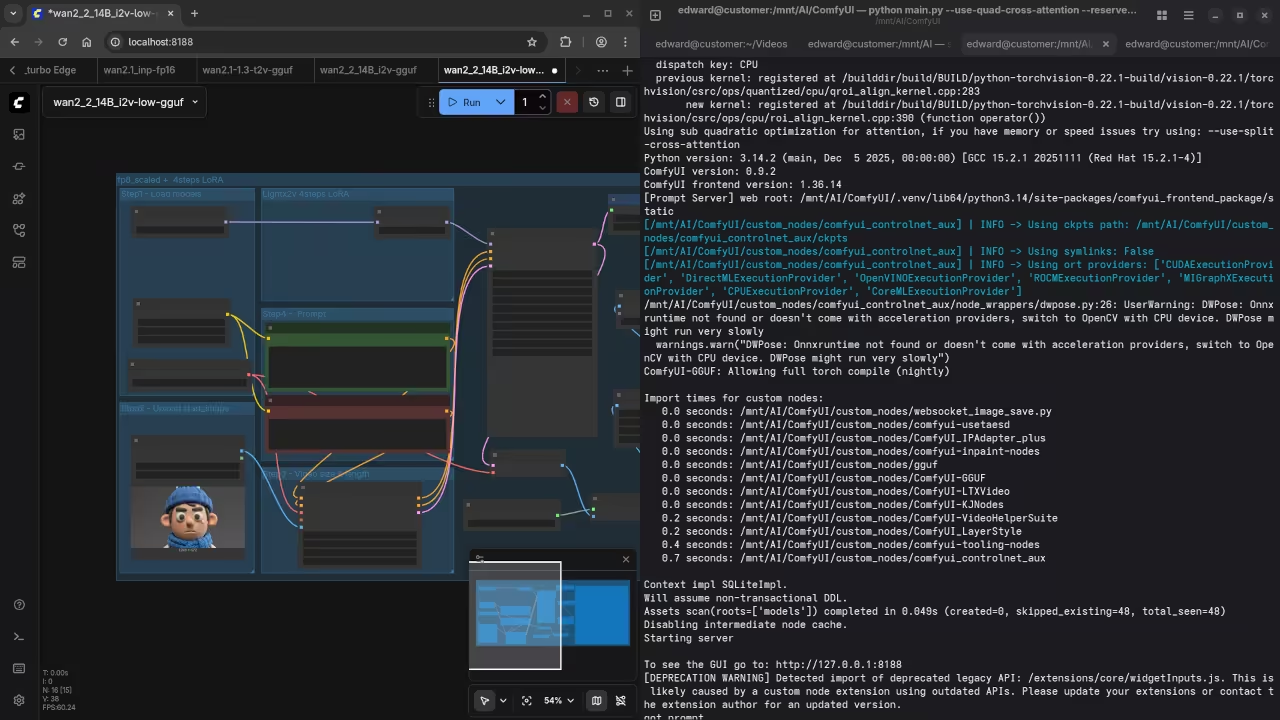
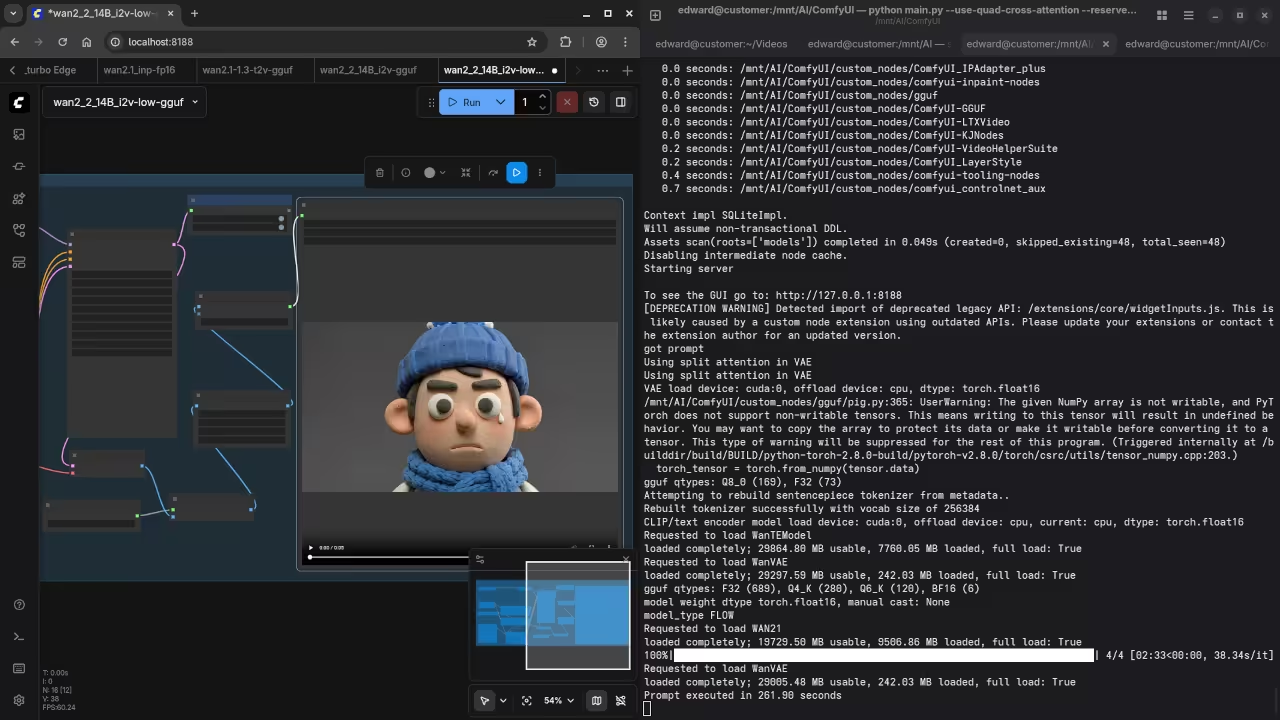
    ComfyUI Want 2.2 14B Options
    Web Browser ComfyUI Running Low Noise Wan 2.2 14B Model

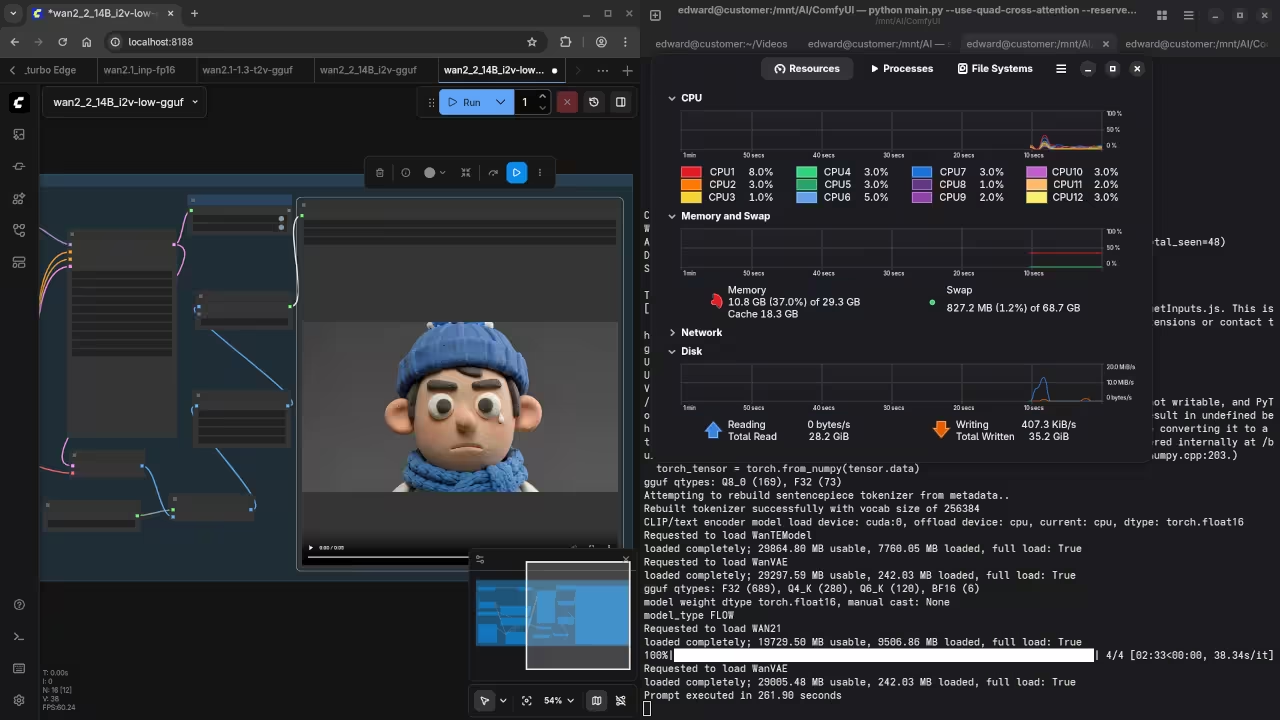
    System Resources
    System Monitor Displaying Resources Used For Wan 2.2 14 Model

    Live Screencast

    Screencast Of AI Generated Video Using Wan 2.2 I2V 14B And ComfyUI On AMD GPU

    Take Your Skills Further

  • Optimizing the 3D Pyraminx for Fedora Linux

    Optimizing the 3D Pyraminx for Fedora Linux

    Introduction

    This tutorial improves our initial 3D Pyraminx game code. We will optimize the geometry for better performance today.

    Refining the Mathematical Geometry

    The original code used simple cones for the puzzle. We now use a proper tetrahedron for accuracy.

    This update defines four unique vertices in 3D space. It ensures the triangular faces align perfectly every time.

    We also added metallic materials to improve the visuals. These shaders make the puzzle look very professional now.

    Performance and Visual Optimizations

    I added a cyan main light for better depth. A magenta rim light helps the edges glow nicely.

    The code now caps the pixel ratio for performance. This keeps the frame rate high on 4K monitors.

    Interactive Controls and Movement

    The new orbit controls allow for smooth puzzle rotation. We enabled damping to make the movement feel heavy.

    This version includes auto-rotation for a great hero shot. You can disable this feature in the animate function.


        <script src="https://cdnjs.cloudflare.com/ajax/libs/three.js/r128/three.min.js"></script>
        <script src="https://cdn.jsdelivr.net/npm/three@0.128.0/examples/js/controls/OrbitControls.min.js"></script>
        <style>
            body { margin: 0; overflow: hidden; background: radial-gradient(circle, #1a1a2e 0%, #0f0f1a 100%); font-family: sans-serif; }
            #ui { position: absolute; top: 20px; left: 20px; color: #00d2ff; text-shadow: 0 0 10px #00d2ff; pointer-events: none; }
            .hint { position: absolute; bottom: 20px; width: 100%; text-align: center; color: rgba(255,255,255,0.5); font-size: 0.8rem; }
        </style>
        <div id="ui">
            <h1>PYRAMINX v2.0</h1>
            <p>Optimized for Fedora 43</p>
        </div>
        <div class="hint">DRAG TO EXPLORE • SCROLL TO ZOOM</div>
    
        <script>
            let scene, camera, renderer, controls, group;
    
            function init() {
                scene = new THREE.Scene();
                camera = new THREE.PerspectiveCamera(45, window.innerWidth / window.innerHeight, 0.1, 1000);
                camera.position.set(8, 5, 8);
    
                renderer = new THREE.WebGLRenderer({ antialias: true, alpha: true });
                renderer.setSize(window.innerWidth, window.innerHeight);
                renderer.setPixelRatio(Math.min(window.devicePixelRatio, 2)); // Performance optimization
                document.body.appendChild(renderer.domElement);
    
                // High-End Lighting "Bling"
                const ambient = new THREE.AmbientLight(0xffffff, 0.4);
                scene.add(ambient);
    
                const mainLight = new THREE.DirectionalLight(0x00d2ff, 1);
                mainLight.position.set(10, 10, 10);
                scene.add(mainLight);
    
                const rimLight = new THREE.PointLight(0xff0055, 1);
                rimLight.position.set(-10, -10, -10);
                scene.add(rimLight);
    
                group = new THREE.Group();
                createRealPyraminx();
                scene.add(group);
    
                controls = new THREE.OrbitControls(camera, renderer.domElement);
                controls.enableDamping = true;
                controls.autoRotate = true; // Auto-rotate for that "hero shot" look
                controls.autoRotateSpeed = 0.5;
    
                window.addEventListener('resize', onResize);
                animate();
            }
    
            function createRealPyraminx() {
                // A Pyraminx is a Tetrahedron. We define the 4 vertices in 3D space.
                const s = 4; // Scale factor
                const vertices = [
                    new THREE.Vector3(s, s, s),
                    new THREE.Vector3(-s, -s, s),
                    new THREE.Vector3(-s, s, -s),
                    new THREE.Vector3(s, -s, -s)
                ];
    
                const colors = [0x00ff88, 0xff3366, 0x00d2ff, 0xffcc00]; // Modern Palette
    
                // Logic to create 4 faces
                const faceIndices = [[0,1,2], [0,2,3], [0,3,1], [1,3,2]];
                
                faceIndices.forEach((indices, i) => {
                    const geometry = new THREE.BufferGeometry();
                    const verts = [];
                    indices.forEach(idx => {
                        verts.push(vertices[idx].x, vertices[idx].y, vertices[idx].z);
                    });
                    
                    geometry.setAttribute('position', new THREE.Float32BufferAttribute(verts, 3));
                    geometry.computeVertexNormals();
    
                    const material = new THREE.MeshPhongMaterial({ 
                        color: colors[i],
                        shininess: 100,
                        specular: 0x555555,
                        side: THREE.DoubleSide,
                        flatShading: true 
                    });
    
                    const faceMesh = new THREE.Mesh(geometry, material);
                    
                    // Add "Edge Bling" - white borders for pieces
                    const edges = new THREE.EdgesGeometry(geometry);
                    const line = new THREE.LineSegments(edges, new THREE.LineBasicMaterial({ color: 0xffffff, linewidth: 2 }));
                    faceMesh.add(line);
                    
                    group.add(faceMesh);
                });
            }
    
            function onResize() {
                camera.aspect = window.innerWidth / window.innerHeight;
                camera.updateProjectionMatrix();
                renderer.setSize(window.innerWidth, window.innerHeight);
            }
    
            function animate() {
                requestAnimationFrame(animate);
                controls.update();
                renderer.render(scene, camera);
            }
    
            init();
        </script>


    Final Thoughts on Optimization

    Local AI helps us iterate on complex math quickly. Our Pyraminx is now ready for a full release.

    Try running this code on your Fedora 43 system. You will see a massive improvement in visual quality.

    Consolidated Demo

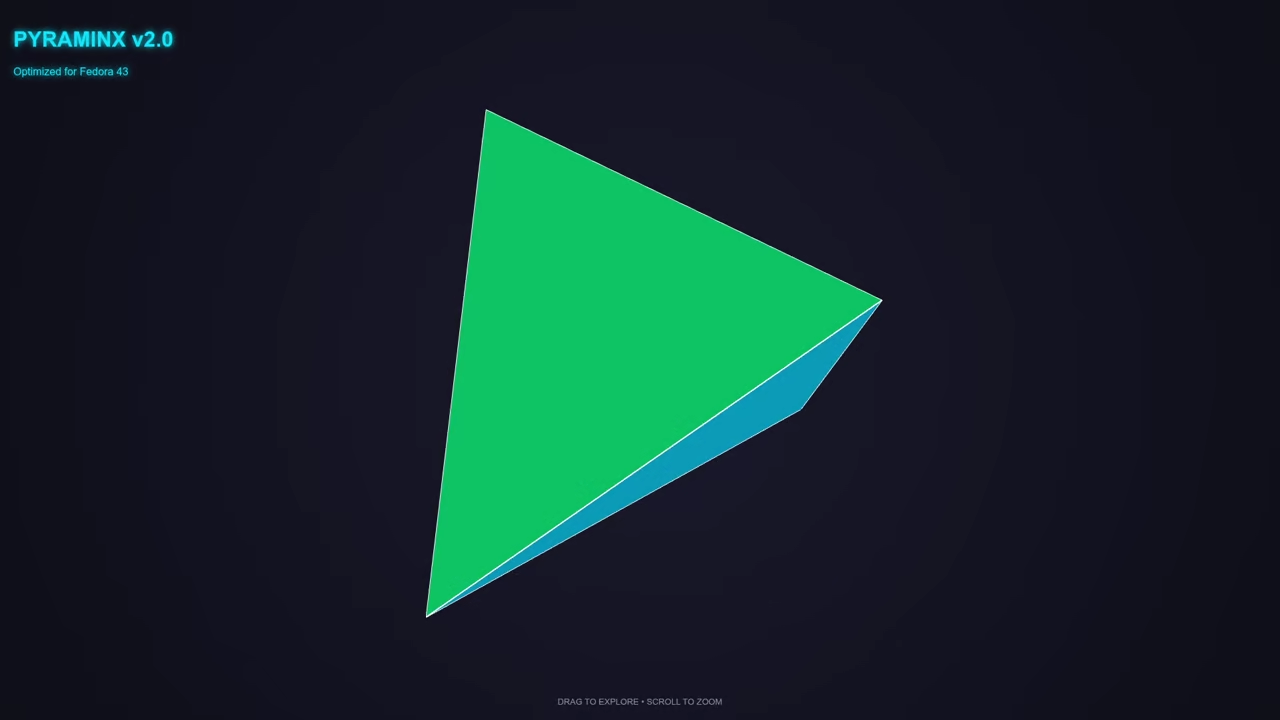
    HTML5 Optimized Pyraminx Cube

    Screenshot

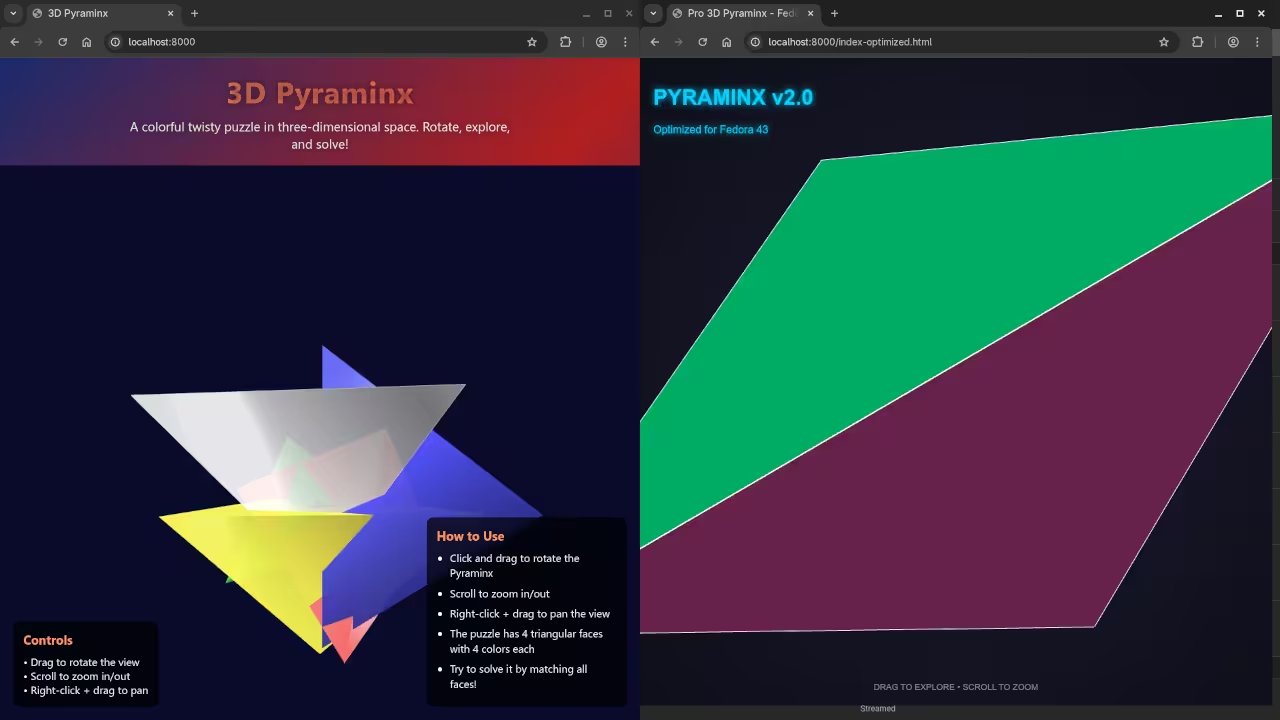
    Original vs Optimized
    Web Browser Showing Original And Optimized Pyraminx Cube

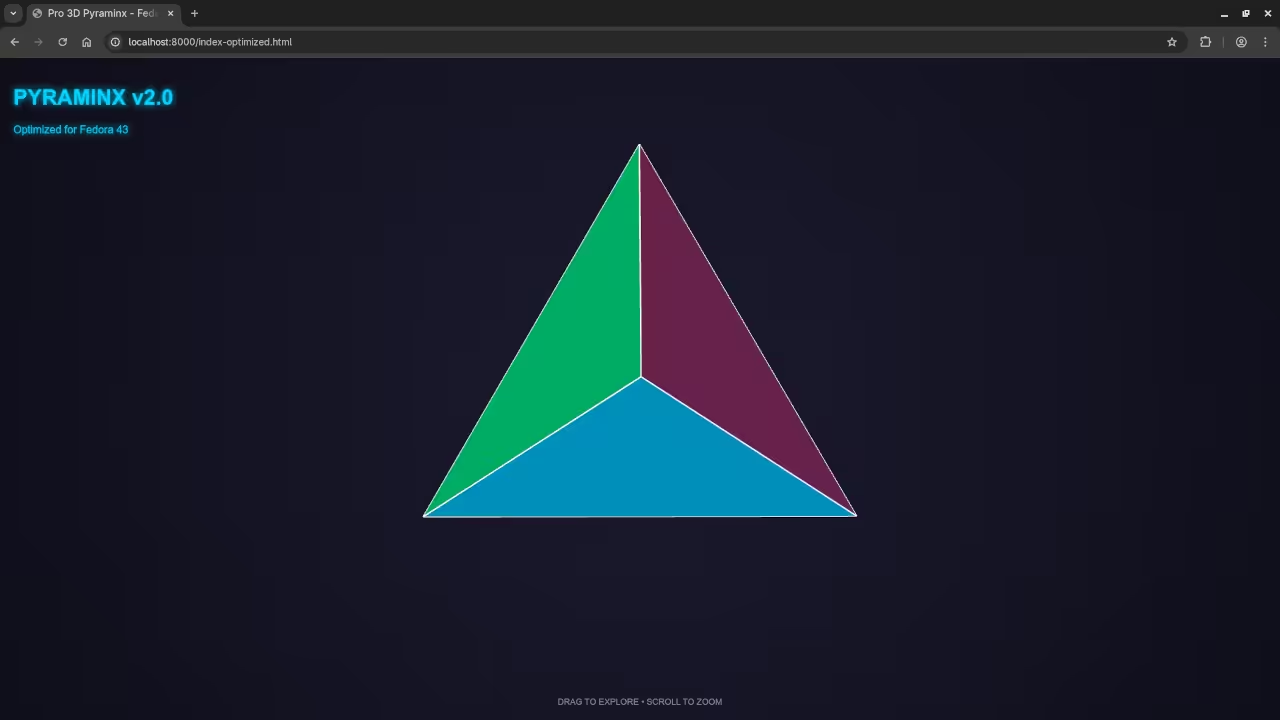
    Optimized Pyraminx Cube
    Web Web Browser Showing Optimized Pyraminx Cube Results

    Live Screencast

    Screencast Of Optimized Pyraminx Cube Code

    Take Your Skills Further

  • Coding the Pyraminx with Local AI on Fedora

    Coding the Pyraminx with Local AI on Fedora

    Introduction

    This tutorial builds a Pyraminx puzzle on Fedora 43. We use the Qwen3-Coder model for initial code generation.

    Installation on Fedora Linux

    Update your Fedora 43 system before you begin today. Type sudo dnf install llama-cpp to install the tools.

    Support for Other Operating Systems

    Ubuntu users must use the sudo apt install command. Windows users should utilize winget to install llama.cpp packages.

    Mac users can install the software using the brew command. These steps ensure everyone can follow this technical guide.

    Running the Local Model

    Download the Qwen3-Coder model file from the official repo. Run the model using the llama-server command right away.

    Input the prompt for a 3D HTML5 Pyraminx game. Watch the model generate the canvas and rotation logic.

    Testing the Output

    Paste the raw output into a new index.html file. Open this file in your favorite web browser immediately.


        <script src="https://cdnjs.cloudflare.com/ajax/libs/three.js/r128/three.min.js"></script>
        <script src="https://cdn.jsdelivr.net/npm/three@0.128.0/examples/js/controls/OrbitControls.min.js"></script>
        <style>
            * {
                margin: 0;
                padding: 0;
                box-sizing: border-box;
            }
            
            body {
                overflow: hidden;
                background: linear-gradient(135deg, #1a2a6c, #b21f1f, #1a2a6c);
                font-family: 'Segoe UI', Tahoma, Geneva, Verdana, sans-serif;
                height: 100vh;
                display: flex;
                flex-direction: column;
            }
            
            .header {
                text-align: center;
                padding: 20px;
                color: white;
                text-shadow: 0 0 10px rgba(0, 0, 0, 0.5);
                z-index: 10;
            }
            
            h1 {
                font-size: 2.8rem;
                margin-bottom: 10px;
                background: linear-gradient(to right, #ff9966, #ff5858);
                -webkit-background-clip: text;
                -webkit-text-fill-color: transparent;
                letter-spacing: 1px;
            }
            
            .subtitle {
                font-size: 1.2rem;
                max-width: 600px;
                margin: 0 auto;
                opacity: 0.9;
            }
            
            #pyraminx-container {
                flex: 1;
                position: relative;
            }
            
            .controls {
                position: absolute;
                bottom: 20px;
                left: 20px;
                background: rgba(0, 0, 0, 0.7);
                padding: 15px;
                border-radius: 10px;
                color: white;
                z-index: 10;
                backdrop-filter: blur(5px);
            }
            
            .controls h3 {
                margin-bottom: 10px;
                color: #ff9966;
            }
            
            .instructions {
                position: absolute;
                bottom: 20px;
                right: 20px;
                background: rgba(0, 0, 0, 0.7);
                padding: 15px;
                border-radius: 10px;
                color: white;
                z-index: 10;
                backdrop-filter: blur(5px);
                max-width: 300px;
            }
            
            .instructions h3 {
                margin-bottom: 10px;
                color: #ff9966;
            }
            
            .instructions ul {
                padding-left: 20px;
            }
            
            .instructions li {
                margin-bottom: 8px;
                line-height: 1.4;
            }
            
            .footer {
                text-align: center;
                padding: 15px;
                color: rgba(255, 255, 255, 0.7);
                font-size: 0.9rem;
                z-index: 10;
            }
            
            @media (max-width: 768px) {
                .header h1 {
                    font-size: 2rem;
                }
                
                .subtitle {
                    font-size: 1rem;
                }
                
                .controls, .instructions {
                    position: relative;
                    max-width: 90%;
                    margin: 15px auto;
                    bottom: auto;
                    right: auto;
                    left: auto;
                }
            }
        </style>
        <div class="header">
            <h1>3D Pyraminx</h1>
            <p class="subtitle">A colorful twisty puzzle in three-dimensional space. Rotate, explore, and solve!</p>
        </div>
        
        <div id="pyraminx-container"></div>
        
        <div class="controls">
            <h3>Controls</h3>
            <p>• Drag to rotate the view</p>
            <p>• Scroll to zoom in/out</p>
            <p>• Right-click + drag to pan</p>
        </div>
        
        <div class="instructions">
            <h3>How to Use</h3>
            <ul>
                <li>Click and drag to rotate the Pyraminx</li>
                <li>Scroll to zoom in/out</li>
                <li>Right-click + drag to pan the view</li>
                <li>The puzzle has 4 triangular faces with 4 colors each</li>
                <li>Try to solve it by matching all faces!</li>
            </ul>
        </div>
        
        <div class="footer">
            <p>Created with Three.js | Pyraminx Puzzle Simulation</p>
        </div>
    
        <script>
            // Main variables
            let scene, camera, renderer, controls;
            let pyraminx, pyramidGroup;
            let clock = new THREE.Clock();
            
            // Initialize the scene
            function init() {
                // Create scene
                scene = new THREE.Scene();
                scene.background = new THREE.Color(0x0a0a2a);
                scene.fog = new THREE.Fog(0x0a0a2a, 15, 30);
                
                // Create camera
                camera = new THREE.PerspectiveCamera(75, window.innerWidth / window.innerHeight, 0.1, 1000);
                camera.position.set(0, 0, 10);
                
                // Create renderer
                renderer = new THREE.WebGLRenderer({ antialias: true });
                renderer.setSize(window.innerWidth, window.innerHeight);
                renderer.setPixelRatio(window.devicePixelRatio);
                document.getElementById('pyraminx-container').appendChild(renderer.domElement);
                
                // Add lighting
                const ambientLight = new THREE.AmbientLight(0xffffff, 0.5);
                scene.add(ambientLight);
                
                const directionalLight = new THREE.DirectionalLight(0xffffff, 1);
                directionalLight.position.set(5, 5, 5);
                scene.add(directionalLight);
                
                const backLight = new THREE.DirectionalLight(0xffffff, 0.8);
                backLight.position.set(-5, -5, -5);
                scene.add(backLight);
                
                // Create the Pyraminx
                createPyraminx();
                
                // Add orbit controls
                controls = new THREE.OrbitControls(camera, renderer.domElement);
                controls.enableDamping = true;
                controls.dampingFactor = 0.05;
                
                // Handle window resize
                window.addEventListener('resize', onWindowResize, false);
                
                // Start animation loop
                animate();
            }
            
            // Create the Pyraminx structure
            function createPyraminx() {
                pyramidGroup = new THREE.Group();
                scene.add(pyramidGroup);
                
                // Define colors for the pyraminx faces
                const colors = [
                    0xff5555, // Red
                    0x55ff55, // Green
                    0x5555ff, // Blue
                    0xffff55  // Yellow
                ];
                
                // Create the main pyramid structure
                const size = 4;
                const geometry = new THREE.ConeGeometry(size, size, 4);
                const material = new THREE.MeshPhongMaterial({ 
                    color: 0xffffff,
                    transparent: true,
                    opacity: 0.9,
                    shininess: 80,
                    wireframe: false
                });
                
                // Create the base pyramid
                const pyramid = new THREE.Mesh(geometry, material);
                pyramid.rotation.x = Math.PI;
                pyramidGroup.add(pyramid);
                
                // Create the four triangular faces with different colors
                for (let i = 0; i < 4; i++) {
                    const faceGeometry = new THREE.ConeGeometry(size * 0.9, size * 0.9, 3);
                    const faceMaterial = new THREE.MeshPhongMaterial({
                        color: colors[i],
                        transparent: true,
                        opacity: 0.95,
                        shininess: 70
                    });
                    
                    const face = new THREE.Mesh(faceGeometry, faceMaterial);
                    
                    // Position each face
                    switch(i) {
                        case 0: // Front
                            face.rotation.z = Math.PI / 6;
                            face.position.set(0, 0, size * 0.3);
                            break;
                        case 1: // Right
                            face.rotation.z = -Math.PI / 6;
                            face.position.set(size * 0.7, 0, size * 0.3);
                            break;
                        case 2: // Left
                            face.rotation.z = Math.PI / 2;
                            face.position.set(-size * 0.7, 0, size * 0.3);
                            break;
                        case 3: // Bottom
                            face.rotation.x = Math.PI;
                            face.position.set(0, -size * 0.5, 0);
                            break;
                    }
                    
                    pyramidGroup.add(face);
                }
                
                // Add wireframe edges for better visualization
                const wireframe = new THREE.WireframeGeometry(geometry);
                const line = new THREE.LineSegments(wireframe);
                line.material.color.set(0xffffff);
                line.material.opacity = 0.3;
                line.material.transparent = true;
                pyramid.add(line);
            }
            
            // Handle window resize
            function onWindowResize() {
                camera.aspect = window.innerWidth / window.innerHeight;
                camera.updateProjectionMatrix();
                renderer.setSize(window.innerWidth, window.innerHeight);
            }
            
            // Animation loop
            function animate() {
                requestAnimationFrame(animate);
                
                const delta = clock.getDelta();
                const elapsedTime = clock.getElapsedTime();
                
                // Rotate the pyraminx slowly
                if (pyramidGroup) {
                    pyramidGroup.rotation.y += 0.005;
                    pyramidGroup.rotation.x = Math.sin(elapsedTime * 0.2) * 0.1;
                }
                
                controls.update();
                renderer.render(scene, camera);
            }
            
            // Initialize the application
            init();
        </script>


    Final Results and Logic

    The triangle faces require specific 3D coordinate math. Qwen3 handles these complex geometric transformations quite well.

    You now have a functional 3D puzzle game. This method shows the power of local AI models.

    Consolidated Demo

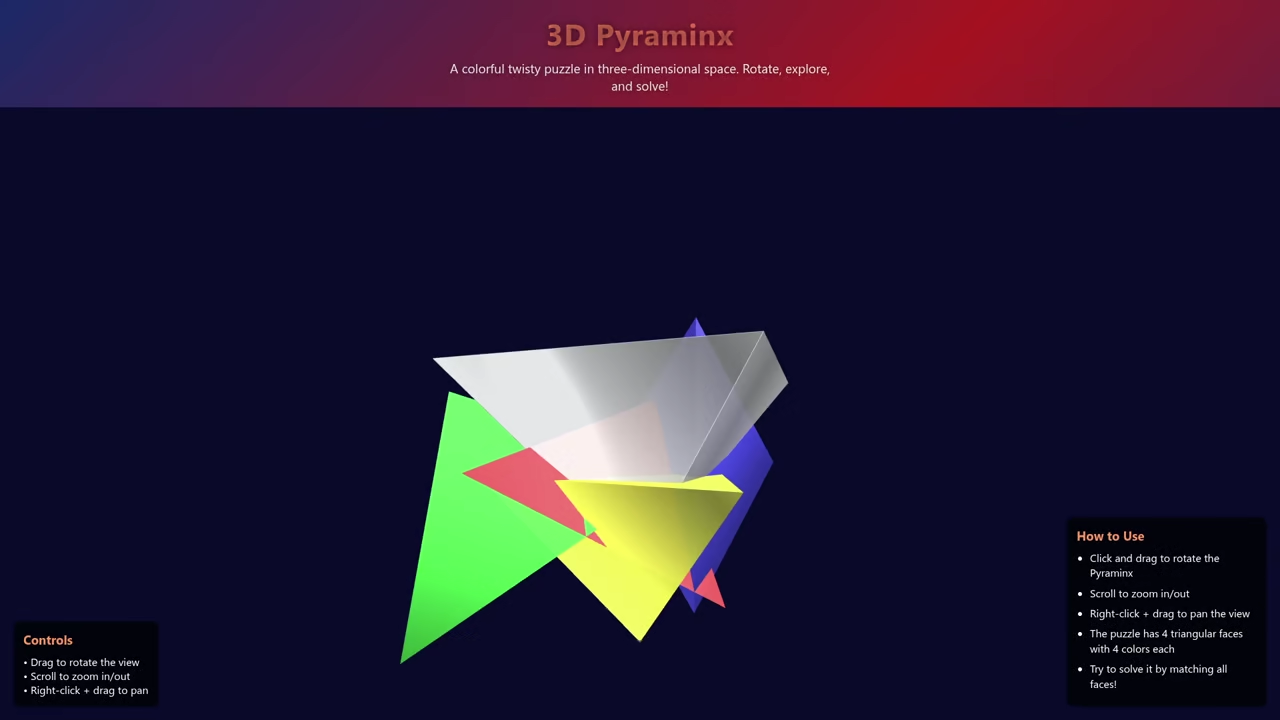
    HTML5 Ai-Generated Pyraminx Cube

    Screenshot

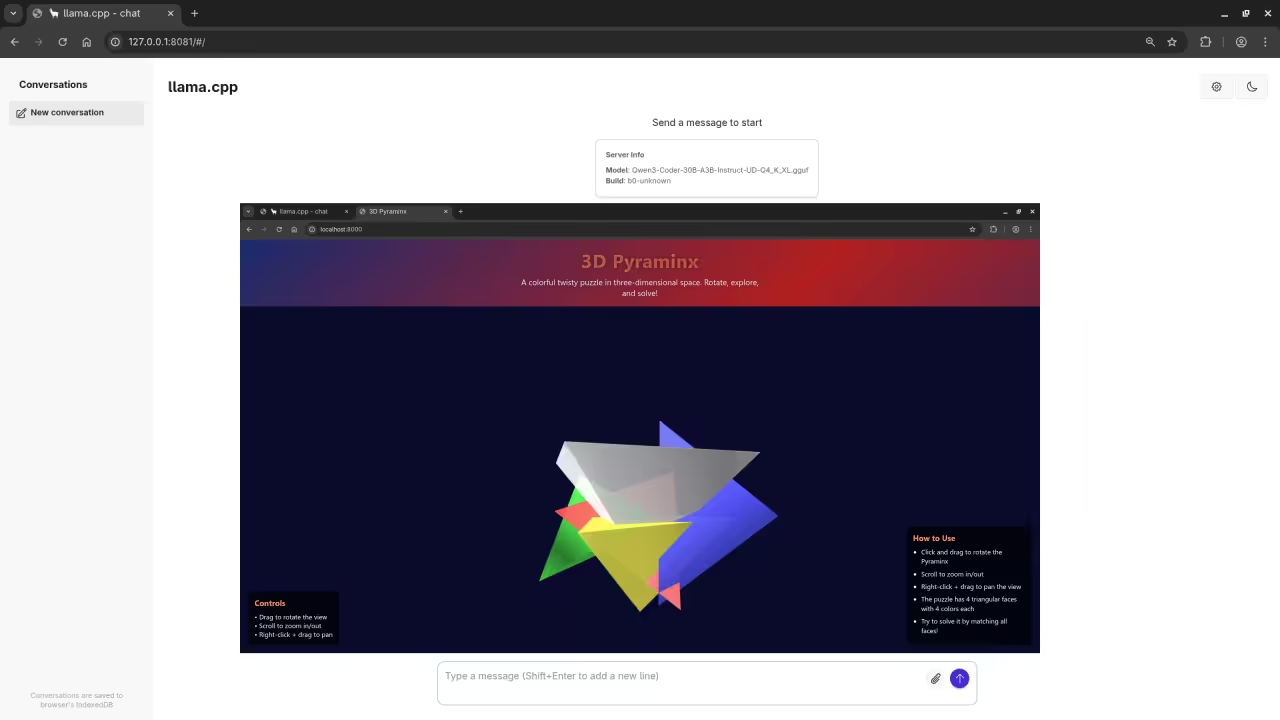
    AI 3D Pyraminx
    Web Browser Showing llama.cpp And Generated Pyraminx Cube

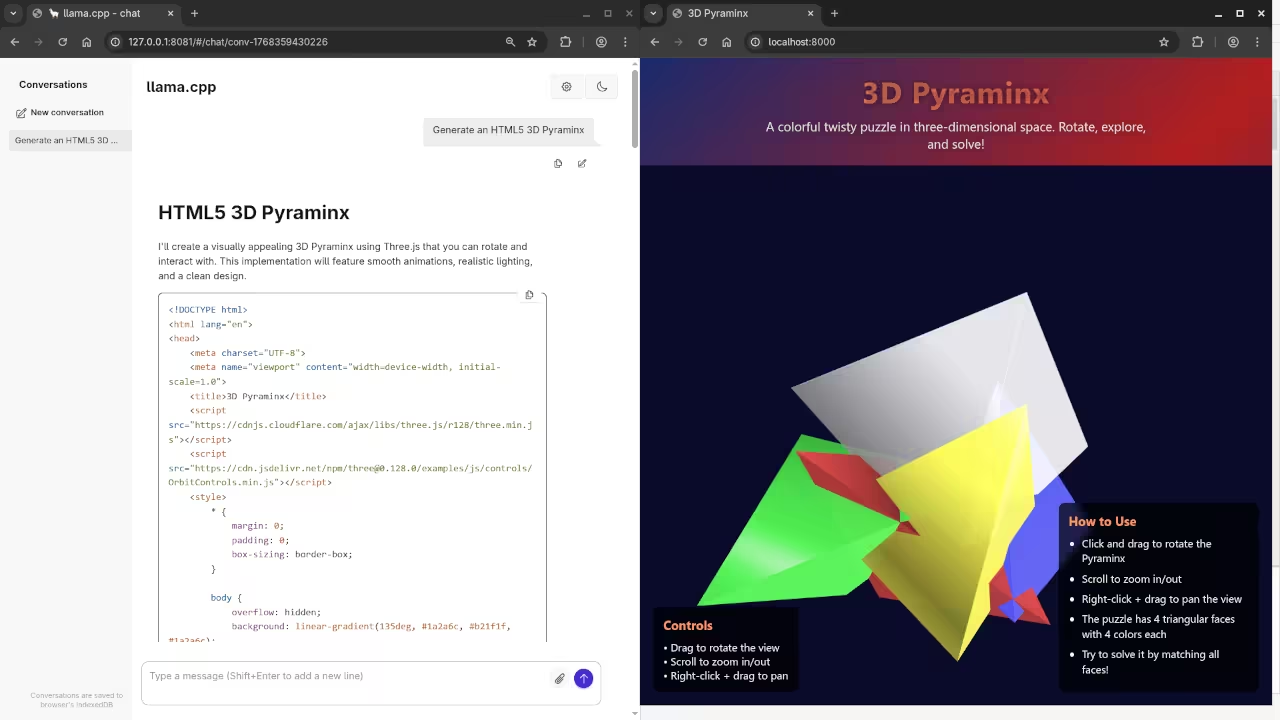
    AI HTML5 Code
    Web Browser Showing AI Code And Generated Pyraminx Cube

    Live Screencast

    Screencast Of AI Generated Pyraminx Cube Code

    Take Your Skills Further

  • Generate Procedural Landscapes With Blender Python API For Website

    Generate Procedural Landscapes With Blender Python API For Website

    Procedural Landscapes with Python in Blender: Infinite World Generation Tutorial

    Creating vast digital worlds does not require manual sculpting. You can generate infinite procedural landscapes using Blender’s Python API. This method allows you to build unique terrains algorithmically.

    Procedural generation uses math to create complex geometry. This script will automate the creation of a terrain mesh. It then applies a noise-based displacement to create mountains.

    The Procedural Blender Script

    Open the Scripting tab in Blender. Create a new text file and paste this code. This script creates a high-resolution grid and manipulates its height.


    import bpy
    import bmesh
    import random
    import math
    
    # Clear existing objects in the scene
    bpy.ops.object.select_all(action='SELECT')
    bpy.ops.object.delete()
    
    # Create a high-resolution grid for the landscape
    size = 10
    subdiv = 100
    bpy.ops.mesh.primitive_grid_add(size=size, x_subdivisions=subdiv, y_subdivisions=subdiv)
    obj = bpy.context.active_object
    
    # Access mesh data to manipulate vertices
    mesh = obj.data
    bm = bmesh.new()
    bm.from_mesh(mesh)
    
    # Apply simple procedural noise for mountains
    for vert in bm.verts:
        # Use math functions to create organic waves
        noise = math.sin(vert.co.x * 1.5) * math.cos(vert.co.y * 1.5)
        vert.co.z = (noise * 2.0) + (random.uniform(0, 0.3))
    
    # Update mesh and cleanup
    bm.to_mesh(mesh)
    bm.free()
    mesh.update()
    
    # Automatic Export to glTF for Web
    export_path = "C:/path/to/your/project/landscape.glb"
    bpy.ops.export_scene.gltf(filepath=export_path, export_format='GLB')


    Viewing Your World in HTML5

    Export your generated landscape as a glTF file. You can then view it in any browser using HTML5. Use the following code to load your landscape with Three.js.


    <script type="module">
            import * as THREE from 'https://unpkg.com/three@0.160.0/build/three.module.js';
            import { GLTFLoader } from 'https://unpkg.com/three@0.160.0/examples/jsm/loaders/GLTFLoader.js';
    
            const scene = new THREE.Scene();
            const camera = new THREE.PerspectiveCamera(75, window.innerWidth / window.innerHeight, 0.1, 1000);
            const renderer = new THREE.WebGLRenderer({ antialias: true });
            
            renderer.setSize(window.innerWidth, window.innerHeight);
            document.body.appendChild(renderer.domElement);
    
            const loader = new GLTFLoader();
            loader.load('landscape.glb', (gltf) => {
                scene.add(gltf.scene);
            });
    
            const light = new THREE.DirectionalLight(0xffffff, 2);
            light.position.set(2, 5, 5);
            scene.add(light);
            scene.add(new THREE.AmbientLight(0x404040));
    
            camera.position.set(0, 5, 10);
            camera.lookAt(0, 0, 0);
    
            function animate() {
                requestAnimationFrame(animate);
                renderer.render(scene, camera);
            }
            animate();
        </script>


    Using Python scripts makes world-building fast. You can tweak parameters to generate entirely new terrains. This workflow is perfect for developers building 3D web games.

    📸 Screenshots & Screencast

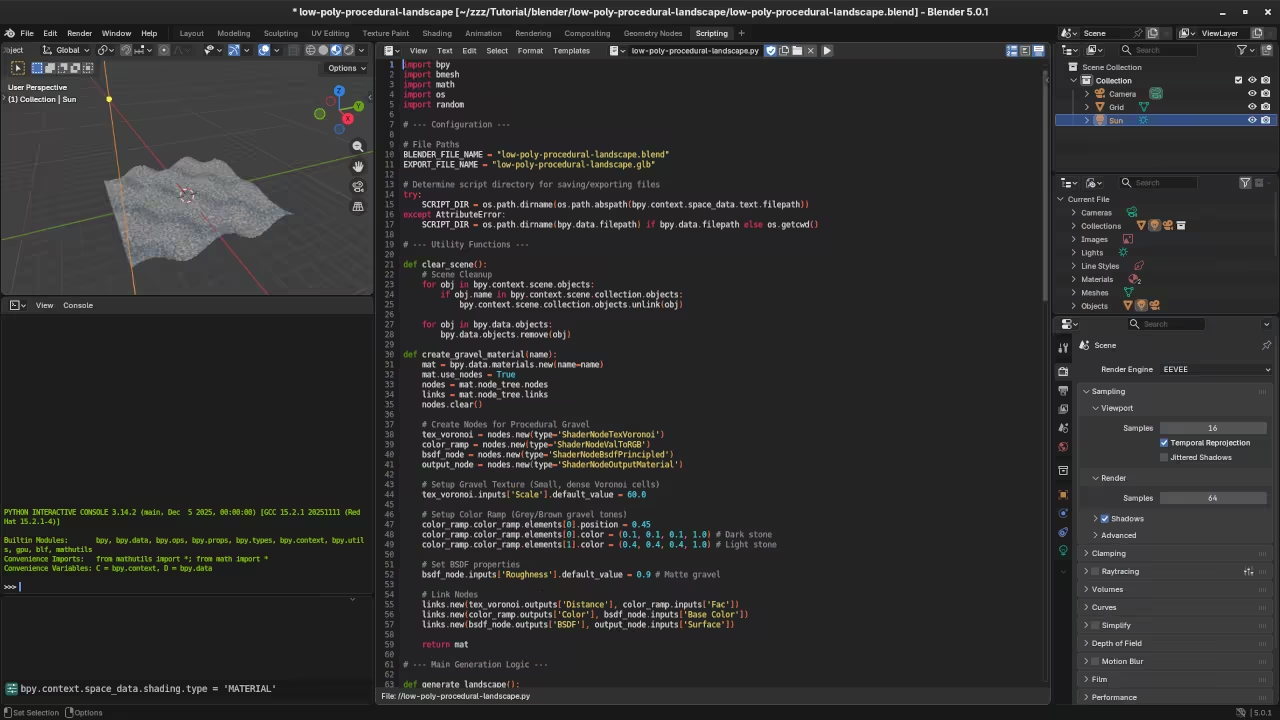
    Low poly Procedural Landscape Python code
    Blender Scripting Workspace Displaying Low Poly Procedural Landscape Python Code

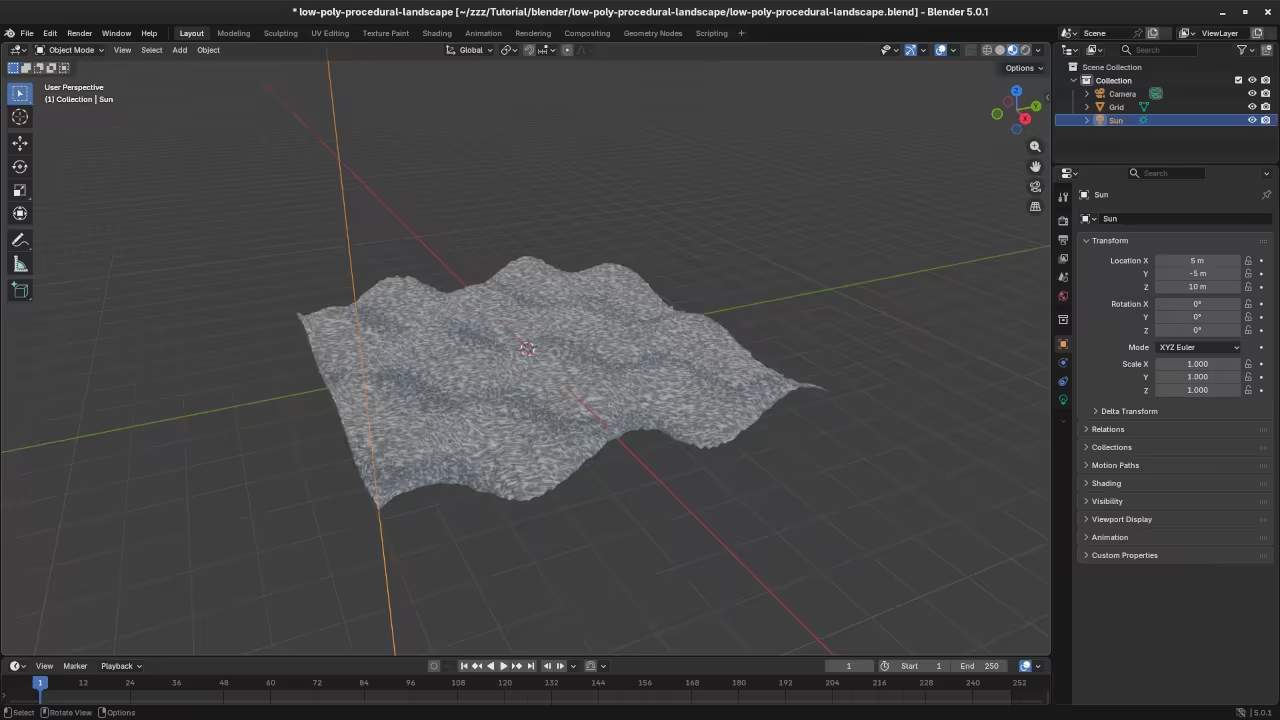
    Low poly Procedural Landscape in Blender
    Blender Layout Workspace Displaying Low Poly Procedural Landscape

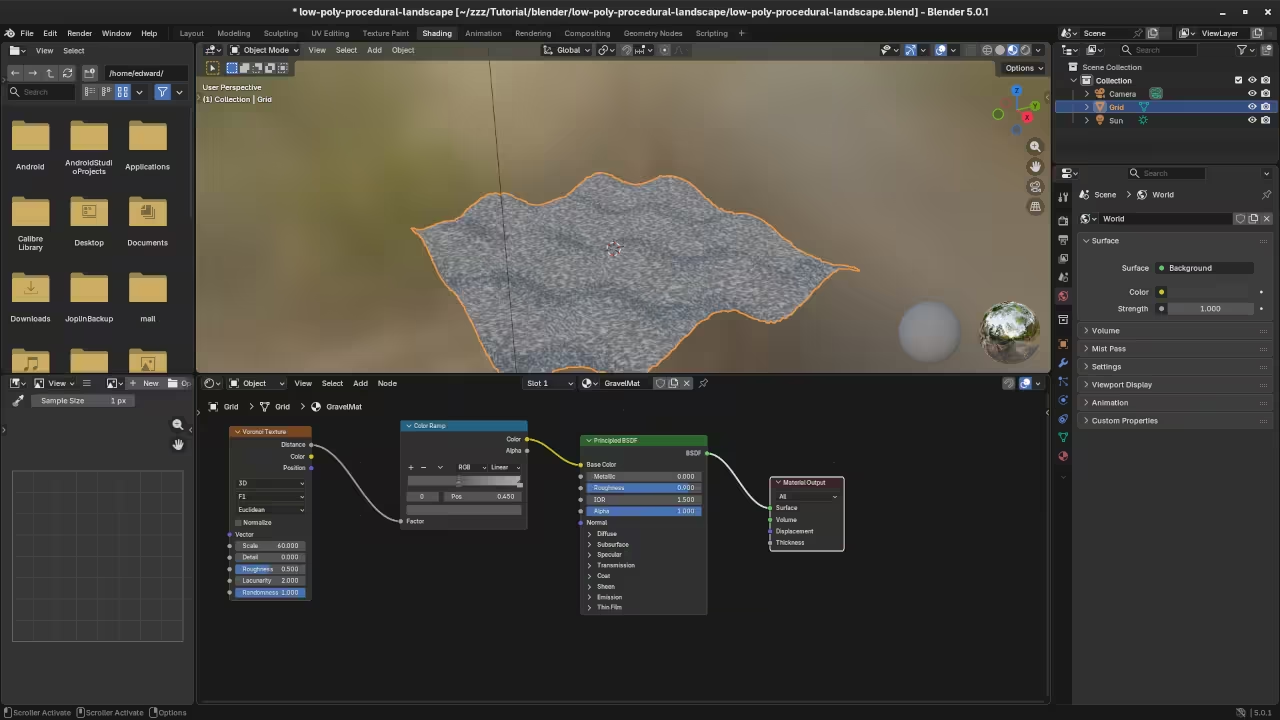
    Low poly Procedural Landscape in Blender Shading
    Blender Shading Workspace Displaying Low Poly Procedural Landscape

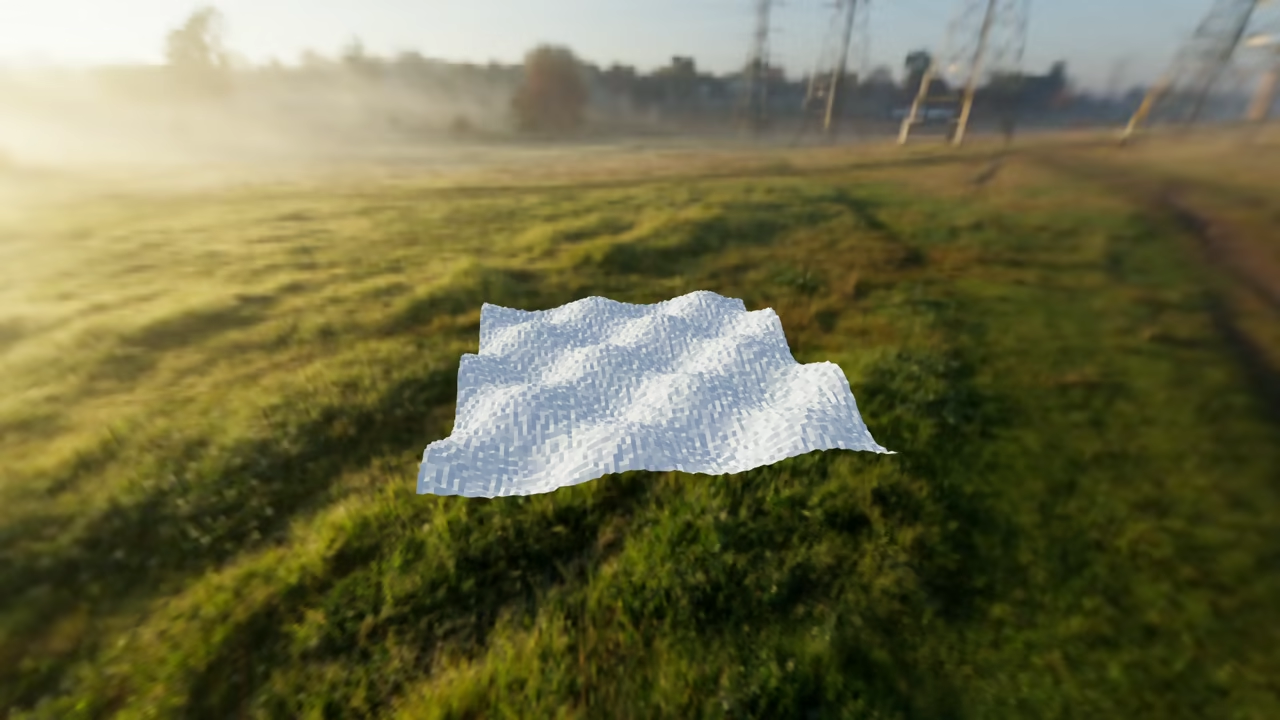
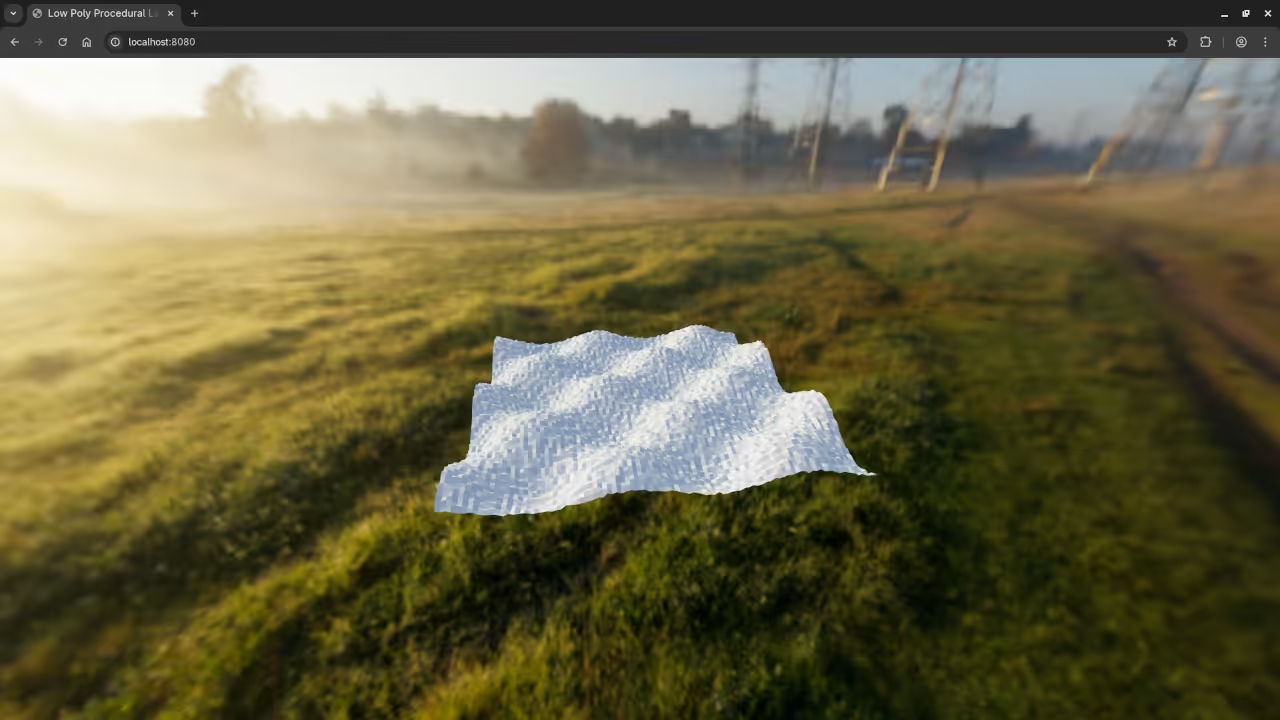
    Low poly Procedural Landscape in Web browser
    Web Browser Displaying Rendered Low Poly Procedural Landscape

    Screencast For Blender Python API Low Poly Procedural Landscape

    Take Your Skills Further