Blog

  • Build Rotating Playing Cards with HTML5 and CSS3

    Build Rotating Playing Cards with HTML5 and CSS3

    Looking for a fun and beginner-friendly way to practice HTML5 and CSS3? In this post, we’ll build a set of rotating playing cards using just HTML and CSS — no JavaScript or libraries required!

    You'll learn how to:

    • Use HTML entities for suit symbols (♥ ♦ ♣ ♠)
    • Style cards to look like a real deck
    • Apply 3D transforms to make them flip on hover
    • Create a simple stacked house-of-cards layout

    Perfect for beginners who want to explore 3D effects and CSS transitions.


        * {
          box-sizing: border-box;
          margin: 0;
          padding: 0;
        }
    
        body {
          background: #0b0b0b;
          height: 100vh;
          display: flex;
          align-items: center;
          justify-content: center;
          perspective: 1200px;
          font-family: 'Georgia', serif;
        }
    
        .house {
          display: flex;
          flex-direction: column;
          align-items: center;
          gap: 30px;
          transform-style: preserve-3d;
          transform: rotateX(10deg) rotateY(10deg);
        }
    
        .row {
          display: flex;
          gap: 20px;
          transform-style: preserve-3d;
        }
    
        .card {
          width: 120px;
          height: 180px;
          perspective: 1000px;
        }
    
        .card-inner {
          position: relative;
          width: 100%;
          height: 100%;
          transform-style: preserve-3d;
          transition: transform 0.8s;
        }
    
        .card:hover .card-inner {
          transform: rotateY(180deg);
        }
    
        .card-face {
          position: absolute;
          width: 100%;
          height: 100%;
          backface-visibility: hidden;
          border-radius: 10px;
          border: 2px solid #000;
          background: white;
          display: flex;
          flex-direction: column;
          justify-content: space-between;
          padding: 10px;
          box-shadow: 0 5px 15px rgba(0,0,0,0.4);
        }
    
        .card-back {
          background: repeating-linear-gradient(45deg, #333 0, #333 5px, #555 5px, #555 10px);
          color: white;
          transform: rotateY(180deg);
          justify-content: center;
          align-items: center;
          font-size: 24px;
        }
    
        .corner {
          font-size: 18px;
          line-height: 1;
        }
    
        .corner.top {
          align-self: flex-start;
        }
    
        .corner.bottom {
          align-self: flex-end;
          transform: rotate(180deg);
        }
    
        .suit {
          font-size: 36px;
          text-align: center;
          flex-grow: 1;
          display: flex;
          align-items: center;
          justify-content: center;
        }
    
        /* Suit Colors */
        .red {
          color: #d40000;
        }
    
        .black {
          color: #000;
        }


      <div class="house">
        <div class="row">
          <div class="card">
            <div class="card-inner">
              <div class="card-face">
                <div class="corner top red">A<br>♥</div>
                <div class="suit red">♥</div>
                <div class="corner bottom red">A<br>♥</div>
              </div>
              <div class="card-face card-back">CARD</div>
            </div>
          </div>
          <div class="card">
            <div class="card-inner">
              <div class="card-face">
                <div class="corner top black">K<br>♣</div>
                <div class="suit black">♣</div>
                <div class="corner bottom black">K<br>♣</div>
              </div>
              <div class="card-face card-back">CARD</div>
            </div>
          </div>
          <div class="card">
            <div class="card-inner">
              <div class="card-face">
                <div class="corner top red">Q<br>♦</div>
                <div class="suit red">♦</div>
                <div class="corner bottom red">Q<br>♦</div>
              </div>
              <div class="card-face card-back">CARD</div>
            </div>
          </div>
        </div>
    
        <div class="row">
          <div class="card">
            <div class="card-inner">
              <div class="card-face">
                <div class="corner top black">J<br>♠</div>
                <div class="suit black">♠</div>
                <div class="corner bottom black">J<br>♠</div>
              </div>
              <div class="card-face card-back">CARD</div>
            </div>
          </div>
          <div class="card">
            <div class="card-inner">
              <div class="card-face">
                <div class="corner top red">10<br>♥</div>
                <div class="suit red">♥</div>
                <div class="corner bottom red">10<br>♥</div>
              </div>
              <div class="card-face card-back">CARD</div>
            </div>
          </div>
        </div>
    
        <div class="row">
          <div class="card">
            <div class="card-inner">
              <div class="card-face">
                <div class="corner top black">9<br>♠</div>
                <div class="suit black">♠</div>
                <div class="corner bottom black">9<br>♠</div>
              </div>
              <div class="card-face card-back">CARD</div>
            </div>
          </div>
        </div>
      </div>


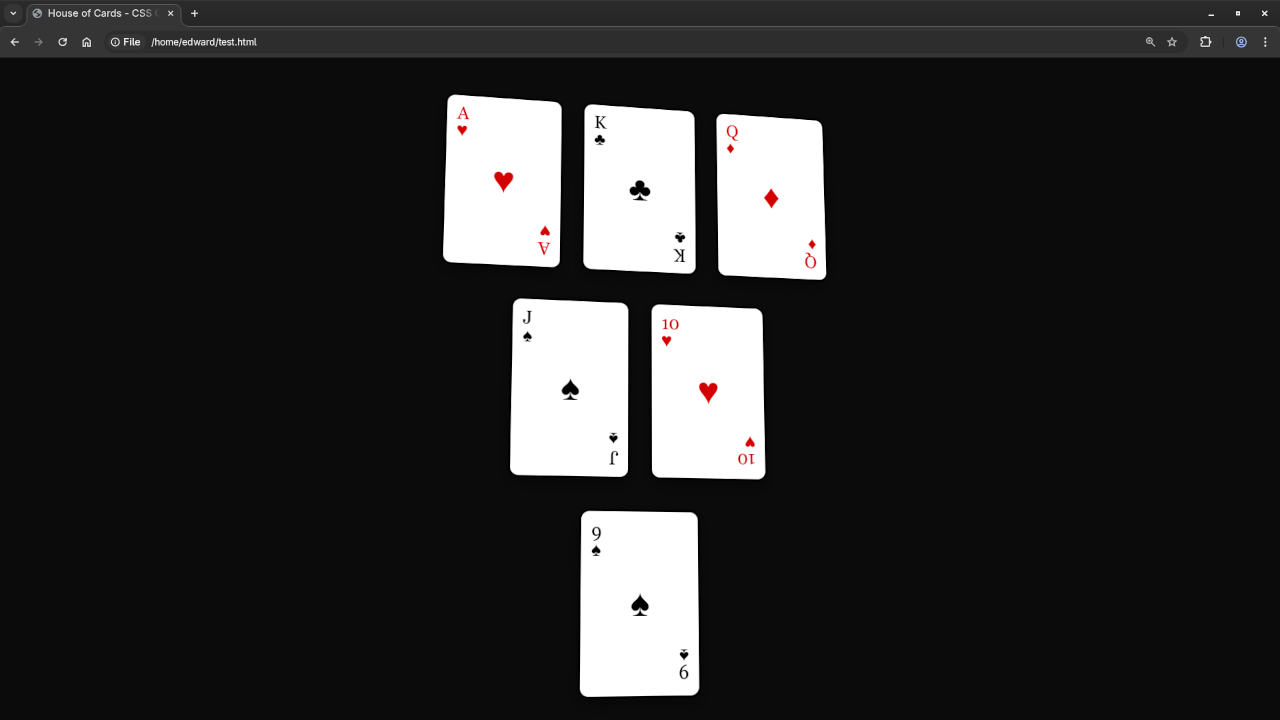
    🃏 What You'll Build

    HTML5 Pure CSS Playing Cards Demo

    Screenshot

    Pure CSS Text Animations
    Web Browser Showing Pure CSS Text Animations

    🎥 Screencast

    Screencast Of Pure CSS Text Animations

    ⚙️ How It Works

    The core concept relies on HTML structure for each card, and CSS 3D transforms to rotate the card on hover. Each card has:

    • A front face with suit and value
    • A back face with a patterned background
    • Smooth flipping animation using transform: rotateY(180deg);

    The layout uses CSS Flexbox to arrange cards in rows like a stacked house of cards.

    📚 Want to Learn More JavaScript?

    This project doesn’t use JavaScript, but if you’re ready to take your coding to the next level, check out my book:

    📖 Learning JavaScript – A beginner-friendly guide to mastering JavaScript fundamentals.

    Or enroll in my full video course:

    🎓 Learning JavaScript (Online Course) – A hands-on course designed to build your skills from the ground up.

    👩‍💻 Need Help? Book a 1-on-1 Session

    I'm also available for one-on-one programming tutorials, including:

    • JavaScript
    • HTML/CSS
    • Front-End Projects

    📅 Schedule a session here

    ✅ Conclusion

    This simple rotating playing card project is a great way to understand how HTML5 and CSS3 can create interactive, animated UIs without JavaScript.

    Ready to dive deeper? Try converting these cards into a full card game layout using JS in your next project!

    Let me know in the comments if you tried this out, and don’t forget to subscribe for more tutorials!
  • Unboxing Guide: Thermalright TL-S12 Case Fan

    Unboxing Guide: Thermalright TL-S12 Case Fan

    Is the Thermalright TL-S12 Worth Buying in 2025 for a PC Build with AMD Instinct MI60 for Blender and AI?

    When building a high-performance PC for tasks like Blender rendering or AI model training, selecting the right thermal solution is crucial. With GPUs like the AMD Instinct MI60 powering AI workloads and complex Blender projects, ensuring your components stay cool is a key part of system stability and performance.

    But does the Thermalright TL-S12 cooler hold up in 2025? Is it worth investing in for your high-end PC build? In this post, we’ll take a look at whether this cooler is still a solid choice for a system using the AMD Instinct MI60, and whether it can keep up with demanding tasks like Blender rendering and AI model training.

    What is the Thermalright TL-S12?

    The Thermalright TL-S12 is a 120mm PWM fan cooler designed for efficient airflow and cooling at an affordable price point. Here are some basic specs for the cooler:

    Specification Details
    Fan Size 120mm
    Fan Speed 500 – 1800 RPM (PWM Control)
    Airflow 58.6 CFM
    Static Pressure 2.18 mm H2O
    Noise Level 15 – 26 dBA
    Connector 4-pin PWM
    Bearing Type Hydraulic Bearing (HYB)
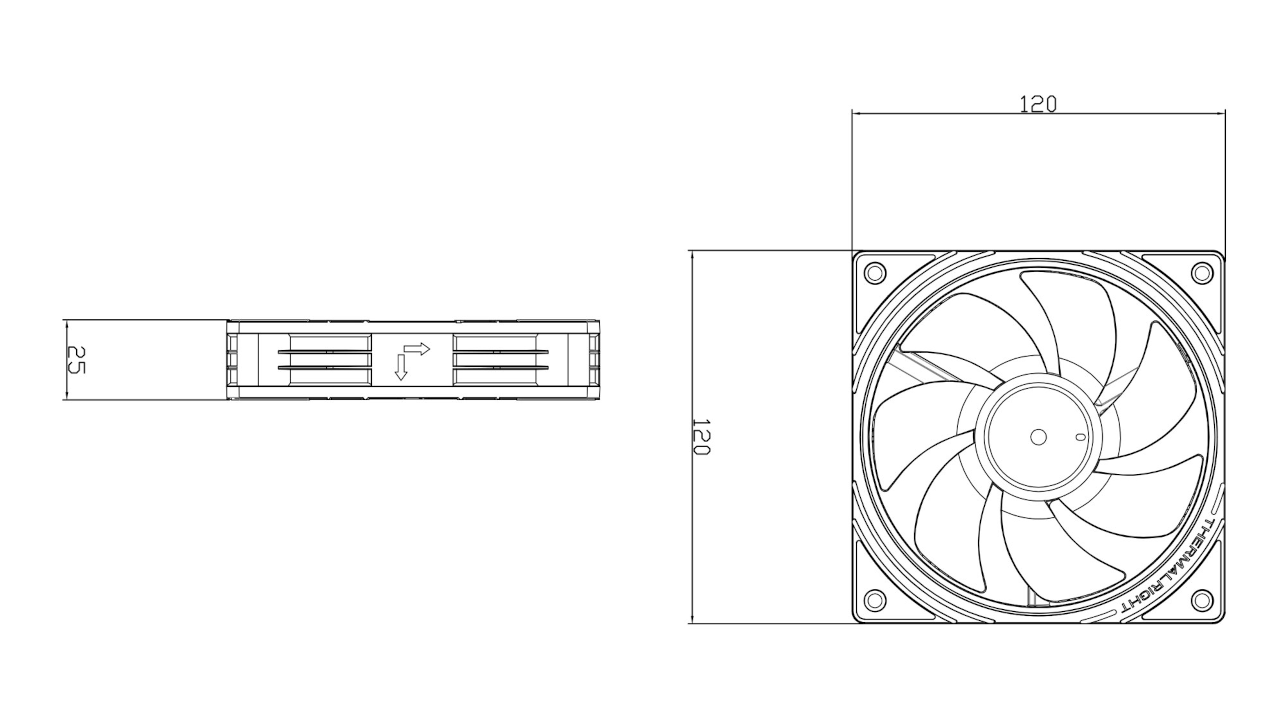
    Dimensions 120 x 120 x 25 mm
    Compatibility Fits most standard 120mm fan mounts
    Application CPU cooling, general-purpose builds

    AMD Instinct MI60 Specifications

    Specification Details
    GPU Architecture AMD Vega 20
    Stream Processors 4096
    Base Clock Speed 1.4 GHz
    Boost Clock Speed 1.8 GHz
    Memory 32 GB HBM2
    Memory Bandwidth 900 GB/s
    TDP 300W
    Peak Power Draw 375W
    PCIe Interface PCIe 4.0

    Does the TL-S12 Keep Up in 2025?

    In 2025, cooling solutions have evolved to support modern hardware, especially GPUs designed for AI and Blender. While the TL-S12 is efficient for most builds, it may struggle to keep up with the AMD Instinct MI60 due to its high TDP. This means that although the TL-S12 will likely keep your CPU at safe temperatures, it might not be enough to cool a high-end GPU under full load.

    Key Stats to Consider:

    • TL-S12 Airflow: 58.6 CFM
    • AMD Instinct MI60 TDP: 300W (and can spike to 375W)
    • TL-S12 Noise Level: 15-26 dBA (not designed to deal with extreme power draw)

    For a GPU like the MI60, liquid cooling or a high-end air cooler designed for high-performance GPUs would be better suited for keeping your system stable during long rendering or AI model training sessions.

    Screenshots And Screencast

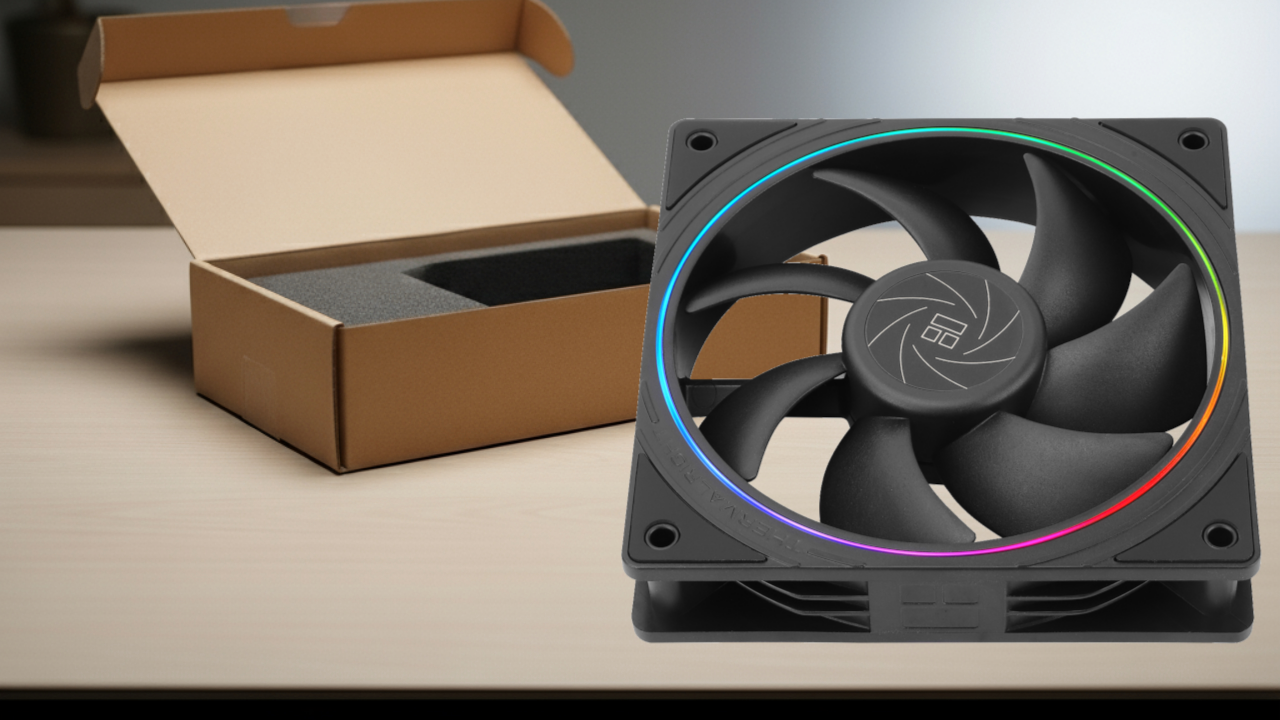
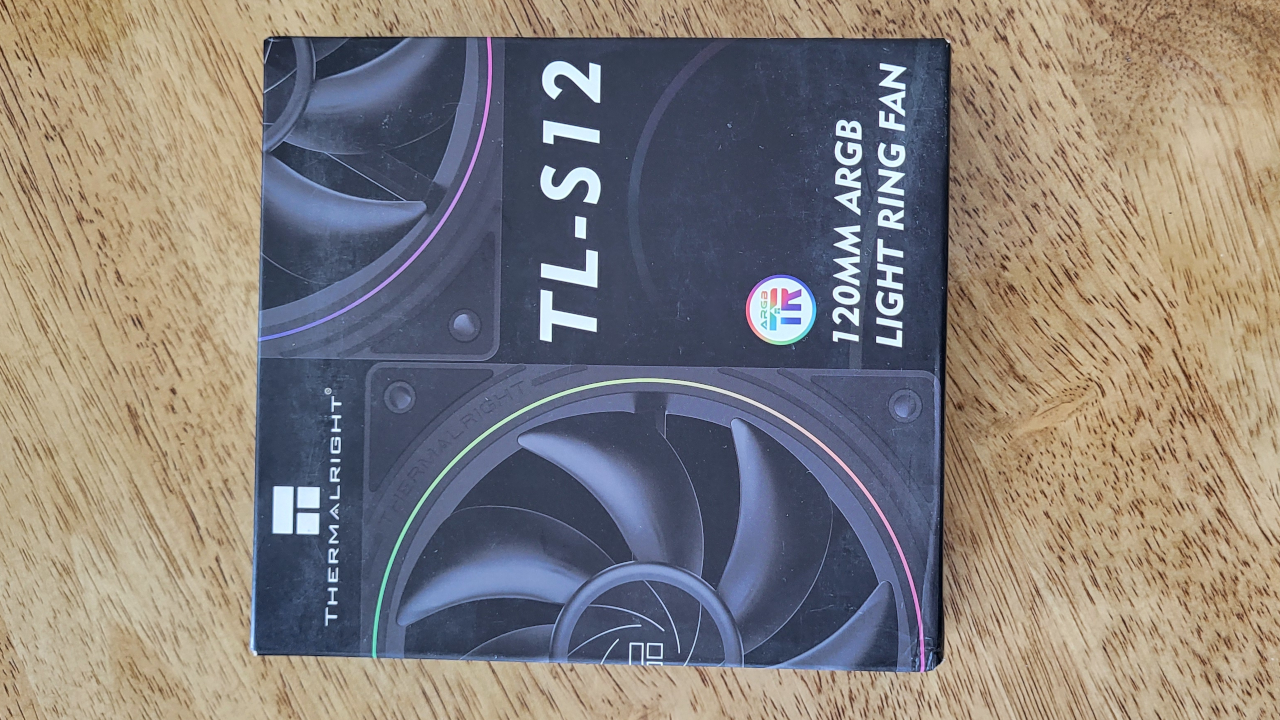
    Thermalright TL-S12 Case Fan
    Thermalright TL-S12 Case Cooler Fan

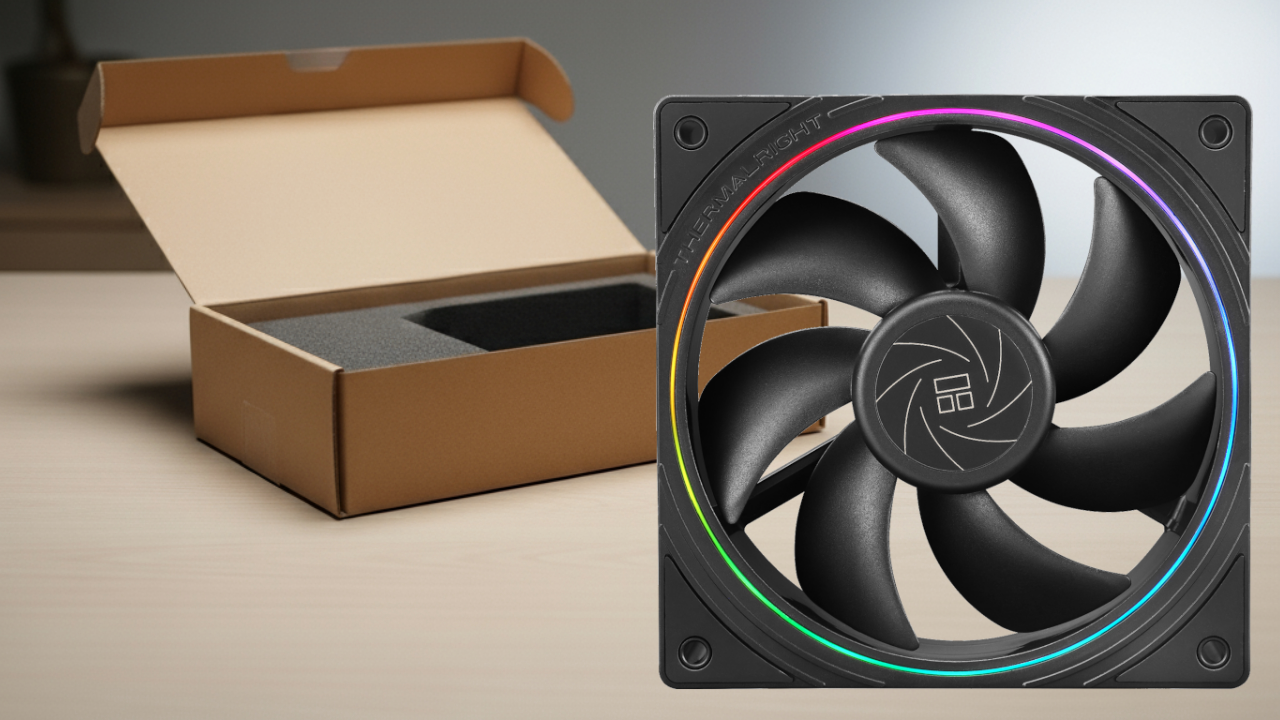
    Fan Closeup
    Thermalright TL-S12 Case Fan Closeup

    Fan Dimensions
    Thermalright TL-S12 Case Fan Dimensions

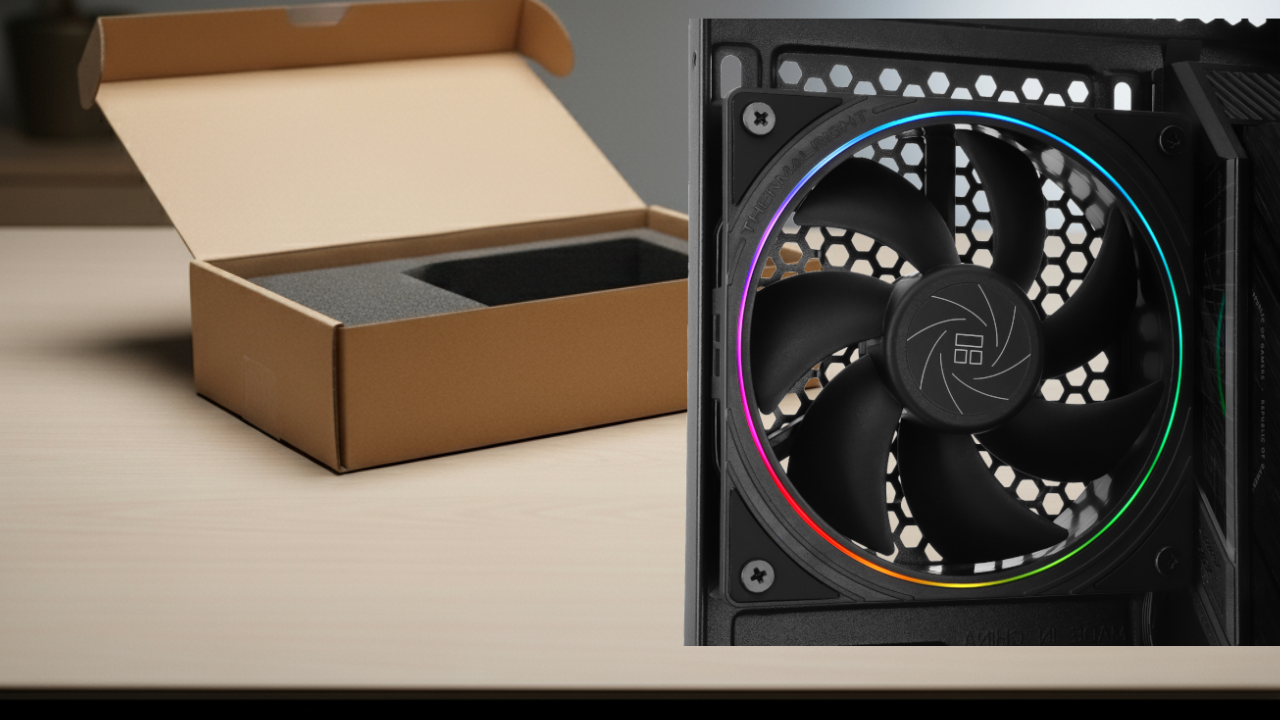
    Fan Installed
    Thermalright TL-S12 Installed On Case

    Screencast Showing setup on Fedora 42, system detection, Fan stats

    Final Thoughts

    In summary, the Thermalright TL-S12 is a great cooler for typical PC builds, providing solid performance in everyday tasks. However, when paired with high-end components like the AMD Instinct MI60, especially for tasks that demand sustained GPU performance like Blender rendering or AI model training, you might encounter thermal throttling or temperature spikes. If you’re pushing the system to its limits, it’s likely worth considering a higher-end cooling solution like liquid cooling or a more powerful air cooler.

    Resources

    To help you with your Python programming and Blender Python API learning, I have some resources that might be helpful for both beginners and advanced users:

    Also, if you’re looking to level up your Python skills, check out my Learning Python course.

    If you need personalized help, I also offer one-on-one online Python tutorials tailored to your needs, including topics like Blender Python scripting or AI installation, training, or migration. You can learn more and reach out via my contact page.

    Conclusion

    Choosing the right cooler for your PC build is about balancing performance, cooling efficiency, and future-proofing. The Thermalright TL-S12 is a solid option for most builds, but depending on your specific needs, such as using the AMD Instinct MI60 for demanding workloads, you may want to explore other cooling solutions for optimal performance.

  • Generate Low-Poly Gothic Arches With Blender Python API For Website

    Generate Low-Poly Gothic Arches With Blender Python API For Website

    How to Generate Gothic Arches in Blender with Python and View Them on the Web

    If you’re new to both 3D modeling and coding, combining Blender’s Python API with web-based visualization might sound intimidating — but it’s totally achievable, even for beginners. In this tutorial, we’ll walk you through how to generate Gothic arches using a Python script in Blender, export the model, and display it directly in a web browser using the HTML element.

    This is a perfect project if you’re looking to learn Blender scripting or want a cool interactive way to share your 3D models online.

    ⚙ What You’ll Need

    • Blender (any recent version)
    • Python (comes bundled with Blender)
    • A code editor (VS Code, Sublime, etc.)
    • Basic HTML knowledge
    • A modern web browser (Chrome, Firefox, etc.)

    🧱 Step 1: Creating the Gothic Arch in Blender via Python

    1. Open Blender.
    2. Go to the Scripting tab.
    3. Paste the following beginner-friendly Python script:


    import bpy
    import math
    
    def create_gothic_arch(radius=1.0, height=2.0, segments=32):
        bpy.ops.object.select_all(action='DESELECT')
        bpy.ops.object.select_by_type(type='MESH')
        bpy.ops.object.delete()
    
        mesh = bpy.data.meshes.new(name='GothicArchMesh')
        obj = bpy.data.objects.new(name='GothicArch', object_data=mesh)
        bpy.context.collection.objects.link(obj)
        bpy.context.view_layer.objects.active = obj
        obj.select_set(True)
    
        verts = []
        edges = []
        faces = []
    
        for i in range(segments + 1):
            angle = math.pi * i / segments
            x = radius * math.cos(angle)
            y = 0
            z = height * math.sin(angle)
            verts.append((x, y, z))
    
        # Mirror arch to form full shape
        verts += [(-x, y, z) for x, y, z in reversed(verts[:-1])]
    
        # Add depth by extruding
        depth = 0.1
        verts = [(x, y - depth / 2, z) for (x, y, z) in verts] + [(x, y + depth / 2, z) for (x, y, z) in verts]
        total = len(verts) // 2
        for i in range(total - 1):
            faces.append([i, i + 1, total + i + 1, total + i])
    
        mesh.from_pydata(verts, edges, faces)
        mesh.update()
    
    create_gothic_arch()


    🚀 Step 2: Run the Script from Command Line

    To automate the process, you can run the script directly from the terminal without opening the Blender GUI:

    blender --background --python path/to/gothic_arch.py

    Replace path/to/gothic_arch.py with the actual file path where you saved your script.

    🌐 Step 3: Export and Display in Web Browser with model-viewer

    1. In Blender, export the model as .glb:
      • File > Export > glTF 2.0 (.glb/.gltf)
      • Choose .glb and save the file
    2. Create an index.html file with the following code:


    <!DOCTYPE html>
    <html lang="en">
    <head>
      <meta charset="UTF-8">
      <title>Gothic Arch</title>
      <script type="module" src="https://unpkg.com/@google/model-viewer/dist/model-viewer.min.js"></script>
    </head>
    <body>
      <model-viewer src="gothic_arch.glb" alt="Gothic Arch"
                    auto-rotate camera-controls ar>
      </model-viewer>
    </body>
    </html>


    Open the HTML file in a browser and interact with your 3D model!

    📸 Screenshots & Screencast

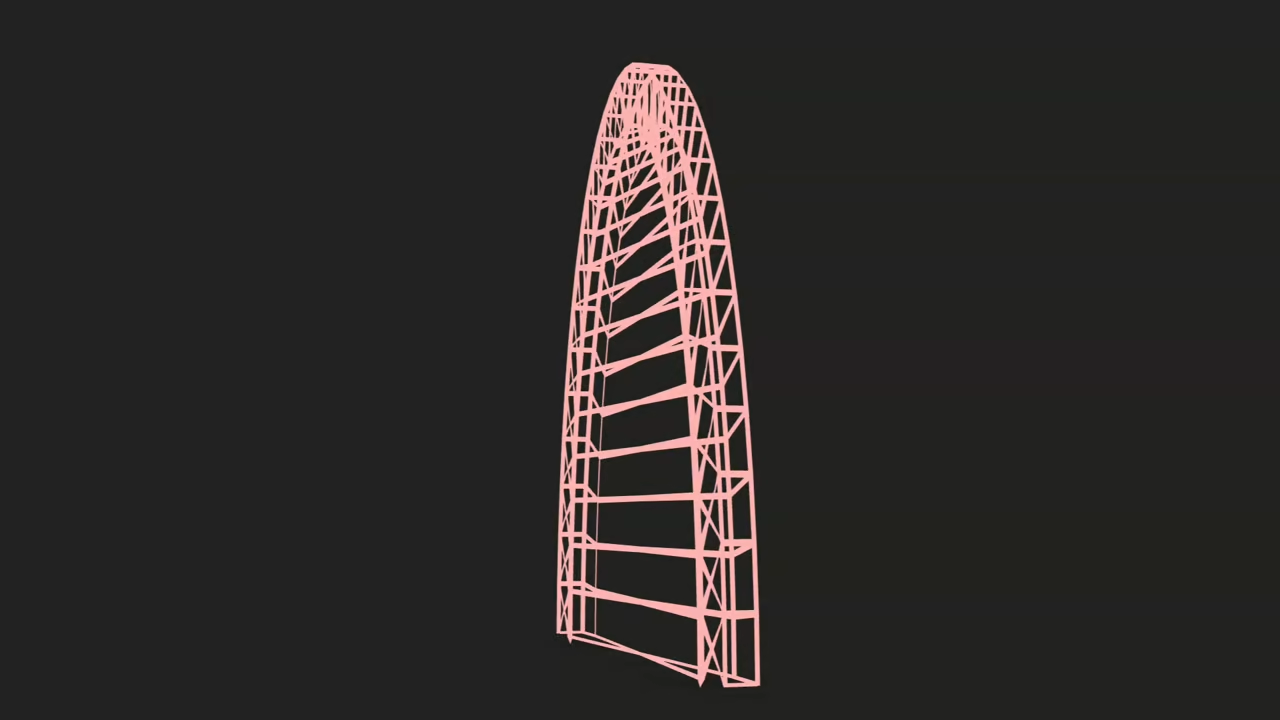
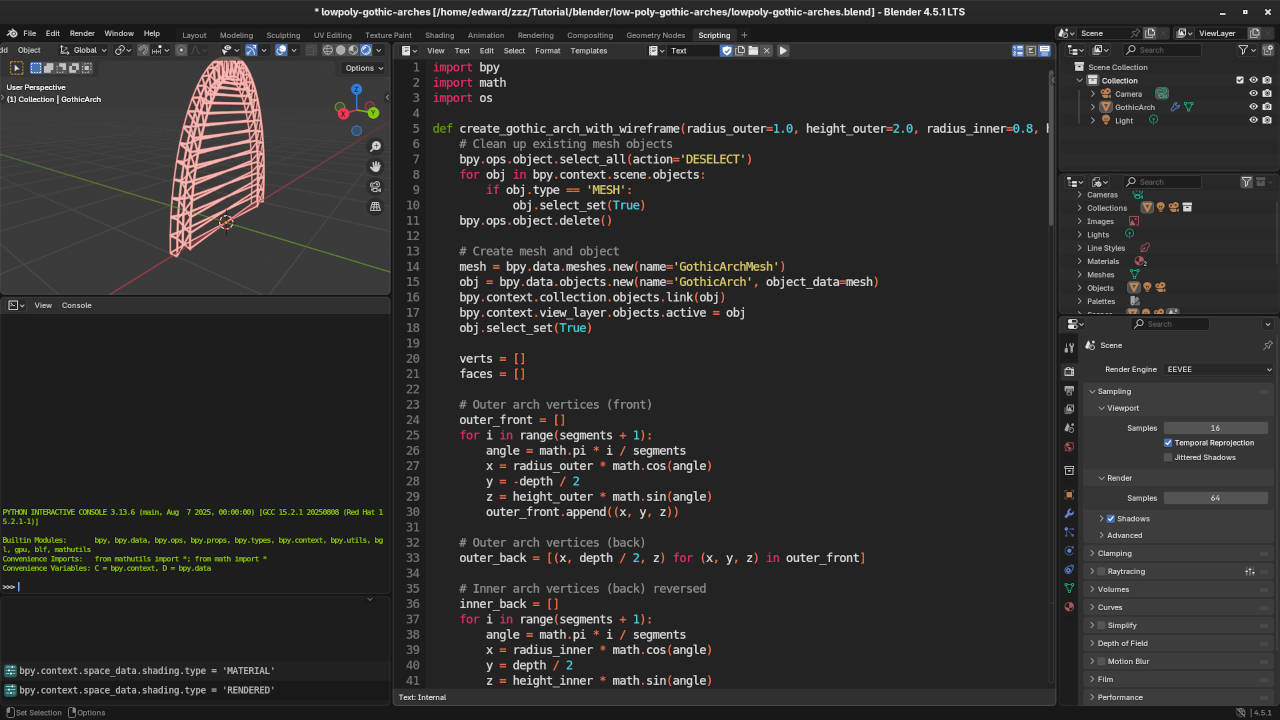
    Low poly gothic arches Python code
    Blender Scripting Workspace Displaying Low Poly Gothic Arches Python Code

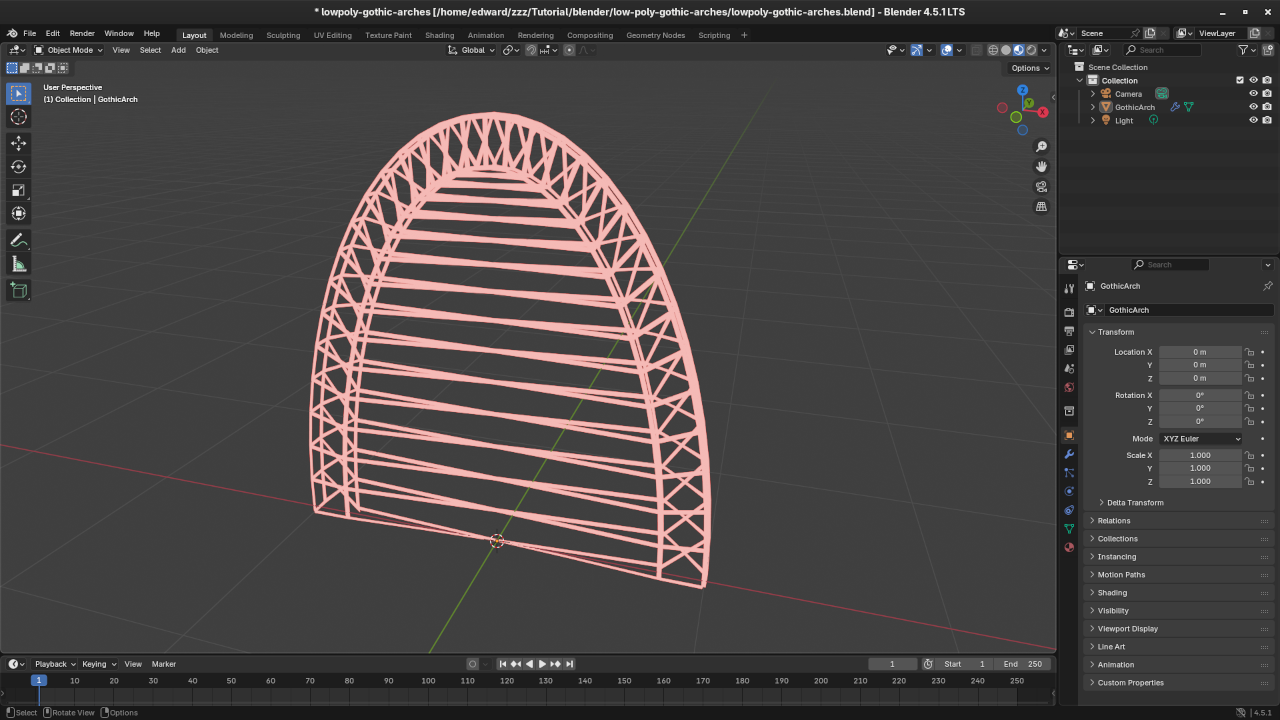
    Low poly gothic arches in Blender
    Blender Layout Workspace Displaying Low Poly Gothic Arches

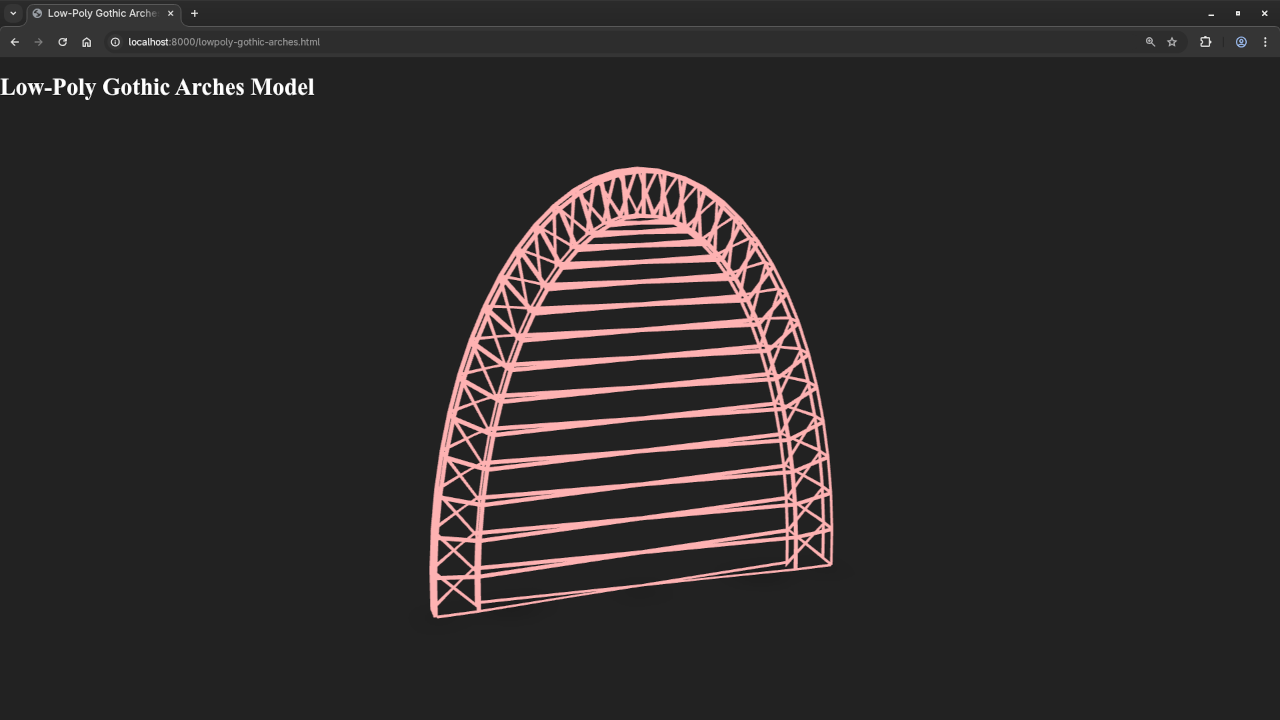
    Low poly gothic arches in Web browser
    Web Browser Displaying Rendered Low Poly Gothic Arches

    Screencast For Blender Python API Low Poly Gothic Arches

    📚 Further Learning

    If this sparked your interest, check out my books and courses:

    Books:

    Course:

    👨‍💻 Need Help?

    I also offer one-on-one online Python tutorials, including Blender scripting.

    Contact me for private tutoring

  • Git Merge Conflicts: What Are They and How to Resolve Them

    Git Merge Conflicts: What Are They and How to Resolve Them

    Git is an open-source version control system widely used by developers to collaborate and manage code. One common issue that beginners often face when working with Git is the merge conflict.

    In this post, we’ll break down:

    • What Git merge conflicts are
    • Why they happen
    • How to resolve them easily
    • Where to learn more, including live help, courses, and resources

    💥 What is a Git Merge Conflict?

    A merge conflict occurs when Git is unable to automatically combine changes made in different branches. This typically happens when two or more developers modify the same line in a file or when one developer deletes a file that another has modified.

    For example:

    • You and your teammate both edit index.html in separate branches.
    • When you try to merge, Git isn’t sure whose version to keep.

    🚧 Why Do Merge Conflicts Happen?

    Merge conflicts are normal in collaborative development. They arise in scenarios like:

    • Simultaneous edits to the same line in the same file
    • File deletion vs. file modification
    • Different changes to file structure or formatting

    Git will pause and ask you to manually resolve these differences before completing the merge.

    ✅ How to Resolve a Git Merge Conflict (Step-by-Step)

    1. Run a merge command
      git merge branch-name
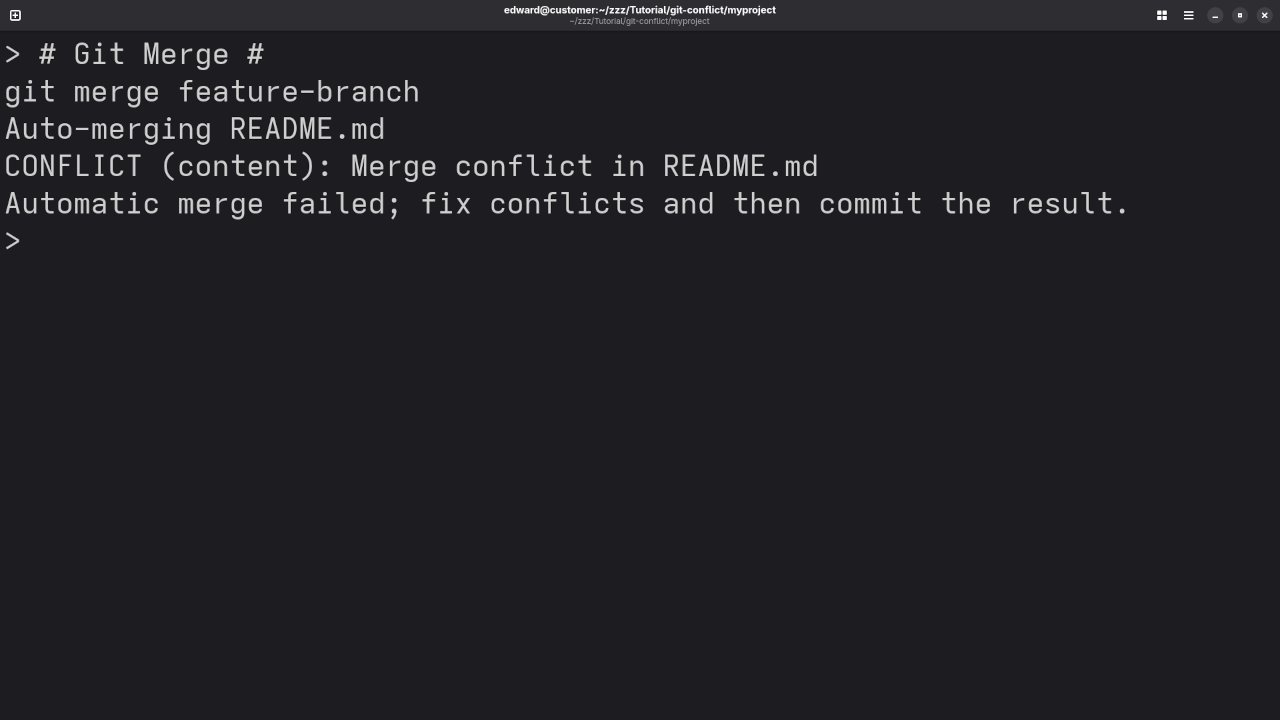
    2. Git detects conflict
      Git will stop the merge and mark conflicted files.
    3. Open conflicted files
      You’ll see markers like:

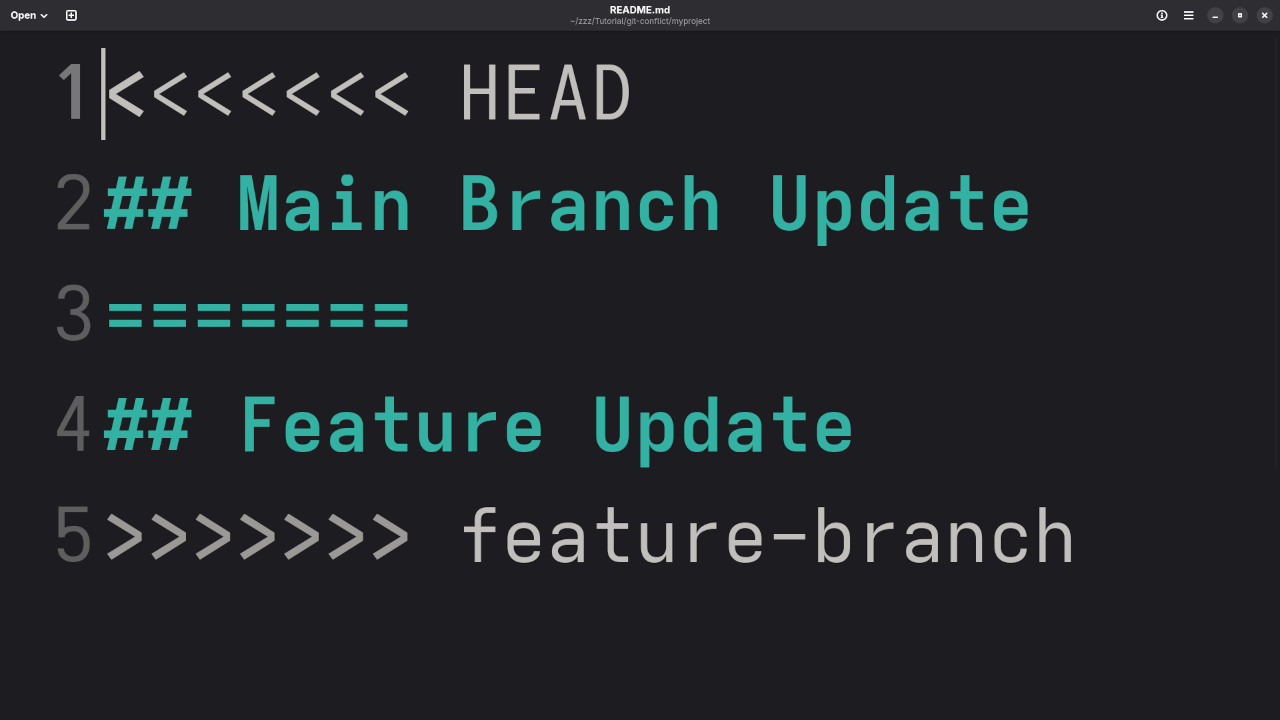
      <<<<<<< HEAD
      Your changes
      =======
      Incoming changes
      >>>>>>> branch-name
    4. Edit and resolve the conflict
      Choose the correct version or combine both changes.
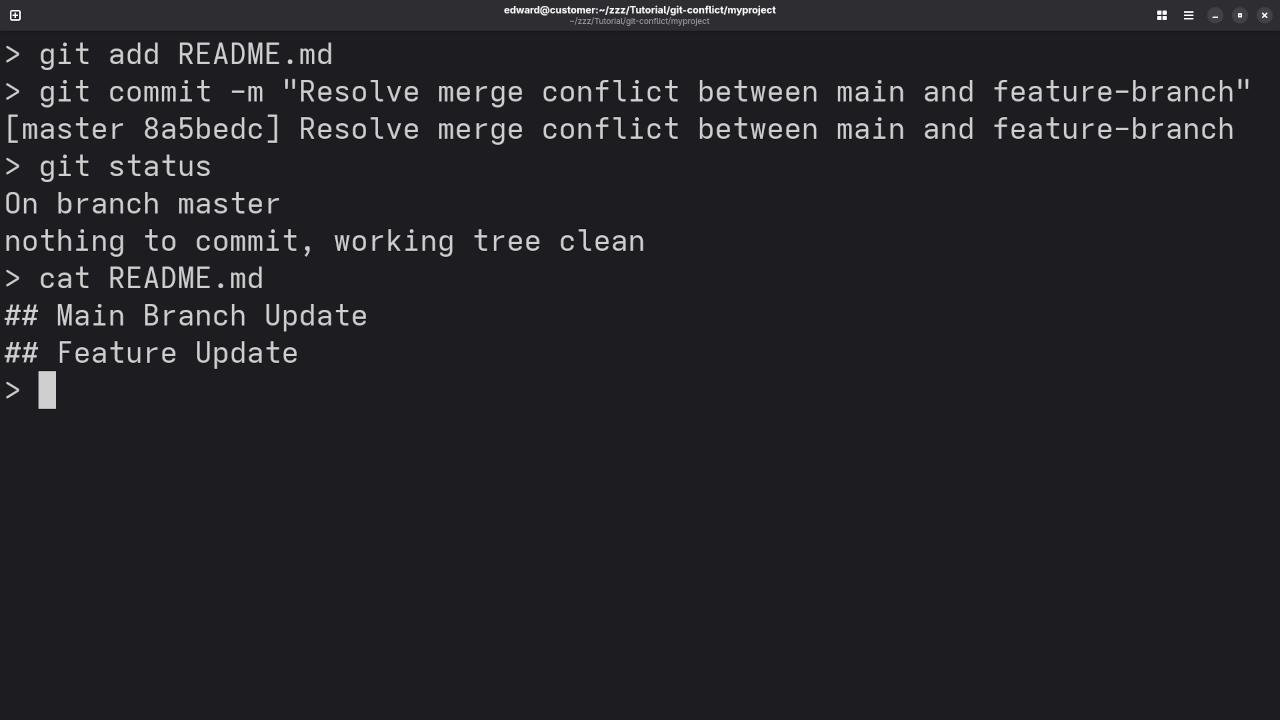
    5. Add the resolved file
      git add filename
    6. Commit the merge
      git commit

    That’s it! You’ve resolved the conflict manually.

    Screenshots & Screencast Tutorial

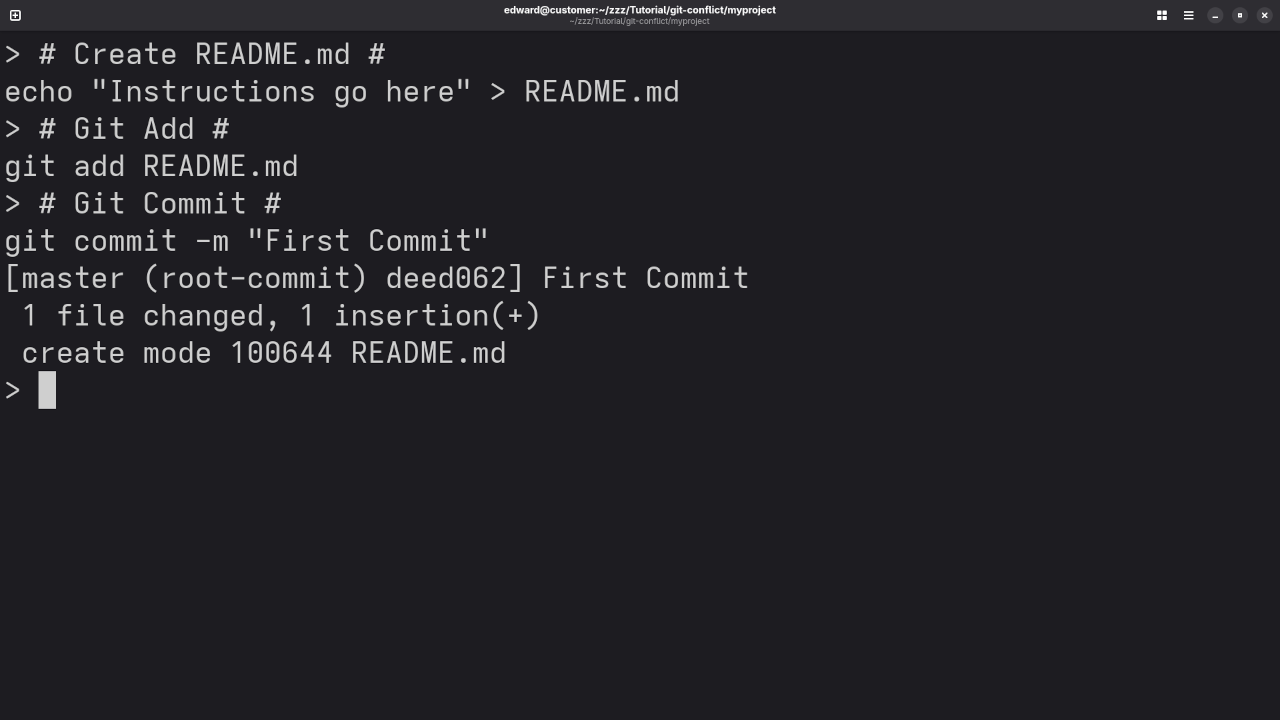
    Git Commit On Main Branch
    Command Line Git Commit On The Main Branch

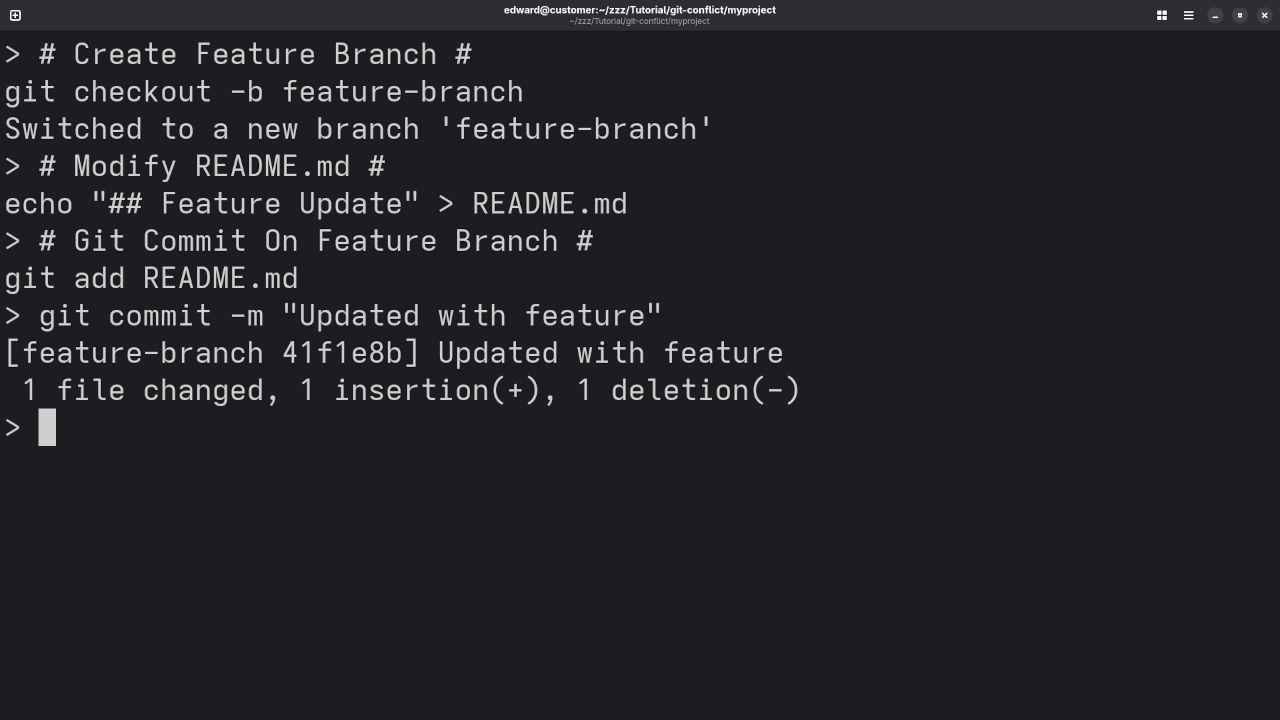
    Git Commit On Feature Branch
    Terminal Showing Git Commit On The Feature Branch

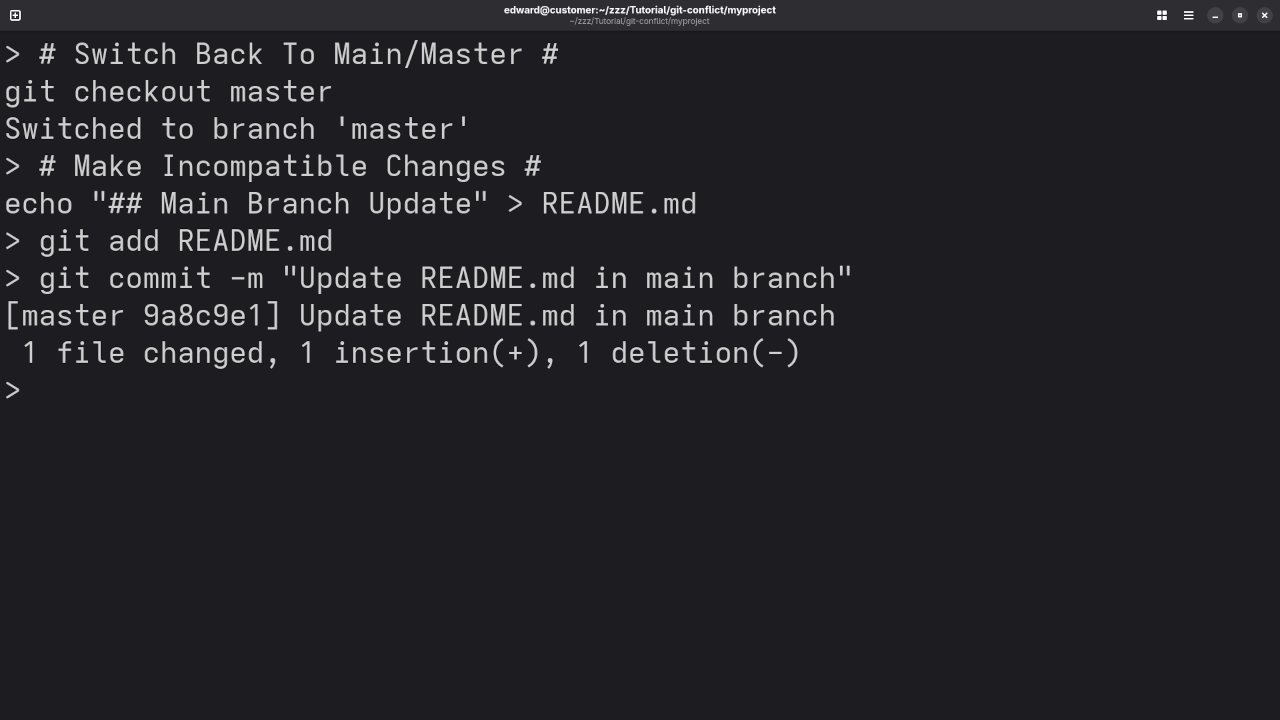
    Git Commit Updates On Main Branch
    Terminal Showing Git Commit Update Result On The Main Branch

    Git Merge Attempt
    Terminal Showing Git Merge Failed Attempt On The Main Branch

    Git Conflict Markers
    Gnome Text Editor Displaying Conflict Markers

    Git Manually Resolved Conflict
    Terminal Showing Manually Resolved Git Merge Conflict

    Screencast Of Git Merge Conflicts

    🎓 Learn More With My Programming Resources

    If you’d like to go deeper into Git, programming, or development best practices, here are some resources I offer:

    🔄 Final Thoughts

    Git merge conflicts can feel intimidating at first, but once you understand the cause and the simple steps to resolve them, they become just another part of your development workflow.

    Keep practicing, and don’t hesitate to reach out for help or guidance!

  • Gvim 9.1.1623 Advanced Editor Review

    Gvim 9.1.1623 Advanced Editor Review

    Getting Started with GVim on Fedora: A Beginner’s Guide to the Powerful Vim Editor

    Introduction to GVim: A Powerful Text Editor for Developers

    GVim is a graphical version of the famous Vim text editor, widely known for its efficiency and powerful features for developers. Whether you are new to Vim or have been using it in the terminal, GVim provides a user-friendly interface that makes it easier to navigate and utilize all the functionalities Vim has to offer. In this post, we’ll guide you through the installation process on Fedora, explain how to get started, and provide helpful resources to enhance your programming experience.

    What is GVim?

    GVim is a free and open-source graphical text editor, based on Vim. Vim, in turn, is a highly customizable text editor that is perfect for programming. While Vim is popular in terminal environments, GVim offers the same functionality but with the addition of a graphical user interface (GUI), making it more approachable for those who prefer a windowed editor over the command-line version.

    Key Features:

    • Powerful text-editing capabilities: GVim allows you to use all the advanced features of Vim with a GUI interface.
    • Customization: You can customize key mappings, color schemes, and more.
    • Plugins: Like Vim, GVim supports plugins, which can extend its functionality significantly.

    GVim License and Open-Source Nature

    GVim, like Vim, is open-source software, which means it is free to use, distribute, and modify. It is licensed under the Vim License, which is very similar to the MIT License. This allows you to freely use GVim for both personal and commercial purposes, with the caveat that if you modify the source code, you must share your modifications under the same license.

    For more details on the license, you can visit the official Vim License page.

    How to Install GVim on Fedora

    Installing GVim on Fedora Linux is a simple process, and there are a few ways to do it. Below, we’ll walk you through the steps to get it up and running using the Fedora package manager.

    1. Using DNF Package Manager (Recommended)

    The easiest way to install GVim on Fedora is by using the DNF package manager, which comes pre-installed on Fedora. Open a terminal and run the following command:

    sudo dnf install gvim

    2. Using Flatpak (Alternative Method)

    If you prefer using Flatpak to install software on Fedora, you can also install GVim via Flatpak. First, make sure Flatpak is set up on your system. Then run:

    flatpak install flathub org.vim.Vim.Gvim

    3. Using Snap (Alternative Method)

    Fedora also supports Snap packages. If you have Snap installed, you can run:

    sudo snap install gvim

    Getting Started with GVim

    Once GVim is installed on your Fedora system, open it by searching for “GVim” in your applications menu or by running the gvim command in your terminal.

    Key Features to Explore:

    • Modes: GVim inherits the same mode-based editing as Vim, including Normal, Insert, and Visual modes.
    • Customization: You can configure your GVim settings by editing the .gvimrc file.
    • Shortcuts: Learn essential shortcuts like :w to save and :q to quit.

    For a deeper dive into GVim commands and customizations, check out the official GVim documentation.

    Screenshots and Screencast

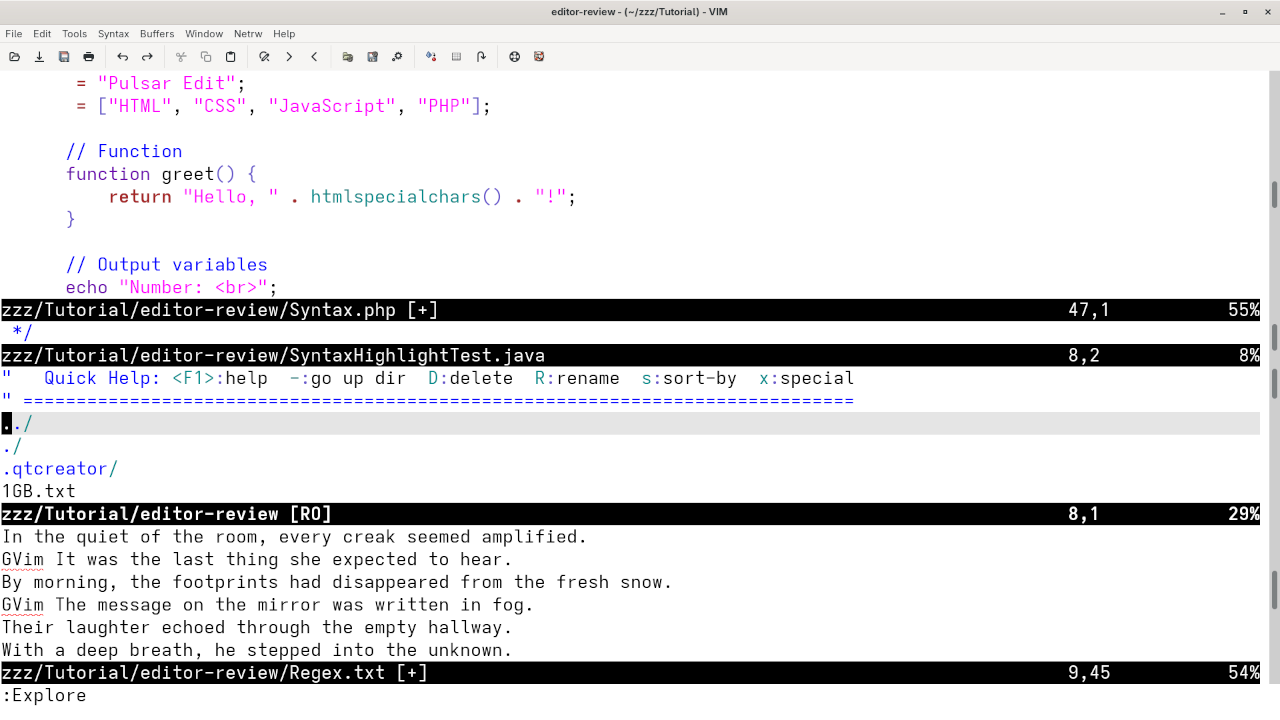
    GVim File Explorer
    GVim Displaying File Explorer

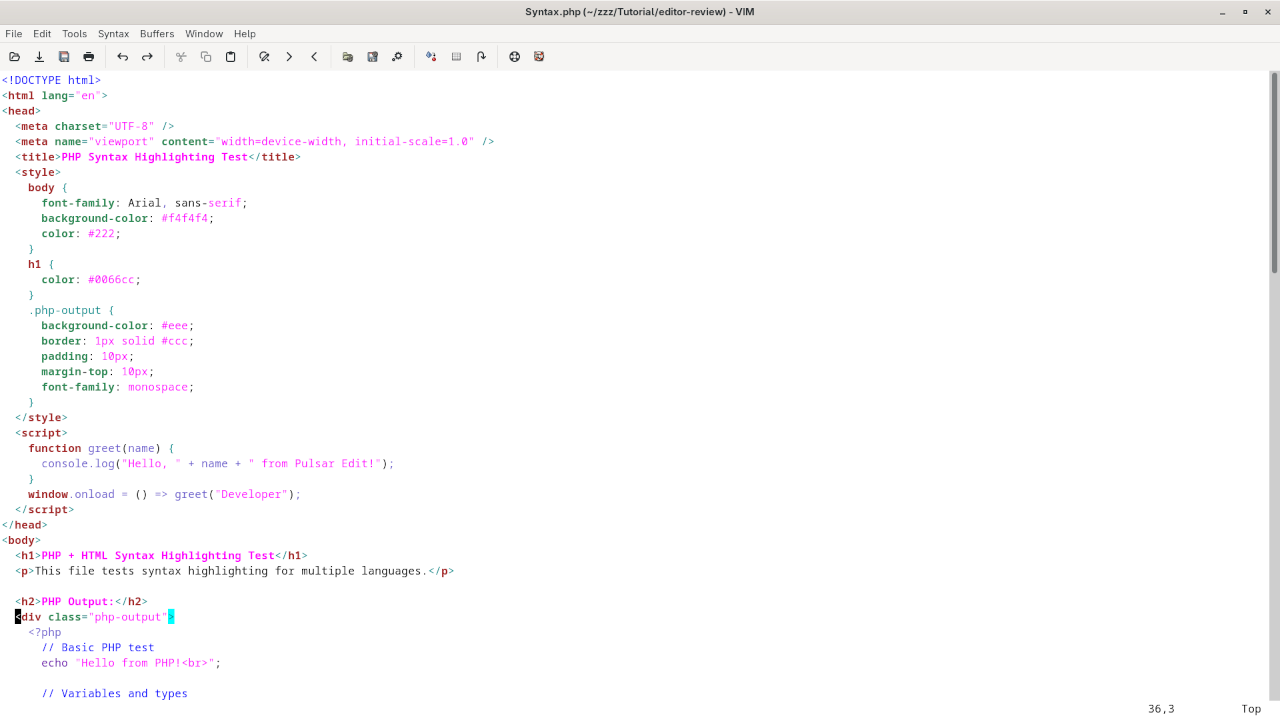
    GVim PHP Syntax Highlighting
    GVim Displaying PHP Syntax Highlighting

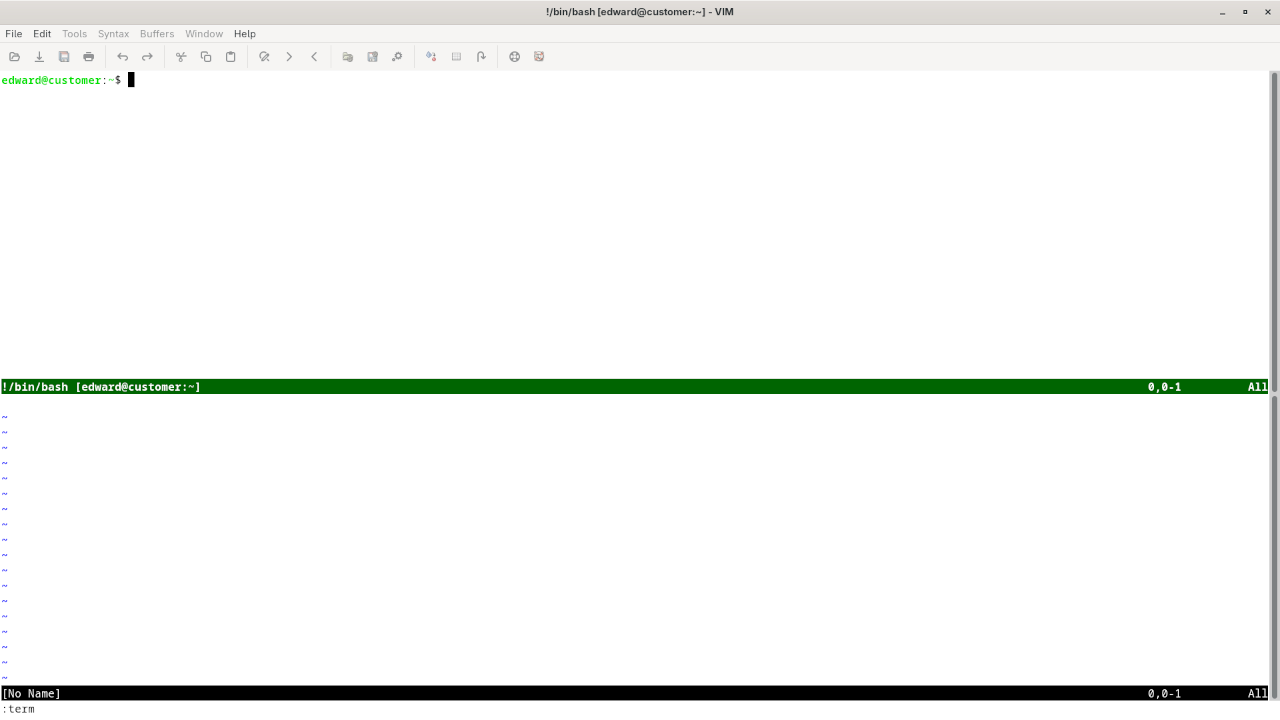
    GVim Terminal
    GVim Displaying Terminal Emulator

    👉 Screencast showing a beginner session in GVim—editing, saving files, and navigating buffers.

    GVim Review And Feature Test

    Requirements For Programming Text Editor

    Glossary:

    Code Editor

    Designed for writing and editing source code.

    IDE

    Integrated Development Environment combines various tools need for software development.

    Plugin

    Software component that adds specific functionality.

    Theme

    Preset package containing graphical appearance to customize look and feel.

    Open source

    Freely available for possible modification and redistribution.

    SCM

    Source code management use to manage and track modifications to a source code repository.

    LMB

    Left Mouse Button (LMB) or left click

    Test Tools

    Test System
    Name Description
    CPU Intel(R) i7 2600 @ 3.40GHz.
    Memory 16GB DDR3.
    Operating System Fedora Linux Workstation 42.
    Desktop Environment Gnome 48.
    Name Description

    Test Suite
    Name Description
    Large File 1GB human-readable text.
    Regex File Text with word “GVim” repeated.
    Syntax File PHP file containing HTML, CSS & JavaScript.
    Media File Smiley face or Tux Linux JPEG file.
    Java Version OpenJDK 21.0.7.
    PHP Version PHP 8.4.10.
    Python Version Python 3.13.5.
    Gvim Version 9.1.1623.
    Name Description

    Test Scoring

    1. Each feature has two parts.
    2. Score of zero indicates a missing feature.
    3. A part of a feature is work a score of 0.5.

    Three bias elimination steps were utilized. The editor was used for at least three years on different platforms. Attempts were made to get stable plug-ins for missing features. The same editor was compared between the one in the repository, the developers website, and the compiled version if applicable.

    Selecting Editor Version

    For this review, Gvim was installed using the instructions from the developers website and it did not require additional plugins.

    Features

    1. The theme can be native for the editor in terms of the background. GVim dark and light themes can be created or downloaded and changed using the menu Edit -> Color Scheme or :colorscheme theme_name. The score for the theme was a perfect 1.0.
    2. Dragging and dropping a text file into the editor opens a new tab or buffer. It is possible to specify the tab location during the drag and drop operation. The score for drag and drop into editor was a perfect 1.0.
    3. Opening a very large text file did not crash GVim. GVim was able to edit the large file. The score for opening a large file was a perfect 1.0.
    4. Multiple documents can opened in multiple tabs or buffers using the optional :tabnew and :tabnext. Tear-off tabs do not work but GVim has a feature to open in new window as a new instance which is handy for multiple monitors. The score for multiple documents was 0.5.
    5. Multiple editors can be opened as new tabs with drag options. Each tab window view can be split either vertically :vsplit or horizontally :vsplitas a multiple editor view. The score for multiple editor view was 0.5.
    6. Creating non-project files is possible. Non-project files can be opened by the drag and drop operation. The score for creating non-project files was a perfect 1.0.
    7. Soft word wrap can be enabled on all documents as line wrapping. Automatic soft wrap for documents is available from the GVim settings or :set wrap. The score for word wrap was a perfect 1.0.
    8. Spell check works as words are typed. It is toggled by :set spell and :set nospell. Spelling errors are shown in opened documents. The score for spell check was a perfect 1.0.
    9. Word count is available for GVim. Word count for the current buffer or file is enabled with :w !wc -w or :echo wordcount().words. Selection word count is available as part of word count. The score for word count was a perfect 1.0.
    10. Go to line can jump to a specified line using :line-number where line-number is the line number. It is possible to jump to either the first or last line. The score for go to line is a perfect 1.0.
    11. Indentation can default to user-defined tab stops using :set autoindent or :set smartindent. Children are automatically indented. The score for indentation was a perfect 1.0.
    12. Fonts can be not dynamically scaled with keyboard shortcuts or the mouse, but can be manually set using :set guifont=*. The system font can be bypassed and a new editor font and size can be set. The score for fonts was 0.5.
    13. Find and replace using regular expressions can be utilized for all open documents in the current session. Find and replace will work for the current document or a selection in the current document. The score for find and replacing using regular expressions was a perfect 1.0.
    14. Multiple language syntax highlighting in one file is enabled if the language plug-ins are installed. Each language has code-sensitive syntax colours which can be modified. The score for multiple language syntax highlighting was a perfect 1.0.
    15. Code folding works for markup languages such as HTML using :set foldmethod=syntax with zo/zc/za/zR/zM/zf or :set foldmethod=manual or :set foldmethod=indent. Code folding also works for programming languages such as Java. The score for code folding was a perfect 1.0.
    16. Selecting rectangular block per column works using CTRL-v then h/j/k/l or LEFT/DOWN/UP/RIGHT. Rectangular block selection works with word wrap enabled. The score for selecting rectangular block was a perfect 1.0.
    17. Multiple selection is not available for GVim but can be mimicked using / to search for the word and n for the next match. Search multiple selection is not available. The score for multiple selection was 0.5.
    18. Distraction-free mode to hide panes works. Line numbers can be toggled to improve distraction-free mode. The score for distraction-free was a perfect 1.0.
    19. The file manager can be enabled using :Explore or :Vexplore. Media files cannot be dragged and dropped into the file manager pane. The score for file manager was 0.5.
    20. Terminal can be enabled using :term. The terminal does not follow folder but it can be set using autocmd BufEnter * silent! lcd %:p:h when a file is opened. Terminal can execute system commands. The score for terminal was 0.5.

    Results

    GVim is a very powerful text editor. By default, the GVim editor is missing required features which can be installed by using extensions. For my required features, the GVim editor scored 85.0% or 8.50 out of 10.

    Additional Resources to Enhance Your Programming Skills

    GVim is a powerful tool for developers, and to get the most out of it, it’s important to continually improve your programming skills. Here are some great resources that I highly recommend:

    • Programming Books by Edward Ojambo: Explore my collection of books on programming, which are designed to help you level up your skills. You can find them on my Amazon Author Page.
    • Programming Courses: If you prefer structured learning, check out my programming courses at Ojambo Shop.
    • One-on-One Online Programming Tutorials: I offer personalized, one-on-one online programming tutorials. If you need direct help with learning programming or setting up tools like GVim, get in touch with me via Contact Page.

    Need Help with GVim?

    If you’re new to GVim or want to migrate your existing configuration, I offer professional services to install or migrate GVim for you. For more details, visit Ojambo Services.

    Conclusion

    GVim is a fantastic text editor for anyone who wants to make the most of the Vim experience with a graphical interface. By following this guide, you should be able to get started with GVim on Fedora Linux in no time. If you encounter any issues or need more help, feel free to reach out to me through the links provided.

    Happy coding!

  • Unboxing Guide: SAMA G850W ATX 3.1 PSU

    Unboxing Guide: SAMA G850W ATX 3.1 PSU

    Unboxing the SAMA G850W ATX 3.1 PSU: A Smart Future Choice for Blender & AI in 2025

    As part of a future PC build focused on 3D rendering in Blender and AI development, I’ve added the SAMA G850W ATX 3.1 PSU to my hardware lineup. While I haven’t tested it yet — other components are still in transit — this post is about the unboxing, technical breakdown, and informed speculation based on specs and community feedback.

    This system will eventually feature:

    • CPU: AMD Ryzen 5 5600GT
    • GPU: AMD Instinct MI60 32GB

    Unboxing Experience

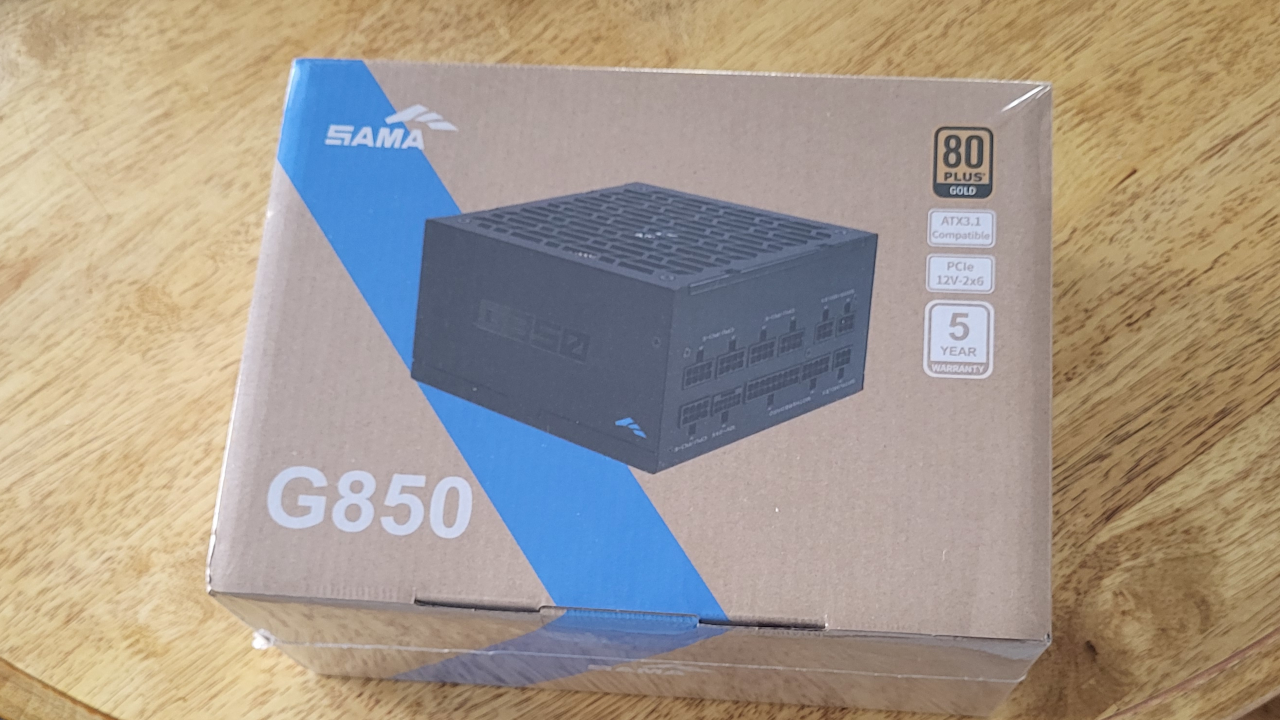
    The unit arrived in clean, compact packaging. Everything inside was well-secured with foam and protective plastic. First impressions were positive.

    What’s Inside the Box:

    Item Notes
    Power Supply Unit Fully modular, matte black chassis
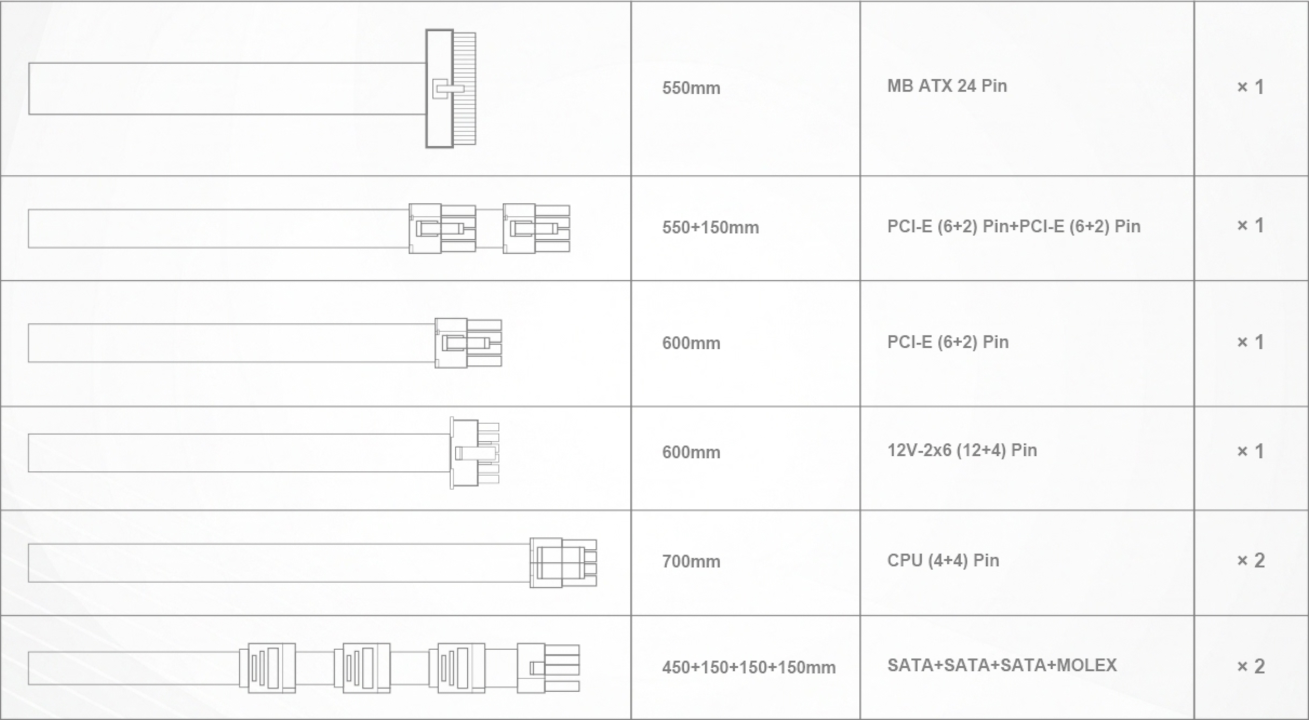
    Cables Flat ribbon-style modular cables including 12VHPWR
    Manual & Warranty Card Quick start guide, 5-year warranty
    Accessories Mounting screws, cable ties, anti-vibration pads

    Why the SAMA G850W?

    About the Brand

    SAMA is a Chinese hardware manufacturer known for cases and power supplies. Founded in 2003, the brand has a strong presence in Asia and is gradually expanding to international markets. Their G Series is positioned for creators and gamers who want the latest standards and reliability at an affordable price.

    Feature Overview

    Feature Details
    Wattage 850W
    Efficiency Certification 80 PLUS Gold (91%)
    Form Factor ATX 3.1
    PCIe Support Native 12V-2×6 (12VHPWR), PCIe 5.1 ready
    Cooling 140mm FDB fan with ECO semi-passive mode
    Modularity Fully modular design
    Capacitors Japanese capacitors for long life
    Protections OVP, OCP, UVP, OTP, SCP, OPP, NLO, SIP
    Warranty 5 years
    Estimated Price (CAD) Approximately $115 (as listed on Newegg.ca)

    Blender and AI Build Considerations

    This PSU was chosen to support a workstation focused on Blender rendering and deep learning. With a GPU like the AMD Instinct MI60, transient power draw can be high. The native 12VHPWR connector and 850W capacity make the SAMA G850W a strong candidate for such use cases.

    The fully modular design also helps manage airflow and maintain a clean internal layout — useful for cooling high-performance components.

    Community Impressions

    Since I haven’t powered the unit yet, I reviewed real-world impressions online:

    • Positive: Compact form factor, low noise, efficient under load, no coil whine reported
    • Critical: Warranty returns may require shipping to China, limited Western customer support

    Sources:

    Planned Future Testing

    Once all my components arrive, I plan to test the PSU under real-world conditions:

    • Blender rendering (GPU load, stability, fan noise)
    • AI model training (power spikes, PSU temps)
    • Coil whine and overall build quality in action

    Screenshots And Screencast

    Sama G850W Input 100 to 240V
    Sama G850W Full-Cover Power Supply AC Input 120-240Vac

    Modular Power Supply
    Full Modular Sama G850W Power Supply

    Cable Specifications
    Sama G850W HAT-850yzB1G Power Supply Cable Specifications

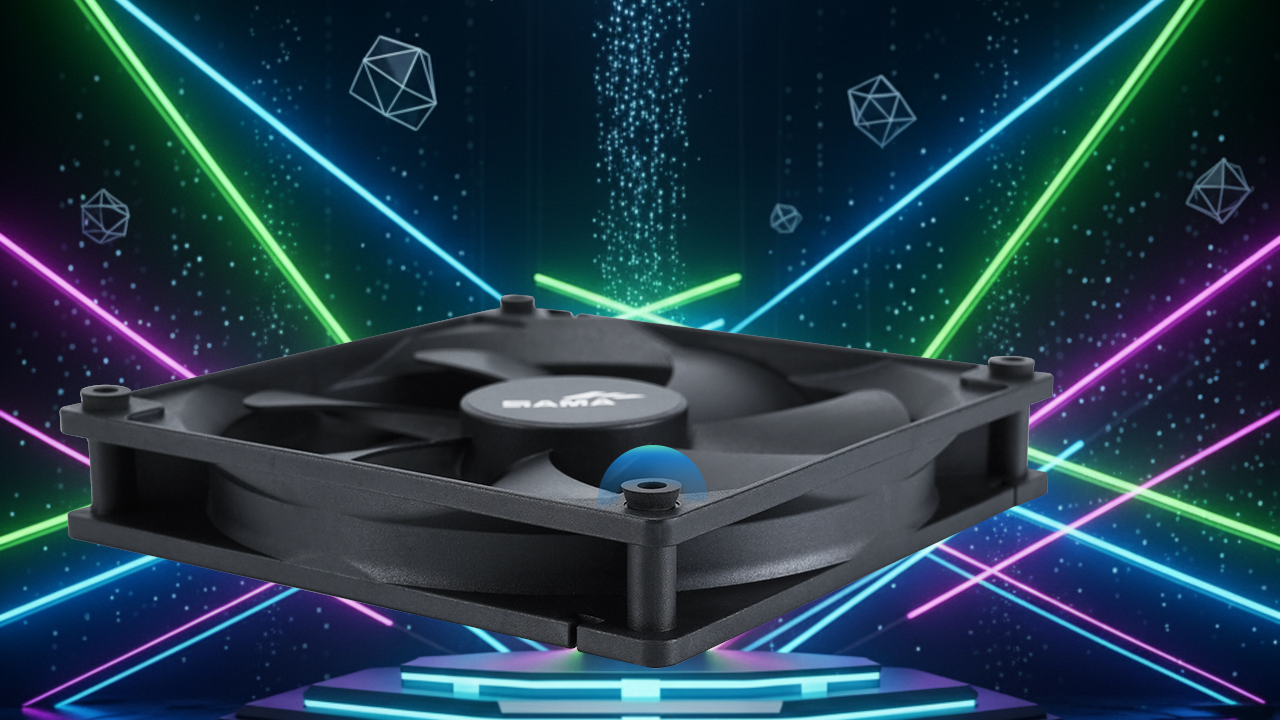
    Shocker Absorber Pad
    Shock-Absorbing Rubber Pad For Silent Sama G850W Power Supply

    Screencast Showing setup on Fedora 42, system detection, PSU stats

    Related Learning Resources

    While waiting on the full build, check out these Python and Blender scripting resources I created:

    Need One-on-One Help?

    I offer personalized support for:

    • Python tutoring (general or Blender scripting)
    • AI installation, training, and migration

    Contact me here if you’re interested.

    Conclusion

    The SAMA G850W ATX 3.1 PSU offers modern features at a compelling price. With native PCIe 5.1 support, a clean modular layout, and solid user feedback, it looks like a smart choice for creators and AI developers in 2025.

    I’ll follow up with a full performance review once my components arrive. For now, based on what’s in the box and what others have shared, the G850W looks like a strong contender for budget-conscious performance builders.

  • How to Self-Host PeerTube: An Open-Source YouTube Alternative Using Podman

    How to Self-Host PeerTube: An Open-Source YouTube Alternative Using Podman

    If you’re looking for a privacy-respecting, ad-free video hosting solution, look no further than PeerTube. PeerTube is an open-source, decentralized alternative to YouTube that lets you take control of your content. In this guide, we’ll show you how to easily self-host PeerTube using Podman and the latest Docker Compose configuration.

    🚀 Why Choose PeerTube?

    • Open Source – PeerTube is free to use and fully open source.
    • Decentralized – Connects with other PeerTube instances for federation.
    • No Ads or Tracking – A video platform that respects your privacy.
    • Self-Hostable – Run it on your own server for full control over your content.

    💻 Requirements

    • A Linux server (Ubuntu 22.04+ recommended)
    • Podman and podman-compose installed
    • Basic knowledge of the terminal
    • Open ports 80 and 443 on your firewall

    ⚡️ Installing PeerTube with Podman

    Follow these steps to install PeerTube locally on your server using Podman.

    1. Install Podman & podman-compose

    First, you need to install Podman and Podman Compose on your server:

    sudo apt update && sudo apt install -y podman podman-compose

    2. Create a Directory for PeerTube

    Next, create a directory for your PeerTube setup and navigate into it:

    mkdir -p ~/peertube-podman && cd ~/peertube-podman

    3. Download the Latest Docker Compose Configuration

    Download the latest Docker Compose file from PeerTube’s official GitHub repository:

    curl -O https://raw.githubusercontent.com/Chocobozzz/PeerTube/master/support/docker/production/docker-compose.yml

    4. Modify docker-compose.yml for Podman Compatibility

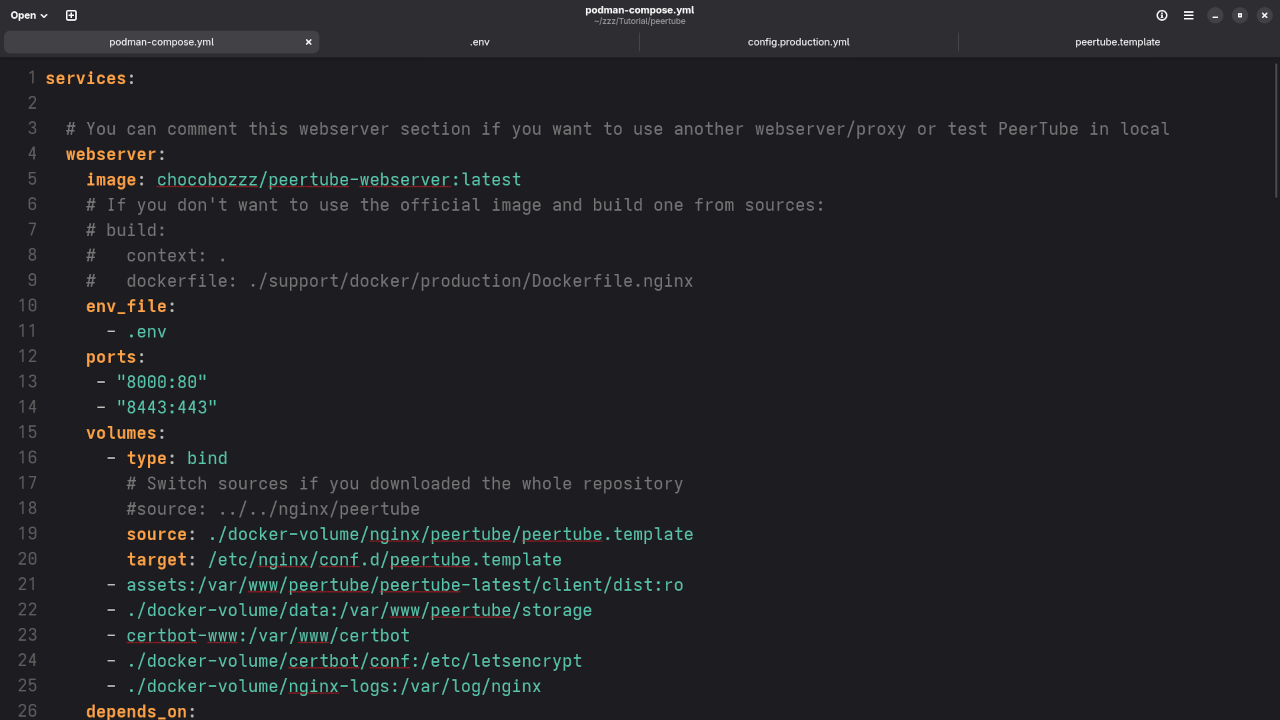
    You’ll need to adjust the configuration file to work with Podman. The following is a sample podman-compose.yml for local PeerTube installation:

    version: "3.7"
    services:
      # PeerTube application container
      peertube:
        image: chocobozzz/peertube:production-bookworm
        container_name: peertube
        environment:
          - NODE_ENV=production
          - PEERTUBE_DB_HOSTNAME=peertube-db
          - PEERTUBE_ADMIN_EMAIL=your-email@example.com
          - PEERTUBE_WEBSERVER_HOSTNAME=localhost:9000
          - PEERTUBE_SECRET=your-secret-key
        ports:
          - "9000:9000" # PeerTube UI
        volumes:
          - ./peertube_data:/data
        restart: unless-stopped
        networks:
          - peertube-net
    
      # PostgreSQL container for PeerTube database
      peertube-db:
        image: postgres:13
        container_name: peertube-db
        environment:
          - POSTGRES_USER=peertube
          - POSTGRES_PASSWORD=peertube_password
          - POSTGRES_DB=peertube
        volumes:
          - ./postgres_data:/var/lib/postgresql/data
        networks:
          - peertube-net
        restart: unless-stopped
    
      # Redis container for PeerTube caching
      peertube-redis:
        image: redis:6
        container_name: peertube-redis
        networks:
          - peertube-net
        restart: unless-stopped
    
      # Nginx container as the reverse proxy (optional, useful for SSL)
      peertube-nginx:
        image: nginx:latest
        container_name: peertube-nginx
        volumes:
          - ./nginx.conf:/etc/nginx/nginx.conf
          - ./peertube_data:/data
        ports:
          - "8000:80"
          - "8443:443"
        networks:
          - peertube-net
        restart: unless-stopped
    
    networks:
      peertube-net:
        driver: bridge

    5. NGINX Configuration (Optional, for Reverse Proxy & SSL)

    If you want to secure your PeerTube installation with SSL and run NGINX as a reverse proxy, you’ll need to configure NGINX with a custom configuration file.

    Here is an example of a basic nginx.conf file for reverse proxying to PeerTube:

    server {
        listen 80;
        server_name localhost;
    
        location / {
            proxy_pass http://peertube:9000;  # Forward requests to PeerTube
            proxy_set_header Host $host;
            proxy_set_header X-Real-IP $remote_addr;
            proxy_set_header X-Forwarded-For $proxy_add_x_forwarded_for;
            proxy_set_header X-Forwarded-Proto $scheme;
        }
    }

    If you’re setting up SSL, you’ll also need to update the configuration to handle HTTPS traffic:

    server {
        listen 443 ssl;
        server_name yourdomain.com;  # Replace with your domain
    
        ssl_certificate /etc/ssl/certs/your_certificate.crt;
        ssl_certificate_key /etc/ssl/private/your_private.key;
    
        location / {
            proxy_pass http://peertube:9000;
            proxy_set_header Host $host;
            proxy_set_header X-Real-IP $remote_addr;
            proxy_set_header X-Forwarded-For $proxy_add_x_forwarded_for;
            proxy_set_header X-Forwarded-Proto $scheme;
        }
    }

    You can obtain SSL certificates from a provider like Let’s Encrypt or any other SSL certificate provider.

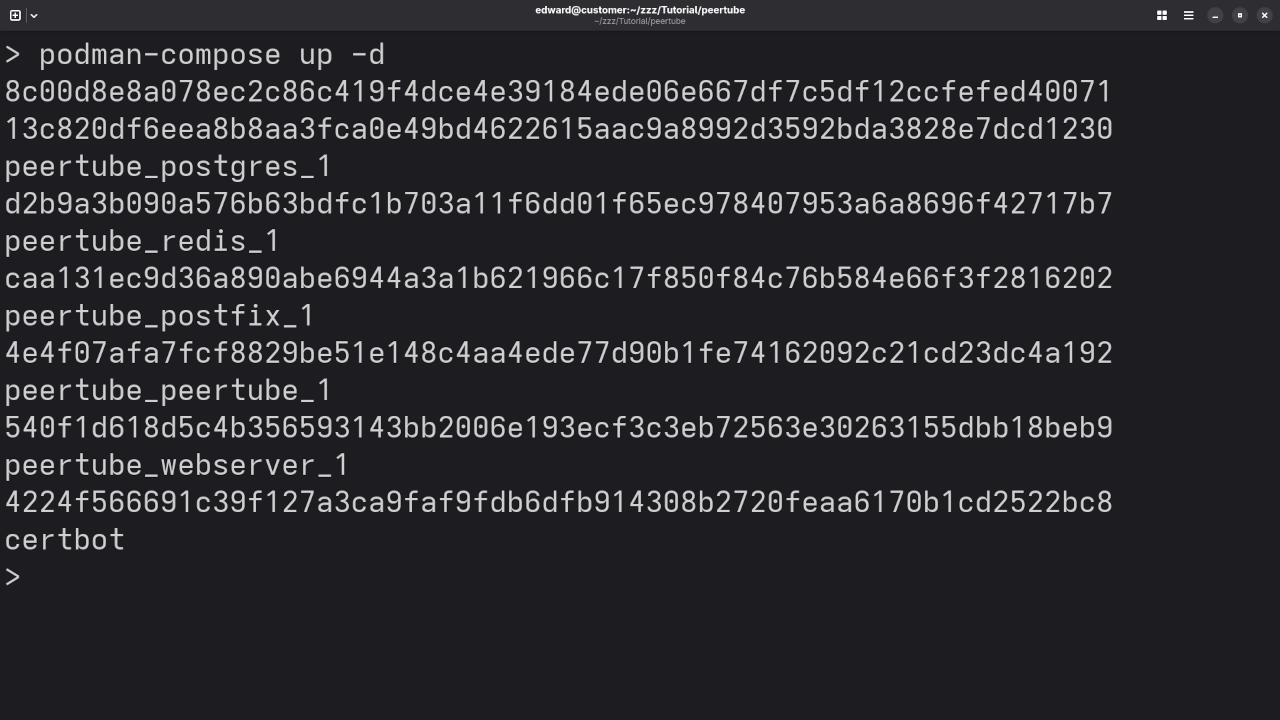
    6. Start PeerTube Using Podman-Compose

    Once the configuration is ready, start the PeerTube containers using Podman Compose:

    podman-compose up -d

    7. Check the Status of Containers

    Verify that the containers are running correctly with the following command:

    podman ps

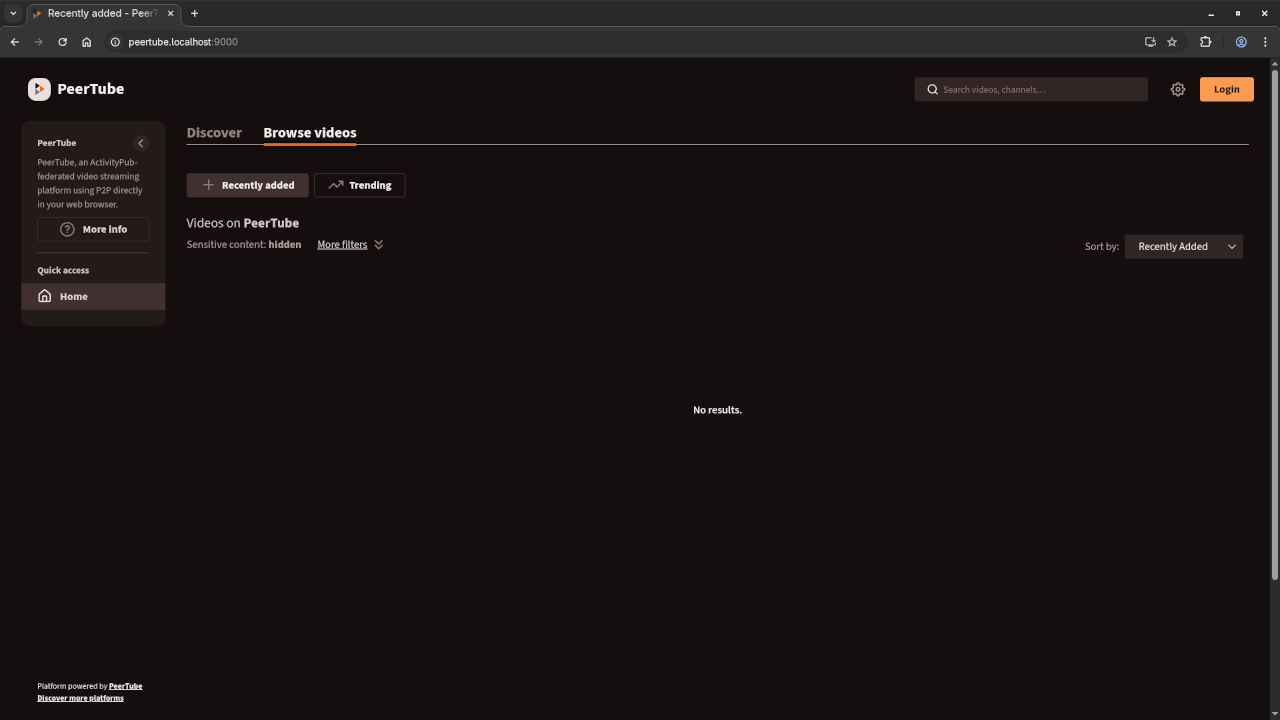
    8. How to View PeerTube in Your Web Browser

    Once your containers are up and running, you can view your PeerTube instance in a web browser:

    • If you are using HTTP, open your browser and go to http://localhost:9000. This will display the PeerTube landing page.
    • If you have configured SSL with NGINX, open your browser and go to https://yourdomain.com, where yourdomain.com is the domain you’ve set up.

    📱 Screenshots & Screencast

    PeerTube Compose YAML File
    Gnome Text Editor Displaying PeerTube Compose YAML File

    PeerTube Podman Compose Build
    Command Line Installation Of PeerTube Via Podman Compose Build

    PeerTube Frontend Screen
    Web Browser Displaying PeerTube Frontend Screen

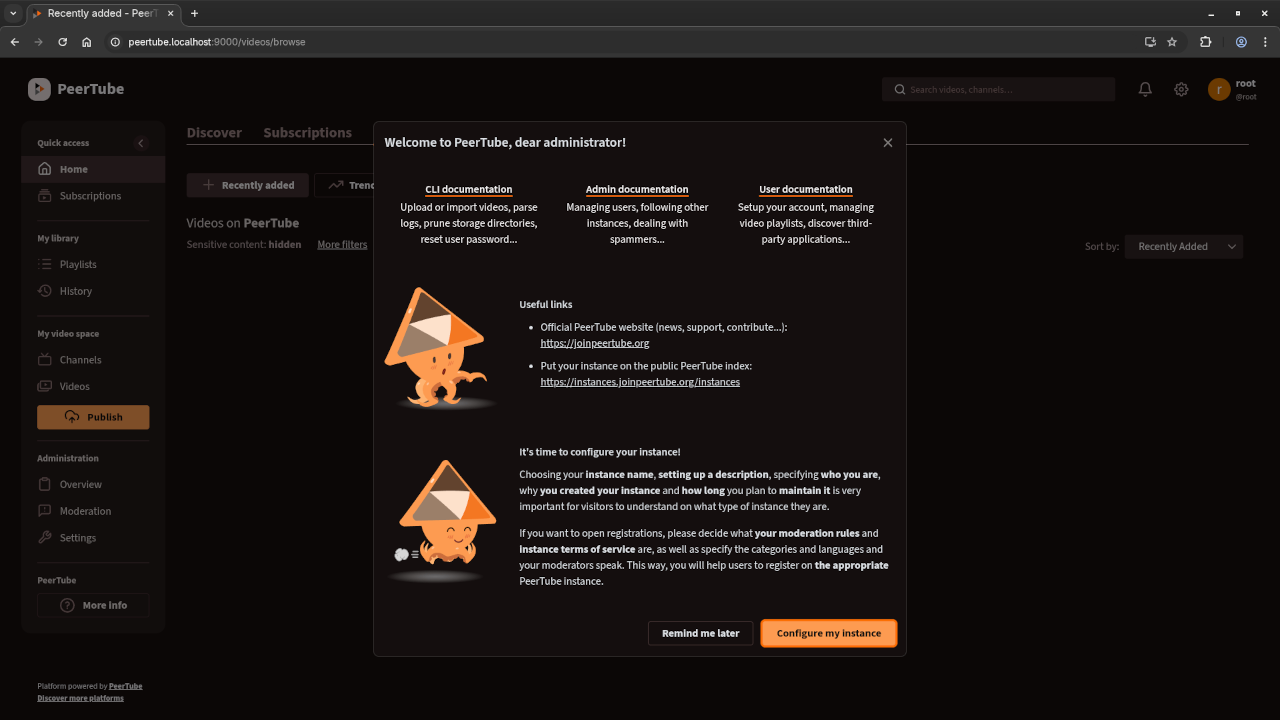
    PeerTube Dashboad Screen
    Web Browser Displaying PeerTube Dashboard Screen

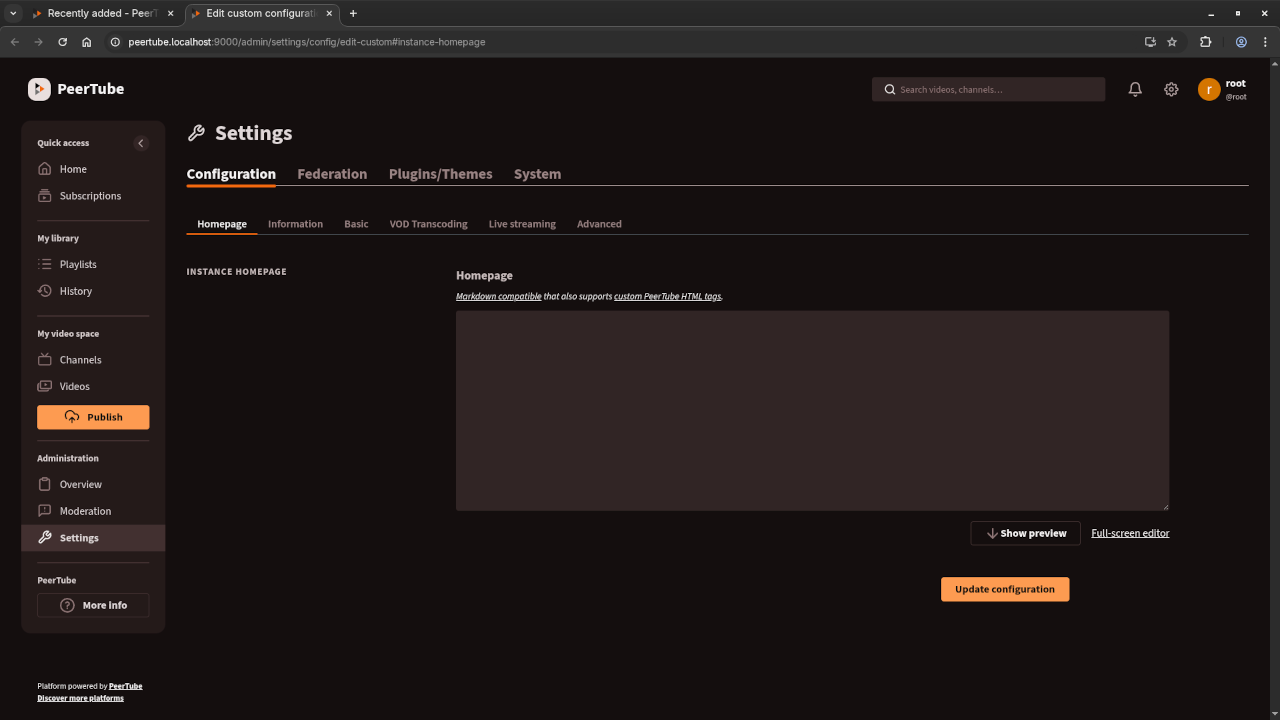
    PeerTube General Settings Screen
    Web Browser Displaying PeerTube General Settings Screen

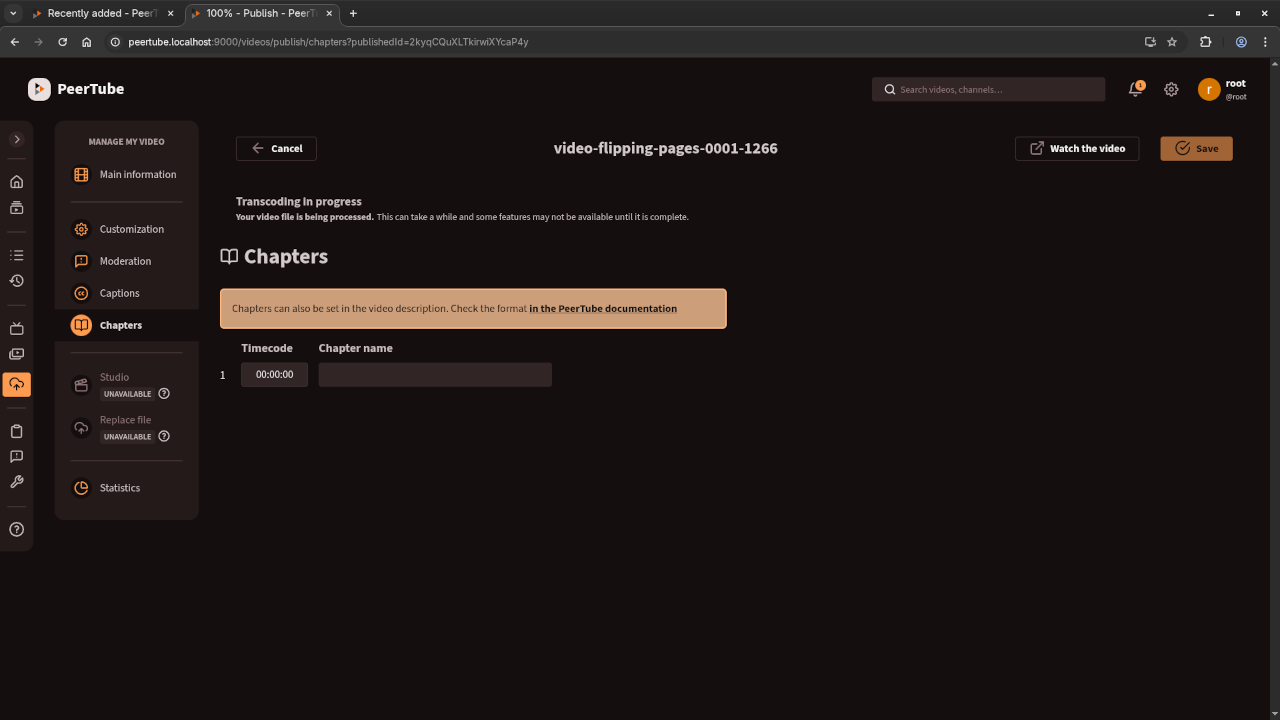
    PeerTube Video Customization Screen
    Web Browser Displaying PeerTube Video Customization Screen

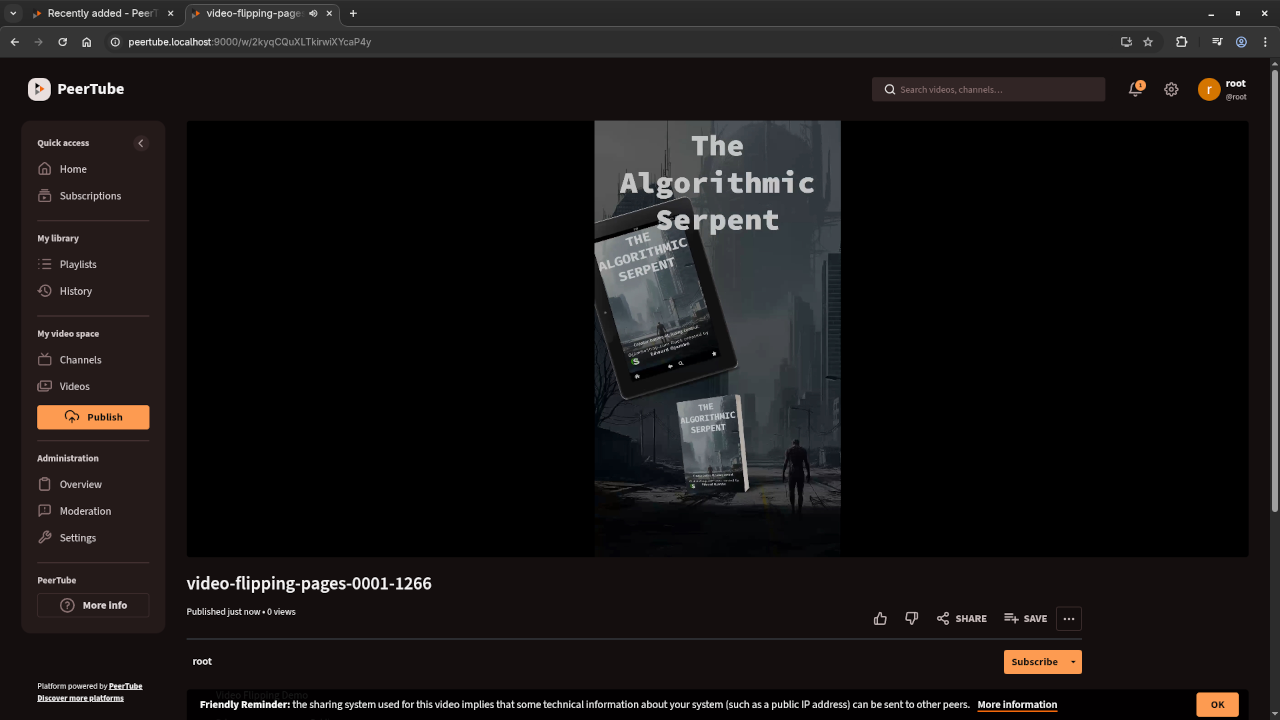
    PeerTube Video Publish Screen
    Web Browser Displaying PeerTube Video Publish Screen

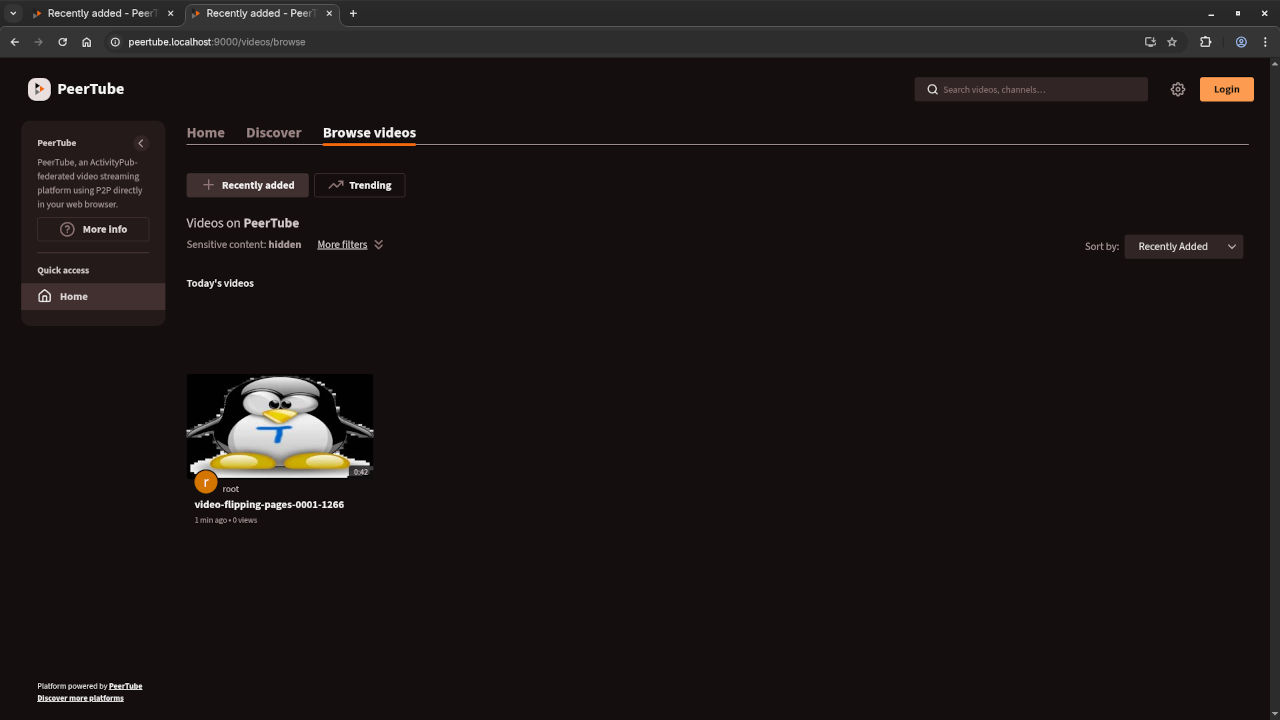
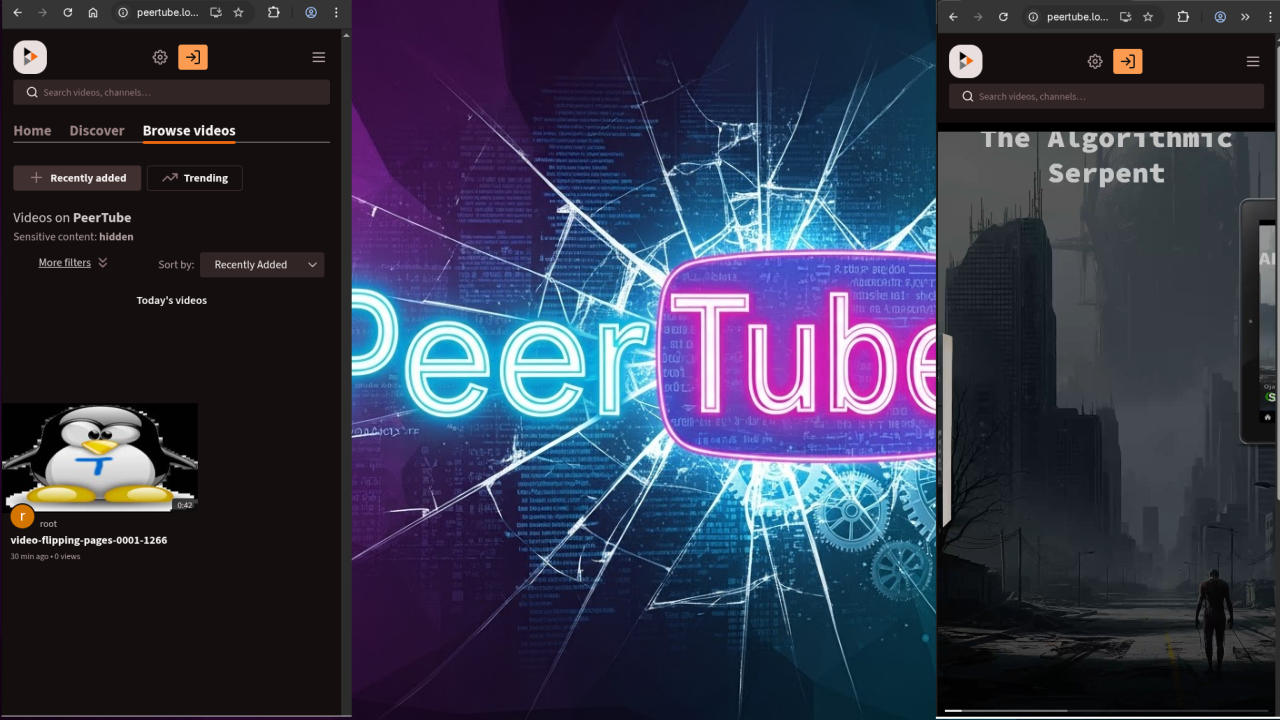
    PeerTube Browse Screen
    Web Browser Displaying PeerTube Browse Screen

    PeerTube Mobile View
    Web Browser Displaying PeerTube Mobile View

    PeerTube Installation And Setup Screencast

    💡 Need Help with PeerTube?

    I’m available for:

    • One-on-one programming tutorials
    • Custom PeerTube installs
    • Updates and migrations

    👇 Contact me here

    By choosing open-source solutions like PeerTube, you’re taking a step toward a freer, user-controlled internet. If you’re ready to take control of your video hosting, give PeerTube a try!