Blog

  • Qt Creator 16.0.1 Advanced Editor Review

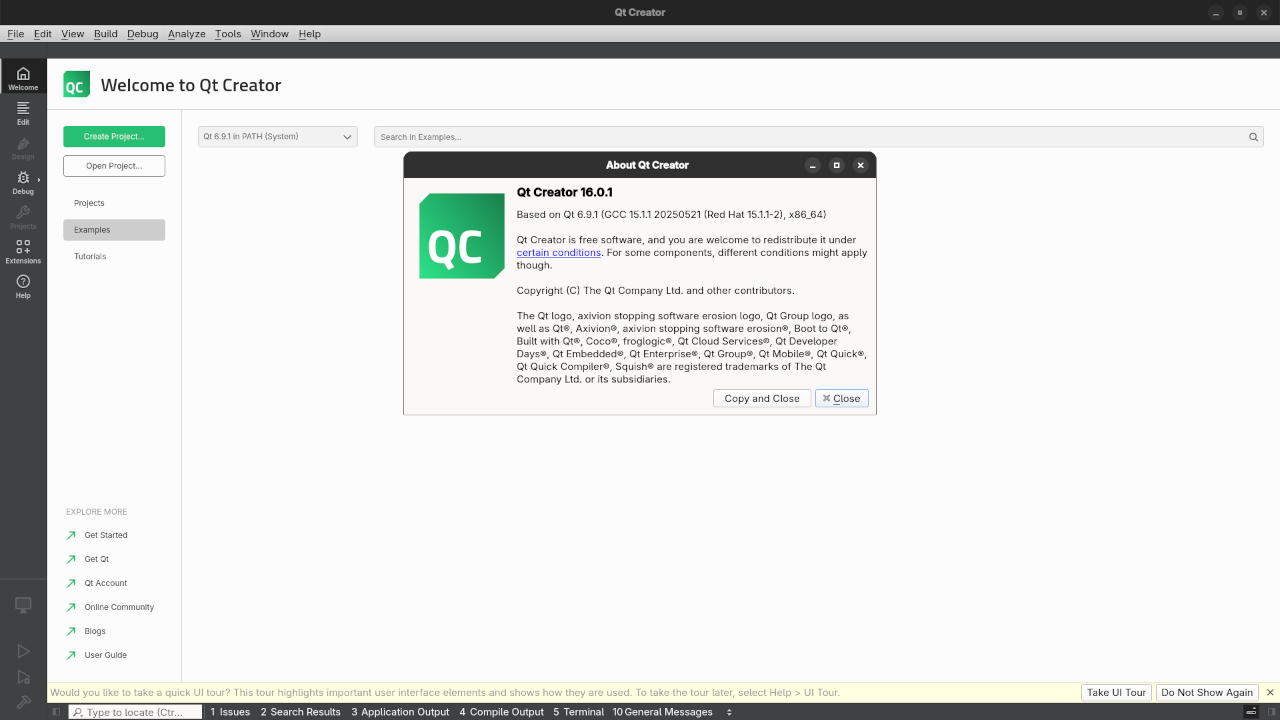
    Qt Creator 16.0.1 Advanced Editor Review

    Qt Creator: Open Source IDE for C++, Python, and Qt Development

    Qt Creator is a powerful, cross-platform Integrated Development Environment (IDE) designed to streamline development with C++, Python (via PySide), and Qt-based applications. It is especially useful for developers building GUI applications using the Qt framework, but it also works well for general code editing and project management.

    In this post, we'll take a beginner-friendly look at Qt Creator, focusing on features, how to install it—especially on Fedora Linux—and how you can get started with Qt development today.

    👨‍💻 What is Qt Creator?

    Qt Creator is a free and open source IDE developed by The Qt Company. It includes:

    • A robust code editor with syntax highlighting and code completion
    • Integrated debugger and profiler
    • Support for Qt Designer (WYSIWYG UI builder)
    • Built-in support for C++, QML, and Python via PySide
    • Version control integration (Git, Subversion, Mercurial)

    Qt Creator is ideal for both beginner and advanced developers who want a reliable IDE for cross-platform desktop, mobile, and embedded systems development.

    🔖 License

    Qt Creator is released under the GNU General Public License v3.0 (GPLv3) and a commercial license is also available.
    You can view the licensing terms on the official Qt Creator GitHub repository.

    💾 Installation

    🔧 On Fedora Linux (Recommended for Beginners)

    You can install Qt Creator easily using the dnf package manager.

    sudo dnf install qt-creator

    This will install the latest version available in Fedora’s repositories.

    Optional: Install Qt libraries and development tools

    sudo dnf groupinstall "Qt Development"

    💻 On Windows

    🍎 On macOS

    • Install using Homebrew:
    brew install --cask qt-creator

    Or download directly from the Qt website.

    📷 Screenshots and Live Demo
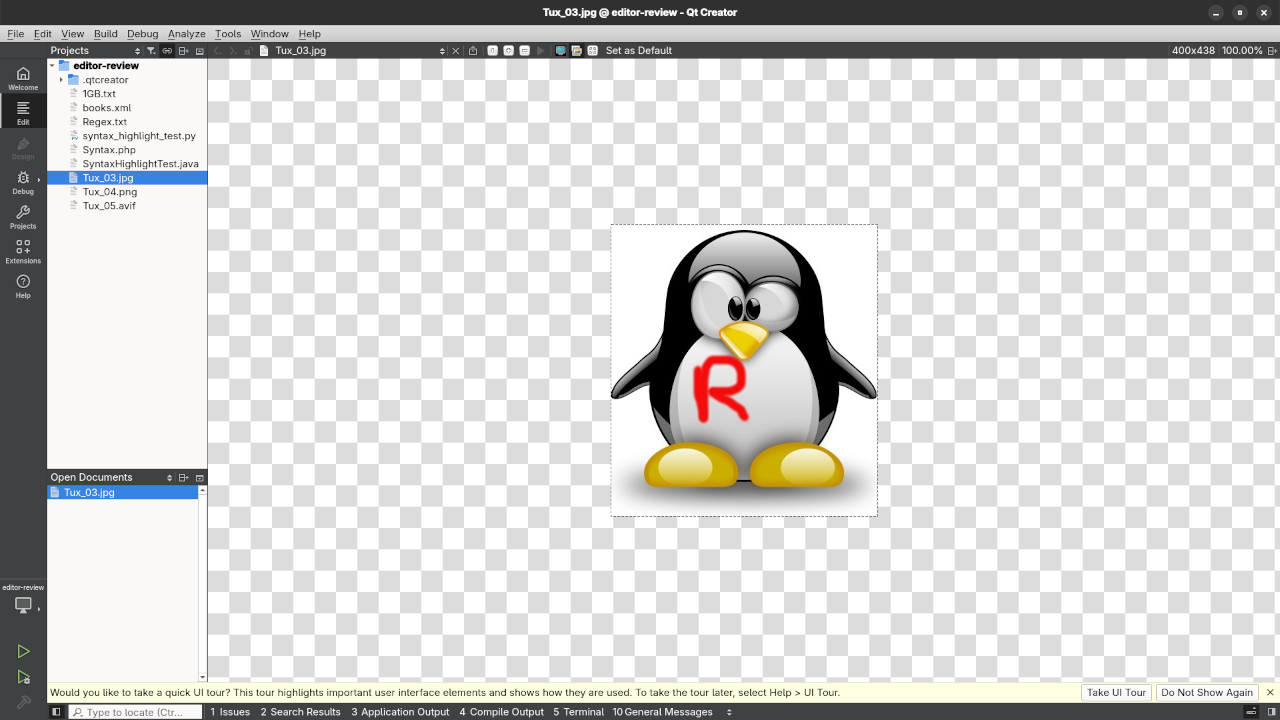
    Qt Creator File Browser
    Qt Creator Displaying Expanded File Browser

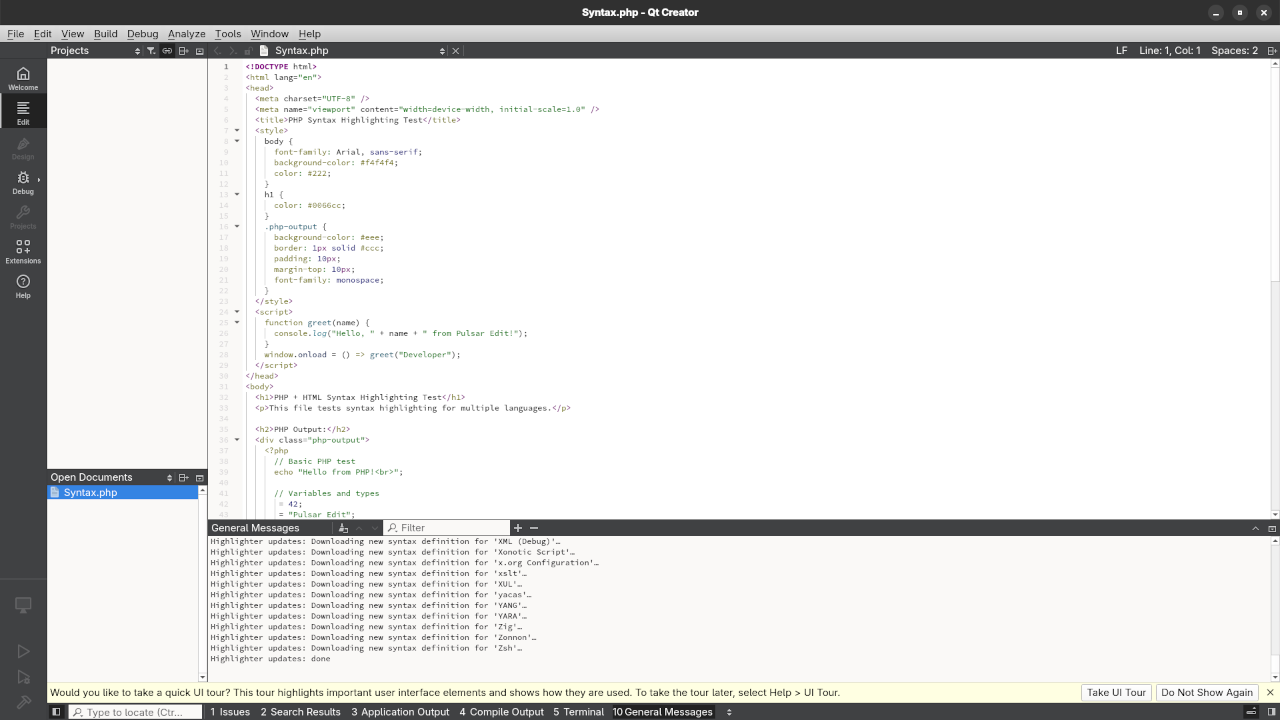
    Qt Creator PHP Syntax Highlighting
    Qt Creator Displaying PHP Syntax Highlighting

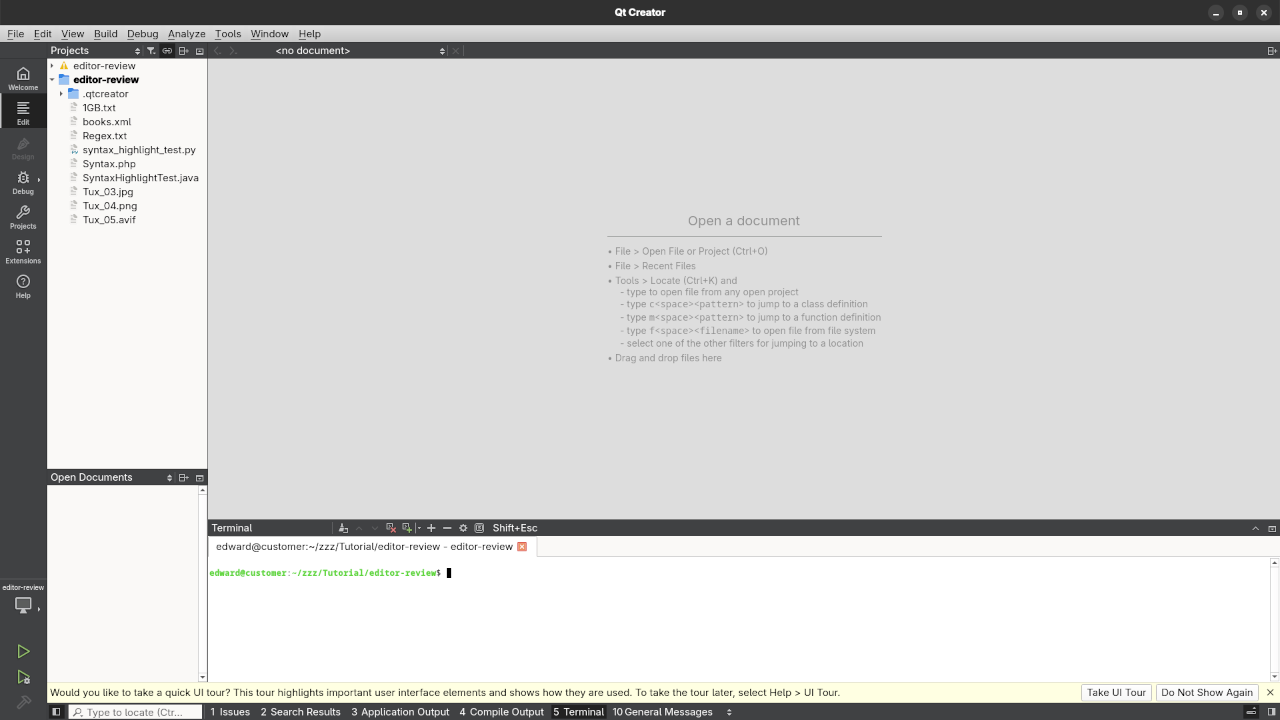
    Qt Creator Terminal
    Qt Creator Displaying Terminal Emulator

    👉 Screencast showing a beginner session in Qt Creator—editing, saving files, and navigating buffers.

    Qt Creator Review And Feature Test

    Requirements For Programming Text Editor

    Glossary:

    Code Editor

    Designed for writing and editing source code.

    IDE

    Integrated Development Environment combines various tools need for software development.

    Plugin

    Software component that adds specific functionality.

    Theme

    Preset package containing graphical appearance to customize look and feel.

    Open source

    Freely available for possible modification and redistribution.

    SCM

    Source code management use to manage and track modifications to a source code repository.

    LMB

    Left Mouse Button (LMB) or left click

    Test Tools

    Test System
    Name Description
    CPU Intel(R) i7 2600 @ 3.40GHz.
    Memory 16GB DDR3.
    Operating System Fedora Linux Workstation 42.
    Desktop Environment Gnome 48.
    Name Description

    Test Suite
    Name Description
    Large File 1GB human-readable text.
    Regex File Text with word “Qt Creator” repeated.
    Syntax File PHP file containing HTML, CSS & JavaScript.
    Media File Smiley face or Tux Linux JPEG file.
    Java Version OpenJDK 21.0.8.
    PHP Version PHP 8.4.10.
    Python Version Python 3.13.5.
    Qt Creator Version 16.0.1.
    Name Description

    Test Scoring

    1. Each feature has two parts.
    2. Score of zero indicates a missing feature.
    3. A part of a feature is work a score of 0.5.

    Three bias elimination steps were utilized. The editor was used for at least three years on different platforms. Attempts were made to get stable plug-ins for missing features. The same editor was compared between the one in the repository, the developers website, and the compiled version if applicable.

    Selecting Editor Version

    For this review, Qt Creator was downloaded from the developers website and it did not require additional plugins.

    Features

    1. The theme can be native for the editor in terms of the background. Qt Creator dark and light themes can be created or downloaded using the plugin manager. The score for the theme was 1.0.
    2. Dragging and dropping a text file into the editor opens a tabbed view. It is possible to specify the tab location during the drag and drop operation. The score for drag and drop into editor was 1.0.
    3. Opening a very large text file did not crash Qt Creator. It was possible to edit the large file. The score for opening a large file was 1.0.
    4. Multiple documents can opened in multiple tabs or buffers. Tear-off tabs can be mimicked by having Qt Creator open the current buffer in a new window as a new instance which is handy for multiple monitors. The score for multiple documents was a perfect 1.0.
    5. Multiple editors can be opened as new tabs with drag options. Each tab window view can be split either vertically or horizontally as a multiple editor view. The score for multiple editor view was a perfect 1.0.
    6. Creating non-project files is possible. Non-project files can be opened by the drag and drop operation. The score for creating non-project files was a perfect 1.0.
    7. Soft word wrap can be enabled on all documents as line wrapping. Automatic soft wrap for documents is available from the Qt Creator settings. The score for word wrap was a perfect 1.0.
    8. Spell check works as words are typed using the SpellChecker plugin. Spelling errors are shown in opened documents. The score for spell check was a perfect 1.0.
    9. Word count is not available for Qt Creator. Selection word count is available as part of scripting. The score for word count was a perfect 0.5.
    10. Go to line CTRL/CMD-Lcan jump to a specified line. It is possible to jump to either the first or last line. The score for go to line was a perfect 1.0.
    11. Indentation can default to user-defined tab stops. Children are automatically indented. The score for indentation was a perfect 1.0
    12. Fonts can be dynamically scaled by macros. The system font can be bypassed and a new editor font and size can be set. The score for fonts was a perfect 1.0..
    13. Find and replace CTRL-Fusing regular expressions can be utilized for all open documents in the current session. Find and replace will work for the current document or a selection in the current document. The score for find and replacing using regular expressions was a perfect 1.0.
    14. Multiple language syntax highlighting in one file is enabled if the language plug-ins are installed. Each language has code-sensitive syntax colors which can be modified. The score for multiple language syntax highlighting was a perfect 1.0.
    15. Code folding works for markup languages such as HTML. Code folding also works for programming languages such as PHP and Java. The score for code folding was 1.0
    16. Selecting rectangular block per column works using ALT-DRAG. Rectangular block selection works with word wrap enabled. The score for selecting rectangular block was a perfect 1.0.
    17. Multiple selection works using ALT-LMB. Search multiple selection is available. The score for multiple selection was 1.0.
    18. Distraction-free mode to hide panes works. Line numbers can be toggled to improve distraction-free mode. The score for distraction-free was a perfect 1.0.
    19. The file manager can be used to create and delete folders. Media files can be dragged and dropped into the file manager pane. The score for file manager was 1.0
    20. Terminal is integrated into Qt Creator. The terminal does follow folder of the file browser. Terminal can execute system commands. The score for terminal was a perfect 1.0.

    Results

    Qt Creator is a very powerful IDE. By default, the Qt Creator editor worked without tweaks, and any missing required features can not be installed by using plugins. For my required features, the Qt Creator editor scored 95.0% or 9.50 out of 10.

    📚 Learn More with Programming Books and Courses

    If you’re interested in mastering Qt Creator or programming in general, check out the following resources:

    👨‍🏫 Need Help? Book a Tutorial or Migration

    I offer one-on-one programming tutorials and installation/migration services:

    Whether you’re just starting out or migrating from another IDE, I can help you get up and running with Qt Creator on your preferred platform.

    ✅ Summary

    Qt Creator is a fully-featured, open source IDE ideal for building modern desktop and embedded applications using C++, Python, and the Qt framework. It’s especially developer-friendly on Fedora Linux thanks to simple package management and community support.

    Whether you’re an aspiring developer or an experienced programmer, Qt Creator is worth exploring—especially if you’re interested in cross-platform GUI development.
  • How to Get Started with Paperless-ngx Using Podman: A Beginner-Friendly Guide

    How to Get Started with Paperless-ngx Using Podman: A Beginner-Friendly Guide

    Have you ever wished for a way to organize all your scanned documents, receipts, and PDFs into a searchable archive? Paperless-ngx is a powerful, open-source document management system designed to help you go paperless and take control of your digital files.

    In this post, I’ll walk you through a simple installation of Paperless-ngx using Podman, an alternative to Docker that works great on Linux. If you’re new to self-hosted solutions or just want a better way to manage documents, you’re in the right place.

    What is Paperless-ngx?

    Paperless-ngx is a community-maintained fork of the original Paperless project. It helps you:

    • Upload, tag, and organize documents
    • Automatically extract text via OCR
    • Search documents with ease
    • Stay in control of your data with a self-hosted solution

    And the best part? It’s completely free and open source!

    Installing Paperless-ngx with Podman

    Here’s a basic example using podman-compose. Make sure you have Podman and podman-compose installed on your system first.

    1. Clone the Paperless-ngx Repository

    git clone https://github.com/paperless-ngx/paperless-ngx.git
    cd paperless-ngx

    2. Create and Edit .env File

    Copy the example environment file:

    cp .env.sample .env

    Edit it with your preferred editor to match your configuration (storage location, ports, timezone, etc.)

    3. Launch with Podman Compose

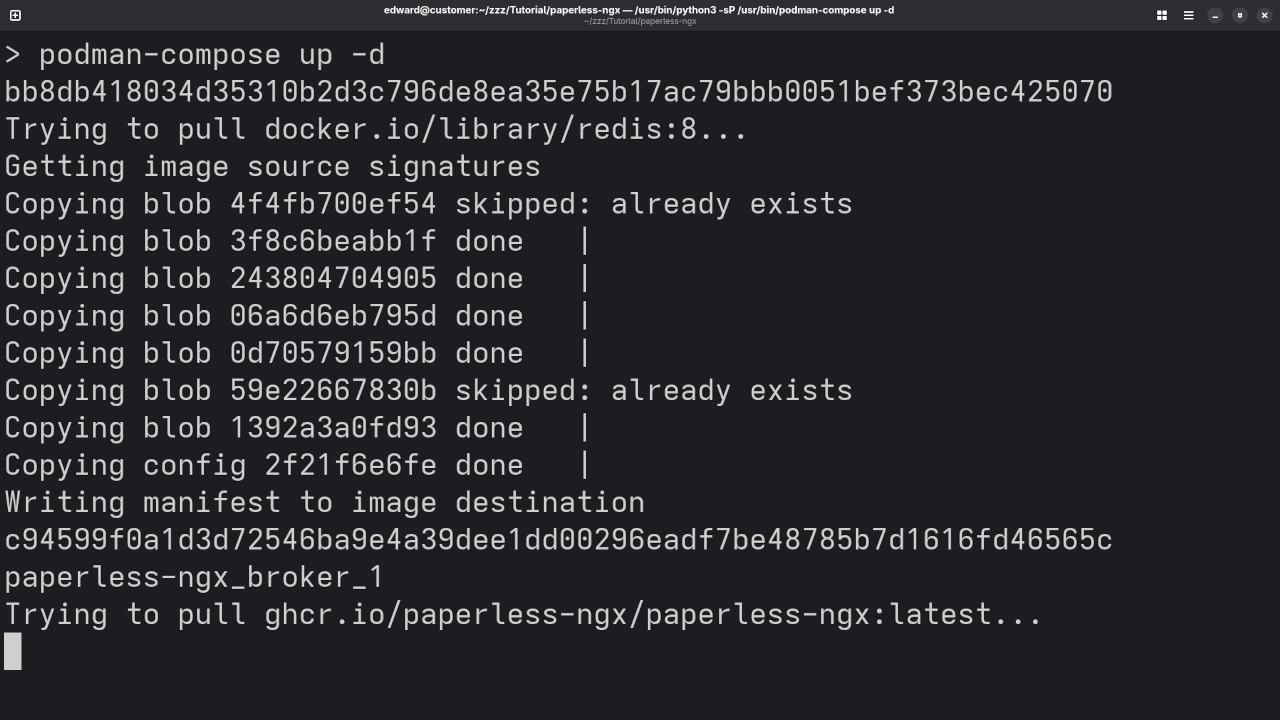
    podman-compose up -d

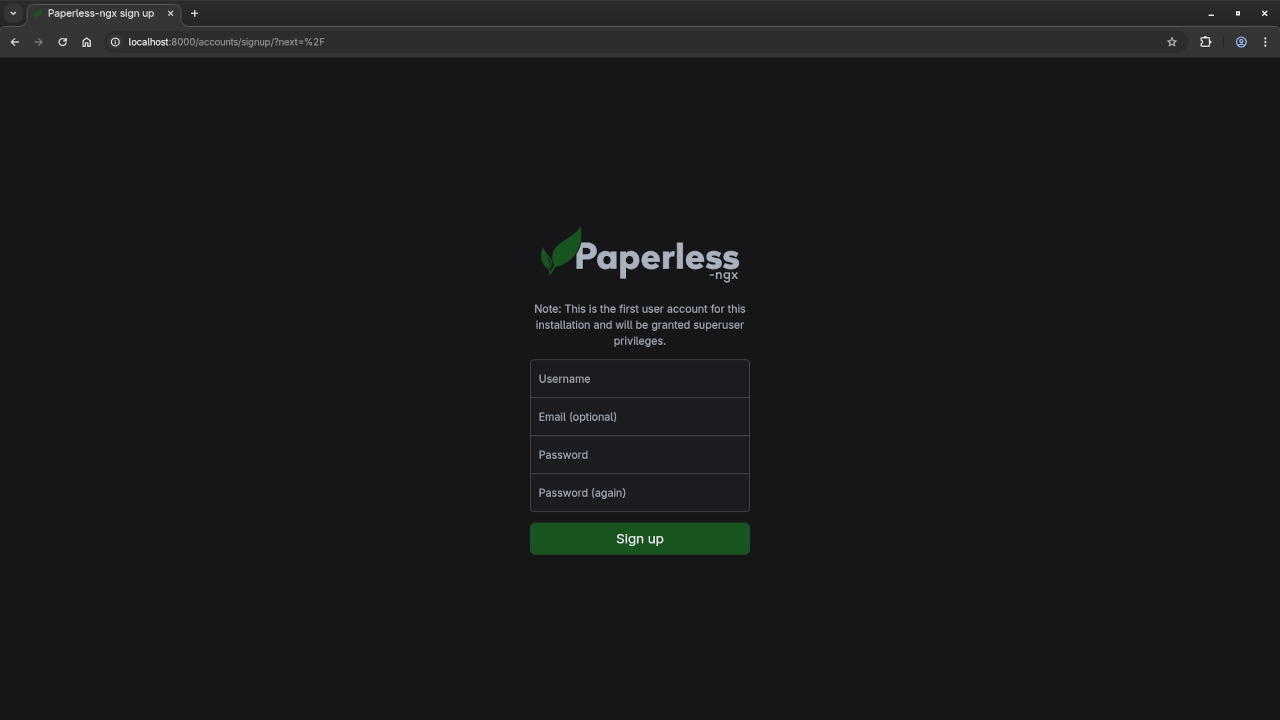
    Once everything starts, you should be able to access Paperless-ngx at http://localhost:8000 or whatever port you configured.

    ⚠️ Need help installing or updating Paperless-ngx? Contact me for one-on-one help.

    📷 Screenshots & Screencast

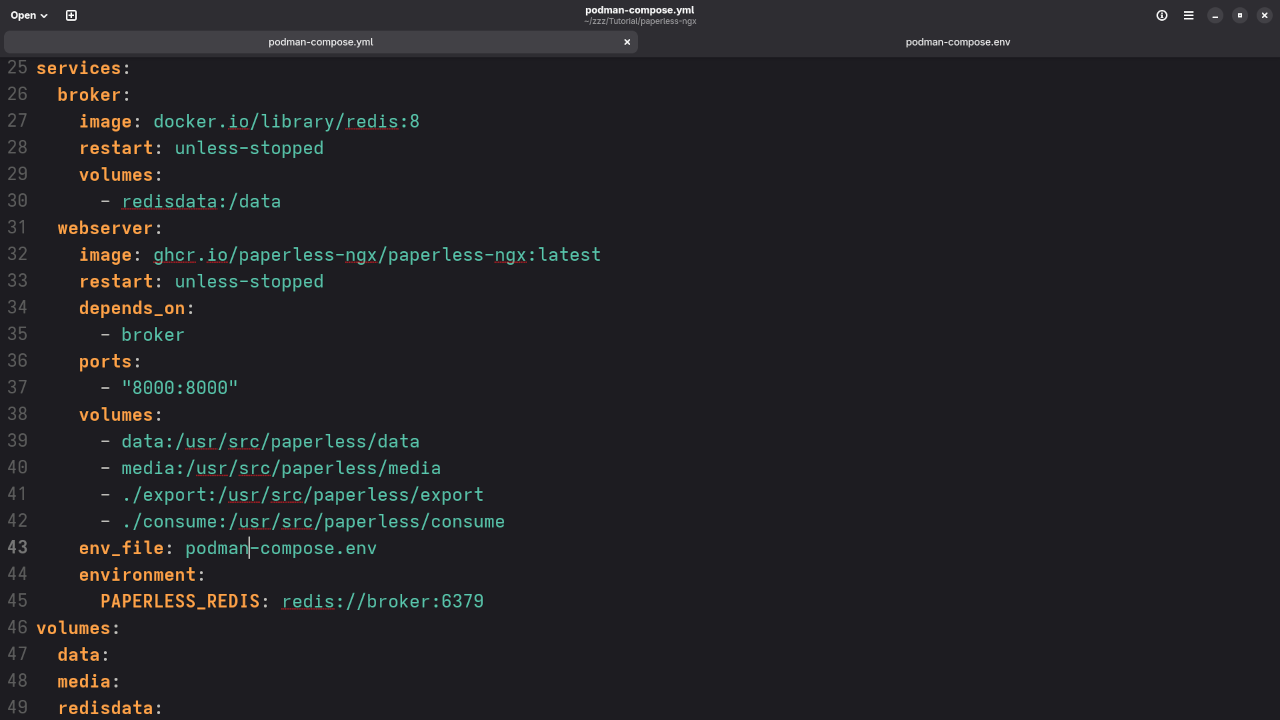
    Jellyfish Compose YAML File
    Gnome Text Editor Displaying Paperless-ngx Compose YAML File

    Paperless-ngx Podman Compose Build
    Command Line Installation Of Paperless-ngx Via Podman Compose Build

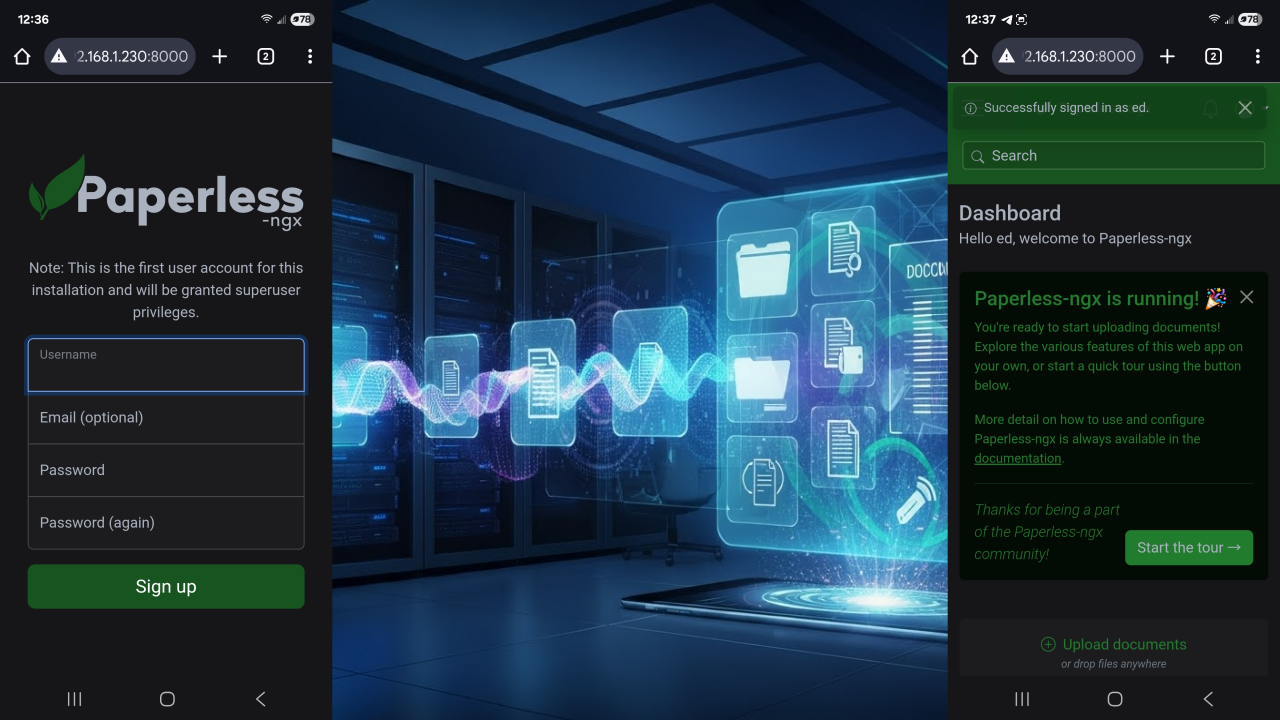
    Paperless-ngx Installation User Screen
    Web Browser Displaying Paperless-ngx Installation User Screen

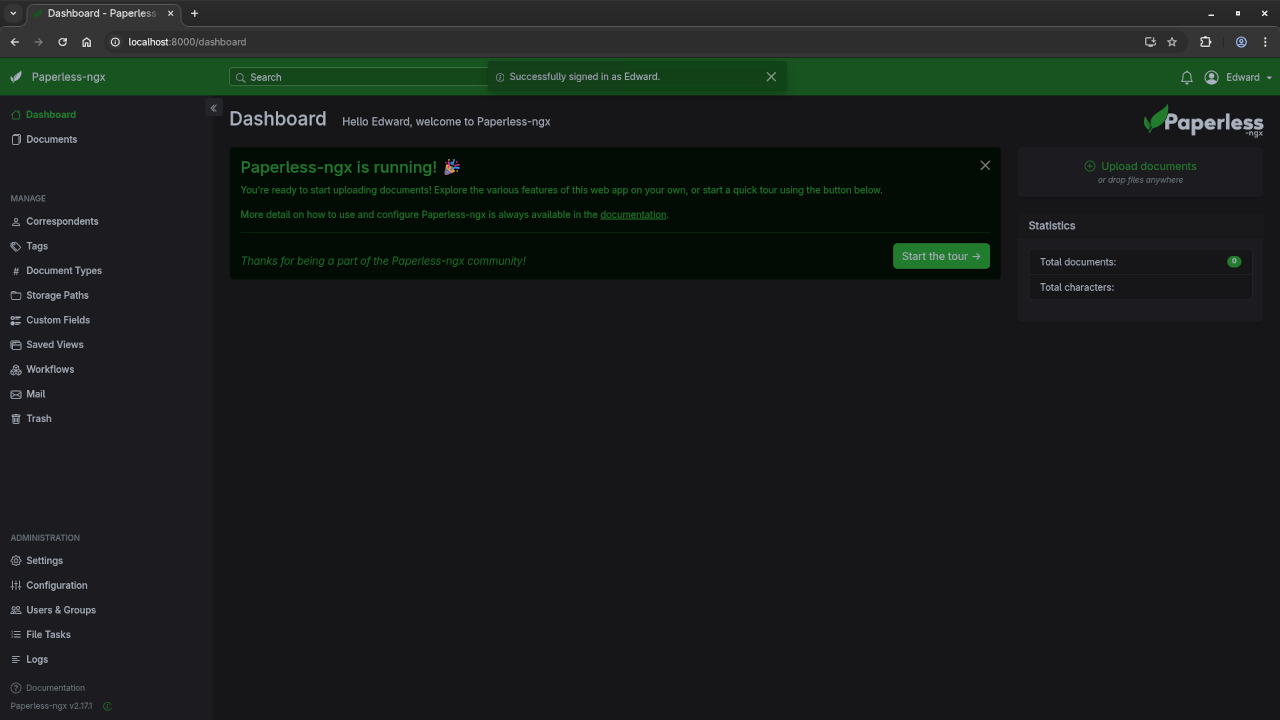
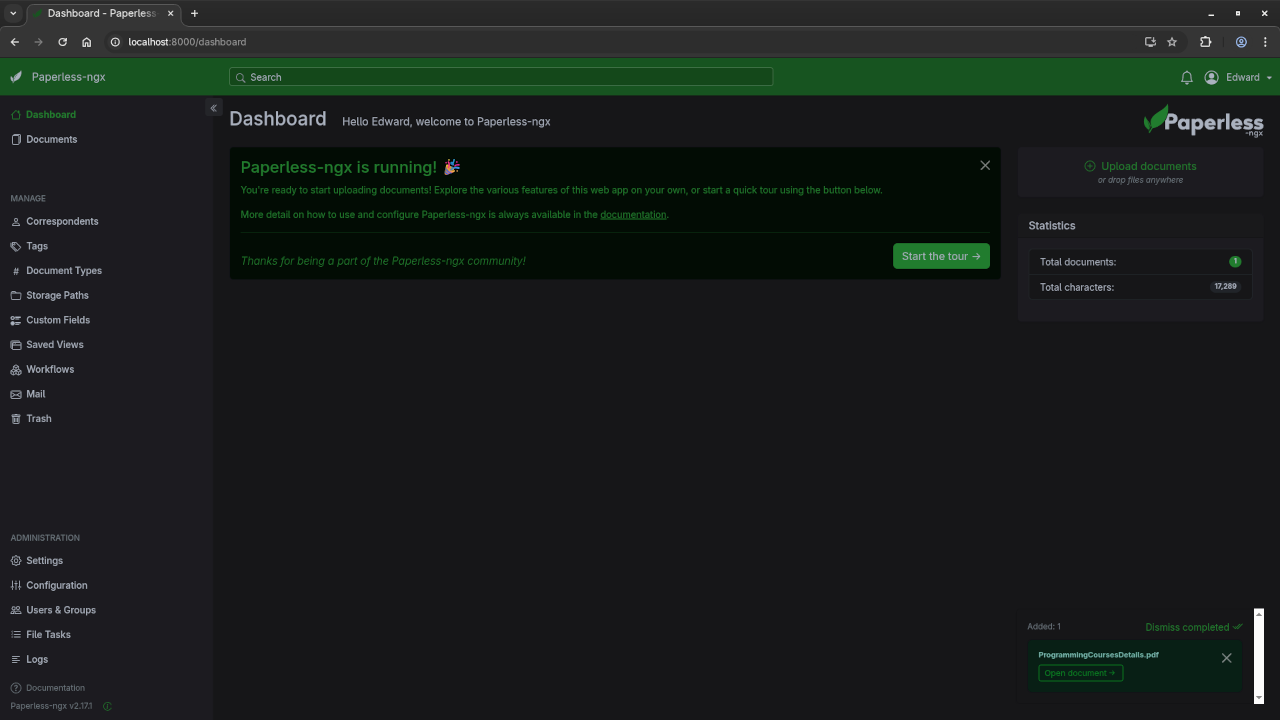
    Paperless-ngx Dashboad Screen
    Web Browser Displaying Paperless-ngx Dashboard Screen

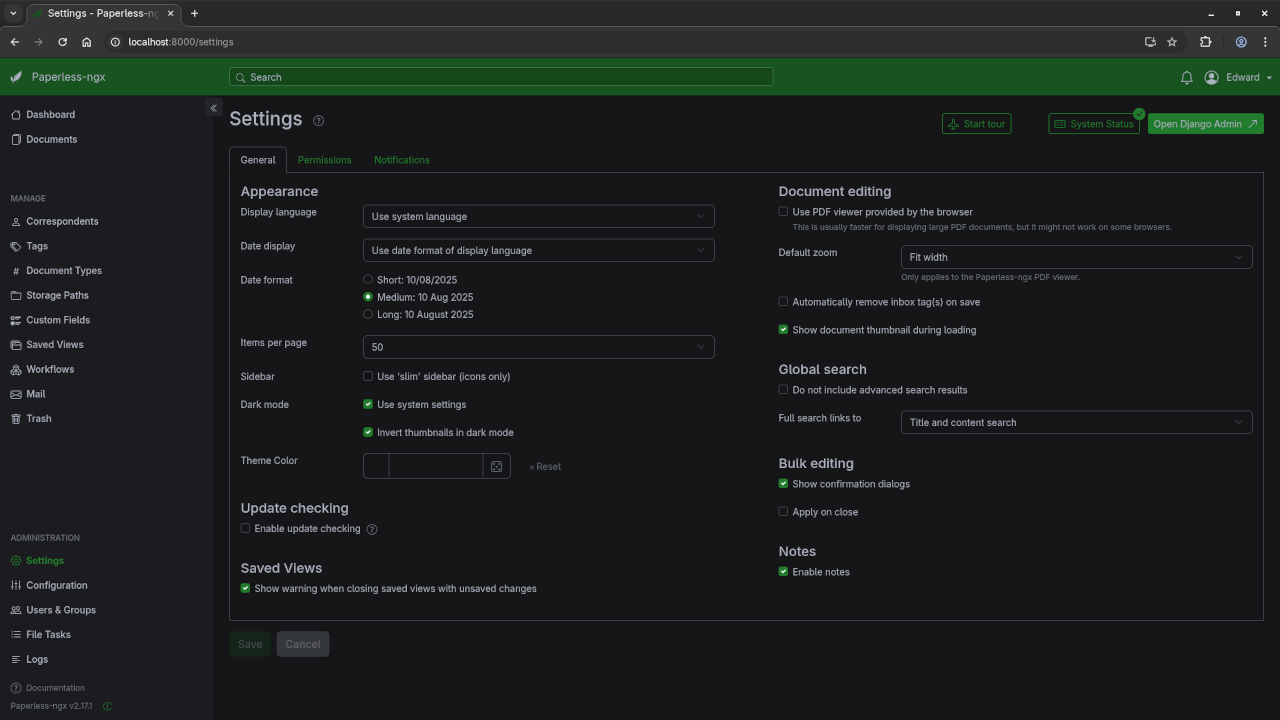
    Paperless-ngx General Settings Screen
    Web Browser Displaying Paperless-ngx General Settings Screen

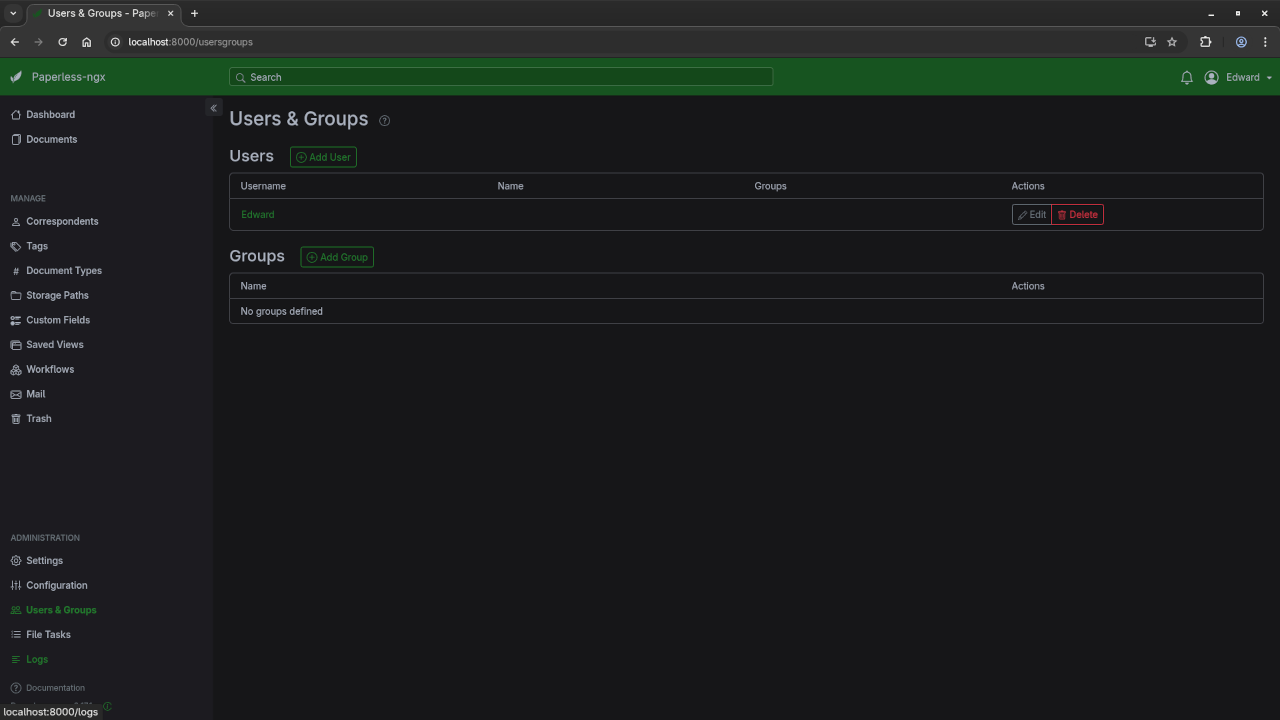
    Paperless-ngx Users & Groups Screen
    Web Browser Displaying Paperless-ngx Users & Groups Screen

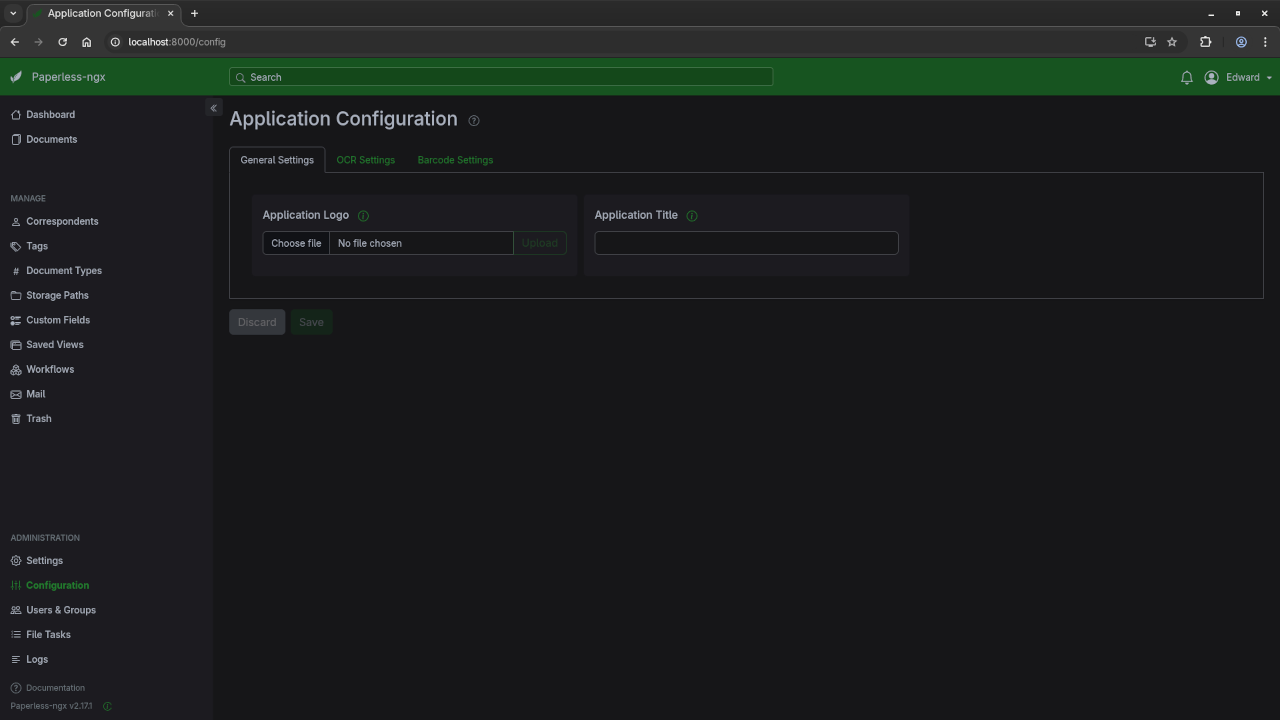
    Paperless-ngx Configuration Screen
    Web Browser Displaying Paperless-ngx Configuration Screen

    Paperless-ngx Upload Screen
    Web Browser Displaying Paperless-ngx Upload Screen

    Paperless-ngx Mobile View
    Web Browser Displaying Paperless-ngx Mobile View

    Paperless-ngx Installation And Setup Screencast

    Learn More – JavaScript Resources

    If you’re new to programming or want to understand more about how apps like Paperless-ngx work under the hood, I’ve written a book and created a course to help you:

    📚 Book: Learning JavaScript on Amazon

    🎓 Course: Learning JavaScript Online Course

    These resources are great for beginners and walk you through JavaScript fundamentals in a simple, project-based way.

    Need Help?

    I offer one-on-one programming tutorials, including:

    • Custom Paperless-ngx installs
    • Migrations from older versions
    • Server updates & backups

    📩 Contact me here to schedule a session.

    Let me know in the comments if you’d like to see an advanced setup guide using Caddy, SSL, or remote backups.

    Thanks for reading, and happy organizing! 🗄️

  • Training Generative AI GPT-Neo 125M Model

    Training Generative AI GPT-Neo 125M Model

    Training GPT-Neo 125M in a Podman Compose Container Using Open Source Tools and Data

    If you’re looking to get started with large language models (LLMs) like GPT-Neo 125M, you’re in the right place. In this tutorial, we’ll explore how to train the open source GPT-Neo 125M model from Hugging Face inside a containerized Podman Compose environment.
    This setup is perfect for developers who prefer open source tools and want a simple, reproducible training workflow — even on a modest machine.

    What Is GPT-Neo 125M?

    GPT-Neo 125M is an open source transformer-based language model created by EleutherAI. It’s a great starting point for fine-tuning with small datasets or learning the basics of language model training.

    Why Use Podman Compose?

    Podman Compose offers a container-based environment similar to Docker Compose — but with a focus on being daemonless and rootless. It’s ideal for developers working on Linux who want an open source alternative to Docker.

    With Podman Compose, you can:

    • Reproducibly build and run training environments
    • Mount volumes for data, model caching, and output
    • Avoid polluting the host system

    Installing GPT-Neo 125M in Podman Compose

    1. Project Structure

    gpt-neo-podman-compose/
    │—— data/                    # Your custom dataset (.jsonl)
    │—— output/                 # Model outputs (saved model)
    │—— cache/                  # Model & pip cache
    │—— Dockerfile
    │—— podman-compose.yml
    │—— requirements.txt
    │—— train.py

    2. Training Script train.py


    from datasets import load_dataset
    from transformers import AutoTokenizer, AutoModelForCausalLM, Trainer, TrainingArguments
    import torch
    
    # Load dataset
    def format_example(example):
        return {"text": f"### Question: {example['prompt']}\n### Answer: {example['response']}"}
    
    dataset = load_dataset("json", data_files="data/custom_dataset.jsonl")
    dataset = dataset.map(format_example)
    dataset = dataset["train"].train_test_split(test_size=0.1)
    dataset = dataset.remove_columns(["prompt", "response"])
    
    # Tokenizer & Model
    model_name = "EleutherAI/gpt-neo-125M"  # Smollm 135M is not public, use similar
    tokenizer = AutoTokenizer.from_pretrained(model_name)
    model = AutoModelForCausalLM.from_pretrained(model_name)
    
    def tokenize(example):
        return tokenizer(example["text"], padding="max_length", truncation=True, max_length=512)
    
    tokenized_dataset = dataset.map(tokenize, batched=True)
    tokenized_dataset.set_format(type='torch', columns=['input_ids', 'attention_mask'])
    
    # Training
    training_args = TrainingArguments(
        output_dir="./output",
        per_device_train_batch_size=2,
        per_device_eval_batch_size=2,
        num_train_epochs=3,
        logging_steps=10,
        evaluation_strategy="epoch",
        save_strategy="epoch",
        logging_dir="./logs",
        save_total_limit=1,
        fp16=torch.cuda.is_available(),
    )
    
    trainer = Trainer(
        model=model,
        args=training_args,
        train_dataset=tokenized_dataset["train"],
        eval_dataset=tokenized_dataset["test"],
        tokenizer=tokenizer,
    )
    
    trainer.train()


    3. Dockerfile

    FROM python:3.10
    
    ENV HF_HOME=/cache/huggingface
    ENV TRANSFORMERS_CACHE=/cache/huggingface/transformers
    ENV HF_DATASETS_CACHE=/cache/huggingface/datasets
    ENV PIP_CACHE_DIR=/cache/pip
    
    WORKDIR /app
    
    # Install system packages
    RUN apt update && apt install -y git
    
    # Pre-install dependencies to enable caching
    COPY requirements.txt .
    RUN pip install --cache-dir=$PIP_CACHE_DIR -r requirements.txt
    
    COPY . .
    
    CMD ["python", "train.py"]

    4. The requirements.txt File

    transformers
    datasets
    torch

    5. Podman Compose YAML

    version: "3"
    
    services:
      smollm-trainer:
        build: .
        volumes:
          - ./data:/app/data
          - ./output:/app/output
          - ./cache:/cache             # Cache for Hugging Face and pip
        command: ["python", "train.py"]

    6. Example Open Source Dataset

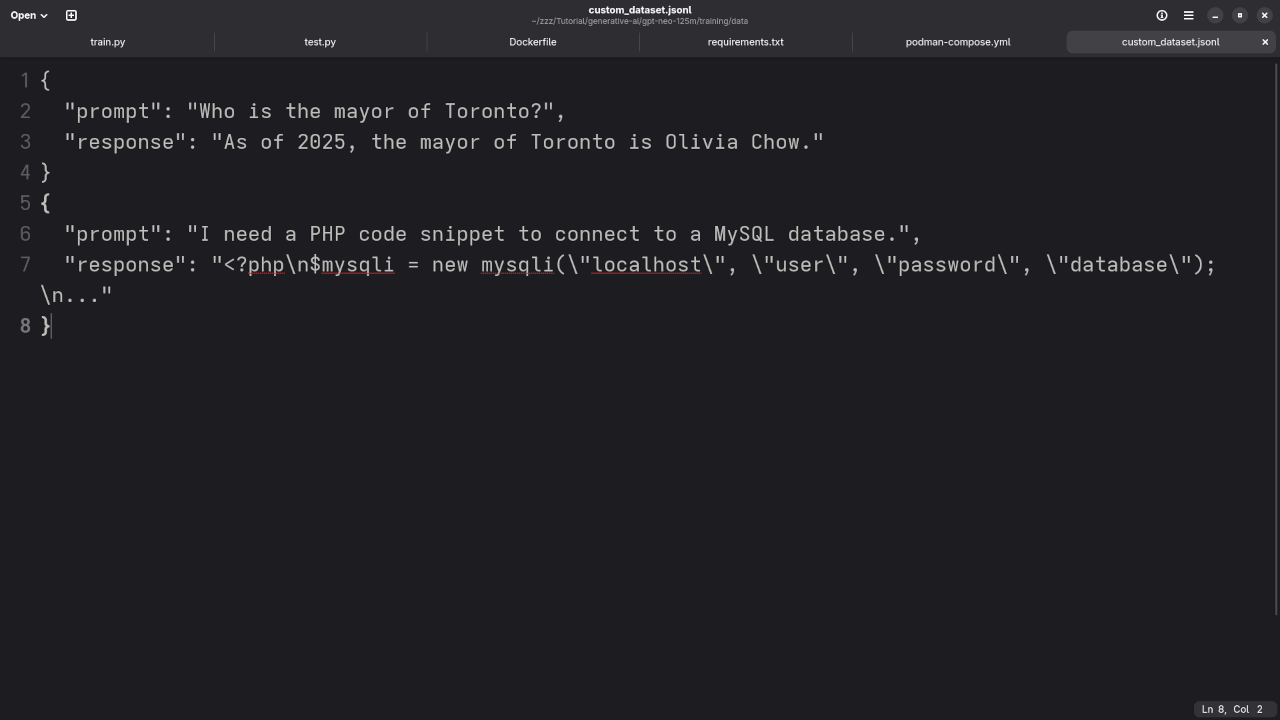
    We’re using a simple JSONL format. Here’s an example from our data/custom_dataset.jsonl file:


    {
      "prompt": "Who is the mayor of Toronto?",
      "response": "As of 2025, the mayor of Toronto is Olivia Chow."
    }
    {
      "prompt": "I need a PHP code snippet to connect to a MySQL database.",
      "response": "<?php\n$mysqli = new mysqli(\"localhost\", \"user\", \"password\", \"database\");\n..."
    }


    6. Build and Run with Podman Compose
    mkdir -p data output cache
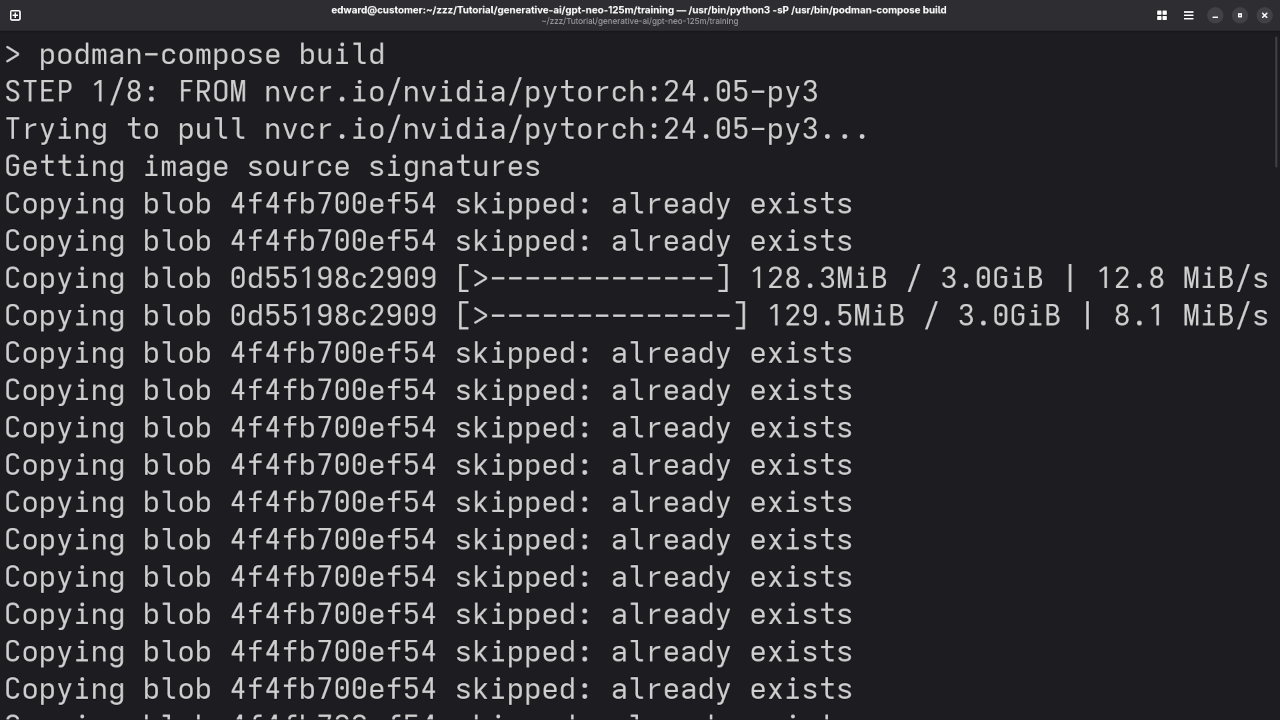
    podman-compose build
    podman-compose up

    This downloads the base GPT-Neo model, loads your dataset, and starts training — all inside a secure, isolated container.

    7. Inference Example (Optional)


    from transformers import AutoTokenizer, AutoModelForCausalLM
    
    tokenizer = AutoTokenizer.from_pretrained(&quot;./output&quot;)
    model = AutoModelForCausalLM.from_pretrained(&quot;./output&quot;)
    
    prompt = &quot;Who is the mayor of Toronto?&quot;
    inputs = tokenizer(prompt, return_tensors=&quot;pt&quot;)
    outputs = model.generate(**inputs, max_new_tokens=100)
    print(tokenizer.decode(outputs[0], skip_special_tokens=True))


    Screenshots & Screencast

    GPT-Neo 125M dataset
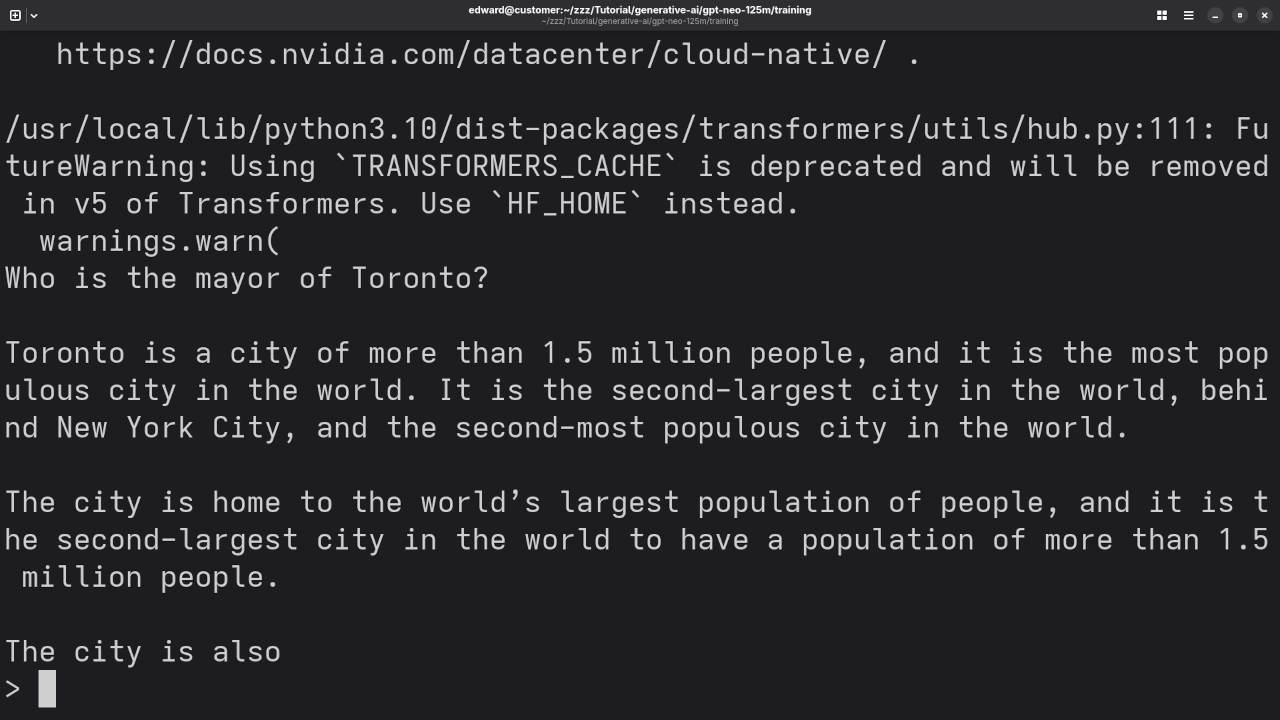
    Command Line GPT-Neo 125M Dataset Creation.

    GPT-Neo 125M Custom Build
    Command Line GPT-Neo 125M Custom Build In Podman Container.

    GPT-Neo 125M Custom Training Dataset
    Command Line GPT-Neo 125M Custom Training Dataset In Podman Container.

    GPT-Neo 125M Pre-Training Test
    Command Line GPT-Neo 125M Pre-Training Test.

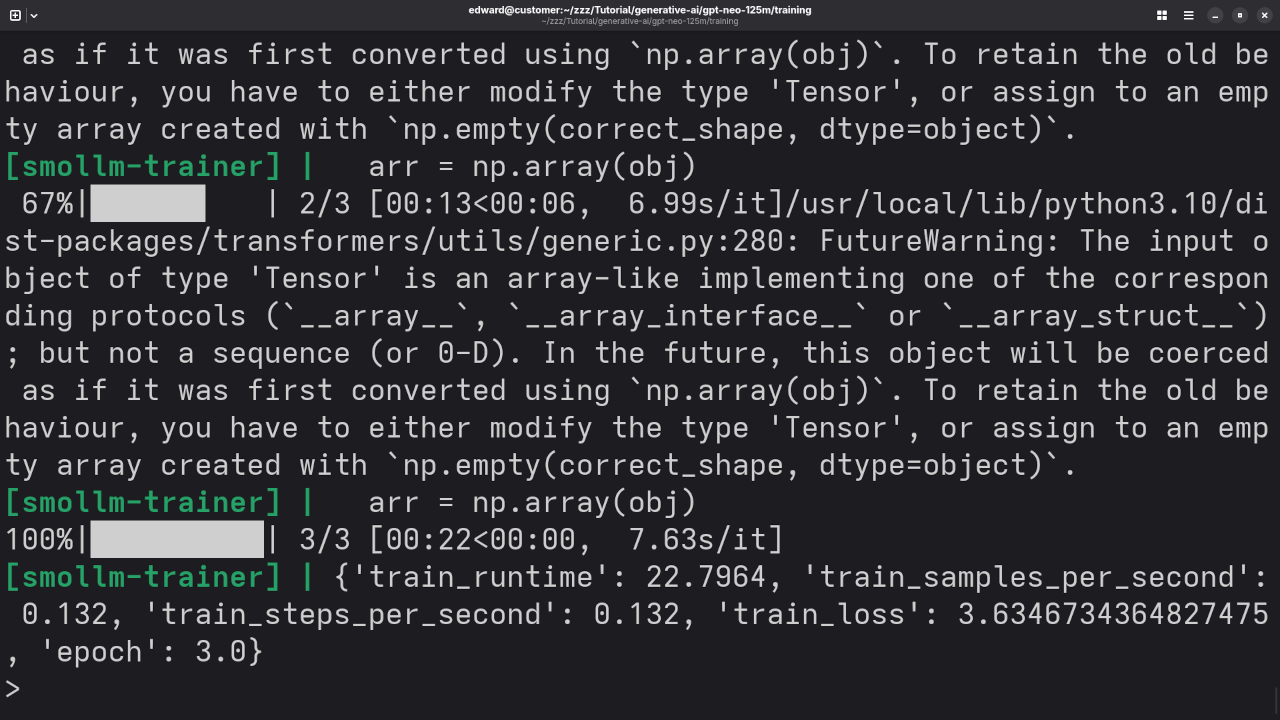
    GPT-Neo 125M Post-Training Test
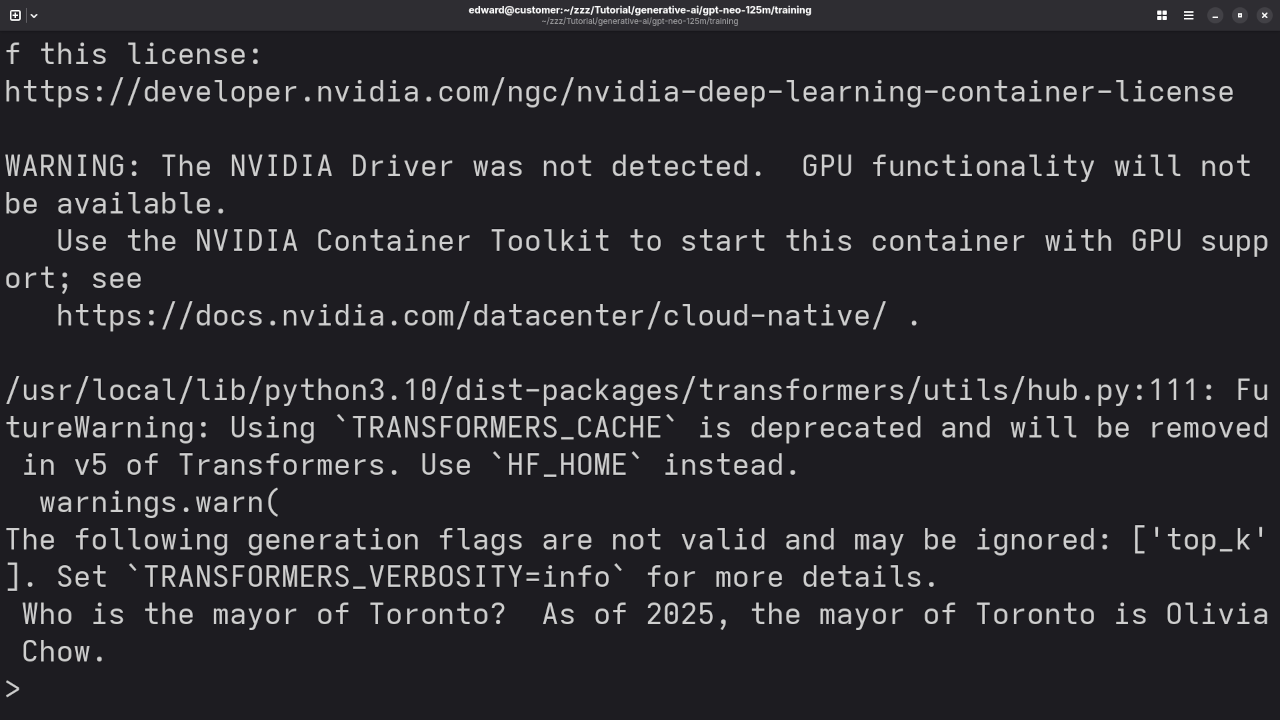
    Command Line GPT-Neo 125M Post-Training Test.

    Video Displaying Training GPT-Neo 125M In Podman Container

    Before and After: Results

    Output Before Training (default GPT-Neo)

    Prompt: Who is the mayor of Toronto?
    Response: I’m not sure.

    Prompt: I need a PHP code snippet to connect to MySQL.
    Response: Incoherent or missing

    Output After Fine-Tuning

    Prompt: Who is the mayor of Toronto?
    Response: As of 2025, the mayor of Toronto is Olivia Chow.

    Prompt: I need a PHP code snippet to connect to MySQL.
    Response:


    &lt;?php
    $mysqli = new mysqli(&quot;localhost&quot;, &quot;user&quot;, &quot;password&quot;, &quot;database&quot;);
    if ($mysqli-&amp;gt;connect_error) {
        die(&quot;Connection failed: &quot; . $mysqli-&amp;gt;connect_error);
    }
    echo &quot;Connected successfully&quot;;
    ?&gt;


    Additional Resources

    If you’re just starting out with Python or want to deepen your understanding, check out my beginner-friendly book and course:

    📚 Book:
    Learning Python (eBook on Amazon)

    🎓 Course:
    Learning Python (Ojambo Shop)

    Need Help?

    I’m available for:

    Feel free to reach out and let’s bring AI to your next project!

    Conclusion

    With open source models like GPT-Neo and tools like Podman Compose, training your own AI assistant is more accessible than ever. Whether you’re creating a chatbot, a code assistant, or a personal knowledge base — it all starts with training.

    Have questions or want to share your setup? Drop a comment below or get in touch!

  • PHP Web Framework Leaf PHP

    PHP Web Framework Leaf PHP

    Getting Started with Leaf PHP 4.2 MVC: A Simple App with MariaDB Integration

    If you’re learning PHP and want to dive into modern frameworks without the heavy lifting of Laravel, then Leaf PHP 4.2 is an amazing choice. It’s a lightweight, expressive PHP framework that supports MVC, Blade templates, and integrates easily with databases — perfect for new developers and PHP veterans alike.

    In this beginner-friendly post, I’ll walk you through how to set up a simple Leaf PHP app that connects to a MariaDB database and displays records from a people table in HTML using Blade.

    Why Leaf PHP?

    Leaf PHP is designed to be simple and fast. It offers:

    • MVC structure (Models, Views, Controllers)
    • Blade templating out-of-the-box
    • Easy integration with Eloquent ORM
    • Composer-based project setup

    Whether you’re migrating from raw PHP or learning to build structured apps, Leaf gives you power without the bloat.

    Prerequisites

    Before we begin, make sure you have:

    • PHP 8.1 or later
    • Composer installed
    • MariaDB running locally (or remotely)
    • A database table called people with at least some sample data

    Step 1: Install Leaf MVC

    Let’s create a new Leaf MVC project using Composer:

    composer create-project leafs/mvc leaf-app
    cd leaf-app

    This gives you a ready-to-go folder structure with MVC support, Blade templating, routing, and more.

    Step 2: Configure the Database

    Open the .env file and set your database credentials:

    DB_HOST=127.0.0.1
    DB_NAME=your_database_name
    DB_USER=your_db_user
    DB_PASS=your_db_password

    Then, open public/index.php and ensure the database is initialized:

    \Leaf\Database::initDb();

    Step 3: Create the Model

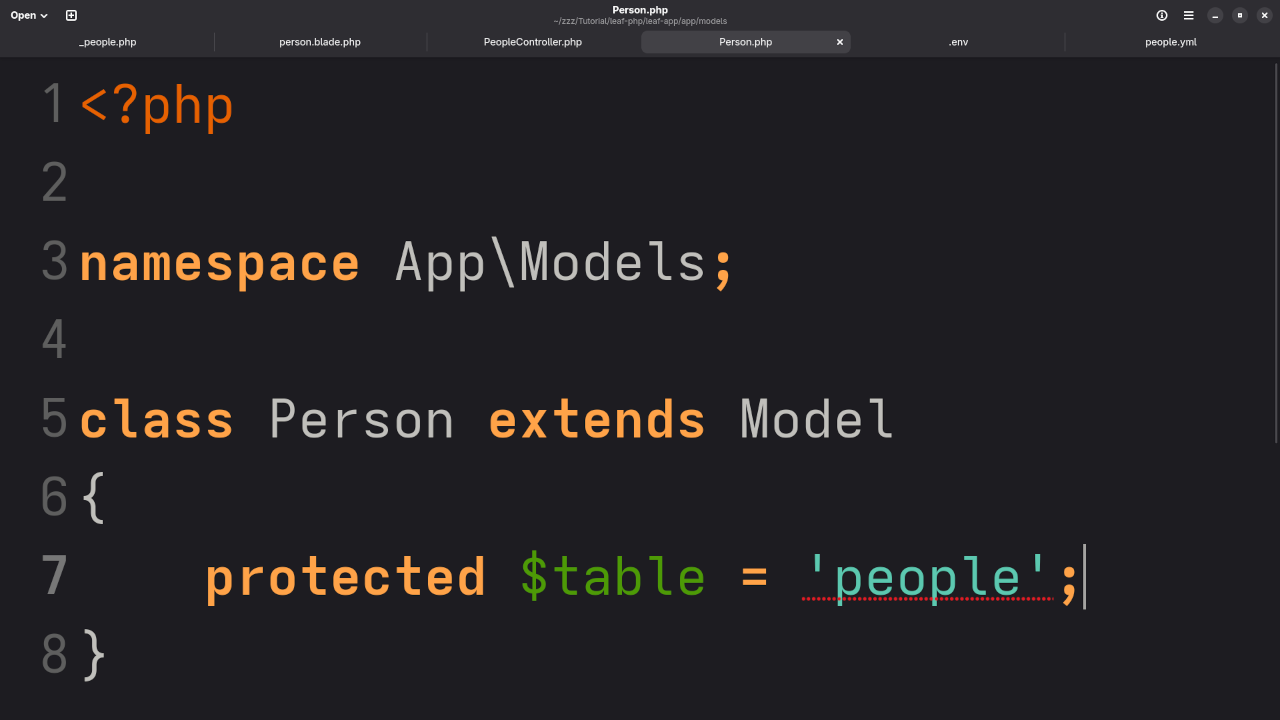
    Let’s define a model for our people table.

    File: app/Models/Person.php


    &lt;?php
    
    namespace App\Models;
    
    use Leaf\Model;
    
    class Person extends Model
    {
        protected $table = &#039;people&#039;; // Set the correct table name
    }


    Step 4: Create the Controller

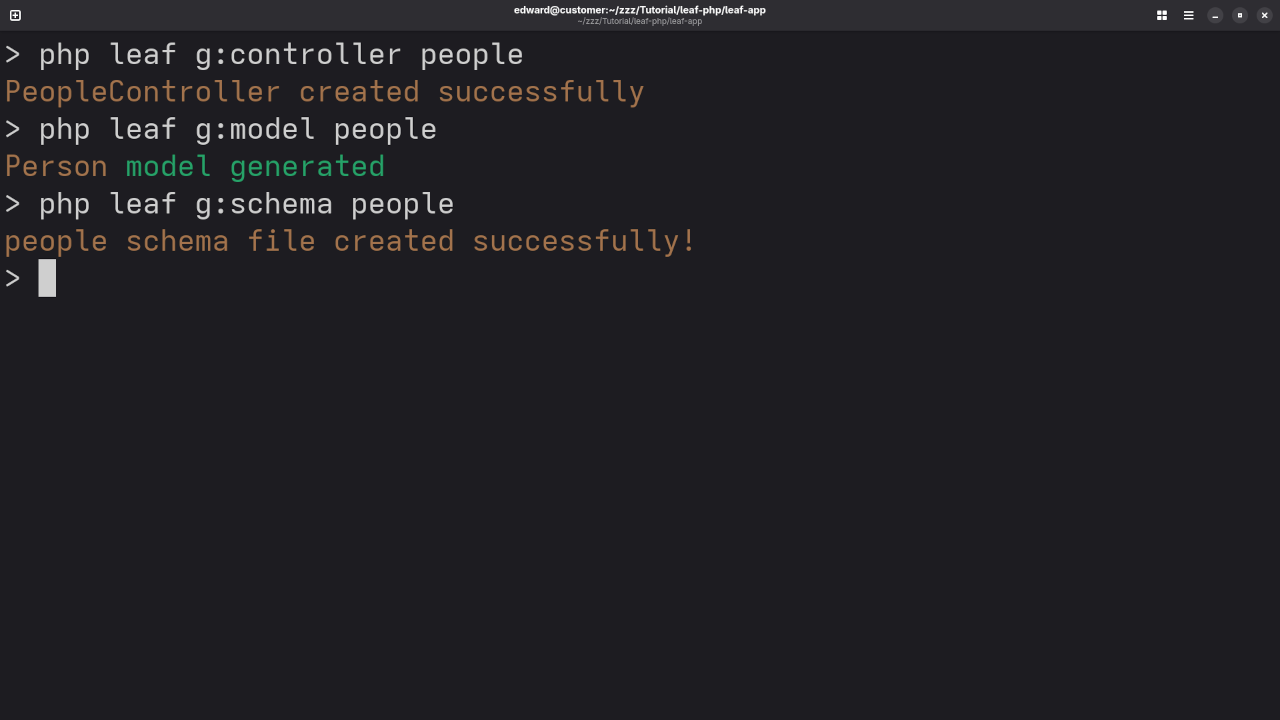
    Generate a controller:

    php leaf g:controller People

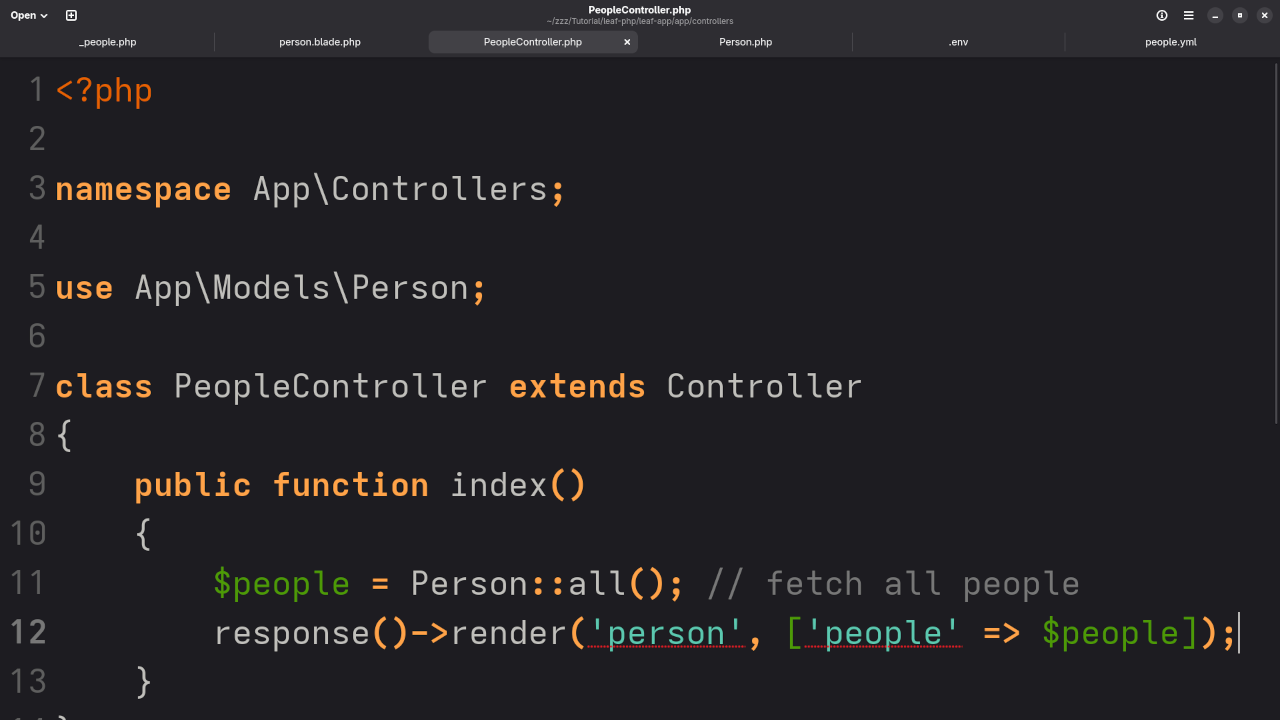
    Then edit it to fetch all rows from the people table and pass them to the Blade view.

    File: app/Controllers/PeopleController.php


    &lt;?php
    
    namespace App\Controllers;
    
    use App\Models\Person;
    
    class PeopleController extends Controller
    {
        public function index()
        {
            $people = Person::all();
    
            response()-&gt;render(&#039;people&#039;, [
                &#039;people&#039; =&gt; $people
            ]);
        }
    }


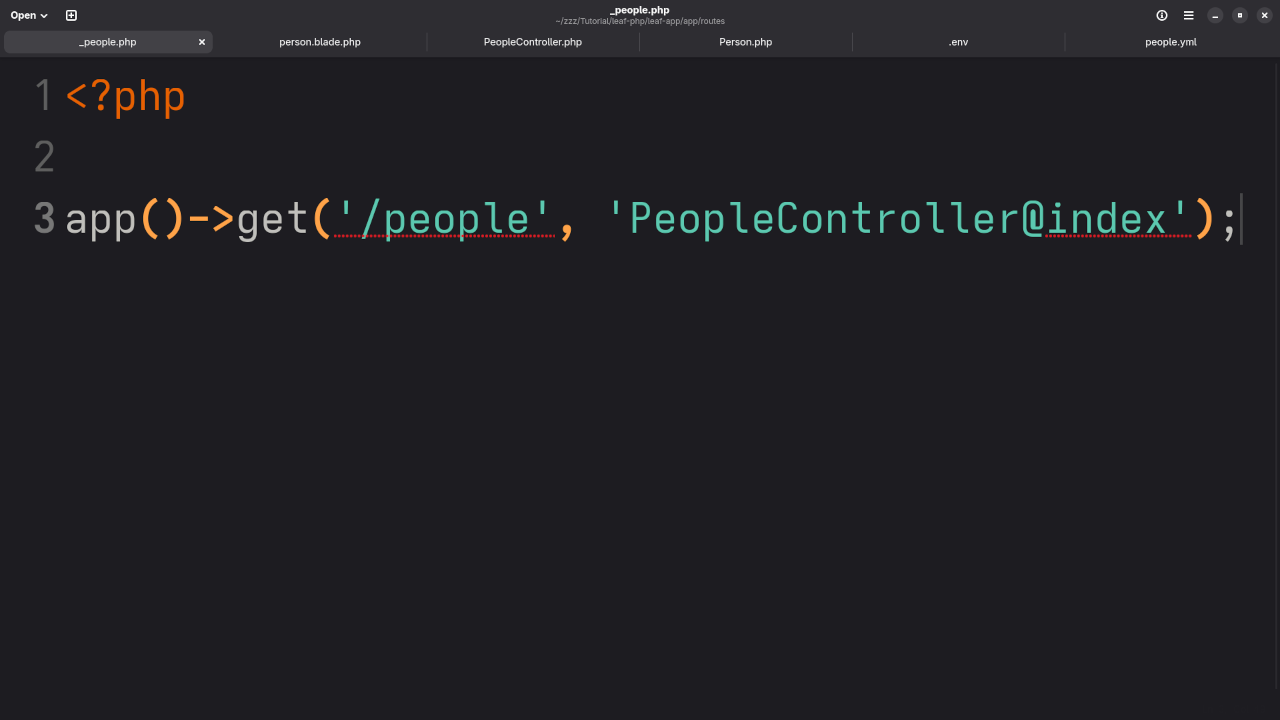
    Step 5: Add the Route

    File: app/routes/web.php

    app()->get('/people', 'PeopleController@index');

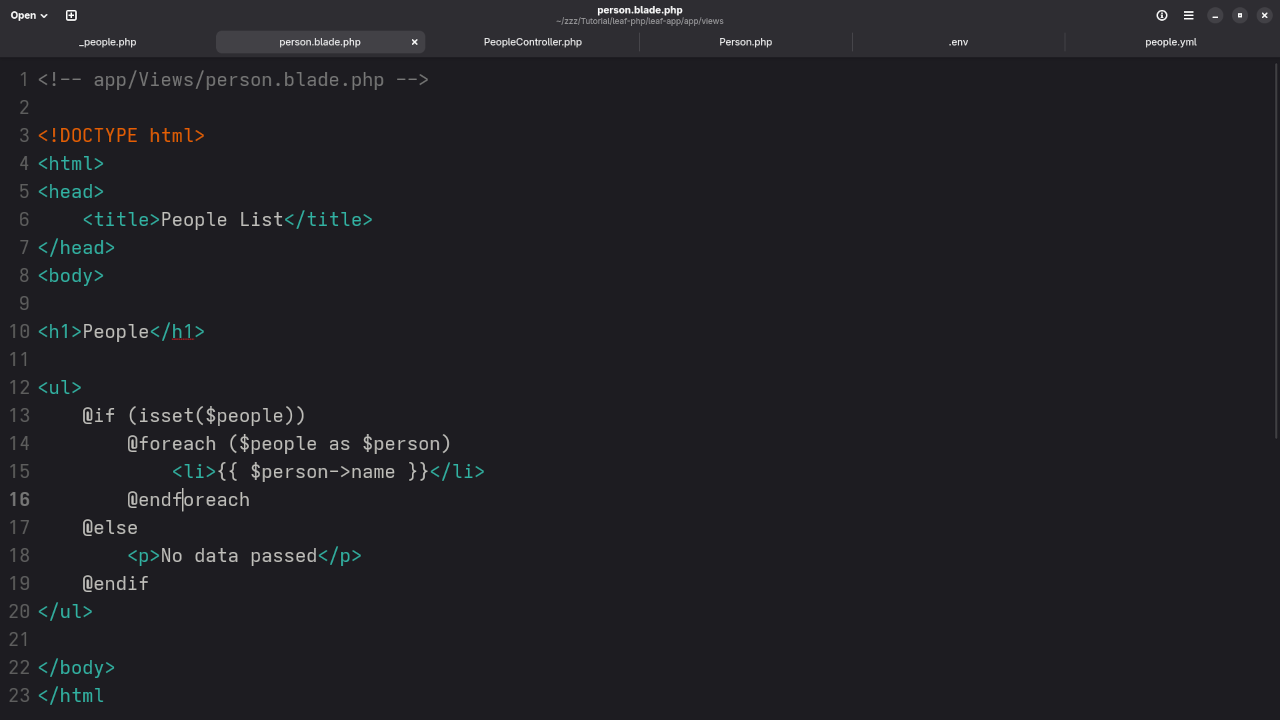
    Step 6: Create the Blade View

    File: app/Views/people.blade.php


    &lt;!DOCTYPE html&gt;
    &lt;html&gt;
    &lt;head&gt;
        &lt;title&gt;People List&lt;/title&gt;
    &lt;/head&gt;
    &lt;body&gt;
        &lt;h1&gt;List of People&lt;/h1&gt;
    
        @if (isset($people) &amp;&amp; count($people) &gt; 0)
            &lt;ul&gt;
                @foreach ($people as $person)
                    &lt;li&gt;{{ $person-&gt;name }} - {{ $person-&gt;email }}&lt;/li&gt;
                @endforeach
            &lt;/ul&gt;
        @else
            &lt;p&gt;No records found.&lt;/p&gt;
        @endif
    &lt;/body&gt;
    &lt;/html&gt;


    Screenshots & Screencast

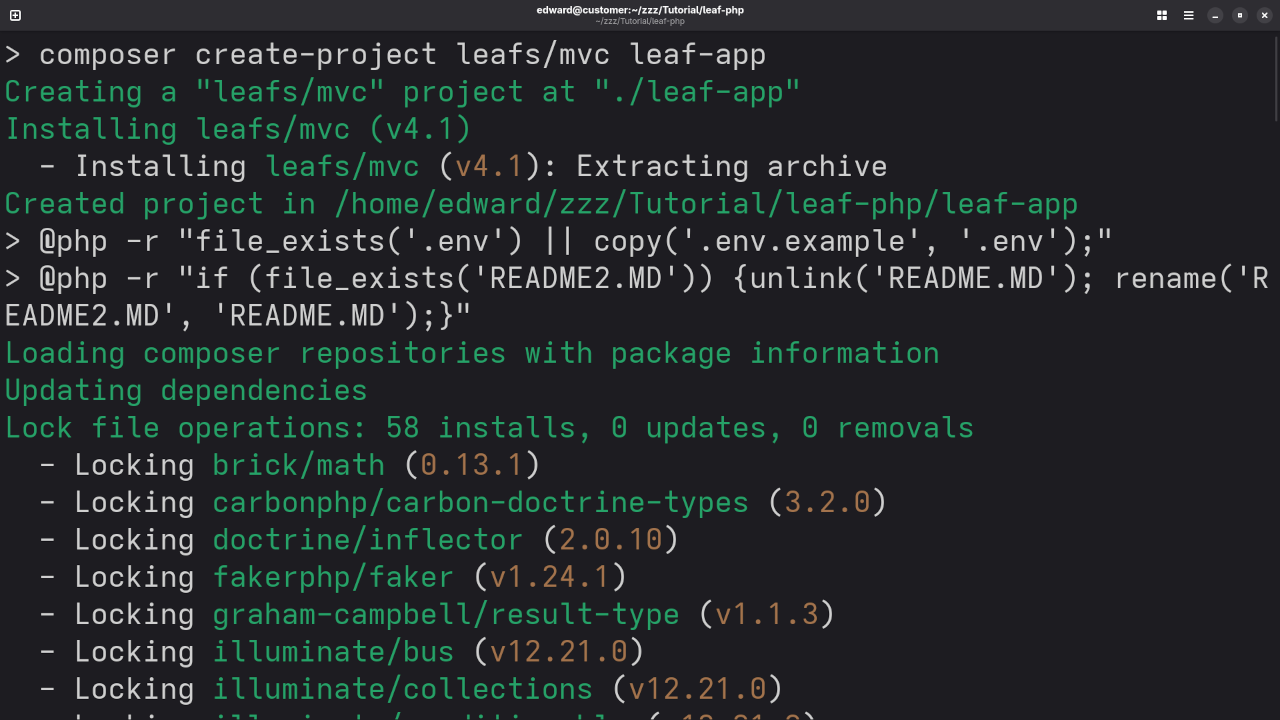
    Leaf PHP Dependencies
    Command Line Installation Of Leaf PHP Web Framework

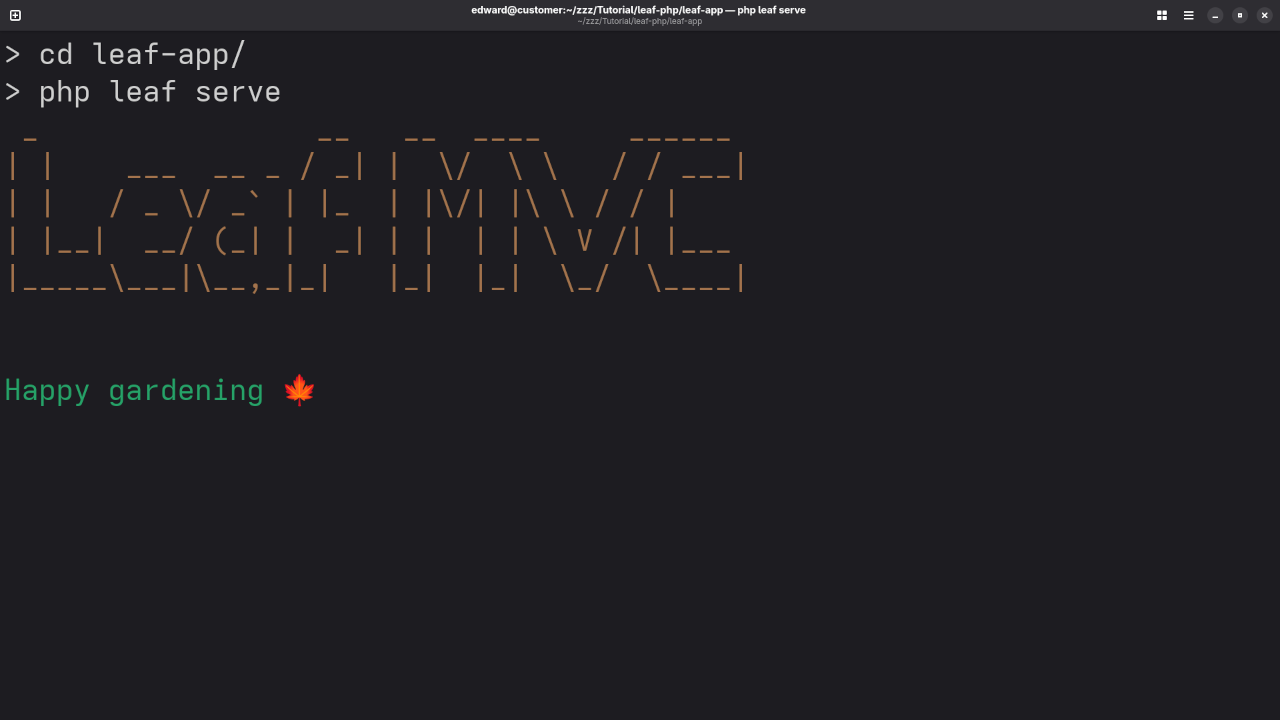
    Leaf PHP Server
    Command Line Server Of Leaf PHP Web Framework

    Leaf PHP Class Generator
    Terminal Displaying Class Generator Result

    Leaf PHP Route
    Gnome Text Editor Displaying App Route File

    Leaf PHP View
    Gnome Text Editor Displaying App View File

    Leaf PHP People Controller
    Gnome Text Editor Displaying Custom People Controller
    Leaf PHP People Model
    Gnome Text Editor Displaying Custom People Model
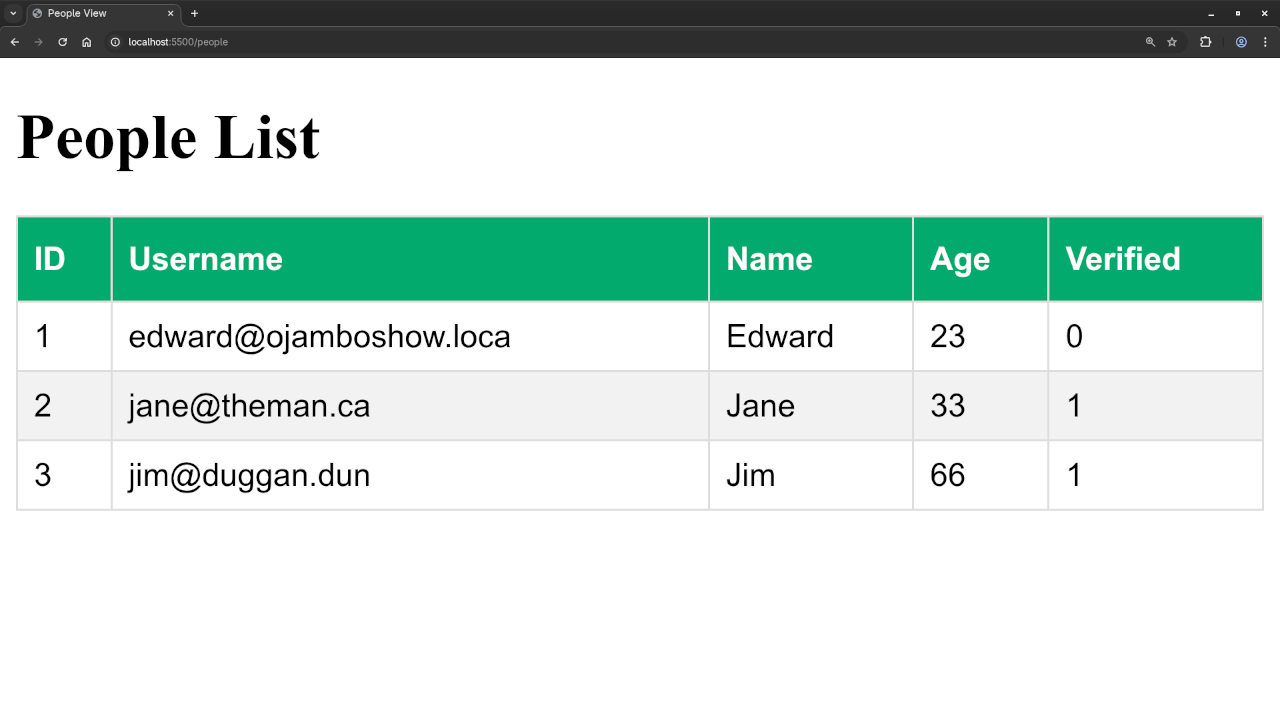
    Leaf PHP People Result
    Web Browser Displaying Custom People Route Result

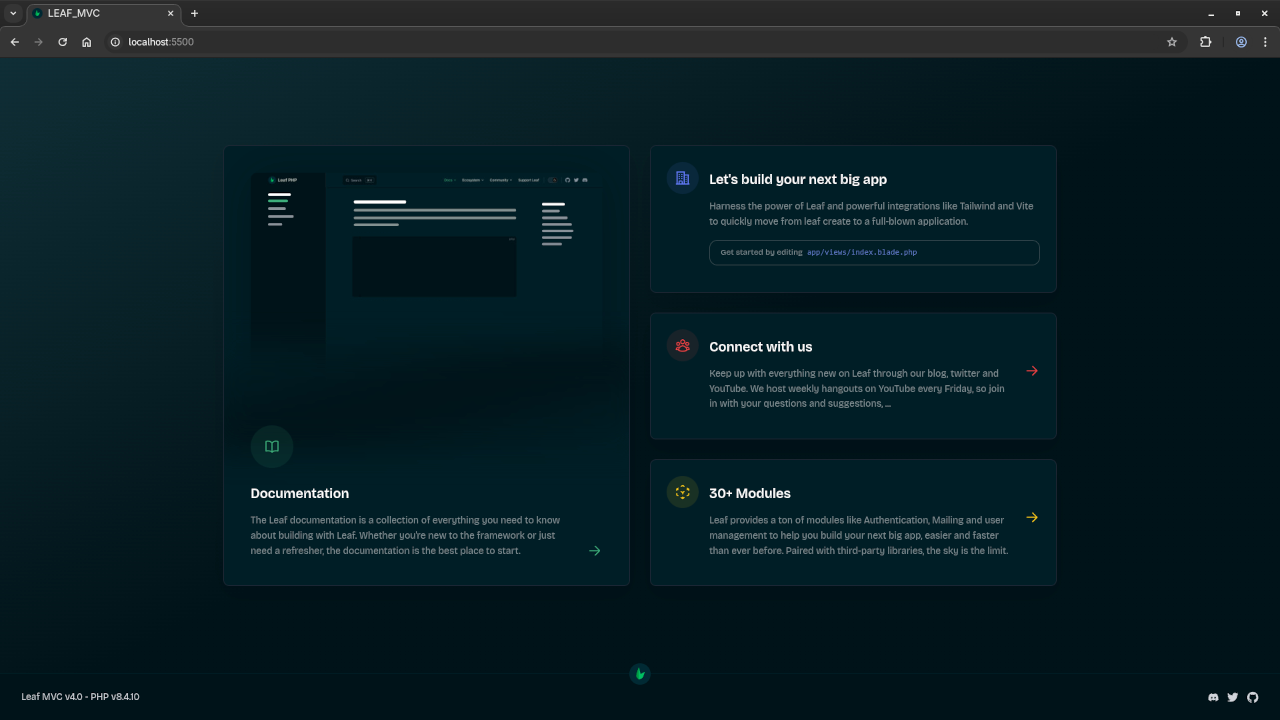
    Leaf PHP Custom View Records In Web Browser

    Learn More: My PHP Book & Course

    This post is a great introduction, but if you’re serious about mastering PHP, I recommend:

    Need Help? Work with Me 1-on-1

    I offer one-on-one PHP tutorials, Leaf PHP project upgrades, and custom migrations. If you’d like personalized help or to work on your own Leaf PHP app:

    Contact Me Here

    Conclusion

    Leaf PHP makes MVC development simple and clean. In just a few steps, you connected to a MariaDB database and displayed results with Blade — without needing to learn a huge framework.

    Whether you’re just getting started or migrating from vanilla PHP, Leaf 4.2 is a lightweight but powerful option.

    Happy coding! 😄

  • Build a Rocket Launch Animation with Tailwind CSS

    Build a Rocket Launch Animation with Tailwind CSS

    Want to add some ✨ spark to your website or just have fun with Tailwind CSS animations? In this beginner-friendly tutorial, we’ll build a rocket launch loop animation using just HTML + Tailwind CSS — no JavaScript needed!

    This is a perfect starter project for those learning front-end design, and it’s completely customizable.

    🚀 What You’ll Learn

    • How to use Tailwind CSS utility classes for layout and animation
    • Create pure CSS animations (no JavaScript required)
    • Build a looping rocket launch effect with smoke and stars

    📚 Continue Learning JavaScript

    Interested in learning more than just styling? Check out my beginner-level book and course:

    👨‍🎓 Want Personal Help?

    I also offer one-on-one programming tutorials — including HTML, CSS, and JavaScript.

    💬 Contact me here to schedule a session »

    🔧 The Code (HTML + Tailwind)

    Below is the actual code used to make the rocket launch animation. It’s fully responsive and requires no JavaScript for the animation loop.


    &lt;!DOCTYPE html&gt;
    &lt;html lang=&quot;en&quot;&gt;
    &lt;head&gt;
      &lt;meta charset=&quot;UTF-8&quot; /&gt;
      &lt;meta name=&quot;viewport&quot; content=&quot;width=device-width, initial-scale=1.0&quot; /&gt;
      &lt;title&gt;CSS Rocket Launch Loop&lt;/title&gt;
      &lt;script src=&quot;https://cdn.tailwindcss.com&quot;&gt;&lt;/script&gt;
      &lt;style&gt;
        /* Background */
        body {
          background: radial-gradient(circle, #0a0a0a 0%, #000000 100%);
          overflow: hidden;
        }
    
        /* Stars */
        .star {
          position: absolute;
          width: 2px;
          height: 2px;
          background: white;
          opacity: 0.8;
          border-radius: 50%;
          animation: twinkle 2s infinite ease-in-out;
        }
    
        @keyframes twinkle {
          0%, 100% { opacity: 0.2; }
          50% { opacity: 1; }
        }
    
        /* Smoke Puff */
        @keyframes smokePuff {
          0% { opacity: 0.5; transform: translateY(0) scale(1); }
          100% { opacity: 0; transform: translateY(30px) scale(2); }
        }
    
        .smoke1 { animation: smokePuff 2s ease-out infinite; animation-delay: 0s; }
        .smoke2 { animation: smokePuff 2s ease-out infinite; animation-delay: 0.3s; }
        .smoke3 { animation: smokePuff 2s ease-out infinite; animation-delay: 0.6s; }
    
        /* Rocket Launch Loop */
        @keyframes launchLoop {
          0% { transform: translateY(0); opacity: 1; }
          10% { transform: translateY(-10px); }
          90% { transform: translateY(-120vh); opacity: 0; }
          100% { transform: translateY(0); opacity: 1; }
        }
    
        .launch-loop {
          animation: launchLoop 10s ease-in-out infinite;
        }
    
        /* Countdown shows only during first cycle */
        @keyframes countdownFade {
          0%   { opacity: 1; }
          60%  { opacity: 1; }
          100% { opacity: 0; visibility: hidden; }
        }
    
        .countdown {
          animation: countdownFade 10s ease forwards;
          animation-iteration-count: 1;
        }
      &lt;/style&gt;
    &lt;/head&gt;
    &lt;body class=&quot;relative flex flex-col items-center justify-end min-h-screen text-white font-mono&quot;&gt;
    
      &lt;!-- Stars (optional: can be static with divs instead of JS) --&gt;
      &lt;script&gt;
        for (let i = 0; i &lt; 80; i++) {
          const star = document.createElement(&#039;div&#039;);
          star.classList.add(&#039;star&#039;);
          star.style.top = `${Math.random() * 100}vh`;
          star.style.left = `${Math.random() * 100}vw`;
          star.style.animationDuration = `${1 + Math.random() * 2}s`;
          document.body.appendChild(star);
        }
      &lt;/script&gt;
    
      &lt;!-- Countdown (only shows during first launch) --&gt;
      &lt;div class=&quot;absolute top-10 text-5xl font-bold countdown&quot;&gt;
        T-minus 5
      &lt;/div&gt;
    
      &lt;!-- Rocket --&gt;
      &lt;div class=&quot;relative w-24 h-72 mb-10 launch-loop&quot;&gt;
    
        &lt;!-- Smoke --&gt;
        &lt;div class=&quot;absolute bottom-0 left-1/2 -translate-x-1/2&quot;&gt;
          &lt;div class=&quot;w-4 h-4 bg-gray-400 rounded-full opacity-50 smoke1 absolute&quot;&gt;&lt;/div&gt;
          &lt;div class=&quot;w-3 h-3 bg-gray-500 rounded-full opacity-50 smoke2 absolute left-1&quot;&gt;&lt;/div&gt;
          &lt;div class=&quot;w-2.5 h-2.5 bg-gray-600 rounded-full opacity-50 smoke3 absolute -left-1&quot;&gt;&lt;/div&gt;
        &lt;/div&gt;
    
        &lt;!-- Flame --&gt;
        &lt;div class=&quot;absolute bottom-2 left-1/2 -translate-x-1/2 w-4 h-8 bg-yellow-400 animate-ping rounded-full shadow-lg z-10&quot;&gt;&lt;/div&gt;
    
        &lt;!-- Rocket Body --&gt;
        &lt;div class=&quot;absolute top-7 left-1/2 -translate-x-1/2 w-12 h-[13rem] bg-gray-300 rounded-t-full rounded-b-full border-4 border-white shadow-lg z-10&quot;&gt;&lt;/div&gt;
    
        &lt;!-- Nose --&gt;
        &lt;div class=&quot;absolute top-0 left-1/2 -translate-x-1/2 w-0 h-0 
                    border-l-[24px] border-r-[24px] border-b-[32px] 
                    border-l-transparent border-r-transparent border-b-red-600 z-10&quot;&gt;&lt;/div&gt;
    
        &lt;!-- Wings --&gt;
        &lt;div class=&quot;absolute bottom-12 left-0 w-8 h-8 bg-gray-500 rotate-45 origin-bottom-left rounded-tr-md z-0&quot;&gt;&lt;/div&gt;
        &lt;div class=&quot;absolute bottom-12 right-0 w-8 h-8 bg-gray-500 -rotate-45 origin-bottom-right rounded-tl-md z-0&quot;&gt;&lt;/div&gt;
      &lt;/div&gt;
    
    &lt;/body&gt;
    &lt;/html&gt;


    You can copy and paste this into your HTML file and customize it however you like.

    Interactive Demo

    Here’s a live example of the Rocket Launch in action:

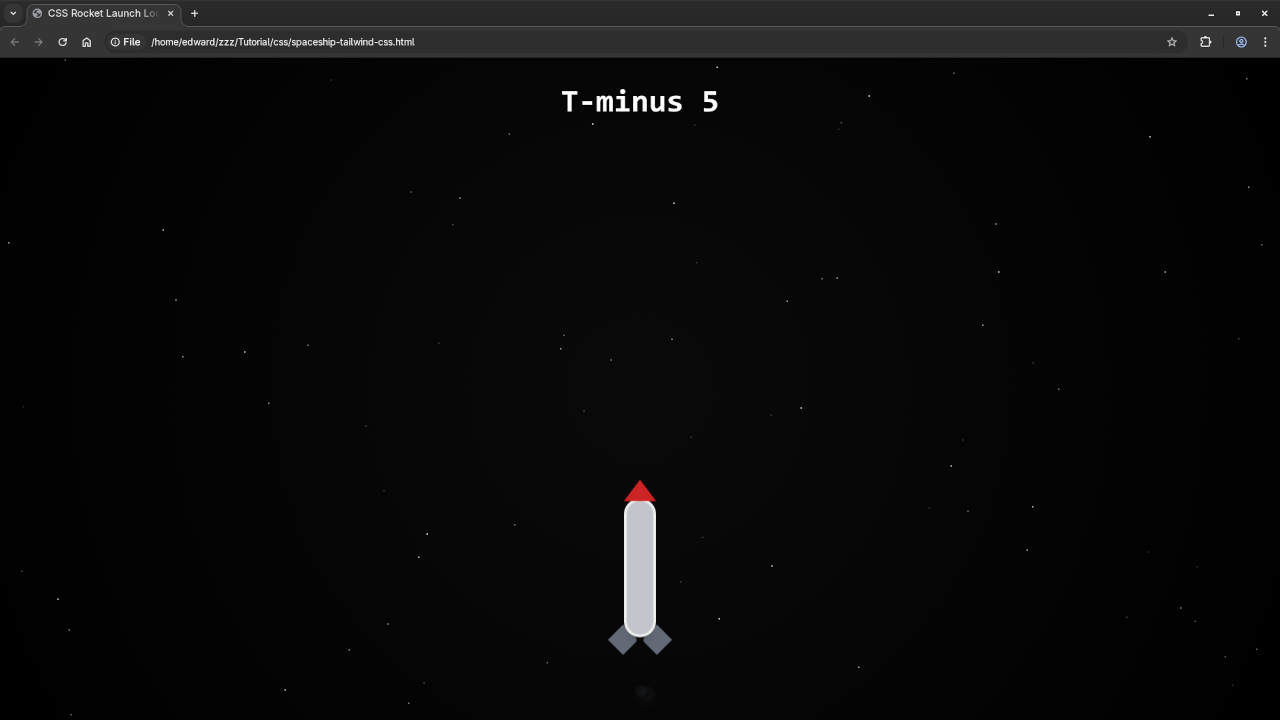
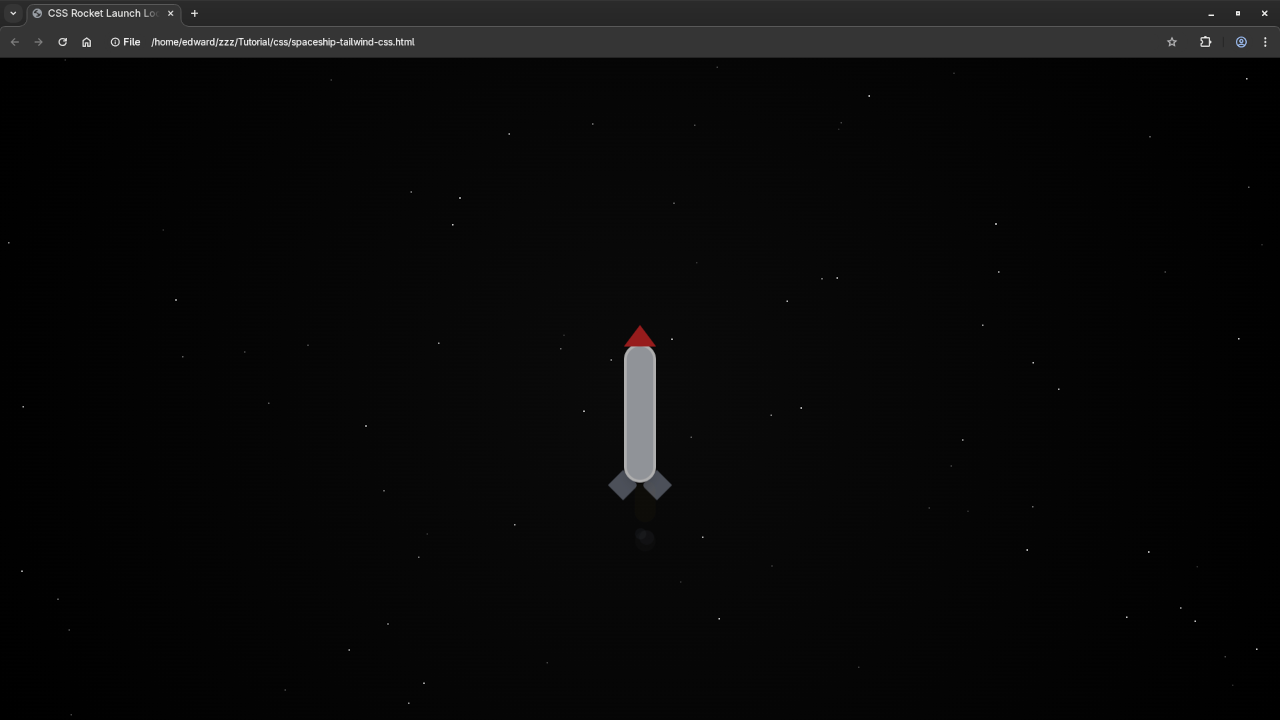
    HTML5 Tailwind CSS Rocket Launch Animation
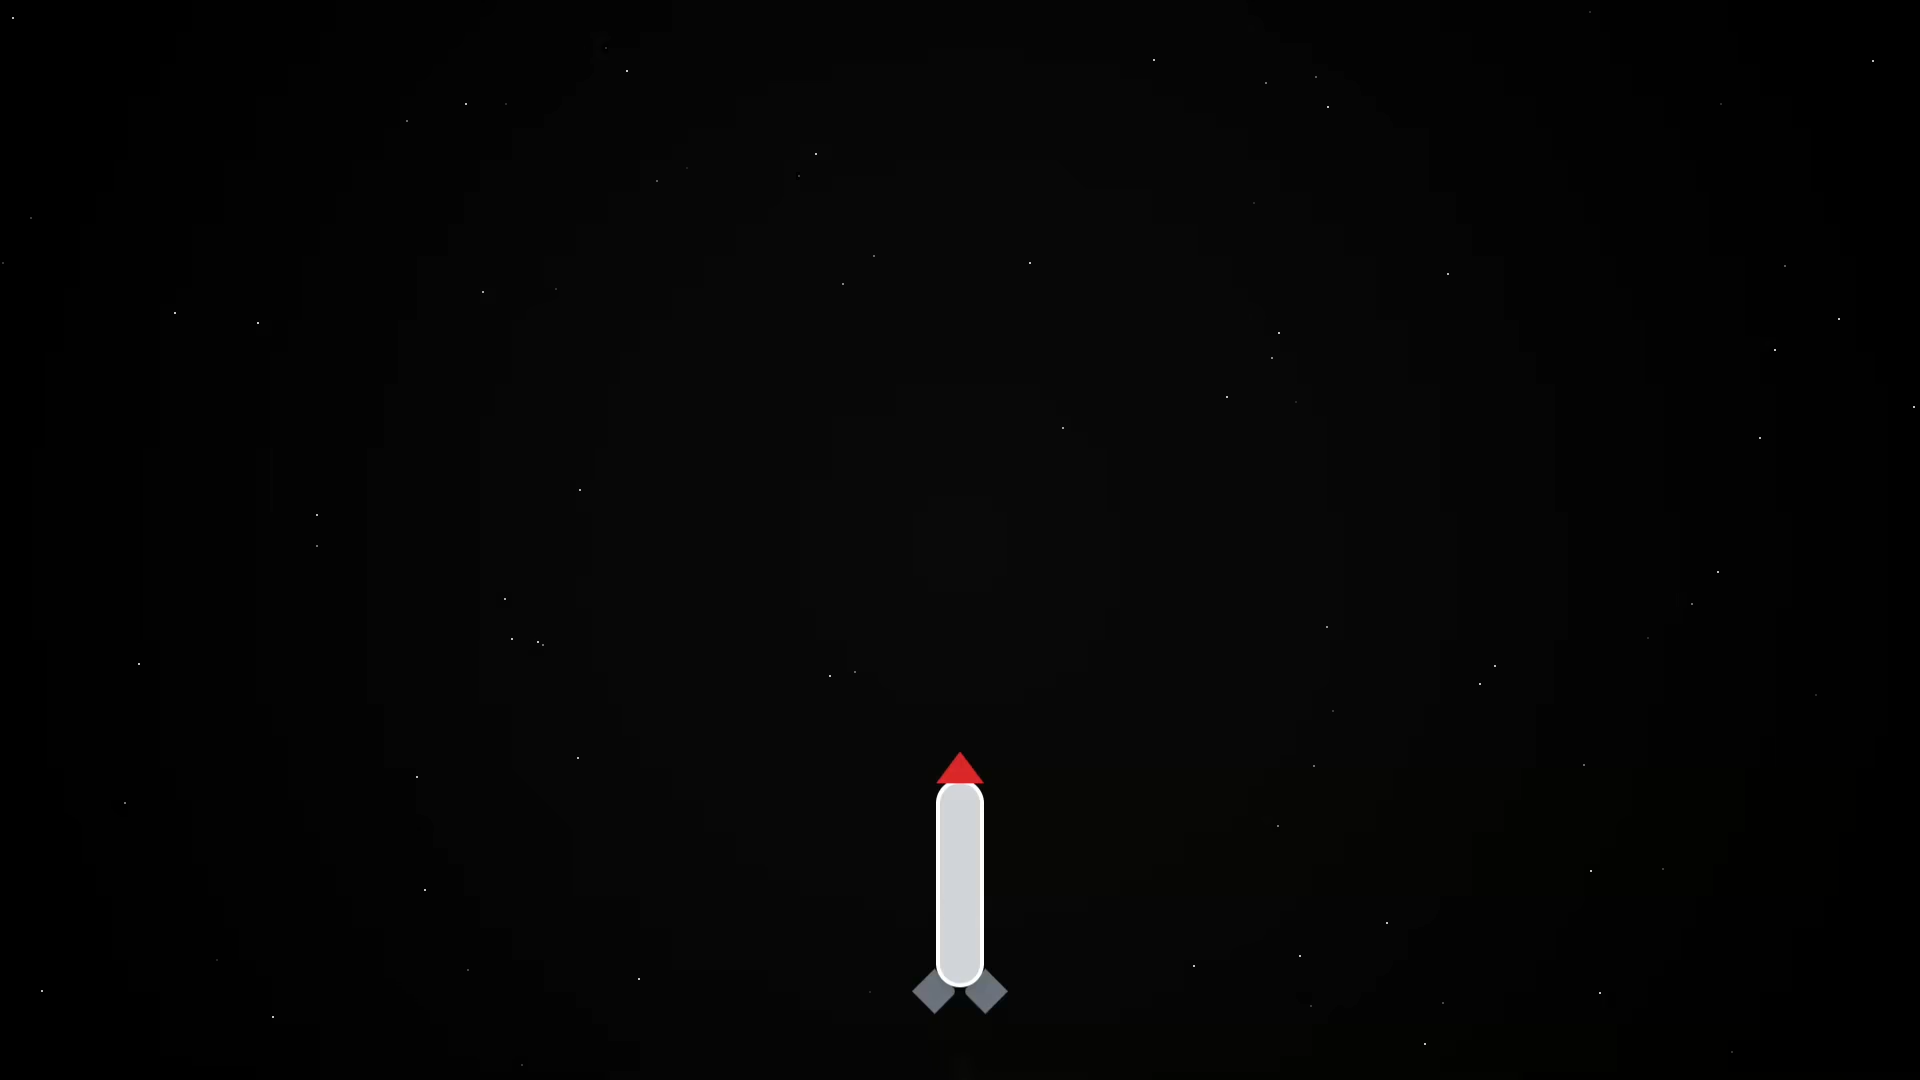
    HTML5 Rocket Launch Countdown
    Web Browser Displaying HTML5 Rocket Launch Countdown

    HTML5 Rocket Launch
    Web Browser Displaying HTML5 Rocket Launch

    🎬 Watch It

    HTML5 Structure, Applying Tailwind CSS To Trigger Animations Video

    🌌 What’s Next?

    • Try adding parallax backgrounds or sound effects
    • Use this as an intro screen or background for your site
    • Customize the rocket to match your branding

    🧠 Summary

    This rocket launch animation is a fun, visual way to learn CSS animation using Tailwind. Whether you’re building a space-themed site or learning front-end techniques, this is a great project to add to your portfolio.

    🚀 Happy launching!

  • Generate Low-Poly Bench With Blender Python API For Website

    Generate Low-Poly Bench With Blender Python API For Website

    Create a Low Poly Metal Bench in Blender with Python and View it in the Browser

    If you’re interested in automating 3D modeling with Python and displaying your creations on the web, this beginner-friendly tutorial is perfect for you!

    In this post, you’ll learn how to:

    • Create a low-poly metal bench using the Blender Python API
    • Bake a texture into a WebP image and embed it into a .glb file
    • Display the final result in a web browser using <model-viewer>
    • Run everything using a command-line Python script

    This is a great starting point for artists and developers who want to combine scripting, 3D design, and web technologies — without needing to be a Blender expert.

    🔧 What You’ll Build

    • A simple, low-poly metal bench
    • A baked texture (WebP format)
    • A .glb file with embedded textures
    • A responsive web viewer using <model-viewer>

    🐍 Python Script for Blender 4.5

    We’ll use Blender 4.5’s Python API to generate and export everything. You can paste it directly into Blender’s Scripting tab.


    import bpy
    import os
    
    # ----------------------------------------------------------
    # Step 0: Clean the scene
    # ----------------------------------------------------------
    
    bpy.ops.object.select_all(action=&#039;SELECT&#039;)
    bpy.ops.object.delete(use_global=False)
    
    # ----------------------------------------------------------
    # Step 1: Create a Simple Low Poly Bridge
    # ----------------------------------------------------------
    
    def create_bridge():
        bpy.ops.mesh.primitive_cube_add(size=2, location=(0, 0, 1))
        bridge = bpy.context.active_object
        bridge.name = &quot;Bridge&quot;
        bridge.scale = (4, 1, 0.2)
    
        # Add support pillars
        bpy.ops.mesh.primitive_cube_add(size=1, location=(-3.5, 0, 0.5))
        left_pillar = bpy.context.active_object
        left_pillar.scale = (0.2, 1, 1)
    
        bpy.ops.mesh.primitive_cube_add(size=1, location=(3.5, 0, 0.5))
        right_pillar = bpy.context.active_object
        right_pillar.scale = (0.2, 1, 1)
    
        # Join all into one mesh
        bpy.ops.object.select_all(action=&#039;DESELECT&#039;)
        for obj in [bridge, left_pillar, right_pillar]:
            obj.select_set(True)
        bpy.context.view_layer.objects.active = bridge
        bpy.ops.object.join()
    
        return bpy.context.active_object
    
    bridge = create_bridge()
    
    # ----------------------------------------------------------
    # Step 2: Create a Metal Material
    # ----------------------------------------------------------
    
    def create_metal_material():
        mat = bpy.data.materials.new(name=&quot;Metal_Material&quot;)
        mat.use_nodes = True
        nodes = mat.node_tree.nodes
    
        # Clear all default nodes
        for node in nodes:
            nodes.remove(node)
    
        # Add Principled BSDF and Output nodes
        bsdf = nodes.new(type=&#039;ShaderNodeBsdfPrincipled&#039;)
        output = nodes.new(type=&#039;ShaderNodeOutputMaterial&#039;)
    
        # Configure BSDF for metal
        bsdf.inputs[&#039;Base Color&#039;].default_value = (0.3, 0.3, 0.35, 1)
        bsdf.inputs[&#039;Metallic&#039;].default_value = 1.0
        bsdf.inputs[&#039;Roughness&#039;].default_value = 0.3
    
        # Link BSDF to Output
        mat.node_tree.links.new(bsdf.outputs[&#039;BSDF&#039;], output.inputs[&#039;Surface&#039;])
    
        return mat
    
    metal_mat = create_metal_material()
    bridge.data.materials.append(metal_mat)
    
    # ----------------------------------------------------------
    # Step 3: Add UV Map for Baking
    # ----------------------------------------------------------
    
    # Set object mode
    bpy.ops.object.select_all(action=&#039;DESELECT&#039;)
    bridge.select_set(True)
    bpy.context.view_layer.objects.active = bridge
    
    # Enter Edit Mode and unwrap
    bpy.ops.object.mode_set(mode=&#039;EDIT&#039;)
    bpy.ops.uv.smart_project(angle_limit=66.0)
    bpy.ops.object.mode_set(mode=&#039;OBJECT&#039;)
    
    # ----------------------------------------------------------
    # Step 4: Create Image for Baking
    # ----------------------------------------------------------
    
    # Create a new image for baking
    output_dir = bpy.path.abspath(&quot;//&quot;)  # Save to current Blender file directory
    baked_image = bpy.data.images.new(name=&quot;BakedTexture&quot;, width=1024, height=1024, alpha=True)
    baked_image.file_format = &#039;PNG&#039;  # Use PNG format for compatibility
    baked_image.filepath_raw = os.path.join(output_dir, &quot;baked_texture.png&quot;)
    
    # Link the image to the material via the Shader Node
    nodes = metal_mat.node_tree.nodes
    image_node = nodes.new(type=&#039;ShaderNodeTexImage&#039;)
    image_node.image = baked_image
    image_node.select = True
    nodes.active = image_node  # Set this as the active node to ensure it&#039;s baked to
    
    # Save the image before baking
    baked_image.save()
    
    # ----------------------------------------------------------
    # Step 5: Bake the Diffuse to the Image
    # ----------------------------------------------------------
    
    bpy.context.scene.render.engine = &#039;CYCLES&#039;
    bpy.context.scene.cycles.device = &#039;CPU&#039;
    
    bpy.ops.object.select_all(action=&#039;DESELECT&#039;)
    bridge.select_set(True)
    bpy.context.view_layer.objects.active = bridge
    
    bpy.ops.object.bake(type=&#039;DIFFUSE&#039;, pass_filter={&#039;COLOR&#039;}, use_clear=True)
    baked_image.save()
    
    # ----------------------------------------------------------
    # Step 6: Replace Shader With Baked Texture
    # ----------------------------------------------------------
    
    # Remove all nodes and recreate material using baked image
    for node in nodes:
        nodes.remove(node)
    
    tex_node = nodes.new(type=&#039;ShaderNodeTexImage&#039;)
    tex_node.image = baked_image
    
    bsdf_node = nodes.new(type=&#039;ShaderNodeBsdfPrincipled&#039;)
    bsdf_node.inputs[&#039;Metallic&#039;].default_value = 1.0
    bsdf_node.inputs[&#039;Roughness&#039;].default_value = 0.3
    
    output_node = nodes.new(type=&#039;ShaderNodeOutputMaterial&#039;)
    
    # Link baked texture
    links = metal_mat.node_tree.links
    links.new(tex_node.outputs[&#039;Color&#039;], bsdf_node.inputs[&#039;Base Color&#039;])
    links.new(bsdf_node.outputs[&#039;BSDF&#039;], output_node.inputs[&#039;Surface&#039;])
    
    # ----------------------------------------------------------
    # Step 7: Export to .glb with embedded WebP texture
    # ----------------------------------------------------------
    
    glb_path = os.path.join(output_dir, &quot;bench.glb&quot;)
    
    bpy.ops.export_scene.gltf(
        filepath=glb_path,
        export_format=&#039;GLB&#039;,
        export_materials=&#039;EXPORT&#039;,
        export_normals=True,
        export_image_format=&quot;AUTO&quot;  # Let Blender decide the image format (usually PNG)
    )


    ▶️ How to Run the Script from the Command Line

    Blender allows you to run Python scripts headlessly via the terminal. Here’s how:

    1. Save your script as metal_bench.py in the same folder as your .blend file (or a new one).
    2. Open your terminal or command prompt.
    3. Run the script using this command:
    blender --background --python metal_bench.py

    ⚠️ --background runs Blender without launching the UI, perfect for automation.

    🌐 Display Your Model in the Browser

    Once you run the script, it generates a bench.glb file. You can display it in any modern web browser using model-viewer:


      &lt;model-viewer src=&quot;lowpoly-bench.glb&quot;
                    alt=&quot;Low poly metal bench&quot;
                    auto-rotate
                    camera-controls
                    environment-image=&quot;neutral&quot;
                    exposure=&quot;1.2&quot;&gt;
      &lt;/model-viewer&gt;


    Save this code as an HTML file in the same folder as your bench.glb, then double-click to open it in your browser.

    📷 Screenshots & 🎥 Screencast

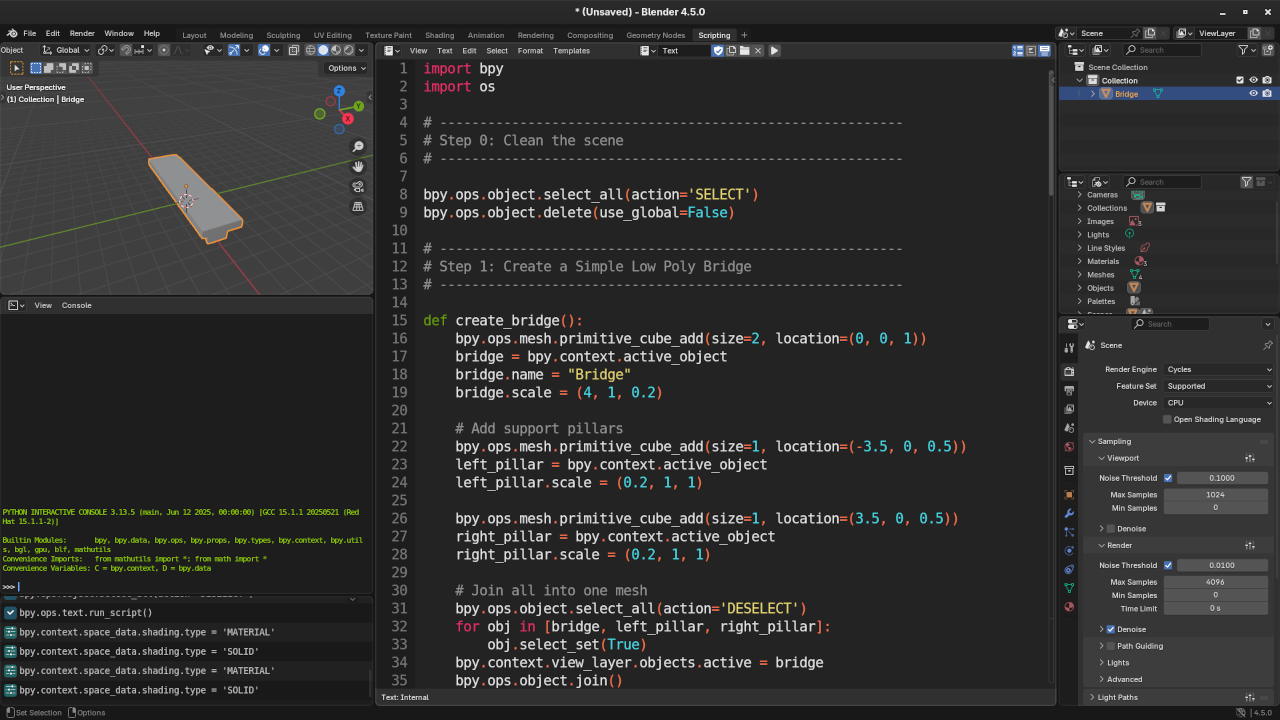
    Low poly bench Python code
    Blender Scripting Workspace Displaying Low Poly Bench Python Code

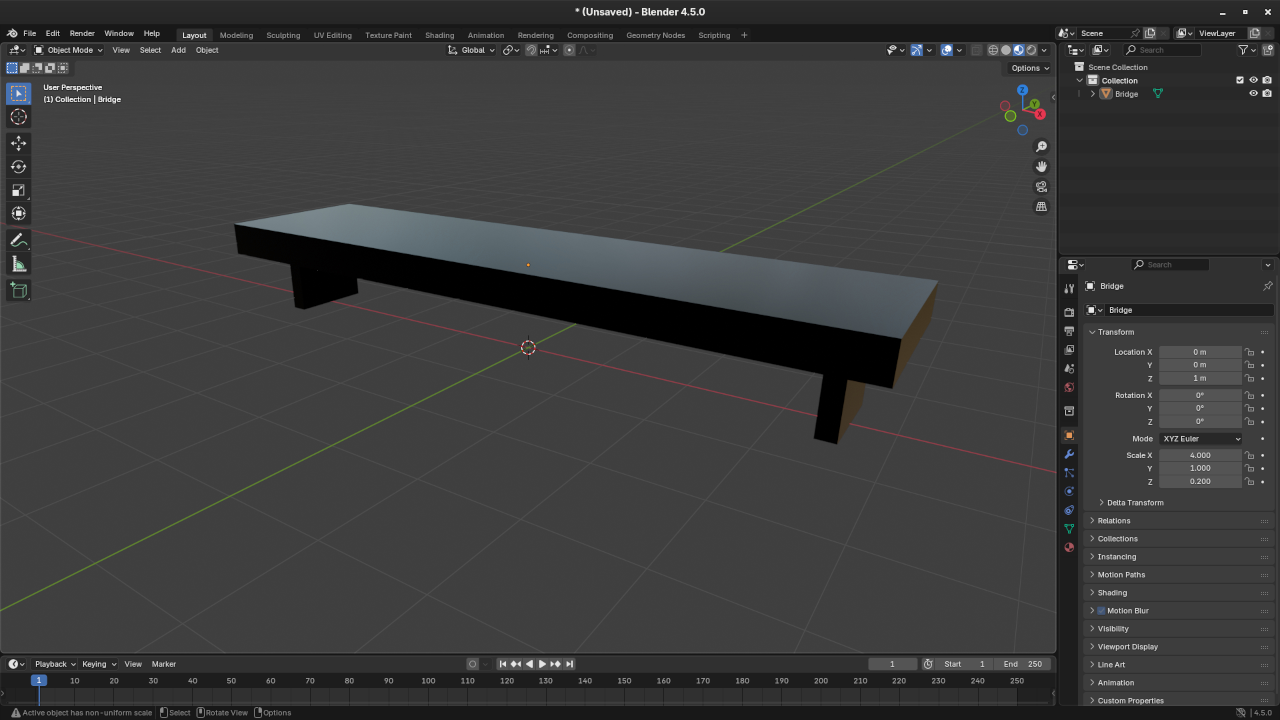
    Low poly bench in Blender
    Blender Layout Workspace Displaying Low Poly Bench

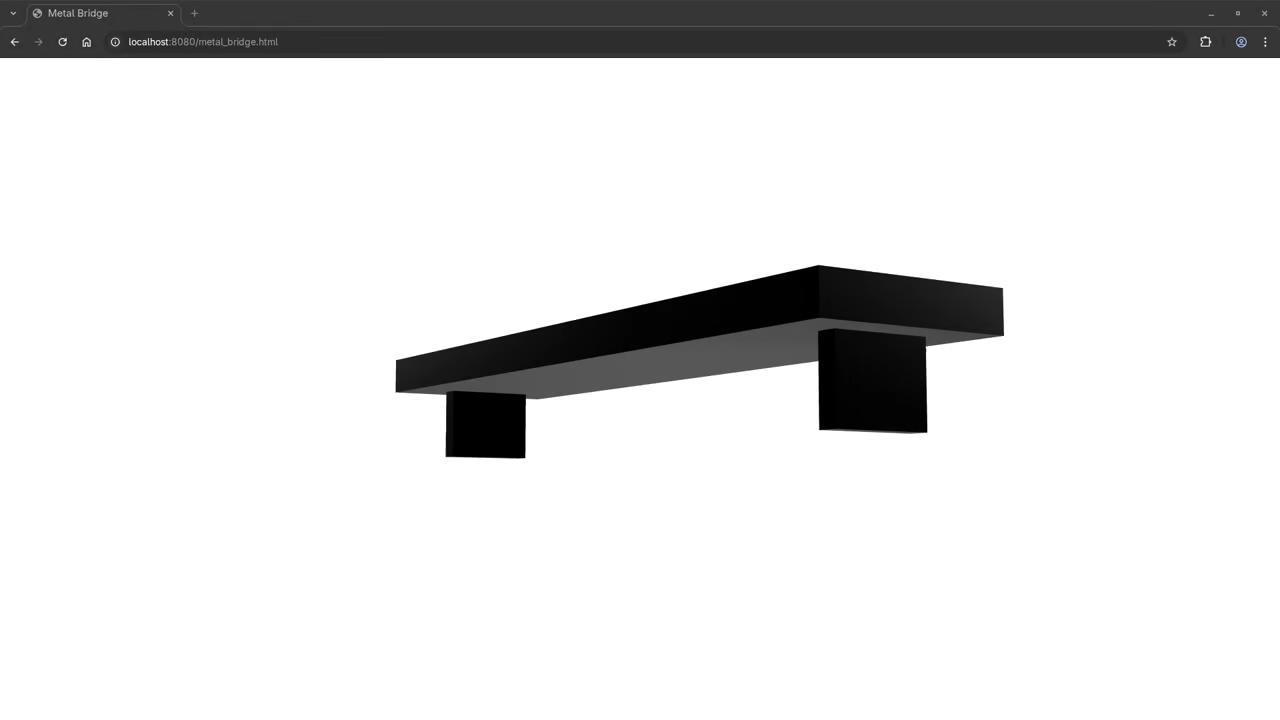
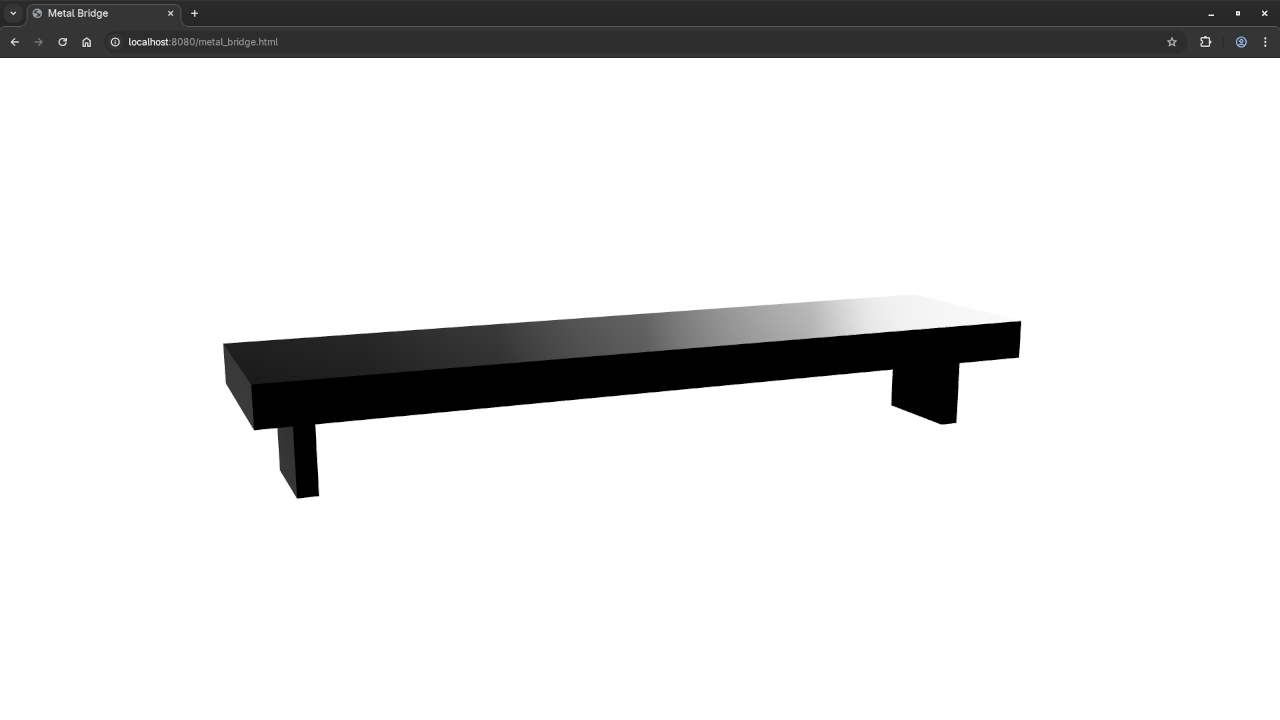
    Low poly bench in Web browser
    Web Browser Displaying Rendered Low Poly Bench

    Screencast For Blender Python API Low Poly Textured Metal Bench

    📚 Learn More with My Books & Courses

    📖 My Books:

    🎓 Online Course:

    👨‍🏫 1-on-1 Python + Blender Help

    Need help customizing scripts, learning Blender’s API, or building your first 3D web app?

    🎥 I offer one-on-one online Python tutorials, including Blender scripting:
    Contact me to book a session

    🏁 Conclusion

    This tutorial gives you a full pipeline from Python-powered 3D modeling in Blender to interactive web display using model-viewer. You’ve learned how to script geometry, bake textures, export .glb files, and showcase your model online.

    Got questions or improvements? Share your feedback or creations in the comments below!

    Happy coding & modeling! 🚀

  • Creating and Managing Git Branches: Branching for Beginners

    Creating and Managing Git Branches: Branching for Beginners

    Are you just starting with Git and wondering what branches are and why they’re so important? You’re in the right place! This beginner-friendly guide will walk you through creating and managing Git branches, a fundamental concept in version control that makes collaborating and testing code safer and easier.

    What is Git?
    Git is a free and open-source distributed version control system. It allows developers to track changes, collaborate with others, and manage multiple versions of code in a reliable way.

    Why Use Branches in Git?

    Branches let you work on new features, bug fixes, or experiments without affecting the main codebase (usually the main or master branch). You can test safely, merge changes when ready, and avoid breaking working code.

    How to Create a Git Branch

    You can create a branch in just a few steps:

    1. Open your terminal and navigate to your Git project.
    2. Run the following command:
    git branch feature-branch
    1. Switch to your new branch:
    git checkout feature-branch

    Or combine both steps in one:

    git checkout -b feature-branch

    Managing Git Branches

    • List branches:
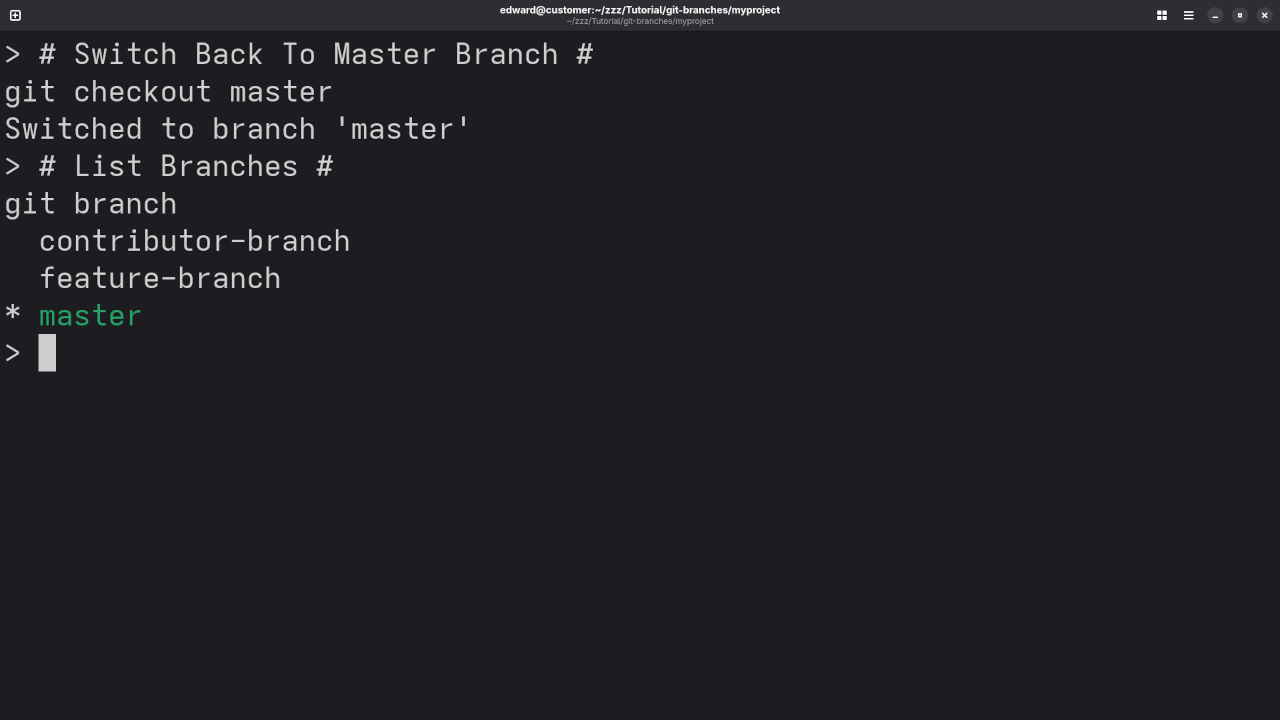
      git branch
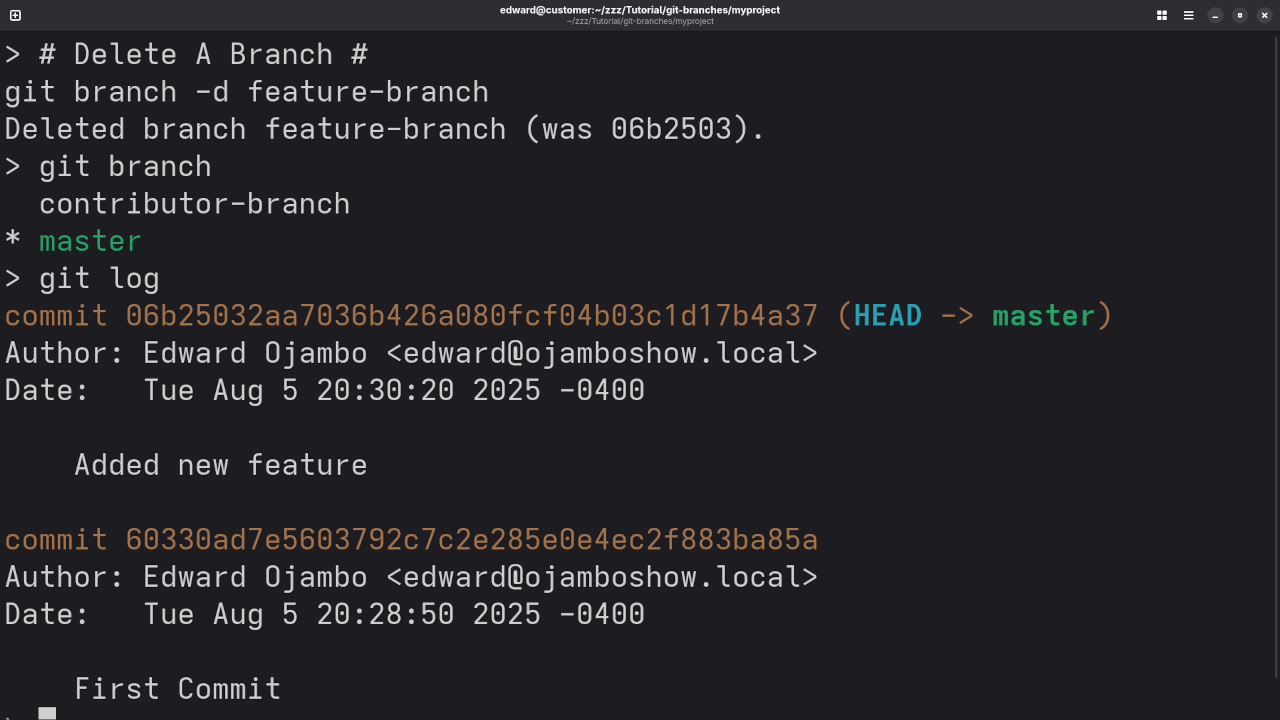
    • Delete a branch:
      git branch -d feature-branch
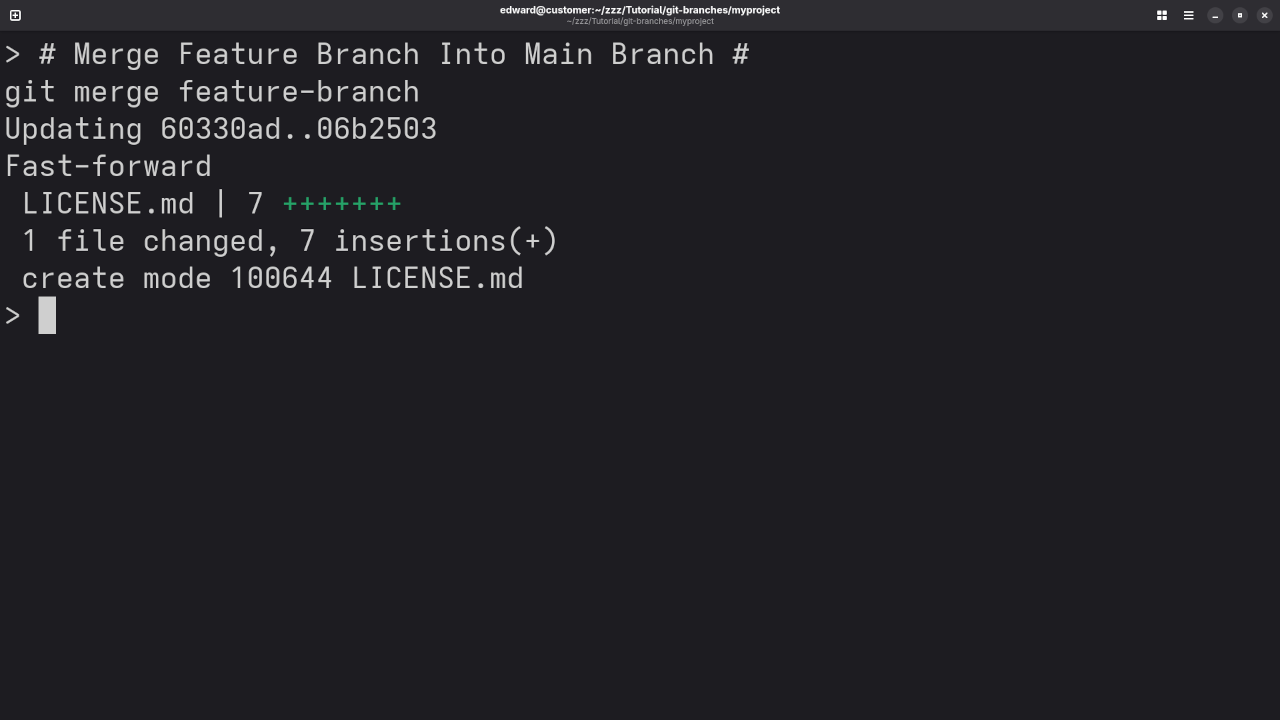
    • Merge a branch into main:
      git checkout main
      git merge feature-branch

    These commands help you manage your project cleanly and keep your code organized.

    Screencast Tutorial & Screenshots

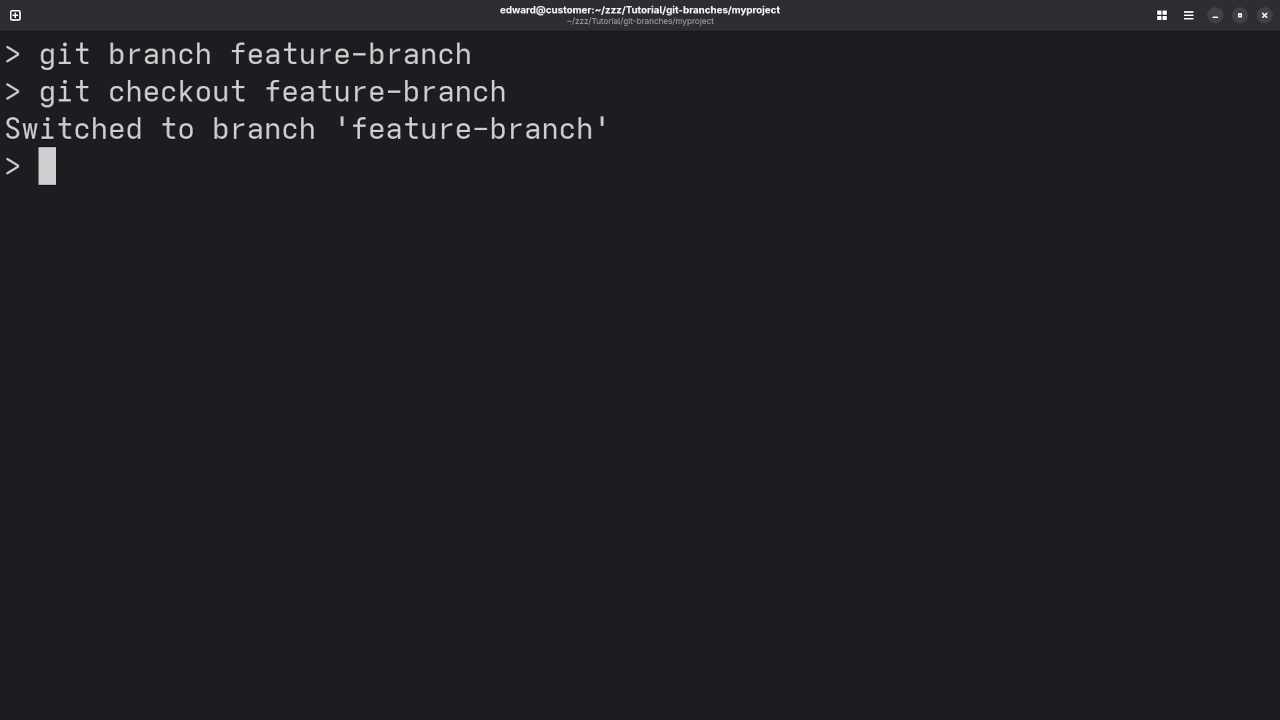
    Git Branch For Feature
    Command Line Git Branch To Create New Feature Branch

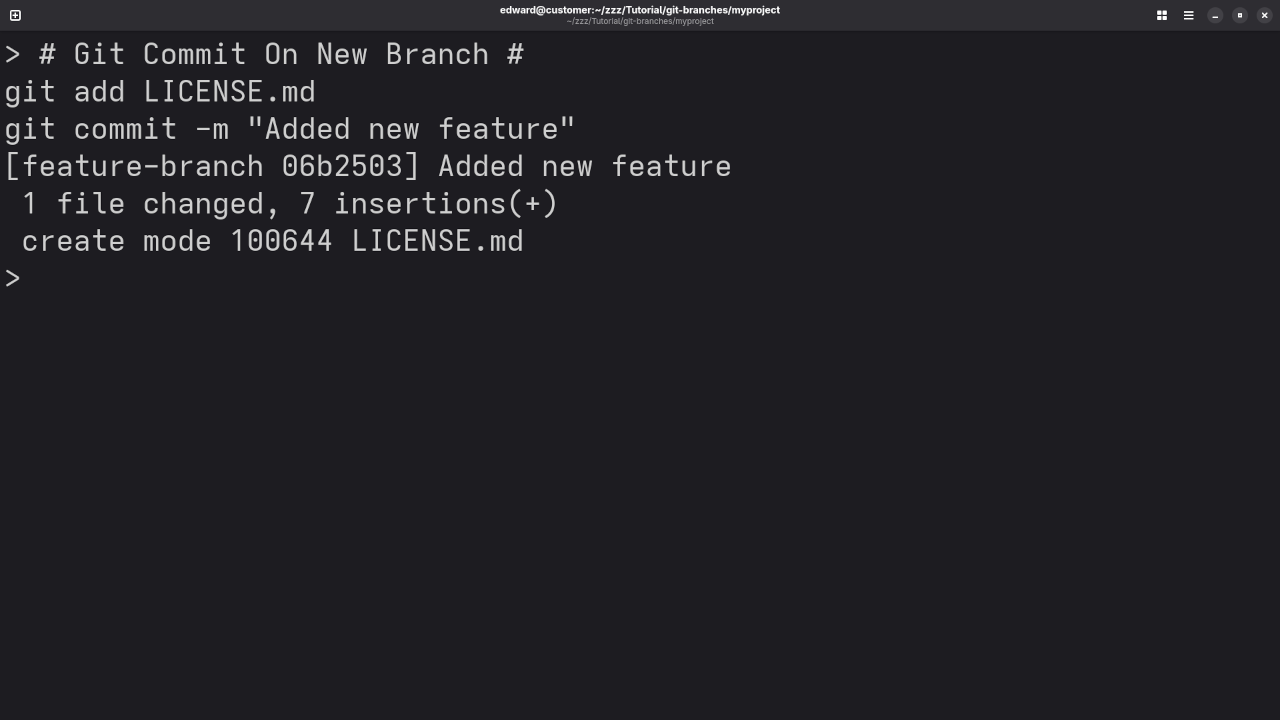
    Git Commit New Feature
    Terminal Showing Git Commit On New Feature Branch

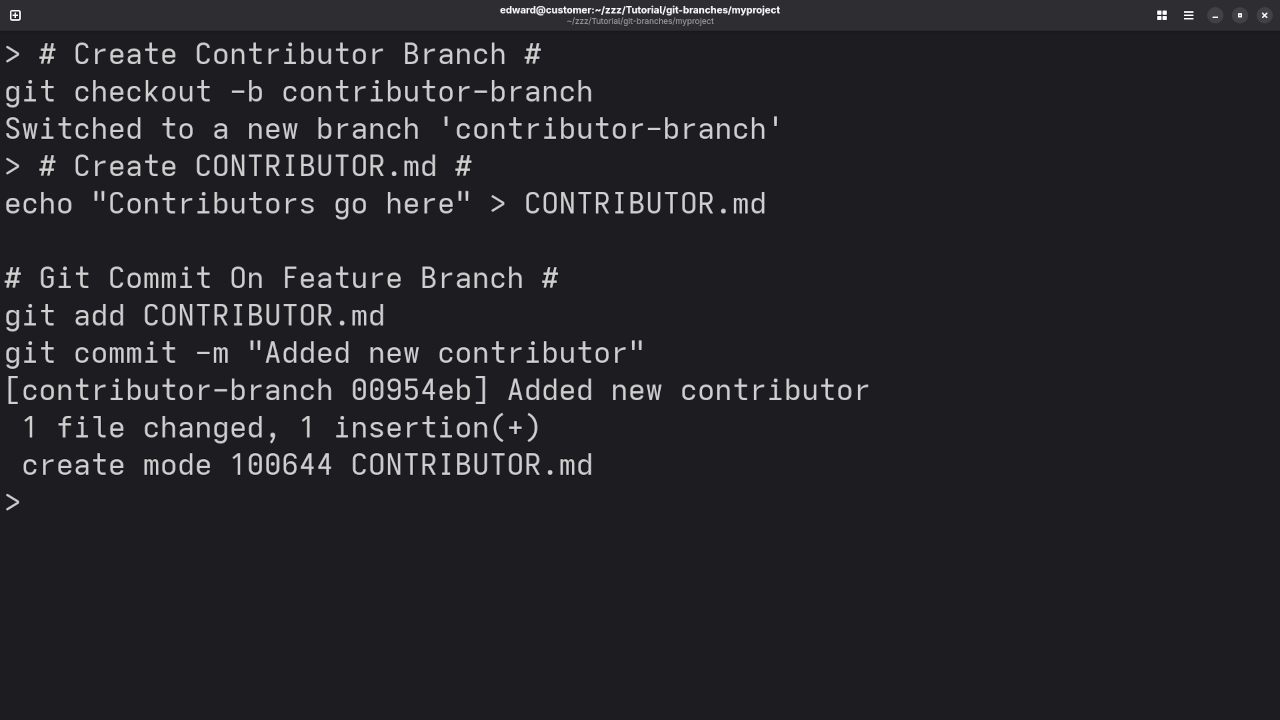
    Git Commit On New Contributor Branch
    Terminal Showing Git Checkout, Branch And Commit On New Contributor Branch

    Git Branch To List Branches
    Terminal Showing Git Branch To List All Branches

    Git Merge Feature Into Main
    Terminal Showing Result of Git Merge Feature Branch Into Main Branch

    Git Branch Delete Feature
    Terminal Showing Result of Git Branch Delete Feature Branch

    Screencast Of Git Branching

    Want to Learn More?

    Check out my growing library of programming books:
    Edward Ojambo’s Books on Amazon

    Online Courses

    Dive deeper into programming with my hands-on online courses:
    Browse Courses on OjamboShop

    Need One-on-One Help?

    I’m available for personal programming tutorials!
    Contact Me for 1-on-1 Programming Help

    Git Installations & Repository Migration

    Need help setting up Git or migrating your existing Git repositories?
    Request Git Services Here

    Final Thoughts

    Branching in Git may sound technical at first, but with a little practice, it becomes second nature. It’s a powerful tool to help keep your projects clean, organized, and collaboration-friendly.

    Don’t hesitate to reach out if you need help getting started!