Blog

  • Kate 25.08.0 Advanced Editor Review

    Kate 25.08.0 Advanced Editor Review

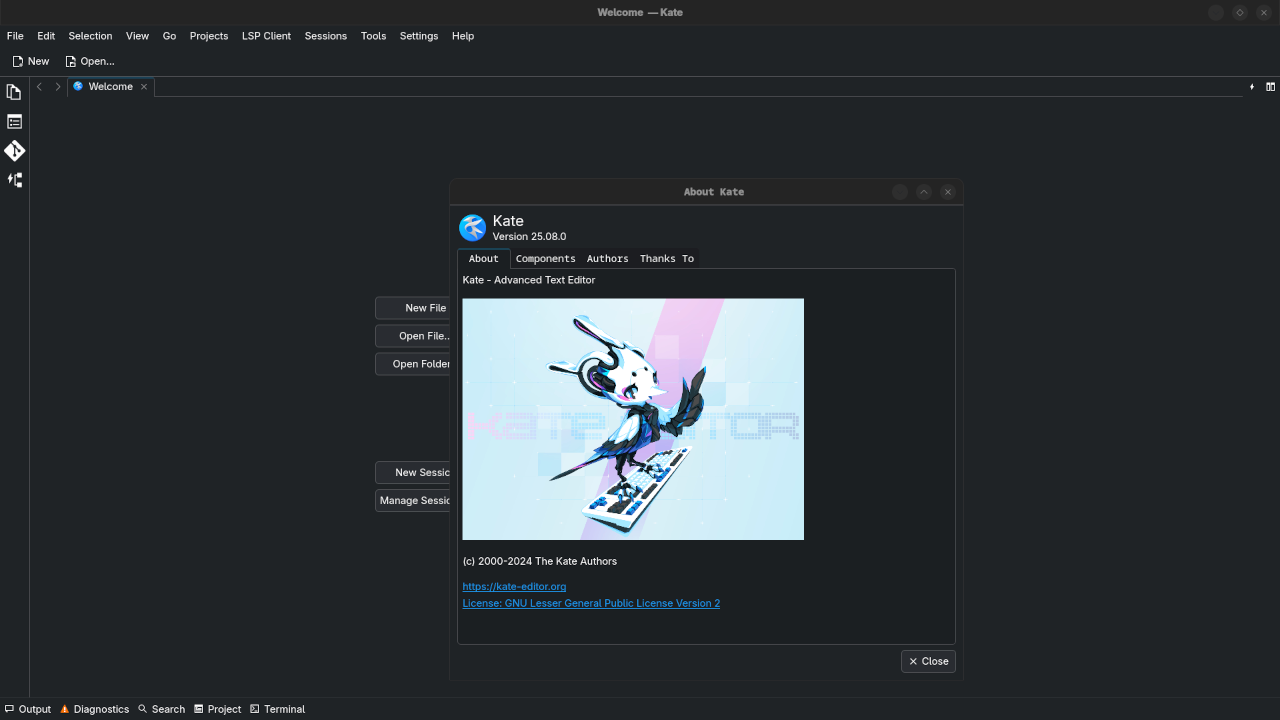
    Getting Started with Kate: The Open-Source Text Editor for Developers

    Introduction

    If you’re a developer looking for a lightweight, feature-packed text editor, Kate could be the solution for you. In this post, we’ll explore why Kate stands out as a top choice, how to install it, and how it can boost your productivity. Kate is open-source and designed for advanced programming, yet it’s user-friendly enough for beginners to quickly get started.

    What is Kate?

    Kate (KDE Advanced Text Editor) is a powerful, open-source text editor designed for software development. It supports a wide variety of programming languages and features syntax highlighting, code completion, and advanced editing options. Whether you’re working on a quick script or a complex application, Kate can handle it all.

    Kate is free to use and is available under the GPL-2.0 license, ensuring you have the freedom to modify, distribute, and use it as needed.

    Why Choose Kate?

    Here are a few reasons why Kate is worth considering:

    • Fast & Lightweight: Ideal for developers who want a responsive editor without the bloat.
    • Multiple Document Interface: Easily work with multiple files in tabs, or split your editor to view several files side by side.
    • Plugins: Enhance functionality with numerous plugins, including Git integration, code folding, and more.
    • Cross-Platform: Kate runs on Linux, Windows, and macOS, ensuring flexibility no matter your preferred OS.
    • Customizable Interface: Tailor the editor to your specific needs with configurable themes, keyboard shortcuts, and more.

    How to Install Kate on Fedora Linux

    Fedora Linux users can easily install Kate using the default package manager. Here’s how you can get started:

    1. Open a terminal window.
    2. Install Kate via the package manager:
      sudo dnf install kate
    3. Launch Kate by typing kate in the terminal or searching for “Kate” in your applications menu.

    Kate Installation on Other Platforms

    Here are installation instructions for other platforms:

    • Ubuntu/Debian:
      sudo apt install kate
    • Windows:
      Download the latest stable version from the Kate website.
    • macOS:
      You can install Kate via Homebrew:
      brew install kate

    Screenshots and Screencast
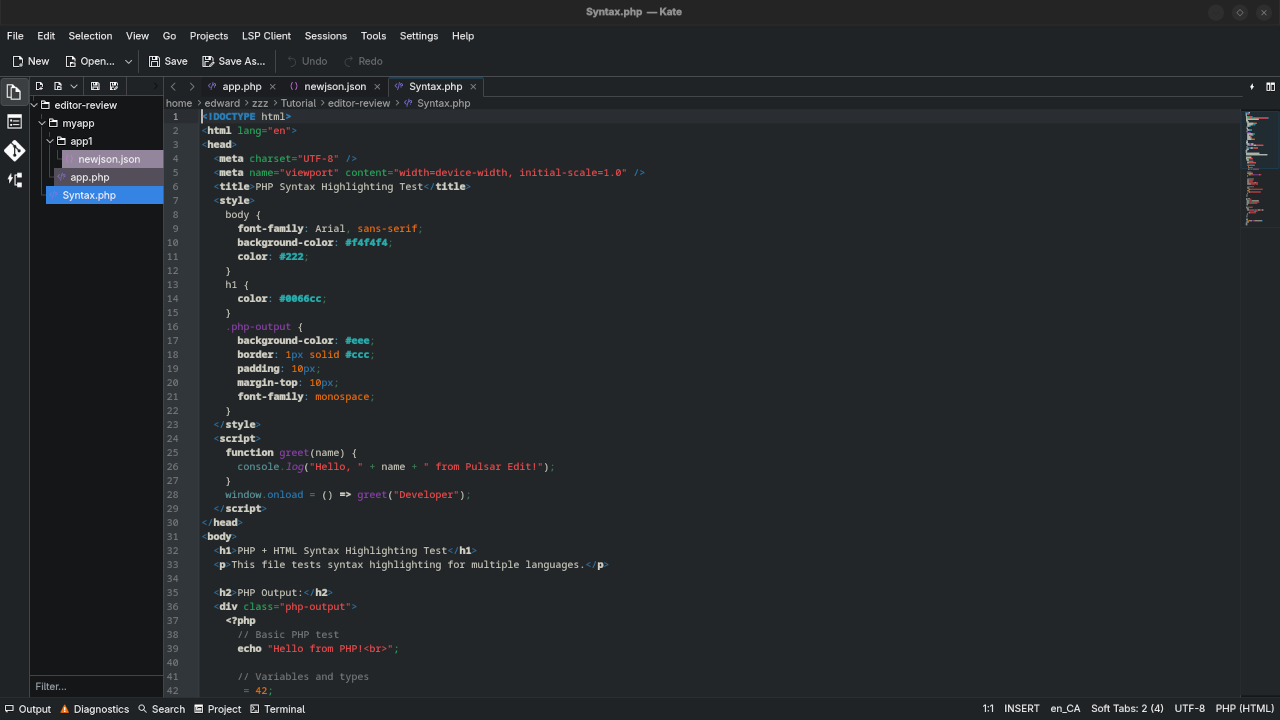
    Kate Filesystem Browser
    Kate Displaying Filesystem Browser

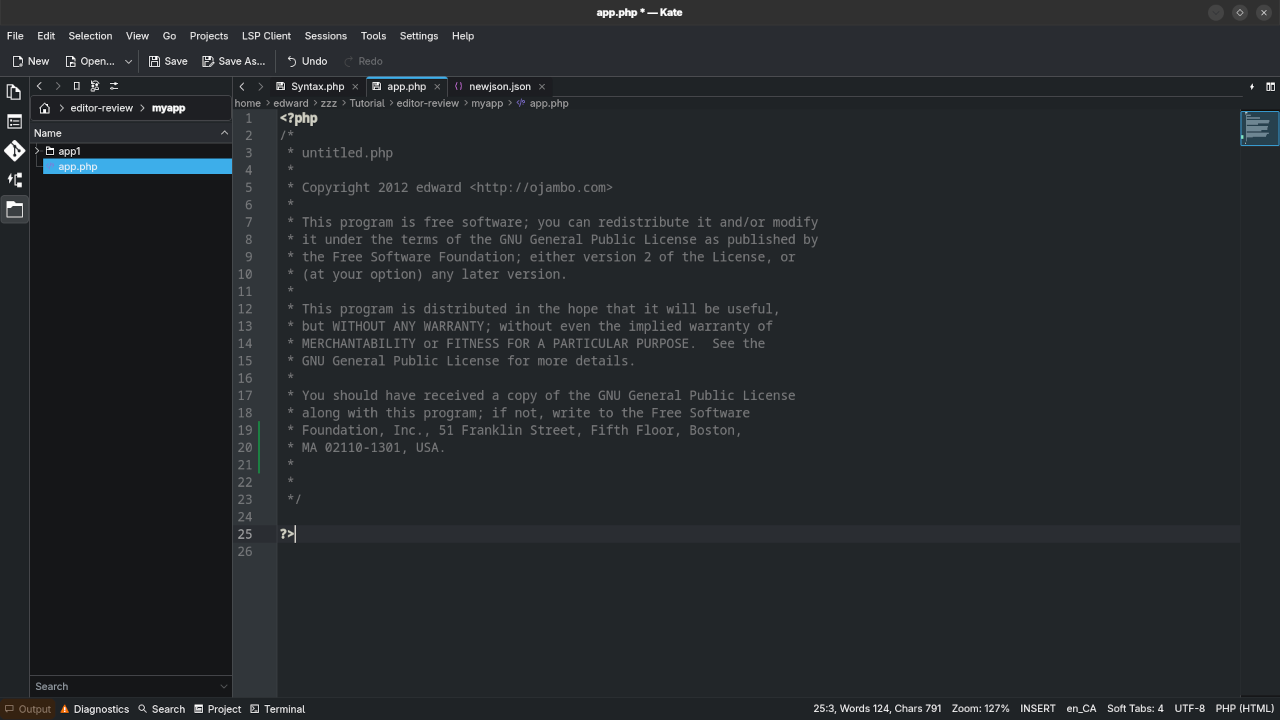
    Kate PHP Syntax Highlighting
    Kate Displaying PHP Syntax Highlighting

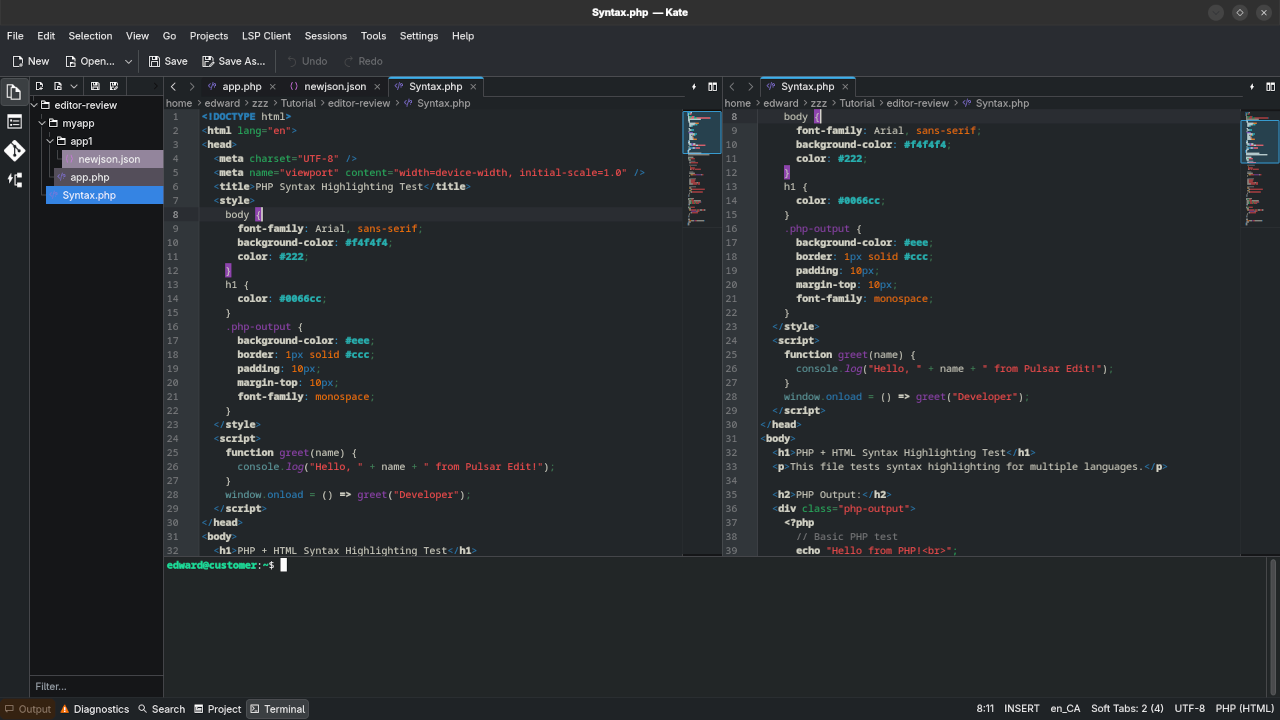
    Kate Terminal
    Kate Displaying Terminal Emulator

    👉 Screencast showing a beginner session in Kate—editing, saving files, and navigating buffers.

    Kate Review And Feature Test

    Requirements For Programming Text Editor

    Glossary:

    Code Editor

    Designed for writing and editing source code.

    IDE

    Integrated Development Environment combines various tools need for software development.

    Plugin

    Software component that adds specific functionality.

    Theme

    Preset package containing graphical appearance to customize look and feel.

    Open source

    Freely available for possible modification and redistribution.

    SCM

    Source code management use to manage and track modifications to a source code repository.

    LMB

    Left Mouse Button (LMB) or left click

    MMB

    Middle Mouse Button (MMB) or scroll wheel

    Test Tools

    Test System
    Name Description
    CPU Intel(R) i7 2600 @ 3.40GHz.
    Memory 16GB DDR3.
    Operating System Fedora Linux Workstation 42.
    Desktop Environment Gnome 48.
    Name Description

    Test Suite
    Name Description
    Large File 1GB human-readable text.
    Regex File Text with word “Kate” repeated.
    Syntax File PHP file containing HTML, CSS & JavaScript.
    Media File Smiley face or Tux Linux JPEG file.
    Java Version OpenJDK 21.0.8.
    PHP Version PHP 8.4.11.
    Python Version Python 3.13.7.
    Kate Version 25.08.0.
    Name Description

    Test Scoring

    1. Each feature has two parts.
    2. Score of zero indicates a missing feature.
    3. A part of a feature is work a score of 0.5.

    Three bias elimination steps were utilized. The editor was used for at least three years on different platforms. Attempts were made to get stable plug-ins for missing features. The same editor was compared between the one in the repository, the developers website, and the compiled version if applicable.

    Selecting Editor Version

    For this review, Kate was installed using the instructions from the developers website and it did not require additional plugins.

    Features

    1. The theme can be native for the editor in terms of the background. Kate dark and light themes can be created or downloaded and changed using the menu Settings > Editor > Color Scheme. The score for the theme was a perfect 1.0.
    2. Dragging and dropping a text file into the editor opens a new tab or buffer. It is possible to specify the tab location during the drag and drop operation. The score for drag and drop into editor was a perfect 1.0.
    3. Opening a very large text file did not crash Kate. Kate was able to edit the large file. The score for opening a large file was a perfect 1.0.
    4. Multiple documents can opened in multiple tabs or sessions. Tear-off tabs do not work but Kate has a feature to open in new window as a new instance which is handy for multiple monitors. The score for multiple documents was 0.5.
    5. Multiple editors can be opened as new tabs with drag options. Each tab window view can be split either vertically or horizontally as a multiple editor view. The score for multiple editor view was a perfect 1.0.
    6. Creating non-project files is possible. Non-project files can be opened by the drag and drop operation. The score for creating non-project files was a perfect 1.0.
    7. Soft word wrap can be enabled on all documents as line wrapping. Automatic soft wrap for documents is available from the Kate settings. The score for word wrap was a perfect 1.0.
    8. Spell check works as words are typed. Spelling errors are shown in opened documents. The score for spell check was a perfect 1.0.
    9. Word count is available for Kate in Settings > Configure Kate > Appearance > Show word count. Selection word count is available as part of word count. The score for word count was a perfect 1.0.
    10. Go to line can jump to a specified line using CTRL-G. It is possible to jump to either the first or last line. The score for go to line is a perfect 1.0.
    11. Indentation can default to user-defined tab stops. Children are automatically indented. The score for indentation was a perfect 1.0.
    12. Fonts can be dynamically scaled using CTRL/CMD-Keypad +/- or CTRL/CMD-MMB. The system font can be bypassed and a new editor font and size can be set. The score for fonts was a perfect 1.0.
    13. Find and replace, with or without regular expressions can be utilized for all open documents in the current session. Find and replace will work for the current document or a selection in the current document. The score for find and replacing using regular expressions was a perfect 1.0.
    14. Multiple language syntax highlighting in one file is enabled if the language plug-ins are installed. Each language has code-sensitive syntax colours which can be modified. The score for multiple language syntax highlighting was a perfect 1.0.
    15. Code folding works for markup languages such as HTML. Code folding also works for programming languages such as PHP and Java. The score for code folding was 1.0.
    16. Selecting rectangular block per column works using CTRL-SHIFT-B. Rectangular block selection works with word wrap enabled. The score for selecting rectangular block was a perfect 1.0.
    17. Multiple selection is available for Kate using ALT-LMB. Search multiple selection is available. The score for multiple selection was 1.0.
    18. Distraction-free mode to hide panes works. Line numbers can be toggled to improve distraction-free mode. The score for distraction-free was a perfect 1.0.
    19. The file manager can be enabled using Settings > Configure Kate > Plugins > File System Browser, then clicking the Current Document Folder icon. Media files cannot be dragged and dropped into the file manager pane. The score for file manager was 0.5.
    20. Terminal is integrated into Kate. The terminal can follow folder of the file browser. Terminal can execute system commands. The score for terminal was 1.0.

    Results

    Kate is a very powerful text editor. By default, the Kate editor is missing required features that can be installed by using extensions. For my required features, the Kate editor scored 95.0% or 9.50 out of 10.

    Resources for Learning Programming

    If you’re looking to improve your programming skills, check out my programming books and courses:

    One-on-One Programming Tutorials & Services

    If you’re looking for personalized help, I offer one-on-one online programming tutorials tailored to your needs. You can reach out and book a session here.

    I can also assist with installing or migrating Kate on your machine. If you need help with that, feel free to get in touch via my services page.

    Conclusion

    Kate is a versatile, fast, and free open-source text editor perfect for developers of all levels. Whether you’re on Fedora, Ubuntu, or even macOS, installing Kate is easy, and its features will make your programming tasks smoother and more efficient.

    If you have any questions or need further assistance with Kate or other programming topics, don’t hesitate to contact me. Happy coding!

  • Take Control of Your Android—Wirelessly or Wired with scrcpy

    Take Control of Your Android—Wirelessly or Wired with scrcpy

    Introduction

    Ever wish you could use your Android phone directly from your desktop — mirror the screen, type with your keyboard, or even record the display? scrcpy makes this possible, and it’s completely free and open source, licensed under the Apache License 2.0.

    In this post, you’ll learn how to install and use scrcpy on Fedora Linux, using precompiled binaries — no compiling required. We’ll also cover other platforms briefly, and point you to great learning resources.

    What Is scrcpy?

    scrcpy is an open source screen mirroring and control tool for Android devices. It offers:

    • High-performance screen mirroring
    • No root required
    • Cross-platform support (Linux, Windows, macOS)
    • Works via USB or wirelessly
    • Advanced features: audio forwarding, screen recording, camera mirroring, clipboard sync, and more

    🔗 Official GitHub repository (Genymobile/scrcpy)

    Install scrcpy on Fedora (Recommended Method)

    1. Download the latest release binaries from the
      official GitHub Releases page.
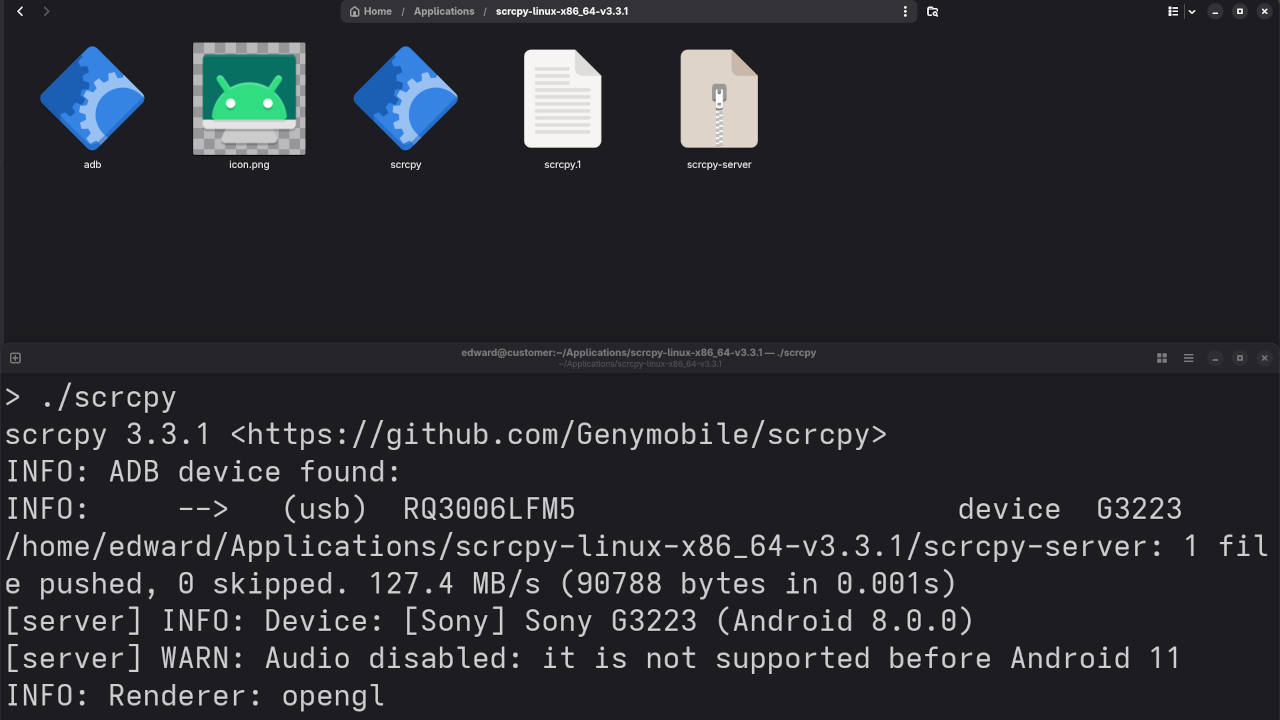
    2. For Linux, download the AppImage and run it:

      chmod +x scrcpy-*.AppImage
      ./scrcpy-*.AppImage

    No need to compile from source — all major platforms have official prebuilt binaries.

    Alternative Fedora Installation (Package Manager)

    If you prefer installing via Fedora’s package manager:

    sudo dnf install scrcpy

    Or using Flatpak:

    flatpak install flathub com.genymobile.scrcpy
    flatpak run com.genymobile.scrcpy

    Other Platforms (Quick Guide)

    • Windows:
      Download the .zip from
      GitHub Releases, unzip, and run scrcpy.exe.
    • macOS:
      brew install scrcpy
    • Ubuntu/Debian:
      sudo apt install scrcpy

      Or download the latest AppImage from GitHub for newer features.

    Requirements For SCRCPY

    Glossary:

    IP

    Internet Protocol address is a numerical label that is assigned to a device connected to a computer network.

    Wi-Fi

    Wireless network protocols based on the IEEE 802.11 standards for local area networks.

    WLAN

    Wireless LAN is a computer network that links 2 or more devices.

    TCP/IP

    Transmission Control Protocol/Internet Protocol is a framework for computer networking.

    Android Devices

    Recording Devices
    Name Description Recording Power
    Sony Xperia XA1 Ultra Updated to Android 8.0 and latest web browser. Takes photos and videos on front and back cameras. USB Type-C 2.0 10W charging
    Samsung Galaxy S21 FE 5G Updated to Android 14.0 and default camera application. Takes photos and videos on front and back cameras. USB Type-C 2.0 <25W charging
    Name Description Example

    Wireless Connection


    # If The Device IP Is Not Know #
    scrcpy --tcpip
    # If The Device IP Know (Replace Xs with IP) #
    scrcpy --tcpip=xxx.xxx.x.xxx:5555


    Screenshots & Screencast

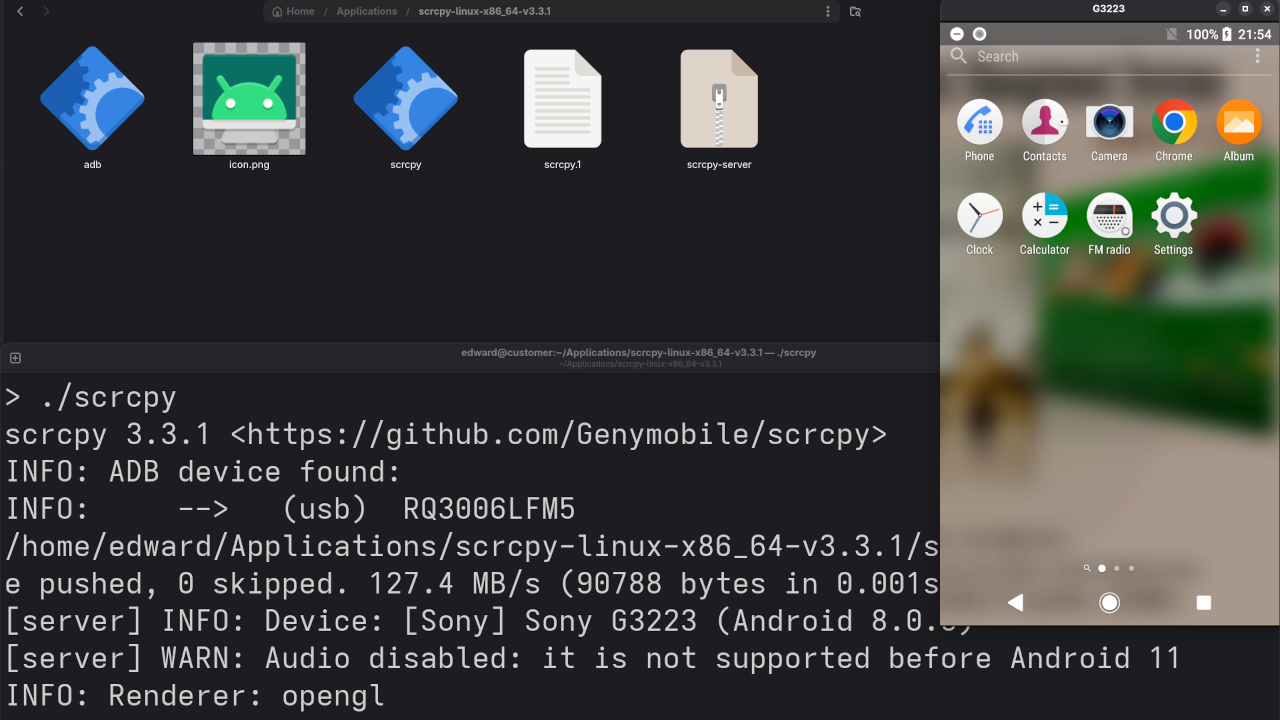
    SCRCPY Device Probe
    SCRCPY Android Device Wireless IP Address Probe

    SCRCPY Device Mirror
    SCRCPY Android Device Wireless IP Address Mirroring

    SCRCPY Installation And Setup Screencast

    Learn with Me – Programming Books, Courses & Services

    Conclusion

    scrcpy makes Android screen mirroring and control incredibly easy — especially now that official binaries are available. Whether you’re debugging apps, demoing software, or just want the convenience of using your Android device on your Fedora desktop, scrcpy is the tool to try.

    Need help getting started? I offer support, training, and custom setups tailored to your needs.

  • Unboxing Guide: MSI B550-A PRO ProSeries Motherboard

    Unboxing Guide: MSI B550-A PRO ProSeries Motherboard

    Is the MSI B550-A PRO ProSeries Motherboard Worth Buying Used in 2025? Unboxing and First Impressions

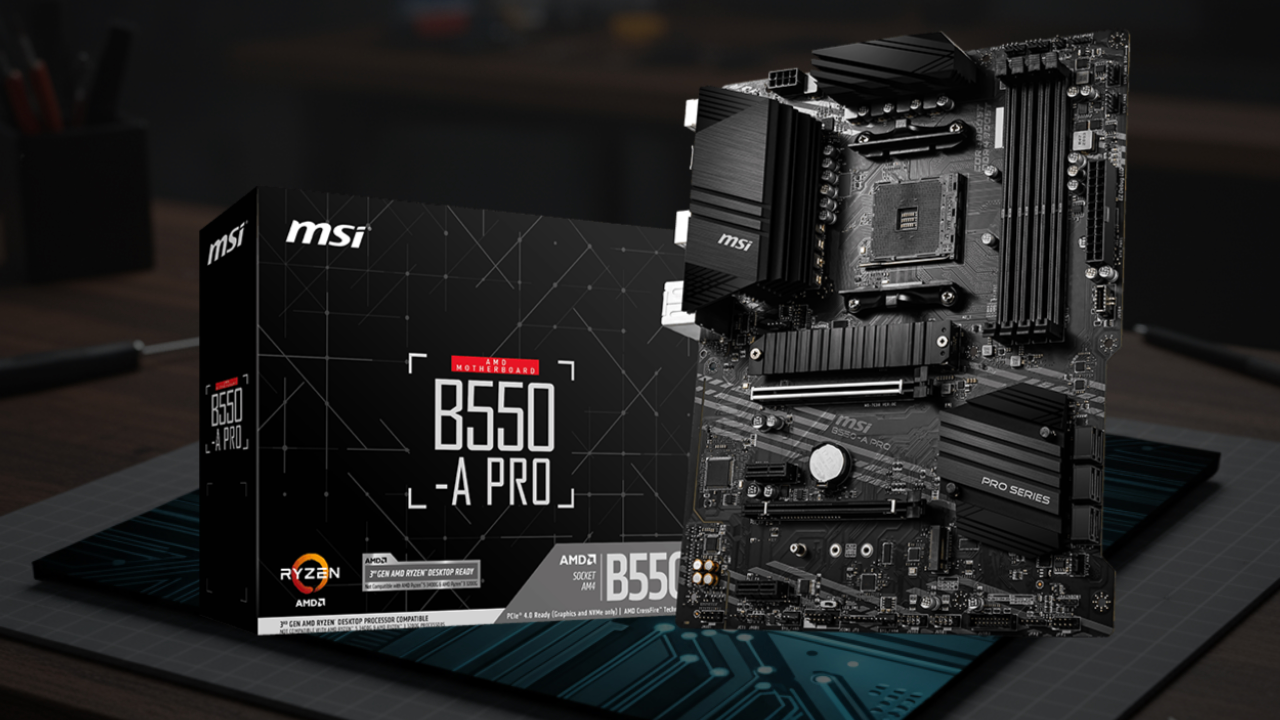
    Hello everyone! Today, I’m unboxing the MSI B550-A PRO ProSeries motherboard which I purchased used to build a new PC tailored for Blender and AI workloads. Although I haven’t tested it yet, I want to share detailed specs, my planned build, and some stats to help you decide if this motherboard is worth buying in 2025.

    MSI B550-A PRO Motherboard: Key Specifications

    Feature Specification
    Chipset AMD B550
    CPU Socket AM4 (Ryzen 3000 & 5000 series)
    Memory Support Up to 128GB DDR4, 4400+ MHz (OC)
    Memory Slots 4 DIMM slots
    Expansion Slots 1x PCIe 4.0 x16, 1x PCIe 3.0 x16, 3x PCIe 3.0 x1
    Storage Options 2x M.2 slots (PCIe 4.0 + PCIe 3.0), 6x SATA III ports
    USB Ports USB 3.2 Gen 2 (Type-A and Type-C), USB 2.0
    Network Realtek 8111H Gigabit LAN
    Audio Codec Realtek ALC892/897
    Form Factor ATX
    Price Range (Used 2025) Approx. $70 – $120 USD

    Planned PC Build Overview

    Component Model / Details
    CPU AMD Ryzen 5 5600GT
    RAM Timetec 32GB DDR4 2133MHz
    GPU AMD Radeon Instinct MI60 32GB
    Power Supply Unit SAMA G850W ATX 3.1 PSU
    Motherboard MSI B550-A PRO ProSeries

    Why This Build?

    The MSI B550-A PRO supports PCIe 4.0, which is important for the Ryzen 5 5600GT and modern GPUs like the Radeon Instinct MI60. This combination should give you:

    • Faster data transfer speeds: Up to 64 GB/s bandwidth with PCIe 4.0 for GPUs and SSDs.
    • Ample RAM capacity: 32GB RAM is sufficient for large 3D projects and AI datasets.
    • Stable power delivery: The motherboard’s VRM design supports the Ryzen 5 5600GT without throttling.

    Performance Statistics and Benchmarks (Reference)

    Benchmark/Test Result / Notes
    Ryzen 5 5600GT Cinebench R23 (Multi-Core) ~7000 points (average)
    Blender BMW Benchmark (GPU + CPU) ~3-5 minutes render time (depending on scene)
    Memory Bandwidth DDR4 2133 MHz ~17 GB/s
    PCIe 4.0 vs PCIe 3.0 GPU bandwidth PCIe 4.0 doubles bandwidth (16 GT/s vs 8 GT/s)
    Power Efficiency (B550 vs X570) B550 boards generally consume ~10-15W less power

    Note: Actual performance will vary based on cooling, drivers, and workloads.

    Screenshots And Screencast

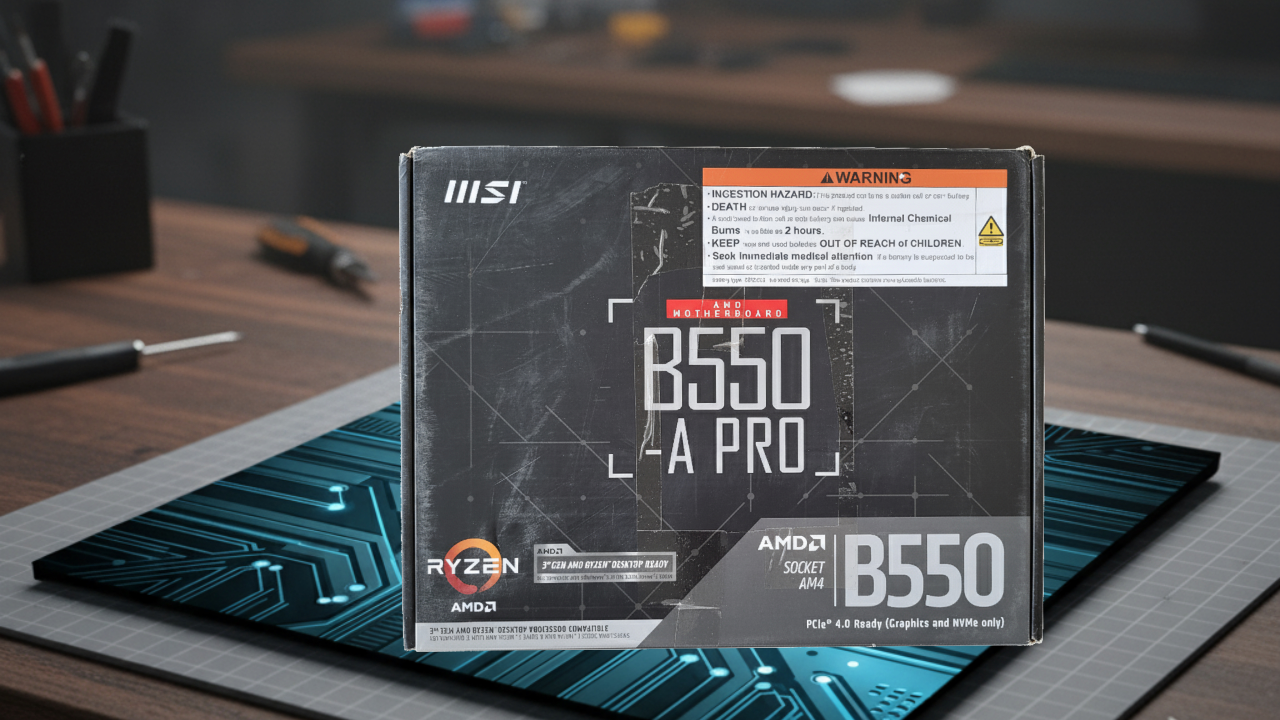
    Motherboard Box
    MSI B550-A PRO Mother And Box

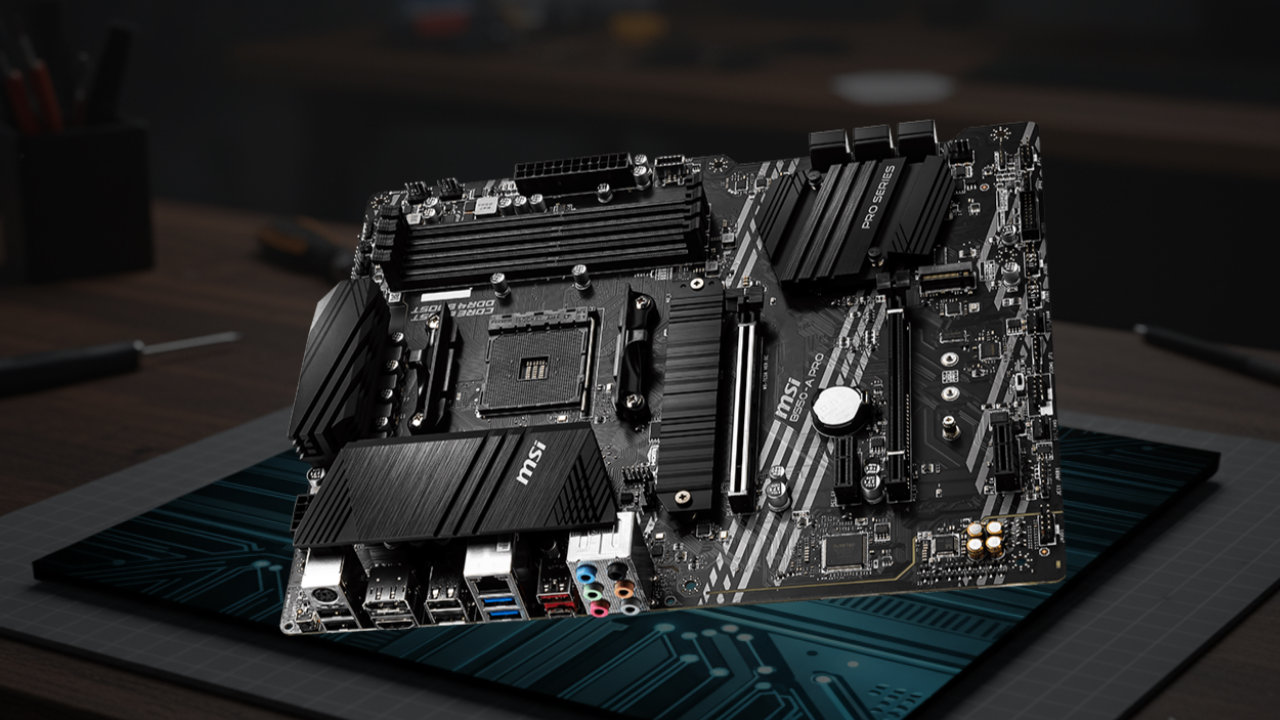
    MSI B550-A PRO
    MSI B550-A PRO Back Connectors

    Screencast Showing setup on Fedora 42, system detection, Fan stats

    Additional Learning Resources

    If you're interested in learning programming to enhance your Blender and AI workflows, check out these books and courses:

    One-on-One Online Tutorials

    I also offer personalized Python tutorials, including Blender scripting and AI installation, training, or migration. Interested? Reach out via my contact page.

    Final Thoughts

    The MSI B550-A PRO remains a solid choice for a budget-friendly, mid-range build in 2025. Buying used can save money without sacrificing performance if the board is in good condition. Once I complete testing, I’ll post detailed benchmarks and workflow insights.

    Stay tuned!

    References

  • Automatic Speech Recognition AI Whisper Tiny EN Model

    Automatic Speech Recognition AI Whisper Tiny EN Model

    How to Run OpenAI Whisper Tiny English Model with Podman Compose (Beginner Guide)

    💡 Introduction

    OpenAI Whisper is a powerful open-source speech recognition system that can transcribe spoken audio into text. It supports multiple models ranging from small and fast to large and highly accurate.

    In this post, you’ll learn how to run the “tiny.en” model (optimized for English) in a Podman Compose container, and integrate it with a simple web interface that records audio and returns the transcription.

    🛣 Why Use Podman Compose?

    Podman is a daemonless container engine that provides a Docker-compatible experience with better security. Podman Compose helps orchestrate containers the same way Docker Compose does—but without requiring root access.

    🔬 What is Whisper Tiny English?

    • ✔ Open-source under MIT license
    • ✔ Very small (~75MB)
    • ✔ Fast inference even on modest CPUs
    • ✔ Trained specifically for English
    • ✔ Great for quick demos and lightweight deployments

    🛠 Example Setup: Voice Recording + Whisper Transcription (Tiny English)

    This example creates a container that uses Whisper’s tiny English model to transcribe speech from a browser-based recorder.

    ✅ Prerequisites:

    • Podman and Podman Compose installed
    • Python 3.9+ installed
    • Git installed

    1. Create a Dockerfile:

    FROM python:3.9
    
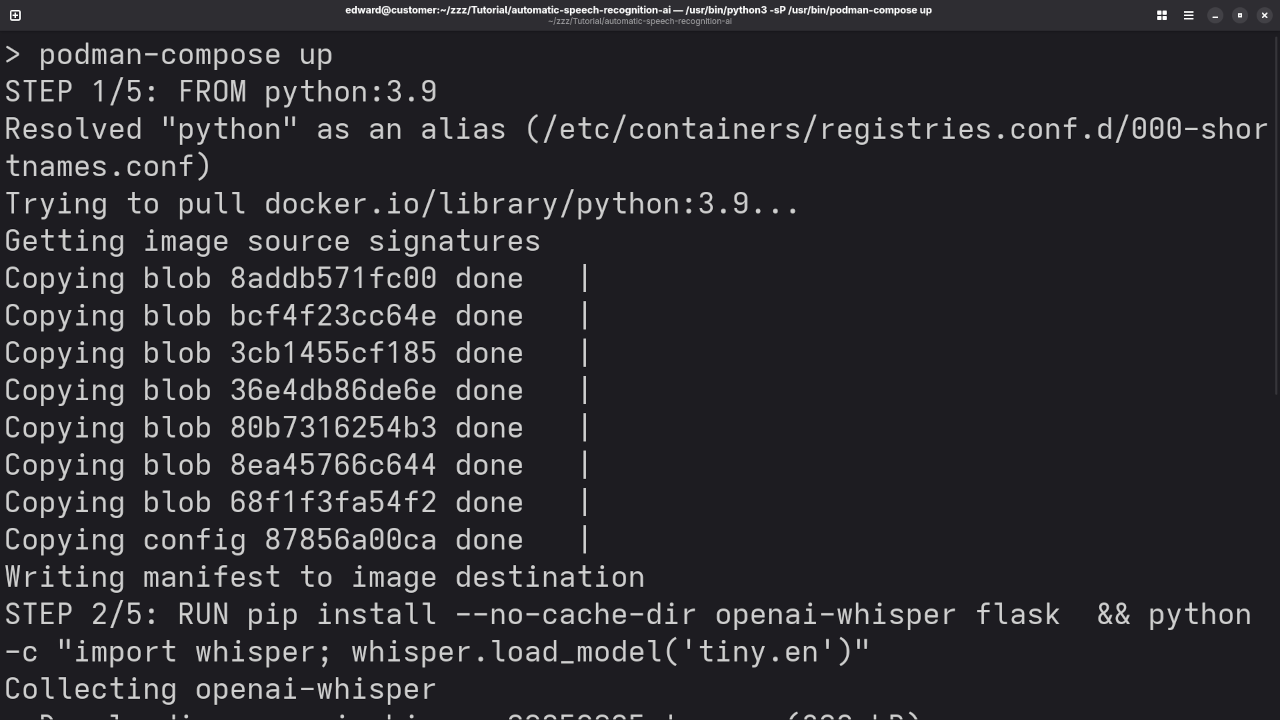
    RUN pip install --no-cache-dir openai-whisper flask \
     &amp;&amp; python -c "import whisper; whisper.load_model('tiny.en')"
    
    WORKDIR /app
    COPY . /app
    
    CMD ["python", "app.py"]

    2. Create podman-compose.yml:

    version: "3"
    services:
      whisper:
        build: .
        volumes:
          - .:/app
          - whisper-model-cache:/root/.cache/whisper
        ports:
          - "5000:5000"
    
    volumes:
      whisper-model-cache:

    3. Create the transcription server (app.py):


    from flask import Flask, request, jsonify
    import whisper
    import tempfile
    
    app = Flask(__name__)
    model = whisper.load_model(&quot;tiny.en&quot;)  # English only
    
    @app.route(&quot;/transcribe&quot;, methods=[&quot;POST&quot;])
    def transcribe():
        file = request.files[&quot;audio&quot;]
        with tempfile.NamedTemporaryFile(delete=False, suffix=&quot;.mp3&quot;) as tmp:
            file.save(tmp.name)
            result = model.transcribe(tmp.name)
            return jsonify(result)
    
    if __name__ == &quot;__main__&quot;:
        app.run(host=&quot;0.0.0.0&quot;, port=5000)


    4. Create the HTML interface:


        &lt;h2&gt;Whisper Voice Recorder (Tiny English)&lt;/h2&gt;
        &lt;button onclick=&quot;startRecording()&quot;&gt;Start&lt;/button&gt;
        &lt;button onclick=&quot;stopRecording()&quot;&gt;Stop&lt;/button&gt;
        &lt;p id=&quot;transcription&quot;&gt;Transcription will appear here...&lt;/p&gt;


            let mediaRecorder;
            let audioChunks = [];
    
            function startRecording() {
                navigator.mediaDevices.getUserMedia({ audio: true }).then(stream =&gt; {
                    mediaRecorder = new MediaRecorder(stream);
                    mediaRecorder.start();
    
                    mediaRecorder.ondataavailable = event =&gt; {
                        audioChunks.push(event.data);
                    };
    
                    mediaRecorder.onstop = () =&gt; {
                        const audioBlob = new Blob(audioChunks, { type: &#039;audio/mp3&#039; });
                        const formData = new FormData();
                        formData.append(&quot;audio&quot;, audioBlob, &quot;recording.mp3&quot;);
    
                        fetch(&quot;/transcribe&quot;, {
                            method: &quot;POST&quot;,
                            body: formData
                        })
                        .then(res =&gt; res.json())
                        .then(data =&gt; {
                            document.getElementById(&quot;transcription&quot;).innerText = data.text;
                        });
    
                        audioChunks = [];
                    };
                });
            }
    
            function stopRecording() {
                mediaRecorder.stop();
            }


    5. Run it:

    podman-compose up

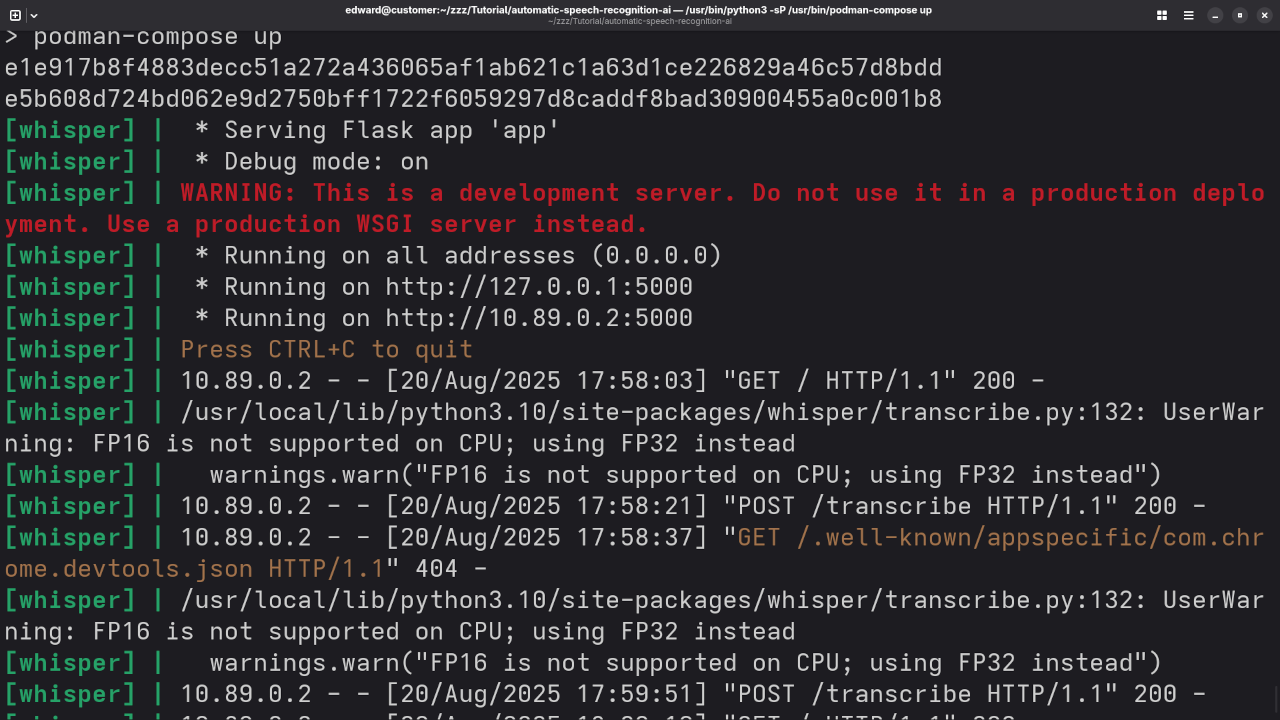
    Visit http://localhost:5000 in your browser to test audio recording and transcription.

    📷 Screenshots & Screencast

    Whisper Tiny EN Custom Build
    Command Line Whisper Tiny EN Custom Build In Podman Container.

    Whisper Tiny EN Web Server
    Command Line Whisper Tiny EN Web Server In Podman Container.

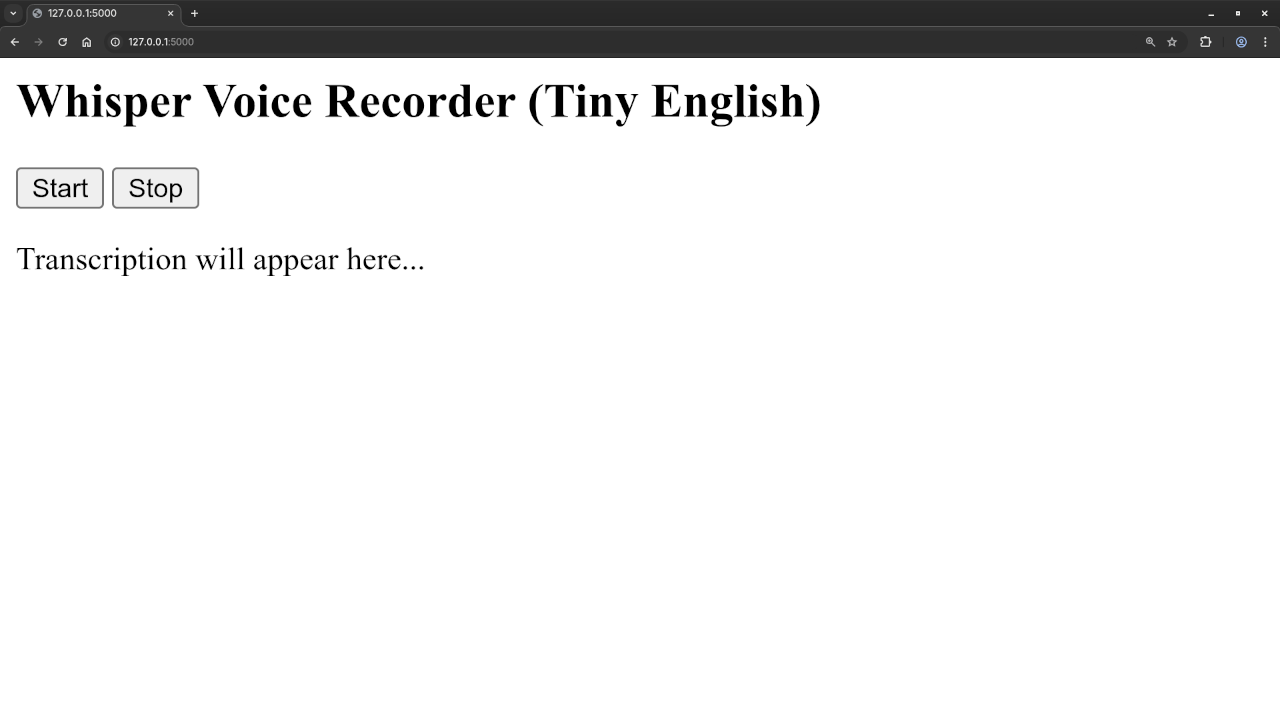
    Whisper Tiny EN Voice Recorder
    Web Browser Displaying Displaying Whisper Tiny EN Voice Recorder.

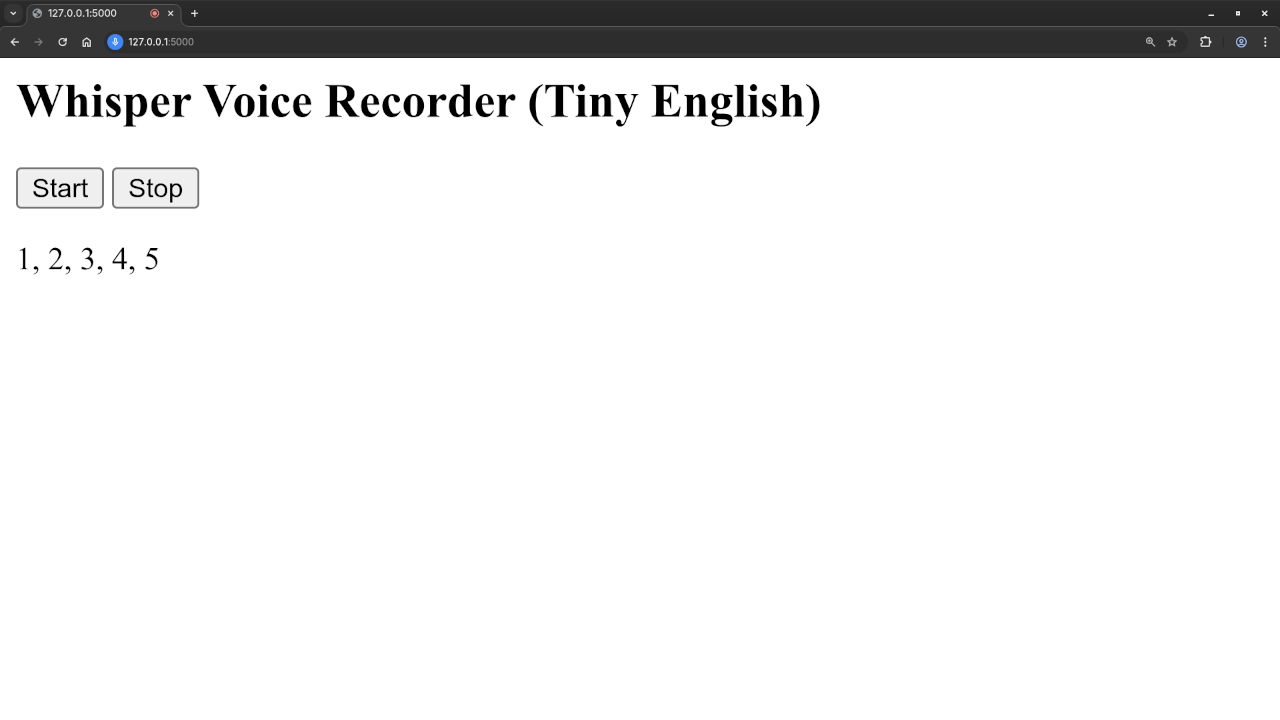
    Whisper Tiny EN Voice Recorder
    Web Browser Displaying Displaying Whisper Tiny EN Voice Recorder.

    Video Displaying Voice Recorder Using Whisper Tiny EN In Podman Container

    📈 Before vs After Training

    🔴 Before Custom Training:

    • Good with general English
    • Less accurate with accents or technical vocabulary

    🟢 After Fine-Tuning:

    • Improved accuracy for domain-specific terms
    • Better noise tolerance
    • Custom language and phrase detection

    📚 Related Learning Resources

    👨‍🎓 Need Help?

  • Unboxing Guide: AMD Ryzen 5 5600GT 6-Core 12-Thread Desktop Processor

    Unboxing Guide: AMD Ryzen 5 5600GT 6-Core 12-Thread Desktop Processor

    Unboxing the AMD Ryzen 5 5600GT in 2025: Is It Still Worth It for Blender and AI?

    Welcome to this beginner-friendly unboxing and overview of the AMD Ryzen 5 5600GT 6-Core, 12-Thread Desktop Processor in 2025. If you are building a system for Blender 3D rendering, AI workflows, or Python development, this post will help you decide whether this budget-friendly CPU is worth your investment today – before we even install it.

    While we have not tested it yet, let’s dig into the specifications, planned build, and use-case potential.

    AMD Ryzen 5 5600GT: Key Specifications

    Even in 2025, the Ryzen 5 5600GT is an impressive value CPU for mid-range builds. Here is what you get:

    Feature Specification
    Cores / Threads 6 Cores / 12 Threads
    Base Clock 3.6 GHz
    Max Boost Clock Up to 4.6 GHz
    Architecture Zen 3 (7nm)
    TDP 65W
    Socket AM4
    Integrated Graphics Yes (Radeon Graphics)
    Cache L2: 3MB, L3: 32MB
    PCIe Version PCIe 3.0
    Memory Support DDR4 3200 MHz (OC supported)

    Note: This processor includes integrated Radeon graphics, which is ideal for troubleshooting or basic graphics tasks. However, we will be using a discrete GPU for compute-heavy workloads.

    Planned Build Overview

    Here is what we are combining with the Ryzen 5 5600GT:

    • RAM: 32GB KIT (2x16GB) DDR4 2133MHz PC4-17000 Non-ECC
    • GPU: AMD Radeon Instinct MI60 32GB HBM2
    • Use Case: Blender, Python scripting, AI training/inference
    • Additional Software: Blender, Python, PyTorch

    While DDR4-2133 is not the fastest RAM, it remains functional for many rendering and AI tasks, especially with a powerful GPU like the MI60 in the system.

    First Impressions: Unboxing

    The box includes:

    • AMD Ryzen 5 5600GT Processor
    • Wraith Stealth Cooler
    • Installation Manual and Warranty

    The packaging is compact, and the included cooler is ideal for small to mid-tower cases. Build quality is what you would expect from AMD in this range.

    Screenshots And Screencast

    Wraith Stealth Cooler
    AMD Ryzen 5 5600GT Bundled Wraith Stealth Cooler

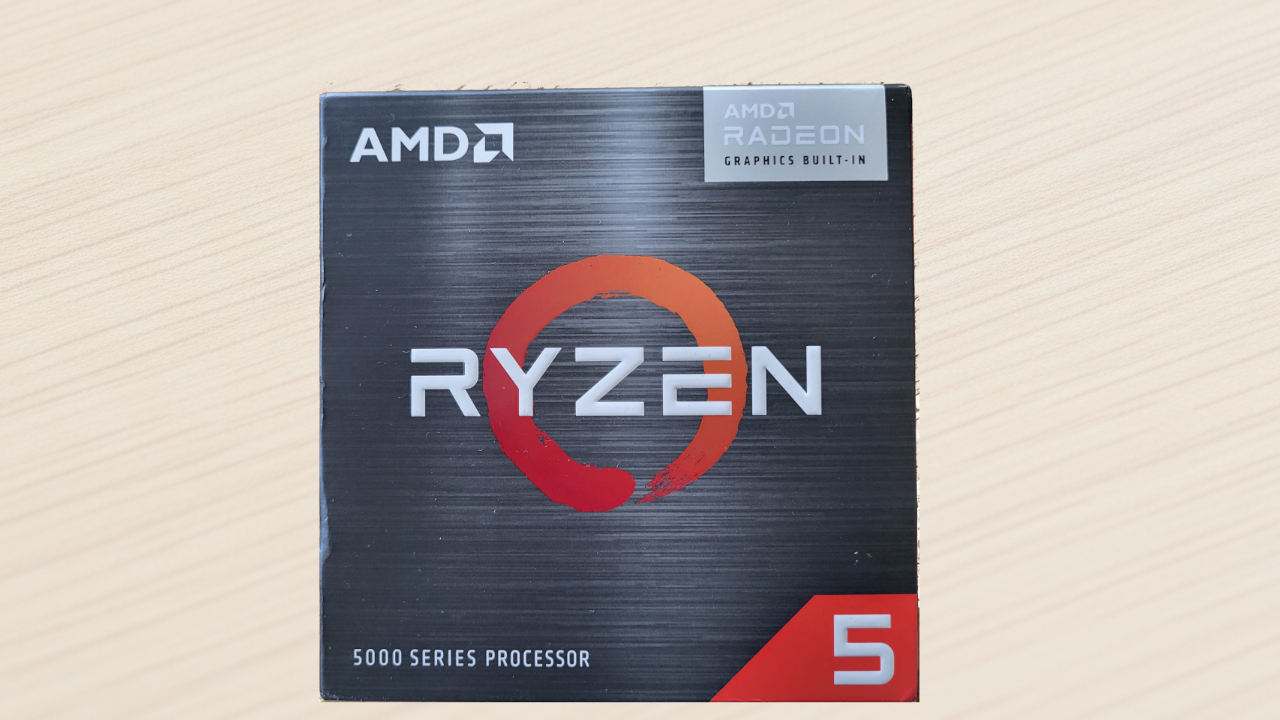
    AMD Ryzen 5 5600GT Box
    AMD Ryzen 5 5600GT CPU Box And CPU

    Screencast Showing setup on Fedora 42, system detection, Fan stats

    Resources to Learn Python and Blender Scripting

    If you plan to use this system for Python development, Blender scripting, or AI workflows, consider checking out the following resources I have authored:

    Books

    Online Course

    One-on-One Python and Blender Support

    Need help building your environment or working with AI and Blender? I offer personalized one-on-one tutorials and consulting services:

    • Install and configure Python, Blender, or AI libraries
    • Train or migrate machine learning models
    • Develop Blender add-ons using Python

    Contact me to schedule a session: https://ojambo.com/contact

    Final Thoughts: Is the Ryzen 5 5600GT Worth It in 2025?

    If you are building a budget-conscious workstation for 3D rendering, Python development, or AI, the AMD Ryzen 5 5600GT remains a great value in 2025. It offers solid multithreaded performance, integrated graphics for convenience, and ships with a stock cooler that works out of the box.

    Though it uses DDR4 memory and PCIe 3.0, both technologies are still viable for many creative and development tasks. For beginners or budget builders, the Ryzen 5 5600GT is a worthwhile CPU that punches above its price class.

  • PHP Web Framework Tempest

    PHP Web Framework Tempest

    Getting Started with the Tempest PHP Framework (v1.6.0): A Beginner’s Guide with MariaDB Integration

    Why Try Tempest PHP Framework?

    If you’re looking for a modern, lightweight, and fast PHP framework that supports MVC architecture, look no further than the Tempest PHP Framework. Recently updated to version 1.6.0, Tempest is perfect for both beginners and experienced developers who want a streamlined alternative to bloated frameworks.

    In this beginner-friendly tutorial, we’ll:

    • Install Tempest using Composer
    • Build a simple app that connects to a MariaDB table called people
    • Fetch all the records
    • Output them as HTML using the MVC pattern

    Step 1: Installing Tempest PHP (v1.6.0)

    Make sure you have Composer installed on your system. Then, in your terminal or command prompt, run the following command:

    composer create-project tempest/framework my-tempest-app 1.6.0

    This will set up a new Tempest project in the my-tempest-app folder using version 1.6.0.

    Step 2: Starting the Web Server

    Navigate into your new project directory:

    cd my-tempest-app

    Then run the following command to start the built-in development web server:

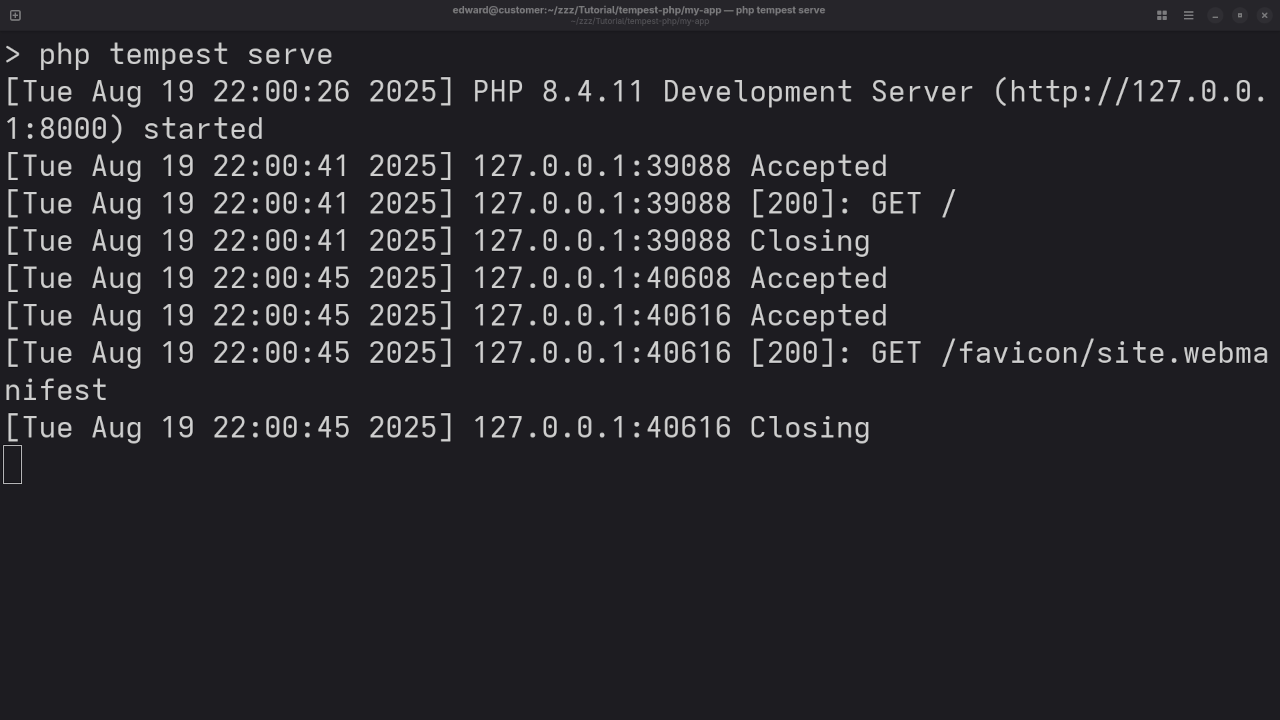
    php tempest serve

    By default, this will start a development server at:

    http://localhost:8000

    Open your browser and go to http://localhost:8000/people to view the app once everything is set up (we’ll create that route below).

    Step 3: Set Up Database Connection

    Edit your .env file to include your MariaDB database credentials:

    DB_HOST=127.0.0.1
    DB_PORT=3306
    DB_DATABASE=my_database
    DB_USERNAME=my_user
    DB_PASSWORD=my_password

    Step 4: Create a Model for the "people" Table

    Create the following model file: App/Models/Person.php


    namespace App\Models;
    
    final class Person
    {
        public int $id;
        public string $username;
        public string $name;
        public string $age;
        public int $verified;
    
        public function __construct(array $data = [])
        {
            foreach ($data as $key =&gt; $value) {
                if(property_exists($this, $key)) {
                    $this-&gt;$key = $value;
                }
            }
        }
    }


    Step 5: Create a Controller

    Create a controller at: App/Controllers/PeopleController.php


    namespace App\Controllers;
    
    use Tempest\Router\Get;
    use Tempest\View\View;
    use function Tempest\view;
    use function Tempest\Database\query;
    use App\Models\Person;
    
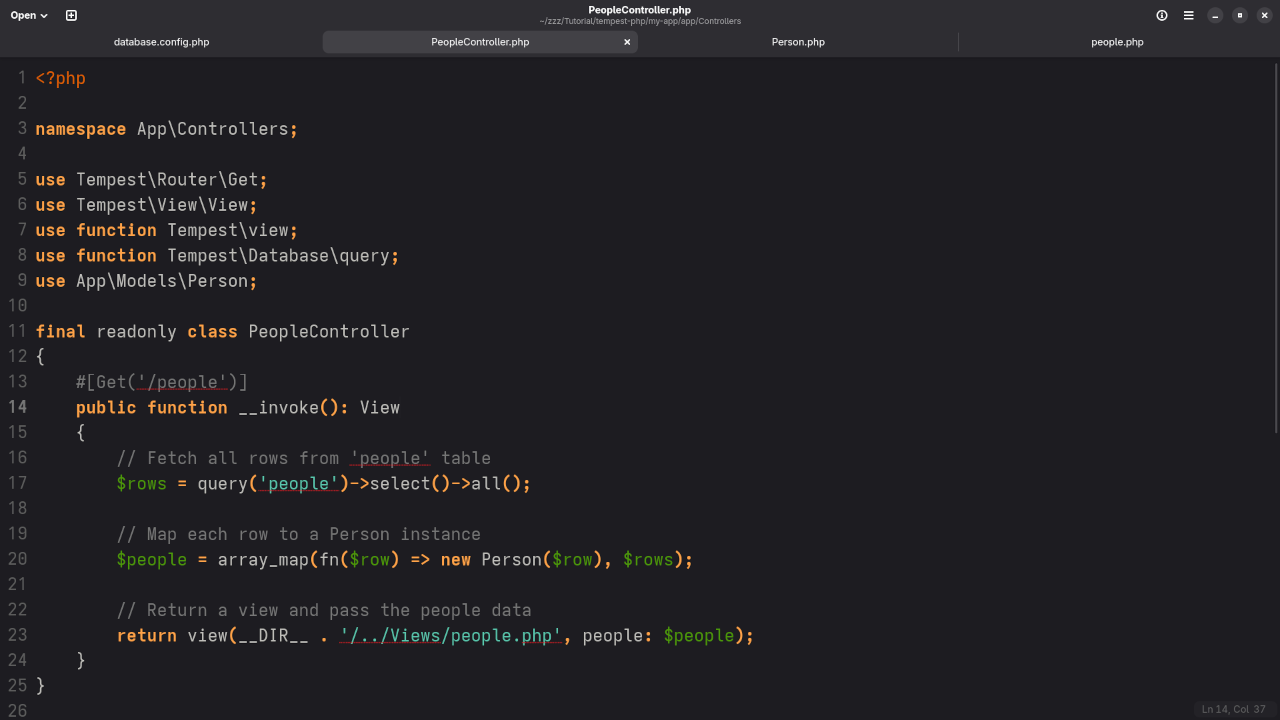
    final readonly class PeopleController
    {
        #[Get(&#039;/people&#039;)]
        public function __invoke(): View
        {
            // Fetch all rows from &#039;people&#039; table
            $rows = query(&#039;people&#039;)-&gt;select()-&gt;all();
    
            // Map each row to a Person instance
            $people = array_map(fn($row) =&gt; new Person($row), $rows);
    
            // Return a view and pass the people data
            return view(__DIR__ . &#039;/../Views/people.php&#039;, people: $people);
        }
    }


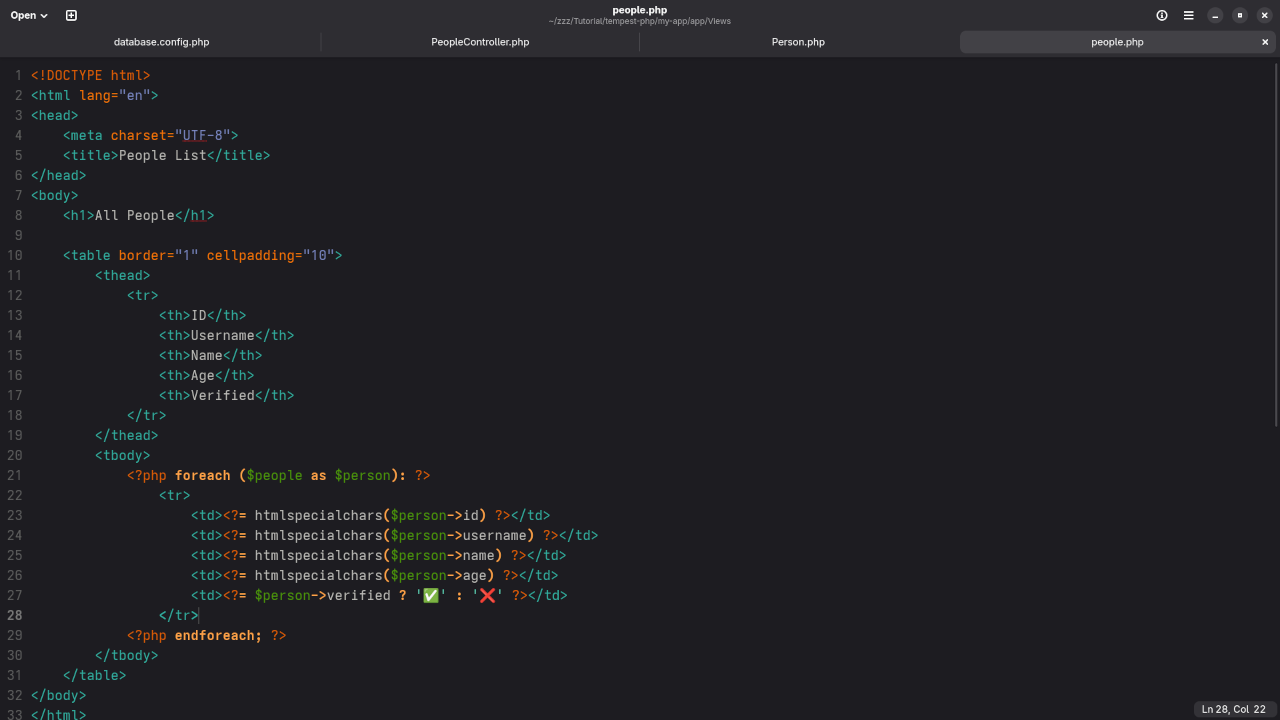
    Step 6: Define a View

    Register a route in App/Views/people.php:


    &lt;?php foreach ($people as $person): ?&gt;
        &lt;tr&gt;
            &lt;td&gt;&lt;?= htmlspecialchars($person-&gt;id) ?&gt;&lt;/td&gt;
            &lt;td&gt;&lt;?= htmlspecialchars($person-&gt;username) ?&gt;&lt;/td&gt;
            &lt;td&gt;&lt;?= htmlspecialchars($person-&gt;name) ?&gt;&lt;/td&gt;
            &lt;td&gt;&lt;?= htmlspecialchars($person-&gt;age) ?&gt;&lt;/td&gt;
            &lt;td&gt;&lt;?= $person-&gt;verified ? &#039;✅&#039; : &#039;❌&#039; ?&gt;&lt;/td&gt;
        &lt;/tr&gt;
    &lt;?php endforeach; ?&gt;


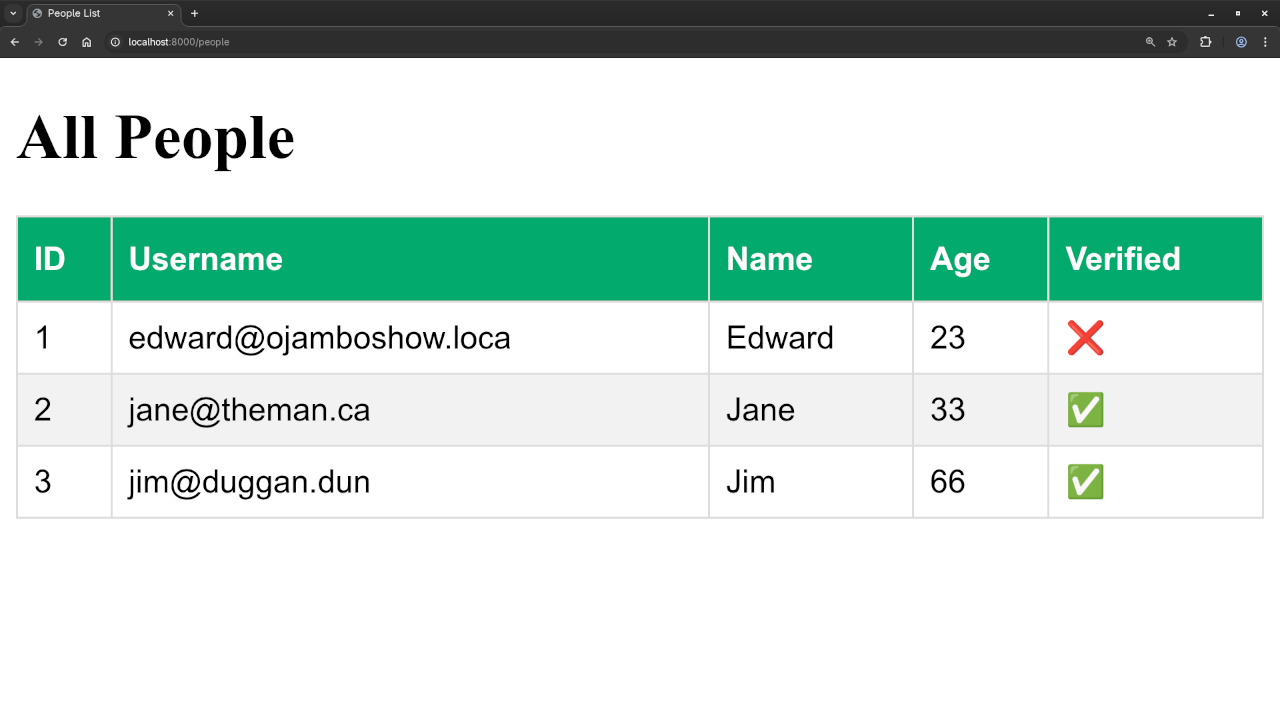
    Now when you visit /people on your local Tempest server, it will display the data from your people table in a clean HTML list.

    Screenshots And Screencast

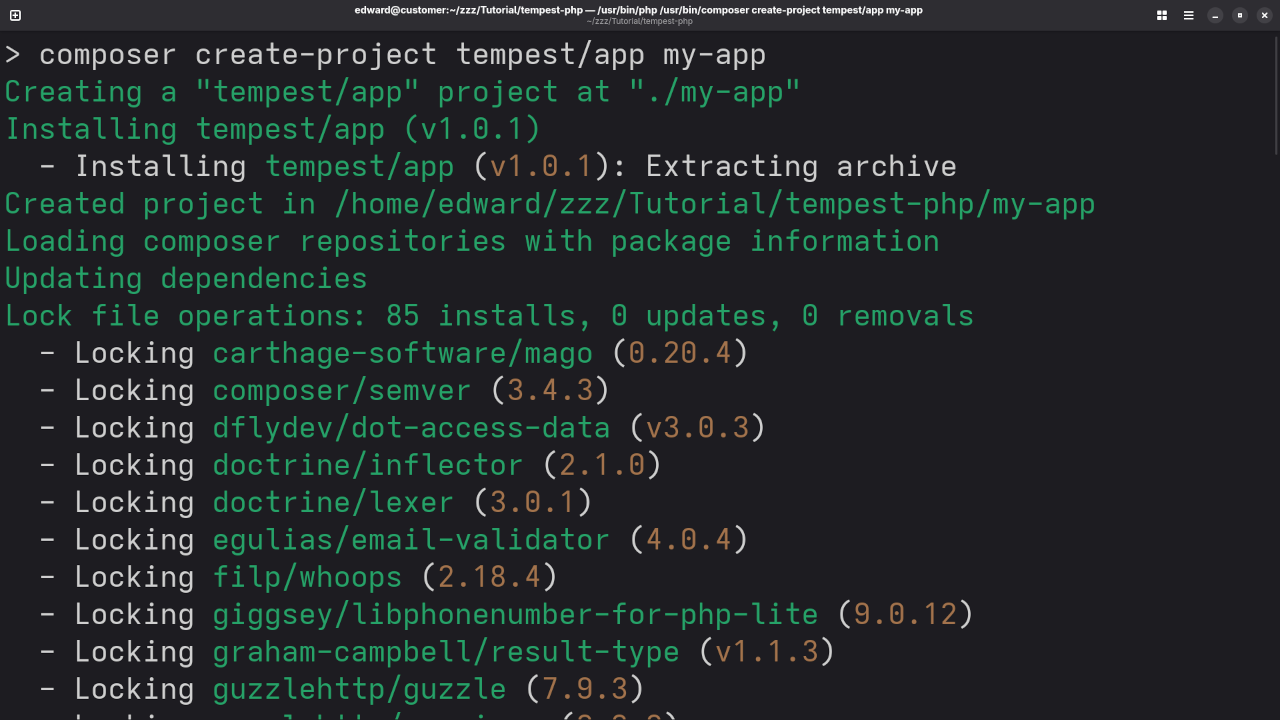
    Tempest Dependencies
    Command Line Installation Of Tempest Web Framework

    Tempest Server
    Command Line Server Of Tempest Web Framework

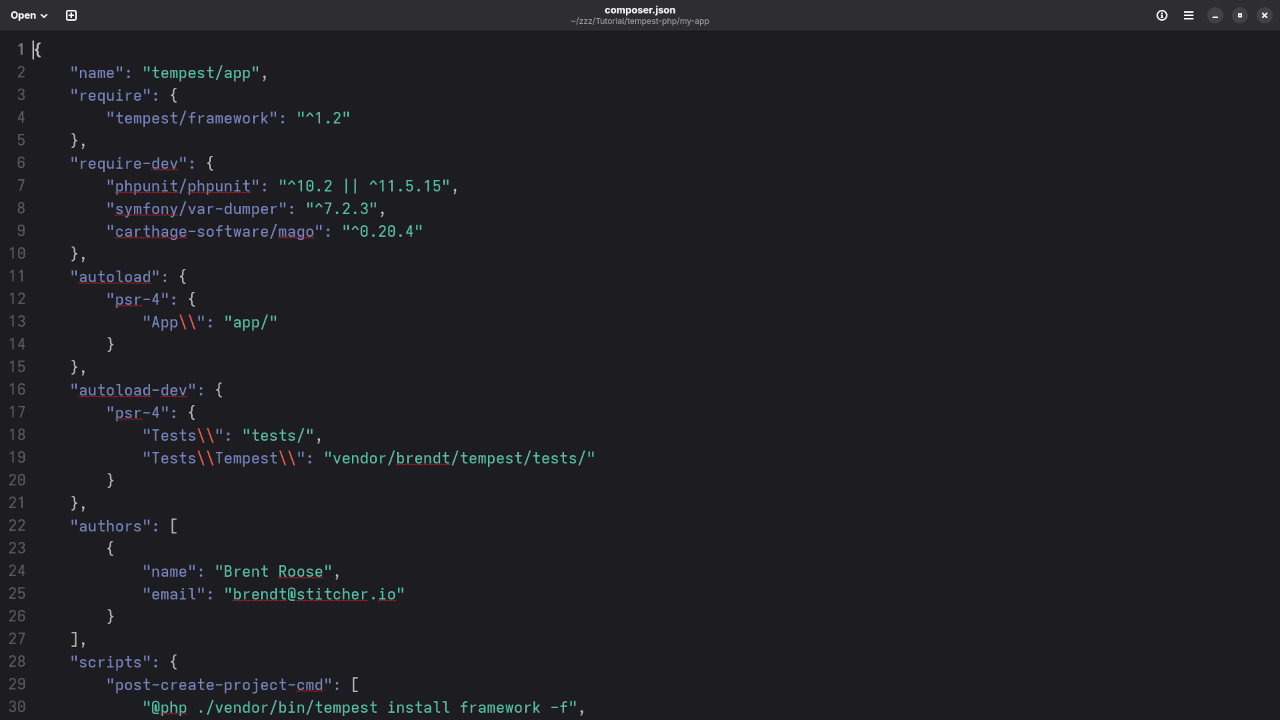
    Tempest Composer
    Gnome Text Editor Displaying Composer JSON

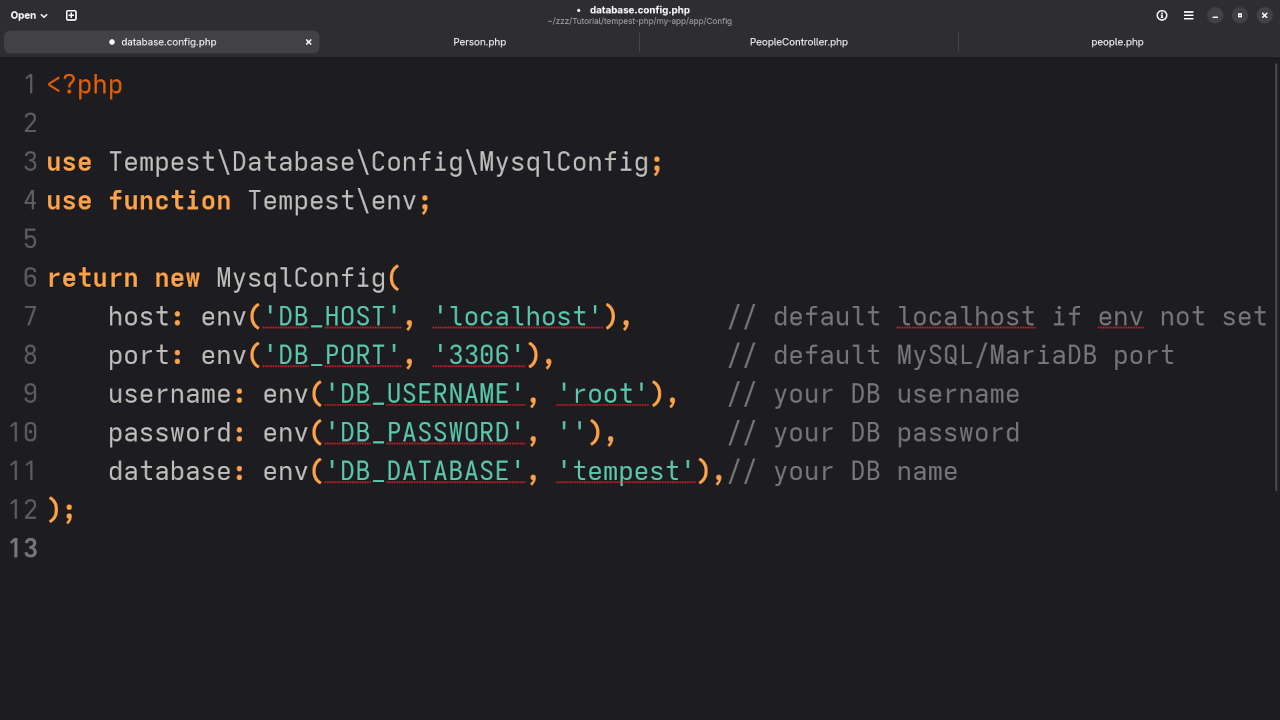
    Tempest Database Config
    Gnome Text Editor Displaying App Database Configuration File

    Tempest View
    Gnome Text Editor Displaying App View File

    Tempest People Controller
    Gnome Text Editor Displaying Custom People Controller
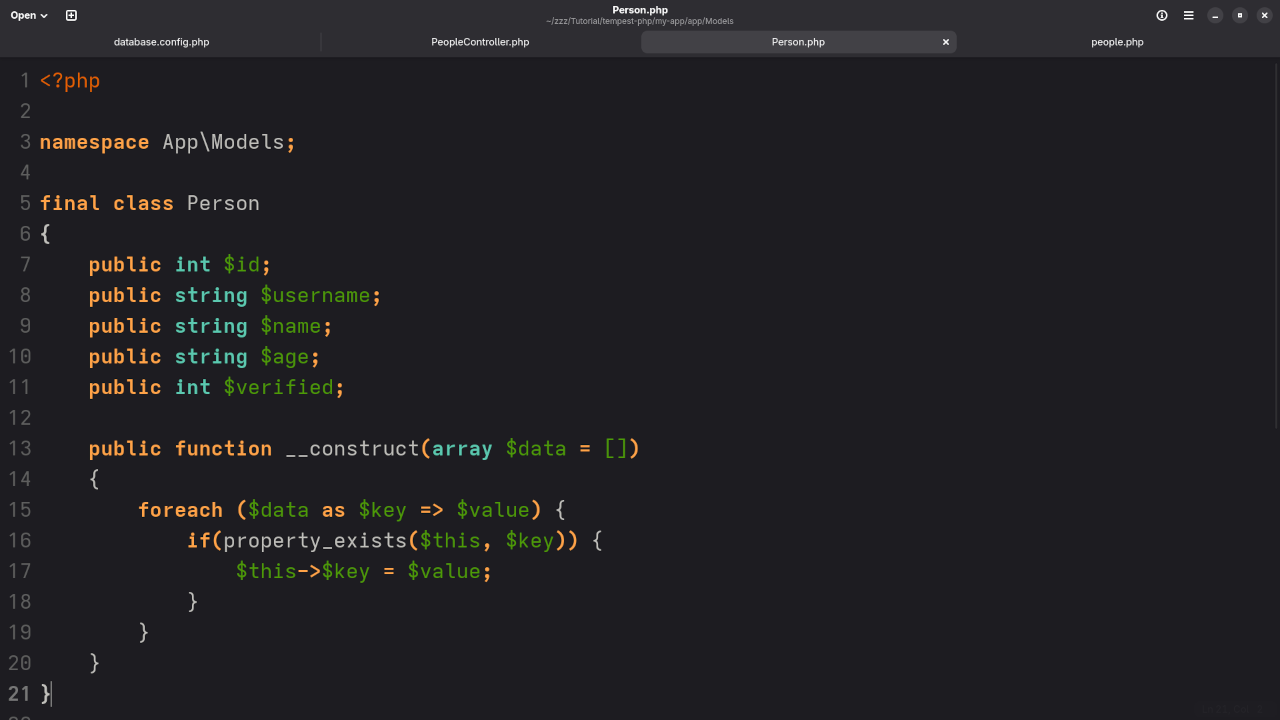
    Tempest People Model
    Gnome Text Editor Displaying Custom People Model
    Tempest People Result
    Web Browser Displaying Custom People Route Result

    Custom View Records In Web Browser

    Further Learning

    If you’re new to PHP or want to deepen your skills, I’ve written a book just for you:

    📚 Learning PHP – By Edward Ojambo

    Also, check out my online course:

    🎓 Learning PHP (Online Course)

    Need Help?

    I’m available for:

    • One-on-one programming tutorials
    • Upgrading to Tempest v1.6.0
    • Migration from older PHP frameworks to Tempest

    Contact me here

    Final Thoughts

    The Tempest PHP framework is fresh, simple, and effective—perfect for those who want power without complexity. With MVC support, modern tooling, and beginner-friendly structure, it’s a great choice for launching your next PHP project.

  • Unboxing Guide: Timetec 32GB KIT DDR4 2133MHz CL15 UDIMM Ram

    Unboxing Guide: Timetec 32GB KIT DDR4 2133MHz CL15 UDIMM Ram

    Is the Timetec 32GB DDR4 2133MHz RAM Worth Buying in 2025? [Unboxing for AI + Blender Build]

    As part of a new PC build focused on AI development and 3D modeling in Blender, I just unboxed the Timetec 32GB KIT (2x16GB) DDR4 2133MHz RAM. In this post, I’ll go over the specifications, share my initial impressions from the unboxing, and provide context on how it fits into the rest of my build.

    This post is a preliminary review – testing and benchmarking will come later. I’ll also be embedding a YouTube live screencast (see below) once testing begins.

    What’s in the Box?

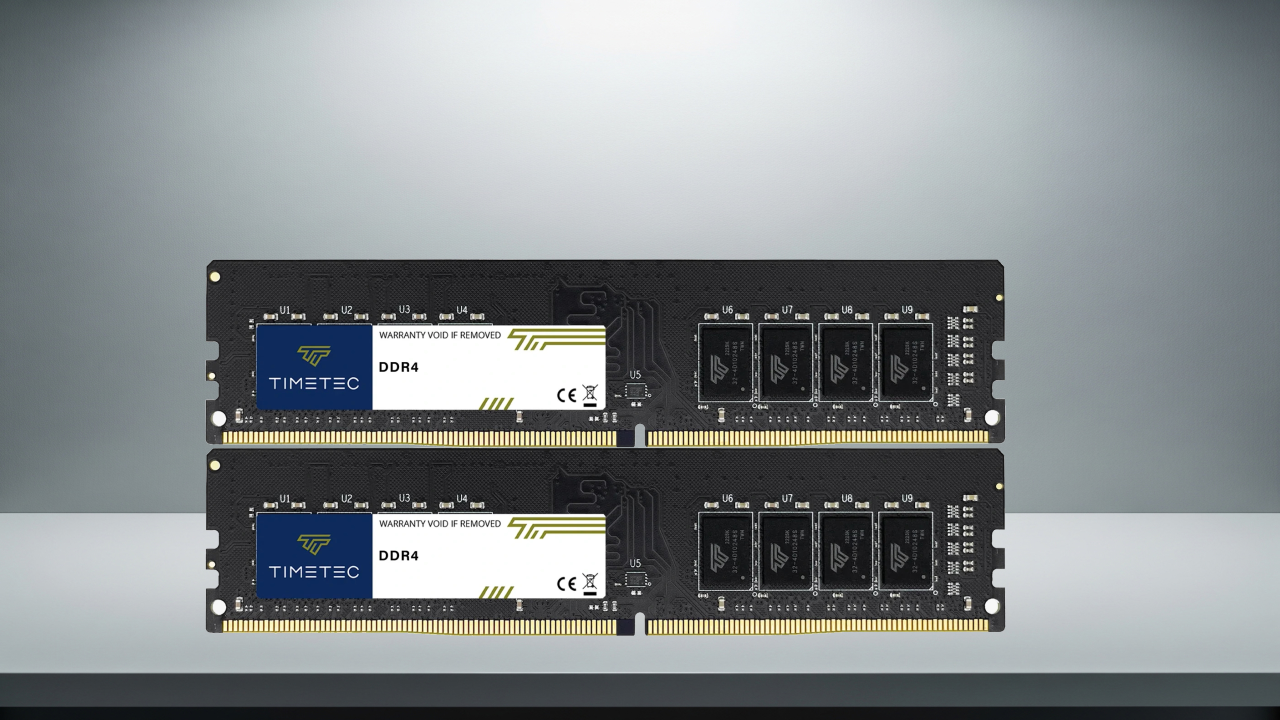
    • 2x 16GB DDR4 UDIMM modules
    • Standard plastic clamshell packaging
    • No heatsinks included (bare modules)
    • Easy to install with standard 288-pin layout

    Specifications of Timetec 32GB DDR4 2133MHz (PC4-17000)

    Feature Specification
    Capacity 32GB Kit (2x16GB)
    Memory Type DDR4 UDIMM (Desktop)
    Speed 2133 MHz (PC4-17000)
    CAS Latency CL15
    Voltage 1.2V
    Rank & Organization 2Rx8 Dual Rank
    Error Checking Non-ECC
    Buffered/Unbuffered Unbuffered
    Form Factor 288-pin UDIMM
    Warranty Limited Lifetime Warranty (manufacturer dependent)

    System Build Overview

    This RAM is going into a new productivity and AI build:

    • CPU: AMD Ryzen 5 5600GT (6 cores, 12 threads)
    • GPU: AMD Radeon Instinct MI60 32GB HBM2 (AI & compute focused)
    • RAM: Timetec 32GB DDR4 2133MHz
    • Use Case: Blender (Python Scripting, Rendering), AI Model Training

    While 2133MHz is on the slower side by 2025 standards, it’s still viable for non-gaming workloads – especially for Blender scripting and AI tasks that are more memory-bound or GPU-focused.

    Stay tuned for performance results and compatibility benchmarks with this unique build.

    Screenshots And Screencast

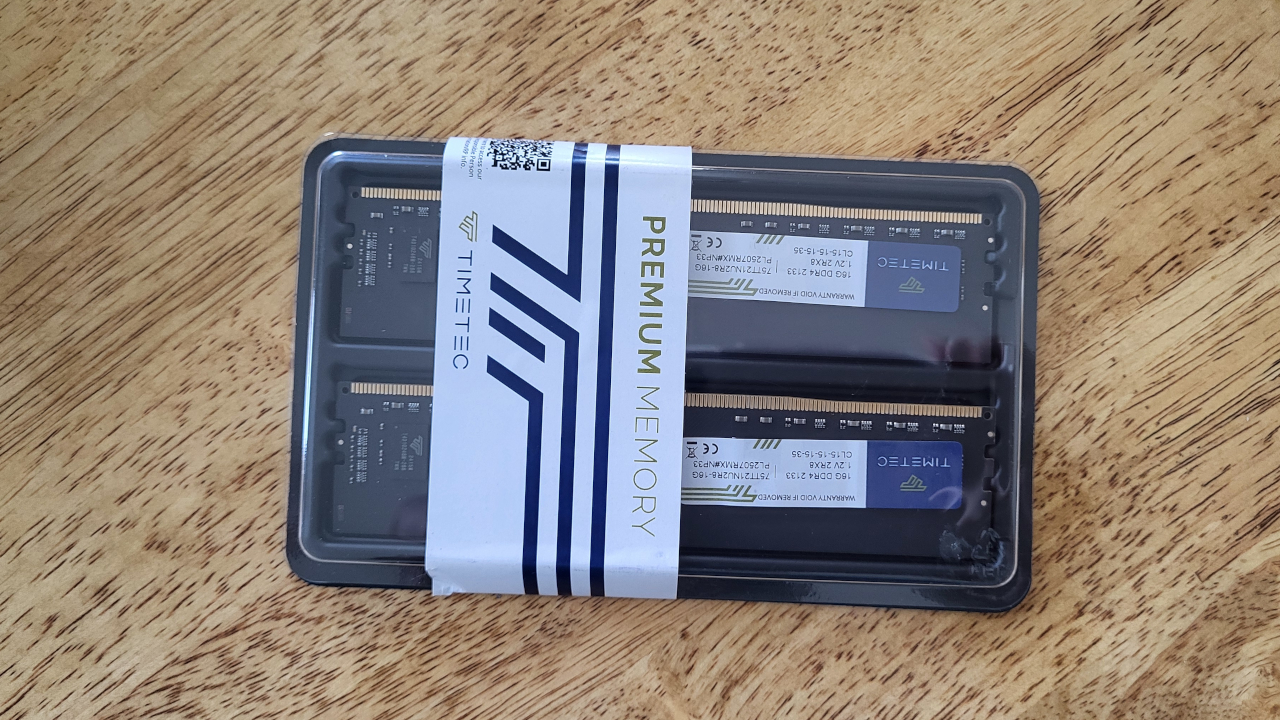
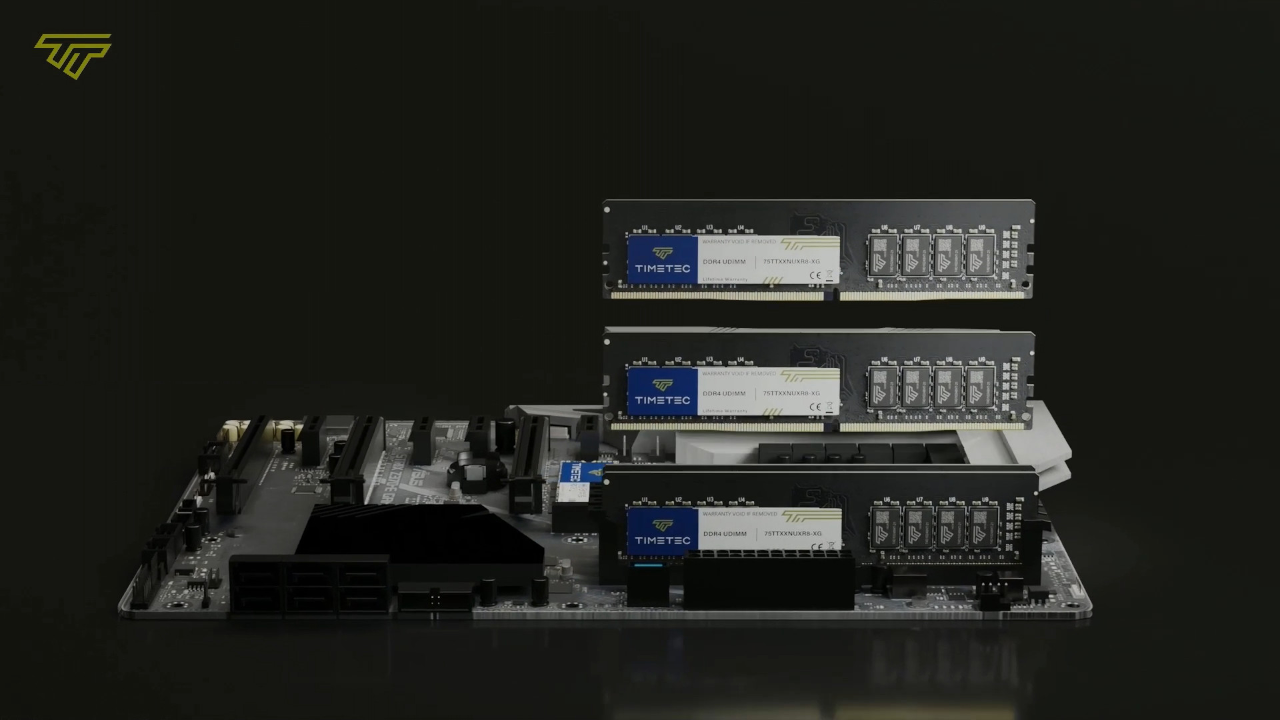
    Timetec 32GB Kit DDR4 2133MHz RAM
    Timetec 32GB (2x16GB) Kit DDR4 2133MHz RAM

    Timetec 32GB Kit DDR4 Installed
    Timetec 32GB Kit DDR4 2133MHz RAM Installed On Motherboard

    Screencast Showing setup on Fedora 42, system detection, Fan stats

    Want to Learn More?

    I also teach Python and Blender scripting. If you’re interested in diving deeper into coding or AI development, check out my learning resources below:

    Final Thoughts (So Far)

    While the Timetec 2133MHz RAM is no longer cutting-edge, it remains an affordable and reliable option for AI and Blender-focused builds where raw RAM speed is not the primary bottleneck.

    Would I recommend it? Yes, with caveats: If you’re on a budget and not doing high-refresh gaming, this kit will serve well, especially when paired with high-performance compute components like the MI60 GPU.

    More to come after testing.

    Let me know in the comments if you’ve used Timetec RAM in your own builds, or if you’re interested in learning Python or Blender scripting – I’m here to help.