Blog

  • Review Generative AI Smollm 135M Model

    Review Generative AI Smollm 135M Model

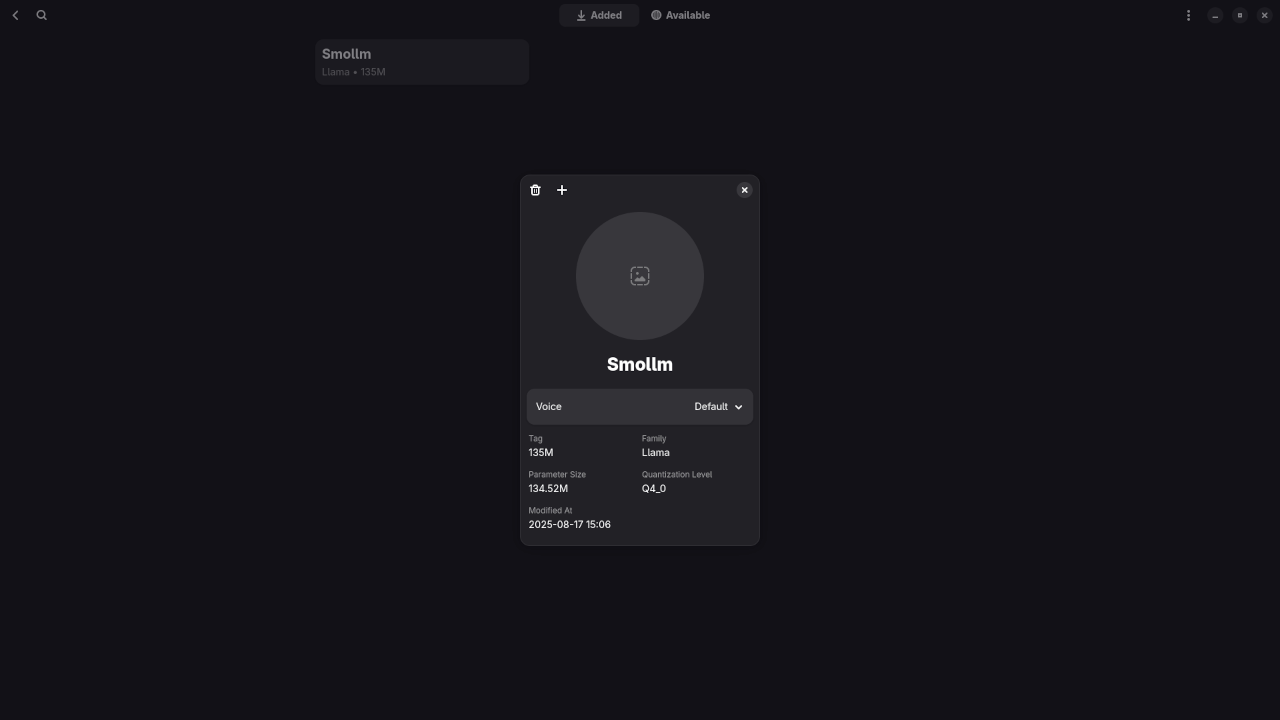
    Getting Started with Smollm 135M LLM on Alpaca Ollama Client (Open Source Guide)

    If you’re curious about running large language models (LLMs) locally and efficiently, this guide will walk you through setting up Smollm 135M with the Alpaca Ollama client. Whether you’re just getting started in machine learning or looking for lightweight models to experiment with, Smollm 135M is a great option.

    ✨ What is Smollm 135M?

    Smollm 135M is a lightweight open-source language model designed to run locally on low-spec machines. It is ideal for testing, development, and learning purposes, especially for Python beginners or anyone exploring AI models without access to powerful GPUs.

    You can run Smollm 135M using the Alpaca Ollama client, available here:
    https://github.com/Jeffser/Alpaca

    🧑‍💻 How to Run Smollm 135M on Alpaca Ollama

    Setting it up is simple and beginner-friendly. I’ve outlined the key steps, and I’ll walk you through them in an upcoming YouTube screencast and screenshots section below.

    📜 License & Restrictions for Smollm 135M

    Smollm 135M is open source and released under the Apache License 2.0, dated January 2004. This license permits free use, modification, reproduction, and distribution, with some conditions:

    • ✅ Free for personal and commercial use
    • ✅ Modification and redistribution allowed
    • 📋 Must include license notice and document changes
    • ❌ No warranties provided

    Always check the official repository or model card for the most up-to-date license terms and ethical usage guidelines.

    🖼️ Screenshots and Screencast
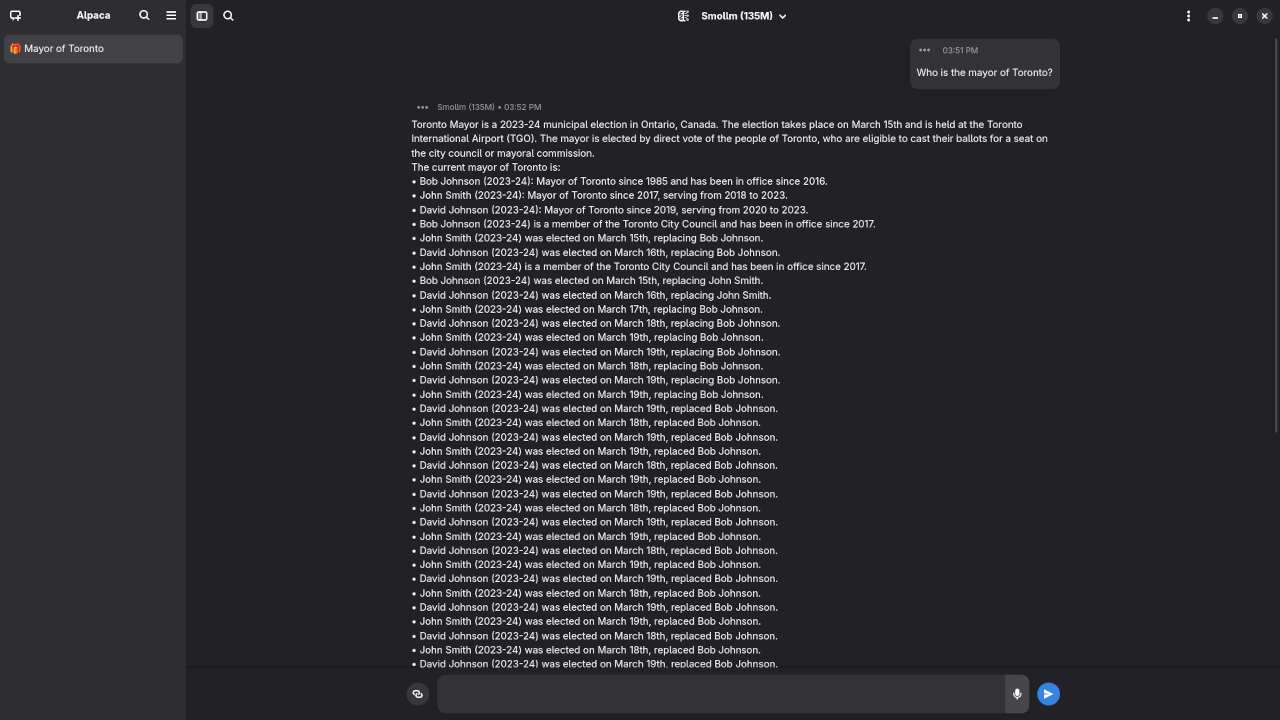
    Smollm 135M answered question about the Mayor
    Command Line Smollm 135M Answered Mayor Of Toronto Request.

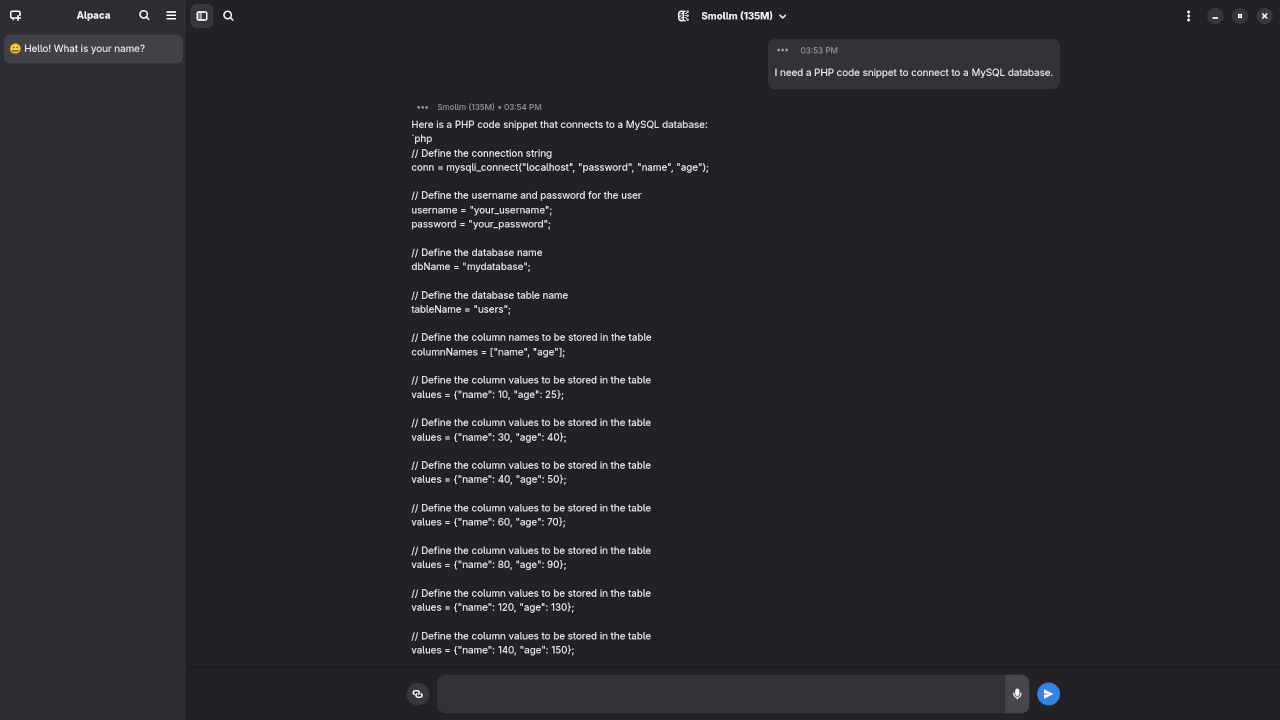
    Smollm 135M answered question about PHP code
    Command Line Smollm 135M Answered PHP Code Request.

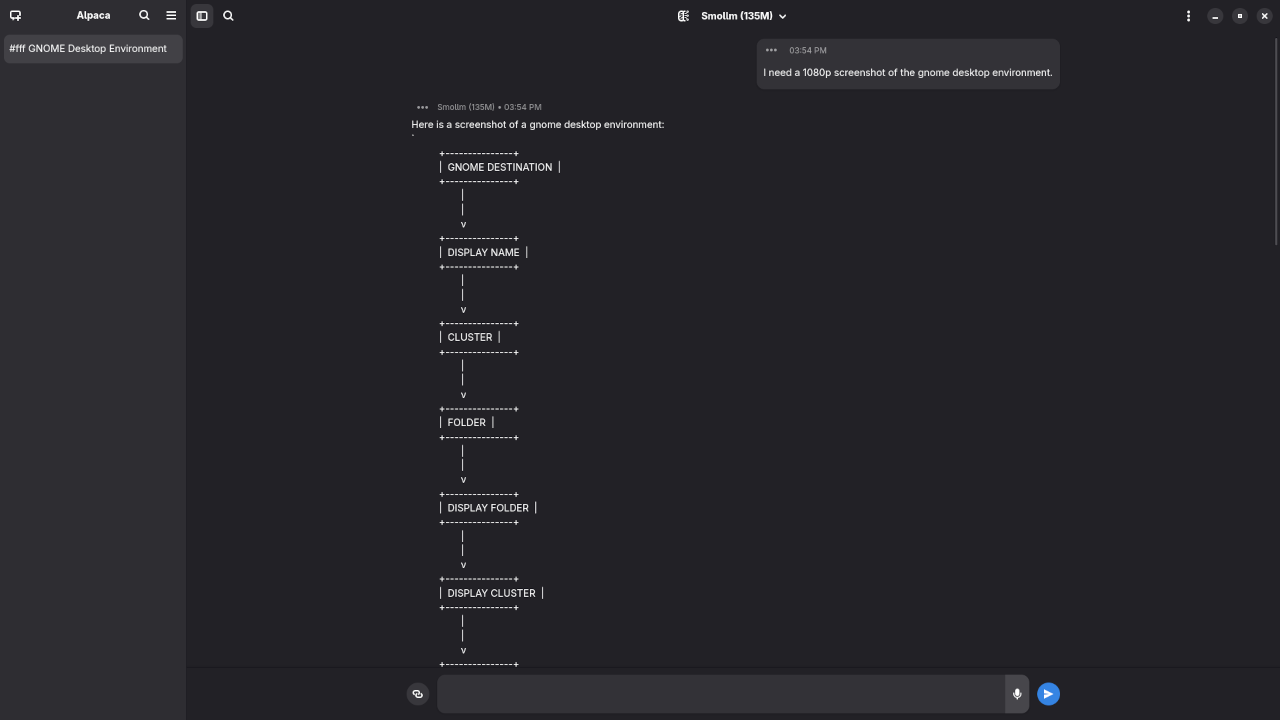
    Smollm 135M answered question about screenshot
    Command Line Smollm 135M Answered Gnome Desktop Screenshot Request.

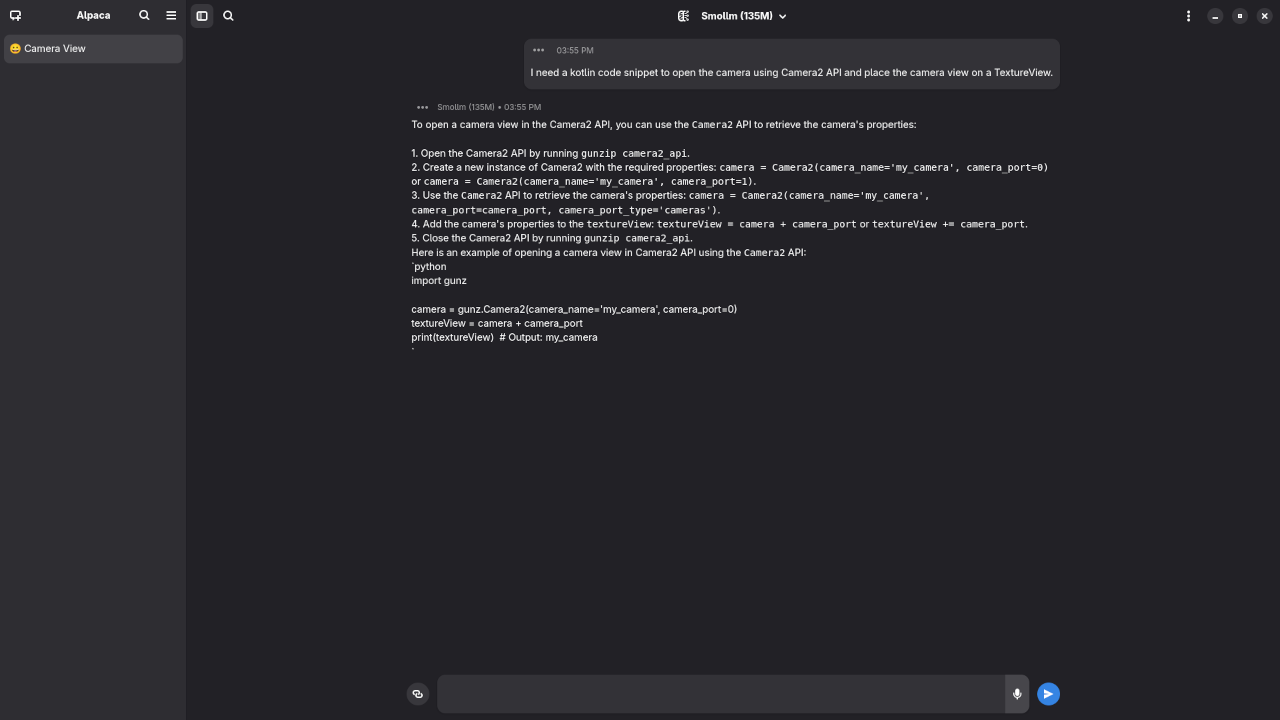
    Smollm 135M answered request for Kotlin code
    Smollm 135M Answered Kotlin Code Request.

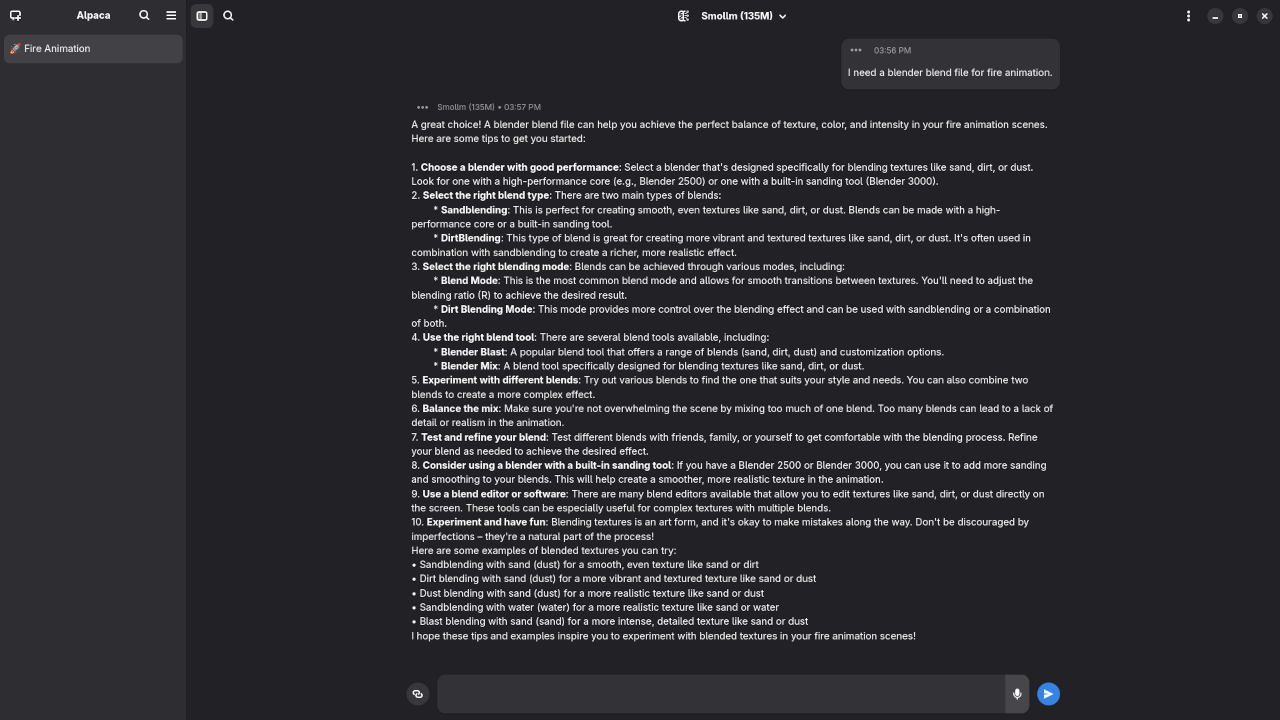
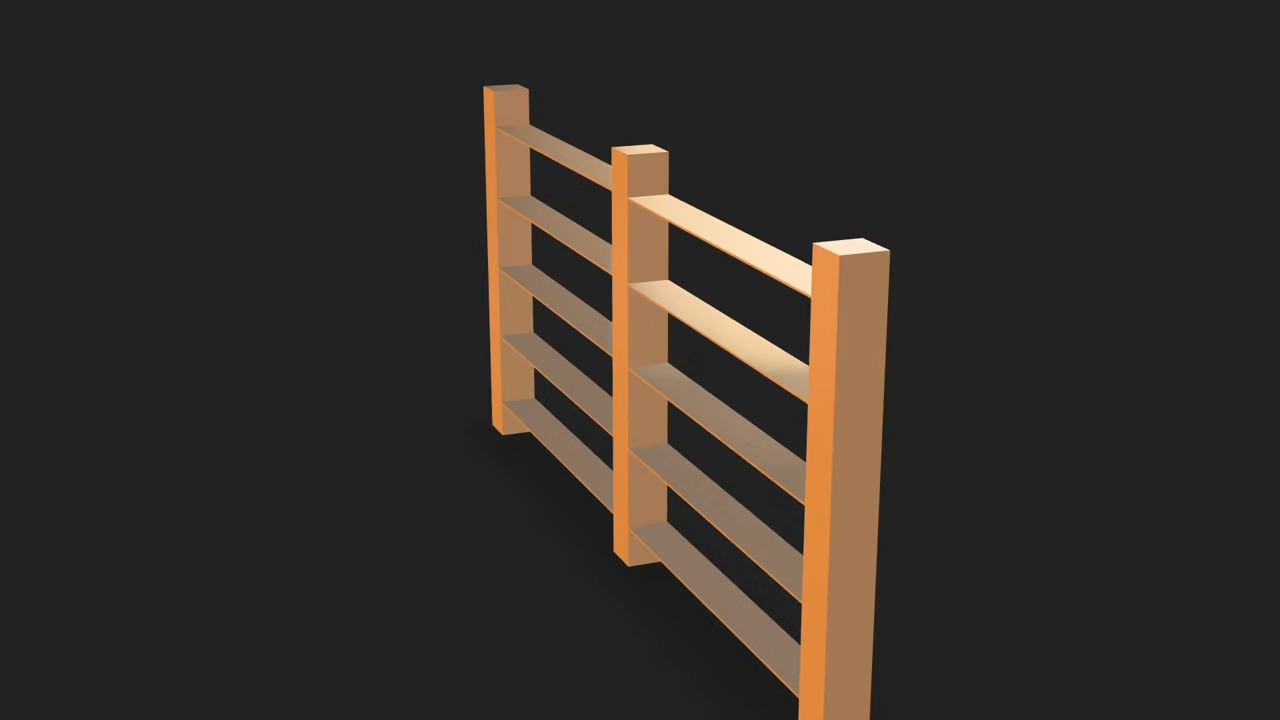
    Smollm 135M answered request for Blender Blend File
    Smollm 135M Answered Blender Blend File Request.

    Video Displaying Using Smollm 135M In Alpaca Ollama Client

    Results:

    Who is the mayor of Toronto?

    Produced inaccurate outdated answer to Olivia Chow as the mayor of Toronto.

    I need a PHP code snippet to connect to a MySQL database.

    Produce incorrect syntax PHP code snippet to connect to a MySQL database.

    I need a 1080p screenshot of the gnome desktop environment.

    Produced inaccurate ASCII answer to generate a 1080p screenshot of Gnome desktop environment.

    I need a kotlin code snippet to open the camera using Camera2 API and place the camera view on a TextureView.

    Produced incomplete Kotlin code snippet.

    I need a blender blend file for fire animation.

    Produced incorrect answer to generate a fire animation.

    📚 Learn Python Along the Way

    If you’re new to Python or want to build a strong foundation, I offer beginner-friendly learning resources:

    👨‍🏫 Need Help? One-on-One Tutorials & Install Support

    I offer personalized support for:

    🚀 Final Thoughts

    Running your own LLM like Smollm 135M is now easier than ever, thanks to open-source tools like Alpaca Ollama. It’s lightweight, accessible, and perfect for learning the ins and outs of AI. Pair that with Python skills, and you’re on your way to becoming an AI-powered developer.

    Let me know in the comments if you’ve tried it or need help getting started!

  • PHP Web Framework Aura PHP

    PHP Web Framework Aura PHP

    Getting Started with Aura PHP: MVC Example with MariaDB

    Are you looking for a lightweight, flexible PHP framework to kick off your next project? Aura PHP is an excellent choice for beginners and experienced developers alike. It’s built around modular, decoupled components and fully supports the MVC (Model-View-Controller) pattern, making it easy to build structured applications.

    In this beginner-friendly post, we’ll walk through:

    • Installing Aura PHP using Composer
    • Setting up a simple MVC application
    • Connecting to an existing MariaDB database table
    • Outputting all results as HTML

    We’ll also provide a screencast and screenshots below so you can follow along visually. Let’s dive in!

    What is Aura PHP?

    Aura PHP is a collection of independent, decoupled libraries for PHP. The Aura framework uses a clean, no-magic approach that emphasizes explicit dependency injection, testability, and simplicity.

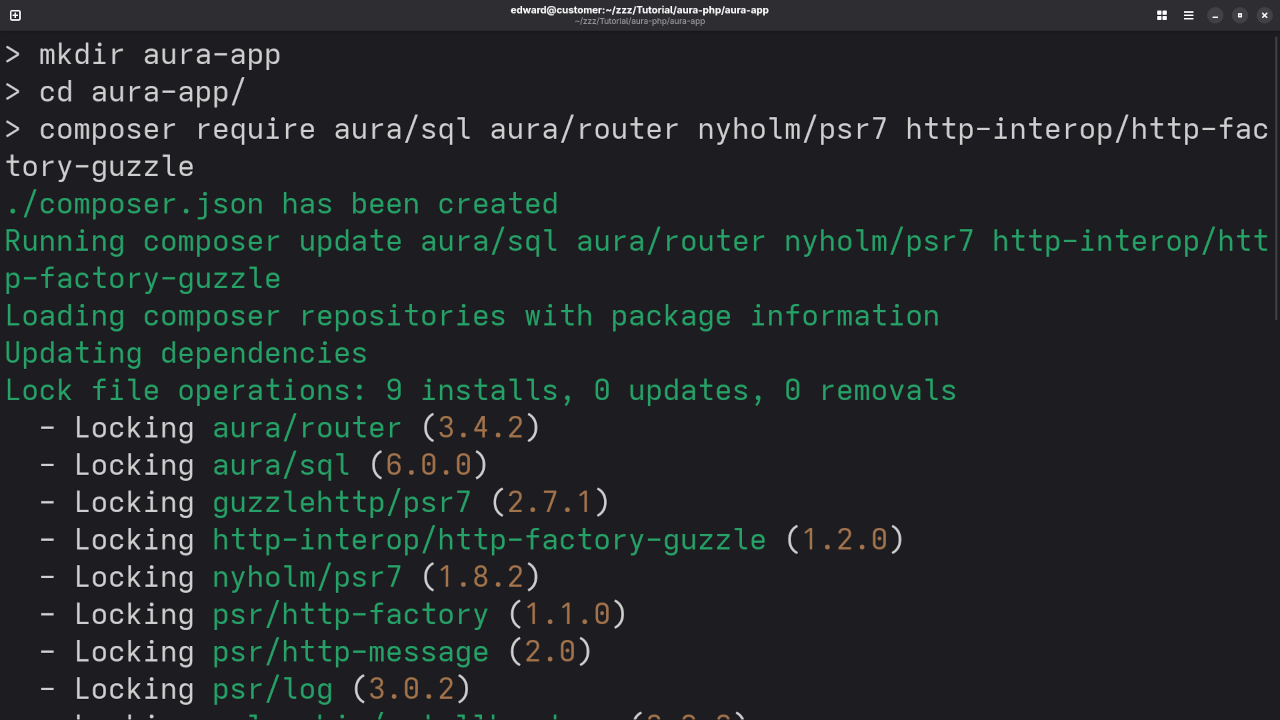
    Installation Using Composer

    Make sure you have Composer installed. Then create a new project directory:

    mkdir aura-app
    cd aura-app
    composer require aura/sql aura/router nyholm/psr7 http-interop/http-factory-guzzle

    This sets up an MVC structure using Aura libraries.

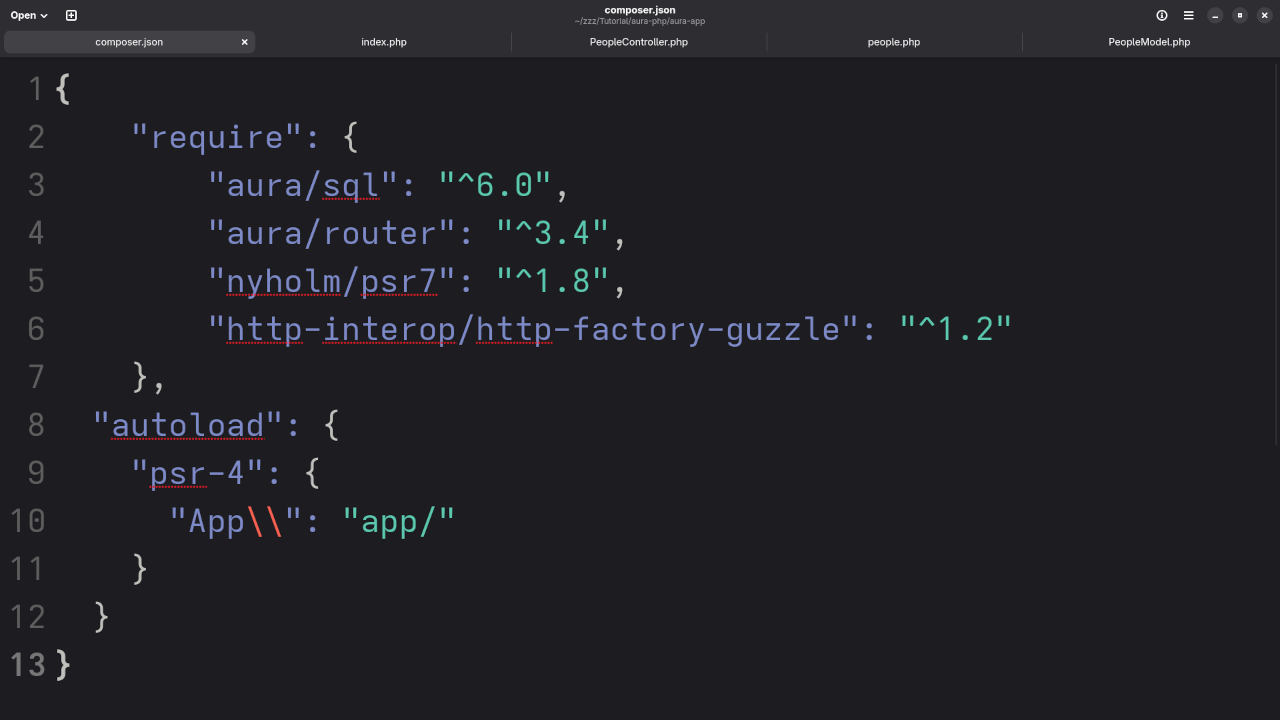
    Update composer.json to autoload your classes:

    "autoload": {
      "psr-4": {
        "App\\": "app/"
      }
    }

    Then run:

    composer dump-autoload

    Connect to a MariaDB Database

    Suppose you already have a MariaDB table named users with the following structure:


    CREATE TABLE users (
      id INT PRIMARY KEY AUTO_INCREMENT,
      name VARCHAR(255),
      email VARCHAR(255)
    );


    File Structure Overview

    Your folder structure might look like:

    aura-app/
      |-- app/
      |    |-- Controller/
      |    |-- Model/
      |    |-- View/
      |-- public/
      |    |-- index.php
      |-- vendor/
      |-- composer.json

    MVC Example: Fetch Users

    Model/UserModel.php


    namespace App\Model;
    
    use Aura\Sql\ExtendedPdo;
    
    class UserModel {
        protected $db;
    
        public function __construct(ExtendedPdo $db) {
            $this->db = $db;
        }
    
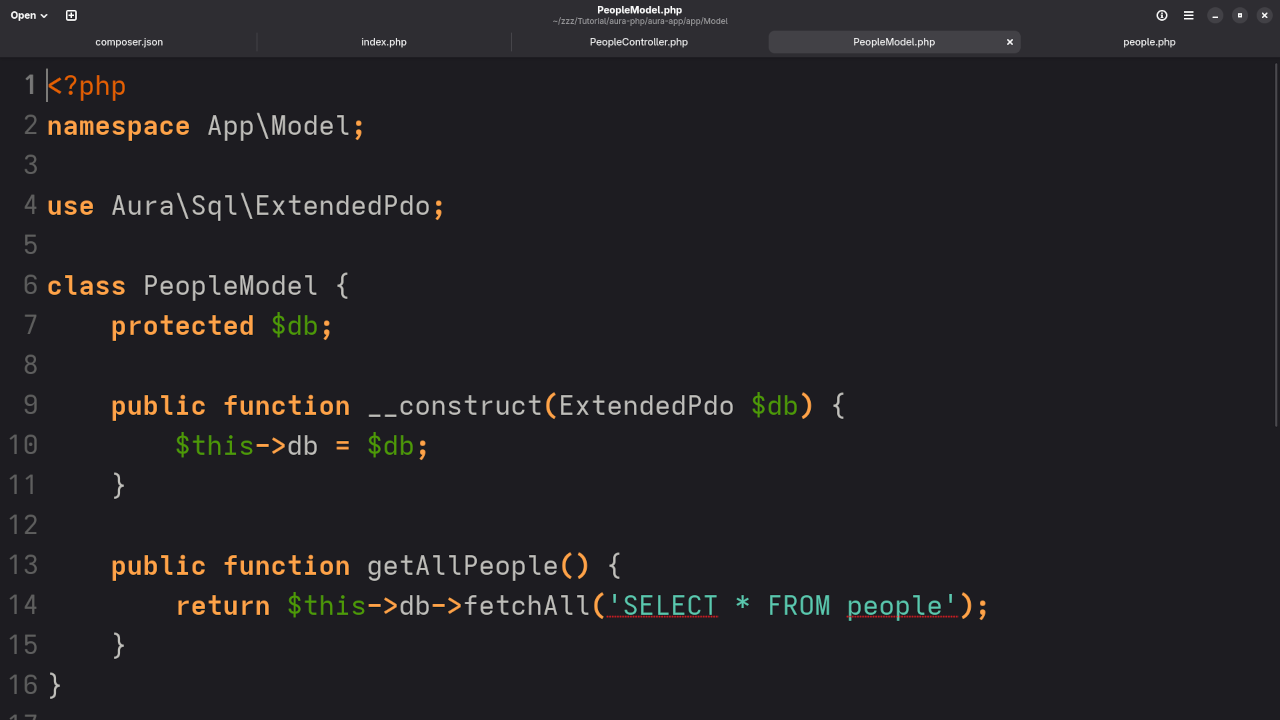
        public function getAllUsers() {
            return $this->db->fetchAll('SELECT * FROM users');
        }
    }


    Controller/UserController.php


    namespace App\Controller;
    
    use App\Model\UserModel;
    
    class UserController {
        protected $model;
    
        public function __construct(UserModel $model) {
            $this->model = $model;
        }
    
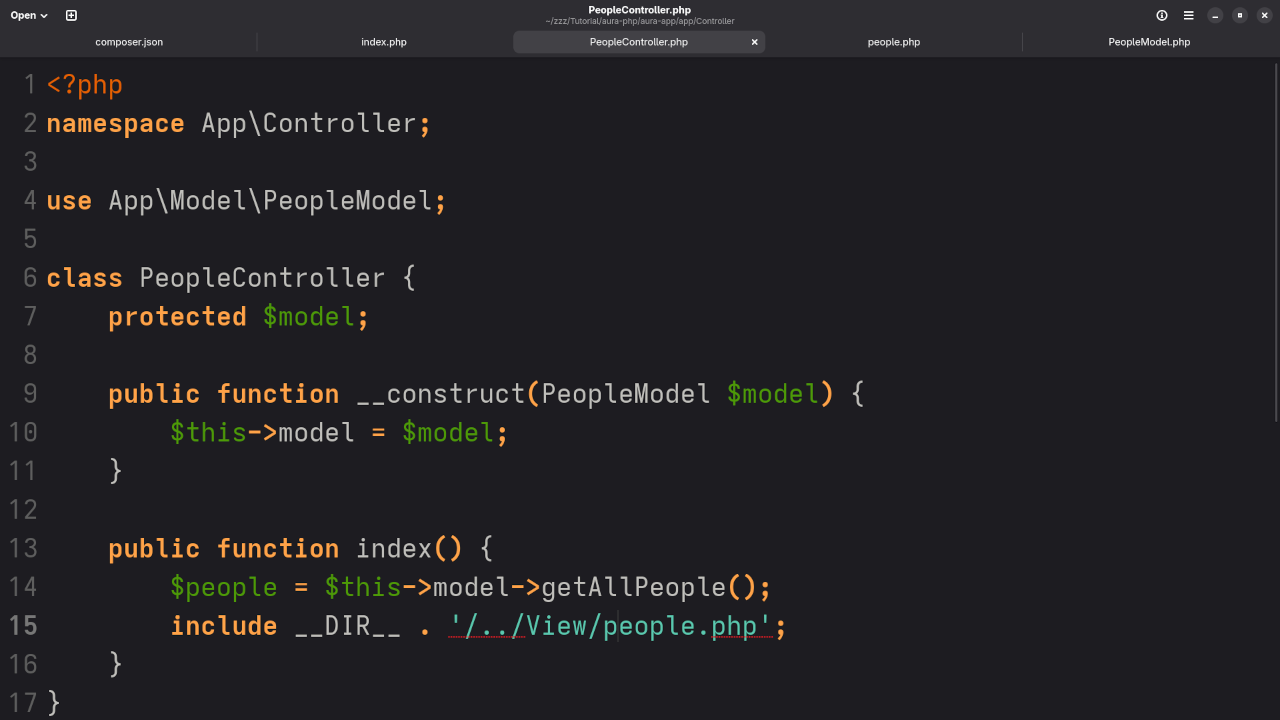
        public function index() {
            $people = $this->model->getAllUsers();
            include __DIR__ . '/../View/users.php';
        }
    }


    View/users.php


    <h1>All Users</h1>
    <ul>
        <?php foreach ($users as $user): ?>
            <li><?= htmlspecialchars($user['name']) ?> - <?= htmlspecialchars($user['email']) ?></li>
        <?php endforeach; ?>
    </ul>


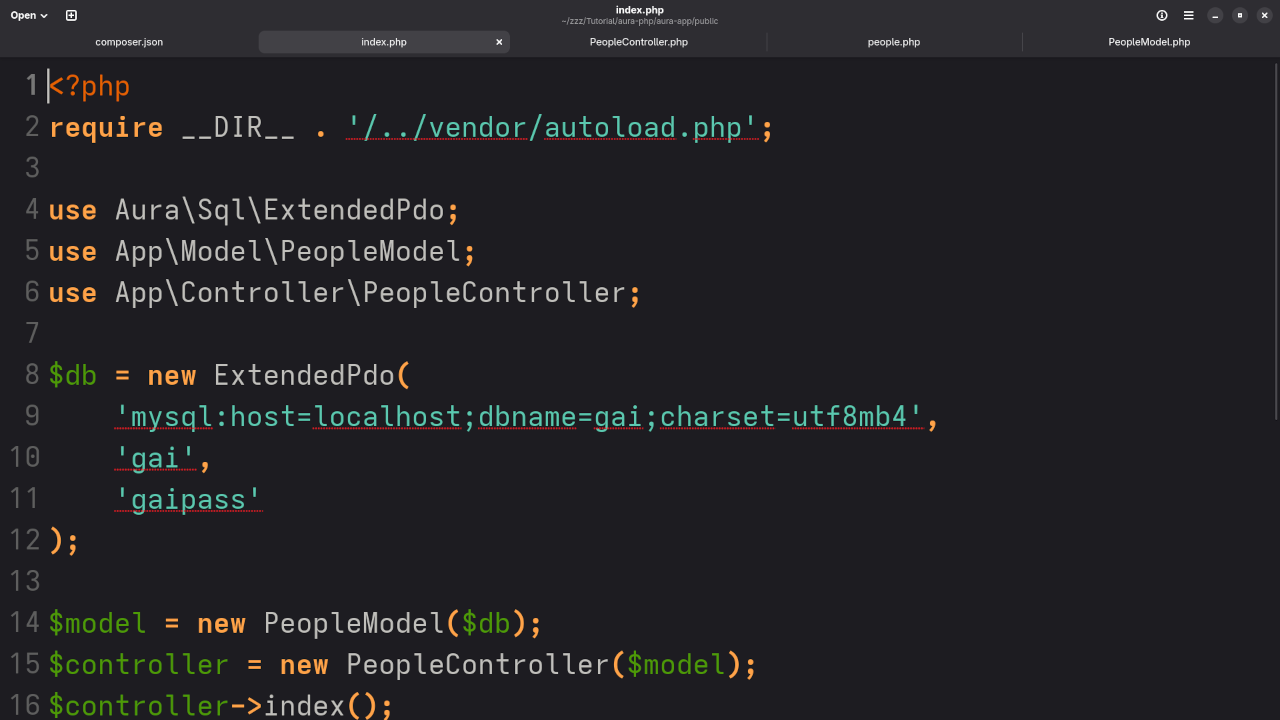
    public/index.php


    require __DIR__ . '/../vendor/autoload.php';
    
    use Aura\Sql\ExtendedPdo;
    use App\Model\PeopleModel;
    use App\Controller\PeopleController;
    
    $db = new ExtendedPdo(
        'mysql:host=localhost;dbname=gai;charset=utf8mb4',
        'gai',
        'gaipass'
    );
    
    $model = new PeopleModel($db);
    $controller = new PeopleController($model);
    $controller->index();


    Screenshots And Screencast Walkthrough

    Aura PHP Dependencies
    Command Line Installation Of Aura PHP Web Framework

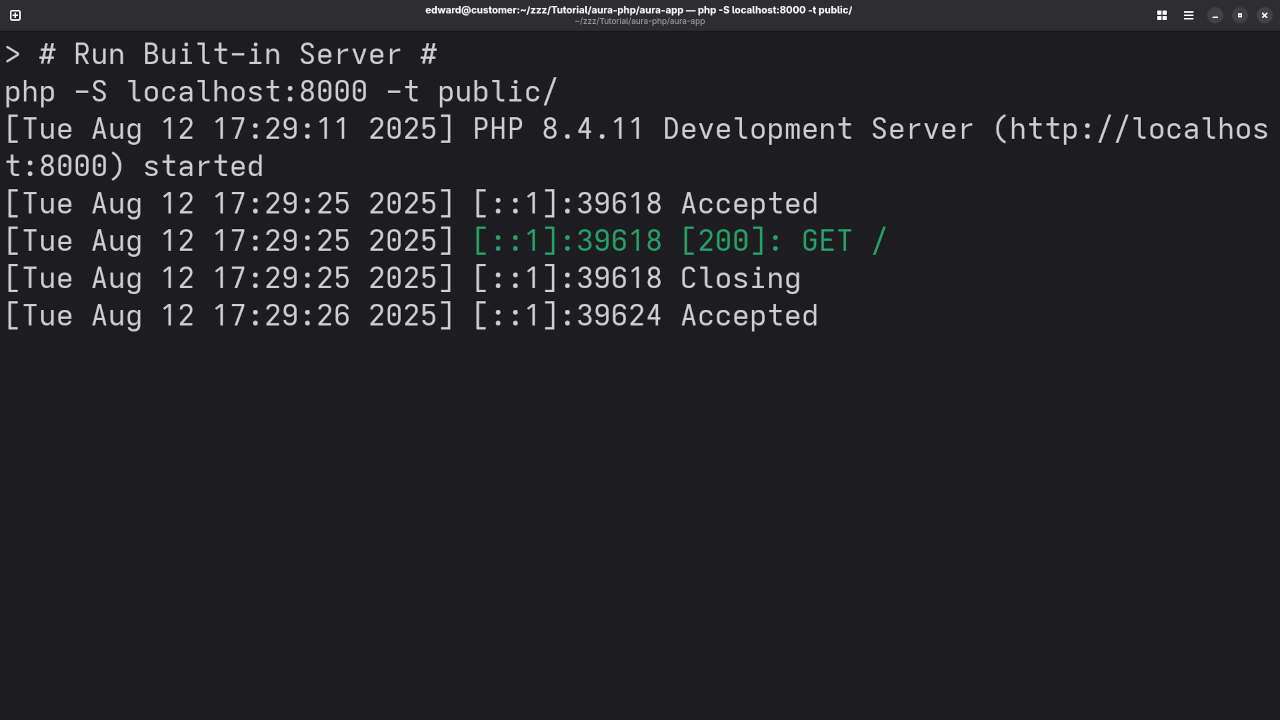
    Aura PHP Server
    Command Line Server Of Aura PHP Web Framework

    Aura PHP Composer
    Gnome Text Editor Displaying Composer JSON

    Aura PHP Route
    Gnome Text Editor Displaying App Route File

    Aura PHP View
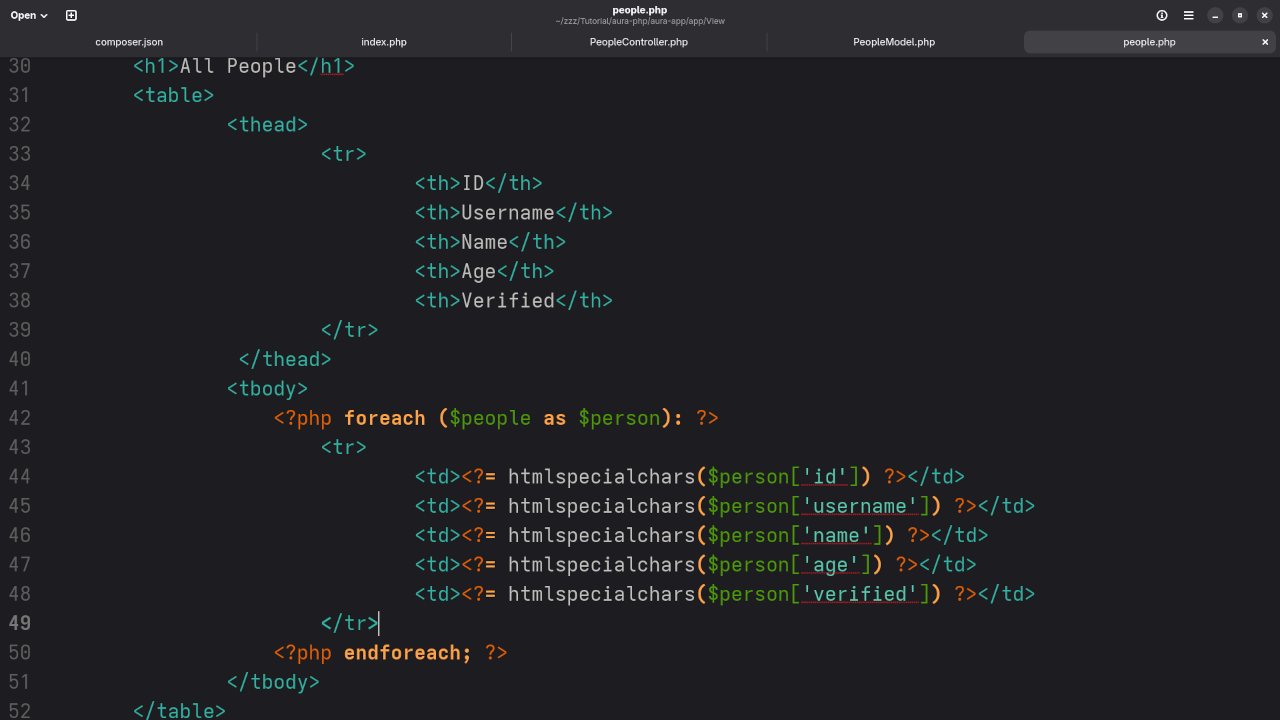
    Gnome Text Editor Displaying App View File

    Aura PHP People Controller
    Gnome Text Editor Displaying Custom People Controller
    Aura PHP People Model
    Gnome Text Editor Displaying Custom People Model
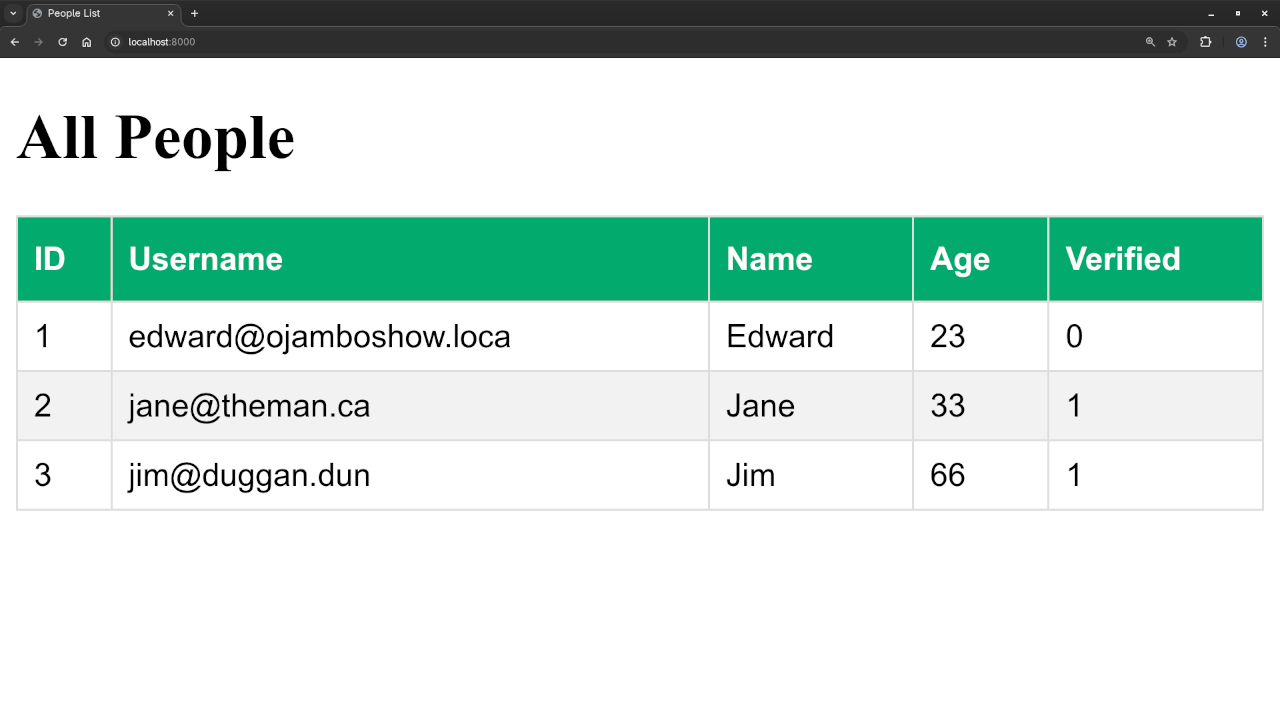
    Aura PHP People Result
    Web Browser Displaying Custom People Route Result

    Aura PHP Custom View Records In Web Browser

    Learn More with My Book

    If you’re just starting out, grab a copy of my beginner-friendly PHP book:

    📚 Learning PHP on Amazon

    Online Course Available

    Want a structured video course? Enroll in my course:

    🎬 Learning PHP Course

    Need Help?

    I offer:

    • ✅ One-on-one programming tutorials
    • 🔄 Aura PHP migration & upgrade services

    📩 Contact Me Here

    Summary

    Aura PHP is a great way to write clean, modular PHP code using the MVC pattern. Whether you’re building a small app or learning how PHP frameworks work, this tutorial gives you a great starting point.

    Feel free to leave questions in the comments, or contact me directly for help!

  • How to Build a Markdown Editor with DaisyUI and JavaScript

    How to Build a Markdown Editor with DaisyUI and JavaScript

    If you’re learning JavaScript and want a fun way to build something practical and interactive, this beginner-friendly tutorial is for you! We’ll use DaisyUI, a plugin for Tailwind CSS, to build a clean and responsive Markdown editor with live preview, theme switching, and local storage support – all in a single HTML file.

    📚 What You’ll Learn

    • How to use DaisyUI for beautiful UI components
    • How to implement a live Markdown preview using JavaScript and marked.js
    • How to switch between light and dark themes
    • How to save your content using localStorage

    💻 Full HTML Code

    Here’s the complete code you can copy and run in your browser:


    <!DOCTYPE html>
    <html lang="en" data-theme="dark">
    <head>
      <meta charset="UTF-8" />
      <meta name="viewport" content="width=device-width, initial-scale=1" />
      <title>DaisyUI Markdown Editor</title>
    
      <link href="https://cdn.jsdelivr.net/npm/daisyui@5" rel="stylesheet" />
      <script src="https://cdn.jsdelivr.net/npm/marked/marked.min.js"></script>
    
      <style>
        html, body { margin: 0; padding: 0; height: 100%; }
        main { flex: 1; display: flex; gap: 1rem; padding: 1rem; }
        textarea, #preview {
          flex: 1;
          min-height: 90vh;
          resize: none;
        }
        #preview { overflow-y: auto; padding: 1rem; }
      </style>
    </head>
    <body class="bg-base-200 text-base-content flex flex-col min-h-screen">
    
      <header class="navbar bg-base-300 shadow-md px-6 py-4">
        <div class="flex-1 text-xl font-bold"> DaisyUI Markdown Editor</div>
        <select id="themeSelector" class="select select-bordered w-40 max-w-xs">
          <option value="light">Light</option>
          <option value="dark">Dark</option>
        </select>
      </header>
    
      <main>
        <textarea id="editor" class="textarea textarea-bordered" placeholder="Write markdown here..."></textarea>
        <article id="preview" class="prose prose-invert bg-base-100 rounded-lg shadow-lg"></article>
      </main>
    
      <footer class="footer footer-center p-4 bg-base-300 text-base-content">
        <button id="clearBtn" class="btn btn-warning btn-sm">Clear</button>
        <button id="resetBtn" class="btn btn-error btn-sm">Reset</button>
      </footer>
    
      <script>
        const editor = document.querySelector('#editor');
        const preview = document.querySelector('#preview');
        const themeSelector = document.querySelector('#themeSelector');
        const clearBtn = document.querySelector('#clearBtn');
        const resetBtn = document.querySelector('#resetBtn');
    
        const STORAGE_KEY = 'markdown-editor-content';
        const THEME_KEY = 'markdown-editor-theme';
    
        function renderMarkdown() {
          preview.innerHTML = marked.parse(editor.value || '');
        }
    
        function loadContent() {
          const content = localStorage.getItem(STORAGE_KEY);
          if (content) {
            editor.value = content;
            renderMarkdown();
          }
        }
    
        function loadTheme() {
          const theme = localStorage.getItem(THEME_KEY) || 'dark';
          document.documentElement.setAttribute('data-theme', theme);
          themeSelector.value = theme;
        }
    
        editor.addEventListener('input', () => {
          localStorage.setItem(STORAGE_KEY, editor.value);
          renderMarkdown();
        });
    
        themeSelector.addEventListener('change', () => {
          const theme = themeSelector.value;
          document.documentElement.setAttribute('data-theme', theme);
          localStorage.setItem(THEME_KEY, theme);
        });
    
        clearBtn.addEventListener('click', () => {
          editor.value = '';
          renderMarkdown();
          localStorage.setItem(STORAGE_KEY, '');
        });
    
        resetBtn.addEventListener('click', () => {
          editor.value = '';
          renderMarkdown();
          localStorage.removeItem(STORAGE_KEY);
          localStorage.removeItem(THEME_KEY);
          themeSelector.value = 'dark';
          document.documentElement.setAttribute('data-theme', 'dark');
        });
    
        loadTheme();
        loadContent();
      </script>
    
    </body>
    </html>


    Interactive Demo

    Here’s a live example of the Markdown Editor in action:

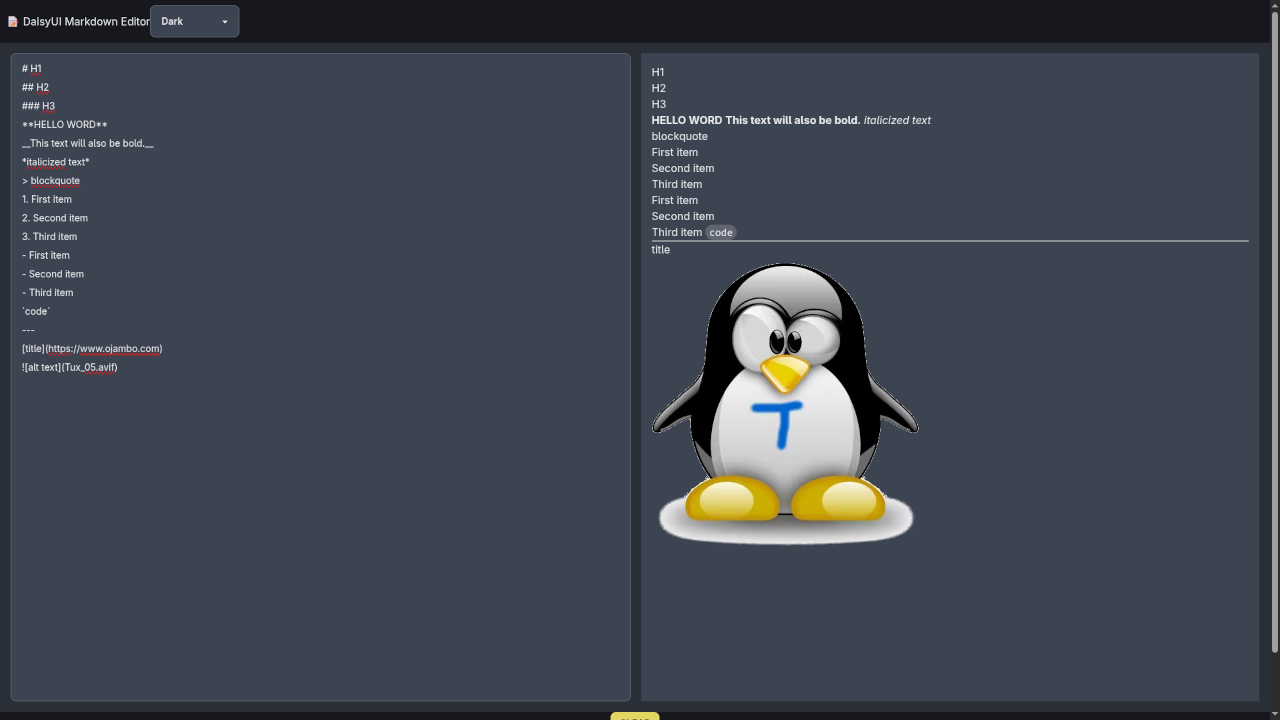
    HTML5 DaisyUI Markdown Editor
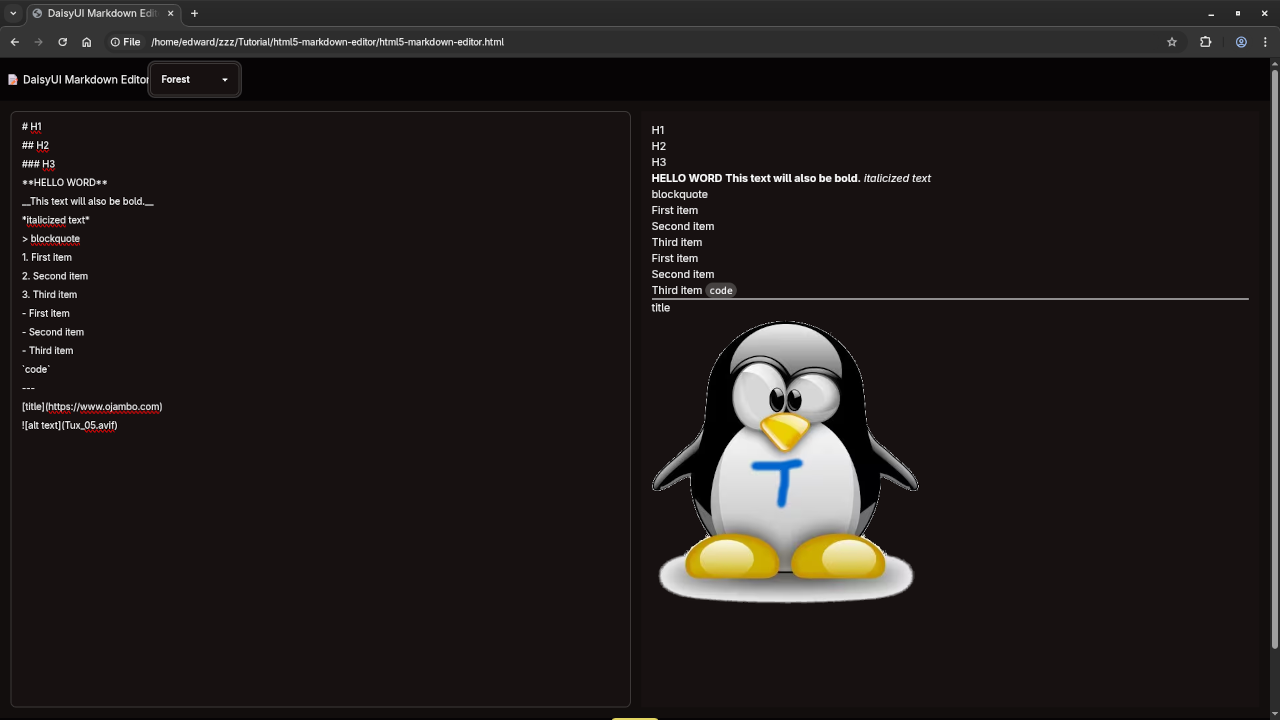
    HTML5 Markdown Editor Forest Theme
    Web Browser Displaying HTML5 Markdown Editor Forest Theme

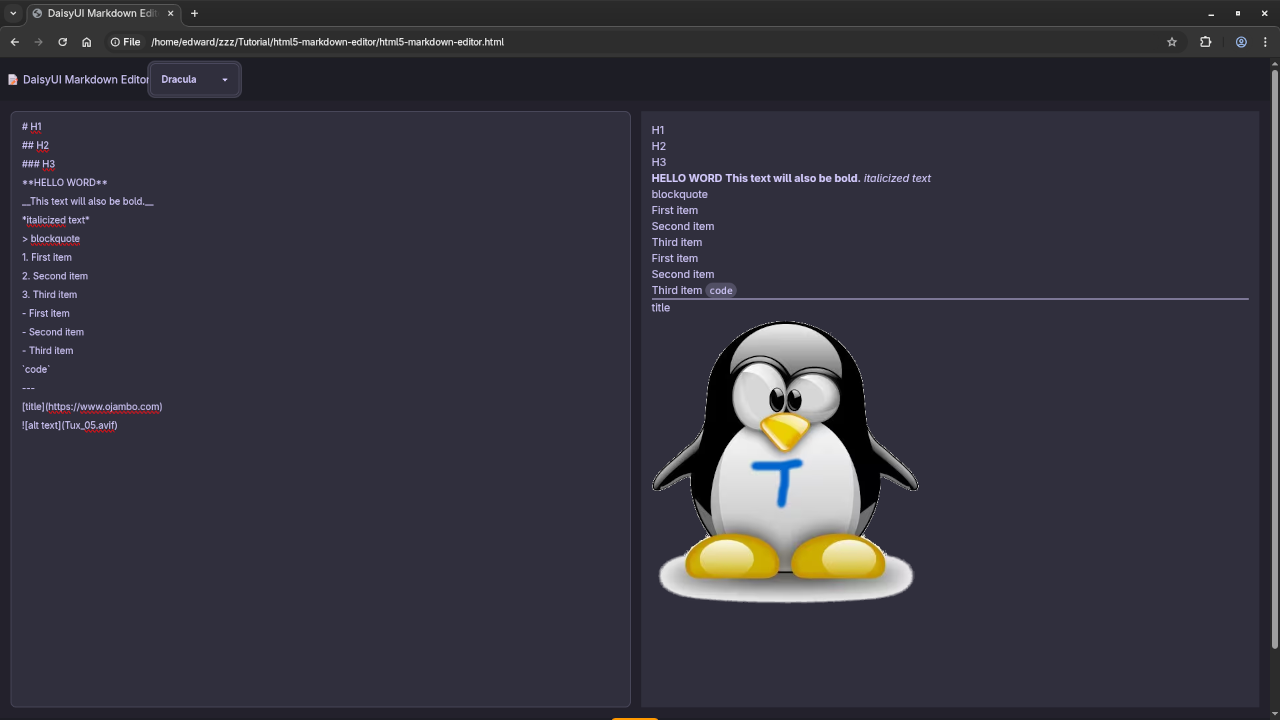
    HTML5 Markdown Editor Dracula Theme
    Web Browser Displaying HTML5 Markdown Editor Dracula Theme

    🎬 Watch It

    HTML5 Structure, Applying Tailwind CSS To Trigger Animations Video

    📖 Learn More with My Book

    If you’re serious about learning JavaScript step-by-step, check out my beginner-friendly book:
    Learning JavaScript on Amazon.

    🎓 Enroll in My Course

    Prefer video lessons and guided exercises? Get access to my self-paced course:
    Learning JavaScript at OjamboShop.

    💻 One-on-One JavaScript Tutorials

    Need extra help? I’m available for 1-on-1 programming tutorials including JavaScript, CSS, Tailwind, and more.
    Contact me here to book a session.

    📦 Final Thoughts

    DaisyUI makes it super easy to build beautiful interfaces without writing a ton of CSS. Combined with JavaScript, it becomes a powerful tool for beginners and pros alike. Try building this Markdown editor and let me know how it goes!

  • Used Guide: AMD Instinct MI60 In 2025

    Used Guide: AMD Instinct MI60 In 2025

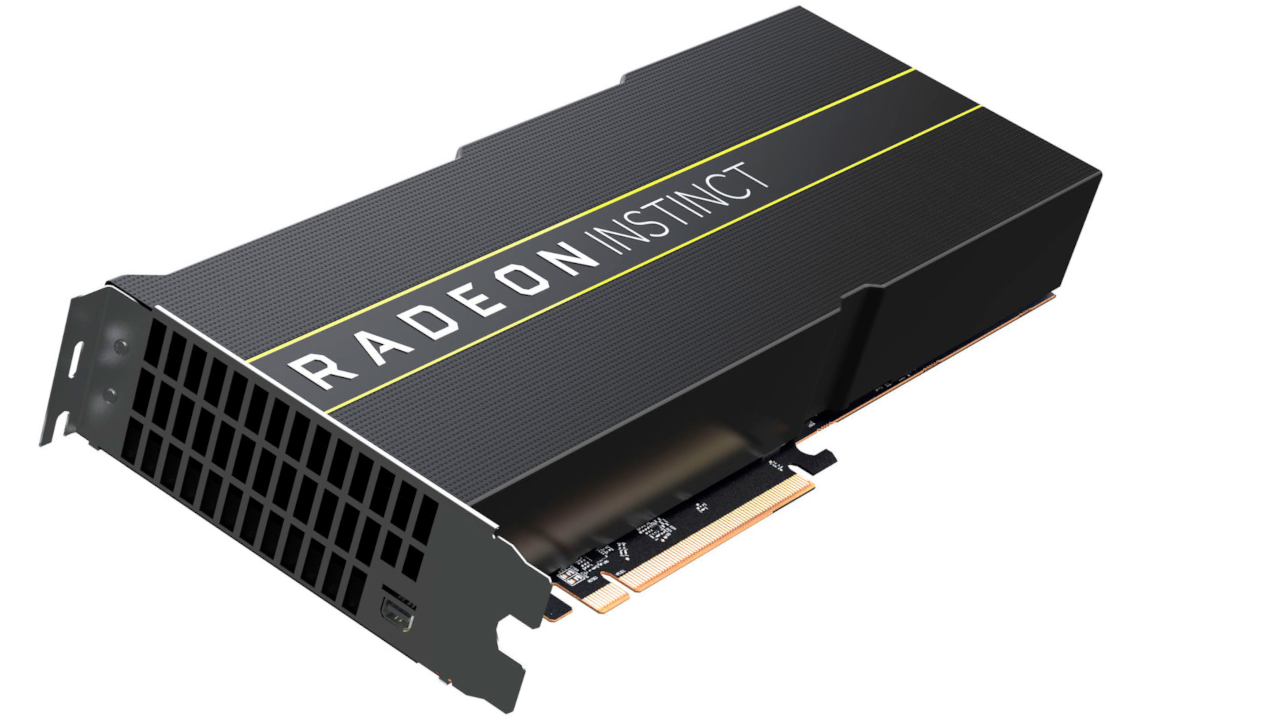
    Is the AMD Instinct MI60 GPU Worth Buying Used in 2025 for Blender and AI?

    Considering a used AMD Instinct MI60 GPU in 2025 for your Blender projects or AI model training? Let’s explore its specifications, power consumption, and whether it’s a worthwhile investment.

    AMD Instinct MI60 Specifications

    Feature Details
    GPU Architecture Vega 20
    Process Node 7nm FinFET (TSMC)
    Compute Units 64
    Stream Processors 4096
    Base Clock 1200 MHz
    Boost Clock 1800 MHz
    Memory 32 GB HBM2
    Memory Bus 4096-bit
    Memory Bandwidth 1.02 TB/s
    FP32 Performance 14.75 TFLOPS
    FP16 Performance 29.49 TFLOPS
    FP64 Performance 7.373 TFLOPS
    TDP 300W
    Cooling Passive
    Power Connectors 1x 6-pin, 1x 8-pin
    PCIe Interface PCIe 4.0 x16
    Form Factor Dual-slot, Full-length (10.5″ x 4.4″)
    Outputs None (requires separate display GPU)

    Sources:
    TechPowerUp

    Power Consumption

    The AMD Instinct MI60 has a Thermal Design Power (TDP) of 300W, indicating the amount of heat it generates that must be dissipated by the cooling system. This high TDP suggests that the GPU is designed for intensive computational tasks, such as AI model training and high-resolution rendering.

    It’s essential to ensure your system’s power supply and cooling solutions can handle this demand.

    Estimated System Overview

    Component Details Estimated Cost (CAD)
    AMD Instinct MI60 (used) 32GB HBM2 GPU $650 – $700
    CPU AMD Ryzen 5 5600G (6-core) $165
    Motherboard B550 or B450 with 4G Decoding support $120
    RAM 16GB DDR4 3200 MHz (2x8GB) $55
    Power Supply (750W Gold) Reliable 80+ Gold PSU $120
    Case Mid-Tower with good airflow $80
    MI60 Power Adapter Cable Dual 8-pin to 8-pin EPS cable $40
    Display GPU Existing NVIDIA GTX 950 $0
    Total Estimated Cost ~$1,230 CAD

    Screenshots And Screencast

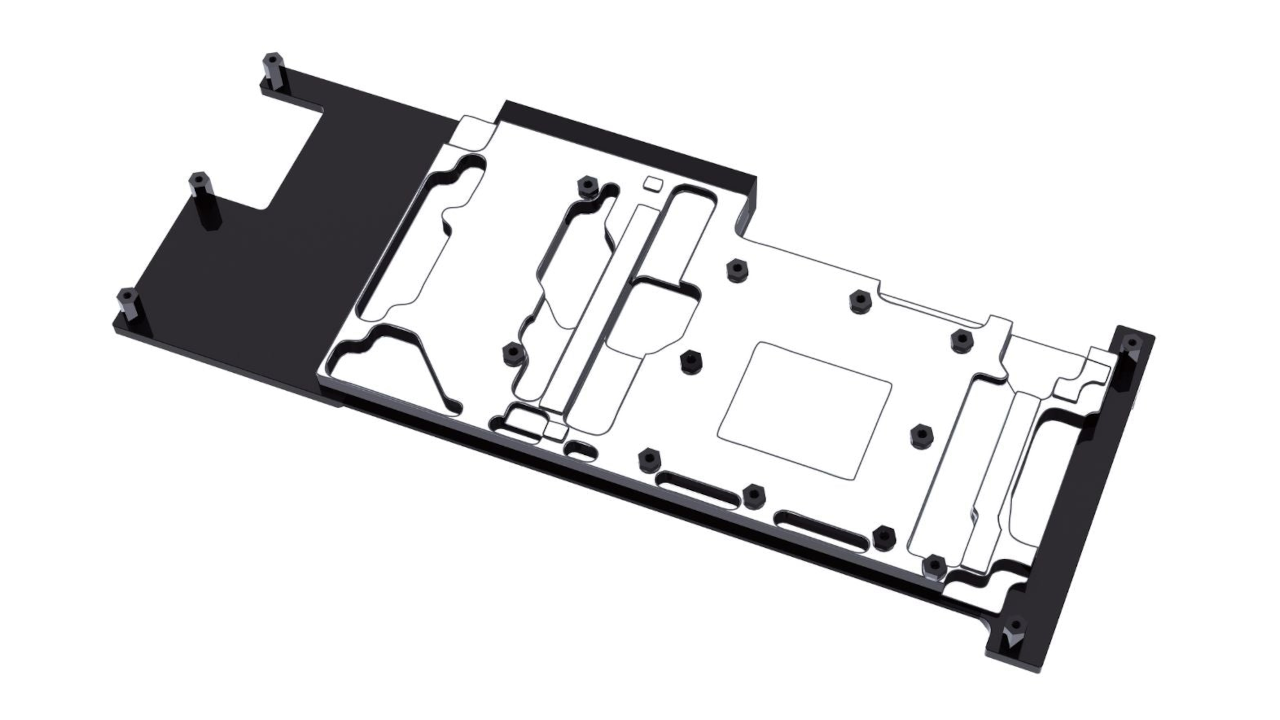
    Bykski full-coverage GPU water block with backplate
    Bykski Full-Cover GPU Water Block And Backplate (MI50, often adapted for MI60)

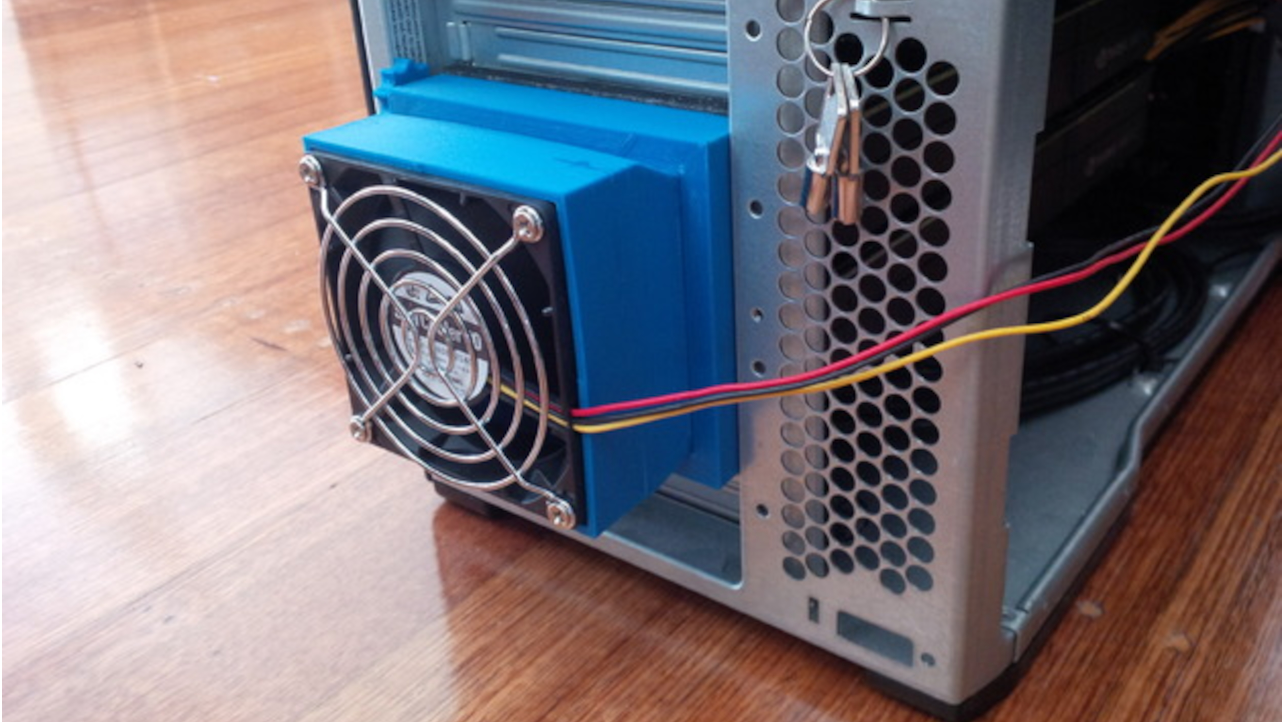
    Mounted Fan Shroud
    Readily Available Clip-On Fan Shroud For Radeon Instinct GPU

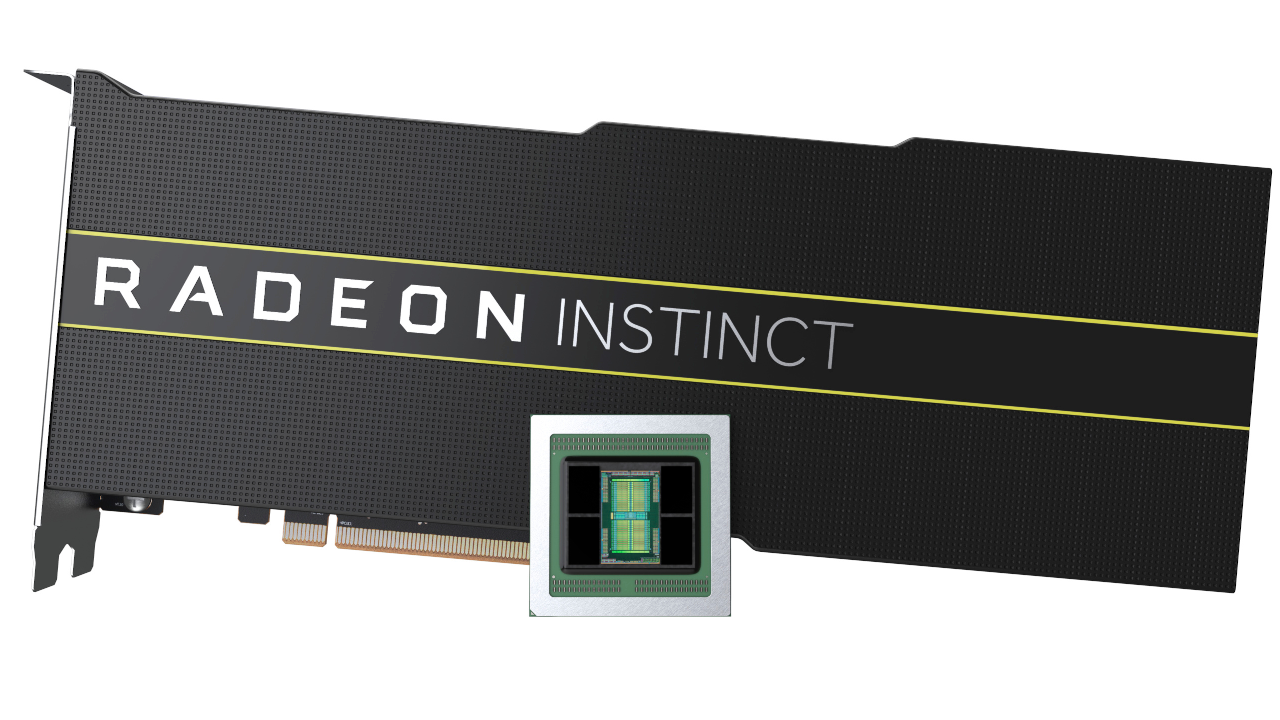
    Close-up Showcase
    A close-up showcasing the Instinct MI60 card ready for modification

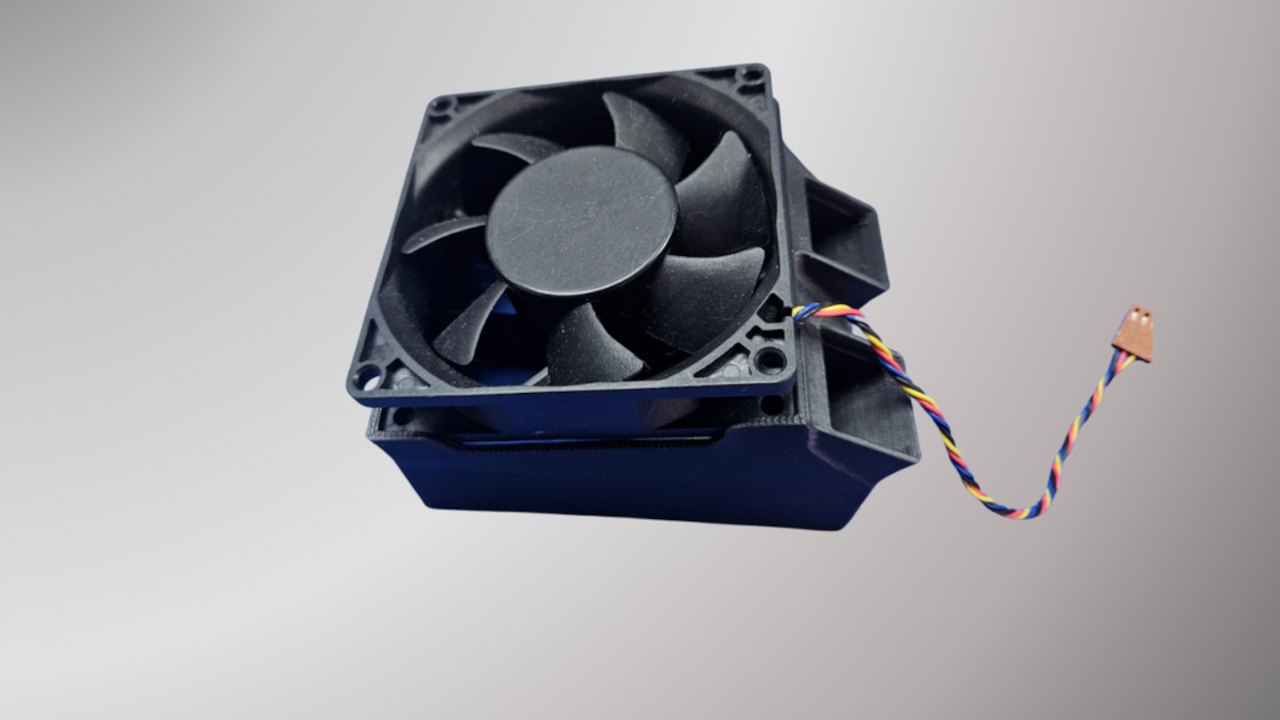
    Blower Fan
    A standard server-style blower fan you might adapt for cooling

    Screencast Showing setup on Fedora 42, system detection, Blender rendering and AI completion stats

    Additional Learning Resources

    Enhance your skills in Python programming, Blender scripting, and AI with these resources:

    Personalized Tutoring & AI Support

    I offer one-on-one online Python tutorials, including Blender scripting and AI-related support such as installation, training, or migration of AI models. Feel free to reach out through my contact page here: Contact Me.

    If you’re interested in leveraging the power of GPUs like the AMD Instinct MI60 in Blender and AI workflows, having the right hardware setup and knowledge can make all the difference. Stay curious and keep learning!

  • Generate Low-Poly Fence Gate With Blender Python API For Website

    Generate Low-Poly Fence Gate With Blender Python API For Website

    Creating Modular Fence Gates with Blender Python API and Displaying Them on the Web

    If you’re new to Blender Python scripting, welcome! In this tutorial, we’ll walk through a basic Python script that generates modular fence gate models in Blender, exports them as glTF (.glb), and displays the result in a web browser using the <model-viewer> component.

    Whether you’re just starting with Python or leveling up your 3D skills, this post will help you get your first model online in minutes!

    🔧 What You’ll Need

    • Blender installed (3.0+ recommended)
    • Basic knowledge of Python
    • Text editor or Blender’s built-in scripting tab
    • Web browser (Chrome, Firefox, Edge)
    • Simple web server (e.g., Python’s http.server)

    📦 Step 1: Generate the Fence Gate in Blender

    Here’s a basic Blender Python script that creates a modular fence gate using cubes and collections. Save this as generate_fence_gate.py:


    import bpy
    
    # Clear the scene
    bpy.ops.object.select_all(action=&#039;SELECT&#039;)
    bpy.ops.object.delete(use_global=False)
    
    # Create a glossy material
    material_name = &quot;GlossyMaterial&quot;
    if material_name in bpy.data.materials:
        glossy_mat = bpy.data.materials[material_name]
    else:
        glossy_mat = bpy.data.materials.new(name=material_name)
        glossy_mat.use_nodes = True
        nodes = glossy_mat.node_tree.nodes
        links = glossy_mat.node_tree.links
    
        # Clear existing nodes
        for node in nodes:
            nodes.remove(node)
    
        # Create new nodes
        output = nodes.new(type=&#039;ShaderNodeOutputMaterial&#039;)
        glossy = nodes.new(type=&#039;ShaderNodeBsdfGlossy&#039;)
        glossy.inputs[&#039;Roughness&#039;].default_value = 0.1  # Glossiness level (lower = glossier)
    
        # Link nodes
        links.new(glossy.outputs[&#039;BSDF&#039;], output.inputs[&#039;Surface&#039;])
    
    # Create fence posts
    for i in range(3):
        bpy.ops.mesh.primitive_cube_add(size=0.1, location=(i, 0, 0.5))
        post = bpy.context.active_object
        post.scale.z = 5
        post.name = f&quot;Post_{i}&quot;
        if post.data.materials:
            post.data.materials[0] = glossy_mat
        else:
            post.data.materials.append(glossy_mat)
    
    # Create connecting bars
    for j in range(1, 10, 2):
        bpy.ops.mesh.primitive_cube_add(size=0.1, location=(1, 0, j * 0.1))
        bar = bpy.context.active_object
        bar.scale.x = 10
        bar.scale.z = 0.05
        bar.name = f&quot;Bar_{j}&quot;
        if bar.data.materials:
            bar.data.materials[0] = glossy_mat
        else:
            bar.data.materials.append(glossy_mat)
    
    # Export to GLB
    bpy.ops.export_scene.gltf(filepath=&quot;fence_gate.glb&quot;, export_format=&#039;GLB&#039;)
    print(&quot;Exported GLB: fence_gate.glb&quot;)
    
    # Save the .blend file
    bpy.ops.wm.save_as_mainfile(filepath=&quot;fence_gate.blend&quot;)
    print(&quot;Saved Blend File: fence_gate.blend&quot;)


    💻 Step 2: Run the Python Script from Command Line

    To execute the script outside the Blender GUI, run this in your terminal:

    blender --background --python generate_fence_gate.py

    This tells Blender to run in the background and execute your script. The result will be a .glb file you can use on the web!

    🌐 Step 3: Display with <model-viewer> in Your Browser

    Create an index.html file:


    &lt;!DOCTYPE html&gt;
    &lt;html lang=&quot;en&quot;&gt;
    &lt;head&gt;
      &lt;meta charset=&quot;UTF-8&quot;&gt;
      &lt;title&gt;Modular Fence Gate&lt;/title&gt;
      &lt;script type=&quot;module&quot; src=&quot;https://unpkg.com/@google/model-viewer/dist/model-viewer.min.js&quot;&gt;&lt;/script&gt;
    &lt;/head&gt;
    &lt;body&gt;
      &lt;model-viewer src=&quot;fence_gate.glb&quot; alt=&quot;Fence Gate&quot;
                    auto-rotate camera-controls
                    style=&quot;width: 600px; height: 400px;&quot;&gt;
      &lt;/model-viewer&gt;
    &lt;/body&gt;
    &lt;/html&gt;


    Then start a simple web server in the same folder:

    python -m http.server

    Visit http://localhost:8000 in your browser to see your gate in full 3D!

    📷 Screenshots & Screencast

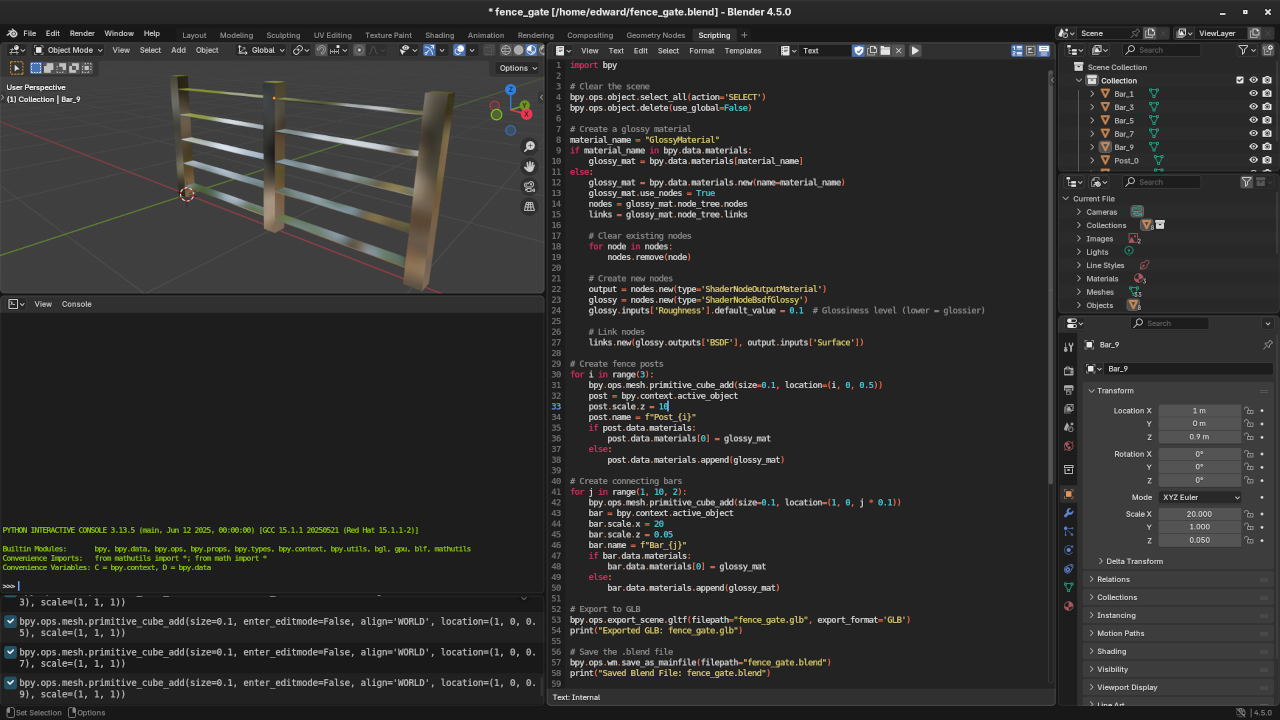
    Low poly fence gate Python code
    Blender Scripting Workspace Displaying Low Poly Fence Gate Python Code

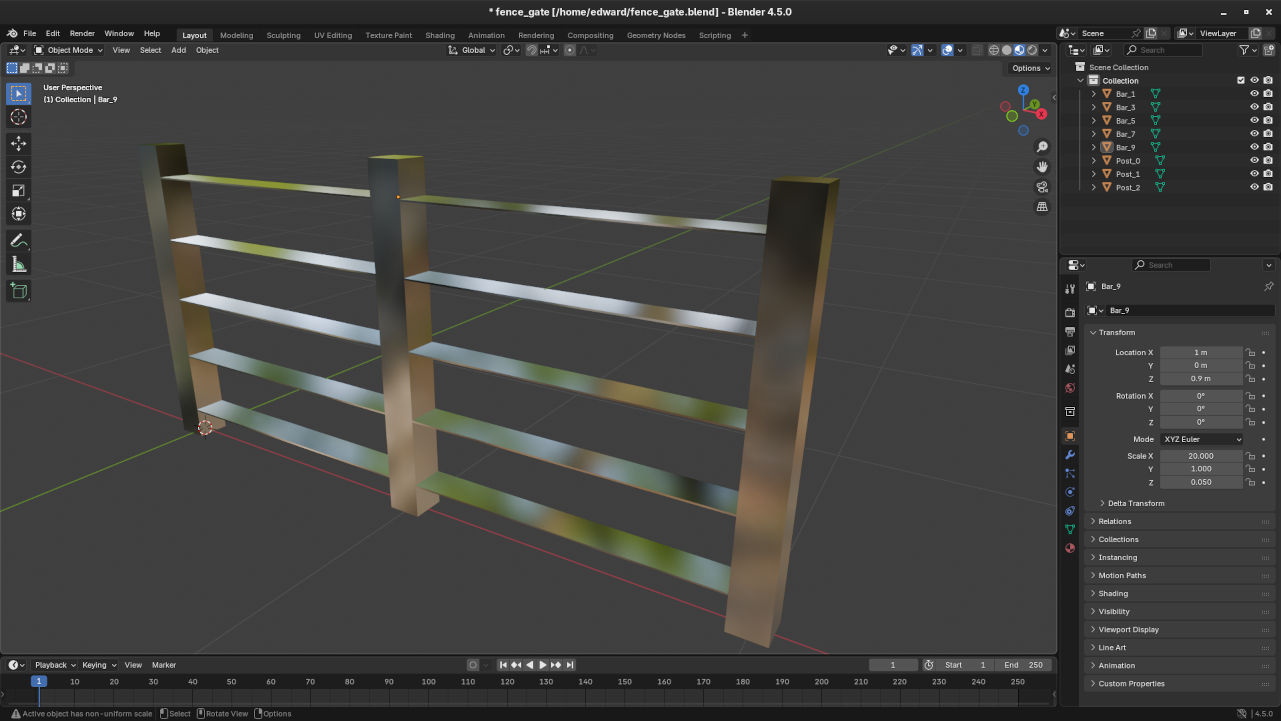
    Low poly fence gate in Blender
    Blender Layout Workspace Displaying Low Poly Fence Gate

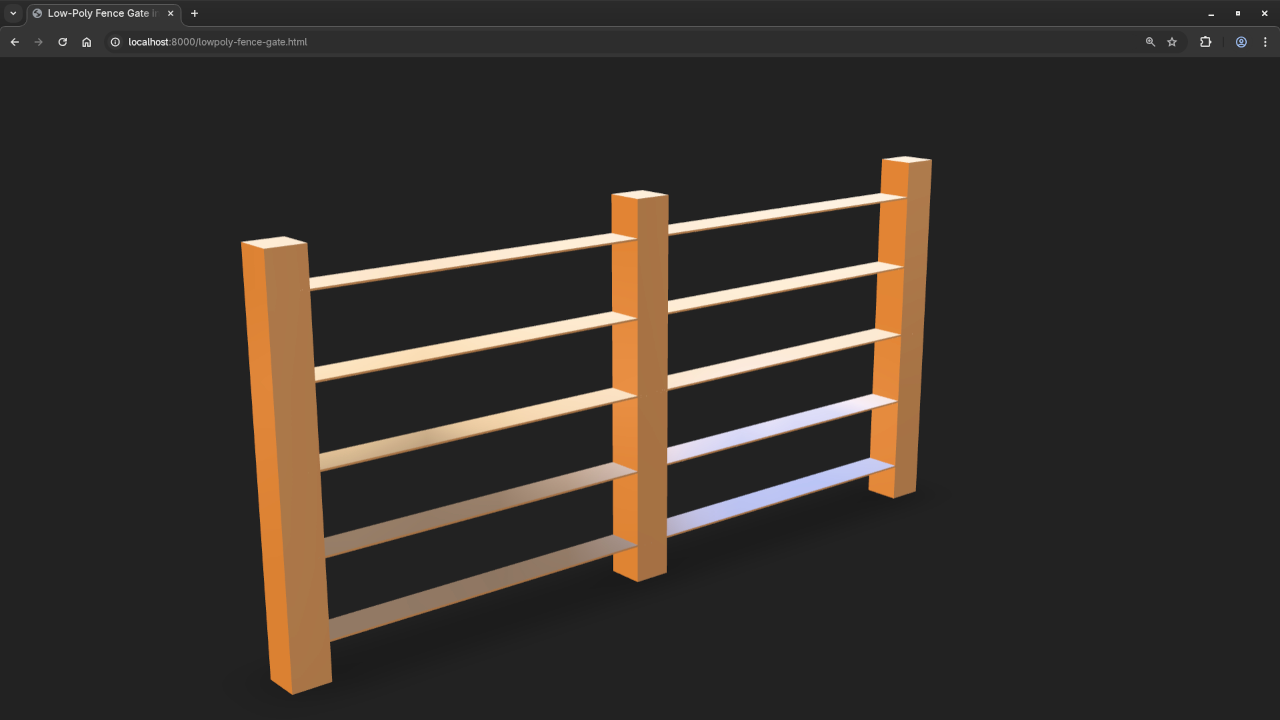
    Low poly fence gate in Web browser
    Web Browser Displaying Rendered Low Poly Fence Gate

    Screencast For Blender Python API Low Poly Fence Gate

    📚 Recommended Reading & Courses

    👨‍💻 Need Help? One-on-One Tutoring Available!

    I offer personalized online Python tutoring, including Blender scripting.
    💻 Reach out via my contact form to schedule your session.

    ✅ Final Thoughts

    You’ve now created a modular 3D model in Blender using Python and visualized it online. This is just the beginning—automated 3D workflows can revolutionize how you design, visualize, and publish assets on the web.

    Have questions or want to show your fence gate render? Drop a comment below!

  • Collaborating with Git: Forking, Cloning, and Pull Requests

    Collaborating with Git: Forking, Cloning, and Pull Requests

    Git is an essential tool for developers that allows them to collaborate on projects, track changes, and manage different versions of their code. While many associate Git with GitHub, you can also use Git in a purely local environment for collaboration. This tutorial will walk you through how to fork, clone, and create pull requests using a local Git setup, without relying on a remote service like GitHub.

    What is Git and Why Use It Locally?

    Git is a distributed version control system, meaning that every developer can have a full copy of a project on their local machine. This local version can be used for collaboration even without an internet connection, making Git highly flexible for a variety of workflows. Local Git setups are ideal for small teams or individual projects, especially when collaborating on a shared server or within an offline environment.

    Forking a Repository Locally

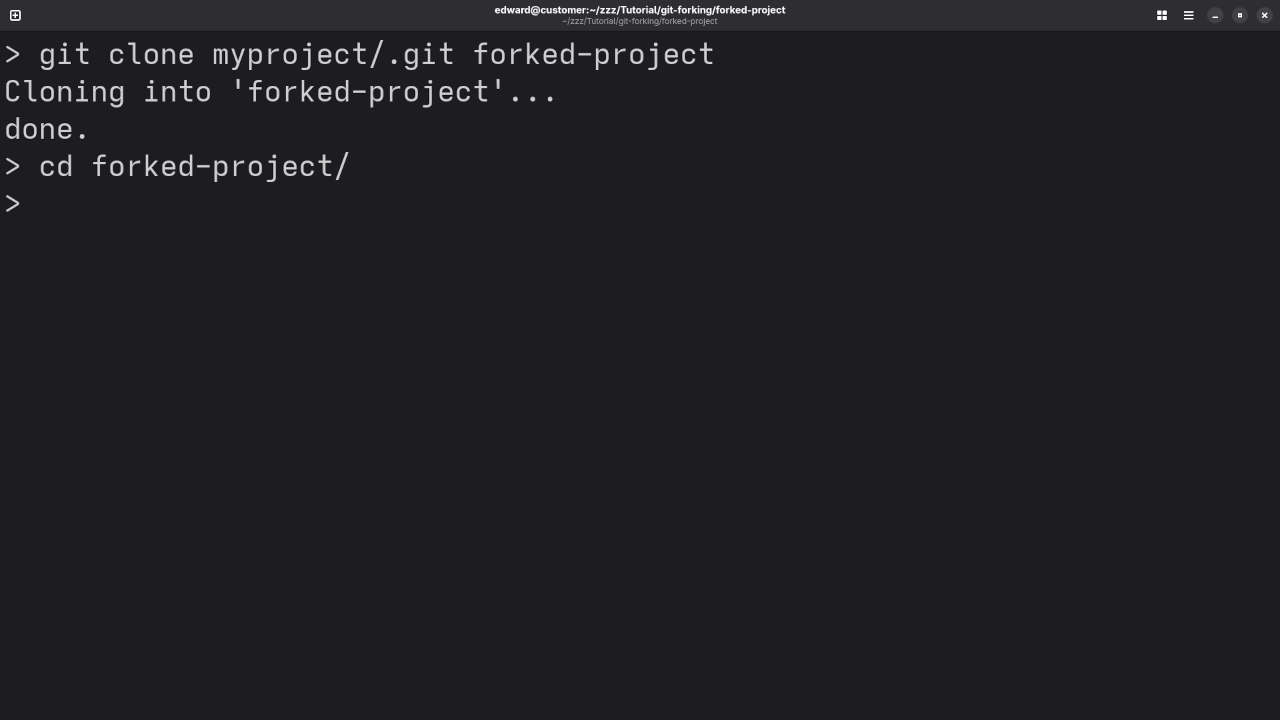
    In a local Git setup, forking is a bit of a manual process, but the concept remains the same: you’ll create a copy of someone else’s repository, making it your own to work on independently.

    1. Create a New Directory for the project you want to “fork.”
    2. Inside the new directory, clone the original repository using Git:
      git clone /path/to/original/repository.git

      This creates a copy of the original repository in your local directory.

    3. Rename the directory of the cloned repository to reflect your “fork.” For example:
      mv repository-name my-forked-repository

      Now you have your own local copy, which you can edit freely.

    Cloning a Repository Locally

    Once you have a local repository (either your own or a “forked” one), the next step is to clone it onto other machines or share it with other team members.

    1. To clone the repository to another location on your local machine or another developer’s system, run:
      git clone /path/to/my-forked-repository.git
    2. After cloning, navigate into the project folder:
      cd my-forked-repository
    3. You now have a working copy of the repository that can be edited and updated independently.

    Making Changes and Committing Locally

    After cloning the repository, you can start working on it. For example, if you’re editing a file:

    1. Open the file you want to modify and make your changes.
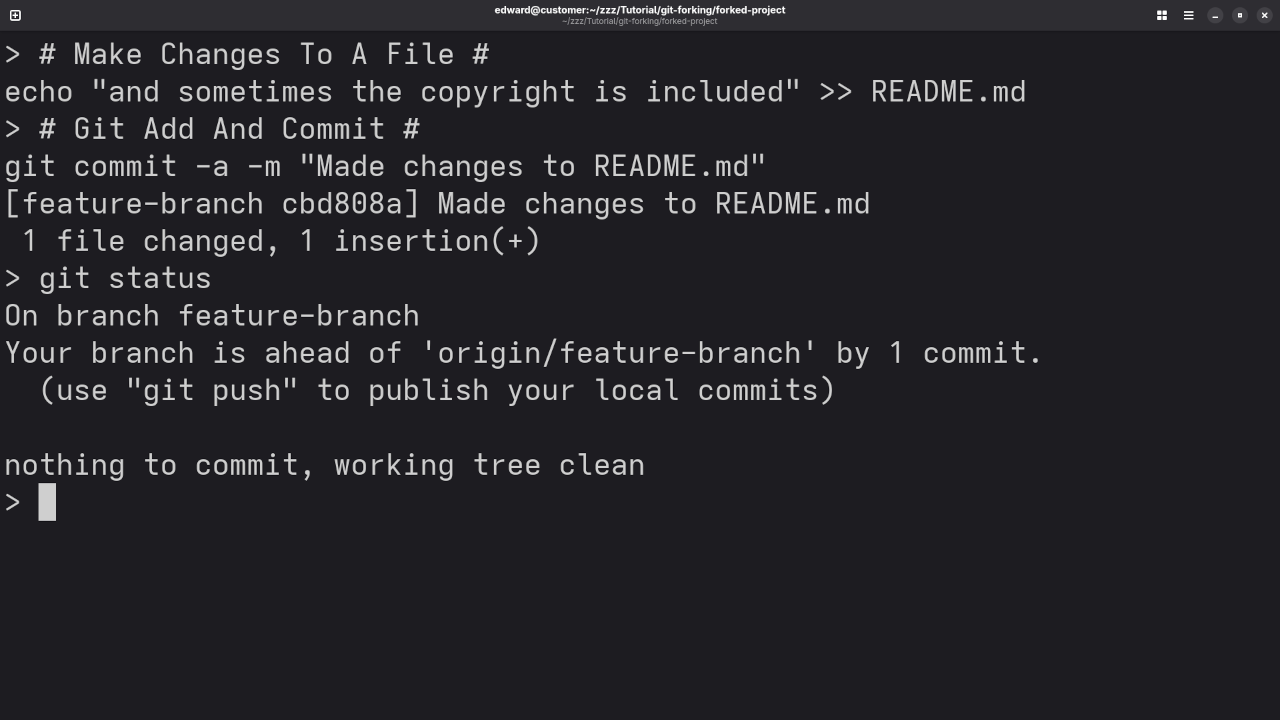
    2. Once the changes are made, stage and commit your work:
      git add .
      git commit -m "Made changes to the file"
    3. To see the changes you made, run:
      git status

      This shows which files were modified and are ready to be committed.

    Pushing Changes Locally (Simulating a Remote Server)

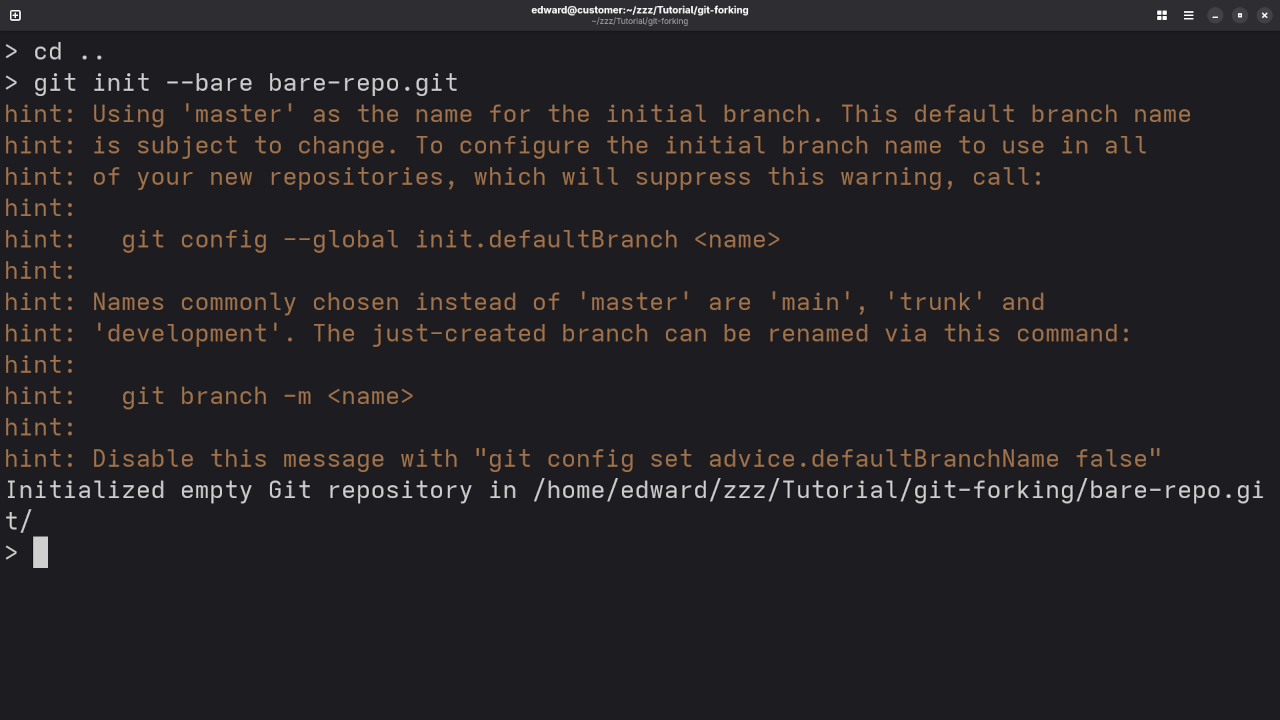
    In a local Git environment, you won’t have a remote server like GitHub. However, you can still push your changes to a different location on your local machine. To simulate this, you can set up a bare repository, which is a repository without a working directory.

    1. On a different machine or directory, create a bare repository:
      mkdir /path/to/bare-repository.git
      cd /path/to/bare-repository.git
      git init --bare
    2. Now, go back to your local working directory and add this bare repository as a remote:
      git remote add origin /path/to/bare-repository.git
    3. Push your changes to this local “remote” repository:
      git push origin main

    Pull Requests Locally: Proposing Changes

    Once you’ve made changes and pushed them to the bare repository, the next step is to propose these changes to the original repository (or another fork) using a local pull request workflow.

    1. Create a new branch for your changes:
      git checkout -b feature-branch
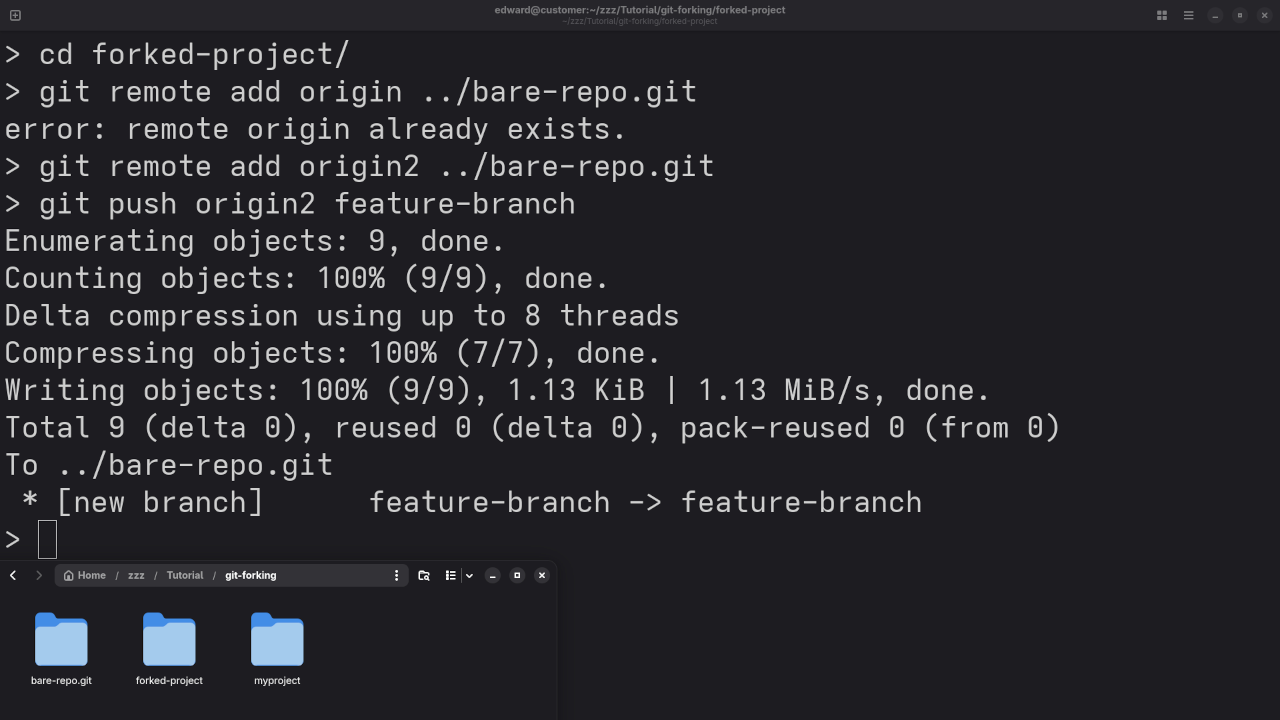
    2. Push your feature branch to the local “remote” repository:
      git push origin feature-branch
    3. Now, go to the original repository and check out the feature branch:
      git checkout feature-branch
    4. Merge the changes from your feature branch into the main branch:
      git merge feature-branch
    5. If everything looks good, delete the feature branch after merging:
      git branch -d feature-branch

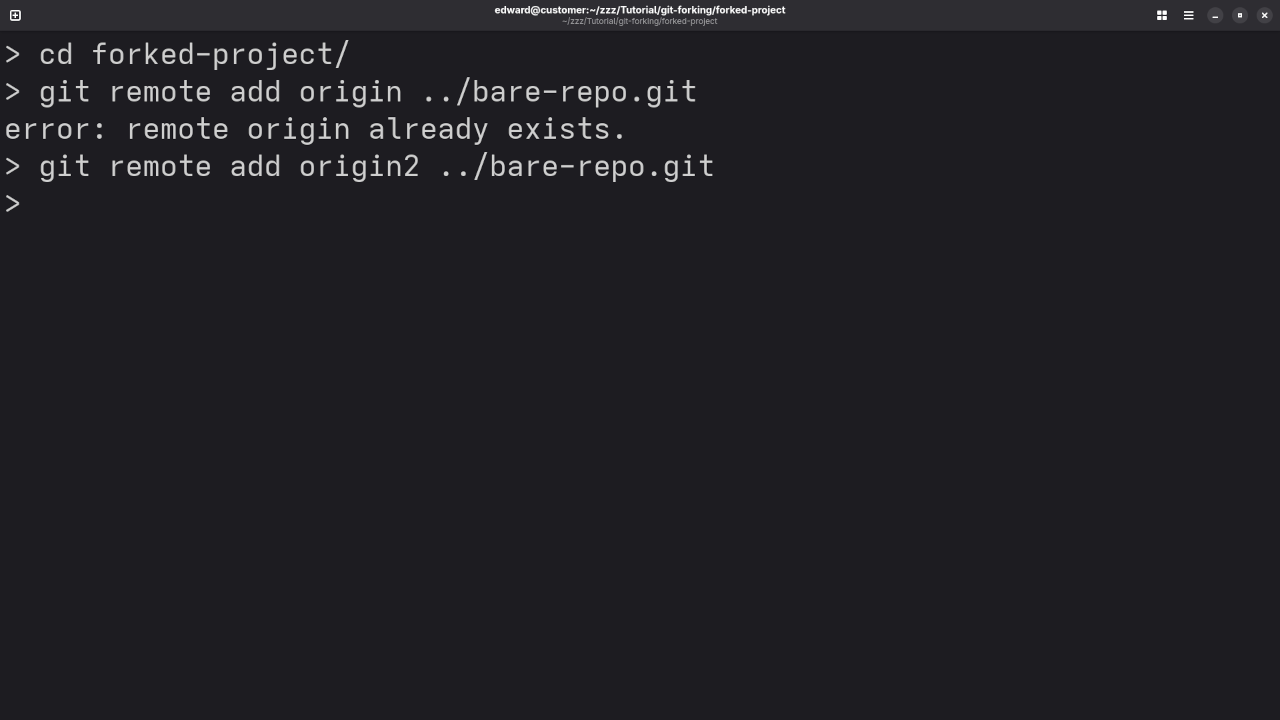
    Screencast Tutorial & Screenshots

    Git Clone For Fork
    Command Line Git Fork To Create New Forked Project

    Git Commit Feature
    Terminal Showing Git Commit On Feature Branch

    Git Remote Repo
    Terminal Showing Creation Of Git Remote Repository

    Git Adding Remote Repo
    Terminal Showing Git Remote Addition

    Git Push For Fork
    Terminal Showing Result of Git Push Feature Branch For Forked Project

    Screencast Of Git Forking

    Why Forking, Cloning, and Pull Requests Matter in Local Git Workflows

    Even in a local environment, these Git features are incredibly important for collaboration. Forking, cloning, and using pull requests allow developers to work independently on different features or fixes, then integrate their work smoothly once it’s ready. The local workflow mimics the online GitHub process, ensuring that teams can work together effectively even without the internet.

    Check Out My Resources:

    For more in-depth programming resources, check out my programming books on Amazon. These books cover various programming topics, including Git, JavaScript, Python, and more!

    I also offer a wide range of online programming courses available through my shop: Online Programming Courses. Whether you’re just getting started or looking to level up your skills, there’s something for everyone.

    If you need personalized help with programming, I am available for one-on-one programming tutorials. Get in touch with me here.

    Additionally, if you need assistance with Git installation or repository migration, feel free to reach out to me through my services page.

  • Used Guide: Nvidia Tesla M40 In 2025

    Used Guide: Nvidia Tesla M40 In 2025

    Is the Nvidia Tesla M40 Still Worth It in 2025 for Blender and AI?

    Are you thinking of picking up a used Nvidia Tesla M40 for your Blender rendering or AI development projects in 2025? This post is for you! While the Tesla M40 was once a high-performance GPU in data centers, it’s now often found at bargain prices on the used market — sometimes under $200 CAD.

    So, is it a good deal for Blender and AI tasks today? Let’s break it down.

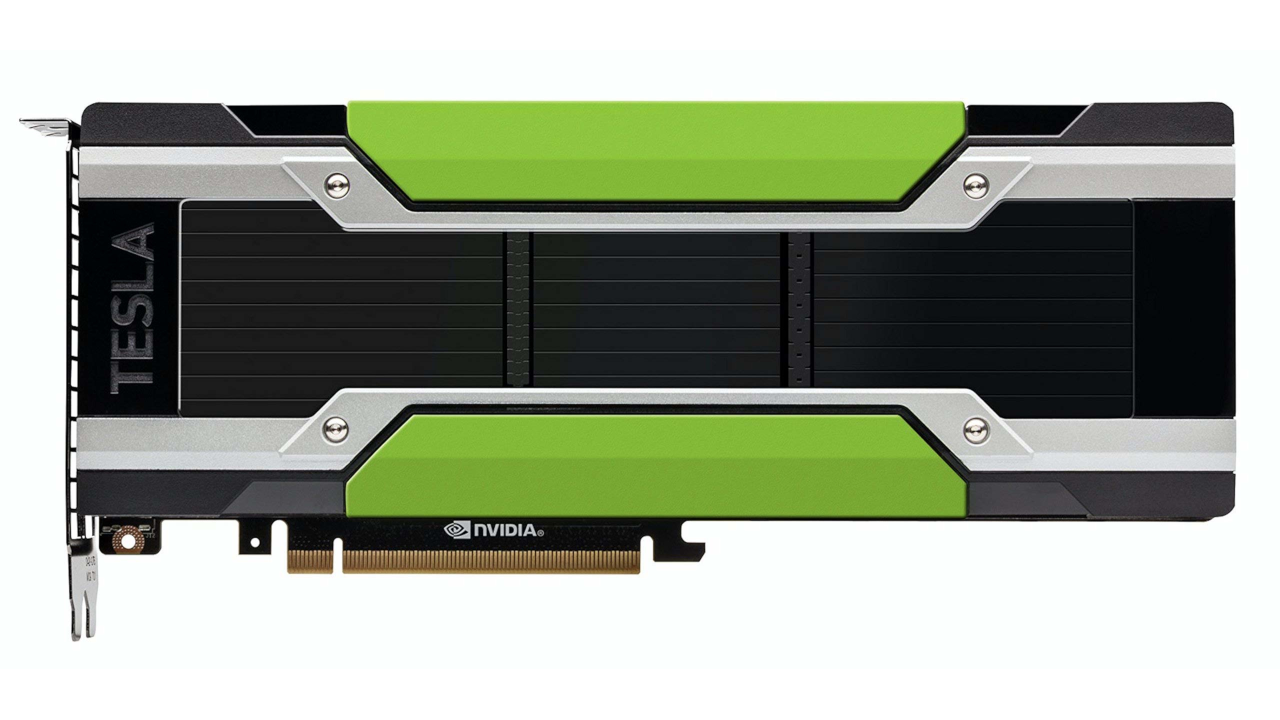
    🚀 What is the Nvidia Tesla M40?

    The Tesla M40 is a server-grade GPU released by Nvidia in 2015. It features:

    • 12 GB of GDDR5 VRAM (some variants with 24 GB)
    • 3072 CUDA cores
    • No display output (headless GPU)
    • Passive cooling (requires active airflow in desktop use)
    • 250W TDP

    ✅ Pros of Buying a Tesla M40 (Used)

    • High VRAM: 12–24 GB is great for handling large 3D scenes or training stable diffusion AI models.
    • Affordable: Found for under $200 in Canada — cheaper than most modern consumer GPUs with similar VRAM.
    • Compatible with Fedora/Linux: With proper setup and driver installation, it works well under Fedora 42.

    ❌ Cons You Need to Know

    • Passive Cooling: You must add your own fans or a liquid cooling mod — otherwise it will overheat in a standard PC case.
    • No Display Outputs: You’ll need another GPU (or integrated graphics) to see your desktop.
    • Slower Rendering: While usable in Blender, it performs like a GTX 1650 Super — well below modern RTX cards.
    • No Tensor Cores: Lacks hardware acceleration for newer AI frameworks (unlike RTX cards).
    • Driver Hassles on Linux: May require kernel tweaks (pci=nocrs) and Secure Boot disabled to detect the GPU via nvidia-smi.

    🔬 Performance Overview

    Task Performance Summary
    Blender Cycles Rendering Similar to GTX 1650 Super
    Stable Diffusion (AI) ~1.7 it/s — usable but slower than RTX 3060
    Video Editing Possible, but not ideal due to lack of NVENC
    AI Training (PyTorch, etc.) Supported, but lacks newer hardware features

    📷 Screenshots & Screencast

    All-in One Liquid Cooling
    DIY AIO liquid cooling setup on a Tesla M40

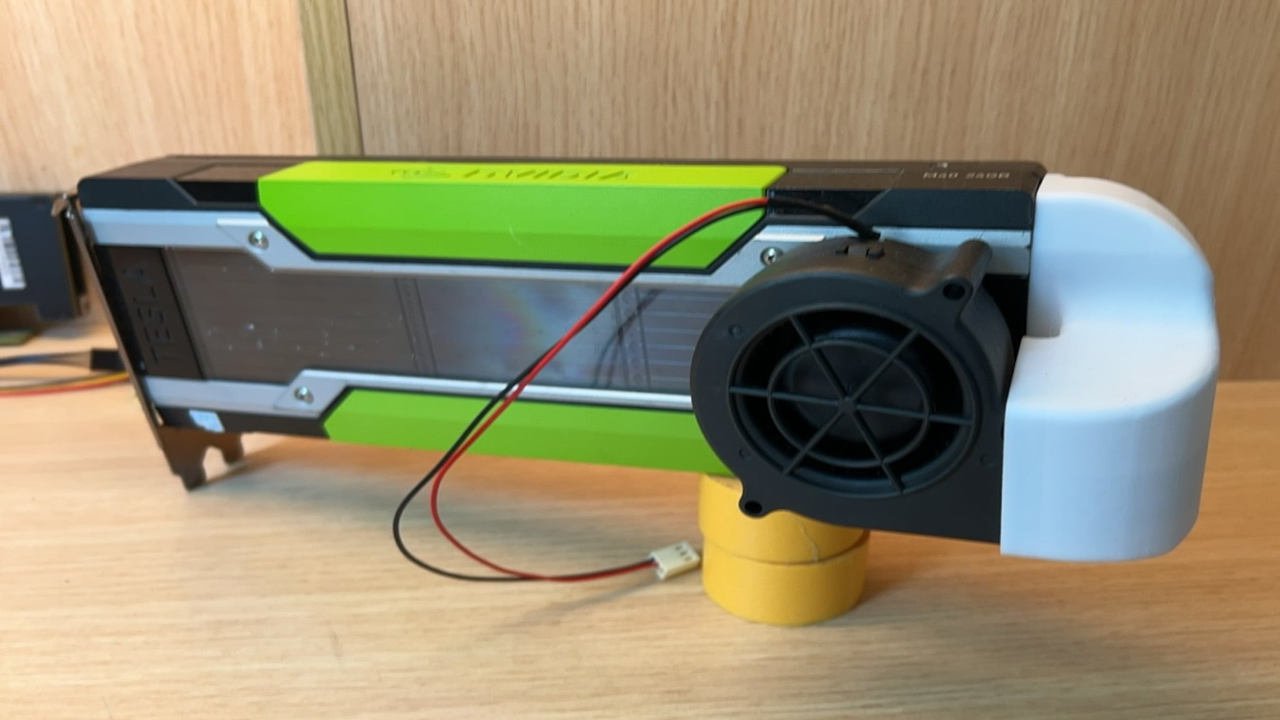
    Mounted Fan Bracked
    A compact DIY fan bracket mounted on the M40

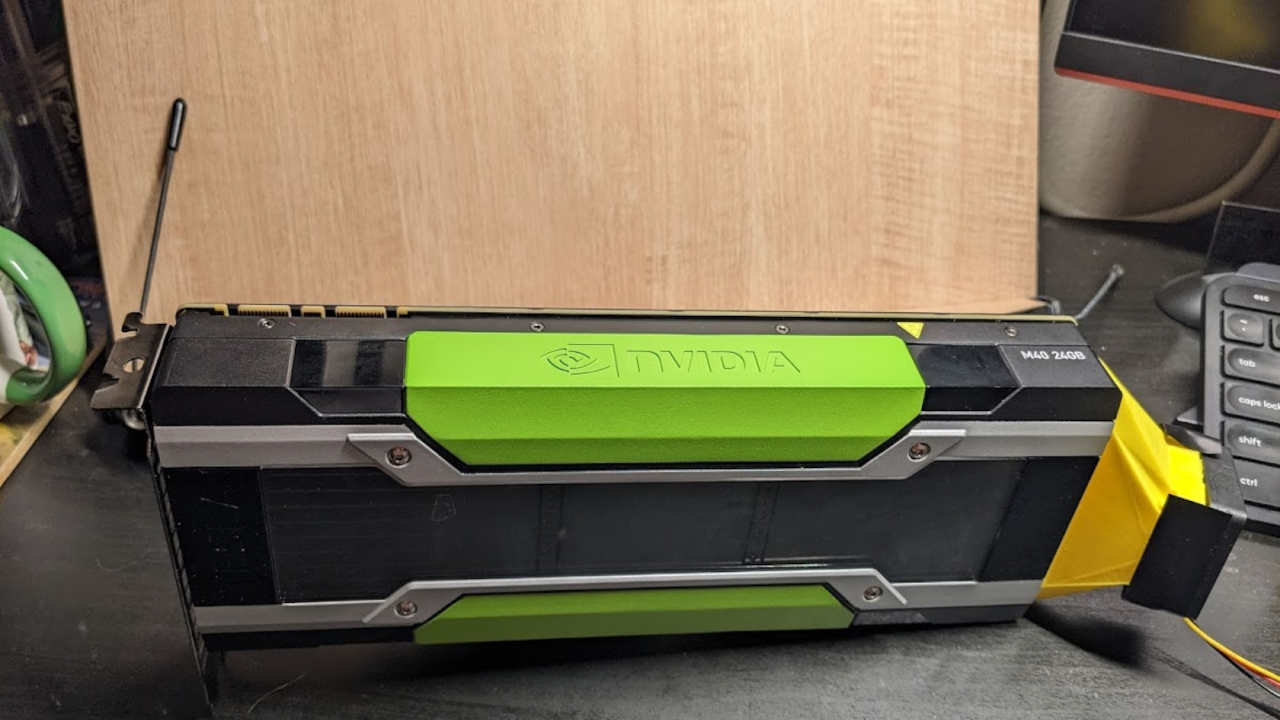
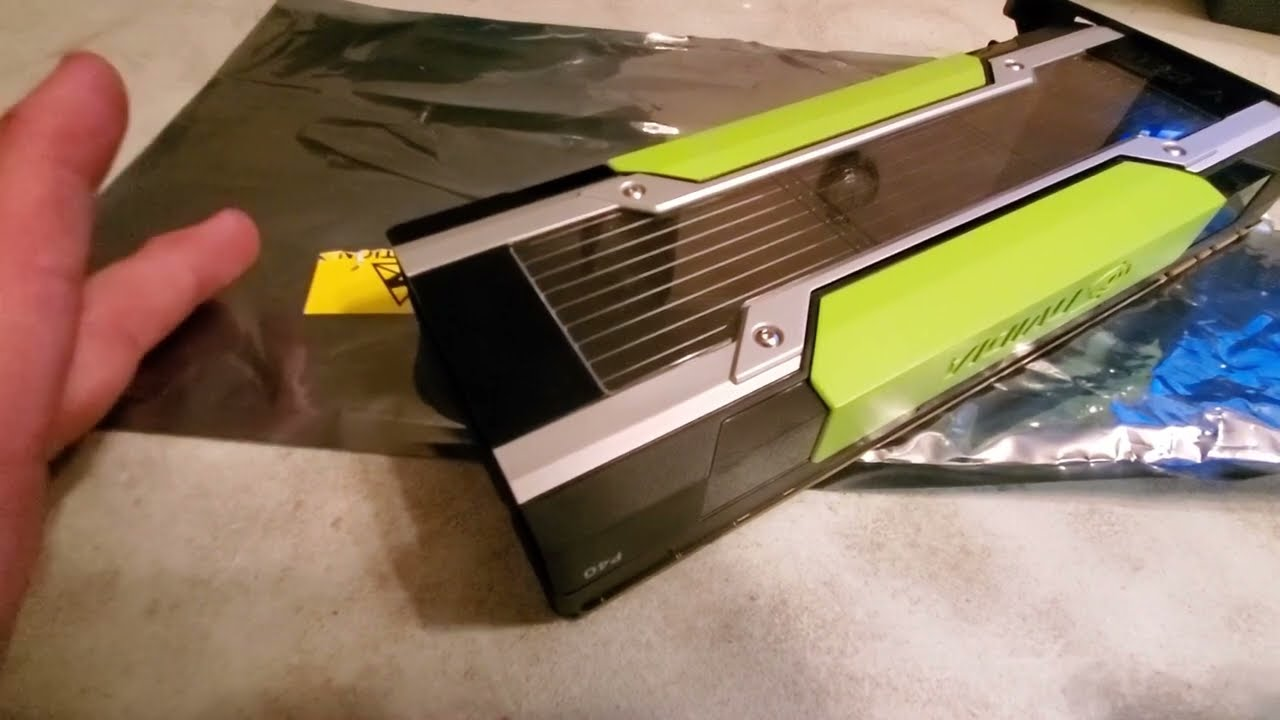
    Close-up Showcase
    A close-up showcasing the M40 card ready for modification

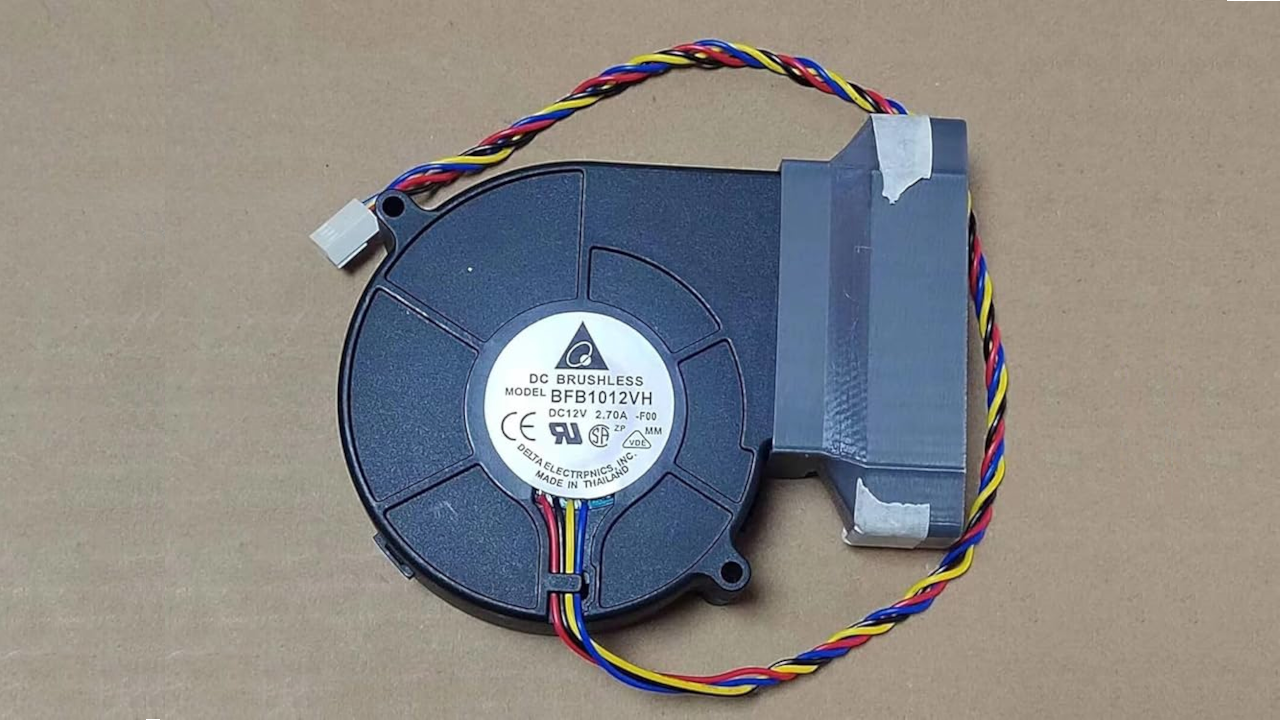
    Blower Fan
    A standard server-style blower fan you might adapt for cooling

    Screencast Showing setup on Fedora 42, system detection, and Blender rendering stats

    📚 Learn More with My Books and Courses

    I’ve written two Python-focused books that are perfect if you’re using the Tesla M40 for programming or Blender scripting:

    🎓 I also offer an affordable course:
    Learning Python (Online Course)

    👨‍🏫 Need One-on-One Help?

    I offer online Python tutorials, including help with:

    • Blender scripting
    • AI training on GPUs (like the M40)
    • Setup & driver installation for Linux (Fedora, Ubuntu, etc.)
    • Migrating your models to another GPU or system

    ➡️ Contact me here to book a session.

    💡 Final Thoughts

    The Nvidia Tesla M40 can still be useful for budget-conscious developers and Blender artists — but only if you’re willing to mod your setup and troubleshoot Linux drivers. For AI work like Stable Diffusion, it performs decently, thanks to its generous VRAM.

    However, if you prefer plug-and-play reliability and faster rendering, a used RTX 3060 or 3070 may be worth the extra cost.

    Let me know your thoughts in the comments or during the live stream!