Blog

  • Server-side Defense: PHP Validation, Hashing, And MariaDB Storage

    Server-side Defense: PHP Validation, Hashing, And MariaDB Storage

    PHP Validation, Santization, and Storage

    Every developer knows the challenge: you need to collect user data via a form, and that data must be both valid and securely stored.

    In the browser, you can use powerful HTML5 Regular Expressions for instant user feedback (If you missed that, see: HTML5 Regular Expressions).

    But here is the most important truth in web security: You must never trust client-side validation.

    Any user can bypass client-side checks with ease. The real defense happens on the server. This guide shows you how to build a robust PHP endpoint that handles the process, from re-validating the data to securely storing it in a MariaDB database and notifying the administrator.

    1. The Goal: Strict Input Rules

    We are building the PHP backend for a registration form that enforces these rules:

    Field Client-Side Rule (HTML5 Regex) Server-Side Enforcement (PHP)
    Username 4-16 lowercase letters/numbers preg_match()
    Password Min 8 chars, must include upper, lower, and number password_hash()

    2. The Database Blueprint: Creating the Users Table

    Our PHP script connects to MariaDB (or MySQL) and ensures the necessary users table exists. We use CREATE TABLE IF NOT EXISTS to ensure the script works even on a fresh setup.


    -- SQL executed by the PHP script to ensure the table is ready
    CREATE TABLE IF NOT EXISTS users (
        id INT(6) UNSIGNED AUTO_INCREMENT PRIMARY KEY,
        username VARCHAR(16) NOT NULL UNIQUE,
        password_hash VARCHAR(255) NOT NULL, -- Long field for secure hash
        created_at TIMESTAMP DEFAULT CURRENT_TIMESTAMP
    );


    3. The Secure PHP Backend Code (process_form.php)

    This script contains the entire logic: input handling, security checks, database communication, and admin email notification. Remember to update the configuration variables (lines 3-6) before testing!


    // --- 1. CONFIGURATION SECTION (CRITICAL: UPDATE THESE VALUES) ---
    $servername = "localhost";
    $db_username = "your_db_user";     // Your MariaDB/MySQL Username
    $db_password = "your_db_password"; // Your MariaDB/MySQL Password
    $dbname = "user_db";            // The name of your database (MUST EXIST)
    $admin_email_recipient = "admin@yourwebsite.com"; // For new user notification
    
    // Initialize error and success variables
    $usernameError = '';
    $passwordError = '';
    $response = ['success' => false, 'message' => ''];
    
    if ($_SERVER["REQUEST_METHOD"] == "POST") {
    
        // Retrieve and trim inputs
        $username = trim($_POST['username'] ?? '');
        $password = $_POST['password'] ?? ''; 
        
        // --- 2. Validation Checks (Matching your form rules) ---
        // Validate Username (4-16 lowercase letters/numbers)
        if (empty($username)) {
            $usernameError = "Username is required.";
        } elseif (strlen($username) < 4 || strlen(trim($username)) > 16) {
            $usernameError = "Username must be between 4 and 16 characters.";
        } elseif (!preg_match("/^[a-z0-9]+$/", $username)) {
            $usernameError = "Username must contain only lowercase letters and numbers.";
        }
    
        // Validate Password (Min 8 chars, incl. upper, lower, and number)
        if (empty($password)) {
            $passwordError = "Password is required.";
        } elseif (strlen($password) < 8) {
            $passwordError = "Password must be at least 8 characters long.";
        } elseif (!preg_match("/[A-Z]/", $password) || !preg_match("/[a-z]/", $password) || !preg_match("/[0-9]/", $password)) {
            $passwordError = "Password must include at least one uppercase letter, one lowercase letter, and one number.";
        }
    
        // --- 3. Database Connection and Preparation ---
        if (empty($usernameError) && empty($passwordError)) {
    
            $conn = new mysqli($servername, $db_username, $db_password, $dbname);
    
            if ($conn->connect_error) {
                $response['message'] = "❌ Server Error: Database connection failed. Check credentials/server.";
            } else {
                
                // **DATABASE PREP: CREATE TABLE IF NOT EXISTS**
                $table_sql = "
                    CREATE TABLE IF NOT EXISTS users (
                        id INT(6) UNSIGNED AUTO_INCREMENT PRIMARY KEY,
                        username VARCHAR(16) NOT NULL UNIQUE,
                        password_hash VARCHAR(255) NOT NULL,
                        created_at TIMESTAMP DEFAULT CURRENT_TIMESTAMP
                    )";
    
                if ($conn->query($table_sql) === FALSE) {
                    error_log("MariaDB Table Creation Error: " . $conn->error);
                }
                
                // --- 4. User Registration and Data Storage ---
                $hashed_password = password_hash($password, PASSWORD_DEFAULT);
                $sql = "INSERT INTO users (username, password_hash) VALUES (?, ?)";
                $stmt = $conn->prepare($sql);
                $stmt->bind_param("ss", $username, $hashed_password);
    
                if ($stmt->execute()) {
                    $response['success'] = true;
                    $response['message'] = " Success! User registered and stored securely.";
                    
                    // --- 5. Admin Notification ---
                    $subject = "NEW User Registration Alert";
                    $message_body = "A new user has registered:\nUsername: " . $username . "\nTime: " . date("Y-m-d H:i:s");
                    $headers = "From: webmaster@yourdomain.com\r\n";
                    
                    if (!mail($admin_email_recipient, $subject, $message_body, $headers)) {
                        error_log("Failed to send admin email for user: " . $username);
                    }
    
                } else {
                    if ($conn->errno === 1062) {
                        $response['message'] = "❌ Username '{$username}' is already taken. Please choose another.";
                    } else {
                        $response['message'] = "❌ Database error during registration.";
                        error_log("MariaDB Error: " . $stmt->error);
                    }
                }
    
                $stmt->close();
                $conn->close();
            }
        } else {
            $errors = array_filter([$usernameError, $passwordError]);
            $response['message'] = "Validation Failed: " . implode(' ', $errors);
        }
    } else {
        $response['message'] = "Invalid request method.";
    }
    
    // Simple redirect on success or show error
    if ($response['success']) {
        header("Location: success_page.html"); 
        exit();
    } else {
        echo "<h1>Registration Status</h1>";
        echo "<p style='color: red;'>" . $response['message'] . "</p>";
    }


    4. Security Deep Dive: Three Critical Steps

    The value of this PHP endpoint is in its security implementation, making it a professional-grade handler.

    A. Reinforcing Validation with preg_match

    PHP re-validates the input using preg_match() to enforce the length and character rules. This catch-all validation prevents improperly formatted data from ever reaching your database or crashing your application.

    B. Password Hashing (The Non-Negotiable Step)

    The line $hashed_password = password_hash($password, PASSWORD_DEFAULT); is the most important security measure here.

    • NEVER store a raw password! password_hash() converts the user’s password into an irreversible hash. If an attacker breaches your database, they only get the hash, not the actual password.
    • Verification: Later, when a user logs in, you use the PHP function password_verify() to check the raw password against the stored hash.

    C. Preventing SQL Injection with Prepared Statements

    The mysqli::prepare() and bind_param() methods are essential. They separate the SQL command from the user-provided data (? placeholders). This guarantees that malicious code entered into the form cannot be executed against your database.

    Screenshots and Screencast
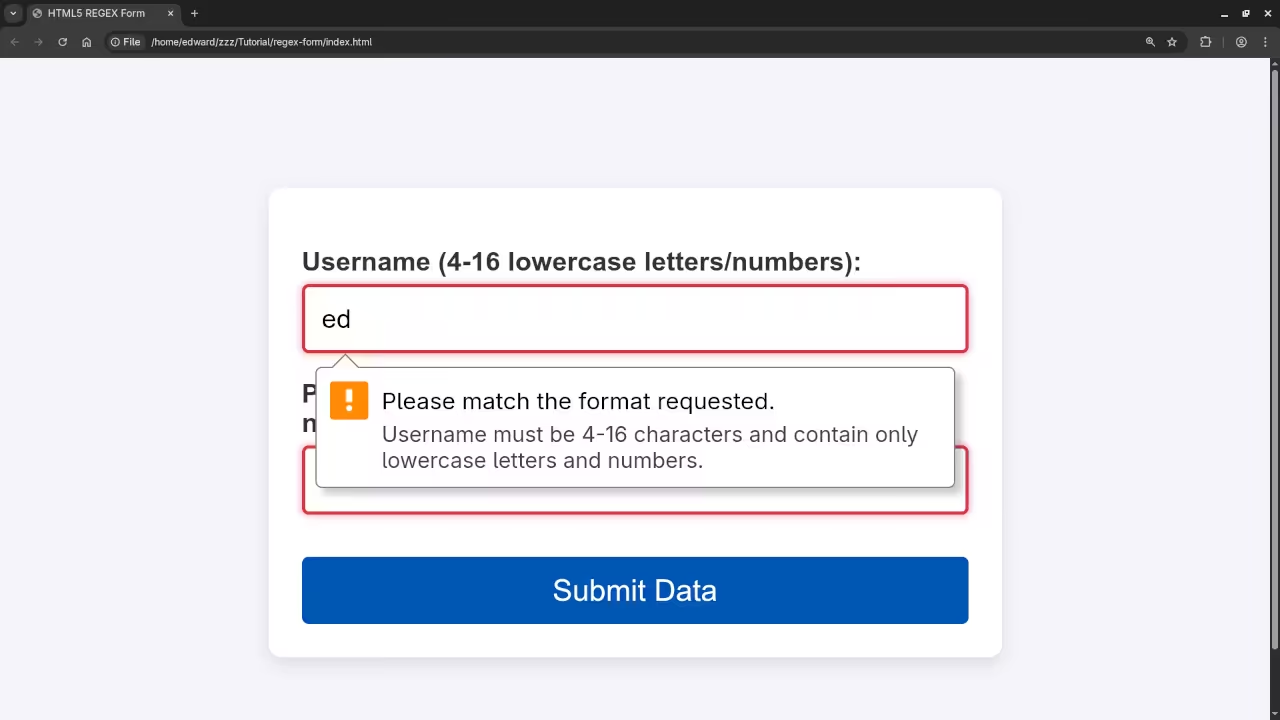
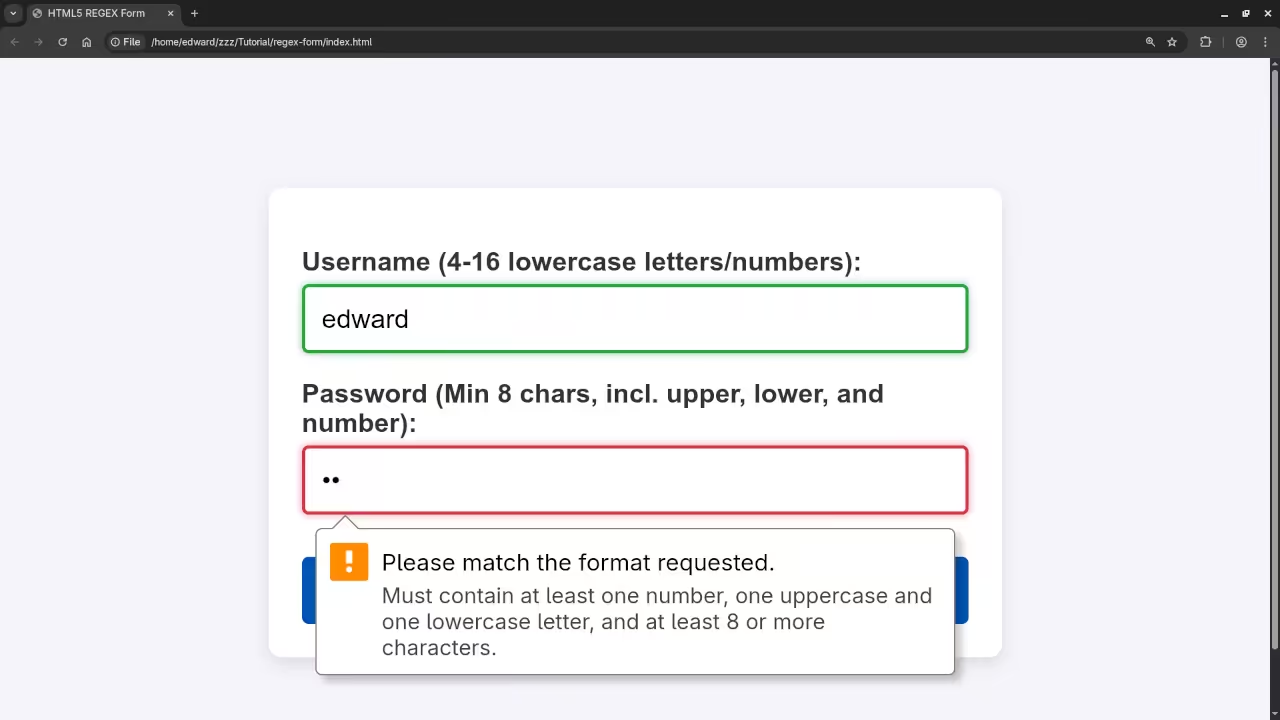
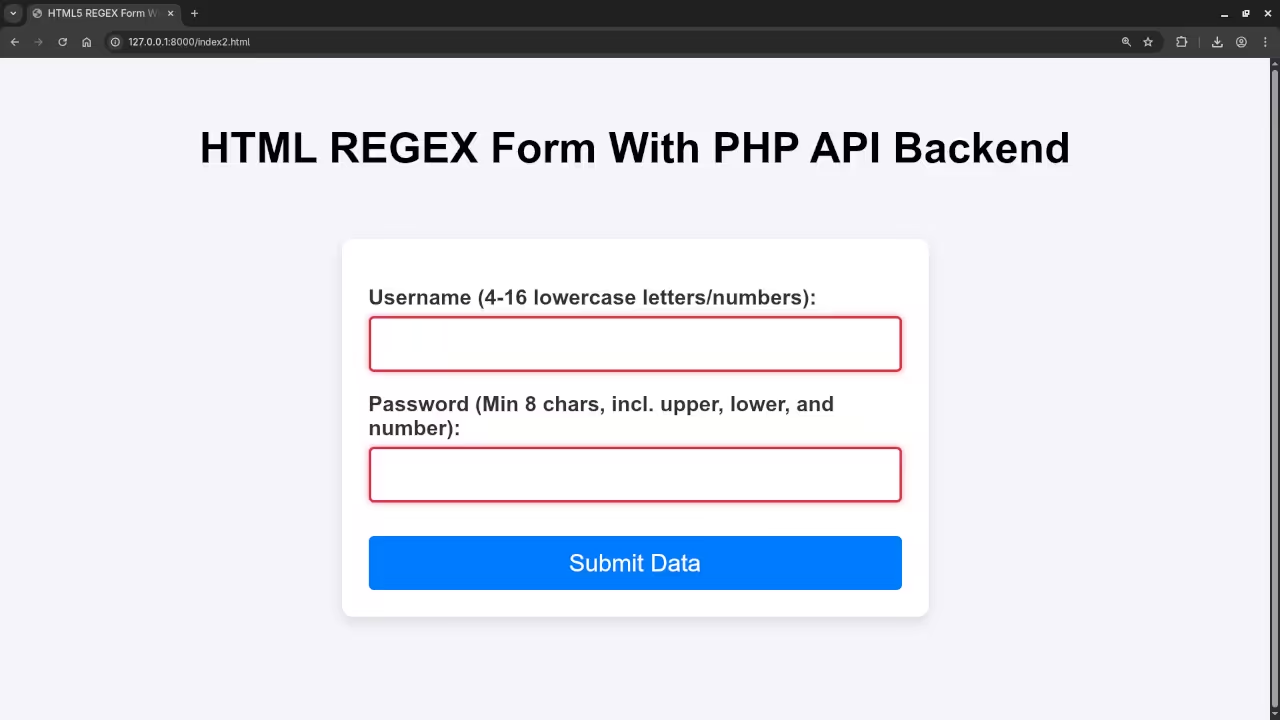
    An HTML5 Regex Form Submit Error
    Web Browser Displaying An HTML5 Regular Expression Form Submission Error

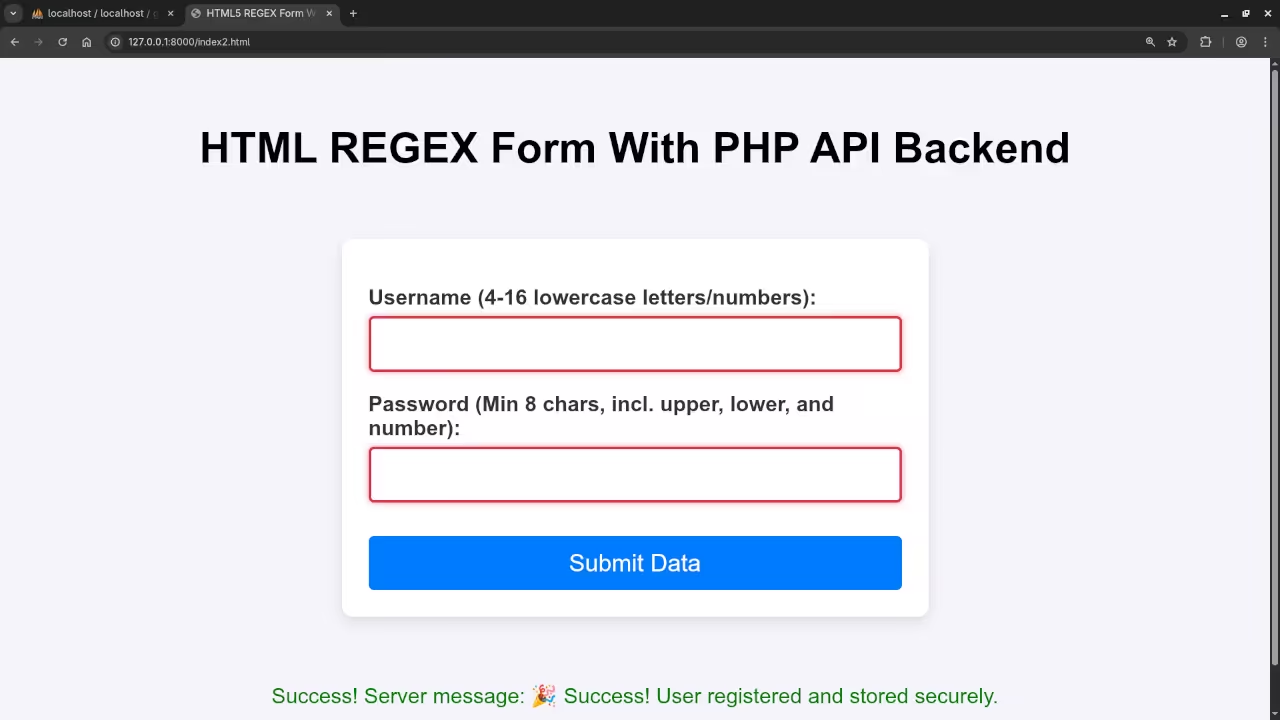
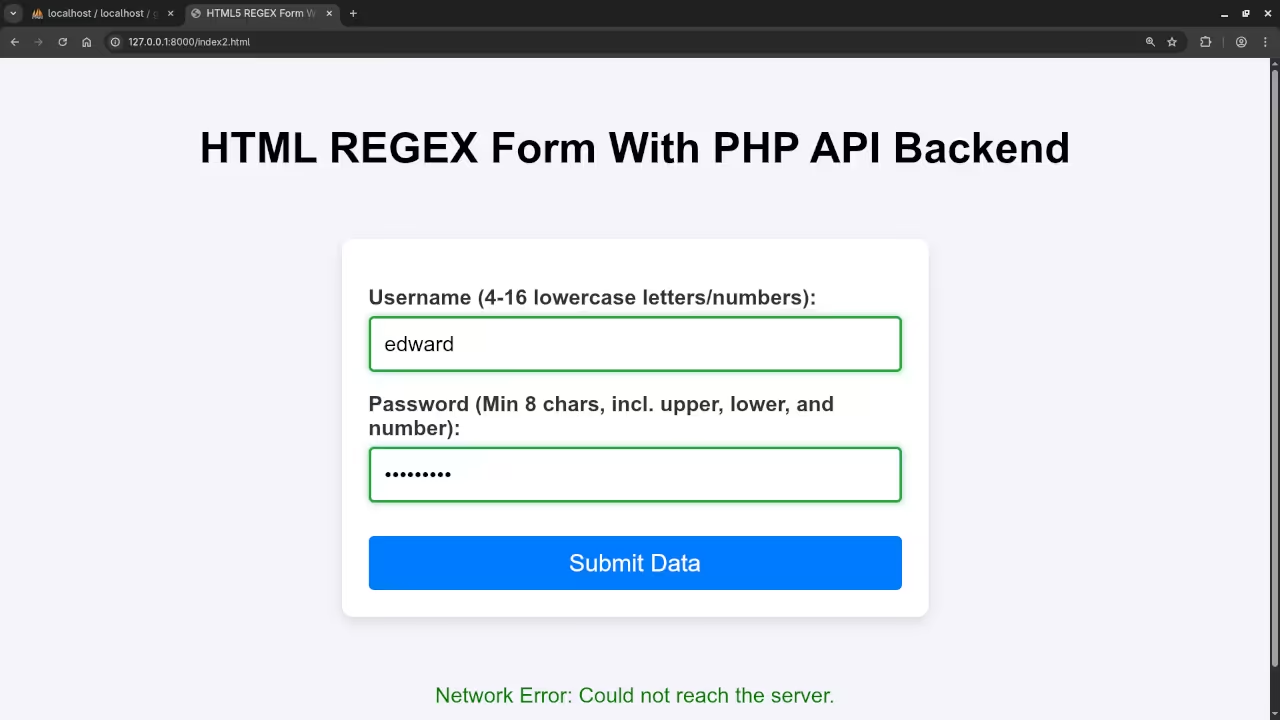
    An HTML5 Regex Form Submission
    Web Browser Displaying An HTML5 Regular Expression Submission Message

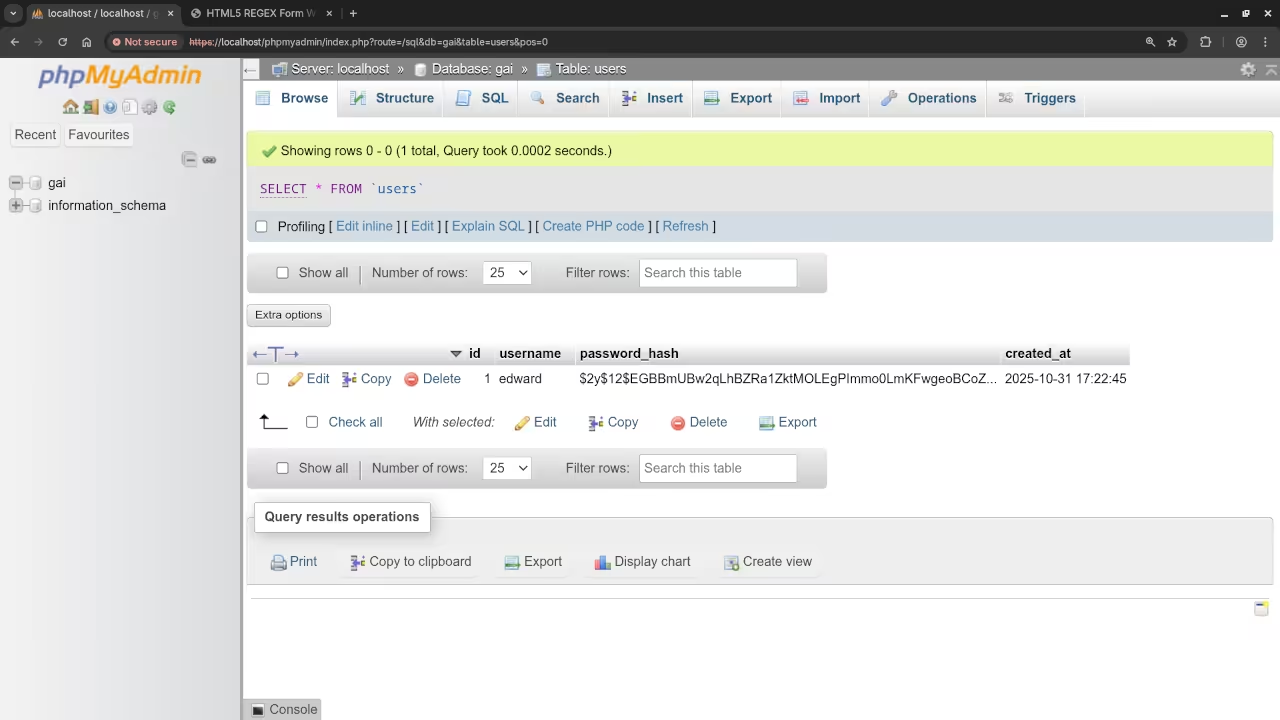
    Form SubmissionIn Database
    Web Browser Displaying PHPMyAdmin Showing Database Table Results

    HTML Drag And Drop Upload Animation Video

    Further Learning and Support

    If you’re excited by the power of connecting HTML forms to a secure database, you’re ready to dive deeper into PHP.

    I offer comprehensive resources to help you master these essential web development skills:

    I am also available for one-on-one programming tutorials and services for updating or migrating existing PHP applications to modern, secure standards.

  • HTML5 Regular Expressions

    HTML5 Regular Expressions

    HTML5 REGEX Form Validation: The Beginner’s Guide to Robust Client-Side Checks

    Forms are the gateway to data on the web, and ensuring users provide valid information is crucial. While JavaScript is often used for validation, did you know that HTML5 offers a powerful, built-in solution using Regular Expressions (REGEX)?

    This post will show you how to use the HTML5 pattern attribute with REGEX for robust, client-side validation right in your form markup, along with some simple CSS to make your form look great.

    The HTML5 ‘pattern’ Attribute and REGEX

    The secret weapon in HTML5 form validation is the pattern attribute, which can be applied to <input type="text">, <input type="tel">, <input type="email">, and other input fields.

    The value of the pattern attribute must be a JavaScript-style regular expression. If the user’s input does not match the entire pattern, the browser will prevent form submission and display an error message.

    Basic Form Structure

    Let’s start with a simple form setup. We will include a <style> block for our CSS and a small <script> block for our future API connection.

    HTML Code


        &lt;form id=&quot;dataForm&quot;&gt;
          &lt;label for=&quot;username&quot;&gt;Username (4-16 lowercase letters/numbers):&lt;/label&gt;
          &lt;input 
              type=&quot;text&quot; 
              id=&quot;username&quot; 
              name=&quot;username&quot; 
              required 
              pattern=&quot;^[a-z0-9]{4,16}$&quot; 
              title=&quot;Username must be 4-16 characters and contain only lowercase letters and numbers.&quot;
          /&gt;
          &lt;label for=&quot;password&quot;&gt;Password (Min 8 chars, incl. upper, lower, and number):&lt;/label&gt;
          &lt;input 
              type=&quot;password&quot; 
              id=&quot;password&quot; 
              name=&quot;password&quot; 
              required 
              pattern=&quot;(?=.*\d)(?=.*[a-z])(?=.*[A-Z]).{8,}&quot; 
              title=&quot;Must contain at least one number, one uppercase and one lowercase letter, and at least 8 or more characters.&quot;
          /&gt;
    
            &lt;button type=&quot;submit&quot;&gt;Submit Data&lt;/button&gt;
        &lt;/form&gt;


    Optional JavaScript


            // Only FETCH API for future use
            const form = document.getElementById(&#039;dataForm&#039;);
            form.addEventListener(&#039;submit&#039;, async (event) =&gt; {
                event.preventDefault(); // Stop default form submission
    
                if (form.checkValidity()) {
                    const formData = new FormData(form);
                    const data = Object.fromEntries(formData.entries());
                    
                    // **THIS IS THE ONLY JAVASCRIPT: FETCH API for future endpoint**
                    try {
                        const response = await fetch(&#039;YOUR_FUTURE_API_ENDPOINT_URL&#039;, { 
                            method: &#039;POST&#039;, 
                            headers: { &#039;Content-Type&#039;: &#039;application/json&#039; },
                            body: JSON.stringify(data) 
                        });
                        
                        if (response.ok) {
                            console.log(&#039;Form data ready to be sent to a future endpoint.&#039;);
                            // Replace with actual success handling later
                            alert(&#039;Form validated! (Data logged to console for future API send.)&#039;); 
                            form.reset();
                        } else {
                            throw new Error(&#039;Server error.&#039;);
                        }
                    } catch (error) {
                        console.error(&#039;Submission failed:&#039;, error);
                        alert(&#039;Submission failed, check console.&#039;);
                    }
                } else {
                    // This block is mostly for completeness, as HTML5 validation 
                    // typically handles the invalid state before the submit event fires.
                    alert(&#039;Please correct the invalid fields.&#039;);
                }
            });


    Common and Complicated REGEX Examples

    Let’s implement REGEX patterns using the pattern attribute in the HTML for two inputs: a common one and a more complicated one.

    1. Common REGEX: Simple Username

    A common requirement is a username that only contains lowercase letters and numbers, and must be between 4 and 16 characters long.

    • REGEX: ^[a-z0-9]{4,16}$
    • Explanation:
      • ^: Matches the beginning of the input.
      • [a-z0-9]: Matches any lowercase letter (a-z) or any digit (0-9).
      • {4,16}: Repeats the preceding set (the character class) between 4 and 16 times.
      • $: Matches the end of the input. Crucial to ensure the entire string matches!

    2. Complicated REGEX: Strong Password

    A more complicated pattern is often a strong password policy requiring a mix of character types.

    • Policy: At least 8 characters, and must contain at least one uppercase letter, one lowercase letter, and one number.
    • REGEX: (?=.*\d)(?=.*[a-z])(?=.*[A-Z]).{8,}
    • Explanation: This uses Lookaheads (?=...) which check for a condition without consuming characters, allowing us to enforce multiple rules simultaneously.
      • (?=.*\d): Positive lookahead to ensure there is at least one digit (\d).
      • (?=.*[a-z]): Positive lookahead to ensure there is at least one lowercase letter.
      • (?=.*[A-Z]): Positive lookahead to ensure there is at least one uppercase letter.
      • .{8,}: Matches any character (.) repeated 8 or more times.

    Styling to Make the Form Beautiful

    HTML5 validation works best when paired with good CSS. By default, browsers use the pseudo-classes :valid and :invalid to apply styles to form elements based on their validation state.

    Add the following CSS inside the <style> tags of your HTML file to create a clean, modern look and visually highlight validation status.


    body {
        font-family: Arial, sans-serif;
        background-color: #f4f4f9;
        padding: 20px;
    }
    
    form {
        max-width: 400px;
        margin: 50px auto;
        padding: 20px;
        background: #fff;
        border-radius: 8px;
        box-shadow: 0 4px 10px rgba(0, 0, 0, 0.1);
    }
    
    label {
        display: block;
        margin-top: 15px;
        margin-bottom: 5px;
        font-weight: bold;
        color: #333;
    }
    
    input[type=&quot;text&quot;], input[type=&quot;password&quot;] {
        width: 100%;
        padding: 10px;
        border: 1px solid #ccc;
        border-radius: 4px;
        box-sizing: border-box;
        font-size: 16px;
        transition: border-color 0.3s, box-shadow 0.3s;
    }
    
    /* 1. Base style for focus */
    input:focus {
        border-color: #007bff;
        box-shadow: 0 0 5px rgba(0, 123, 255, 0.3);
        outline: none;
    }
    
    /* 2. Styling for valid input */
    input:not(:placeholder-shown):valid {
        border: 2px solid #28a745; /* Green border for valid */
        box-shadow: 0 0 5px rgba(40, 167, 69, 0.5);
    }
    
    /* 3. Styling for invalid input */
    input:not(:placeholder-shown):invalid {
        border: 2px solid #dc3545; /* Red border for invalid */
        box-shadow: 0 0 5px rgba(220, 53, 69, 0.5);
    }
    
    button[type=&quot;submit&quot;] {
        display: block;
        width: 100%;
        padding: 10px;
        margin-top: 25px;
        background-color: #007bff;
        color: white;
        border: none;
        border-radius: 4px;
        cursor: pointer;
        font-size: 18px;
        transition: background-color 0.3s;
    }
    
    button[type=&quot;submit&quot;]:hover {
        background-color: #0056b3;
    }


    Here’s a preview of what you’ll create — an HTML5 Regex Form:

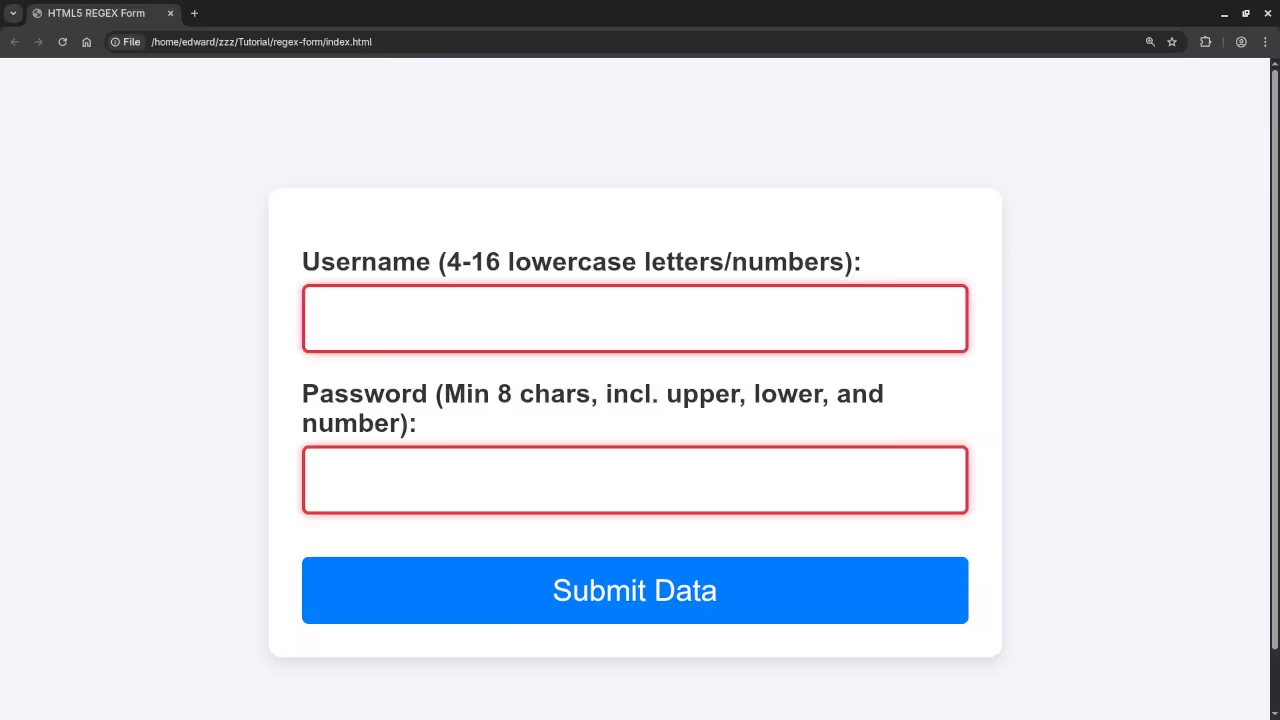
    HTML5 Pure REGEX Form Demo

    Screenshots and Screencast

    An HTML5 Username Regex
    Web Browser Displaying An HTML5 Username Regular Expression

    An HTML5 Password Regex
    Web Browser Displaying An HTML5 Password Regular Expression

    HTML Drag And Drop Upload Animation Video

    Level Up Your JavaScript Skills

    Mastering front-end development, from basic forms to complex API integrations, requires a strong foundation in JavaScript.

  • Generate Classic Cup Trophy With Blender Python API For Website

    Generate Classic Cup Trophy With Blender Python API For Website

    Generate a Golden Cup Trophy via Blender Python API for Web 3D with <model-viewer>

    Welcome to a beginner-friendly deep dive into the exciting world where Python scripting meets web development! In this post, we’ll walk through generating a classic cup trophy using Blender’s Python API, giving it a luxurious golden material, and then displaying it in a web browser with photorealistic lighting using Google’s powerful **<model-viewer>** web component.

    Step 1: Generating the Trophy in Blender with Python (The Full Code)

    Providing the full, working code upfront gives you a complete resource. The following script includes code for creating the trophy shape, a handle, the golden material, and the final glTF export. Your accompanying video will walk through every line and concept in detail.

    The Complete Python Script (trophy_generator.py):


    import bpy
    import math
    
    # --- SCENE SETUP ---
    
    # 1. Clear existing objects
    def clear_scene():
        &quot;Delete all meshes, curves, and lamps in the scene.&quot;
        bpy.ops.object.select_all(action=&#039;DESELECT&#039;)
        
        # Select all meshes, curves, and lights
        for obj in bpy.data.objects:
            if obj.type in (&#039;MESH&#039;, &#039;CURVE&#039;, &#039;LIGHT&#039;):
                obj.select_set(True)
        
        # Delete selected objects
        bpy.ops.object.delete(use_global=False)
    
    clear_scene()
    
    # --- TROPHY MESH CREATION ---
    
    # 2. Create the Trophy Profile Curve
    bpy.ops.curve.primitive_bezier_curve_add(enter_editmode=True, align=&#039;WORLD&#039;, location=(0, 0, 0))
    curve = bpy.context.object
    curve.name = &quot;Trophy_Profile&quot;
    
    # Get the two bezier points
    points = curve.data.splines[0].bezier_points
    
    # Move/Adjust the control points to create a simple classic cup profile
    # Start at the base (Z=0) and end at the lip (Z=3)
    
    # Point 1 (Base - Center)
    points[0].co = (0.01, 0, 0)
    points[0].handle_left = (0.01, 0, 0)
    points[0].handle_right = (0.5, 0, 0.5)
    
    # Point 2 (Lip - Top)
    points[1].co = (1.2, 0, 3.0)
    points[1].handle_left = (1.0, 0, 2.0)
    points[1].handle_right = (1.2, 0, 3.0)
    
    # Set handle types to vector for sharp edges at the bottom
    points[0].handle_right_type = &#039;VECTOR&#039;
    points[1].handle_left_type = &#039;AUTO&#039;
    
    
    # 3. Apply Screw Modifier for the cup body
    bpy.ops.object.mode_set(mode=&#039;OBJECT&#039;)
    screw_mod = curve.modifiers.new(name=&quot;Screw&quot;, type=&#039;SCREW&#039;)
    screw_mod.angle = 2 * math.pi  # 360 degrees
    screw_mod.steps = 64
    screw_mod.render_steps = 128
    screw_mod.axis = &#039;Z&#039;
    
    # Convert the curve to a mesh
    bpy.ops.object.convert(target=&#039;MESH&#039;)
    trophy_mesh = bpy.context.object
    trophy_mesh.name = &quot;Classic_Trophy&quot;
    
    
    # --- HANDLE CREATION ---
    
    # 4. Create the Handle Curve
    bpy.ops.curve.primitive_bezier_curve_add(location=(1.5, 0, 2))
    handle_curve = bpy.context.object
    handle_curve.name = &quot;Trophy_Handle&quot;
    
    # Adjust the handle shape (e.g., a simple loop)
    handle_points = handle_curve.data.splines[0].bezier_points
    
    # Point 1
    handle_points[0].co = (1.5, 0, 2.0)
    handle_points[0].handle_right = (1.5, 0, 2.5)
    
    # Point 2
    handle_points[1].co = (1.5, 0, 1.0)
    handle_points[1].handle_left = (1.5, 0, 0.5)
    
    # Add depth and resolution to the handle
    handle_curve.data.bevel_depth = 0.1
    handle_curve.data.bevel_resolution = 8
    
    # 5. Apply Mirror Modifier to the Handle Curve
    mirror_mod = handle_curve.modifiers.new(name=&quot;Mirror&quot;, type=&#039;MIRROR&#039;)
    mirror_mod.use_axis = {&#039;Y&#039;} # Mirror across the Y-axis (side to side)
    
    # 6. Convert Handle to Mesh
    bpy.ops.object.select_all(action=&#039;DESELECT&#039;)
    handle_curve.select_set(True)
    bpy.context.view_layer.objects.active = handle_curve
    bpy.ops.object.convert(target=&#039;MESH&#039;)
    handle_mesh = bpy.context.object
    handle_mesh.name = &quot;Trophy_Handle_Mesh&quot;
    
    
    # --- MATERIAL AND EXPORT ---
    
    # 7. Create Golden Material (PBR Setup)
    mat = bpy.data.materials.new(name=&quot;Golden_Metal&quot;)
    mat.use_nodes = True
    bsdf = mat.node_tree.nodes[&quot;Principled BSDF&quot;]
    
    # Set PBR values for Gold:
    bsdf.inputs[&#039;Base Color&#039;].default_value = (0.8, 0.6, 0.1, 1) # Yellowish-Gold
    bsdf.inputs[&#039;Metallic&#039;].default_value = 1.0
    bsdf.inputs[&#039;Roughness&#039;].default_value = 0.2 
    
    # 8. Assign Material to both the Cup and Handle
    trophy_mesh.data.materials.append(mat)
    handle_mesh.data.materials.append(mat)
    
    
    # 9. Select all meshes and Export as glTF (.glb)
    bpy.ops.object.select_all(action=&#039;DESELECT&#039;)
    trophy_mesh.select_set(True)
    handle_mesh.select_set(True)
    
    output_path = &quot;//trophy.glb&quot; # Relative path to the Blend file directory
    bpy.ops.export_scene.gltf(
        filepath=bpy.path.abspath(output_path), 
        export_format=&#039;GLB&#039;,
        # Only export selected objects
        use_selection=True
    )
    
    print(&quot;Trophy generation and export complete: trophy.glb created!&quot;)


    Running the Python Script from the Command Line

    To run this complete script without opening the full Blender GUI, use the command line. This is the ideal way for automation or server-side generation.

    1. **Save** your script as trophy_generator.py.
    2. **Open** your terminal or command prompt.
    3. **Execute** the command (adjusting the paths as needed):
    /path/to/blender -b -P /path/to/trophy_generator.py
    • blender: The path to your Blender executable.
    • -b or -background: Runs Blender in the background (no GUI).
    • -P or -python <file>: Runs the specified Python script.

    This will generate a **trophy.glb** file in the same directory as your script.

    Step 2: Realistic Lighting with an HDR Image

    Photorealistic 3D models on the web require high-quality lighting. This is achieved using **High Dynamic Range (HDR)** images, which capture an entire environment’s lighting information.

    Using Blender’s Courtyard EXR

    Blender 4.5 LTS includes built-in HDR environment textures. The Courtyard environment provides excellent default lighting:

    • **File Path**: The courtyard.exr file is typically found within Blender’s installation directory, in a path similar to 4.5/datafiles/studiolight/world/courtyard.exr. You should copy this file to your web project directory or host it for the <model-viewer>.

    HDR Image Format Compatibility for the Web

    Choosing the right image format is crucial for both quality and performance in web 3D rendering. Here is a comparison of common formats:

    Format Full Name HDR Support Web Browser Support Notes
    .hdr Radiance HDR Yes Good (Supported by 3D libraries) A classic, simple HDR format. Can be large.
    .exr OpenEXR Yes Limited/No (Needs a library to load) High-quality, used in VFX, but typically not natively supported by web browsers.
    .ktx2 Khronos Texture 2 Yes (Via Basis Universal UASTC HDR) Excellent (Modern/Recommended) The best current option! Supports supercompression for fast loading and efficient GPU memory use.

    The winner for best modern web support is .ktx2.

    Open Source Alternatives to HDR Formats

    For open-source, web-friendly alternatives, you should use the tools that create the modern, optimized formats:

    • **Basis Universal / ktx2:** The Basis Universal encoder (an open-source project from Khronos) creates highly optimized .ktx2 files.
    • **Filament’s cmgen:** Google’s open-source Filament rendering engine includes a tool called **cmgen** that converts HDR images (like your Courtyard .exr) into optimized cubemaps ready for web PBR rendering.

    Step 3: Displaying the Trophy on the Web

    We’ll use Google’s **<model-viewer>** to embed the 3D model with the Courtyard lighting.

    HTML Code with <model-viewer>

    Place this code snippet into your WordPress blog post’s HTML editor:


    &lt;script type=&quot;module&quot; src=&quot;https://ajax.googleapis.com/ajax/libs/model-viewer/3.5.0/model-viewer.min.js&quot;&gt;&lt;/script&gt;
    
    &lt;model-viewer
      src=&quot;trophy.glb&quot;
      alt=&quot;A golden cup trophy&quot;
      ar
      camera-controls
      auto-rotate
      shadow-intensity=&quot;1&quot;
      environment-image=&quot;courtyard.exr&quot; 
      exposure=&quot;1.0&quot;
      style=&quot;width: 100%; height: 400px;&quot;&gt;
    &lt;/model-viewer&gt;


    • **src="trophy.glb"**: Links to the model we generated.
    • **environment-image="courtyard.exr"**: Points to your Courtyard HDR file. The component handles loading and processing the HDR image for lighting.

    📸 Screenshots & Screencast

    Low poly classic cup trophy Python code
    Blender Scripting Workspace Displaying Low Poly Classic Cup Python Code

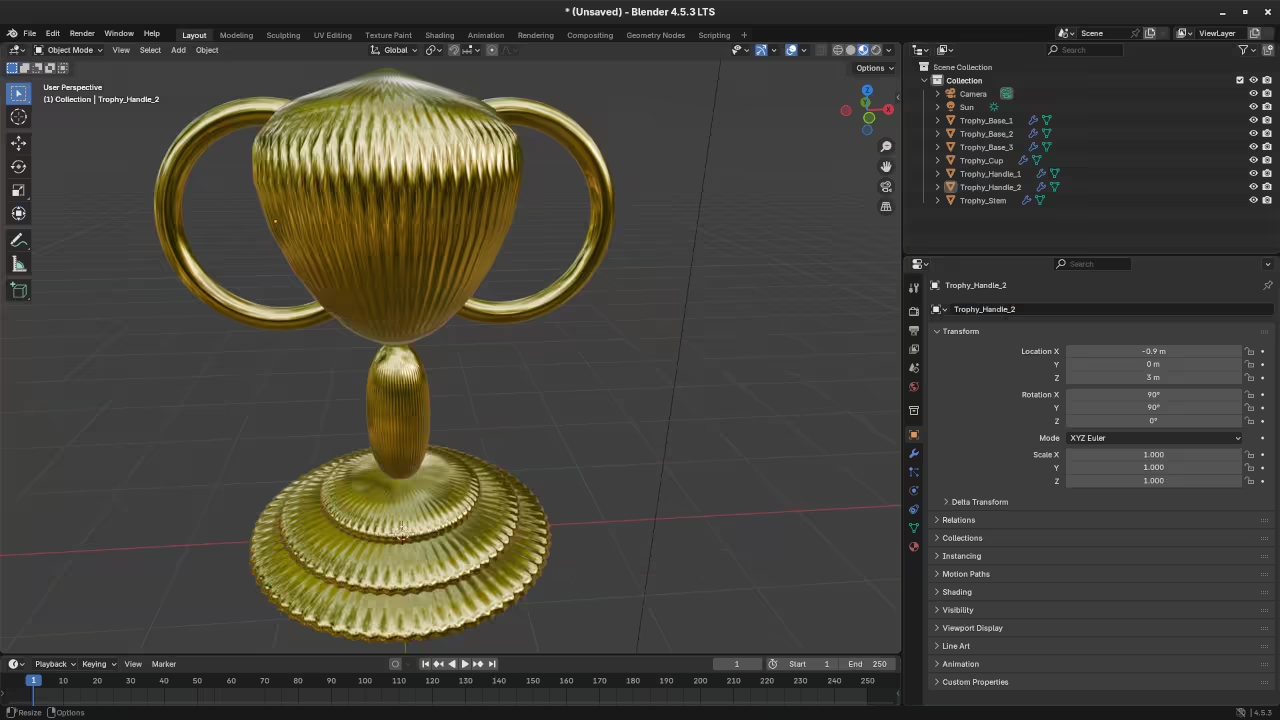
    Low poly classic cup trophy in Blender
    Blender Layout Workspace Displaying Low Poly Classic Cup

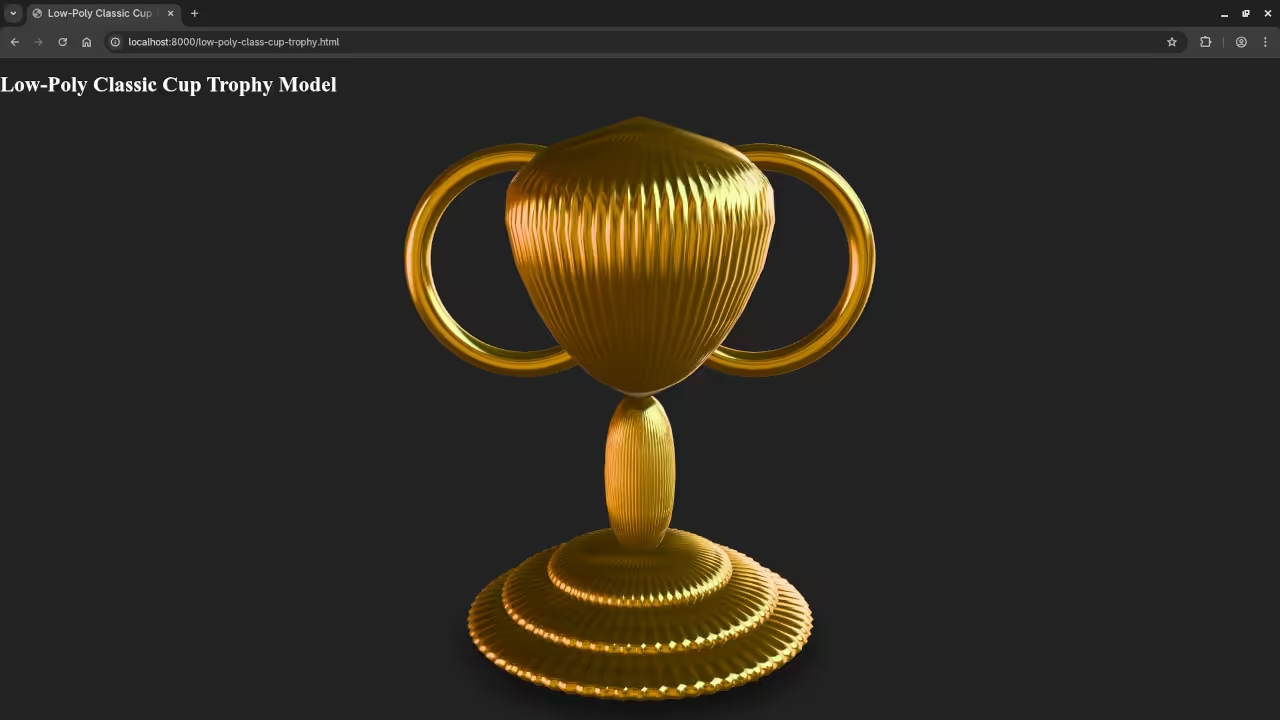
    Low poly classic cup trophy in Web browser
    Web Browser Displaying Rendered Low Poly Classic Cup

    Screencast For Blender Python API Low Poly Classic Cup

    Level Up Your Python and Blender Skills!

    Are you eager to dive deeper into scripting and automation? I’ve authored resources to help you master Python and its application in 3D:

    You can also enroll in my comprehensive online course:

    Need Personalized Guidance?

    If you prefer one-on-one attention, I am available for **online Python tutorials**, including specialized topics like the Blender Python API and 3D web integration. Feel free to contact me to schedule a session: https://ojambo.com/contact
  • Getting Started with Gogs Locally Using Git and Podman

    Getting Started with Gogs Locally Using Git and Podman


    Introduction to Gogs: Your Lightweight, Personal Git Service

    Are you looking for a simple, fast, and easy way to host your own Git repositories? Meet Gogs, the open source “Go Git Service.” Think of it as your own personal, lightweight alternative to platforms like GitHub or GitLab, designed to be set up with minimal fuss on your own server.

    Gogs is written in the Go language and is designed for simplicity and low resource consumption, making it perfect for smaller teams, personal projects, or even running on low-powered devices like a Raspberry Pi. Best of all, because it’s open source, you get full transparency and control over your code hosting environment.

    Setting Up Gogs with Podman-Compose

    Using containers is the easiest and most recommended way to install Gogs. We’ll use Podman-a daemonless container engine-and Podman-Compose-a tool for defining and running multi-container applications-to get Gogs and its database running quickly and securely.

    Prerequisites

    • Podman installed on your server/local machine.
    • Podman-Compose (often installed via pip).
    • A directory for your configuration files.

    Step 1: Create a compose.yaml File

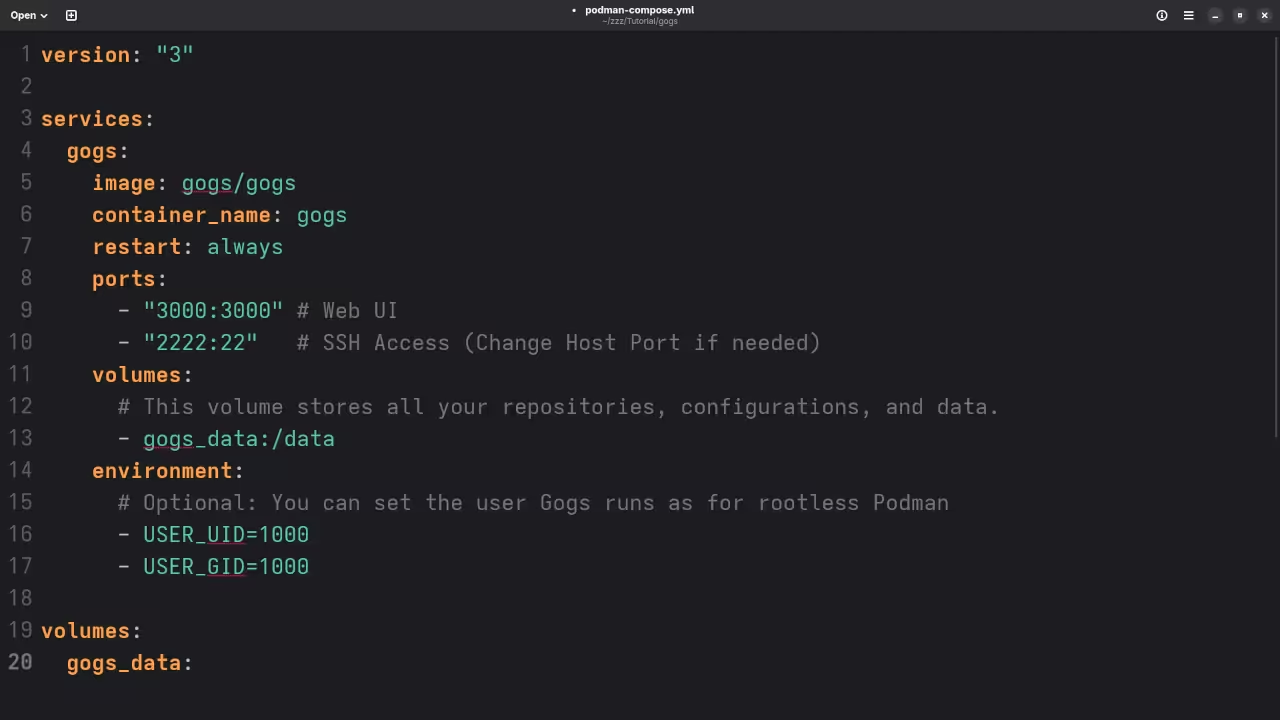
    Create a file named compose.yaml (or docker-compose.yaml as Podman-Compose often supports Docker Compose files) to define your Gogs service and its required SQLite database volume. We’ll use the official Gogs image.

    version: "3"
    
    services:
      gogs:
        image: gogs/gogs
        container_name: gogs
        restart: always
        ports:
          - "3000:3000" # Web UI
          - "2222:22"   # SSH Access (Change Host Port if needed)
        volumes:
          # This volume stores all your repositories, configurations, and data.
          - gogs_data:/data 
        environment:
          # Optional: You can set the user Gogs runs as for rootless Podman
          - USER_UID=1000
          - USER_GID=1000
    
    volumes:
      gogs_data:

    Step 2: Start Gogs

    Navigate to the directory containing your compose.yaml file and execute the following command:

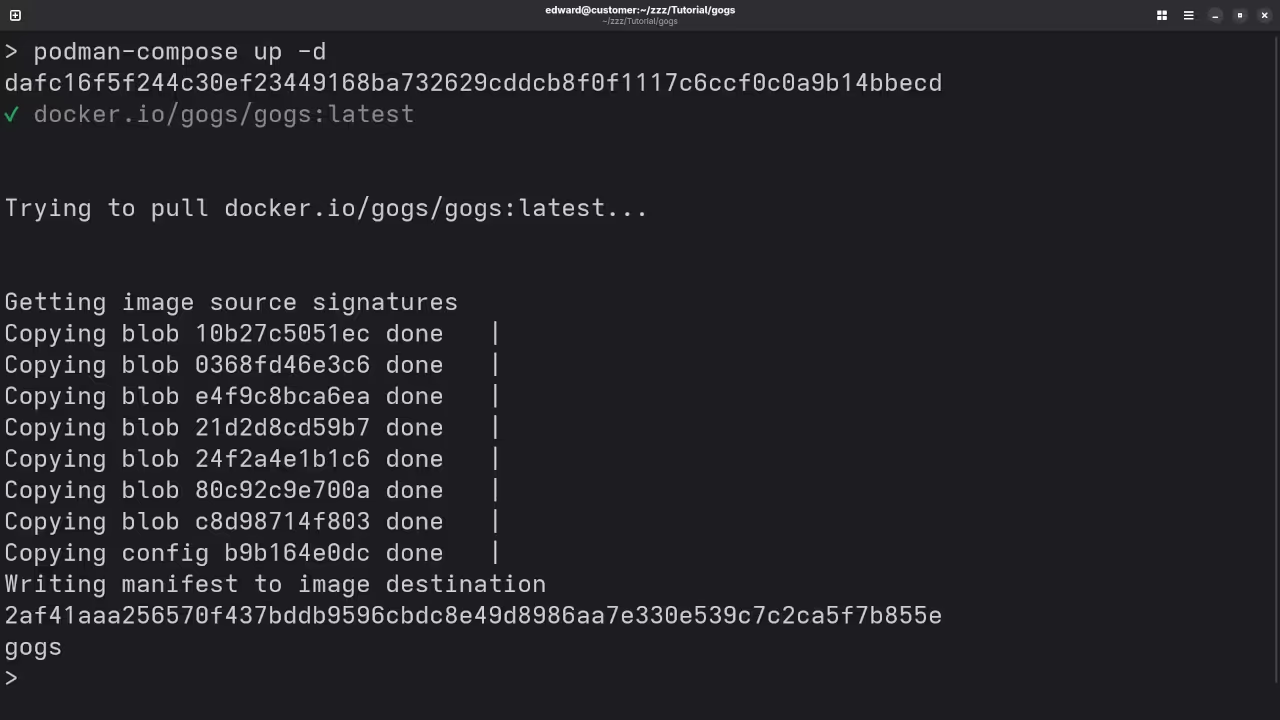
    podman-compose up -d

    This command pulls the Gogs image (if not already local), creates the volume, and starts the container in the background (-d).

    Step 3: Initial Setup

    Open your web browser and navigate to the Gogs web interface. If you are running it on your local machine, this will typically be http://localhost:3000.

    • Fill out the initial configuration form.
    • For a simple setup, choose SQLite3 as the Database Type.
    • Set the Run User to git (the default user inside the container).
    • Set the Application URL to the external URL your users will use (e.g., http://your-server-ip:3000/).
    • Crucially: Scroll down to create your first Admin Account.

    Once configured, click Install Gogs.

    Cloning and Pushing Your Code

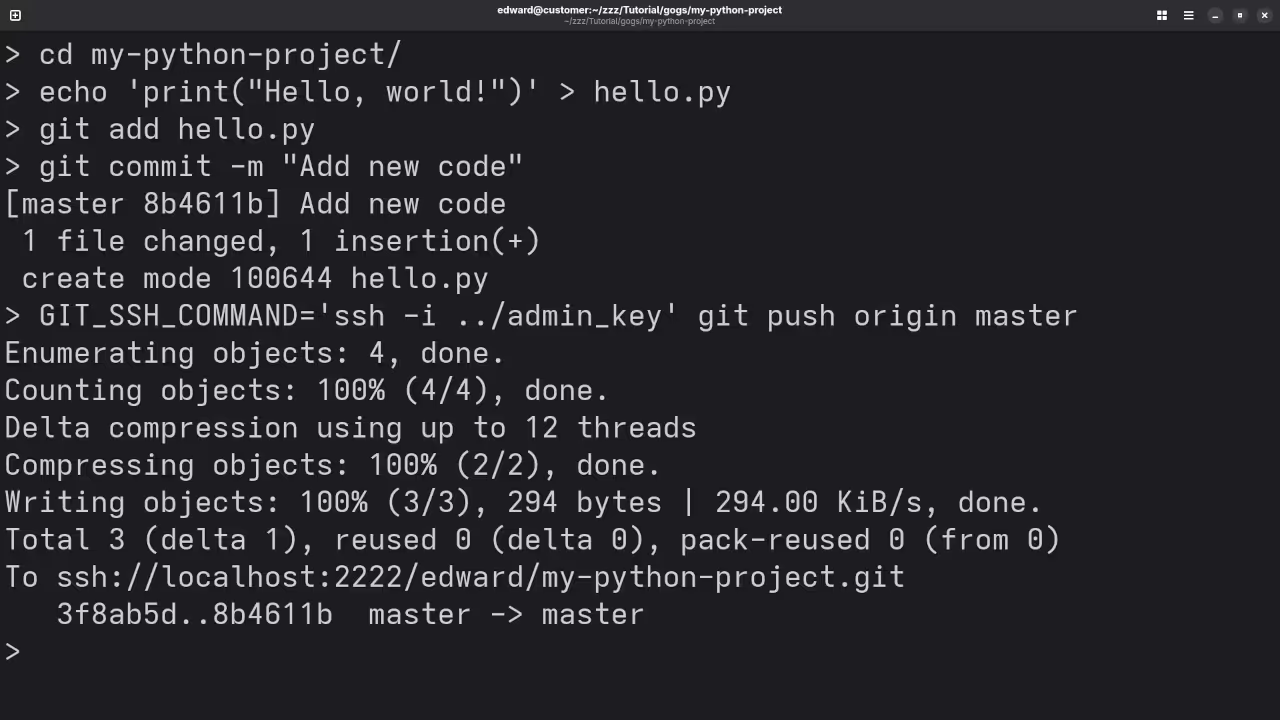
    After installation, create a new repository in your Gogs web interface (e.g., named my-first-repo). Gogs will provide you with the commands needed to clone and push your code.

    Assuming your repository is called my-first-repo and your username is myuser, here are the standard Git commands you’ll use from your local development machine:

    Cloning the Repository

    To get a local copy of your new, empty repository (using HTTPS in this example):

    # Replace 'your-server-ip:3000' and 'myuser/my-first-repo' with your details
    git clone http://your-server-ip:3000/myuser/my-first-repo.git

    Pushing Code to Gogs

    1. Navigate into your new local repository directory:
      cd my-first-repo
    2. Create an initial file and commit it:
      echo "# My First Gogs Project" &gt;&gt; README.md
      git add .
      git commit -m "Initial commit of README"
    3. Push your local changes to your Gogs server:
      # 'origin' is the default name for the remote repository you cloned from
      git push origin master

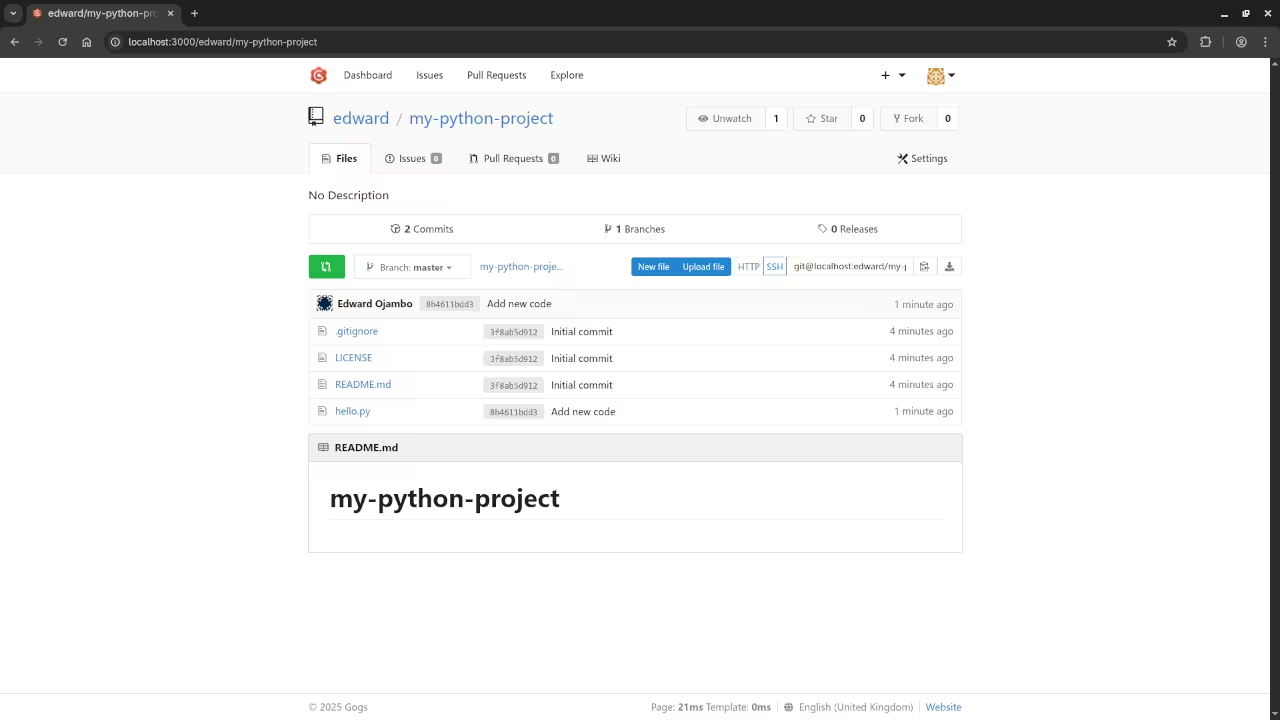
    You will be prompted for your Gogs username and password. After a successful push, refresh the repository page in Gogs to see your new file!

    Screenshots and Screencast Tutorial

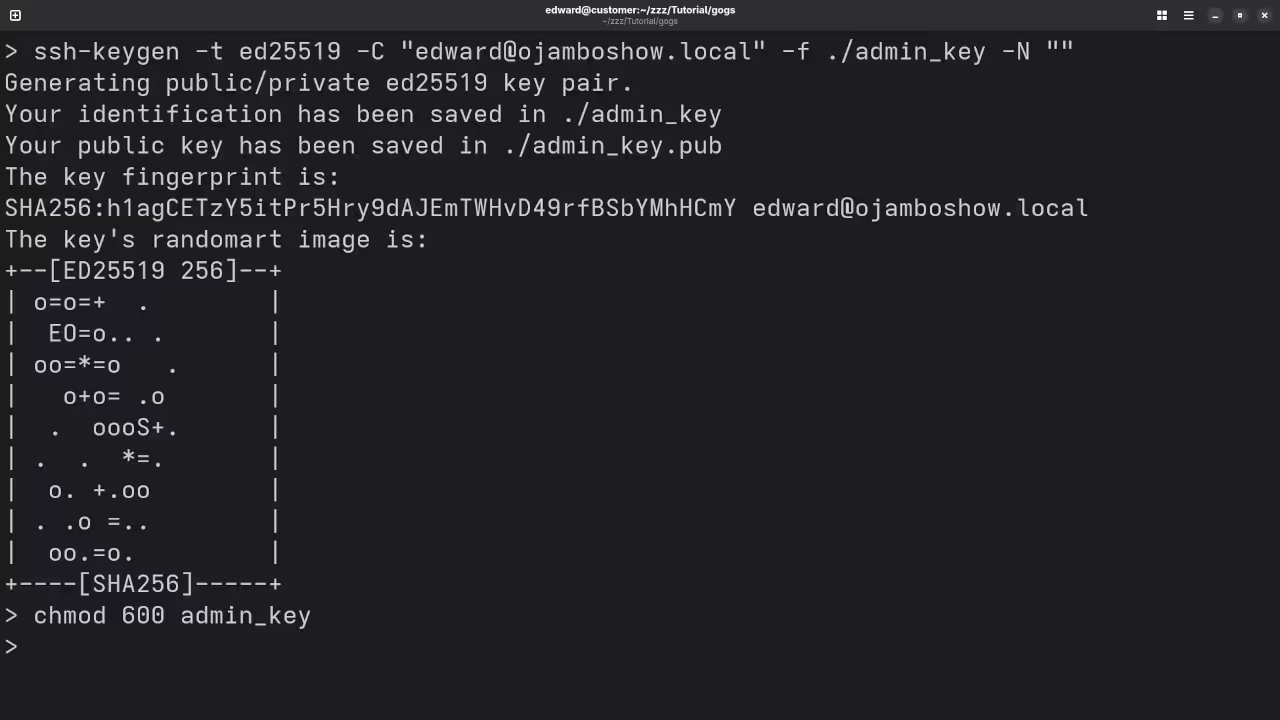
    SSH Key
    Command Line Podman Generating SSH Key pair

    Compose YAML
    Gnome Text Editor Displaying Podman Compose YAML File

    Gogs Container
    Command Line Podman Compose Building Gogs Container

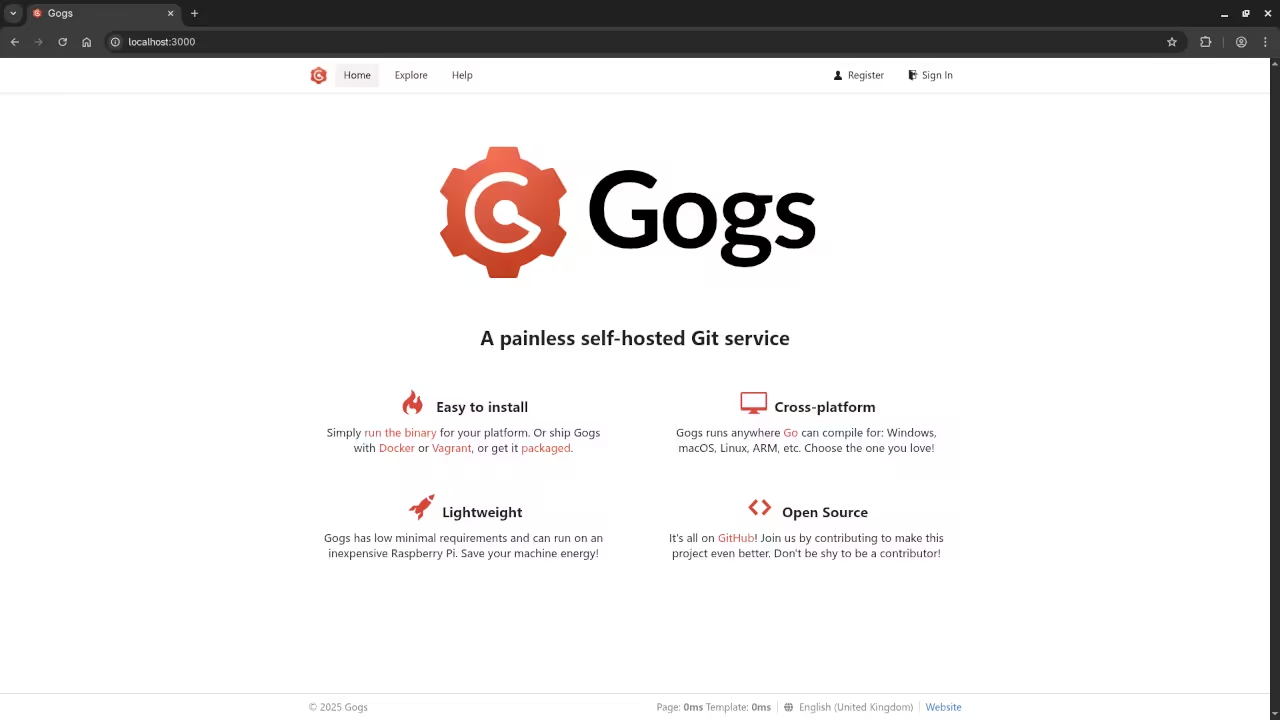
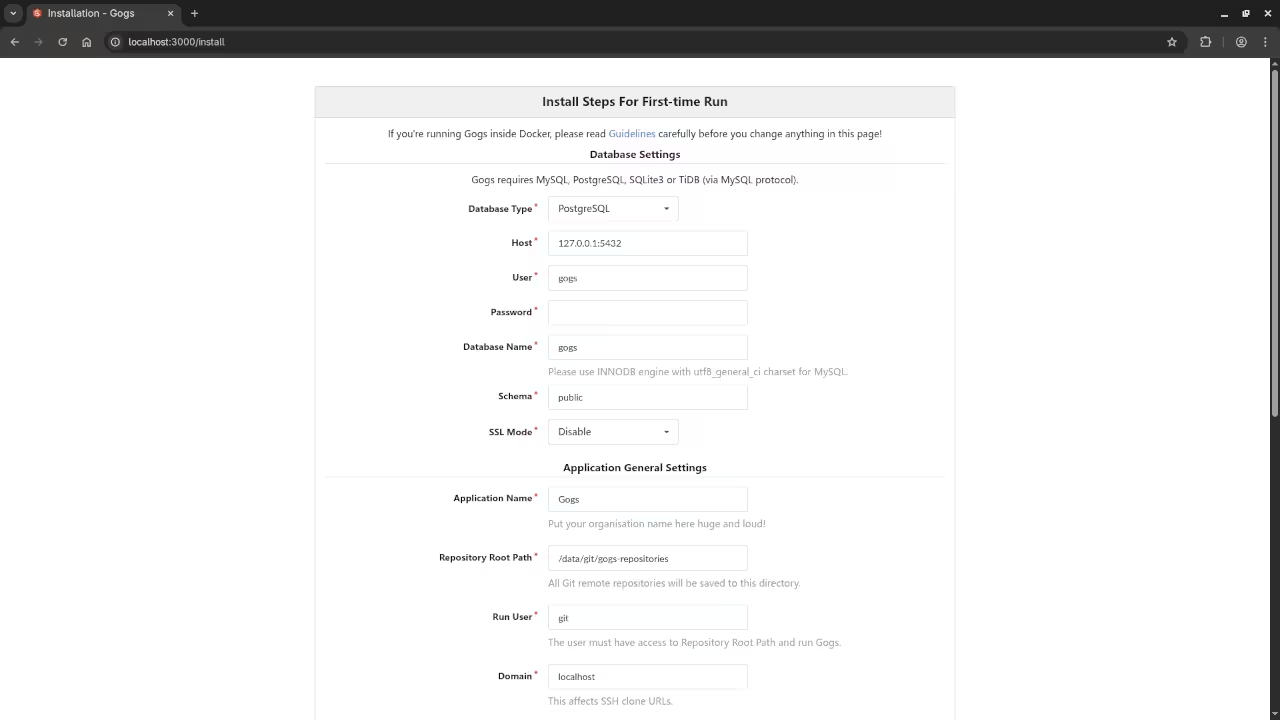
    Gogs Setup
    Web Browser Displaying Gogs Installation Setup Screen

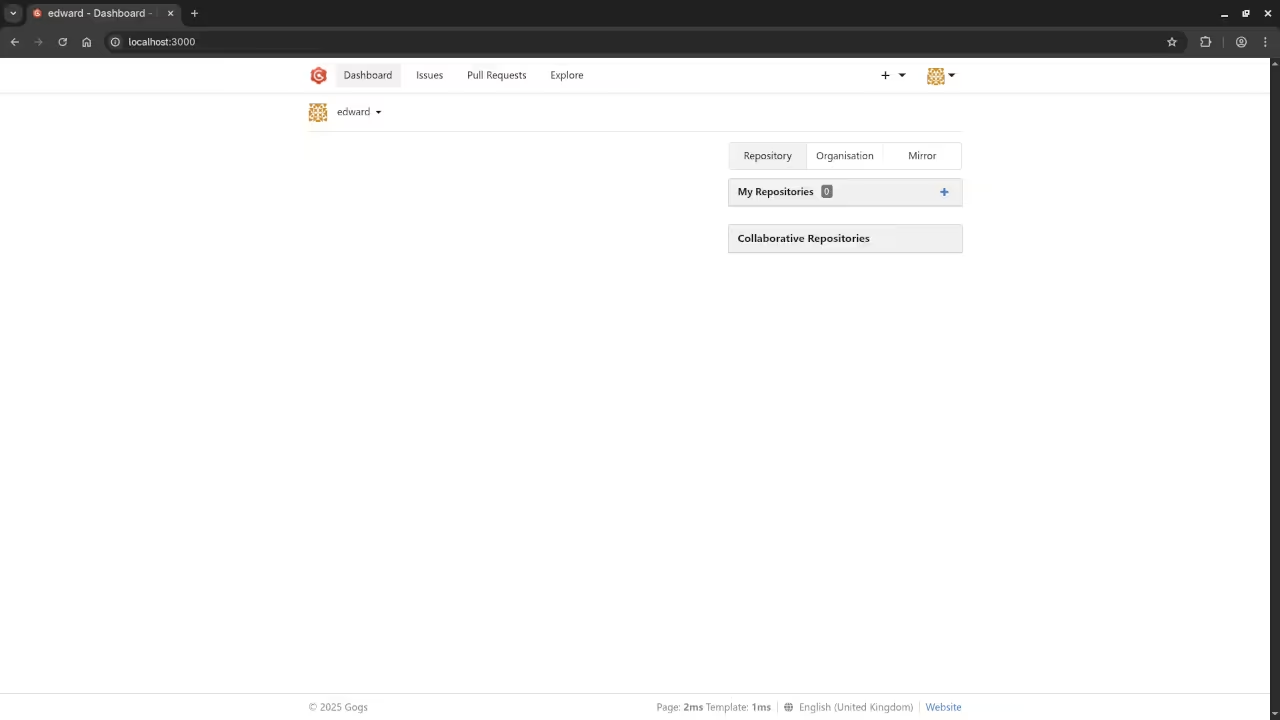
    Gogs Dashboard
    Web Browser Displaying Gogs Dashboard

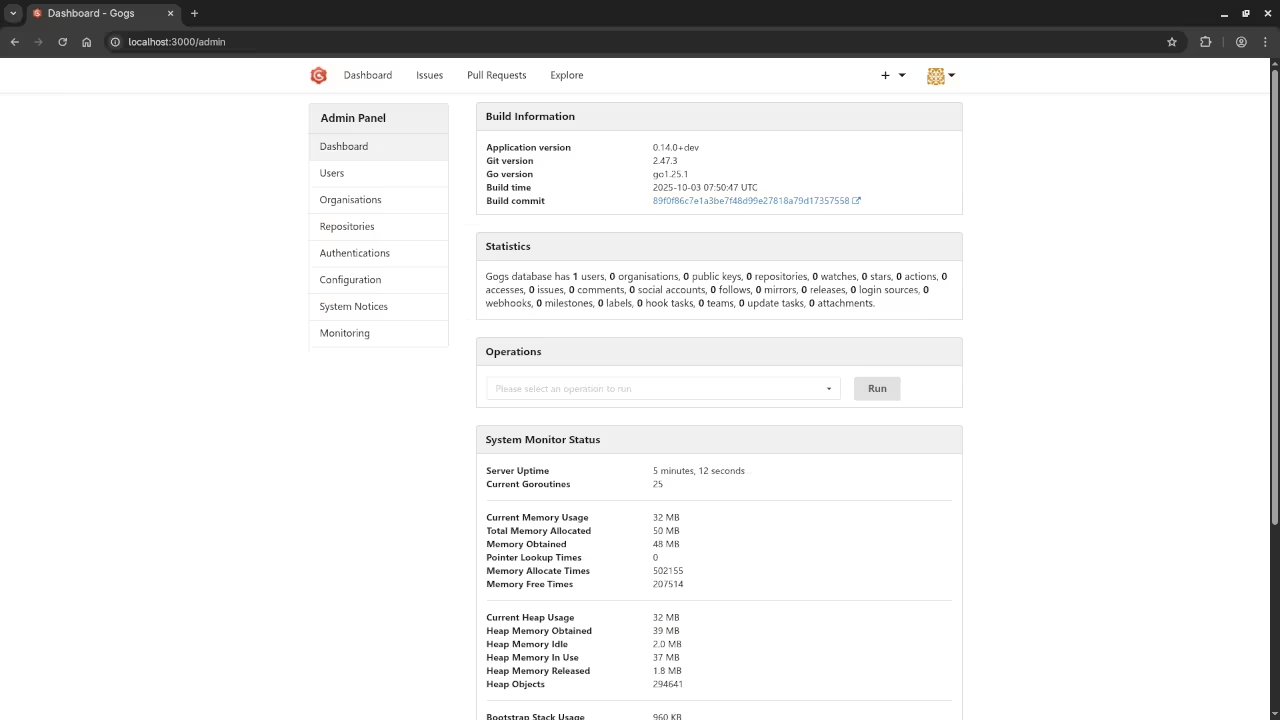
    Gogs Admin
    Web Browser Displaying Gogs Admin Panel

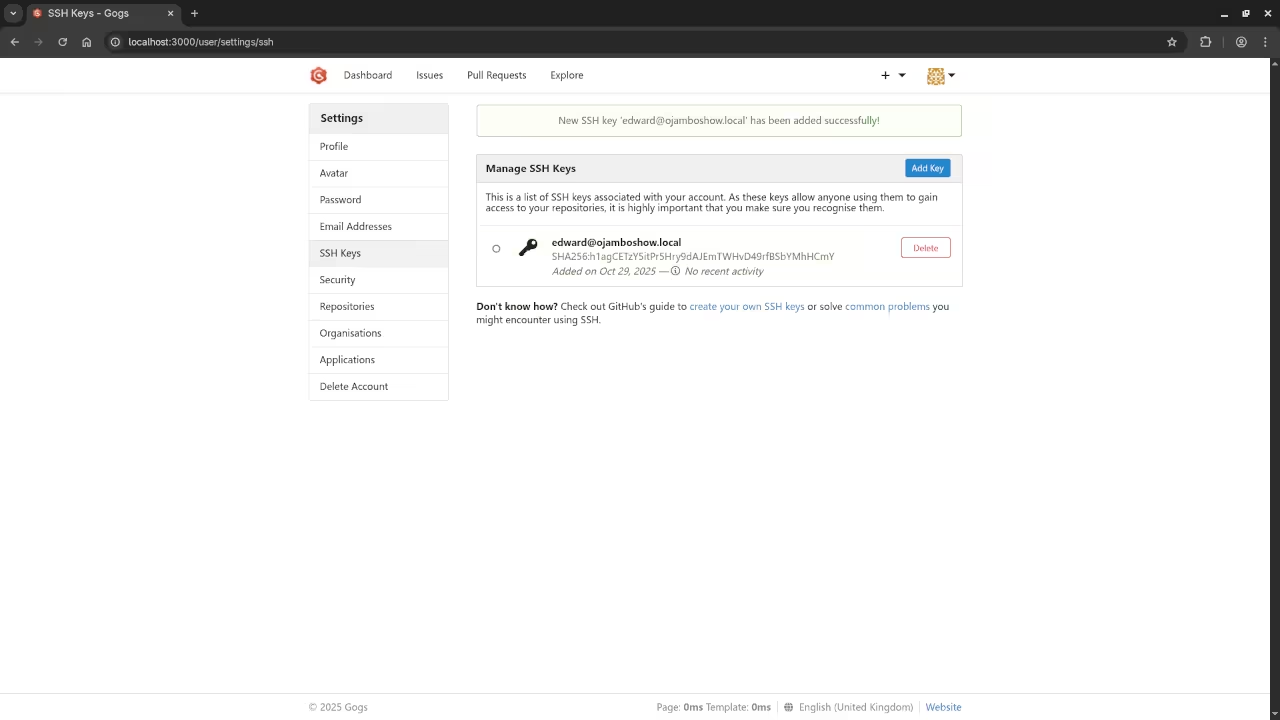
    Gogs SSH Keys
    Web Browser Displaying Gogs SSH Keys

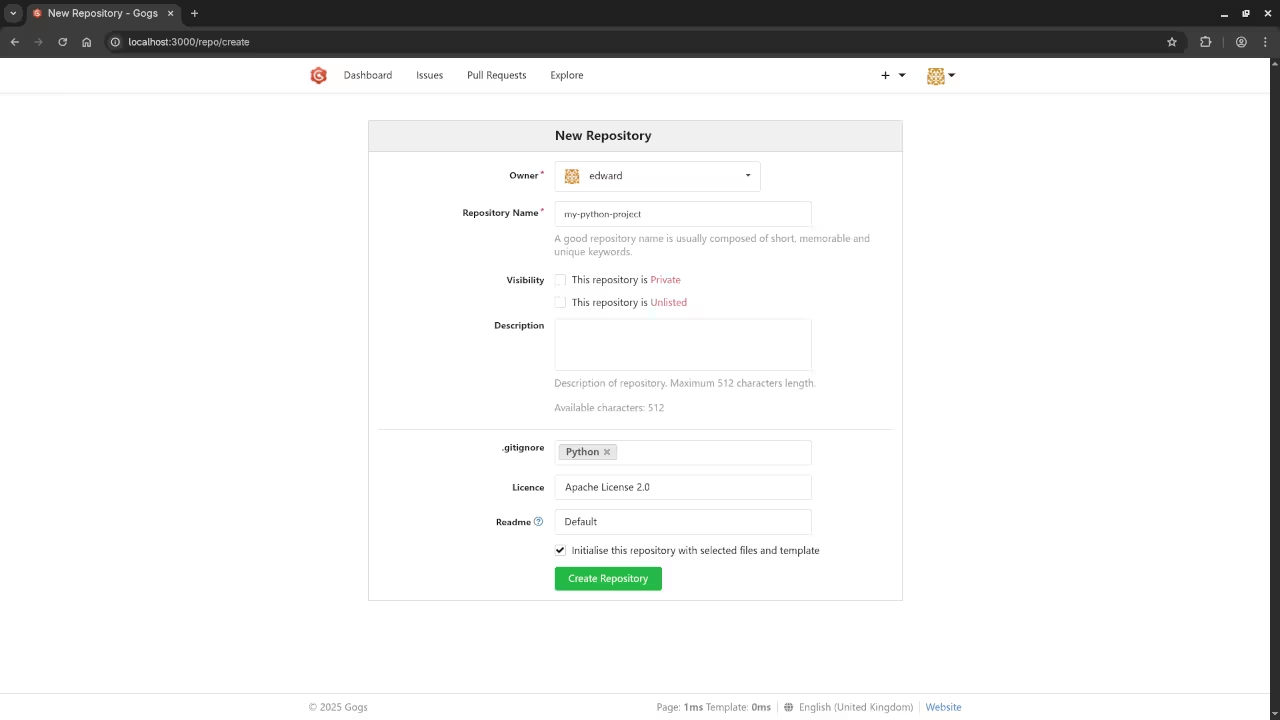
    Gogs New Repo
    Web Browser Displaying Gogs Repository Creation

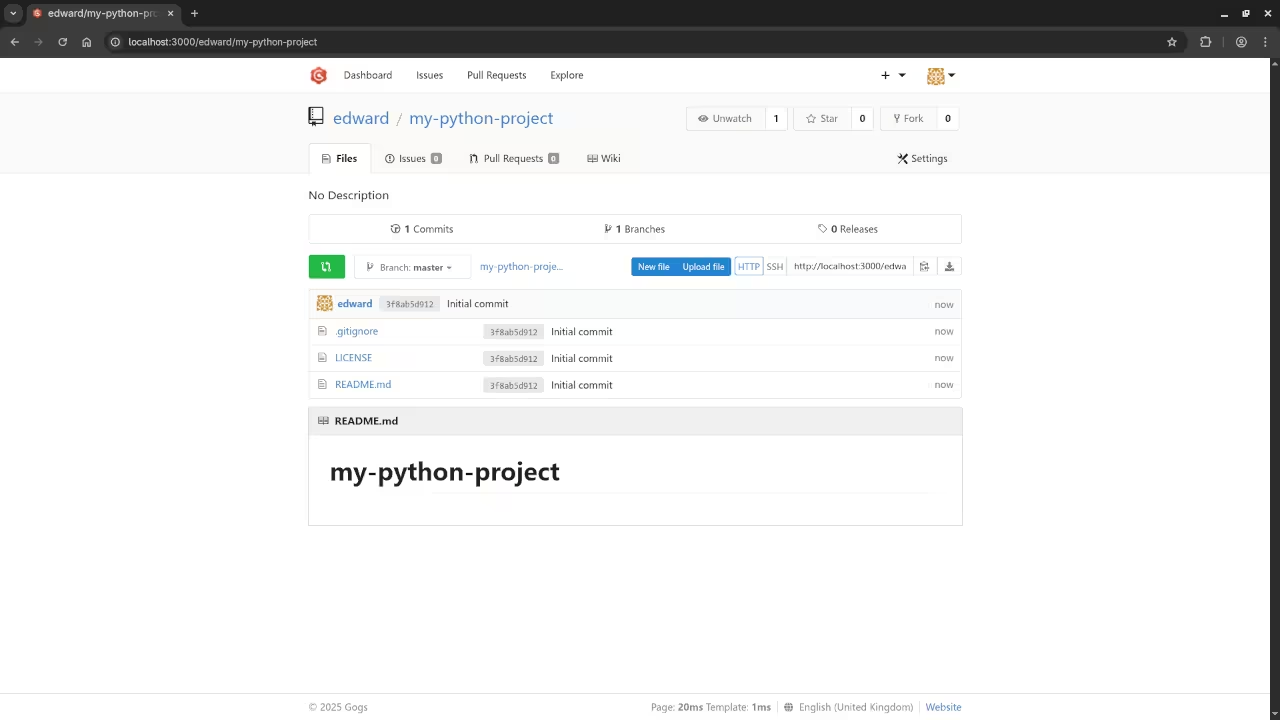
    Gogs Repo Summary
    Web Browser Displaying Gogs Repository Summary

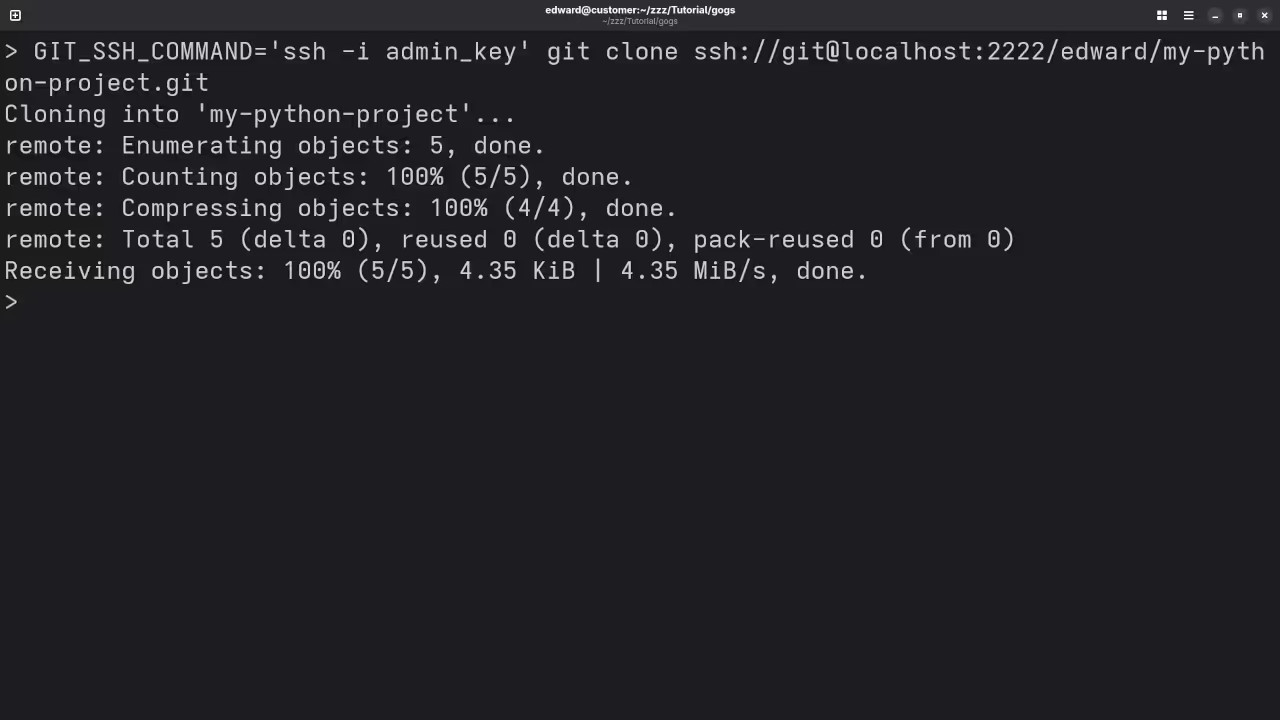
    Gogs Clone Repo
    Command Line Pushing To Cloning Gogs Repository

    Gogs Repo Push
    Command Line Pushing To Gogs Repository

    Gogs Updated Repo Summary
    Web Browser Displaying Gogs Updated Repo Summary

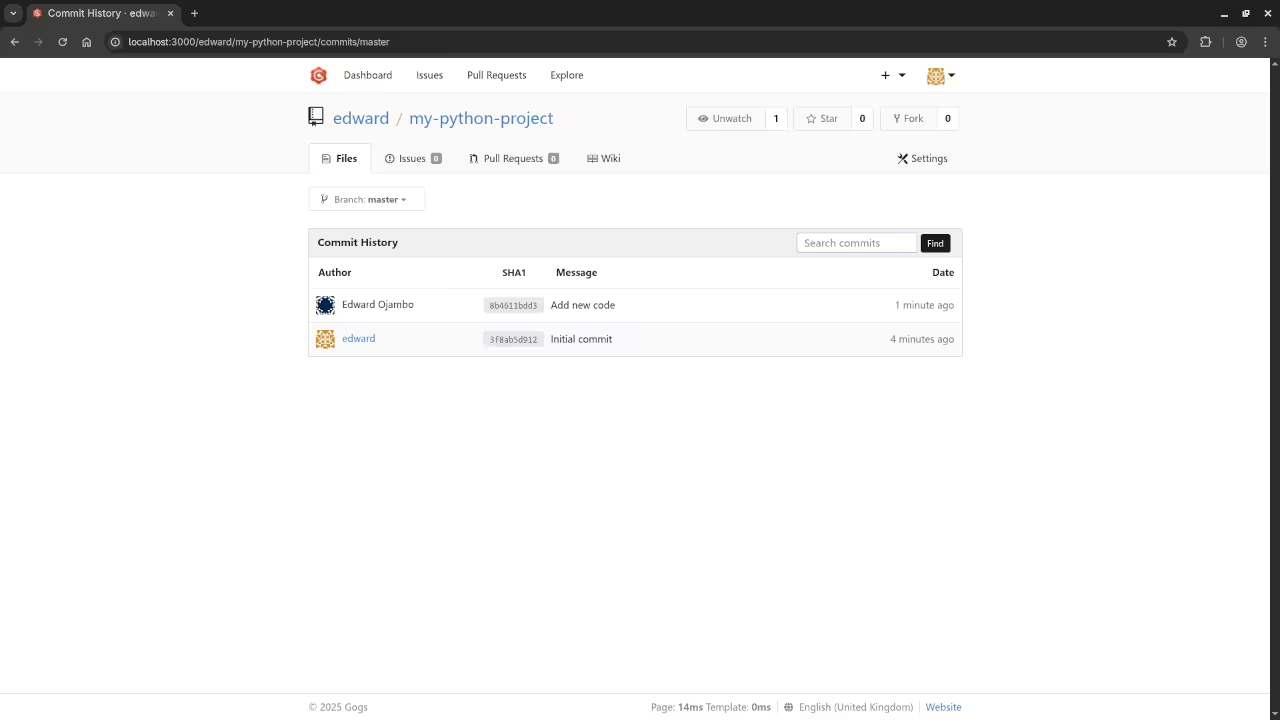
    Gogs Commits
    Web Browser Displaying Gogs Commit History

    Screencast Of Gogs Setup

    Level Up Your Programming Skills

    Ready to take your development to the next level?

    Professional Support and Tutorials

    Need personalized help with your coding journey or a professional setup of your Git service?

    Happy self-hosting!

  • Lite XL 2.1.8 Advanced Editor Review

    Lite XL 2.1.8 Advanced Editor Review

    Getting Started with Lite XL 2.1.8: Lightweight, Open-Source & Ready for Fedora Linux

    Introduction

    If you are looking for a fast, minimalist code editor that is easy to customize and totally free, let me introduce you to Lite XL 2.1.8. It is an open-source fork of the original Lite editor, rewritten in Lua (with some C) to provide a snappy, extensible experience. Visit Lite XL website.

    In this blog post I will walk you through its key features, licensing, how to install it across platforms (with a focus on Fedora Linux), and how you can get productive quickly.

    Why Lite XL?

    • It is lightweight: the core editor is compact, loads fast and runs well even on modest machines. Learn more
    • It is hackable and open to extension: written mostly in Lua, easy to tweak, create plugins, and themes. View on GitHub
    • Multi-platform support: Windows, macOS and Linux all supported (either via packages or by compiling from source). Setup guide
    • Good font rendering and modern features (tabs, split panes, syntax highlighting) for a small editor.
    • For those who like to customize their editor environment, Lite XL gives freedom without heavy overhead.

    License & Open-Source Details

    Lite XL is an open-source project. The upstream repository lists the license as the MIT License. See license on GitHub.

    On Fedora’s packaging side, you will also see references to MIT and OFL (Open Font License) for components. Fedora package info.

    This means you are free to use, modify and distribute Lite XL subject to the terms of the MIT license. It is a great choice for both personal and professional use without heavy licensing concerns.

    Installation Guide

    Cross-Platform Overview

    Before diving into Fedora-specific steps, here is how you can install Lite XL on various OSes:

    • Windows: Download the installer or ZIP from GitHub releases. Windows setup
    • macOS: DMG download is available; simply drag into your Applications folder. macOS setup
    • Linux: Use your distribution’s package manager (if available) or download the tarball/AppImage and install manually. Linux setup

    Installing on Fedora Linux

    If you are running Fedora, here is the easiest way to get Lite XL 2.1.8 up and running:

    1. Open a terminal.
    2. Install via dnf:
    sudo dnf install lite-xl

    This installs the stable version from Fedora’s repositories. More details

    1. If you prefer the nightly build (or newer version), you can enable a Copr repository:
    sudo dnf copr enable sentry/lite
    sudo dnf install lite-xl-nightly

    Note: this will bring a less-tested version. Installation instructions

    1. Verify installation:
    lite-xl --version

    You should see version 2.1.8 listed (or the current stable version).

    1. Launch Lite XL from your desktop environment or via the terminal by typing lite-xl.

    Manual Build / Install (Advanced Users)

    If you want to build from source (for example for a custom prefix or portable install), follow these steps:

    • Clone the repository or download the source tarball. Build instructions
    • Install dependencies: Meson (0.63+), Ninja, SDL2, Lua 5.x, FreeType2, etc.
    • Run the following commands:
    meson setup --buildtype=release --prefix=/usr build
    meson compile -C build
    sudo meson install -C build

    On Fedora, if you installed manually you might need to ensure $HOME/.local/bin is in your PATH or create a desktop entry.

    Screenshots and Screencast

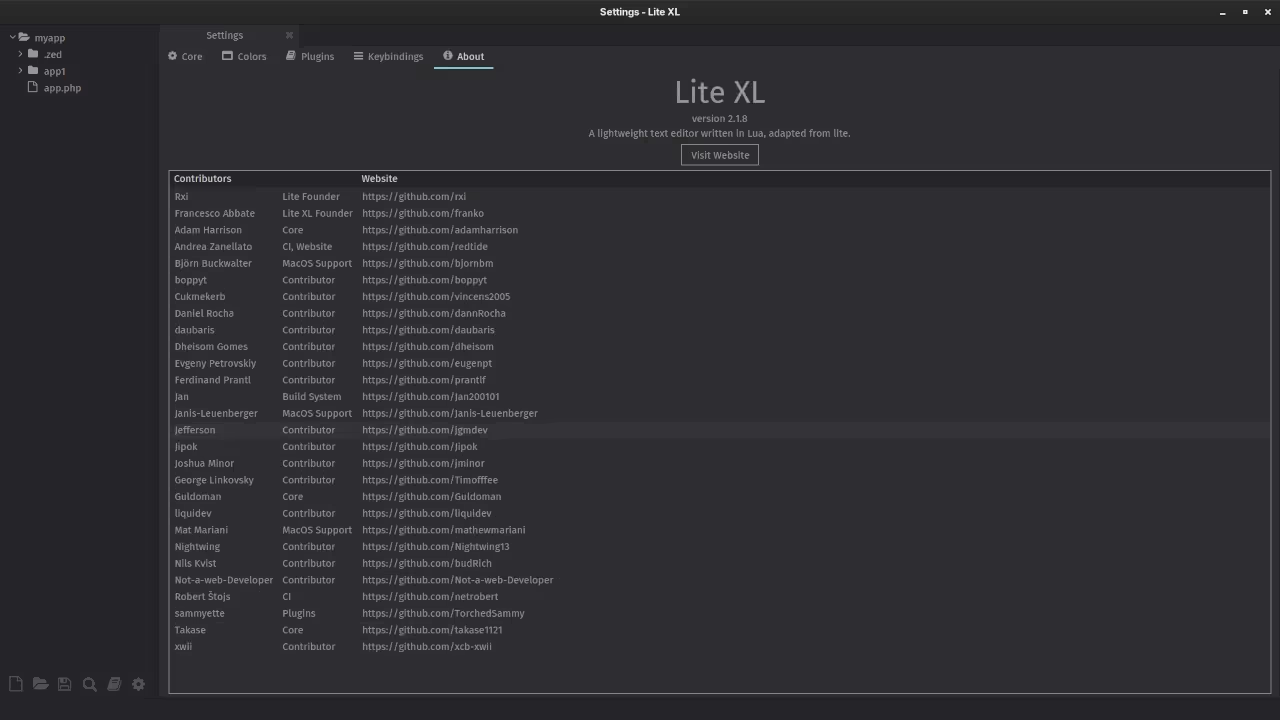
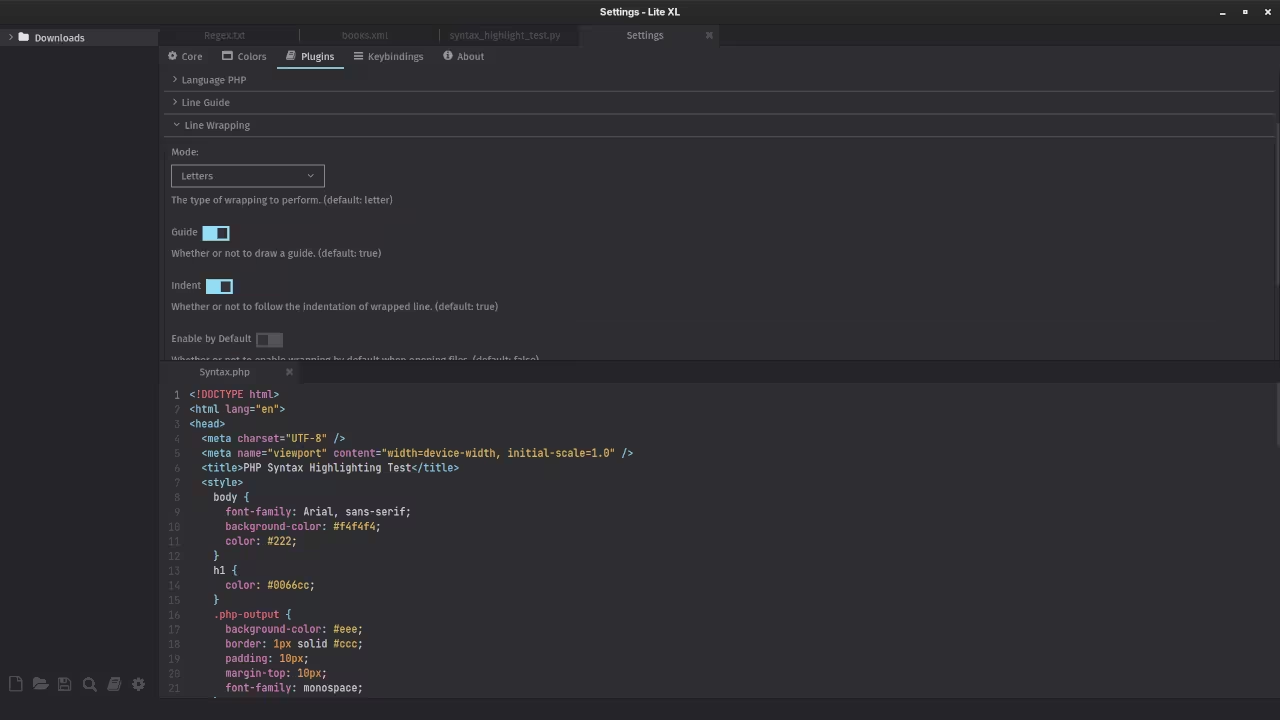
    Lite XL Settings View
    Lite XL Displaying Settings

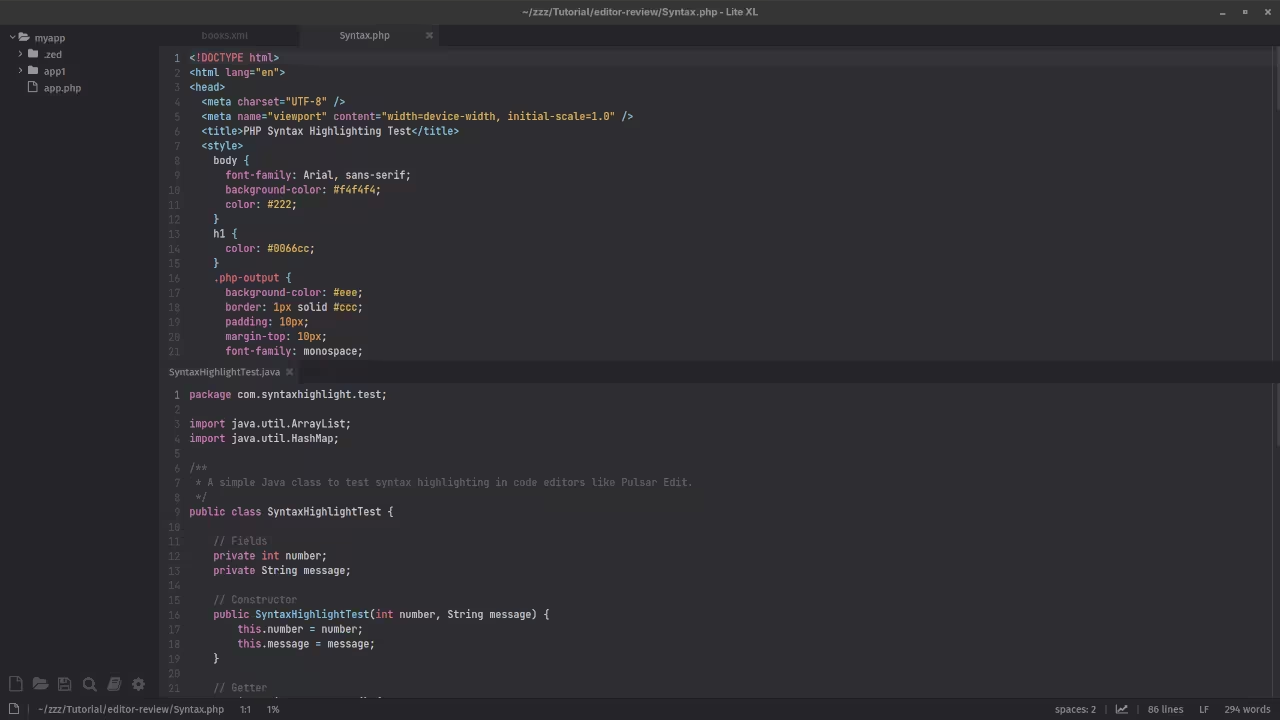
    Lite XL PHP Syntax Highlighting
    Lite XL Displaying PHP Syntax Highlighting

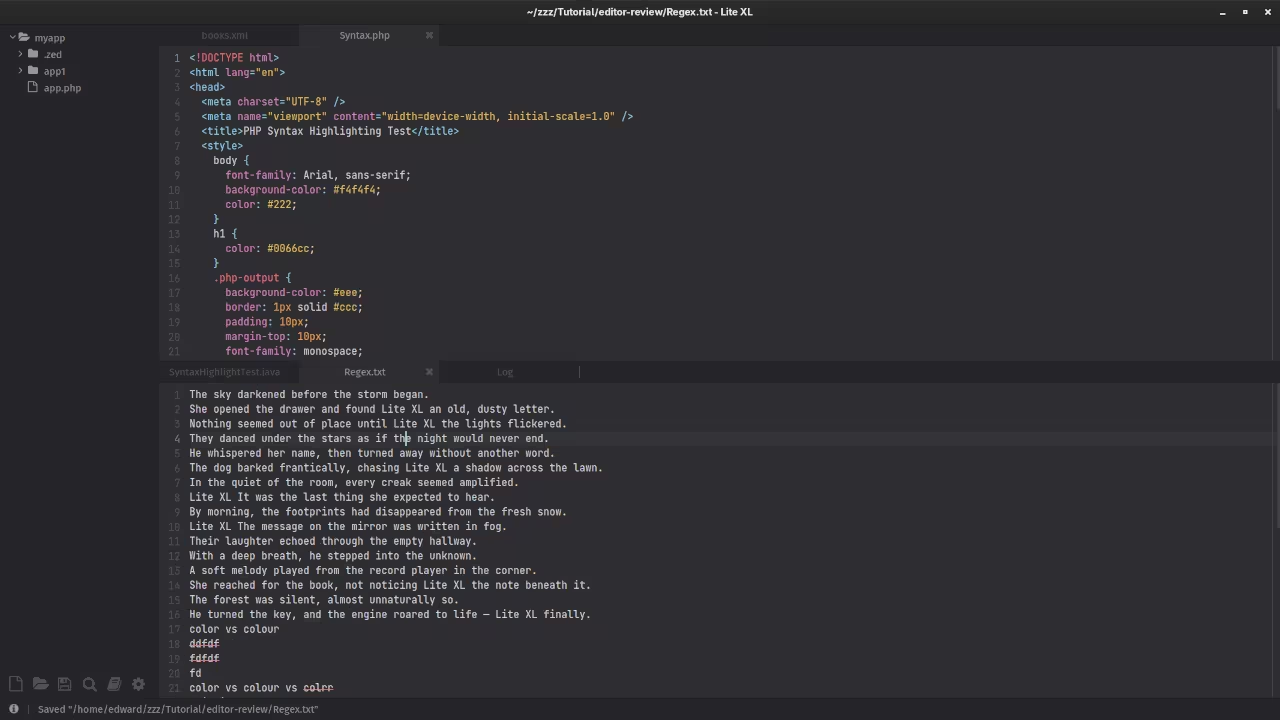
    Lite XL Folder View
    Lite XL Displaying Folder In Workspace

    👉 Screencast showing a beginner session in Lite XL—editing, saving files, and navigating buffers.

    Lite XL Review And Feature Test

    Requirements For Programming Text Editor

    Glossary:

    Code Editor

    Designed for writing and editing source code.

    IDE

    Integrated Development Environment combines various tools need for software development.

    Plugin

    Software component that adds specific functionality.

    Theme

    Preset package containing graphical appearance to customize look and feel.

    Open source

    Freely available for possible modification and redistribution.

    SCM

    Source code management use to manage and track modifications to a source code repository.

    LMB

    Left Mouse Button (LMB) or left click

    MMB

    Middle Mouse Button (MMB) or scroll wheel

    Test Tools

    Test System
    Name Description
    CPU Ryzen 5 5600GT @ 3.60GHz.
    Memory 32GB DDR4.
    Operating System Fedora Linux Workstation 42.
    Desktop Environment Gnome 48.
    Name Description

    Test Suite
    Name Description
    Large File 1GB human-readable text.
    Regex File Text with word “Lite XL” repeated.
    Syntax File PHP file containing HTML, CSS & JavaScript.
    Media File Smiley face or Tux Linux JPEG file.
    Java Version OpenJDK 21.0.8.
    PHP Version PHP 8.4.13.
    Python Version Python 3.13.7.
    Lite XL Version 2.1.8.
    Name Description

    Test Scoring

    1. Each feature has two parts.
    2. Score of zero indicates a missing feature.
    3. A part of a feature is work a score of 0.5.

    Three bias elimination steps were utilized. The editor was used for at least three years on different platforms. Attempts were made to get stable plug-ins for missing features. The same editor was compared between the one in the repository, the developers website, and the compiled version if applicable.

    Selecting Editor Version

    For this review, Lite XL was installed using the instructions from the developers website and it did not require additional plugins.

    Features

    1. The theme can be native for the editor in terms of the background. Lite XL dark and light themes can be created or downloaded and changed. The score for the theme was a perfect 1.0.
    2. Dragging and dropping a text file into the editor opens a new tab or buffer. It was not possible to specify the tab location during the drag and drop operation. The score for drag and drop into editor was 0.5.
    3. Opening a very large text file did not crash Lite XL. Lite XL was able to open or to edit the large file. The score for opening a large file was 1.0.
    4. Multiple documents can opened in multiple tabs or buffers. Tear-off tabs do not work and Lite XL does not have a feature to open in new window as a new instance which is handy for multiple monitors. The score for multiple documents was 0.5.
    5. Multiple editors can be opened as new tabs with drag options. Each tab window view can be split either vertically or horizontally as a multiple editor view in Wayland display server protocol. The score for multiple editor view was 1.0.
    6. Creating non-project files is possible. Non-project files can be opened on the command line. The score for creating non-project files was a perfect 1.0.
    7. Soft word wrap can be enabled in Settings -> Plugins as line wrapping but it did not work even after a restart, but was toggled by F10. Automatic soft wrap for documents is is available for Lite XL. The score for word wrap was 1.0.
    8. Spell check plugin was downloaded and placed in the .config/lite-xl/plugins folder, and works as words are typed. Spelling errors are shown in opened documents. The score for spell check was 1.0.
    9. Word count plugin was downloaded and placed in the .config/lite-xl/plugins folder, and works immediately. Word count for the current buffer or file worked. Selection word count is available as part of word count. The score for word count was 1.0.
    10. Go to line can jump to a specified line using CTRL-G and entering the line number. It is possible to jump to either the first or last line. The score for go to line is a perfect 1.0.
    11. Indentation can default to user-defined tab stops. Children are automatically indented. The score for indentation was a perfect 1.0.
    12. Fonts can be dynamically scaled with custom keyboard shortcuts CTRL-MMB. The system font can be bypassed and a new editor font and size can be set. The score for fonts was a perfect 1.0.
    13. Find and replace CTRL-R using regular expressions CTRL-SHIFT-Ican be utilized for all open documents in the current session. Find and replace will work for the current document or a selection in the current document. The score for find and replacing using regular expressions was a perfect 1.0.
    14. Multiple language syntax highlighting in one file is enabled. Each language has code-sensitive syntax colours. The score for multiple language syntax highlighting was a perfect 1.0.
    15. Code folding does not work for markup languages such as HTML. Code folding also does not work for programming languages such as Java. The score for code folding was 0.0.
    16. Selecting rectangular block per column works holding the CTRL key. Rectangular block selection does work properly with word wrap enabled. The score for selecting rectangular block was 1.0.
    17. Multiple cursors is available using CTRL. Search multiple selection does not work. The score for multiple selection was 0.5.
    18. Distraction-free mode to hide panes works. Line numbers can be toggled to improve distraction-free mode. The score for distraction-free was a perfect 1.0.
    19. The file manager can be enabled by default. Media files can not be dragged and dropped into the file manager pane. The score for file manager was 0.5.
    20. Terminal is be installed but it requires building. The terminal does (from the installation link screenshot) follow folder. Terminal can execute system commands. The score for terminal was 1.0.

    Results

    Lite XL is a lightweight IDE. By default, the Lite XL editor is missing required features that can be enabled or implemented by plugins. For my required features, the Lite XL editor scored 85.0% or 8.50 out of 10.

    Getting Productive: First Steps & Tips

    • Use the built-in Settings (since v2.1.0) to tweak fonts, themes, and keybindings. Lite XL FAQ
    • Explore the plugin ecosystem: install LSP support, minimap, and indent guides via the built-in plugin manager. Plugin guide
    • On Fedora, you may want to create a desktop entry for quick launching or add it to your favorites.
    • Use the user config file (~/.config/lite-xl/init.lua) to add custom Lua tweaks. Configuration guide

    Why Use Me for Support & Tutorials

    If you would like help installing, configuring, or migrating to Lite XL 2.1.8 (especially on Fedora or Linux), I am available for one-on-one online programming tutorials and editor setup assistance.

    Conclusion

    Lite XL 2.1.8 is a compelling choice if you want a fast, lightweight, extensible editor that you can customize fully and that works smoothly on Fedora Linux and other platforms. Because it is open-source with the MIT license, you are free to adapt it as you like. With just a few minutes you can have it installed, configured, and ready for programming.

    If you would like help getting started or someone to walk you through migrating from another editor, I would be happy to assist.

    Thank you for reading this review and installation guide. Stay tuned for more posts on open-source development tools.

  • How to Install Mattermost Collaboration Platform

    How to Install Mattermost Collaboration Platform

    Getting Started with Mattermost: Open Source Team Collaboration with Podman

    Introduction

    If you are looking for an open-source alternative to Slack or Microsoft Teams, Mattermost is a great choice. It is a self-hosted chat and collaboration platform designed for developers, DevOps teams, and businesses that want full control over their communication and data.

    In this beginner-friendly guide, we will walk through what Mattermost is, why it is powerful, and how to install it using Podman or Podman Compose.

    What is Mattermost?

    Mattermost is an open-source collaboration platform that allows you to chat, share files, and integrate tools across your organization – all while maintaining full control of your infrastructure.

    Some key features include:

    • Self-hosted or cloud deployment options
    • Channels, direct messages, and group conversations
    • Integrations with GitLab, GitHub, Jenkins, Jira, and more
    • Secure data storage and customizable user management

    Because it is open source, you can review, modify, and contribute to the code on GitHub.

    Installing Mattermost with Podman

    Podman is a daemonless container engine that is compatible with Docker commands and ideal for running Mattermost in isolated environments.

    Below is a basic example of installing and running Mattermost using Podman Compose.

    1. Create a project directory

    mkdir mattermost-podman
    cd mattermost-podman

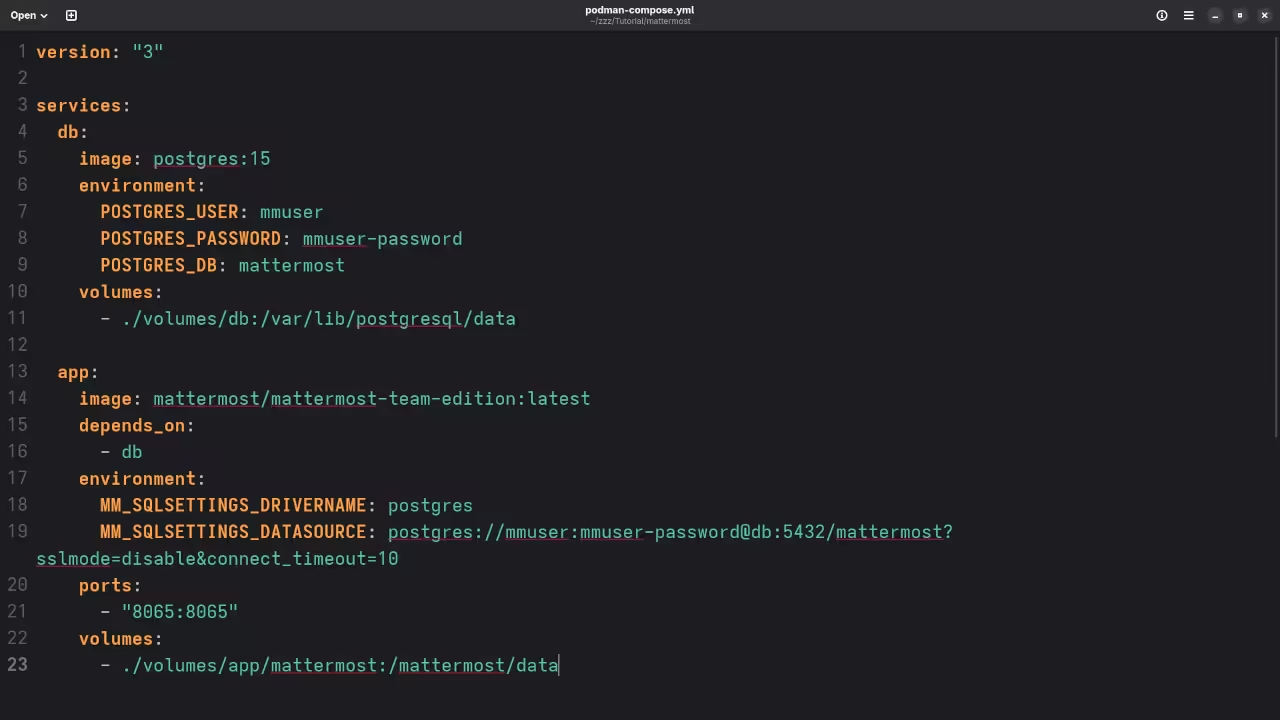
    2. Create a ‘podman-compose.yml’ file

    version: "3"
    
    services:
      db:
        image: postgres:15
        environment:
          POSTGRES_USER: mmuser
          POSTGRES_PASSWORD: mmuser-password
          POSTGRES_DB: mattermost
        volumes:
          - ./volumes/db:/var/lib/postgresql/data
    
      app:
        image: mattermost/mattermost-team-edition:latest
        depends_on:
          - db
        environment:
          MM_SQLSETTINGS_DRIVERNAME: postgres
          MM_SQLSETTINGS_DATASOURCE: postgres://mmuser:mmuser-password@db:5432/mattermost?sslmode=disable&connect_timeout=10
        ports:
          - "8065:8065"
        volumes:
          - ./volumes/app/mattermost:/mattermost/data

    3. Start Mattermost

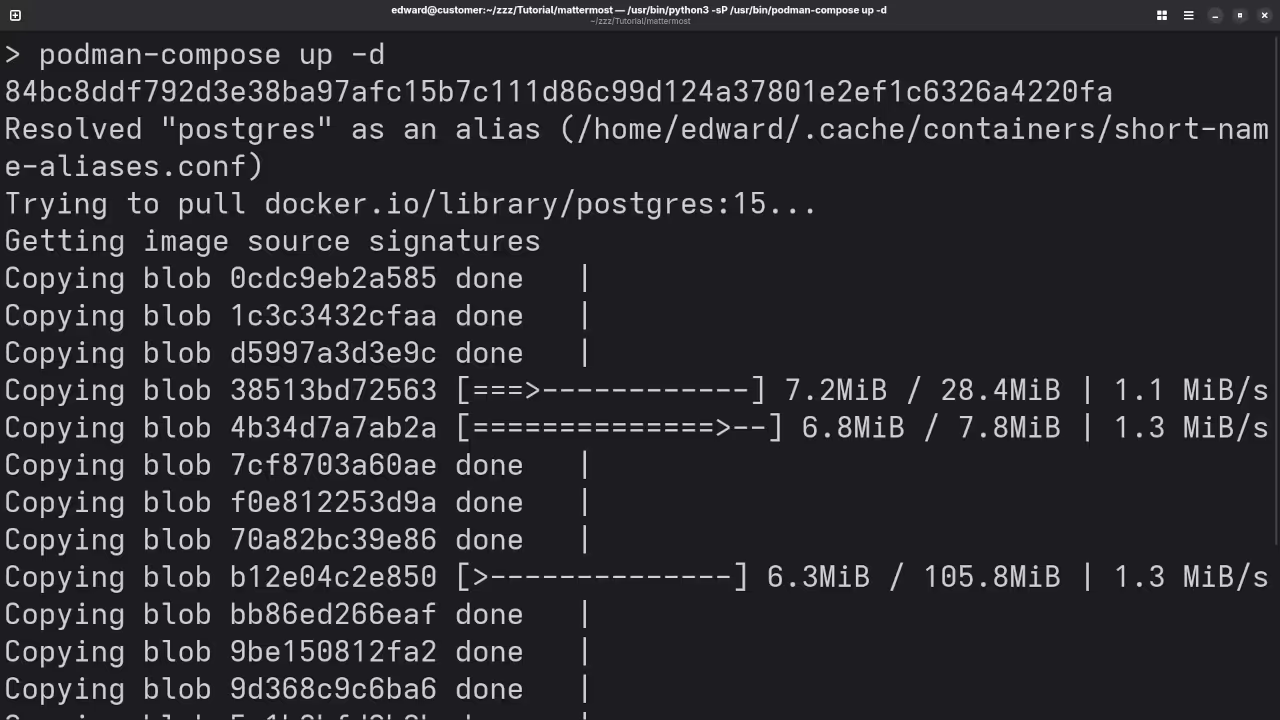
    podman-compose up -d

    4. Access Mattermost

    Once the containers are up, open your web browser and go to:

    http://localhost:8065

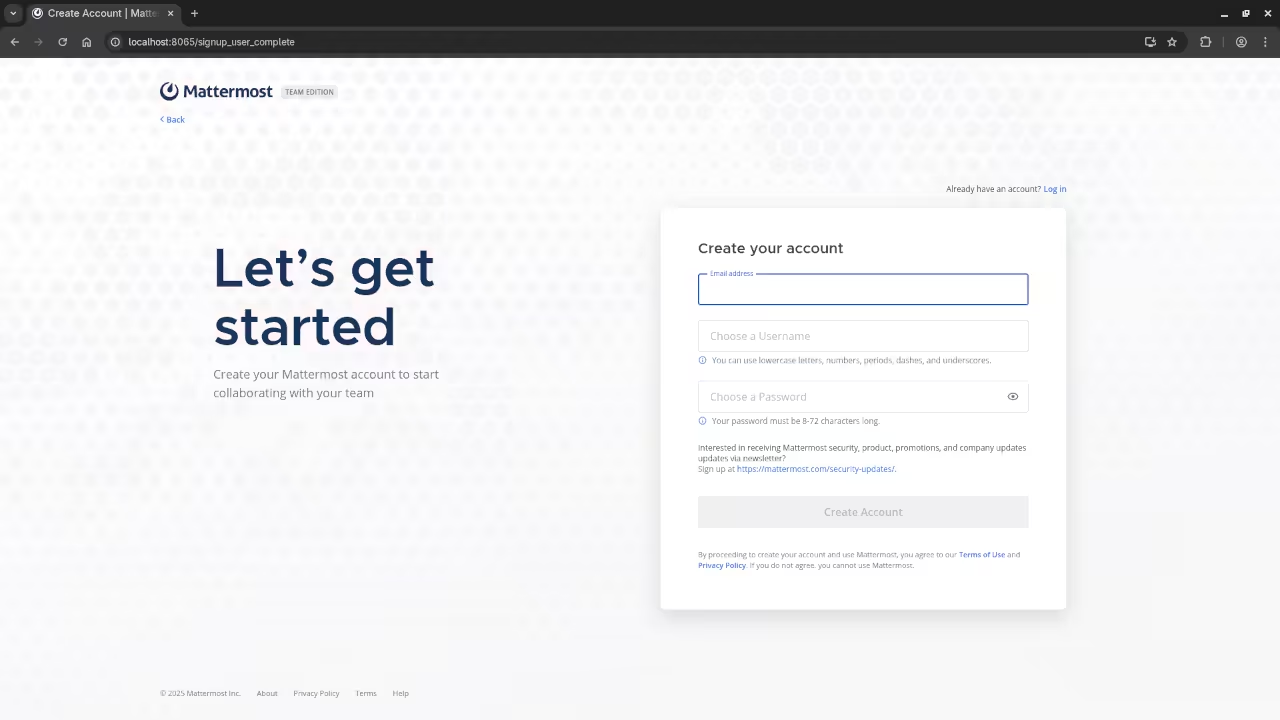
    From here, you can create your admin account and start using Mattermost.

    📷 Screenshots & 📽️ Screencast

    Mattermost YAML Compose
    Gnome Text Editor Displaying Mattermost Podman Compose YAML

    Mattermost Podman Container
    Command Line Displaying Mattermost Podman Compose Container

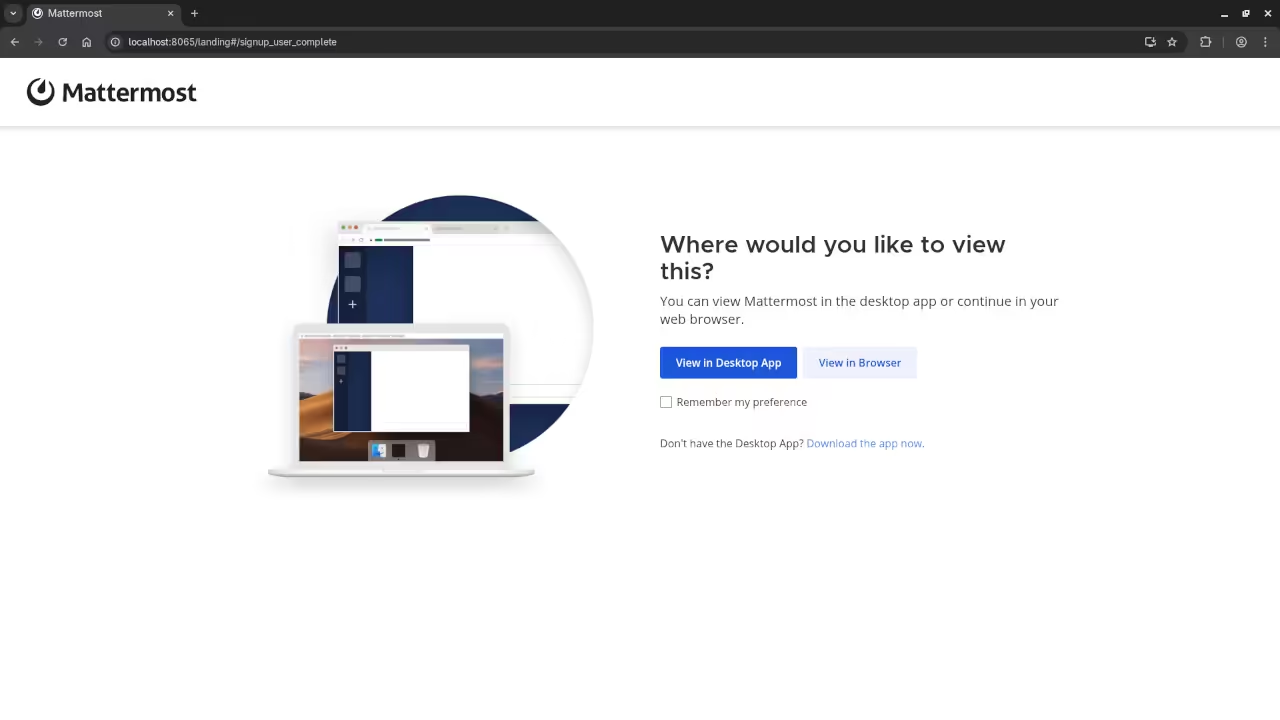
    Mattermost Account Creation
    Web Browser Displaying Mattermost Setup Of Administrator Account

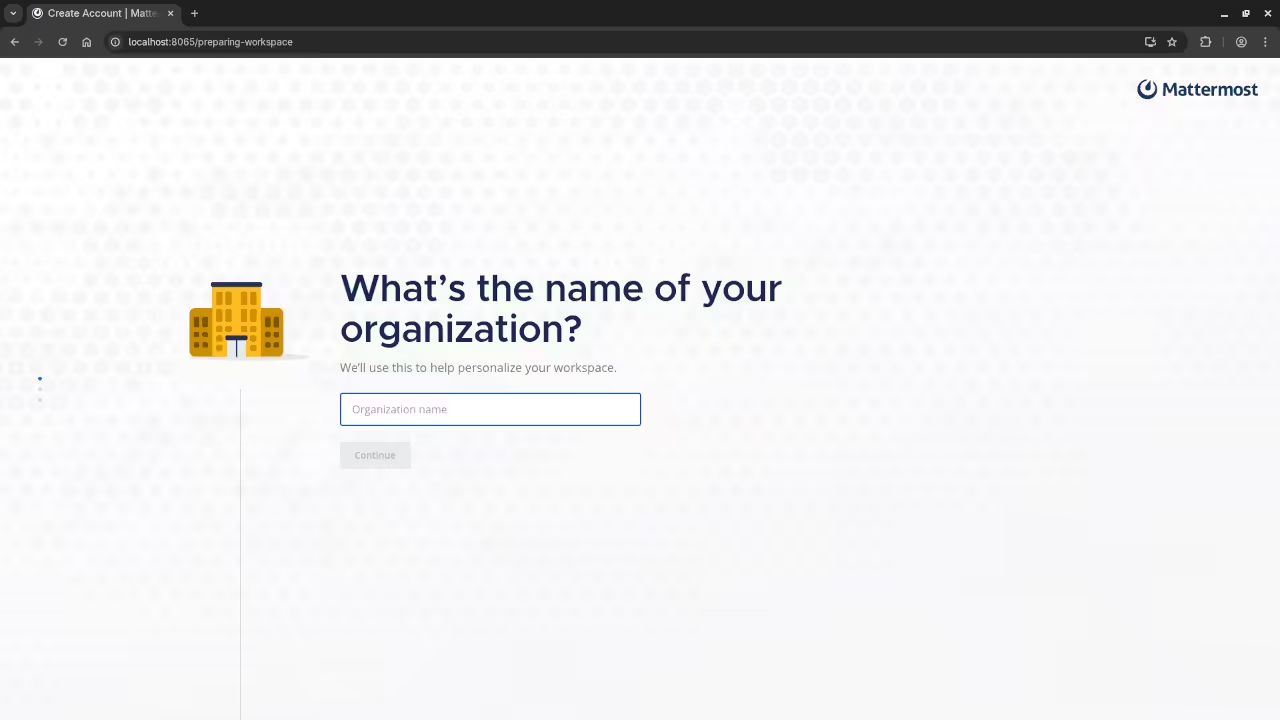
    Mattermost Organization Creation
    Web Browser Displaying Mattermost Setup Of Organization

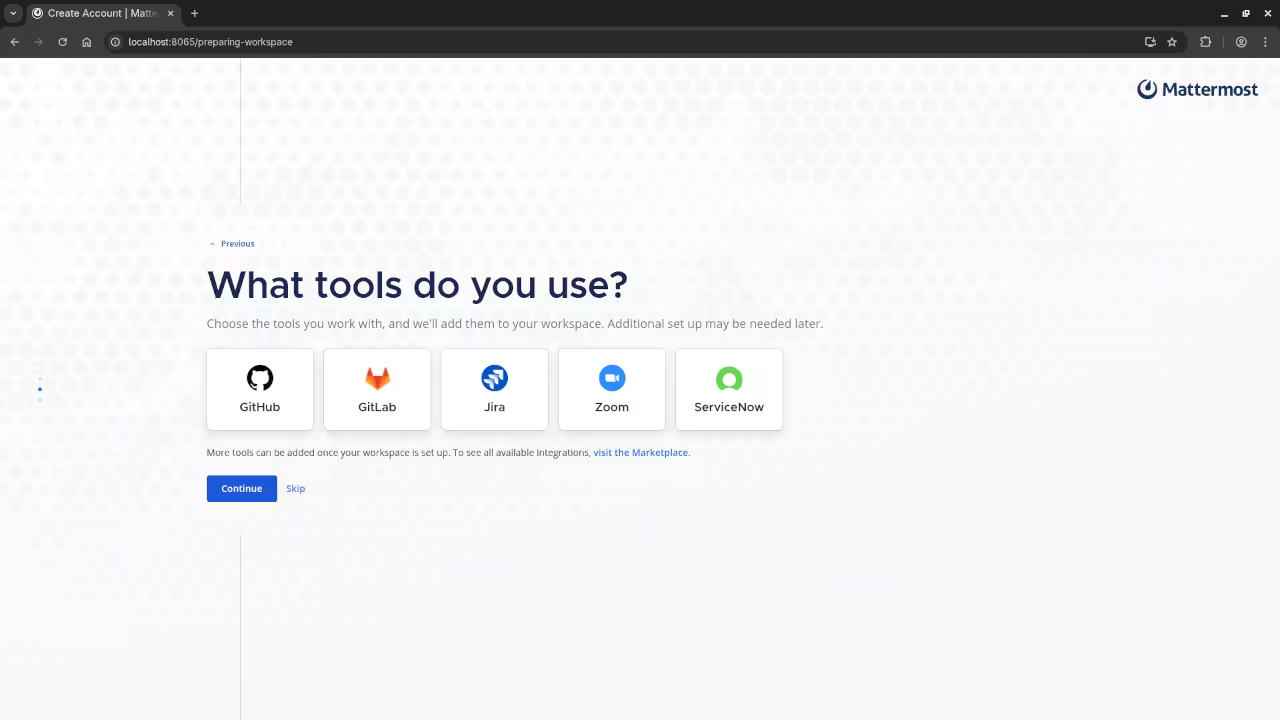
    Mattermost Tools Integration
    Web Browser Displaying Mattermost Setup Of Tools

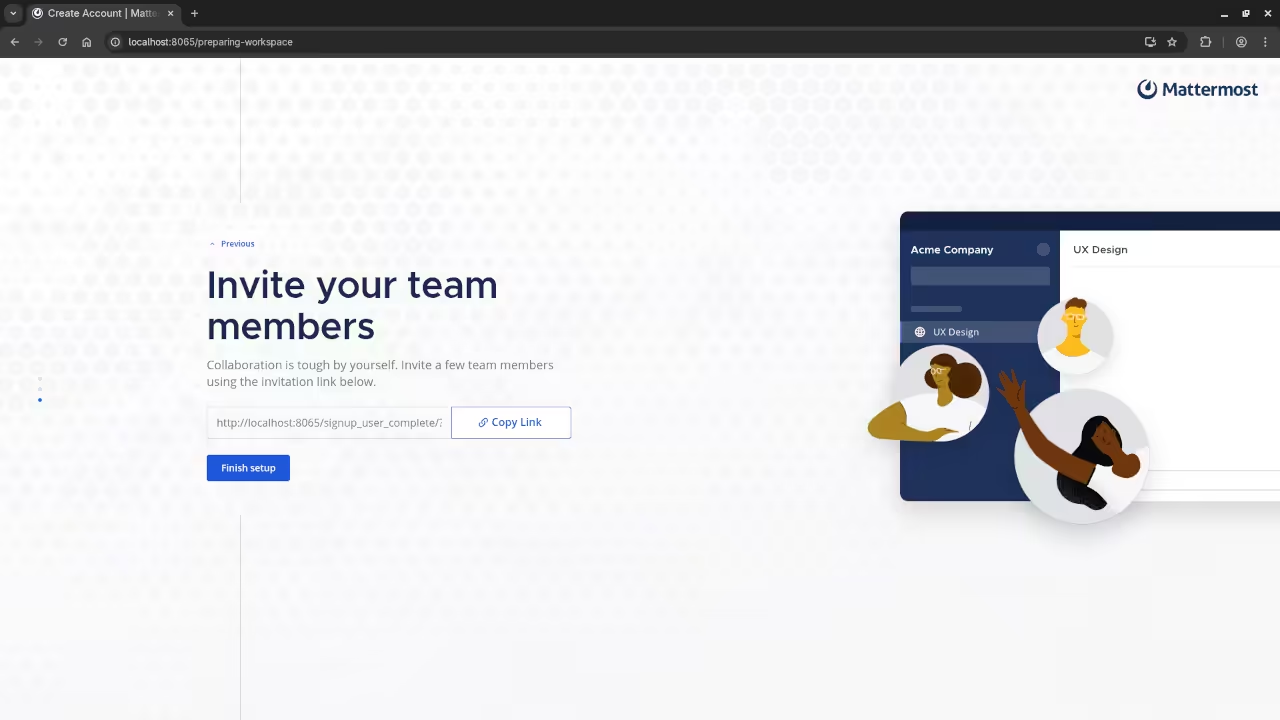
    Mattermost Invite
    Web Browser Displaying Mattermost Invite Link

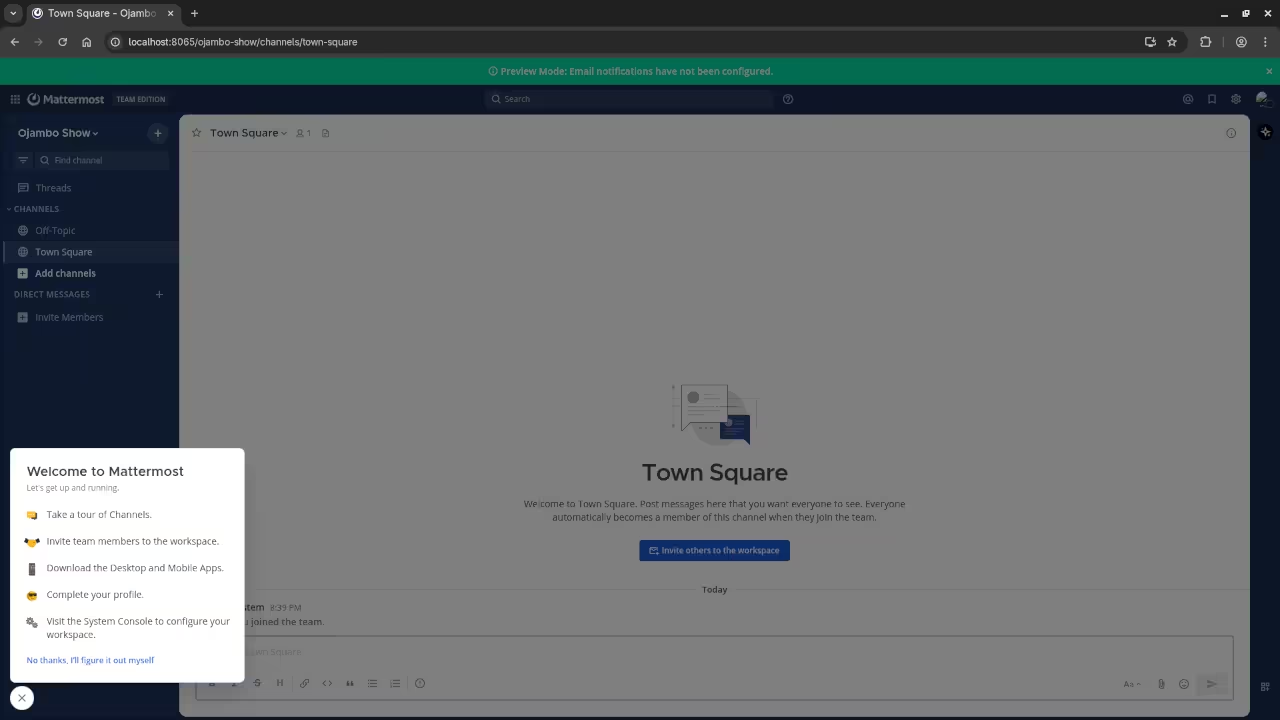
    Mattermost Dashboard
    Web Browser Displaying Mattermost Dashboard Screen

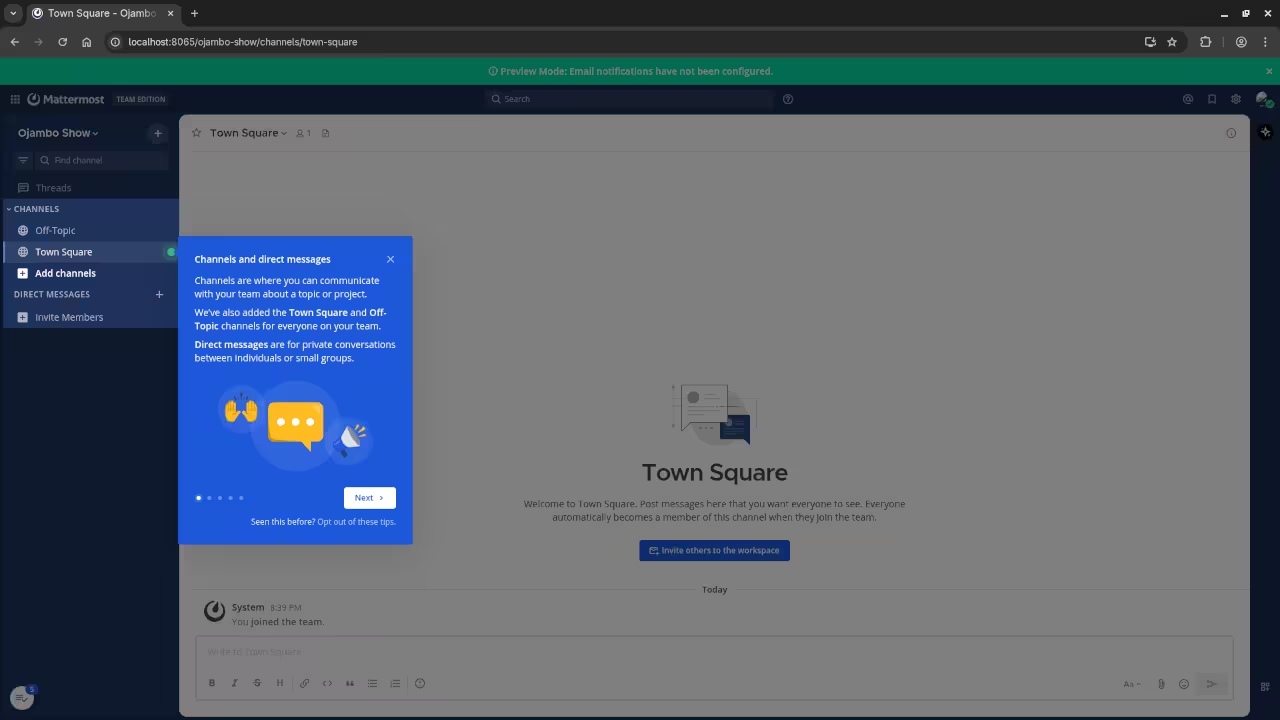
    Mattermost Channels
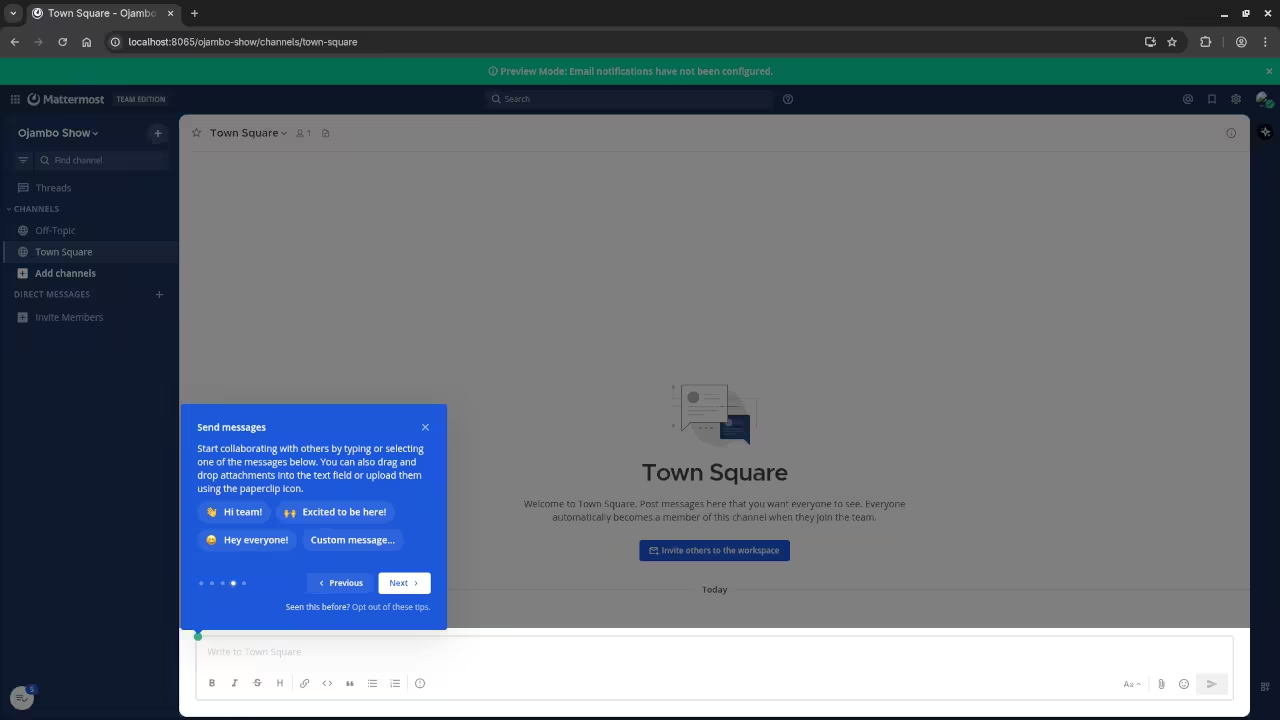
    Web Browser Displaying Mattermost Helper Channels Screen

    Mattermost Messages
    Web Browser Displaying Mattermost Helper Messages Screen

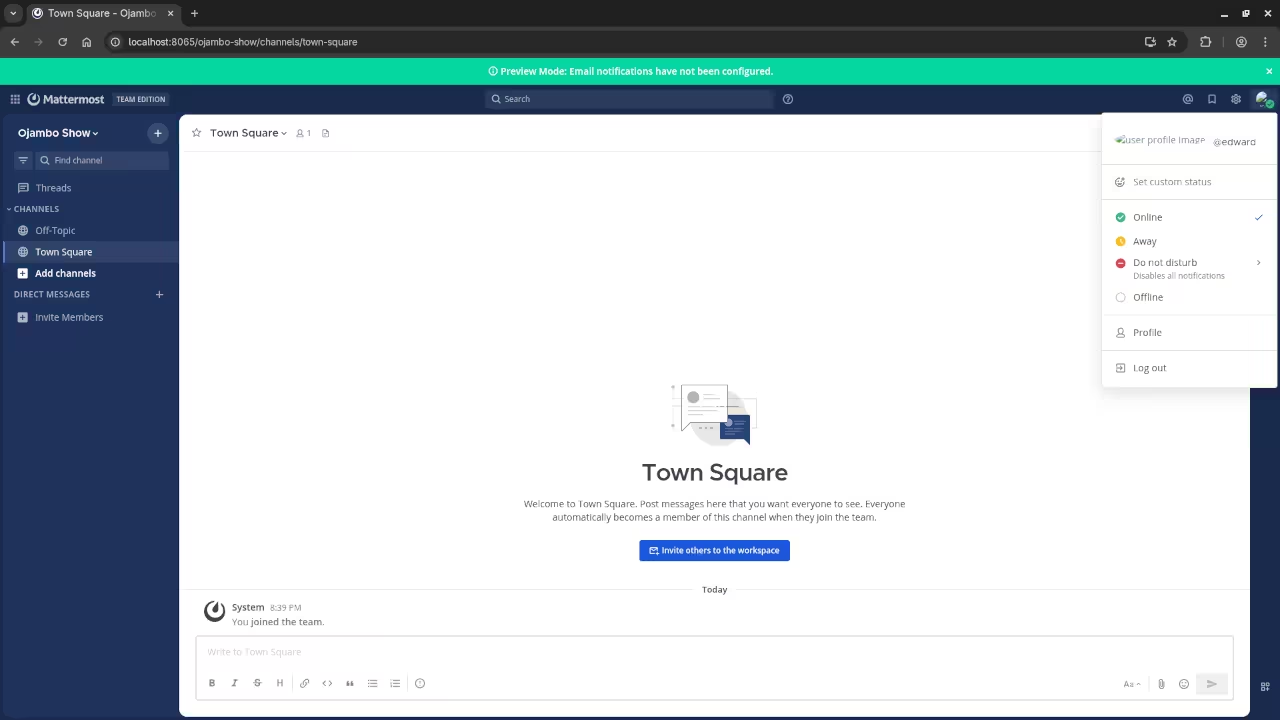
    Mattermost User Status
    Web Browser Displaying Mattermost User Status Screen

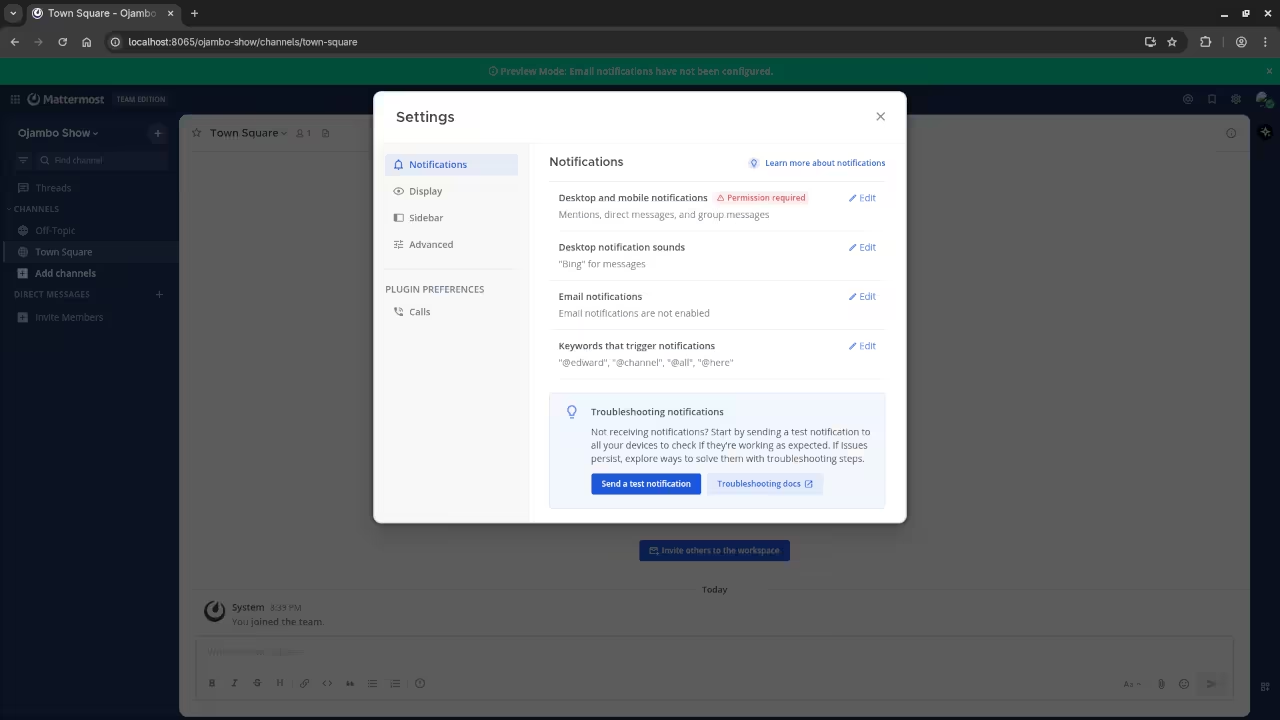
    Mattermost Settings
    Web Browser Displaying Mattermost Settings Screen

    Mattermost Marketplace
    Web Browser Displaying Mattermost App Marketplace Screen

    Mattermost Installation And Setup Screencast

    Learn More About Programming

    If you want to expand your programming skills, check out my other resources:

    Conclusion

    Mattermost is a fantastic open-source team collaboration tool that puts you in control of your data and integrations. Using Podman, you can deploy it quickly in a secure, containerized environment.

    If you would like help installing or migrating your Mattermost setup, feel free to contact me for assistance.

  • Web UI For AI DeepSeek-R1 32B Model

    Web UI For AI DeepSeek-R1 32B Model

    DeepSeek-R1 32B on Fedora: Launching the Local AI Web Chat (Moving Beyond the CLI)

    Introduction

    Following our previous exploration of the powerful DeepSeek-R1 32B Large Language Model (LLM) via the command line (as detailed here), we’re ready for the next step. While the terminal is excellent for validation, a proper web interface provides a much better and more accessible user experience.

    This guide will show you how to move from that initial command-line setup to a custom, clean web application on your Fedora system. We will utilize your existing Ollama installation and leverage Python’s requests and json libraries to build a basic, framework-free chat front-end.

    DeepSeek-R1 32B: Open Source Powerhouse

    The DeepSeek-R1 LLM remains an impressive and crucial example of the value of open-source AI. Running it locally gives you complete control over privacy and performance.

    • Model: DeepSeek-R1 32B
    • License: The model weights for the DeepSeek-R1 series are released under the highly permissive MIT License. This allows for free use, modification, distribution, and commercialization of the software, provided the terms are respected.

    Installation: Setting up DeepSeek-R1 32B on Fedora

    Since you’ve already installed Ollama from the Fedora repositories, setting up the model and its server endpoint is straightforward.

    1. Verify and Start Ollama

    Ensure the Ollama service is running to expose the local API endpoint (usually on http://localhost:11434):

    ollama serve &amp;

    (Run this command if your Ollama service is not already active in the background.)

    2. Pull the DeepSeek-R1 32B Model

    If you haven’t already, use the Ollama CLI to download the 32 Billion parameter version:

    ollama pull deepseek-r1:32b

    This ensures the model is downloaded and ready for your new web application to communicate with via the Ollama API.

    The Web Interface: Python, HTML, and Custom Styling

    We will create a simple, custom application using three files to demonstrate connecting to the local AI without relying on large web frameworks: index.html, style.css, and the Python backend logic.

    Step 1: The Python Backend Logic (app.py)

    This Python logic is the crucial middleman, handling the communication with the Ollama API using requests and json. Note that in a full web setup, you’d need a web server to expose this logic as an endpoint.


    import requests
    import json
    
    OLLAMA_API_URL = &quot;http://localhost:11434/api/generate&quot;
    MODEL_NAME = &quot;deepseek-r1:32b&quot;
    
    def get_deepseek_response(prompt):
        &quot;&quot;&quot;Sends a request to the local Ollama API and returns the AI&#039;s response.&quot;&quot;&quot;
        payload = {
            &quot;model&quot;: MODEL_NAME,
            &quot;prompt&quot;: prompt,
            &quot;stream&quot;: False # Request a single, complete response
        }
        headers = {&#039;Content-Type&#039;: &#039;application/json&#039;}
        
        try:
            # Send the prompt to the local Ollama endpoint
            response = requests.post(OLLAMA_API_URL, data=json.dumps(payload), headers=headers)
            response.raise_for_status() # Check for HTTP errors
            
            # Extract the response text from the JSON data
            data = response.json()
            
            if &#039;response&#039; in data:
                return data[&#039;response&#039;]
            else:
                return &quot;Error: Could not parse model response.&quot;
    
        except requests.exceptions.RequestException as e:
            return f&quot;Error connecting to Ollama: {e}&quot;
    
    # NOTE: In a complete solution, you would set up an HTTP server 
    # to call this function when the web page sends a request.
    if __name__ == &quot;__main__&quot;:
        test_prompt = &quot;Explain why the MIT License is suitable for open-source LLMs.&quot;
        print(f&quot;**Query:** {test_prompt}&quot;)
        answer = get_deepseek_response(test_prompt)
        print(f&quot;**DeepSeek-R1 32B:** {answer}&quot;)


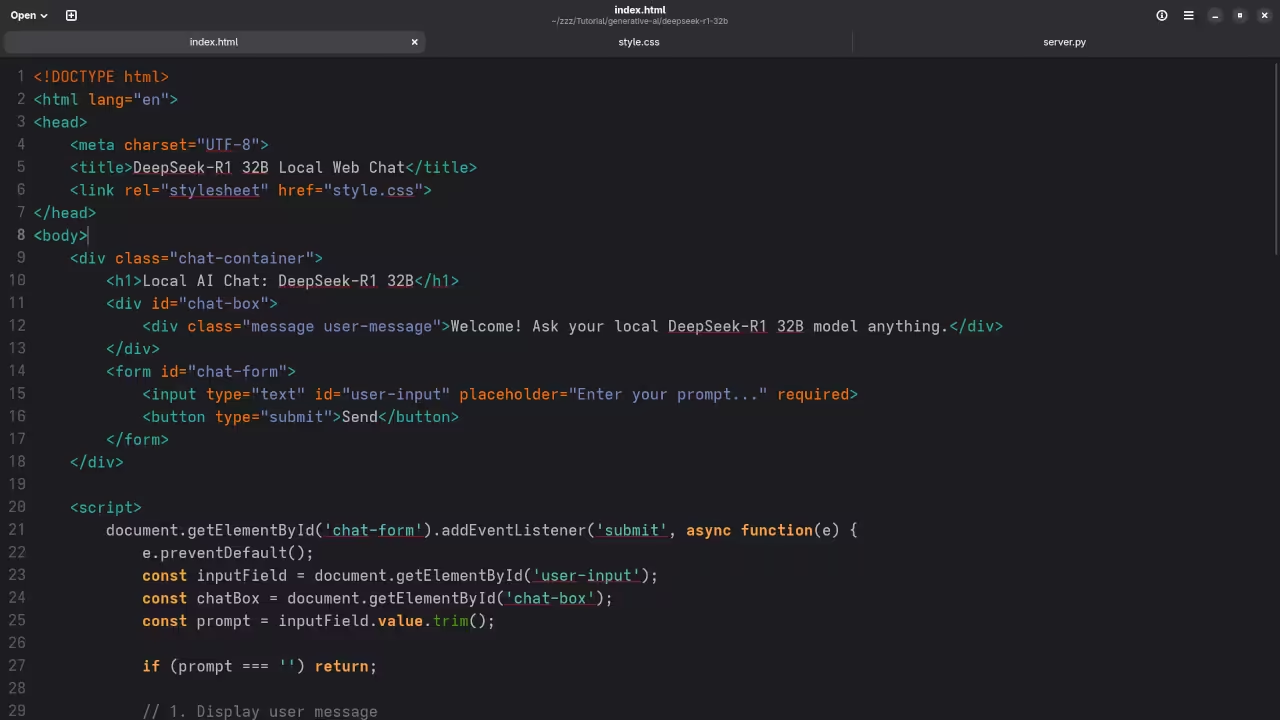
    Step 2: The HTML Front-end (index.html)

    This file provides the chat interface structure. Custom JavaScript handles sending the input and displaying the AI’s response.


        &lt;div class=&quot;chat-container&quot;&gt;
            &lt;h1&gt;Local AI Chat: DeepSeek-R1 32B&lt;/h1&gt;
            &lt;div id=&quot;chat-box&quot;&gt;
                &lt;!-- Messages will appear here --&gt;
                &lt;div class=&quot;message user-message&quot;&gt;Welcome! Ask your local DeepSeek-R1 32B model anything.&lt;/div&gt;
            &lt;/div&gt;
            &lt;form id=&quot;chat-form&quot;&gt;
                &lt;input type=&quot;text&quot; id=&quot;user-input&quot; placeholder=&quot;Enter your prompt...&quot; required&gt;
                &lt;button type=&quot;submit&quot;&gt;Send&lt;/button&gt;
            &lt;/form&gt;
        &lt;/div&gt;
    
        &lt;script&gt;
            document.getElementById(&#039;chat-form&#039;).addEventListener(&#039;submit&#039;, async function(e) {
                e.preventDefault();
                const inputField = document.getElementById(&#039;user-input&#039;);
                const chatBox = document.getElementById(&#039;chat-box&#039;);
                const prompt = inputField.value.trim();
    
                if (prompt === &#039;&#039;) return;
    
                // 1. Display user message
                const userMsg = document.createElement(&#039;div&#039;);
                userMsg.className = &#039;message user-message&#039;;
                userMsg.textContent = prompt;
                chatBox.appendChild(userMsg);
    
                inputField.value = &#039;&#039;; // Clear input
                chatBox.scrollTop = chatBox.scrollHeight; // Scroll to bottom
    
                // 2. Display &quot;Thinking...&quot; message
                const thinkingMsg = document.createElement(&#039;div&#039;);
                thinkingMsg.className = &#039;message ai-message thinking&#039;;
                thinkingMsg.textContent = &#039;DeepSeek-R1 32B is thinking...&#039;;
                chatBox.appendChild(thinkingMsg);
                chatBox.scrollTop = chatBox.scrollHeight;
    
                try {
                    // *** IMPORTANT: Replace this placeholder with your actual fetch call ***
                    // You must configure your Python script (like app.py) to run as an API 
                    // endpoint that the browser can contact.
                    
                    // Placeholder response for simple demonstration
                    const aiText = await new Promise(resolve =&gt; setTimeout(() =&gt; resolve(&quot;The MIT License is great because it grants broad rights to use, copy, modify, and distribute the software with minimal restrictions, fostering an open ecosystem for LLM research and commercial deployment.&quot;), 2000));
                    
                    // 3. Update with AI response
                    thinkingMsg.classList.remove(&#039;thinking&#039;);
                    thinkingMsg.textContent = aiText;
    
                } catch (error) {
                    thinkingMsg.classList.remove(&#039;thinking&#039;);
                    thinkingMsg.textContent = &#039;Error: Could not get a response from the AI backend.&#039;;
                    console.error(&#039;Fetch error:&#039;, error);
                }
    
                chatBox.scrollTop = chatBox.scrollHeight;
            });
        &lt;/script&gt;


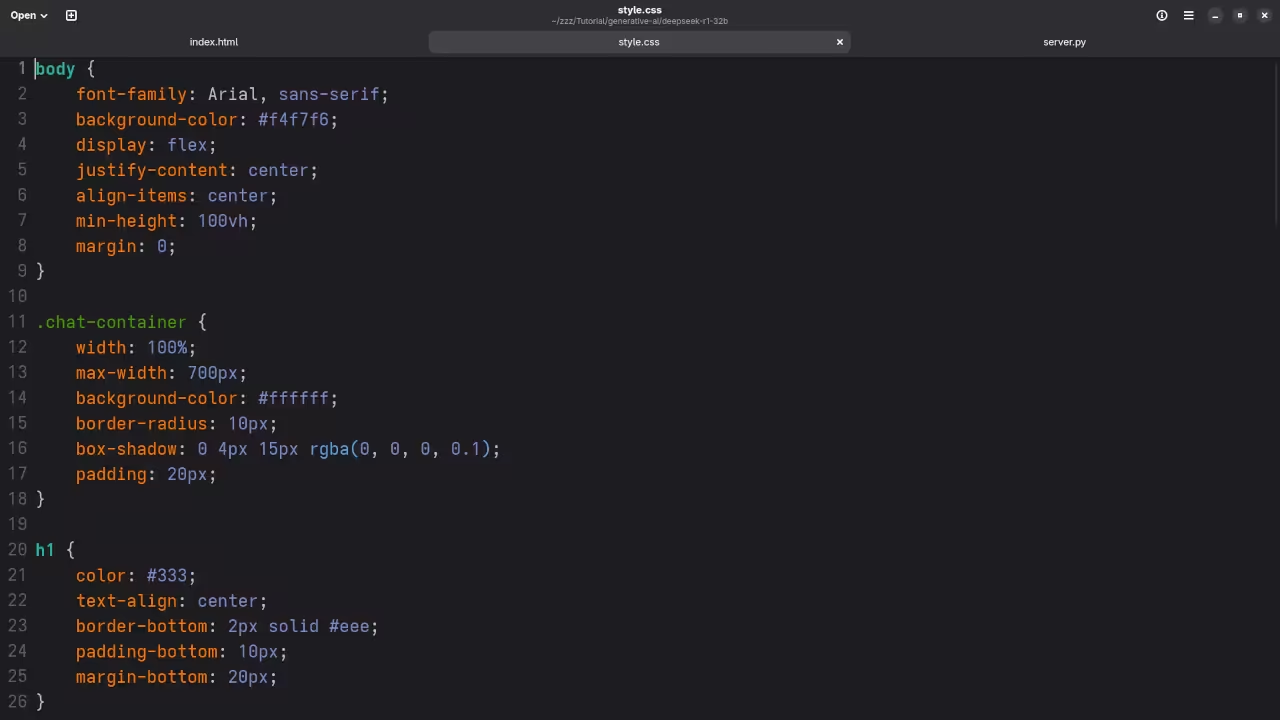
    Step 3: Custom CSS Styling (style.css)

    A simple, professional style for your chat application.


        body {
        font-family: Arial, sans-serif;
        background-color: #f4f7f6;
        display: flex;
        justify-content: center;
        align-items: center;
        min-height: 100vh;
        margin: 0;
    }
    
    .chat-container {
        width: 100%;
        max-width: 700px;
        background-color: #ffffff;
        border-radius: 10px;
        box-shadow: 0 4px 15px rgba(0, 0, 0, 0.1);
        padding: 20px;
    }
    
    h1 {
        color: #333;
        text-align: center;
        border-bottom: 2px solid #eee;
        padding-bottom: 10px;
        margin-bottom: 20px;
    }
    
    #chat-box {
        height: 400px;
        overflow-y: auto;
        border: 1px solid #ddd;
        padding: 15px;
        margin-bottom: 15px;
        border-radius: 5px;
        display: flex;
        flex-direction: column;
    }
    
    .message {
        padding: 10px 15px;
        margin-bottom: 10px;
        border-radius: 15px;
        max-width: 80%;
        line-height: 1.4;
        word-wrap: break-word;
    }
    
    .user-message {
        background-color: #007bff;
        color: white;
        align-self: flex-end;
        border-bottom-right-radius: 3px;
    }
    
    .ai-message {
        background-color: #e9ecef;
        color: #333;
        align-self: flex-start;
        border-bottom-left-radius: 3px;
    }
    
    #chat-form {
        display: flex;
    }
    
    #user-input {
        flex-grow: 1;
        padding: 10px;
        border: 1px solid #ddd;
        border-radius: 5px 0 0 5px;
        font-size: 16px;
    }
    
    button[type=&quot;submit&quot;] {
        padding: 10px 20px;
        background-color: #28a745;
        color: white;
        border: none;
        border-radius: 0 5px 5px 0;
        cursor: pointer;
        font-size: 16px;
        transition: background-color 0.3s;
    }
    
    button[type=&quot;submit&quot;]:hover {
        background-color: #218838;
    }


    Screenshots and Screencast

    Here’s where you’ll find a visual walkthrough of setting up DeepSeek-R1 32B using Alpaca Ollama on your local system:

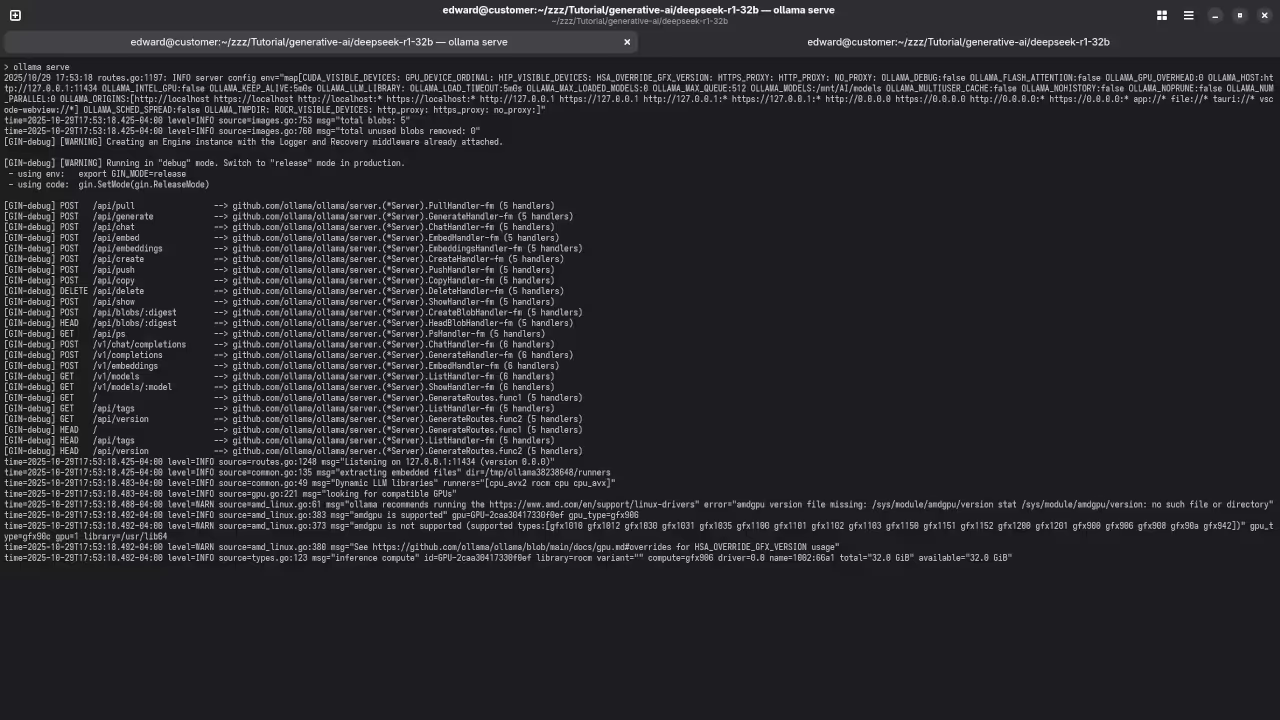
    Ollama loading tensors for AMD GPU
    Command Line Ollama Loading Tensors For AMD Instinct Mi60.

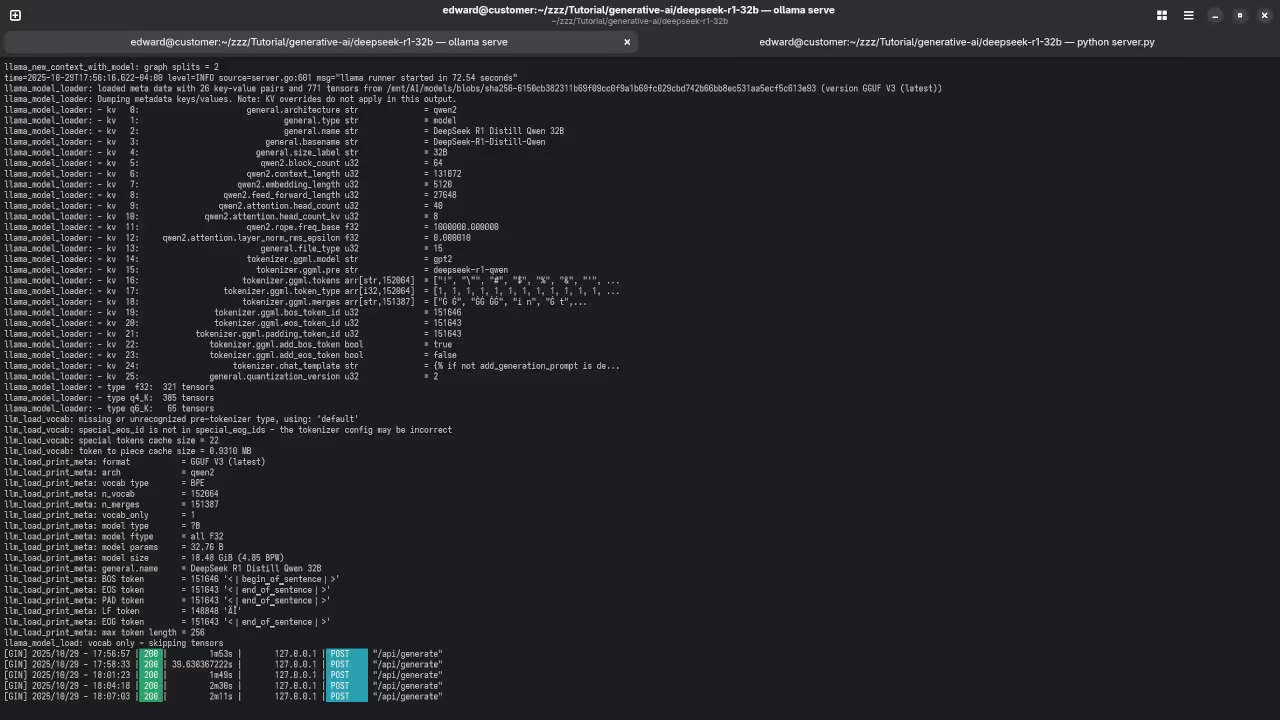
    Ollama API Endpoint
    Command Line Ollama API Endpoint Ready.

    Custom Ollama Web UI HTML
    Gnome Text Editor Displaying Ollama Web Interface HTML File.

    Custom Ollama Web UI CSS
    Gnome Text Editor Displaying Ollama Web Interface CSS File.

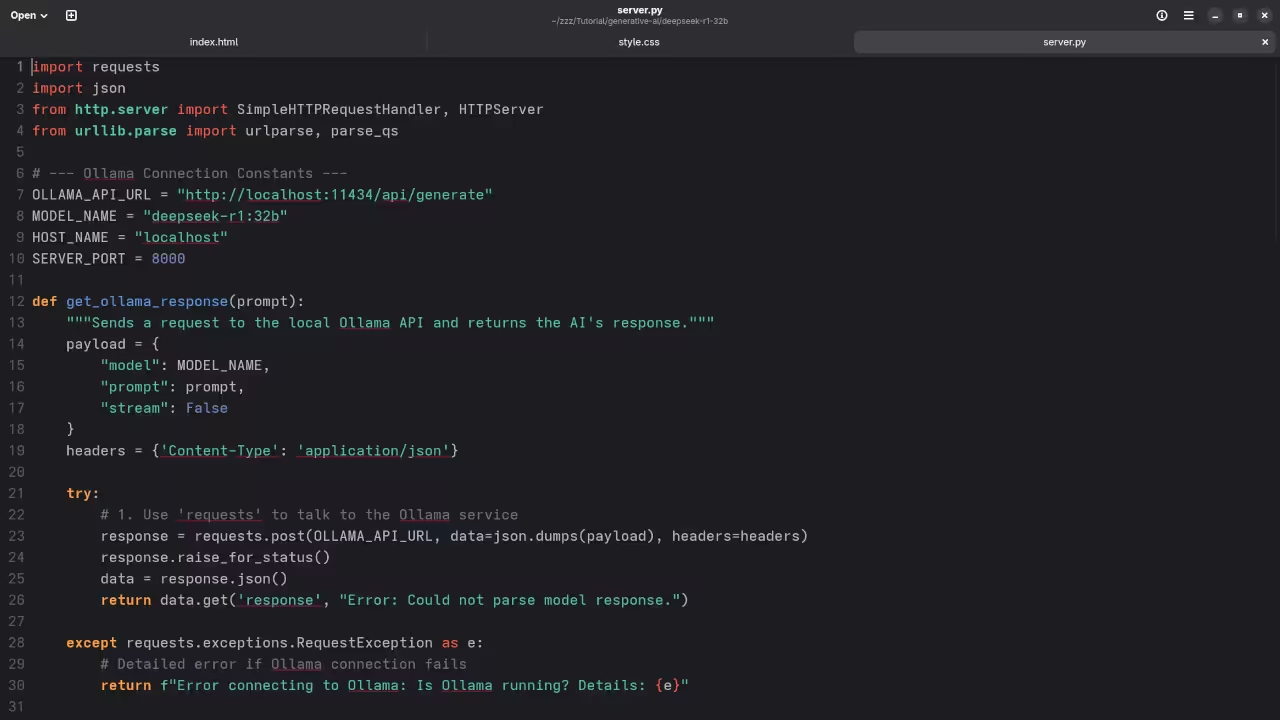
    Ollama API Direct Python Script
    Gnome Text Editor Displaying Ollama Endpoint Direct API Python Script.

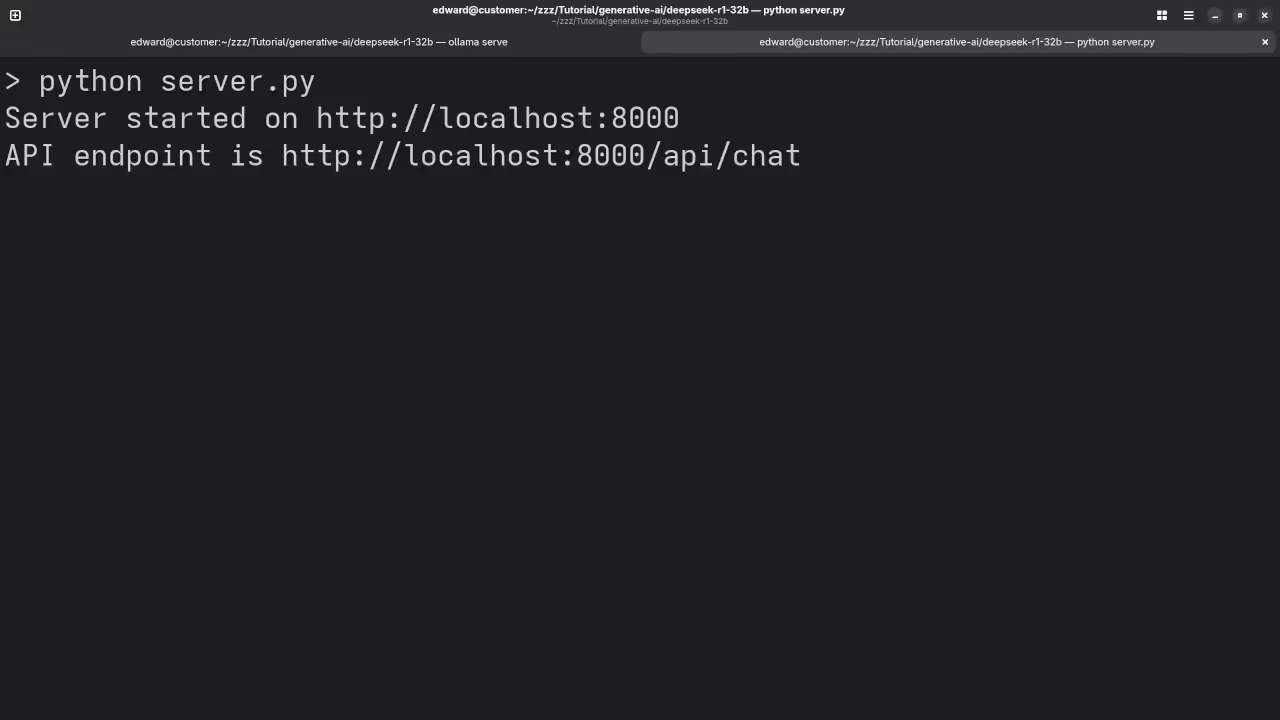
    Python Server
    Command Line Python Server.

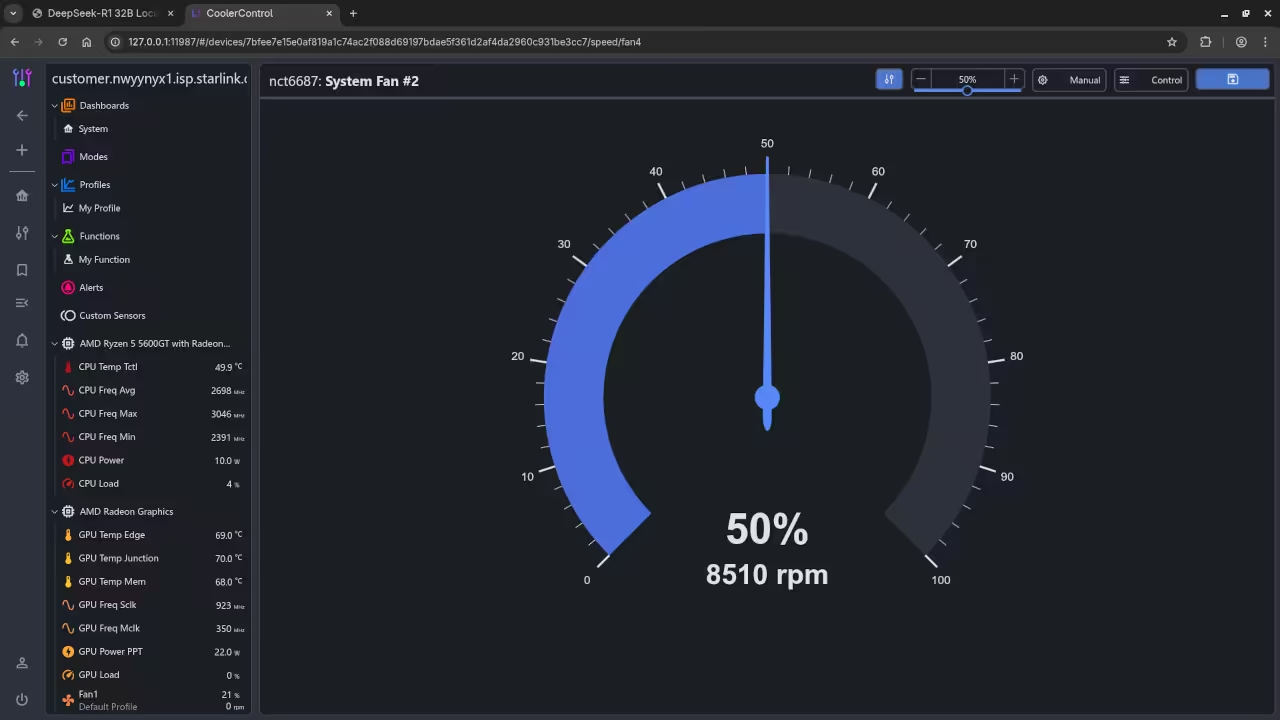
    CoolerControl Showing AMD Instinct Mi60 temperature
    Web Browser Running CoolerControl Displaying AMD Instinct Mi60 Temperature And Shroud Fan RPM.

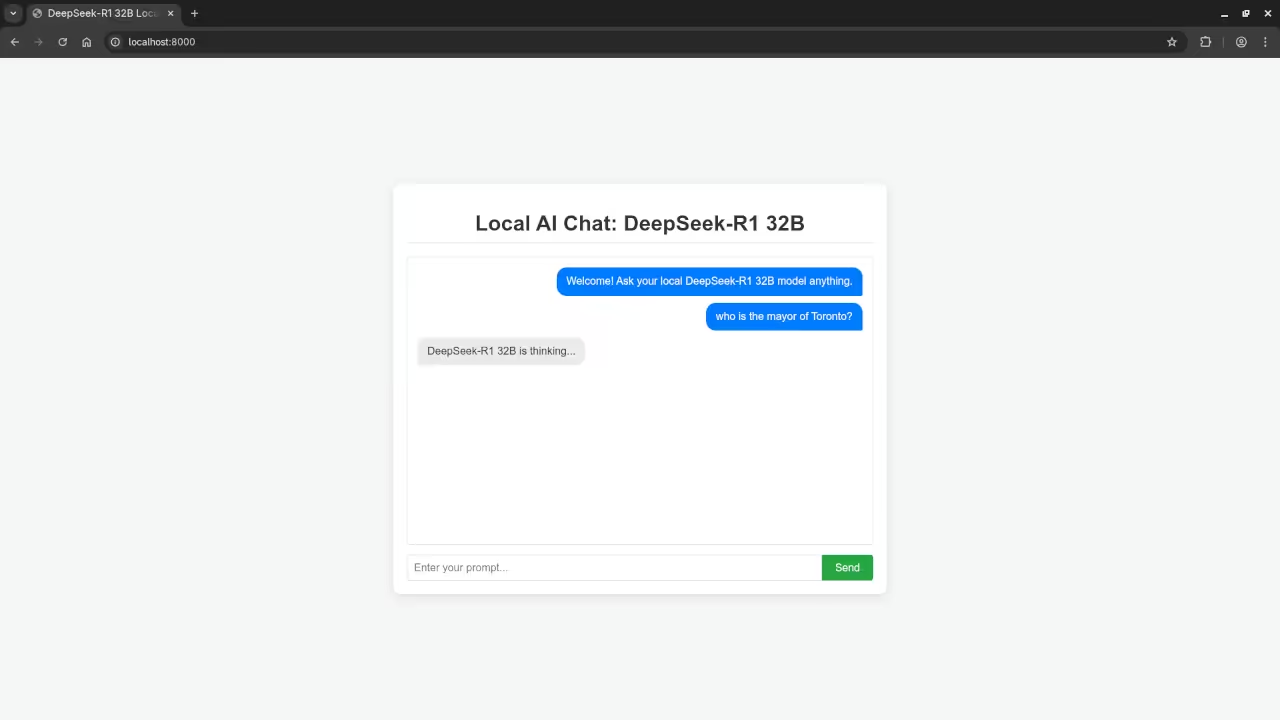
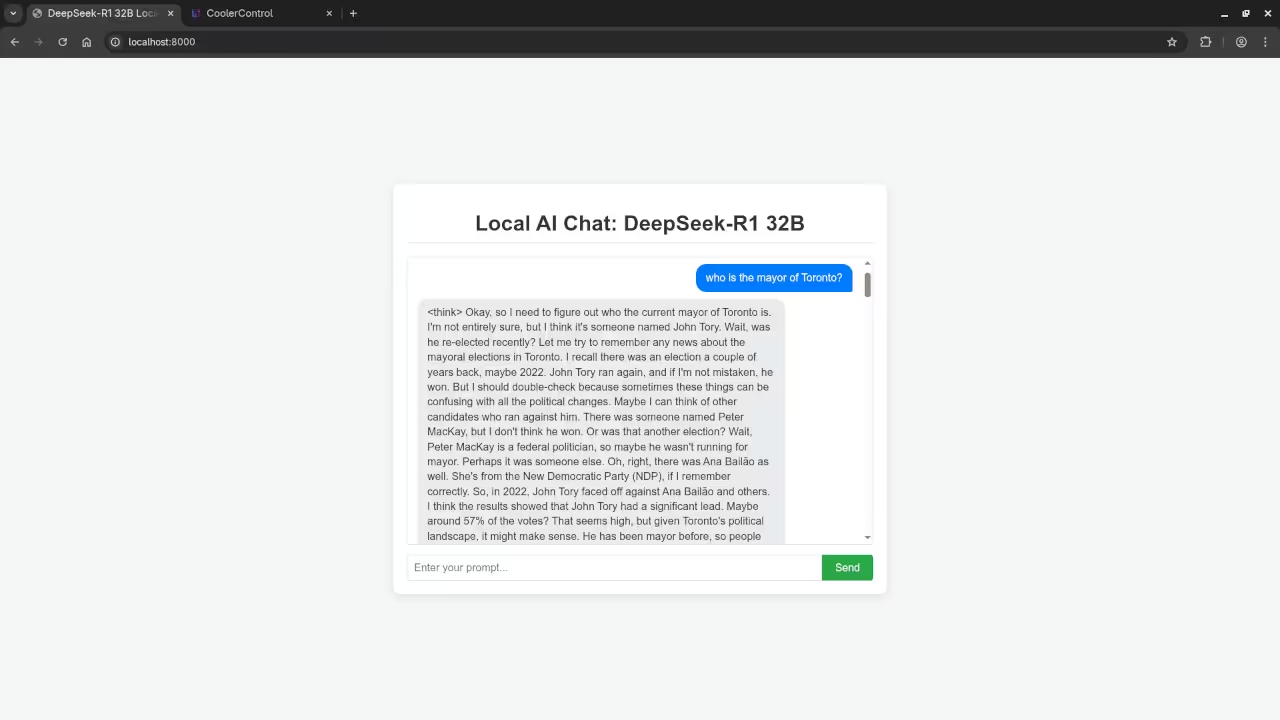
    DeepSeek-R1 32B answered question about the Mayor
    Command Line DeepSeek-R1 32B Answered Mayor Of Toronto Request.

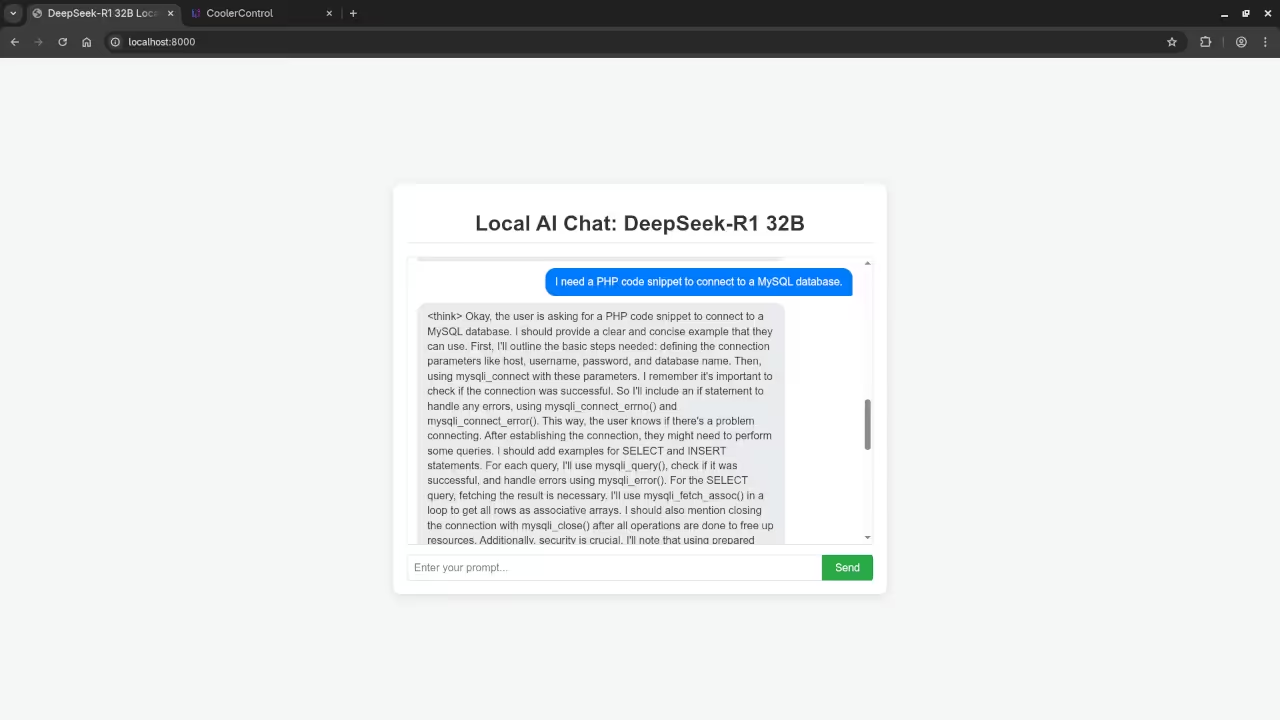
    DeepSeek-R1 32B answered question about PHP code
    Command Line DeepSeek-R1 32B Answered PHP Code Request.

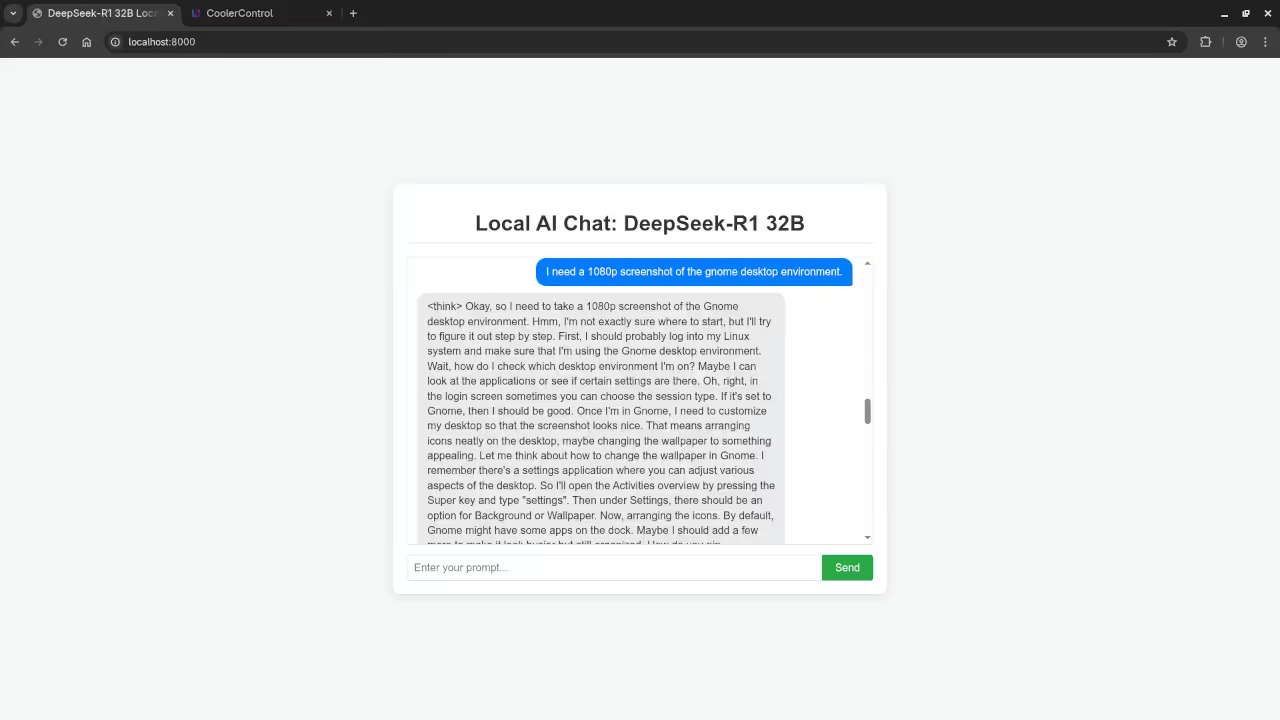
    DeepSeek-R1 32B answered question about screenshot
    Command Line DeepSeek-R1 32B Answered Gnome Desktop Screenshot Request.

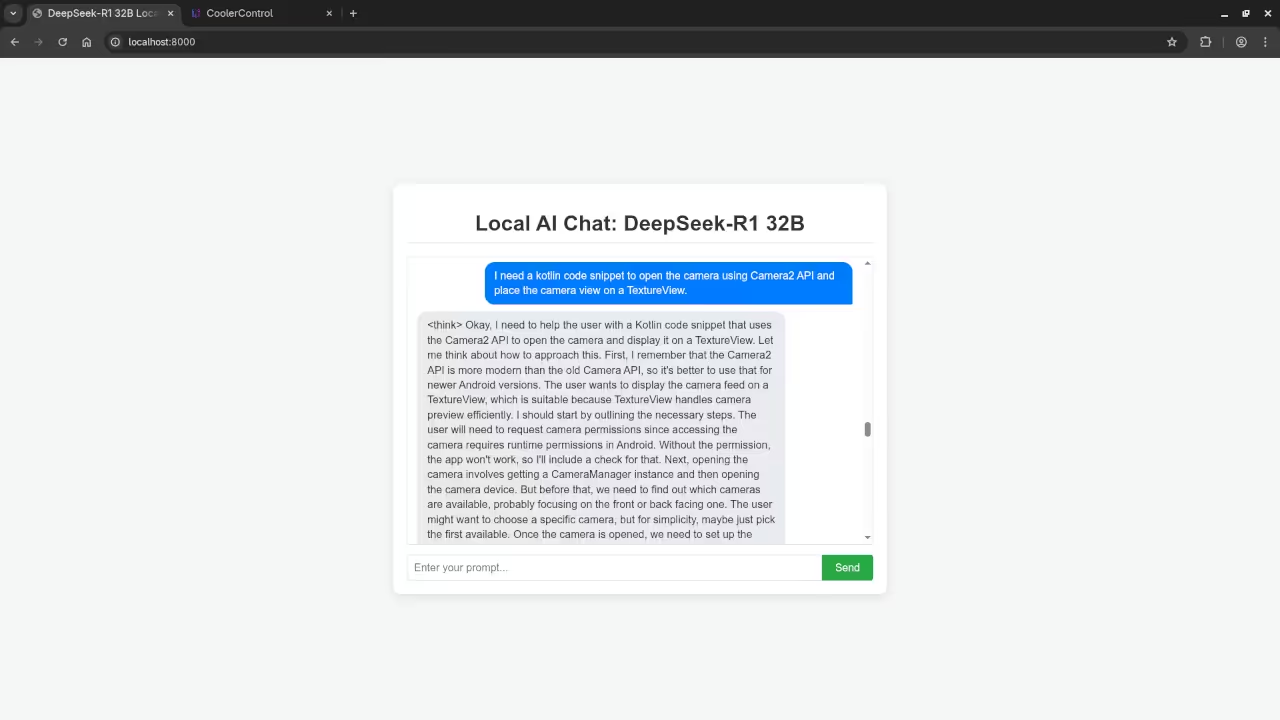
    DeepSeek-R1 32B answered request for Kotlin code
    DeepSeek-R1 32B Answered Kotlin Code Request.

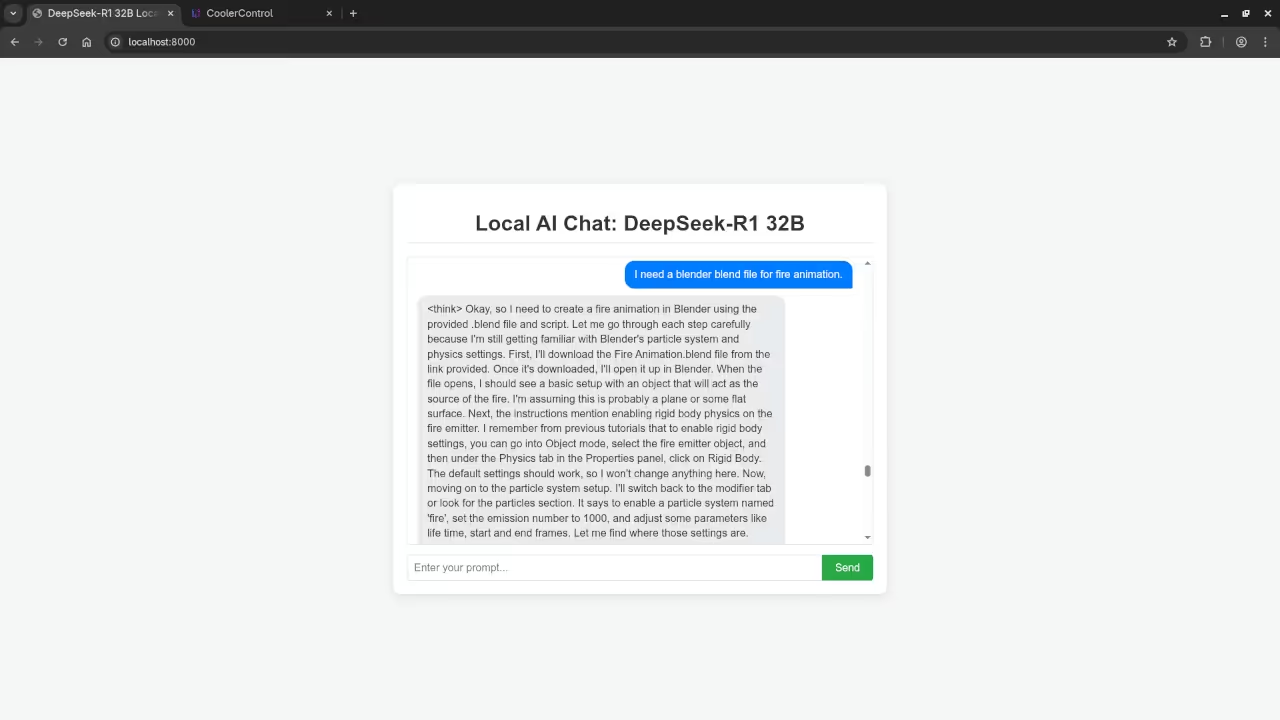
    DeepSeek-R1 32B answered request for Blender Blend File
    DeepSeek-R1 32B Answered Blender Blend File Request.

    Video Displaying Using DeepSeek-R1 32B In Custom Web UI For Ollama Client

    Results:

    Who is the mayor of Toronto?

    Produced inaccurate outdated answer to Olivia Chow as the mayor of Toronto.

    I need a PHP code snippet to connect to a MySQL database.

    Produced correct syntax PHP code snippet to connect to a MySQL database.

    I need a 1080p screenshot of the gnome desktop environment.

    Accurately provided instructions to generate a 1080p screenshot of Gnome desktop environment because it is a text-based AI lacking ability.

    I need a kotlin code snippet to open the camera using Camera2 API and place the camera view on a TextureView.

    Produced untested Kotlin code snippet.

    I need a blender blend file for fire animation.

    Accurately detected inability to generate Blender Blend file for a fire animation because it is a text-based AI lacking ability.

    Level Up Your Python Skills

    This simple web integration is just the beginning of what you can do with Python and powerful local LLMs.

    Professional AI and Python Services

    Need expert help setting up this powerful technology or mastering your coding skills?

    • One-on-One Tutorials: I offer dedicated one-on-one online Python tutorials tailored to your learning pace and goals: https://ojambo.com/contact
    • LLM Installation and Migration: I can professionally install the DeepSeek-R1 32B LLM– or migrate it- to your machine or server environment to ensure smooth, optimal performance. Contact me for professional AI services: https://ojamboservices.com/contact