Blog

  • Pure CSS 3D Text Spiral Animations

    Pure CSS 3D Text Spiral Animations

    How to Create a CSS3 3D Text Spiral Animation in Your WordPress Blog

    Categories: CSS, Web Development, WordPress, Animations, Beginner Tutorials

    Tags: CSS3, 3D Text Animation, WordPress, Web Design, JavaScript, Animation Effects, CSS Tutorial

    Introduction

    In this beginner-friendly tutorial, we will explore how to create a stunning CSS3 3D Text Spiral Animation effect using four rotating words. This animation can be easily embedded into your WordPress blog to make your posts or site more interactive and engaging. With just a few lines of code, we will make some text swirl around in a 3D spiral motion.

    Let’s dive in!

    What You Will Learn:

    • How to create the basic HTML structure
    • How to style text with CSS3 animations
    • How to apply a 3D perspective and create a rotating spiral effect

    Step 1: HTML Structure

    Let’s start by creating the HTML structure for our rotating words. We will be using a div container for each of the four words. Here’s the basic HTML:


        <div class="container">
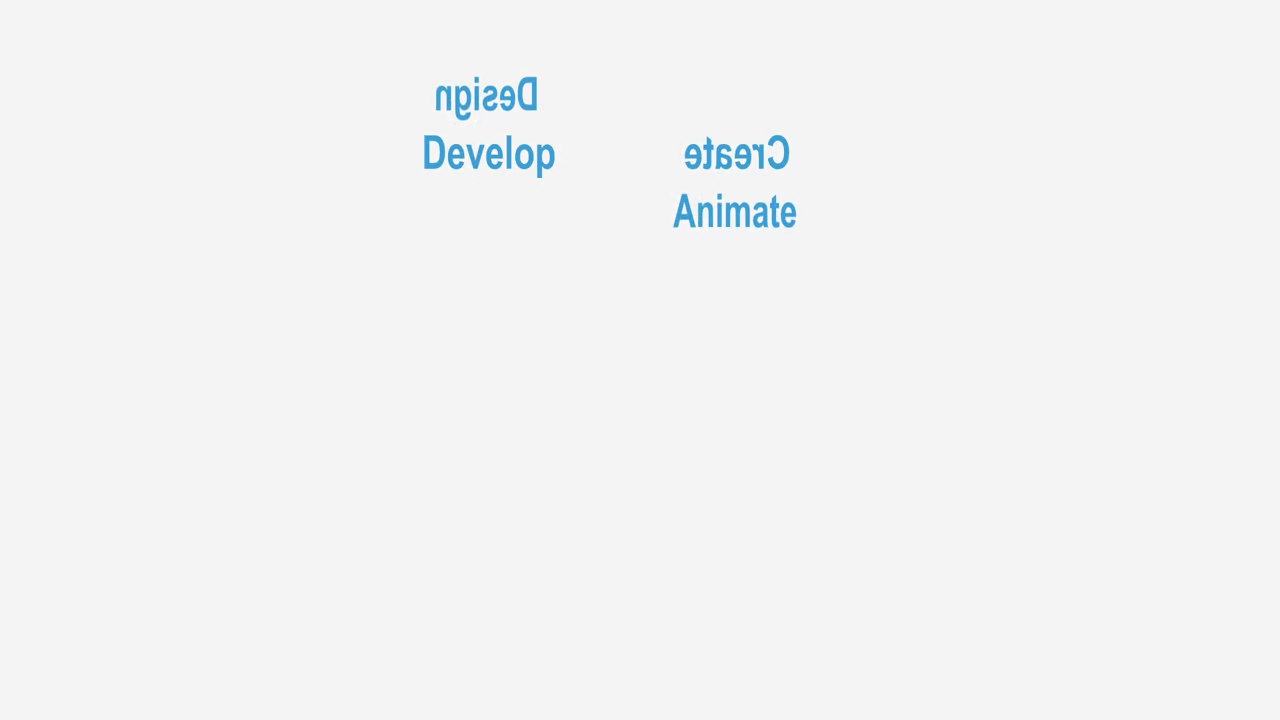
            <div class="word">Design</div>
            <div class="word">Develop</div>
            <div class="word">Animate</div>
            <div class="word">Create</div>
        </div>


    Here we’ve created a div container that holds four div elements with the class word that will represent the four rotating words.

    Step 2: CSS for the 3D Text Spiral Effect

    Now, we will add the CSS to style the text and create the spiral animation. This will involve setting up a 3D space for the animation to happen, using @keyframes to control the rotation, and applying perspective.


    * {
        margin: 0;
        padding: 0;
        box-sizing: border-box;
    }
    
    body {
        font-family: Arial, sans-serif;
        background: #f4f4f4;
        height: 100vh;
        display: flex;
        justify-content: center;
        align-items: center;
    }
    
    .container {
        position: relative;
        width: 400px;
        height: 400px;
        animation: rotateSpiral 10s infinite linear;
        transform-style: preserve-3d;
    }
    
    .word {
        position: absolute;
        font-size: 40px;
        color: #3498db;
        font-weight: bold;
        transform-origin: center;
        text-align: center;
        opacity: 0;
        animation: fadeIn 10s infinite;
    }
    
    @keyframes rotateSpiral {
        0% {
            transform: rotateY(0deg) translateZ(150px);
        }
        25% {
            transform: rotateY(90deg) translateZ(150px);
        }
        50% {
            transform: rotateY(180deg) translateZ(150px);
        }
        75% {
            transform: rotateY(270deg) translateZ(150px);
        }
        100% {
            transform: rotateY(360deg) translateZ(150px);
        }
    }
    
    @keyframes fadeIn {
        0% {
            opacity: 0;
        }
        25% {
            opacity: 1;
        }
        75% {
            opacity: 1;
        }
        100% {
            opacity: 0;
        }
    }


    Explanation:

    • The .container class is responsible for holding all the words. We set a rotateSpiral animation for it that rotates the entire container in a 3D space.
    • The .word class defines the individual words and positions them absolutely inside the container.
    • The rotateSpiral animation rotates the container from 0 to 360 degrees in 3D space along the Y-axis.
    • The fadeIn animation makes the words appear and disappear smoothly.

    Step 3: Add Screenshots and Live Screencast

    You can capture a screenshot or even create a live screencast to show the effect in action. Once you’ve created your spiral animation, take a few screenshots to highlight the rotating words in different stages.

    Step 4: Final Touches

    Once the animation is in place, you can customize the words, the speed of the rotation, and even the colors. The power of CSS3 allows you to create beautiful and complex animations with minimal effort.

    Consolidated Demo

    HTML5 Pure CSS 3D Text Spiral Animation Demo

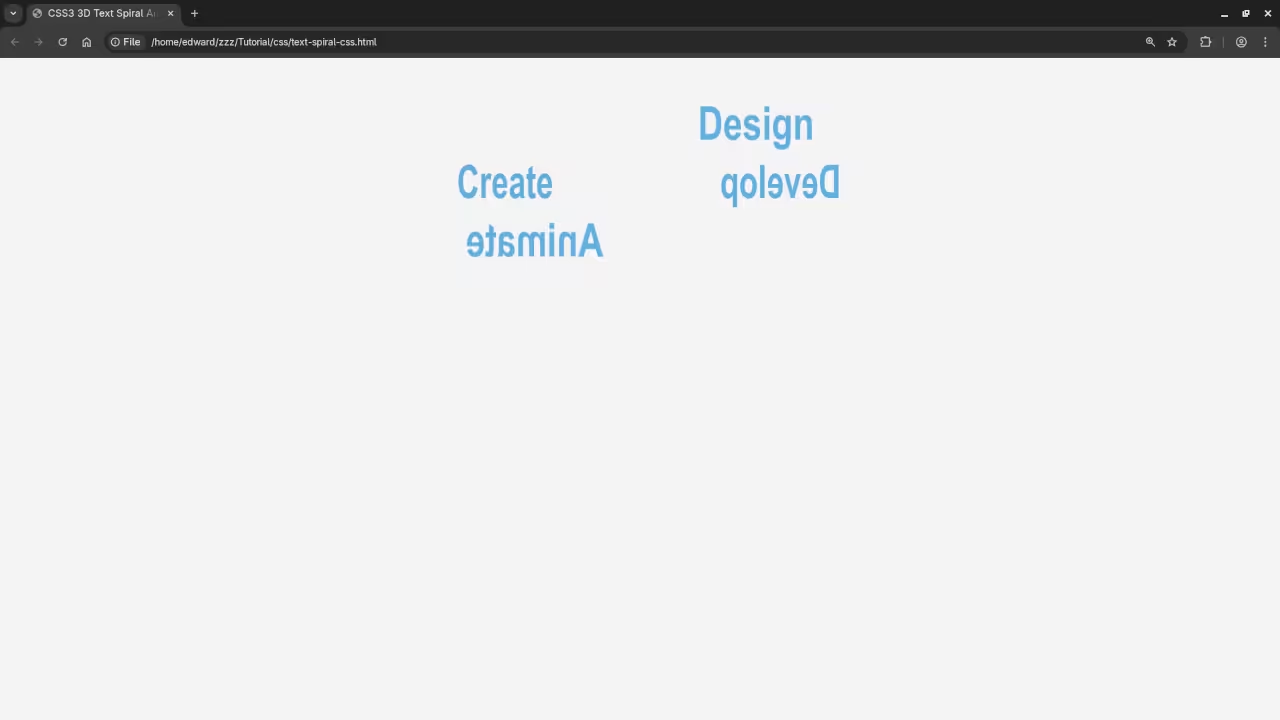
    Screenshot

    Pure CSS 3D Text Spiral Animations
    Web Browser Showing Pure CSS 3D Text Spiral Animations

    Live Screencast

    Screencast Of Pure CSS 3D Text Spiral Animations

    Additional Resources

    If you’re interested in learning more about JavaScript and other web development techniques, I have a book called Learning JavaScript, where I go over essential programming concepts for beginners.

    You can also check out my Learning JavaScript Course, which is a great way to dive deeper into JavaScript and improve your coding skills.

    If you need one-on-one programming tutorials, I’m available for personalized lessons. Feel free to contact me for more information.

    Conclusion

    I hope you found this tutorial helpful! If you have any questions, feel free to leave a comment below or reach out to me. Happy coding!
  • Generate Potion Holder With Blender Python API For Website

    Generate Potion Holder With Blender Python API For Website

    Creating a Golden Potion Holder in Blender with Python and Displaying it in the Browser

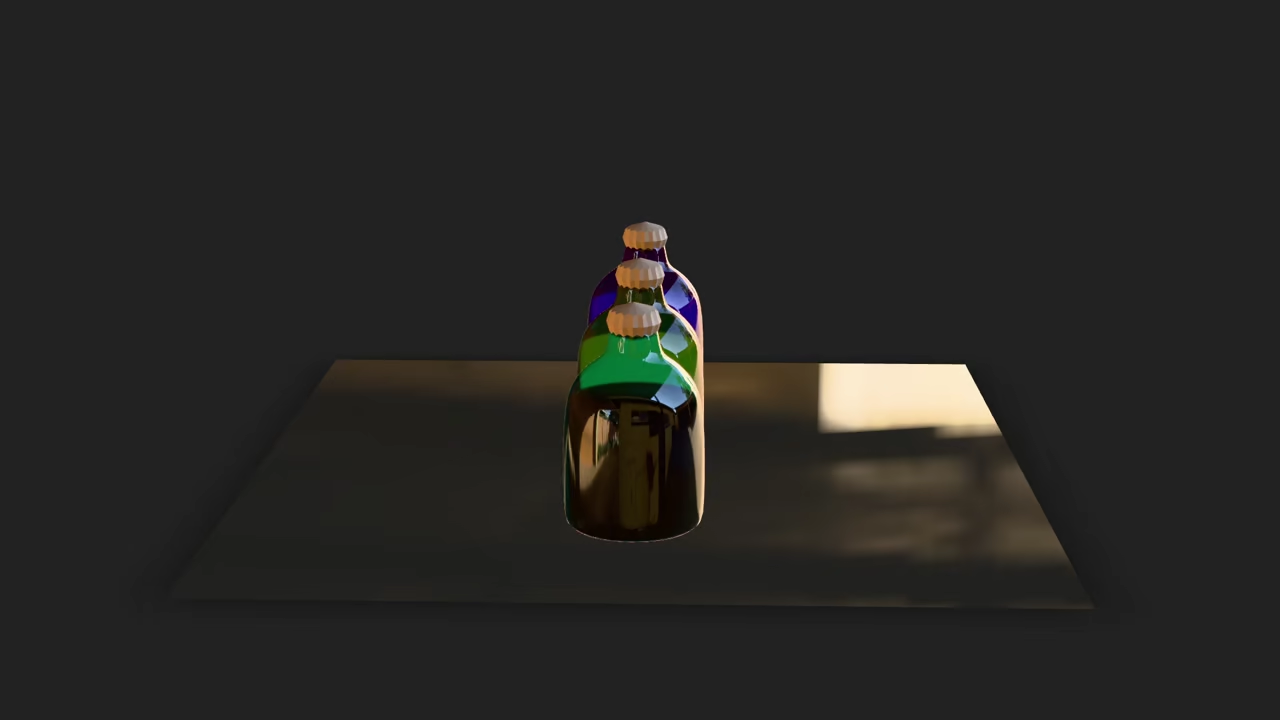
    In this tutorial, we will walk through creating a simple 3D potion holder in Blender using Python and displaying it in a web browser with the <model-viewer> tag. You’ll learn how to give the holder a golden color and add handles to it. The model will be lit with an HDR image of a courtyard in Blender 4.5 LTS. We’ll also explore which image formats are most compatible with web browsers for lighting and discuss the differences between HDR, EXR, KTX, and KTX2 formats.

    This tutorial is beginner-friendly and assumes you have a basic understanding of Python and Blender. If you’re just starting out, be sure to check out my books Learning Python and Mastering Blender Python API for more in-depth tutorials!

    What You’ll Need:

    • Blender 4.5 LTS or later
    • Python 3.x installed on your system
    • Basic knowledge of Python and Blender
    • Familiarity with HTML and web technologies like the <model-viewer> tag

    Step 1: Setting Up Blender with Python

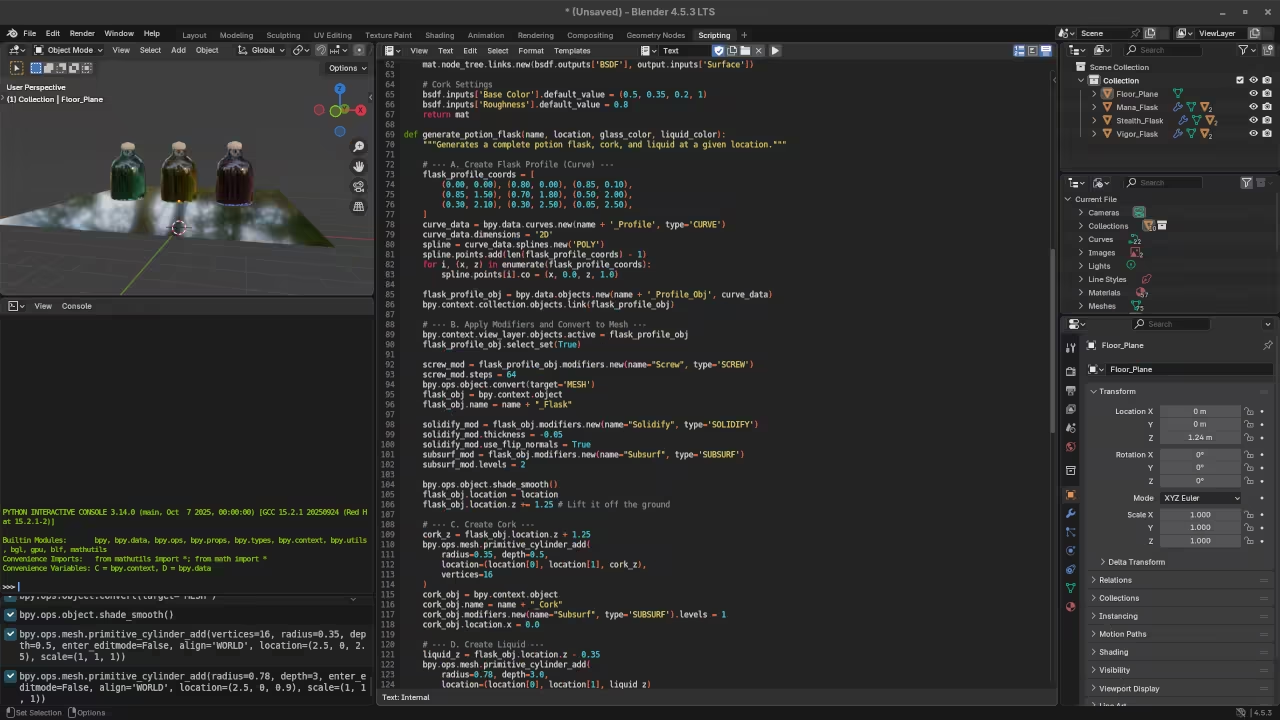
    To start, let’s create a potion holder model in Blender using Python scripting. First, open Blender, go to the Scripting tab, and you’ll see a Python console and text editor where we can write and execute Python scripts to interact with Blender’s 3D objects.

    Below is a Python script to create a simple potion holder and add handles to it:


    import bpy
    
    # Delete all objects in the scene
    bpy.ops.object.select_all(action=&#039;SELECT&#039;)
    bpy.ops.object.delete()
    
    # Create the potion holder (a cylinder with a hollow interior)
    bpy.ops.mesh.primitive_cylinder_add(vertices=32, radius=0.5, depth=1.5, location=(0, 0, 0))
    potion_holder = bpy.context.object
    
    # Scale it to resemble a potion holder
    potion_holder.scale = (1, 1, 1.5)
    
    # Create handles (toruses)
    bpy.ops.mesh.primitive_torus_add(location=(0.6, 0, 0.75), rotation=(1.57, 0, 0), major_radius=0.2, minor_radius=0.05)
    handle_1 = bpy.context.object
    handle_1.scale = (1, 1, 0.5)
    
    bpy.ops.mesh.primitive_torus_add(location=(-0.6, 0, 0.75), rotation=(1.57, 0, 0), major_radius=0.2, minor_radius=0.05)
    handle_2 = bpy.context.object
    handle_2.scale = (1, 1, 0.5)
    
    # Apply a golden material to the potion holder
    mat = bpy.data.materials.new(name=&quot;GoldenPotionMaterial&quot;)
    mat.use_nodes = True
    principled_shader = mat.node_tree.nodes[&quot;Principled BSDF&quot;]
    principled_shader.inputs[&quot;Base Color&quot;].default_value = (1, 0.843, 0, 1)  # Gold color
    
    potion_holder.data.materials.append(mat)
    
    # Optional: Add smooth shading
    bpy.ops.object.shade_smooth()
    
    # Add HDR lighting (courtyard HDRI)
    bpy.context.scene.world.use_nodes = True
    world_nodes = bpy.context.scene.world.node_tree.nodes
    bg_node = world_nodes.get(&#039;Background&#039;)
    env_texture = world_nodes.new(&#039;ShaderNodeTexEnvironment&#039;)
    env_texture.image = bpy.data.images.load(&quot;path_to_your_courtyard_hdr_image.exr&quot;)
    bg_node.inputs[&quot;Color&quot;].connect(env_texture.outputs[&quot;Color&quot;])


    Step 2: Exporting the Model for the Web

    Once the potion holder is created and you’ve applied the golden material, it’s time to export the model in a format suitable for web display. The most common format for 3D models on the web is glTF (.glb), which is compact and efficient for web rendering.

    To export the model:

    1. Go to File > Export > Export As .glTF (.glb).
    2. Choose glTF Binary (.glb) to keep the file size smaller and ensure it includes all textures and materials.

    Step 3: Displaying the Model in the Browser

    Now, let’s embed our 3D model into a web page using the <model-viewer> tag. This HTML tag makes it easy to showcase 3D models in any modern browser without needing complex frameworks.

    Here’s the HTML code to display your potion holder model:


        &lt;h1&gt;Golden Potion Holder&lt;/h1&gt;
        &lt;model-viewer src=&quot;path_to_your_model.glb&quot; alt=&quot;Potion Holder&quot; auto-rotate camera-controls ar 
                      shadow-intensity=&quot;1&quot; 
                      style=&quot;width: 100%; height: 500px;&quot;&gt;
        &lt;/model-viewer&gt;
        &lt;script type=&quot;module&quot; src=&quot;https://cdn.jsdelivr.net/npm/@google/model-viewer@2.5.0/dist/model-viewer.min.js&quot;&gt;&lt;/script&gt;


    Replace path_to_your_model.glb with the actual path to your .glb file. This will allow your model to be interactively viewed in the browser with automatic rotation and camera controls.

    Step 4: Lighting with HDR

    For realistic lighting, we’ll use an HDR image in Blender. The .hdr and .exr formats are ideal for high-quality lighting, as they carry more dynamic range than standard image formats like PNG or JPG.

    In Blender 4.5 LTS, there is a default courtyard.exr HDR image that works well. When rendering the scene, you can use this image to illuminate the model naturally.

    Blender also supports the .ktx and .ktx2 formats, which are optimized for real-time applications and have better compression for large scenes. However, .hdr and .exr tend to have more robust support across applications like Blender and other rendering engines.

    For web compatibility, .hdr and .exr are supported for high-quality scenes, but you may also consider converting HDR images to .ktx or .ktx2 for better performance in browsers.

    Step 5: Running the Python Script on the Command Line

    To run the Python script from the command line:

    1. Save the script as create_potion_holder.py.
    2. Open your terminal and navigate to the Blender directory (or ensure Blender is in your PATH).
    3. Run the script by executing the following command:
    blender --background --python create_potion_holder.py

    This command will execute the Python script in the background and create the potion holder model.

    📸 Screenshots & Screencast

    Low poly potion holder Python code
    Blender Scripting Workspace Displaying Low Poly Potion Holder Python Code

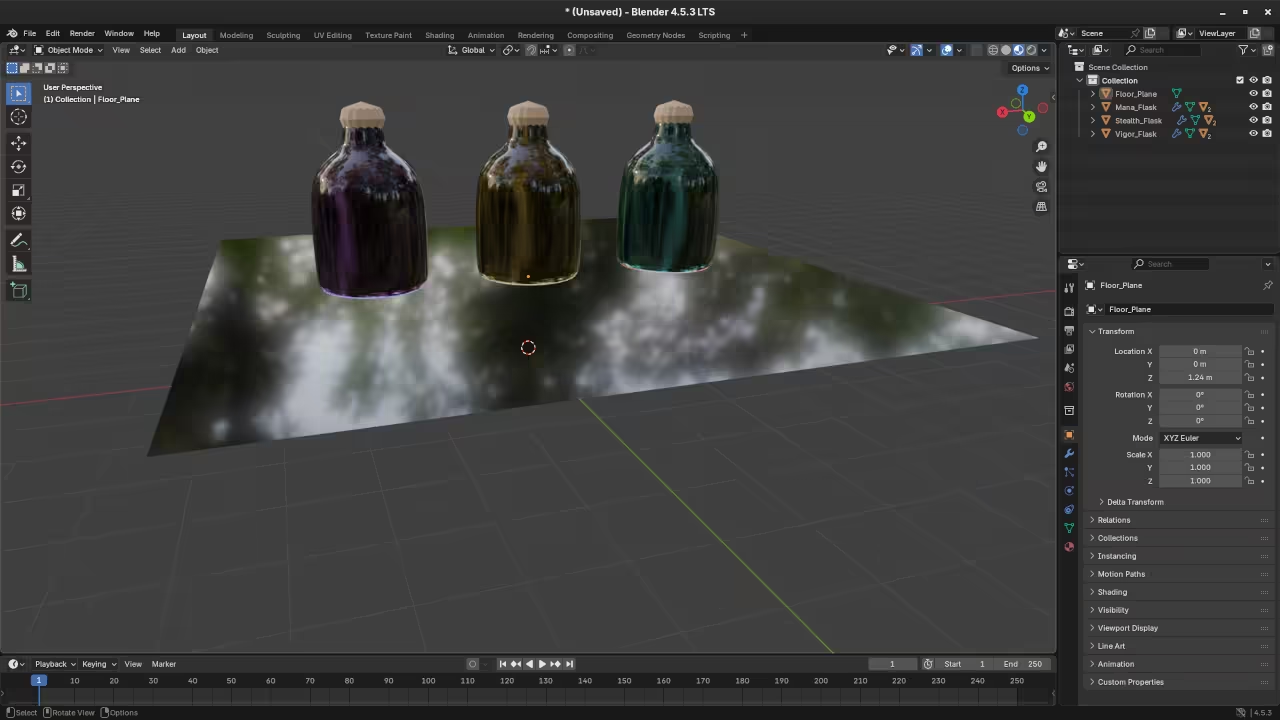
    Low poly potion holder in Blender
    Blender Layout Workspace Displaying Low Poly Potion Holder

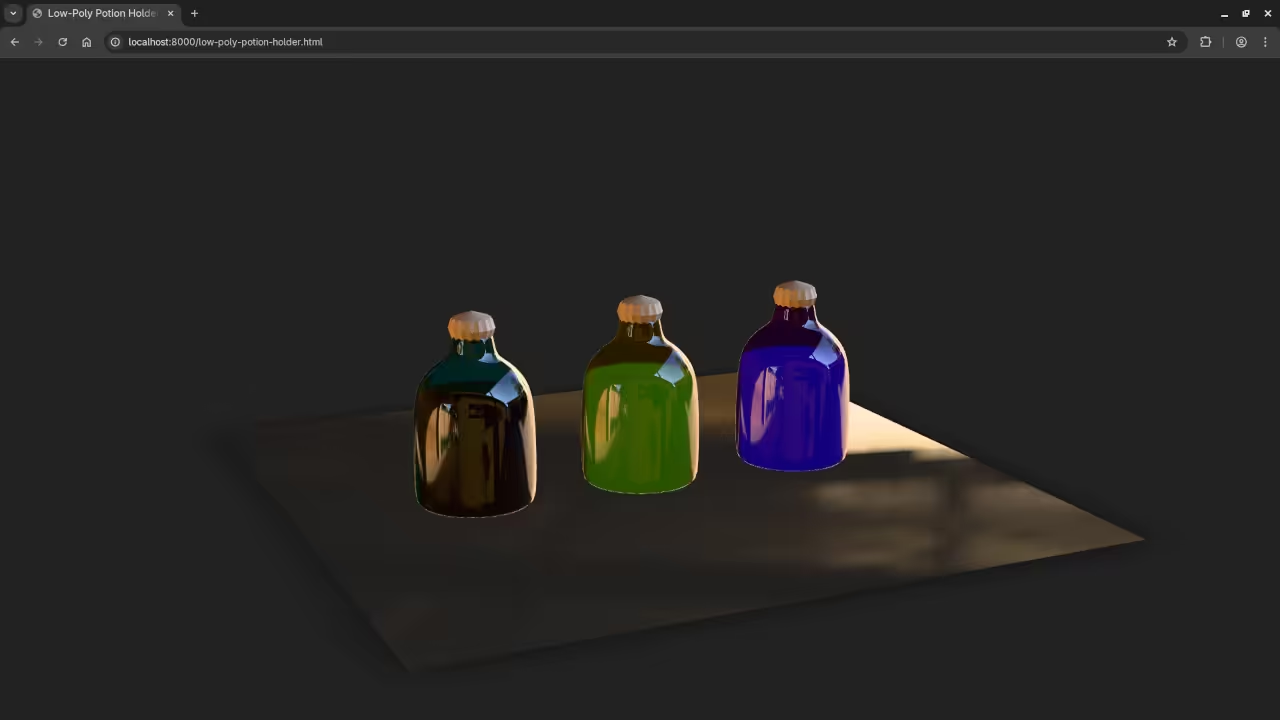
    Low poly potion holder in Web browser
    Web Browser Displaying Rendered Low Poly Potion Holder

    Screencast For Blender Python API Low Poly Potion Holder

    Conclusion

    You’ve now learned how to create a 3D potion holder using Blender’s Python API, apply a golden material, light the scene with an HDR image, and display the model in a web browser using the <model-viewer> tag. This process gives you the foundation for integrating 3D models into web projects with Python and Blender.

    For more in-depth tutorials, check out my books Learning Python and Mastering Blender Python API. If you’re interested in personalized learning, I offer one-on-one Python tutorials, including Blender, via my contact page.

    Also, be sure to check out my course Learning Python for a hands-on, interactive experience!

    Happy coding, and happy modeling!
  • Remmina Remote Desktop Client For Linux

    Remmina Remote Desktop Client For Linux

    Remmina: A Comprehensive Review and Installation Guide for Fedora Linux Users

    In today’s fast-paced tech environment, remote desktop access has become a crucial tool for managing systems remotely. One popular open-source application for this purpose is Remmina. In this post, we will review Remmina, highlight its open-source nature, and guide you through the installation process on Fedora Linux, both from Flathub and the Fedora distribution repository.

    What is Remmina?

    Remmina is a feature-rich remote desktop client that supports a variety of protocols, including RDP (Remote Desktop Protocol), VNC, NX, XDMCP, and SSH. It’s ideal for users who need to manage multiple remote servers or desktops from a single platform. Since it’s open-source, anyone can contribute to its development, and it’s free to use for anyone who needs it.

    I personally use Remmina to manage my servers and to assist users with system upgrades, like upgrading Fedora 42 to Fedora 43, via RDP. It’s lightweight, intuitive, and offers the security needed for professional remote connections.

    Installing Remmina on Fedora Linux

    Option 1: Installing from Flathub

    If you’re using Fedora 42 or Fedora 43, you can install Remmina easily from Flathub, a popular platform for distributing Flatpak applications.

    1. First, make sure you have Flatpak installed:
    sudo dnf install flatpak
    1. Next, add the Flathub repository if you haven’t already:
    flatpak remote-add --if-not-exists flathub https://flathub.org/repo/flathub.flatpakrepo
    1. Now, you can install Remmina from Flathub:
    flatpak install flathub org.remmina.Remmina
    1. Once installed, you can launch Remmina from the application menu or by using:
    flatpak run org.remmina.Remmina

    Option 2: Installing from Fedora’s Distro Repository

    Alternatively, you can install Remmina directly from Fedora’s default package repository.

    1. Update your system:
    sudo dnf update
    1. Install Remmina:
    sudo dnf install remmina
    1. Once the installation is complete, you can launch Remmina from your applications menu.

    Upgrading Fedora with Remmina (Using RDP)

    In this scenario, I’ll be upgrading my Fedora 42 laptop to Fedora 43 using the RDP protocol via Remmina. RDP provides a smooth and responsive remote session, making it perfect for managing remote desktops during major OS upgrades.

    📷 Screenshots

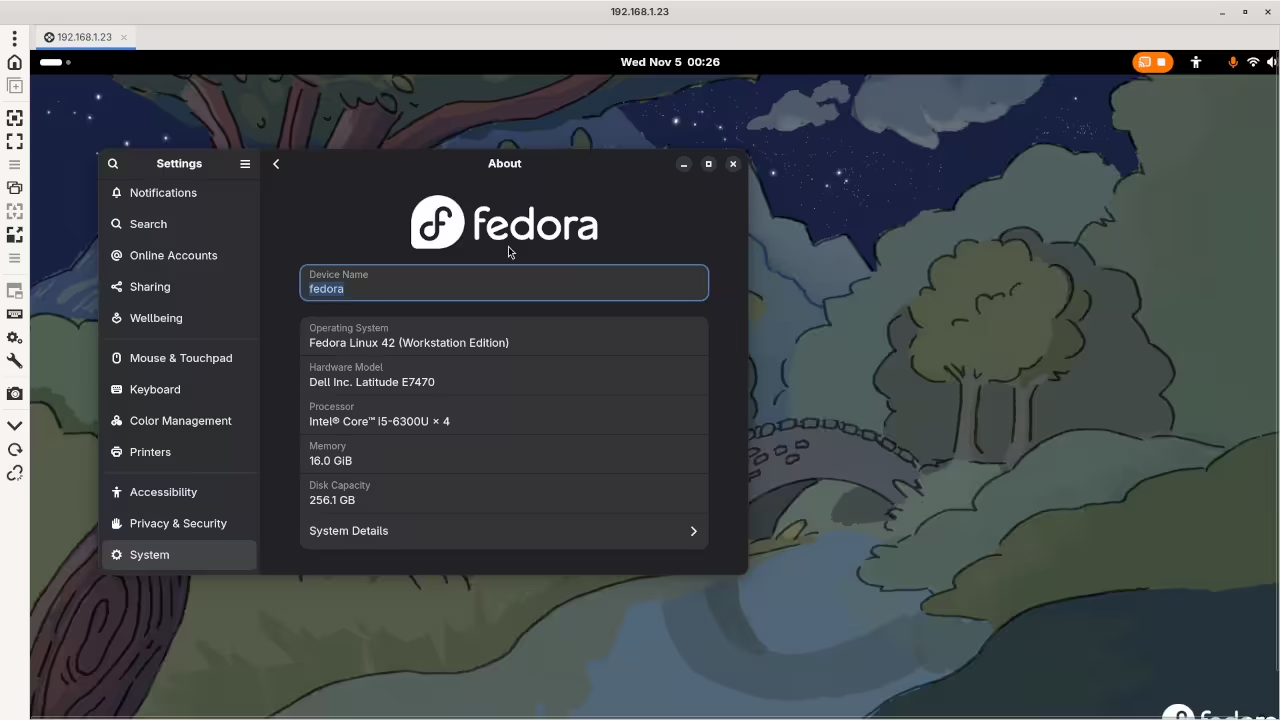
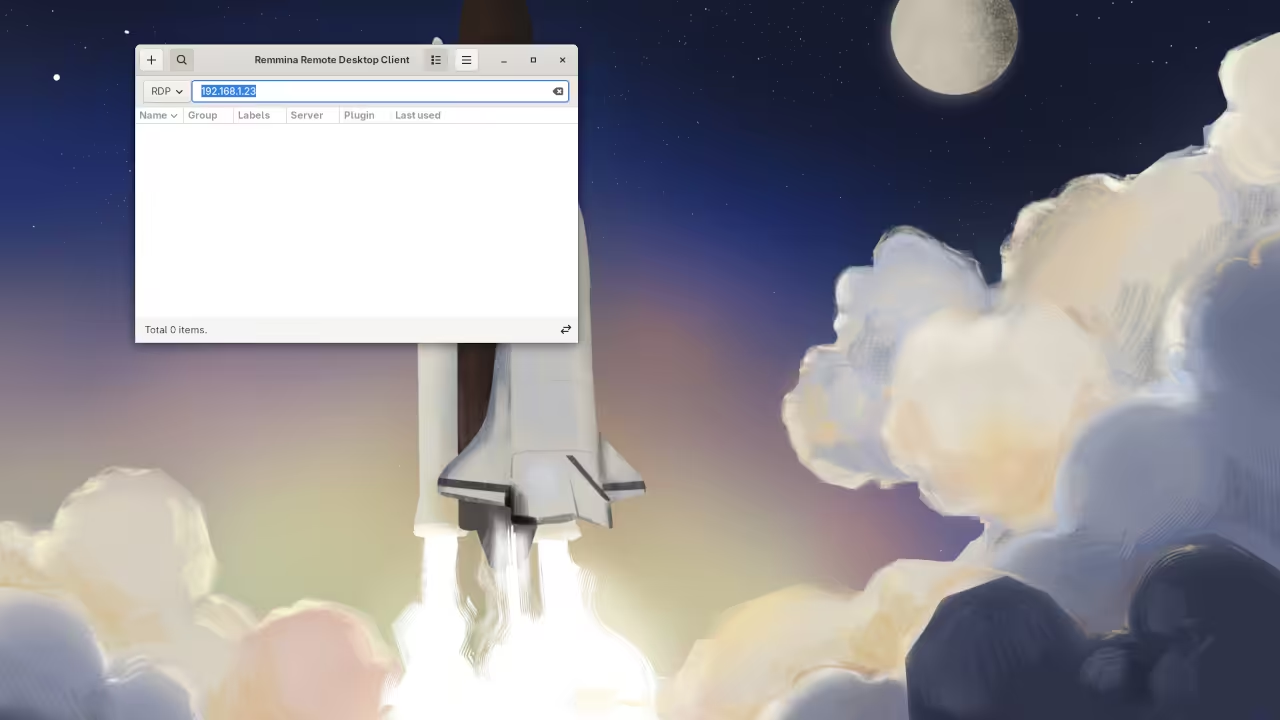
    Remmina Client
    Remmina Client Default Screen

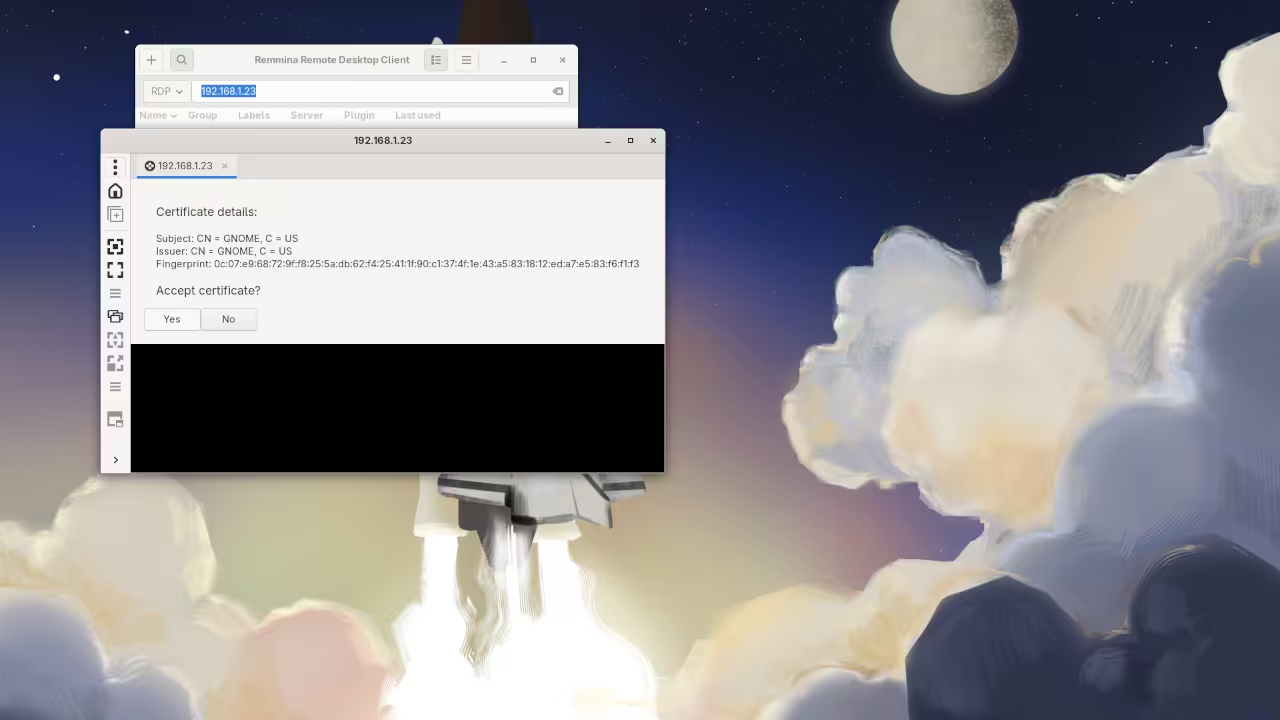
    Remmina Gnome Certificate
    Remmina Client Certificate Screen

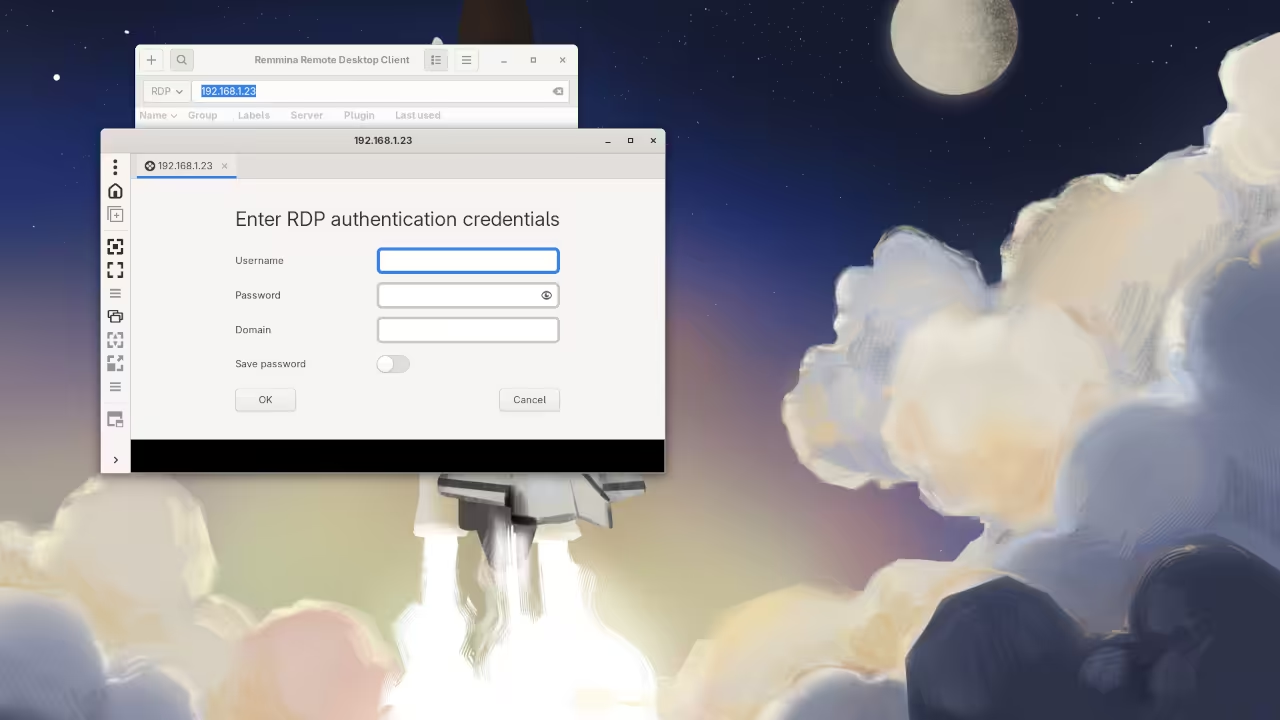
    Remmina Client RDP Credentials
    Remmina Client RDP Authentication Screen

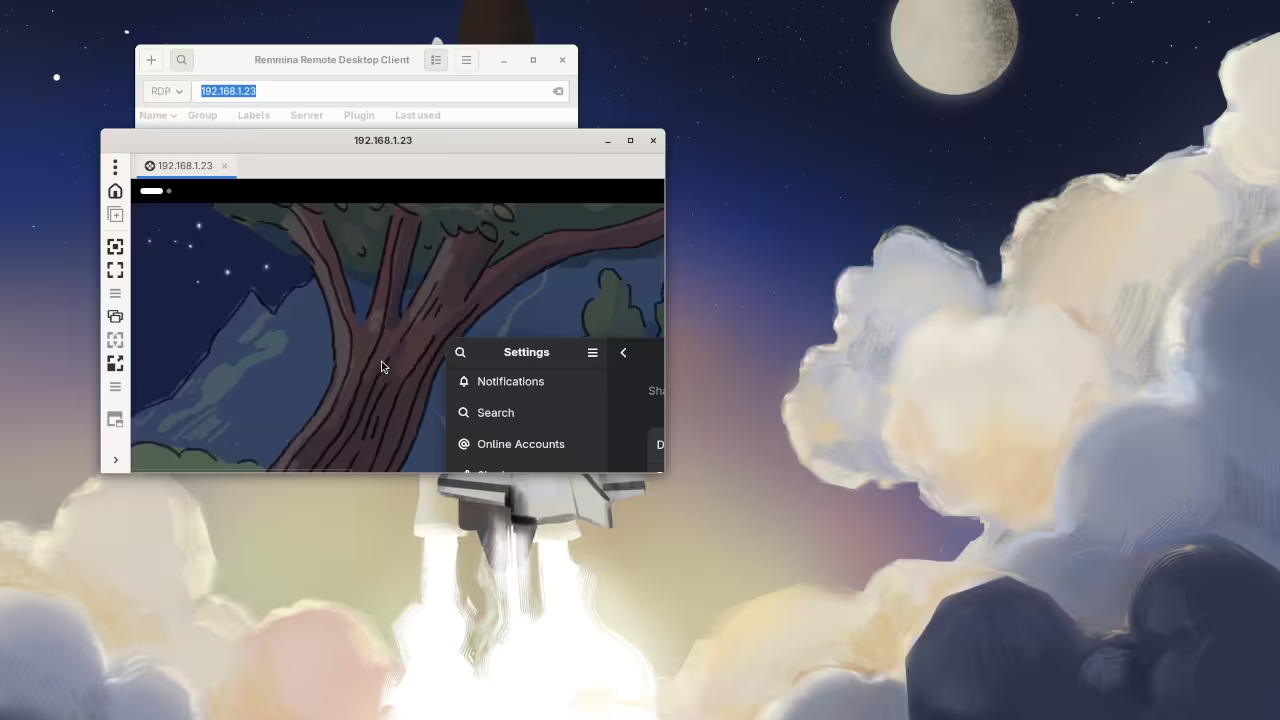
    Remmina Client Connection
    Remmina Client Connection Screen

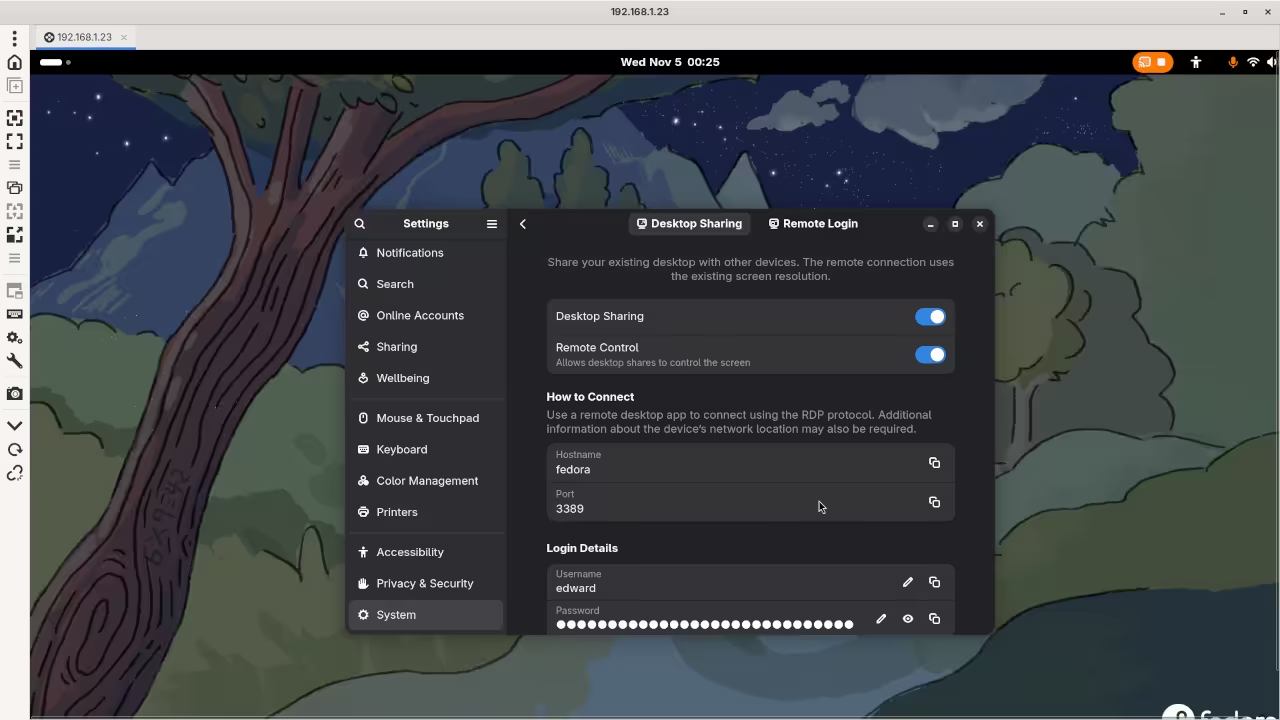
    Remmina Client Desktop Sharing
    Remmina Client Desktop Sharing Screen

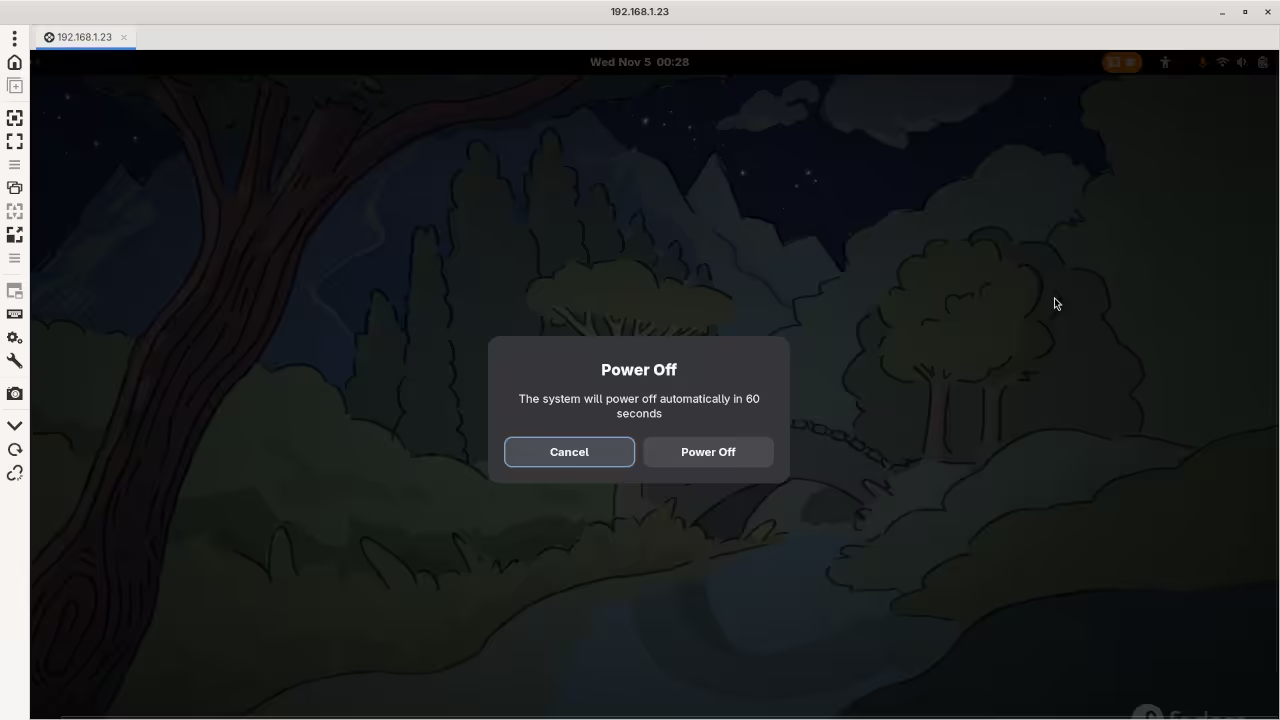
    Remmina Client Remote Control
    Remmina Client Controlling Remote Desktop

    🎬 Live YouTube Screencast

    Video Displaying The Installation And Use Of Remmina On Linux

    🎬 Addedum YouTube Screencast

    Video Displaying Fedora Upgrade Using Remmina On Linux

    Additional Resources

    • Programming Books: If you’re interested in improving your programming skills, check out my collection of programming books on Amazon.
      Visit my Amazon Author Page.
    • Online Programming Courses: I also offer a range of online programming courses designed to help you level up your coding skills.
      Explore my courses.
    • One-on-One Programming Tutorials: I’m available for personalized programming tutorials to help you tackle specific challenges and projects.
      Contact me for one-on-one tutorials.
    • Consulting and Remote Desktop Assistance: If you need help installing Remmina or other remote desktop clients, or if you require consulting for any related tech tasks, I’m here to assist.
      Contact me for consulting.
  • Kakoune 2025.06.03 Advanced Editor Review

    Kakoune 2025.06.03 Advanced Editor Review


    Kakoune: A Beginner’s Look at the Open Source, Interactive Code Editor

    Are you on the hunt for a text editor that’s as efficient as it is interactive? Meet Kakoune, a modern and powerful modal code editor that takes inspiration from the classic Vi/Vim but flips the editing model to enhance your workflow. It’s a fantastic tool for developers and anyone who spends a lot of time writing or manipulating text!
    What Makes Kakoune Stand Out?

    Kakoune is built around a philosophy of interactivity and multiple selections. Instead of operating in the traditional ‘verb-object’ style (like ‘delete word’), Kakoune uses an ‘object-verb’ model: select first, then act. This immediate feedback is a game-changer and makes editing highly intuitive.

    • Multiple Selections: This is the core feature. You can select multiple, non-contiguous pieces of text simultaneously and apply an action to all of them at once. Imagine changing the name of a variable everywhere in a file with a single set of keystrokes!
    • Contextual Help & Completion: Kakoune provides real-time information as you type commands, making it much easier for beginners to learn the system without constantly referring to documentation.
    • Client-Server Architecture: This design allows multiple windows (clients) to connect to the same editing session (server), which is perfect for working in a terminal multiplexer like tmux or zellij.

    Open Source and Licensing

    One of the greatest things about Kakoune is that it is completely open source. Its source code is freely available for anyone to view, modify, and distribute.

    • License: Kakoune is licensed under the Unlicense. The Unlicense essentially dedicates the work to the public domain, offering maximum freedom. It’s one of the most permissive licenses available, meaning you can pretty much do anything you want with the code.

    How to Install Kakoune

    Kakoune is available for most Unix-like systems. Installation is typically straightforward, often leveraging your distribution’s package manager.

    Focus Platform: Fedora Linux

    For users on Fedora Linux (or RHEL/CentOS 8+ via EPEL), the simplest way to install Kakoune is through the standard package manager, dnf:

    sudo dnf install kakoune

    Other Popular Platforms

    Here are installation methods for a few other common systems:

    Platform Installation Command(s)
    Debian/Ubuntu sudo apt install kakoune
    macOS (Homebrew) brew install kakoune
    Arch Linux sudo pacman -S kakoune

    Once installed, you can start the editor by simply typing kak in your terminal:

    kak my_new_file.txt

    Screenshots and Screencast

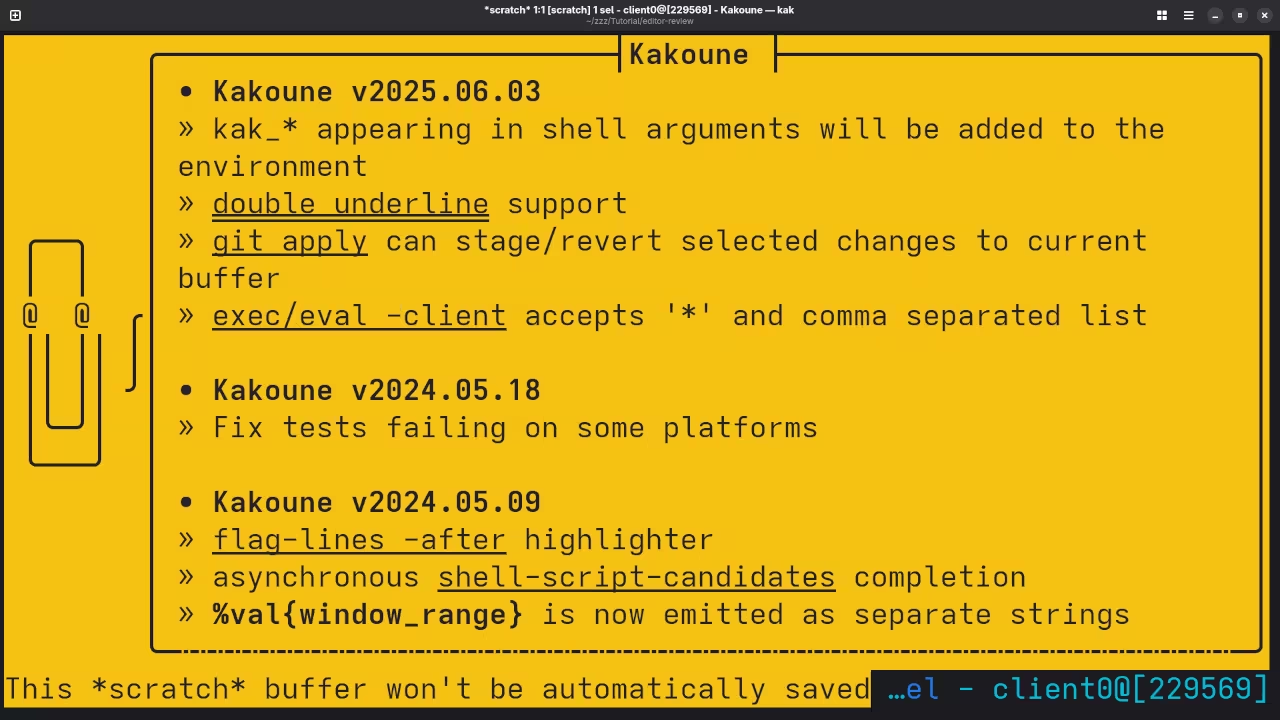
    Kakoune Settings View
    Kakoune Displaying Settings

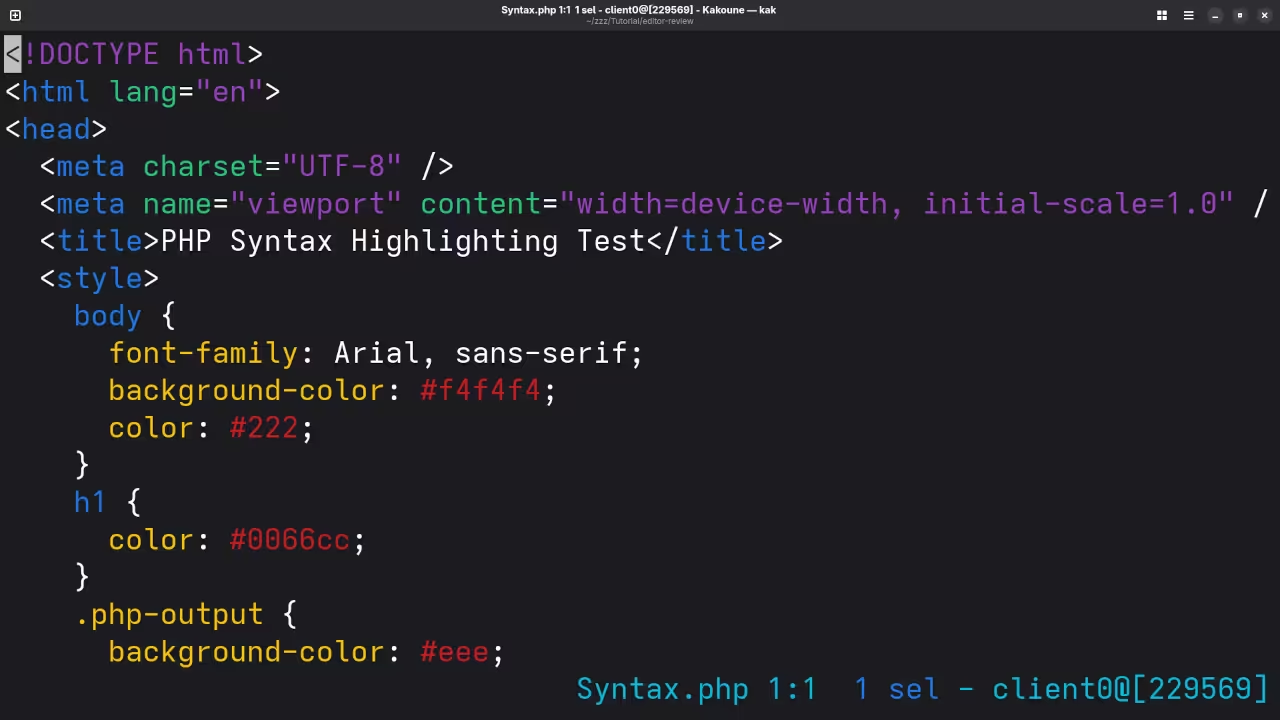
    Kakoune PHP Syntax Highlighting
    Kakoune Displaying PHP Syntax Highlighting

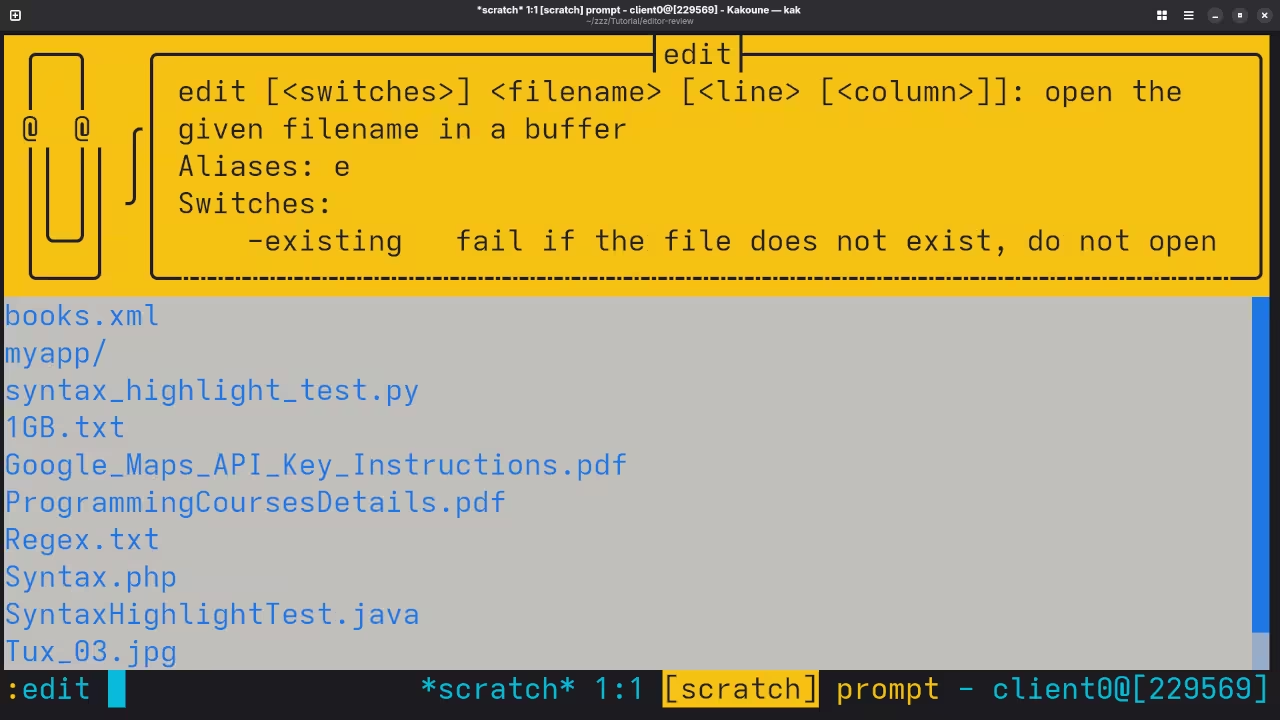
    Kakoune Folder View
    Kakoune Displaying Folder In Workspace

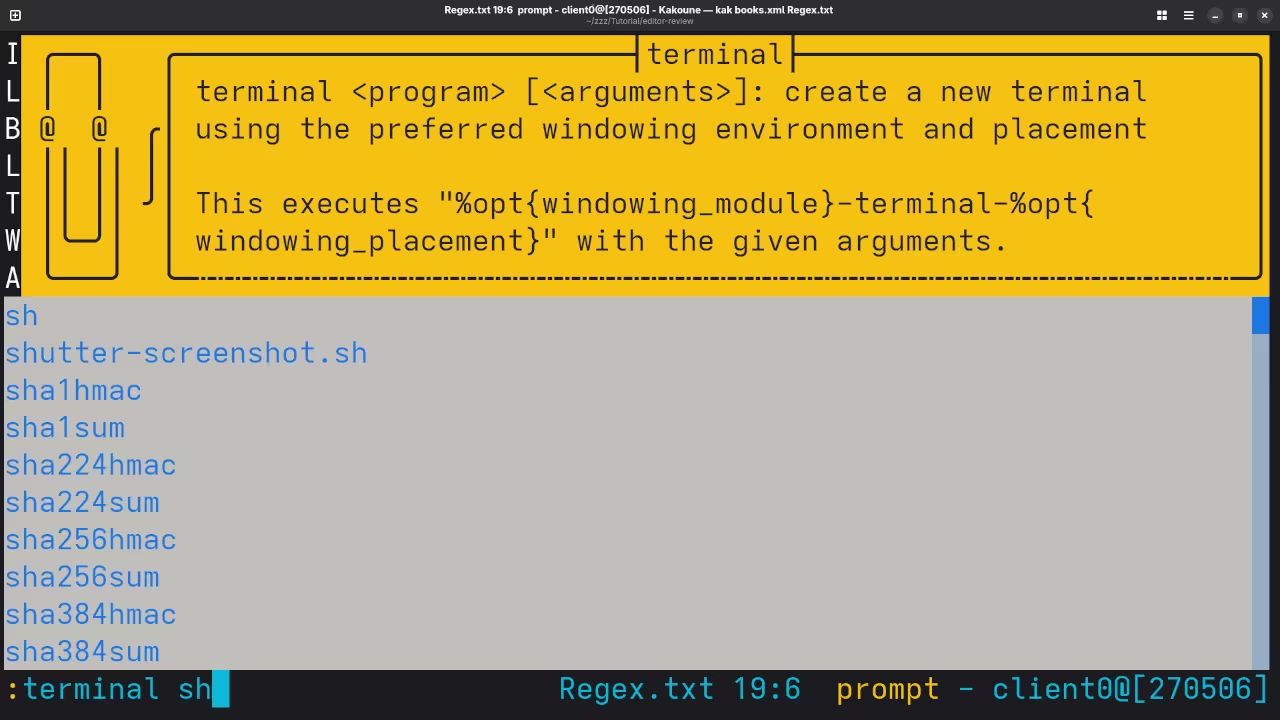
    Kakoune Terminal
    Kakoune Displaying How Terminal Works

    👉 Screencast showing a beginner session in Kakoune—editing, saving files, and navigating buffers.

    Kakoune Review And Feature Test

    Requirements For Programming Text Editor

    Glossary:

    Code Editor

    Designed for writing and editing source code.

    IDE

    Integrated Development Environment combines various tools need for software development.

    Plugin

    Software component that adds specific functionality.

    Theme

    Preset package containing graphical appearance to customize look and feel.

    Open source

    Freely available for possible modification and redistribution.

    SCM

    Source code management use to manage and track modifications to a source code repository.

    LMB

    Left Mouse Button (LMB) or left click

    MMB

    Middle Mouse Button (MMB) or scroll wheel

    Test Tools

    Test System
    Name Description
    CPU Ryzen 5 5600GT @ 3.60GHz.
    Memory 32GB DDR4.
    Operating System Fedora Linux Workstation 43.
    Desktop Environment Gnome 49.
    Name Description

    Test Suite
    Name Description
    Large File 1GB human-readable text.
    Regex File Text with word “Kakoune” repeated.
    Syntax File PHP file containing HTML, CSS & JavaScript.
    Media File Smiley face or Tux Linux JPEG file.
    Java Version OpenJDK 21.0.9.
    PHP Version PHP 8.4.13.
    Python Version Python 3.14.0.
    Kakoune Version 2025.06.03
    Name Description

    Test Scoring

    1. Each feature has two parts.
    2. Score of zero indicates a missing feature.
    3. A part of a feature is work a score of 0.5.

    Three bias elimination steps were utilized. The editor was used for at least three years on different platforms. Attempts were made to get stable plug-ins for missing features. The same editor was compared between the one in the repository, the developers website, and the compiled version if applicable.

    Selecting Editor Version

    For this review, Kakoune was installed using the instructions from the developers website and it did not require additional plugins.

    Features

    1. The theme can be native for the editor in terms of the background and toggled using :colorscheme. Kakoune dark and light themes can be created or downloaded and changed. The score for the theme was a perfect 1.0.
    2. Dragging and dropping a text file into the editor does not opens a new tab or buffer. It was not possible to specify the tab location during the drag and drop operation. The score for drag and drop into editor was 0.0.
    3. Opening a very large text file did not crash Kakoune. Kakoune was able to open or to edit the large file. The score for opening a large file was 1.0.
    4. Multiple documents can opened in multiple tabs or buffers. Tear-off tabs do not work and Kakoune does not have a feature to open in new window as a new instance which is handy for multiple monitors. The score for multiple documents was 0.5.
    5. Multiple editors can not be opened as new tabs with drag options. Each tab window view can not be split either vertically or horizontally as a multiple editor view in Wayland display server protocol. The score for multiple editor view was 0.0.
    6. Creating non-project files is possible. Non-project files can be opened on the command line. The score for creating non-project files was a perfect 1.0.
    7. Soft word wrap can be toggled by :add-highlighter buffer/wrap wrap. Automatic soft wrap for documents is is available for Kakoune. The score for word wrap was 1.0.
    8. Spell check can be enabled with :spell en if aspell is installed, and works as words are typed. Spelling errors are shown in opened documents. The score for spell check was 1.0.
    9. Word count can be achieved using word count (wc) as %|wc -w<ret> for the entire buffer or |wc -w<ret> for selection. Word count for the current buffer or file worked. Selection word count is available as part of word count. The score for word count was 1.0.
    10. Go to line can jump to a specified line using g and entering the line number. It is possible to jump to either the first or last line. The score for go to line is a perfect 1.0.
    11. Indentation can default to user-defined tab stops. Children are automatically indented. The score for indentation was a perfect 1.0.
    12. Fonts can be dynamically scaled with custom keyboard shortcuts CTRL-MMB. The system font can be bypassed and a new editor font and size can be set. The score for fonts was a perfect 1.0.
    13. Find and replace %sWORDTOREPLACET then press Enter then cREPLACEMENT, and also works when using regular expressions for all open documents in the current session. Find and replace will work for the current document or a selection in the current document. The score for find and replacing using regular expressions was a perfect 1.0.
    14. Multiple language syntax highlighting in one file is enabled. Each language has code-sensitive syntax colours. The score for multiple language syntax highlighting was a perfect 1.0.
    15. Code folding does not work for markup languages such as HTML. Code folding also does not work for programming languages such as Java. The score for code folding was 0.0.
    16. Selecting rectangular block per column works holding the SHIFT-C key. Rectangular block selection does not work properly with word wrap enabled. The score for selecting rectangular block was 0.5.
    17. Multiple cursors is available using SHIFT-N. Search multiple selection does work using / for forward and ? for backward. The score for multiple selection was 1.0.
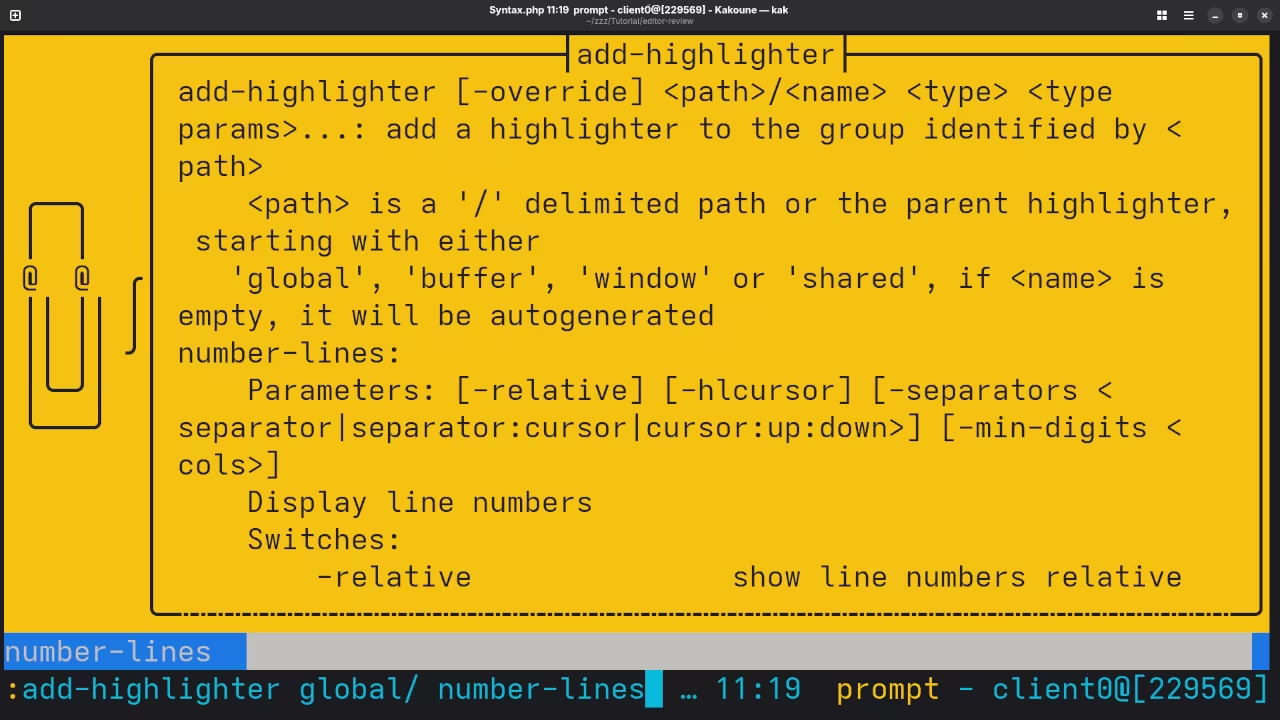
    18. Distraction-free mode to hide panes works. Line numbers can be toggled :add-highlighter global/number-linesto improve distraction-free mode. The score for distraction-free was a perfect 1.0.
    19. The file manager can be enabled by default using :edit or via a plugin. Media files can not be dragged and dropped into the file manager pane. The score for file manager was 0.5.
    20. Terminal is be invoked using :terminal sh. The terminal does follow folder. Terminal can execute system commands. The score for terminal was 1.0.

    Results

    Kakoune is a lightweight IDE. By default, the Kakoune editor is missing required features that can be enabled or implemented by plugins. For my required features, the Kakoune editor scored 77.5% or 7.75 out of 10.

    Ready to Deep Dive into Programming?

    If Kakoune sparks your interest in coding, I have resources to help you on your journey!

    Need Personalized Help?

    I am available for one-on-one online programming tutorials tailored to your specific learning needs.

    I can also assist with the installation of Kakoune on your system or help you migrate your workflow from a different editor.

  • How to Install ONLYOFFICE Secure Online Office

    How to Install ONLYOFFICE Secure Online Office

    Getting Started with ONLYOFFICE: A Beginner’s Guide to the Open Source Office Suite

    If you’ve ever wanted a powerful open source alternative to Microsoft Office or Google Workspace, ONLYOFFICE might be the perfect solution for you. It is a fully featured office suite that supports text documents, spreadsheets, presentations, forms, and collaborative editing – all self-hosted on your own server.

    Why Choose ONLYOFFICE?

    • Open Source – Completely transparent and customizable.
    • Collaborative Editing – Real-time document co-editing just like Google Docs.
    • Secure – You have full control over your data.
    • Integrations – Works with Nextcloud, ownCloud, WordPress, and more.

    Installing ONLYOFFICE Using Podman

    If you prefer Podman instead of Docker for container management, you can easily set up ONLYOFFICE with the following commands.

    Step 1: Create a Podman Compose File

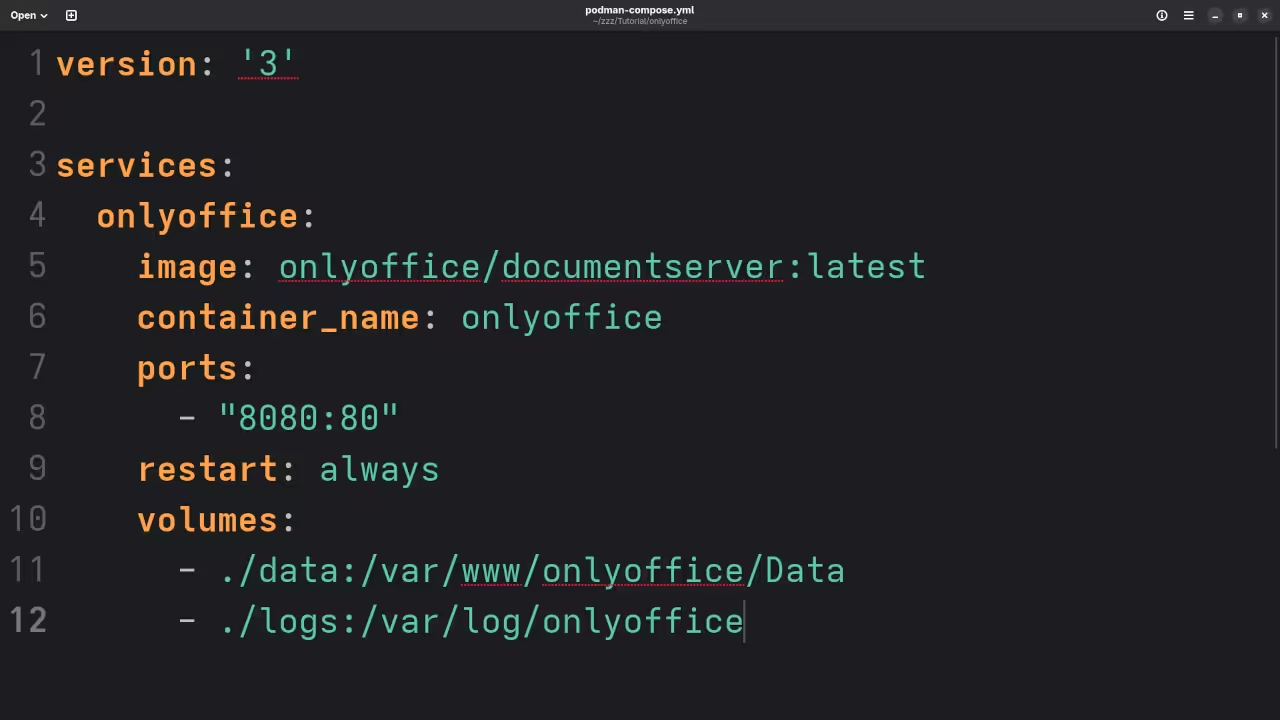
    Create a file called podman-compose.yml:

    version: '3'
    
    services:
      onlyoffice:
        image: onlyoffice/documentserver:latest
        container_name: onlyoffice
        ports:
          - "8080:80"
        restart: always
        volumes:
          - ./data:/var/www/onlyoffice/Data
          - ./logs:/var/log/onlyoffice

    Step 2: Start the Service

    Run the following command to launch ONLYOFFICE:

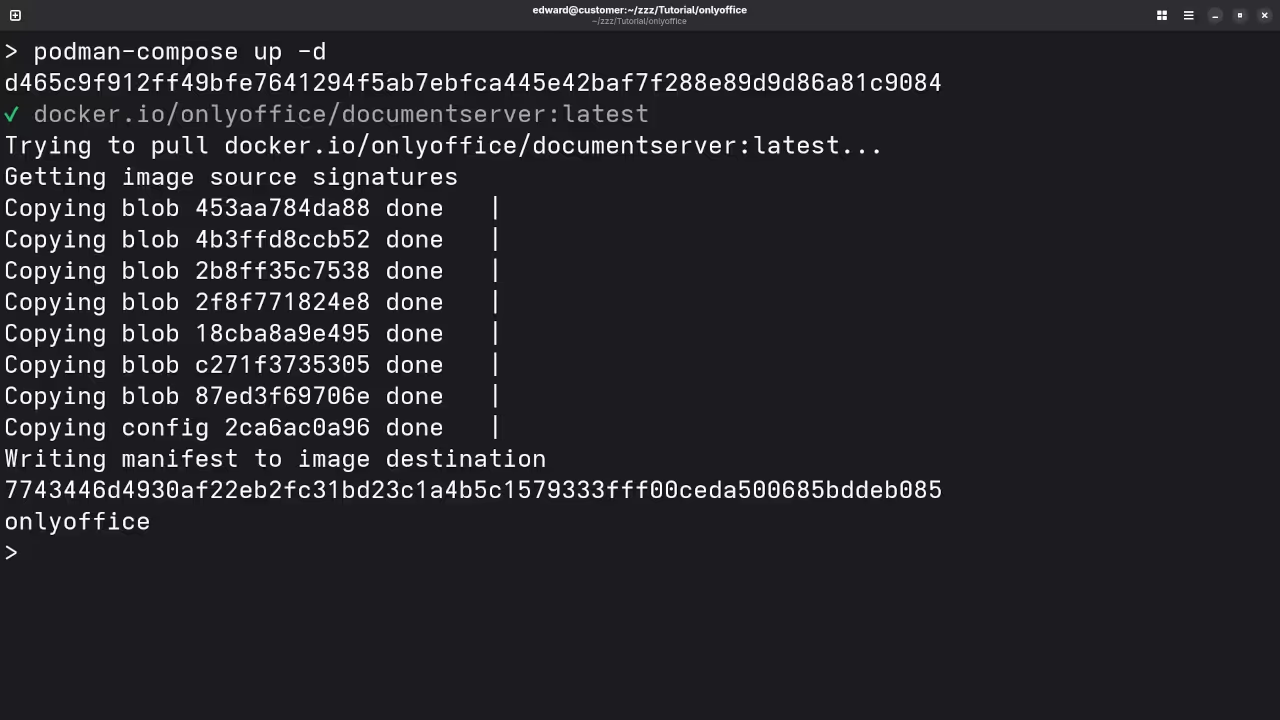
    podman-compose up -d

    Once the container starts, open your web browser and go to:

    http://localhost:8080

    You will see the ONLYOFFICE interface ready to use.

    📷 Screenshots & 📽️ Screencast

    ONLYOFFICE YAML Compose
    Gnome Text Editor Displaying ONLYOFFICE Podman Compose YAML

    ONLYOFFICE Podman Container
    Command Line Displaying ONLYOFFICE Podman Compose Container

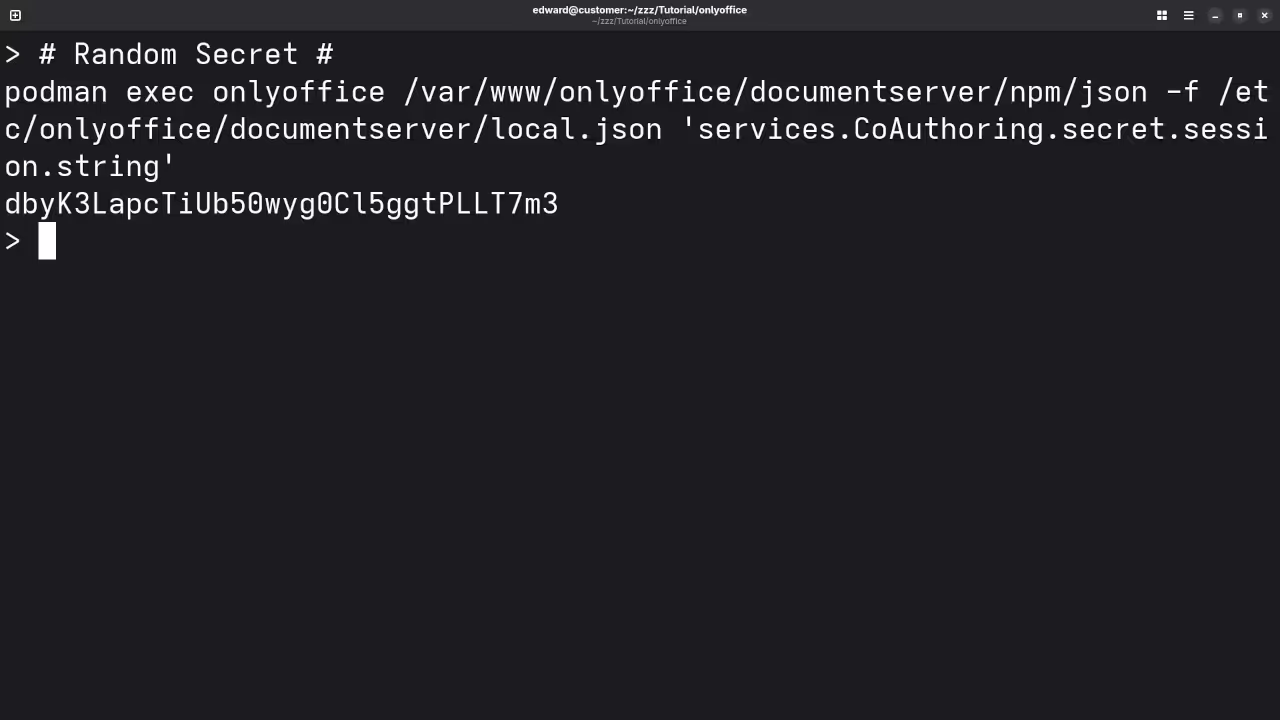
    ONLYOFFICE Random Secret
    Command Line Displaying ONLYOFFICE Generated Random Secret

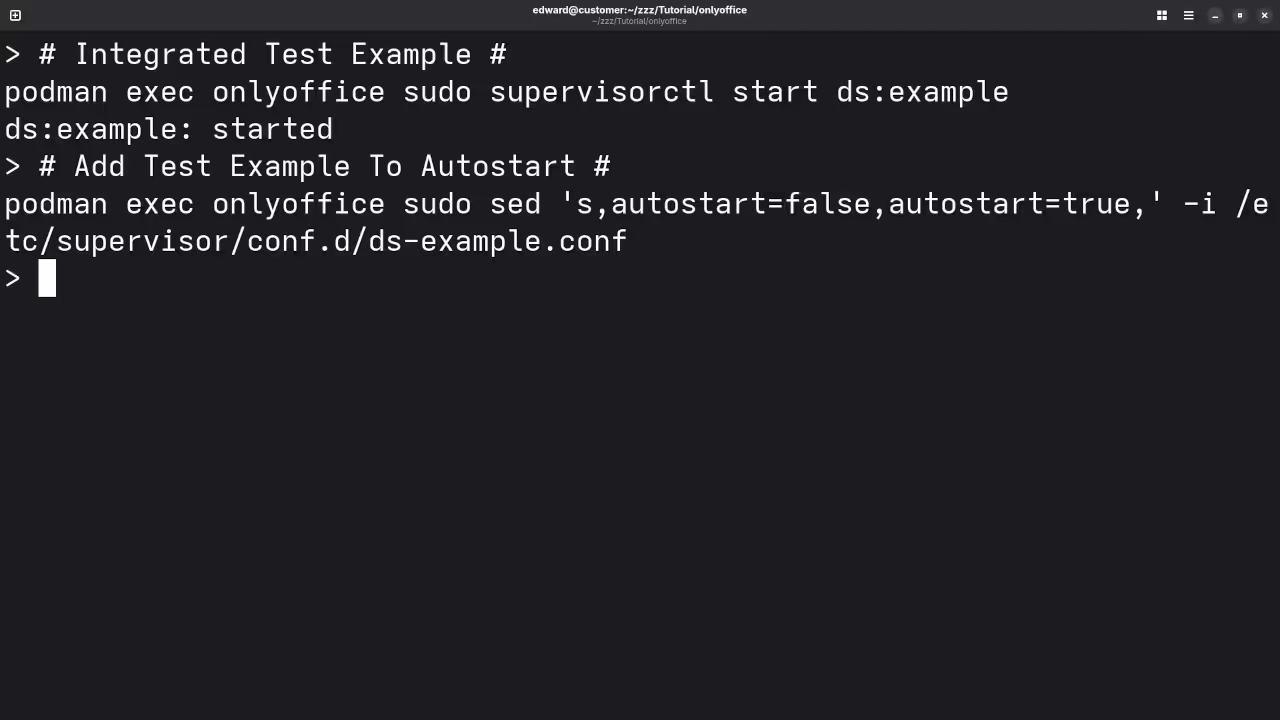
    ONLYOFFICE Test Example
    Command Line Displaying ONLYOFFICE Test Example Started

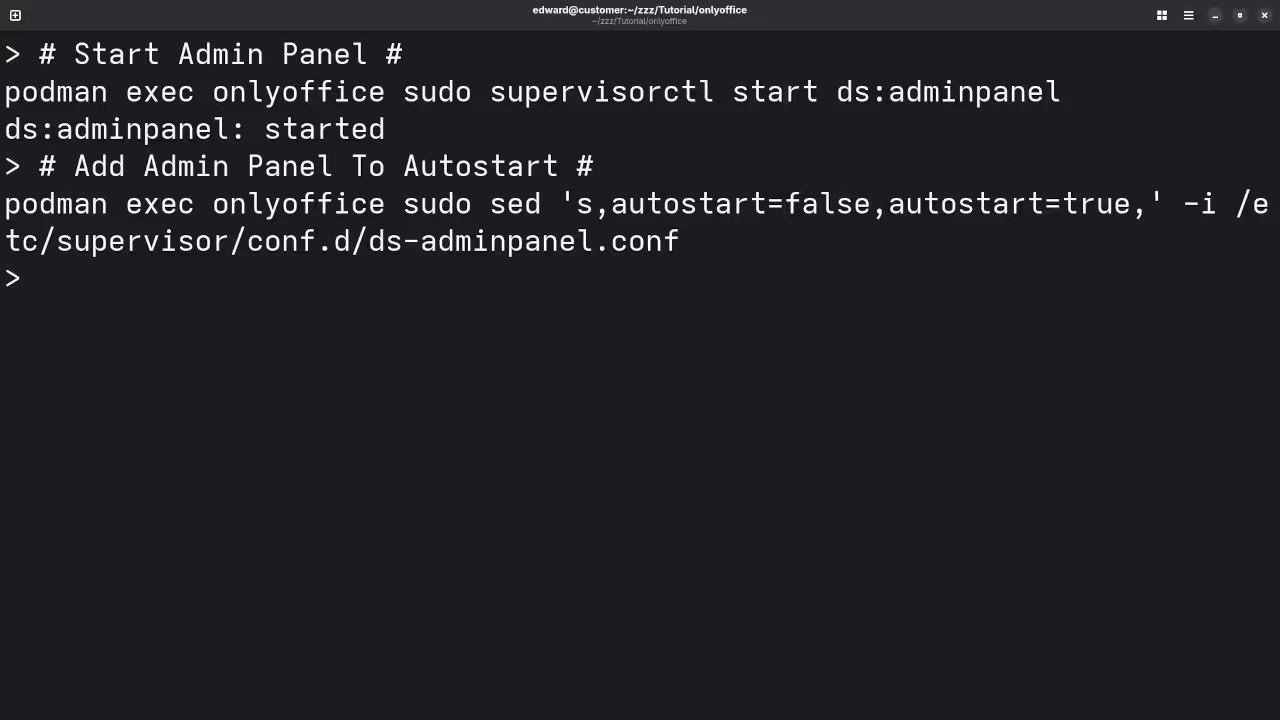
    ONLYOFFICE Admin Panel
    Command Line Displaying ONLYOFFICE Admin Panel Started

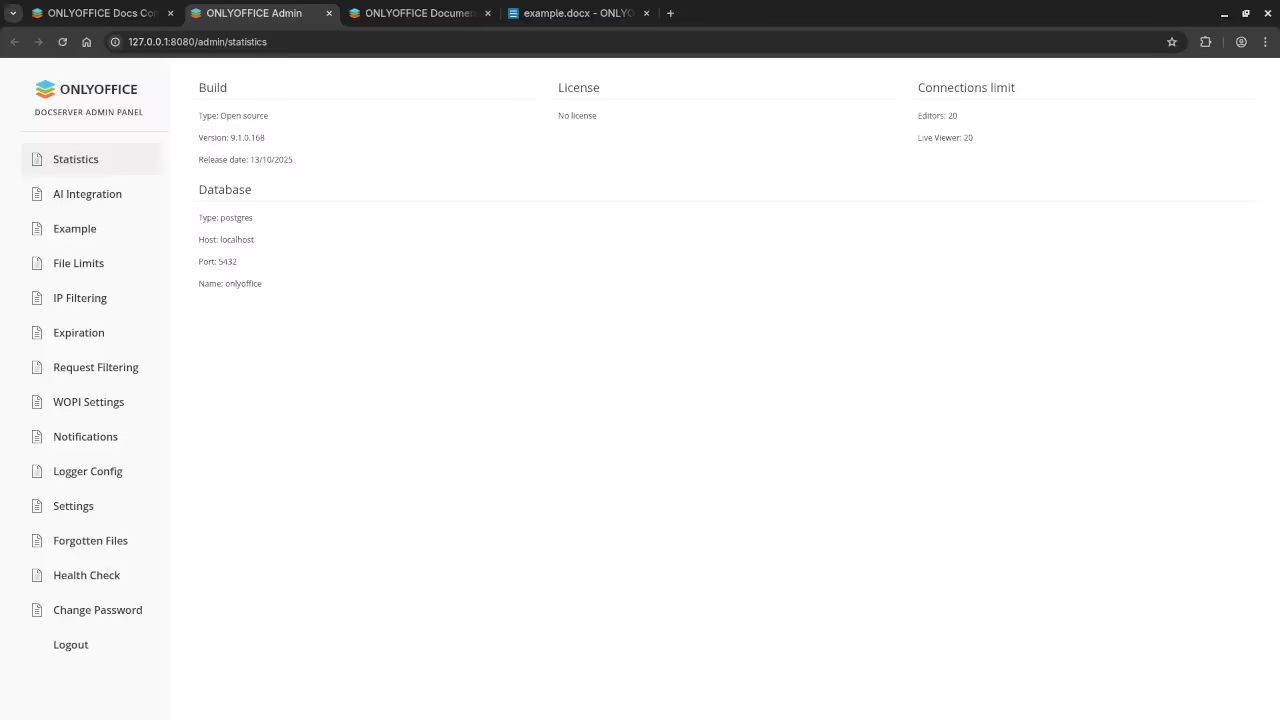
    ONLYOFFICE Admin Dashboard
    Web Browser Displaying ONLYOFFICE Administrator Dashboard

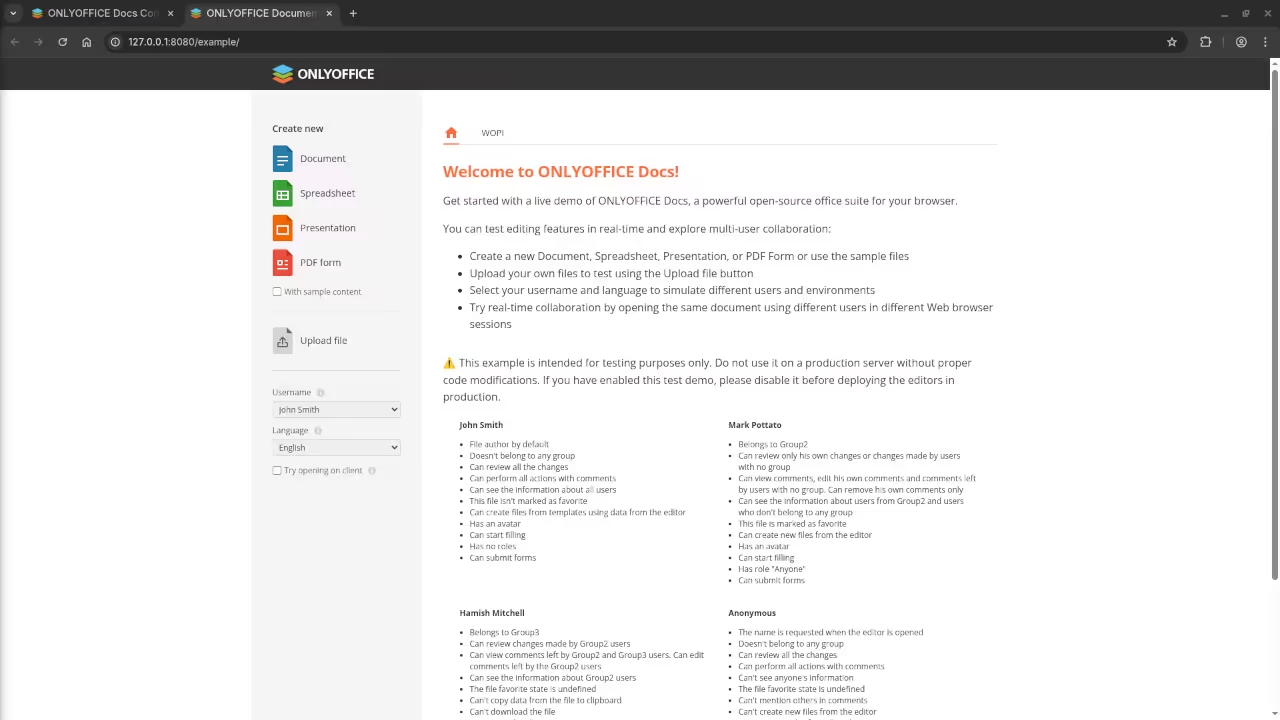
    ONLYOFFICE Example URL
    Web Browser Displaying ONLYOFFICE Example Document URL

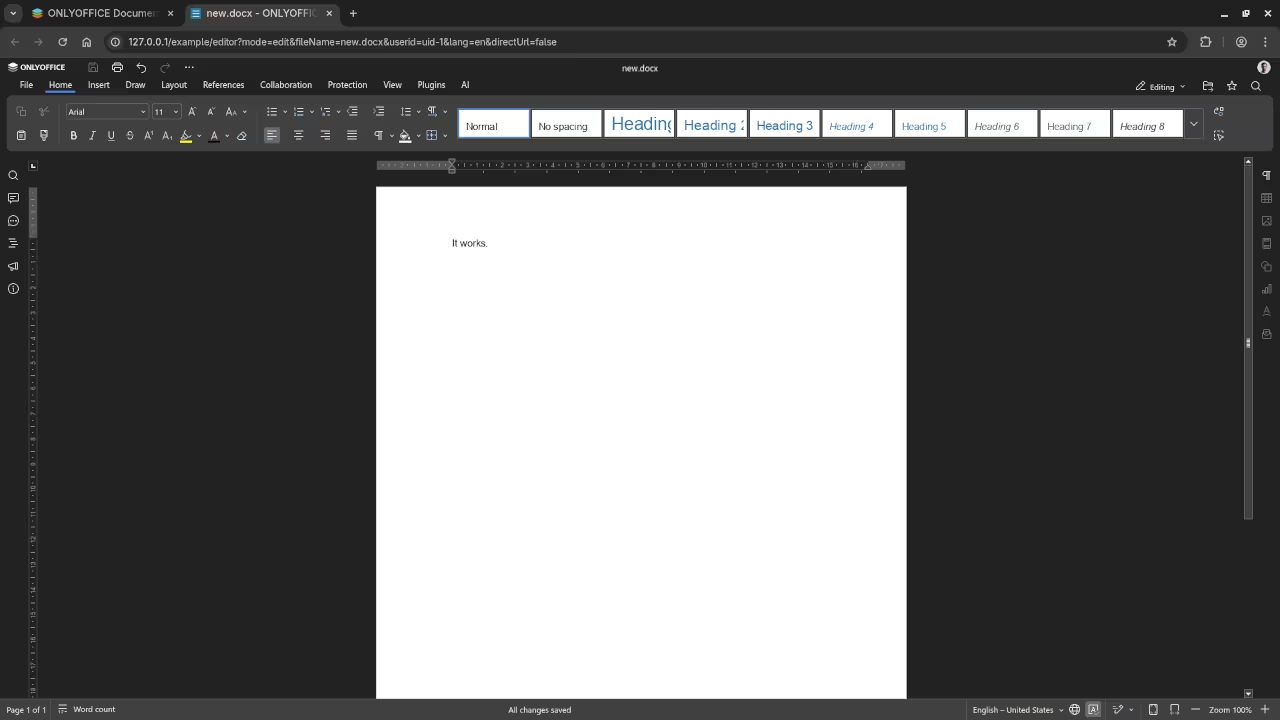
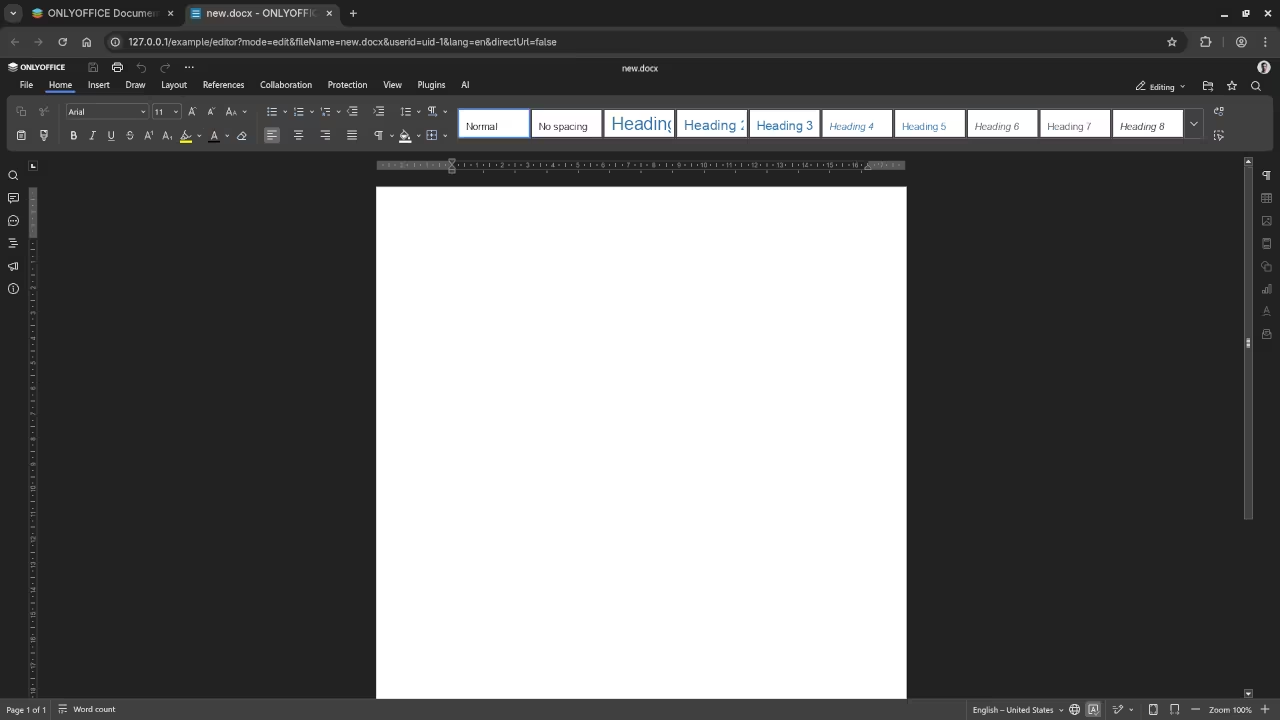
    ONLYOFFICE Word Processor
    Web Browser Displaying ONLYOFFICE Example Word Processor

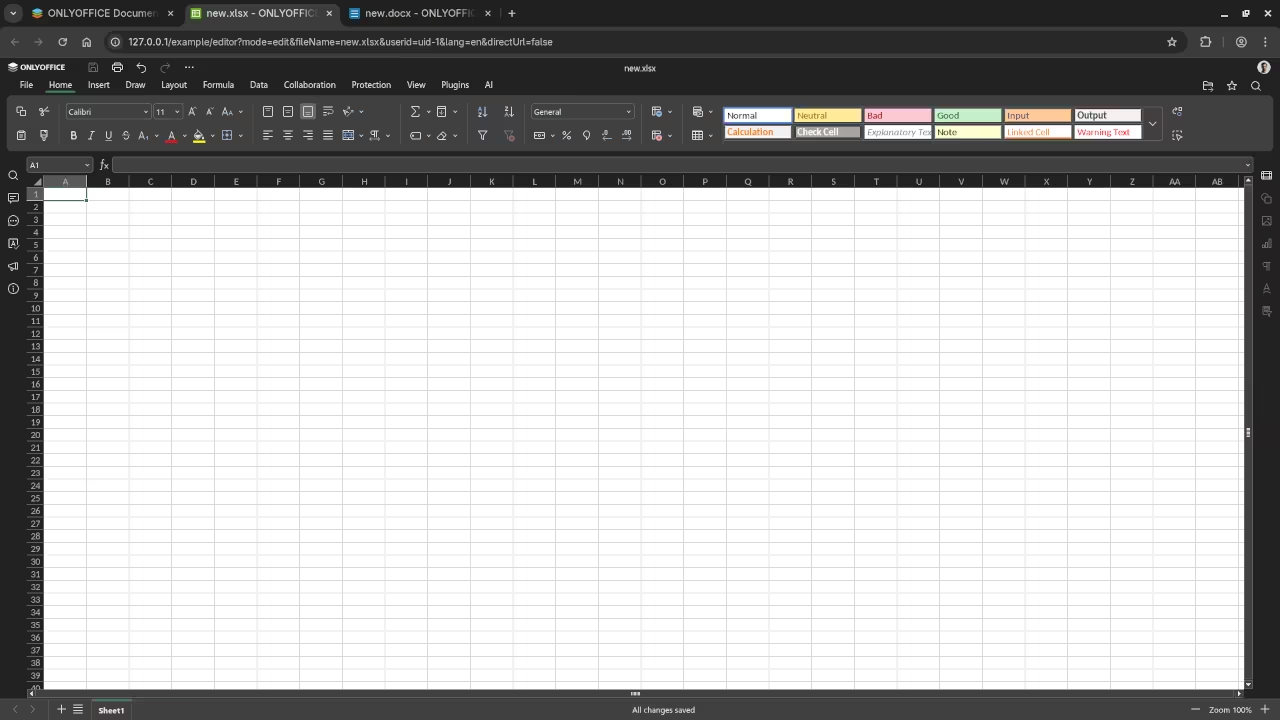
    ONLYOFFICE Spreadsheet
    Web Browser Displaying ONLYOFFICE Example Spreadsheet

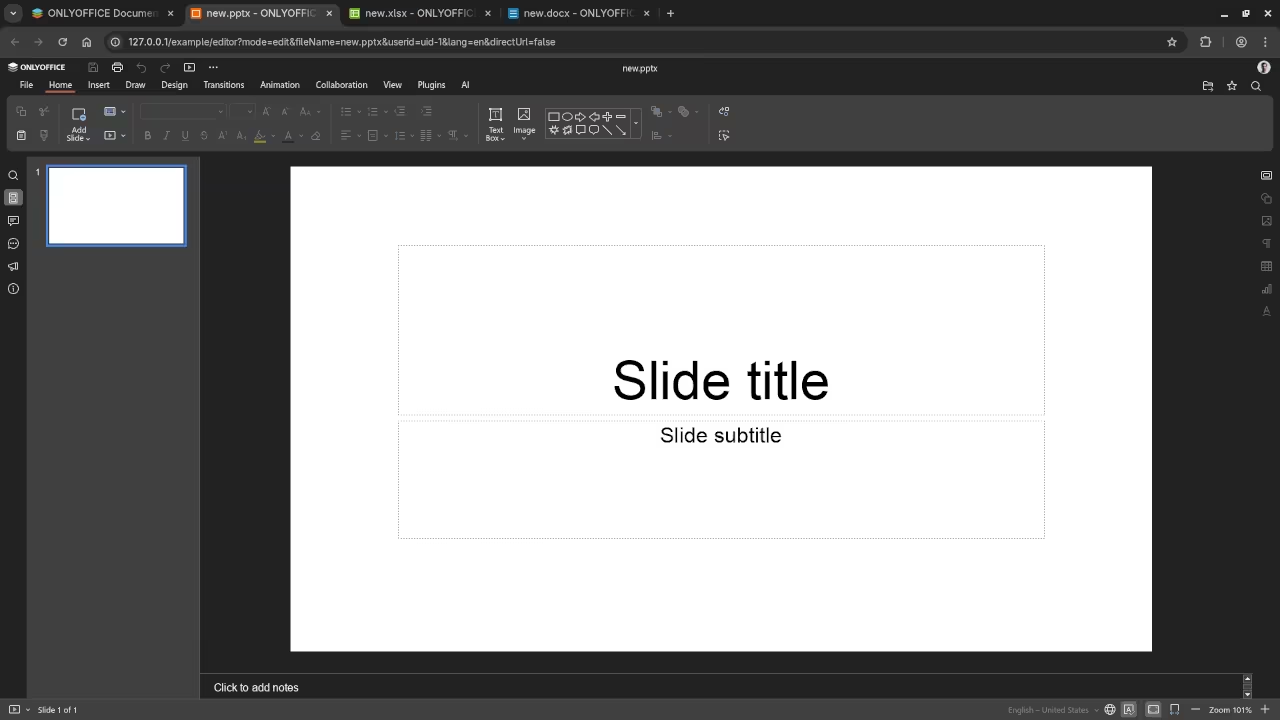
    ONLYOFFICE Presentation
    Web Browser Displaying ONLYOFFICE Example Presentation

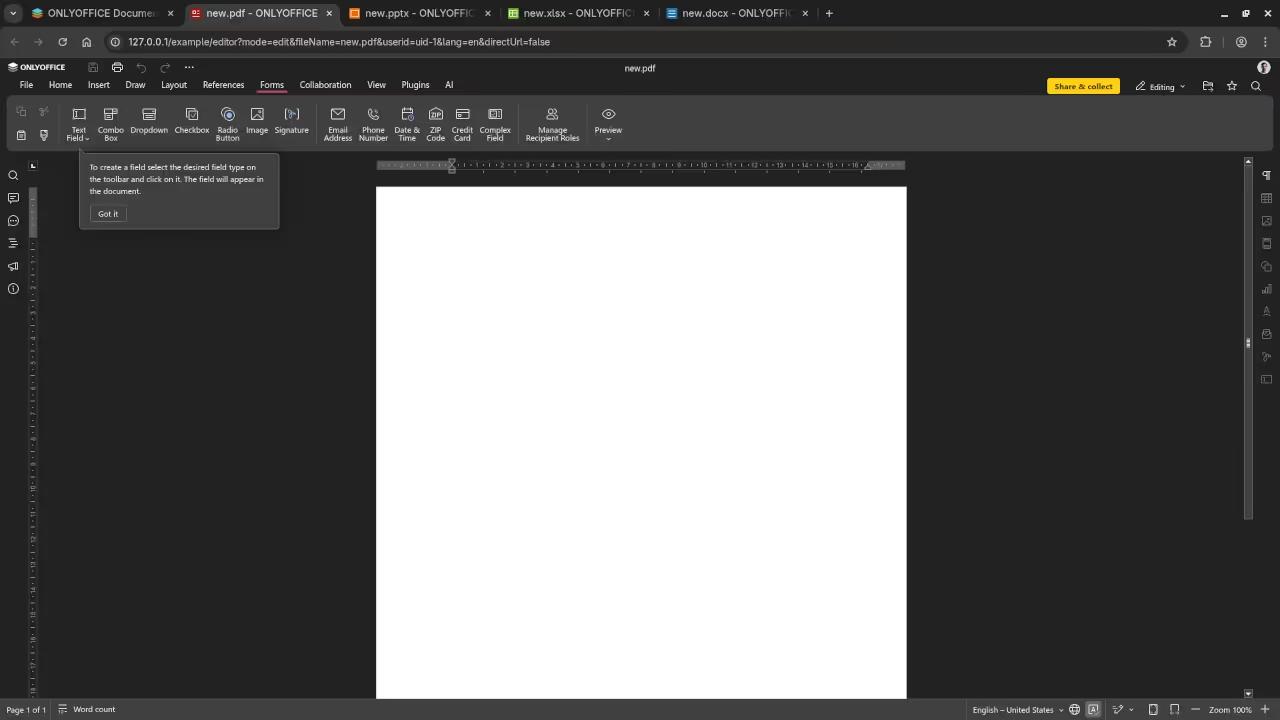
    ONLYOFFICE PDF
    Web Browser Displaying ONLYOFFICE Example PDF

    ONLYOFFICE Installation And Setup Screencast

    Learn Programming and More

    If you are interested in learning how to program or deepen your technical skills, check out these resources:

    Final Thoughts

    ONLYOFFICE offers a flexible, open source, and user-friendly solution for personal or business productivity. Whether you are self-hosting for privacy, collaboration, or learning purposes, installing it with Podman is quick and straightforward.

    If you would like help with your installation or a full migration, contact me directly at https://ojamboservices.com/contact – I would be happy to assist.

  • Review Generative AI Gemma-The-Writer-J.GutenBerg-10B-D_AU-Q6_k Model

    Review Generative AI Gemma-The-Writer-J.GutenBerg-10B-D_AU-Q6_k Model

    Setting Up Gemma-The-Writer-J.GutenBerg-10B-D_AU-Q6_k LLM on Your Custom Web UI

    In today’s post, we’ll dive into how to set up the Gemma-The-Writer-J.GutenBerg-10B-D_AU-Q6_k LLM (Large Language Model) on a custom web user interface (UI) using the Llama.cpp backend. We’ll also go over the licensing details for Gemma-The-Writer-J.GutenBerg-10B-D_AU-Q6_k and discuss whether it’s open-source, its licensing terms, and any restrictions you should be aware of.

    What is Gemma-The-Writer-J.GutenBerg-10B-D_AU-Q6_k?

    Gemma-The-Writer-J.GutenBerg-10B-D_AU-Q6_k is a powerful Large Language Model (LLM) designed for text generation, conversational AI, and content creation tasks. It leverages the Llama.cpp backend, which is a high-performance, efficient engine for running LLMs.

    Gemma vs Gemma-The-Writer-J.GutenBerg-10B-D_AU-Q6_k

    It’s essential to note that Gemma and Gemma-The-Writer-J.GutenBerg-10B-D_AU-Q6_k are separate models:

    • Gemma: A different LLM model, which is governed by the Gemma License and is not fully open-source.
    • Gemma-The-Writer-J.GutenBerg-10B-D_AU-Q6_k: This model is available under the Apache License 2.0 for the code and architecture, and the weights are subject to Google’s specific licensing terms.

    Is Gemma-The-Writer-J.GutenBerg-10B-D_AU-Q6_k Open Source?

    Yes, Gemma-The-Writer-J.GutenBerg-10B-D_AU-Q6_k is often considered “open-source” within the AI community due to its availability and general use. However, it’s important to understand the distinction:

    • Apache License 2.0 governs the code and model architecture of Gemma-The-Writer-J.GutenBerg-10B-D_AU-Q6_k.
    • However, the underlying weights of the model are subject to a specific license from Google, which introduces some use restrictions. These restrictions include limitations on commercial use, redistribution, and other factors that developers need to be aware of before integrating the model into their applications.

    So, while the model itself is open in the sense that it’s publicly accessible and can be modified or used freely for many purposes, the weights are restricted and must be used in compliance with Google’s license terms.

    Gemma License and Restrictions

    Gemma (the separate LLM model) operates under the Gemma License, which has its own set of restrictions:

    • Not Fully Open Source: The Gemma License does not allow for complete freedom of use, modification, or redistribution.
    • Commercial Restrictions: The Gemma License has specific restrictions on commercial applications and redistribution of the model.
    • Attribution Requirements: You must provide proper attribution when using or distributing the model.
    • Modifications: Modifying the model may be restricted or require special approval under the Gemma License.

    In summary, Gemma is subject to the Gemma License, which imposes certain usage limitations, while Gemma-The-Writer-J.GutenBerg-10B-D_AU-Q6_k is released under the Apache License 2.0 for the model code, but with restrictions on the use of the weights as per Google’s licensing terms.

    To review the full terms of the Apache License 2.0 and Gemma License, please refer to the official documentation.

    Setting Up Gemma-The-Writer-J.GutenBerg-10B-D_AU-Q6_k on a Custom Web UI

    Now, let’s walk through the steps for setting up Gemma-The-Writer-J.GutenBerg-10B-D_AU-Q6_k on your custom web UI:

    1. Install Llama.cpp: Ensure that you have Llama.cpp set up on your system. This backend will handle the heavy lifting for running the model.
    2. Create a Web Interface: Design a custom frontend with HTML, CSS, and JavaScript, allowing users to interact with the model. The frontend should be able to send requests to your Llama.cpp backend and display the responses from Gemma-The-Writer-J.GutenBerg-10B-D_AU-Q6_k.
    3. Integrate the Model: Once the backend is configured, you can integrate Gemma-The-Writer-J.GutenBerg-10B-D_AU-Q6_k into your web UI to allow for seamless interaction.
    4. Testing: Run some tests to ensure the system is functioning properly and that the model is generating meaningful and accurate responses.

    Screenshots and Screencast

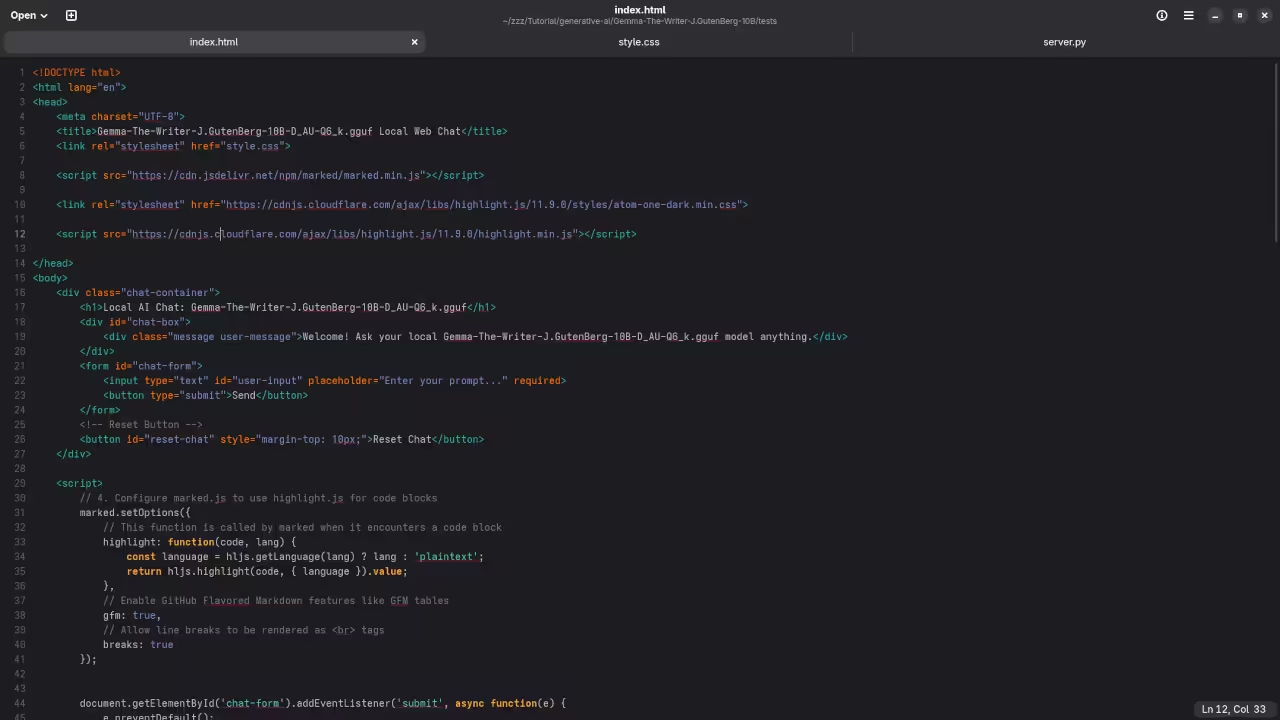
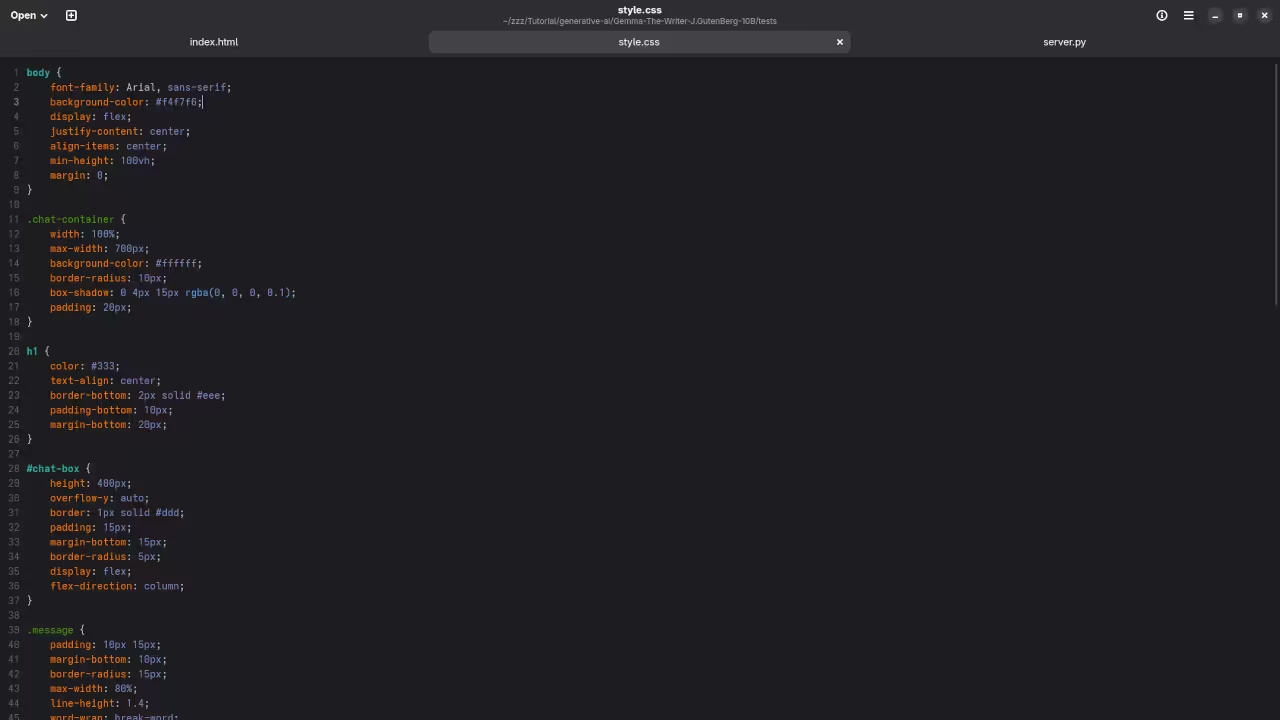
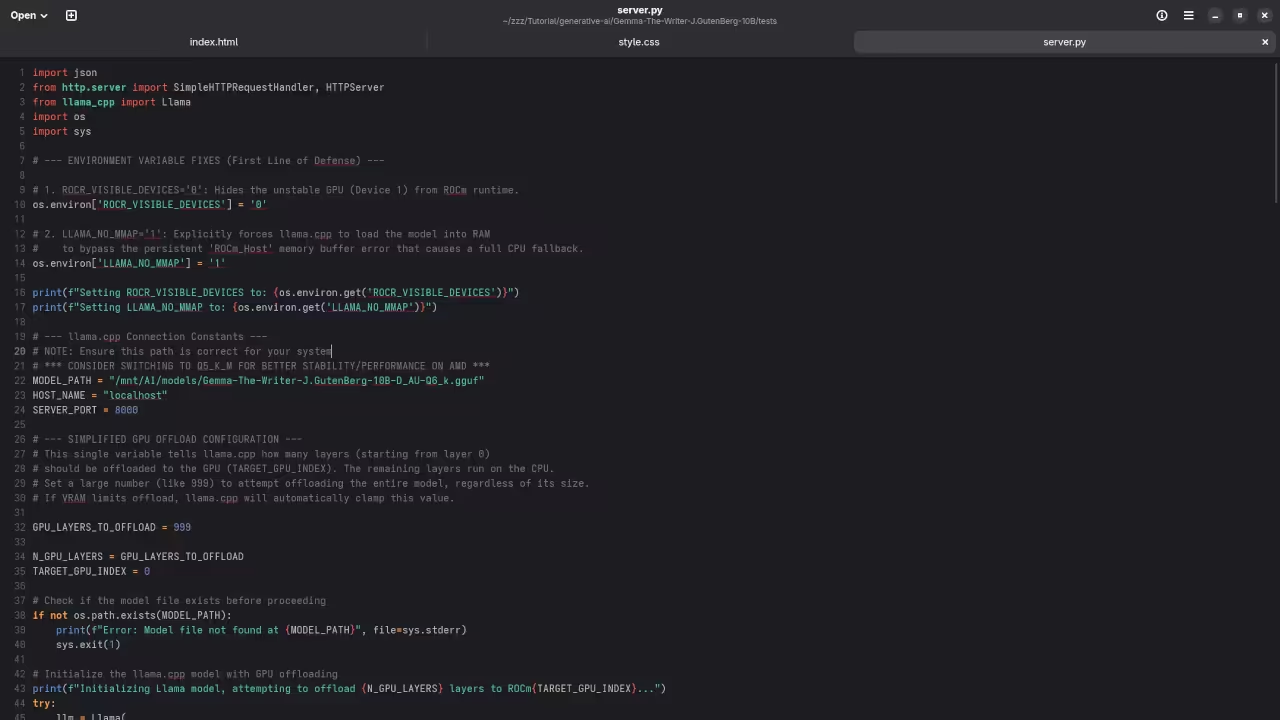
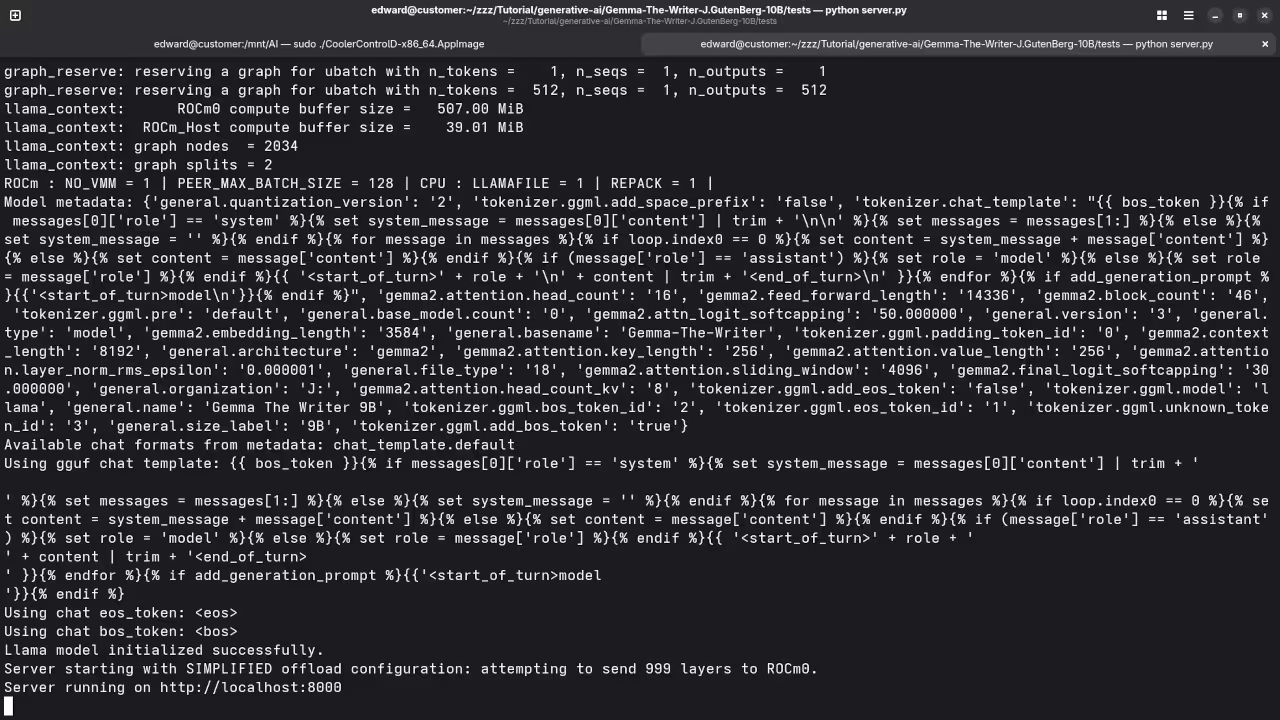
    Here’s where you’ll find a visual walkthrough of setting up Gemma-The-Writer-J.GutenBerg-10B-D_AU-Q6_k using Alpaca llama.cpp on your local system:

    Custom llama.cpp Web UI HTML
    Gnome Text Editor Displaying llama.cpp Web Interface HTML File.

    Custom llama.cpp Web UI CSS
    Gnome Text Editor Displaying llama.cpp Web Interface CSS File.

    llama.cpp API Direct Python Script
    Gnome Text Editor Displaying llama.cpp Endpoint Direct API Python Script.

    Python Server
    Command Line Python Server.

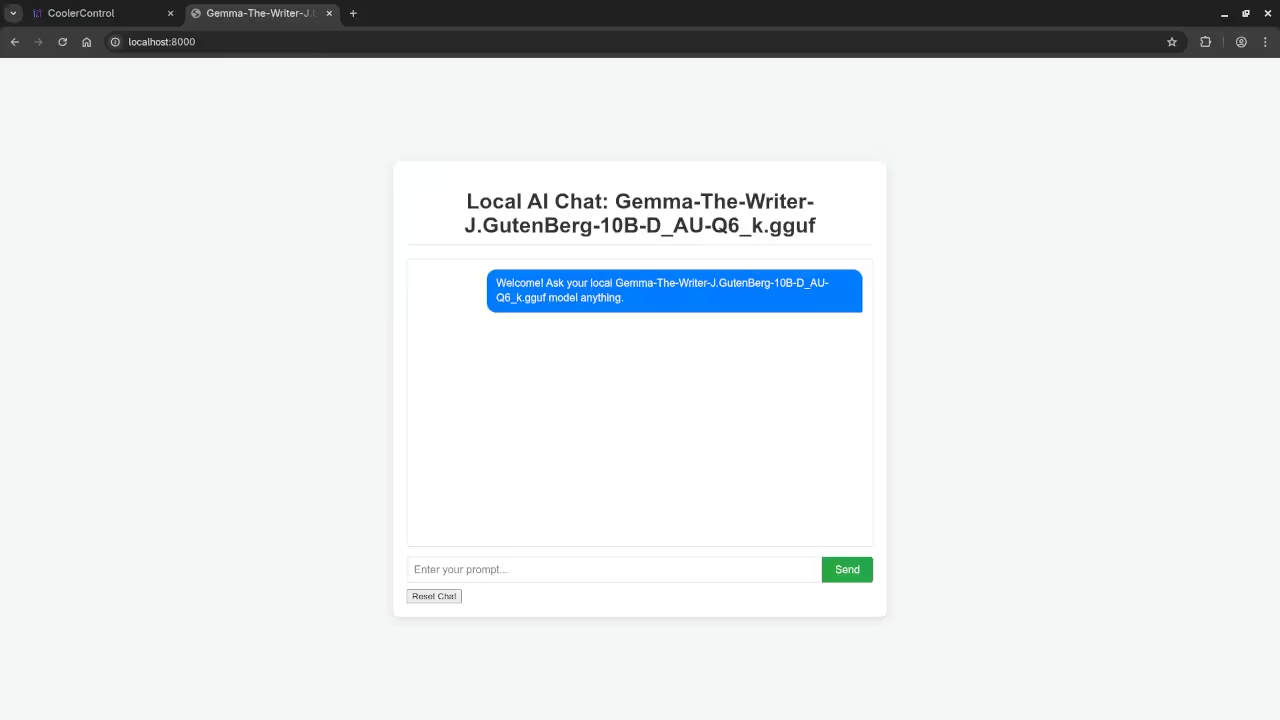
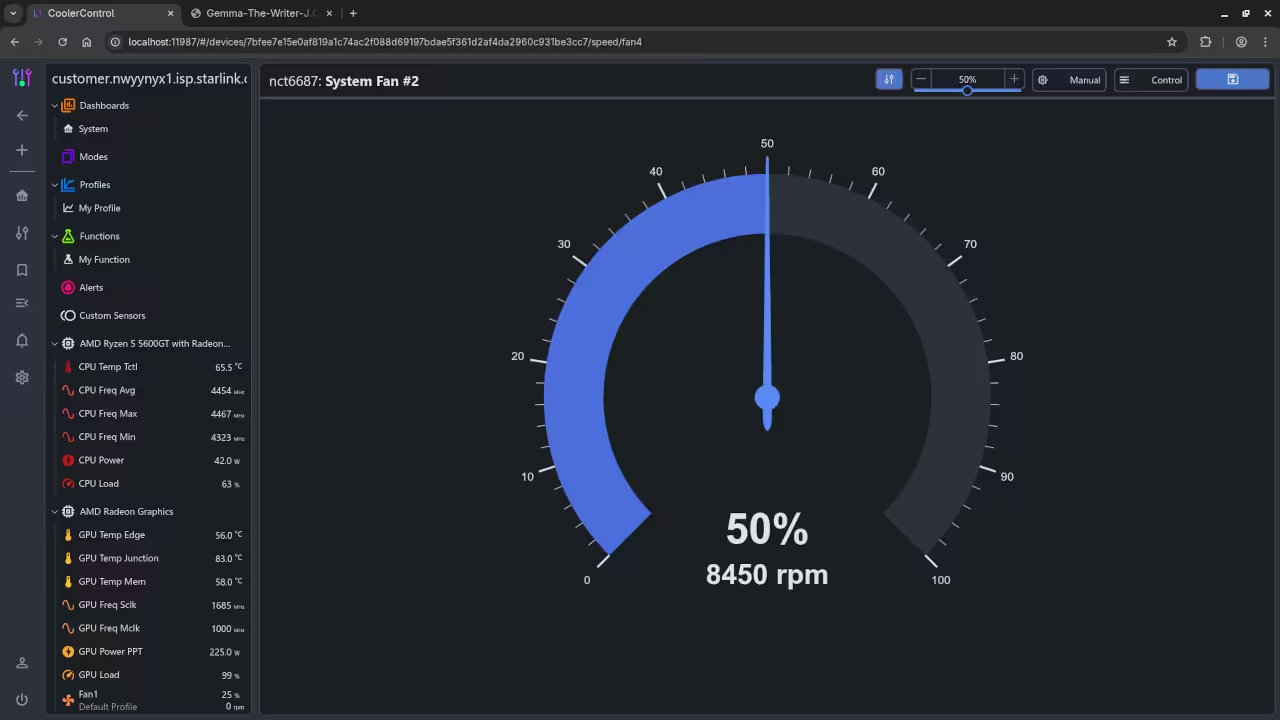
    CoolerControl Showing AMD Instinct Mi60 temperature
    Web Browser Running CoolerControl Displaying AMD Instinct Mi60 Temperature And Shroud Fan RPM.

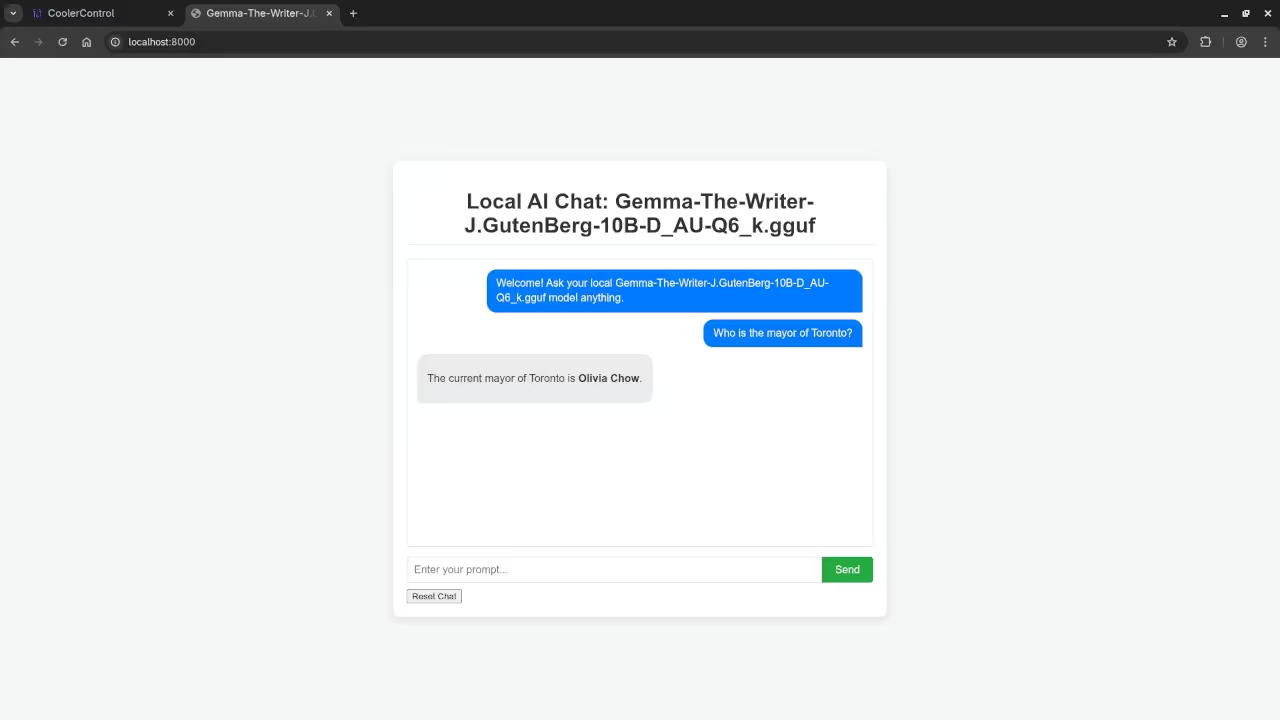
    Gemma-The-Writer-J.GutenBerg-10B-D_AU-Q6_k answered question about the Mayor
    Command Line Gemma-The-Writer-J.GutenBerg-10B-D_AU-Q6_k Answered Mayor Of Toronto Request.

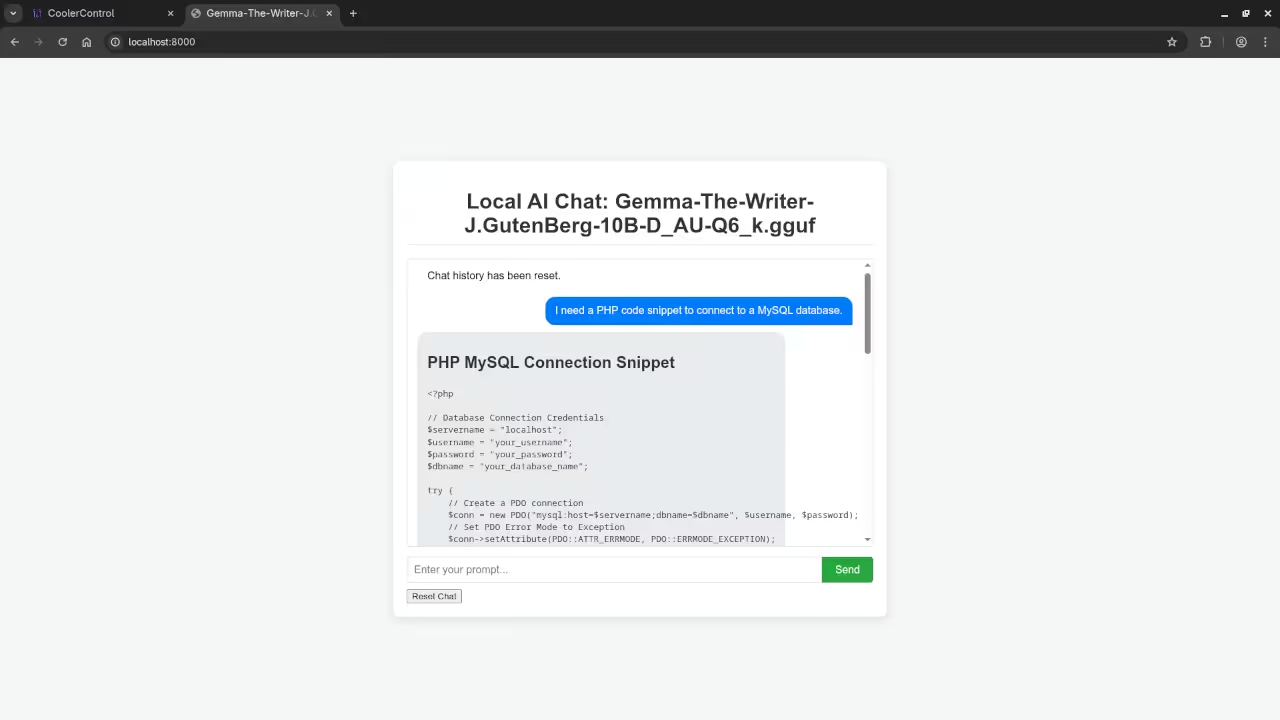
    Gemma-The-Writer-J.GutenBerg-10B-D_AU-Q6_k answered question about PHP code
    Command Line Gemma-The-Writer-J.GutenBerg-10B-D_AU-Q6_k Answered PHP Code Request.

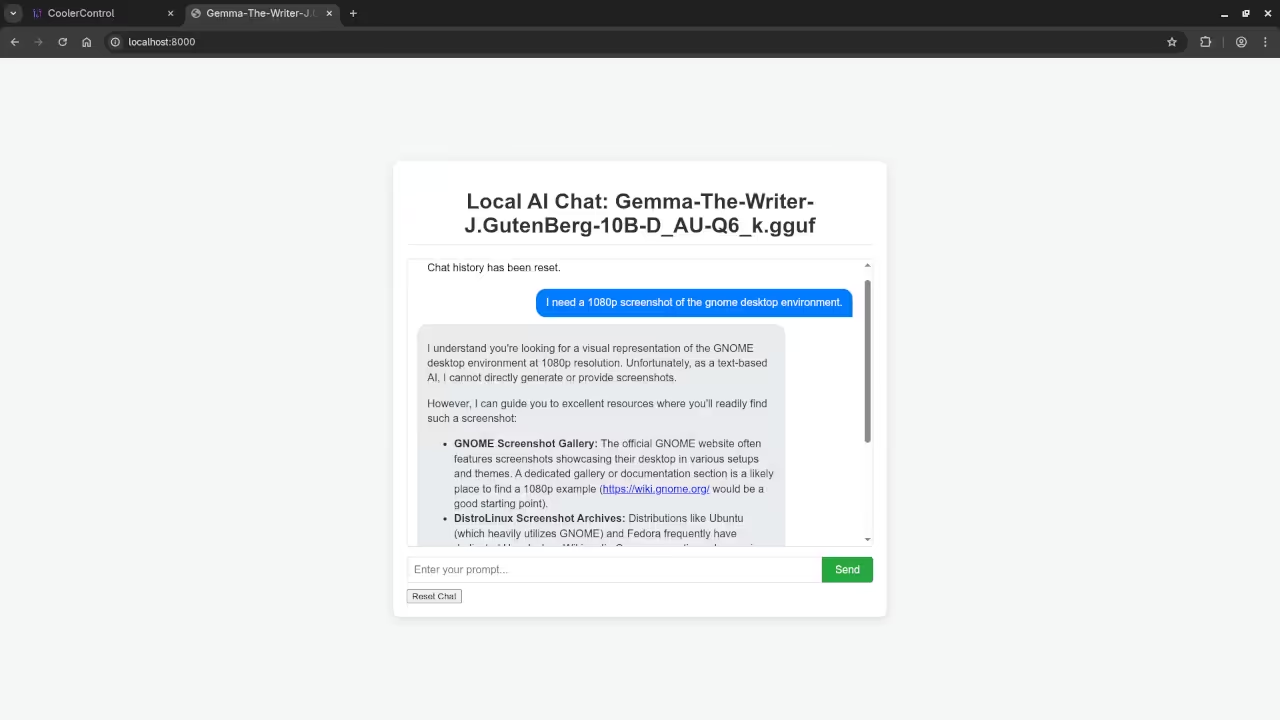
    Gemma-The-Writer-J.GutenBerg-10B-D_AU-Q6_k answered question about screenshot
    Command Line Gemma-The-Writer-J.GutenBerg-10B-D_AU-Q6_k Answered Gnome Desktop Screenshot Request.

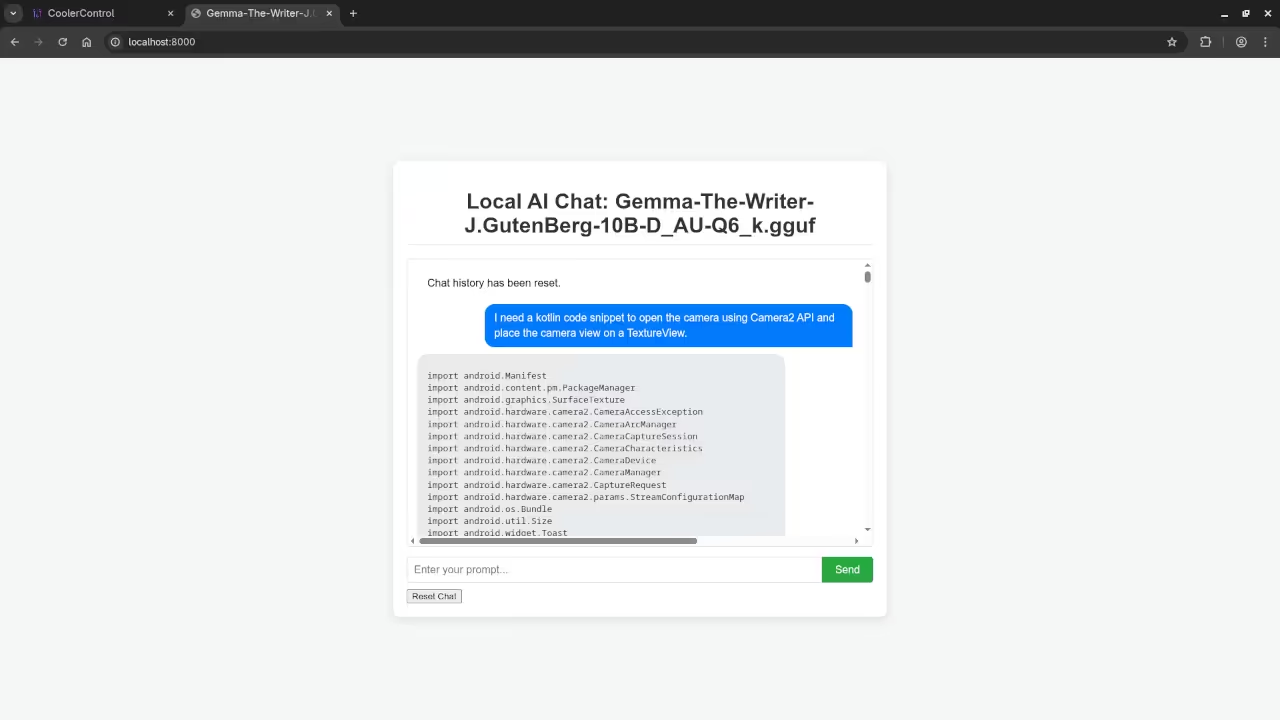
    Gemma-The-Writer-J.GutenBerg-10B-D_AU-Q6_k answered request for Kotlin code
    Gemma-The-Writer-J.GutenBerg-10B-D_AU-Q6_k Answered Kotlin Code Request.

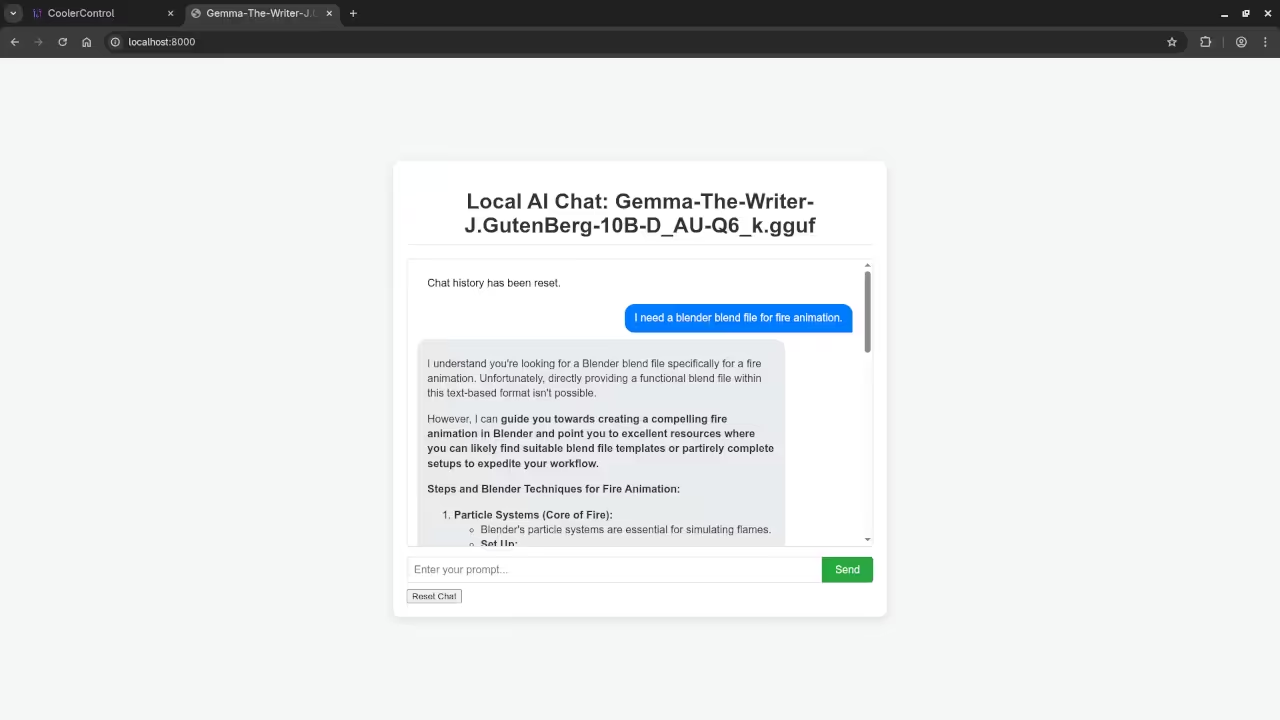
    Gemma-The-Writer-J.GutenBerg-10B-D_AU-Q6_k answered request for Blender Blend File
    Gemma-The-Writer-J.GutenBerg-10B-D_AU-Q6_k Answered Blender Blend File Request.

    Video Displaying Using Gemma-The-Writer-J.GutenBerg-10B-D_AU-Q6_k In Custom Web UI For llama.cpp Client

    Results:

    Who is the mayor of Toronto?

    Produced accurate current answer to Olivia Chow as the mayor of Toronto.

    I need a PHP code snippet to connect to a MySQL database.

    Produced correct syntax PHP code snippet to connect to a MySQL database.

    I need a 1080p screenshot of the gnome desktop environment.

    Accurately provided instructions to generate a 1080p screenshot of Gnome desktop environment because it is a text-based AI lacking ability.

    I need a kotlin code snippet to open the camera using Camera2 API and place the camera view on a TextureView.

    Never completed, had to restart server to produce untested Kotlin code snippet.

    I need a blender blend file for fire animation.

    Accurately detected inability to generate Blender Blend file for a fire animation because it is a text-based AI lacking ability.

    Additional Resources

    To further your knowledge of Python and enhance your programming skills, check out these resources:

    If you need one-on-one Python tutorials, feel free to reach out to me via Ojambo Contact. I also offer services for installing or migrating Gemma-The-Writer-J.GutenBerg-10B-D_AU-Q6_k through Ojambo Services.

    Conclusion

    With Gemma-The-Writer-J.GutenBerg-10B-D_AU-Q6_k, you can unlock powerful language generation capabilities for a variety of applications. While the code and model architecture are licensed under the Apache License 2.0, it’s important to remember that the weights are subject to Google’s specific licensing restrictions, so be sure to review and comply with those terms.

    If you need any help setting up Gemma-The-Writer-J.GutenBerg-10B-D_AU-Q6_k or have questions about Python programming, feel free to contact me!

  • Post-Unboxing: Honeywell HCE100B Ceramic Heater

    Post-Unboxing: Honeywell HCE100B Ceramic Heater

    Honeywell HCE100B Ceramic Heater – 1 Year Review and Unboxing (2025)

    Is the Honeywell HCE100B Ceramic Heater Still Worth Buying?

    Unboxing the Honeywell HCE100B

    The Honeywell HCE100B arrives in a small, eco-friendly cardboard box with clear branding and specifications printed on the sides. Inside the package, you will find:

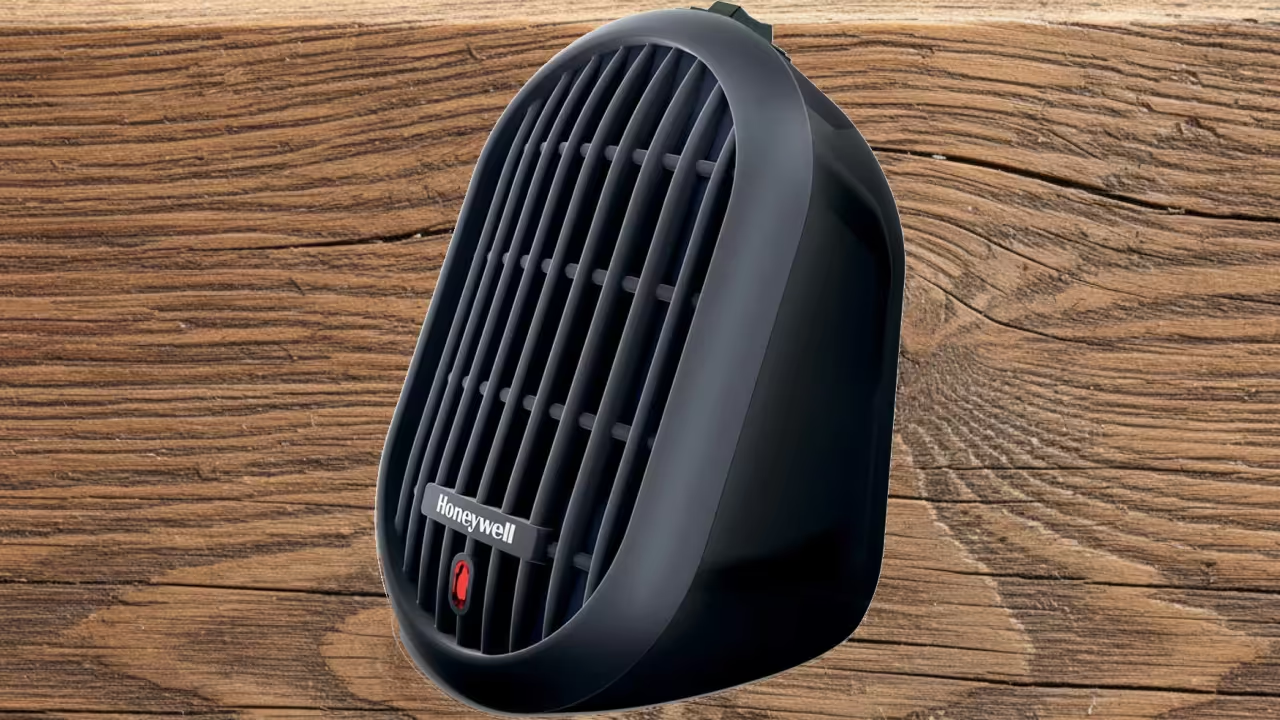
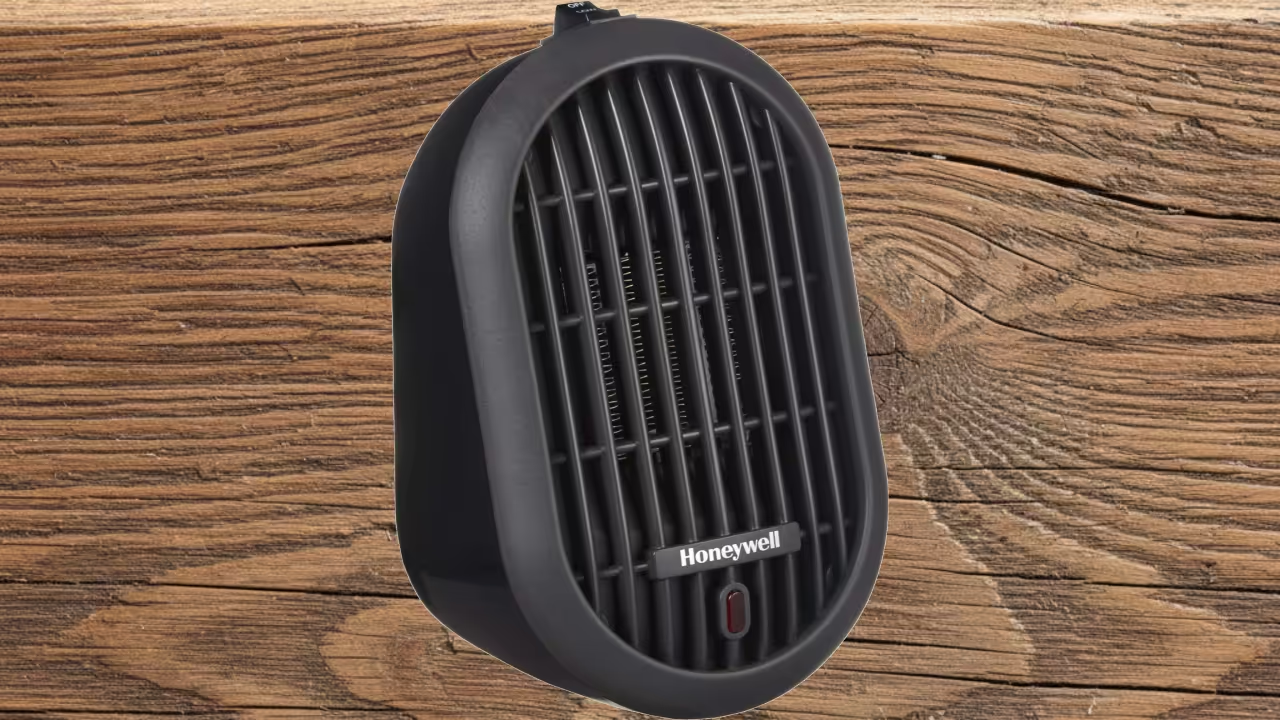
    • Honeywell HCE100B Ceramic Heater (black model)
    • User manual and safety guide
    • Warranty information (limited 3-year warranty)

    The heater itself is well-packaged with recyclable materials and requires no assembly. Simply remove the protective plastic wrap and plug it into a standard 120V household outlet.

    First Impressions and Design

    The Honeywell HCE100B is a compact, personal ceramic heater designed for small spaces such as a home office or bedroom. It feels solid for its size, measuring approximately 5 inches tall, 4 inches wide, and 4 inches deep. The matte black finish gives it a professional look, suitable for desktop use.

    There are two simple switches on top for power and temperature control, and the back panel includes a safety grill and power cord. The power cord is about 6 feet long, allowing flexible placement.

    Technical Specifications

    Feature Specification
    Model Honeywell HCE100B HeatBud Personal Ceramic Heater
    Power Settings 170 W (Low) / 250 W (High)
    Voltage 120V AC, 60Hz
    Dimensions Approx. 5 x 4 x 4 inches
    Weight Approx. 1.1 pounds (0.5 kg)
    Safety Features Tip-over protection, overheat shut-off, cool-touch housing
    Warranty Limited 3-year warranty

    Why I Bought It

    Last winter, propane cost me $1.33 per liter, and my regular delivery was 248 liters. Instead of heating the entire house to 20 °C all day, I lowered the thermostat to 16 °C and used the Honeywell HCE100B Ceramic Heater in my home office to stay warm while working.

    How I Used It

    I used the HCE100B four times per hour for five minutes each, or about 20 minutes per hour during a 10-hour workday. This equals roughly 3.3 hours of actual heating time per day over a 4-month cold season (about 120 days).

    Energy and Cost Comparison

    Factor Value
    Electricity rate 23¢ / kWh
    Propane price $1.33 / L
    Seasonal duration ≈ 120 days
    Thermostat change 20 °C → 16 °C (≈ 12.5% less propane)

    Propane savings: approximately $41.23 CAD (based on 12.5% less propane use).
    Electricity cost: depends on power setting and usage.

    Setting Electricity Cost Propane Savings Net Savings
    170 W (Low) $15.64 $41.23 +$25.59
    250 W (High) $23.00 $41.23 +$18.23

    Depending on the setting, I saved between $18 and $26 CAD for the winter, while reducing propane usage by around 31 liters. More importantly, the heater kept my office comfortable without running the main furnace as often.

    Performance and Safety

    The Honeywell HCE100B performs well for its size. It produces gentle, consistent warmth within a few seconds of turning on. While it will not heat a large room, it is perfect for personal comfort in a small area. Safety is a key focus with tip-over protection, an overheat shut-off, and a cool-touch housing, making it safe for desks or tight spaces.

    Verdict – Worth Buying in 2025?

    Yes. The Honeywell HCE100B remains one of the best compact personal ceramic heaters for home offices or small spaces. It is energy-efficient, reliable, and backed by Honeywell’s reputation for safety and quality. For anyone looking to cut propane or central heating costs, this small heater pays for itself within one season of moderate use.

    Buy the Honeywell HCE100B Ceramic Heater on Amazon

    Screenshots And Screencast

    Honeywell HCE100B Side View
    Honeywell HCE100B Side View With Plug

    Honeywell HCE100B Left Section
    Honeywell HCE100B Facing Left

    Honeywell HCE100B Right Section
    Honeywell HCE100B Facing Right

    Screencast showing setup, power consumtiion, and stats

    Learn More from Me

    Affiliate Disclosure

    As an Amazon Associate, I earn from qualifying purchases. This review is based on my personal experience and independent testing over one year of use.