
Generate a Golden Cup Trophy via Blender Python API for Web 3D with <model-viewer>
Welcome to a beginner-friendly deep dive into the exciting world where Python scripting meets web development! In this post, we’ll walk through generating a classic cup trophy using Blender’s Python API, giving it a luxurious golden material, and then displaying it in a web browser with photorealistic lighting using Google’s powerful **<model-viewer>** web component.
Step 1: Generating the Trophy in Blender with Python (The Full Code)
Providing the full, working code upfront gives you a complete resource. The following script includes code for creating the trophy shape, a handle, the golden material, and the final glTF export. Your accompanying video will walk through every line and concept in detail.
The Complete Python Script (trophy_generator.py):
import bpy
import math
# --- SCENE SETUP ---
# 1. Clear existing objects
def clear_scene():
"Delete all meshes, curves, and lamps in the scene."
bpy.ops.object.select_all(action='DESELECT')
# Select all meshes, curves, and lights
for obj in bpy.data.objects:
if obj.type in ('MESH', 'CURVE', 'LIGHT'):
obj.select_set(True)
# Delete selected objects
bpy.ops.object.delete(use_global=False)
clear_scene()
# --- TROPHY MESH CREATION ---
# 2. Create the Trophy Profile Curve
bpy.ops.curve.primitive_bezier_curve_add(enter_editmode=True, align='WORLD', location=(0, 0, 0))
curve = bpy.context.object
curve.name = "Trophy_Profile"
# Get the two bezier points
points = curve.data.splines[0].bezier_points
# Move/Adjust the control points to create a simple classic cup profile
# Start at the base (Z=0) and end at the lip (Z=3)
# Point 1 (Base - Center)
points[0].co = (0.01, 0, 0)
points[0].handle_left = (0.01, 0, 0)
points[0].handle_right = (0.5, 0, 0.5)
# Point 2 (Lip - Top)
points[1].co = (1.2, 0, 3.0)
points[1].handle_left = (1.0, 0, 2.0)
points[1].handle_right = (1.2, 0, 3.0)
# Set handle types to vector for sharp edges at the bottom
points[0].handle_right_type = 'VECTOR'
points[1].handle_left_type = 'AUTO'
# 3. Apply Screw Modifier for the cup body
bpy.ops.object.mode_set(mode='OBJECT')
screw_mod = curve.modifiers.new(name="Screw", type='SCREW')
screw_mod.angle = 2 * math.pi # 360 degrees
screw_mod.steps = 64
screw_mod.render_steps = 128
screw_mod.axis = 'Z'
# Convert the curve to a mesh
bpy.ops.object.convert(target='MESH')
trophy_mesh = bpy.context.object
trophy_mesh.name = "Classic_Trophy"
# --- HANDLE CREATION ---
# 4. Create the Handle Curve
bpy.ops.curve.primitive_bezier_curve_add(location=(1.5, 0, 2))
handle_curve = bpy.context.object
handle_curve.name = "Trophy_Handle"
# Adjust the handle shape (e.g., a simple loop)
handle_points = handle_curve.data.splines[0].bezier_points
# Point 1
handle_points[0].co = (1.5, 0, 2.0)
handle_points[0].handle_right = (1.5, 0, 2.5)
# Point 2
handle_points[1].co = (1.5, 0, 1.0)
handle_points[1].handle_left = (1.5, 0, 0.5)
# Add depth and resolution to the handle
handle_curve.data.bevel_depth = 0.1
handle_curve.data.bevel_resolution = 8
# 5. Apply Mirror Modifier to the Handle Curve
mirror_mod = handle_curve.modifiers.new(name="Mirror", type='MIRROR')
mirror_mod.use_axis = {'Y'} # Mirror across the Y-axis (side to side)
# 6. Convert Handle to Mesh
bpy.ops.object.select_all(action='DESELECT')
handle_curve.select_set(True)
bpy.context.view_layer.objects.active = handle_curve
bpy.ops.object.convert(target='MESH')
handle_mesh = bpy.context.object
handle_mesh.name = "Trophy_Handle_Mesh"
# --- MATERIAL AND EXPORT ---
# 7. Create Golden Material (PBR Setup)
mat = bpy.data.materials.new(name="Golden_Metal")
mat.use_nodes = True
bsdf = mat.node_tree.nodes["Principled BSDF"]
# Set PBR values for Gold:
bsdf.inputs['Base Color'].default_value = (0.8, 0.6, 0.1, 1) # Yellowish-Gold
bsdf.inputs['Metallic'].default_value = 1.0
bsdf.inputs['Roughness'].default_value = 0.2
# 8. Assign Material to both the Cup and Handle
trophy_mesh.data.materials.append(mat)
handle_mesh.data.materials.append(mat)
# 9. Select all meshes and Export as glTF (.glb)
bpy.ops.object.select_all(action='DESELECT')
trophy_mesh.select_set(True)
handle_mesh.select_set(True)
output_path = "//trophy.glb" # Relative path to the Blend file directory
bpy.ops.export_scene.gltf(
filepath=bpy.path.abspath(output_path),
export_format='GLB',
# Only export selected objects
use_selection=True
)
print("Trophy generation and export complete: trophy.glb created!")
Running the Python Script from the Command Line
To run this complete script without opening the full Blender GUI, use the command line. This is the ideal way for automation or server-side generation.
- **Save** your script as
trophy_generator.py. - **Open** your terminal or command prompt.
- **Execute** the command (adjusting the paths as needed):
/path/to/blender -b -P /path/to/trophy_generator.py blender: The path to your Blender executable.-bor-background: Runs Blender in the background (no GUI).-Por-python <file>: Runs the specified Python script.
This will generate a **trophy.glb** file in the same directory as your script.
Step 2: Realistic Lighting with an HDR Image
Photorealistic 3D models on the web require high-quality lighting. This is achieved using **High Dynamic Range (HDR)** images, which capture an entire environment’s lighting information.
Using Blender’s Courtyard EXR
Blender 4.5 LTS includes built-in HDR environment textures. The Courtyard environment provides excellent default lighting:
- **File Path**: The
courtyard.exrfile is typically found within Blender’s installation directory, in a path similar to4.5/datafiles/studiolight/world/courtyard.exr. You should copy this file to your web project directory or host it for the <model-viewer>.
HDR Image Format Compatibility for the Web
Choosing the right image format is crucial for both quality and performance in web 3D rendering. Here is a comparison of common formats:
| Format | Full Name | HDR Support | Web Browser Support | Notes |
|---|---|---|---|---|
| .hdr | Radiance HDR | Yes | Good (Supported by 3D libraries) | A classic, simple HDR format. Can be large. |
| .exr | OpenEXR | Yes | Limited/No (Needs a library to load) | High-quality, used in VFX, but typically not natively supported by web browsers. |
| .ktx2 | Khronos Texture 2 | Yes (Via Basis Universal UASTC HDR) | Excellent (Modern/Recommended) | The best current option! Supports supercompression for fast loading and efficient GPU memory use. |
The winner for best modern web support is .ktx2.
Open Source Alternatives to HDR Formats
For open-source, web-friendly alternatives, you should use the tools that create the modern, optimized formats:
- **Basis Universal / ktx2:** The Basis Universal encoder (an open-source project from Khronos) creates highly optimized
.ktx2files. - **Filament’s cmgen:** Google’s open-source Filament rendering engine includes a tool called **
cmgen** that converts HDR images (like your Courtyard.exr) into optimized cubemaps ready for web PBR rendering.
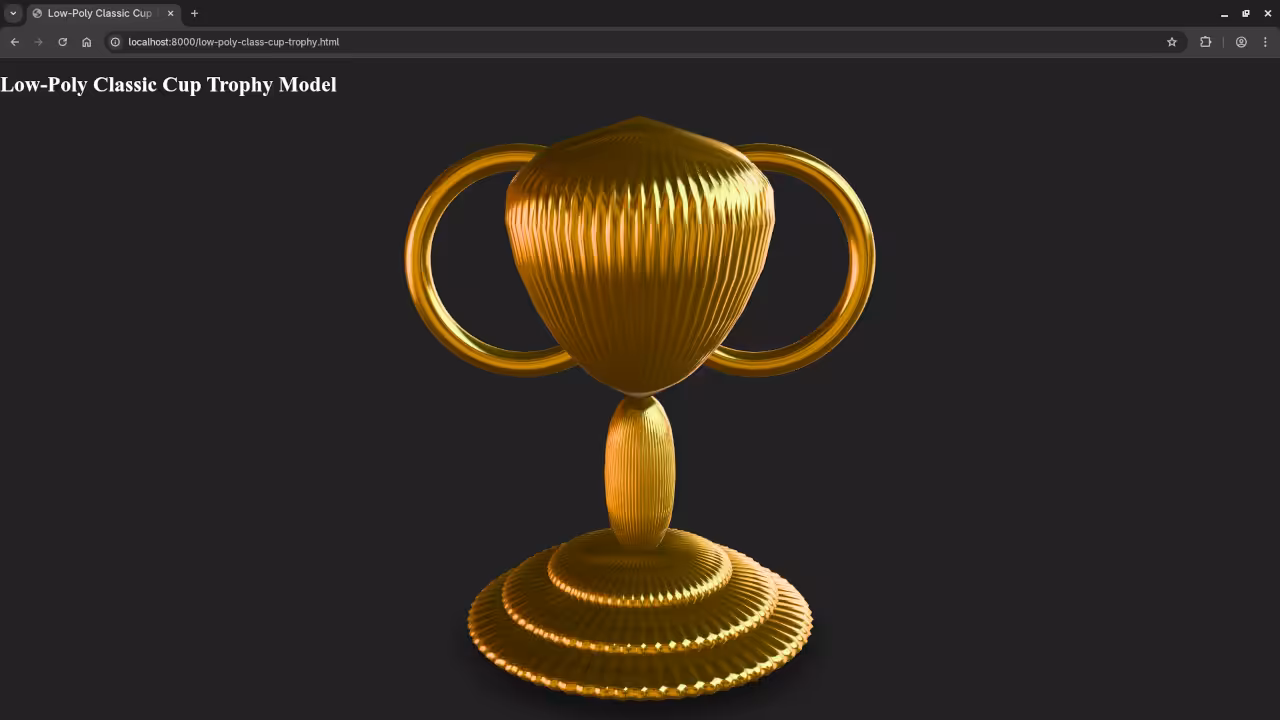
Step 3: Displaying the Trophy on the Web
We’ll use Google’s **<model-viewer>** to embed the 3D model with the Courtyard lighting.
HTML Code with <model-viewer>
Place this code snippet into your WordPress blog post’s HTML editor:
<script type="module" src="https://ajax.googleapis.com/ajax/libs/model-viewer/3.5.0/model-viewer.min.js"></script>
<model-viewer
src="trophy.glb"
alt="A golden cup trophy"
ar
camera-controls
auto-rotate
shadow-intensity="1"
environment-image="courtyard.exr"
exposure="1.0"
style="width: 100%; height: 400px;">
</model-viewer>
- **
src="trophy.glb"**: Links to the model we generated. - **
environment-image="courtyard.exr"**: Points to your Courtyard HDR file. The component handles loading and processing the HDR image for lighting.
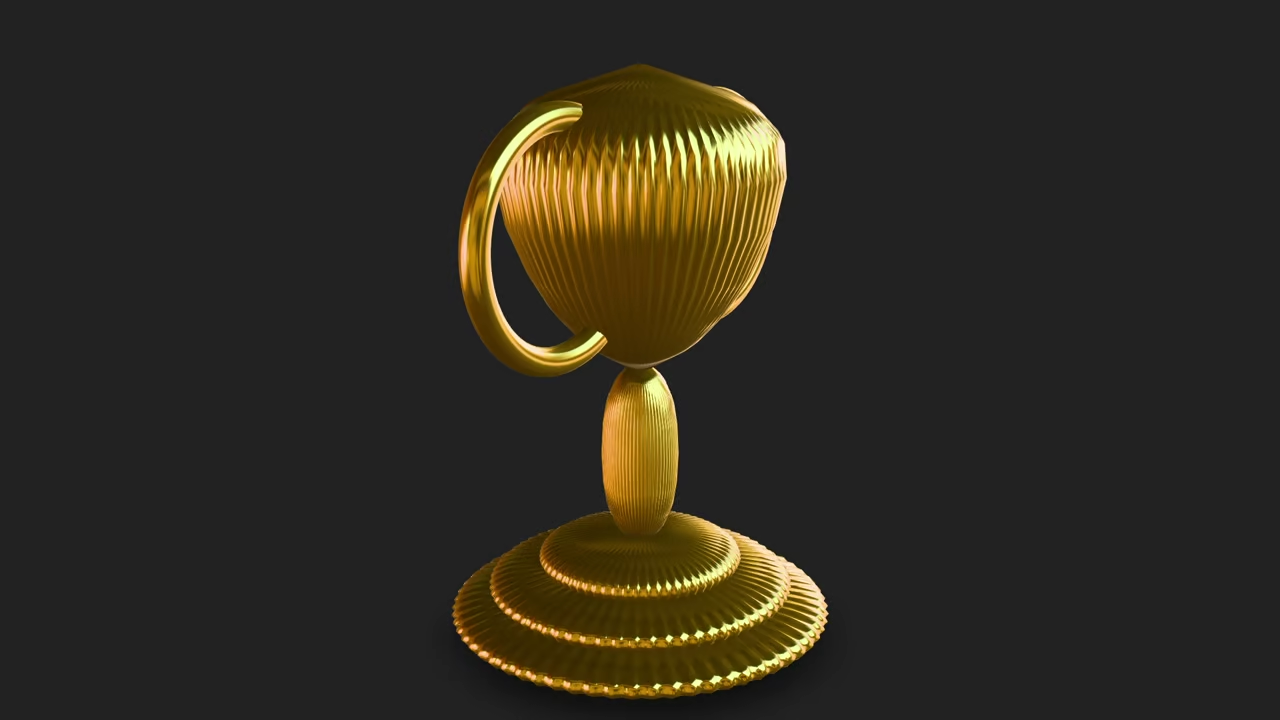
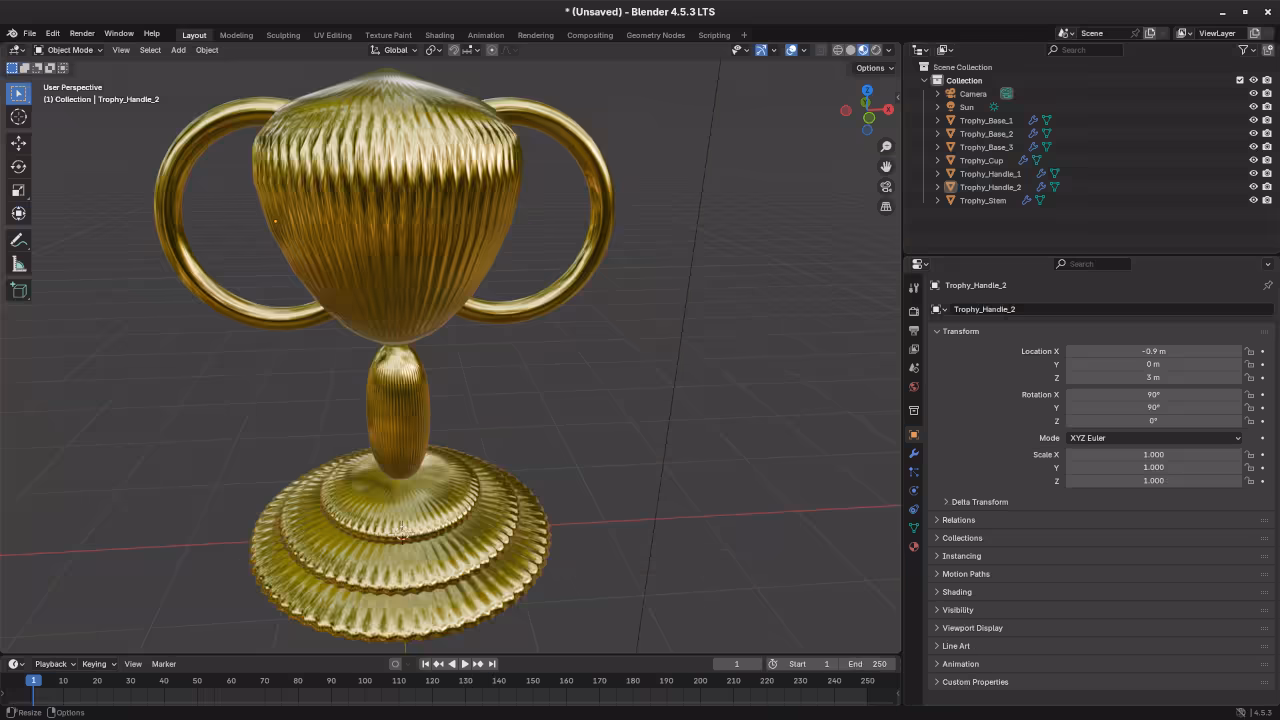
📸 Screenshots & Screencast

Level Up Your Python and Blender Skills!
Are you eager to dive deeper into scripting and automation? I’ve authored resources to help you master Python and its application in 3D:
- **Learning Python:** My book for beginners covers the fundamentals of programming: https://www.amazon.com/Learning-Python-Programming-eBook-Beginners-ebook/dp/B0D8BQ5X99
- **Mastering Blender Python API:** Take your 3D automation skills to the next level with this comprehensive guide: https://www.amazon.com/Mastering-Blender-Python-API-Programming-ebook/dp/B0FCCQKFFZ
You can also enroll in my comprehensive online course:
- **Learning Python Course:** https://ojamboshop.com/product/learning-python
Need Personalized Guidance?
If you prefer one-on-one attention, I am available for **online Python tutorials**, including specialized topics like the Blender Python API and 3D web integration. Feel free to contact me to schedule a session: https://ojambo.com/contact
🚀 Recommended Resources
Disclosure: Some of the links above are referral links. I may earn a commission if you make a purchase at no extra cost to you.