Blog

  • Generate Snowman With Blender Python API For Website

    Generate Snowman With Blender Python API For Website

    Creating a Simple Snowman with Blender Python API and Displaying It in the Web Browser with Model-Viewer

    Introduction

    Creating 3D models with Blender’s Python API is a fun and educational experience, especially when you’re a beginner. In this tutorial, we’ll walk through the process of generating a basic snowman using Python in Blender, and then we’ll display it in a web browser using the model-viewer component. This will involve using some basic shapes like spheres for the snowman’s body, sticks for arms, a button for the chest, and a nose. We’ll also use a High Dynamic Range (HDR) image to light our scene, making it look more realistic. Additionally, we’ll talk about the different image formats supported by web browsers for HDR and offer some open-source alternatives.

    Let’s dive in!

    Setting Up Blender and Python

    Before we get started, ensure you have Blender 4.5 LTS installed. This version of Blender comes with robust Python support and the ability to generate 3D models directly using the Python API.

    To run a Python script in Blender, you can use Blender’s scripting tab or execute the script directly from the command line. For the command line, simply navigate to your Blender installation directory and run the following:

    blender --background --python my_script.py

    Where my_script.py is the Python script you want to run.

    Step 1: Creating the Snowman in Blender using Python

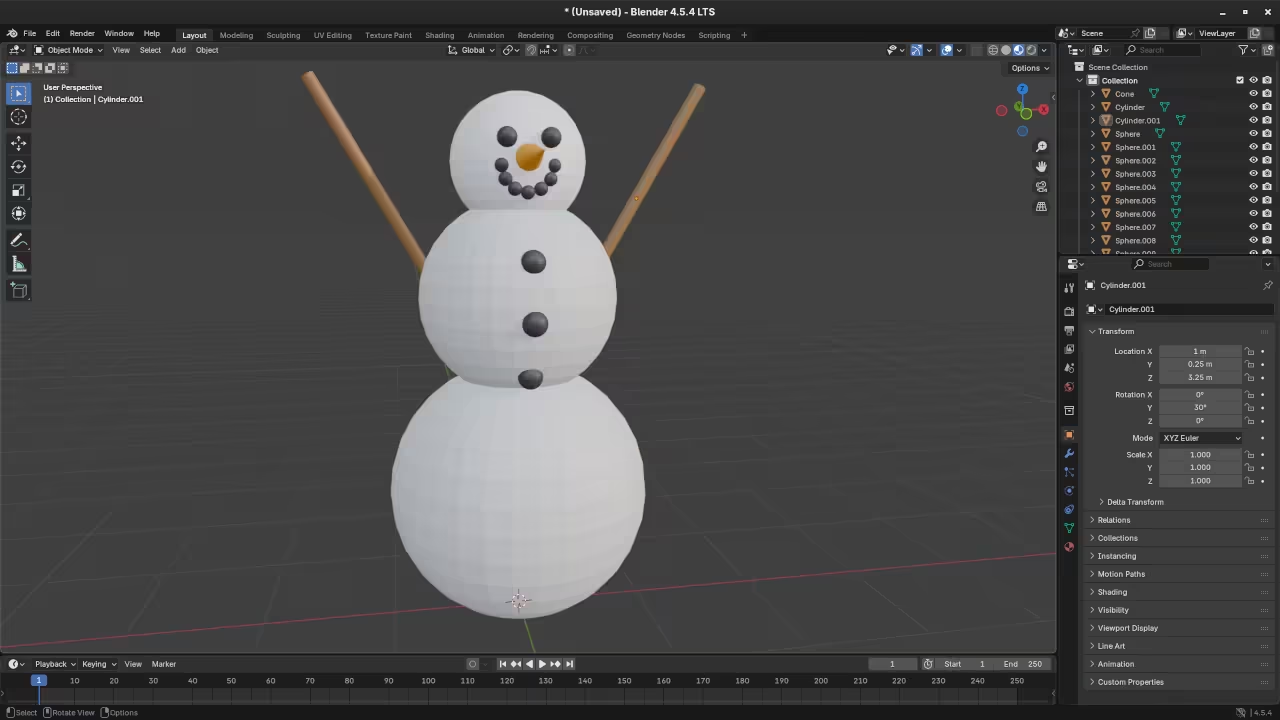
    In Blender, you can use the Python API to generate the basic shapes for your snowman. We’ll use spheres for the body, a cone for the nose, and cubes for the buttons. We’ll also use simple cylinders for the sticks (arms). Here’s a Python script to create the basic snowman model:


    import bpy
    
    # Clear existing objects
    bpy.ops.object.select_all(action='SELECT')
    bpy.ops.object.delete(use_global=False)
    
    # Create the body - 3 spheres (bottom, middle, top)
    bpy.ops.mesh.primitive_uv_sphere_add(radius=1, location=(0, 0, 1))
    bpy.ops.mesh.primitive_uv_sphere_add(radius=0.75, location=(0, 0, 2.5))
    bpy.ops.mesh.primitive_uv_sphere_add(radius=0.5, location=(0, 0, 3.75))
    
    # Add buttons to the snowman (just a few spheres on the body)
    bpy.ops.mesh.primitive_uv_sphere_add(radius=0.1, location=(0, 0, 2))
    bpy.ops.mesh.primitive_uv_sphere_add(radius=0.1, location=(0, 0.3, 2))
    bpy.ops.mesh.primitive_uv_sphere_add(radius=0.1, location=(0, -0.3, 2))
    
    # Create a nose (cone) and place it
    bpy.ops.mesh.primitive_cone_add(vertices=4, radius1=0, radius2=0.1, depth=0.5, location=(0, 0, 4.2))
    
    # Create sticks (arms) using cylinders
    bpy.ops.mesh.primitive_cylinder_add(radius=0.05, depth=2, location=(-1.5, 0, 3.5))
    bpy.ops.mesh.primitive_cylinder_add(radius=0.05, depth=2, location=(1.5, 0, 3.5))
    
    # Move the camera and set up the scene
    bpy.data.objects['Camera'].location = (5, -5, 5)
    bpy.data.objects['Camera'].rotation_euler = (1, 0, 1)
    bpy.context.scene.camera = bpy.data.objects['Camera']
    
    # Set up HDR lighting using an EXR file
    hdr_image = bpy.data.images.load("path_to_courtyard.exr")
    world = bpy.data.worlds['World']
    world.use_nodes = True
    bg_node = world.node_tree.nodes['Background']
    bg_node.inputs[0].default_value = 1.0  # Strength of the light
    texture_node = world.node_tree.nodes.new(type='ShaderNodeTexEnvironment')
    texture_node.image = hdr_image
    world.node_tree.links.new(texture_node.outputs[0], bg_node.inputs[0])


    Step 2: Exporting the Model for Web

    Now that we’ve created the snowman, we need to export the model to a format that can be used in a web browser. We’ll use the glTF format for this purpose, as it’s widely supported in web applications and lightweight enough for use in interactive 3D viewers like model-viewer.

    You can export the model by going to File > Export > Export As glTF (.glb/.gltf). For optimal web use, the .glb format is recommended, as it includes all the necessary textures and materials in a single file.

    Step 3: Displaying the Snowman in the Web Browser with model-viewer

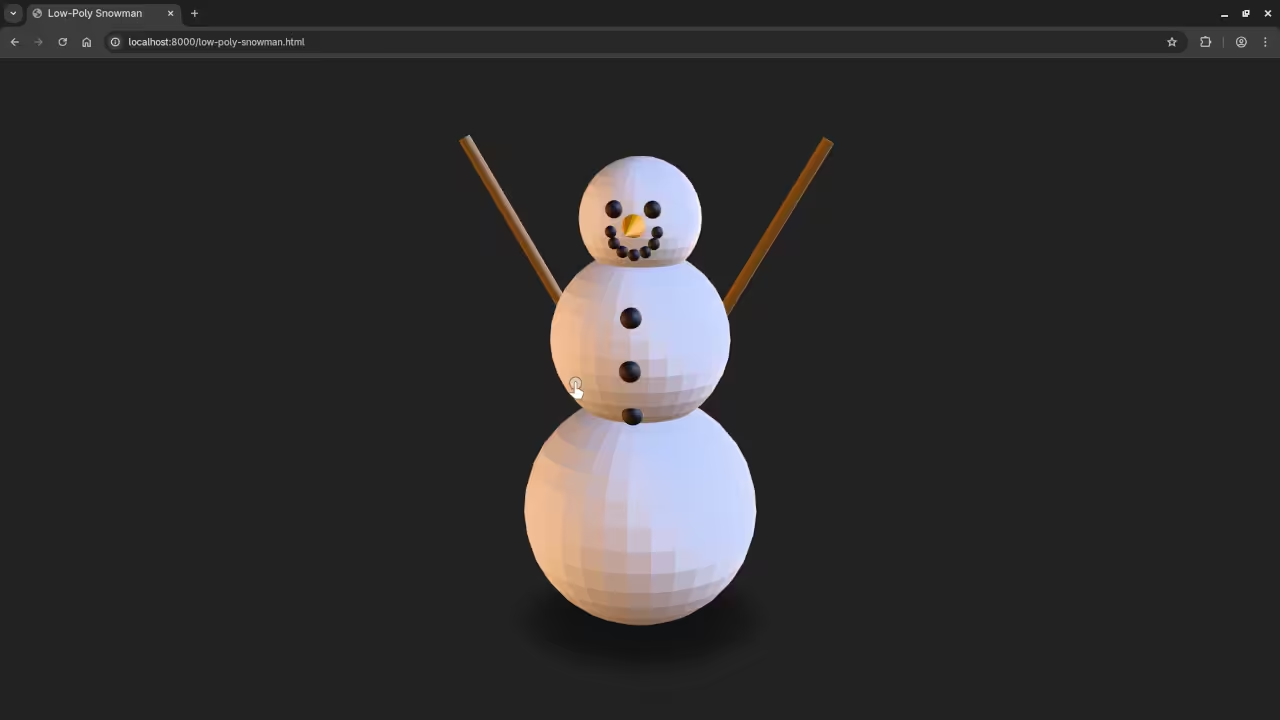
    To display your snowman in a web browser, you can use Google’s model-viewer element, which makes it super easy to embed 3D models in a web page. Here’s how to integrate it into an HTML file:


        <h1>My Snowman</h1>
        <model-viewer src="path_to_your_model.glb" alt="Snowman" auto-rotate camera-controls background-color="#ffffff" shadow-intensity="1" style="width: 100%; height: 500px;"></model-viewer>
    
        <script type="module" src="https://cdn.jsdelivr.net/npm/@google/model-viewer@3.0.0/dist/model-viewer.min.js"></script>


    Make sure to replace "path_to_your_model.glb" with the actual path to your exported .glb model file.

    Step 4: Understanding HDR Image Formats for the Web

    When using HDR images for lighting, Blender supports several formats like .hdr, .exr, .ktx, and .ktx2. However, web browsers have limited support for these formats:

    • .hdr and .exr: These formats are commonly used in 3D rendering, and .exr is the most widely supported format in web applications.
    • .ktx and .ktx2: These formats are optimized for GPUs and generally offer faster rendering. However, they are not as commonly supported in all browsers as .exr.
    • Alternatives: For open-source alternatives, you can convert .hdr and .exr images to other formats like .png or .jpg, but these won’t retain the HDR lighting effects as well as the dedicated formats. For best results, stick with .exr or .hdr for lighting.

    📸 Screenshots & Screencast
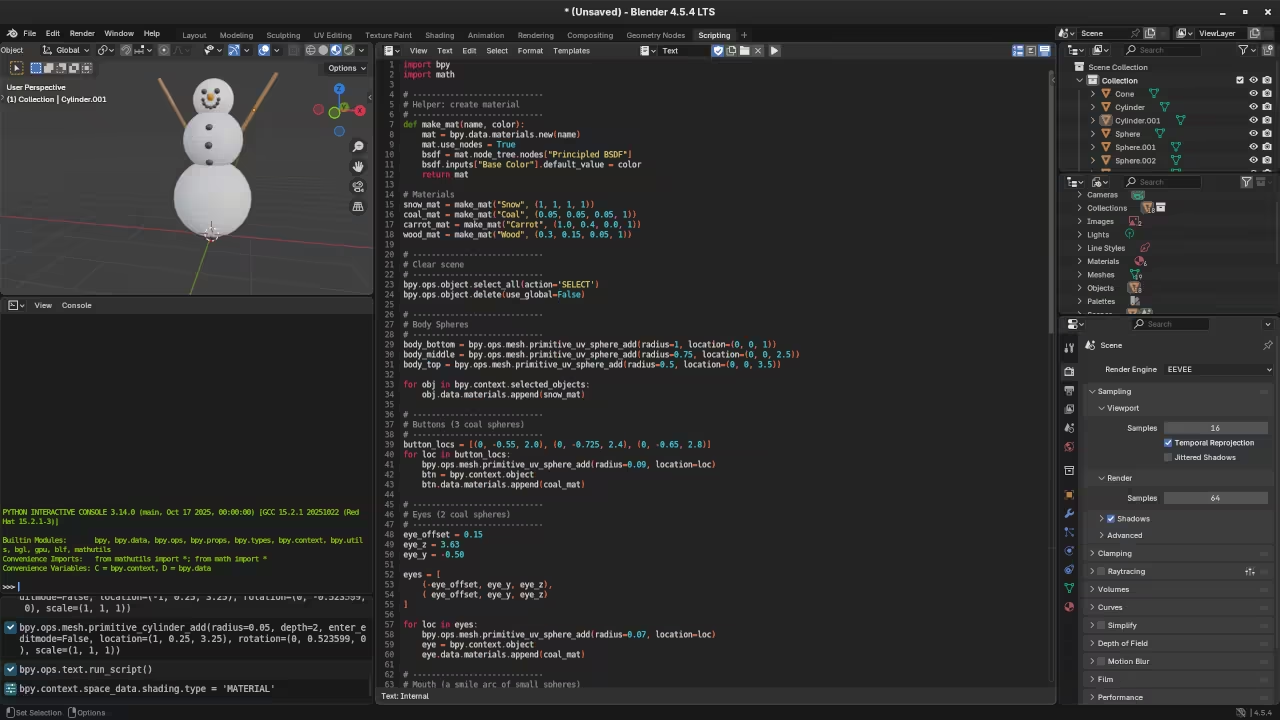
    Low poly snowman Python code
    Blender Scripting Workspace Displaying Low Poly Snowman Python Code

    Low poly snowman in Blender
    Blender Layout Workspace Displaying Low Poly Snowman

    Low poly snowman in Web browser
    Web Browser Displaying Rendered Low Poly Snowman

    Screencast For Blender Python API Low Poly Snowman

    Resources

    If you’re interested in learning more about Python programming or Blender’s Python API, check out my books:

    I also offer a course on Python programming:

    For personalized one-on-one online tutorials, including Blender Python, feel free to reach out to me:

  • Warpinator Shares Files On Your Network

    Warpinator Shares Files On Your Network


    Warpinator: The Ultimate Open-Source File Sharing Tool for Local Networks

    In today’s world of digital communication, sharing files seamlessly across devices is more important than ever. Whether it’s between a workstation, a laptop, or even an Android device, having a smooth, secure, and efficient way to transfer files can save you a lot of time and frustration. In this post, I’ll be reviewing Warpinator, an open-source, cross-platform file-sharing application that has made a significant impact in local network file transfers.

    Warpinator, developed by the Linux Mint team, is an easy-to-use, network file-sharing tool that allows users to send and receive files across devices connected to the same local area network (LAN). Whether you’re using a Linux desktop, a laptop, or an Android device, Warpinator simplifies the sharing process. It’s open-source, so it is free to use and benefits from contributions from the global developer community.

    Here’s an in-depth look at Warpinator and how you can set it up on Fedora Linux for a seamless file-sharing experience.

    Why Choose Warpinator?

    Warpinator is an excellent choice for anyone looking to share files locally, especially for those already in the Linux ecosystem. Here are a few reasons why I recommend it:

    • Open-Source: Warpinator is completely open-source, ensuring that users have the freedom to modify and customize the software to their needs.
    • Cross-Platform: Supports Linux (through Flatpak and distro-specific installation methods), and Android.
    • User-Friendly Interface: The app is designed to be simple, with minimal setup required.
    • Fast Transfers: Warpinator can transfer large files over your local network with ease and speed, providing a smooth experience for users.
    • No Internet Required: As it operates on your local network, there’s no need for internet access, making it secure and fast for transferring files without external interference.

    How to Install Warpinator on Fedora Linux

    You have a couple of ways to install Warpinator on Fedora Linux: through Flathub or directly from your distro’s repository.

    1. Installing Warpinator via Flathub

    Flathub is a great place to find applications packaged as Flatpaks. If you’re familiar with Flatpak, this method is the easiest and quickest.

    1. Install Flatpak if it’s not already installed:
    2. sudo dnf install flatpak
    3. Add the Flathub repository (if not already added):
    4. flatpak remote-add --if-not-exists flathub https://flathub.org/repo/flathub.flatpakrepo
    5. Install Warpinator from Flathub:
    6. flatpak install flathub org.linuxmint.Warpinator
    7. Run Warpinator: You can launch it from the applications menu or by running:
    8. flatpak run org.linuxmint.Warpinator

    2. Installing Warpinator from Fedora’s Official Repository

    Warpinator is available directly from Fedora’s official package repositories, so installing it this way is easy.

    1. Open a terminal and run the following command:
    2. sudo dnf install warpinator
    3. Launch Warpinator: You can now launch Warpinator from your applications menu or via the terminal:
    4. warpintor

    Using Warpinator for File Sharing

    Once installed, using Warpinator is a breeze. Here’s a quick overview of how you can share files across your local network using Warpinator:

    1. Open the application on all your devices.
    2. Select the device you want to send files to from the list of available devices on the local network.
    3. Drag and drop the files you want to share into the application window, or select the “Send Files” button.
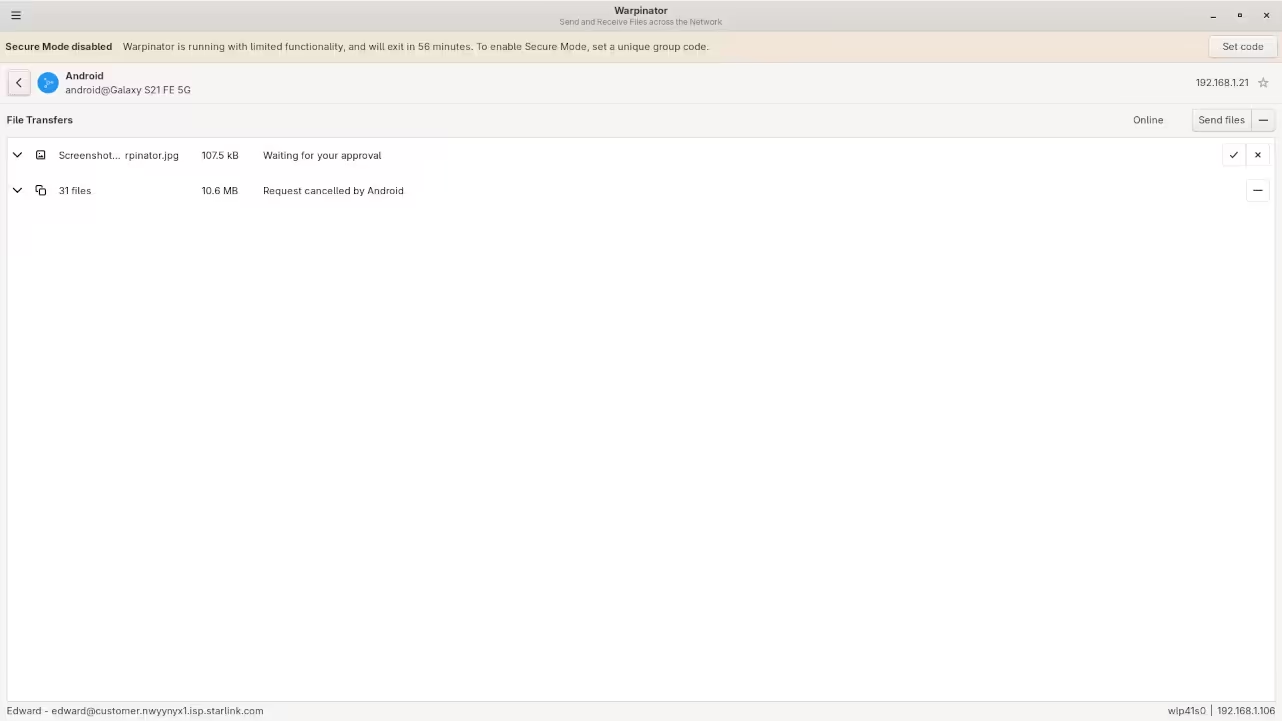
    4. Accept the file transfer on the receiving device.

    It’s that simple! Warpinator handles all the technicalities of network communication behind the scenes, leaving you with a seamless file-sharing experience.

    📷 Screenshots

    Warpinator Client
    Warpinator Client Default Screen

    Warpinator File Transfer
    Warpinator Client File Transfer Screen

    Warpinator Approved Transfer
    Warpinator Client Approved Transfer Screen

    🎬 Live YouTube Screencast

    Video Displaying The Installation And Use Of Warpinator On Linux

    More Resources from Edward Ojambo

    While you’re here, I invite you to check out my personal collection of resources to help you improve your programming skills:

    • Programming Books: You can browse my programming books here on Amazon and gain insights into various programming languages and software development topics.
    • Online Programming Courses: I offer a range of online courses to help you master different programming technologies. Explore my offerings at Ojambo Shop.
    • One-on-One Programming Tutorials: Looking for personalized guidance? I offer one-on-one programming tutorials. You can reach out to me via my contact page here.
    • Consulting and Installation Services: Need help installing Warpinator or other sharing clients on your system? I offer consulting and installation services, and you can book them here.

    Conclusion

    Warpinator is a simple, effective, and secure file-sharing tool that I highly recommend for users who need to transfer files across devices in their local area network. With its open-source nature and ease of use, it makes file sharing a hassle-free experience. Whether you’re using it on a Linux workstation, laptop, or Android device, it’s the perfect solution for all your file-sharing needs.

  • Micro 2.0.14 Advanced Editor Review

    Micro 2.0.14 Advanced Editor Review

    Unleash Your Inner Programmer with Micro: A Beginner-Friendly Markdown Editor

    Micro Editor, a delightful and remarkably lightweight command-line text editor, presents itself as a compelling alternative to full-fledged IDEs, particularly for tasks involving Markdown formatting. Its intuitive design and robust feature set make it an excellent tool for writers, developers, and anyone needing a streamlined Markdown workflow.

    Embracing Simplicity and Openness: The Micro Advantage

    At its core, Micro distinguishes itself through its minimalist philosophy. It prioritizes essential functionalities without overwhelming users with intricate menus and configurations. This focused approach translates to a remarkably efficient editing experience, enabling rapid text composition and Markdown markup. Furthermore, Micro boasts a vibrant open-source spirit. Its source code is readily accessible and modifiable under the MIT License, fostering a collaborative development environment and community-driven enhancements.

    Installation Symphony: Tailored for Fedora Linux

    Fedora users rejoice! Integrating Micro Editor into your workflow is effortlessly accomplished through the adept package manager, dnf. Here’s a concise installation guide:

    1. Terminal Command: Open your terminal and execute the following command:
      sudo dnf install micro
    2. Verification: Once the installation concludes, confirm its presence by typing:
      micro --version

      This should output the currently installed Micro version.

    Platform-Specific Installations:

    • macOS: Employing brew install micro through Homebrew.
    • Windows: Leverage the dedicated installer downloadable from the official Micro repository (https://github.com/zyedidia/micro#installation).
    • Other Linux Distributions: Consult your distribution’s package manager documentation (e.g., apt-get for Debian/Ubuntu) for tailored installation instructions.

    Screenshots and Screencast

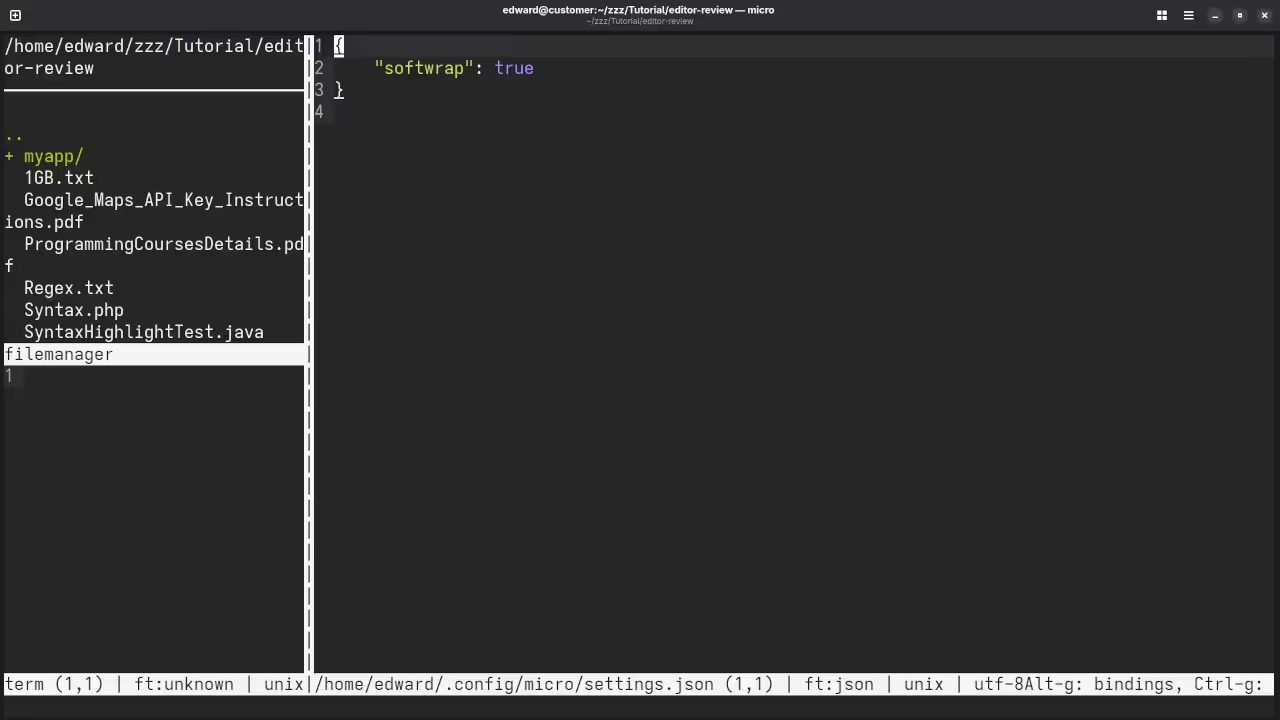
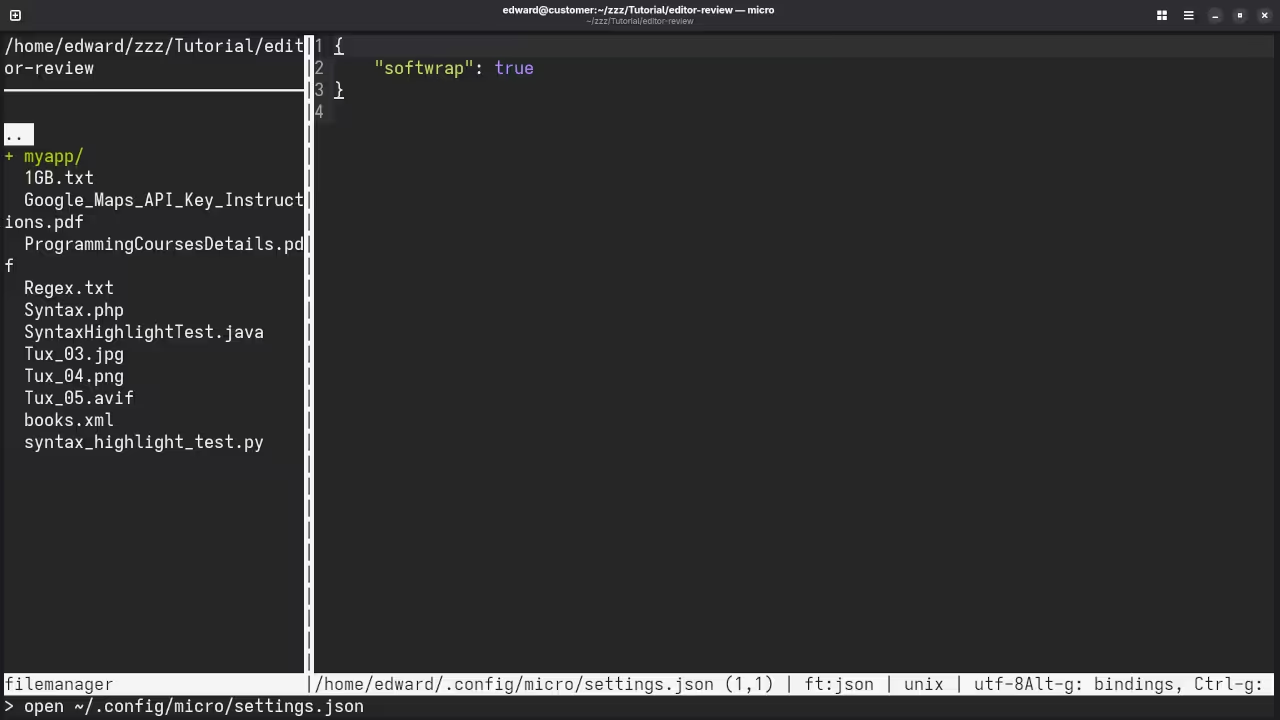
    Micro Settings View
    Micro Displaying Settings

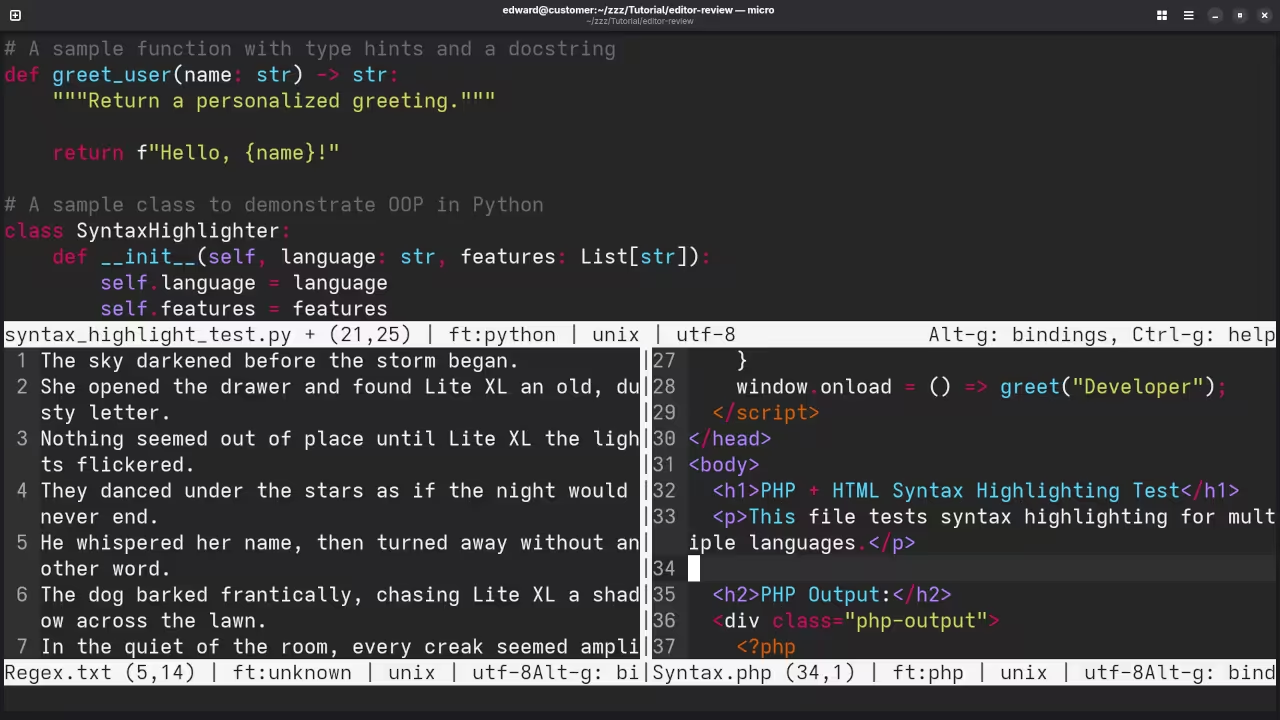
    Micro PHP Syntax Highlighting
    Micro Displaying PHP Syntax Highlighting

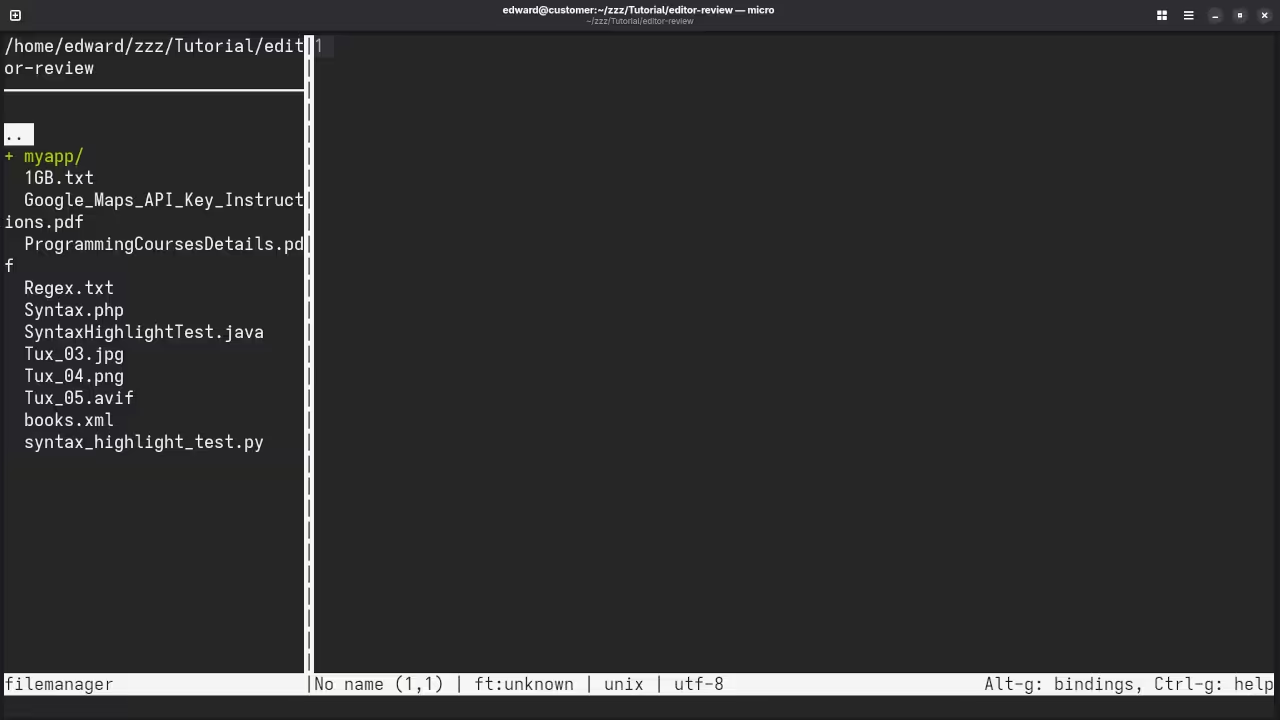
    Micro Folder View
    Micro Displaying Folder In Workspace

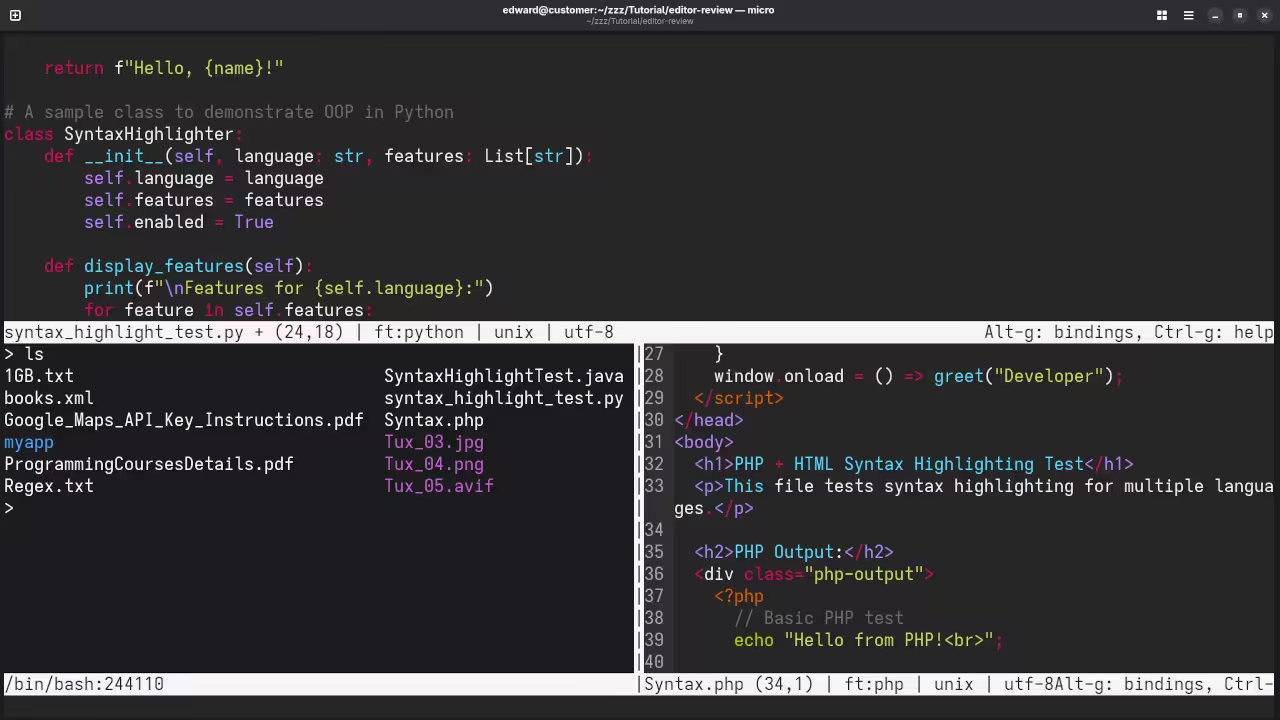
    Micro Terminal
    Micro Displaying How Terminal Works

    👉 Screencast showing a beginner session in Micro—editing, saving files, and navigating buffers.

    Micro Review And Feature Test

    Requirements For Programming Text Editor

    Glossary:

    Code Editor

    Designed for writing and editing source code.

    IDE

    Integrated Development Environment combines various tools need for software development.

    Plugin

    Software component that adds specific functionality.

    Theme

    Preset package containing graphical appearance to customize look and feel.

    Open source

    Freely available for possible modification and redistribution.

    SCM

    Source code management use to manage and track modifications to a source code repository.

    LMB

    Left Mouse Button (LMB) or left click

    MMB

    Middle Mouse Button (MMB) or scroll wheel

    Test Tools

    Test System
    Name Description
    CPU Ryzen 5 5600GT @ 3.60GHz.
    Memory 32GB DDR4.
    Operating System Fedora Linux Workstation 43.
    Desktop Environment Gnome 49.
    Name Description

    Test Suite
    Name Description
    Large File 1GB human-readable text.
    Regex File Text with word “Micro” repeated.
    Syntax File PHP file containing HTML, CSS & JavaScript.
    Media File Smiley face or Tux Linux JPEG file.
    Java Version OpenJDK 21.0.9.
    PHP Version PHP 8.4.13.
    Python Version Python 3.14.0.
    Micro Version 2.0.14
    Name Description

    Test Scoring

    1. Each feature has two parts.
    2. Score of zero indicates a missing feature.
    3. A part of a feature is work a score of 0.5.

    Three bias elimination steps were utilized. The editor was used for at least three years on different platforms. Attempts were made to get stable plug-ins for missing features. The same editor was compared between the one in the repository, the developers website, and the compiled version if applicable.

    Selecting Editor Version

    For this review, Micro was installed using the instructions from the developers website and it did not require additional plugins.

    Features

    1. The theme can be native for the editor in terms of the background and toggled using > set colorscheme. Micro dark and light themes can be created or downloaded and changed. The score for the theme was a perfect 1.0.
    2. Dragging and dropping a text file into the editor does not opens a new tab or buffer. It was not possible to specify the tab location during the drag and drop operation. The score for drag and drop into editor was 0.0.
    3. Opening a very large text file did not crash Micro. Micro was able to open or to edit the large file. The score for opening a large file was 1.0.
    4. Multiple documents can opened in multiple tabs or buffers. Tear-off tabs do not work and Micro does not have a feature to open in new window as a new instance which is handy for multiple monitors. The score for multiple documents was 0.5.
    5. Multiple editors can not be opened as new tabs with drag options. Each tab window view can be split either vertically > vsplit filename or horizontally > hssplit filename as a multiple editor view in Wayland display server protocol. The score for multiple editor view was 0.5.
    6. Creating non-project files is possible. Non-project files can be opened on the command line. The score for creating non-project files was a perfect 1.0.
    7. Soft word wrap can be toggled by set softwrap true. Automatic soft wrap for documents is is available for Micro. The score for word wrap was 1.0.
    8. Spell check can be enabled with > plugin install aspell if aspell is installed then > set aspell.check auto, and works as words are typed. Spelling errors are shown in opened documents. The score for spell check was 1.0.
    9. Word count can be achieved using word count plugin > plugin install wc for the entire buffer or F5 or > wc for selection. Word count for the current buffer or file worked. Selection word count is available as part of word count. The score for word count was 1.0.
    10. Go to line can jump to a specified line using CTRL-l and entering the line number. It is possible to jump to either the first or last line. The score for go to line is a perfect 1.0.
    11. Indentation can default to user-defined tab stops. Children are automatically indented. The score for indentation was a perfect 1.0.
    12. Fonts can be dynamically scaled with custom keyboard shortcuts CTRL-MMB. The system font can be bypassed and a new editor font and size can be set. The score for fonts was a perfect 1.0.
    13. Find and replace CTRL-F for find and > replace "search_pattern" "replacement_string" [flags] for replace, and also works when using regular expressions for all open documents in the current session. Find and replace will work for the current document or a selection in the current document. The score for find and replacing using regular expressions was a perfect 1.0.
    14. Multiple language syntax highlighting in one file is enabled. Each language has code-sensitive syntax colours. The score for multiple language syntax highlighting was a perfect 1.0.
    15. Code folding does not work for markup languages such as HTML. Code folding also does not work for programming languages such as Java. The score for code folding was 0.0.
    16. Selecting rectangular block per column works holding the SHIFT-RMB key. Rectangular block selection does not work properly with word wrap enabled. The score for selecting rectangular block was 0.5.
    17. Multiple cursors is available using CTRL-LMB. Search multiple selection does work using CTRL-F. The score for multiple selection was 1.0.
    18. Distraction-free mode to hide panes works. Line numbers can be toggled CTRL-Rto improve distraction-free mode. The score for distraction-free was a perfect 1.0.
    19. The file manager can be enabled with plugin install filemanager using > tree. Media files can not be dragged and dropped into the file manager pane. The score for file manager was 0.5.
    20. Terminal is be invoked using > term. The terminal does follow folder. Terminal can execute system commands. The score for terminal was 1.0.

    Results

    Micro is a lightweight IDE. By default, the Micro editor is missing required features that can be enabled or implemented by plugins. For my required features, the Micro editor scored 80.0% or 8.00 out of 10.

    Elevate Your Programming Journey

    Intrigued by the world of programming and seeking structured learning? Explore my curated collection of programming books on Amazon (https://www.amazon.com/stores/Edward-Ojambo/author/B0D94QM76N ):

    • Foundational Guides: Master the bedrock concepts of programming.
    • Specialized Ressources: Dive deep into domains like web development, data science, and AI.

    Complement your learning with interactive programming courses hosted on ojamboshop.com (https://ojamboshop.com/product-category/course ):

    • Hands-on Projects: Solidify your understanding through practical exercises.
    • Instructor Guidance: Receive personalized feedback and accelerate your progress.

    Personalized Guidance Awaits:

    • One-on-One Tutoring: Need tailored assistance? Book a session via https://ojambo.com/contact for focused, online programming tutorials.
    • Micro Expertise: Leverage my services at https://ojamboservices.com/contact Micro Editor installation, configuration, or migration seamlessly integrated into your Fedora workflow.
  • Getting Started with Distrobox: A Beginner’s Guide to Easy Deployment

    Getting Started with Distrobox: A Beginner’s Guide to Easy Deployment

    How to Use Distrobox to Install ROCm 6.3 on Fedora 43 for AMD Instinct MI60 GPUs

    If you recently upgraded to Fedora 43, you may have noticed that it now includes ROCm 6.4, the latest release of AMD’s open source GPU computing platform. Unfortunately, ROCm 6.4 no longer supports the AMD Instinct MI60 GPU, which can make it difficult to continue using your existing hardware.

    Thankfully, with the help of an amazing open source tool called Distrobox, you can easily install and run an older version of ROCm (such as ROCm 6.3) in an isolated environment without downgrading your entire operating system.

    What is Distrobox?

    Distrobox is an open source project that allows you to run any Linux distribution inside your existing system using containers (via Docker or Podman). It seamlessly integrates the containerized environment with your host system, so you can access your files, graphical apps, and even GPUs directly.

    In this tutorial, we will use Distrobox to install Ubuntu 22.04 inside Fedora 43, and then set up ROCm 6.3 to regain compatibility with the AMD Instinct MI60 GPU.

    Step-by-Step Guide

    1. Install Distrobox

    Fedora 43 includes Distrobox in its repositories, so installation is simple:

    sudo dnf install distrobox

    2. Create a Distrobox Container

    Create a container based on Ubuntu 22.04:

    distrobox create -n ubuntu-rocm63 -i ubuntu:22.04

    Then, enter the container:

    distrobox enter ubuntu-rocm63

    3. Add the ROCm 6.3 Repository

    Inside the Distrobox container:

    wget https://repo.radeon.com/rocm/rocm.gpg.key
    sudo mv rocm.gpg.key /etc/apt/trusted.gpg.d/
    echo 'deb [arch=amd64] https://repo.radeon.com/rocm/apt/6.3/ jammy main' | sudo tee /etc/apt/sources.list.d/rocm.list
    sudo apt update

    4. Install ROCm 6.3

    sudo apt install rocm-dev

    Once installation is complete, verify the version with:

    /opt/rocm/bin/rocminfo | grep "ROCm version"

    5. Accessing GPU Resources

    Distrobox supports GPU passthrough automatically when using Podman or Docker with the appropriate flags. You can add GPU access by running:

    distrobox enter ubuntu-rocm63 --additional-flags "--device=/dev/kfd --device=/dev/dri"

    Why Use Distrobox for ROCm?

    • No need to downgrade your Fedora system
    • Keep your main environment clean
    • Run older or custom ROCm versions for hardware compatibility
    • Easily update, remove, or recreate environments

    Distrobox provides a flexible and safe way to keep older GPUs like the AMD Instinct MI60 functional on newer Linux distributions.

    📷 Screenshots

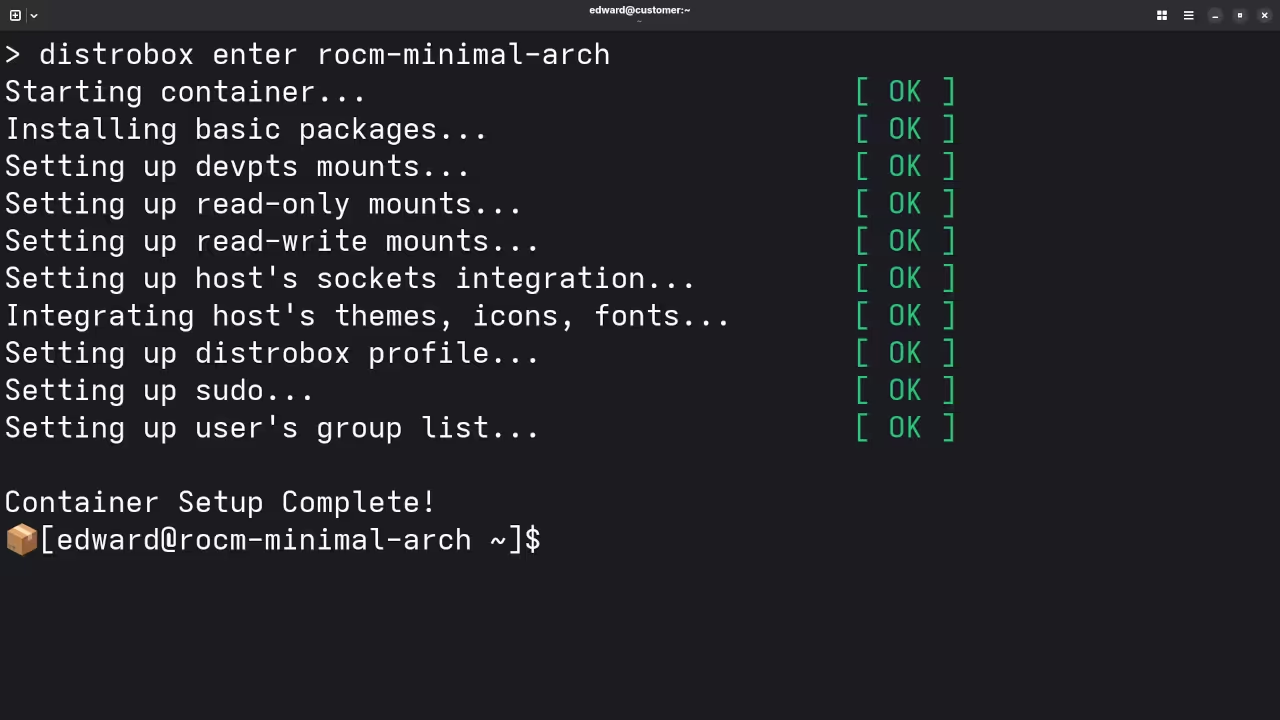
    Distrobox Entrance
    Distrobox Default Screen

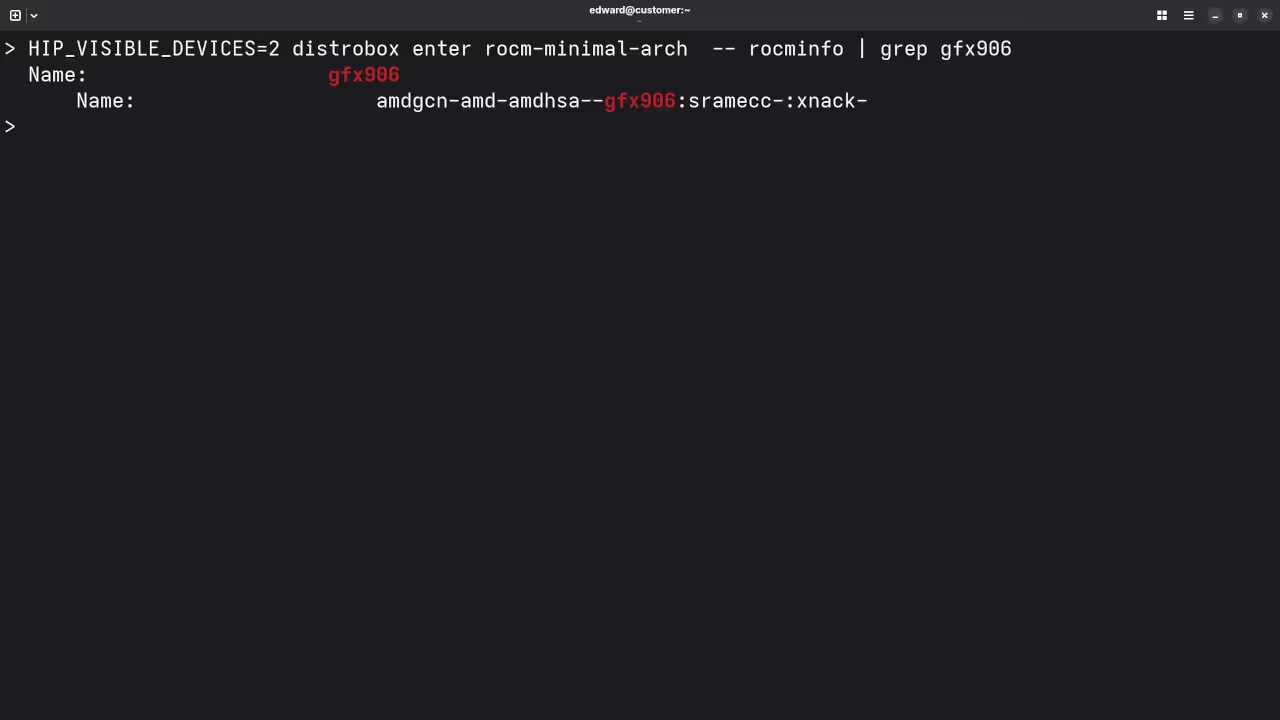
    Distrobox ROCm With GPU
    Distrobox ROCm For AMD Instinct Mi60

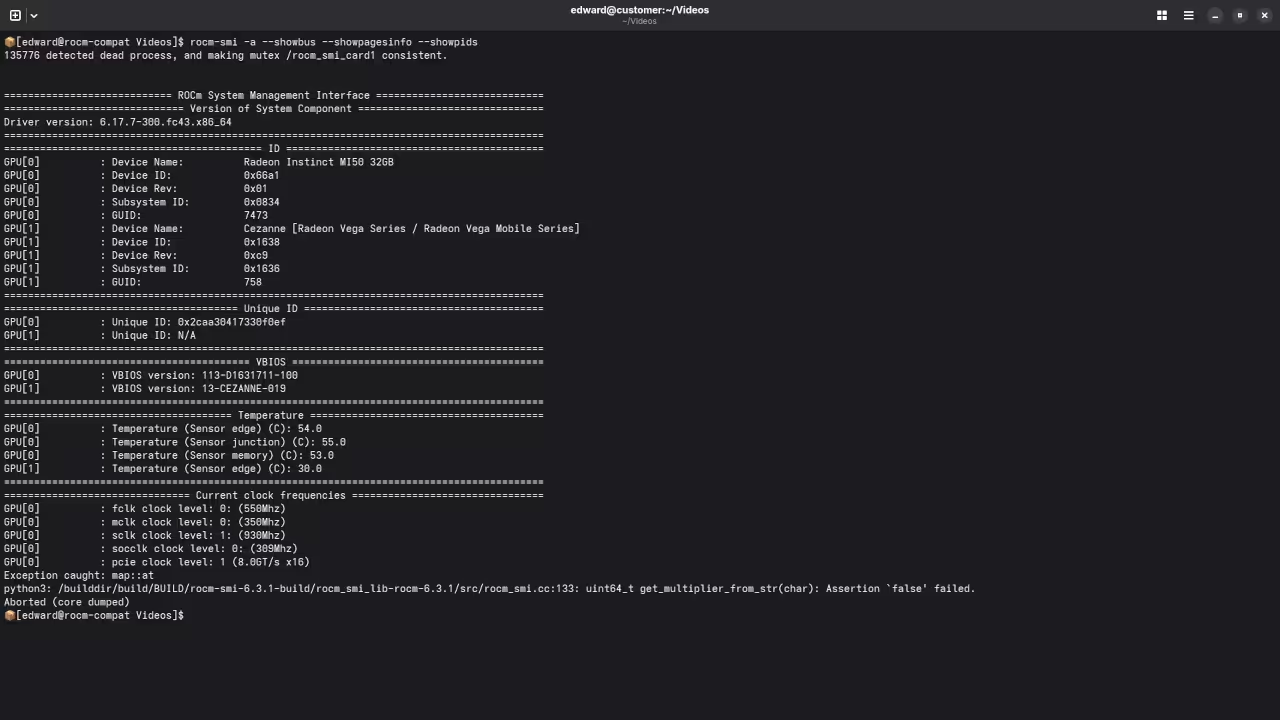
    Distrobox ROCm With GPU Temperatures
    Distrobox ROCm For AMD Instinct Mi60 Temperatures

    🎬 Live YouTube Screencast

    Video Displaying The Installation And Use Of ROCm Via Distrobox

    Need Help Installing or Customizing ROCm?

    If you would like one-on-one programming tutorials or custom help installing, updating, or migrating ROCm, I am available to assist. You can reach me directly through my contact page:

    https://ojambo.com/contact

  • Review Generative AI v1-5-pruned-emaonly-fp16.safetensors Model

    Review Generative AI v1-5-pruned-emaonly-fp16.safetensors Model

    How to Compile Stable-Diffusion.cpp on Linux with AMD Instinct Mi60 GPU (Using Vulkan)

    Introduction
    In this tutorial, I’ll walk you through how to compile and run stable-diffusion.cpp on a Linux system using an AMD Instinct Mi60 32GB HBM2 GPU. We’ll use Vulkan for GPU acceleration since the latest update to Fedora 43 with ROCm 6.4 has unfortunately caused the AMD Instinct Mi60 to no longer be supported by ROCm. I’ll explain the system requirements, how Vulkan differs from ROCm and OpenCL, and show you how to generate images using the v1-5-pruned-emaonly-fp16.safetensors model. I will also provide additional information about resources like my “Learning Python” book and course, and my one-on-one Python tutorials.

    System Requirements

    To follow along with this tutorial, you will need the following:

    • Operating System: Linux (I’m using Fedora 43)
    • CPU: A modern x86_64 processor (Intel or AMD)
    • GPU: AMD Instinct Mi60 (32GB HBM2)
    • Vulkan: Vulkan-compatible GPU driver (since ROCm is no longer supported for Mi60)
    • Memory: At least 8GB RAM (16GB recommended)
    • Disk Space: 10GB free for installation
    • Dependencies:
      • CMake (to build the project)
      • Vulkan SDK
      • Clang++ or GCC (for compilation)
      • libvulkan library
    • Model File: Download the v1-5-pruned-emaonly-fp16.safetensors model (for generating images).

    Is stable-diffusion.cpp Open Source?

    Yes! stable-diffusion.cpp is an open-source project that allows you to run Stable Diffusion models using C++ and Vulkan for faster execution on supported GPUs. The project is hosted on GitHub, and you can find the repository here.

    License and Restrictions for v1-5-pruned-emaonly-fp16.safetensors

    The v1-5-pruned-emaonly-fp16.safetensors file is available under the CreativeML Open RAIL-M license, which is a permissive license designed to allow use in research and commercial applications. However, you must ensure that your usage complies with all applicable laws and ethical guidelines, especially when generating or distributing images. Be sure to review the full license before use.

    How to Compile stable-diffusion.cpp with Vulkan

    Since ROCm 6.4 dropped support for the AMD Instinct Mi60, I’ve opted to compile stable-diffusion.cpp with Vulkan for GPU acceleration. Below are the steps to compile it:

    1. Clone the Repository:
    
    git clone https://github.com/leejet/stable-diffusion.cpp
    cd stable-diffusion.cpp
    
    2. Install Dependencies:
    
    For Fedora (adjust for your distro):
    
    sudo dnf install cmake vulkan vulkan-devel clang++ libvulkan
    
    3. Build the Project:
    
    From within the <strong>stable-diffusion.cpp</strong> directory, create the build directory and compile:
    
    mkdir build
    cd build
    cmake ..
    make
    
    4. Set Vulkan as the Backend:
    
    If Vulkan is correctly installed, it will be detected automatically. If not, make sure you have the Vulkan SDK installed and your GPU drivers support Vulkan.
    
    5. Run the Program:
    
    Once compiled, you can use the following command to generate an image with the <strong>v1-5-pruned-emaonly-fp16.safetensors</strong> model:
    
    ./stable-diffusion -i "A beautiful landscape" -m /path/to/v1-5-pruned-emaonly-fp16.safetensors
    
    Adjust the prompt and model path as necessary.

    What are ROCm, Vulkan, and OpenCL?

    • ROCm (Radeon Open Compute) is a software stack that provides a set of tools and libraries for high-performance computing on AMD GPUs. ROCm typically provides better integration with deep learning frameworks and libraries.
    • Vulkan is a low-level, cross-platform graphics API that provides efficient access to modern GPUs. It’s highly flexible and allows direct control of GPU resources, making it ideal for tasks like real-time graphics rendering or AI model inference, as in this case.
    • OpenCL (Open Computing Language) is an older, open standard for parallel computing. It works on both CPUs and GPUs and is used for a wide range of tasks, including image processing and machine learning. Unlike Vulkan, OpenCL is more generalized but can be less efficient for certain tasks.

    Where to Place Your Models

    Model Type Folder
    Checkpoints (e.g. *.safetensors) ComfyUI/models/checkpoints/
    LoRA models ComfyUI/models/loras/
    VAEs ComfyUI/models/vae/
    ControlNet ComfyUI/models/controlnet/

    Just drop your files into the appropriate folder and rerun stable-diffusion.cpp.

    Test Tools

    Test System
    Name Description
    CPU AMD Ryzen 5 5600GT (6C/12T, 3.6GHz).
    Memory 32GB DDR4.
    GPU AMD Instinct MI60 (32GB HBM2).
    Operating System Fedora Linux Workstation 43.
    Desktop Environment Gnome 49.
    Name Description

    Screenshots and Screencast

    Here’s where you’ll find a visual walkthrough of setting up v1-5-pruned-emaonly-fp16.safetensors using stable-diffusion.cpp on your local system:

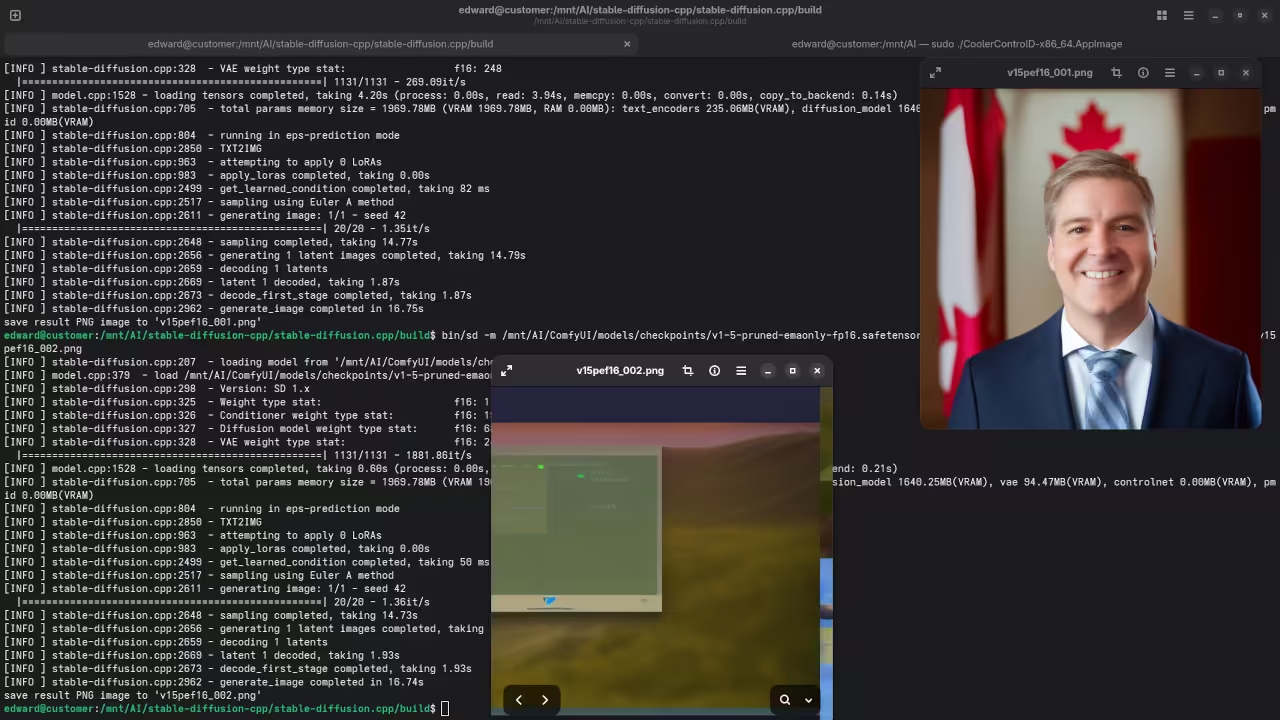
    Mayor And Gnome Desktop
    Command Line stable-diffusion.cpp Result For Toronto Mayor And Gnome Desktop.

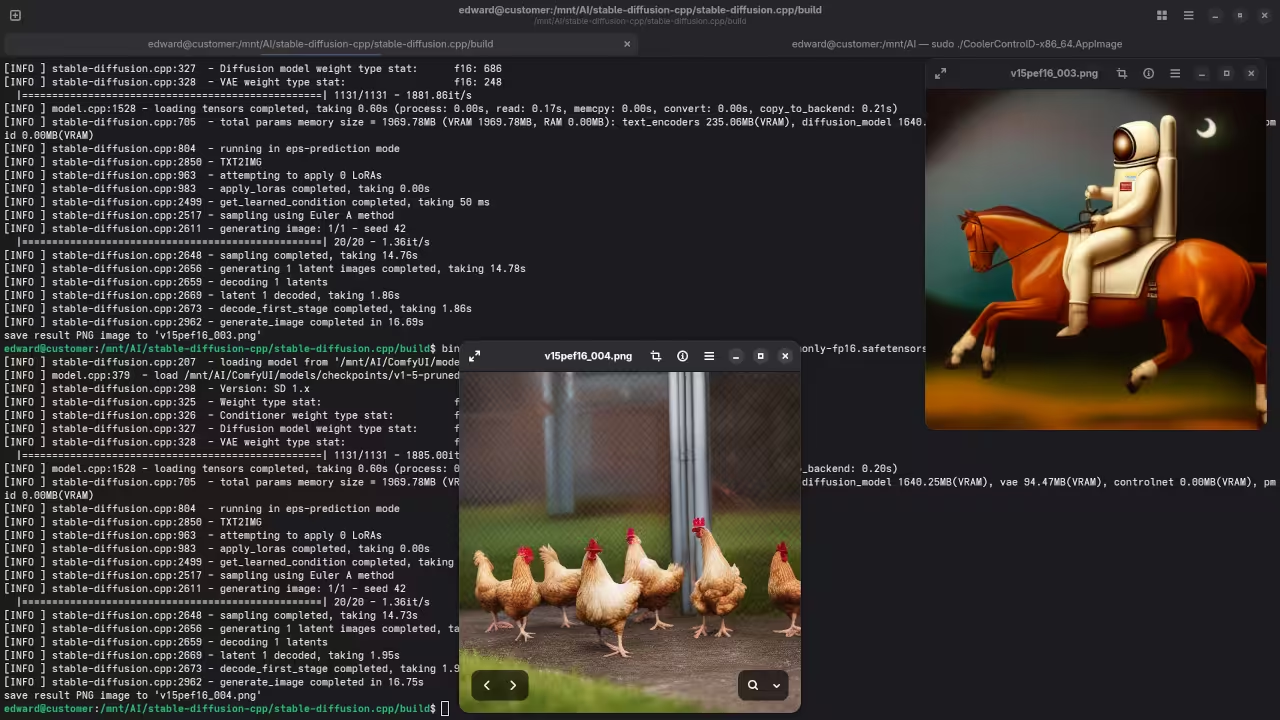
    Astronaut And Chickens
    Command Line stable-diffusion.cpp Result For Riding Astronaut And Chicken Run.

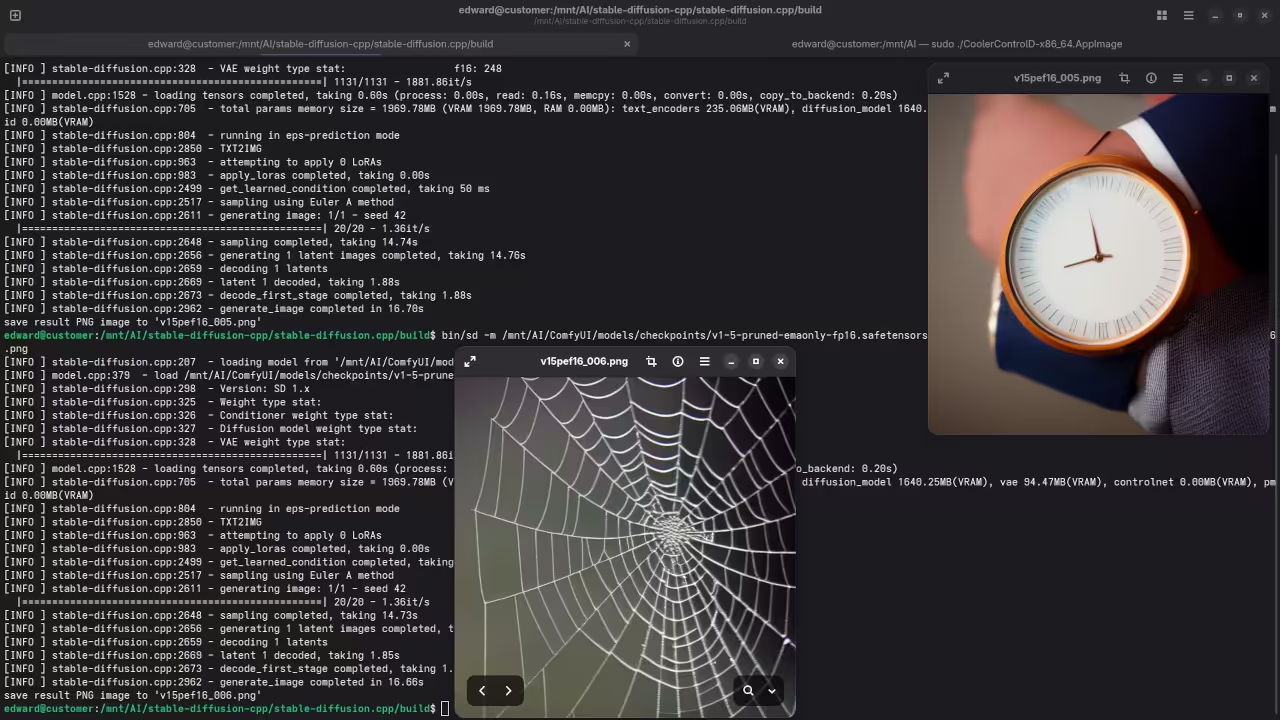
    Watch And Spider Web
    Command Line stable-diffusion.cpp Result For Watch Wearer And Spider Web.

    Video Displaying Using v1-5-pruned-emaonly-fp16.safetensors With stable-diffusion.cpp

    Addenum Video Using v1-5-pruned-emaonly-fp16.safetensors With stable-diffusion.cpp And Vulkan

    Results:

    A photograph of the mayor of Toronto

    Accurately drew a photograph mishmash of past mayors of Toronto.

    A screenshot of the gnome desktop environment.

    Accurately drew a screenshot of an older version of the Gnome desktop environment.

    A photograph of an astronaut riding a horse.

    Accurately drew a photograph of an astronaut riding a horse.

    A picture of a chicken run.

    Accurately drew a picture of a chicken run.

    A picture of a man wearing a watch.

    Accurately drew a picture of a man wearing a watch.

    A picture of a spider web on sockets.

    Accurately drew a picture of a spider web on sockets.

    Additional Resources

  • Smarter Business, Smarter Future: How to Integrate AI into Everyday Operations

    Artificial intelligence isn’t just for tech giants anymore. From small retail shops to logistics companies, AI is quickly becoming the invisible engine behind better decisions, faster service, and leaner operations. For many business owners, the challenge isn’t deciding whether to use AI – it’s figuring out how to start, what to expect, and how to make it pay off without creating chaos.


    TL;DR

    AI can transform a business by automating repetitive tasks, improving customer experiences, and helping leaders make data-driven decisions. But to succeed, companies must focus on three fundamentals: start small, integrate gradually, and maintain human oversight to avoid dependency or error creep.


    Why AI Is Reshaping How Businesses Compete

    The appeal of AI lies in its ability to take over tedious, repetitive work – freeing human teams to focus on creativity and strategy. For instance, small manufacturers now use predictive analytics to reduce downtime, while accounting teams rely on machine learning tools for fraud detection. Even marketing departments are turning to AI-driven personalization to tailor customer experiences dynamically.

    The result? Better decisions, happier customers, and measurable savings.


    Common Challenges to Expect

    AI is powerful, but it’s not magic. The most frequent challenges businesses face when integrating AI include:

    • Data chaos: Poor or incomplete data leads to unreliable outcomes.
    • High initial costs: Training and implementation can demand significant investment before ROI kicks in.
    • Employee resistance: Teams may fear replacement or lack clarity about how AI will affect their roles.
    • Integration complexity: Existing systems often need updates before they can “talk” to AI tools.

    Overcoming these requires preparation, transparency, and a mindset that treats AI as a partner, not a replacement.


    Quick Reference Table – Benefits vs. Risks

    Area Potential Benefit Associated Risk
    Customer Service 24/7 chatbots, faster response times Reduced personal touch
    Operations Predictive analytics to streamline workflows Overreliance on algorithms
    Marketing Real-time personalization and targeting Data privacy issues
    Finance Fraud detection, invoice automation Model bias or false positives
    HR Resume screening and onboarding automation Ethical risks, lack of human nuance
    Area Potential Benefit Associated Risk


    How to Incorporate AI into Daily Operations (Checklist)

    • ✅ Define your biggest bottleneck. Don’t apply AI everywhere – identify the one process that costs the most time or money.
    • ✅ Audit your data. Make sure the information feeding your systems is accurate.
    • ✅ Pick the right tool for your scale. Cloud-based AI services (like AWS SageMaker or Microsoft Azure AI) can minimize cost and complexity.
    • ✅ Run a pilot project. Test on a small team before rolling out organization-wide.
    • ✅ Train your people. Ensure employees understand what AI does and doesn’t do.
    • ✅ Monitor and recalibrate. AI models drift over time – review performance regularly to maintain reliability.


    Going Back to School for the Competitive Edge

    AI technology moves fast, and keeping up requires more than online tutorials. Many entrepreneurs are returning to school to build foundational skills in data and machine learning. Pursuing coursework in information technology can provide business owners with the structure and support needed to understand data structures, programming, and the principles behind intelligent systems. An IT degree also helps bridge the gap between business strategy and technical implementation – and with online programs, you can balance studying while still running your business.


    Streamlining Inventory with Smart Tools

    One small manufacturer in Ohio adopted AI-based forecasting software to anticipate which parts would run out first based on historical orders. Within months, the company reduced stockouts by 40% and cut over-purchasing by 15%. The secret wasn’t expensive software – it was clean data, a single pilot department, and consistent feedback loops between human managers and the AI model.

    Similar success stories appear across industries:

    • Retailers using IBM Watson for predictive logistics
    • Restaurants leveraging OpenTable’s AI to optimize seating patterns
    • Service providers turning to HubSpot AI for automated lead scoring

    Each success shares one thing: they started with a defined business need, not just curiosity about technology.


    Notion AI – Productivity’s Silent Partner

    While there are many tools out there, Notion AI stands out as an example of balanced automation. It helps teams summarize meeting notes, organize tasks, and generate written drafts quickly – without overwhelming users with complex configurations.

    For small teams that can’t afford dedicated data scientists, tools like this can be a first step toward AI-driven efficiency.


    Frequently Asked Questions

    Is AI too expensive for small businesses?

    Not anymore. Many platforms offer usage-based pricing, so you can start with minimal cost and scale as you see returns.

    How do I know if my company’s ready for AI?

    If you have digital data, clear business goals, and staff open to learning, you’re ready to pilot a small project.

    Will AI replace my employees?

    AI replaces tasks, not people. In most successful cases, employees evolve into higher-value roles – managing strategy, oversight, and creative problem-solving.

    How long before I see ROI?

    Typically, within 6–12 months for small implementations. The key is tracking measurable improvements like reduced processing time or fewer errors.


    The Bottom Line

    Integrating AI isn’t a one-time event – it’s a cultural and strategic shift. Success comes from curiosity, discipline, and structure. Start small, keep your data clean, and give your people time to adapt. When done right, AI becomes less about automation and more about amplification – helping every person in your organization deliver at their best.

    References

  • PHP Database Word Search App

    PHP Database Word Search App

    Building a Word Search with PHP and MariaDB: Fetching Search Results Using FULLTEXT, LIKE, and LOCATE/POSITION

    In this beginner-level tutorial, we’ll walk you through creating a simple word search application using PHP and MariaDB. This will allow users to search for specific words in a database using three different search methods: FULLTEXT, LIKE, and LOCATE/POSITION. We’ll also implement the Fetch API to dynamically display the search results in real-time without needing to reload the page.

    Along the way, we’ll cover how to set up your MariaDB database, create a simple PHP script to handle the search functionality, and explore best practices for querying a database. Let’s get started!

    Setting Up the MariaDB Database

    Before we dive into the PHP code, let’s set up the database and table. We will create a posts table to store some sample text data for the word search.


    CREATE DATABASE blog_db;
    
    USE blog_db;
    
    CREATE TABLE posts (
        id INT AUTO_INCREMENT PRIMARY KEY,
        title VARCHAR(255) NOT NULL,
        content TEXT NOT NULL,
        FULLTEXT(title, content)
    );
    
    -- Insert sample data into the table
    INSERT INTO posts (title, content) VALUES
    (&#039;First Post&#039;, &#039;This is the first post. It talks about PHP and MariaDB.&#039;),
    (&#039;Learning PHP&#039;, &#039;PHP is a powerful server-side language used for web development.&#039;),
    (&#039;WordPress and PHP&#039;, &#039;WordPress uses PHP for creating dynamic content on websites.&#039;),
    (&#039;MariaDB Introduction&#039;, &#039;MariaDB is a popular relational database management system.&#039;);


    This SQL code creates a table called posts with two columns: title and content. We’ve also added a FULLTEXT index on both columns, which will help with the FULLTEXT search method.

    Creating the HTML Structure

    Now, let’s create a simple HTML form with an input field for the user to type a search query and options to choose the type of search method they prefer.


        &lt;h1&gt;PHP Word Search with MariaDB&lt;/h1&gt;
        
        &lt;label for=&quot;searchInput&quot;&gt;Search:&lt;/label&gt;
        &lt;input type=&quot;text&quot; id=&quot;searchInput&quot; placeholder=&quot;Enter a search term&quot;&gt;
        
        &lt;label for=&quot;searchType&quot;&gt;Search Type:&lt;/label&gt;
        &lt;select id=&quot;searchType&quot;&gt;
            &lt;option value=&quot;fulltext&quot;&gt;FULLTEXT&lt;/option&gt;
            &lt;option value=&quot;like&quot;&gt;LIKE&lt;/option&gt;
            &lt;option value=&quot;locate&quot;&gt;LOCATE/POSITION&lt;/option&gt;
        &lt;/select&gt;
        
        &lt;button id=&quot;searchButton&quot;&gt;Search&lt;/button&gt;
        
        &lt;h2&gt;Search Results:&lt;/h2&gt;
        &lt;table id=&quot;resultsTable&quot;&gt;
            &lt;thead&gt;
                &lt;tr&gt;
                    &lt;th&gt;Title&lt;/th&gt;
                    &lt;th&gt;Content&lt;/th&gt;
                &lt;/tr&gt;
            &lt;/thead&gt;
            &lt;tbody&gt;
                &lt;!-- Results will be displayed here --&gt;
            &lt;/tbody&gt;
        &lt;/table&gt;
    
        &lt;script src=&quot;script.js&quot;&gt;&lt;/script&gt;


    Here, we’ve created an input field where users can type their search query, a dropdown to select the search type, and a button to initiate the search. The results will be displayed in a table below the input.

    Writing the JavaScript for Fetch API

    Now, let’s write the JavaScript code that will handle the user’s search request. This script will make use of the Fetch API to send the user’s input to a PHP script without reloading the page.


    document.getElementById(&#039;searchButton&#039;).addEventListener(&#039;click&#039;, function() {
        const searchInput = document.getElementById(&#039;searchInput&#039;).value;
        const searchType = document.getElementById(&#039;searchType&#039;).value;
    
        if (searchInput === &#039;&#039;) {
            alert(&#039;Please enter a search term.&#039;);
            return;
        }
    
        fetch(&#039;search.php&#039;, {
            method: &#039;POST&#039;,
            headers: {
                &#039;Content-Type&#039;: &#039;application/json&#039;
            },
            body: JSON.stringify({
                searchInput: searchInput,
                searchType: searchType
            })
        })
        .then(response =&gt; response.json())
        .then(data =&gt; {
            let resultsHTML = &#039;&#039;;
            data.forEach(post =&gt; {
                resultsHTML += `&lt;tr&gt;&lt;td&gt;${post.title}&lt;/td&gt;&lt;td&gt;${post.content}&lt;/td&gt;&lt;/tr&gt;`;
            });
            document.querySelector(&#039;#resultsTable tbody&#039;).innerHTML = resultsHTML;
        })
        .catch(error =&gt; console.error(&#039;Error:&#039;, error));
    });


    This script listens for a click on the search button, grabs the input values (search term and search type), and sends them via a POST request to the search.php file. When the response is received, it populates the search results in the table.

    PHP Script to Handle the Search

    Next, let’s create the search.php file that will process the search query and return the results from the database based on the selected search type.


    header(&#039;Content-Type: application/json&#039;);
    $servername = &quot;localhost&quot;;
    $username = &quot;root&quot;;
    $password = &quot;&quot;;
    $dbname = &quot;blog_db&quot;;
    
    // Create connection
    $conn = new mysqli($servername, $username, $password, $dbname);
    
    if ($conn-&gt;connect_error) {
        die(&quot;Connection failed: &quot; . $conn-&gt;connect_error);
    }
    
    $inputData = json_decode(file_get_contents(&#039;php://input&#039;), true);
    $searchInput = $conn-&gt;real_escape_string($inputData[&#039;searchInput&#039;]);
    $searchType = $conn-&gt;real_escape_string($inputData[&#039;searchType&#039;]);
    
    $query = &quot;&quot;;
    if ($searchType === &#039;fulltext&#039;) {
        $query = &quot;SELECT * FROM posts WHERE MATCH(title, content) AGAINST(&#039;$searchInput&#039; IN NATURAL LANGUAGE MODE)&quot;;
    } elseif ($searchType === &#039;like&#039;) {
        $query = &quot;SELECT * FROM posts WHERE title LIKE &#039;%$searchInput%&#039; OR content LIKE &#039;%$searchInput%&#039;&quot;;
    } elseif ($searchType === &#039;locate&#039;) {
        $query = &quot;SELECT * FROM posts WHERE LOCATE(&#039;$searchInput&#039;, title) &gt; 0 OR LOCATE(&#039;$searchInput&#039;, content) &gt; 0&quot;;
    }
    
    $result = $conn-&gt;query($query);
    
    $posts = [];
    if ($result-&gt;num_rows &gt; 0) {
        while($row = $result-&gt;fetch_assoc()) {
            $posts[] = $row;
        }
    }
    
    $conn-&gt;close();
    echo json_encode($posts);


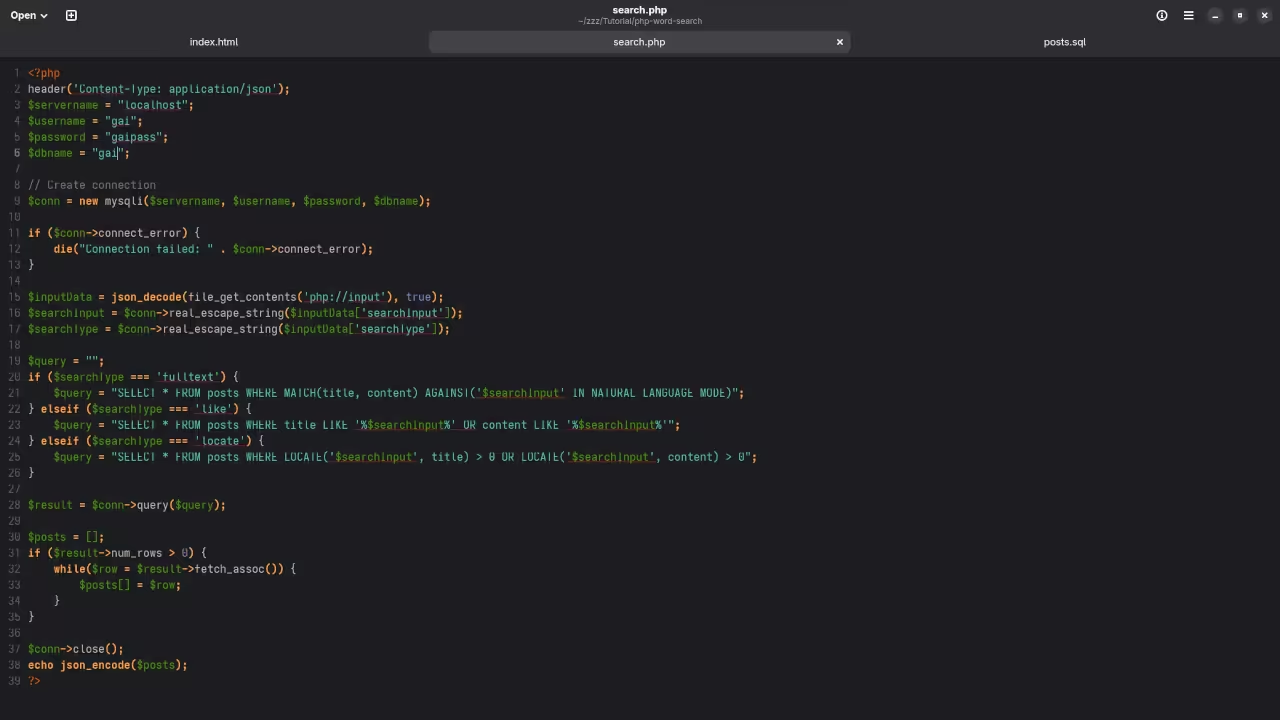
    This PHP script connects to the MariaDB database, retrieves the search input, and runs the appropriate SQL query based on the search method selected by the user. It then returns the results as a JSON object, which is handled by the JavaScript to update the page with the results.

    Best Practices for Word Search

    When implementing search functionality in a web application, here are a few best practices to keep in mind:

    • Indexing: Use FULLTEXT indexes to optimize searches on large text fields like titles and content.
    • Prepared Statements: Always use prepared statements or sanitize inputs to prevent SQL injection.
    • Efficient Querying: Choose the correct query type based on your use case. LIKE can be slow on large datasets, while FULLTEXT is optimized for larger text fields.

    Screenshots And Screencast

    Word Search HTML Code
    Gnome Text Editor Displaying Word Search HTML Code

    Word Search PHP Code
    Gnome Text Editor Displaying Word Search PHP Code

    PHPMyAdmin Table Creation
    Web Browser Displaying PHPMyAdmin Database Table Creation

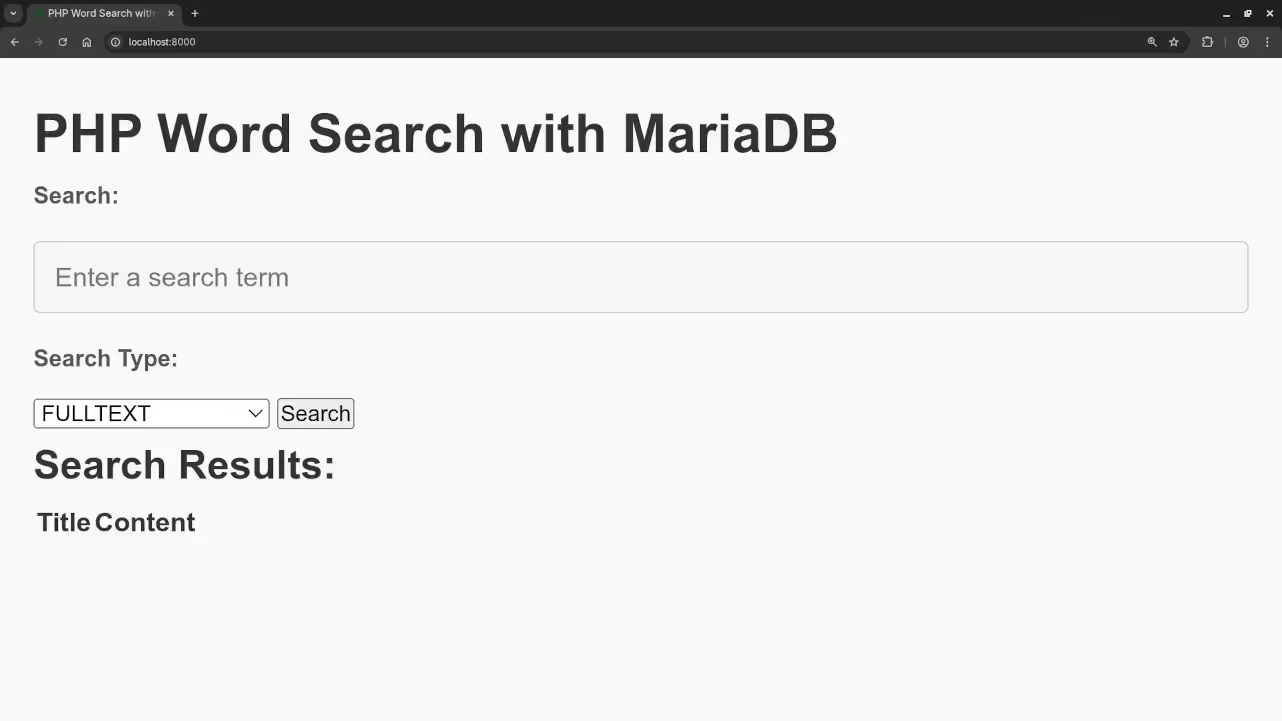
    Empty Word Search
    Web Browser Displaying Empty Word Search

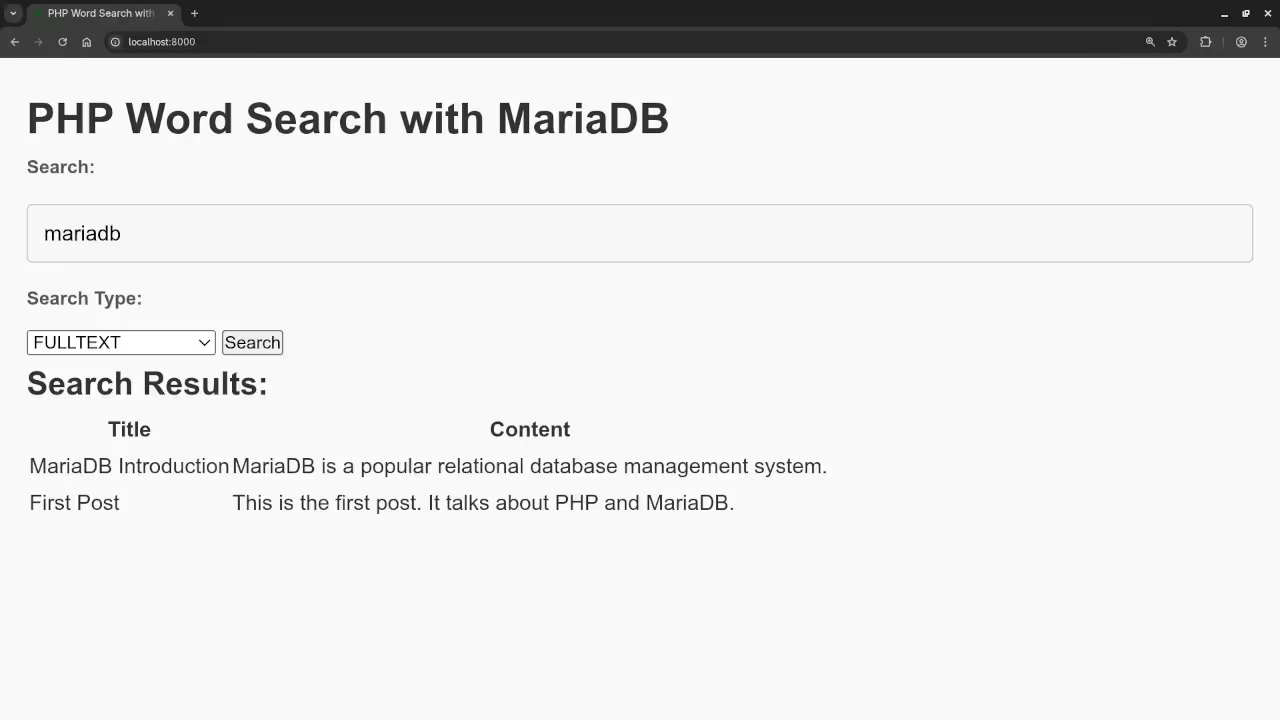
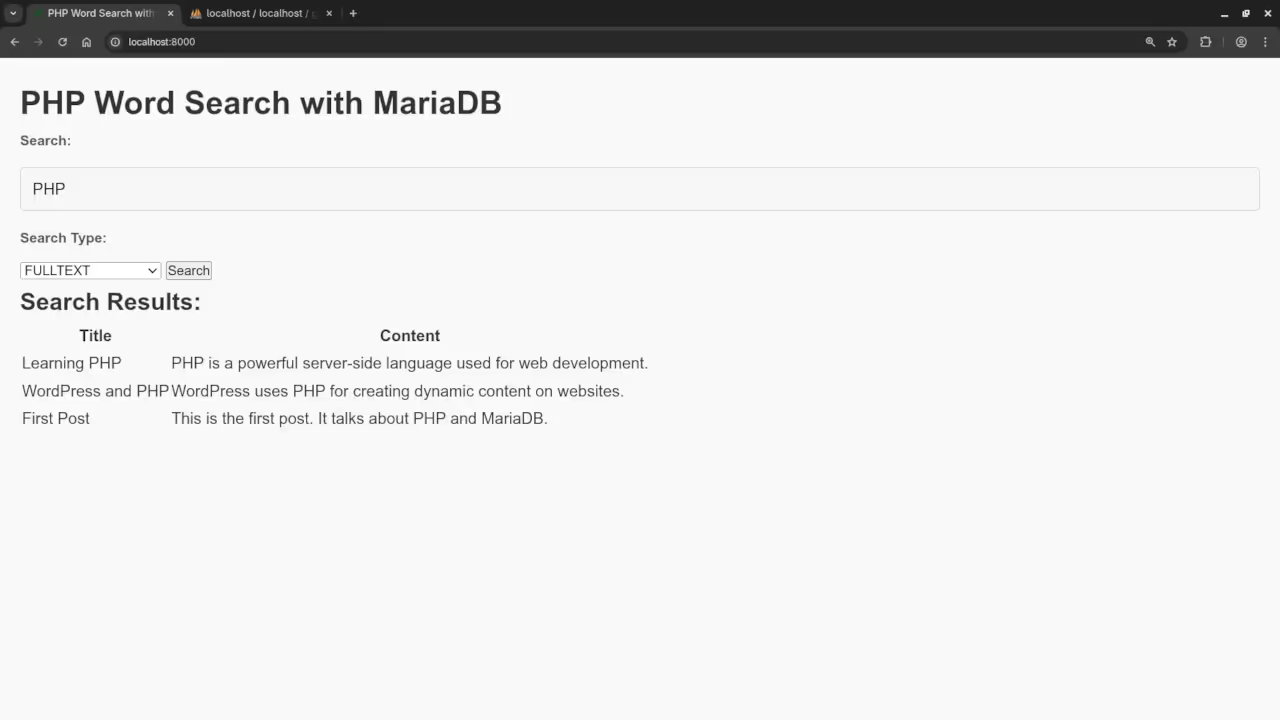
    Full Text Word Search
    Web Browser Displaying Full Text Word Search

    PHP Word Search Video

    Learn More

    If you’re interested in learning more about PHP and database interaction, I recommend checking out my book Learning PHP, which covers PHP fundamentals and much more.

    Additionally, if you prefer learning through video tutorials, I’ve created a course called Learning PHP, which is perfect for anyone looking to improve their PHP skills.

    If you need personalized help, I offer one-on-one programming tutorials, as well as services for updating or migrating PHP applications. Feel free to reach out via my contact page.

    Conclusion

    That’s it! You’ve now built a simple PHP-based word search application using MariaDB and learned how to search using different query methods. This can be expanded with more advanced features such as pagination, fuzzy search, or filtering results based on different criteria.

    Happy coding!