Secure Video Uploads: Building the PHP and MariaDB Backend (Part 2)
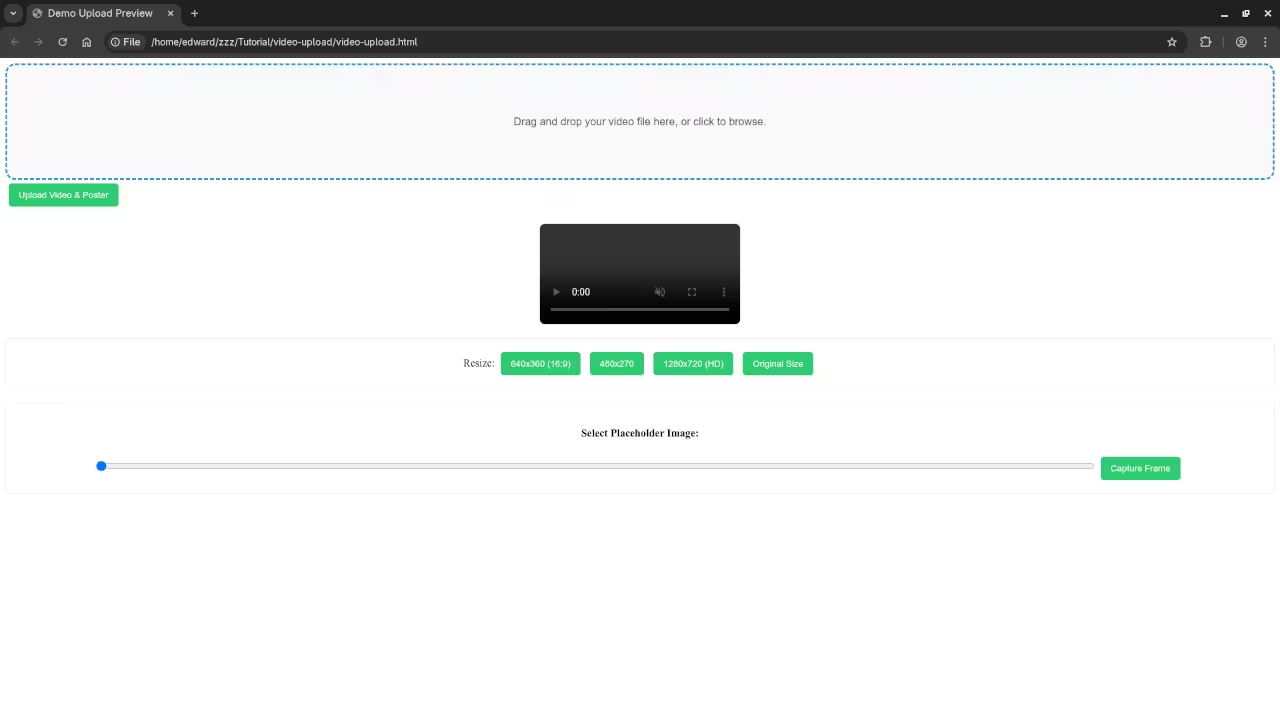
Welcome back! In [Part 1: The Frontend], we built a beautiful HTML5 user interface for uploading, resizing, and selecting a poster image for our videos. Now, we’re diving into the essential part: the backend.
This post focuses on using PHP to handle the file uploads, manage video metadata using MariaDB, and secure the system with CRUD operations (Create, Read, Update, Delete).
The Backend Architecture
Our backend needs to perform three core tasks:
Receive the video file, poster image, and metadata from the Fetch API request.
Securely save the video and image files in a dedicated folder outside of the main web root.
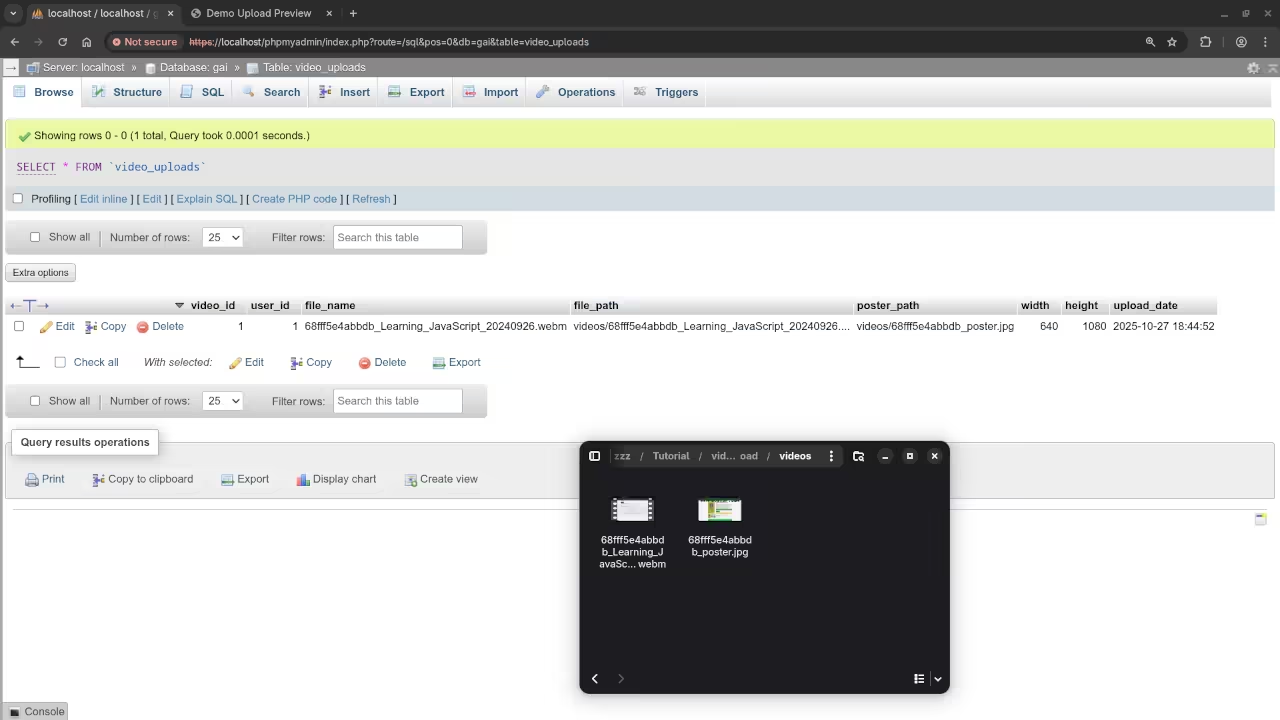
Store the video’s information (like the file path, user ID, and dimensions) in a MariaDB database.
1. Setting Up the Database (MariaDB)
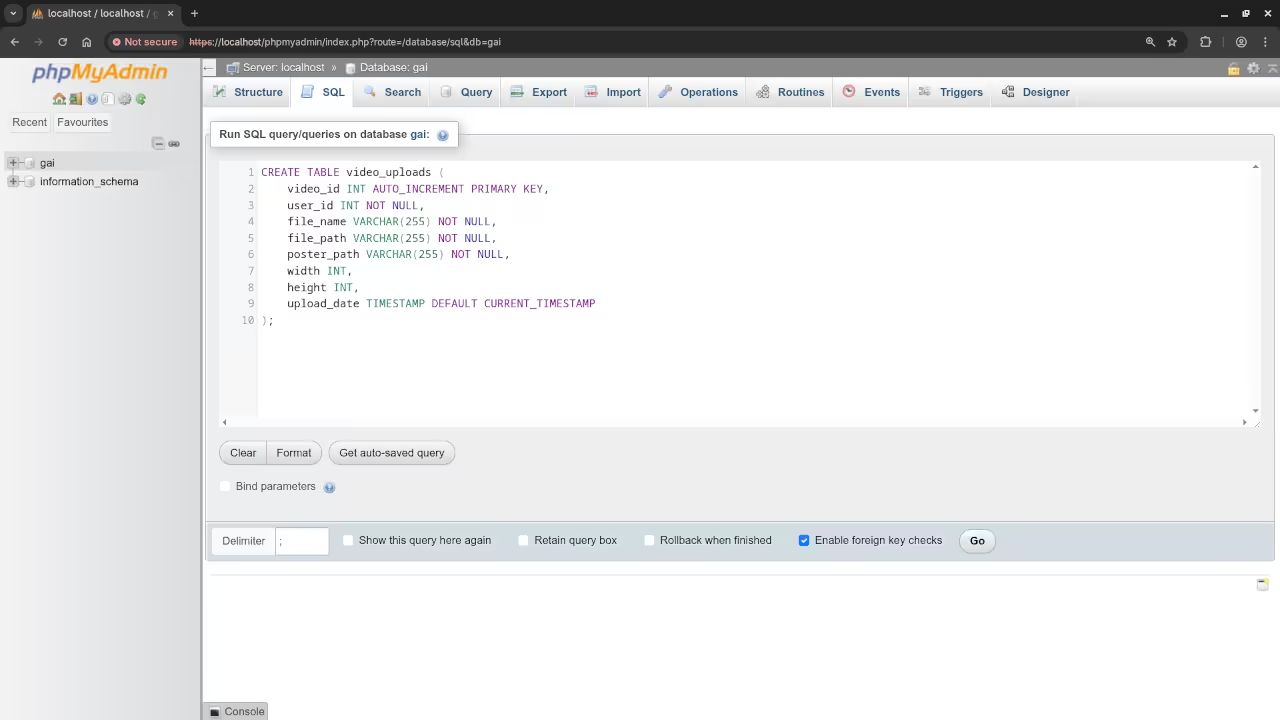
We need a simple table to store the details about each uploaded video. This allows us to easily retrieve, update, or delete records.
SQL Code:
CREATE TABLE video_uploads (
video_id INT AUTO_INCREMENT PRIMARY KEY,
user_id INT NOT NULL,
file_name VARCHAR(255) NOT NULL,
file_path VARCHAR(255) NOT NULL,
poster_path VARCHAR(255) NOT NULL,
width INT,
height INT,
upload_date TIMESTAMP DEFAULT CURRENT_TIMESTAMP
);
2. The PHP Endpoint and File Handling
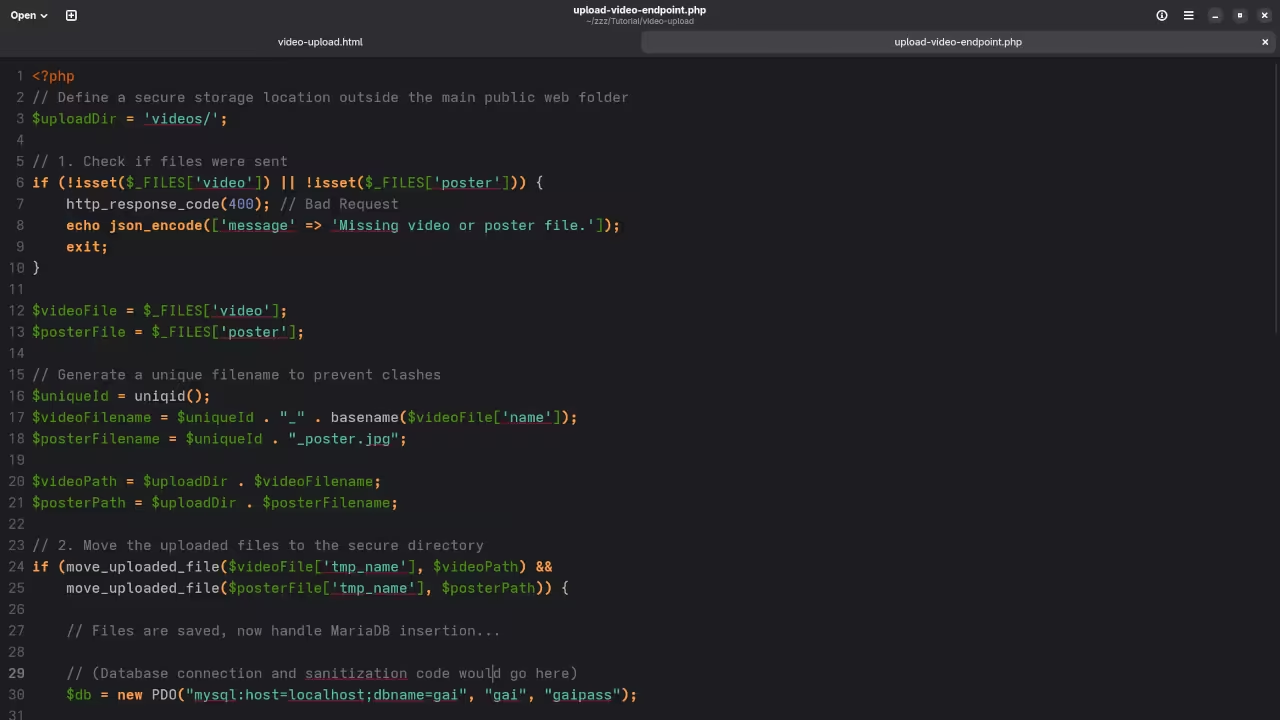
Remember the endpoint we defined in Part 1? /wp-json/my-video-plugin/v1/upload. Your PHP code will live behind this URL. The script below illustrates the core logic for receiving the files via the POST request and moving them to a secure location.
PHP Upload Script:
// Define a secure storage location outside the main public web folder
$uploadDir = '/home/user/secure_video_storage/';
// 1. Check if files were sent
if (!isset($_FILES['video']) || !isset($_FILES['poster'])) {
http_response_code(400); // Bad Request
echo json_encode(['message' => 'Missing video or poster file.']);
exit;
}
$videoFile = $_FILES['video'];
$posterFile = $_FILES['poster'];
// Generate a unique filename to prevent clashes
$uniqueId = uniqid();
$videoFilename = $uniqueId . "_" . basename($videoFile['name']);
$posterFilename = $uniqueId . "_poster.jpg";
$videoPath = $uploadDir . $videoFilename;
$posterPath = $uploadDir . $posterFilename;
// 2. Move the uploaded files to the secure directory
if (move_uploaded_file($videoFile['tmp_name'], $videoPath) &&
move_uploaded_file($posterFile['tmp_name'], $posterPath)) {
// Files are saved, now handle MariaDB insertion...
// (Database connection and sanitization code would go here)
$db = new PDO("mysql:host=localhost;dbname=your_db_name", "user", "pass");
// Get metadata from the Fetch API
$width = $_POST['width'] ?? 0;
$height = $_POST['height'] ?? 0;
$userId = 1; // Example user ID
// 3. INSERT (Create) the record into MariaDB
$stmt = $db->prepare("INSERT INTO video_uploads
(user_id, file_name, file_path, poster_path, width, height)
VALUES (?, ?, ?, ?, ?, ?)");
$stmt->execute([$userId, $videoFilename, $videoPath, $posterPath, $width, $height]);
http_response_code(201); // Created
echo json_encode(['message' => 'Video uploaded and metadata saved successfully!', 'id' => $db->lastInsertId()]);
} else {
http_response_code(500); // Server Error
echo json_encode(['message' => 'Failed to move uploaded files. Check folder permissions.']);
}
3. Handling CRUD Operations (Replace/Delete)
A complete system must handle the full lifecycle of a video:
Replace (Update): User uploads a new video/poster for an existing ID. You must use an UPDATE SQL statement on the video_uploads table. Crucially, you must first use PHP’s unlink() function to **delete the old video and poster files** from the secure folder to save disk space.
Delete: User removes the video entirely. Execute a SQL DELETE query against the video_uploads table, then use PHP’s unlink() function to **permanently delete the files** from the disk using the file path stored in the database.
Screenshots and Screencast
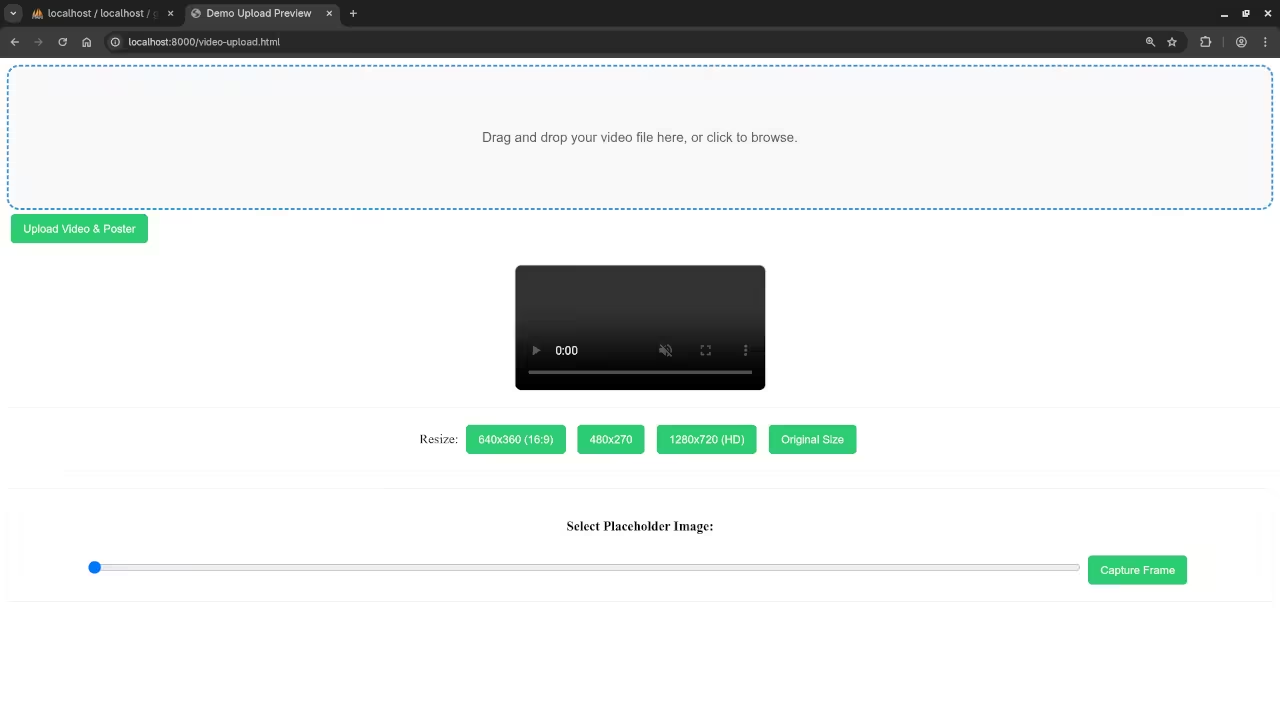
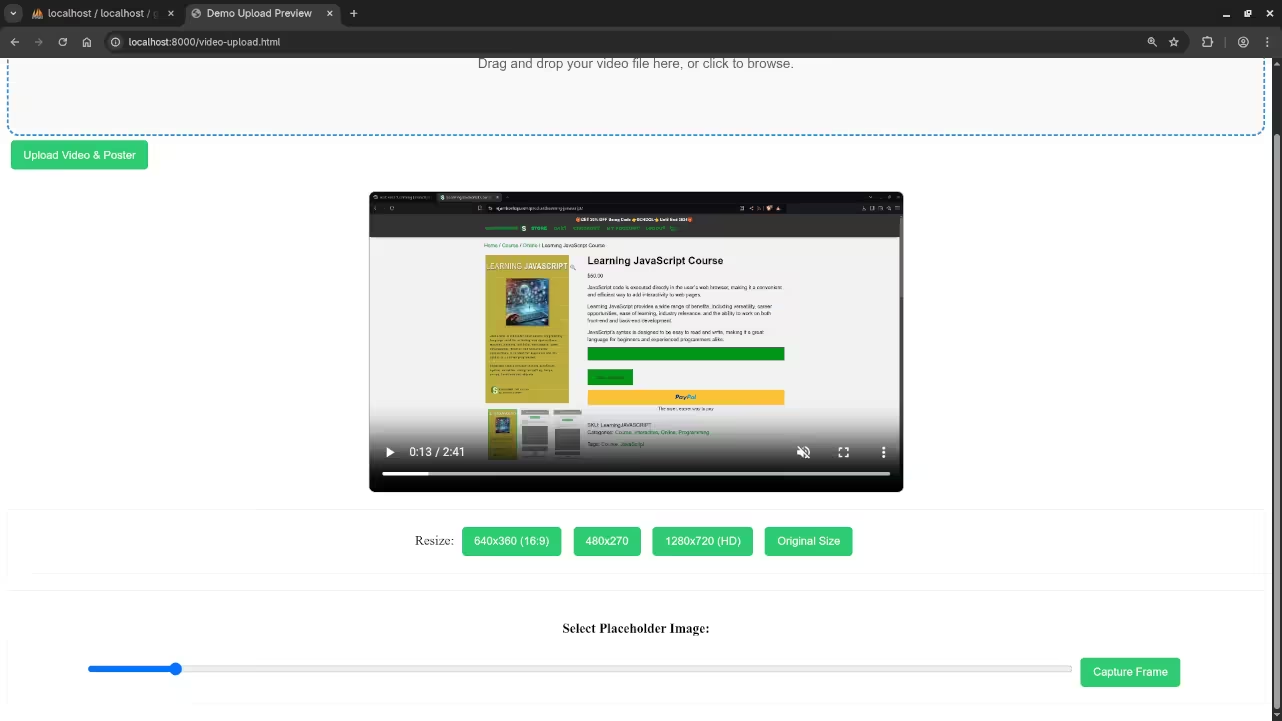
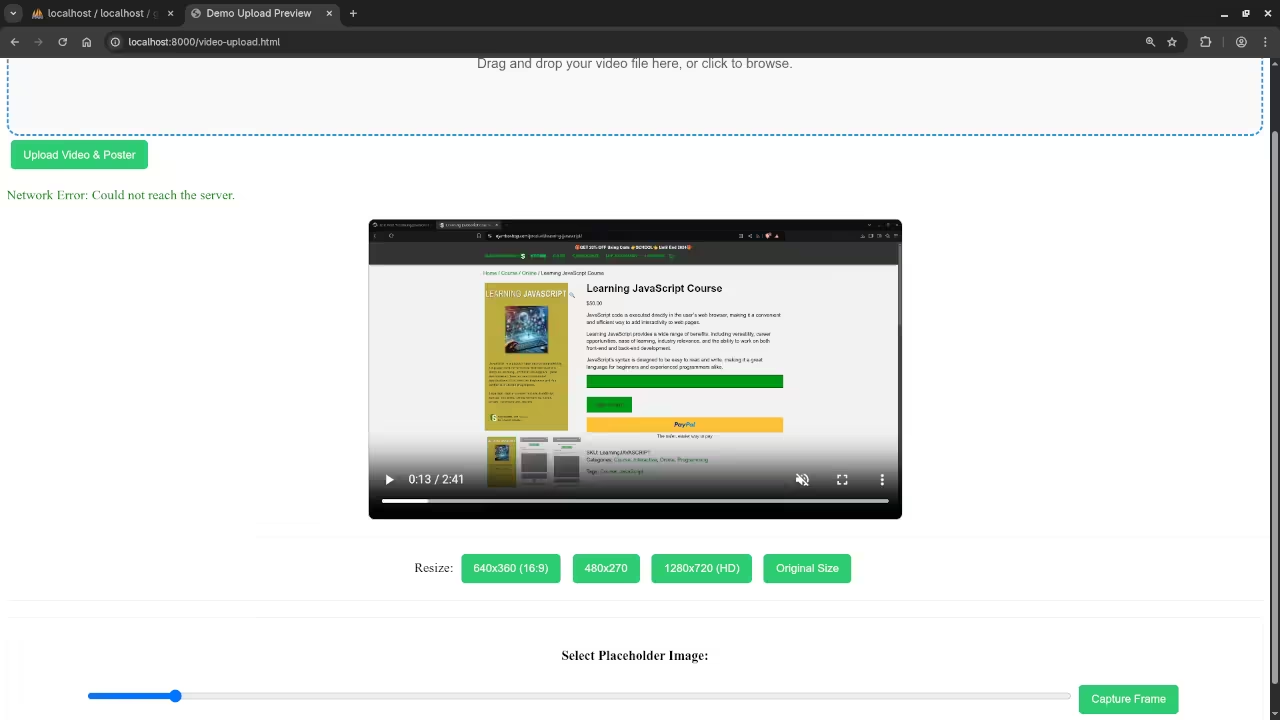
Gnome Text Editor Displaying Fetch URL For Video Upload HTML CodeGnome Text Editor Displaying PHP Video Upload CodeWeb Browser Displaying PHPMyAdmin Database Table Creation QueryWeb Browser Displaying A Drag And Drop Video Upload FormWeb Browser Displaying Video Preview With Resize And Thumbnail Scrubber OptionsWeb Browser Displaying A Failed Video File UploadWeb Browser Running PHPMyAdmin Displaying A List Of Uploaded VideosPHP Video File Upload AJAX Video
Keep Learning PHP and Backends
Ready to take your PHP and backend development skills to the next level?
If you need personalized guidance on your coding journey, including PHP, or require help with **updating or migrating existing frameworks**, I’m available for **one-on-one programming tutorials**. Feel free to reach out and schedule a session: https://ojambo.com/contact.
HTML5 Video Uploads with Fetch API: Building a Beautiful Frontend (Part 1)
Welcome to the first part of our guide on handling video uploads! We’re diving into the exciting world of HTML5, the Fetch API, and building a beautiful, user-friendly frontend. In this post, we’ll focus on creating the client-side experience, including drag-and-drop, video resizing options, and selecting the perfect placeholder image using a scrubber.
Designing the Ultimate Video Uploader UI
A great user interface (UI) makes complex tasks feel simple. For video uploads, that means making the file selection process painless and providing immediate control over the video’s presentation.
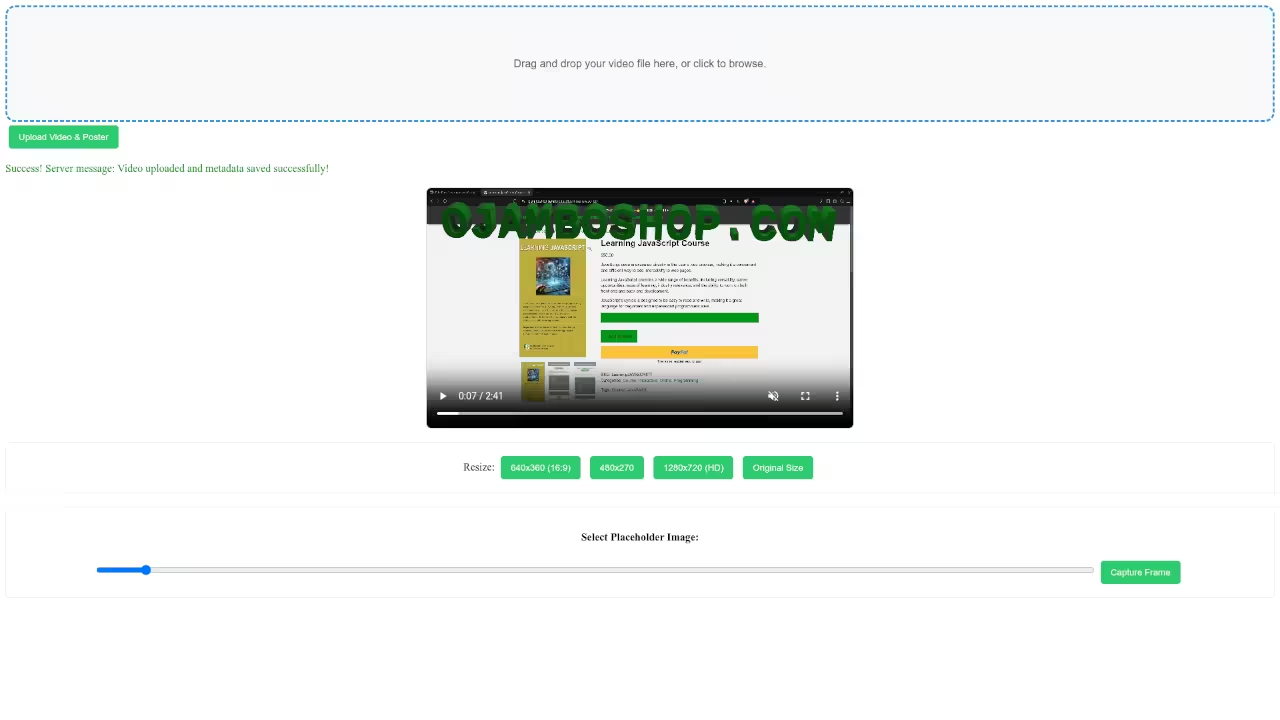
1. The Drag-and-Drop Zone
The first element is a clear, inviting area where users can drop their video files. This improves usability significantly over just clicking a small ‘Choose File’ button.
HTML Structure
<div id="dropZone">
<p>Drag and drop your video file here, or click to browse.</p>
<input type="file" id="videoFile" accept="video/*" hidden>
</div>
<button id="uploadButton">Upload Video & Poster</button>
<p id="statusMessage" style="color: green;"></p>
Using JavaScript, we’ll add event listeners to handle the **dragover**, **dragleave**, and most importantly, the **drop** events. When a file is dropped, we’ll immediately load it into a video element for preview and manipulation.
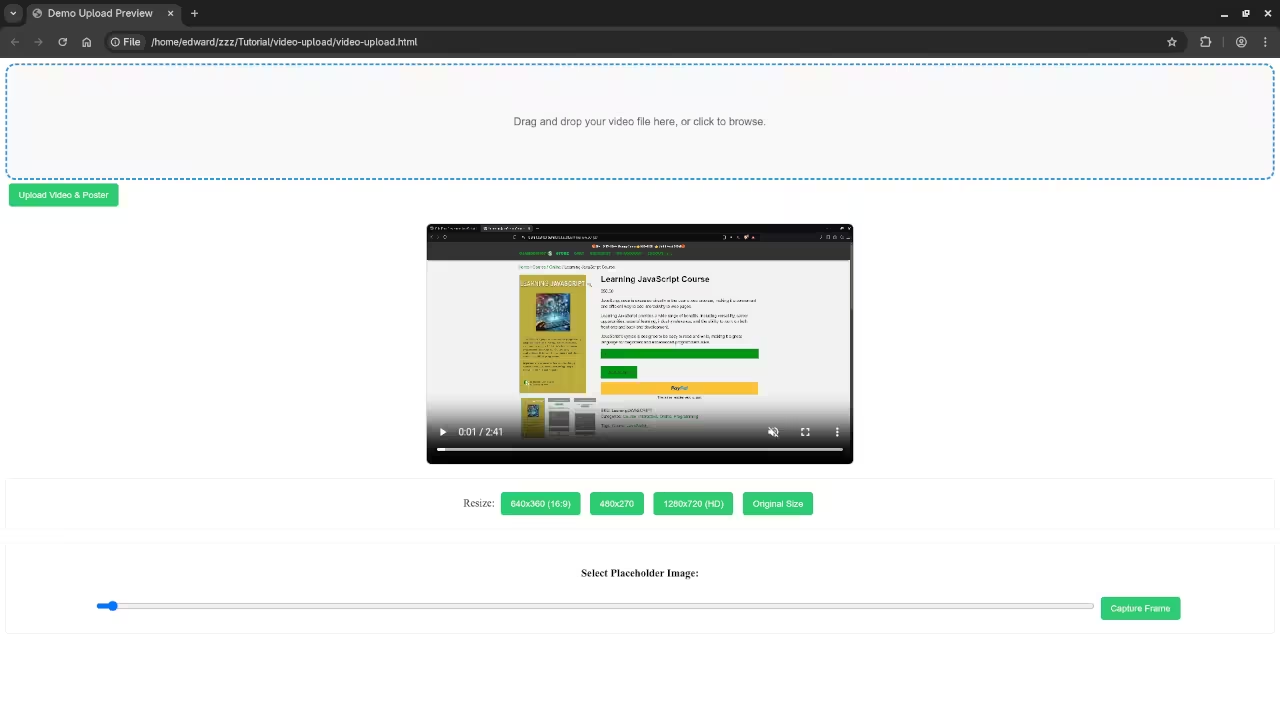
2. Live Video Preview and Resizing Controls
Once a video is loaded, we need to show it and give the user options.
We’ll use JavaScript to capture the click on these buttons and dynamically change the video element’s width and height properties, giving the user instant visual feedback on how the final video will look.
3. Scrubbing for the Perfect Placeholder
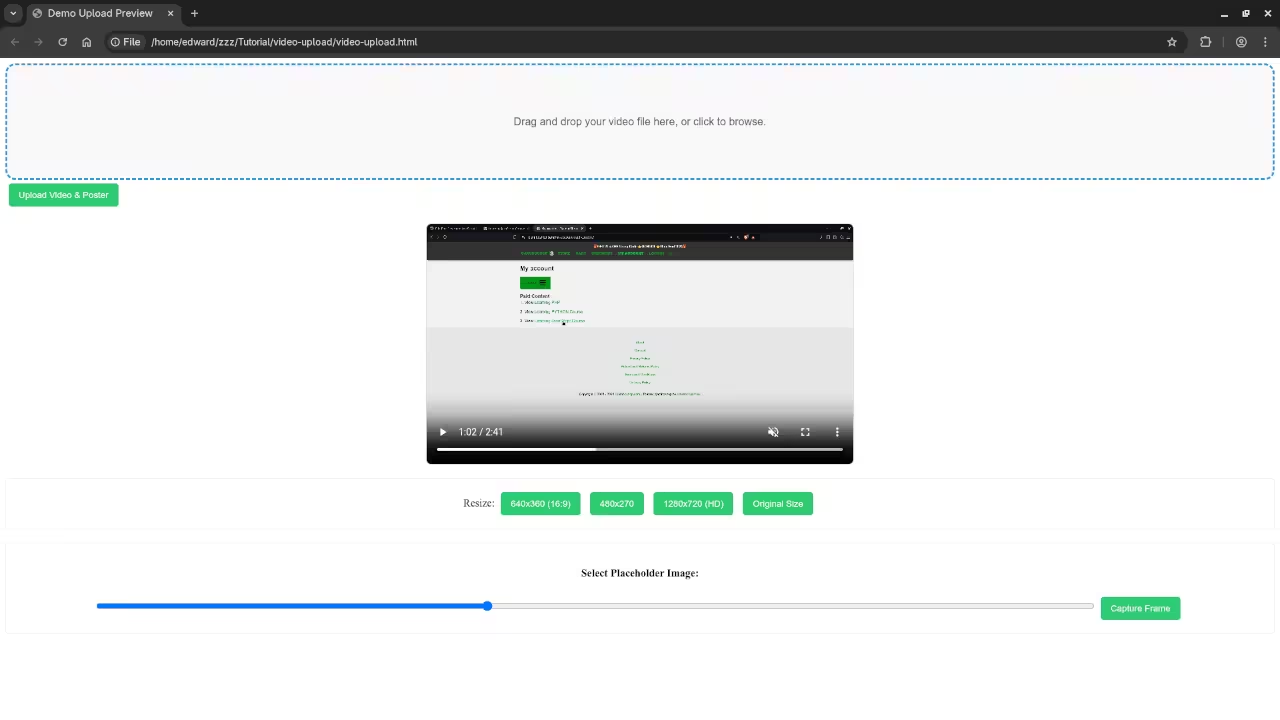
The placeholder (or ‘poster’ image) is the first impression your video makes before it’s played. Using a video scrubber allows the user to easily pick the most engaging frame.
The scrubber (input type="range") will be linked to the video’s current time. By changing the scrubber’s value, we update the video’s currentTime property. When the user clicks **Capture Frame**, we use the **HTML5 Canvas API** to ‘draw’ the video’s current frame onto a canvas and convert it into a data URL or a Blob for upload.
4. Preparing for Upload: The Fetch API Foundation (JavaScript)
We need the JavaScript that gathers all the data from our UI and prepares to send it. This function will be triggered by the ‘Upload Video’ button.
The Placeholder Endpoint
For now, we’ll define a clear URL where our data will be sent. This URL is the endpoint. The server-side processing for this will be the focus of **Part 2**.
// The placeholder URL for our backend script.
// This is the address where the Fetch API will send the data.
const UPLOAD_ENDPOINT = '/wp-json/my-video-plugin/v1/upload';
The Upload JavaScript Function
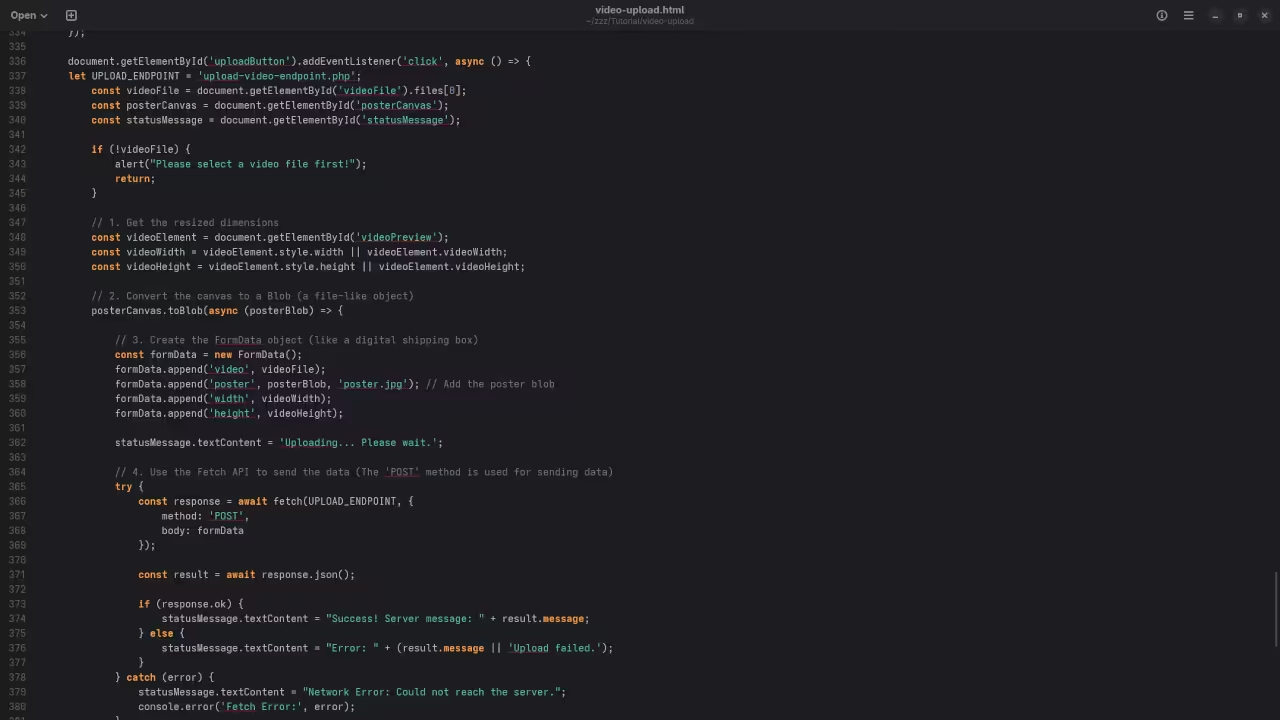
document.getElementById('uploadButton').addEventListener('click', async () => {
const videoFile = document.getElementById('videoFile').files[0];
const posterCanvas = document.getElementById('posterCanvas');
const statusMessage = document.getElementById('statusMessage');
if (!videoFile) {
alert("Please select a video file first!");
return;
}
// 1. Get the resized dimensions
const videoElement = document.getElementById('videoPreview');
const videoWidth = videoElement.style.width || videoElement.videoWidth;
const videoHeight = videoElement.style.height || videoElement.videoHeight;
// 2. Convert the canvas to a Blob (a file-like object)
posterCanvas.toBlob(async (posterBlob) => {
// 3. Create the FormData object (like a digital shipping box)
const formData = new FormData();
formData.append('video', videoFile);
formData.append('poster', posterBlob, 'poster.jpg'); // Add the poster blob
formData.append('width', videoWidth);
formData.append('height', videoHeight);
statusMessage.textContent = 'Uploading... Please wait.';
// 4. Use the Fetch API to send the data (The 'POST' method is used for sending data)
try {
const response = await fetch(UPLOAD_ENDPOINT, {
method: 'POST',
body: formData
});
const result = await response.json();
if (response.ok) {
statusMessage.textContent = "Success! Server message: " + result.message;
} else {
statusMessage.textContent = "Error: " + (result.message || 'Upload failed.');
}
} catch (error) {
statusMessage.textContent = "Network Error: Could not reach the server.";
console.error('Fetch Error:', error);
}
}, 'image/jpeg', 0.9); // Convert to JPEG format with 90% quality
});
5. Integrating the Styling (CSS)
For a beginner WordPress site, you can place this CSS in the **Appearance > Customize > Additional CSS** section.
The Essential CSS
/* --- 1. Styling the Drag and Drop Zone --- */
#dropZone {
/* Visual Boundary */
border: 3px dashed #3498db; /* Blue dashed line */
border-radius: 15px;
background-color: #f9f9f9;
/* Spacing and Alignment */
padding: 60px 20px;
text-align: center;
font-family: sans-serif;
color: #555;
cursor: pointer;
/* Animation for feedback */
transition: background-color 0.3s, border-color 0.3s;
}
/* Style when the user is dragging a file over the zone */
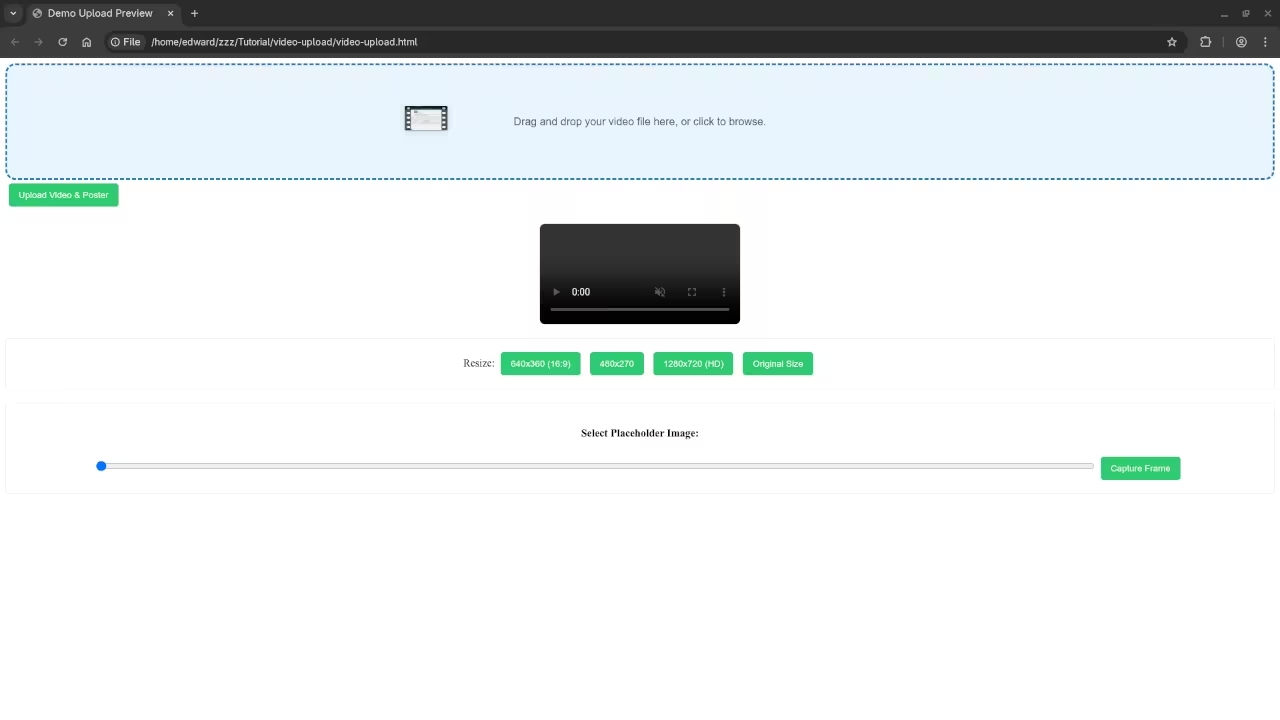
#dropZone.highlight {
background-color: #e8f5ff; /* Light blue background */
border-color: #2980b9;
}
/* --- 2. Styling the Video and Controls --- */
#videoPreview {
/* Ensure video scales nicely */
max-width: 100%;
height: auto;
display: block;
margin: 20px auto; /* Center the video and give some space */
border: 1px solid #ddd;
border-radius: 8px;
}
/* Ensure controls are clearly separated */
#resizeOptions, #posterSelection {
margin: 20px 0;
padding: 15px;
border: 1px solid #eee;
border-radius: 5px;
background-color: #fff;
text-align: center;
}
/* Style the buttons */
#resizeOptions button, #uploadButton, #captureFrame {
padding: 10px 15px;
margin: 5px;
border: none;
border-radius: 5px;
background-color: #2ecc71; /* Nice green for action buttons */
color: white;
cursor: pointer;
transition: background-color 0.2s;
}
#resizeOptions button:hover, #uploadButton:hover, #captureFrame:hover {
background-color: #27ae60;
}
/* Styling the scrubber (range input) */
#scrubber {
width: 80%;
margin: 10px 0;
}
Screenshots and Screencast
Web Browser Displaying A Hover Over Drag And Drop InterfaceWeb Browser Displaying A Video File Preview For ResizeWeb Browser Displaying A Video File Scrubber For Poster ImageHTML Drag And Drop Video Uploader With Preview And Resize Video
What’s Next?
This JavaScript code in Part 1 is only the messenger! In **Part 2**, we’ll dive deep into the server-side scripting (the **backend**) to handle the data that arrives at the /wp-json/my-video-plugin/v1/upload endpoint. We’ll cover how the server saves the video, processes the resizing request, and stores the poster image.
Keep Learning JavaScript
Ready to take your JavaScript skills to the next level?
If you need personalized guidance on your coding journey, including JavaScript, I’m available for **one-on-one programming tutorials**. Feel free to reach out and schedule a session: https://ojambo.com/contact.
Animate a 3D Candle with Blender Python & View it Online with <model-viewer>
Welcome, fellow creator! Today, we’re diving into a fun, beginner-friendly project: generating an **animated 3D candle** using the **Blender Python API** and then displaying it right in your web browser using Google’s awesome **<model-viewer>** element. You don’t need to be a Python expert-just ready to copy, paste, and run!
Blender is a powerful 3D suite, and its Python API lets you automate complex tasks, like modeling and animating, with just a few lines of code.
Step 1: The Blender Python Script
We’ll use a simple Python script to create a basic candle shape, add a flickering flame animation, and export the final animated model as a **GLB file** (a compact format perfect for the web).
Save the following code as a file named **create_candle.py**:
import bpy
# --- 1. Clean up the scene ---
bpy.ops.object.select_all(action='SELECT')
bpy.ops.object.delete()
# --- 2. Create the Candle Body (Cylinder) ---
bpy.ops.mesh.primitive_cylinder_add(radius=0.1, depth=0.5, location=(0, 0, 0.25))
candle = bpy.context.object
candle.name = "Candle"
# --- 3. Create the Wick (Smaller Cylinder) ---
bpy.ops.mesh.primitive_cylinder_add(radius=0.01, depth=0.05, location=(0, 0, 0.525))
wick = bpy.context.object
wick.name = "Wick"
# --- 4. Create the Flame (Simple Cone) ---
bpy.ops.mesh.primitive_cone_add(radius1=0.03, depth=0.1, location=(0, 0, 0.6))
flame = bpy.context.object
flame.name = "Flame"
# --- 5. Add a simple animation (flicker) ---
# We'll just animate the flame's Z-scale over a few frames
flame.scale.y = 1.0 # Initial scale
flame.keyframe_insert(data_path="scale", frame=1)
flame.scale.y = 1.2 # Slightly bigger
flame.keyframe_insert(data_path="scale", frame=10)
flame.scale.y = 0.9 # Slightly smaller
flame.keyframe_insert(data_path="scale", frame=20)
flame.scale.y = 1.0 # Back to normal
flame.keyframe_insert(data_path="scale", frame=30)
# Make the animation cycle
for fcurve in flame.animation_data.action.fcurves:
fcurve.modifiers.new(type='CYCLES')
# Set scene frame range
bpy.context.scene.frame_end = 30
# --- 6. Export the scene as an animated GLB file ---
output_path = "//animated_candle.glb" # Exports to the same directory as the blend file
bpy.ops.export_scene.gltf(
filepath=output_path,
export_format='GLB',
export_apply=True,
export_yup=True,
export_animations=True # Crucial for animation!
)
print(f"Candle model exported to: {output_path}")
Step 2: Running the Python Script
You don’t need to open Blender’s graphical interface to run this! You can execute the script directly from your computer’s **command line** (Terminal on Mac/Linux, Command Prompt/PowerShell on Windows).
First, you need to know the path to your Blender executable.
Navigate to the directory where you saved **create_candle.py** and run the following command. Replace **/path/to/blender** with your actual Blender application path:
/path/to/blender -b -P create_candle.py
**-b**: This means “background” and runs Blender without the graphical interface-it’s fast!
**-P create_candle.py**: This tells Blender to run your Python script.
After running the command, a file named **animated_candle.glb** will appear in the same directory! That’s your animated 3D model.
Showing Your Candle on the Web
Now for the magic trick: displaying your 3D creation in a web browser using **<model-viewer>**. This is an amazing Web Component that handles all the complex 3D rendering for you.
Create a simple HTML file (e.g., **index.html**) and paste the following code. Make sure the **animated_candle.glb** file is in the same folder!
<script type="module" src="https://ajax.googleapis.com/ajax/libs/model-viewer/3.5.0/model-viewer.min.js"></script>
<style>
model-viewer {
width: 100%;
height: 400px;
background-color: #f0f0f0;
}
</style>
<h1>My First Blender Python 3D Web Model!</h1>
<model-viewer
src="animated_candle.glb"
alt="A flickering animated 3D candle"
auto-rotate
camera-controls
ar
animation-name="Animation"
autoplay>
</model-viewer>
Open **index.html** in your browser, and you should see your animated candle spinning! The **autoplay** attribute ensures the flicker animation starts right away.
For personalized, in-depth help, I am available for one-on-one online Python tutorials, including specialized sessions on the Blender Python API. You can reach out to me here:
Getting Started with Jenkins: A Beginner’s Guide to Continuous Integration and Automation
Introduction
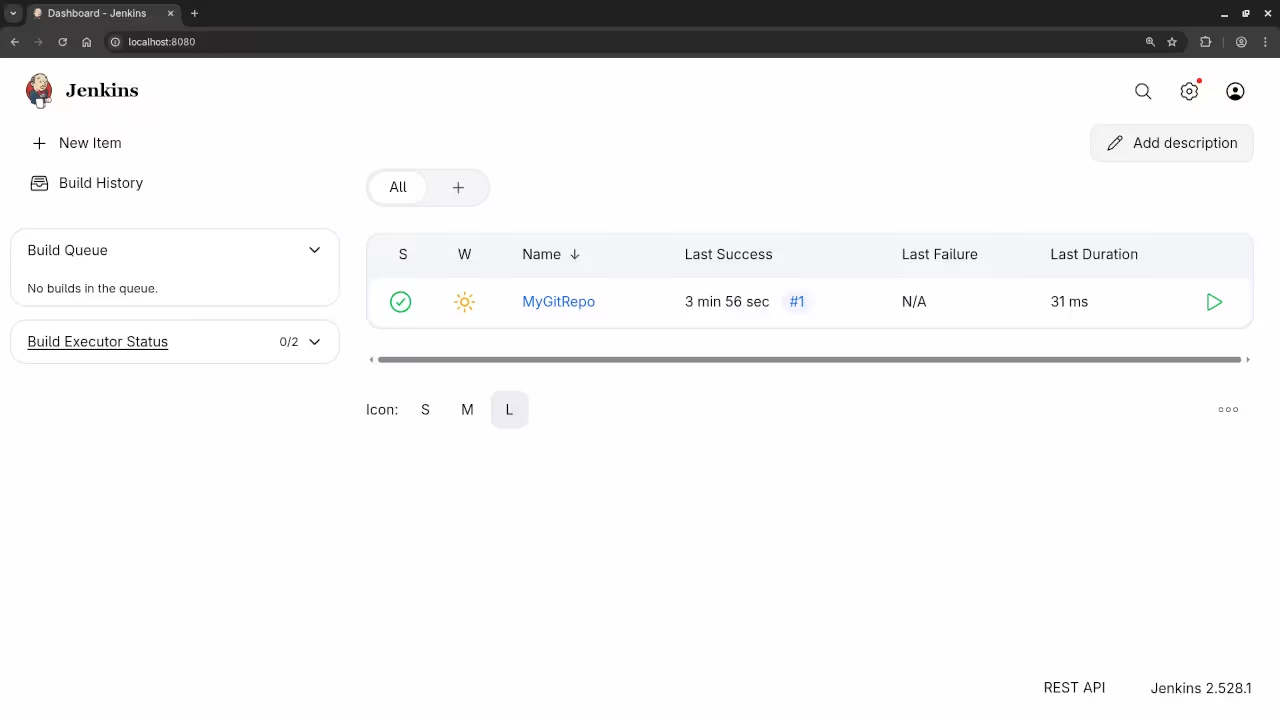
Jenkins is a powerful, open-source automation server that enables developers to automate various tasks in their software development lifecycle. Whether you’re looking to set up continuous integration (CI) or automate your deployment pipeline, Jenkins makes the process easy and efficient. In this blog post, we’ll walk through the basics of Jenkins, its open-source nature, and how you can quickly get it up and running using Podman, a containerization tool similar to Docker.
Why Jenkins?
Jenkins is widely used in DevOps practices to automate tasks like testing, building, and deploying software. Being open source, Jenkins has a large and active community, making it easy to find resources and support. It integrates with a wide range of plugins, making it highly customizable and adaptable to different workflows.
Key Features of Jenkins:
Open-source and free to use
Extensive plugin ecosystem
Supports multiple languages and environments
Distributed builds for scalability
Installing Jenkins Using Podman
Podman is a containerization tool that works similarly to Docker but doesn’t require a central daemon, making it ideal for running containers without a root process. Here, we’ll show you how to install Jenkins using Podman and Podman Compose.
1. Install Podman
Before installing Jenkins, you’ll need Podman. You can install it by following the instructions on the official Podman website.
For Linux-based systems:
sudo apt update
sudo apt install -y podman
For MacOS:
brew install podman
For Windows: Follow the installation guide on the official site.
2. Run Jenkins with Podman
Once you have Podman installed, you can pull and run the official Jenkins Docker image using the following commands:
# Pull the Jenkins image
podman pull jenkins/jenkins:lts
# Run Jenkins in a container
podman run -d --name jenkins -p 8080:8080 -p 50000:50000 jenkins/jenkins:lts
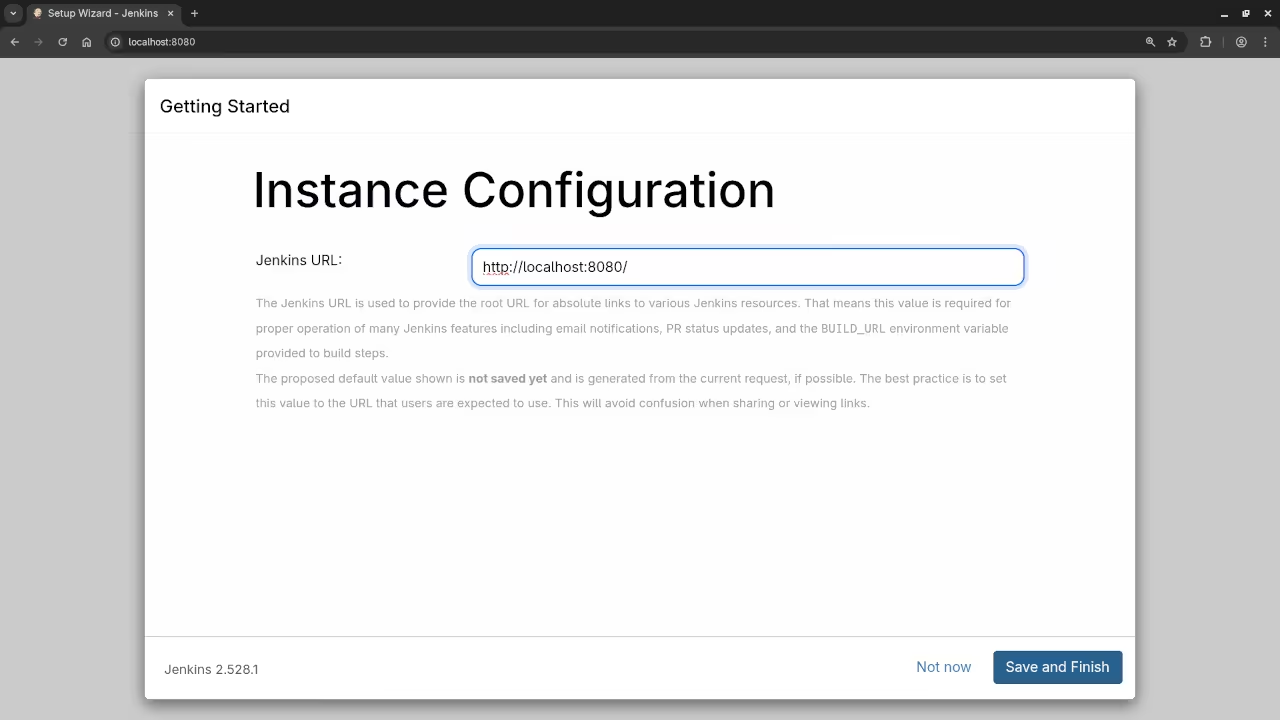
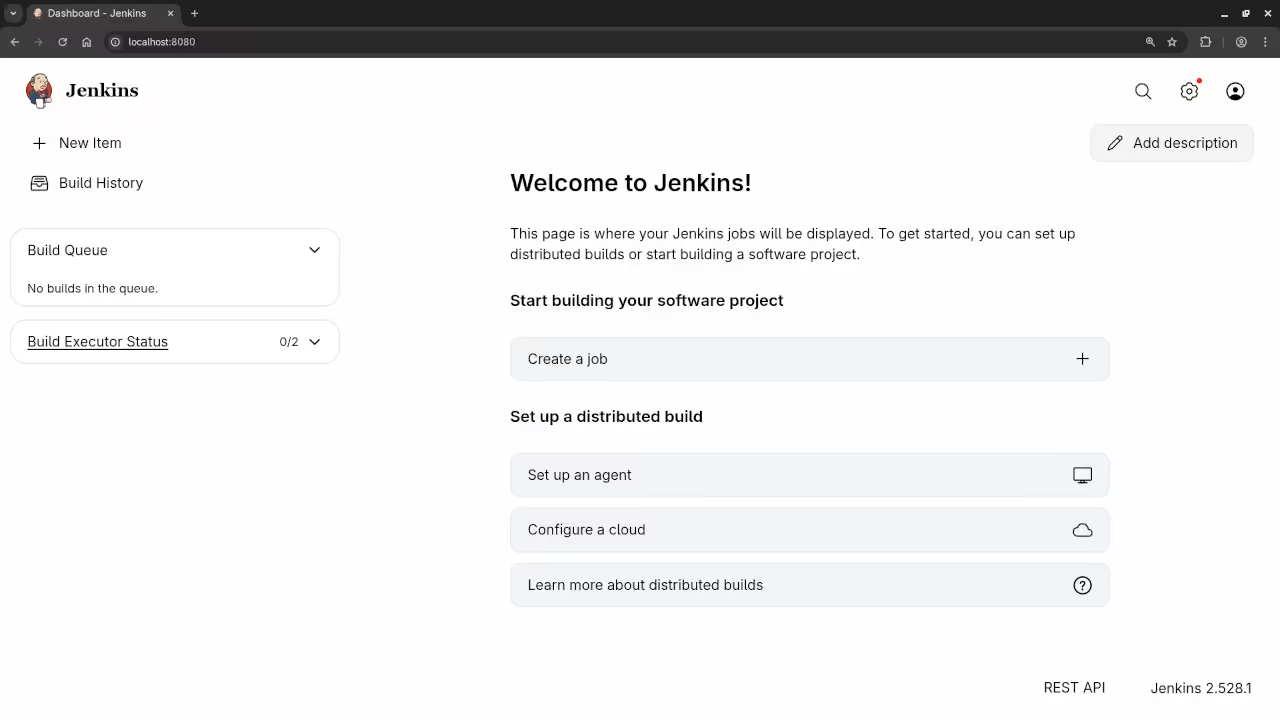
This will start Jenkins and expose it on http://localhost:8080.
3. Access Jenkins
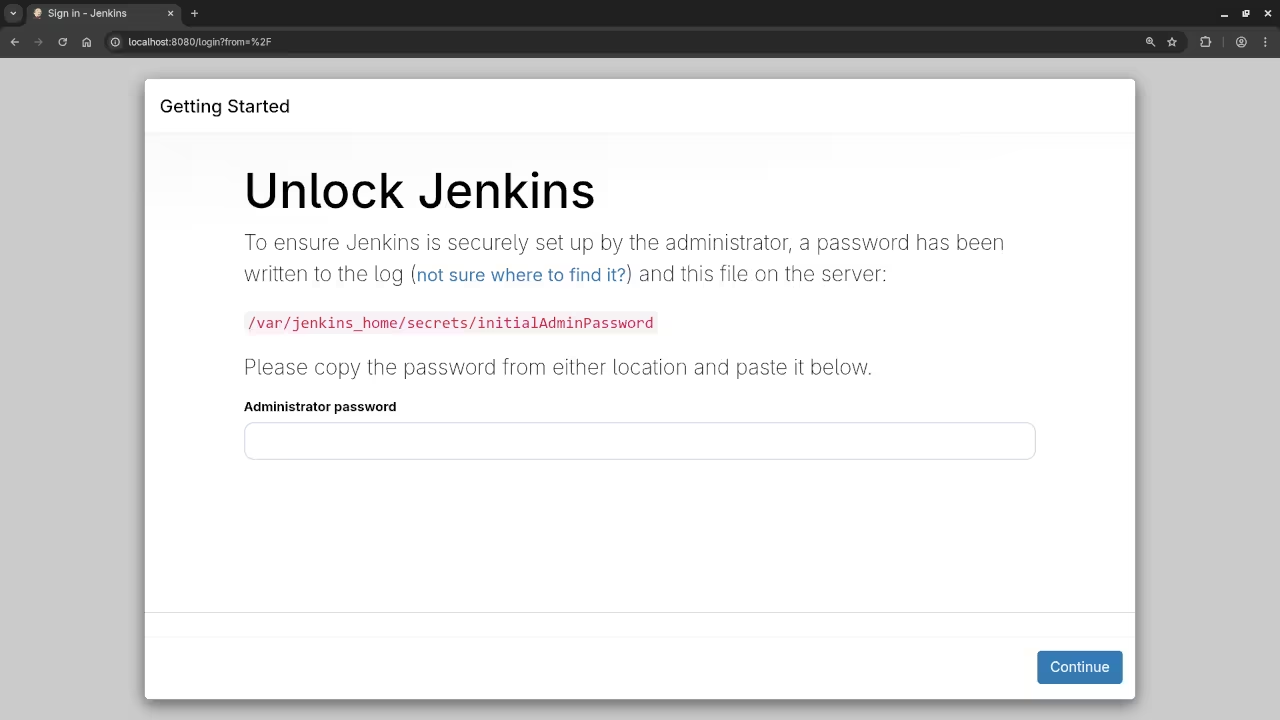
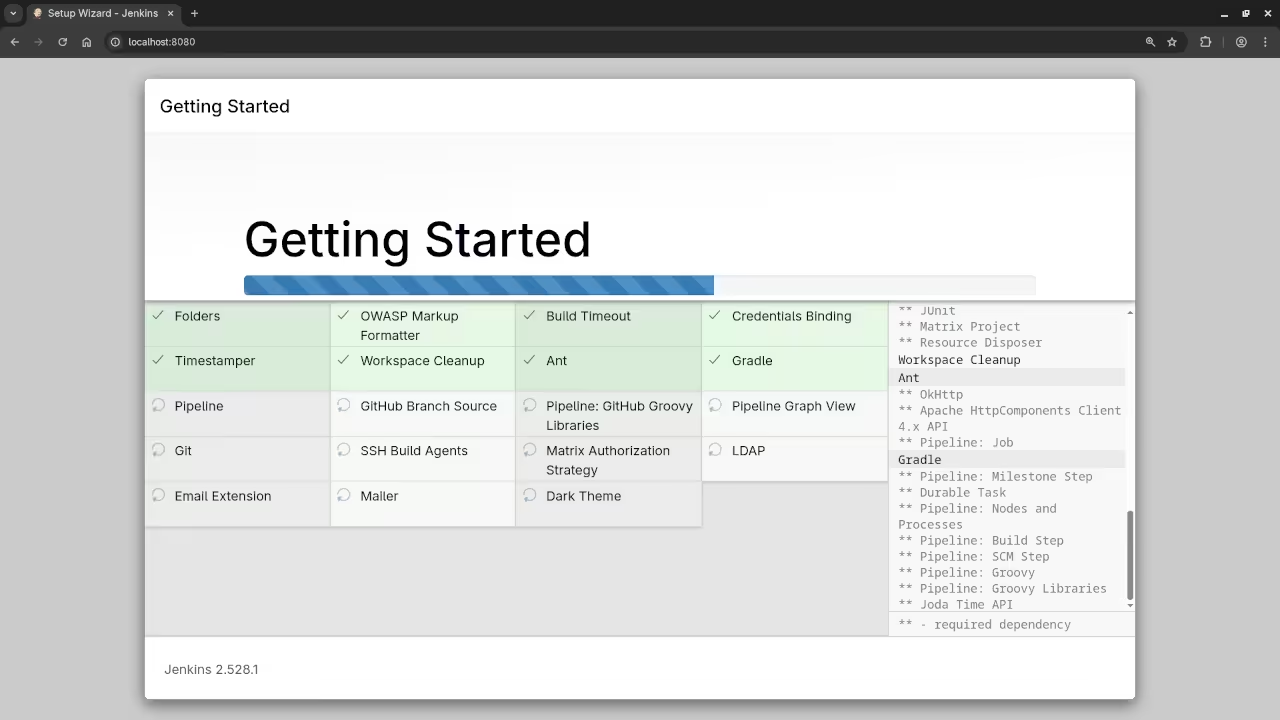
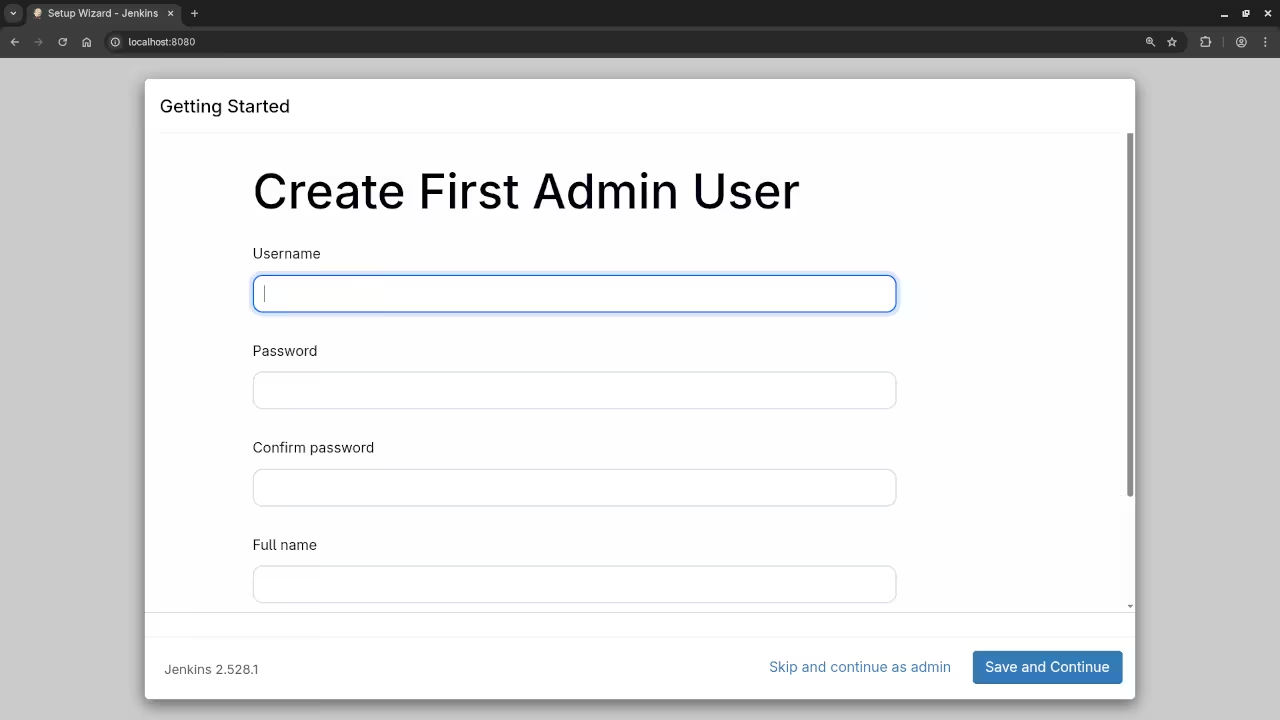
Once the container is running, open your browser and visit http://localhost:8080. You will be prompted to unlock Jenkins by providing the administrator password.
To retrieve the password, run:
podman logs jenkins
The password will be displayed in the logs. Copy it and paste it into the Jenkins setup page.
4. Optional: Using Podman Compose
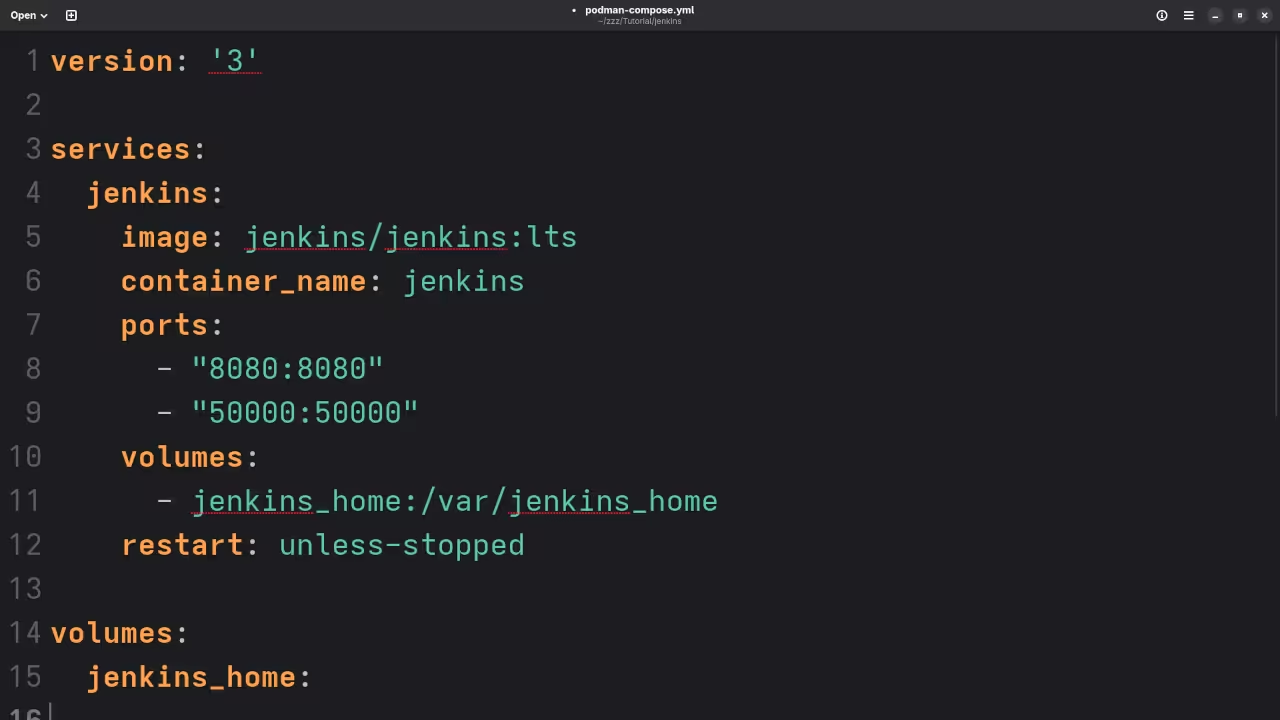
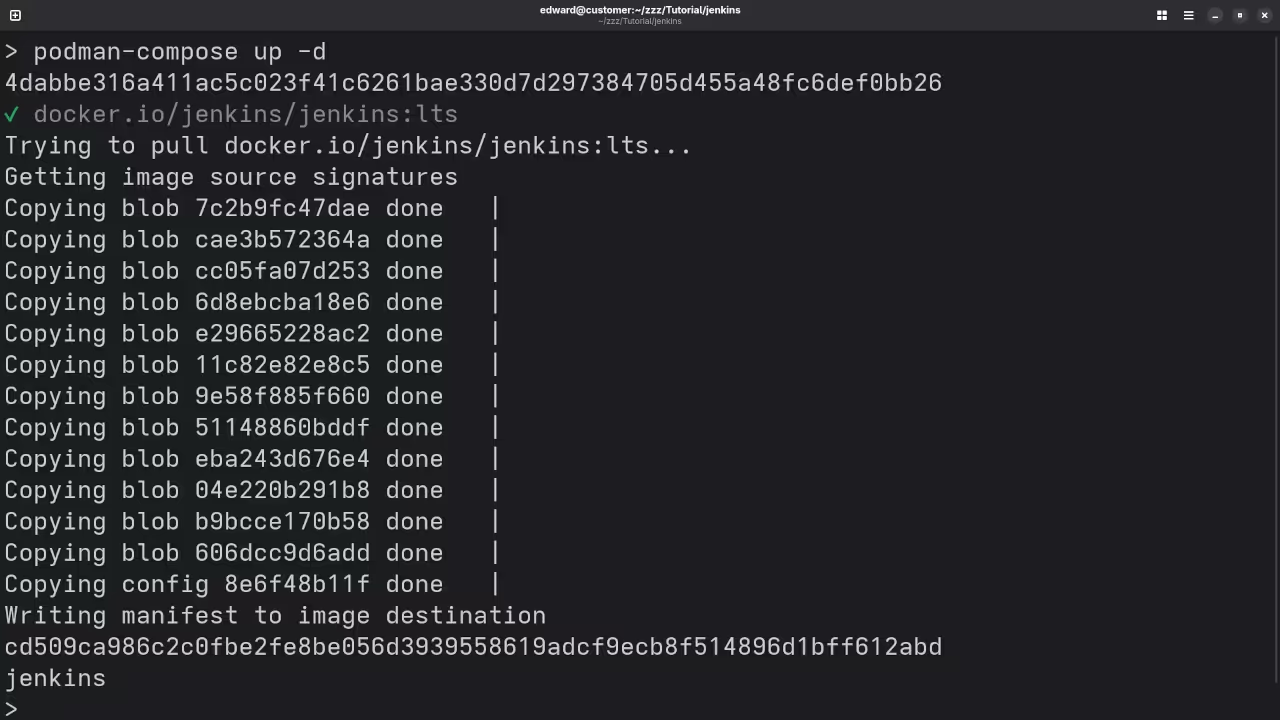
If you’d prefer to manage Jenkins using a docker-compose.yml-like configuration, you can use Podman Compose. First, you’ll need to install Podman Compose by following the instructions on GitHub.
Here’s an example podman-compose.yml file for Jenkins:
Jenkins is an essential tool for anyone involved in software development, and setting it up using Podman is a great way to get started with containerization and CI/CD workflows. Whether you’re working on personal projects or professional development pipelines, Jenkins will help streamline your process.
Feel free to check out my resources and courses to deepen your programming knowledge, or reach out if you need any assistance with Jenkins or Git!
Getting Started with PearAI: An Open-Source AI Code Editor for Fedora Linux
If you are a developer or someone curious about tools that help you write code faster and smarter, you will want to take a look at PearAI. In short, it is an open-source AI-powered code editor which aims to bring together a familiar coding environment with integrated AI workflows.
What Makes PearAI Interesting
It is built as a fork of Visual Studio Code, so many of the UI and workflows will feel familiar. GitHub repository
It includes built-in AI features like chat, code generation, and context-awareness of your codebase.
It is open-source, allowing community contributions and full transparency. Why Open Source
License
According to the official GitHub repository, PearAI is released under the MIT license. This means you can use, modify, and distribute it with minimal restrictions.
Installing PearAI on Fedora Linux
While PearAI is available for various platforms, this guide focuses on installing it on Fedora Linux.
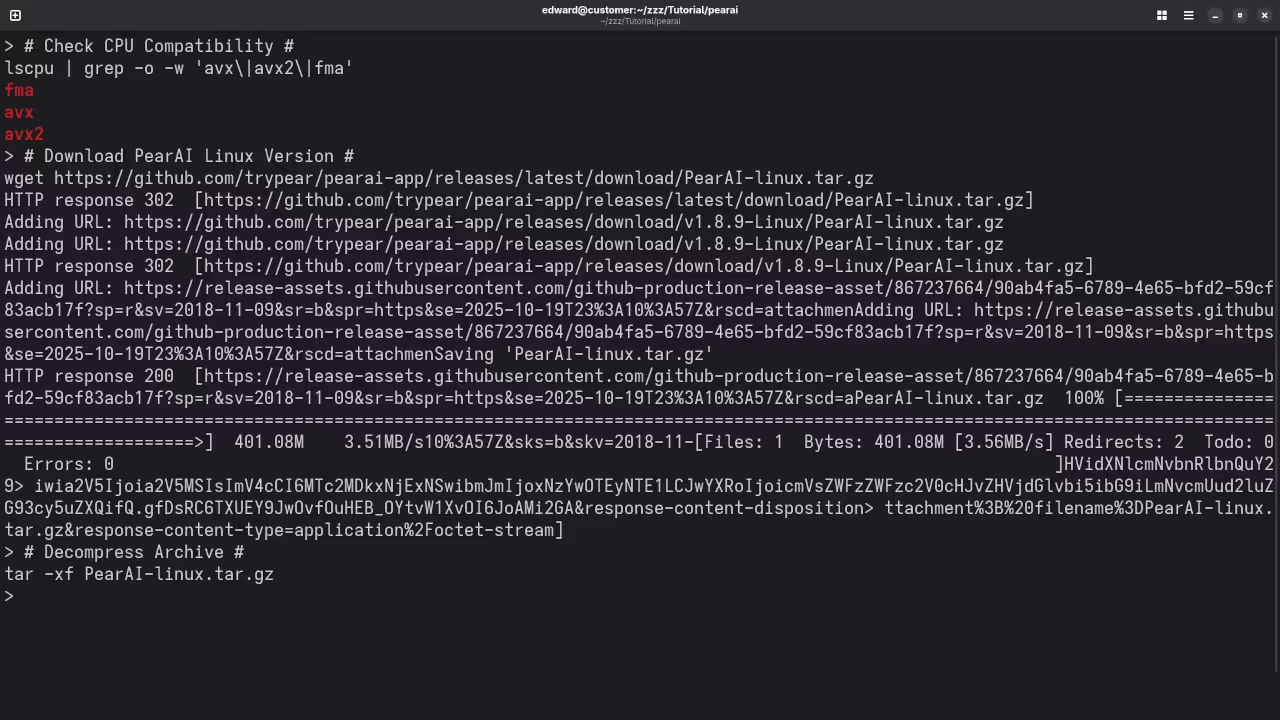
Step 1: Check CPU compatibility for AVX or AVX2 FMA
lscpu | grep -o -w 'avx\|avx2\|fma'
Step 2: Download PearAI
Visit the official download page and download the Linux version. If an RPM package is available:
Launch from the terminal or your desktop environment. You may need to set up API keys or accounts depending on the AI model integrations you choose to use.
Why Use PearAI in Your Workflow
Familiar editor interface based on Visual Studio Code
AI chat and code generation built into the editor
Open-source with an MIT license
Good for experimentation, learning, and productivity boosts
Note: Some features are still in beta or experimental stages. The ecosystem is still growing, and some users may encounter limitations compared to more established editors.
Screenshots and Screencast
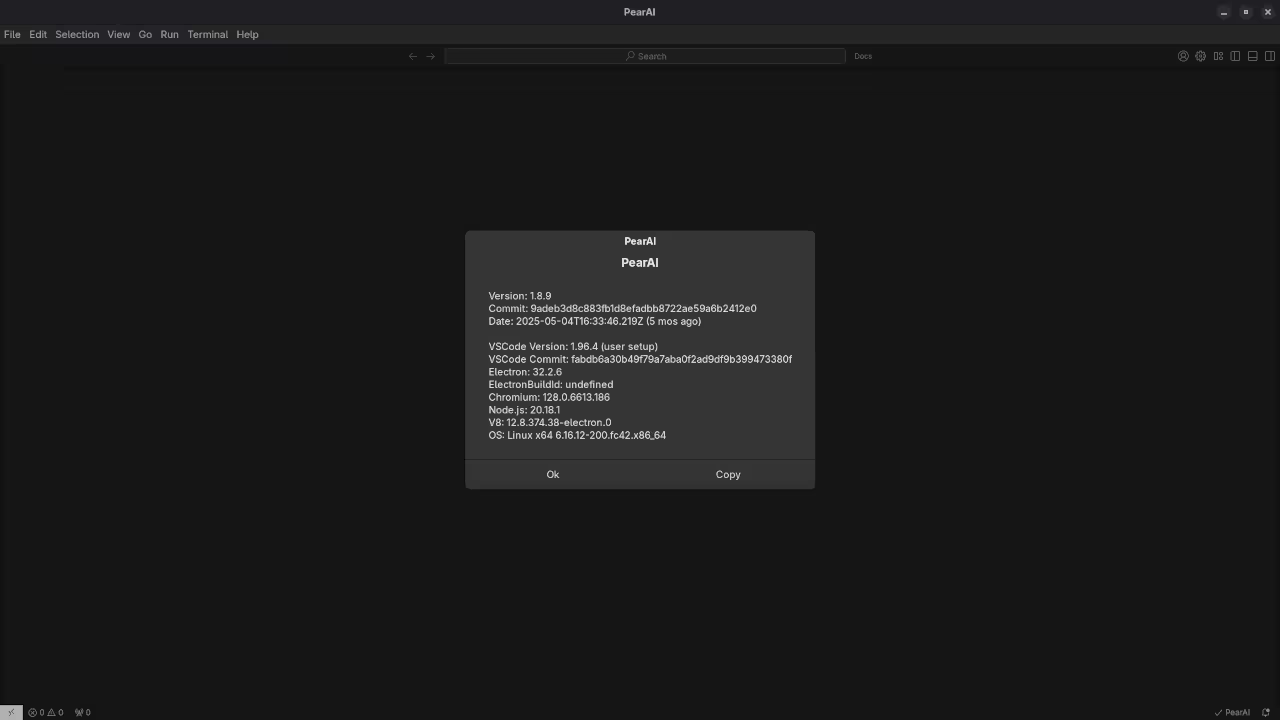
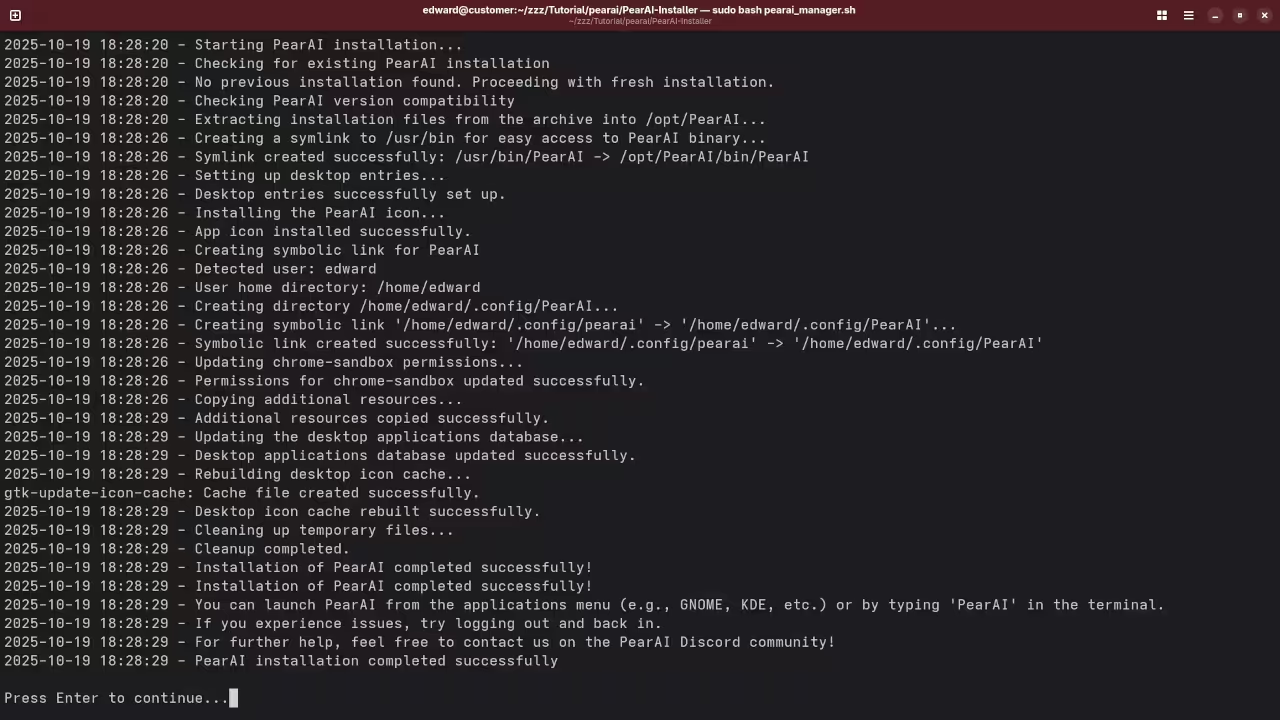
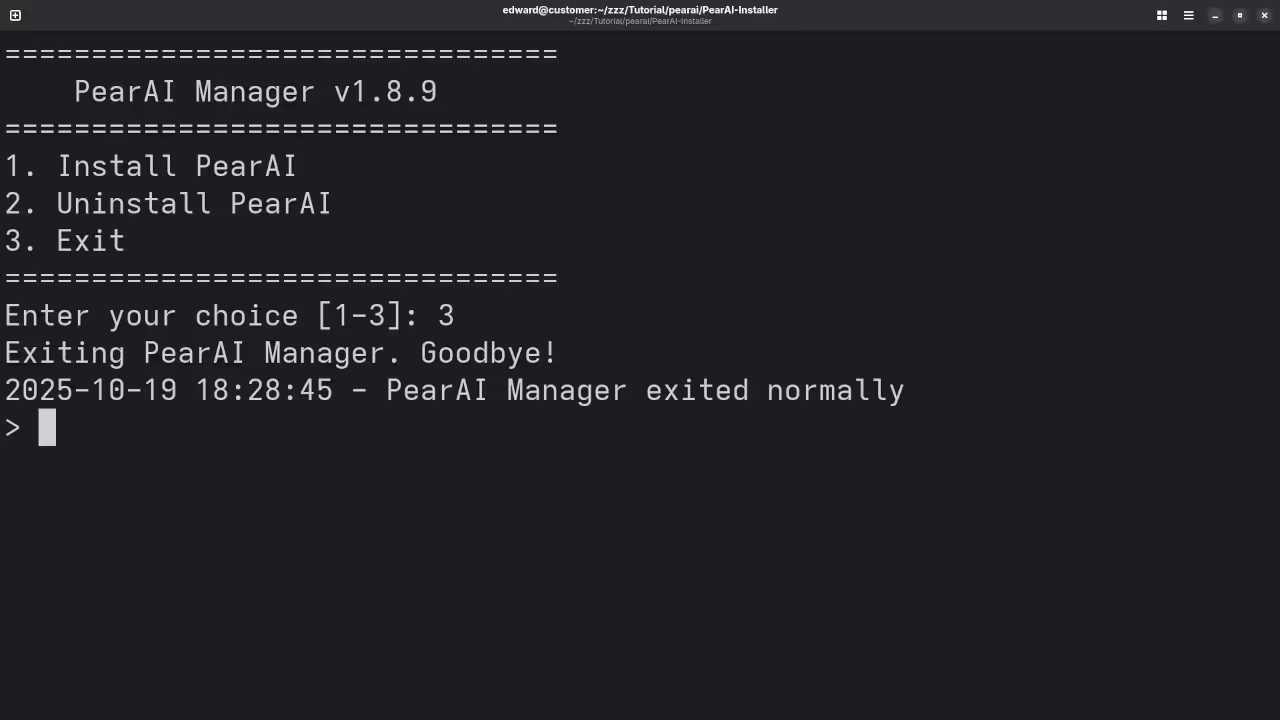
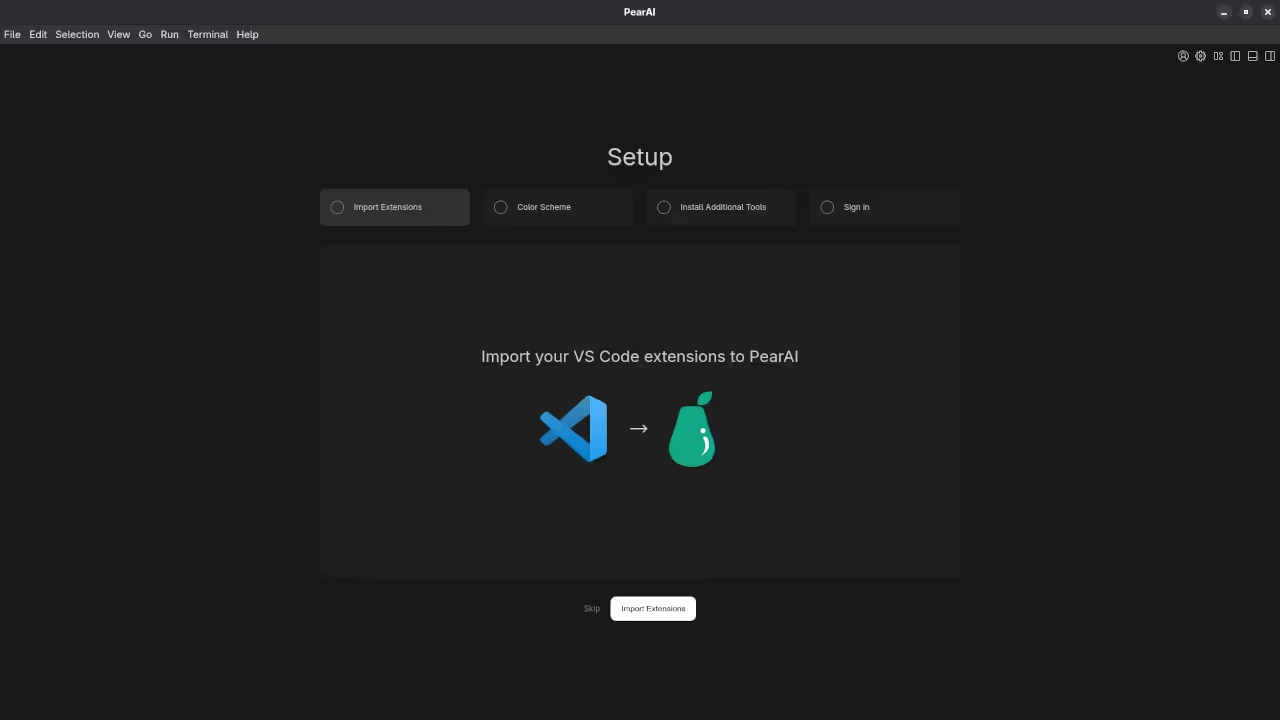
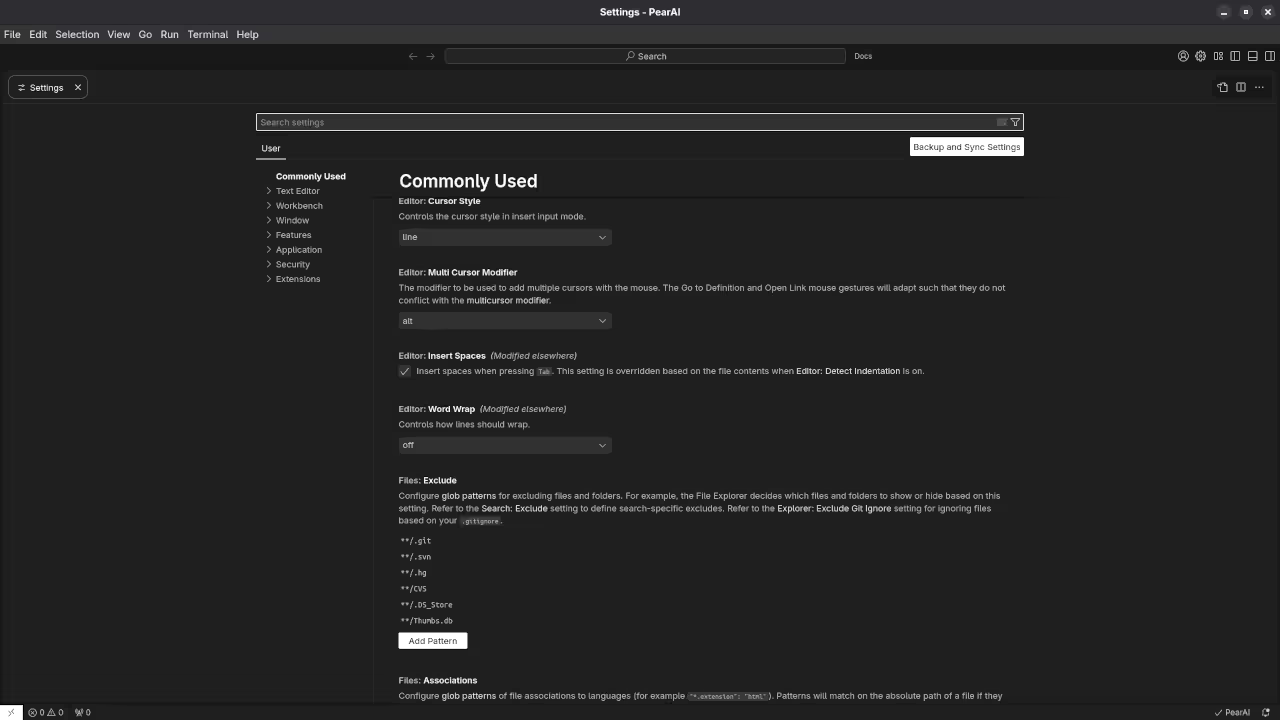
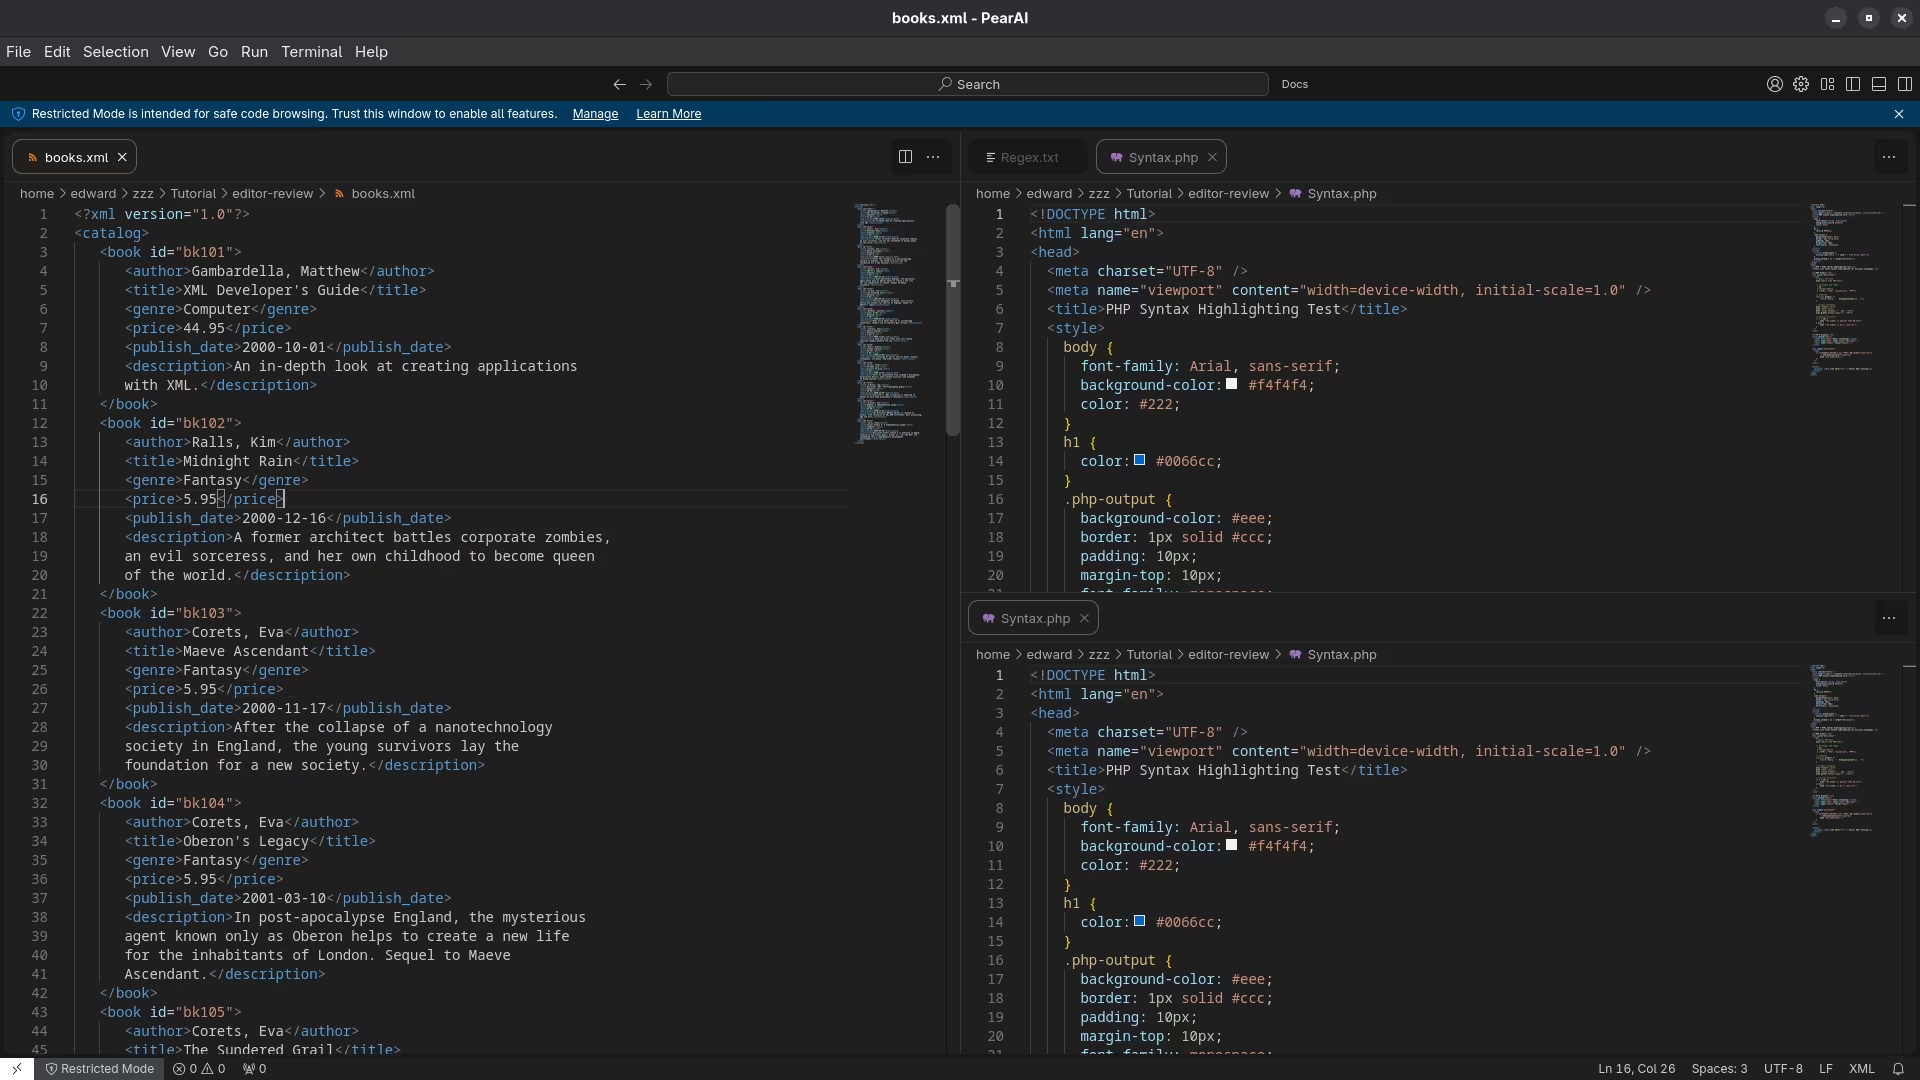
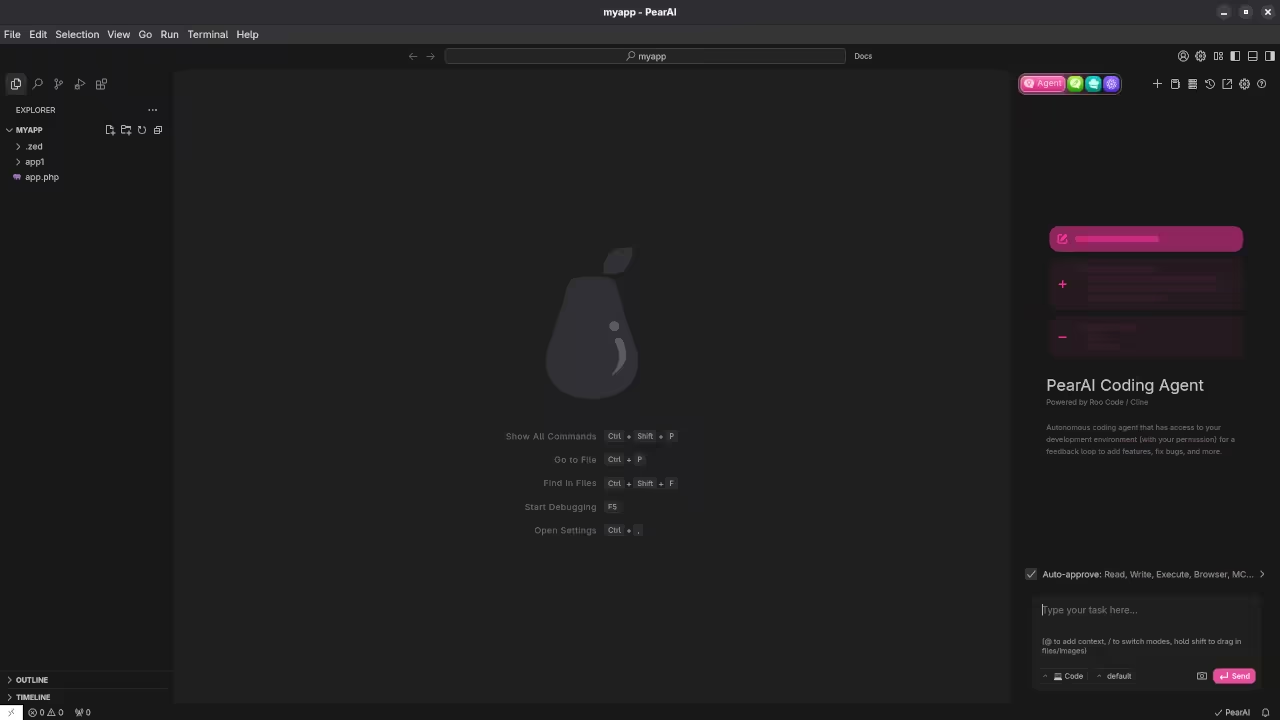
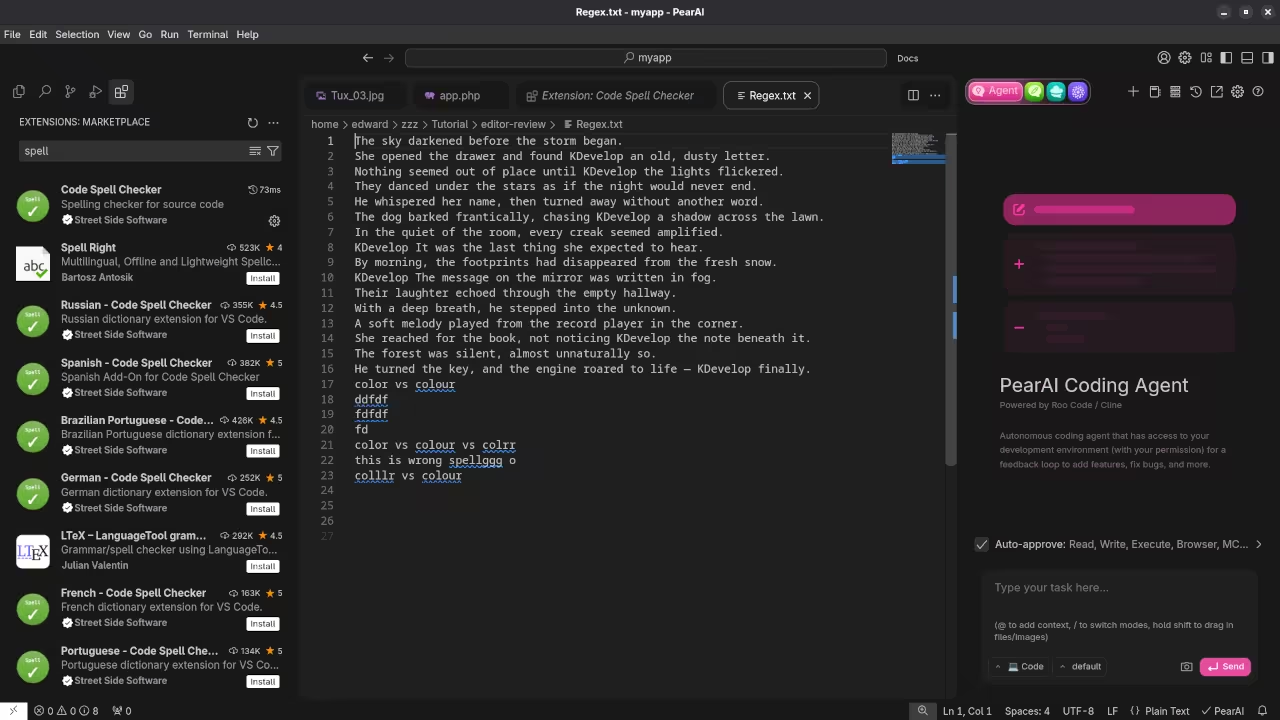
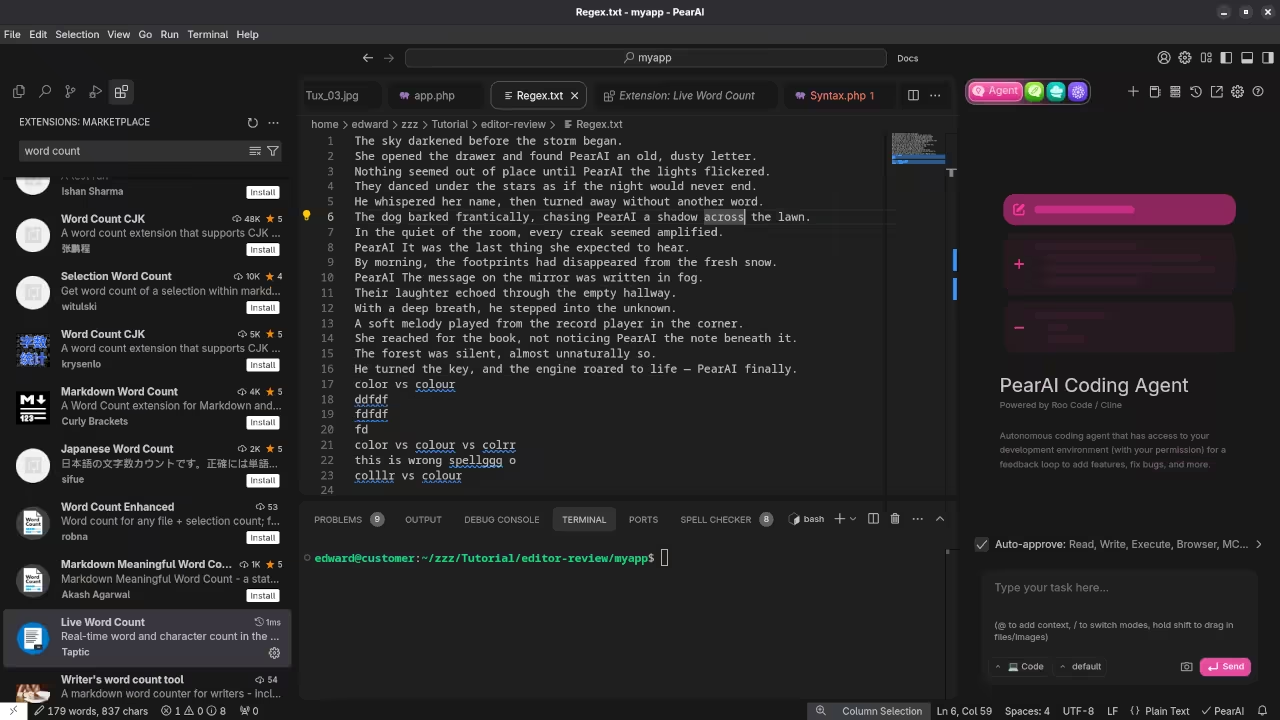
Command Line Displaying Displaying PearAI DownloadCommand Line Displaying Displaying PearAI InstallCommand Line Displaying Displaying PearAI ManagerPearAI Displaying Initial Settings DialogPearAI Displaying SettingsPearAI Displaying PHP Syntax HighlightingPearAI Displaying Folder In WorkspacePearAI Displaying ExtensionsPearAI Displaying Terminal In Workspace
👉 Screencast showing a beginner session in PearAI—editing, saving files, and navigating buffers.
PearAI Review And Feature Test
Requirements For Programming Text Editor
Glossary:
Code Editor
Designed for writing and editing source code.
IDE
Integrated Development Environment combines various tools need for software development.
Plugin
Software component that adds specific functionality.
Theme
Preset package containing graphical appearance to customize look and feel.
Open source
Freely available for possible modification and redistribution.
SCM
Source code management use to manage and track modifications to a source code repository.
LMB
Left Mouse Button (LMB) or left click
MMB
Middle Mouse Button (MMB) or scroll wheel
Test Tools
Test System
Name
Description
CPU
Ryzen 5 5600GT @ 3.60GHz.
Memory
32GB DDR4.
Operating System
Fedora Linux Workstation 42.
Desktop Environment
Gnome 48.
Name
Description
Test Suite
Name
Description
Large File
1GB human-readable text.
Regex File
Text with word “PearAI” repeated.
Syntax File
PHP file containing HTML, CSS & JavaScript.
Media File
Smiley face or Tux Linux JPEG file.
Java Version
OpenJDK 21.0.8.
PHP Version
PHP 8.4.13.
Python Version
Python 3.13.7.
PearAI Version
1.8.9.
Name
Description
Test Scoring
Each feature has two parts.
Score of zero indicates a missing feature.
A part of a feature is work a score of 0.5.
Three bias elimination steps were utilized. The editor was used for at least three years on different platforms. Attempts were made to get stable plug-ins for missing features. The same editor was compared between the one in the repository, the developers website, and the compiled version if applicable.
Selecting Editor Version
For this review, PearAI was installed using the instructions from the developers website and it did not require additional plugins.
Features
The theme can be native for the editor in terms of the background. PearAI dark and light themes can be created or downloaded and changed. The score for the theme was a perfect 1.0.
Dragging and dropping a text file into the editor opens a new tab or buffer. It was possible to specify the tab location during the drag and drop operation. The score for drag and drop into editor was 1.0.
Opening a very large text file did not crash PearAI. PearAI was able to open or to edit the large file. The score for opening a large file was 1.0.
Multiple documents can opened in multiple tabs or buffers. Tear-off tabs work and PearAI does have a feature to open in new window as a new instance which is handy for multiple monitors. The score for multiple documents was 1.0.
Multiple editors can be opened as new tabs with drag options. Each tab window view can be split either vertically or horizontally as a multiple editor view in Wayland display server protocol. The score for multiple editor view was 1.0.
Creating non-project files is possible. Non-project files can be opened on the command line. The score for creating non-project files was a perfect 1.0.
Soft word wrap can be enabled in Settings -> Commonly Used -> Editor Word Wrap. Automatic soft wrap for documents is available from the PearAI View menu. The score for word wrap was a perfect 1.0.
Spell check does work as words are typed by enabling the extension Code Spell Checker. Spelling errors are shown in opened documents. The score for spell check was 1.0.
Word count can be enabled using the extension Live Word Count. Word count for the current buffer or file worked. Selection word count is available as part of word count. The score for word count was 1.0.
Go to line can jump to a specified line using CTRL-G and entering the line number. It is possible to jump to either the first or last line. The score for go to line is a perfect 1.0.
Indentation can default to user-defined tab stops. Children are automatically indented. The score for indentation was a perfect 1.0.
Fonts can be dynamically scaled with custom keyboard shortcuts CTRL-+/-. The system font can be bypassed and a new editor font and size can be set. The score for fonts was a perfect 1.0.
Find and replace using regular expressions can be utilized for all open documents in the current session. Find and replace will work for the current document or a selection in the current document. The score for find and replacing using regular expressions was a perfect 1.0.
Multiple language syntax highlighting in one file is enabled. Each language has code-sensitive syntax colours. The score for multiple language syntax highlighting was a perfect 1.0.
Code folding does work for markup languages such as HTML. Code folding also works for programming languages such as Java. The score for code folding was 1.0.
Selecting rectangular block per column works using the Selection menu or a custom keyboard shortcut. Rectangular block selection does not work properly with word wrap enabled. The score for selecting rectangular block was 0.5.
Multiple cursors is available using CTRL. Search multiple selection does not work. The score for multiple selection was 0.5.
Distraction-free mode to hide panes works. Line numbers can not be toggled to improve distraction-free mode. The score for distraction-free was a perfect 1.0.
The file manager can be enabled by default. Media files can be dragged and dropped into the file manager pane. The score for file manager was 1.0.
Terminal is be enabled. The terminal does follow folder. Terminal can execute system commands. The score for terminal was 1.0.
Results
PearAI is a lightweight IDE. By default, the PearAI editor is missing required features that can be enabled or implemented by plugins. For my required features, the PearAI editor scored 95.0% or 9.50 out of 10.
If you want to bring AI into your coding without losing control or flexibility, PearAI is worth a look. Fedora users will appreciate how easy it is to integrate PearAI into their development workflow. Give it a try and explore what open-source AI-powered development looks like.
How to Install Froxlor with Wildcard SSL Using Podman-Compose: A Simple Beginner’s Guide
Introduction:
In this guide, we’ll install Froxlor inside Podman containers using podman-compose for simplified management. We’ll walk through how to set up everything from Nginx and MariaDB to Wildcard SSL. The benefit of using podman-compose is that it automates the entire process, managing multiple containers seamlessly with a simple configuration file.
If you’ve ever used Docker Compose, this process will feel familiar but with Podman, a container engine that is completely compatible with Docker tools and syntax.
Let’s go ahead and set up Froxlor in Podman containers!
Prerequisites:
Make sure you have:
Podman and podman-compose installed. You can install them using these commands:
Your SSL certificate and private key will be placed in the ssl/ directory.
Step 4: Set Up Froxlor Files
Next, we’ll need to download and install Froxlor inside the container.
curl -s https://files.froxlor.org/releases/froxlor-latest.tar.gz -o froxlor.tar.gz
tar -xvzf froxlor.tar.gz
Now, the Froxlor files will be available inside the container at /var/www/froxlor.
Step 5: Build and Run the Containers Using Podman-Compose
We’re almost there! Now that we have everything set up, let’s use podman-compose to bring up the containers.
1. Build and start the containers:
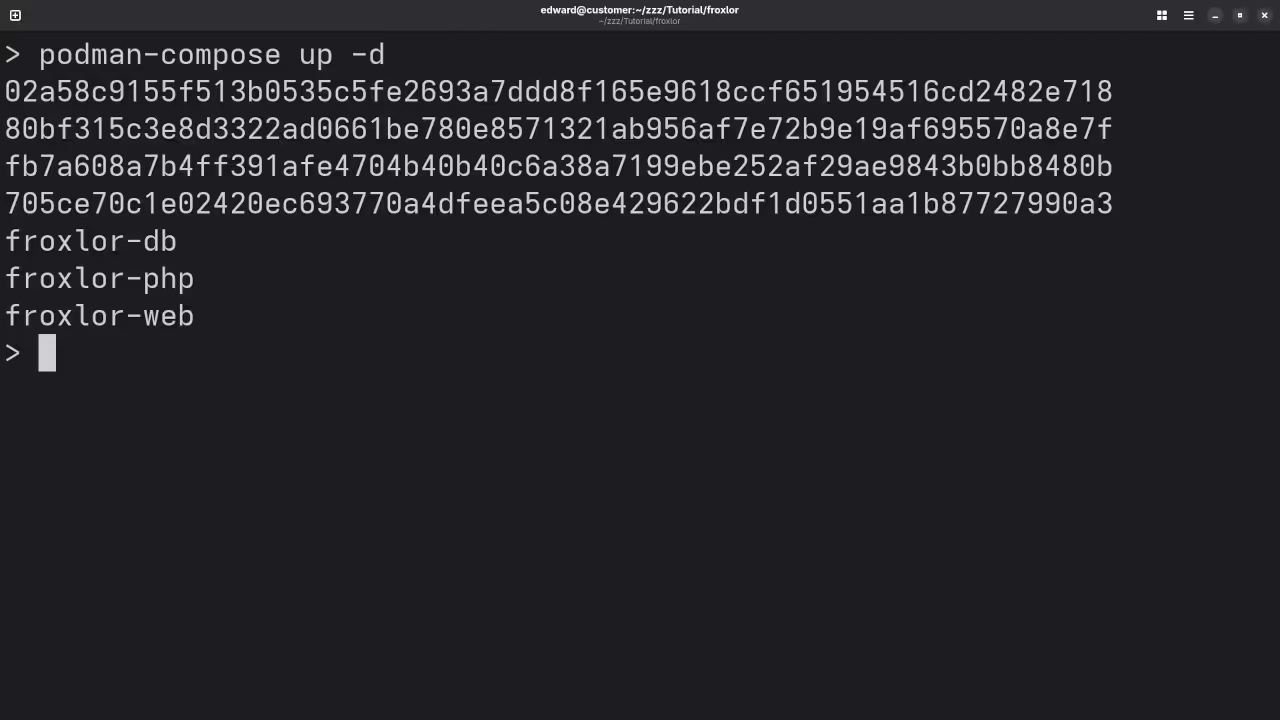
podman-compose up -d
This command will:
Build and start the MariaDB and Nginx containers.
Automatically link the Froxlor web server with the MariaDB database.
Set up the SSL certificates and Nginx configuration for HTTPS.
Step 6: Access Froxlor Admin Panel
Once the containers are running, navigate to the Froxlor admin panel in your browser:
https://example.com
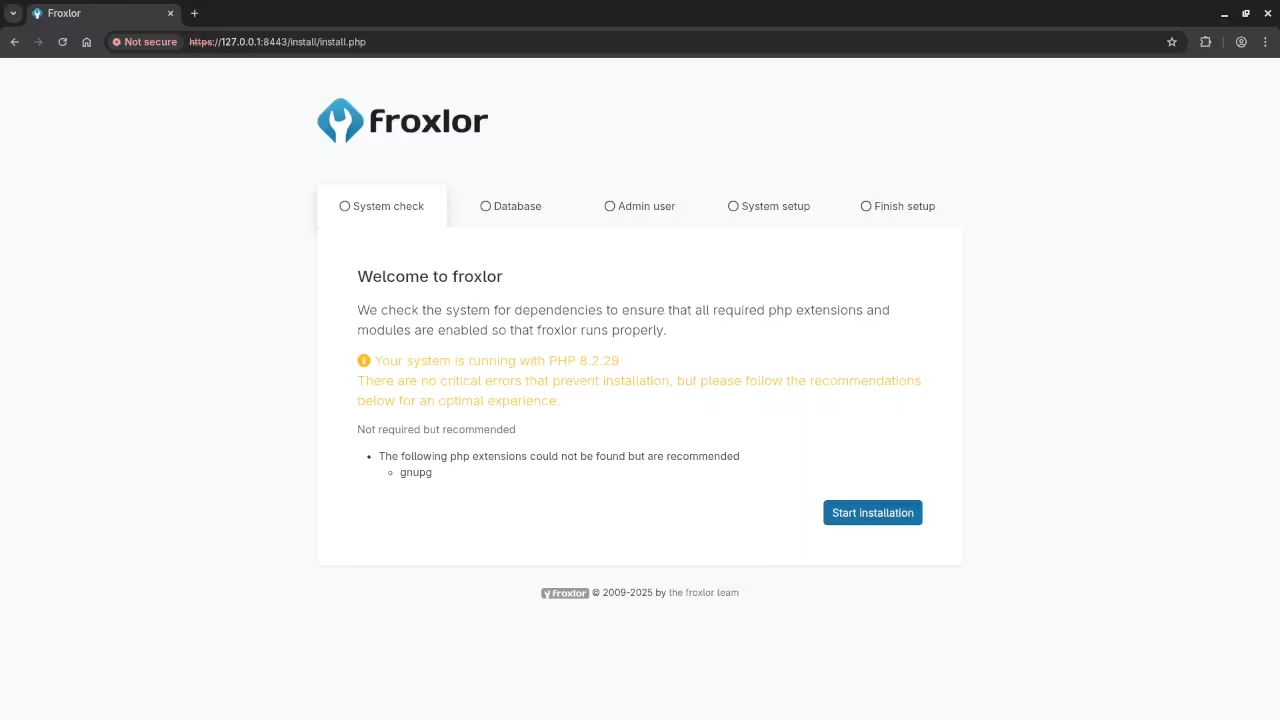
You should see the Froxlor login page.
Verify the SSL certificate is active by checking for the padlock symbol in your browser.
Step 7: Finalize SSL Settings in Froxlor
To ensure that Froxlor uses the SSL certificates correctly, go to the Froxlor admin panel and navigate to Configuration > SSL Settings.
Set the correct paths for your SSL certificate:
SSL Certificate: /etc/ssl/example.com.crt
Private Key: /etc/ssl/example.com.key
Screenshots and Screencast
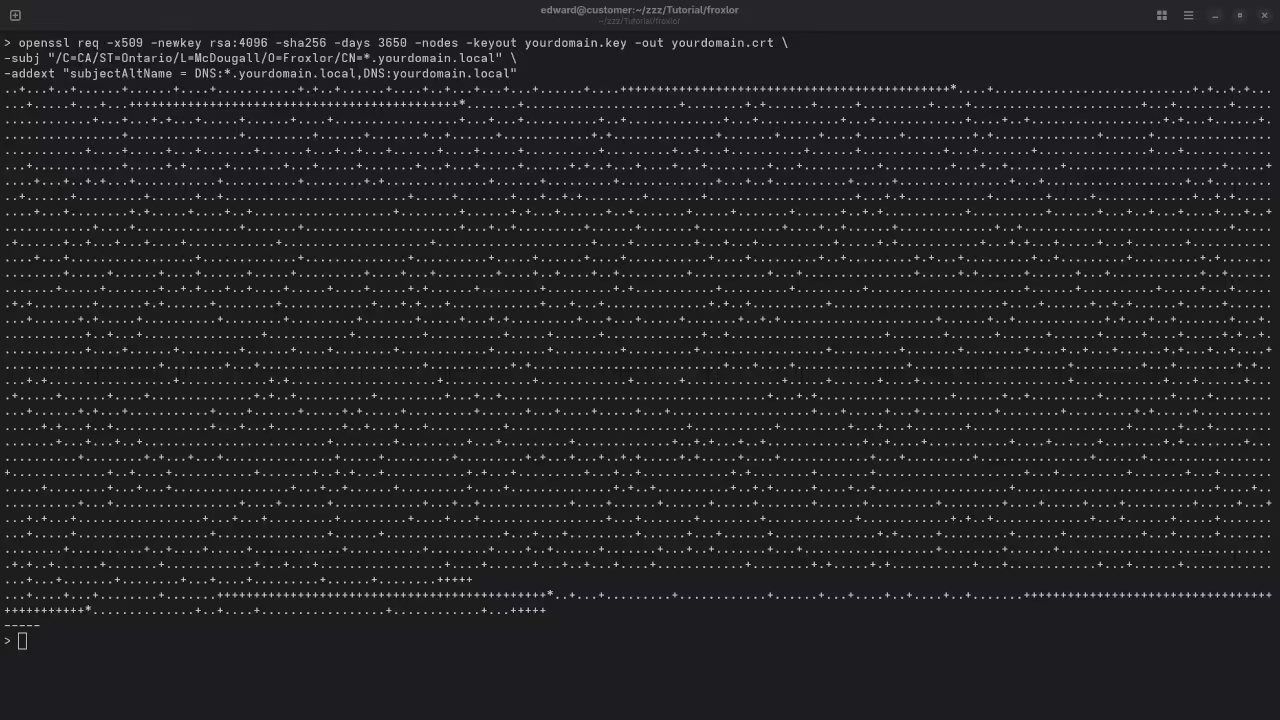
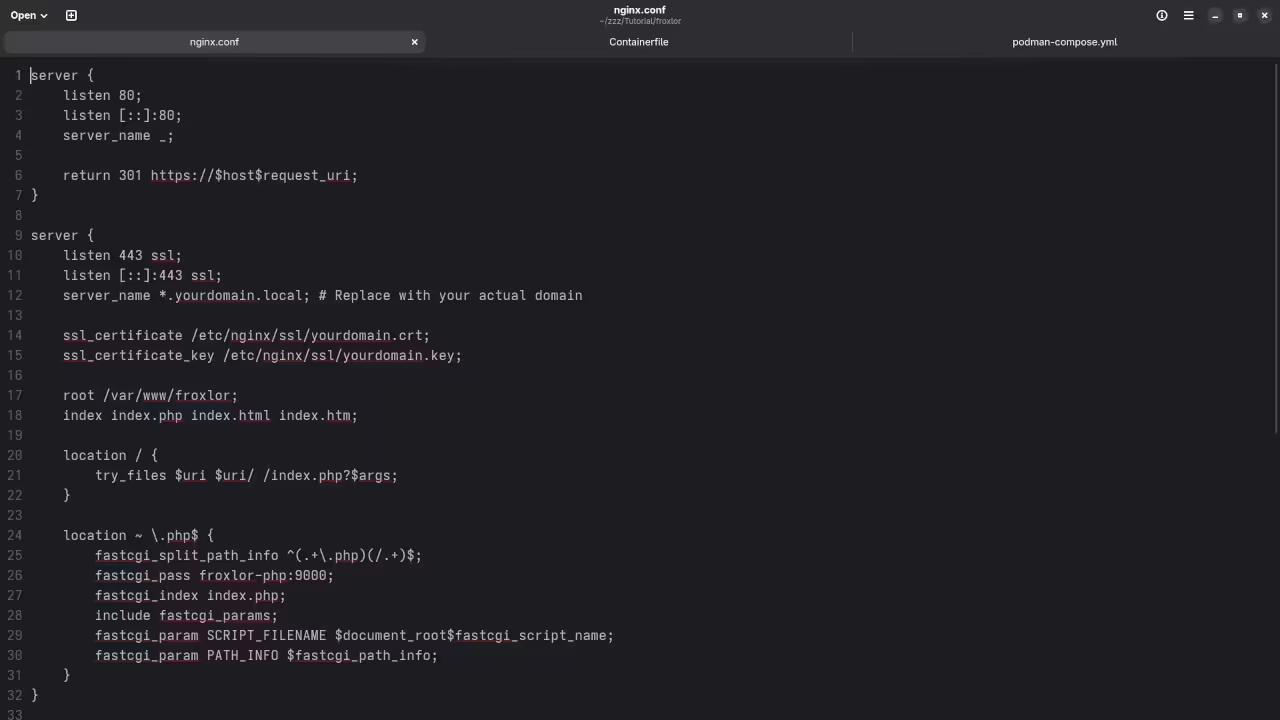
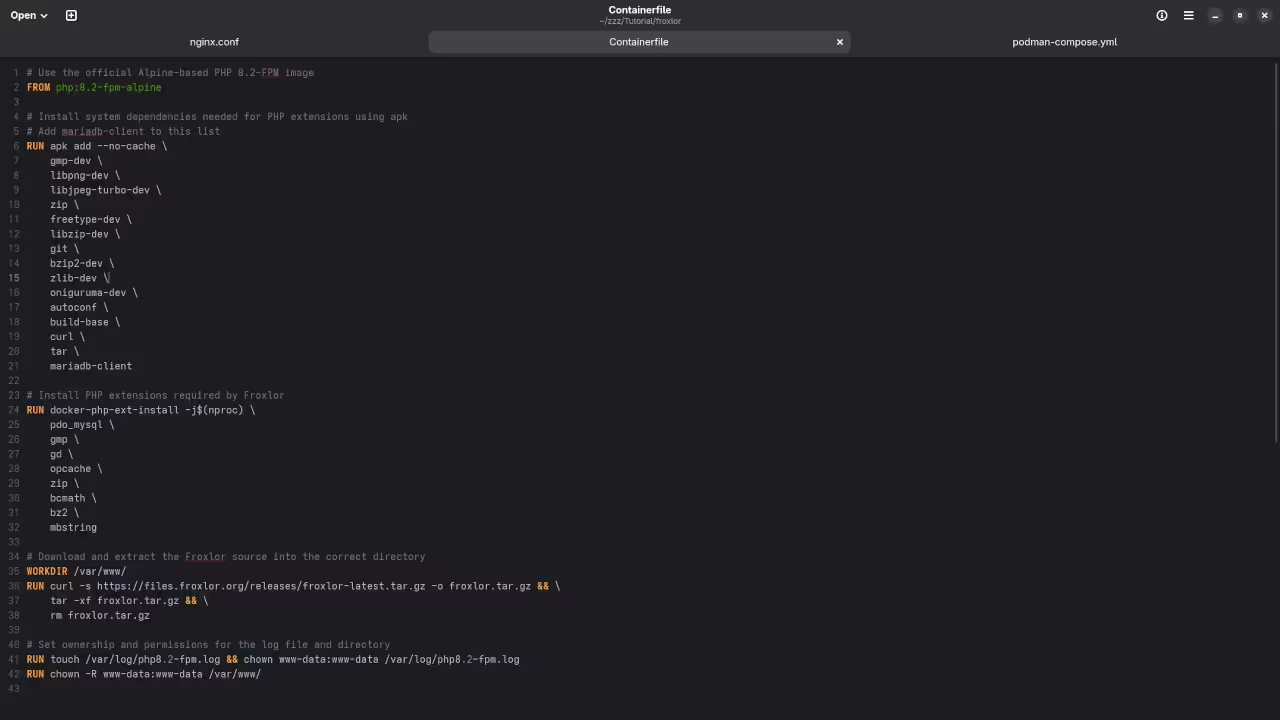
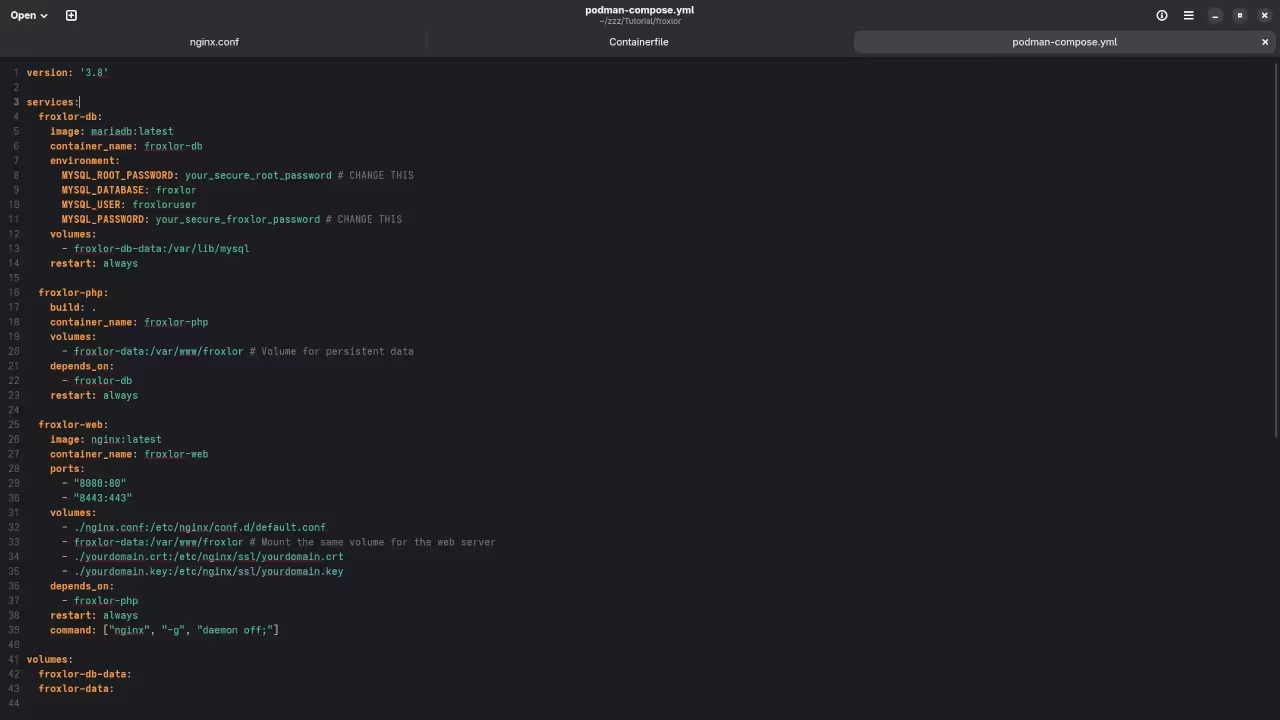
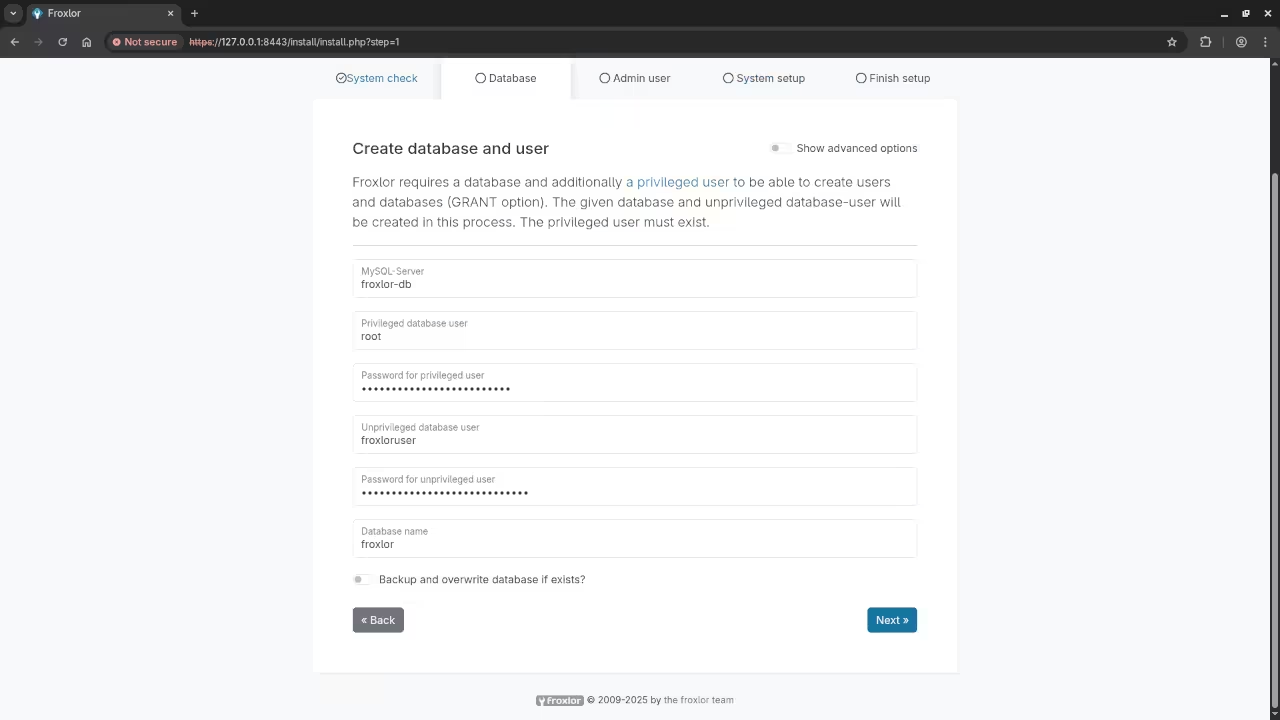
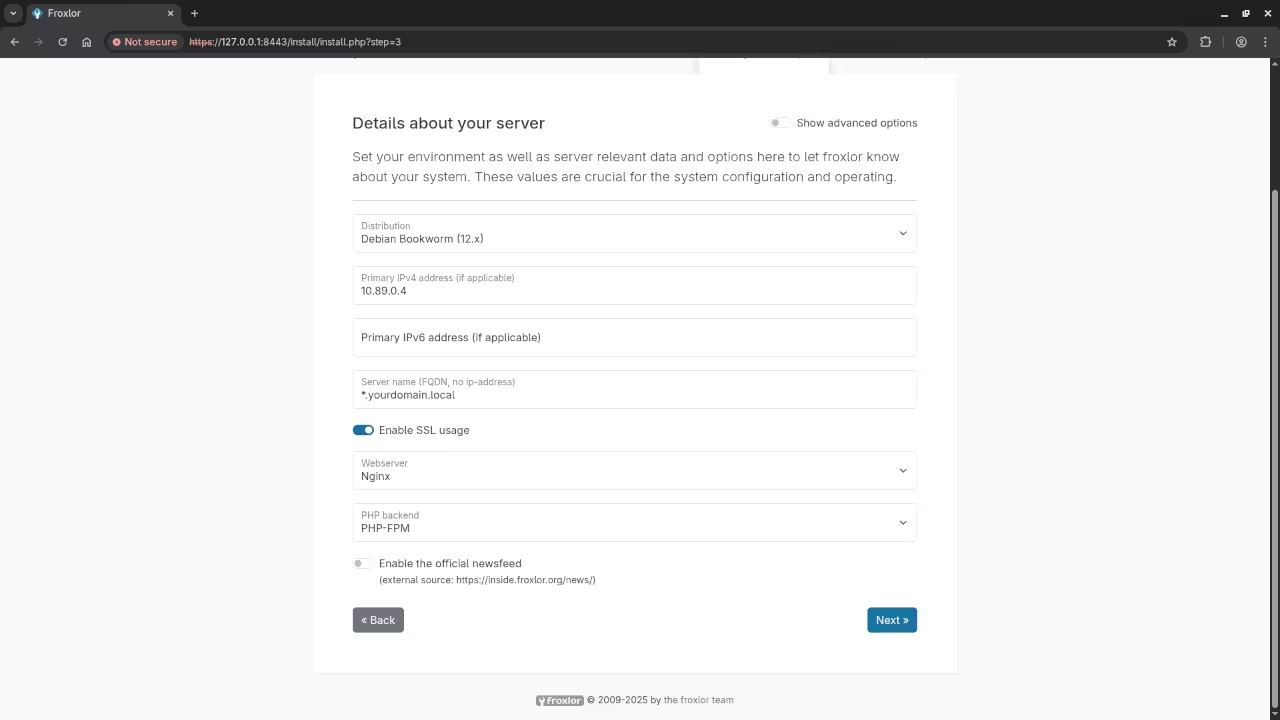
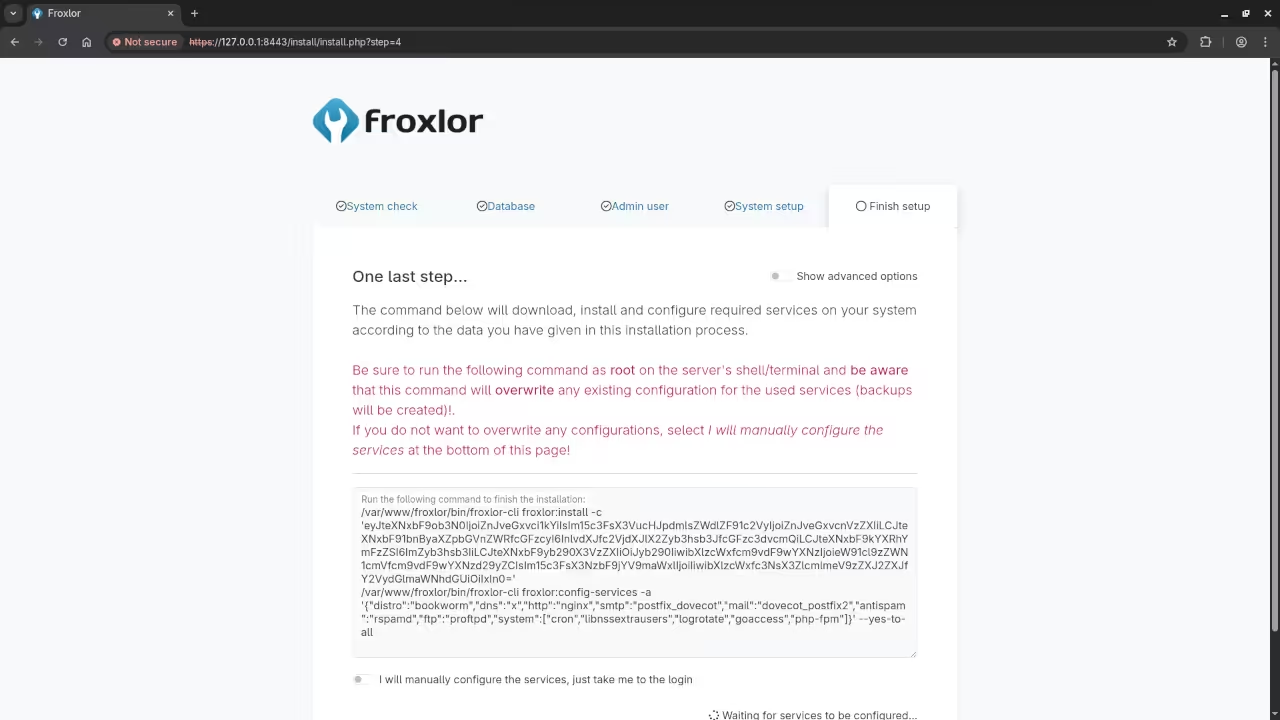
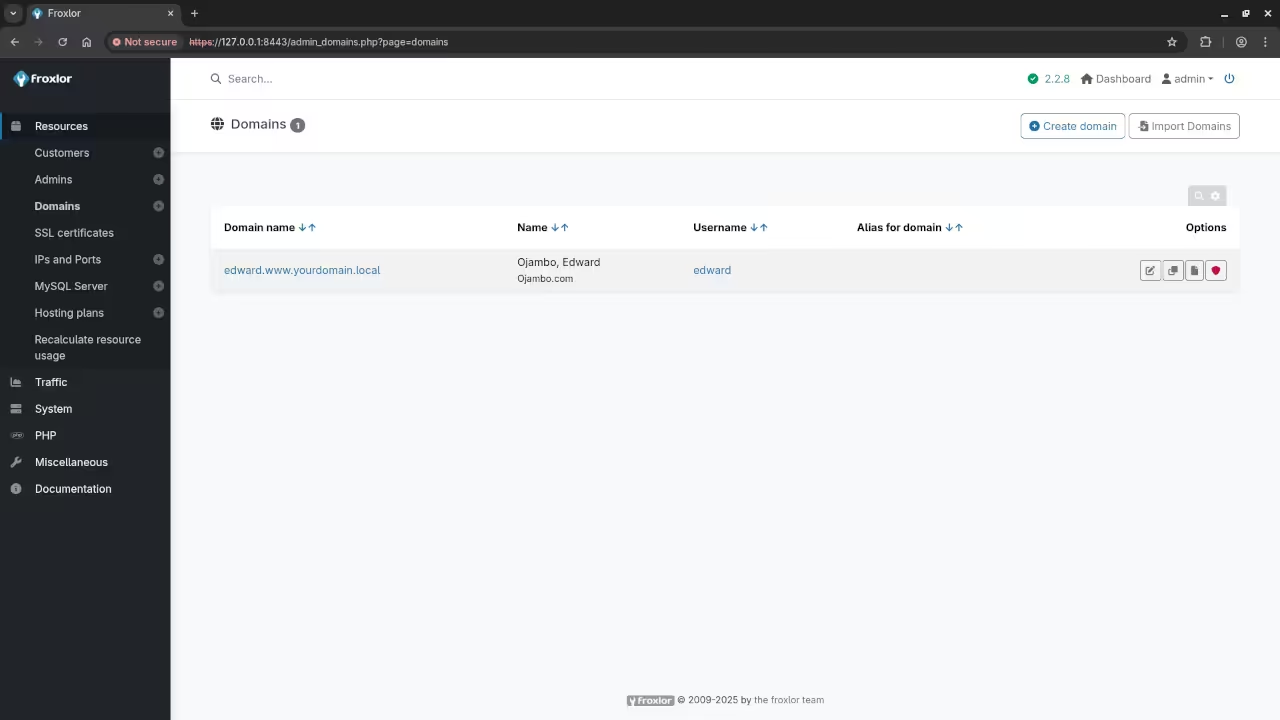
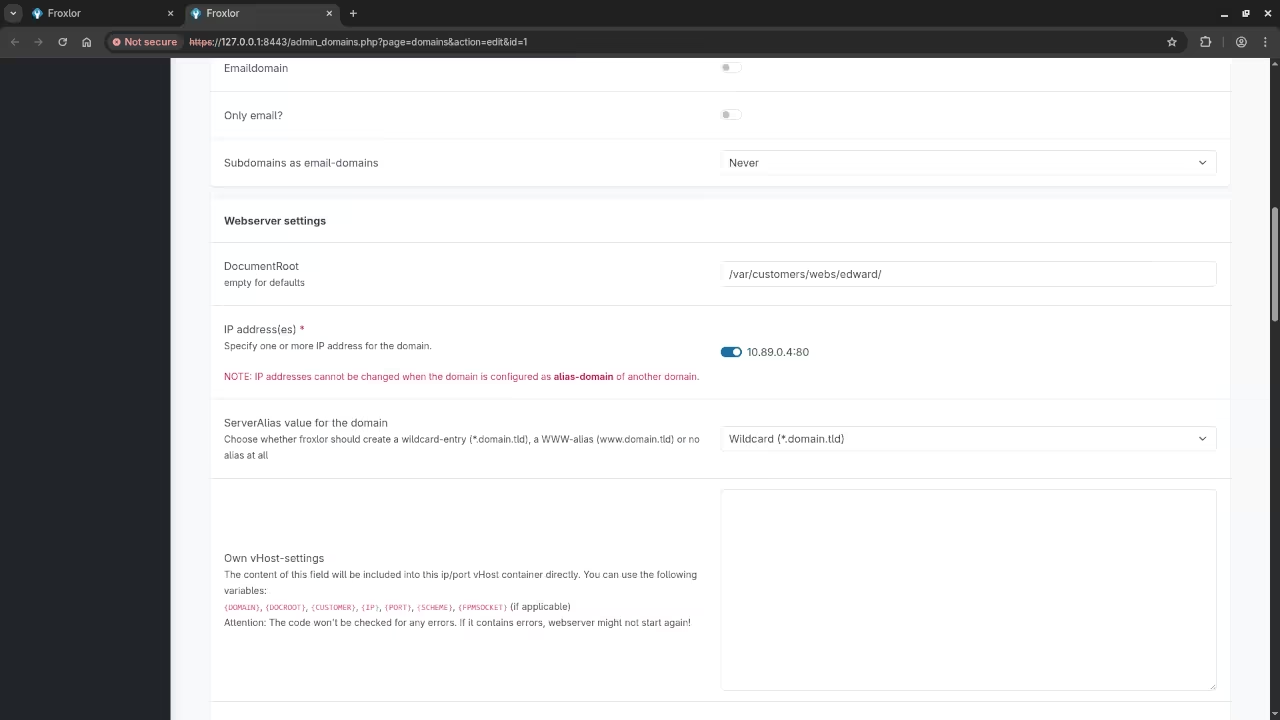
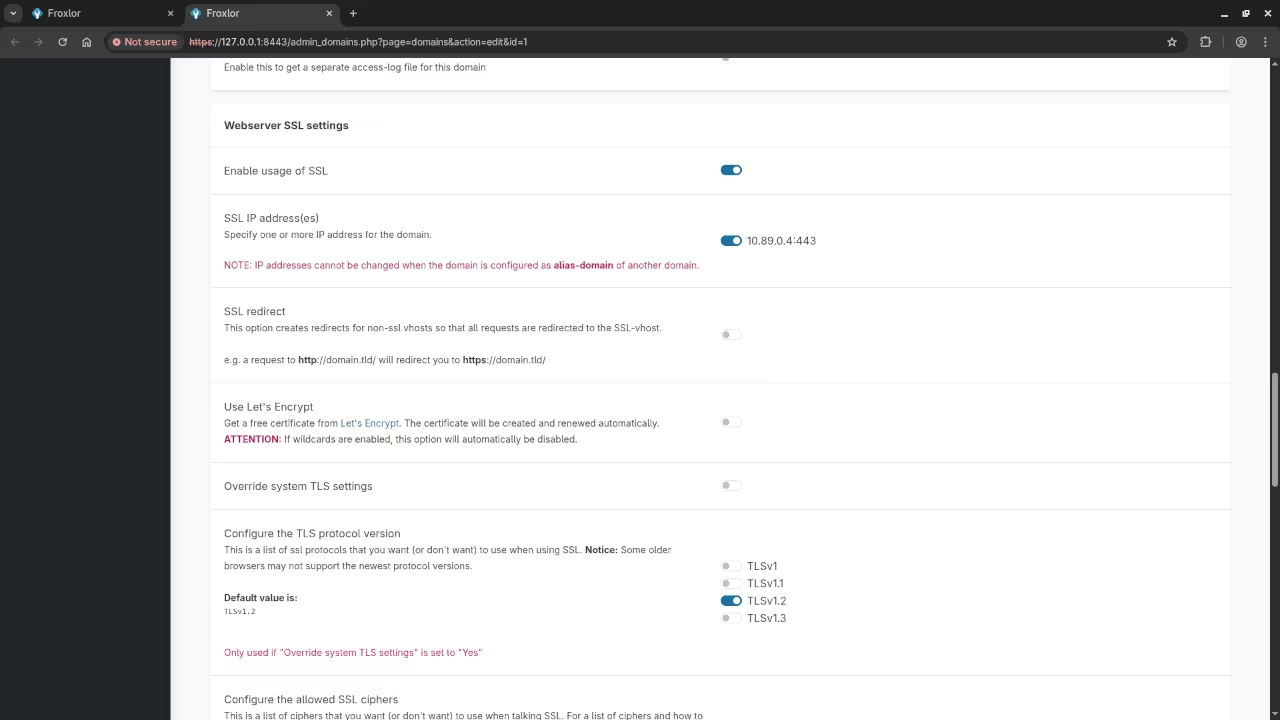
Command Line Displaying SSL Certificate Generation.Gnome Text Editor Displaying Nginx Configuration File.Gnome Text Editor Displaying Froxlor Podman Containerfile.Gnome Text Editor Displaying Froxlor Podman Compose File.Command Line Running Froxlor Podman Container.Web Browser Displaying Froxlor System Check Screen.Web Browser Displaying Froxlor Database Setup Screen.Web Browser Displaying Froxlor System Setup Screen.Web Browser Displaying Froxlor Last Setup Screen.Web Browser Displaying Froxlor Domains Screen.Web Browser Displaying Froxlor Domain Webserver Settings Screen.Web Browser Displaying Froxlor Domain Webserver SSL Settings Screen.Video Displaying Using Froxlor Monitoring Tool
Conclusion
Using podman-compose made it super easy to set up Froxlor inside containers, with everything managed automatically. By defining everything in a single podman-compose.yml file, you can easily recreate or scale this setup on any machine.
Additional Resources
If you found this guide useful, check out my other resources:
ComfyUI + Wan 2.2 T2V 14B: Beginner’s Guide to Text-to-Video on Linux (AMD Instinct Mi60 Setup)
Hello, creative minds and tech enthusiasts! Ever wanted to turn your text prompts into amazing, high-quality videos right on your own Linux machine? Today, we’re diving into the exciting world of **ComfyUI** and the powerful **Wan 2.2 T2V 14B** Text-to-Video model. This guide is tailored for beginners running **Linux** with an **AMD Instinct Mi60 32GB HBM2 GPU**-a powerful setup that can truly make this model shine.
ComfyUI is a node-based interface that makes advanced Stable Diffusion and video generation workflows more visual and manageable. Wan 2.2 T2V 14B is a cutting-edge AI model that excels at generating high-fidelity videos from text. Let’s get started!
System Requirements and Model Details
Before we jump into the fun part, let’s make sure your system’s ready to handle this robust model. The Wan 2.2 T2V 14B model is a significant undertaking, and running it on a single GPU often requires specialized optimization.
Requirement
Recommended/Required Specification
Notes
Operating System
Linux (e.g., Ubuntu, Debian)
Necessary for native AMD ROCm support.
GPU
AMD Instinct Mi60 32GB HBM2
Your 32GB VRAM is excellent! This model typically runs best with 80GB+ VRAM for full-speed, unoptimized inference, but your 32GB should be usable with quantization (GGUF) and/or model offloading techniques in ComfyUI.
AMD Drivers
ROCm 6.3.4 or higher
Required for efficient use of your AMD GPU for AI tasks.
System RAM
64GB minimum (32GB is the absolute minimum)
Essential for model offloading, which moves parts of the model not actively used to system RAM to free up VRAM.
Storage
SSD recommended
Faster loading times for the large model checkpoints.
Software
Python, PyTorch (with ROCm support), ComfyUI
You’ll need these foundational tools installed correctly.
Is Wan 2.2 T2V 14B Open Source?
Yes, Wan 2.2 T2V 14B is an open-source model!
License: The model is released under the **Apache 2.0 License**.
Restrictions: The Apache 2.0 license is highly permissive. It generally allows you to **use, modify, and distribute** the software and models, even for **commercial purposes**, without royalties. However, it requires you to include the original **copyright and license notices** in your work and note any significant changes you make. **Always check the latest official repository documentation** for any specific usage limitations or ethical guidelines (e.g., concerning harmful or illegal content generation) that the creators may have imposed.
Step-by-Step: Configuring Wan 2.2 T2V 14B in ComfyUI
Since you’re using Linux with an AMD GPU, you must rely on **ROCm** for GPU acceleration.
1. Prerequisites (For AMD Linux Users)
Ensure you have your **ROCm** drivers and a PyTorch version compiled with ROCm support installed. This is the foundation for using your Mi60 for AI tasks.
2. Install ComfyUI
Clone the Repository: Open your Linux terminal and clone the ComfyUI repository.
git clone https://github.com/comfyanonymous/ComfyUI.git
cd ComfyUI
Install Dependencies: Use the ROCm-compatible requirement installation.
pip install -r requirements.txt
Note: If you have issues, search for guides on installing PyTorch with ROCm for your specific ROCm version.
3. Install the Wan2.2 Custom Node
Wan 2.2 integration often requires a custom ComfyUI node to load and manage the MoE (Mixture-of-Experts) architecture. You can often find these via the **ComfyUI Manager** (a recommended custom node for managing others), or by manually cloning a dedicated Wan2.2 workflow/node repository into your ComfyUI/custom_nodes folder.
4. Download the Model Checkpoint
Locate the official **Wan 2.2 T2V 14B checkpoint** (or a recommended GGUF/quantized version for lower VRAM) on platforms like Hugging Face.
Place the model file (e.g., a .ckpt or .safetensors file) into your ComfyUI/models/unet directory. For GGUF files, the location may vary (e.g., ComfyUI/models/llm or a specific folder designated by the custom node).
5. Run ComfyUI and Load the Workflow
Start ComfyUI from your terminal:
python main.py
Open the web interface (usually http://127.0.0.1:8188).
Load a Workflow: Find a pre-built **Wan 2.2 T2V 14B ComfyUI workflow** online (they are often shared as .json files or directly through the node’s documentation). Load this workflow by dragging the .json file onto the ComfyUI canvas. This pre-configures all the necessary nodes for you.
Select the Model: In the **Checkpoint Loader** or specific Wan 2.2 loading node, select the Wan2.2-T2V-A14B model file you downloaded.
6. Configure and Generate!
Adjust Settings: Modify the text prompt (your desired video description) and other parameters like frame count, resolution (start with 480P or a smaller resolution like 832×480 to test performance), and number of steps.
Optimize for 32GB VRAM: Look for settings in your workflow that enable **model offloading** or use a **quantized (GGUF)** checkpoint. These are crucial for fitting the 14B model onto your 32GB VRAM.
Click “Queue Prompt”: ComfyUI will process your request, utilizing your powerful AMD Instinct Mi60! Video generation can take several minutes, depending on the complexity and settings.
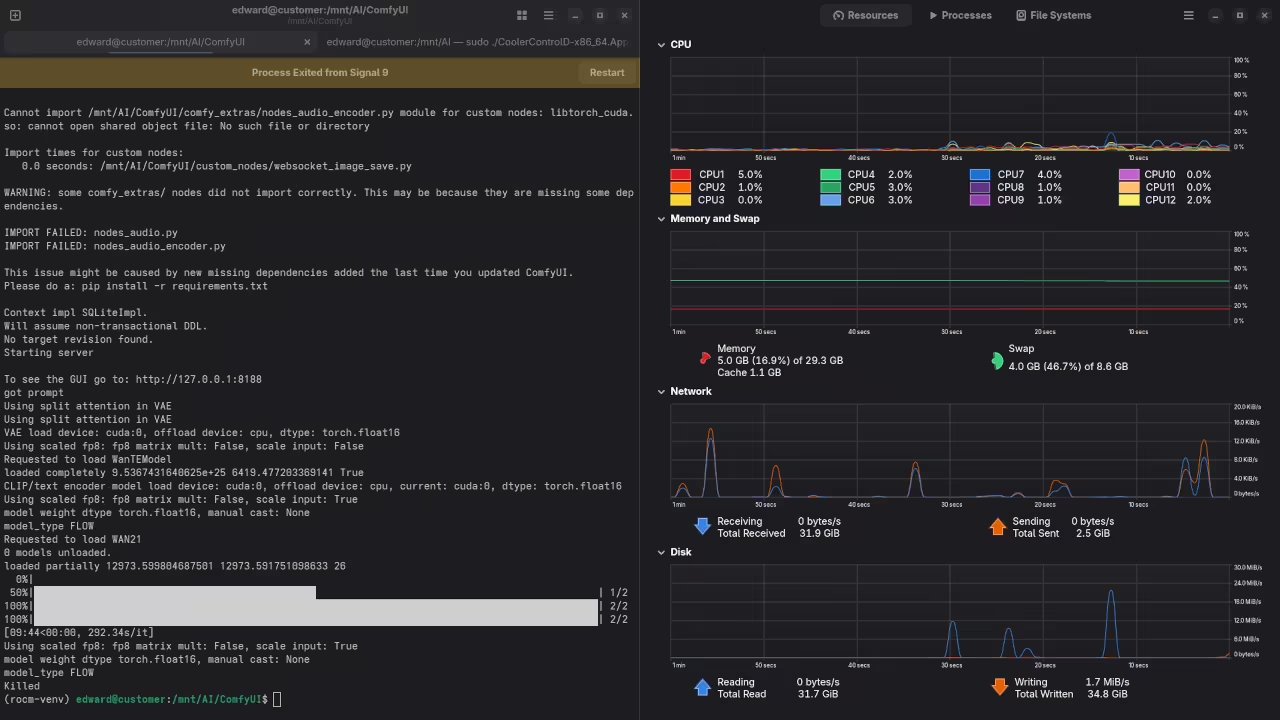
Analysis of Model Loading Failure
The following table summarizes resource usage before and during the memory-intensive AI model loading process. The rapid consumption of resources led to an immediate Out-of-Memory (OOM) event.
Resource Usage During AI Model Loading
Metric
Idle State (Before Loading)
Peak Load (During Model Loading)
Change / Impact
Model Parameters
N/A
Default settings, 640×640, length 81
N/A
RAM Usage
8.2 GB
28.3 GB
Increased by 20.1 GB
Swap Usage
Idle (0 GB)
4.4 GB
System started using swap aggressively
CPU Temperature
37°C
55°C
Increased by 18°C
dGPU Temperature
43.0°C
80°C
Increased by 37°C
Summary of the Failure Event
The system experienced a critical failure because the AI model’s memory requirements, peaking with a 20.1 GB increase in RAM demand, exceeded the combined total of physical RAM and the compressed ZRAM swap.
Although the system attempted to manage the load by utilizing 4.4 GB of swap space, this was insufficient. The failure message-“Application Stooped Device memory is nearly full. An application was using a lot of memory and was forced to stop.”-confirms an Out-of-Memory (OOM) event was triggered. This resulted in the operating system forcibly terminating the application. The simultaneous spikes in CPU temperature (to 55°C) and dedicated GPU temperature (to 80°C) confirm that the hardware was stressed right up until the point of termination. Increasing the disk swap capacity, as outlined in the previous steps, is the correct measure to allow the system to handle these large memory demands by providing a large, disk-backed memory overflow.
Increasing Swap for AI Workloads (Adding Disk Swap)
I had an 8GB ZRAM partition (/dev/zram0), which is compressed swap space that lives in RAM. Since AI workloads demand high memory, we will add a 16GB disk-backed swap file on the dedicated AI partition (/mnt/AI on /dev/sdb1) to act as a high-capacity overflow.
Using the /mnt/AI partition is ideal because it isolates the heavy swap I/O from your root system drive (/dev/sda3) and utilizes the available 103GB on that dedicated drive.
Command Verification
$ swapon --show
NAME TYPE SIZE USED PRIO
/dev/zram0 partition 8G 3.5G 100
$ sudo fallocate -l 16G /mnt/AI/swapfile_ai
$ sudo chmod 600 /mnt/AI/swapfile_ai
$ sudo mkswap /mnt/AI/swapfile_ai
Setting up swapspace version 1, size = 16 GiB (17179865088 bytes)
no label, UUID=your-real-uuid-7a1c2e9b-5f3d-4b90-a021-1111aabbccdd
$ swapon --show
NAME TYPE SIZE USED PRIO
/dev/zram0 partition 8G 3.5G 100
Step 1: Activate the New Swap File
The disk swap file was created and initialized, but was not yet active. Use swapon to activate it immediately.
Activate the Swap File:
sudo swapon /mnt/AI/swapfile_ai
Verify Total Swap Space (Expected 24GB Total):
You should now see both the ZRAM and the new disk file active. The system automatically prioritizes the fast ZRAM (PRIO 100) over the slower disk swap (lower PRIO).
swapon --show
Expected Output will show both entries:
NAME
TYPE
SIZE
PRIO
/dev/zram0
partition
8G
100
/mnt/AI/swapfile_ai
file
16G
-2 (or similar low value)
Step 2: Make the Disk Swap Permanent (/etc/fstab)
This is a crucial step to ensure the 16GB swap file is enabled automatically every time you reboot.
Open the /etc/fstab file:
sudo nano /etc/fstab
Add the following line to the end of the file:
/mnt/AI/swapfile_ai none swap sw 0 0
Save and close the file (in nano, press Ctrl+O then Enter, then Ctrl+X).
Step 3: Kernel Optimization (Swappiness)
Since you are running AI tasks, it’s best to configure the kernel to keep active data in the fast physical RAM as long as possible before resorting to disk swap.
Set swappiness to 10 (less aggressive swapping):
sudo sysctl vm.swappiness=10
sudo sh -c 'echo "vm.swappiness=10" >> /etc/sysctl.conf'
This setting is permanent and will take effect immediately and after reboots.
Model Precision and Quantization Comparison
To run large AI models like the 14B parameter model efficiently on systems with limited memory (like 32GB VRAM + 27GB RAM), it’s crucial to reduce the model’s footprint. This is achieved by moving from standard full-precision formats (FP32) to half-precision (FP16) and finally to advanced quantization (like FP8 and GGUF).
Comparison Table: Precision vs. Performance
Format/Quantization
Memory Usage (Relative)
Quality/Fidelity
Best For
Typical Use in ComfyUI
FP32 (Full Precision)
4x (Highest)
Highest Fidelity
Training, fine-tuning, or inference on dedicated high-end servers (e.g., 80GB+ GPUs).
Original checkpoint format (rarely used for inference).
FP16 (Half Precision)
2x (High)
Minimal quality loss compared to FP32.
Inference on high-VRAM consumer GPUs (24GB-48GB). Standard for many Stable Diffusion workflows.
Common checkpoint format (e.g., _fp16.safetensors).
FP8 (8-bit)
1x (Low)
Good. Negligible loss for most inference tasks.
Inference on mid-range GPUs (16GB-24GB) or when memory is the primary constraint.
Quantized models (e.g., ExLlamaV2/GPTQ for LLMs, emerging for Diffusion/T2V).
GGUF K-Quants (Q4_K, Q5_K)
Approx. 0.75x (Lowest)
Excellent balance of size/speed/quality.
Inference on memory-constrained systems (e.g., your 32GB VRAM + swapping setup).
Primarily used for large language models, but the concept applies to any aggressive quantization.
K-Quant Suffixes (_S, _M, _L)
Varies by suffix: S < M < L
Varies by suffix: S < M < L
These letters denote sub-versions within a bit-depth (e.g., Q4_K). **_M (Medium)** offers the best blend of speed and quality. **_S (Small)** is for maximum compression.
Key Takeaways for Your Workflow
Given the hardware and the memory failure, switching to a lower precision model is the most effective solution:
FP32: **Infeasible.** Requires 4x the memory and would instantly crash your system.
FP16: **Too Large.** The current failure indicates the 14B model in FP16 is too big for your combined memory, forcing the slow disk swap.
FP8 or Q4_K: **Recommended.** These formats reduce the memory requirement enough to keep the entire model structure within your **VRAM and fast RAM**, eliminating the need to constantly offload to the extremely slow disk swap. This will directly resolve the “long time” taken during the last step and prevent memory crashes.
Part 3: Download Recommendation Summary
For the specific hardware (32GB VRAM + 27GB RAM), the **Q5\_K\_M** level is the optimal choice for the 14B model, as it is the highest quality file likely to fit entirely within your fast memory, thus eliminating the severe slowdown caused by disk swapping.
Recommended GGUF File
Quantization Level
Approx. File Size (per expert)
Quality / Fidelity
Action
**Q5\_K\_M**
~9.6 GB
Very High (Negligible loss)
**Primary Choice.** Best balance of speed and fidelity for systems with 32GB VRAM.
**Q4\_K\_M**
~8.4 GB
Good (Industry Standard)
**Fallback.** Use this if Q5\_K\_M still causes significant speed issues.
Download the following two files for the I2V diffusion model:
Wan2.2-I2V-A14B-HighNoise-Q5_K_M.gguf
Wan2.2-I2V-A14B-LowNoise-Q5_K_M.gguf
Note: You must also download the separate VAE and Text Encoder files for the Wan 2.2 model and place them in their correct ComfyUI directories.
The goal is to convert your memory-intensive workflow from **FP8 safetensors** to the highly efficient **GGUF Q5_K_M** format. This involves replacing the standard model loading nodes and removing incompatible components.
📄 Original vs. Optimized Structure
Original Node (FP8)
Action / Optimized Node (GGUF)
Reason
Load Diffusion Model (High Noise FP8)
⇒ **REPLACE WITH** Unet Loader (GGUF)
GGUF files require a specialized loader node.
Load Diffusion Model (Low Noise FP8)
⇒ **REPLACE WITH** Unet Loader (GGUF)
Switching to the quantized, highly-optimized GGUF files.
LoraLoader (LightX2V LoRA)
❌ **REMOVE / BYPASS**
LoRA is generally not compatible with GGUF quantization.
💾 Download Link and File Location
Download the required **High Noise** and **Low Noise** GGUF models from the repository below. Look under the “Files and versions” tab to find the specific Q5_K_M files.
Place all downloaded .gguf files into your ComfyUI/models/unet directory.
🔴 Required Action Checklist
**INSTALL:** The ComfyUI-GGUF custom node via the ComfyUI Manager.
**DOWNLOAD & PLACE:** Get the two **Q5_K_M** GGUF files and put them in ComfyUI/models/unet.
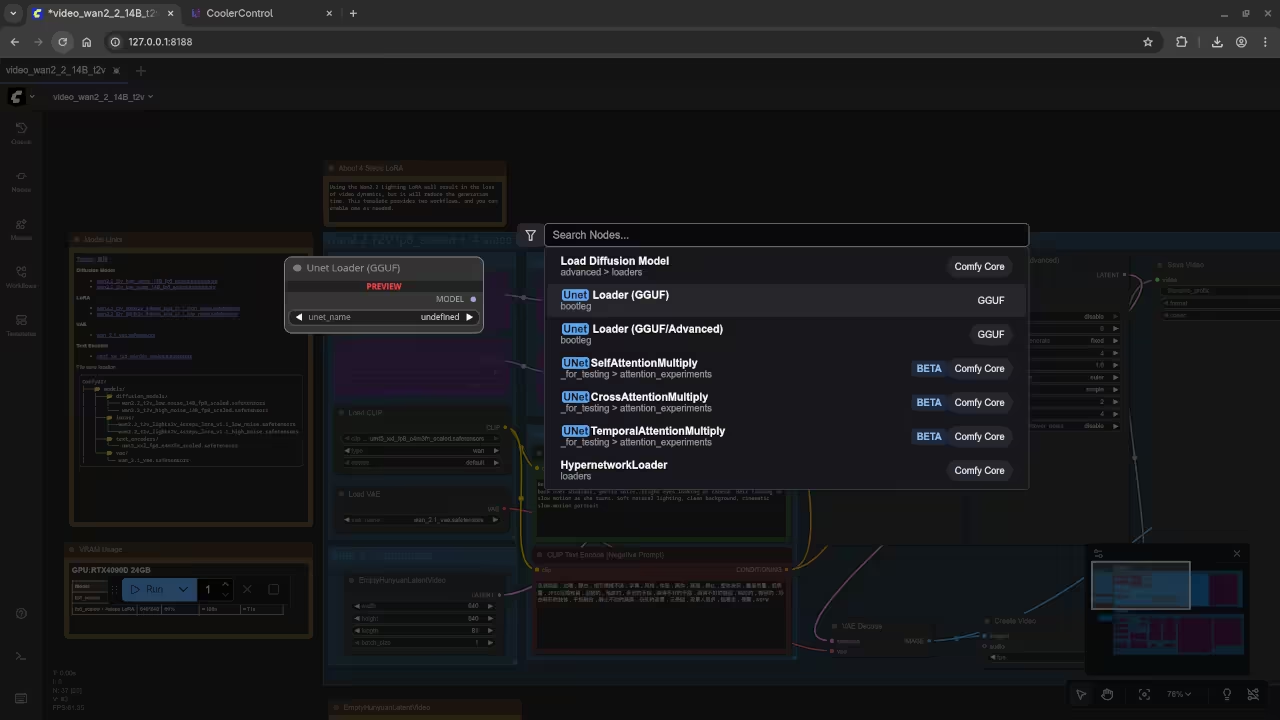
**SWAP NODES:** In your workflow, replace the two existing Load Diffusion Model nodes with two new Unet Loader (GGUF) nodes, selecting the corresponding High and Low Noise files.
**BYPASS:** Remove or bypass any LoraLoader nodes.
Guide: Running GGUF Models (Wan 2.2) in ComfyUI
This guide explains how to install the custom nodes necessary to use highly efficient GGUF models (like the Wan 2.2 video models) and set up the required dual-model workflow.
1. Installation: ComfyUI-GGUF Custom Node
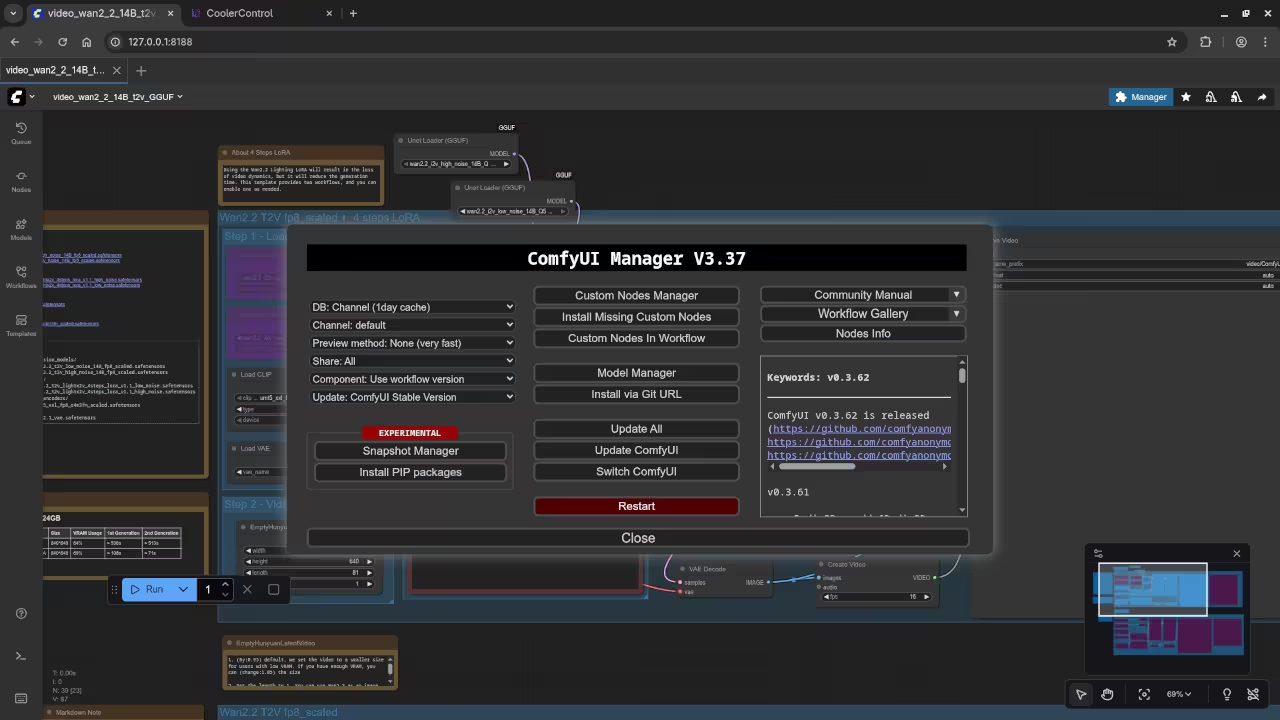
Step 1: Install via ComfyUI Manager
Click the Manager button in ComfyUI.
Select Install Custom Nodes.
Search for ComfyUI-GGUF (by city96).
Click Install, then Restart ComfyUI.
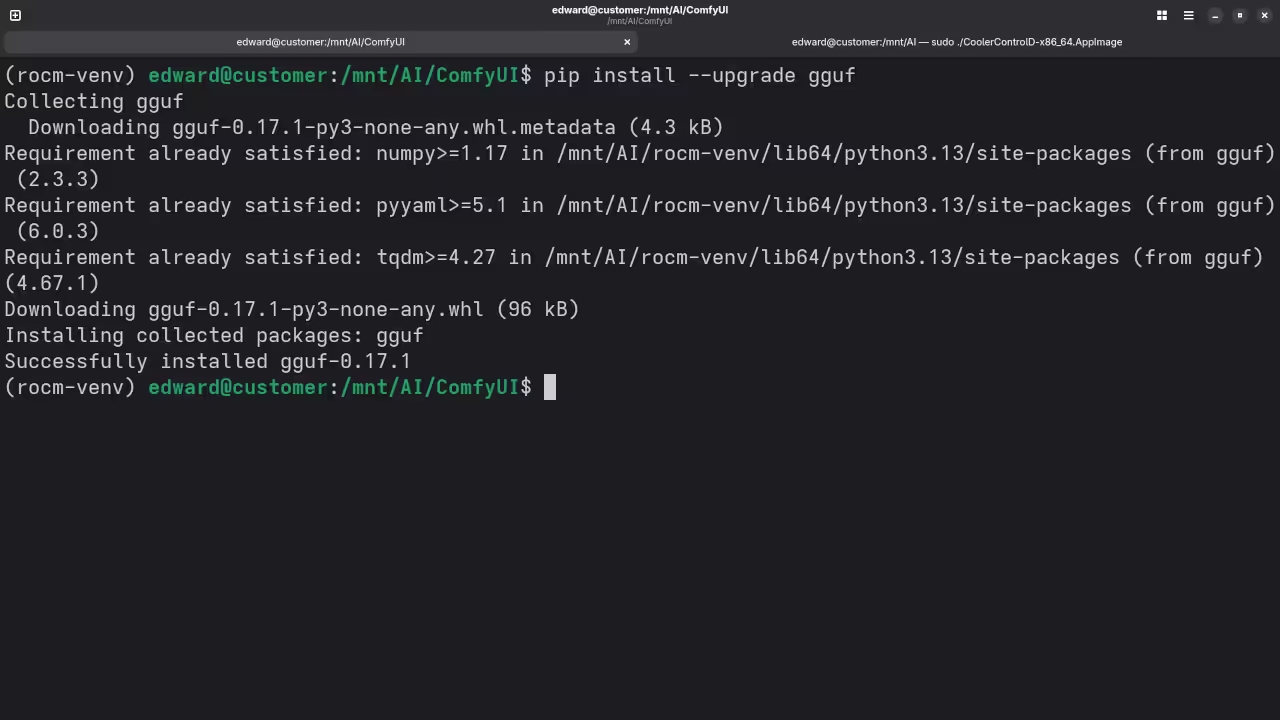
Step 2: Install Python Dependency (Crucial Fix)
The custom node often fails to load without its required Python library.
Close ComfyUI (browser and terminal).
Open your command line/terminal and navigate to your ComfyUI installation folder.
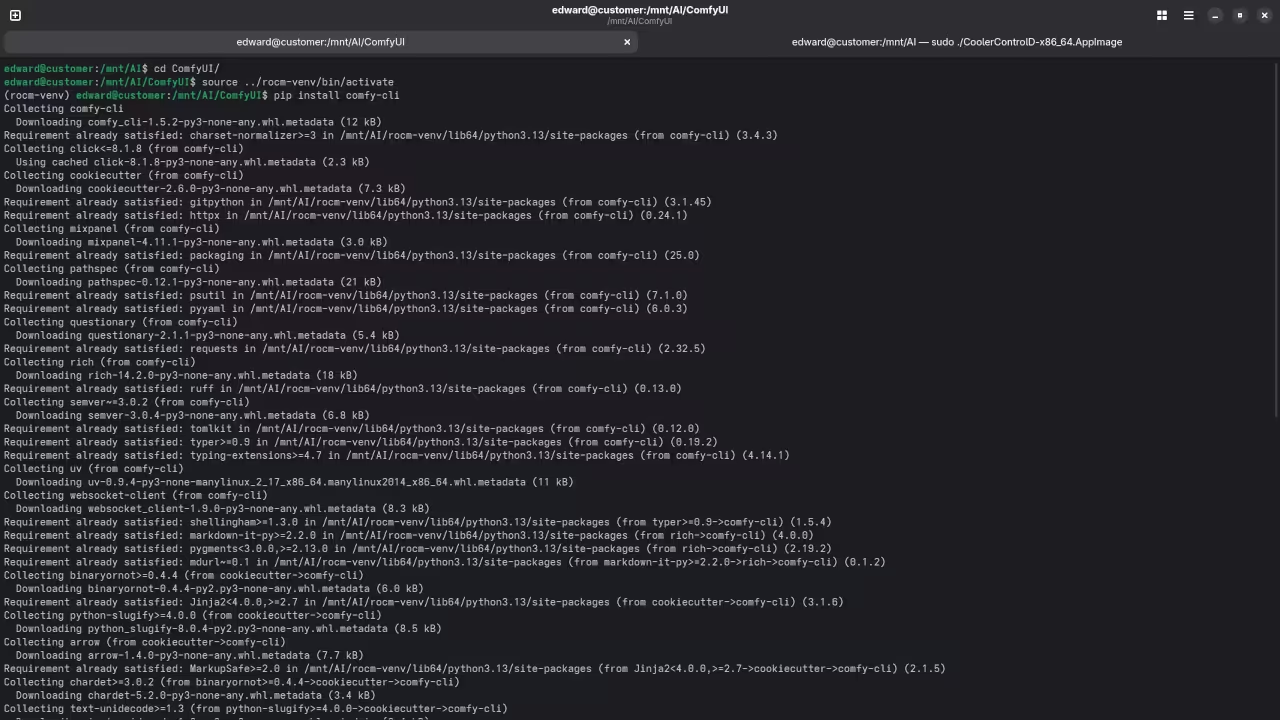
Execute the following command to install the gguf library:
pip install --upgrade gguf
(Use .\python_embeded\python.exe -s -m pip install --upgrade gguf if on a portable Windows install.)
Restart ComfyUI.
2. Workflow Setup: The Dual-Stage GGUF Flow
You will replace your standard Load Diffusion Model nodes with the GGUF components, using two separate models for the two-stage process (High Noise and Low Noise).
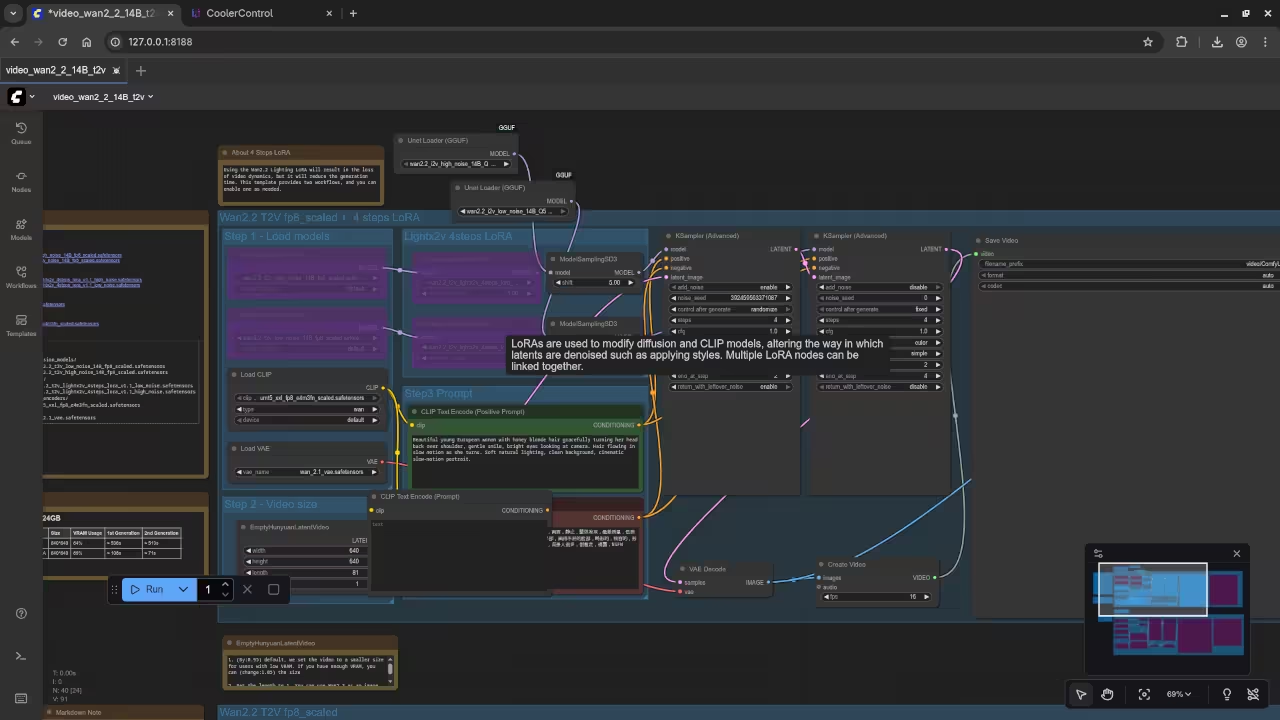
Step 1: Add the GGUF Loaders
Delete/Bypass your old Load Diffusion Model nodes.
Add Two instances of the node: Unet Loader (GGUF).
Instance 1: Select the High Noise model (wan2.2_t2v_high_noise...).
Instance 2: Select the Low Noise model (wan2.2_t2v_low_noise...).
Step 2: Add Model Sampling Nodes
The Wan 2.2 model requires the SD3-style sampling patch.
Add Two instances of the node: ModelSamplingSD3.
For both nodes, ensure the shift parameter is set to 5.0 (or your observed default).
Step 3: Connect the Final Flow to K-Samplers
The entire workflow uses two separate chains that lead to your two K-Sampler nodes.
This setup allows you to leverage the VRAM-saving benefits of the GGUF format for the Wan 2.2 model.
3. GGUF Conversion: Node Replacement Summary
The GGUF workflow is designed to replace the VRAM-heavy original model loading and sampling nodes while keeping the core logic of the Wan 2.2 dual-stage generation intact. The key changes are summarized below:
Original Node (FP8 Workflow)
GGUF Replacement Node
Purpose & Action
Load Diffusion Model (High Noise)
Unet Loader (GGUF)
Replace. Loads the memory-efficient wan2.2_..._high_noise.gguf file.
Load Diffusion Model (Low Noise)
Unet Loader (GGUF)
Replace. Loads the memory-efficient wan2.2_..._low_noise.gguf file.
(Often Absent/Implied Patching)
ModelSamplingSD3 (with shift: 5.0)
Add. Required patch for the SD3-style sampling logic that the Wan 2.2 DiT architecture uses. Must be added after bothUnet Loader (GGUF) nodes.
Load CLIP
Load CLIP / CLIPLoader (GGUF) (Optional)
Keep or Replace. If you use the standard CLIP model, keep the original. For max VRAM savings, replace with CLIPLoader (GGUF) if a quantized CLIP model is available.
Load VAE
Load VAE
Keep. The VAE is typically loaded separately and does not have a GGUF replacement in this specific workflow.
By following these steps, you successfully transition your powerful Wan 2.2 workflow to the VRAM-optimized GGUF format, making cinematic-quality video generation accessible on consumer-grade hardware.
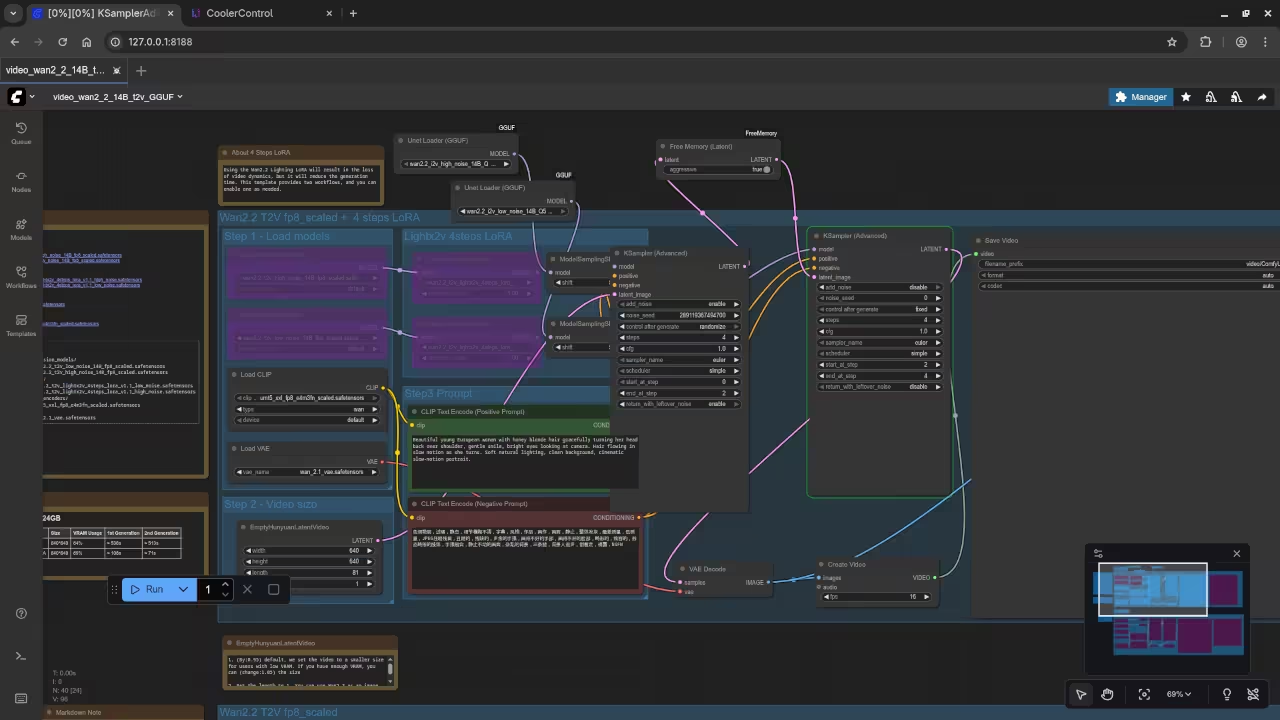
Step 4: Adding the Free Memory (Latent) Node to the Workflow
Now that the node is installed, you need to correctly insert it between your two KSampler nodes. This step forces the VRAM clean-up to happen exactly when the Model from the first pass is no longer needed.
A. Disconnect the Latent Wire
First, remove the direct connection between your two KSampler nodes:
**Disconnect** the wire from the **LATENT** output of your **KSampler (Pass 1)**.
**Disconnect** the wire from the **latent_image** input of your **KSampler (Pass 2)**.
B. Insert and Connect the Node
Insert the **Free Memory (Latent)** node and use it as a bridge for the latent data.
Add the **Free Memory (Latent)** node to your canvas (Add Node → custom_nodes → ComfyUI-FreeMemory → Free Memory (Latent)).
Connect the **LATENT** output of the **KSampler (Pass 1)** to the **latent** input of the **Free Memory (Latent)** node.
Connect the **LATENT** output of the **Free Memory (Latent)** node to the **latent_image** input of the **KSampler (Pass 2)**.
C. Final Workflow Structure
Your finished multi-sampler chain will now look like this, ensuring optimal VRAM management:
Connection Point
Source Node
Output Port
→
Destination Node
Input Port
1st Pass Latent
KSampler (Pass 1)
LATENT
→
Free Memory (Latent)
latent
Memory Cleanup
Free Memory (Latent)
LATENT
→
KSampler (Pass 2)
latent_image
Step 5: Reviewing the “Aggressive” Setting
The **Free Memory (Latent)** node includes an aggressive boolean input, which defaults to False. Understanding this setting is crucial for balancing performance and memory management.
Aggressive Setting
Action Performed
When to Use
False (Default)
Performs a standard VRAM clear (clearing the PyTorch/CUDA cache). This is faster as it keeps models loaded in case they are reused.
Use by default. It offers better speed for most complex workflows where memory is tight but manageable.
True
Performs an intense clear: **Unloads all loaded models** from VRAM, then clears caches. This is slower because the next KSampler must reload its Model.
Only use if you get an Out-of-Memory (OOM) error. This is your last resort to free the maximum possible VRAM for resource-heavy models.
Tip: Always try running your workflow with aggressive set to False first. Only enable it if you encounter OOM errors, as the added reloading time can significantly increase your generation time.
Why the Free Memory Node is Essential for the Original Setup
You asked a critical question: Would the **ComfyUI-FreeMemory** node work on the original, default template? The answer is a definitive **Yes**, and in fact, its entire purpose is to be the **fix** for that exact scenario.
The Problem: VRAM Caching in the Default Chain
The standard ComfyUI architecture is designed for speed and automatically caches (keeps loaded) large models like the U-Net in VRAM after they run, assuming they will be needed again immediately. In the original, memory-inefficient setup:
**Pass 1 (KSampler)** loads its Model. The workflow completes this step and holds the Model in VRAM.
**Pass 2 (KSampler)** attempts to load its required components (or a second, large upscaling model).
Since the VRAM from Pass 1 was never explicitly freed, the system runs out of space, resulting in the dreaded Out-of-Memory (OOM) error.
The Solution: Forcing a VRAM Checkpoint
The custom **ComfyUI-FreeMemory (Latent)** node acts as a mandatory checkpoint. By inserting it between KSampler 1 and KSampler 2, you are manually executing the critical cleanup command that ComfyUI’s default caching mechanism skips.
Workflow Step
Node Involved
VRAM Status (Default)
VRAM Status (With Free Memory Node)
**Initial Pass**
KSampler 1
High (Model Loaded)
High (Model Loaded)
**The Critical Bridge**
**Free Memory (Latent)**
**High (Cache is Held)**
**Low (Cache is Forced Clear) ✅**
**Refinement Pass**
KSampler 2
**CRASH (OOM)**
High (New Model Loads Successfully)
Therefore, inserting this node is not an optional optimization, but a **necessary functional step** to enable the two-KSampler latent upscale chain on systems that are VRAM-constrained.
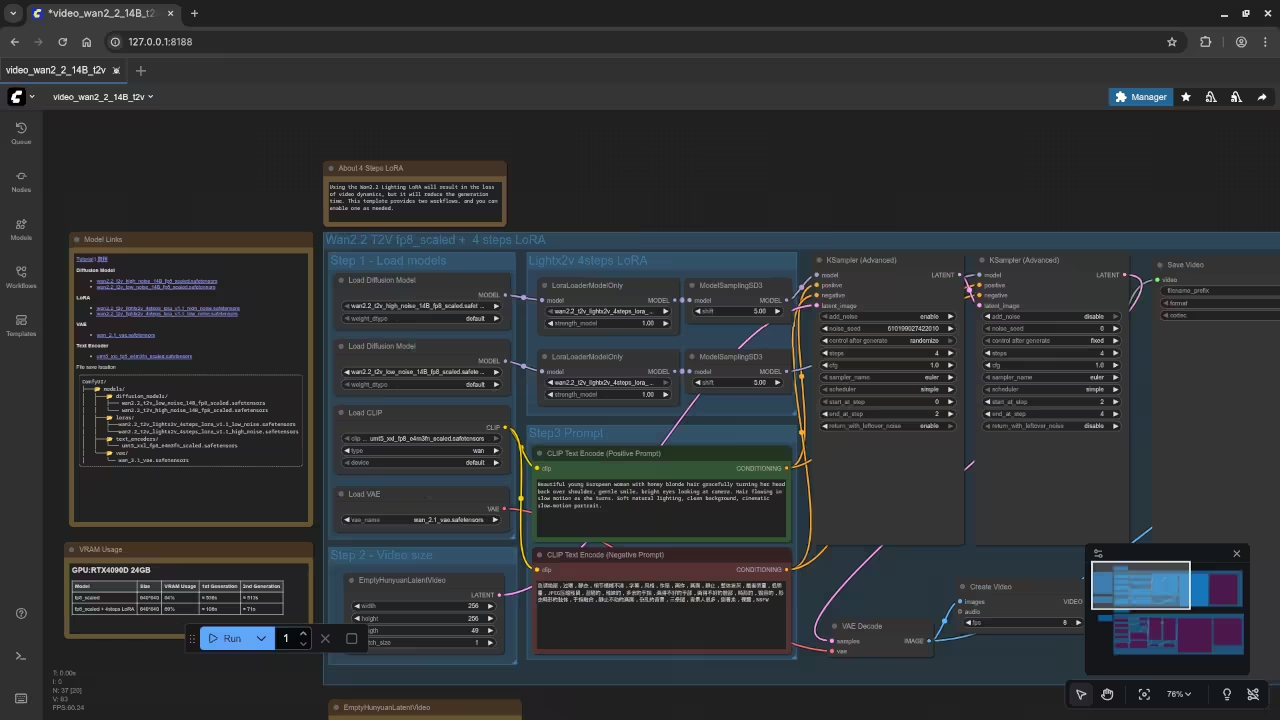
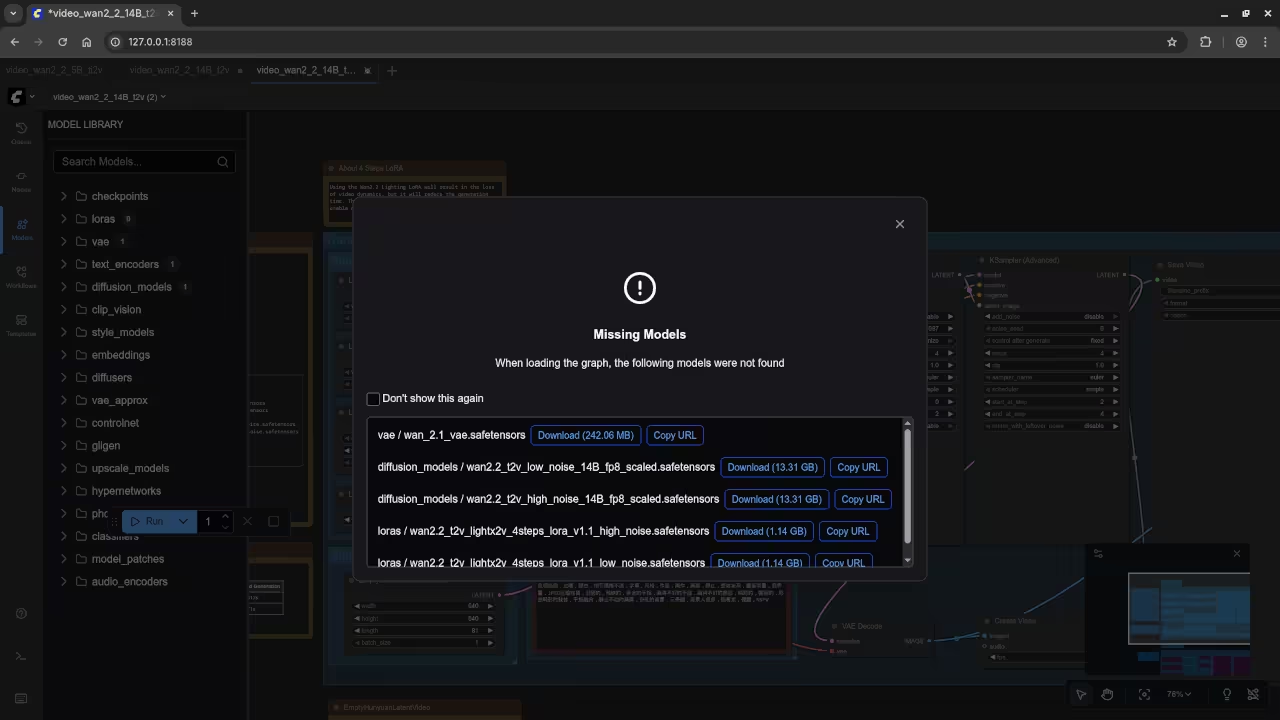
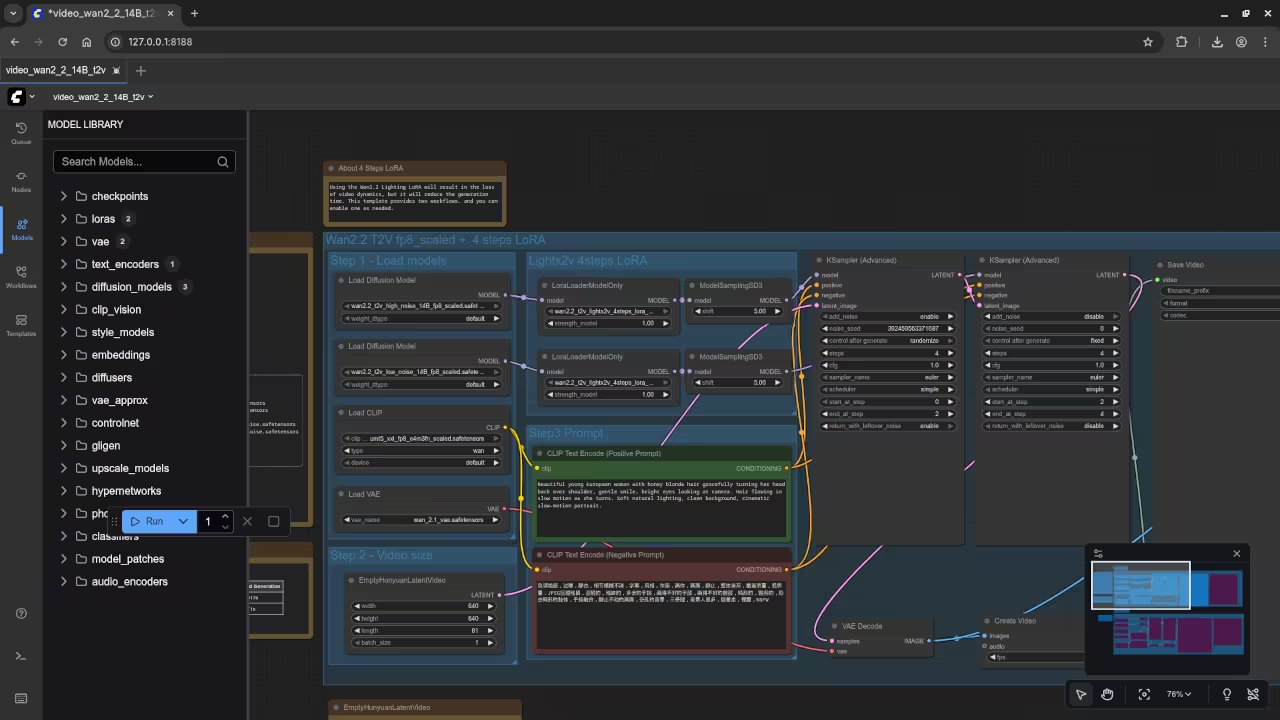
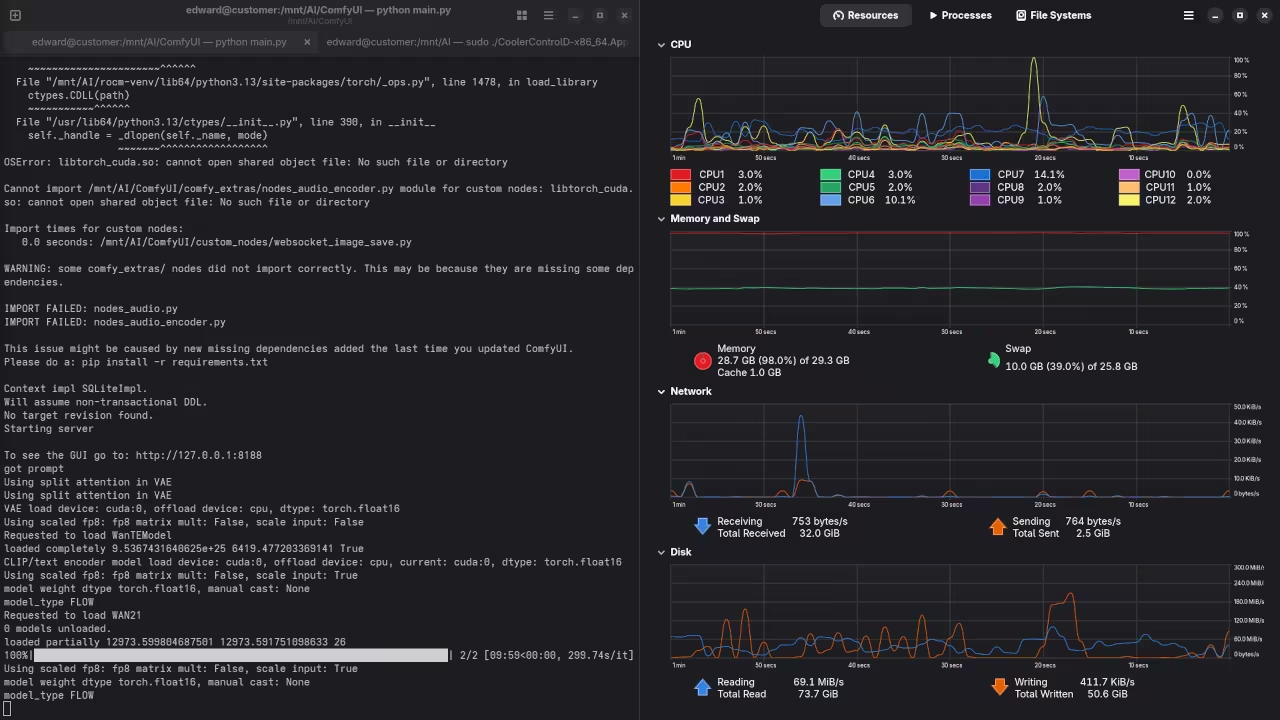
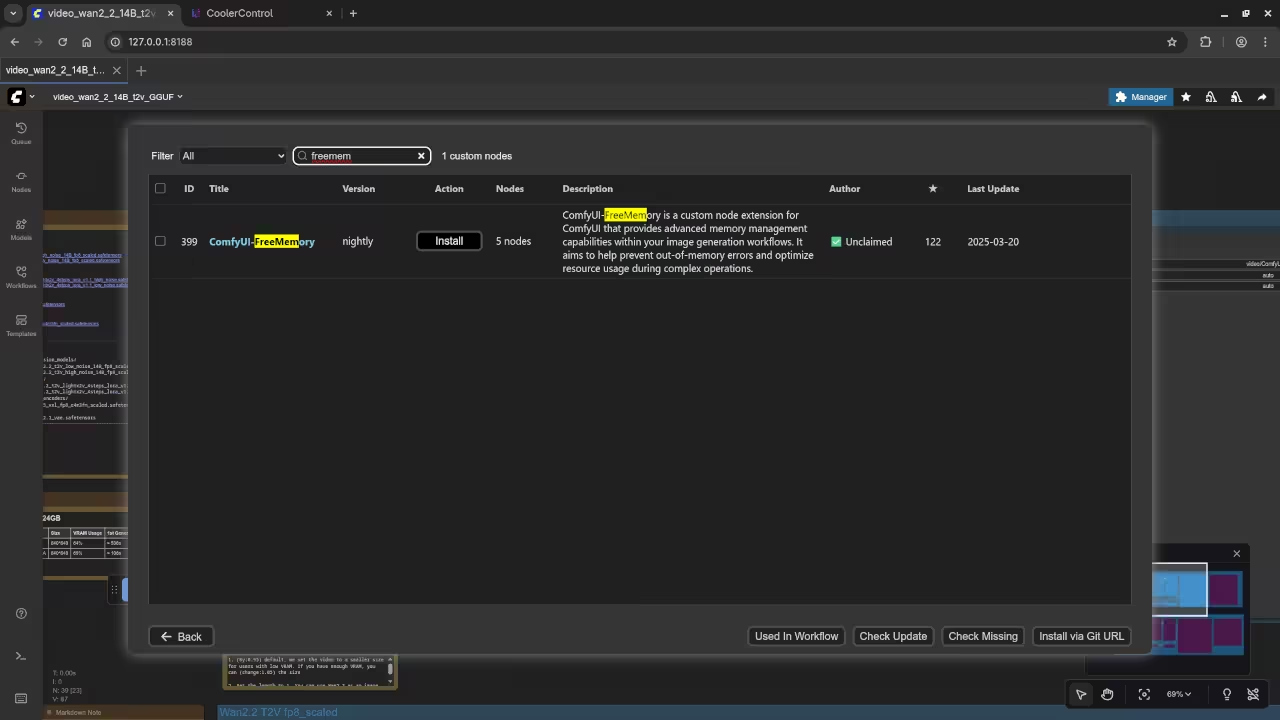
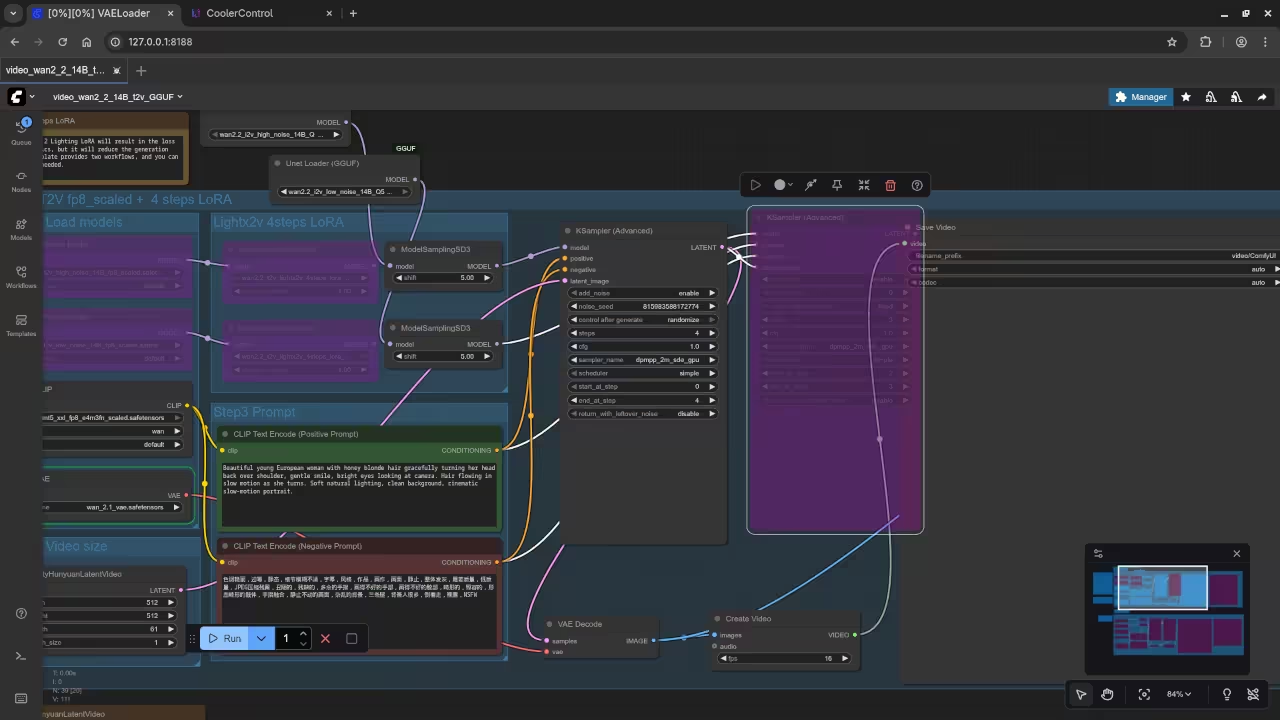
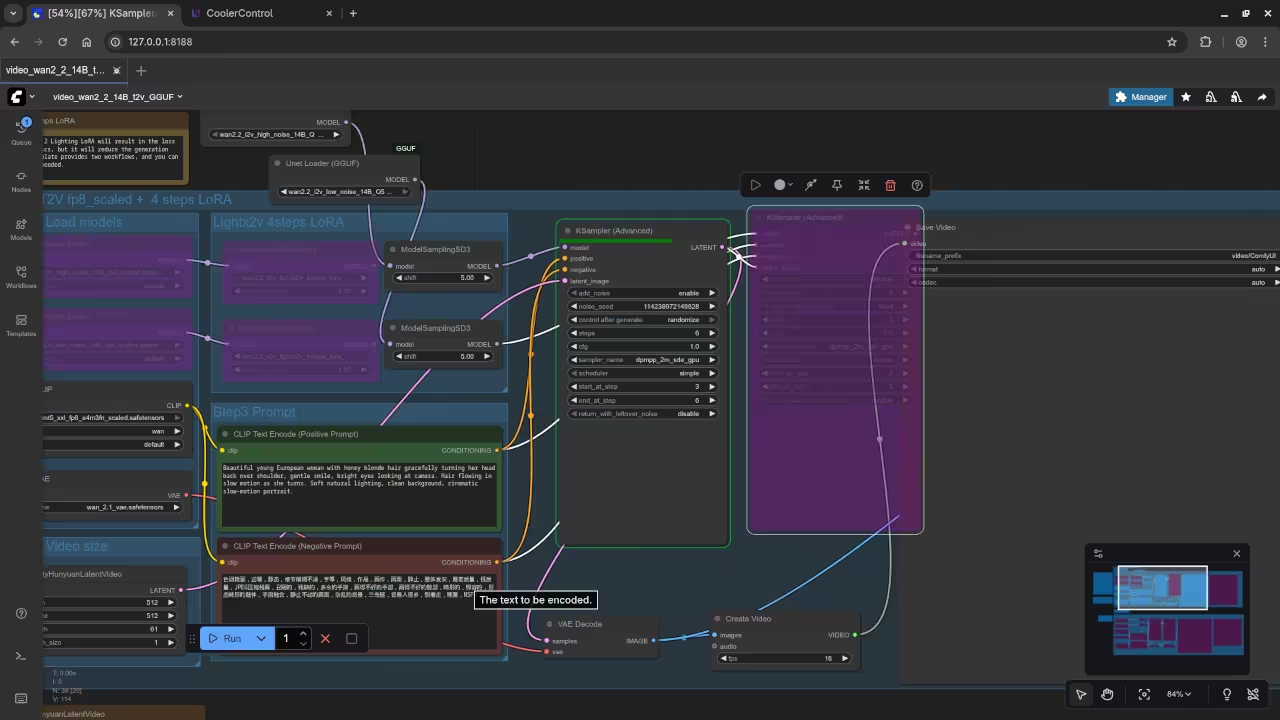
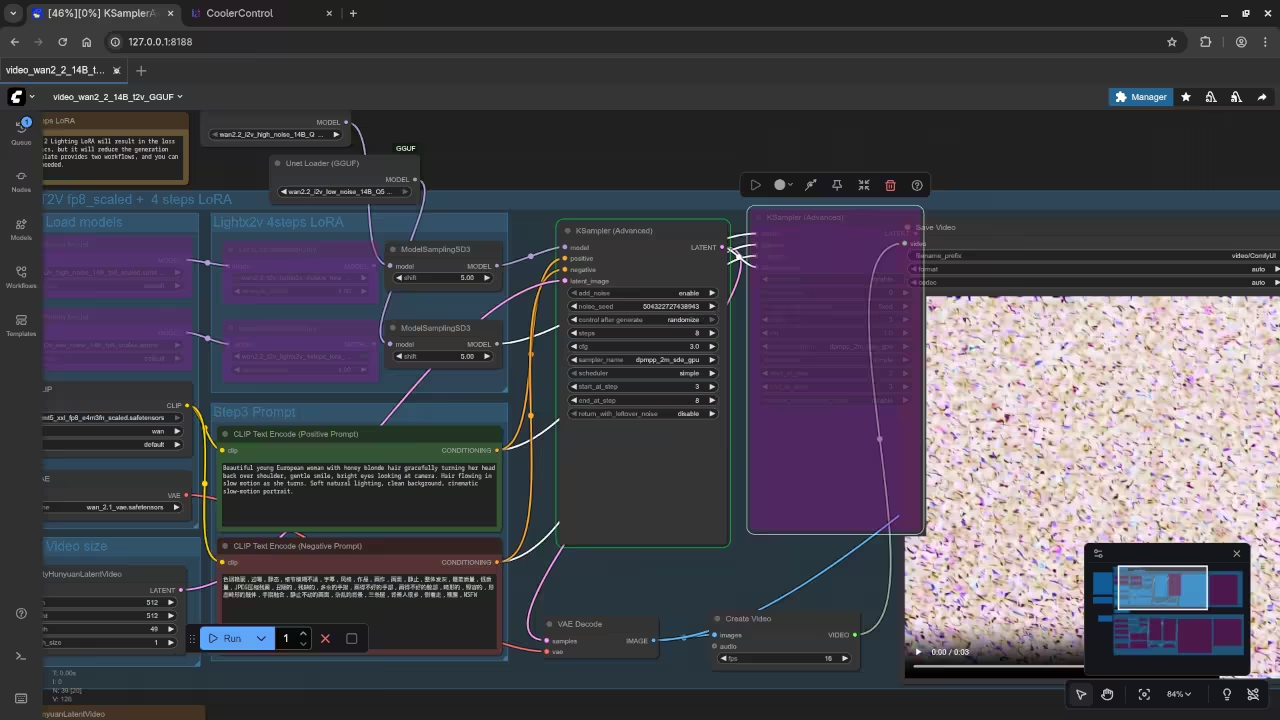
ComfyUI With Wan 2.2 T2V 14B Installation Instructions.ComfyUI With Wan 2.2 T2V 14B Default Nodes.ComfyUI With Wan 2.2 T2V 14B VRAM And RAM Issues.ComfyUI With Wan 2.2 T2V 14B Offloading To Slow Disk Swap.Command Line ComfyUI Installation Of GGUF Extension.ComfyUI Using Unet Loader (GGUF).ComfyUI With Wan 2.2 T2V 14B Using GGUF Model.Command Line ComfyUI Installation Of Manager Extension.
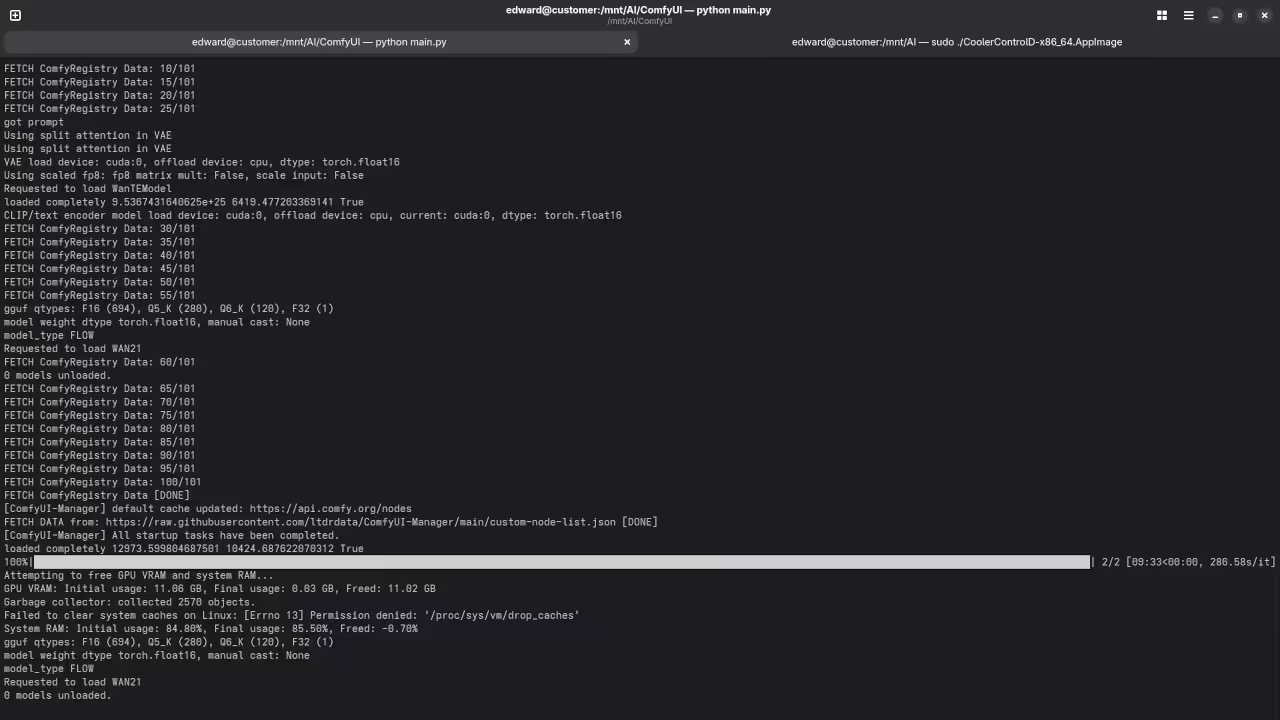
ComfyUI Using Manager.ComfyUI Using Manager Installing FreeMemory Extension.ComfyUI With Wan 2.2 T2V 14B Using FreeMemory Node.Command Line Displaying ComfyUI Generation Results.
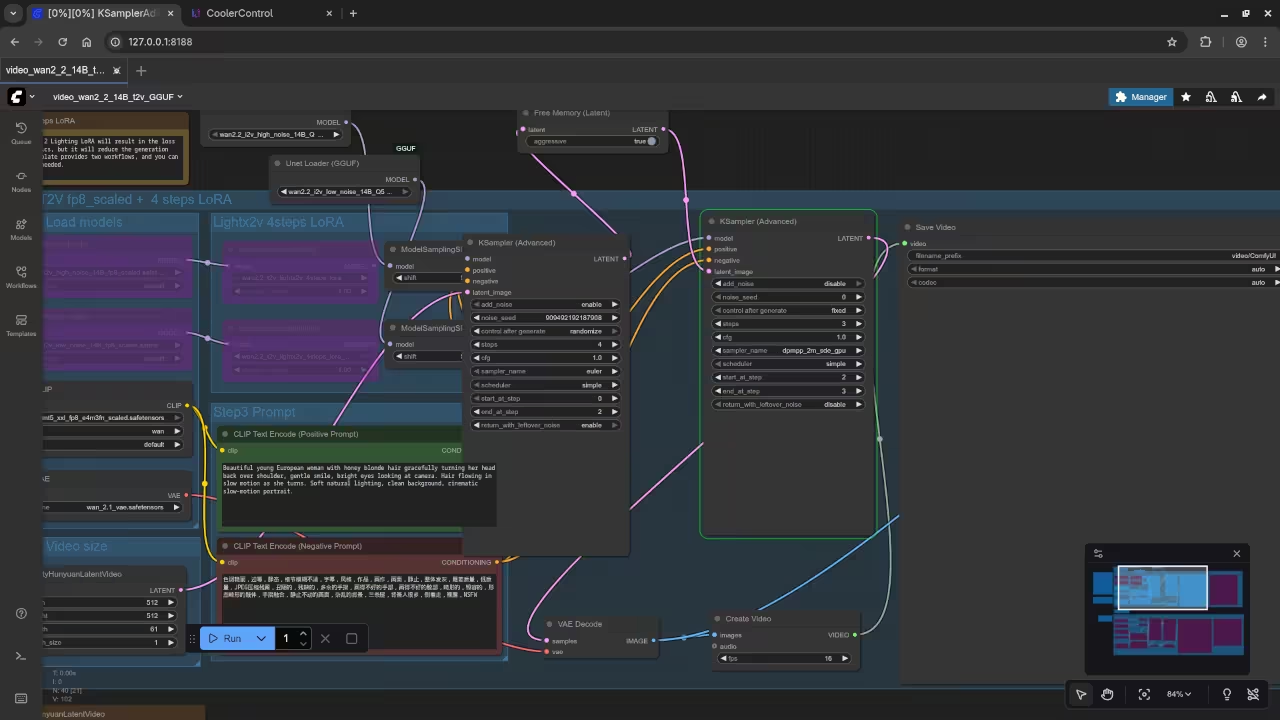
ComfyUI With Wan 2.2 T2V 14B Using KSampler2 Tweaks.
ComfyUI With Wan 2.2 T2V 14B Using One KSampler.
ComfyUI With Wan 2.2 T2V 14B Using One KSampler Tweaked.
ComfyUI With Wan 2.2 T2V 14B Using One KSampler Step Tweaked.
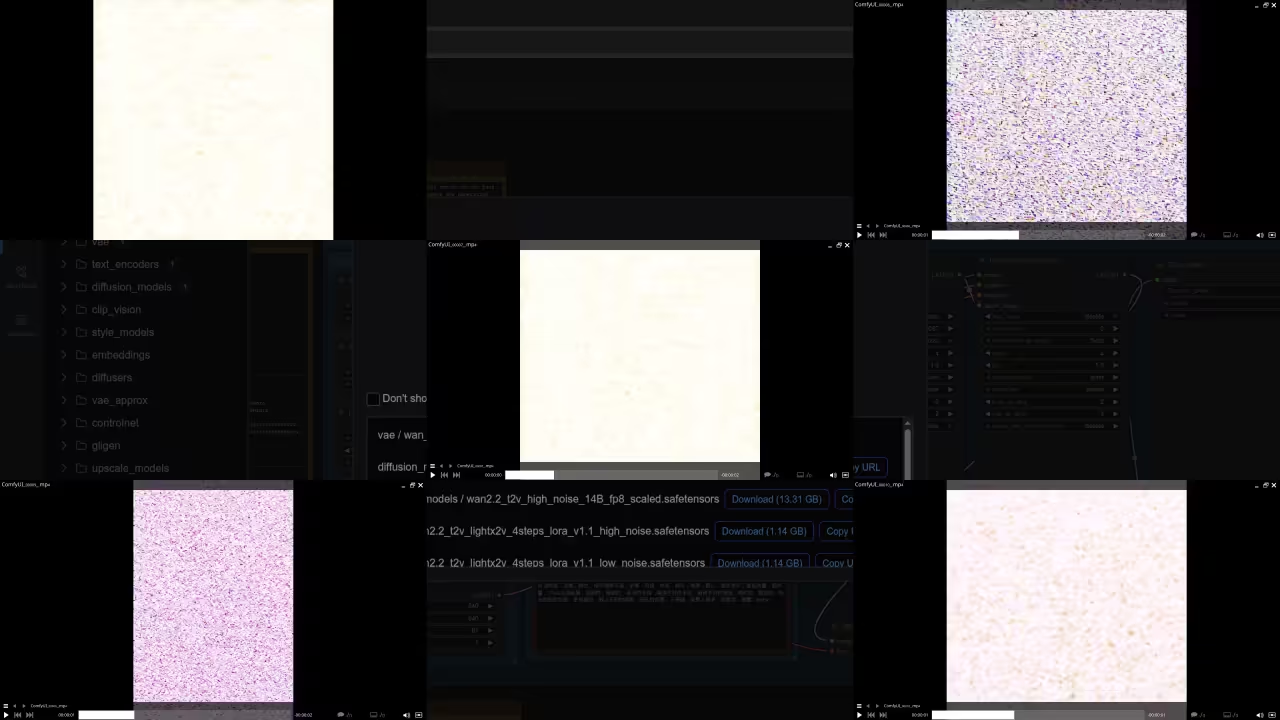
ComfyUI With Wan 2.2 T2V 14B Single Frame Collage Of Results.
▶️ Screencast
Watch my real-time demo of Wan 2.2 T2V 14B on Linux:
Video Displaying ComfyUI With Wan 2.2 T2V 14B Setup
Results:
3 seconds 512×512 16FPS GGUF 2 KSamplers Video
Produced square noise video in Quicktime container.
3 second 512×512 16FPS GGUF 2 Tweaked KSamplers Video
Produced square noise video in Quicktime container.
3 second 768 16FPS GGUF 2 Tweaked KSamplers Video
Produced vertical noise video in Quicktime container.
3 second 512×512 16FPS GGUF 1 KSampler Video
Produced square noise video in Quicktime container.
3 second 512×512 16FPS GGUF 1 Tweaked KSampler Video
Produced square noise video in Quicktime container.
Ready to Deepen Your Python Skills?
If this guide sparked your interest in the technical side of AI, you’re in luck! Python is the core language used in tools like ComfyUI and PyTorch.
**Need personalized guidance?** I am available for **one-on-one online Python tutorials**. Book your session here: https://ojambo.com/contact
**Want expert setup?** If you need assistance with the complex setup process, I offer professional services to **install or migrate Wan 2.2 T2V 14B** or other AI models for you. Contact me for service inquiries: https://ojamboservices.com/contact