Beginner’s Guide: Secure File Uploads with PHP, AJAX, and MariaDB
In our previous tutorial, we focused on the frontend, using HTML5 and the Fetch API to create a sleek, drag-and-drop user interface for file uploads. That was all about making the user experience seamless.
Now, we shift our focus to the engine room: the backend. This is where the real work happens- where we secure the data, process the files, and permanently store information in our database. This guide will walk you through setting up a robust PHP script to handle the Fetch API requests and interact with a MariaDB database.
1. Understanding the Backend’s Role
The backend’s primary job is to process the data sent from the frontend securely and efficiently. For file uploads, this means:
Validation: Checking file size, type, and quantity.
Processing: Saving the file to a secure location on the server.
Database Interaction: Recording the file’s information (like its name, path, and user ID) into the database.
Action Handling: Managing operations like deletion and replacement.
2. Setting up the PHP Handler for Fetch
The frontend sends the files and other data to your PHP script via the Fetch API. On the backend, PHP reads this data from the global $_FILES superglobal array.
Your PHP handler needs to listen for a specific action passed in the request. For example, the request might include an action flag like ‘upload’, ‘delete’, or ‘replace’.
<?php
// PHP Script to handle AJAX/Fetch requests (e.g., upload_handler.php)
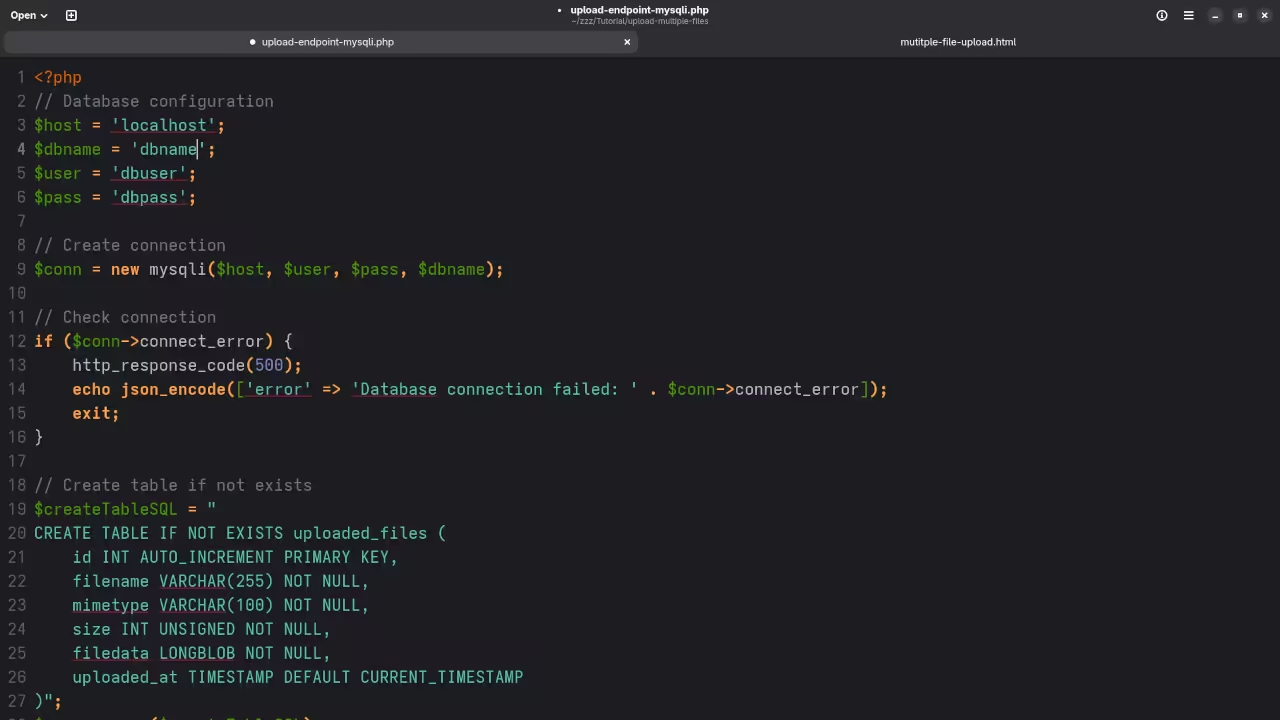
// 1. Database Connection Setup (Replace with your credentials)
$conn = new mysqli("localhost", "user", "password", "database");
if ($conn->connect_error) {
die("Connection failed: " . $conn->connect_error);
}
// 2. Security and Setup
$upload_dir = 'uploads/'; // Ensure this directory exists and is writable!
// ... (Your security checks for user authentication would go here)
if ($_SERVER['REQUEST_METHOD'] === 'POST' && isset($_FILES['file_data'])) {
$action = $_POST['action'] ?? 'upload'; // Get the intended action
foreach ($_FILES['file_data']['name'] as $key => $name) {
// Basic security and sanitization before proceeding
$safe_name = preg_replace("/[^A-Za-z0-9.]/", '_', $name);
$temp_path = $_FILES['file_data']['tmp_name'][$key];
$target_file = $upload_dir . basename($safe_name);
if ($action === 'upload' && move_uploaded_file($temp_path, $target_file)) {
// Success: Save details to MariaDB
$stmt = $conn->prepare("INSERT INTO files (file_name, file_path) VALUES (?, ?)");
$stmt->bind_param("ss", $safe_name, $target_file);
$stmt->execute();
// ... Respond to frontend
} else {
// Handle error or other actions
}
}
}
?>
3. Handling Replacement and Deletion Actions
This is where the power of a database comes in. To handle file replacement or deletion, you primarily interact with MariaDB.
File Deletion
When the frontend sends a ‘delete’ action along with a unique file ID:
Delete from Server: Use PHP’s unlink() function to remove the physical file from the uploads/ directory.
Delete from Database: Run a SQL DELETE command on your MariaDB table using the file ID.
DELETE FROM files WHERE id = [file_id];
File Replacement
When the frontend sends a ‘replace’ action:
Get Old Data: Retrieve the existing file path from MariaDB using the old file’s ID.
Upload New File: Save the new file to the server (as shown in Step 2).
Remove Old File: Use unlink() to delete the original file.
Update Database: Run a SQL UPDATE command to point the existing file ID to the new file name and path.
UPDATE files SET file_name = 'new_name.jpg', file_path = 'uploads/new_name.jpg' WHERE id = [file_id];
Screenshots and Screencast
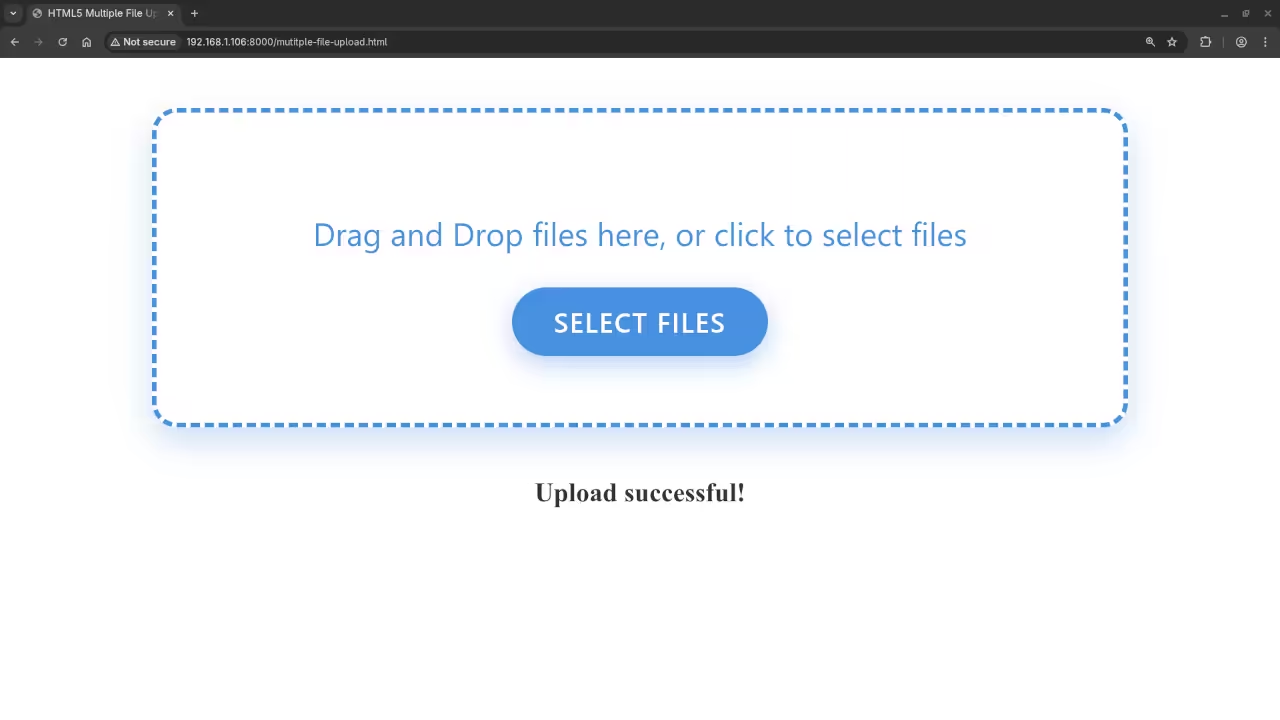
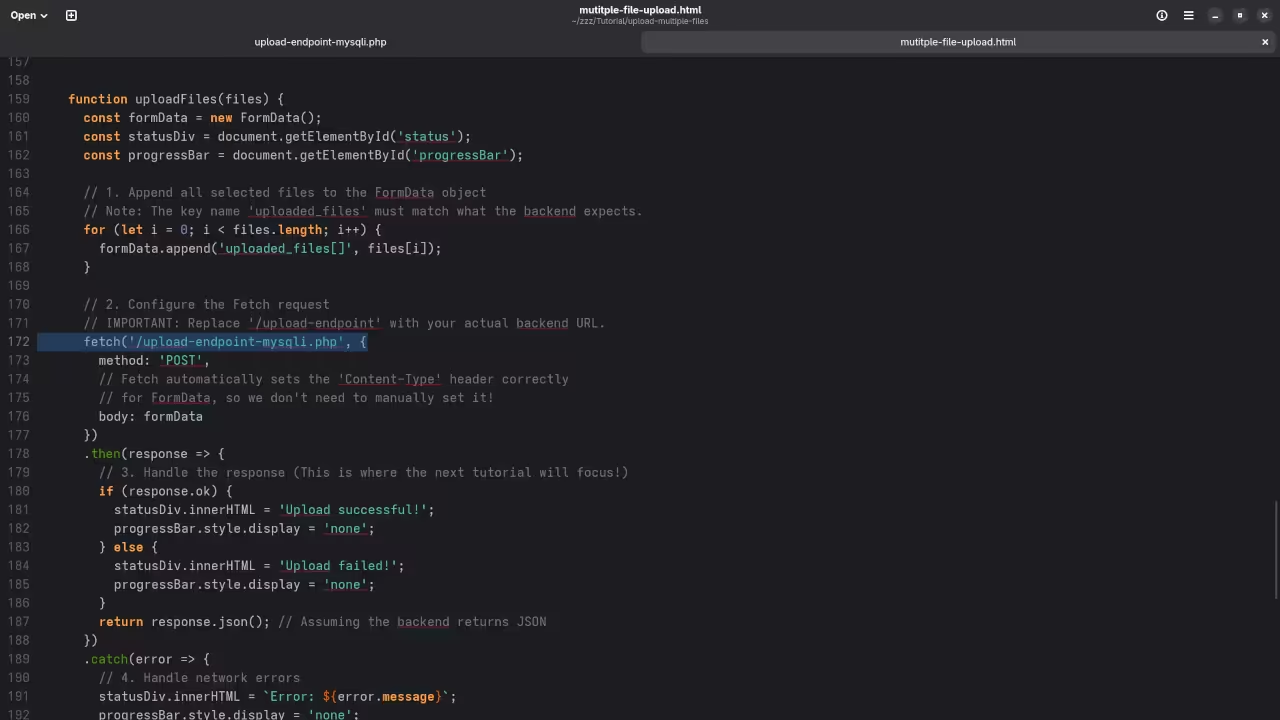
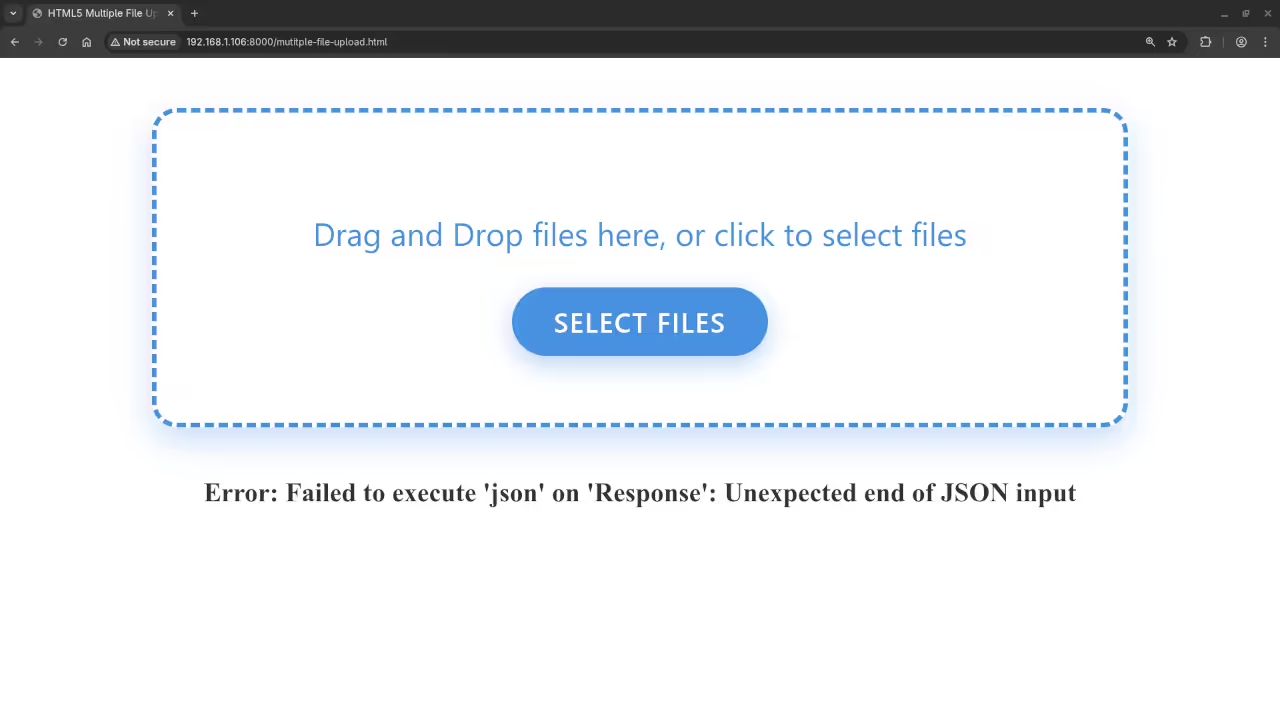
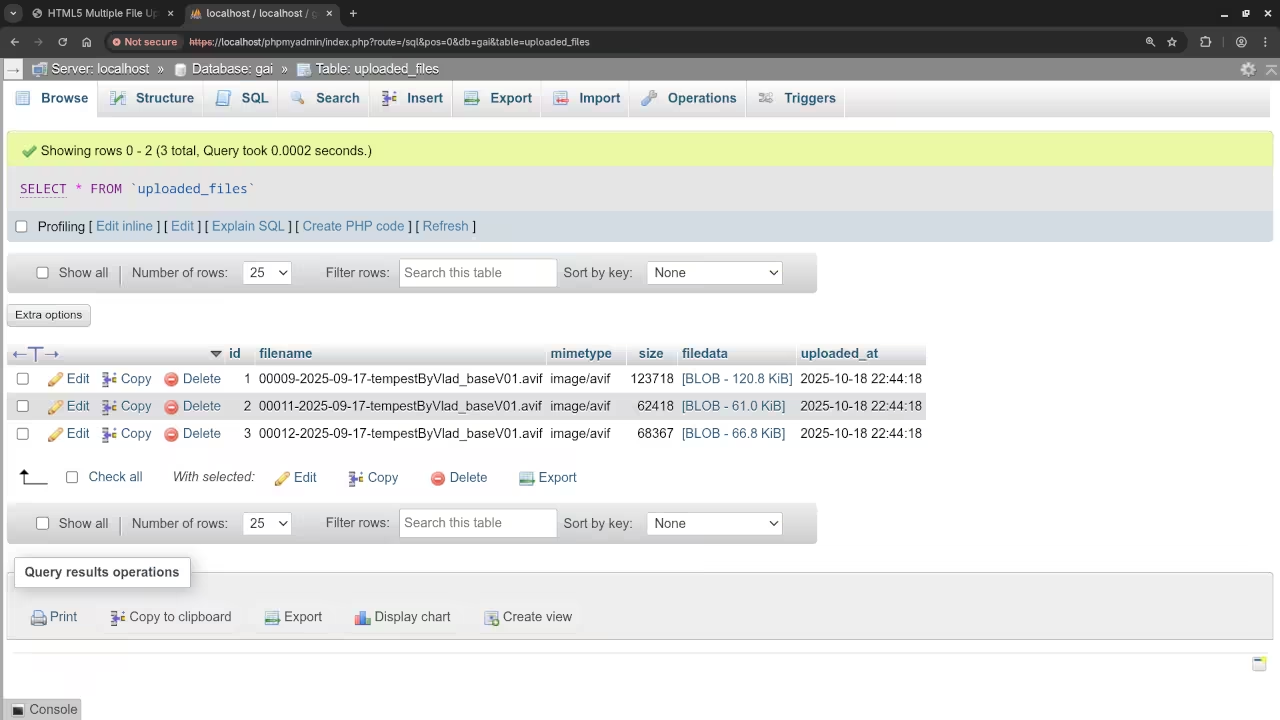
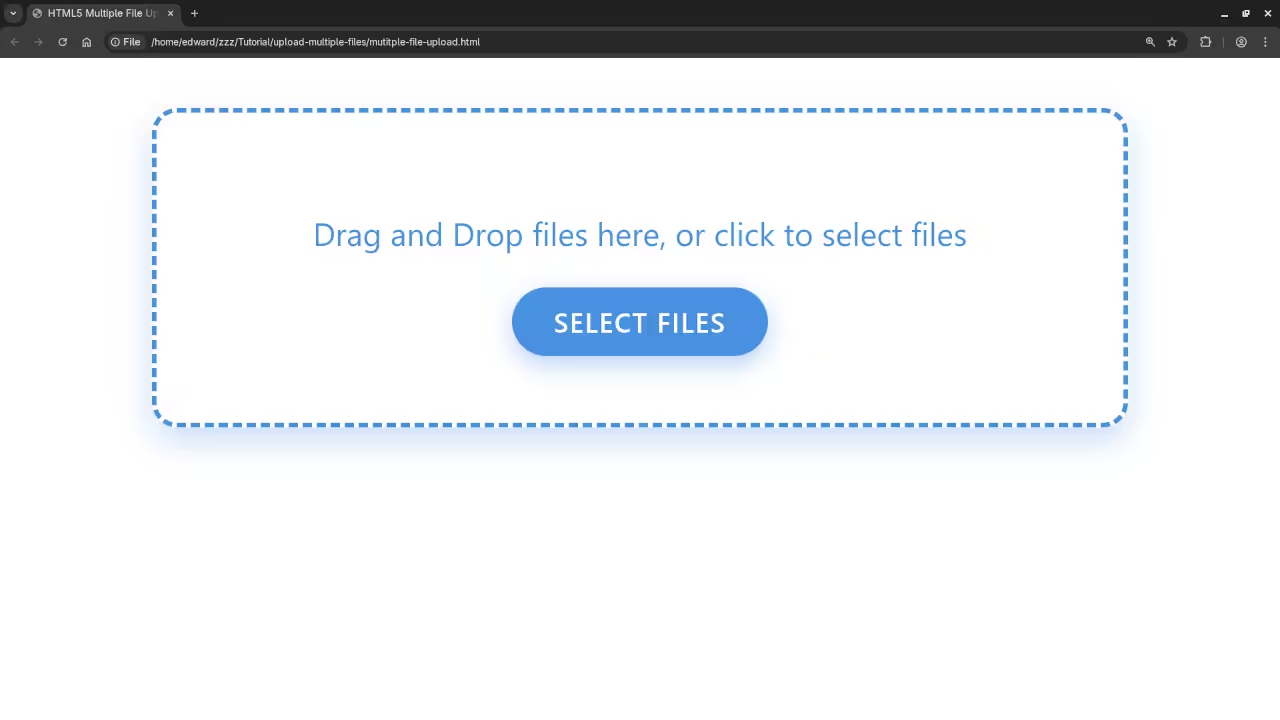
Gnome Text Editor Displaying Fetch URL For File Upload HTML CodeGnome Text Editor Displaying PHP File Upload CodeWeb Browser Displaying A Drag And Drop Multiple File Upload FormWeb Browser Displaying A Failed Multiple File UploadWeb Browser RUnning PHPMyAdmin Displaying A List Of Uploaded FilesPHP Multiple File Upload AJAX Video
Ready to Master PHP?
This backend process is a core skill for any serious web developer. If you’re a beginner ready to dive deep into PHP, I highly recommend checking out my resources:
My Book: Learning PHP Programming
It’s the perfect structured guide for building a strong foundation in PHP.
Frontend File Uploads: Mastering HTML5 Multiple Upload AJAX with Fetch API
Welcome to the start of an exciting, beginner-friendly series! Dealing with **file uploads** is a fundamental task in web development, and modern techniques make it far more powerful and user-friendly than the old-school methods.
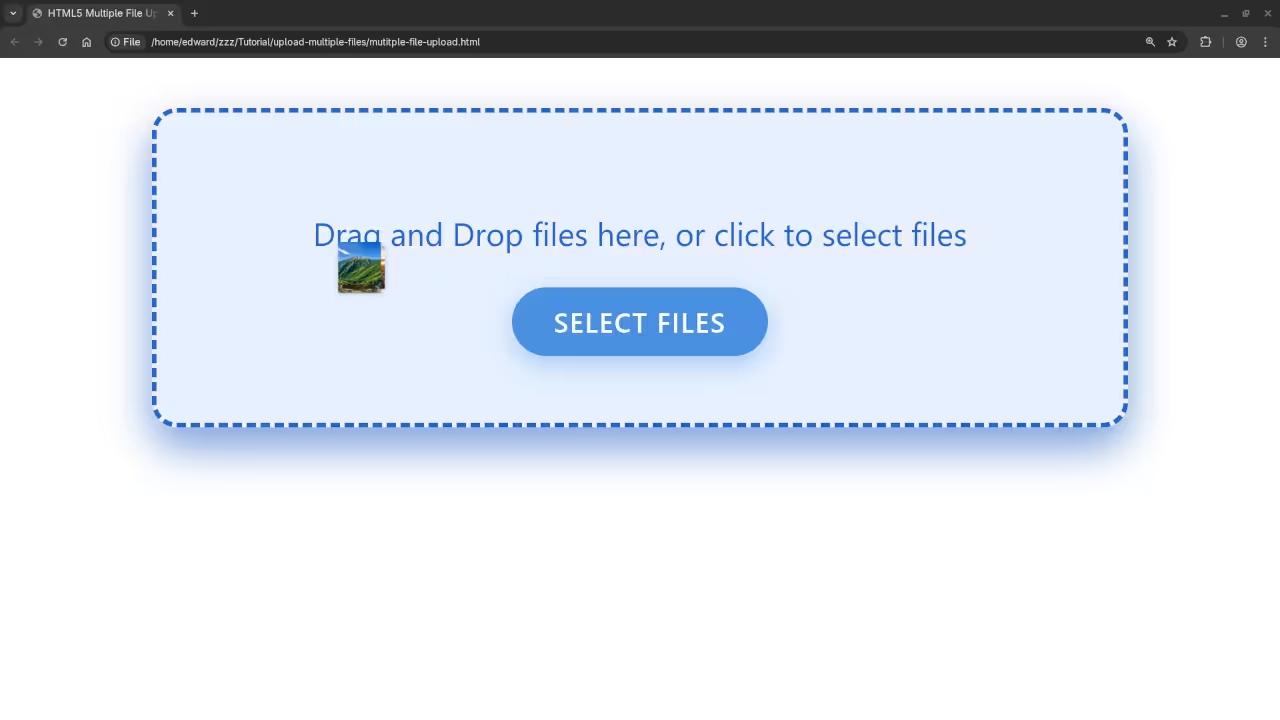
In this tutorial, we’re going to dive deep into the **frontend** mechanics of creating a **multiple file upload** system using **HTML5**, the **Fetch API** for **AJAX**, and a touch of **Drag and Drop** functionality. This will lay the groundwork for a robust system, with the backend processing to follow in our next post!
Let’s get started on building a sleek and functional file upload interface.
The HTML5 Foundation
Every modern web application starts with solid **HTML**. For file uploads, the core is a simple <input type="file"> element with two crucial attributes:
multiple: This tells the browser to allow the user to select more than one file.
accept: This helps restrict the types of files the user can select (e.g., image/* for all image types).
Here’s the basic HTML structure we’ll use:
<div id="drop-area">
<p>Drag and Drop files here, or click to select files</p>
<input type="file" id="fileElem" multiple accept="image/*" style="display: none;">
<label for="fileElem" class="button">Select Files</label>
<progress id="progressBar" value="0" max="100" style="display:none;"></progress>
</div>
<div id="status"></div>
We’ve added a few extras:
#drop-area: This is the main container that will receive the dropped files.
The <input> is hidden (style="display: none;") and triggered by a user-friendly <label> acting as a button.
#progressBar: A simple HTML5 element to show upload progress.
#status: A space for messages (like “Upload Complete!”).
Adding Drag and Drop Functionality
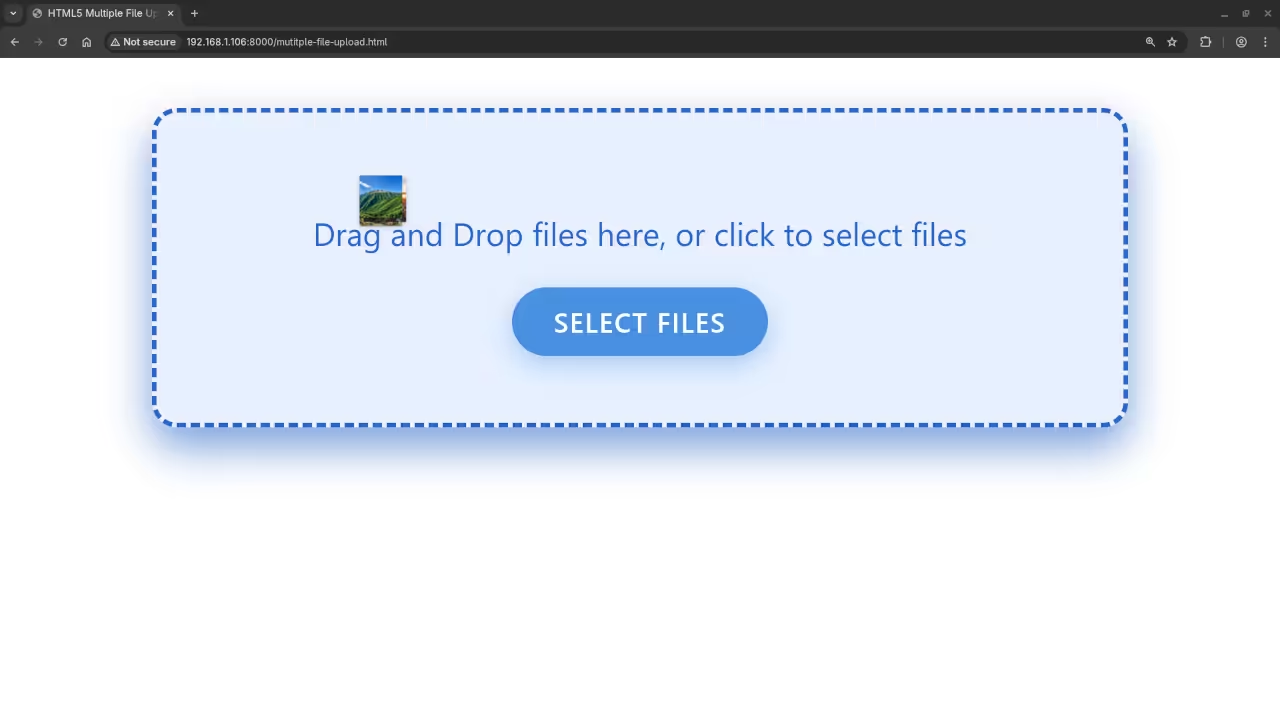
To make this user-friendly, we’ll implement **Drag and Drop**. This requires listening for a few specific **JavaScript** events on our #drop-area:
dragenter and dragleave: To change the area’s visual style when a user drags a file over it.
dragover: To prevent the browser’s default behavior (which is to open the file).
drop: The key event where we actually access the files.
The core code for handling the drop event looks like this:
const dropArea = document.getElementById('drop-area');
const fileInput = document.getElementById('fileElem');
// Prevent default drag behaviors
['dragenter', 'dragover', 'dragleave', 'drop'].forEach(eventName => {
dropArea.addEventListener(eventName, preventDefaults, false);
});
function preventDefaults(e) {
e.preventDefault();
e.stopPropagation();
}
// Handle dropped files
dropArea.addEventListener('drop', handleDrop, false);
function handleDrop(e) {
const dt = e.dataTransfer;
const files = dt.files;
// Pass the files to the upload function
uploadFiles(files);
}
// Also trigger upload when the hidden input changes
fileInput.addEventListener('change', (e) => {
uploadFiles(e.target.files);
});
When a file is dropped or selected, we pass the collection of files to our main uploadFiles function.
AJAX Upload using the Fetch API
The **Fetch API** is the modern, promise-based standard for making network requests, replacing older XMLHttpRequest techniques for most tasks. To send files, we must use the **FormData** object. This object easily constructs a set of key/value pairs representing form fields and their values, including the file data.
Here is the uploadFiles function, focusing purely on the frontend preparation and sending:
function uploadFiles(files) {
const formData = new FormData();
const statusDiv = document.getElementById('status');
const progressBar = document.getElementById('progressBar');
// 1. Append all selected files to the FormData object
// Note: The key name 'uploaded_files' must match what the backend expects.
for (let i = 0; i < files.length; i++) {
formData.append('uploaded_files[]', files[i]);
}
// 2. Configure the Fetch request
// IMPORTANT: Replace '/upload-endpoint' with your actual backend URL.
fetch('/upload-endpoint', {
method: 'POST',
// Fetch automatically sets the 'Content-Type' header correctly
// for FormData, so we don't need to manually set it!
body: formData
})
.then(response => {
// 3. Handle the response (This is where the next tutorial will focus!)
if (response.ok) {
statusDiv.innerHTML = 'Upload successful!';
progressBar.style.display = 'none';
} else {
statusDiv.innerHTML = 'Upload failed!';
progressBar.style.display = 'none';
}
return response.json(); // Assuming the backend returns JSON
})
.catch(error => {
// 4. Handle network errors
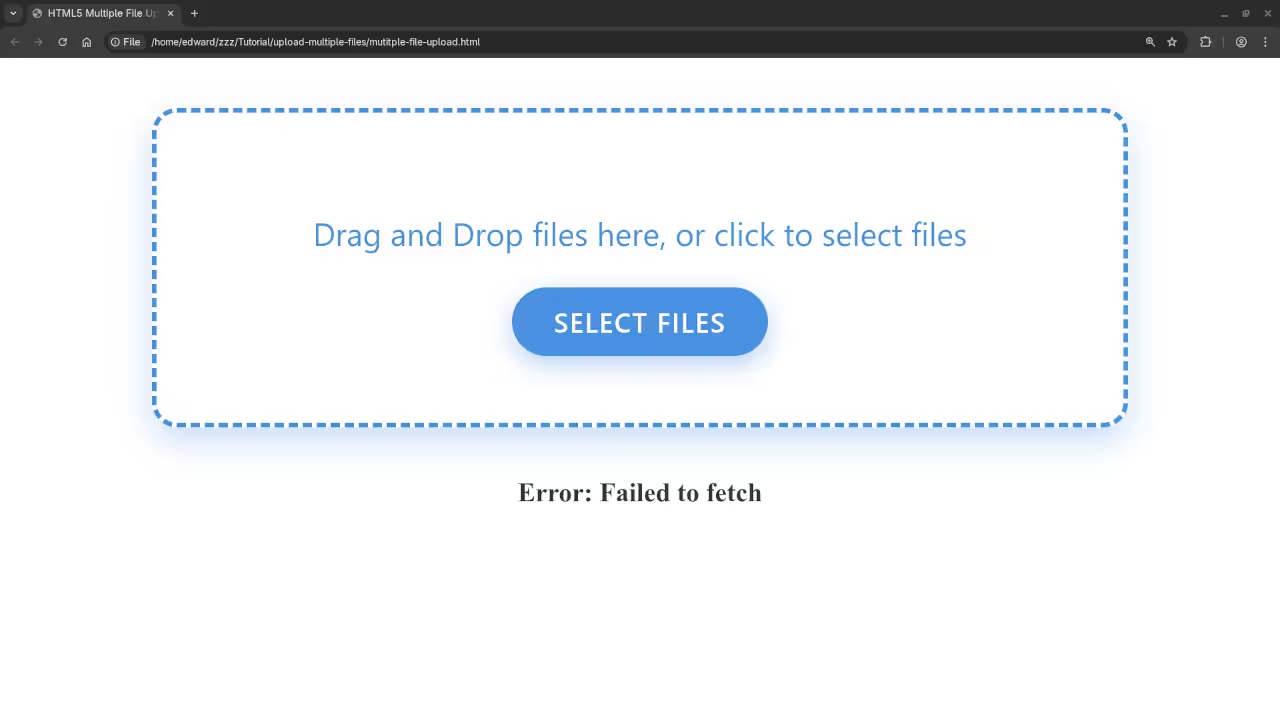
statusDiv.innerHTML = `Error: ${error.message}`;
progressBar.style.display = 'none';
console.error('Upload Error:', error);
});
// Display a loading message and the progress bar (though progress tracking
// is more complex and often handled by the XHR object,
// for this simple fetch, we just show the bar).
statusDiv.innerHTML = 'Uploading...';
progressBar.style.display = 'block';
progressBar.value = 50; // Simple placeholder progress
}
Next Steps: The Backend!
And that’s it for the frontend! You now have a working **HTML5 Drag and Drop interface** that collects multiple files and sends them to a backend endpoint using the modern **Fetch API**.
In the **next tutorial**, we will focus on the **backend**, showing you how to correctly receive the FormData object and process (save, validate, resize, etc.) the uploaded_files on the server using a language like PHP, Node.js, or Python.
Screenshots and Screencast
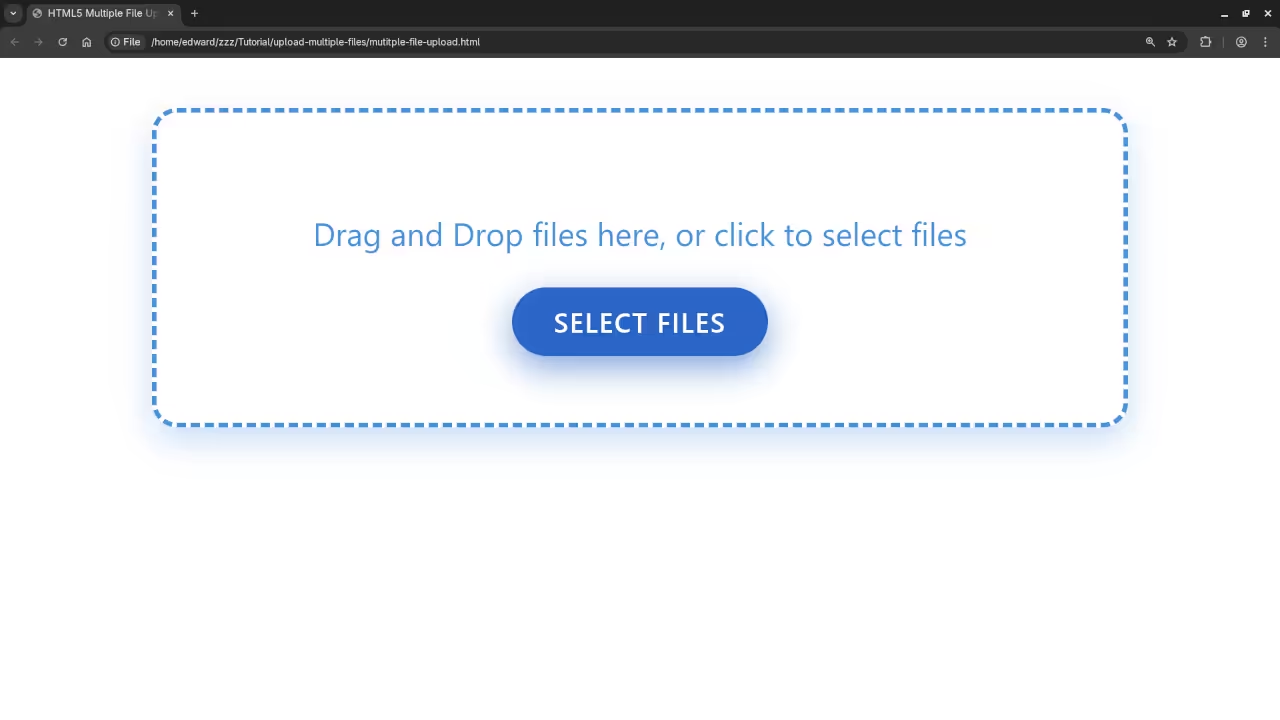
Web Browser Displaying A Hover Over Drag And Drop InterfaceWeb Browser Displaying A Drag And Drop Multiple File AnimationWeb Browser Displaying A Drag And Drop File Failed Upload MessageHTML Drag And Drop Multiple Upload Animation Video
Keep Learning JavaScript!
If you’re eager to deepen your understanding of the language that powers the frontend-**JavaScript**-I have resources designed just for you:
**Book:** Check out my book, **”Learning JavaScript: A Programming Beginner’s Guide,”** available now! Grab your copy on Amazon today.
**Course:** Prefer a guided course format? The comprehensive **”Learning JavaScript”** course covers everything from basics to advanced topics. Enroll in the course here.
**One-on-One Help:** Need personalized attention? I’m available for **one-on-one programming tutorials**, including in-depth **JavaScript** sessions to help you master challenging concepts. Contact me to schedule a session!
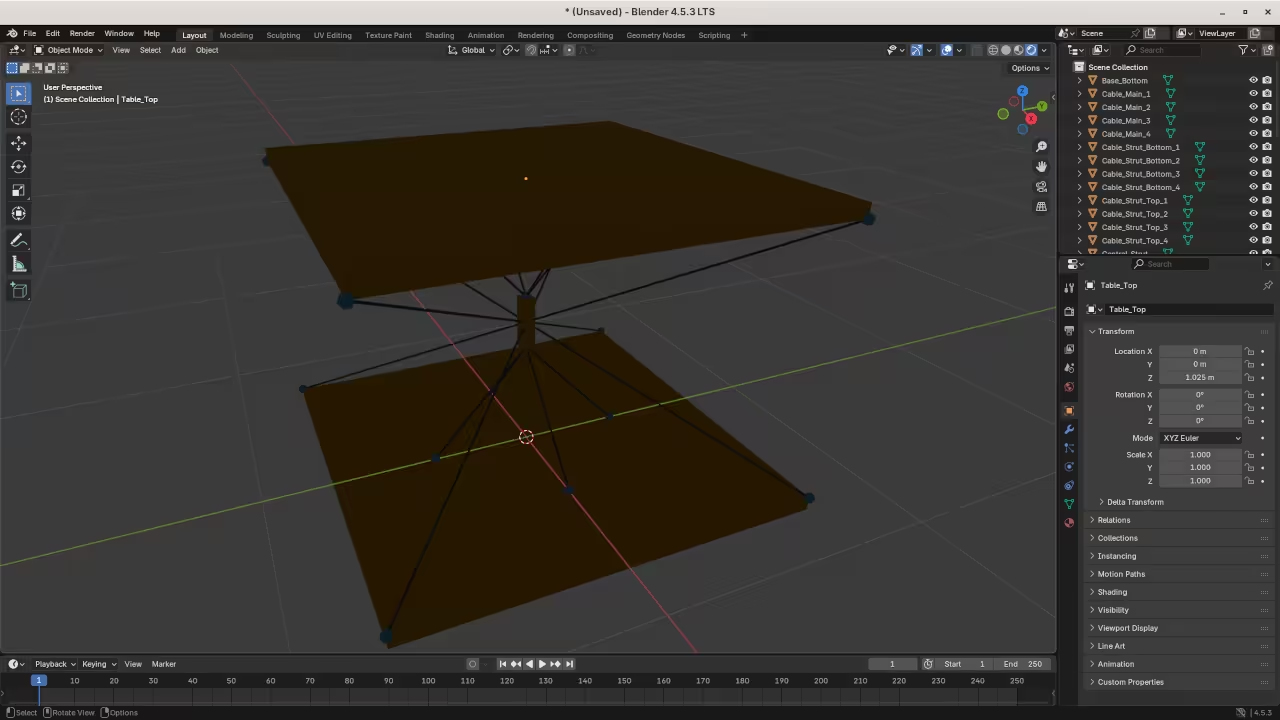
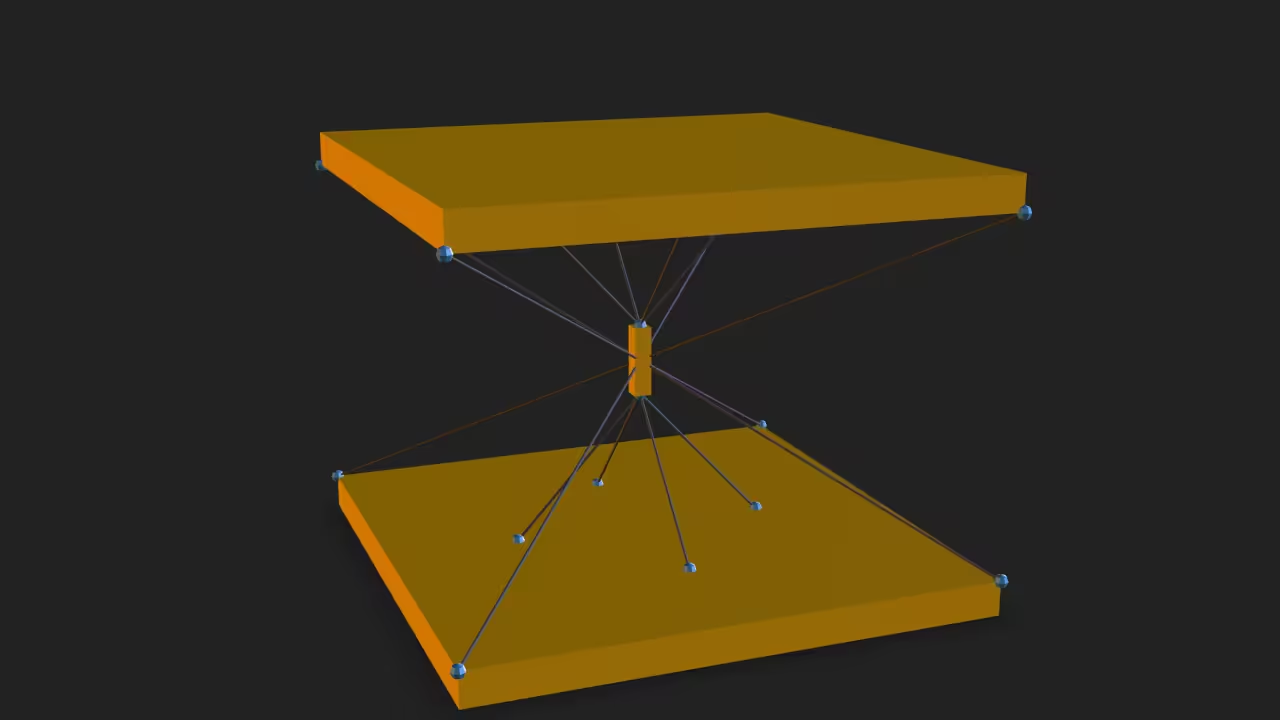
Tensegrity Tables from Code to Web: Your Blender Python & Model-Viewer Project
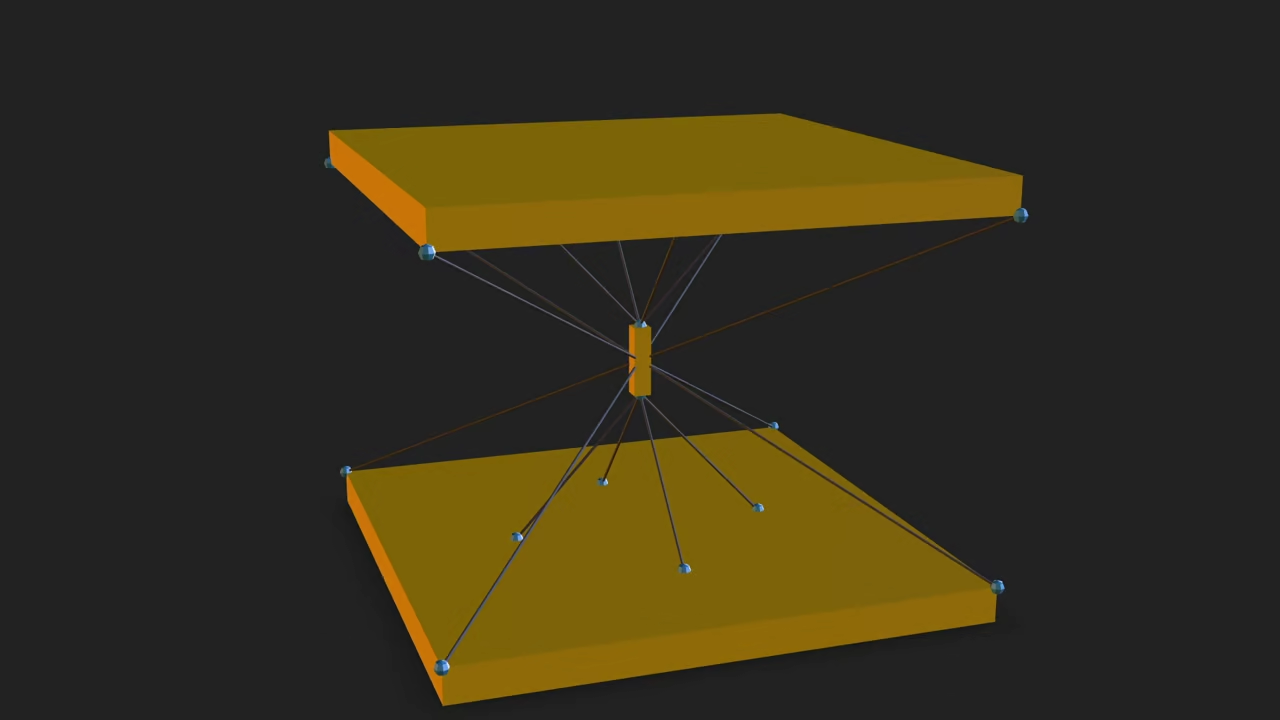
Ever wanted to create cool 3D models with code and show them on your website? This beginner-friendly blog post will guide you through generating a fascinating Tensegrity Table (a structure held together by continuous tension and discontinuous compression) using a Python script inside Blender, and then displaying that 3D model right in your web browser using Google’s awesome <model-viewer> element! Get ready to combine the power of Python, 3D design, and web development.
Step 1: Generating the Low-Poly Tensegrity Table in Blender with Python
Blender, the free and open-source 3D suite, has a powerful Python API (Application Programming Interface). To keep things simple and easy to understand for beginners, we will use a **low-poly** approach, building the struts from simple **cubes** and the cables from **edges**.
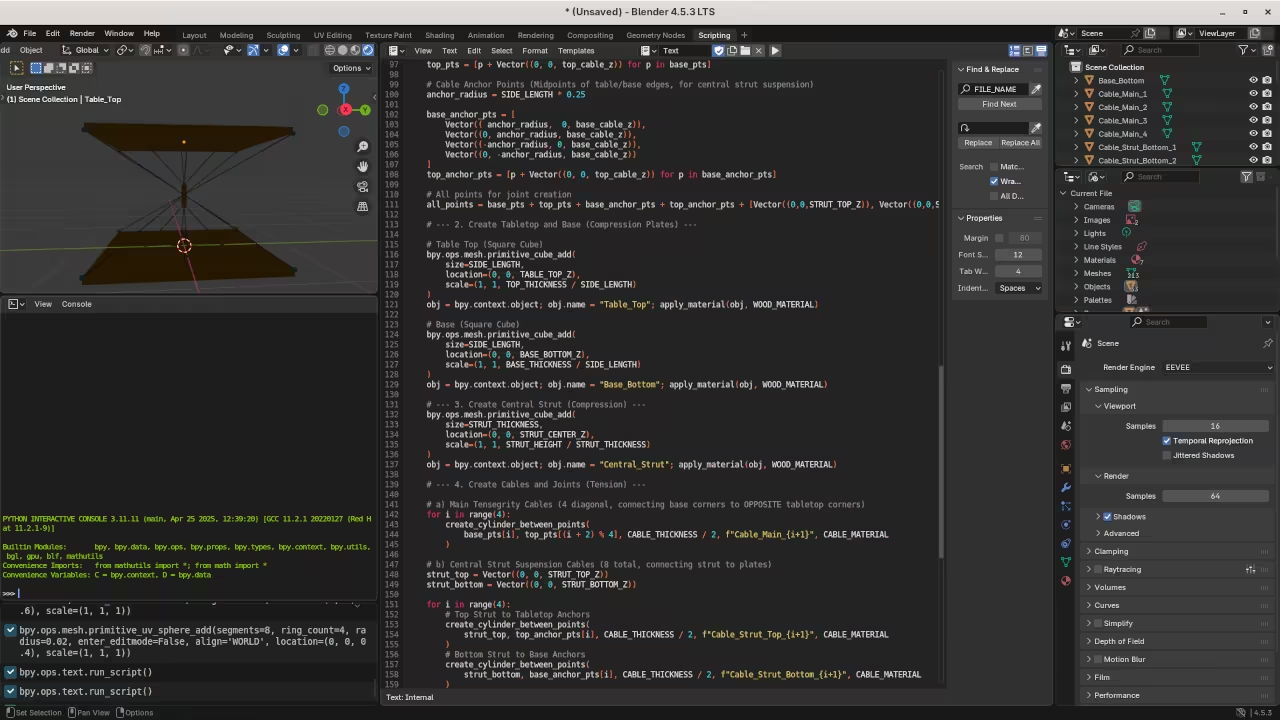
Here is the Python script you need. Save it as low_poly_tensegrity_table.py:
import bpy
import math
from mathutils import Vector
# --- Configuration ---
FILE_NAME = "square_floating_table.glb"
TABLE_HEIGHT = 1.0 # Vertical distance between the plates
SIDE_LENGTH = 1.5 # Side length of the square tabletop and base
TOP_THICKNESS = 0.05 # Thickness of the tabletop
BASE_THICKNESS = 0.05 # Thickness of the base
STRUT_HEIGHT = 0.2 # Height of the floating central strut
STRUT_THICKNESS = 0.05 # Thickness of the floating central strut
CABLE_THICKNESS = 0.008
LOW_POLY_VERTICES = 8 # Vertex count for low-poly appearance
JOINT_SIZE = 0.04
# --- Constants for Z-Positioning ---
TABLE_TOP_Z = TABLE_HEIGHT + TOP_THICKNESS / 2
BASE_BOTTOM_Z = -BASE_THICKNESS / 2
STRUT_TOP_Z = TABLE_HEIGHT / 2 + STRUT_HEIGHT / 2
STRUT_BOTTOM_Z = TABLE_HEIGHT / 2 - STRUT_HEIGHT / 2
STRUT_CENTER_Z = TABLE_HEIGHT / 2
# --- Utility Functions ---
def clear_scene():
"""Removes all objects from the current scene."""
bpy.ops.object.select_all(action='DESELECT')
bpy.ops.object.select_all(action='SELECT')
bpy.ops.object.delete(use_global=False)
def create_material(name, color, metallic=0.0, roughness=0.5):
"""Creates a simple PBR material."""
if name in bpy.data.materials: return bpy.data.materials[name]
mat = bpy.data.materials.new(name=name); mat.use_nodes = True
bsdf = mat.node_tree.nodes["Principled BSDF"]
bsdf.inputs['Base Color'].default_value = color
bsdf.inputs['Metallic'].default_value = metallic
bsdf.inputs['Roughness'].default_value = roughness
return mat
def apply_material(obj, mat):
"""Applies a material to a given object."""
if obj.data.materials: obj.data.materials[0] = mat
else: obj.data.materials.append(mat)
def create_cylinder_between_points(start_loc, end_loc, radius, name, material, vertices=LOW_POLY_VERTICES):
"""Creates a cylinder and aligns it between two vector locations."""
center = (start_loc + end_loc) / 2; direction = end_loc - start_loc
length = direction.length
bpy.ops.mesh.primitive_cylinder_add(vertices=vertices, radius=radius, depth=length, location=center)
obj = bpy.context.object; obj.name = name; apply_material(obj, material)
if length > 0.0001:
rotation_quat = direction.normalized().to_track_quat('Z', 'Y')
obj.rotation_euler = rotation_quat.to_euler()
return obj
def create_joint(location, size, name, material):
"""Creates a low-poly sphere at a connection point."""
bpy.ops.mesh.primitive_uv_sphere_add(
segments=LOW_POLY_VERTICES, ring_count=LOW_POLY_VERTICES // 2,
radius=size / 2, location=location
)
obj = bpy.context.object; obj.name = name; apply_material(obj, material)
return obj
# --- Main Generation Logic ---
def generate_square_floating_table():
clear_scene()
# Define Materials
WOOD_MATERIAL = create_material("Wood_Material", (0.5, 0.25, 0.0, 1.0), roughness=0.8)
CABLE_MATERIAL = create_material("Cable_Material", (0.1, 0.1, 0.1, 1.0), metallic=0.0, roughness=0.9)
JOINT_MATERIAL = create_material("Joint_Material", (0.1, 0.3, 0.5, 1.0), metallic=0.2, roughness=0.4)
# --- 1. Define Points ---
half_side = SIDE_LENGTH / 2
# Base Corners (Z-level of base surface)
base_surface_z = BASE_BOTTOM_Z + BASE_THICKNESS/2
base_pts = [
Vector(( half_side, half_side, base_surface_z)),
Vector((-half_side, half_side, base_surface_z)),
Vector((-half_side, -half_side, base_surface_z)),
Vector(( half_side, -half_side, base_surface_z))
]
# Tabletop Corners (Z-level of top surface)
top_surface_z = TABLE_TOP_Z - TOP_THICKNESS/2
top_pts = [p + Vector((0, 0, TABLE_HEIGHT)) for p in base_pts]
# Cable Anchor Points (Midpoints of table/base edges)
# These points are closer to the center to suspend the central strut
anchor_radius = SIDE_LENGTH * 0.25
base_anchor_pts = [
Vector(( anchor_radius, 0, base_surface_z)),
Vector((0, anchor_radius, base_surface_z)),
Vector((-anchor_radius, 0, base_surface_z)),
Vector((0, -anchor_radius, base_surface_z))
]
top_anchor_pts = [p + Vector((0, 0, TABLE_HEIGHT)) for p in base_anchor_pts]
# All points for joint creation
all_points = base_pts + top_pts + base_anchor_pts + top_anchor_pts + [Vector((0,0,STRUT_TOP_Z)), Vector((0,0,STRUT_BOTTOM_Z))]
# --- 2. Create Tabletop and Base (Compression Plates) ---
# Table Top (Square Cube)
bpy.ops.mesh.primitive_cube_add(
size=SIDE_LENGTH,
location=(0, 0, TABLE_TOP_Z),
scale=(1, 1, TOP_THICKNESS / SIDE_LENGTH)
)
obj = bpy.context.object; obj.name = "Table_Top"; apply_material(obj, WOOD_MATERIAL)
# Base (Square Cube)
bpy.ops.mesh.primitive_cube_add(
size=SIDE_LENGTH,
location=(0, 0, BASE_BOTTOM_Z),
scale=(1, 1, BASE_THICKNESS / SIDE_LENGTH)
)
obj = bpy.context.object; obj.name = "Base_Bottom"; apply_material(obj, WOOD_MATERIAL)
# --- 3. Create Central Strut (Compression) ---
bpy.ops.mesh.primitive_cube_add(
size=STRUT_THICKNESS,
location=(0, 0, STRUT_CENTER_Z),
scale=(1, 1, STRUT_HEIGHT / STRUT_THICKNESS)
)
obj = bpy.context.object; obj.name = "Central_Strut"; apply_material(obj, WOOD_MATERIAL)
# --- 4. Create Cables and Joints (Tension) ---
# a) Main Tensegrity Cables (4 diagonal, providing overall stability)
# These run from the base corners to the OPPOSITE side tabletop corners (i+2 is more stable than i+1)
for i in range(4):
create_cylinder_between_points(
base_pts[i], top_pts[(i + 2) % 4], CABLE_THICKNESS / 2, f"Cable_Main_{i+1}", CABLE_MATERIAL
)
# b) Central Strut Suspension Cables (8 total, connecting strut to plates)
strut_top = Vector((0, 0, STRUT_TOP_Z))
strut_bottom = Vector((0, 0, STRUT_BOTTOM_Z))
for i in range(4):
# Top Strut to Tabletop Anchors
create_cylinder_between_points(
strut_top, top_anchor_pts[i], CABLE_THICKNESS / 2, f"Cable_Strut_Top_{i+1}", CABLE_MATERIAL
)
# Bottom Strut to Base Anchors
create_cylinder_between_points(
strut_bottom, base_anchor_pts[i], CABLE_THICKNESS / 2, f"Cable_Strut_Bottom_{i+1}", CABLE_MATERIAL
)
# c) Place Spheres (Joints) at all cable attachment points
for i, loc in enumerate(all_points):
create_joint(loc, JOINT_SIZE, f"Joint_{i}", JOINT_MATERIAL)
# --- Execution ---
if __name__ == "__main__":
generate_square_floating_table()
print(f"\n--- Square Tensegrity Table (Floating Strut Design) generation complete! ---")
This script clears the scene, uses simple math to calculate the positions of the three struts, creates those struts as **low-poly cubes**, connects the top and bottom points with **simple edges** (our cables), and then exports the final model as a **GLB file**.
How to Run the Python Script from the Command Line
To run your low_poly_tensegrity_table.py script using the Blender Python interpreter, open your Terminal (macOS/Linux) or Command Prompt/PowerShell (Windows) and use the following format:
Replace /path/to/blender with the actual path to your Blender executable (e.g., on Windows: "C:\Program Files\Blender Foundation\Blender\blender.exe").
The -b flag tells Blender to run in background mode (headless), meaning the graphical user interface won’t load-it’s faster!
The -P flag specifies the Python script Blender should execute.
This command will run your script, which should be set up to export the generated Tensegrity Table as a 3D file format suitable for the web, like GLB or GLTF.
Step 2: Displaying the Model on the Web with <model-viewer>
Once you have your low_poly_tensegrity.glb file exported from Blender, it’s time to put it on a webpage! The <model-viewer> custom web element makes embedding interactive 3D models incredibly easy, often without needing complex frameworks.
Include the Library: In the <head> of your HTML file, include the <model-viewer> script:
Gitblit: Your Easy Open Source Git Server for Beginners
Are you new to programming and looking for a simple, self-hosted way to manage your Git repositories? Look no further than Gitblit!
What is Gitblit?
In simple terms, Gitblit is a pure Java stack for managing, viewing, and accessing Git repositories. Think of it as your own personal, lightweight GitHub that you can run on your own server or even your laptop. It’s incredibly easy to set up and is an excellent choice for individuals, small teams, or anyone who needs a private Git solution without the complexity of larger enterprise tools.
One of the best things about Gitblit is that it is open source. This means it’s code is freely available, constantly being reviewed and improved by a community of developers, and you don’t have to pay a licensing fee to use it!
Why Choose Gitblit?
Ease of Use: Gitblit is famous for its simple, user-friendly interface. Getting a repository set up and browsing the code is a breeze.
Lightweight: It doesn’t require a large amount of resources, making it perfect for smaller servers or running locally for testing.
Cross-Platform: Since it’s built with Java, it runs effortlessly on Windows, macOS, and Linux.
No Databases Required: Gitblit can use files for user authentication and repository storage, simplifying the initial setup immensely.
Installation Example: Running Gitblit with Podman
For modern deployments, using a containerization tool like Podman (or Docker) is the easiest and most reliable way to get Gitblit running. We’ll use a podman-compose setup, which is similar to Docker Compose, to define and run the service.
First, you’ll need Podman and Podman-Compose installed on your system.
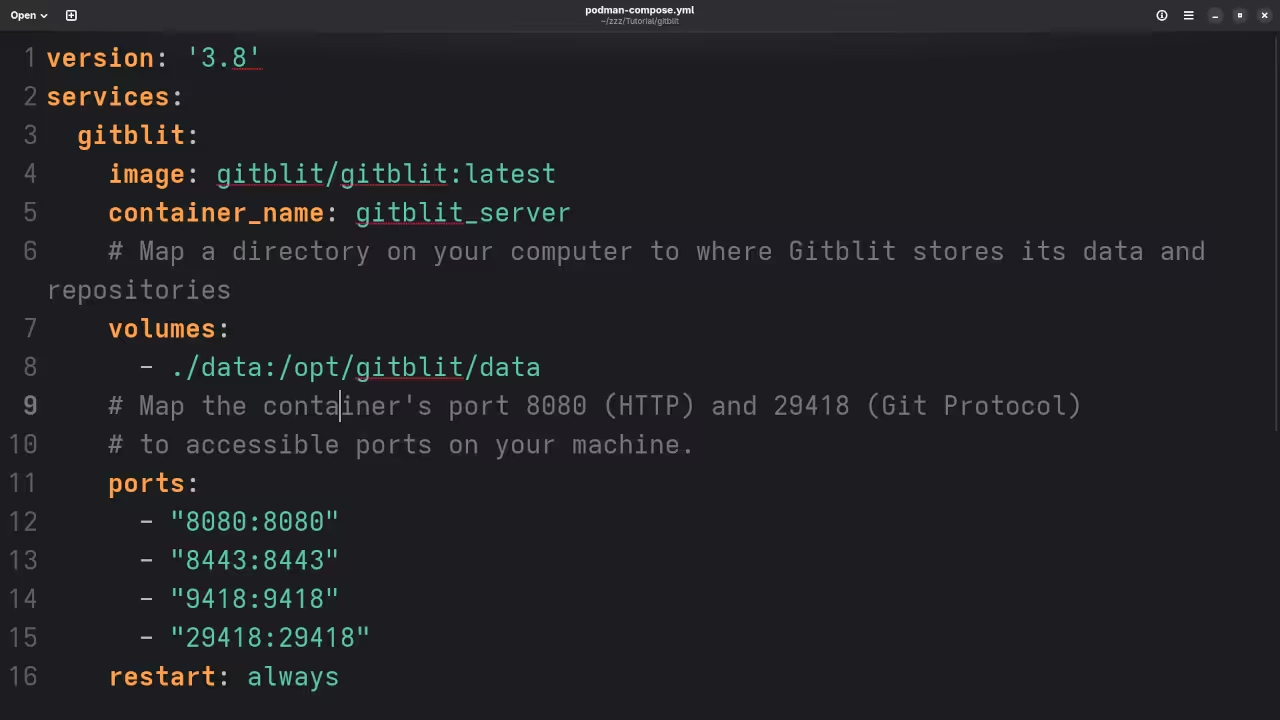
1. Create a podman-compose.yaml file:
This file tells Podman exactly how to build and run your Gitblit container.
version: '3.8'
services:
gitblit:
image: gitblit/gitblit:latest
container_name: gitblit_server
# Map a directory on your computer to where Gitblit stores its data and repositories
volumes:
- ./data:/opt/gitblit/data
# Map the container's port 8080 (HTTP) and 29418 (Git Protocol)
# to accessible ports on your machine.
ports:
- "8080:8080"
- "29418:29418"
restart: always
2. Run the Service:
Navigate to the directory where you saved the podman-compose.yaml file and run:
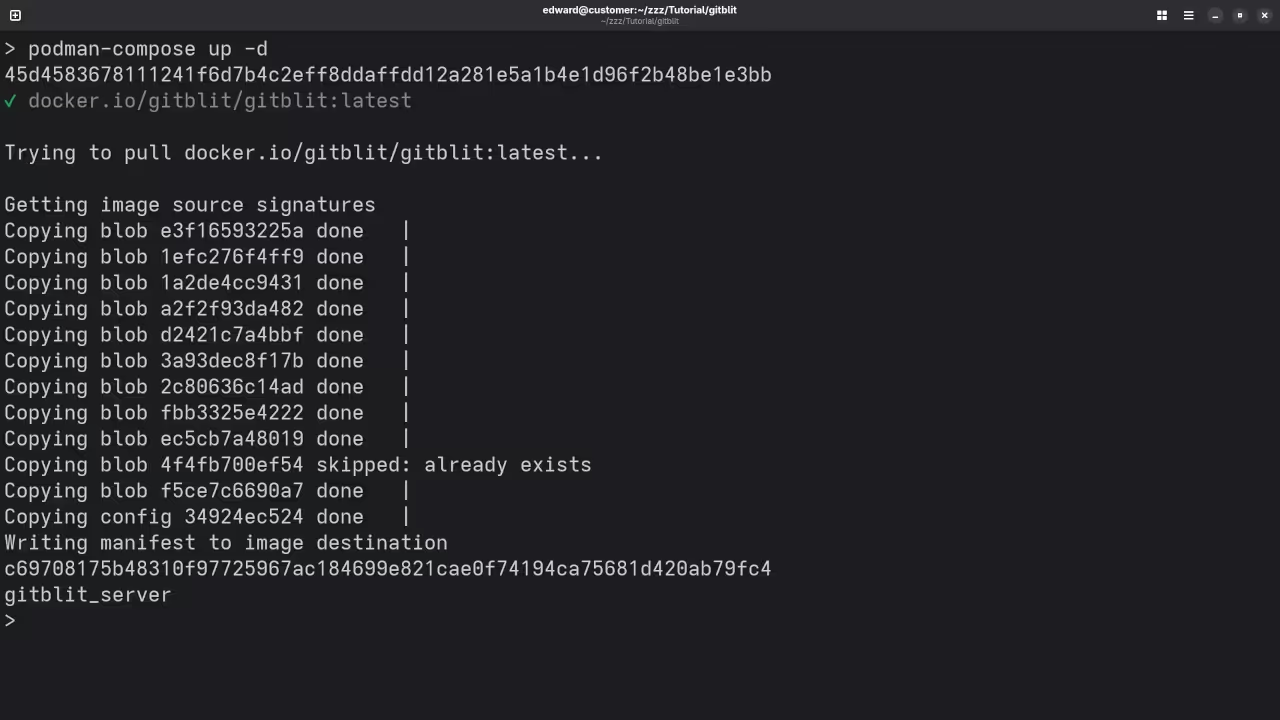
podman-compose up -d
The -d flag runs the container in “detached” mode, meaning it will run in the background.
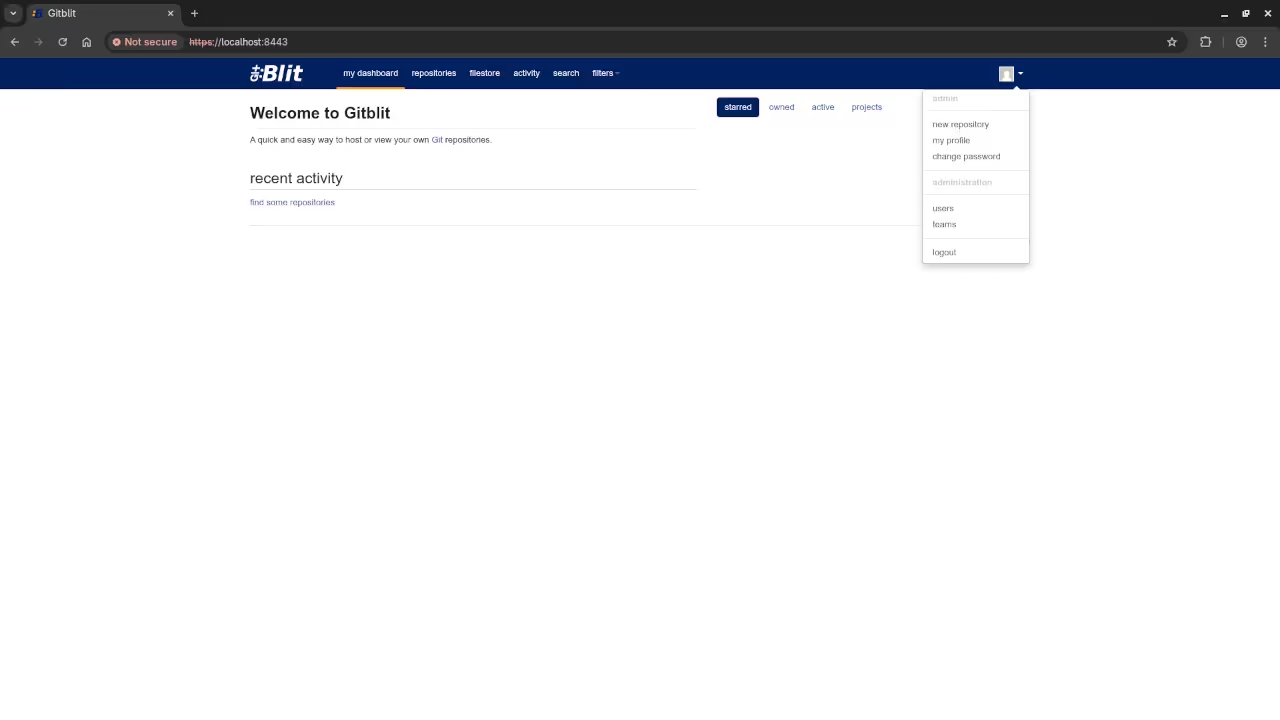
3. Access Gitblit:
After a few moments, your Gitblit server will be running! You can access the web interface by opening your browser and navigating to:
http://localhost:8080
The default administrator username is admin and the password is admin. Make sure to change this immediately after your first login!
Screenshots and Screencast Tutorial
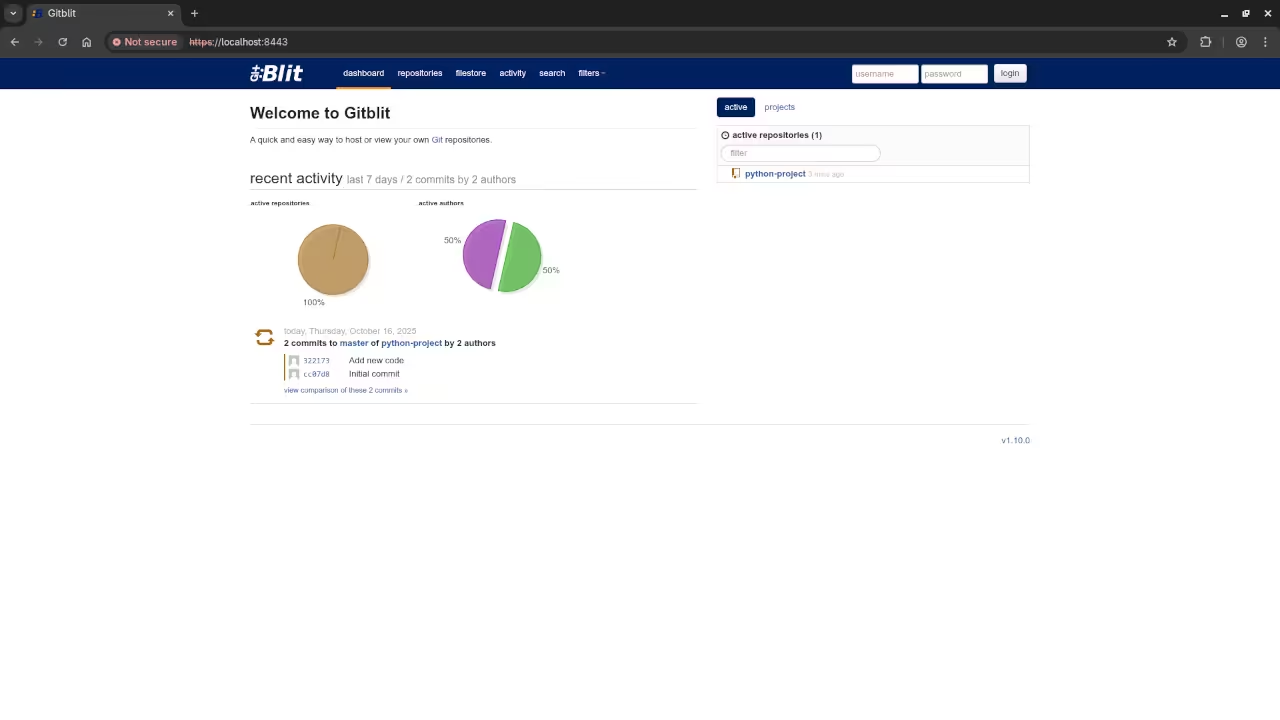
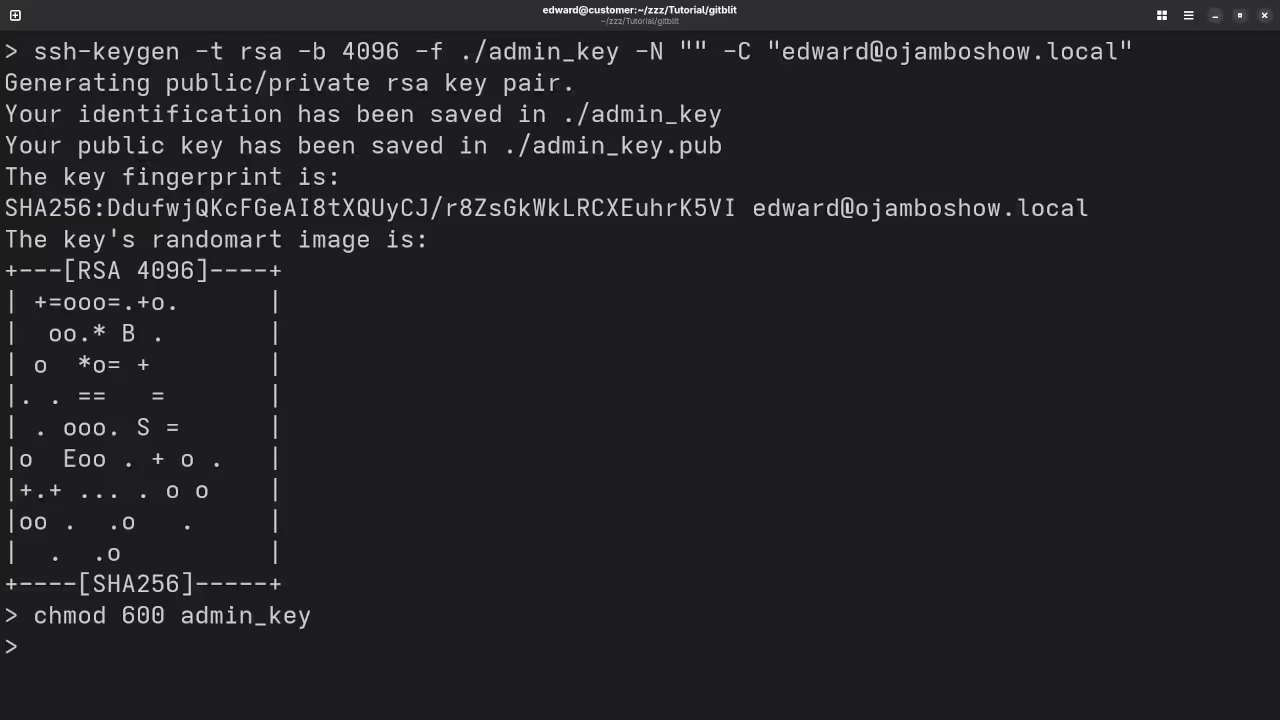
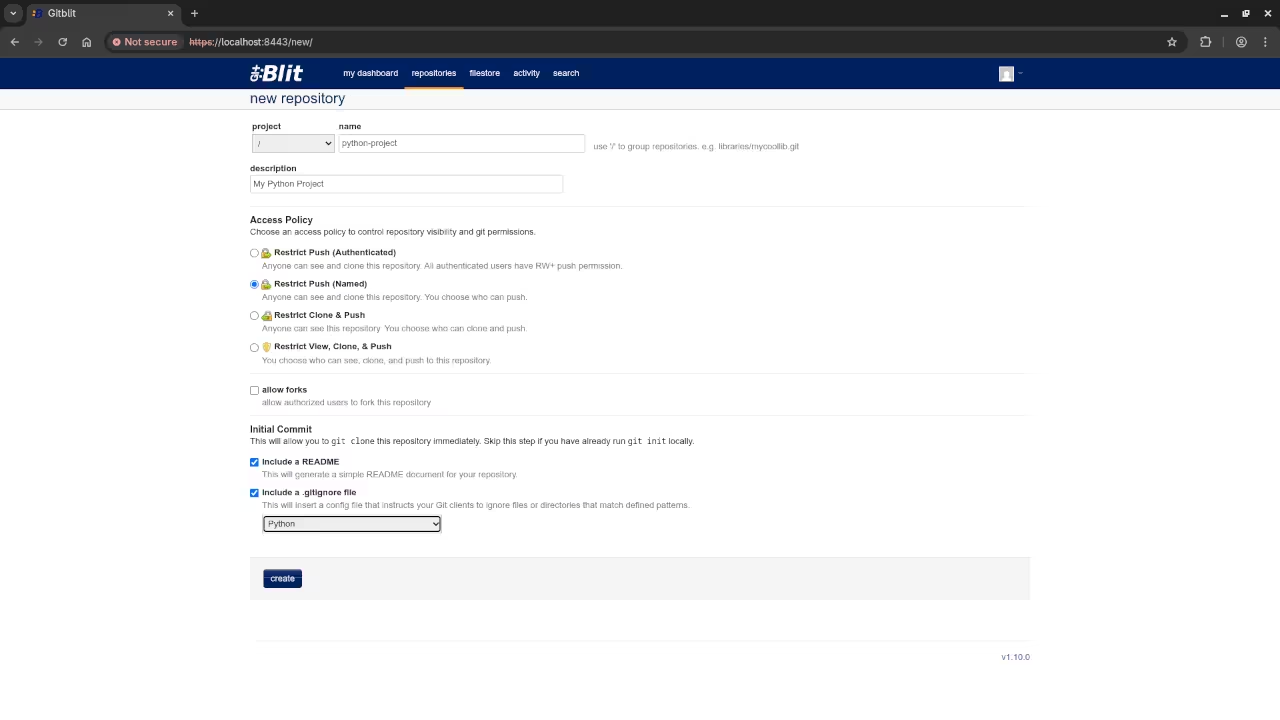
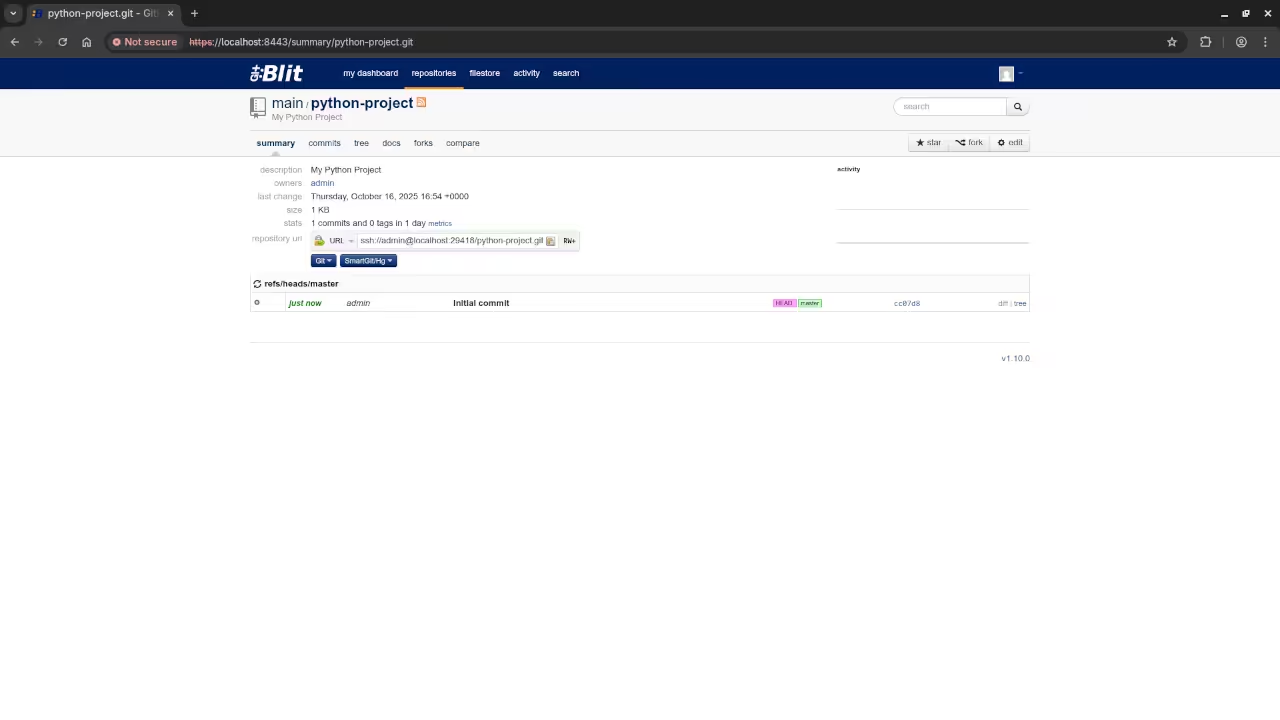
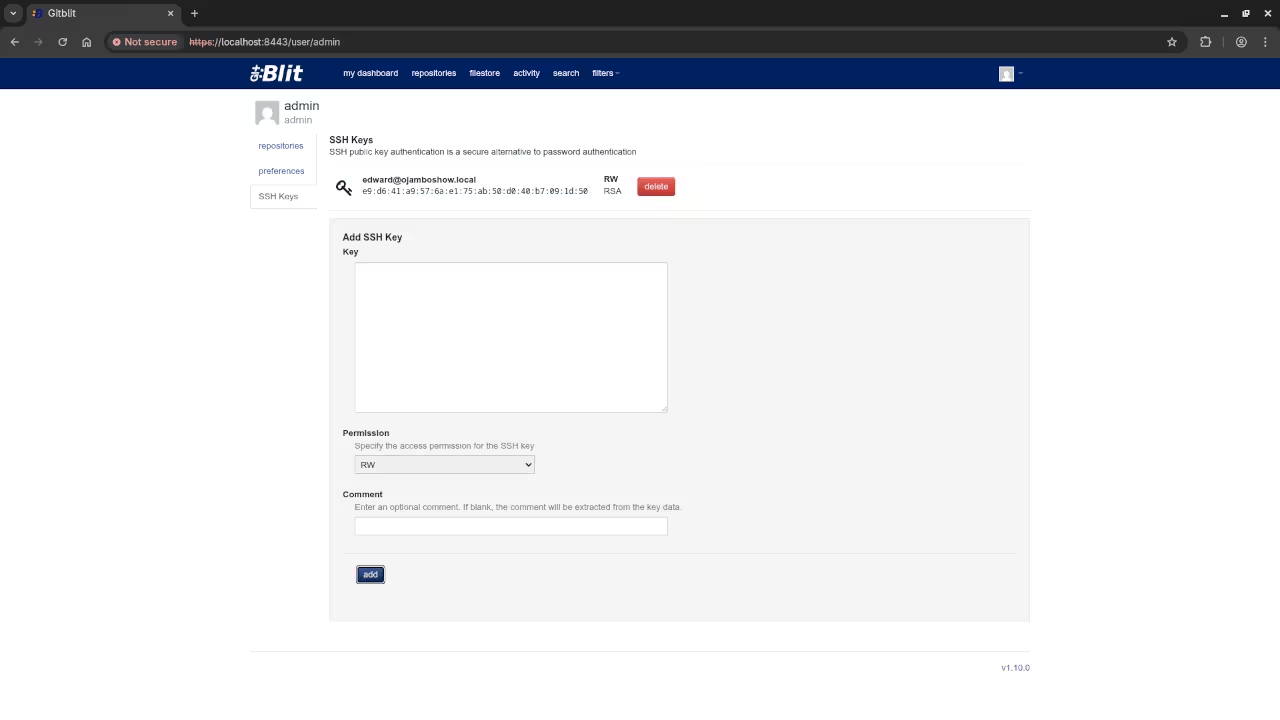
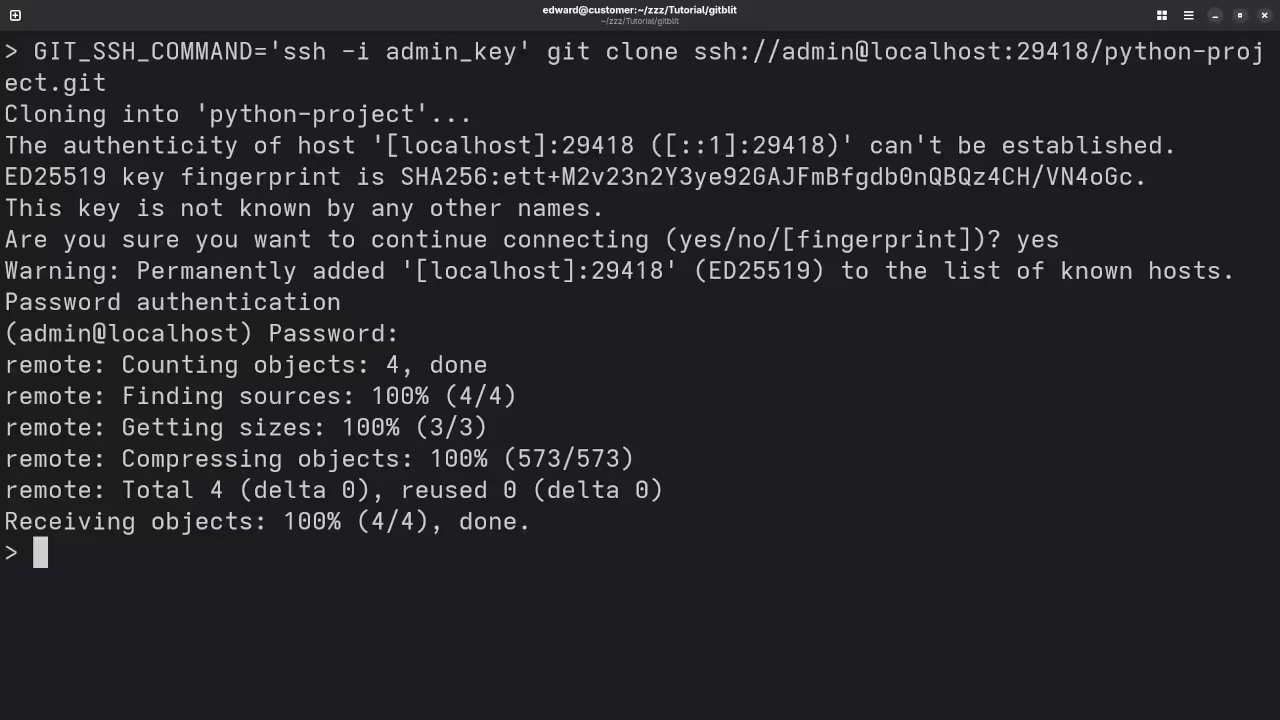
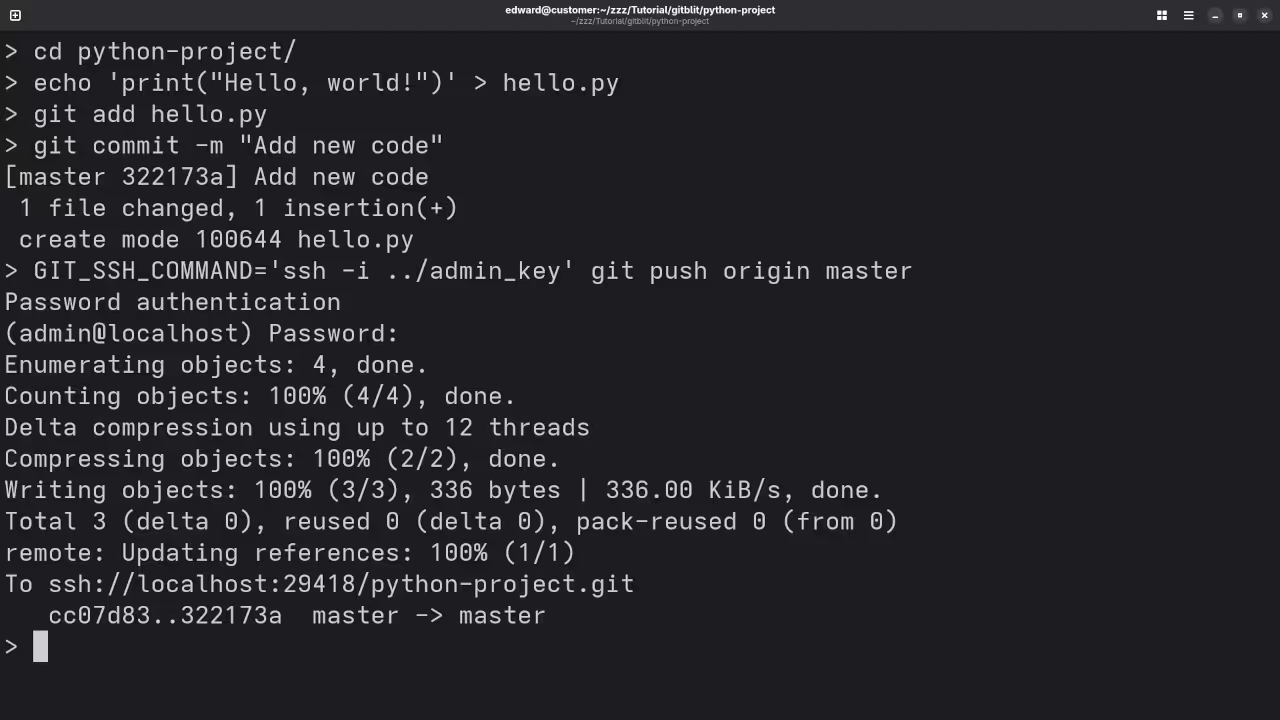
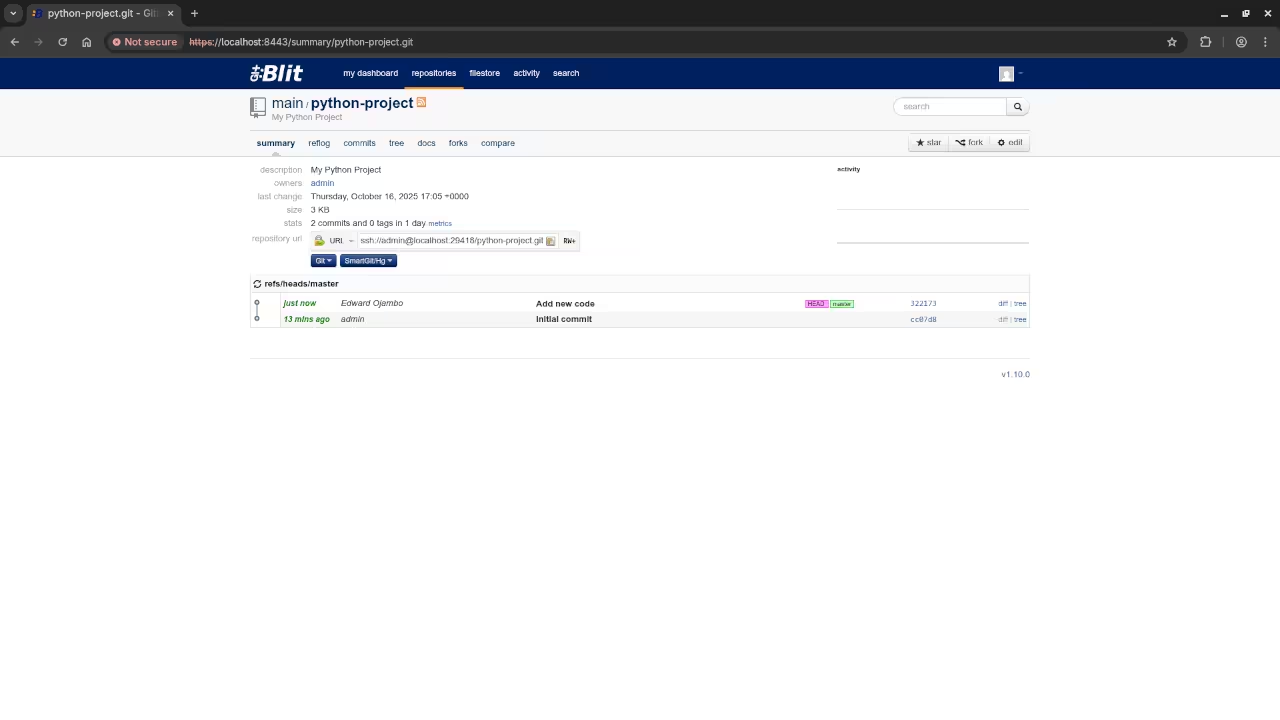
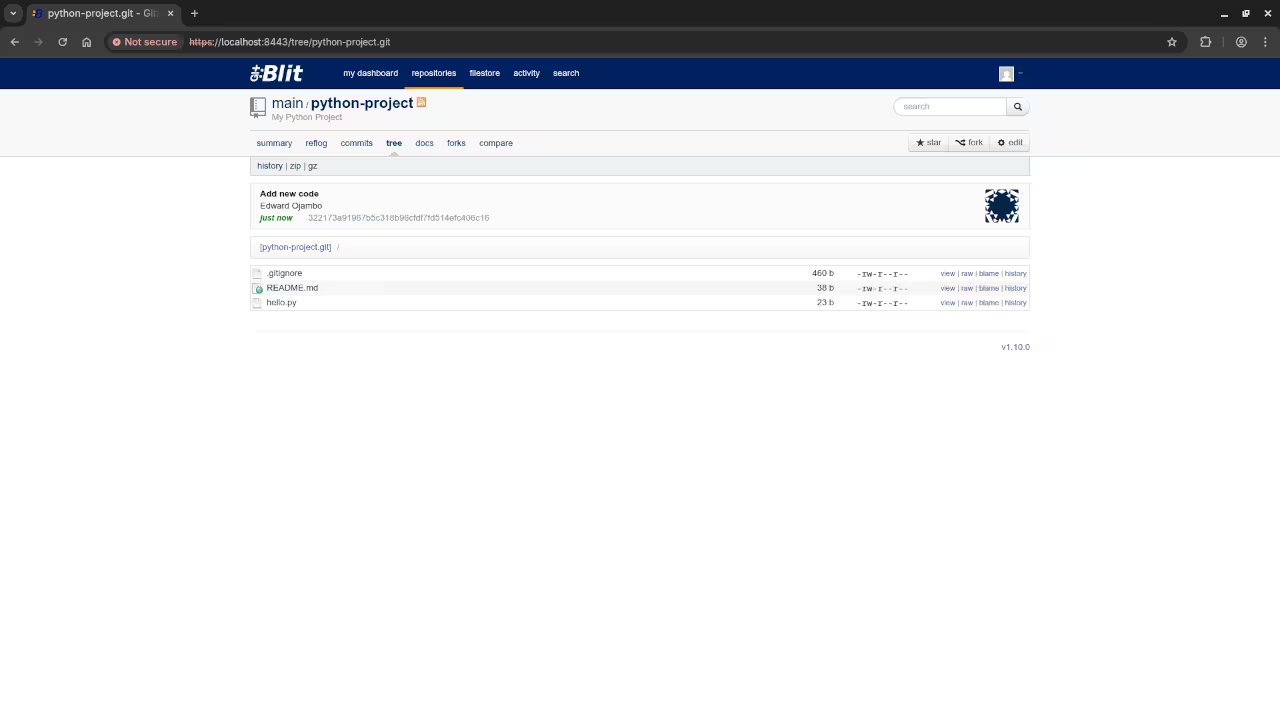
Command Line Podman Generating SSH Key pairGnome Text Editor Displaying Podman Compose YAML FileCommand Line Podman Compose Building Gitblit ContainerWeb Browser Displaying Gitblit DashboardWeb Browser Displaying Gitblit Repository CreationWeb Browser Displaying Gitblit Repository SummaryWeb Browser Displaying Gitblit SSH KeysCommand Line Pushing To Cloning Gitblit RepositoryCommand Line Pushing To Gitblit RepositoryWeb Browser Displaying Gitblit Updated Repo SummaryWeb Browser Displaying Gitblit Repo TreeScreencast Of Gitblit Setup
Ready to Learn More?
If you’re interested in diving deeper into programming, version control, and setting up tools like Gitblit, I can help!
One-on-One Programming Tutorials: For personalized help and guidance, book a one-on-one session with me: https://ojambo.com/contact
Professional Services: Need Gitblit installed professionally, or do you need to migrate existing repositories? I offer services for installing Git, Gitblit, and migrating repositories. Contact me for professional assistance: https://ojamboservices.com/contact
Happy coding, and enjoy your new open-source Git server!
Zed: Your Next Code Editor? A Beginner’s Guide to the Open Source Speed Demon
If you’ve been looking for a code editor that feels truly **fast**, responsive, and built for modern development, you need to meet **Zed**. Unlike many of today’s popular editors that are built on web technologies, Zed is engineered from the ground up in the Rust programming language to leverage your computer’s hardware, including the GPU, to deliver an experience with virtually zero lag.
It’s been described as “remarkably responsive,” and for good reason-it’s designed to be the next-generation tool for developers.
Lightning-Fast and Built for Collaboration
Zed isn’t just fast; it’s packed with modern features:
**Blazing Speed:** The core experience is all about speed. From startup time to keystroke response, Zed is built for minimal latency, making your coding flow feel seamless.
**Real-Time Collaboration:** One of its standout features is built-in, real-time “multiplayer” collaboration. You can invite a teammate into your project to co-edit code, share terminals, and even chat-all from within the editor.
**AI Integration:** Zed smoothly integrates with Large Language Models (LLMs), allowing you to use AI to explain code, generate snippets, and assist with complex refactoring right within your workflow.
Open Source and Licensing
In a major move for the community, Zed is **open source**! This means its source code is publicly available, allowing anyone to inspect it, suggest improvements, and build upon it.
The Zed code editor is primarily licensed under the **GNU General Public License (GPL) version 3**, which is a popular and robust license for open source software. This commitment to being open source makes Zed a transparent and community-driven project.
How to Install Zed on Different Platforms (Focus on Fedora Linux)
Zed supports the major operating systems, but as a Linux enthusiast, I want to focus on getting you set up on **Fedora**.
Installation for Fedora Linux
While you can often find third-party packages in Fedora’s COPR repositories, the most straightforward and officially recommended way to install Zed on Linux distributions like Fedora is by using the official installation script.
**Open your Terminal** (Ctrl + Alt + T).
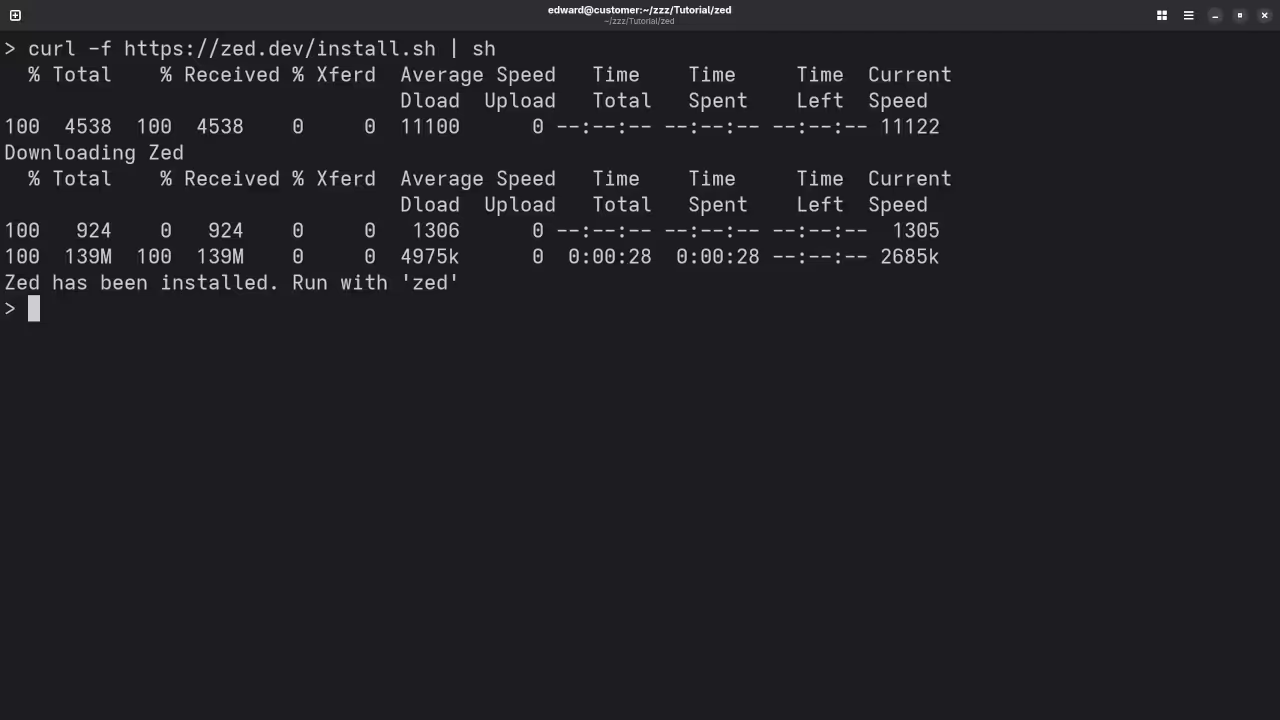
**Run the official install script:** This script downloads the stable binary and places it in your local application directory (~/.local).
curl -f https://zed.dev/install.sh | sh
**Start Coding:** Once the script finishes, you should be able to launch the editor by typing zed in your terminal or by finding it in your application launcher!
Note: Zed requires a Vulkan-compatible GPU for optimal performance, as it uses your graphics card for rendering a smoother UI.
Installation for Other Platforms
**macOS:** You can download the native installer from the official Zed website or install it using **Homebrew**:
brew install --cask zed
**Windows:** Zed is also available on Windows. You can download the stable release directly from the official Zed website. It also features integration with the Windows Subsystem for Linux (WSL).
Screenshots and Screencast
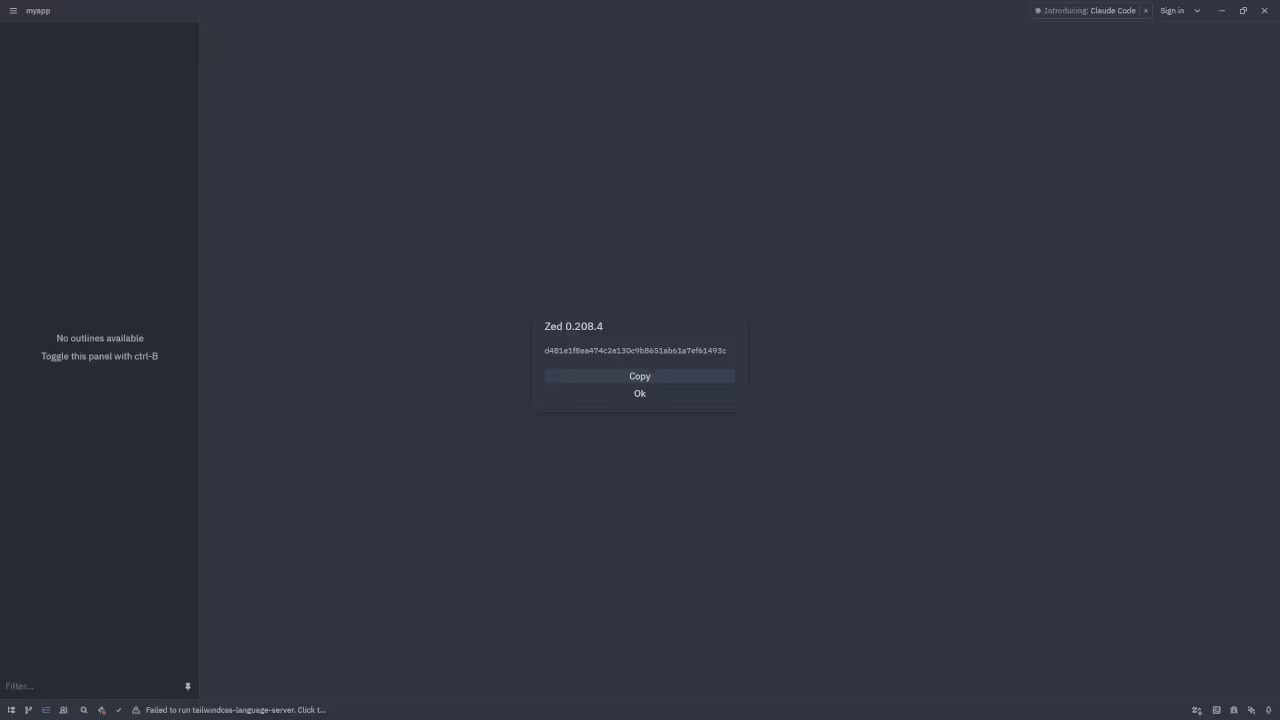
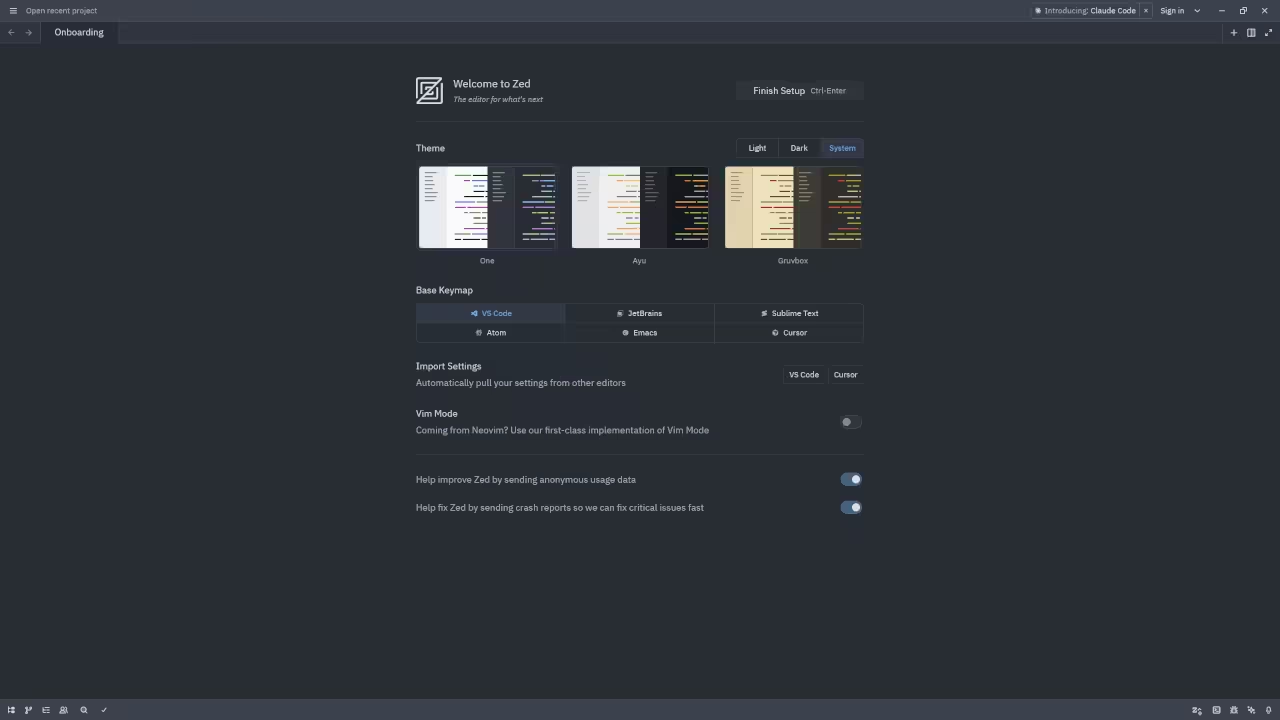
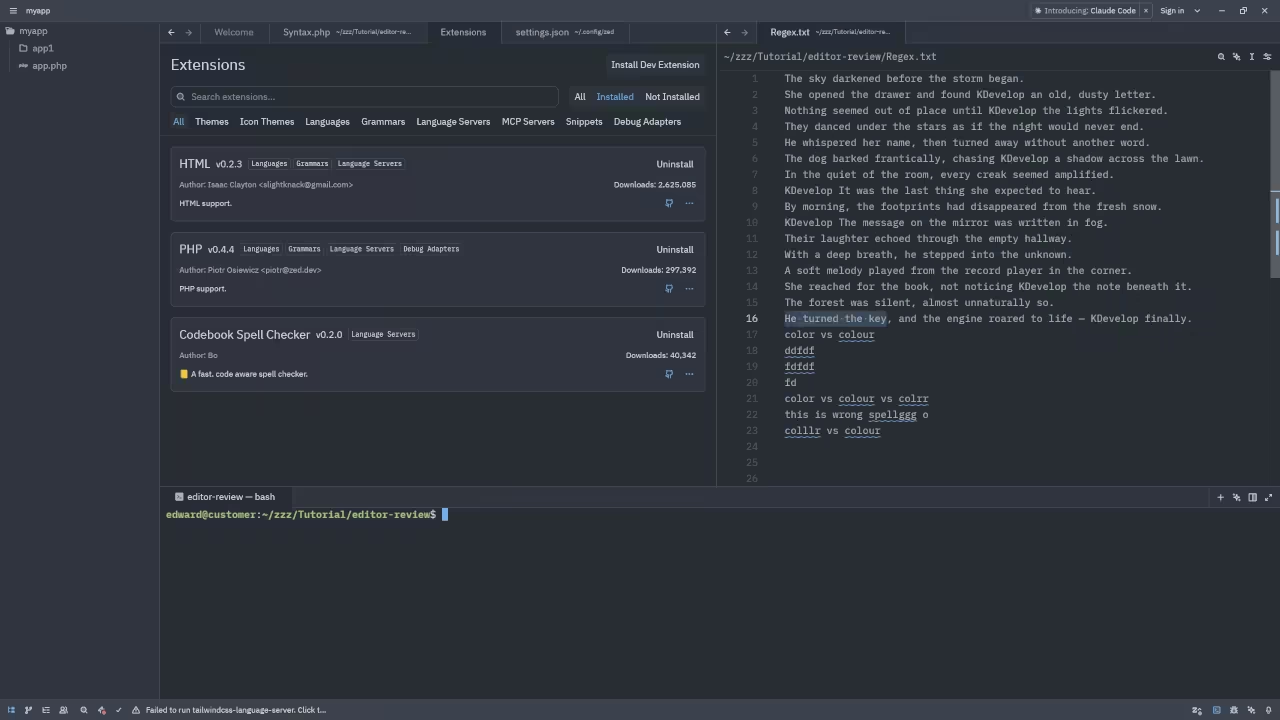
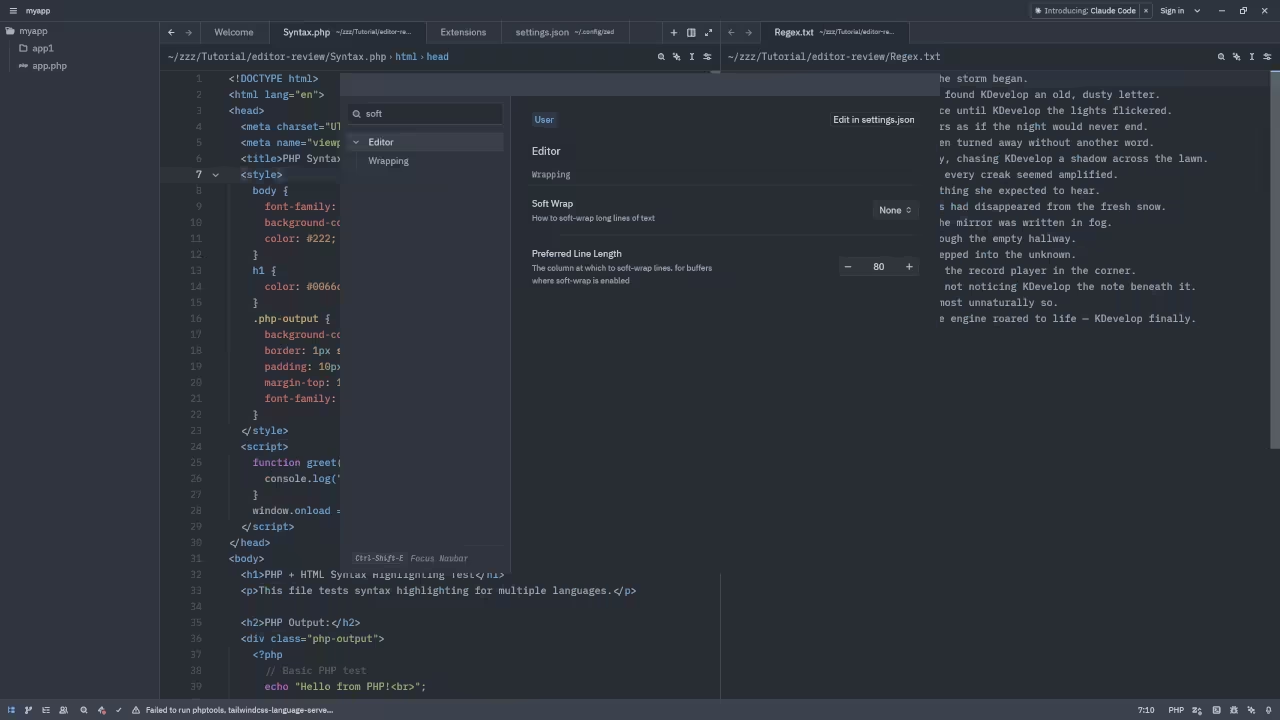
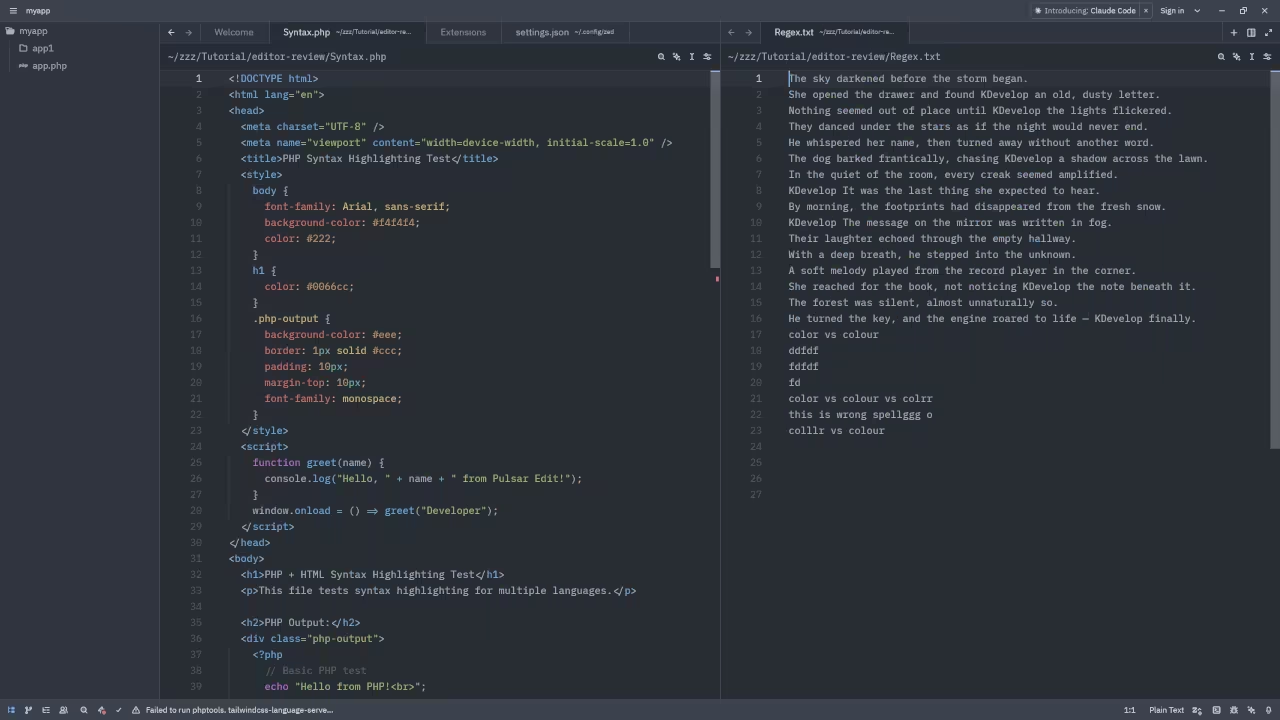
Command Line Displaying Displaying Zed InstallZed Displaying Initial Settings DialogZed Displaying ExtensionsZed Displaying SettingsZed Displaying PHP Syntax HighlightingZed Displaying Folder In WorkspaceZed Displaying Terminal In Workspace
👉 Screencast showing a beginner session in Zed—editing, saving files, and navigating buffers.
Zed Review And Feature Test
Requirements For Programming Text Editor
Glossary:
Code Editor
Designed for writing and editing source code.
IDE
Integrated Development Environment combines various tools need for software development.
Plugin
Software component that adds specific functionality.
Theme
Preset package containing graphical appearance to customize look and feel.
Open source
Freely available for possible modification and redistribution.
SCM
Source code management use to manage and track modifications to a source code repository.
LMB
Left Mouse Button (LMB) or left click
MMB
Middle Mouse Button (MMB) or scroll wheel
Test Tools
Test System
Name
Description
CPU
Ryzen 5 5600GT @ 3.60GHz.
Memory
32GB DDR4.
Operating System
Fedora Linux Workstation 42.
Desktop Environment
Gnome 48.
Name
Description
Test Suite
Name
Description
Large File
1GB human-readable text.
Regex File
Text with word “Zed” repeated.
Syntax File
PHP file containing HTML, CSS & JavaScript.
Media File
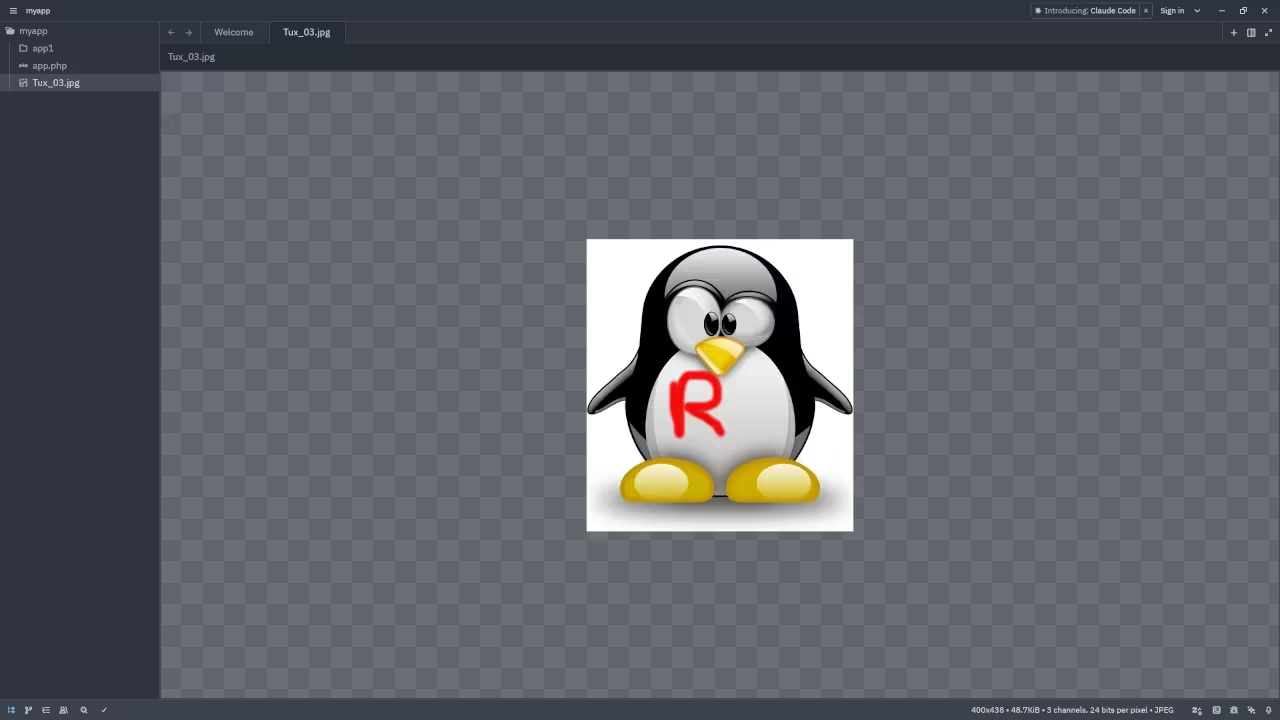
Smiley face or Tux Linux JPEG file.
Java Version
OpenJDK 21.0.8.
PHP Version
PHP 8.4.13.
Python Version
Python 3.13.7.
Zed Version
0.208.4.
Name
Description
Test Scoring
Each feature has two parts.
Score of zero indicates a missing feature.
A part of a feature is work a score of 0.5.
Three bias elimination steps were utilized. The editor was used for at least three years on different platforms. Attempts were made to get stable plug-ins for missing features. The same editor was compared between the one in the repository, the developers website, and the compiled version if applicable.
Selecting Editor Version
For this review, Zed was installed using the instructions from the developers website and it did not require additional plugins.
Features
The theme can be native for the editor in terms of the background. Zed dark and light themes can be created or downloaded and changed. The score for the theme was a perfect 1.0.
Dragging and dropping a text file into the editor opens a new tab or buffer. It is not possible to specify the tab location during the drag and drop operation. The score for drag and drop into editor was 0.5.
Opening a very large text file did not crash Zed. Zed was able to open or to edit the large file. The score for opening a large file was 1.0.
Multiple documents can opened in multiple tabs or buffers. Tear-off tabs do not work and Zed does not have a feature to open in new window as a new instance which is handy for multiple monitors. The score for multiple documents was 0.5.
Multiple editors can be opened as new tabs with drag options. Each tab window view can be split either vertically or horizontally as a multiple editor view in Wayland display server protocol. The score for multiple editor view was 1.0.
Creating non-project files is possible. Non-project files can be opened on the command line. The score for creating non-project files was a perfect 1.0.
Soft word wrap can be enabled on all documents as wrapping. Automatic soft wrap for documents is available from the Zed View menu. The score for word wrap was a perfect 1.0.
Spell check does work as words are typed by enabling the extension Codebook Spell Checker. Spelling errors are shown in opened documents. The score for spell check was 1.0.
Word count is not available. Word count for the current buffer or file is not enabled. Selection word count is not available as part of word count. The score for word count was 0.0.
Go to line can jump to a specified line using CTRL-G and entering the line number. It is possible to jump to either the first or last line. The score for go to line is a perfect 1.0.
Indentation can default to user-defined tab stops. Children are automatically indented. The score for indentation was a perfect 1.0.
Fonts can be dynamically scaled with custom keyboard shortcuts CTRL-+/-. The system font can be bypassed and a new editor font and size can be set. The score for fonts was a perfect 1.0.
Find and replace using regular expressions can be utilized for all open documents in the current session. Find and replace will work for the current document or a selection in the current document. The score for find and replacing using regular expressions was a perfect 1.0.
Multiple language syntax highlighting in one file is enabled. Each language has code-sensitive syntax colours. The score for multiple language syntax highlighting was a perfect 1.0.
Code folding does work for markup languages such as HTML. Code folding also works for programming languages such as Java. The score for code folding was 1.0.
Selecting rectangular block per column works using CTRL-SHIFT. Rectangular block selection works with word wrap enabled. The score for selecting rectangular block was a perfect 1.0.
Multiple selection is available using ALT. Search multiple selection does not work. The score for multiple selection was 0.5.
Distraction-free mode to hide panes works. Line numbers can not be toggled to improve distraction-free mode. The score for distraction-free was a perfect 1.0.
The file manager can be enabled by default. Media files can be dragged and dropped into the file manager pane. The score for file manager was 1.0.
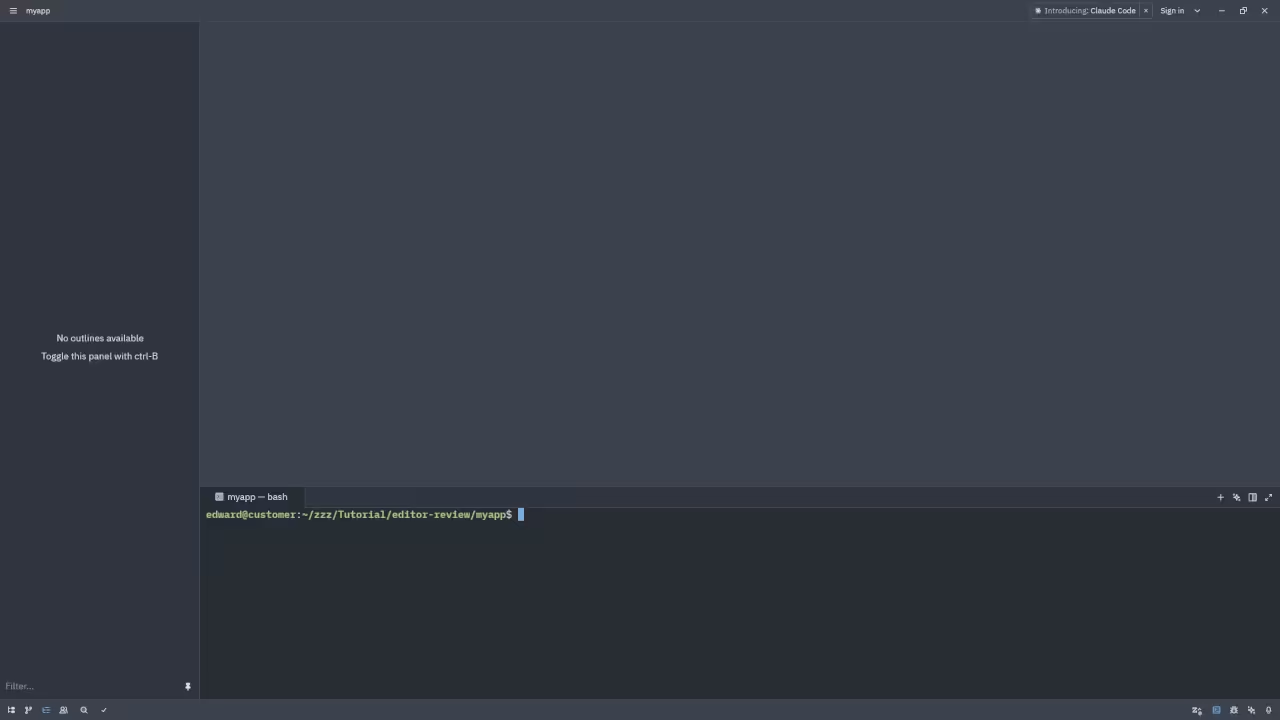
Terminal is be enabled. The terminal does follow folder. Terminal can execute system commands. The score for terminal was 1.0.
Results
Zed is a lightweight IDE. By default, the Zed editor is missing required features that can be enabled or implemented by plugins. For my required features, the Zed editor scored 87.5% or 8.75 out of 10.
Next Steps in Your Programming Journey
Whether you’re just starting out or looking to sharpen your skills, using a fast and reliable editor like Zed is only the beginning.
I have a collection of **programming books** available on my Amazon Author Page that cover a range of topics to help you master your craft:
If you’re finding a particular topic challenging or want to rapidly accelerate your learning, I’m available for **one-on-one online programming tutorials**. We can work through specific problems, review code, and set a learning path tailored just for you.
Do you love the look of Zed but need help getting it set up on your specific system, or are you looking to migrate from an older editor? I offer specialized technical services to ensure your development environment is running perfectly:
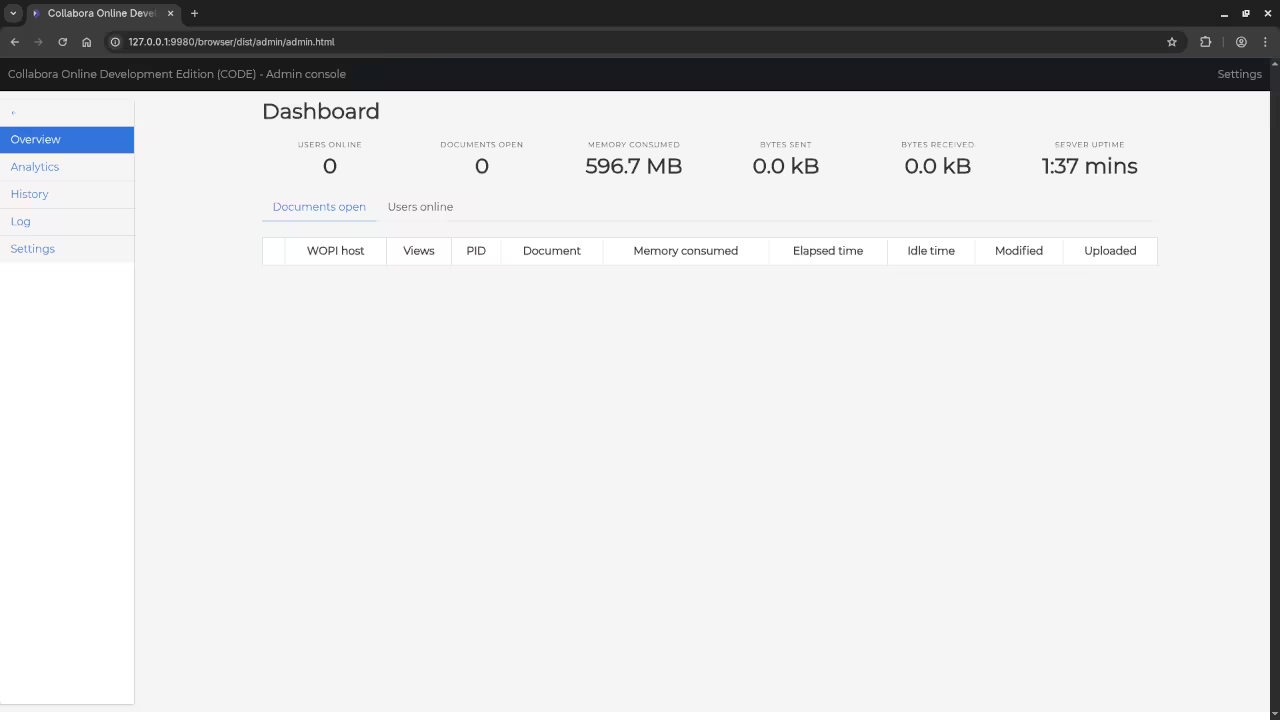
How to Use LibreOffice Online: Open Source Office Suite in Your Browser
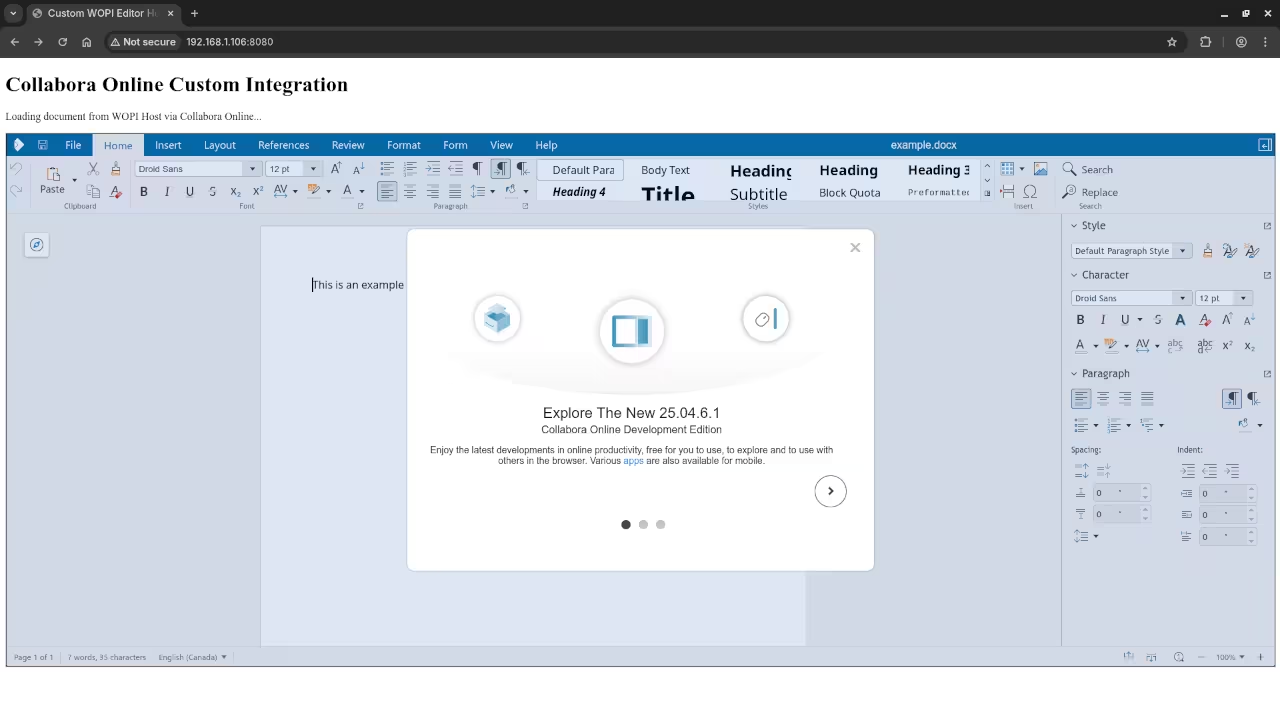
If you have ever wanted a private, open-source alternative to Google Docs or Microsoft Office Online, LibreOffice Online is a great choice. It is the web-based version of the popular LibreOffice suite, allowing you to edit documents, spreadsheets, and presentations right from your browser.
In this post, we will go over what LibreOffice Online is, how to install it using Podman or Podman Compose, and where you can get additional help and programming resources.
What is LibreOffice Online?
LibreOffice Online is the cloud version of the LibreOffice suite. It allows users to:
Create and edit documents, spreadsheets, and presentations directly in the browser
Collaborate in real-time with multiple users
Maintain full control over their data (since you can host it yourself)
It is completely open-source, which means anyone can use, modify, and distribute it freely.
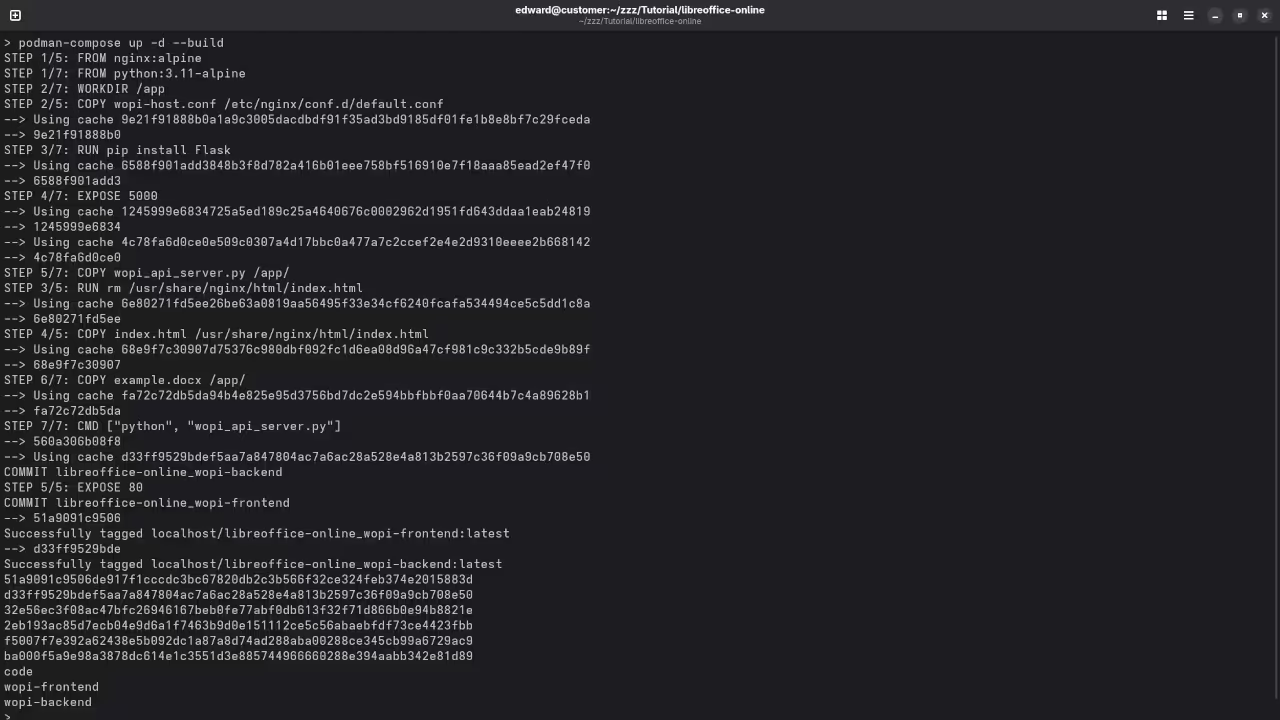
Installing LibreOffice Online Using Podman
You can run LibreOffice Online in containers using Podman, a daemonless alternative to Docker.
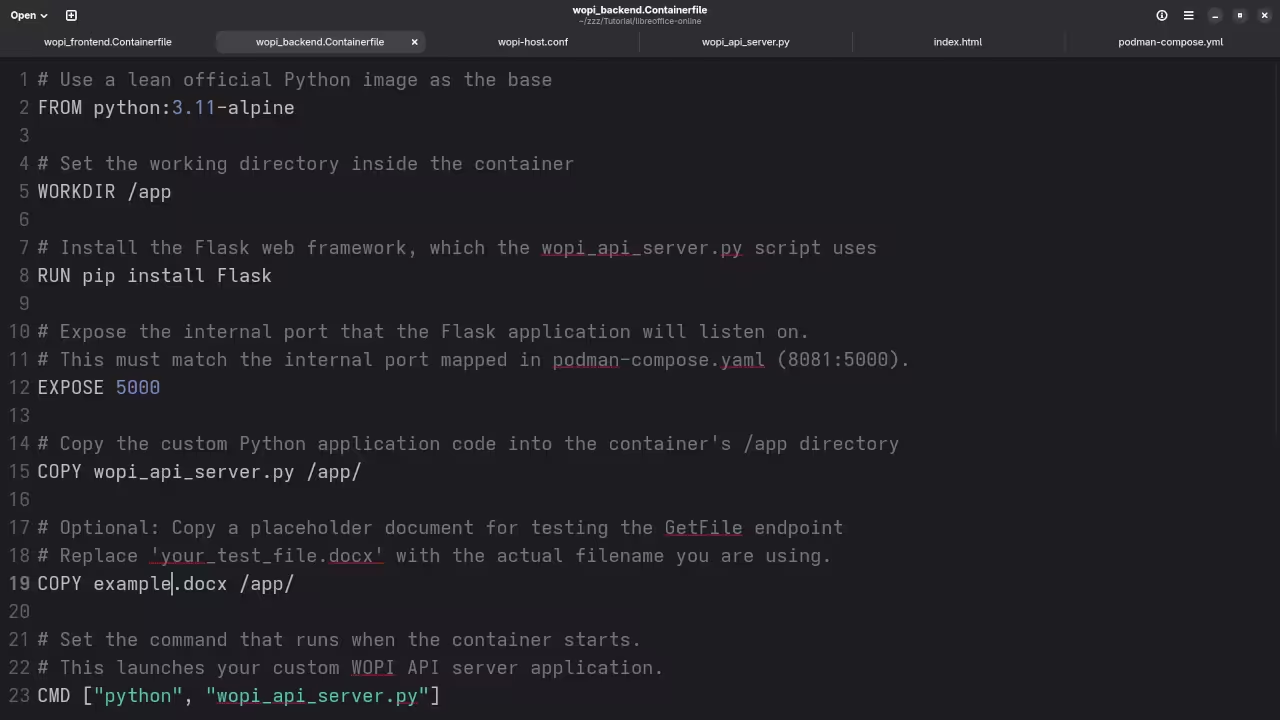
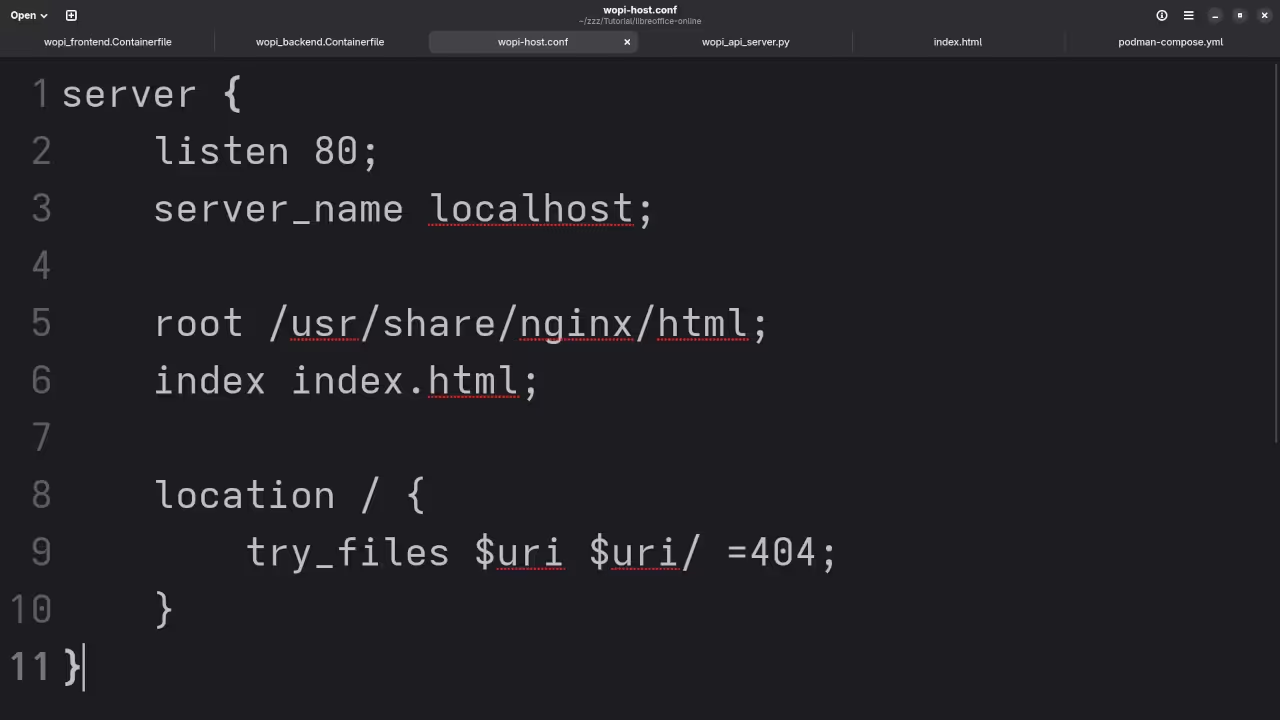
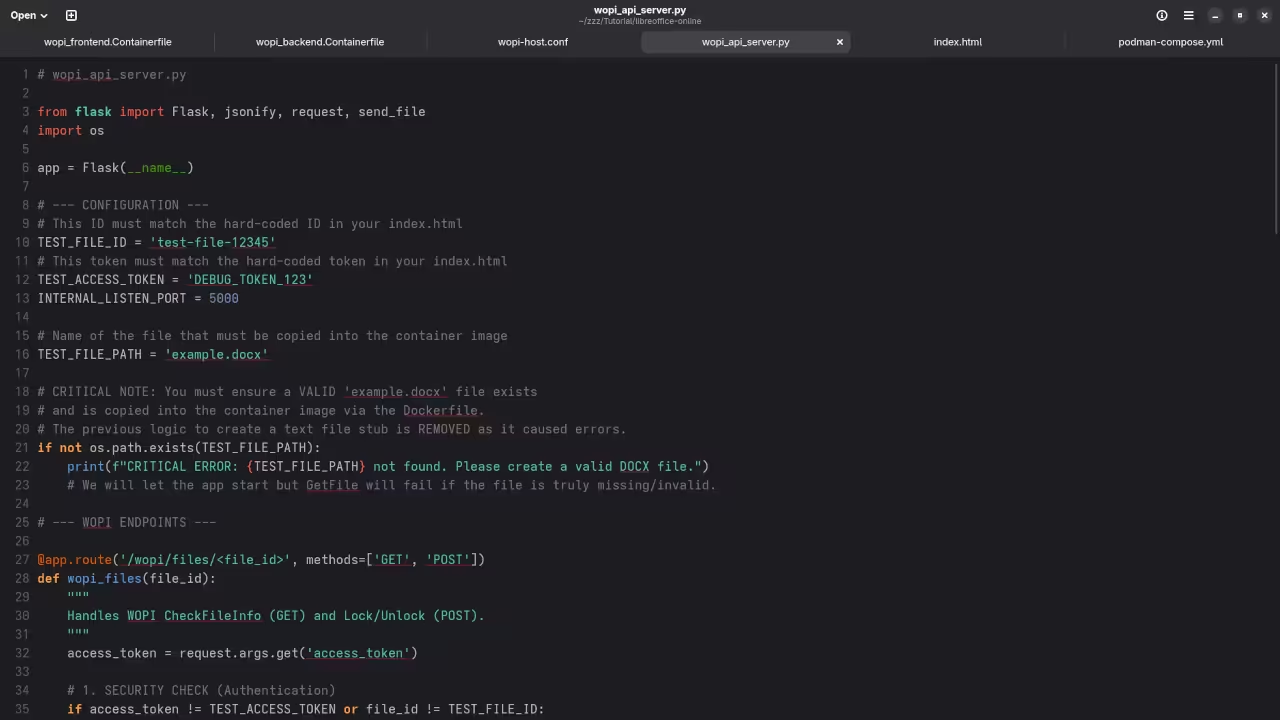
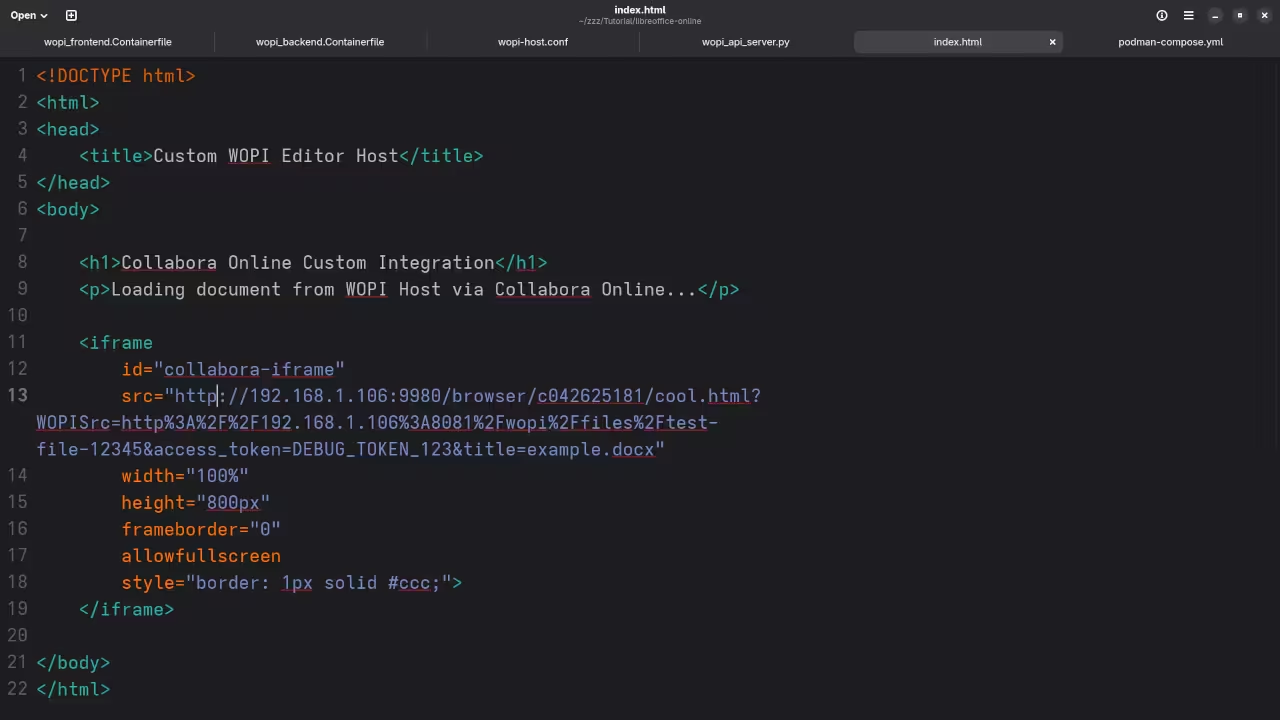
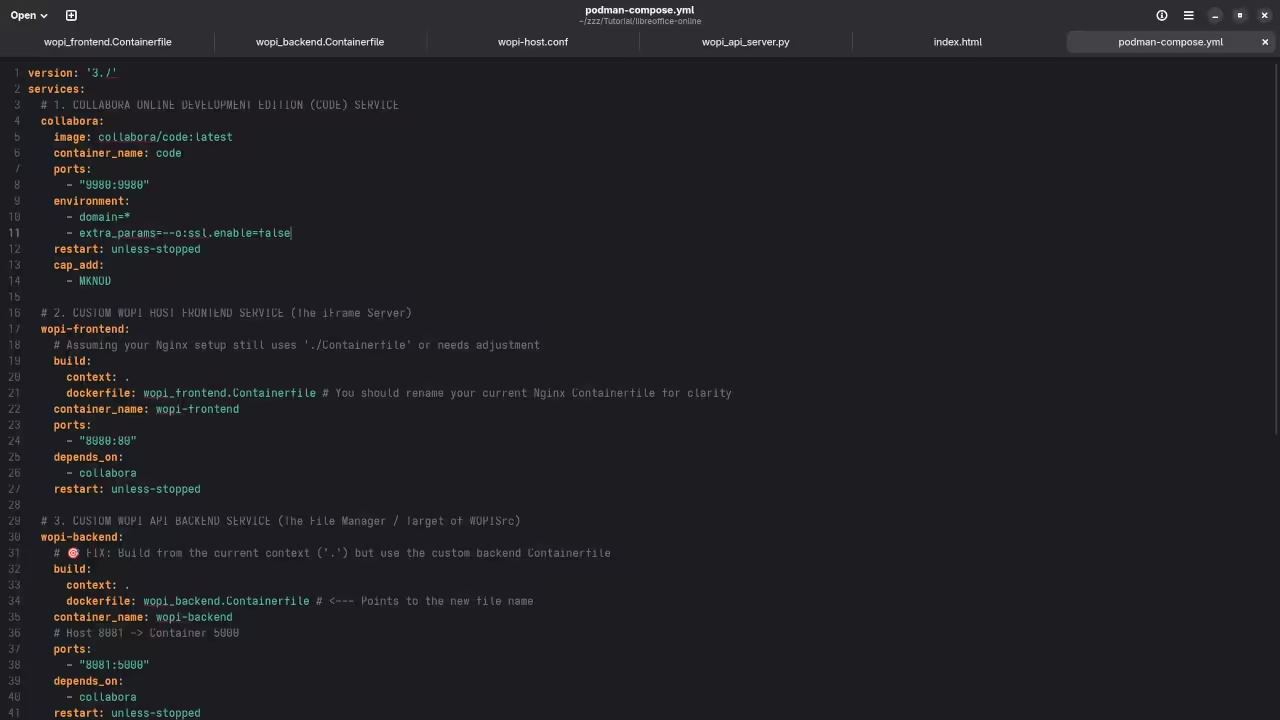
Here is a basic example setup using Podman Compose. This example uses Collabora CODE, a popular implementation of LibreOffice Online.
Prerequisites: Podman, podman-compose, and a domain name with SSL (optional but recommended for production)
1. Create a Project Folder
mkdir libreoffice-online && cd libreoffice-online
One-on-One Programming Tutorials:
I am available for personal tutoring sessions. https://ojambo.com/contact
LibreOffice Online Setup or Migration Help:
Need help installing LibreOffice Online or migrating its repositories? https://ojamboservices.com/contact
Final Thoughts
LibreOffice Online is a powerful tool for anyone who wants control over their online document editing. Using Podman, you can set it up in minutes and begin editing documents securely in your own environment.
Whether you are learning to code, managing your own server, or just curious about self-hosting, LibreOffice Online is a great addition to your toolkit.
Getting Started with Wan 2.2 TI2V 5B Running in ComfyUI: An Open-Source Powerhouse for AI Projects
Wan 2.2 TI2V 5B is an exciting, cutting-edge AI model that can supercharge your projects in fields like natural language processing, image generation, and more. Running it within ComfyUI, an easy-to-use graphical user interface, allows you to harness the model’s power without worrying about coding complexities. Plus, Wan 2.2 TI2V 5B is open-source and licensed under the Apache 2.0 License, making it accessible for both personal and commercial use.
In this post, I’ll walk you through the installation process, explain the features of this model, and clarify how its open-source license impacts your usage.
What is Wan 2.2 TI2V 5B?
Wan 2.2 TI2V 5B is a powerful AI model designed for advanced machine learning tasks. It has been trained to generate high-quality outputs based on large datasets, making it an excellent choice for those working with text, images, or other types of data.
Running Wan 2.2 TI2V 5B in ComfyUI makes it much easier to interact with the model. ComfyUI provides a user-friendly graphical interface that abstracts away the need for complex command-line operations or programming, making it ideal for both beginners and advanced users alike.
The Apache 2.0 License: What Does It Mean?
One of the best parts of using Wan 2.2 TI2V 5B and ComfyUI is that they are open-source and distributed under the Apache 2.0 License. Here’s what this means:
Free to Use: You can use the model for personal and commercial purposes without needing permission.
Modify and Distribute: You are allowed to modify the model and share your modified versions. If you do redistribute, you must provide a copy of the license and credit the original authors.
Patent Grant: The Apache 2.0 License includes a patent grant, meaning contributors cannot sue you for using patented technology that’s part of the model.
No Warranty: The model comes without any warranty. You’re using it at your own risk, but the flexibility and power it provides are worth it for many developers.
By being released under the Apache 2.0 License, Wan 2.2 TI2V 5B encourages collaboration and innovation within the open-source community, which leads to faster improvements and wider accessibility.
Installation Guide for Wan 2.2 TI2V 5B in ComfyUI
Here’s a beginner-friendly step-by-step guide to get Wan 2.2 TI2V 5B running in ComfyUI.
Step 1: Install Python and Dependencies
First, ensure that you have Python 3.8+ installed on your system. You will also need a few key dependencies.
Install Python: Download and install Python from python.org.
Set Up a Virtual Environment (optional but recommended):
python -m venv comfyenv
source comfyenv/bin/activate # On Windows use comfyenv\Scripts\activate
Install Dependencies: Use pip to install the required libraries.
pip install -r requirements.txt
Step 2: Clone the Wan 2.2 TI2V 5B Repository
Now, you’ll need to clone the Wan 2.2 TI2V 5B repository.
Clone the GitHub Repository:
git clone https://github.com/Wan-Video/Wan2.2.git
cd Wan2.2
Step 3: Clone the ComfyUI Repository
Next, clone ComfyUI from its official GitHub repository:
git clone https://github.com/comfyanonymous/ComfyUI.git
cd ComfyUI
At this point, you should have both ComfyUI and Wan 2.2 TI2V 5B cloned onto your machine.
Step 4: Place the Model Files in the Correct Folder
Now, let’s get the model files into the correct location.
Download the Wan 2.2 TI2V 5B Model: Go to the Hugging Face page for Wan 2.2 TI2V 5B and download the model file (it will likely be a .pth or .bin file).
Find the “Models” Folder in ComfyUI: Inside the ComfyUI folder, you will see a folder called models. This is where you need to place the Wan 2.2 TI2V 5B model file.
Place the Model File in the “Models” Folder: Move or copy the Wan 2.2 TI2V 5B model file into the models folder inside ComfyUI.
Step 5: Configure ComfyUI to Use the Model (if needed)
In most cases, ComfyUI will automatically detect the model. However, if needed, you may have to configure ComfyUI to recognize the model:
Open the ComfyUI settings file (usually named config.json or similar).
If you need to manually configure the model path, make sure it points to the correct file in the models folder:
{
"model_path": "models/Wan2.2_TI2V_5B.pth"
}
Step 6: Launch ComfyUI
Once the model file is in place, you’re ready to start ComfyUI.
Open a terminal (or command prompt) in the ComfyUI folder and run:
python app.py
Visit http://localhost:5000 in your web browser to start interacting with Wan 2.2 TI2V 5B through the ComfyUI interface.
📷 Screenshots
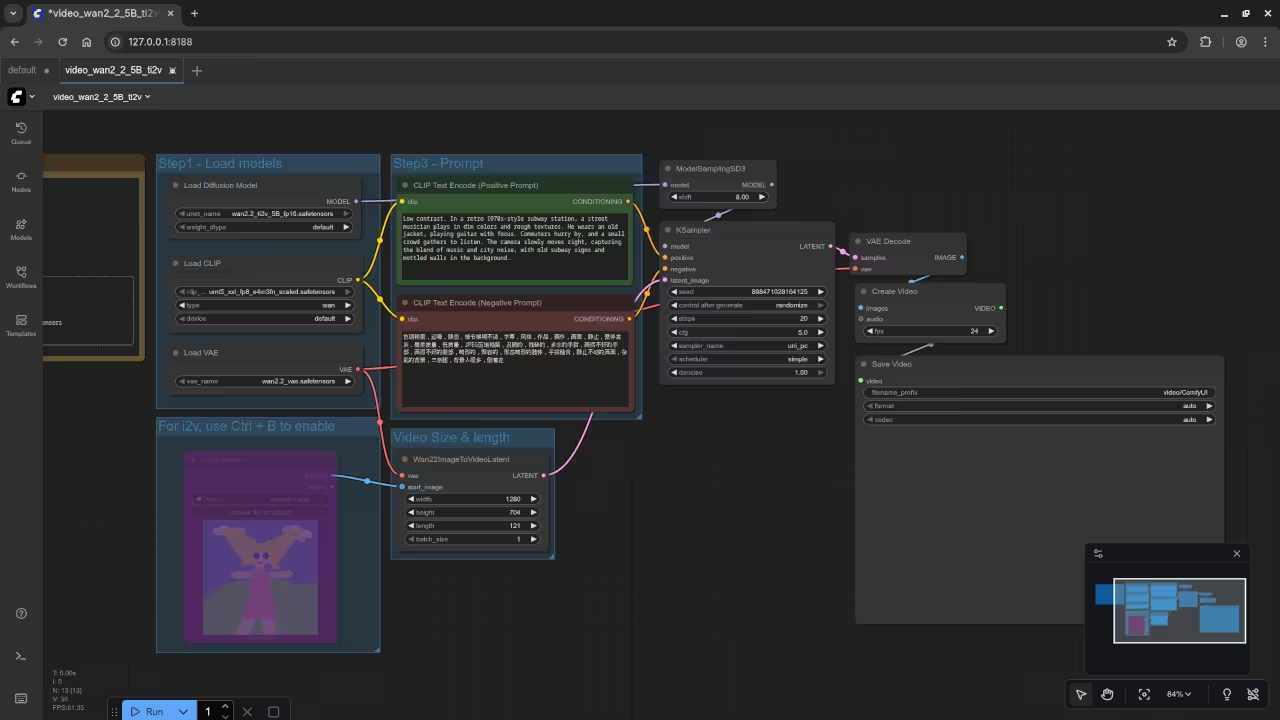
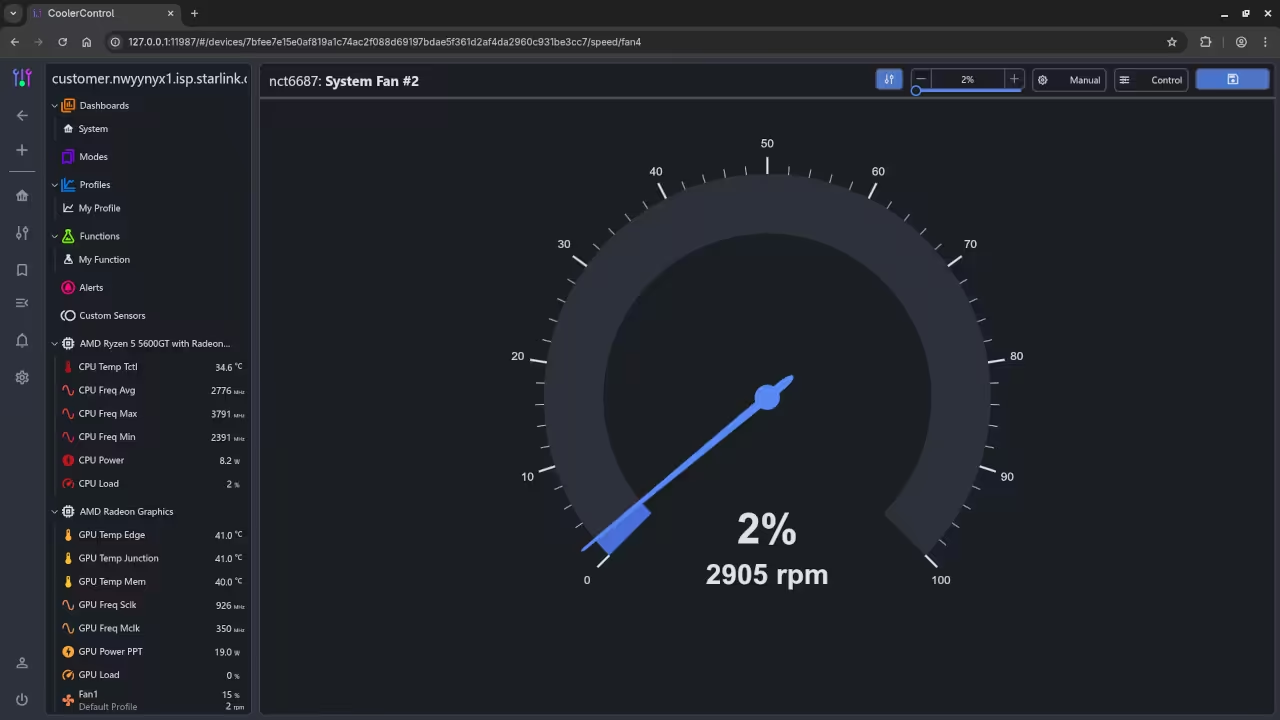
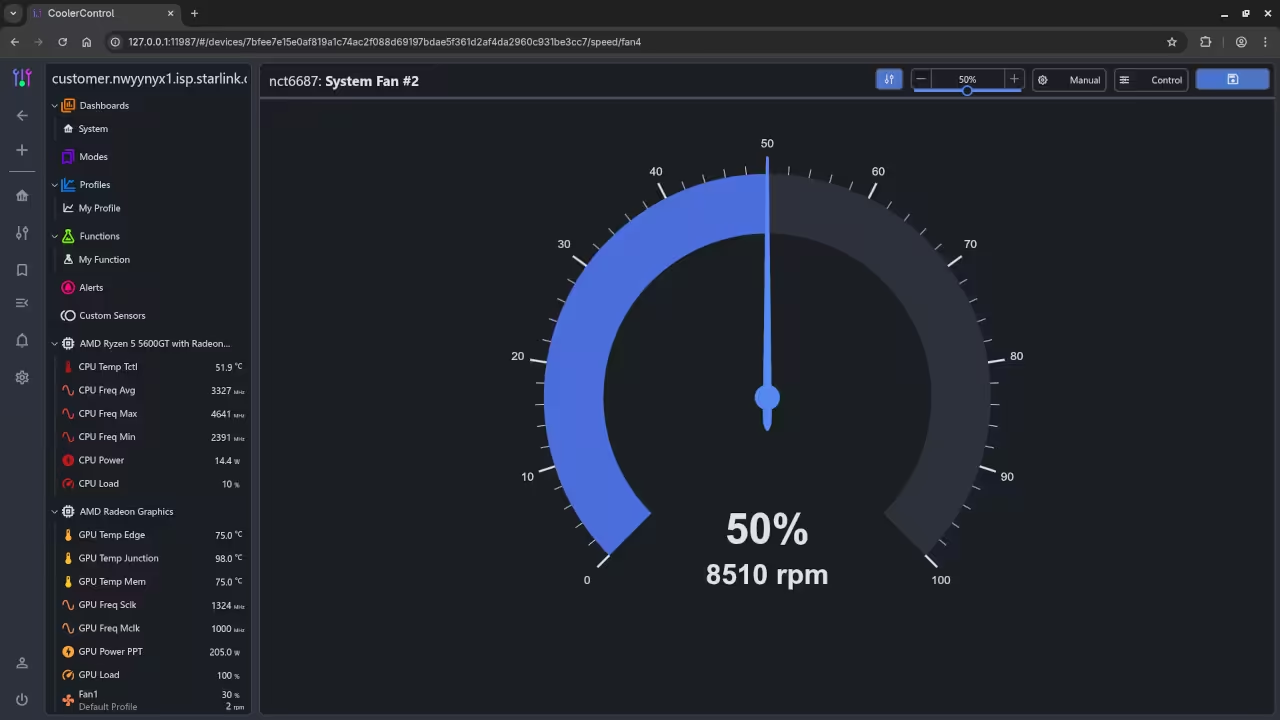
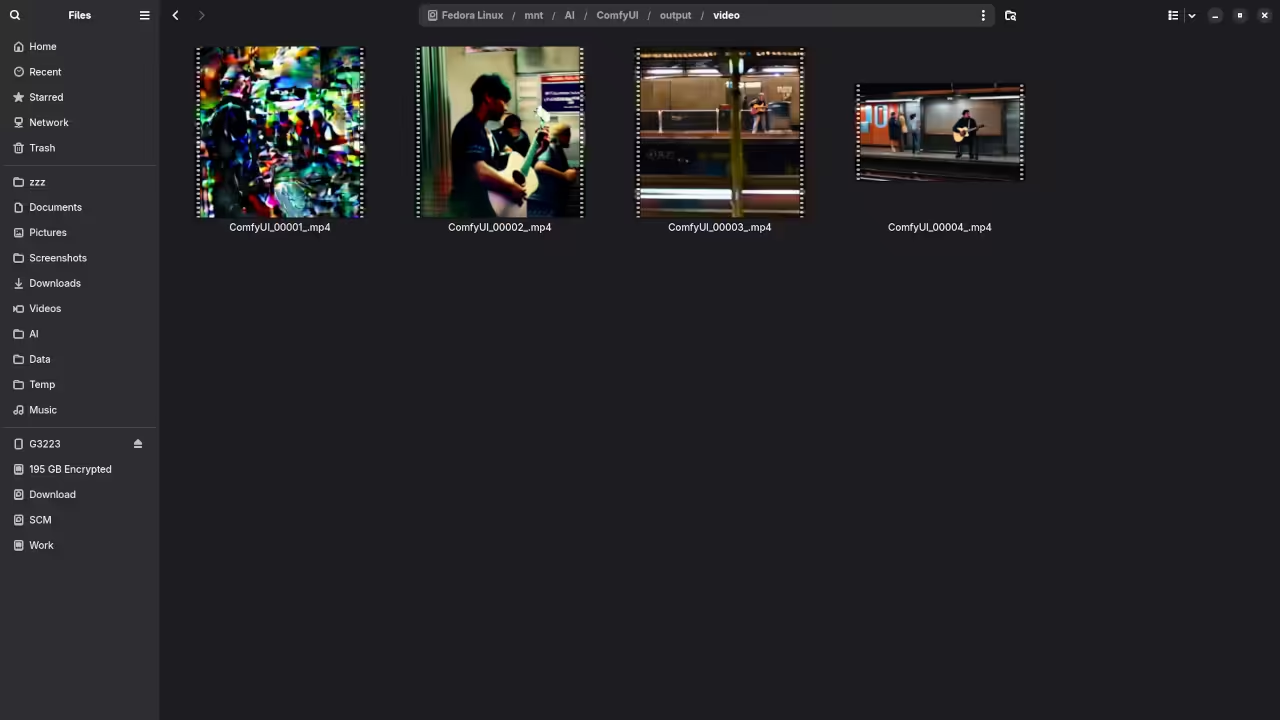
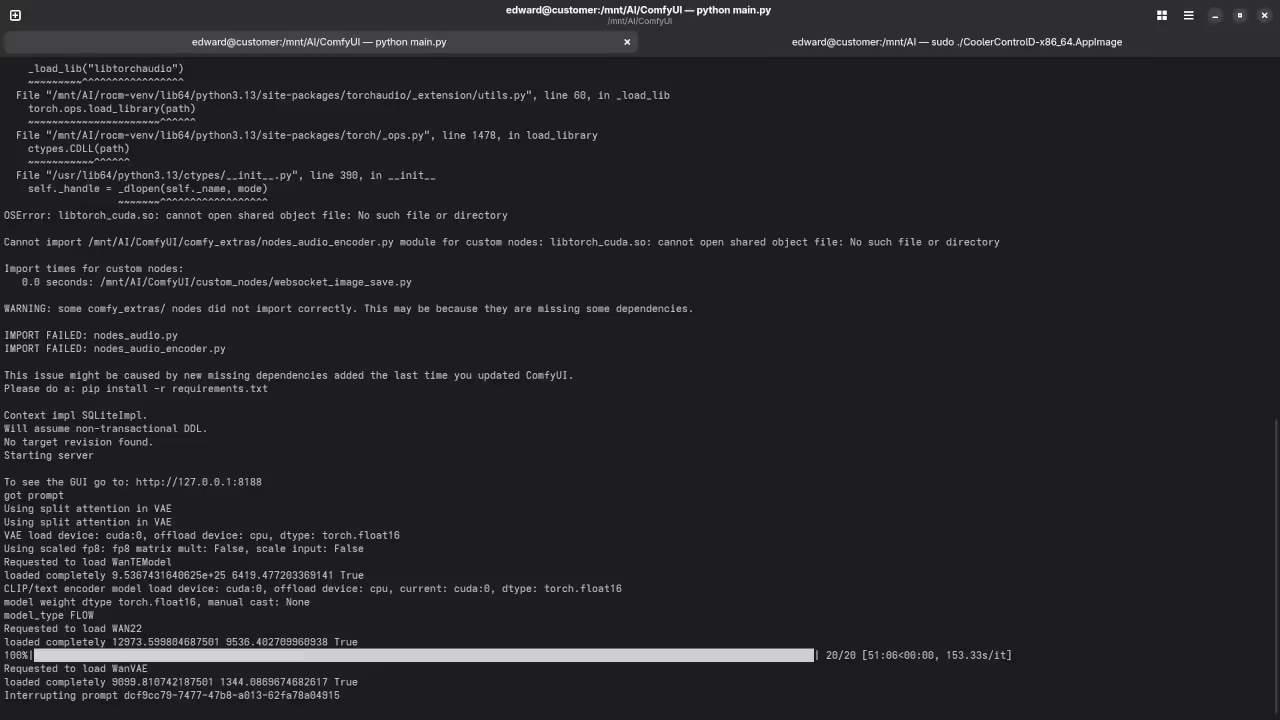
ComfyUI With Wan 2.2 TI2V 5B Default Nodes.CoolerControl Showing Idle AMD CPU AND GPUs Temperatures.CoolerControl Showing Computation AMD CPU AND GPUs Temperatures.Gnome Files Displaying Generated Video Files.Command Line Displaying Status Of Video Generation.
▶️ Screencast
Watch my real-time demo of Wan 2.2 TI2V 5B on Linux:
Video Displaying ComfyUI With Wan 2.2 TI2V 5B Setup
Results:
0 second 512×512 24FPS Video
Produced vertical pixelated video in Quicktime container.
1 second 512×512 24FPS Video
Produced vertical low resolution video in Quicktime container.
1 second 512×512 24FPS Video
Produced vertical low resolution subway platform video in Quicktime container.
1 second 896×512 24FPS Video
Produced wide angle low resolution subway platform video in Quicktime container.
1 second 1280×704 24FPS Video
Took a very long time and seems to be stuck after loading WanVAE.
Learn Python with My Resources
If you’re new to Python or want to deepen your understanding, I have resources that can help you:
Book: Check out my book, Learning Python, which is designed for beginners and will guide you step-by-step through the basics of Python programming.
Online Course: My course, Learning Python, offers a comprehensive curriculum that covers essential Python concepts and practical applications.
One-on-One Python Tutorials: If you need personalized guidance, I offer one-on-one online Python tutorials. Learn at your own pace—contact me here to schedule a session.
Need Help with Wan 2.2 TI2V 5B Installation?
If you want to install or migrate Wan 2.2 TI2V 5B, I’m available to assist you with that. I can walk you through the process or set it up for you. Get in touch with me via this contact form.
Conclusion
Wan 2.2 TI2V 5B running in ComfyUI is a powerful, flexible, and open-source solution for AI projects. With the Apache 2.0 License, you have the freedom to use, modify, and distribute the model, enabling innovation and collaboration. I hope this guide helps you get up and running quickly with Wan 2.2 TI2V 5B.