Blog

  • Zettlr WYSIWYG Markdown Editor

    Zettlr WYSIWYG Markdown Editor

    Zettlr Review An Open Source WYSIWYG Markdown Editor for Fedora Linux

    Zettlr is a free and open source Markdown editor built for developers writers researchers and educators who want a clean and productive writing environment. It provides a near WYSIWYG editing experience while keeping all content in plain Markdown which makes it ideal for WordPress blogging documentation and programming books.

    Why Zettlr Is Worth Using

    Zettlr focuses on clarity speed and control. It is especially useful when you want to write Markdown content while visually understanding the final structure of your document as you type.

    • Free and open source software
    • Clean WYSIWYG style Markdown editing
    • Designed for developers and technical writers
    • Cross platform support including Linux
    • Excellent for blogging books and documentation

    Key Features

    • Live Markdown preview with minimal distractions
    • Project and folder based organization
    • Citation and bibliography management
    • Export to PDF HTML and LaTeX
    • Syntax highlighting for code blocks

    Zettlr License

    Zettlr is licensed under the GNU General Public License version 3.0.

    This license allows you to use study modify and redistribute the software while ensuring that Zettlr and any derived works remain open source. It is well suited for educators developers and organizations that value software freedom.

    Installing Zettlr on Fedora Linux

    Install Using Flathub

    This method is recommended for getting the latest stable release.

    sudo dnf install flatpak
    flatpak remote-add --if-not-exists flathub https://flathub.org/repo/flathub.flatpakrepo
    flatpak install flathub com.zettlr.Zettlr

    Launch Zettlr using the following command.

    flatpak run com.zettlr.Zettlr

    Install From the Fedora Distribution

    You may also install Zettlr from available Fedora repositories if present.

    sudo dnf search zettlr
    sudo dnf install zettlr

    The distribution version may not always be the most recent compared to Flathub.

    Using Zettlr as a WYSIWYG Markdown Editor

    Zettlr uses Markdown syntax but renders formatting clearly while writing. Headings lists emphasis and code blocks are visually distinct which creates a writing experience close to traditional WYSIWYG editors without hiding the Markdown structure.

    This makes Zettlr well suited for WordPress posts programming tutorials technical books and long form documentation.

    📷 Screenshots
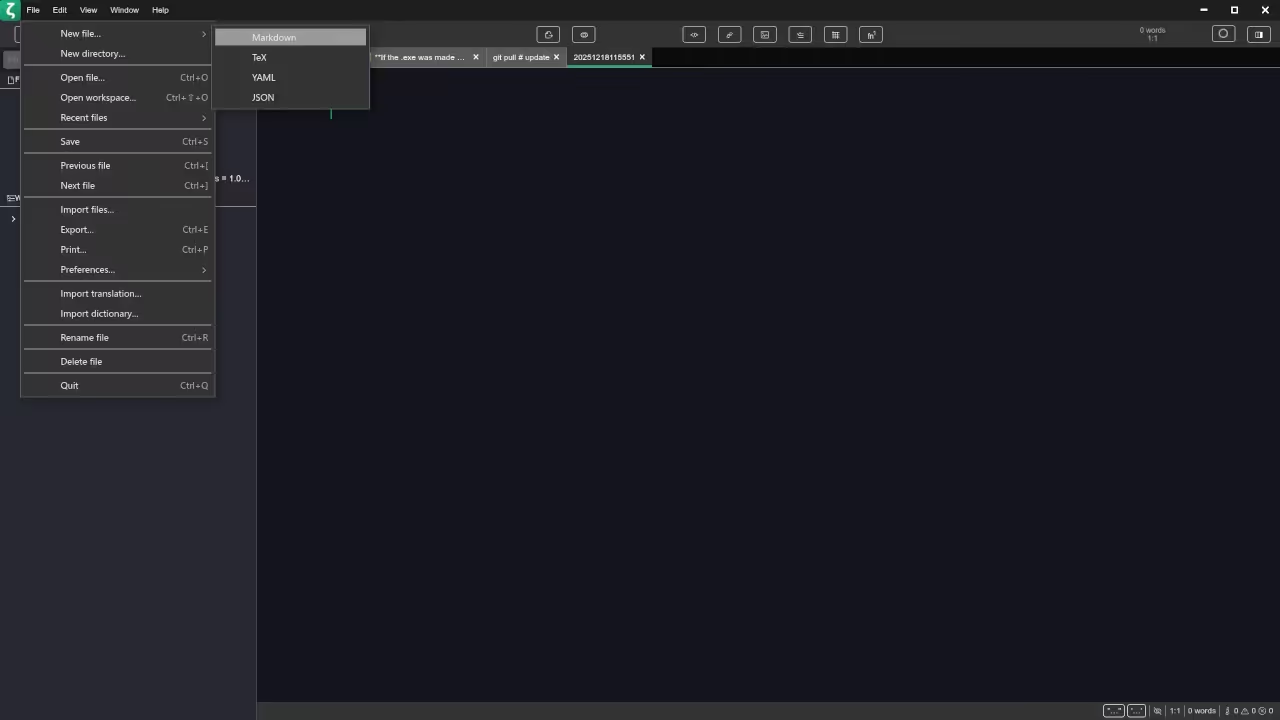
    Zettlr New File
    Zettlr New File Screen

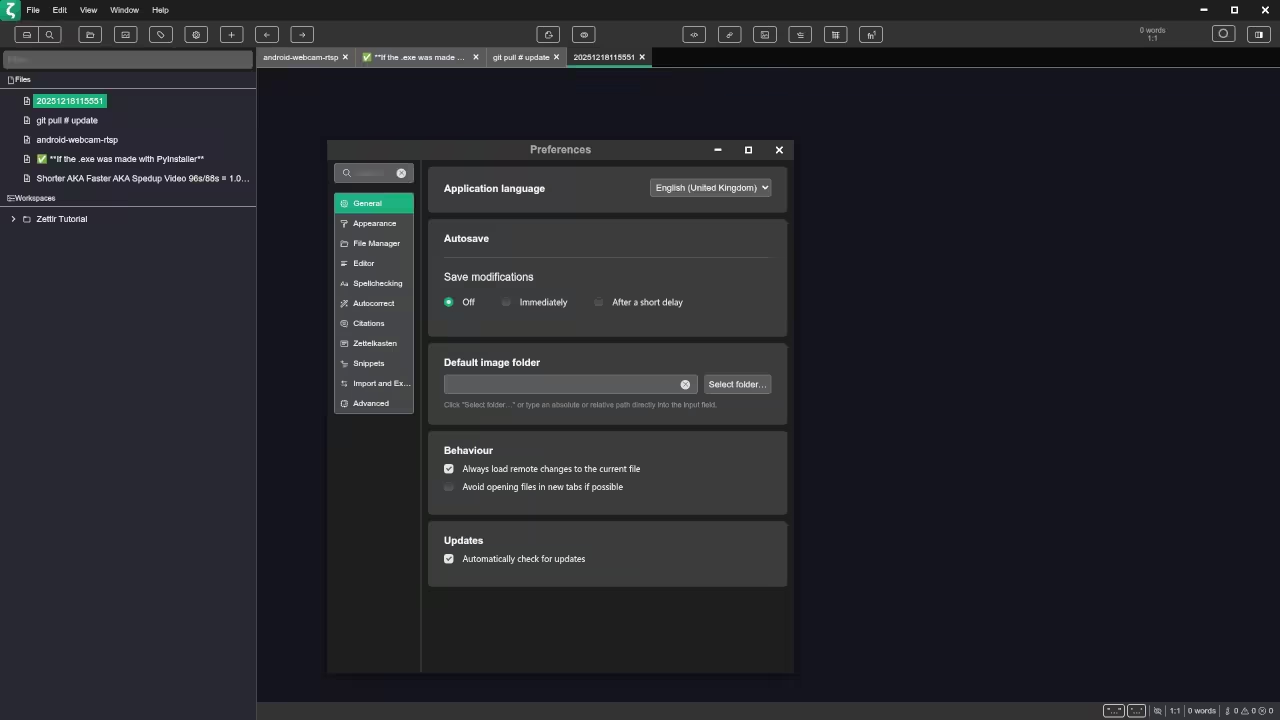
    Zettlr Preferences
    Zettlr Preferences Screen

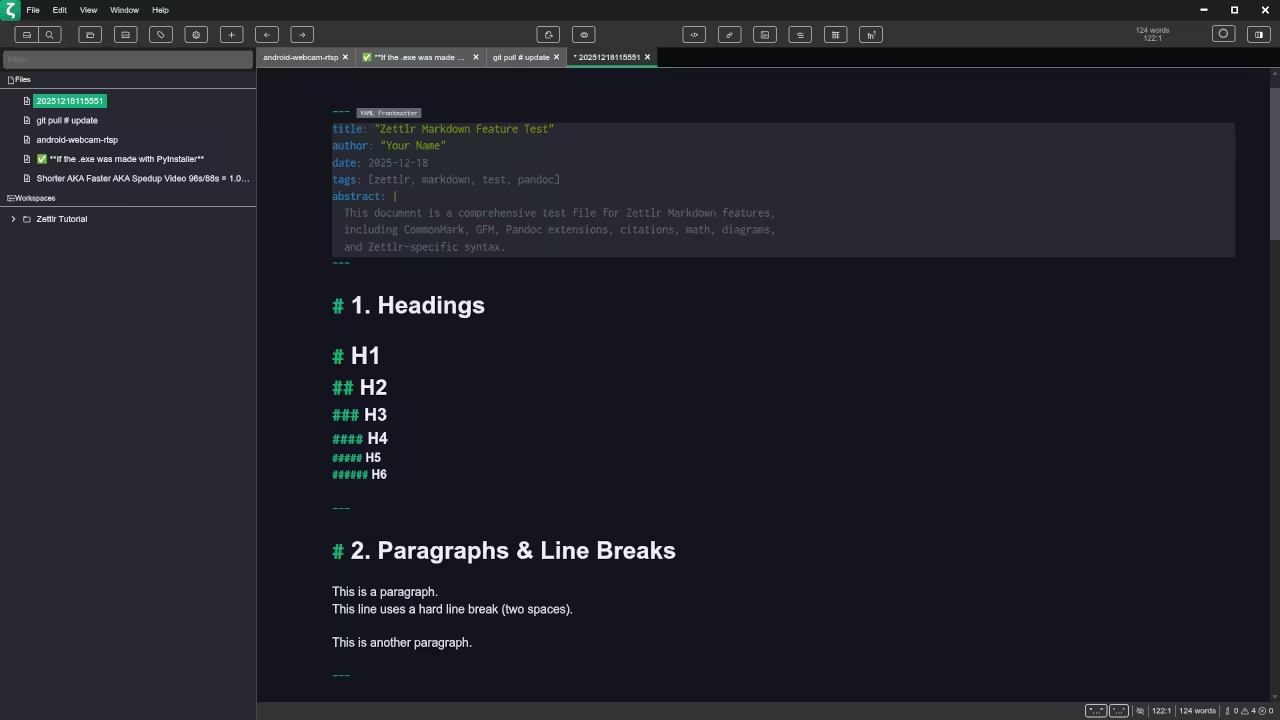
    Zettlr Markdown Headings, Paragraghs & Line Breaks
    Zettlr Headings, Paragraghs And Line Breaks Markdown File

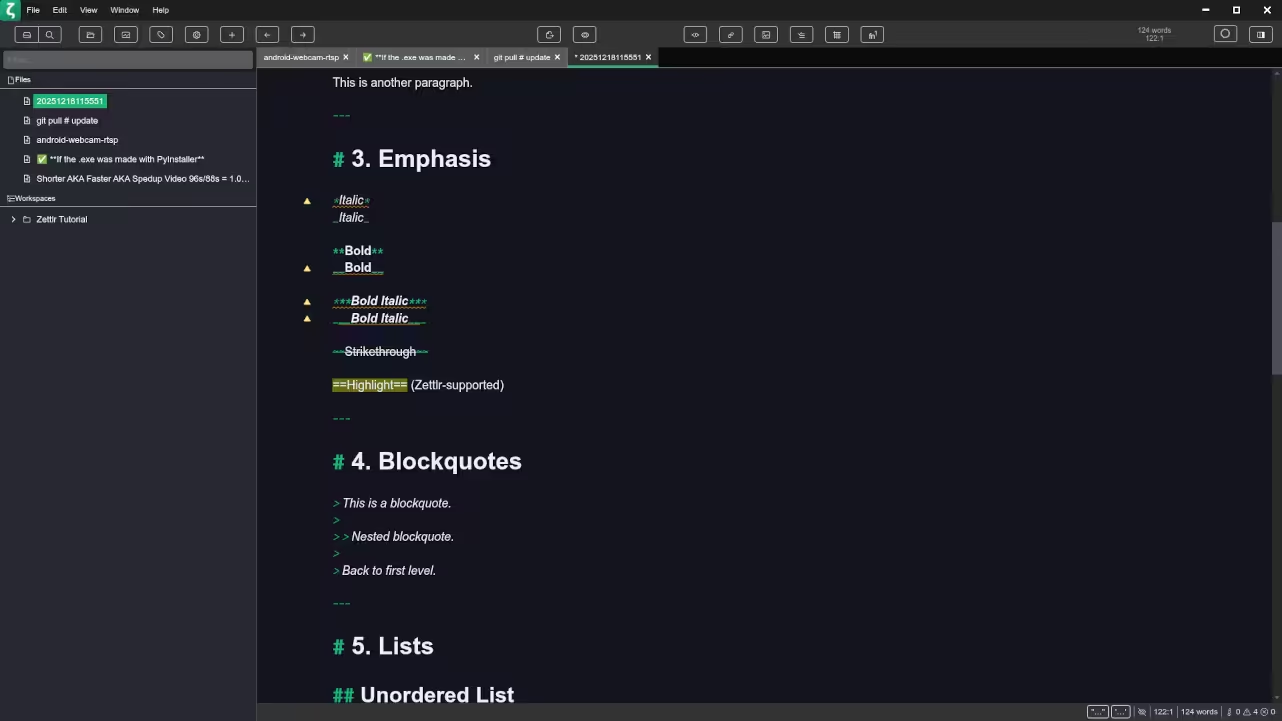
    Zettlr Emphasis, Blockquotes & Lists
    Zettlr Emphasis, Blockquotes And Lists Markdown File

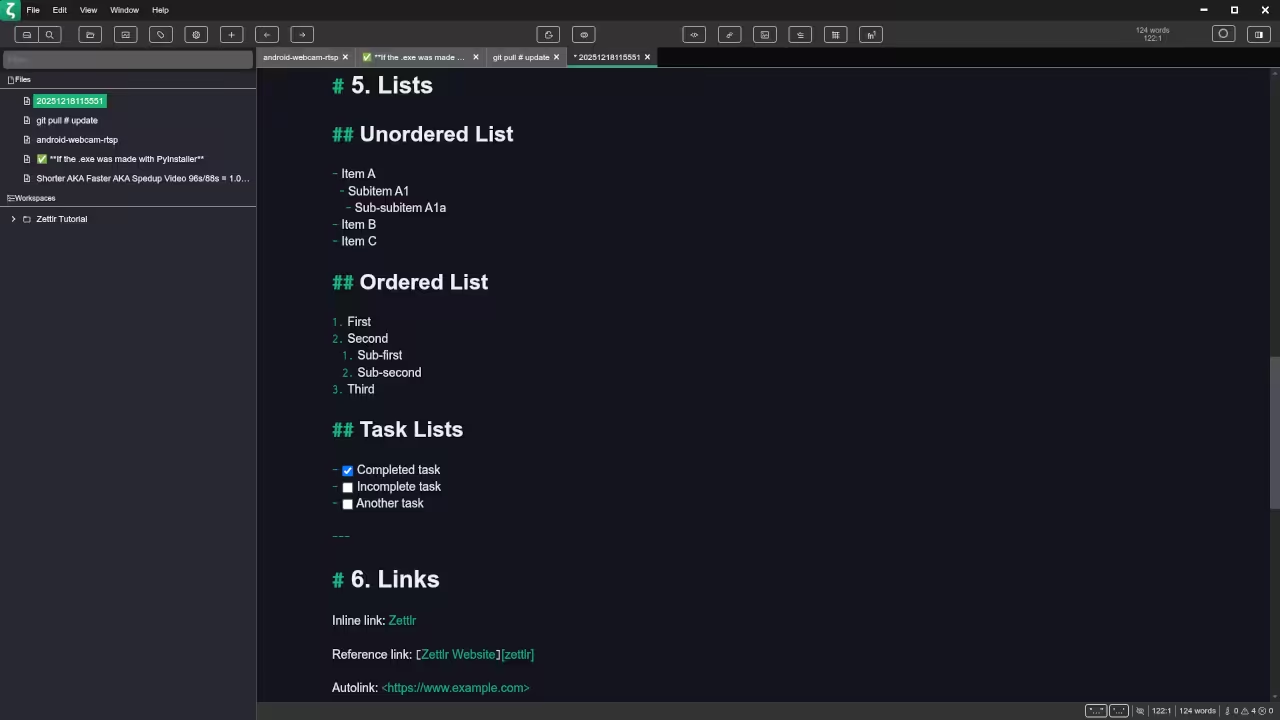
    Zettlr Links
    Zettlr Unordered List, Ordered List, Tasks Lists And Links Markdown File

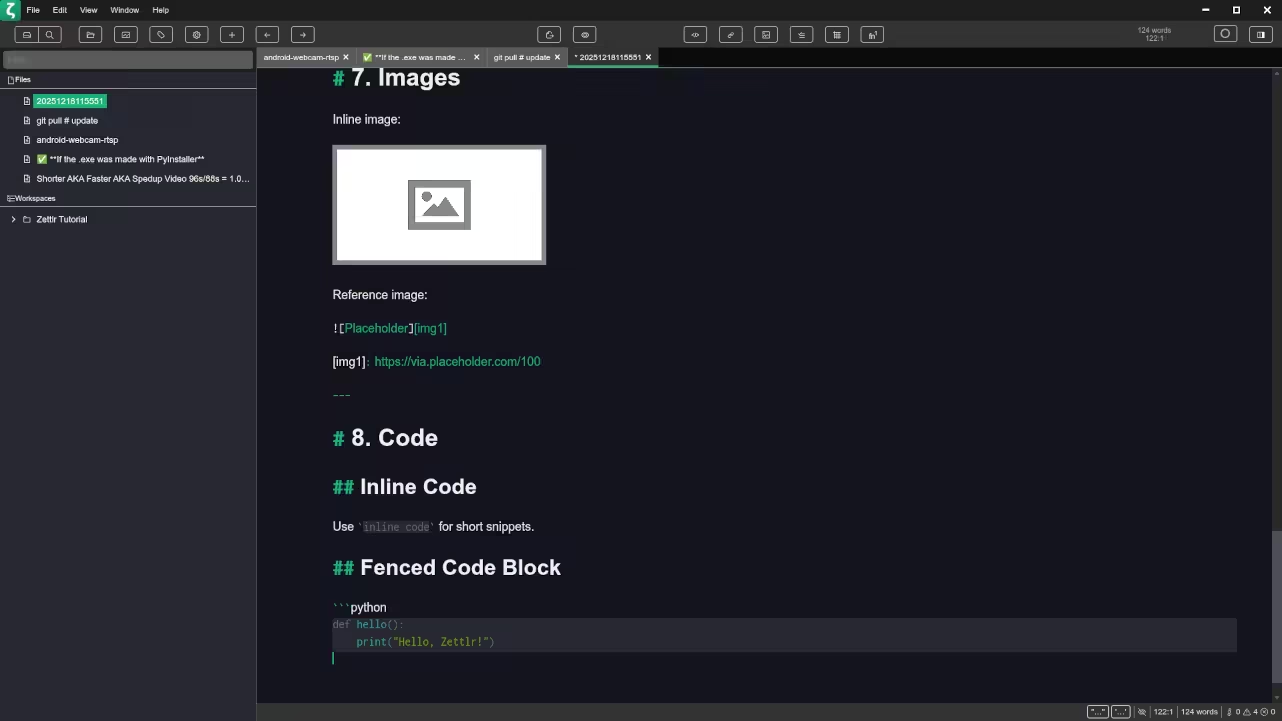
    Zettlr Images & Code
    Zettlr Images, Inline Code And Fenced Code Block Markdown File

    🎬 Live YouTube Screencast

    Video Displaying The Installation And Use Of Warpinator On Linux

    Programming Resources and Services

    Programming Books

    I have published programming books that focus on practical and real world learning.


    View my programming books on Amazon

    Online Programming Courses

    Browse my online programming courses designed for beginners and professionals.


    View online programming courses

    One on One Programming Tutorials

    I am available for personalized one on one programming tutorials.


    Contact me for one on one programming tutorials

    Consulting and Remote Installation Services

    I also provide consulting services and can install Zettlr and other remote desktop clients for individuals and teams.


    Contact me for consulting and installation services

    Final Thoughts

    Zettlr is a powerful open source Markdown editor that fits perfectly into a Fedora Linux workflow. Whether you are writing WordPress articles programming books or technical documentation it delivers clarity flexibility and control while respecting open source principles.
  • NetBeans 28 in 2025: A Deep Dive into Its Advanced Editing Capabilities

    NetBeans 28 in 2025: A Deep Dive into Its Advanced Editing Capabilities

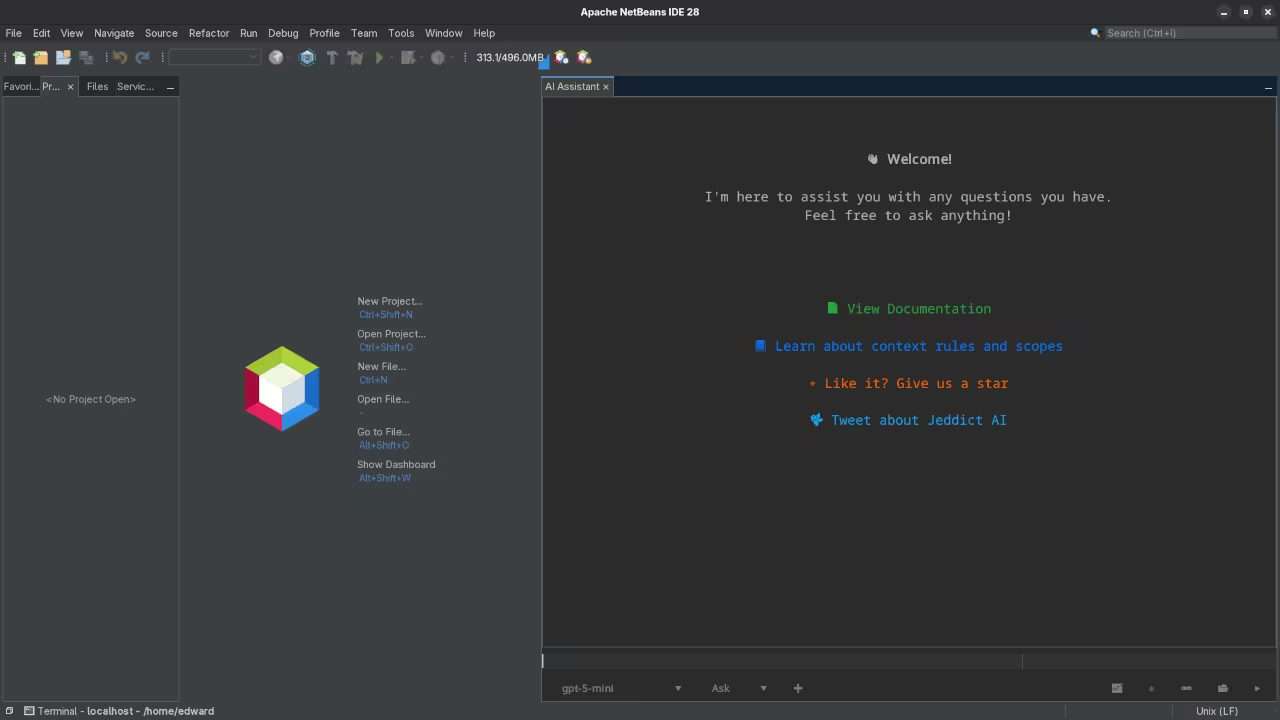
    Jeddict AI Assistant Supercharge Your Apache NetBeans on Fedora Linux

    Whether you are a seasoned Jakarta EE architect or a student just starting your journey with Java the tools you choose define your productivity. Recently I have been exploring Jeddict AI Assistant a powerful extension for Apache NetBeans. Much like my previous review of the Netbeans 28 Advanced Editor Jeddict transforms a standard environment into a high performance development hub.

    What is Jeddict AI Assistant

    Jeddict AI Assistant is an open source plugin designed specifically for the Apache NetBeans IDE. It provides intelligent real time code suggestions and advanced hints tailored for Java and Jakarta EE. It is released under the Apache License 2.0 ensuring it remains free for the community to use and improve.

    Installation Guide

    The plugin is cross platform but since I am a huge proponent of open source operating systems we will focus on Fedora Linux.

    For Fedora Linux Users

    • Open NetBeans and go to Tools then Plugins.
    • Go to the Settings tab and click Add.
    • For the Update Center use the name Jeddict and provide the URL https://jeddict.github.io/uc/updates.xml. Ensure you check the official catalogue for the version matching your IDE.
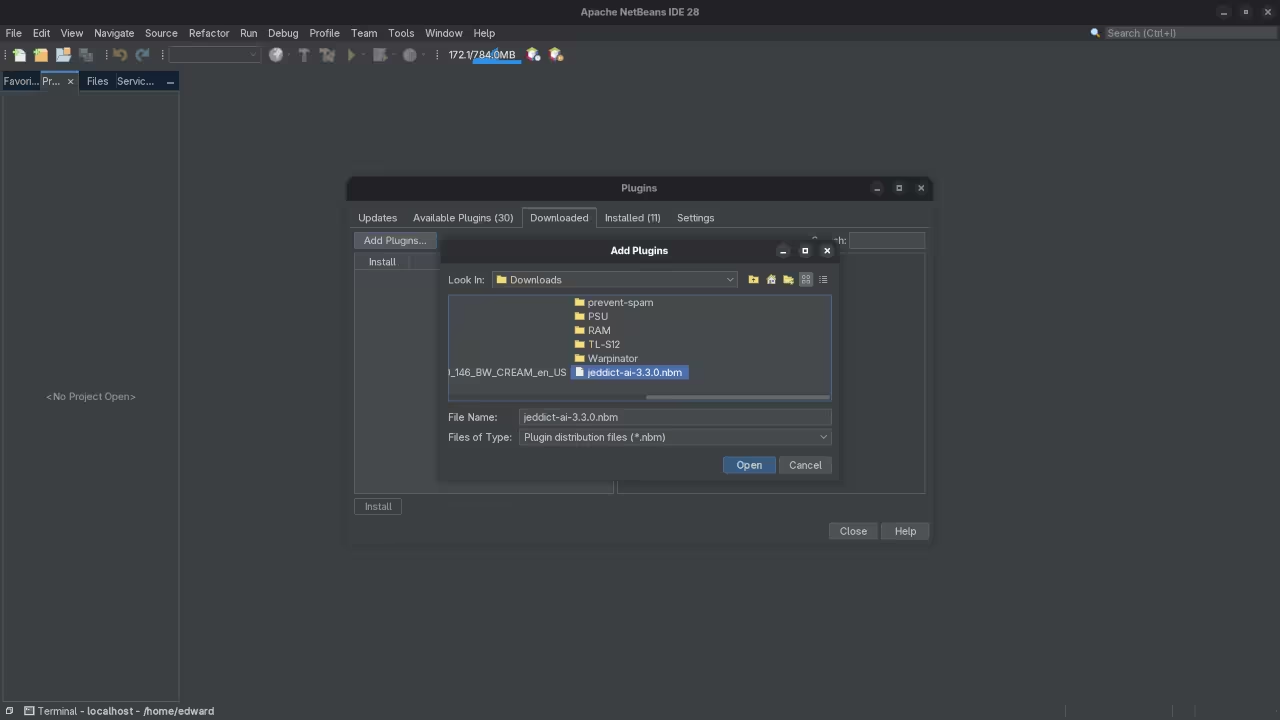
    • Go to the Available Plugins tab search for Jeddict select it and click Install.

    Other Platforms

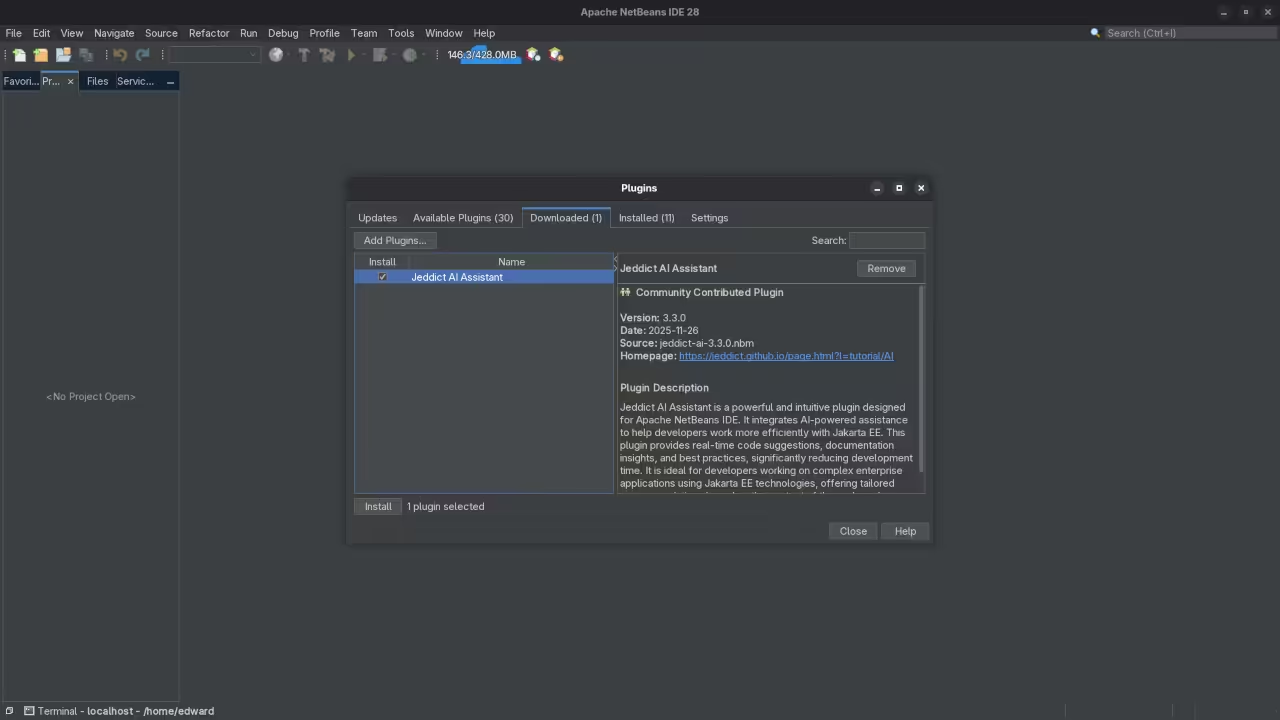
    The process is identical within the NetBeans IDE on Windows or macOS. Alternatively you can download the .nbm file directly from the NetBeans Plugin Portal link above and add it via the Downloaded tab in the Plugins menu.

    Managing Disk Space The 20GB NetBeans Log Problem

    One common issue many users face especially on Linux is that Apache NetBeans logs and history files can balloon to over 20GB if left unchecked.

    Tweak Your netbeans.conf

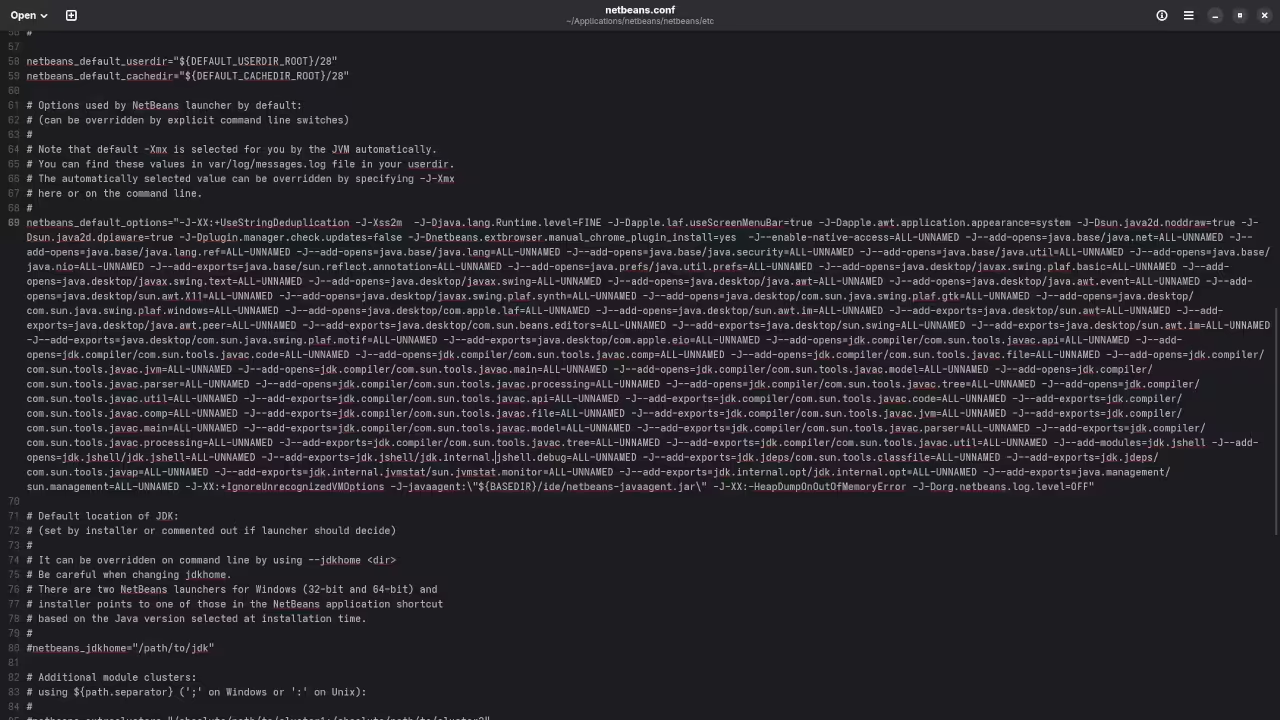
    You can limit the log file size by editing the configuration file. On Fedora this is typically located in your installation directory under etc/netbeans.conf. Add or modify the following line in netbeans_default_options to limit memory and logging overhead.

    -J-Djava.util.logging.FileHandler.limit=5000000

    This setting limits the log to roughly 5MB.

    Adjust History Settings

    NetBeans Local History is great for undoing mistakes but it eats disk space. To change this go to Tools then Options then Editor and finally Versioning. Reduce the Keep local history for setting from the default to 2 or 3 days.

    Requirements For Programming Text Editor

    Glossary:

    Code Editor

    Designed for writing and editing source code.

    IDE

    Integrated Development Environment combines various tools need for software development.

    Plugin

    Software component that adds specific functionality.

    Theme

    Preset package containing graphical appearance to customize look and feel.

    Open source

    Freely available for possible modification and redistribution.

    SCM

    Source code management use to manage and track modifications to a source code repository.

    LMB

    Left Mouse Button (LMB) or left click

    MMB

    Middle Mouse Button (MMB) or scroll wheel

    Test Tools

    Test System
    Name Description
    CPU Ryzen 5 5600GT @ 3.60GHz.
    Memory 32GB DDR4.
    Operating System Fedora Linux Workstation 43.
    Desktop Environment Gnome 49.
    Name Description

    Test Suite
    Name Description
    Large File 1GB human-readable text.
    Regex File Text with word “Helix” repeated.
    Syntax File PHP file containing HTML, CSS & JavaScript.
    Media File Smiley face or Tux Linux JPEG file.
    Java Version OpenJDK 21.0.9.
    PHP Version PHP 8.4.14.
    Python Version Python 3.14.0.
    Netbeans Version 28
    Name Description

    Test Scoring

    1. Each feature has two parts.
    2. Score of zero indicates a missing feature.
    3. A part of a feature is work a score of 0.5.

    Three bias elimination steps were utilized. The editor was used for at least three years on different platforms. Attempts were made to get stable plug-ins for missing features. The same editor was compared between the one in the repository, the developers website, and the compiled version if applicable.

    Selecting Editor Version

    For this review, Netbeans was downloaded from the developers website and it did not require additional plugins.

    Features

    1. The theme can be native for the editor in terms of the background, and the dark theme did not need tweaks for source code management. Netbeans comes with dark and light themes and others can be created or downloaded. The score for the theme was 1.0.
    2. Dragging and dropping a text file into the editor opens a new tab. It is still not possible to specify the tab location during the drag and drop operation. The score for drag and drop into editor was 0.5.
    3. Opening a very large text file did not crash Netbeans. An out of memory window was shown and it was not possible to edit the large file. The score for opening a large file was 0.5.
    4. Multiple documents can opened in multiple tabs. Tear-off tabs work by opening a new Netbeans editor instances which is handy for multiple monitors. The score for multiple documents was a perfect 1.0.
    5. Multiple editors can be opened as new tabs with drag options. Every new editor tab can be split vertically or horizontally. The score for multiple editor view was a perfect 1.0.
    6. Creating non-project files is possible by dragging the folder into the workspace. Non-project files can be opened by the drag and drop operation. The score for creating non-project files was a perfect 1.0.
    7. Soft word wrap can be enabled in the editor settings. Automatic soft wrap for documents is available for Netbeans. The score for word wrap was a perfect 1.0.
    8. Spell check works as words are typed. Spelling errors are shown in opened documents. The score for spell check was a perfect 1.0.
    9. Word count is not available for Netbeans. Selection word count is not available. The score for word count was 0.0.
    10. Go to line CTRL-G can jump to a specified line. It is possible to jump to either the first or last line. The score for go to line was a perfect 1.0.
    11. Indentation can default to user-defined tab stops. Children are automatically indented. The score for indentation was a perfect 1.0
    12. Fonts can be dynamically scaled using ALT-MMB. The system font can be bypassed and a new editor font and size can be set. The score for fonts was a perfect 1.0.
    13. Find and replace using regular expressions can be utilized for all open documents in the current session. Find and replace will work for the current document or a selection in the current document. The score for find and replacing using regular expressions was 1.0.
    14. Multiple language syntax highlighting in one file is enabled if the language plug-ins are installed. Each language has code-sensitive syntax colors which can be modified. The score for multiple language syntax highlighting was a perfect 1.0.
    15. Code folding works for markup languages such as HTML. Code folding also works for programming languages such as Java and PHP. The score for code folding was 1.0.
    16. Selecting rectangular block per column works via a toggle or CTRL-SHIFT-R on Linux. Rectangular block selections work with word wrap enabled. The score for selecting rectangular block was a perfect 1.0.
    17. Multiple selection works using the shortcut CTRL-SHIFT-LMB or CMD-SHIFT-LMB on Macs. Search multiple selection is not available. The score for multiple selection was 0.5.
    18. Distraction-free mode to hide panes works. Line numbers can be toggled to improve distraction-free mode. The score for distraction-free was a perfect 1.0.
    19. The file manager can create and delete folders. Media files can be dragged and dropped into the file manager pane. The score for file manager was a perfect 1.0.
    20. Terminal is integrated into Netbeans. The terminal can follow folder. Terminal can execute system commands. The score for terminal was 1.0.

    Results

    Netbeans is a very powerful IDE. By default, the Netbeans editor is no longer missing required features which can be installed by using extensions. For my required features, the Netbeans editor scored 87.5% or 8.75 out of 10.

    📱 Screenshots

    Netbeans 28 Configuration Settings
    Apache Netbeans 28 Configuration Settings File

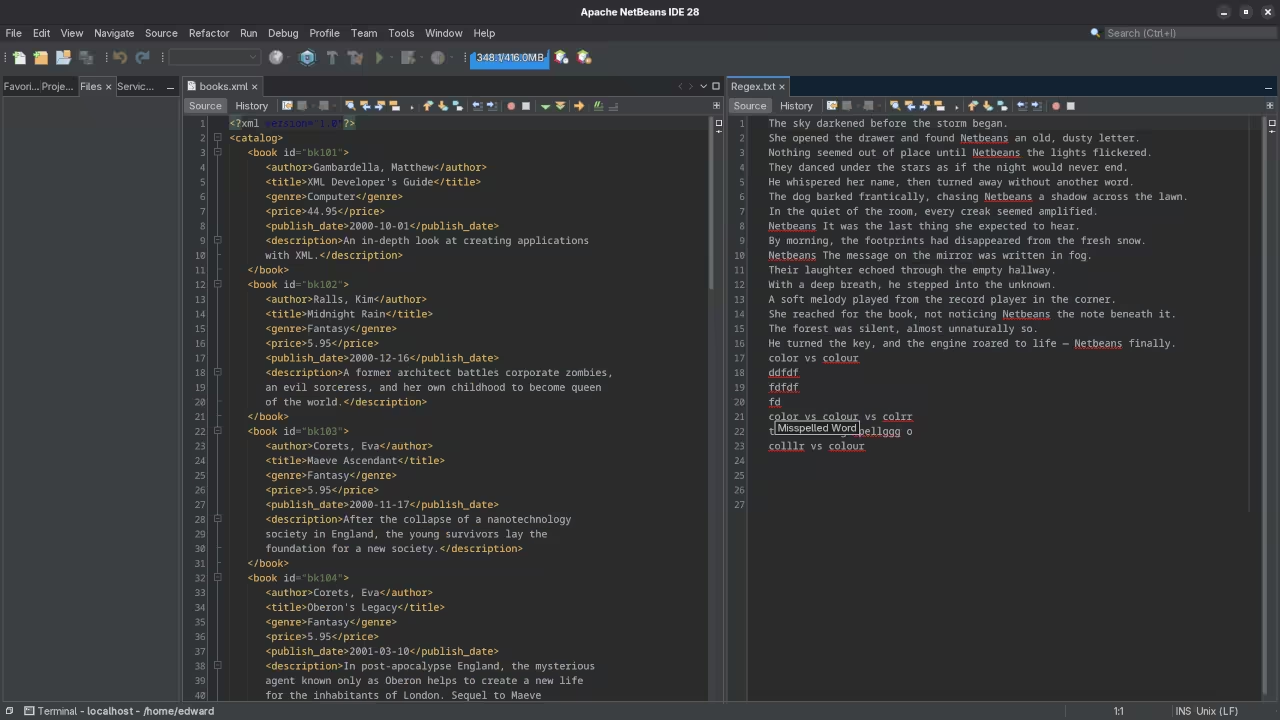
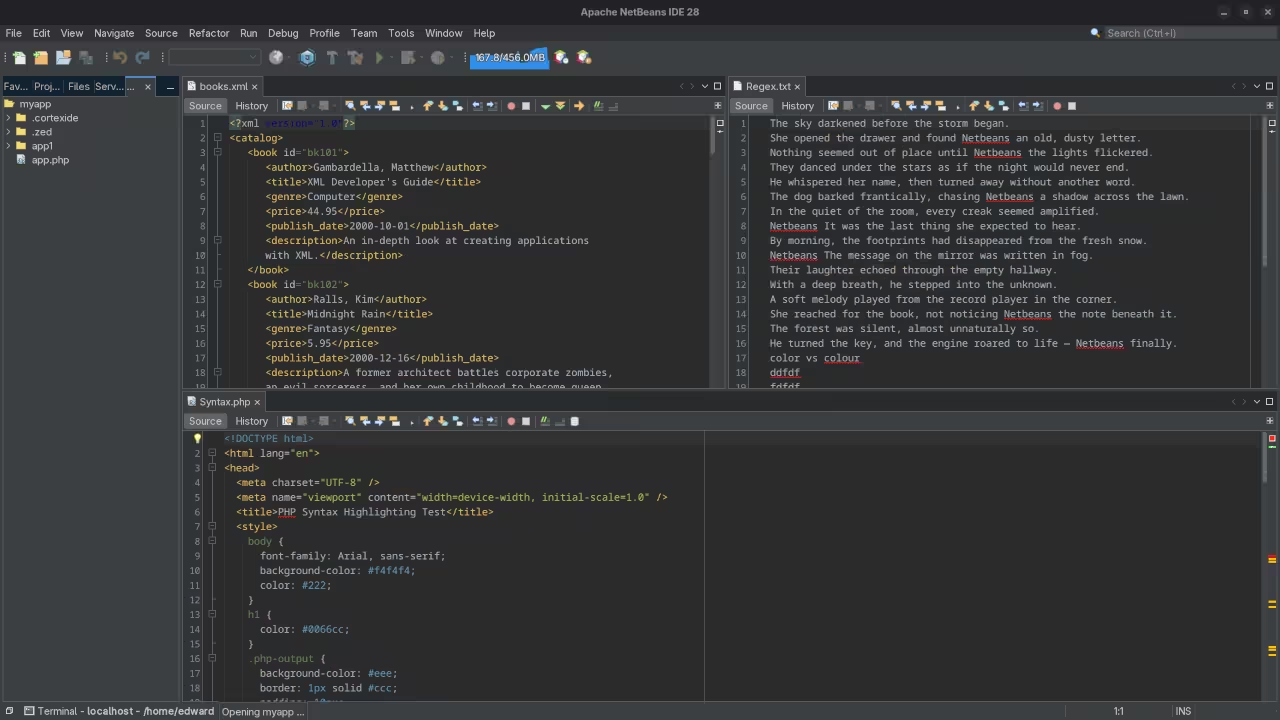
    Netbeans 28 Split View
    Apache Netbeans 28 Multiple Editor Split View

    Netbeans 28 Folder View
    Apache Netbeans 28 Installed Folder View

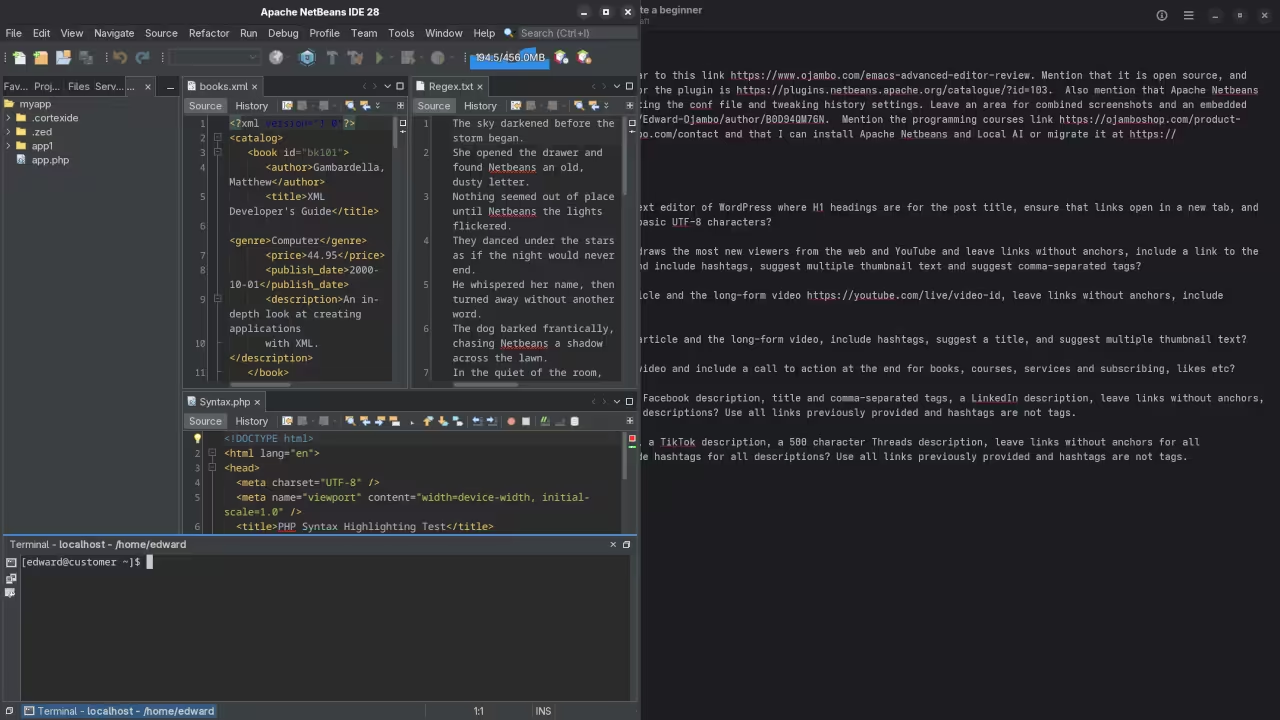
    Netbeans 28 Terminal View
    Apache Netbeans 28 Terminal View

    Netbeans 28 Plugins View
    Apache Netbeans 28 Plugins View

    Netbeans 28 Install Jeddict AI
    Apache Netbeans 28 Install Jeddict AI Assistant

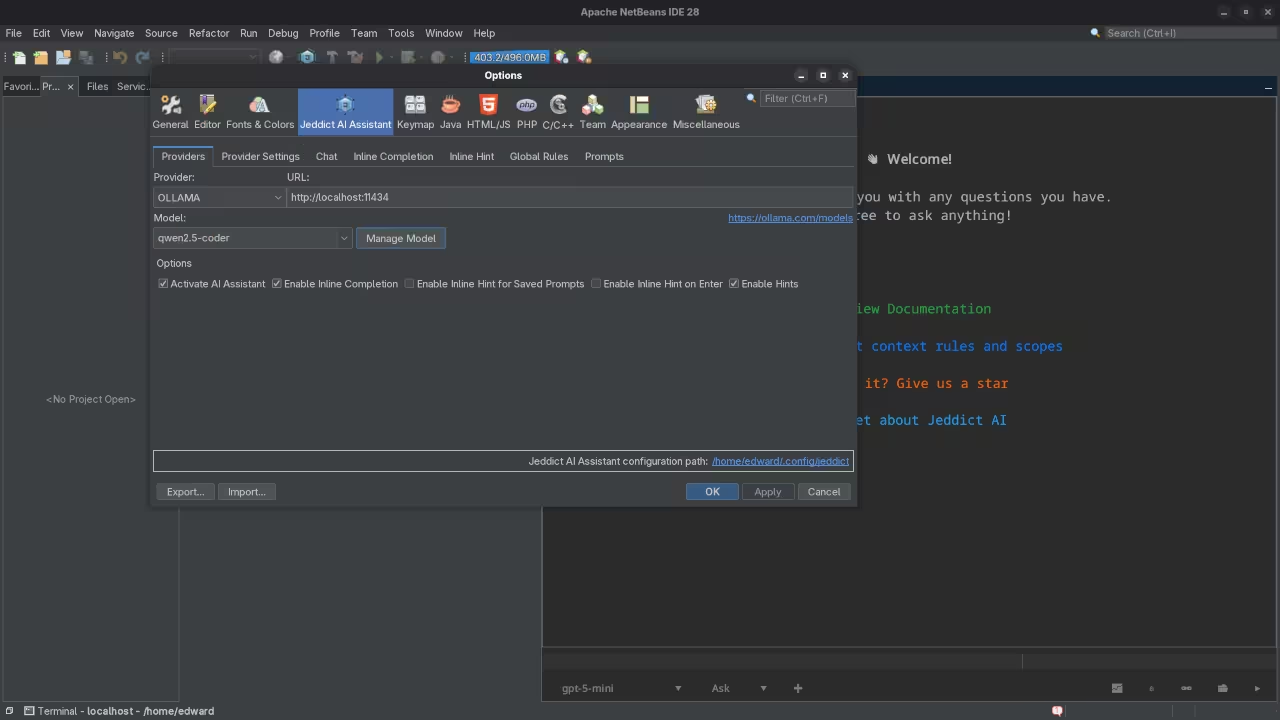
    Netbeans 28 Jeddict AI Settings
    Apache Netbeans 28 Jeddict AI Assistant Settings

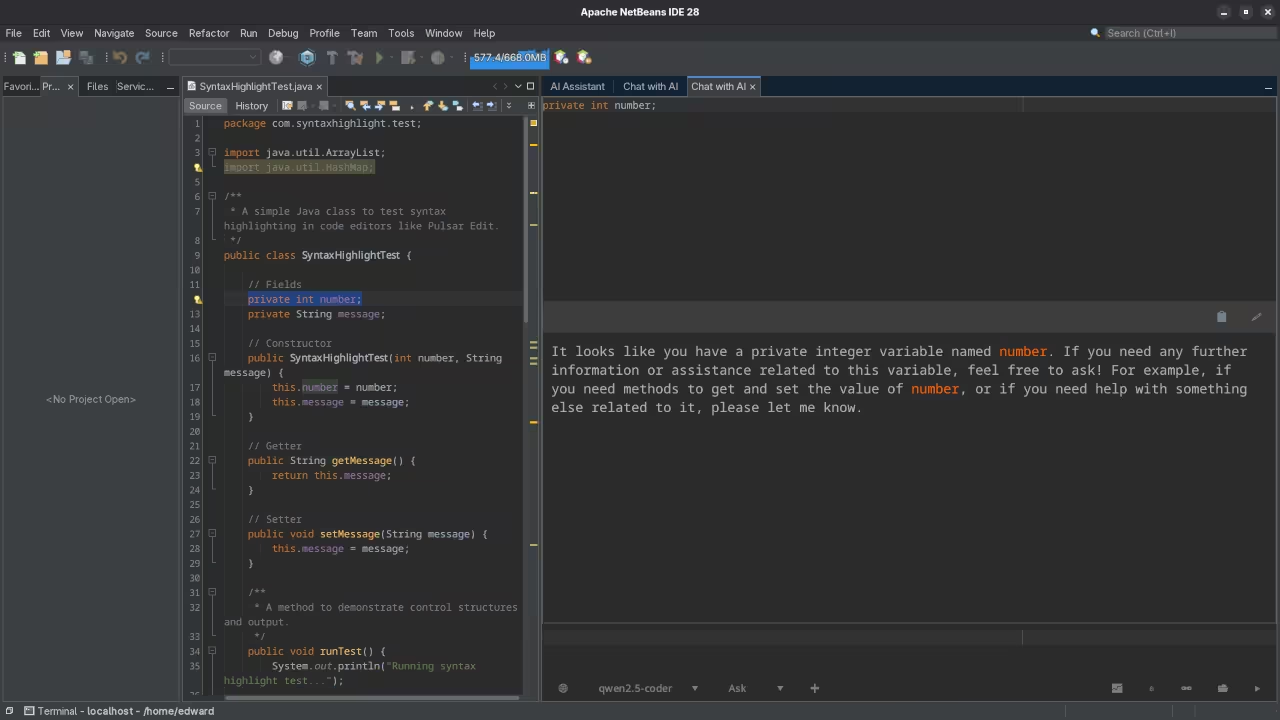
    Netbeans 28 Jeddict AI Java Code
    Apache Netbeans 28 Jeddict AI Assistant Java Code

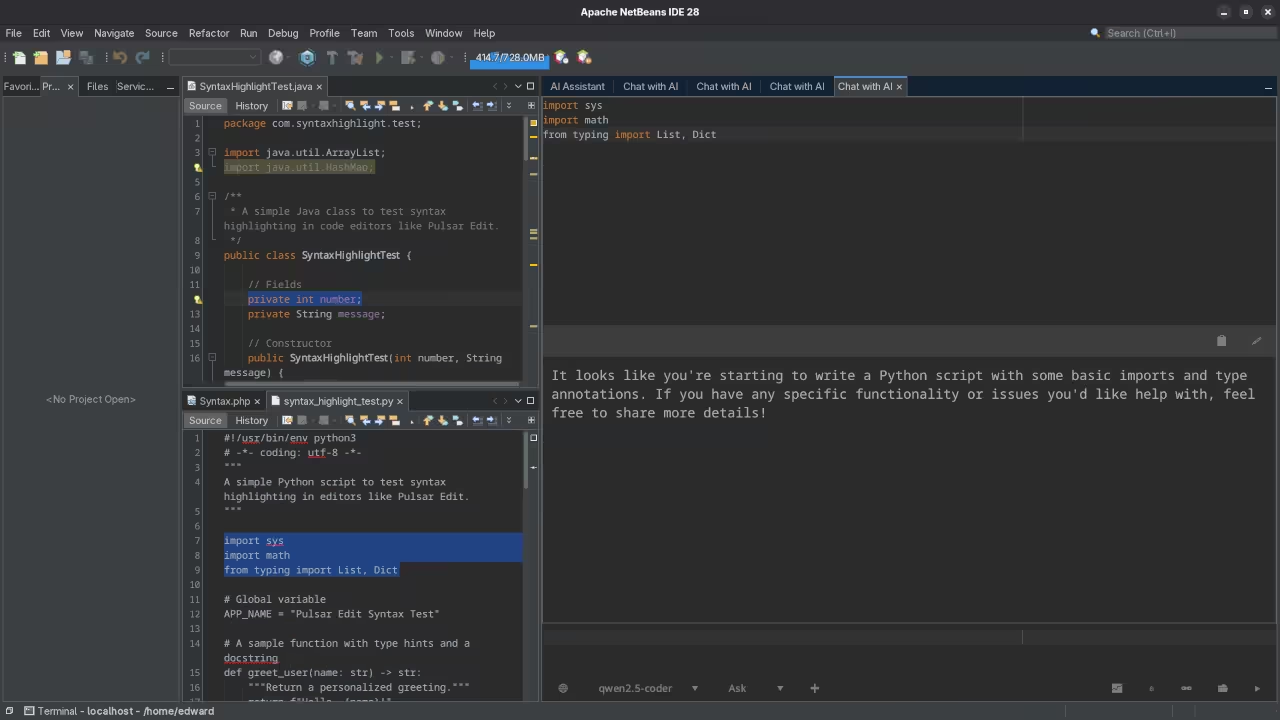
    Netbeans 28 Jeddict AI Python Code
    Apache Netbeans 28 Jeddict AI Assistant Python Code

    🞍 Screencast Tour

    Take a guided walk-through of some of NetBeans 28’s best new features—from database tools to testing frameworks:

    Apache Netbeans 28 Tour And Review

    Learn More and Get Help

    If you are looking to dive deeper into programming check out my resources below.

  • How to Self-Host Passbolt: An Open-Source Password Manager

    How to Self-Host Passbolt: An Open-Source Password Manager


    How to Install Passbolt Community Edition on Your Server (Using Podman with Self-Signed SSL)

    Introduction

    In this guide, we will walk you through setting up Passbolt Community Edition using Podman and self-signed SSL certificates for HTTPS. This approach is perfect for local or development environments where you want to securely manage passwords, but do not need a commercial SSL certificate. Since you are working locally, you’ll configure a self-signed certificate and bind-mount it inside your Passbolt container.

    What is Passbolt Community Edition?

    Passbolt is an open-source password manager designed for teams to securely manage shared passwords. The Community Edition is free to use and can be self-hosted for complete control over your password management system. It features robust security protocols, including encryption and audit trails, and works well for both small teams and individuals.

    Prerequisites

    Before you begin, make sure you have the following:

    • A server or local machine with root or sudo access.
    • Podman installed on your system (or Podman-Compose for Docker Compose compatibility).
    • A working SMTP server to send email notifications.
    • A working NTP service to avoid GPG authentication issues.
    • Self-signed SSL certificates for HTTPS setup.

    For Podman installation, refer to the official guide.

    Step 1: Download the Official Passbolt Docker Compose File

    Let’s start by downloading the official docker-compose.yaml file for Passbolt, which we can use with Podman:

        curl -LO "https://download.passbolt.com/ce/docker/docker-compose-ce.yaml"
        curl -LO "https://github.com/passbolt/passbolt_docker/releases/latest/download/docker-compose-ce-SHA512SUM.txt"
      

    This will download the docker-compose-ce.yaml file and the checksum file to verify its integrity.

    Step 2: Verify the Integrity of the Downloaded Files

    Ensure that the downloaded file hasn’t been corrupted by verifying the checksum:

        sha512sum -c docker-compose-ce-SHA512SUM.txt && echo "Checksum OK" || (echo "Bad checksum. Aborting" && rm -f docker-compose-ce.yaml)
      

    If the checksum is valid, you can proceed. If not, the script will abort.

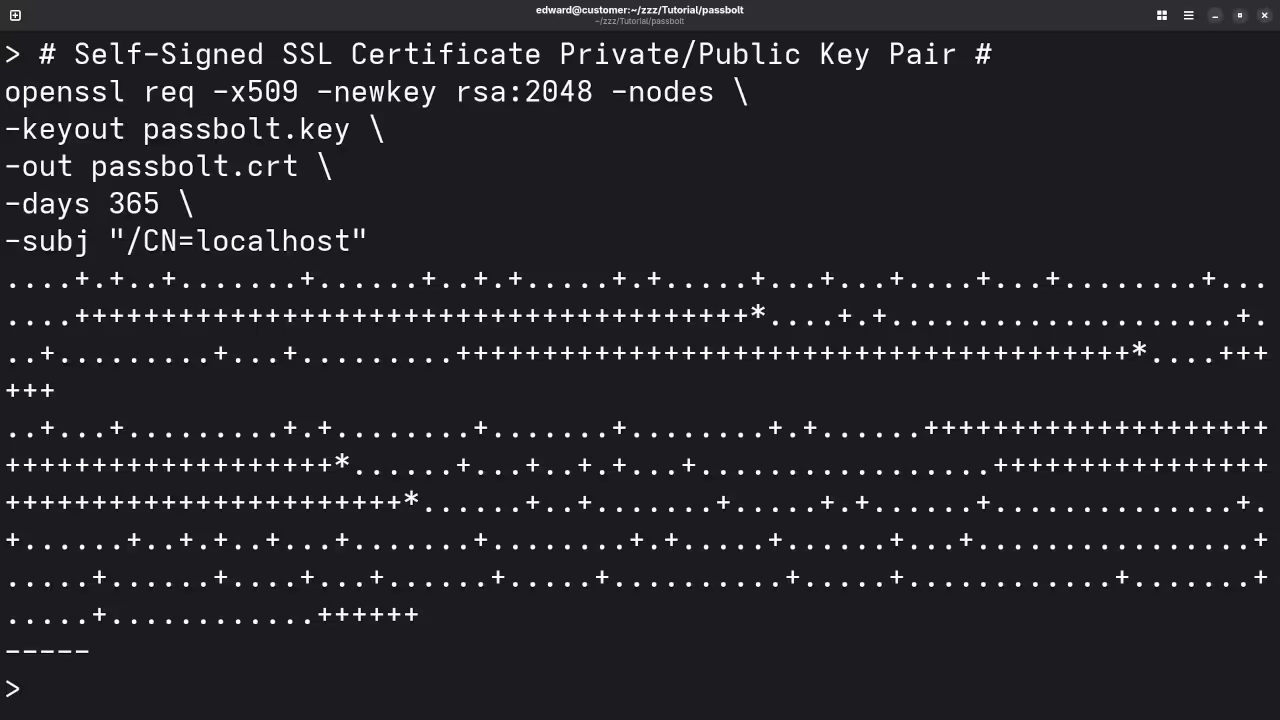
    Step 3: Prepare Your Self-Signed SSL Certificates

    To use HTTPS, you need to prepare your self-signed certificates. Create a folder for your certificates:

        mkdir certs
        mv /path/to/your/certificate.crt certs/cert.pem
        mv /path/to/your/certificate.key certs/key.pem
      

    Replace /path/to/your/certificate.crt and /path/to/your/certificate.key with the actual paths to your self-signed certificate files.

    Step 4: Configure the Docker Compose YAML File for Podman

    Now, modify the docker-compose-ce.yaml file to use your self-signed certificates. There are two configurations you can use: for standard images or non-root images. Since you are using Podman, we will focus on binding the certificate files correctly.

    For standard Passbolt images, add the following to the volumes section of the passbolt service:

        version: '3.7'
        services:
          db:
            ...
          passbolt:
            ...
            volumes:
              - ./certs/cert.pem:/etc/ssl/certs/certificate.crt:ro
              - ./certs/key.pem:/etc/ssl/certs/certificate.key:ro
            ports:
              - 80:80
              - 443:443
            environment:
              APP_FULL_BASE_URL: "https://your-domain-or-ip"
      

    For non-root images, the bind-mount paths will be different, and the ports may also differ (e.g., 4433 for non-root images):

        version: '3.7'
        services:
          db:
            ...
          passbolt:
            ...
            volumes:
              - ./certs/cert.pem:/etc/passbolt/certs/certificate.crt:ro
              - ./certs/key.pem:/etc/passbolt/certs/certificate.key:ro
            ports:
              - 80:8080
              - 443:4433
            environment:
              APP_FULL_BASE_URL: "https://your-domain-or-ip"
      

    Ensure that the APP_FULL_BASE_URL environment variable starts with https://, as you will be using SSL.

    Step 5: Start Your Containers with Podman-Compose

    Now that everything is configured, start the containers using Podman-Compose:

        podman-compose -f docker-compose-ce.yaml up -d
      

    This command will download the necessary Docker images and start the containers for Passbolt and MySQL in the background.

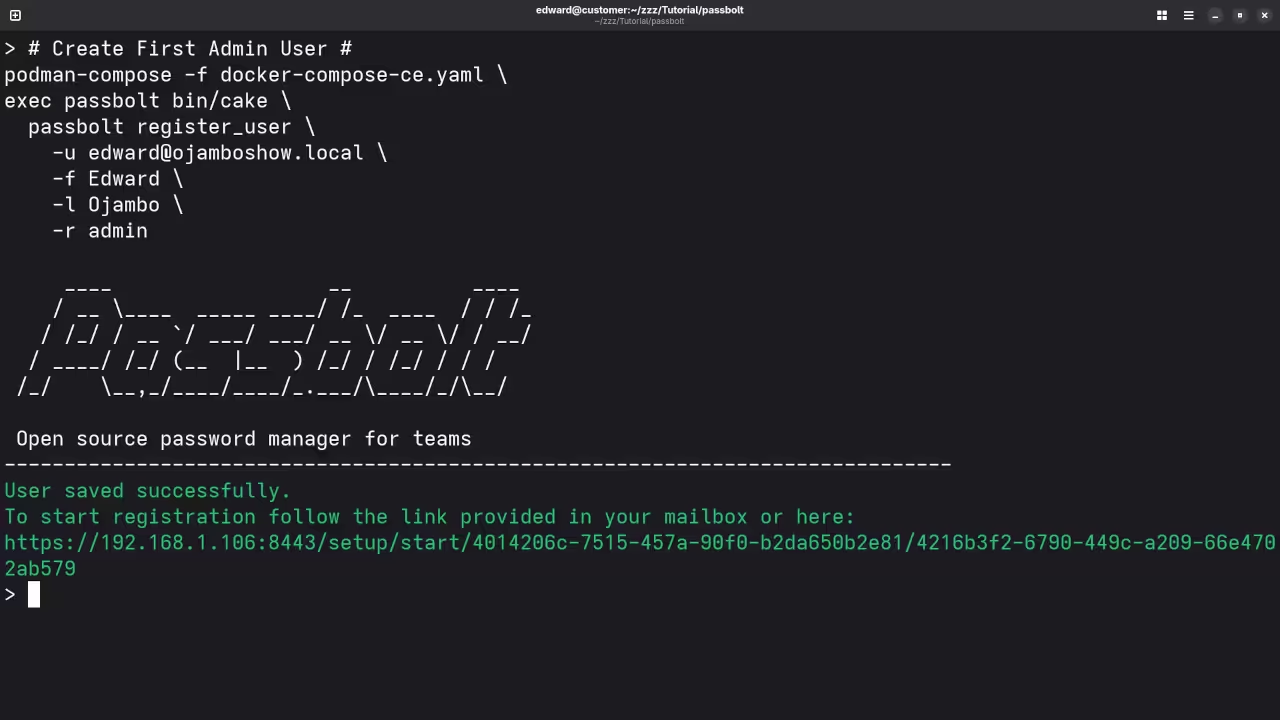
    Step 6: Create the First Admin User

    After the containers are up and running, create the first admin user by executing the following:

        podman-compose -f docker-compose-ce.yaml exec passbolt su -m -c "/usr/share/php/passbolt/bin/cake \
          passbolt register_user \
            -u YOUR_EMAIL \
            -f YOUR_NAME \
            -l YOUR_LASTNAME \
            -r admin" -s /bin/sh www-data
      

    Replace YOUR_EMAIL, YOUR_NAME, and YOUR_LASTNAME with the admin details. This will generate a registration link that you can paste into your browser to finalize the user creation.

    Step 7: Access Passbolt via HTTPS

    Once the containers are up, you can access Passbolt via your browser:

        https://your-domain-or-ip
      

    Since you are using a self-signed certificate, your browser will likely show a security warning. Proceed with the exception to continue.

    📱 Screenshots & Screencast

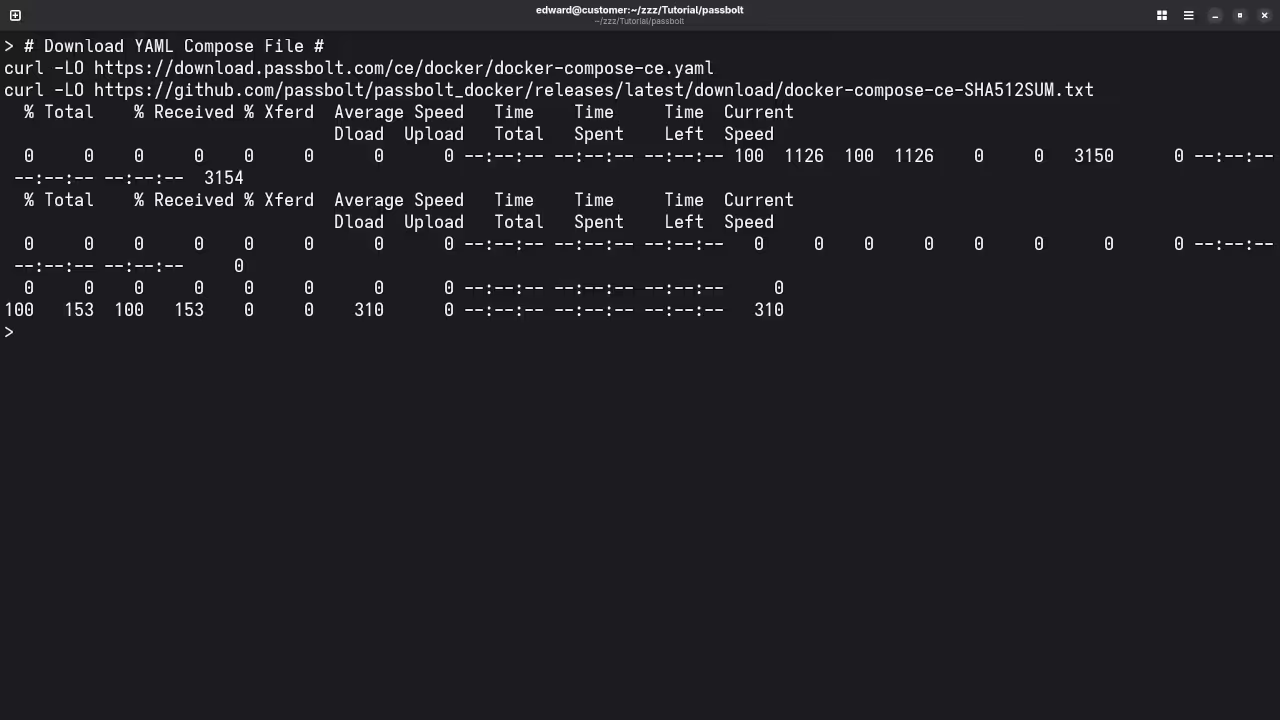
    Passbolt YAML Compose
    Command Line Download Passbolt YAML Compose

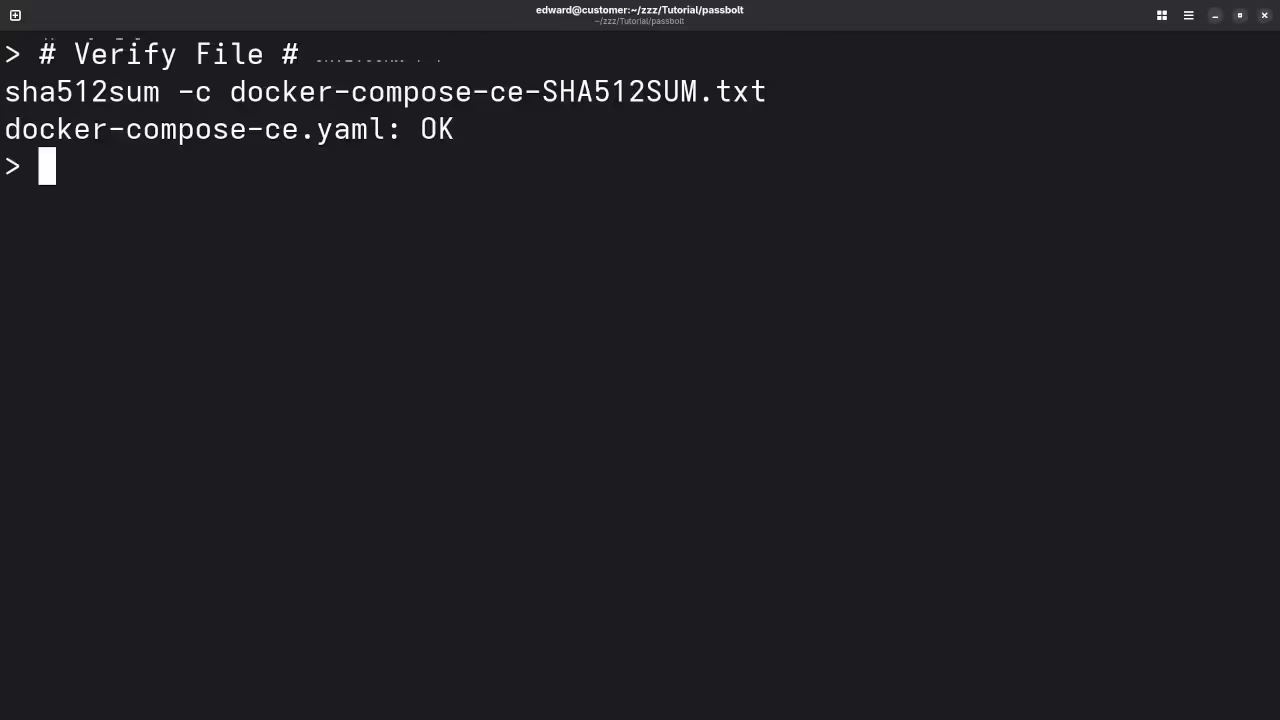
    Passbolt Verification File
    Command Line Run Passbolt Verification File

    Generate SSL Certificate
    Command Line Generate SSL Key Pair

    Passbolt Environment Variables
    Gnome Text Editor Displaying Passbolt Environment Variables

    Passbolt Podman Compose Build
    Command Line Installation Of Passbolt Via Podman Compose Build

    Passbolt Create Admin User
    Command Line Installation First Admin User

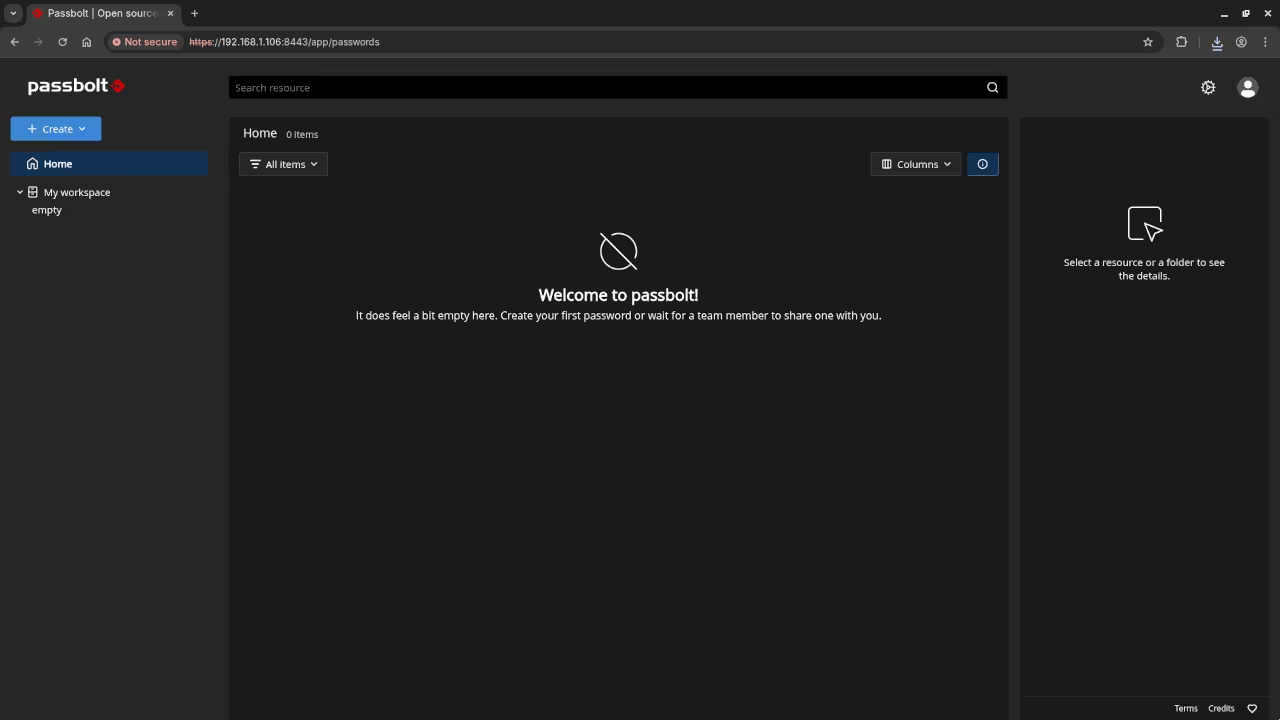
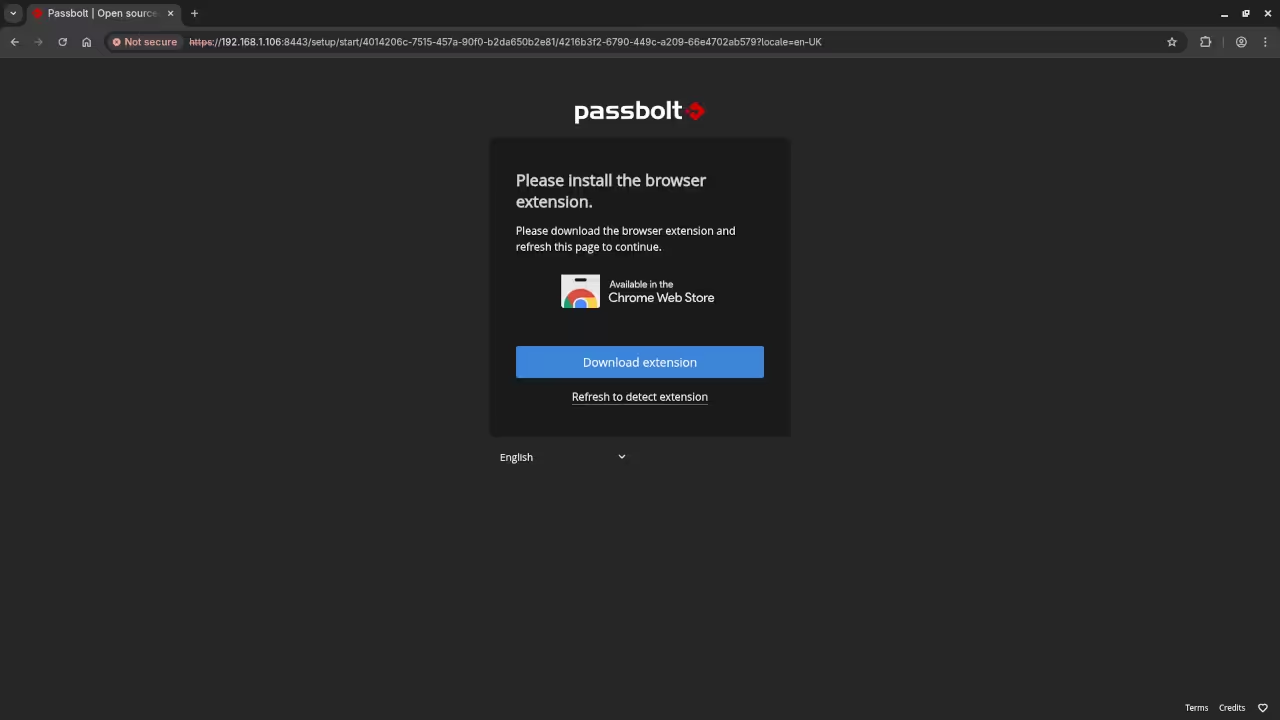
    Passbolt Browser Extension
    Web Browser Showing Passbolt Browser Extension Install Screen

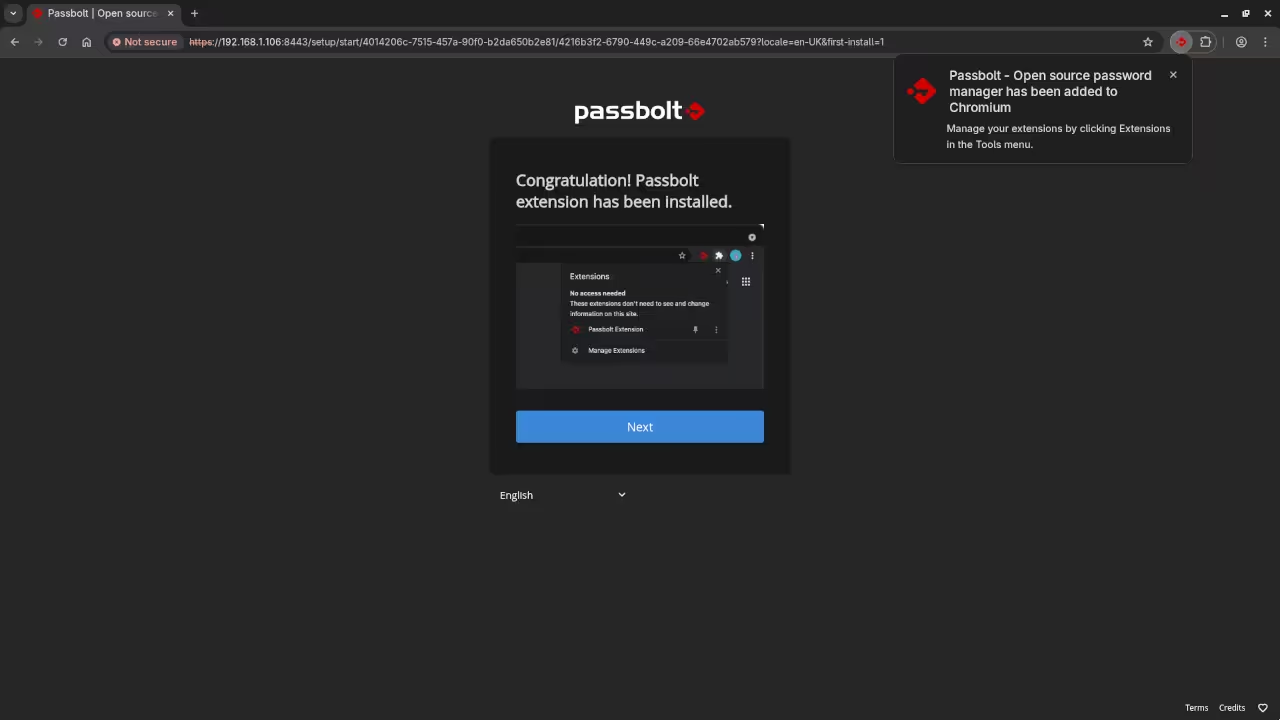
    Passbolt Chrome Browser Extension
    Web Browser Showing Passbolt Browser Extension Setup Screen

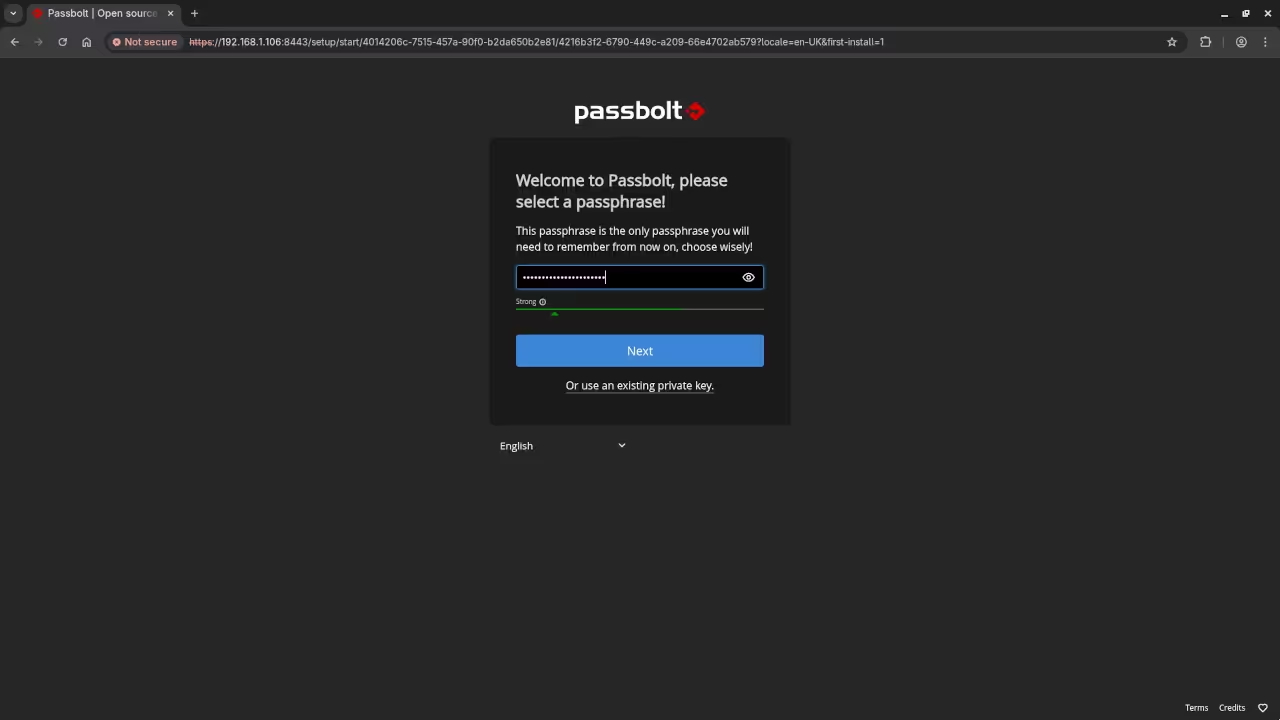
    Passbolt Admin Password
    Web Browser Showing Passbolt Admin Password Setup Screen

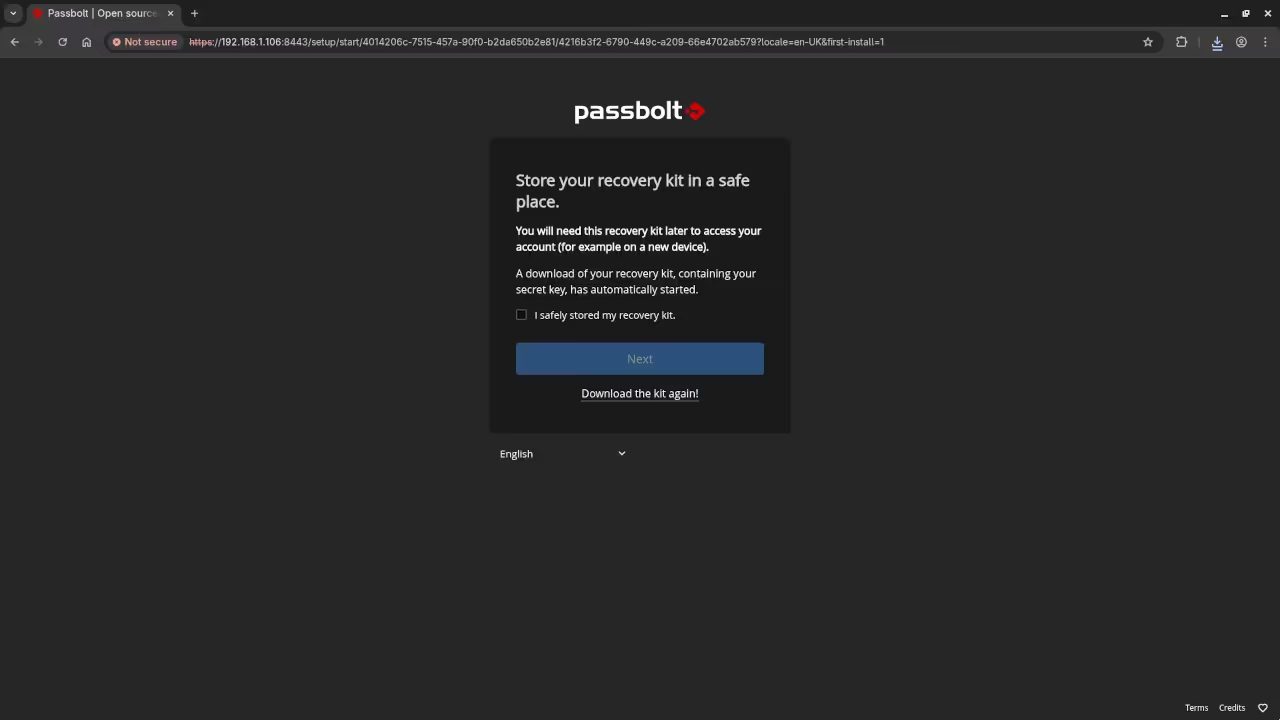
    Passbolt Recovery Kit
    Web Browser Showing Passbolt Recovery Kit Setup Screen

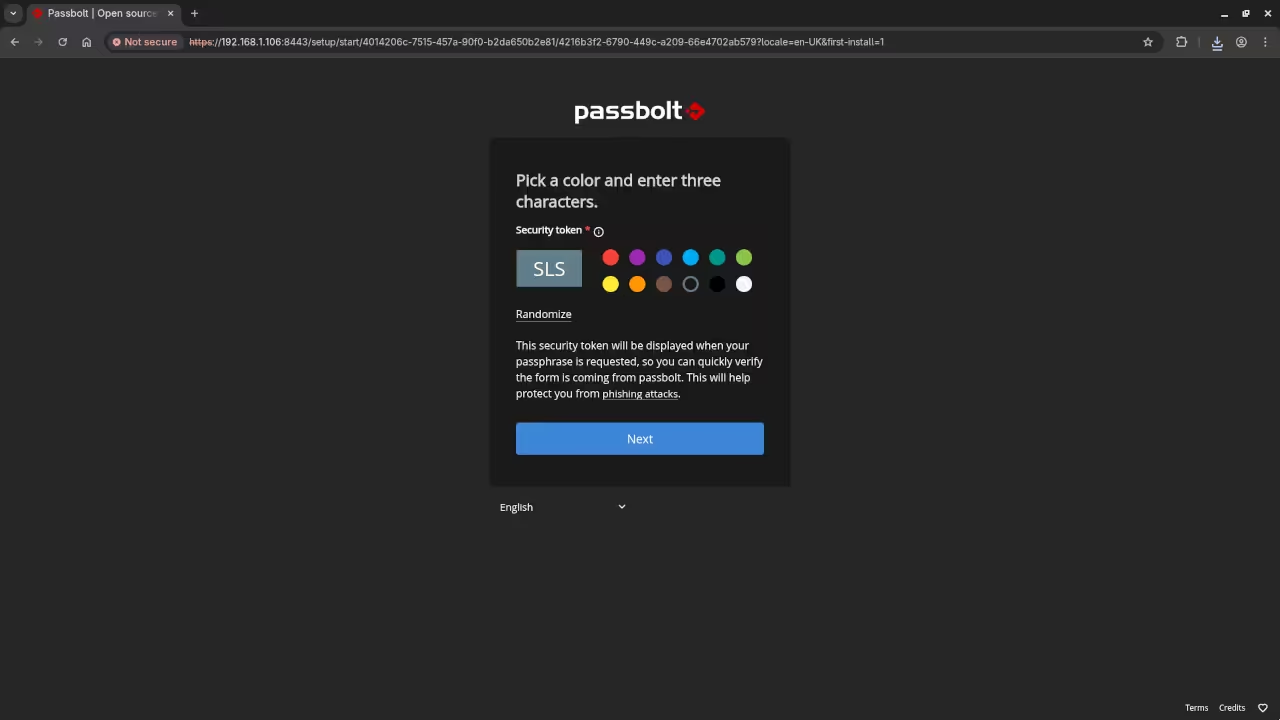
    Passbolt Security Token
    Web Browser Showing Passbolt Security Token Setup Screen

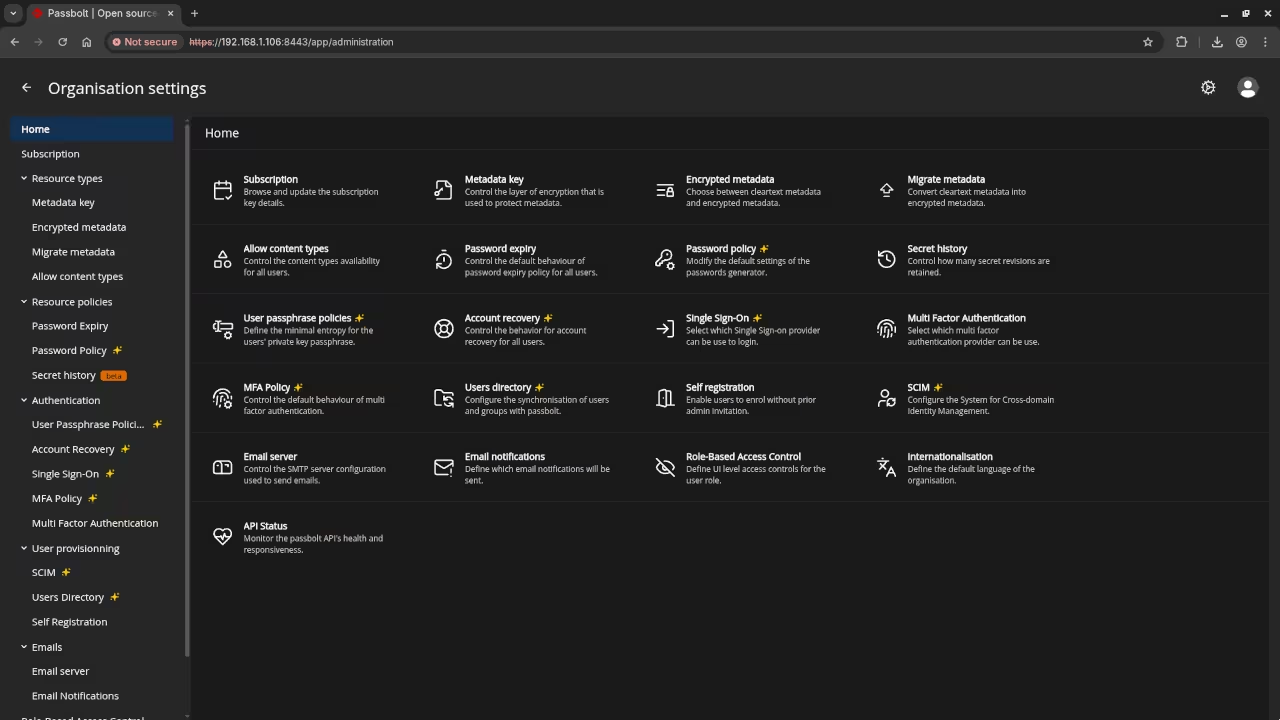
    Passbolt Organisation Settings
    Web Browser Showing Passbolt Organisation Settings Screen

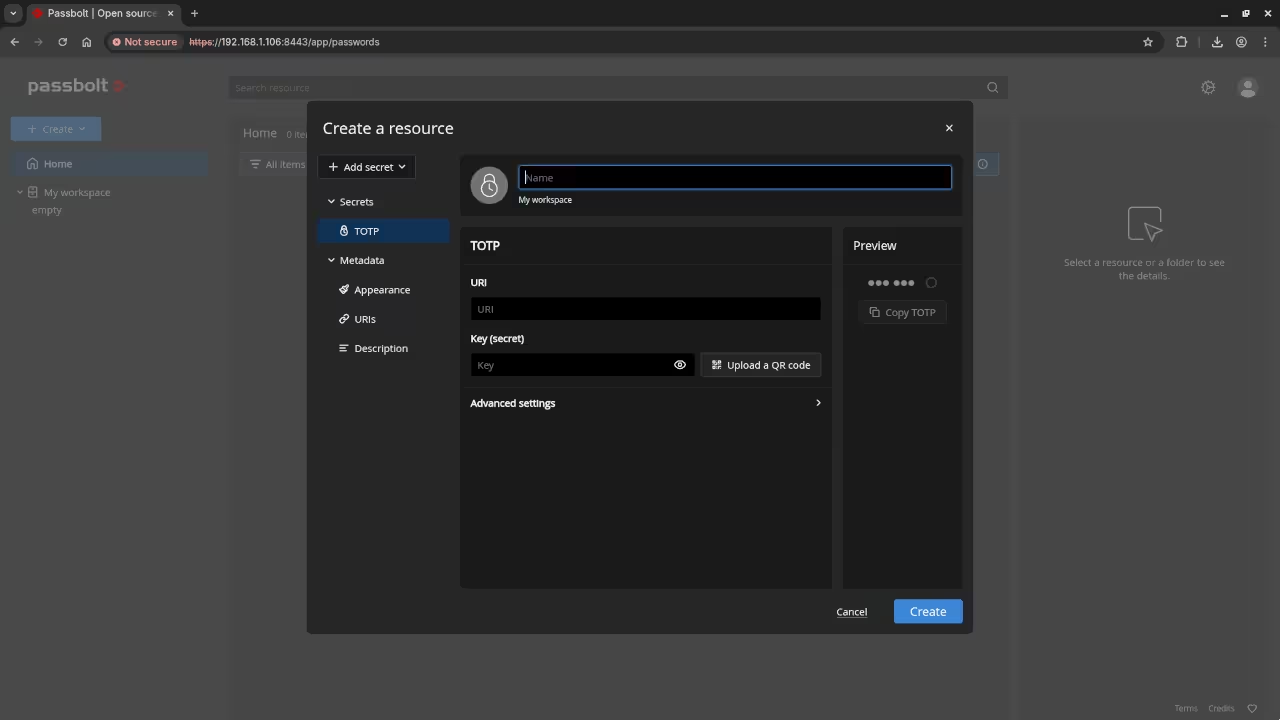
    Passbolt Resource Creation
    Web Browser Showing Passbolt Resource Creation Screen

    Passbolt Installation And Setup Screencast

    Additional Services and Resources

    If you need help with Passbolt installation or migration, I offer the following services:

    More from Edward Ojambo

    Conclusion

    With this guide, you can now set up Passbolt Community Edition using Podman with self-signed SSL certificates for local development environments. It is an easy, secure way to get started with password management for teams. If you need any further assistance or a customized setup, feel free to contact me!

  • Review Generative AI Z-Image-Turbo Q3_K GGUF 6B Model

    Review Generative AI Z-Image-Turbo Q3_K GGUF 6B Model

    Running Stable Diffusion cpp with Z Image Turbo Q3 K GGUF 6B on AMD Instinct MI60 Linux Guide

    Stable Diffusion is a popular tool for local AI image generation. This beginner level guide explains how to configure stable diffusion cpp to run the Z Image Turbo Q3 K GGUF 6B model on a Linux system using the AMD Instinct MI60 GPU with 32GB HBM2 memory. This approach allows fast image generation while keeping full control of your data.

    What Is Stable Diffusion cpp

    Stable diffusion cpp is a lightweight C plus plus implementation of Stable Diffusion designed for efficiency and portability. It supports CPU and GPU acceleration and works well with modern Linux systems and AMD GPUs.

    Is Stable Diffusion cpp Open Source

    Yes. Stable diffusion cpp is open source software. It is commonly released under the MIT license which allows use modification and redistribution for personal or commercial projects with very few restrictions.

    What Is Z Image Turbo Q3 K GGUF 6B

    Z Image Turbo Q3 K GGUF 6B is a quantized image generation model stored in GGUF format. Quantization reduces memory usage and improves inference speed while maintaining good visual quality. This makes it suitable for local inference on GPUs such as the AMD Instinct MI60.

    System Requirements

    Hardware

    • GPU AMD Instinct MI60 with 32GB HBM2 recommended
    • CPU 8 core x86 64 processor or better
    • System memory at least 32GB with 64GB recommended
    • Storage at least 20GB of free disk space

    Software

    • Linux operating system such as Ubuntu 22.04
    • ROCm compatible with AMD Instinct MI60
    • GCC or Clang compiler
    • CMake
    • Git

    Basic Configuration Overview

    Below is a simple overview of the typical setup process.

    rocminfo
    git clone --recursive https://github.com/leejet/stable-diffusion.cpp
    cd stable-diffusion.cpp
    mkdir build && cd build
    
    if command -v rocminfo; then export GFX_NAME=$(rocminfo | awk '/ *Name: +gfx[1-9]/ {print $2; exit}'); else echo "rocminfo missing!"; fi
    if [ -z "${GFX_NAME}" ]; then echo "Error: Couldn't detect GPU!"; else echo "Building for GPU: ${GFX_NAME}"; fi
    cmake .. -G "Ninja" -DCMAKE_C_COMPILER=clang -DCMAKE_CXX_COMPILER=clang++ -DSD_HIPBLAS=ON -DCMAKE_BUILD_TYPE=Release -DGPU_TARGETS=$GFX_NAME -DAMDGPU_TARGETS=$GFX_NAME -DCMAKE_BUILD_WITH_INSTALL_RPATH=ON -DCMAKE_POSITION_INDEPENDENT_CODE=ON
    cmake --build . --config Release
    
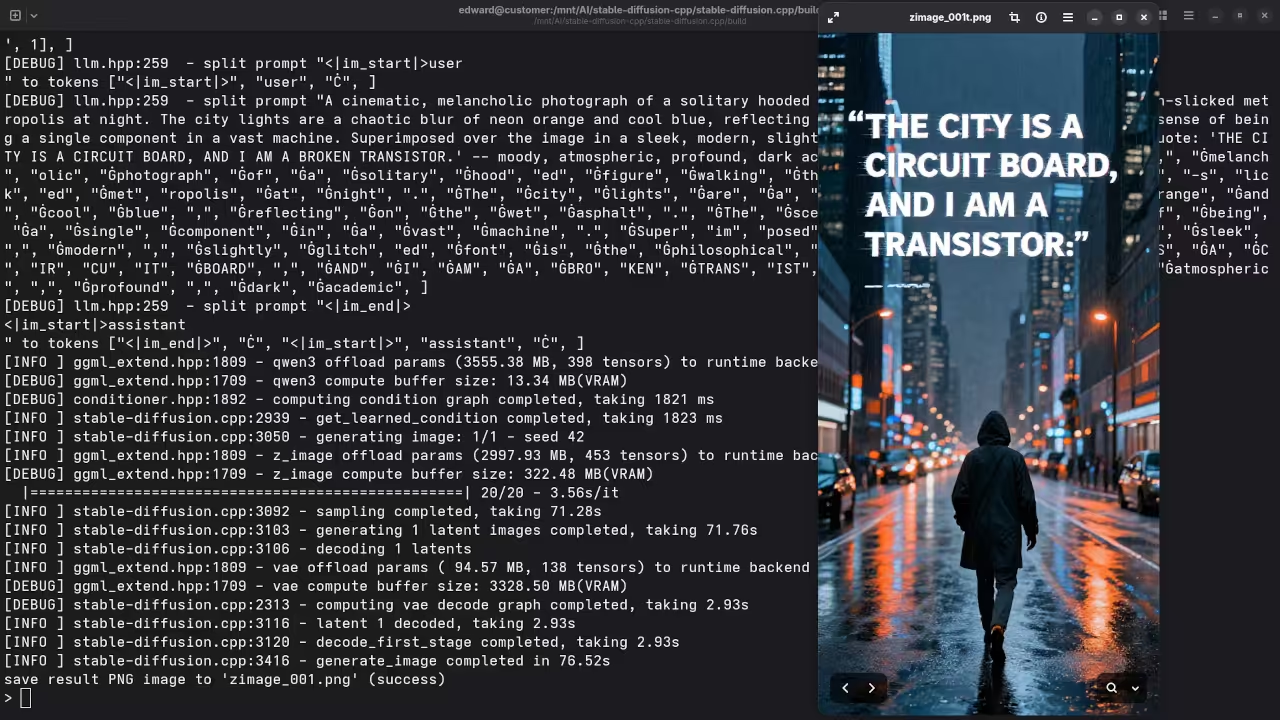
    bin/sd --diffusion-model ../../ComfyUI/models/diffusion_models/z_image_turbo-Q3_K.gguf --vae ../../ComfyUI/models/vae/ae.safetensors --llm ../../ComfyUI/models/text_encoders/Qwen3-4B-Instruct-2507-Q4_K_M.gguf -p "A cinematic, melancholic photograph of a solitary hooded figure walking through a sprawling, rain-slicked metropolis at night. The city lights are a chaotic blur of neon orange and cool blue, reflecting on the wet asphalt. The scene evokes a sense of being a single component in a vast machine. Superimposed over the image in a sleek, modern, slightly glitched font is the philosophical quote: 'THE CITY IS A CIRCUIT BOARD, AND I AM A BROKEN TRANSISTOR.' -- moody, atmospheric, profound, dark academic" --cfg-scale 1.0 -v --offload-to-cpu --diffusion-fa -H 1024 -W 512 -o zimage_001.png

    License and Restrictions for Z Image Turbo Q3 K GGUF 6B

    Z Image Turbo Q3 K GGUF 6B is released under the Apache 2.0 license.

    • Commercial use is permitted
    • Modification and redistribution are allowed
    • Attribution and inclusion of the license notice are required
    • The software is provided without warranty

    Where to Place Your Models

    Model Type Folder
    Checkpoints (e.g. *.safetensors) ComfyUI/models/checkpoints/
    LoRA models ComfyUI/models/loras/
    VAEs ComfyUI/models/vae/
    ControlNet ComfyUI/models/controlnet/

    Just drop your files into the appropriate folder and rerun stable-diffusion.cpp.

    Test Tools

    Test System
    Name Description
    CPU AMD Ryzen 5 5600GT (6C/12T, 3.6GHz).
    Memory 32GB DDR4.
    GPU AMD Instinct MI60 (32GB HBM2).
    Operating System Fedora Linux Workstation 43.
    Desktop Environment Gnome 49.
    Name Description

    Screenshots and Screencast

    Here’s where you’ll find a visual walkthrough of setting up Z-Image-Turbo Q3_K GGUF 6B using stable-diffusion.cpp on your local system:

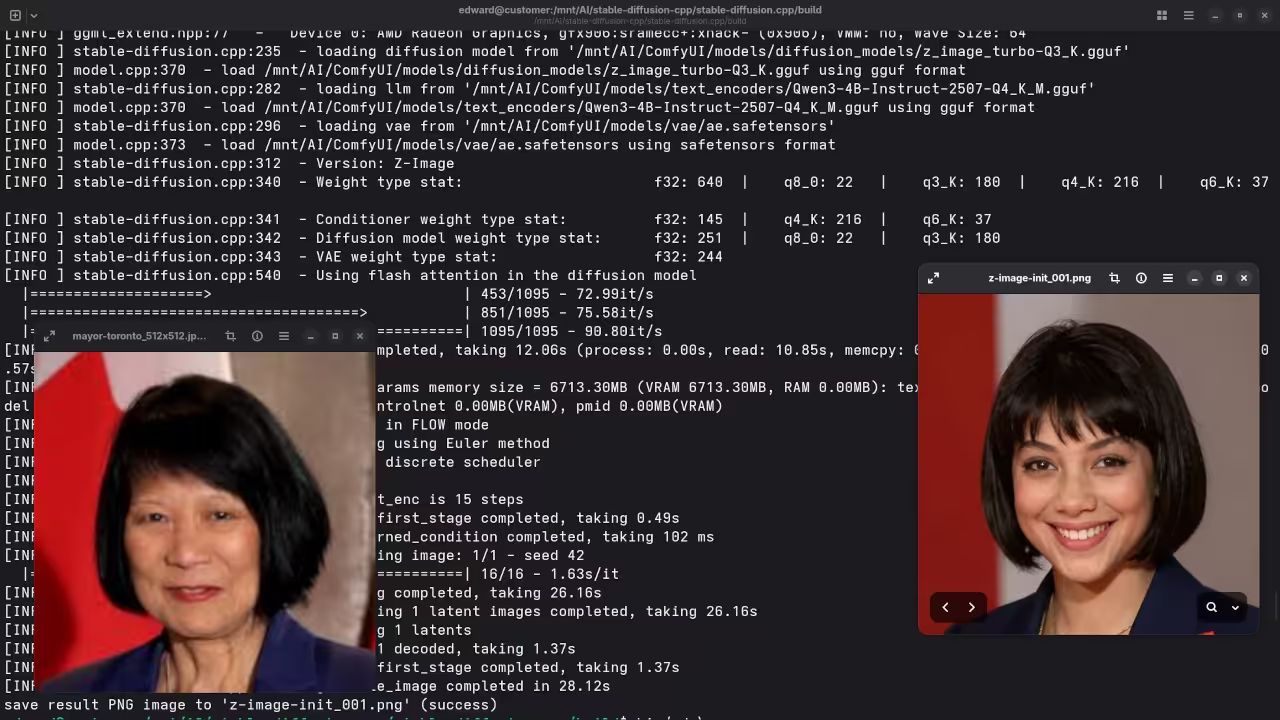
    Mayor Of Toronto
    Command Line stable-diffusion.cpp Z-Image-Turbo Q3_K GGUF 6B Result For Toronto Mayor.

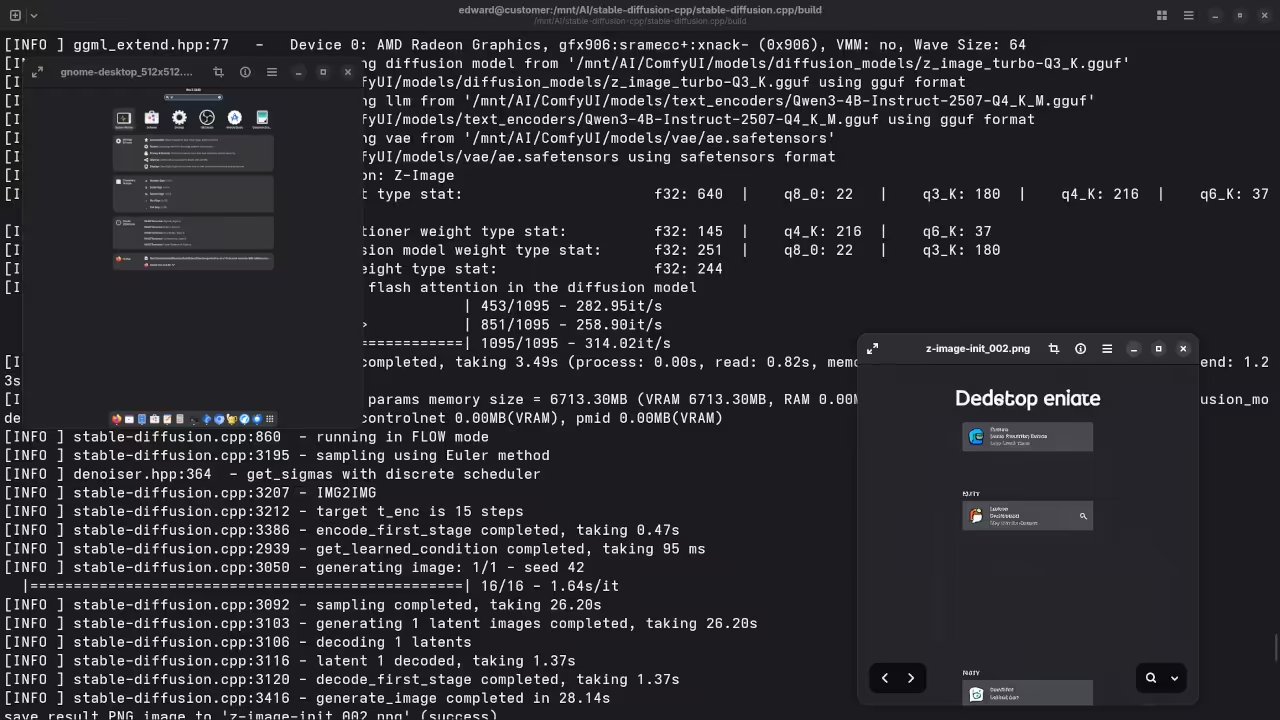
    Gnome Desktop
    Command Line stable-diffusion.cpp Z-Image-Turbo Q3_K GGUF 6B Result For Gnome Desktop.

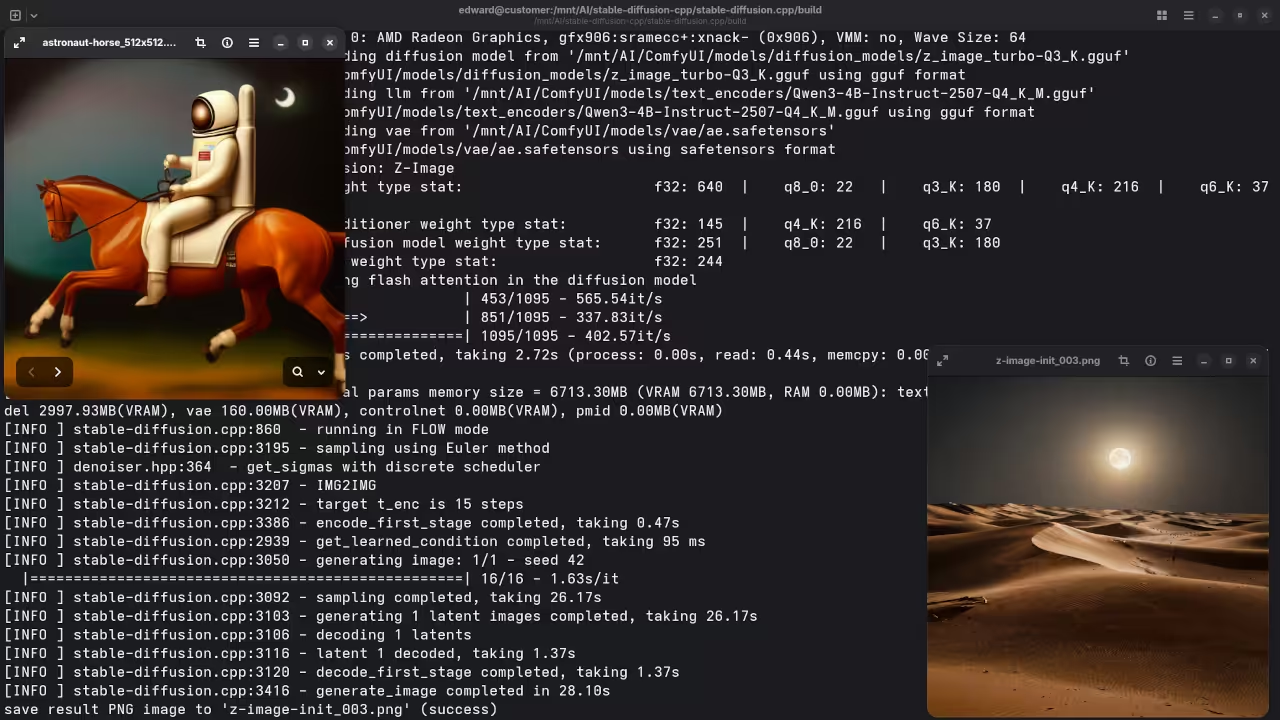
    Astronaut Riding
    Command Line stable-diffusion.cpp Z-Image-Turbo Q3_K GGUF 6B Result For Horse-Riding Astronaut.

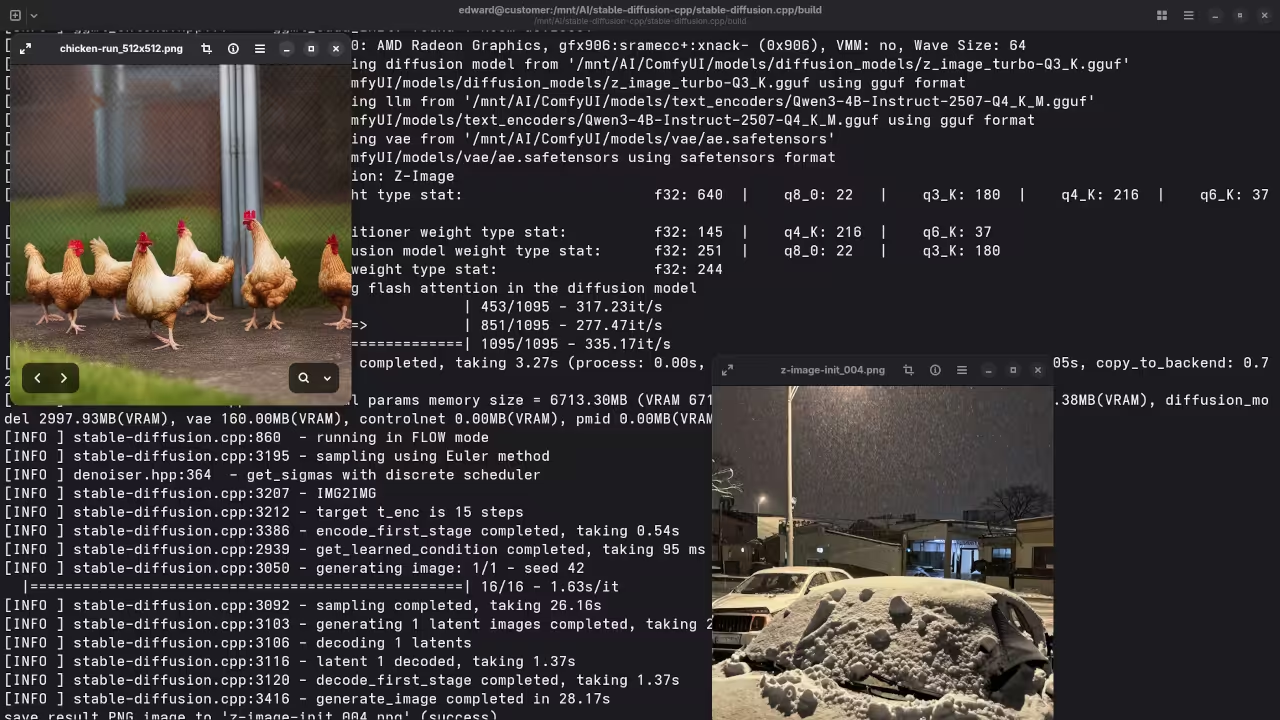
    Chicken Run
    Command Line stable-diffusion.cpp Z-Image-Turbo Q3_K GGUF 6B Result For Chicken Run.

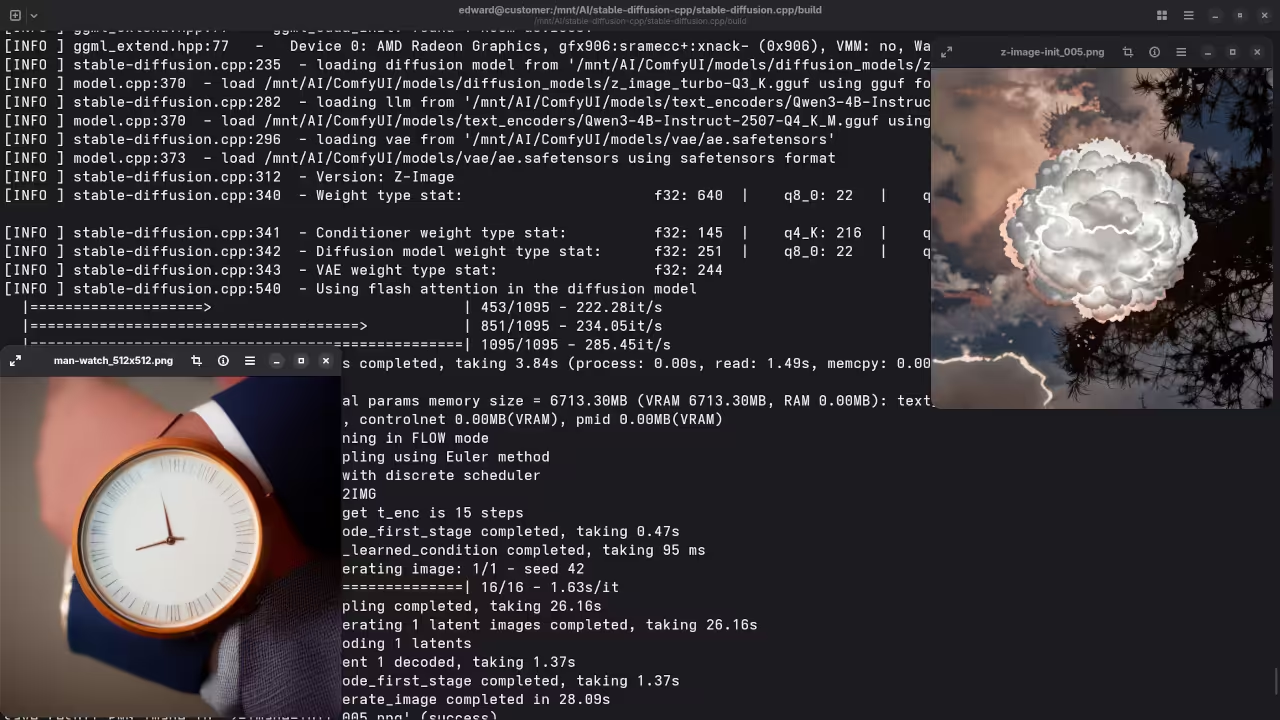
    Man Wearing Watch
    Command Line stable-diffusion.cpp Z-Image-Turbo Q3_K GGUF 6B Result For Watch Wearer.

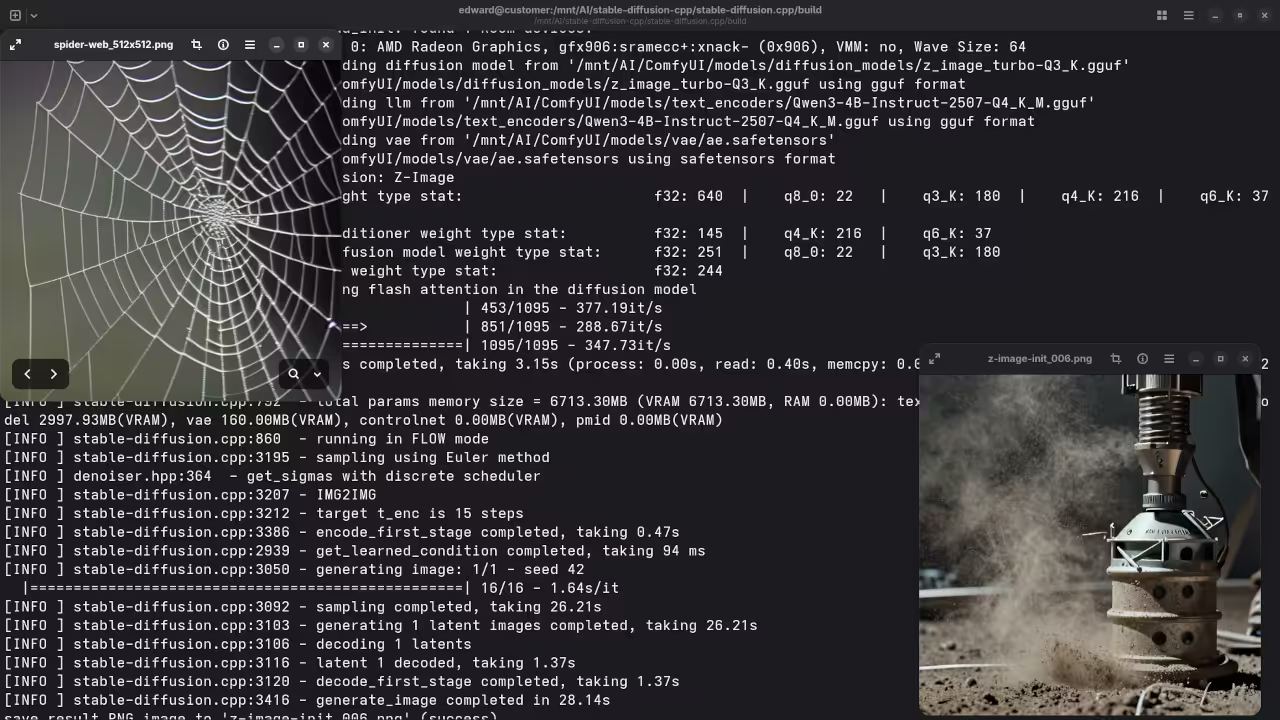
    Spider Web
    Command Line stable-diffusion.cpp Z-Image-Turbo Q3_K GGUF 6B Result For Spider Web.

    Video Displaying Using Z-Image-Turbo Q3_K GGUF 6B With stable-diffusion.cpp

    Addedum Video Comparing Z-Image-Turbo Q3_K to Q4_K and Q8_0 GGUF 6B With ComfyUI

    Results:

    A photograph of the mayor of Toronto

    De-aged mayor of Toronto.

    A screenshot of the gnome desktop environment.

    Reimagined a screenshot of an older version of the Gnome desktop environment.

    A photograph of an astronaut riding a horse.

    Accurately drew a desert for a photograph of an astronaut riding a horse.

    A picture of a chicken run.

    Accurately drew snow for a picture of a chicken run.

    A picture of a man wearing a watch.

    Accurately drew cloud for a picture of a man wearing a watch.

    A picture of a spider web on sockets.

    Accurately drew dust for a picture of a spider web on sockets.

    Learn Python With My Book

    If you want to learn Python for AI automation or general programming you can read my beginner friendly book.


    Learning Python on Amazon

    Learning Python Course

    I also offer a structured online course covering Python fundamentals and practical examples.

    Learning Python Course

    One on One Python Tutoring

    I am available for personalized online Python tutoring sessions.


    Contact Me for Python Tutoring

    Z Image Turbo Installation and Migration Services

    If you need help installing or migrating Z Image Turbo Q3 K GGUF 6B on your Linux system or GPU server I can assist.

    Z Image Turbo Setup Services

    Conclusion

    Running Stable Diffusion locally with stable diffusion cpp and the AMD Instinct MI60 provides a powerful and flexible image generation environment. With the right hardware and configuration beginners can explore advanced AI workflows directly on Linux.

  • PHP URL Shortener App

    PHP URL Shortener App

    Build a Simple URL Shortener Using PHP and MariaDB

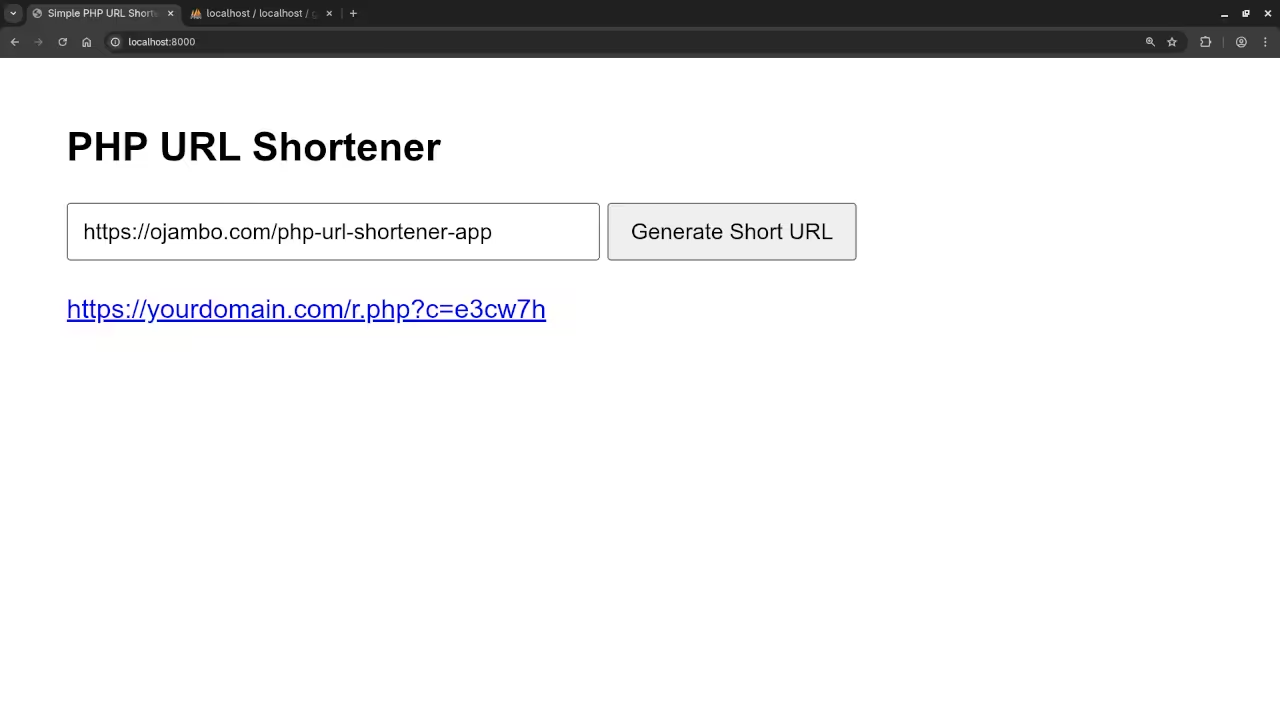
    In this tutorial, we will build a simple URL shortener using PHP and MariaDB. The application will allow users to generate short URLs, view a list of previously created URLs, and serve redirects when the short URLs are accessed. We will use HTML5 and the Fetch API for a modern, interactive interface.

    Step 1: Database Setup

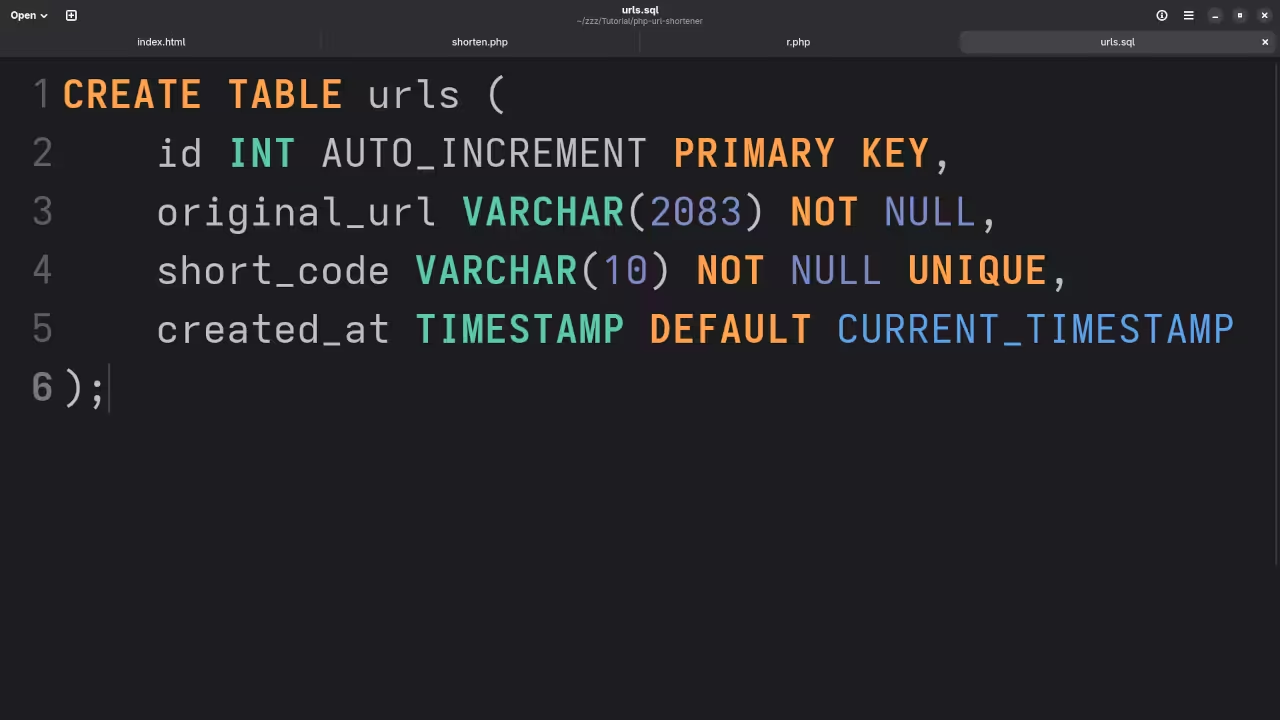
    Create a MariaDB table to store original and short URLs.


    CREATE TABLE urls (
        id INT AUTO_INCREMENT PRIMARY KEY,
        original_url VARCHAR(2083) NOT NULL,
        short_code VARCHAR(10) NOT NULL UNIQUE,
        created_at TIMESTAMP DEFAULT CURRENT_TIMESTAMP
    );


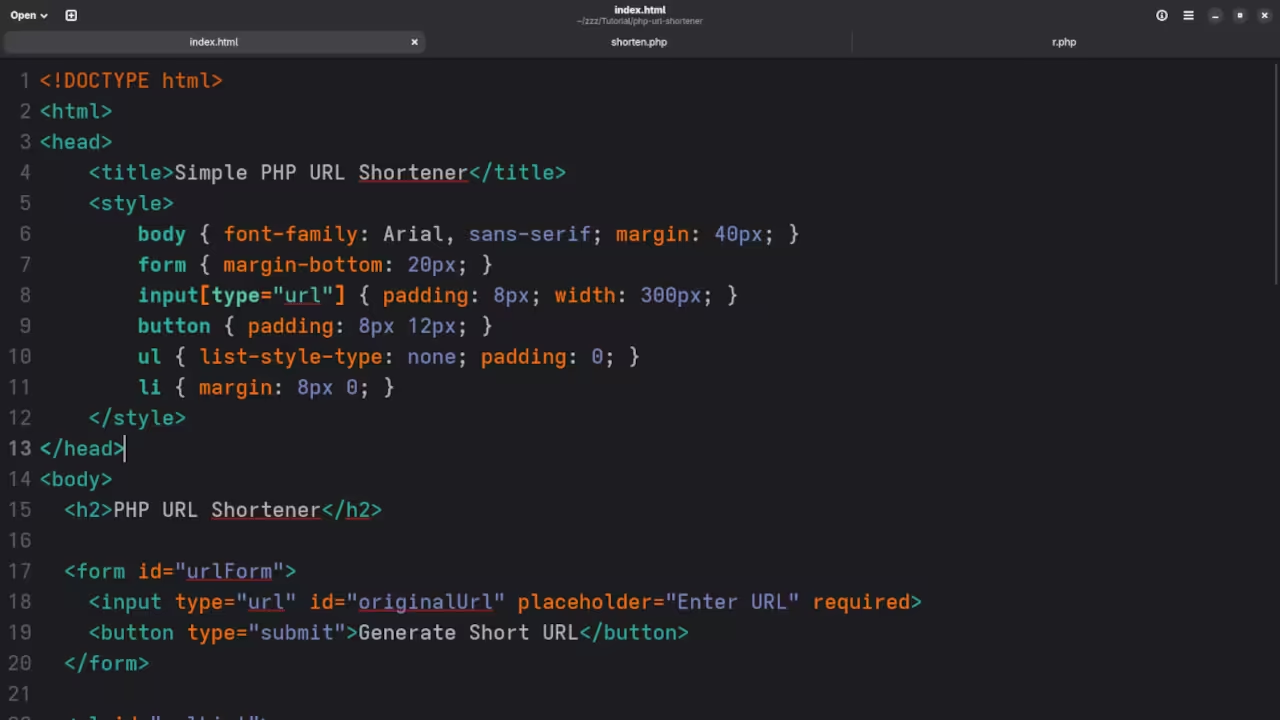
    Step 2: HTML Form for Shortening URLs


    <form id="urlForm">
      <input type="url" id="originalUrl" placeholder="Enter URL" required>
      <button type="submit">Generate Short URL</button>
    </form>
    
    <ul id="urlList">
      <!-- Short URLs will be listed here -->
    </ul>


    Step 3: JavaScript with Fetch API


    document.getElementById('urlForm').addEventListener('submit', async (e) => {
        e.preventDefault();
        const originalUrl = document.getElementById('originalUrl').value;
    
        const response = await fetch('shorten.php', {
            method: 'POST',
            headers: {'Content-Type': 'application/json'},
            body: JSON.stringify({url: originalUrl})
        });
    
        const data = await response.json();
        if (data.shortUrl) {
            const li = document.createElement('li');
            li.innerHTML = `<a href="${data.shortUrl}" target="_blank">${data.shortUrl}</a>`;
            document.getElementById('urlList').appendChild(li);
        }
    });


    Step 4: PHP Backend for Shortening and Redirects

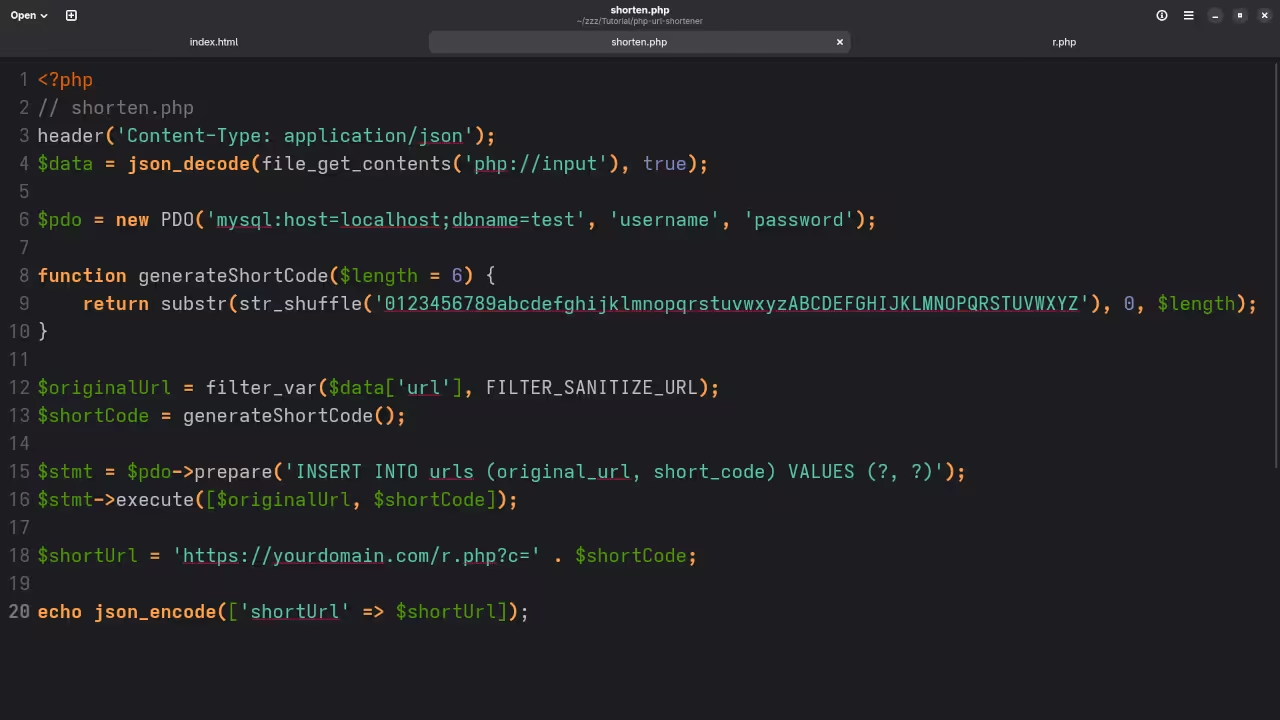
    File: shorten.php


    // shorten.php
    header('Content-Type: application/json');
    $data = json_decode(file_get_contents('php://input'), true);
    
    $pdo = new PDO('mysql:host=localhost;dbname=test', 'username', 'password');
    
    function generateShortCode($length = 6) {
        return substr(str_shuffle('0123456789abcdefghijklmnopqrstuvwxyzABCDEFGHIJKLMNOPQRSTUVWXYZ'), 0, $length);
    }
    
    $originalUrl = filter_var($data['url'], FILTER_SANITIZE_URL);
    $shortCode = generateShortCode();
    
    $stmt = $pdo->prepare('INSERT INTO urls (original_url, short_code) VALUES (?, ?)');
    $stmt->execute([$originalUrl, $shortCode]);
    
    $shortUrl = 'https://yourdomain.com/r.php?c=' . $shortCode;
    
    echo json_encode(['shortUrl' => $shortUrl]);


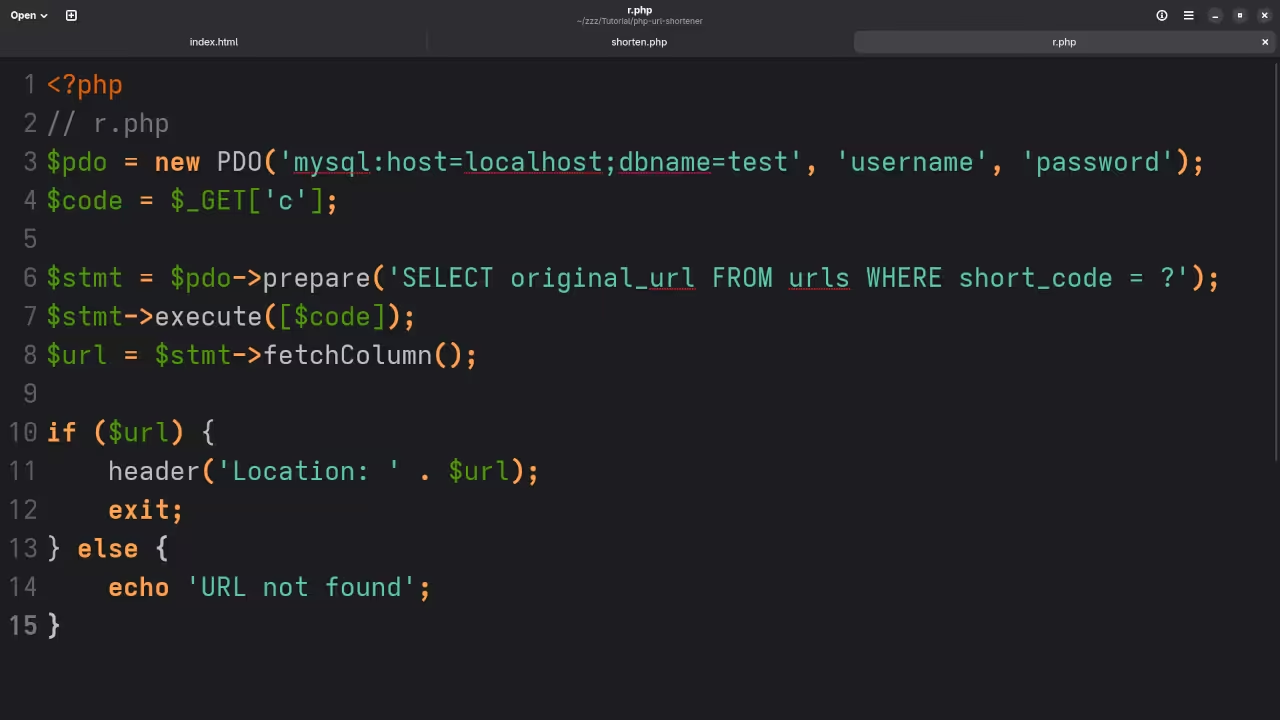
    File: r.php


    // r.php
    $pdo = new PDO('mysql:host=localhost;dbname=test', 'username', 'password');
    $code = $_GET['c'];
    
    $stmt = $pdo->prepare('SELECT original_url FROM urls WHERE short_code = ?');
    $stmt->execute([$code]);
    $url = $stmt->fetchColumn();
    
    if ($url) {
        header('Location: ' . $url);
        exit;
    } else {
        echo 'URL not found';
    }


    Step 5: Running the Application

    • Place the PHP files on your server.
    • Ensure your MariaDB database is configured correctly.
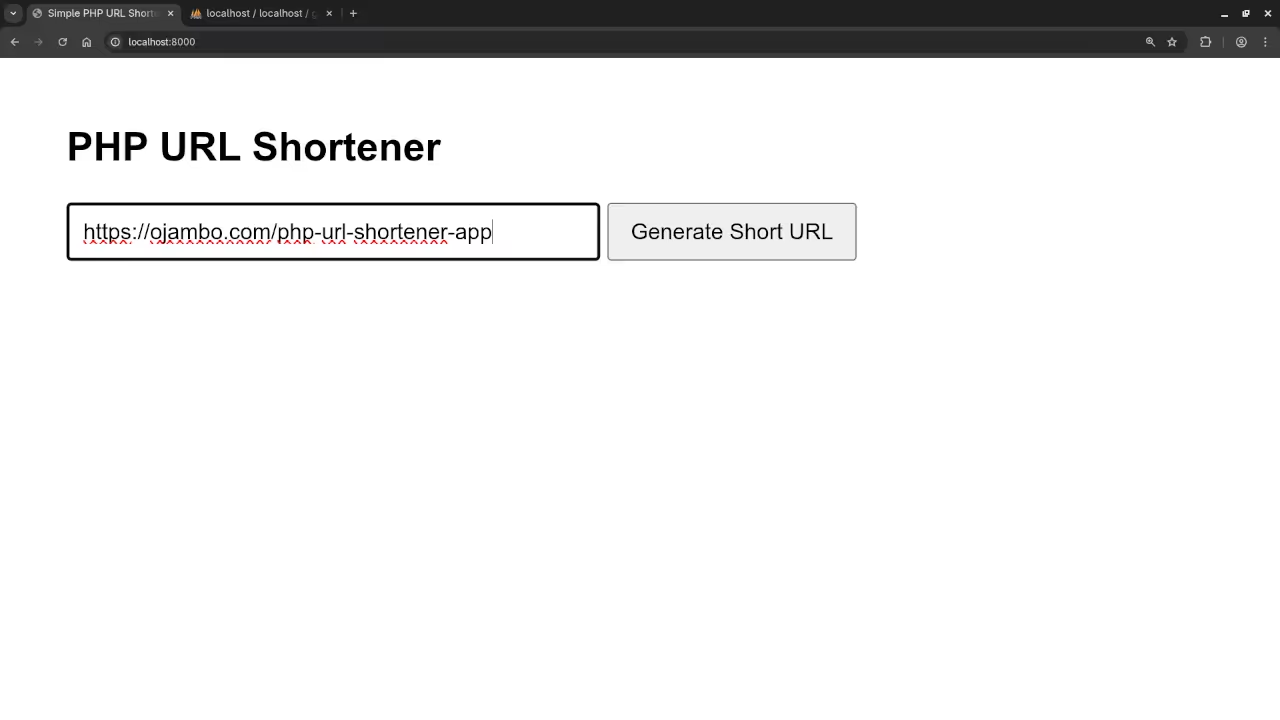
    • Open the HTML form in a browser, enter a URL, and generate a short link.
    • Click the short URL to test the redirect.

    Screenshots And Screencast

    URL Shortener HTML Code
    Gnome Text Editor Displaying URL Shortener HTML Code

    URL Shortener PHP Save Code
    Gnome Text Editor Displaying URL Shortener PHP Save Code

    URL Shortener PHP Redirect Code
    Gnome Text Editor Displaying URL Shortener PHP Redirect Code

    URL Shortener SQL Code
    Gnome Text Editor Displaying URL Shortener SQL Code

    Add URL Shortener
    Web Browser Displaying Adding URL Shortener

    PHPMyAdmin Table URL Shortener
    Web Browser Displaying PHPMyAdmin Database Table URL Shortener

    PHP Basic URL Shortener Video

    Learning Resources

    Book: Learning PHP
    https://www.amazon.com/Learning-PHP-Programming-Edward-Ojambo-ebook/dp/B0D442PR8T

    Course: Learning PHP
    https://ojamboshop.com/product/learning-php

    One-on-One Programming Tutorials & PHP App Services:
    https://ojambo.com/contact

  • Build An HTML5 Elastic Spring

    Build An HTML5 Elastic Spring

    Creating Interactive HTML5 Elastic Spring Animations Using JavaScript

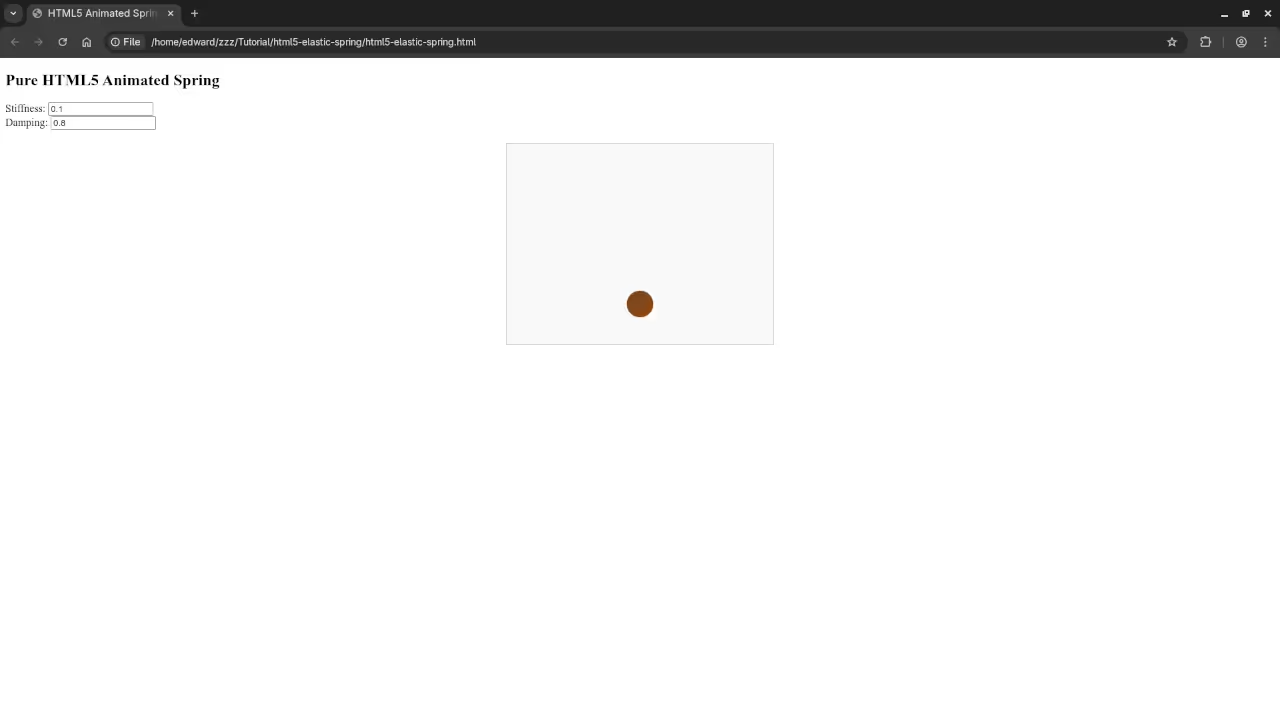
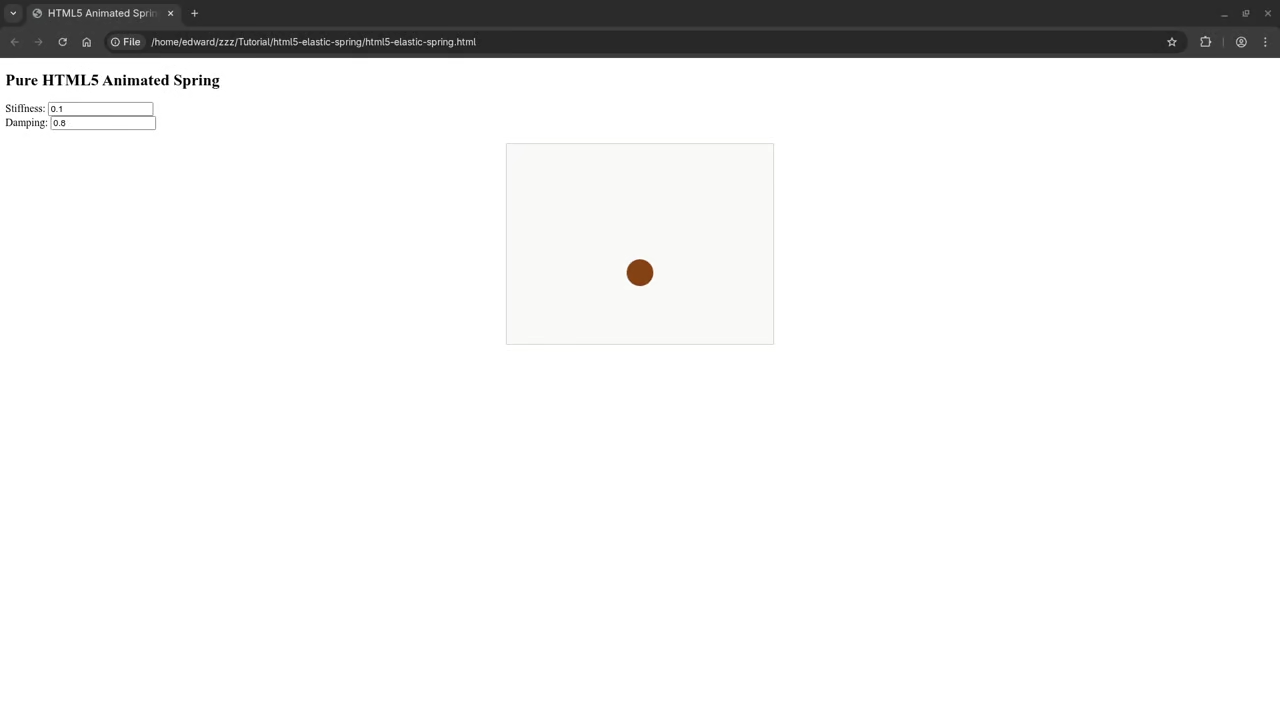
    In this beginner tutorial we will create a simple HTML5 elastic spring animation using JavaScript. Some motion values are inspired by the GNOME Elastic application. Users can interactively change the spring stiffness and damping using input boxes to see how the motion changes in real time.

    HTML Structure


    <div>
      <label for="stiffness">Stiffness:</label>
      <input type="number" id="stiffness" value="0.1" step="0.01">
    </div>
    <div>
      <label for="damping">Damping:</label>
      <input type="number" id="damping" value="0.8" step="0.01">
    </div>
    
    <canvas id="springCanvas" width="400" height="300"></canvas>


    CSS3 Animation


      #springCanvas {
        border: 1px solid #ccc;
        background-color: #f9f9f9;
        display: block;
        margin: 20px auto;
      }
    
      /* Optional: Add rotation animation to a container element if desired */
      .rotating {
        animation: rotate 5s linear infinite;
      }
    
      @keyframes rotate {
        0% { transform: rotate(0deg); }
        100% { transform: rotate(360deg); }
      }


    JavaScript for Elastic Motion


    const canvas = document.getElementById('springCanvas');
    const ctx = canvas.getContext(2d);
    
    let position = 150;
    let velocity = 0;
    let target = 150;
    
    const stiffnessInput = document.getElementById('stiffness');
    const dampingInput = document.getElementById('damping');
    
    function animate() {
        ctx.clearRect(0, 0, canvas.width, canvas.height);
    
        let stiffness = parseFloat(stiffnessInput.value);
        let damping = parseFloat(dampingInput.value);
    
        let force = (target - position) * stiffness;
        velocity += force;
        velocity *= damping;
        position += velocity;
    
        ctx.save();
        ctx.translate(canvas.width / 2, position);
        let scale = 1 + Math.abs(velocity) * 0.05;
        ctx.scale(scale, scale);
        ctx.rotate(velocity * 0.1);
    
        ctx.beginPath();
        ctx.arc(0, 0, 20, 0, Math.PI * 2);
        ctx.fillStyle = #8B4513;
        ctx.fill();
        ctx.closePath();
        ctx.restore();
    
        requestAnimationFrame(animate);
    }
    
    canvas.addEventListener('click', function(e) {
        target = e.offsetY;
    });
    
    animate();


    Customizing the Spring

    • Try different stiffness and damping values from the GNOME Elastic app
    • Add multiple springs or elements for complex animations
    • Enhance visuals with colors gradients or shadows

    Consolidated Demo

    HTML5 Elastic Spring Demo

    Screenshot

    HTML5 Elastic Spring
    Web Browser Showing HTML5 Elastic Spring

    Live Screencast

    Screencast Of HTML5 Elastic Spring

    Learning Resources

    My JavaScript Book
    https://www.amazon.com/Learning-JavaScript-Programming-Beginner-Guide/dp/B0DRDB2P2P

    My JavaScript Course
    https://ojamboshop.com/product/learning-javascript

    One-on-One JavaScript Tutorials
    https://ojambo.com/contact

  • Generate Animated Spring With Blender Python API For Website

    Generate Animated Spring With Blender Python API For Website

    Creating a Simple Elastic Spring Animation in Blender 5 Python and Displaying It in the Browser with Model Viewer

    In this beginner tutorial you will learn how to generate a simple elastic style spring animation in Blender 5 using the Python API. After creating the animation we will export the object and display it directly in the web browser using the open source model viewer library. The goal is to demonstrate how Blender Python scripting can be combined with web technology to show animated 3D scenes online.

    The animation will use very basic keyframes to approximate a spring bounce effect. The values are inspired by the motion settings from the GNOME Elastic application but simplified so new users can follow step by step. We will also apply a rustic color to the object and try drawing with Grease Pencil for a decorative outline. The model viewer display will use a high dynamic range image for lighting using the courtyard EXR file included in Blender 4.5 LTS.

    Step 1 Creating a Simple Spring Animation in Blender 5 Using Python

    Below is a small Python script that creates a mesh object adds simple scaling keyframes to imitate a spring squash and stretch sets a rustic color material adds an optional Grease Pencil layer and prepares the object for export. Save this script as spring_anim.py and run it from the command line.

    Running the script from the command line

    blender myscene.blend --background --python spring_anim.py

    If the blend file does not exist Blender will create a new empty scene.

    Blender 5 Python Example Script


    import bpy
    from mathutils import Color
    import os # Import the os module for file path construction
    
    # --- Configuration ---
    SPRING_OBJECT_NAME = "Spring_Cylinder"
    MATERIAL_NAME = "SpringMaterial"
    OUTLINE_NAME = "Outline_GP"
    EXPORT_FILE_NAME = "spring_animation.glb"
    
    # Use the current blend file's directory for export, falling back to CWD
    try:
        SCRIPT_DIR = os.path.dirname(bpy.data.filepath)
    except AttributeError:
        SCRIPT_DIR = os.getcwd()
        
    EXPORT_PATH = os.path.join(SCRIPT_DIR, EXPORT_FILE_NAME)
    
    # Animation data path constant
    DATA_PATH_SCALE = "scale"
    Z_INDEX = 2 # Z-axis scale index
    
    # --- Main Logic ---
    
    def create_animated_spring():
        # 1. Scene Cleanup
        
        # Select all objects and delete them
        bpy.ops.object.select_all(action='SELECT')
        bpy.ops.object.delete()
    
        # 2. Create Geometry and Material
        
        # Add a cylinder mesh
        bpy.ops.mesh.primitive_cylinder_add(radius=0.2, depth=2)
        obj = bpy.context.object
        obj.name = SPRING_OBJECT_NAME
    
        # Create and configure material
        mat = bpy.data.materials.new(MATERIAL_NAME)
        mat.use_nodes = True
        bsdf = mat.node_tree.nodes['Principled BSDF'] # Principled BSDF node name must be in quotes
        rust = Color((0.45, 0.23, 0.12))
        bsdf.inputs['Base Color'].default_value = (rust.r, rust.g, rust.b, 1.0)
        obj.data.materials.append(mat)
    
        # 3. Keyframe Animation (Z-Scale)
        
        # Frame 1: Full height
        bpy.context.scene.frame_current = 1
        obj.scale = (1.0, 1.0, 1.0)
        # The data_path must be a string, and we keyframe only the Z-scale (index 2)
        obj.keyframe_insert(data_path=DATA_PATH_SCALE, index=Z_INDEX, frame=1)
    
        # Frame 10: Compressed
        bpy.context.scene.frame_current = 10
        obj.scale = (1.0, 1.0, 0.6)
        obj.keyframe_insert(data_path=DATA_PATH_SCALE, index=Z_INDEX, frame=10)
    
        # Frame 20: Stretched
        bpy.context.scene.frame_current = 20
        obj.scale = (1.0, 1.0, 1.2)
        obj.keyframe_insert(data_path=DATA_PATH_SCALE, index=Z_INDEX, frame=20)
    
        # Frame 30: Reset
        bpy.context.scene.frame_current = 30
        obj.scale = (1.0, 1.0, 1.0)
        obj.keyframe_insert(data_path=DATA_PATH_SCALE, index=Z_INDEX, frame=30)
        
        bpy.context.scene.frame_end = 30 # Set end frame
    
        # 4. Create Grease Pencil Object (For Outline)
        
        # The correct operator is 'object.gpencil_add' in object mode, 
        # but the simplest way is to create the data and object manually.
        gp_data = bpy.data.grease_pencils.new(OUTLINE_NAME)
        gp = bpy.data.objects.new(OUTLINE_NAME, gp_data)
        bpy.context.collection.objects.link(gp)
        gp.location = (0, 0, 0)
        
        # 5. Export to GLTF
        
        # Select the objects to be exported (the cylinder is already active/selected)
        bpy.ops.object.select_all(action='DESELECT')
        obj.select_set(True)
        
        bpy.ops.export_scene.gltf(
            filepath=EXPORT_PATH, # Use the constructed path variable
            export_format='GLB',
            export_animations=True
        )
        print(f"Successfully exported GLB to: {EXPORT_PATH}")
    
    if __name__ == "__main__":
        create_animated_spring()


    Step 2 Lighting the Animation with HDR Using the Courtyard EXR

    Blender includes a courtyard EXR file inside the installation directory. EXR provides very high dynamic range lighting which results in realistic shading inside the model viewer. To use this HDRI in the model viewer environment reference it in your HTML.

    Step 3 Displaying the Animation on the Web Using Model Viewer

    Create an HTML file like the example below. Model viewer supports glTF and glb animations and plays them with no extra code.


    <script type="module" src="https://unpkg.com/@google/model-viewer/dist/model-viewer.min.js"></script>
    <model-viewer
        src="spring_animation.glb"
        autoplay
        animation-name="Action"
        environment-image="court_yard.exr"
        camera-controls
        exposure="1.0"
        style="width: 100 percent height: 400px">
    </model-viewer>


    Which HDR Formats Work Best in Web Browsers

    Format .hdr has limited browser support .exr is very limited .ktx has good support .ktx2 has very good support in modern browsers. Open source alternatives include Radiance HDR OpenEXR and PNG lighting maps for low dynamic range.

    📸 Screenshots & Screencast

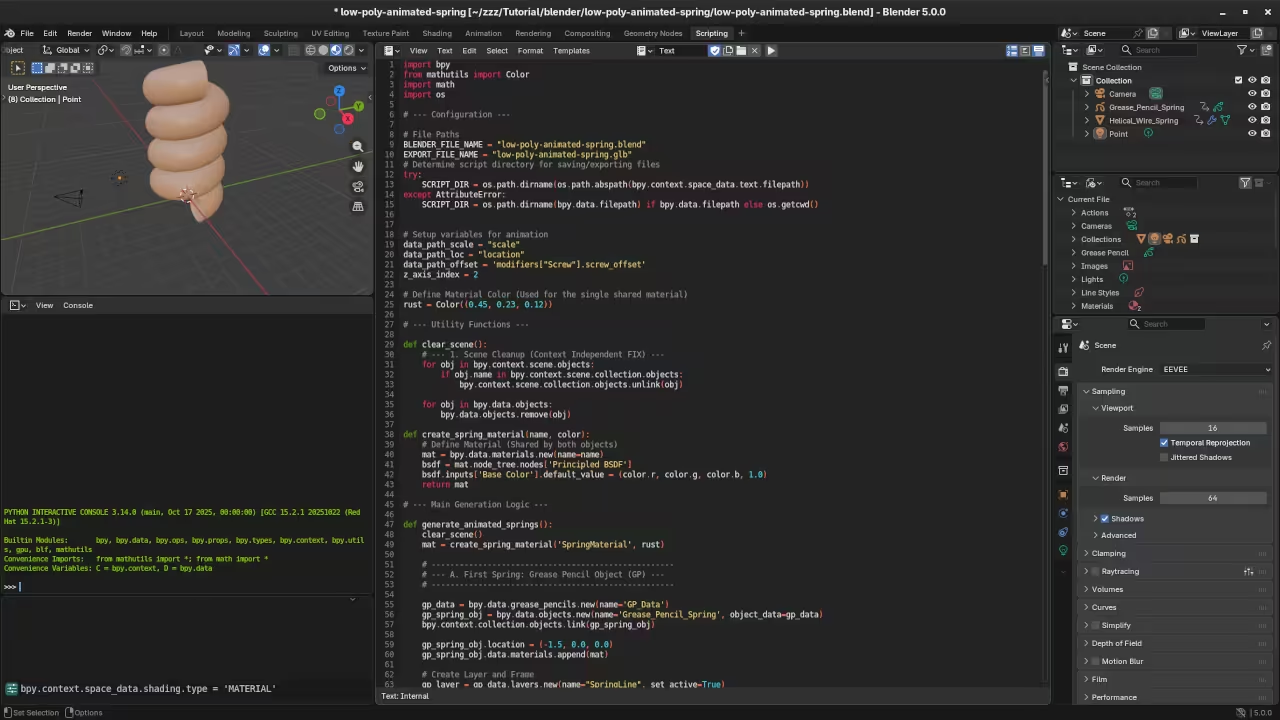
    Low poly Animated Spring Python code
    Blender Scripting Workspace Displaying Low Poly Animated Spring Python Code

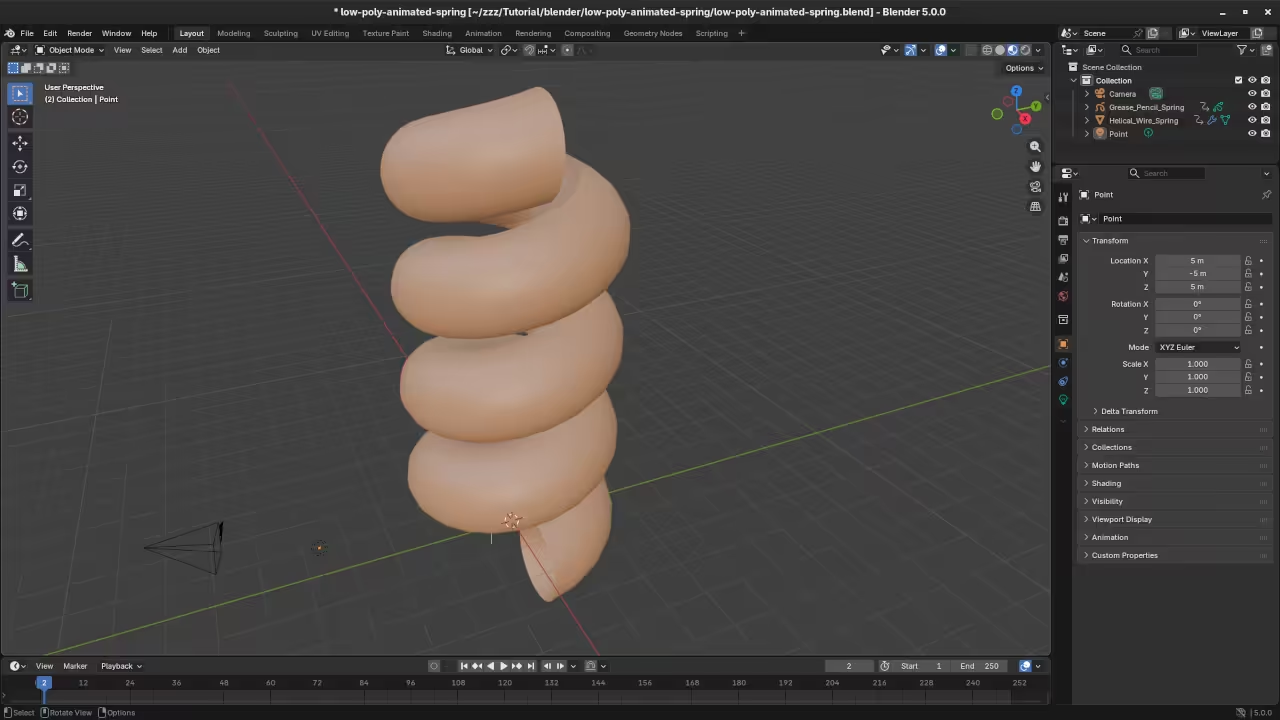
    Low poly Animated Spring in Blender
    Blender Layout Workspace Displaying Low Poly Animated Spring

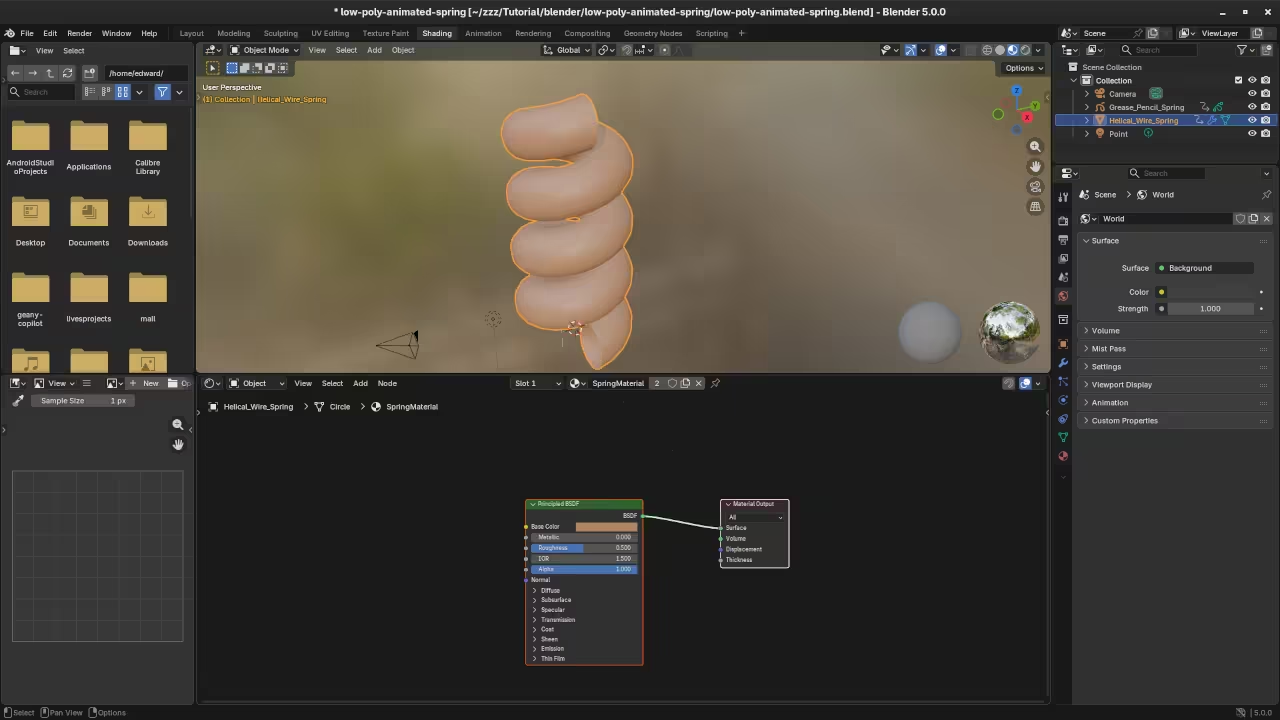
    Low poly Animated Spring in Blender Shading
    Blender Shading Workspace Displaying Low Poly Animated Spring

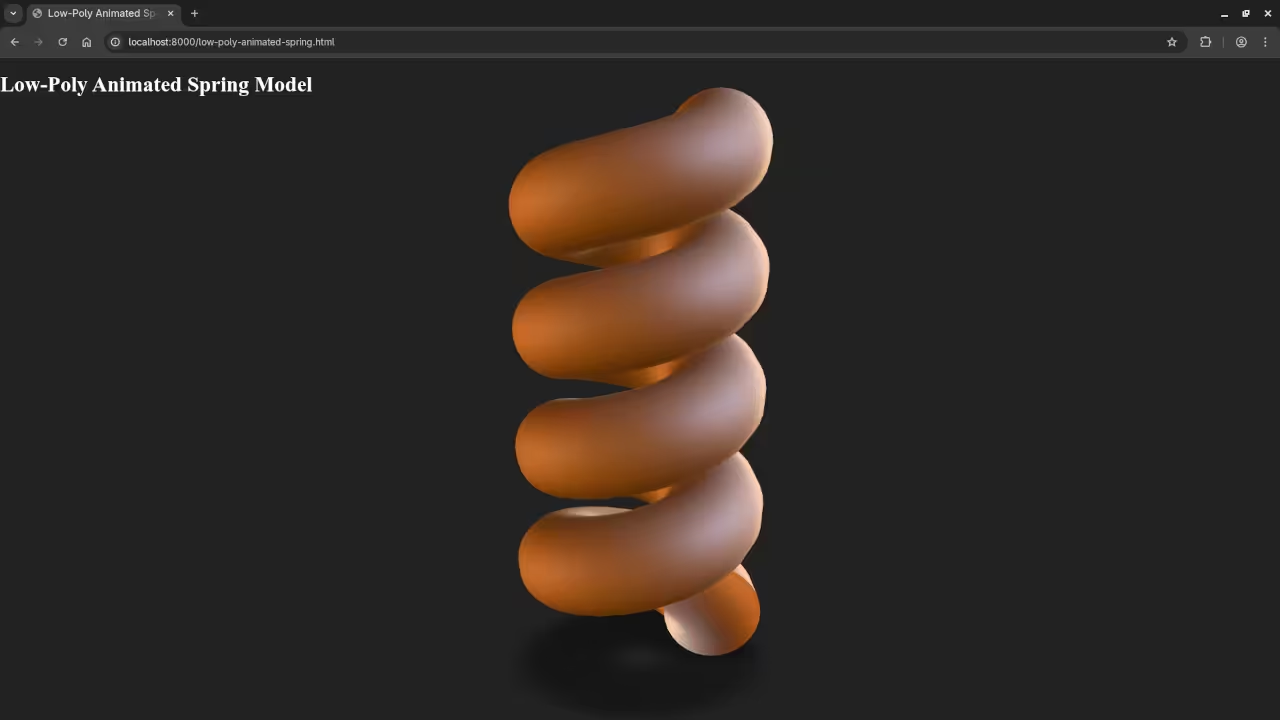
    Low poly Animated Spring in Web browser
    Web Browser Displaying Rendered Low Poly Animated Spring

    Screencast For Blender Python API Low Poly Animated Spring

    Conclusion

    You have now created a simple spring style animation using Blender 5 Python scripting and displayed it directly inside a web browser using model viewer. This beginner workflow teaches you the foundations of 3D automation web display and HDR environment lighting. Experiment with changing keyframes or using more advanced physics as you become comfortable.

    My Python and Blender Books

    Learning Python
    https://www.amazon.com/Learning-Python-Programming-eBook-Beginners-ebook/dp/B0D8BQ5X99

    Mastering Blender Python API
    https://www.amazon.com/Mastering-Blender-Python-API-Programming-ebook/dp/B0FCCQKFFZ

    My Python Course

    Learning Python
    https://ojamboshop.com/product/learning-python

    One on One Python and Blender Tutoring

    I am available for private online lessons
    https://ojambo.com/contact