Elastic for GNOME Review A Powerful Open Source Tool for Designing Spring Animations
Modern UI animations rely on polished spring based motion with smooth transitions and natural rebound effects. Elastic is an open source GNOME application that makes creating spring physics animations visual and efficient. Developers and designers can preview curves, adjust physics values, and export animation code directly for languages such as C Python JavaScript Rust and Vala. Elastic supports GTK and libadwaita development and integrates well into a Linux workflow.
I will be using Elastic for future Blender physics animation projects and for HTML5 spring based object animations. The application allows me to fine tune damping stiffness and motion curves in a visual way that can be converted directly into scripts or animation nodes.
What Elastic Provides
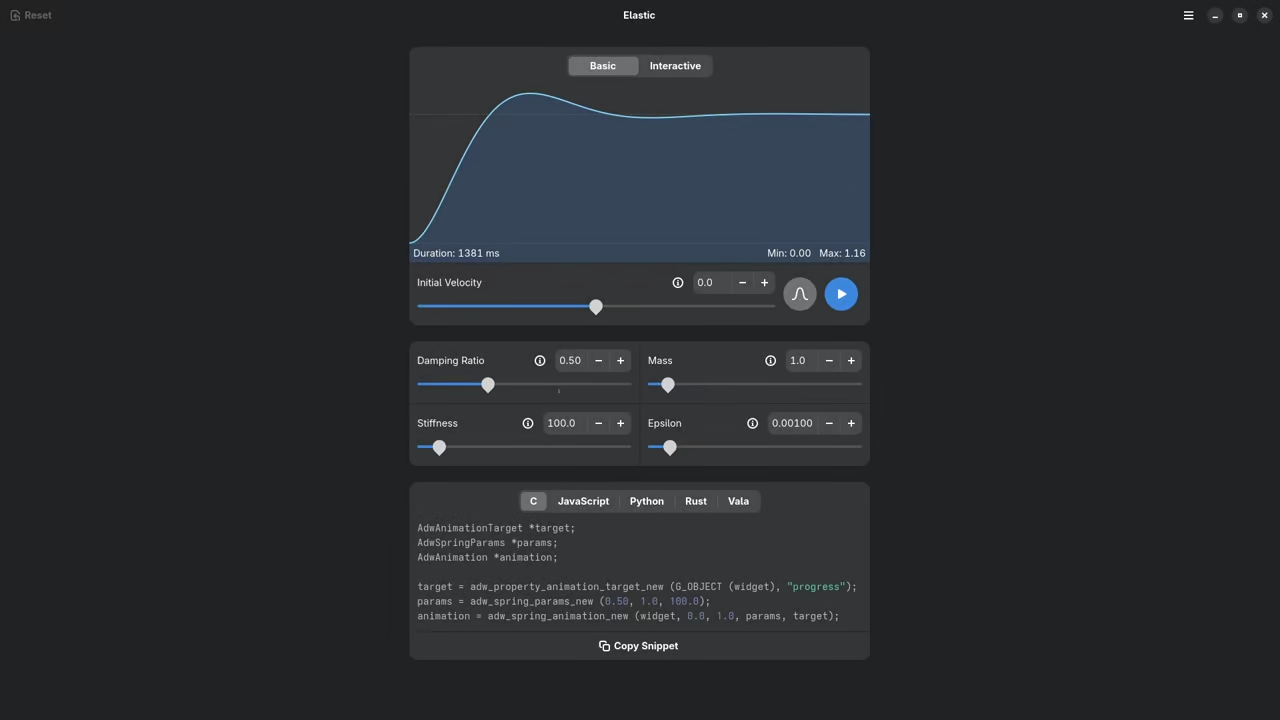
Real time preview of spring motion
Interactive control of stiffness damping and mass
Graphical curve visualization
Exportable animation code in multiple languages
Clean GNOME and libadwaita interface
Fully open source with community development
How to Install Elastic on Fedora Linux
Elastic can be installed on Fedora using Flathub or the Fedora package repositories. Both methods are included below.
Install from Flathub Recommended
flatpak install flathub app.drey.Elastic
flatpak run app.drey.Elastic
This method usually provides the latest version and works on most Linux distributions supporting Flatpak.
Install from Fedora Repositories
Some Fedora releases include Elastic directly in the official repositories. Check availability using
sudo dnf search elastic
If available install using
sudo dnf install elastic
If the package is not available for your Fedora release the Flathub method is recommended.
📷 Screenshots
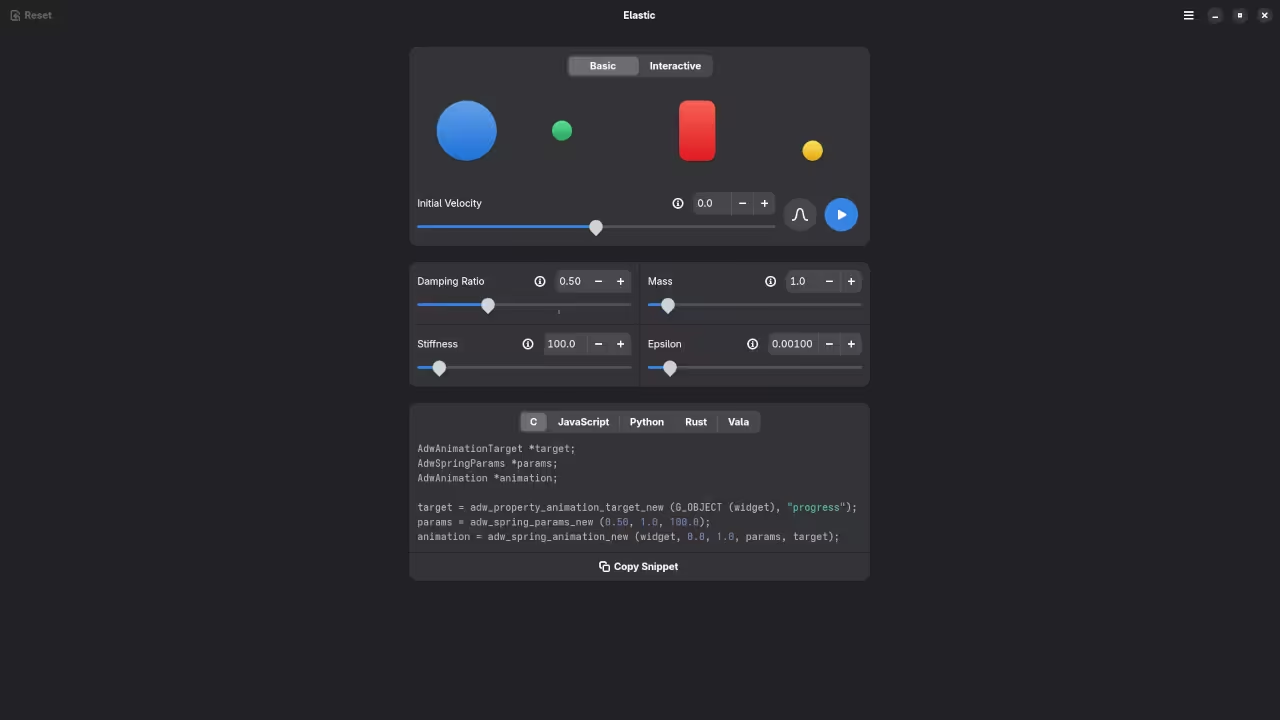
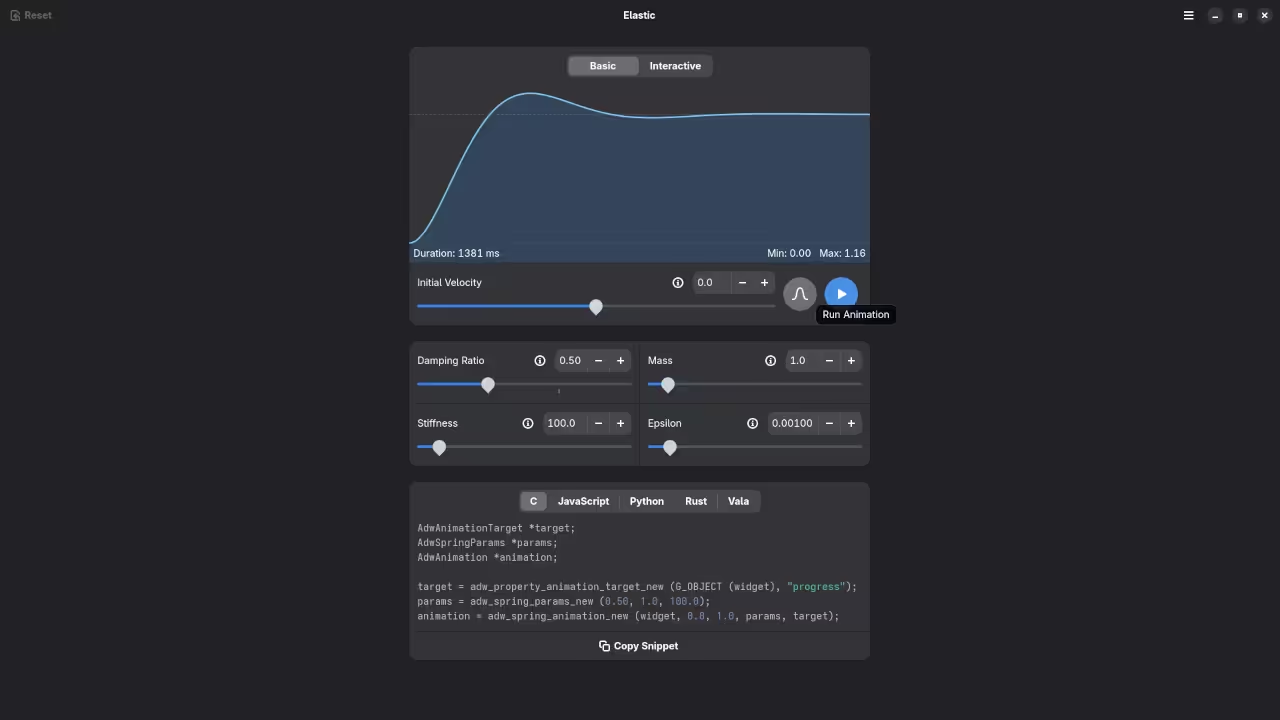
Elastic Basic ScreenElastic Basic Run Animation
🎬 Live YouTube Screencast
Video Displaying The Installation And Use Of LosslessCut On Linux
Conclusion
Elastic is an effective tool for crafting consistent spring based animations for both UI and creative work. Its visual tuning system saves considerable time compared to manual curve editing. Anyone creating Blender motion scenes HTML5 animation systems or GNOME applications will find Elastic valuable in their workflow.
How to Install Geany on Fedora Linux and Set Up Geany Copilot Plugin
Geany is a lightweight, open-source Integrated Development Environment (IDE) that is perfect for programmers who need a fast, simple, and efficient tool for coding. With a broad range of features, such as syntax highlighting, code completion, and debugging support, Geany is an excellent choice for developers looking for a versatile and customizable IDE.
In this post, we’ll cover how to install Geany on Fedora Linux, and we’ll show you how to set up the Geany Copilot plugin for an enhanced coding experience. We’ll also provide instructions for other platforms, but the primary focus will be on Fedora.
Additionally, there will be a bonus section on how to install Geany Copilot using Distrobox, especially if your Fedora setup lacks certain packages, like geanylua, in the repositories.
1. What is Geany?
Geany is an open-source IDE designed to be small and fast. It supports a wide range of programming languages like Python, C++, Java, and HTML, among others. Geany aims to be a practical, fast, and extensible IDE with all the essential features needed by developers.
The best part? Geany is open-source and available for various operating systems, including Linux, Windows, and macOS.
License:
Geany is licensed under the GNU General Public License (GPL), which means it is free to use, modify, and distribute. You can find more information about the license on Geany’s official website.
2. Installing Geany on Fedora Linux
Before we dive into the installation, make sure you have an active internet connection and root (administrator) privileges on your machine.
Install Geany Using DNF (Fedora Package Manager)
1. Open the Terminal on your Fedora system.
2. Update your package list to ensure you’re installing the latest available version:
sudo dnf update
3. Install Geany:
sudo dnf install geany
4. After installation, you can launch Geany from your application menu or simply by typing geany in the terminal.
Alternative Installation: Using Flatpak
If you’d like to install Geany using Flatpak (which ensures a more isolated environment), you can do so by running:
sudo flatpak install flathub org.geany.Geany
3. Installing Geany on Other Platforms
If you’re not using Fedora Linux, no worries! Here’s how to install Geany on other platforms.
Ubuntu/Debian-based systems:
sudo apt install geany
Windows:
Visit the Geany download page and download the installer for Windows. Follow the installation instructions.
macOS:
You can install Geany using Homebrew:
brew install geany
4. Setting Up Geany Copilot Plugin (Bonus)
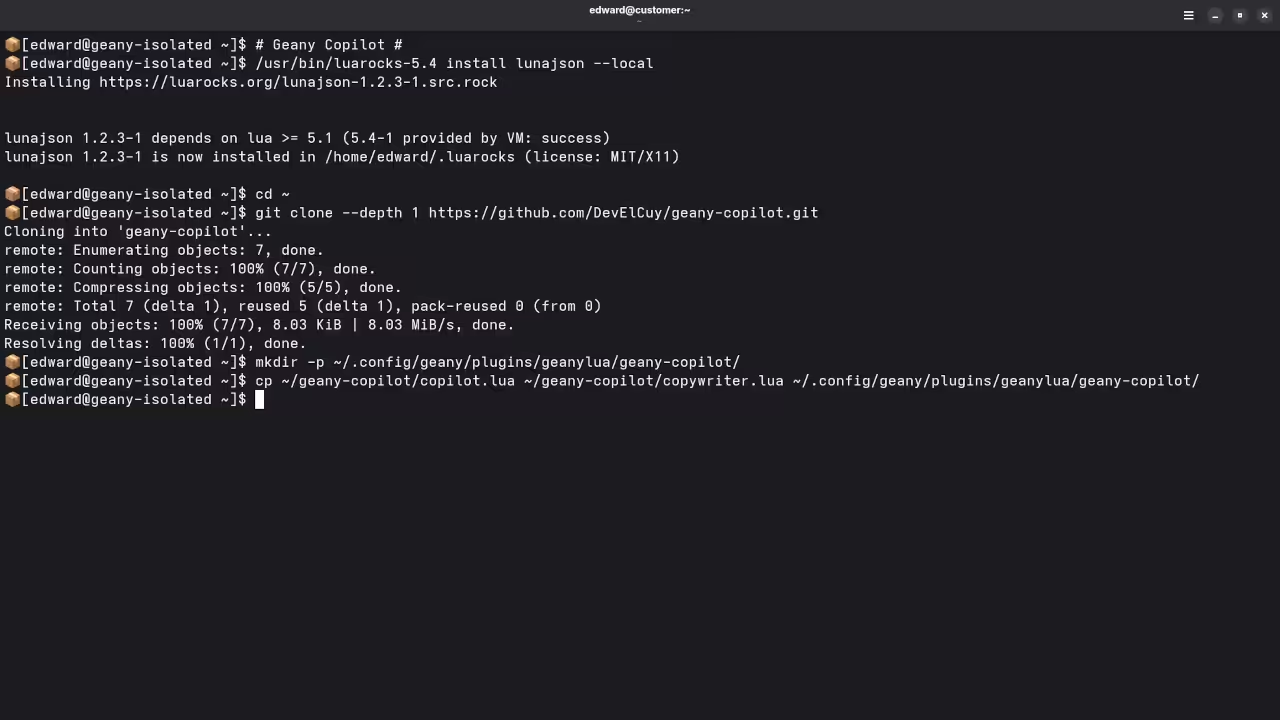
Fedora 43, as of this writing, doesn’t include the geanylua plugin in its repositories. Fortunately, you can easily set up Geany Copilot using a Distrobox container. Here’s how you can do it.
Install Distrobox (If not already installed):
sudo dnf install distrobox
Install Geany and GeanyLua in an Isolated Environment
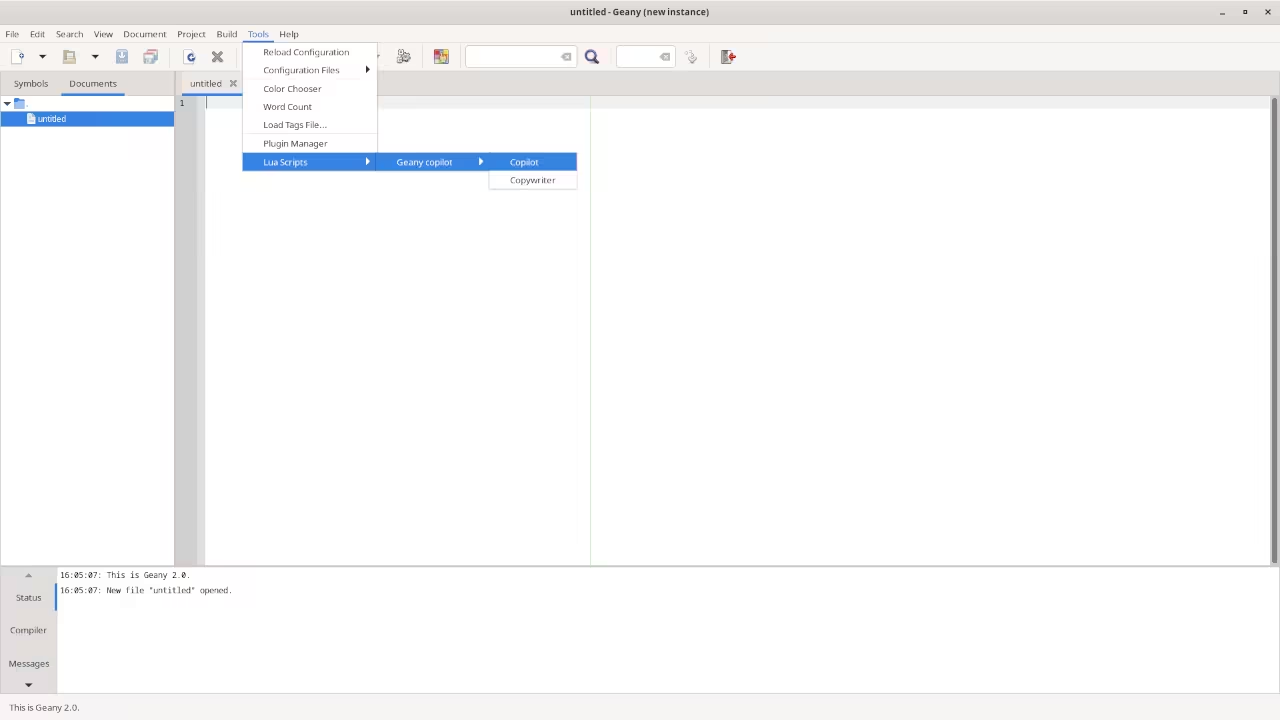
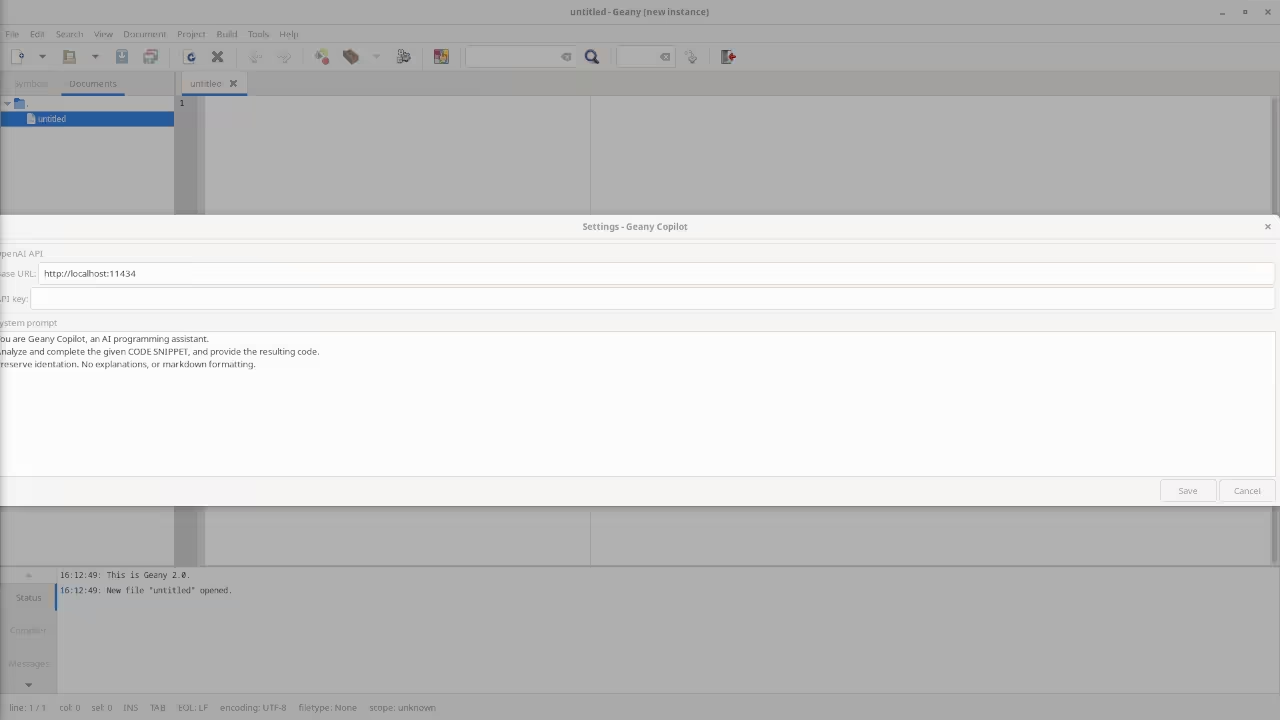
Then, navigate to Lua Scripts -> Geany Copilot -> copilot and enter the following details:
Base URL: http://localhost:11434
API Key: N/A
Final Setup: Run Ollama (Optional)
ollama serve
Requirements For Programming Text Editor
Glossary:
Code Editor
Designed for writing and editing source code.
IDE
Integrated Development Environment combines various tools need for software development.
Plugin
Software component that adds specific functionality.
Theme
Preset package containing graphical appearance to customize look and feel.
Open source
Freely available for possible modification and redistribution.
SCM
Source code management use to manage and track modifications to a source code repository.
LMB
Left Mouse Button (LMB) or left click
MMB
Middle Mouse Button (MMB) or scroll wheel
Test Tools
Test System
Name
Description
CPU
Ryzen 5 5600GT @ 3.60GHz.
Memory
32GB DDR4.
Operating System
Fedora Linux Workstation 43.
Desktop Environment
Gnome 49.
Name
Description
Test Suite
Name
Description
Large File
1GB human-readable text.
Regex File
Text with word “Helix” repeated.
Syntax File
PHP file containing HTML, CSS & JavaScript.
Media File
Smiley face or Tux Linux JPEG file.
Java Version
OpenJDK 21.0.9.
PHP Version
PHP 8.4.14.
Python Version
Python 3.14.0.
Geany Versions
2.1 in Fedora and 2.0 in Alpine Linux For Geany Copilot
Name
Description
Test Scoring
Each feature has two parts.
Score of zero indicates a missing feature.
A part of a feature is work a score of 0.5.
Three bias elimination steps were utilized. The editor was used for at least three years on different platforms. Attempts were made to get stable plug-ins for missing features. The same editor was compared between the one in the repository, the developers website, and the compiled version if applicable.
Selecting Editor Version
For this review, Geany was obtained from the Fedora repositories and it did not require additional plugins.
Features
The theme can be native for the editor in terms of the background. Geany dark and light themes can be created or downloaded. The score for the theme was a perfect 1.0.
Dragging and dropping a text file into the editor opens a new tab. It is still not possible to specify the tab location during the drag and drop operation. The score for drag and drop into editor was 0.5.
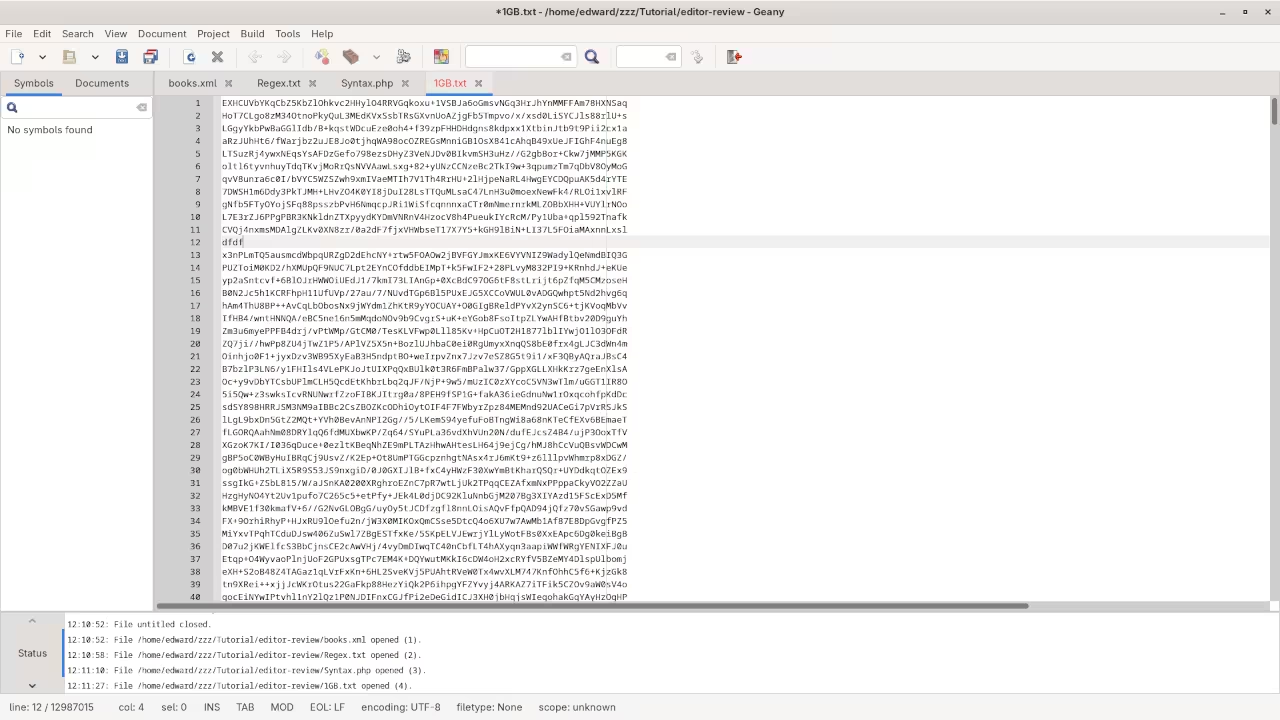
Opening a very large text file did not crash Geany. Geany was able to edit the large file. The score for opening a large file was a perfect 1.0.
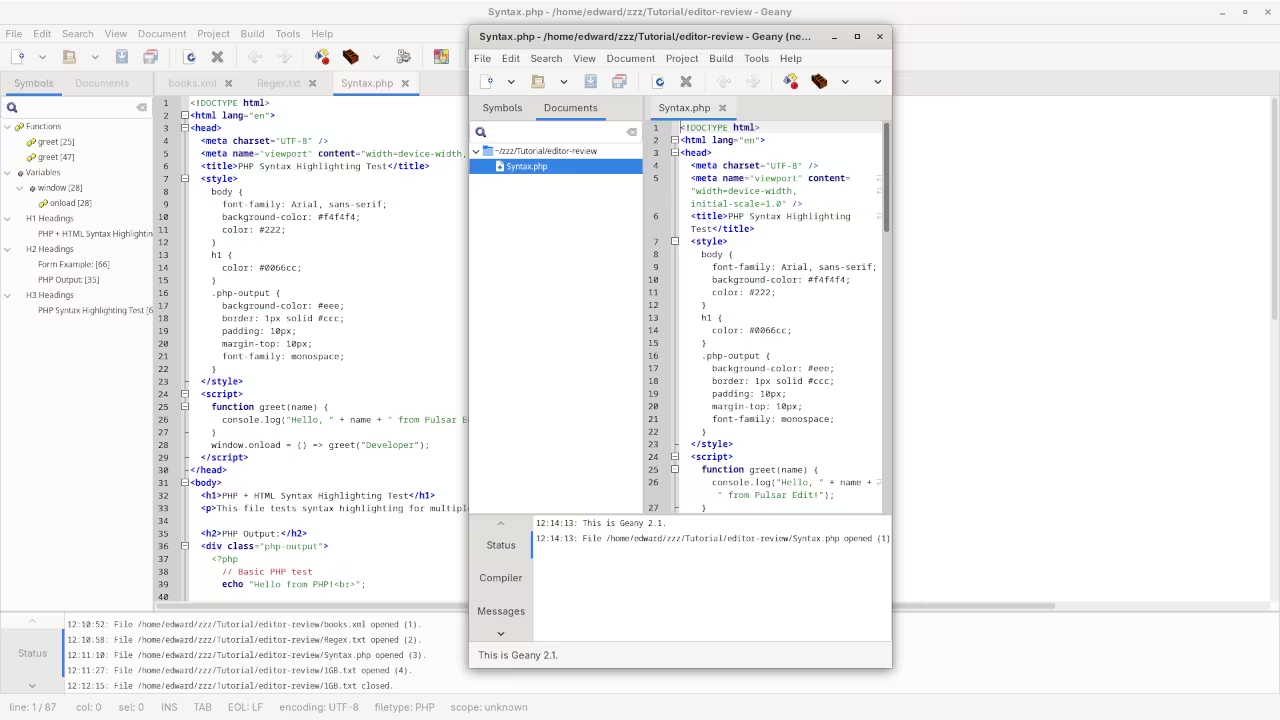
Multiple documents can opened in multiple tabs. Tear-off tabs still do not work but Geany has a feature to open in new window as a new instance which is handy for multiple monitors. The score for multiple documents was 0.5.
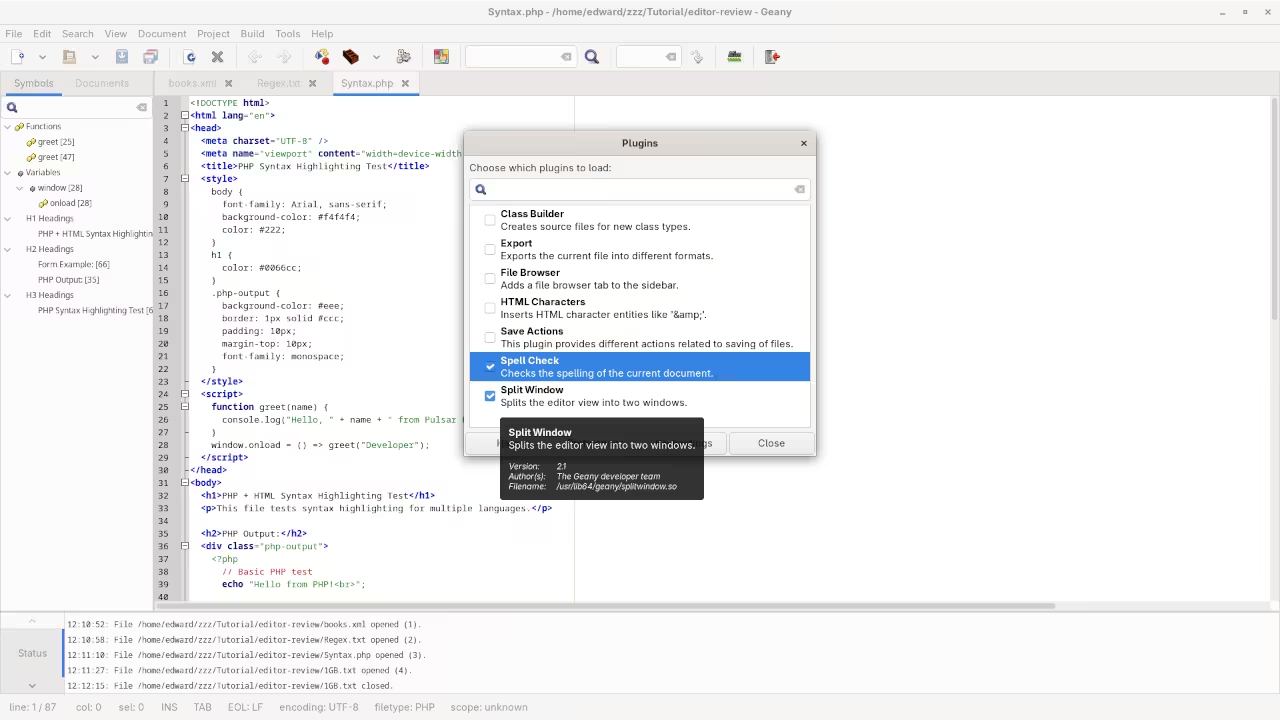
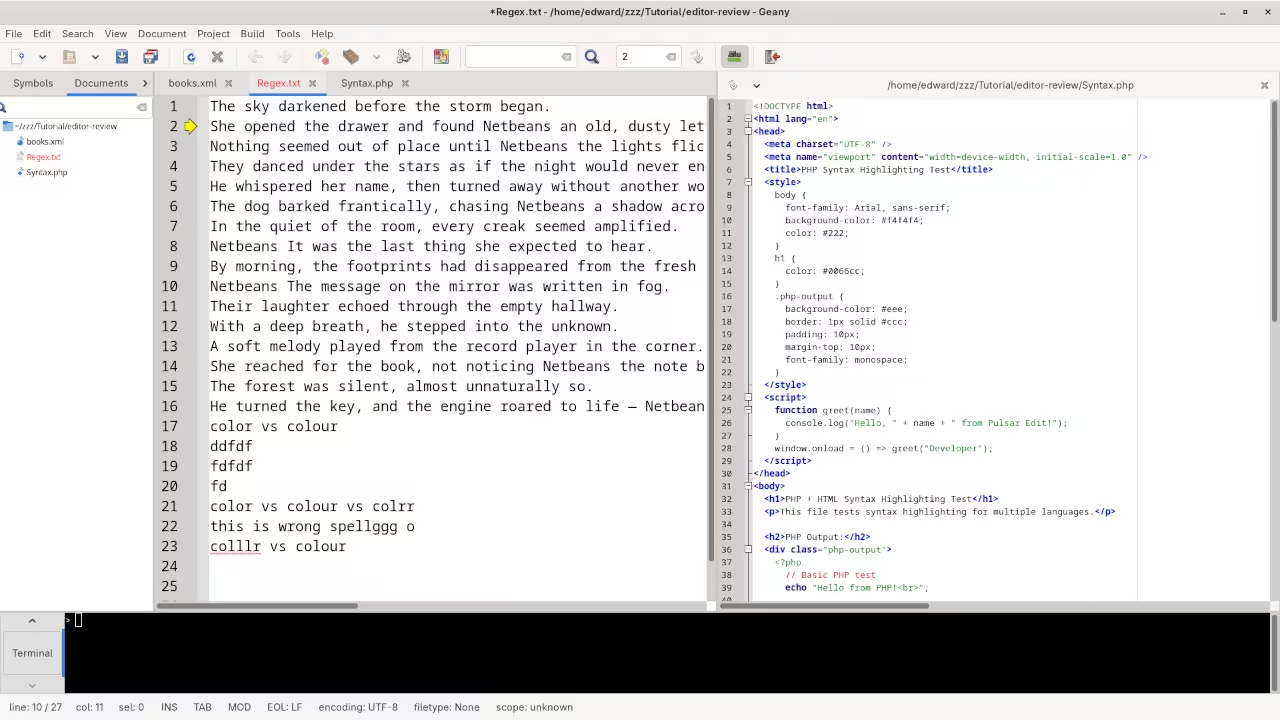
Multiple editors can be opened as new tabs with drag options. The window view can be split either vertically or horizontally using a plugin but Geany does not have a multiple editor view unless a new instance of Geany is opened. The score for multiple editor view was 0.5.
Creating non-project files is possible by dragging the folder into the workspace. Non-project files can be opened by the drag and drop operation. The score for creating non-project files was a perfect 1.0.
Soft word wrap can be enabled Edit > Preferences > Editor > Features > Line wrapping. Automatic soft wrap for documents is available for Geany. The score for word wrap was a perfect 1.0.
Spell check works as words are typed using the Spell Check plugin. Spelling errors are shown in opened documents. The score for spell check was a perfect 1.0.
Word count is available for Geany and is enabled using Tools > Word Count. Selection word count is available as part of word count. The score for word count was a perfect 1.0.
Go to line can jump to a specified line using CTRL-L. It is possible to jump to either the first or last line. The score for go to line was a perfect 1.0.
Indentation can default to user-defined tab stops. Children are automatically indented. The score for indentation was a perfect 1.0
Fonts can be dynamically scaled using CTRL-+/-/0. The system font can be bypassed and a new editor font and size can be set. The score for fonts was a perfect 1.0.
Find and replace using regular expressions can be utilized for all open documents in the current session. Find and replace will work for the current document or a selection in the current document. The score for find and replacing using regular expressions was 1.0.
Multiple language syntax highlighting in one file is enabled if the language plug-ins are installed. Each language has code-sensitive syntax colors which can be modified. The score for multiple language syntax highlighting was a perfect 1.0.
Code folding works for markup languages such as HTML. Code folding also works for programming languages such as Java and PHP. The score for code folding was 1.0.
Selecting rectangular block per column works via CTRL-LMB or CTRL-SHIFT on Linux. Rectangular block selections work with word wrap enabled. The score for selecting rectangular block was a perfect 1.0.
Multiple selection is not available for Geany. Search multiple selection is not available. The score for multiple selection was 0.0.
Distraction-free mode to hide panes works. Line numbers can be toggled to improve distraction-free mode. The score for distraction-free was a perfect 1.0.
The file manager required the File system browser plug-in to create and delete folders. Media files cannot be dragged and dropped into the file manager pane. The score for file manager was 0.5.
Terminal is integrated into Geany. The terminal can follow folder if enabled. Terminal can execute system commands. The score for terminal was 1.0.
Results
Geany is a very powerful IDE. By default, the Geany editor is no longer missing required features which can be installed by using extensions. For my required features, the Geany editor scored 85.0% or 8.50 out of 10.
📱 Screenshots
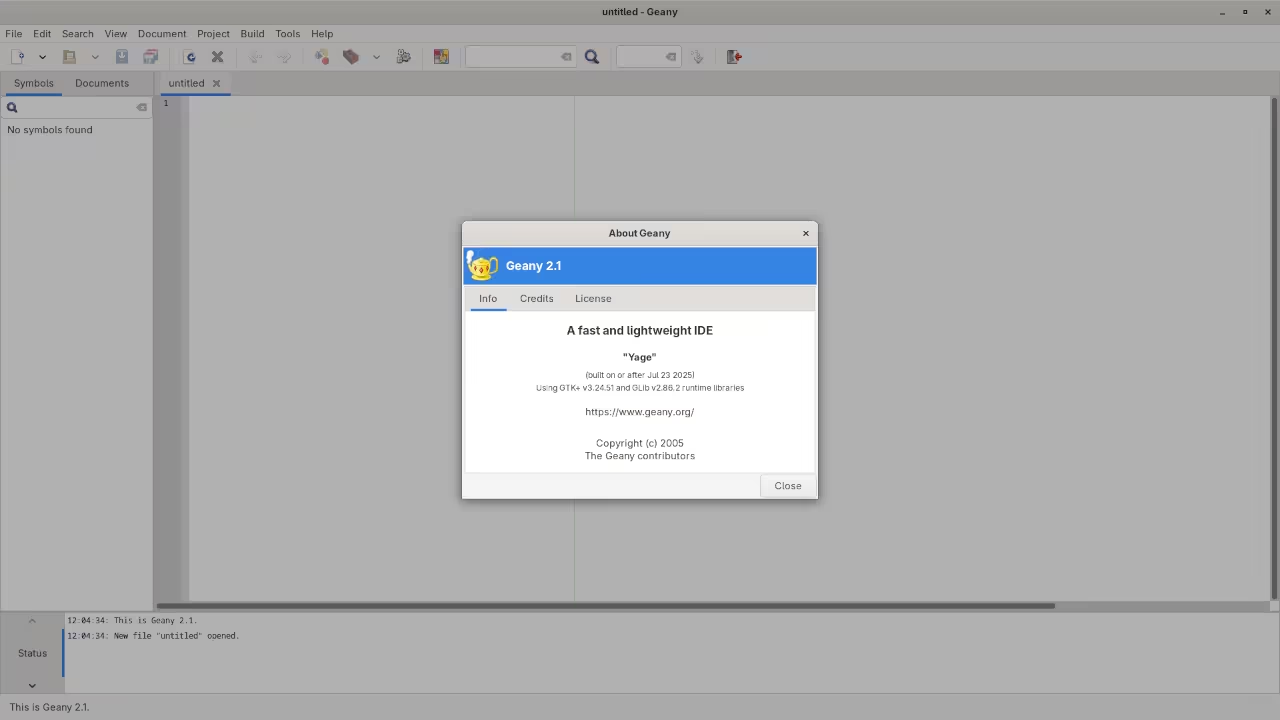
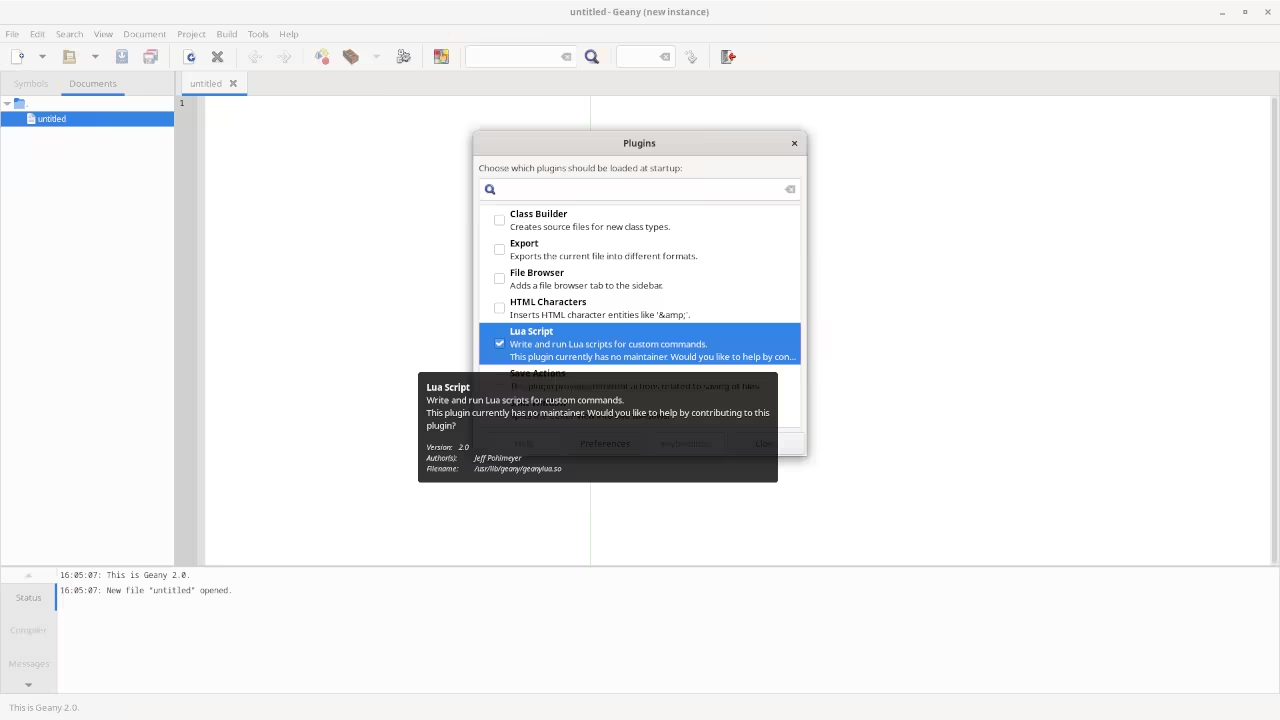
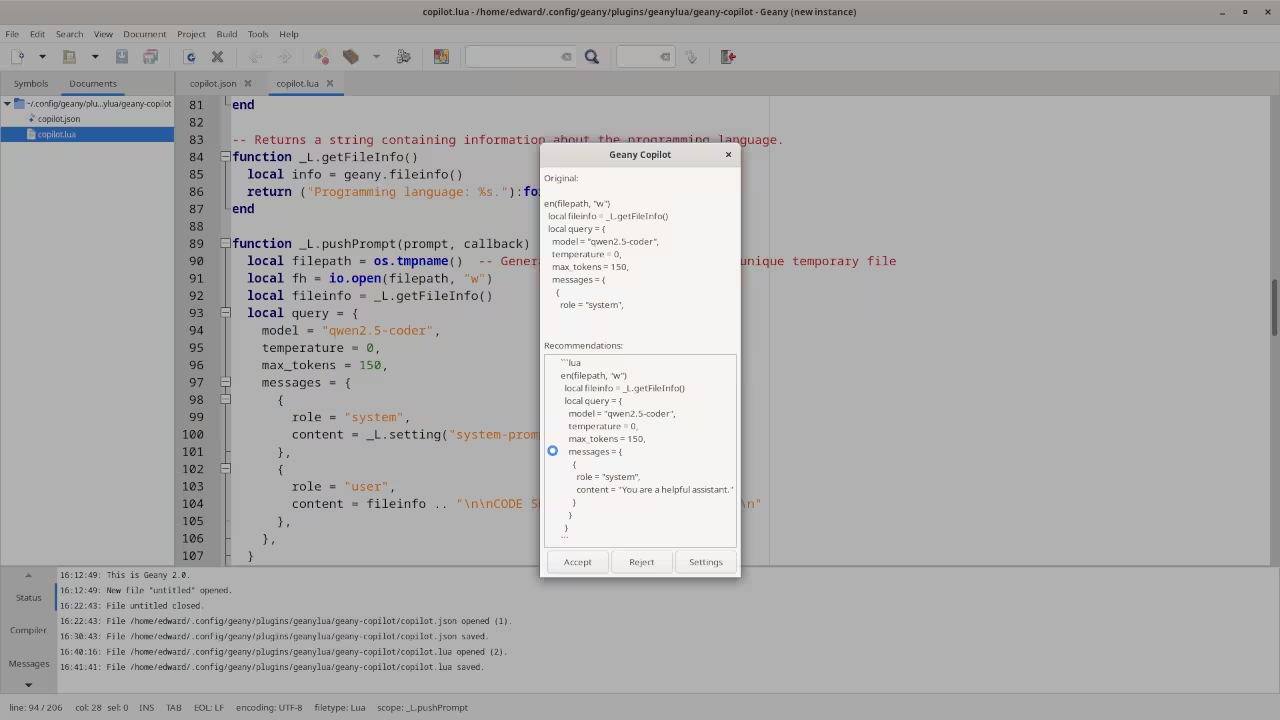
Geany 2.1 Opened Large FileGeany 2.1 Opened New WindowGeany 2.1 Plugins ManagerGeany 2.1 Multiple Editor Split, Folder And Terminal ViewCommand Line Displaying Installed Geany Copilot PluginGeany 2.1 Plugins View To Enable Lua Scripts PluginGeany 2.1 Opening Geany Copilot PluginGeany 2.1 Settings For Geany Copilot PluginGeany 2.1 Using Qwen2.5-coder Model For Geany Copilot
🞍 Screencast Tour
Take a guided walk-through of some of Geany 2.1’s best new features—from database tools to testing frameworks:
Geany 2.1 Tour And Review
6. Other Resources from Edward Ojambo
Check out my Programming Books to dive deeper into programming topics.
How to Install Immich: An Open-Source Photo Management Solution Using Podman
If you are looking for a self-hosted, open-source solution to manage your photos and videos, Immich might be exactly what you need. Immich is a modern, open-source photo management platform that gives you complete control over your media-without the need to rely on cloud services.
In this tutorial, we will walk through the process of installing Immich on your server using Podman (or podman-compose for easier container management), making sure you can get up and running quickly.
What is Immich?
Immich is an open-source photo management system designed to let you store, organize, and view your photos and videos privately. It is an excellent alternative to services like Google Photos or iCloud, but with the benefit of being self-hosted. That means you control your data and privacy.
Key features:
Open Source: Completely free and modifiable.
Self-Hosted: Host it on your own server for full data privacy.
Multi-format Support: Organize and access a wide range of media files.
Syncing: Sync photos across devices without relying on a third-party cloud provider.
How to Install Immich Using Podman or Podman-Compose
While Docker is a popular choice for containerization, Podman is another great option for managing containers without needing a daemon. If you prefer using Podman, here’s how you can install Immich on your system.
Step 1: Install Podman
Before proceeding, you need to have Podman installed on your machine. You can follow the installation instructions for your operating system from the official Podman installation guide.
Step 2: Download the Immich Files
To install Immich, create a new directory where you will store the necessary files for Podman.
mkdir ./immich-app
cd ./immich-app
Then, download the required files for Immich:
docker-compose.yml file: This file is used for container orchestration, and we can use it with podman-compose, which is Podman’s equivalent of Docker Compose.
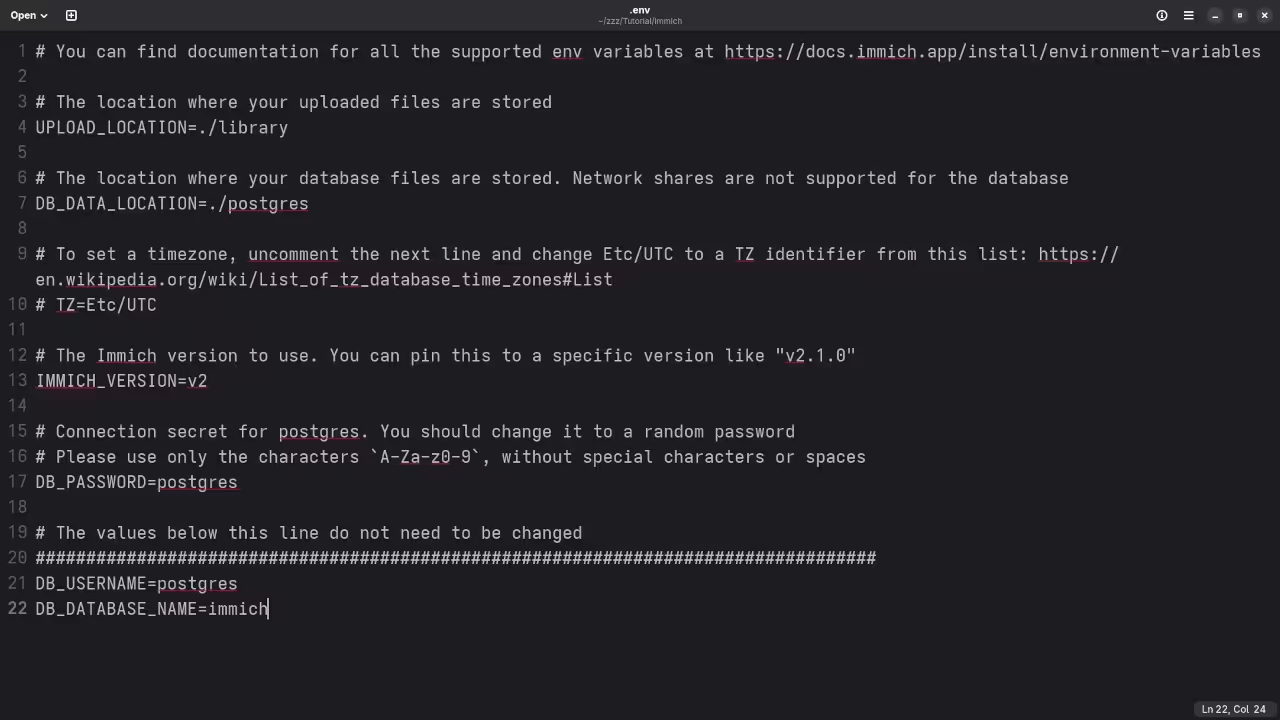
Before starting the containers, open the .env file and customize the environment variables. Here is a quick overview of the most important variables to configure:
UPLOAD_LOCATION: Specify where you want to store your uploaded media files.
UPLOAD_LOCATION=./library
DB_DATA_LOCATION: Set the directory where the Postgres database files will be stored.
DB_DATA_LOCATION=./postgres
TZ (Optional): Uncomment and set the timezone if needed. For example:
TZ=Etc/UTC
IMMICH_VERSION: Set the version of Immich you want to run. The latest version is usually fine:
IMMICH_VERSION=v2
DB_PASSWORD: Change the default DB_PASSWORD to something secure:
DB_PASSWORD=your_secure_password
After customizing the variables, save the .env file.
Step 4: Start Immich Using Podman-Compose
Now that you’ve configured the environment, you can use podman-compose to start the containers.
Once podman-compose is installed, start the containers:
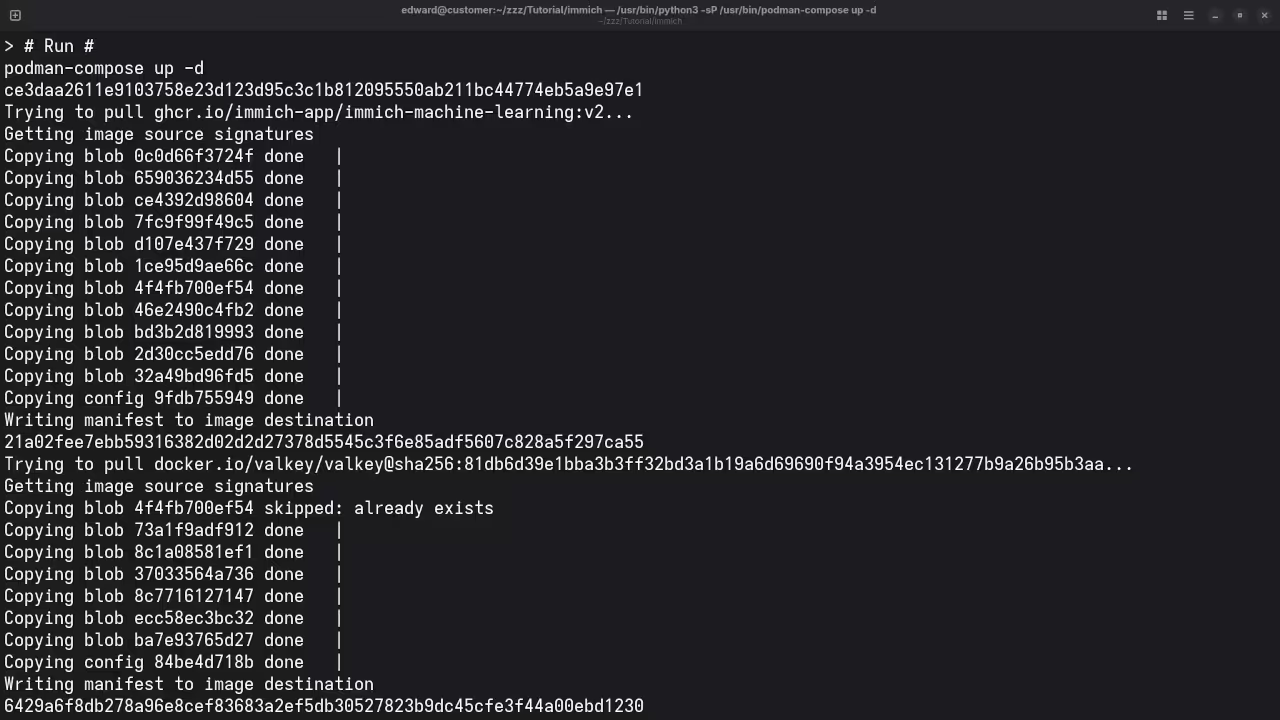
podman-compose up -d
This command will start Immich in detached mode, meaning the containers will run in the background.
Step 5: Verify the Installation
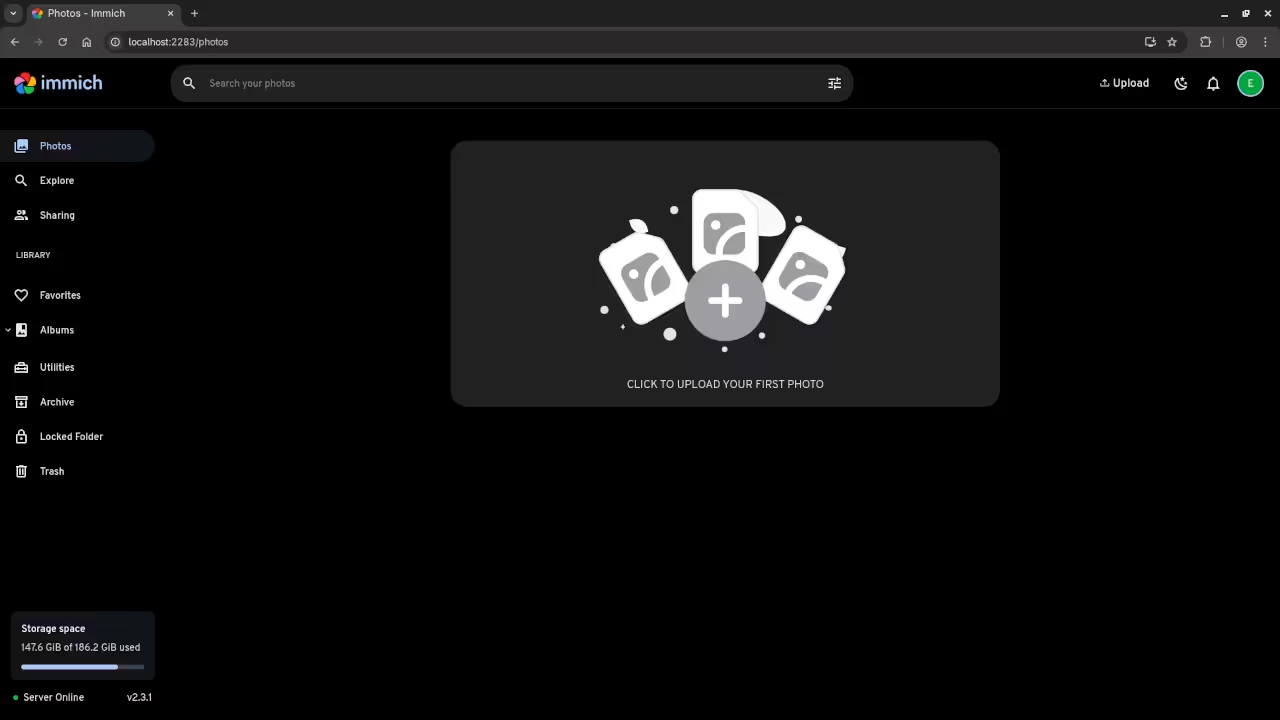
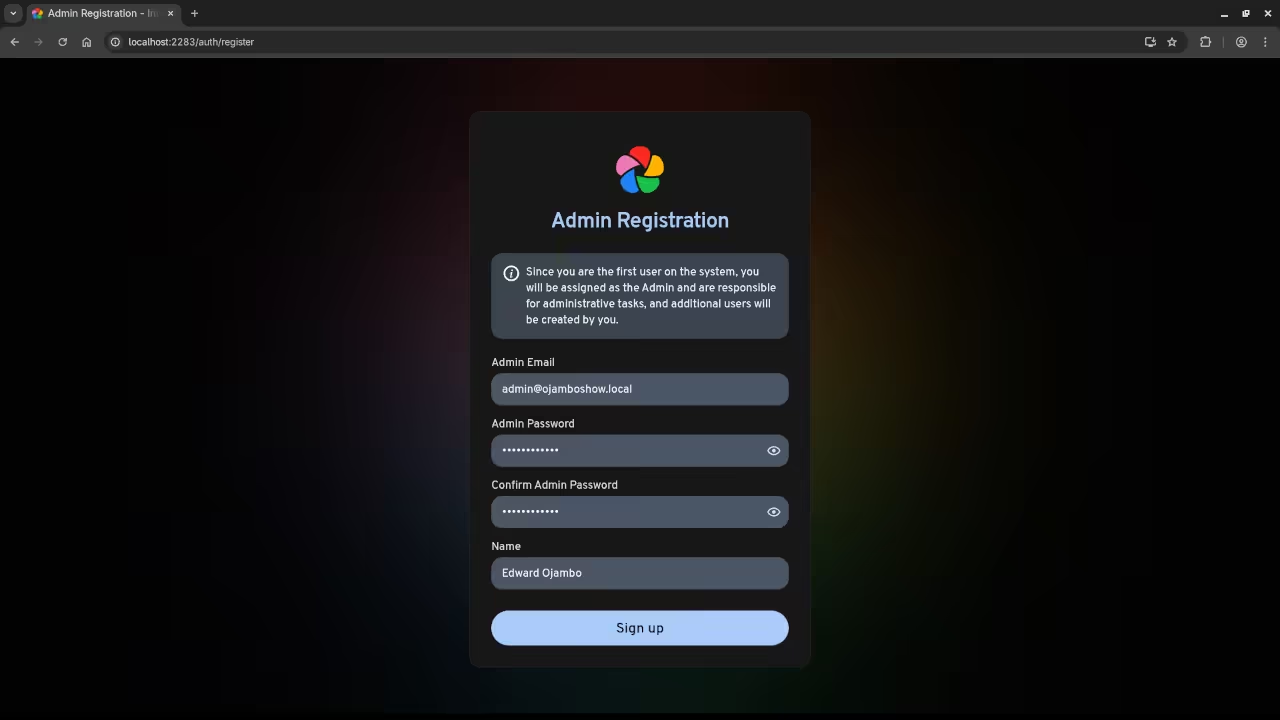
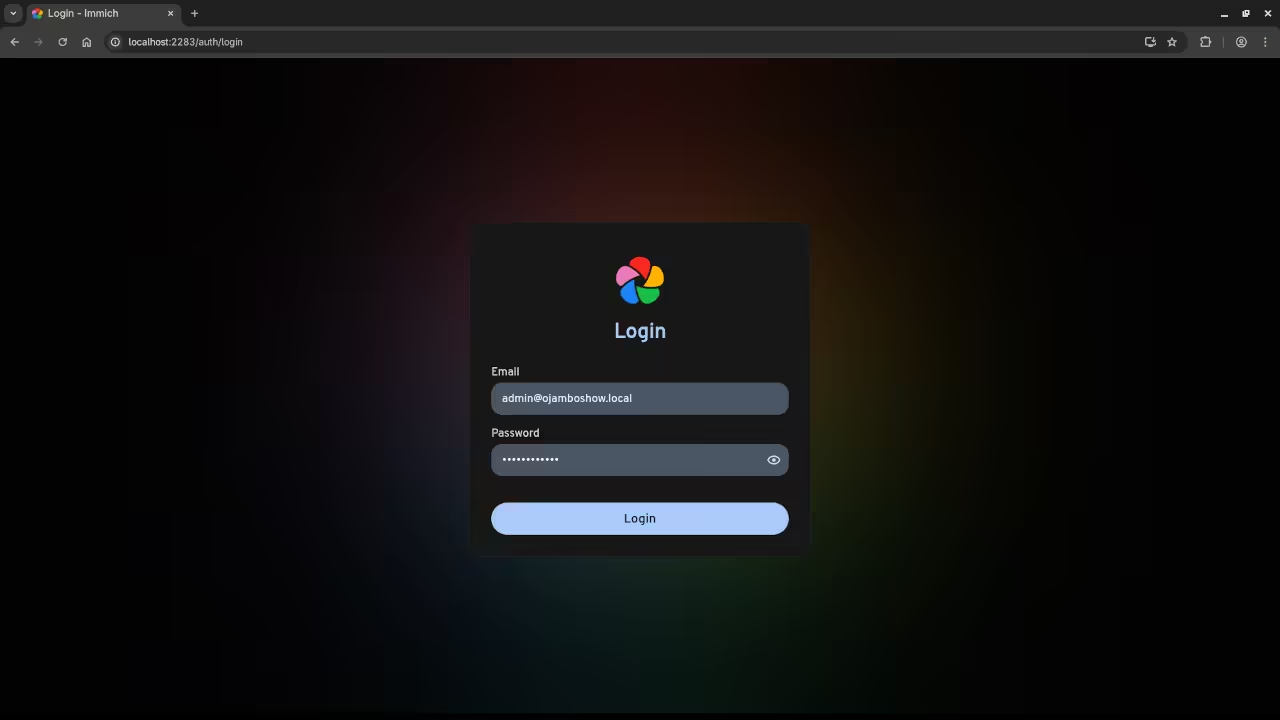
Once the containers are running, you can check if Immich is working by visiting http://localhost:2283 in your web browser. You should see the Immich login page, where you can begin using the platform to manage your photos and videos.
Watch the Full Installation Process
If you prefer a more visual approach, check out the screencast below, where I walk you through the entire installation process:
📱 Screenshots & Screencast
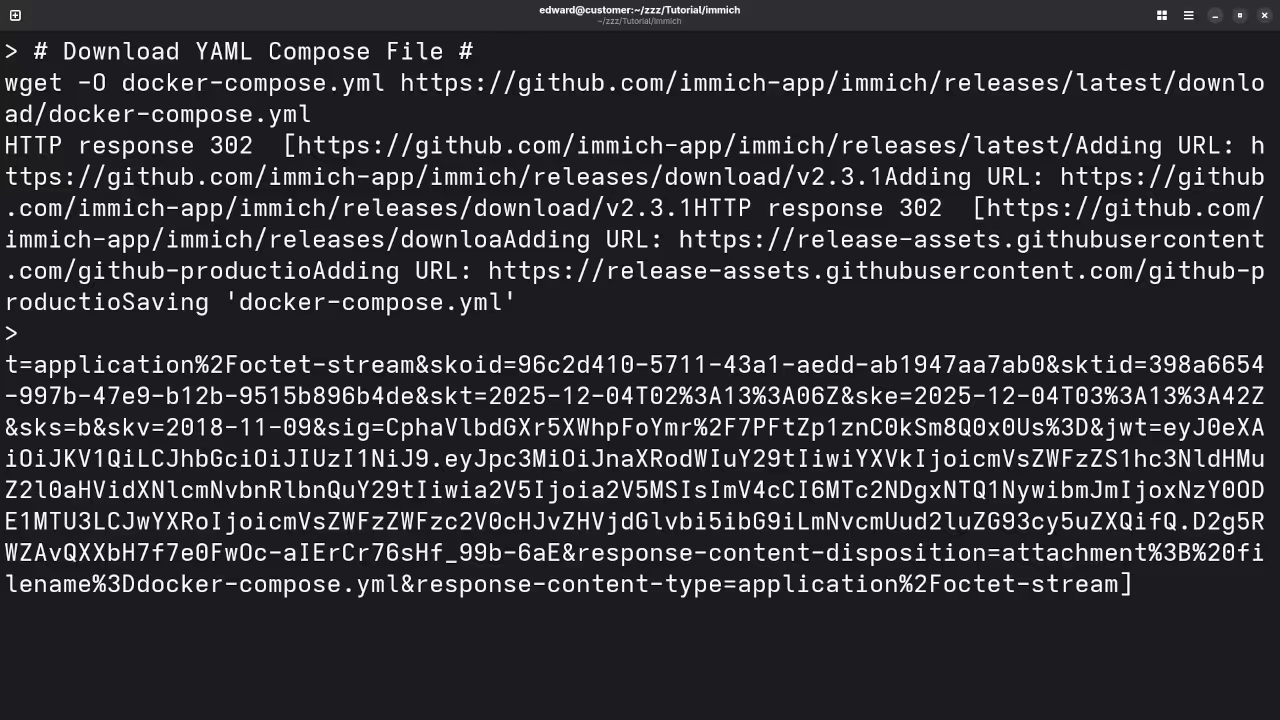
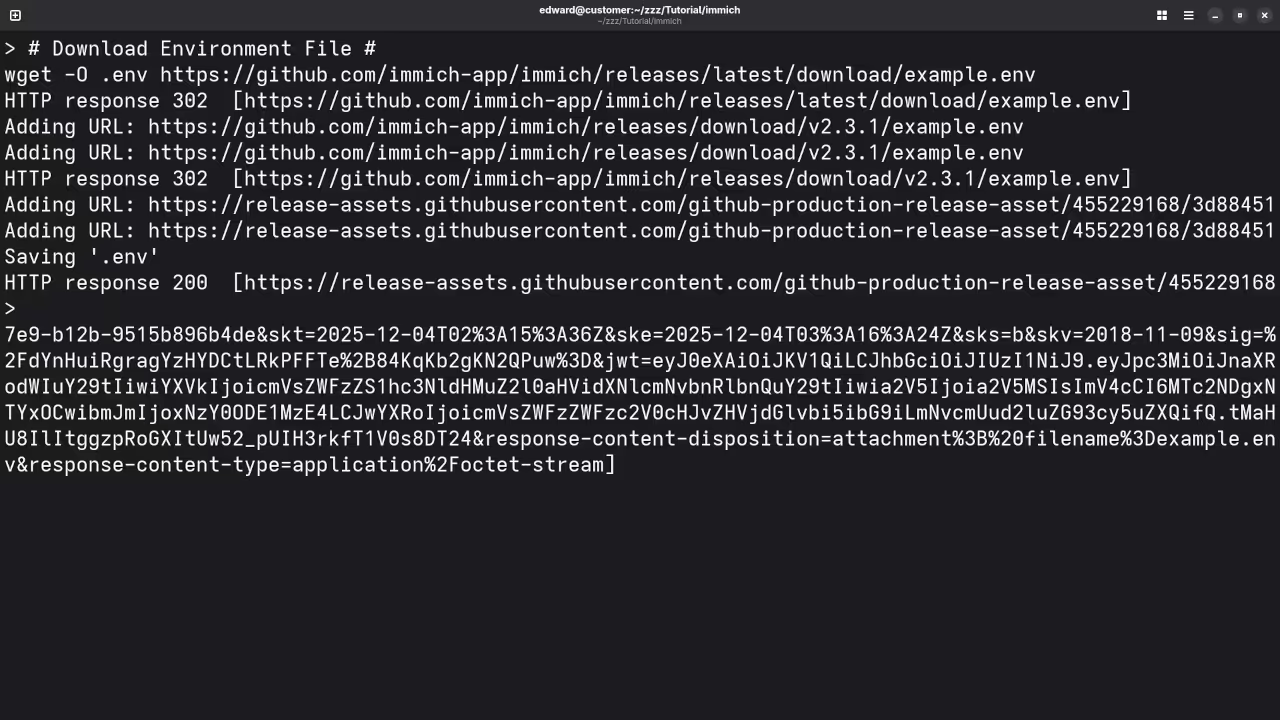
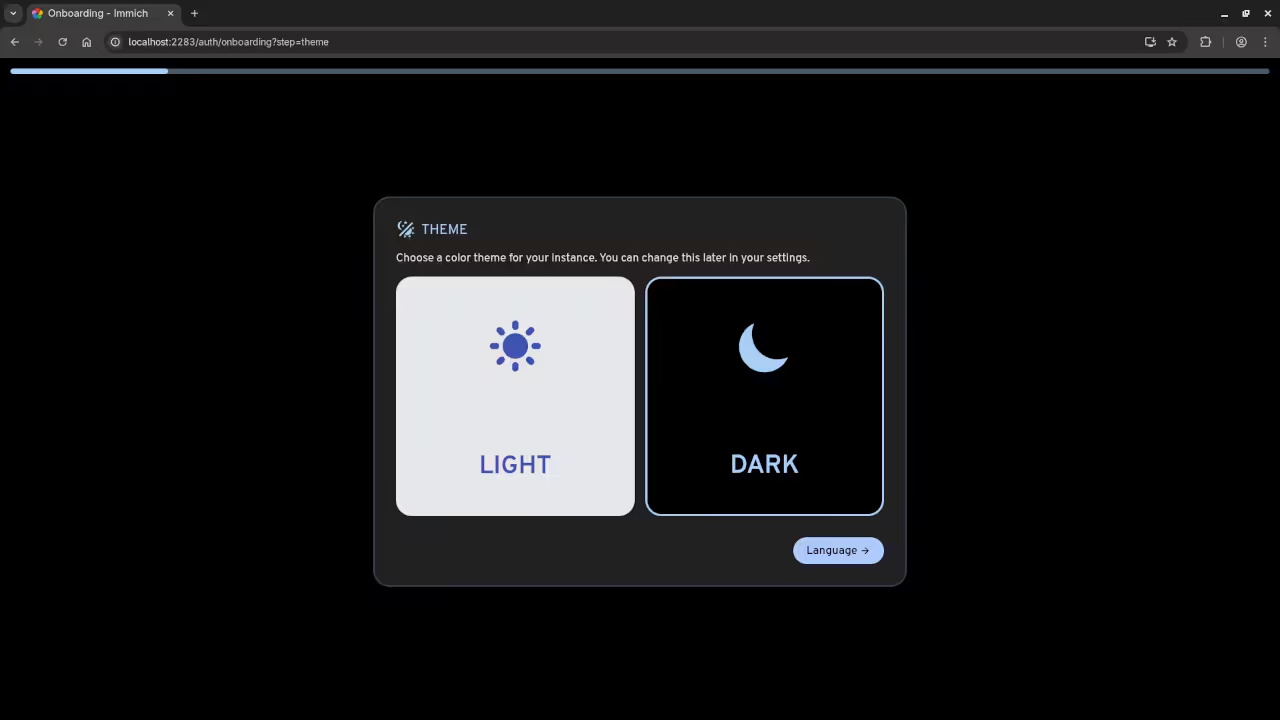
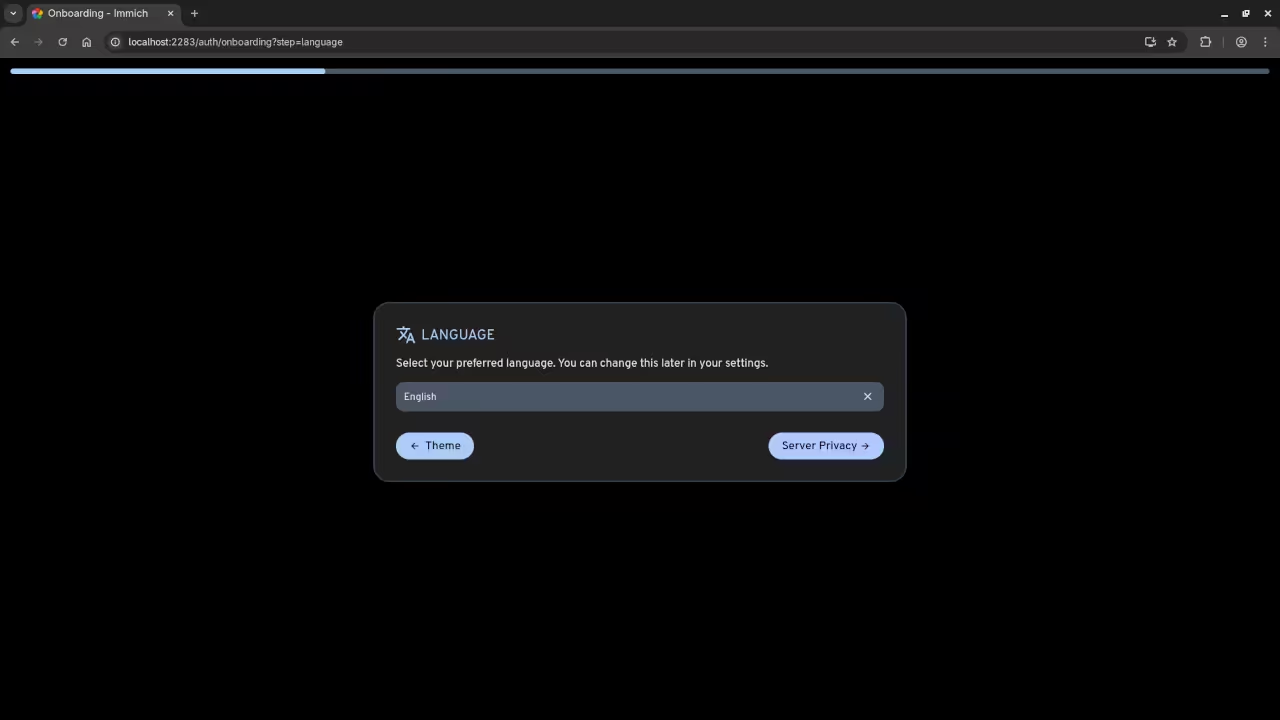
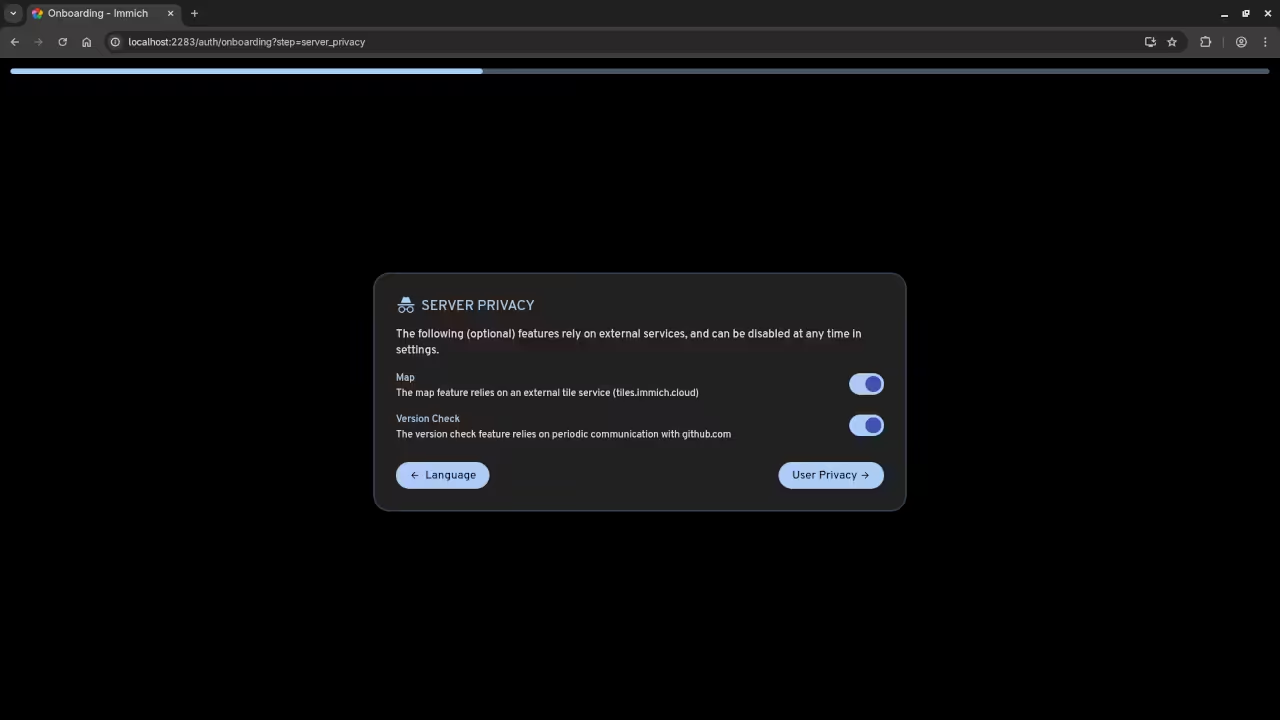
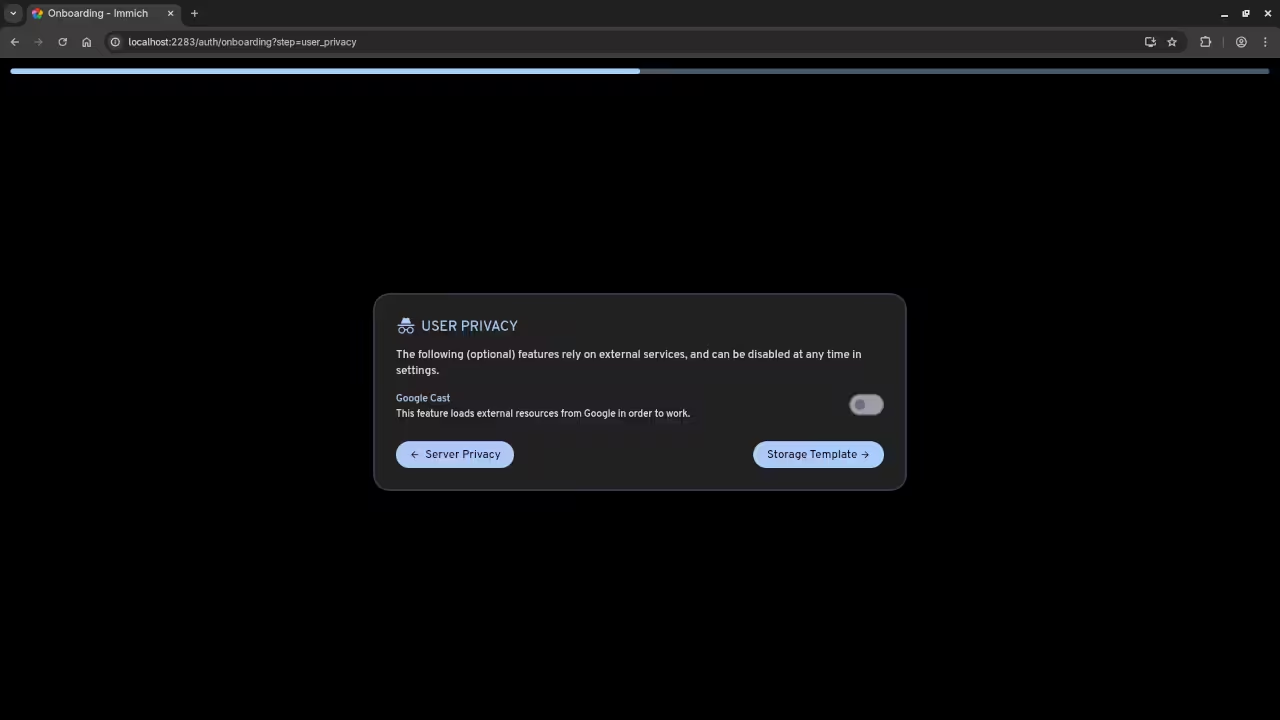
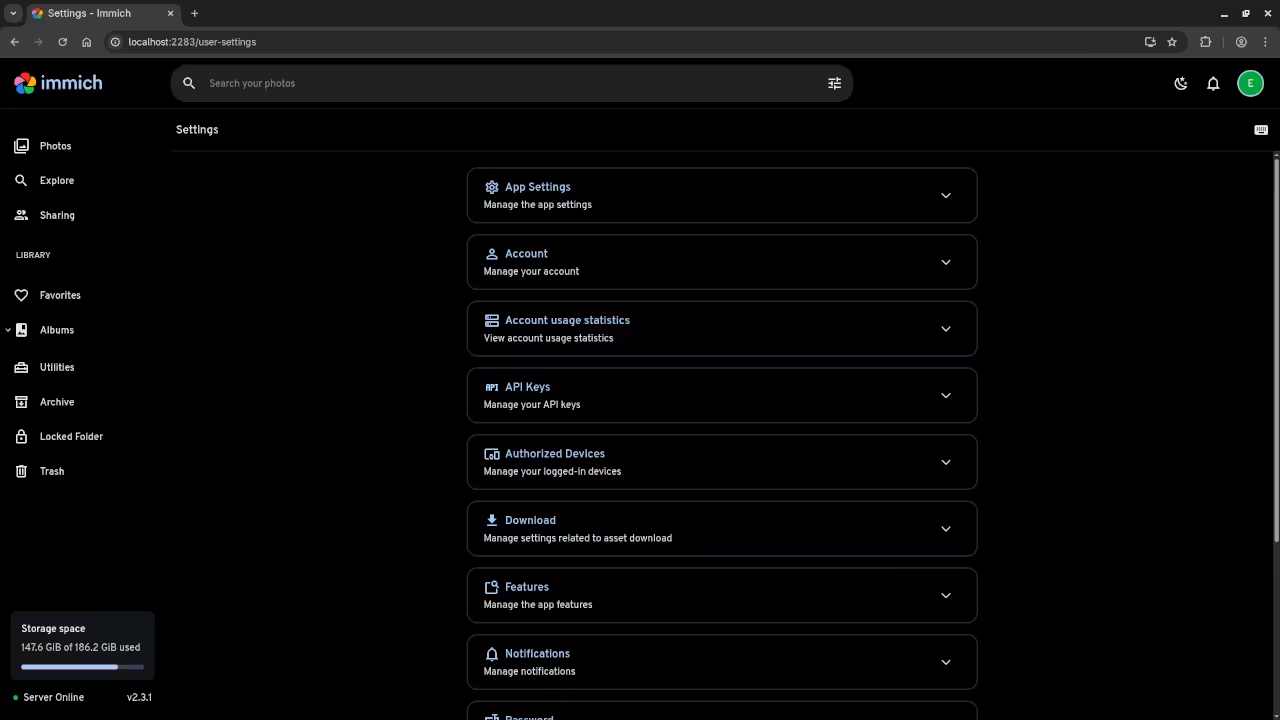
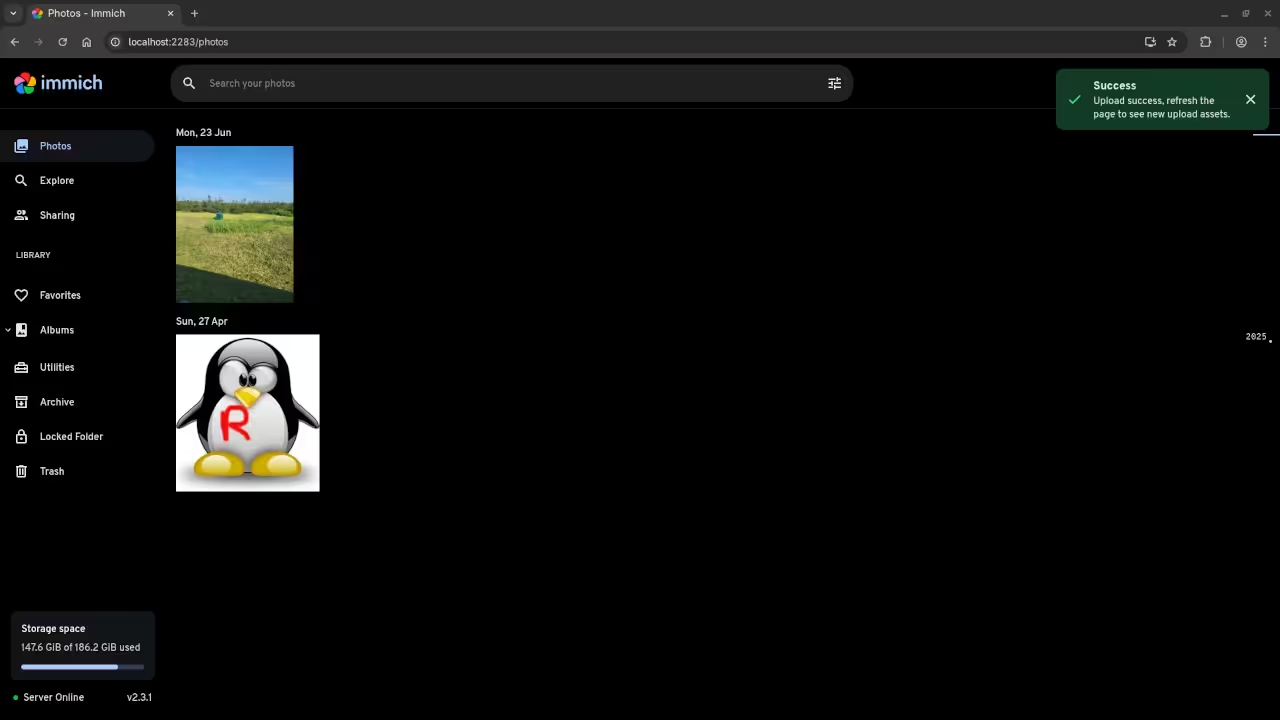
Command Line Download Immich YAML ComposeCommand Line Download Immich Environment FileGnome Text Editor Displaying Immich Environment VariablesCommand Line Installation Of Immich Via Podman Compose BuildWeb Browser Showing Immich Admin Setup ScreenWeb Browser Showing Immich Login ScreenWeb Browser Showing Immich Theme ScreenWeb Browser Showing Immich Language ScreenWeb Browser Showing Immich Server Privacy ScreenWeb Browser Showing Immich User Privacy ScreenWeb Browser Showing Immich User Settings ScreenWeb Browser Showing Immich Photos ScreenImmich Installation And Setup Screencast
Additional Resources
Here are some useful links if you are interested in expanding your knowledge of programming or need further assistance with Immich:
One-on-One Programming Tutorials: Need personalized programming assistance? Book a session with me at Ojambo Tutorials.
Immich Installation & Migration Services: I offer professional Immich installation and migration services if you need help with setting up or moving your photo management system.
Conclusion
With Immich, you can take control of your photo management system and host it on your own server, keeping all your data secure and private. By following this guide, you should be able to get Immich up and running with Podman in no time.
Feel free to reach out if you need any help with installation, migration, or programming tutorials!
How to Set Up Stable-Diffusion.cpp with Stable Diffusion v1-5 1B on Linux (AMD Instinct Mi60)
In this guide, we will walk you through setting up Stable-Diffusion.cpp with the Stable Diffusion v1-5 1B model on Linux, optimized for the AMD Instinct Mi60 32GB HBM2 GPU. Stable-Diffusion.cpp is a highly efficient C/C++ implementation of Stable Diffusion, and it runs without requiring Python. Let us get started!
Key Features of Stable-Diffusion.cpp
C/C++ Implementation: Efficient, lightweight, and no Python dependencies.
Cross-Platform: Works on Linux, Windows, macOS, and Android.
Multiple Backends: Supports CUDA, OpenCL, Vulkan, Metal, SYCL, and more.
Flexible Models: Supports various models like SD1.x, SD2.x, SD-Turbo, SDXL, and more.
Optimizations: Includes features like Flash Attention, TAESD, and VAE Tiling for efficient memory usage.
You will need to have CMake, Git, and Clang installed. These are the only necessary tools to get started. Make sure they are installed on your system using your package manager.
Step 3: Build the Project
Now, choose one of the following build configurations based on your hardware setup.
Once everything is set up, you can generate an image. For example, generating a lovely cat:
./bin/sd -m ../models/v1-5-pruned-emaonly.safetensors -p "a lovely cat"
ControlNet Support
Stable-Diffusion.cpp also supports ControlNet, a technique that enables fine-grained control over generated images. This feature allows you to manipulate the output by controlling specific elements of the image, such as style, structure, and more. For instance, if you want to apply an image as a guide for generating another, ControlNet can help achieve that.
You can enable ControlNet with the following command:
./bin/sd \
-m ../models/checkpoints/v1-5-q8_0.gguf \
-p "**flat paperback book, 3D render, photorealistic, full cover, clean, blank pages, white cover**, cinematic lighting, **isolated on a pure white background**" \
--steps 20 \
--cfg-scale 8.0 \
--seed 42 \
--width 768 --height 1280 \
--control-net ../models/controlnet/control_v11f1p_sd15_depth.safetensors \
--control-image softcover_768x1280.png \
-o CLEAN_BLANK_3D_TEMPLATE_002.png \
-n "low quality, shadows on background, messy background, text, writing"
Screenshots and Screencast
Here’s where you’ll find a visual walkthrough of setting up Stable Diffusion v1-5 1B using stable-diffusion.cpp on your local system:
Where to Place Your Models
Model Type
Folder
Checkpoints (e.g. *.safetensors)
ComfyUI/models/checkpoints/
LoRA models
ComfyUI/models/loras/
VAEs
ComfyUI/models/vae/
ControlNet
ComfyUI/models/controlnet/
Just drop your files into the appropriate folder and rerun stable-diffusion.cpp.
Test Tools
Test System
Name
Description
CPU
AMD Ryzen 5 5600GT (6C/12T, 3.6GHz).
Memory
32GB DDR4.
GPU
AMD Instinct MI60 (32GB HBM2).
Operating System
Fedora Linux Workstation 43.
Desktop Environment
Gnome 49.
Name
Description
Screenshots and Screencast
Here’s where you’ll find a visual walkthrough of setting up Stable Diffusion v1-5 1B using stable-diffusion.cpp on your local system:
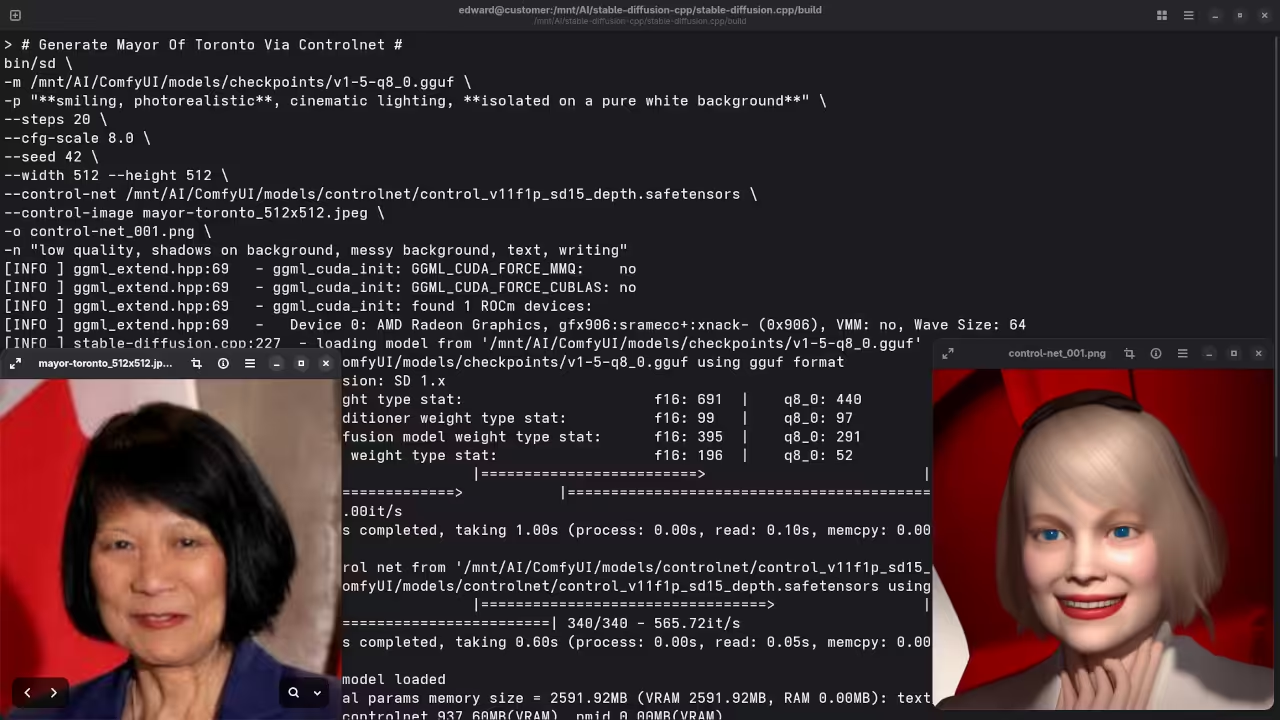
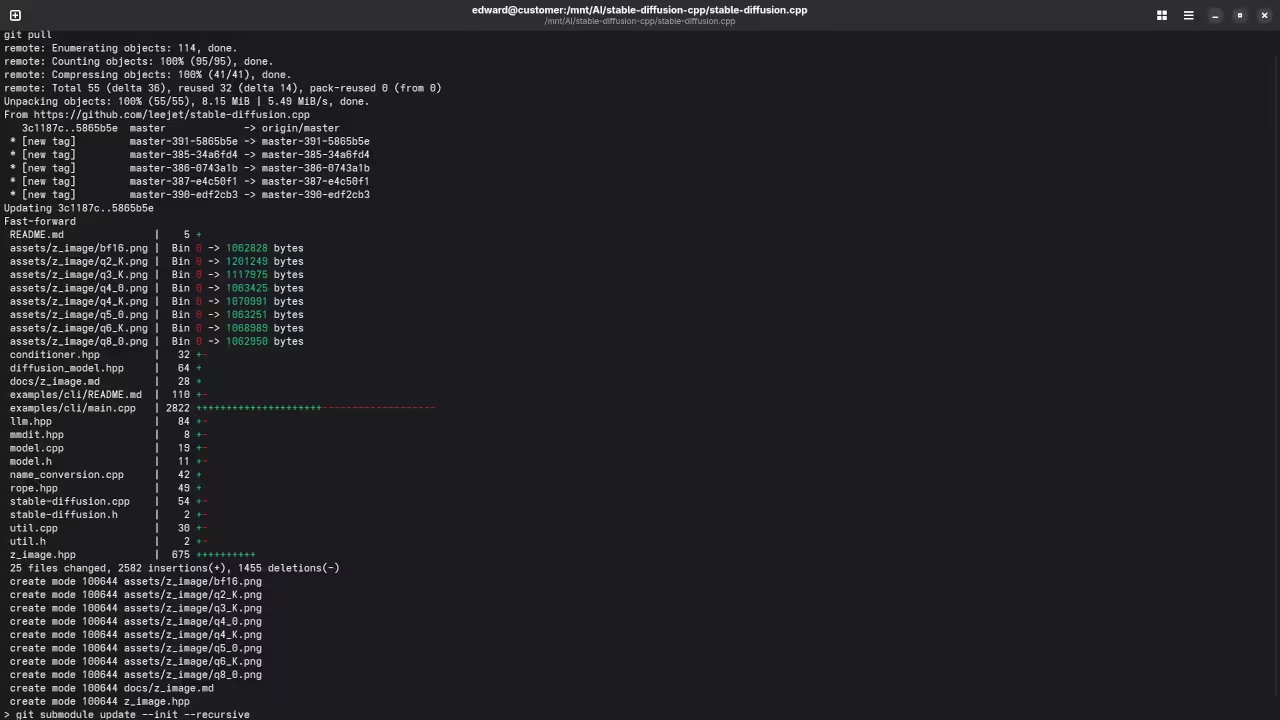
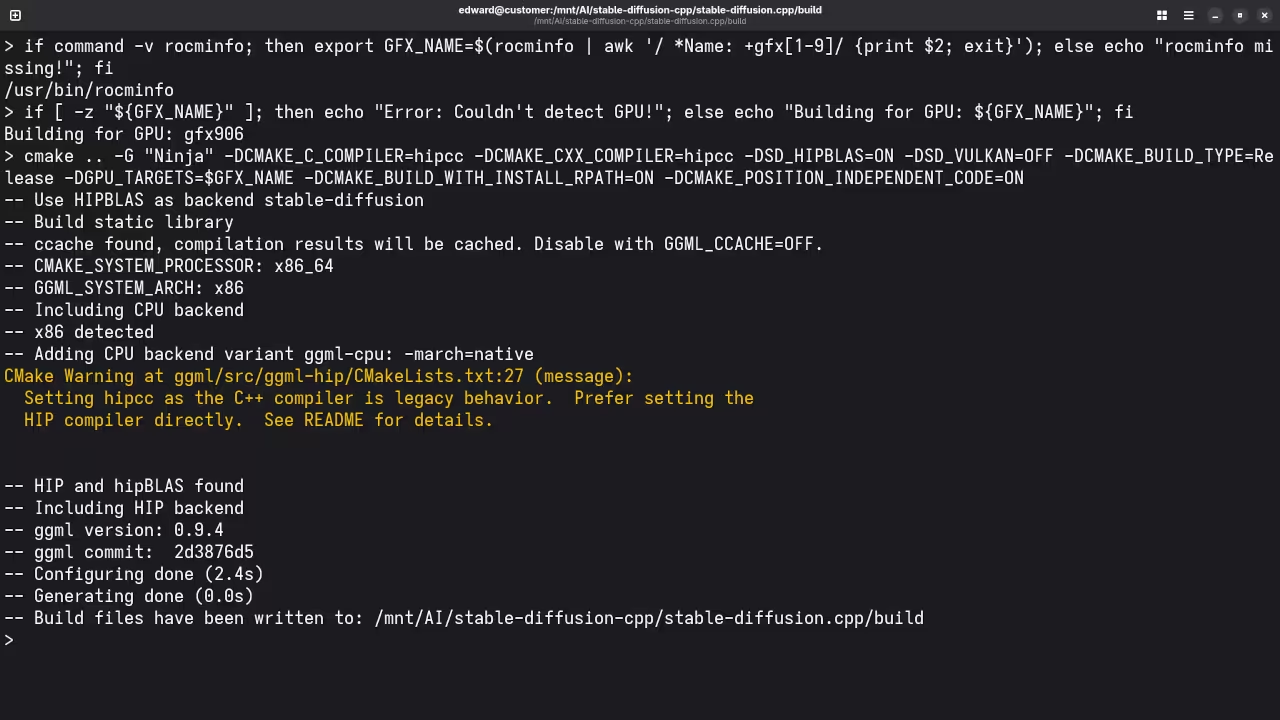
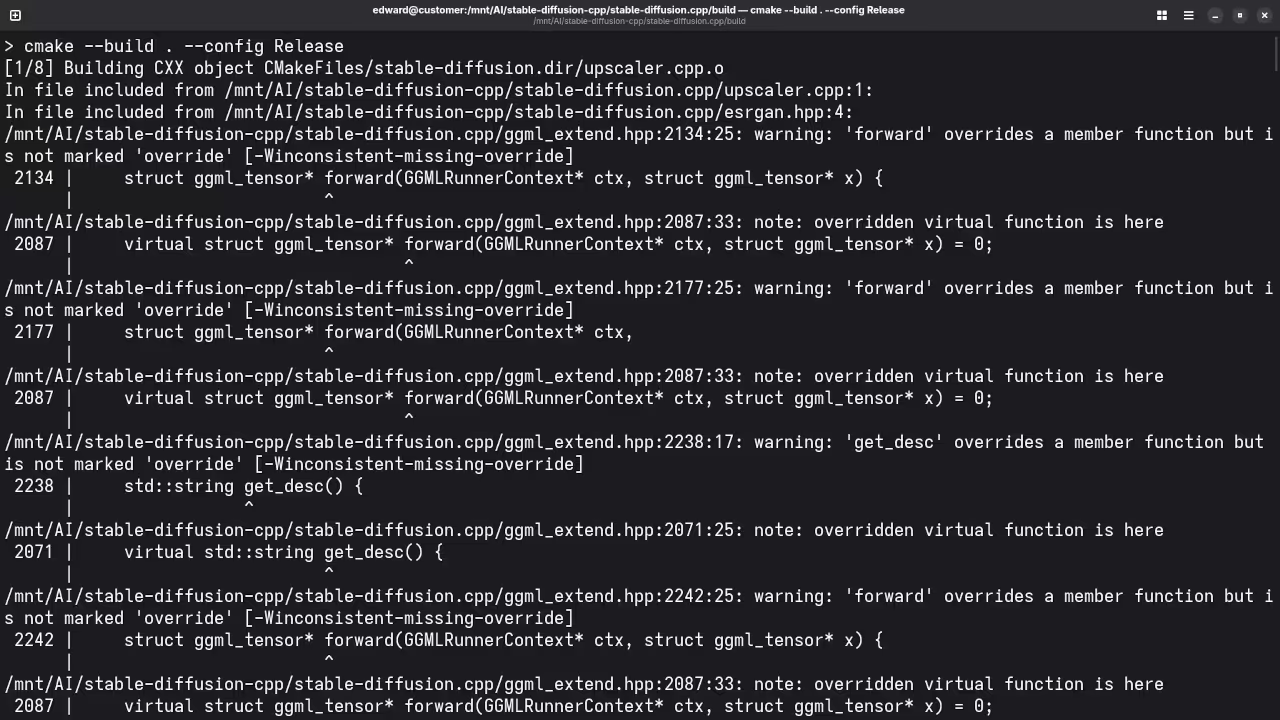
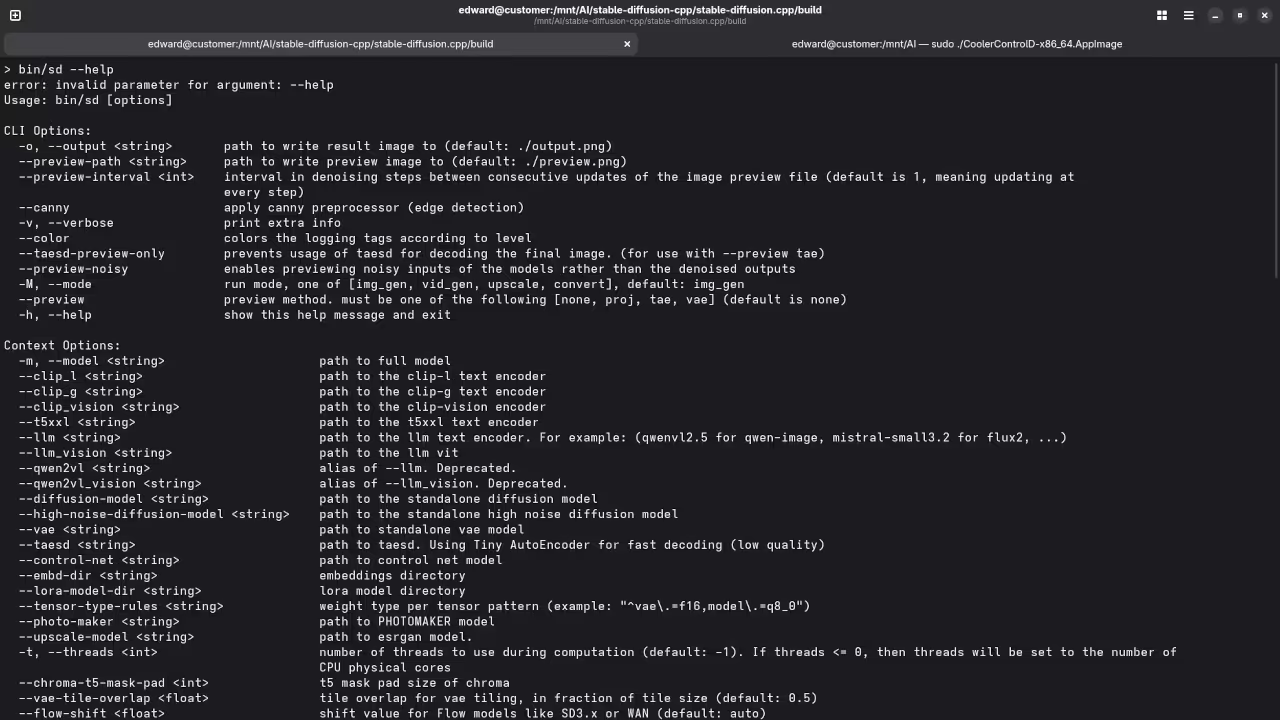
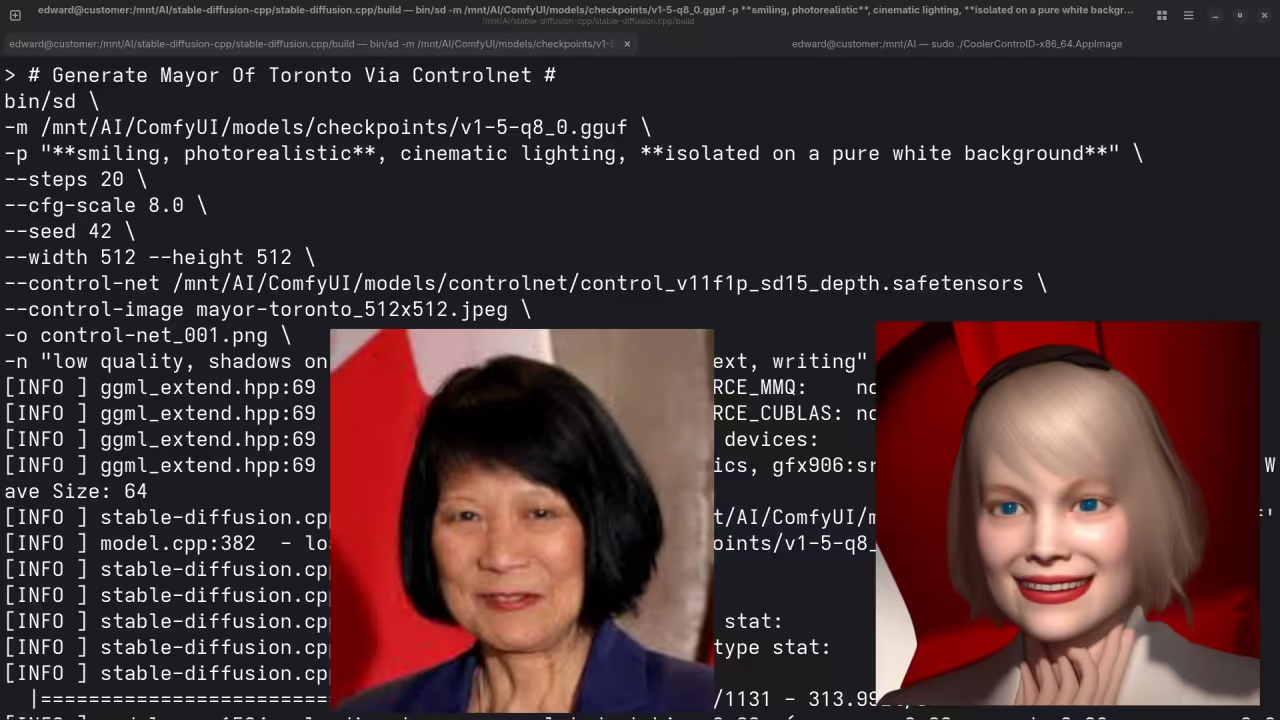
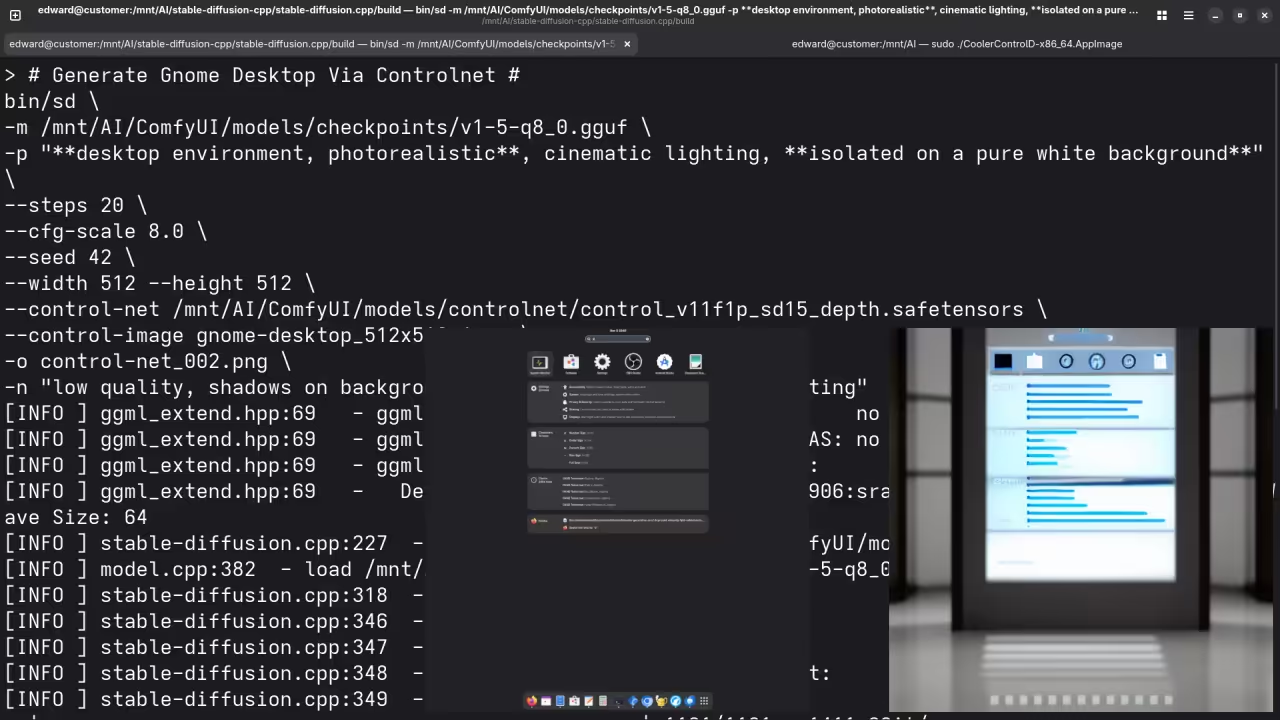
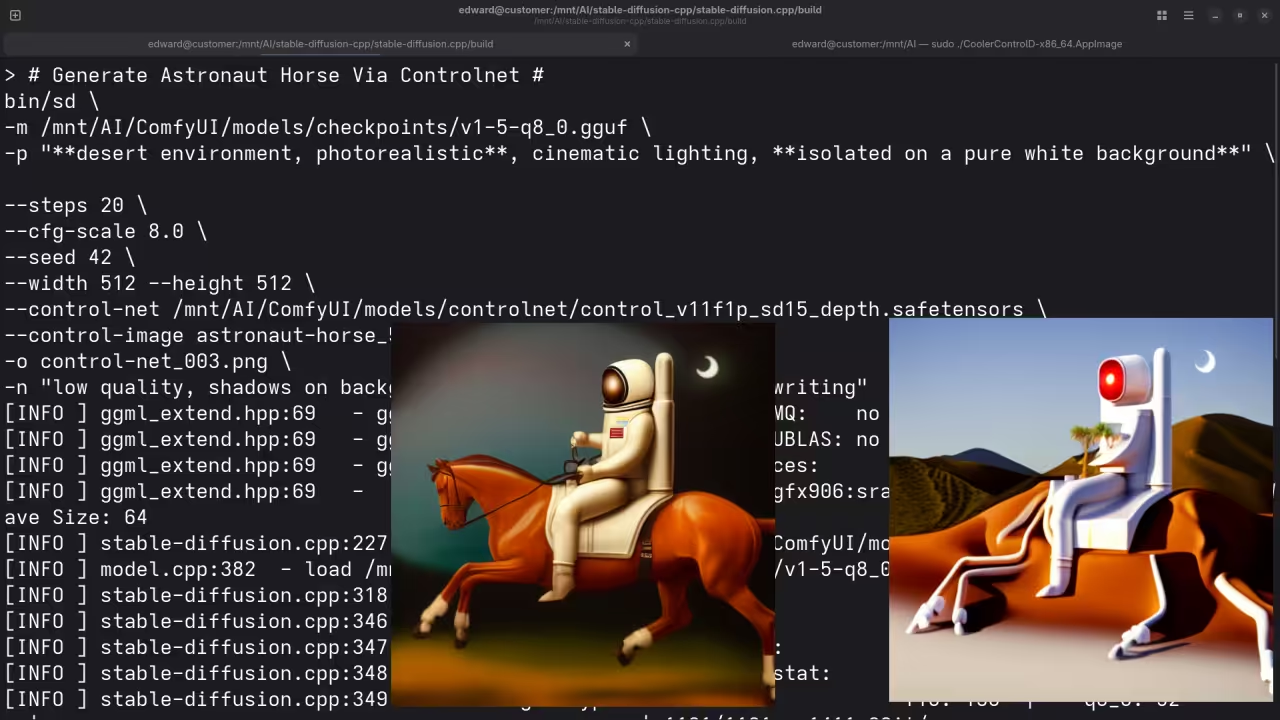
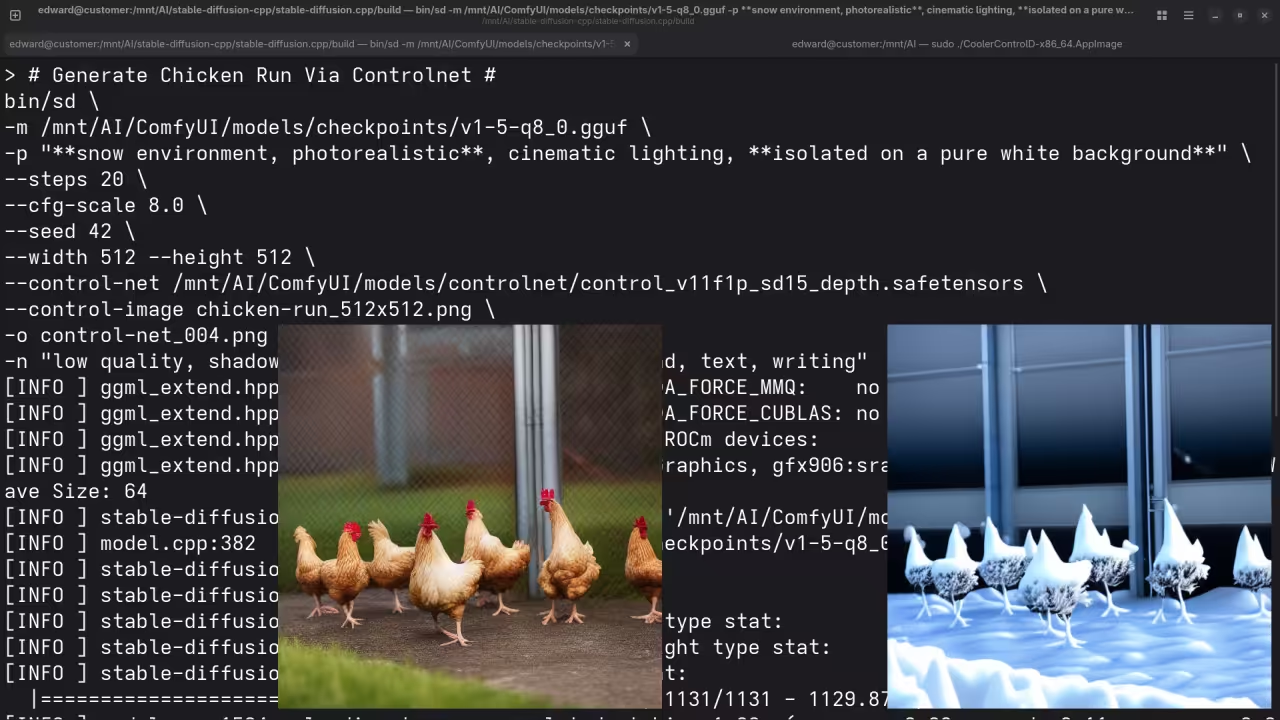
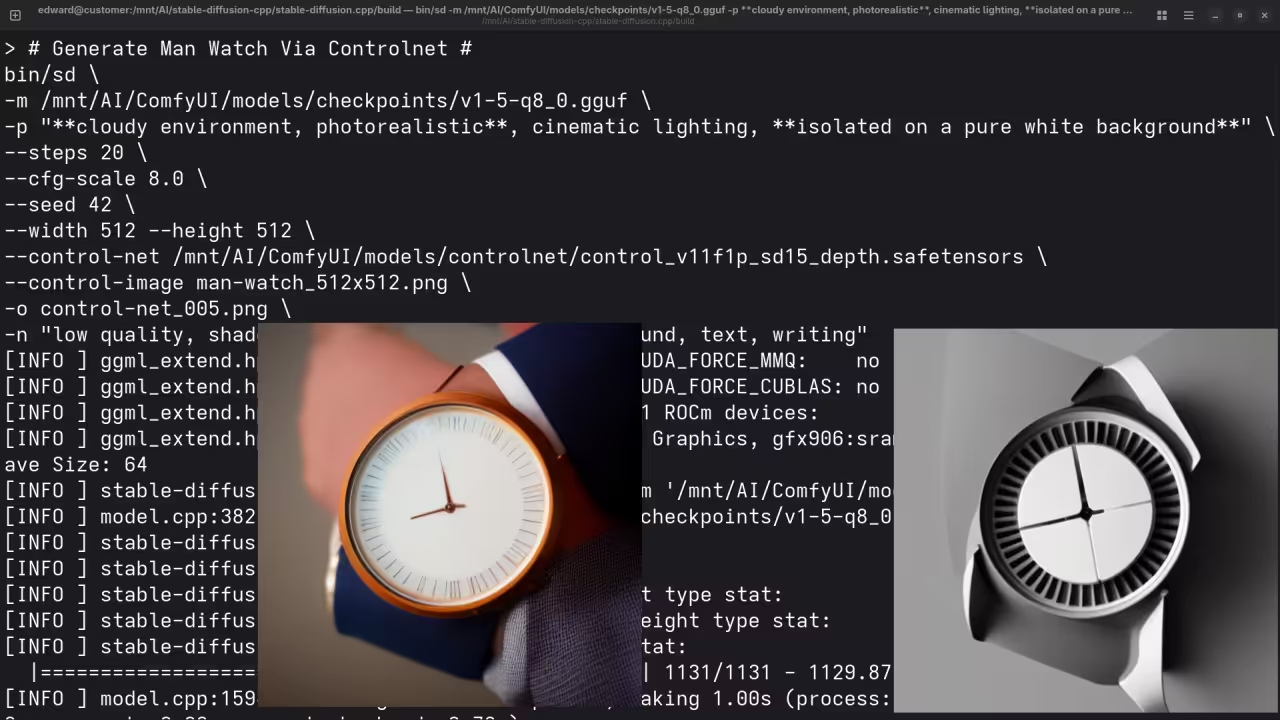
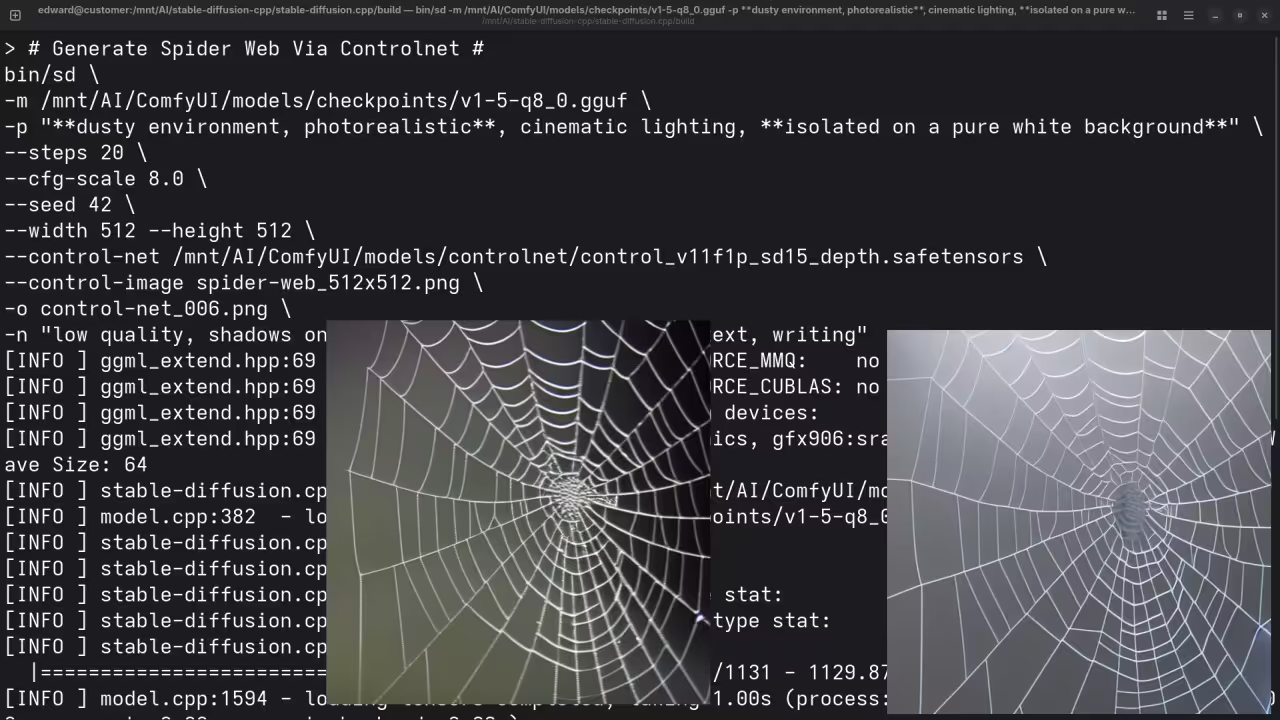
Command Line stable-diffusion.cpp Git Update.Command Line stable-diffusion.cpp Cmake Results.Command Line stable-diffusion.cpp Cmake Build Release.Command Line stable-diffusion.cpp Help Results.Command Line stable-diffusion.cpp Stable Diffusion v1-5 1B Result For Toronto Mayor.Command Line stable-diffusion.cpp Stable Diffusion v1-5 1B Result For Gnome Desktop.Command Line stable-diffusion.cpp Stable Diffusion v1-5 1B Result For Horse-Riding Astronaut.Command Line stable-diffusion.cpp Stable Diffusion v1-5 1B Result For Chicken Run.Command Line stable-diffusion.cpp Stable Diffusion v1-5 1B Result For Watch Wearer.Command Line stable-diffusion.cpp Stable Diffusion v1-5 1B Result For Spider Web.Video Displaying Using Stable Diffusion v1-5 1B With stable-diffusion.cppAddendum Video Comparing Using Stable Diffusion v1-5 1B To z_image_turbo-Q3_K.gguf
Results:
A photograph of the mayor of Toronto
Accurately drew a photograph mishmash of past mayors of Toronto.
A screenshot of the gnome desktop environment.
Accurately drew a screenshot of an older version of the Gnome desktop environment.
A photograph of an astronaut riding a horse.
Accurately drew a photograph of an astronaut riding a horse.
A picture of a chicken run.
Accurately drew a picture of a chicken run.
A picture of a man wearing a watch.
Accurately drew a picture of a man wearing a watch.
A picture of a spider web on sockets.
Accurately drew a picture of a spider web on sockets.
Conclusion
With Stable-Diffusion.cpp, you can run Stable Diffusion models efficiently without relying on Python. This guide shows you how to set it up on Linux, optimized for the AMD Instinct Mi60 GPU, and offers various build configurations based on your hardware. Enjoy generating high-quality AI images!
Build a PHP Backend for Your HTML5 Voting Form with MariaDB
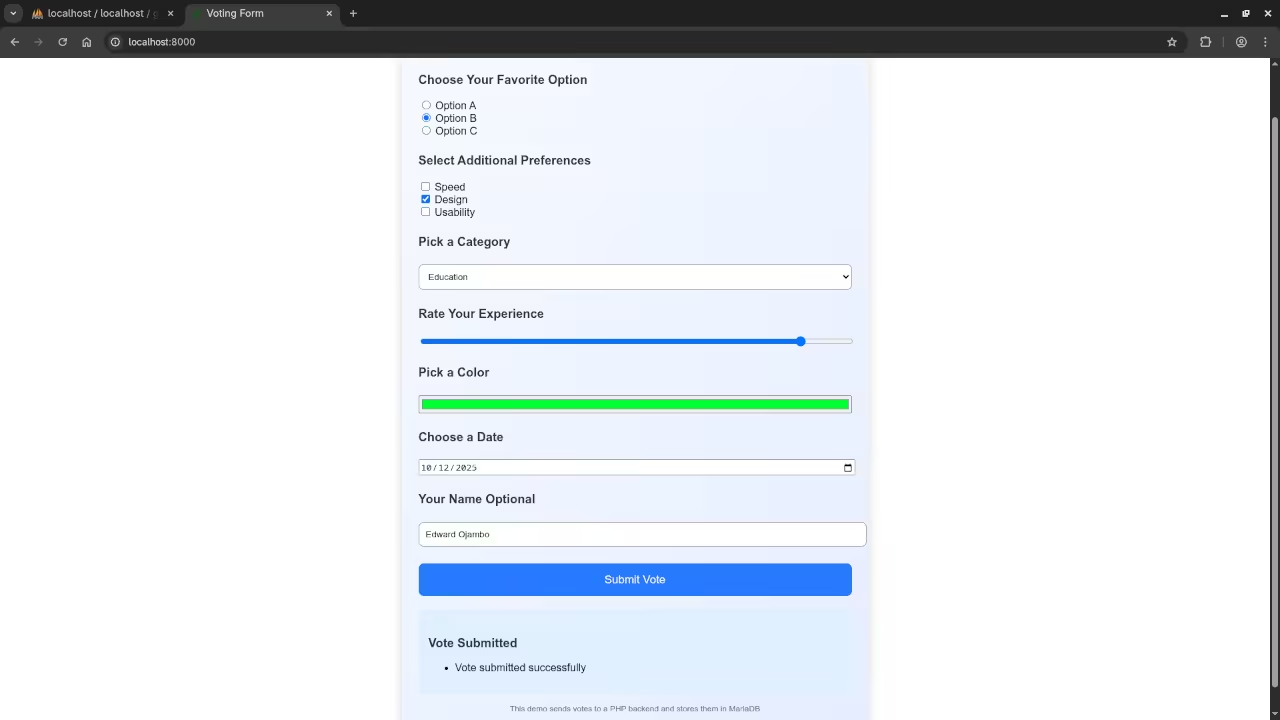
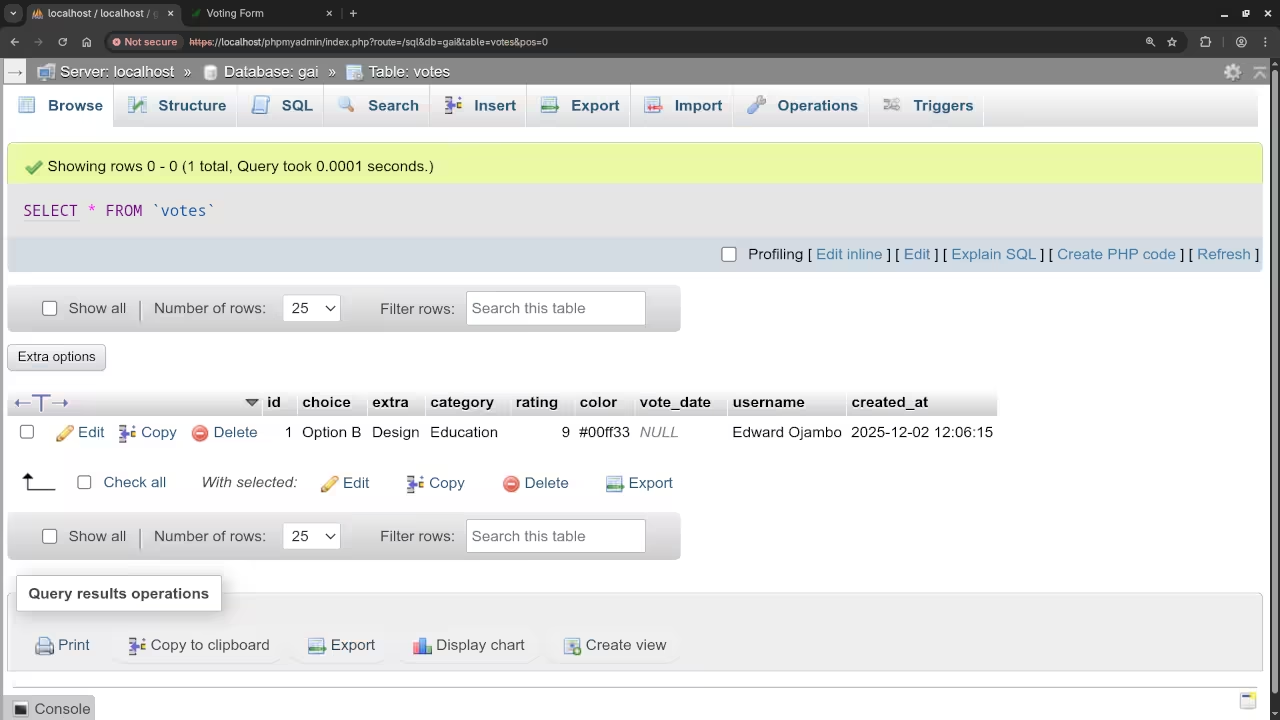
In this tutorial we take your HTML5 voting form to the next level by adding a PHP backend with MariaDB storage. Using the Fetch API we can send form submissions to the server and store votes in a database. This makes it possible to save and retrieve votes across different users and devices.
Database Setup
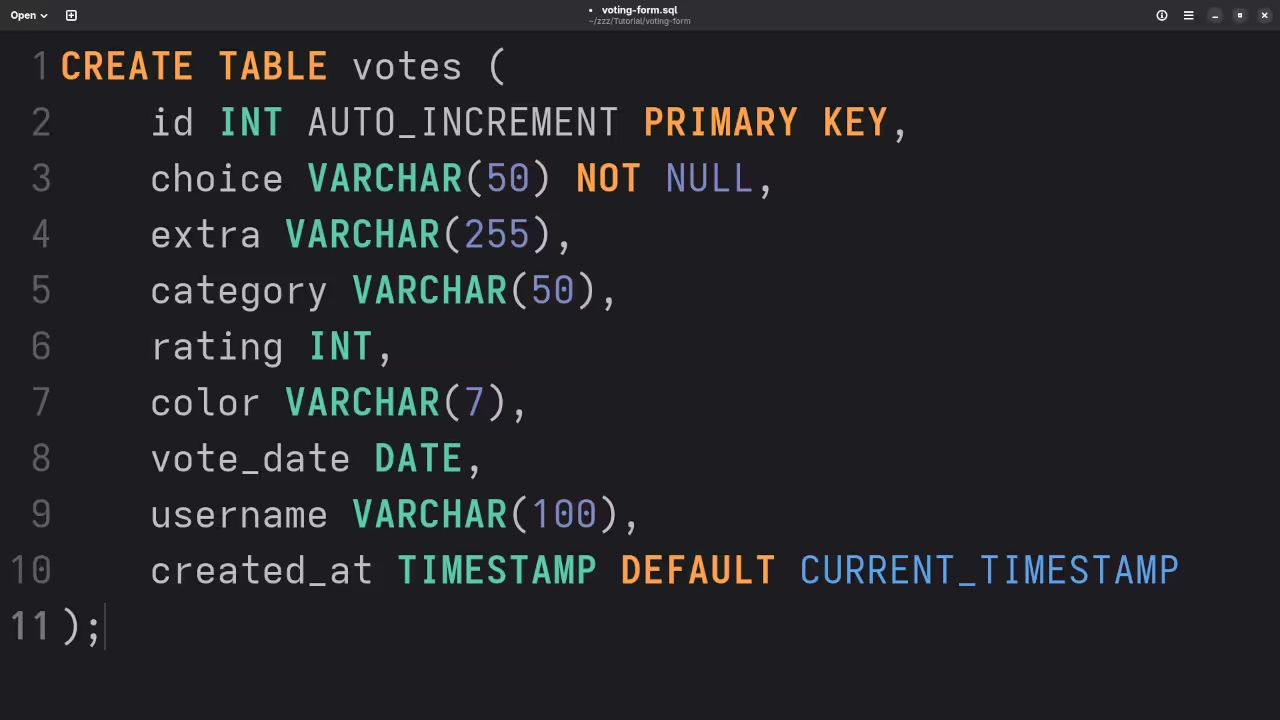
First create a MariaDB database and table to store votes. Here is an example SQL table
CREATE TABLE votes (
id INT AUTO_INCREMENT PRIMARY KEY,
choice VARCHAR(50) NOT NULL,
extra VARCHAR(255),
category VARCHAR(50),
rating INT,
color VARCHAR(7),
vote_date DATE,
username VARCHAR(100),
created_at TIMESTAMP DEFAULT CURRENT_TIMESTAMP
);
Front-End Updates
Update the HTML5 form to submit via JavaScript using the Fetch API
If you want private programming tutorials or help updating or migrating PHP applications contact me at Programming Tutorials
Final Thoughts
Adding a PHP backend with MariaDB and using the Fetch API makes your HTML5 voting form fully functional across users and devices. This beginner-friendly approach teaches you how to combine front-end and back-end development in a real project
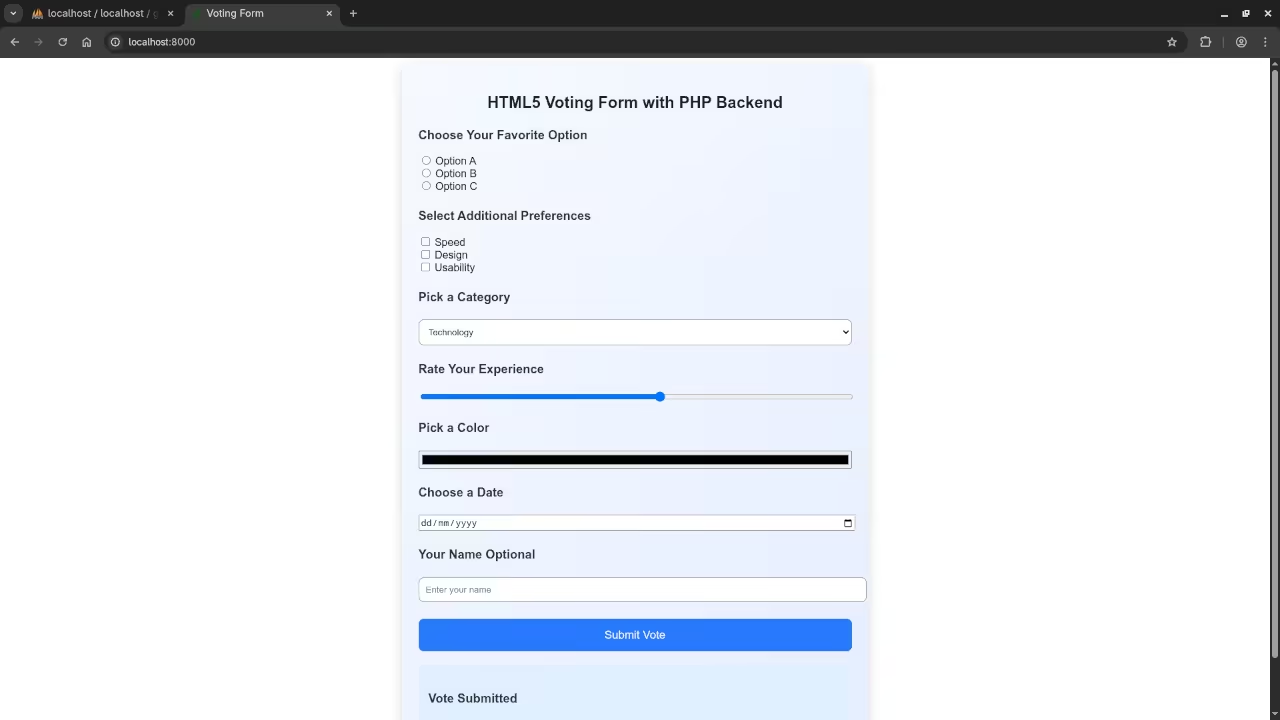
Creating an HTML5 Voting Form Demo Demonstrating Client Side Storage Limits
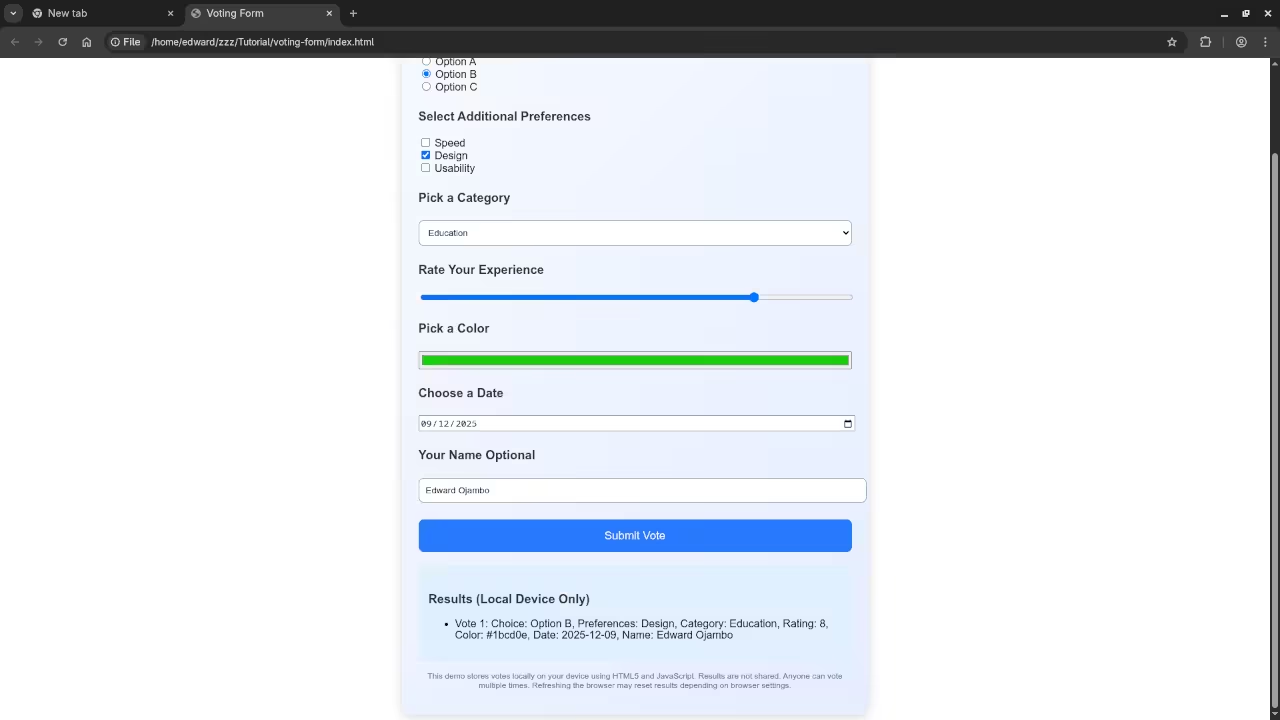
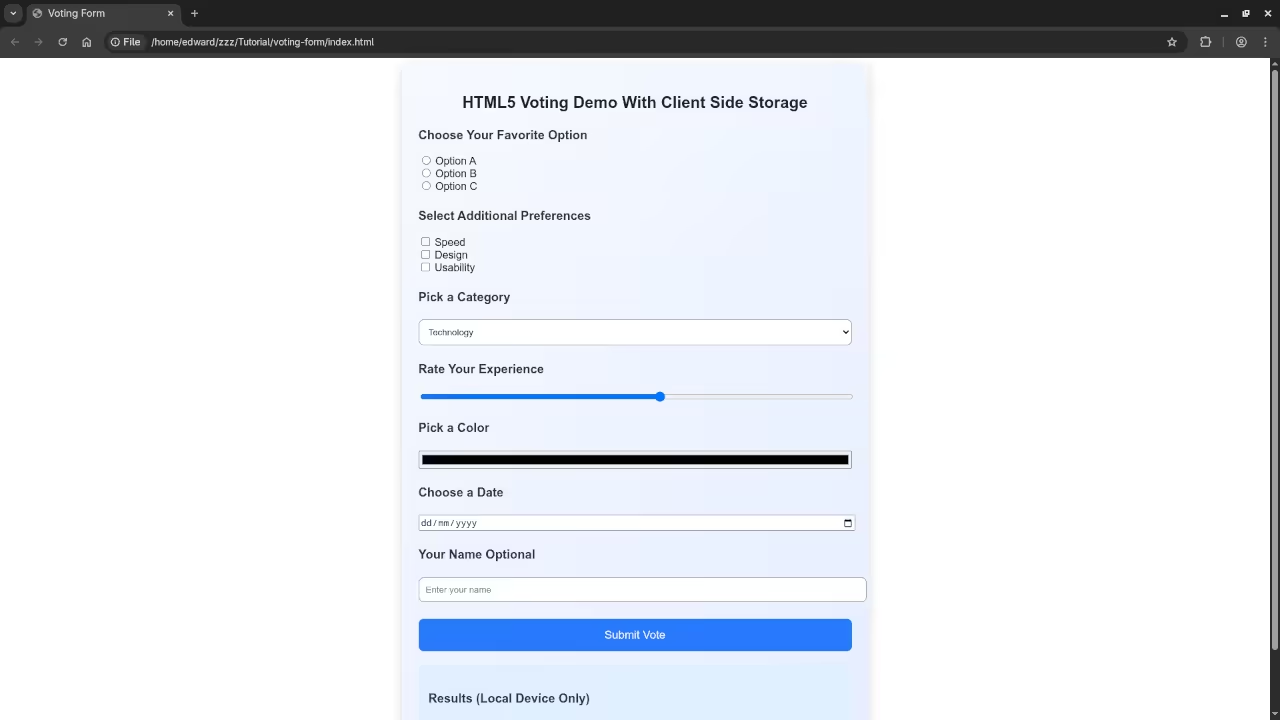
This post demonstrates a beginner friendly HTML5 voting form that saves results locally in the browser. The purpose is to show the limits of using only HTML5 with client side storage: votes are saved only on the device, anyone can vote multiple times, and results are not shared across devices. This helps beginners understand why JavaScript and backend systems are necessary for real voting applications.
If you want private programming tutoring including JavaScript lessons you can contact me at Programming Tutorials.
Final Thoughts
This demo shows a visually appealing HTML5 voting form with client side storage. Votes are saved only on your device, anyone can vote multiple times, and results are not shared. It demonstrates the limits of HTML5 alone while still allowing users to see votes locally.
Transform Recession into Opportunity: Grab Your Copy of The Recession Business Blueprint Today!
Introduction
The narrative around recessions has long been one of doom and gloom: rising job losses, falling stock markets, and uncertain futures. But what if, instead of a period of fear and scarcity, a recession could be seen as a time of unparalleled opportunity? The Recession Business Blueprint is your guide to turning economic uncertainty into your greatest business advantage.
This powerful book reveals how to leverage recessions as fertile ground for new ventures and entrepreneurial success. Rather than feeling paralyzed by fear, you’ll learn how to adopt a contrarian mindset, identify recession-proof industries, and build resilient businesses that thrive even in tough times.
What The Recession Business Blueprint Offers You
In The Recession Business Blueprint, you’ll discover:
The Paradigm Shift: Why recessions are more than just economic downturns-they’re opportunities for innovation, investment, and growth.
Financial Resilience: Learn to assess and shore up your financial vulnerabilities while uncovering your untapped assets-skills, networks, and hidden opportunities.
Skills for Success: Translate your existing expertise into marketable services and learn how to position yourself for success even when others are retreating.
The Lean Startup: Build recession-proof businesses with minimal investment, using the principles of lean operations to maximize efficiency and adaptability.
Strategic Networking: Build a resilient network of mentors, partners, and collaborators to strengthen your business’s foundation.
Creative Funding: Explore unconventional funding options-bootstrapping, microloans, and crowdfunding-to finance your venture without relying on traditional capital.
Customer Targeting in Tough Times: Learn to identify and connect with the right customers, even when they’re tightening their belts.
Mastering Lean Operations: Implement operational systems that keep your overhead low and scalability high.
Why The Recession Business Blueprint Is a Must-Have Resource
Many people view recessions as obstacles, but with the right tools and mindset, they can be a springboard for success. The Recession Business Blueprint doesn’t promise a get-rich-quick scheme. Instead, it offers a methodical, realistic approach to building a sustainable, recession-proof business. With actionable frameworks, expert insights, and real-world case studies, you’ll learn how to create long-term value in uncertain times.
By the end of the book, you’ll not only be prepared to weather the storm-you’ll be empowered to thrive through it.
Where to Get Your Copy
The Recession Business Blueprint is available in both paperback and eBook formats, giving you the flexibility to read in a way that suits you best.
Papeback Edition: For those who prefer a tangible reference guide, the paperback is available on Amazon. Order it here.
eBook Edition: If you’re on the go or prefer digital reading, grab the eBook version on Amazon. Order it here.
Preview Of The Recession Business Blueprint
The Recession Business Blueprint Promotional BannerVideo Discussing The Recession Business Blueprint
Conclusion
Recessions don’t have to be a time of fear or retreat. They can be a time of immense growth, opportunity, and success-if you know how to navigate them. The Recession Business Blueprint is your roadmap to not just surviving but thriving in any economic climate. Ready to take control of your future? Get your copy today and start building your recession-proof business!