Git is an essential tool for modern software development, allowing developers to track changes in their code and collaborate efficiently with others. Whether you’re just starting out or looking to improve your development skills, understanding the basic Git commands is crucial.
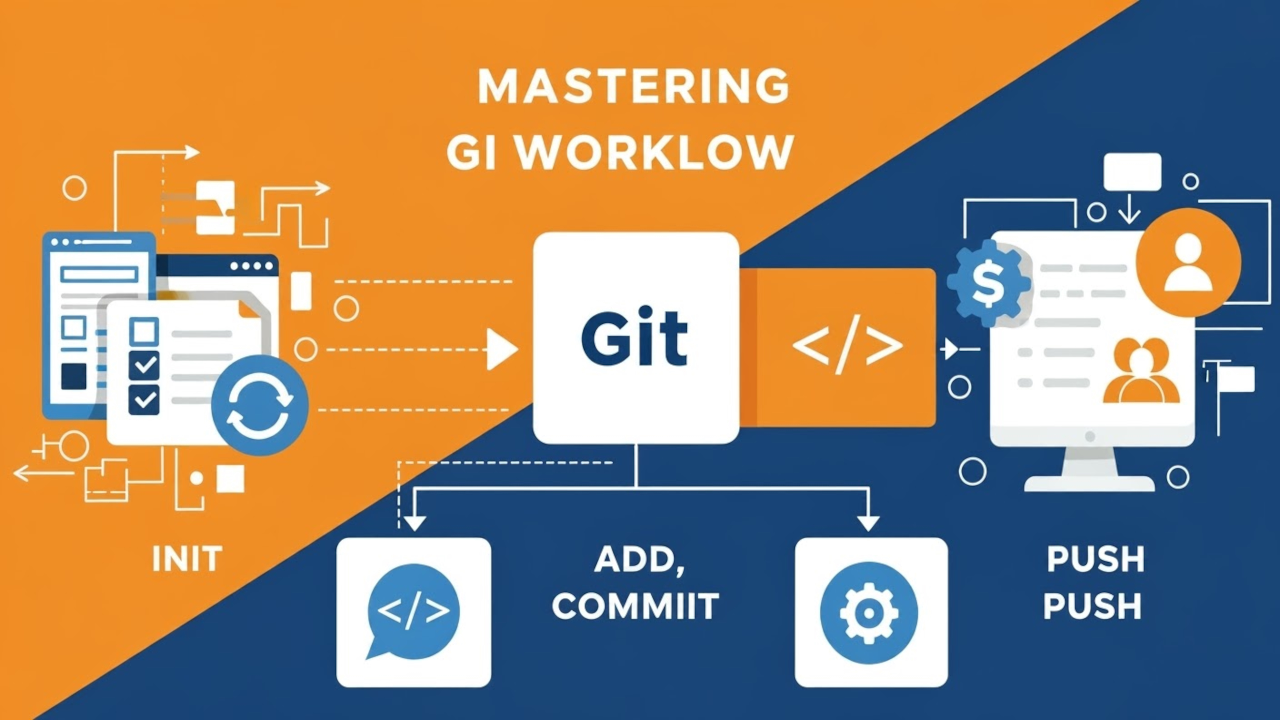
In this post, we will walk you through the four most basic Git commands:
git init
git add
git commit
git push
Let’s dive in and explore how to use them effectively!
What is Git?
Git is an open-source version control system that tracks changes to your files and allows you to collaborate with other developers on coding projects. It helps prevent the loss of work and lets you revisit previous versions of your project when needed.
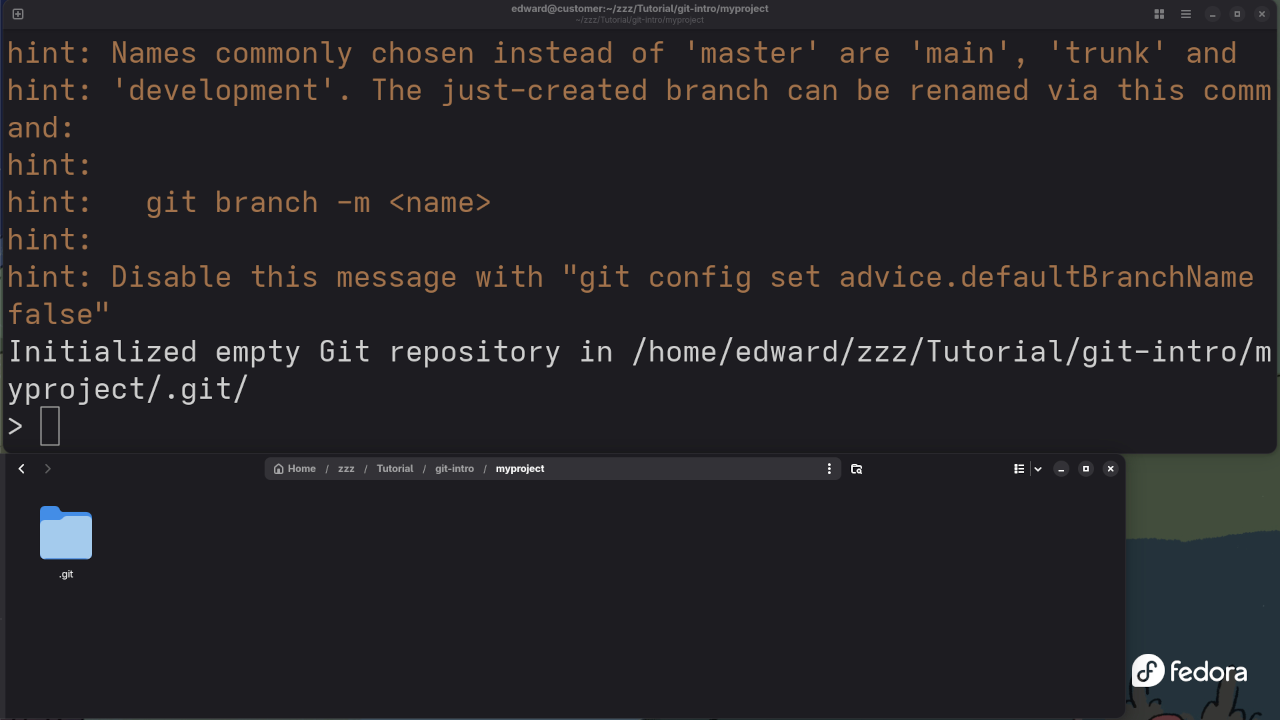
1. git init: Initializing a New Git Repository
Before you can start using Git in your project, you first need to initialize a new Git repository. This is where Git will track all of your files.
How to Use: To initialize a new repository, open your terminal or command prompt and run:
git init
This command creates a new .git folder in your project directory, which Git will use to track changes.
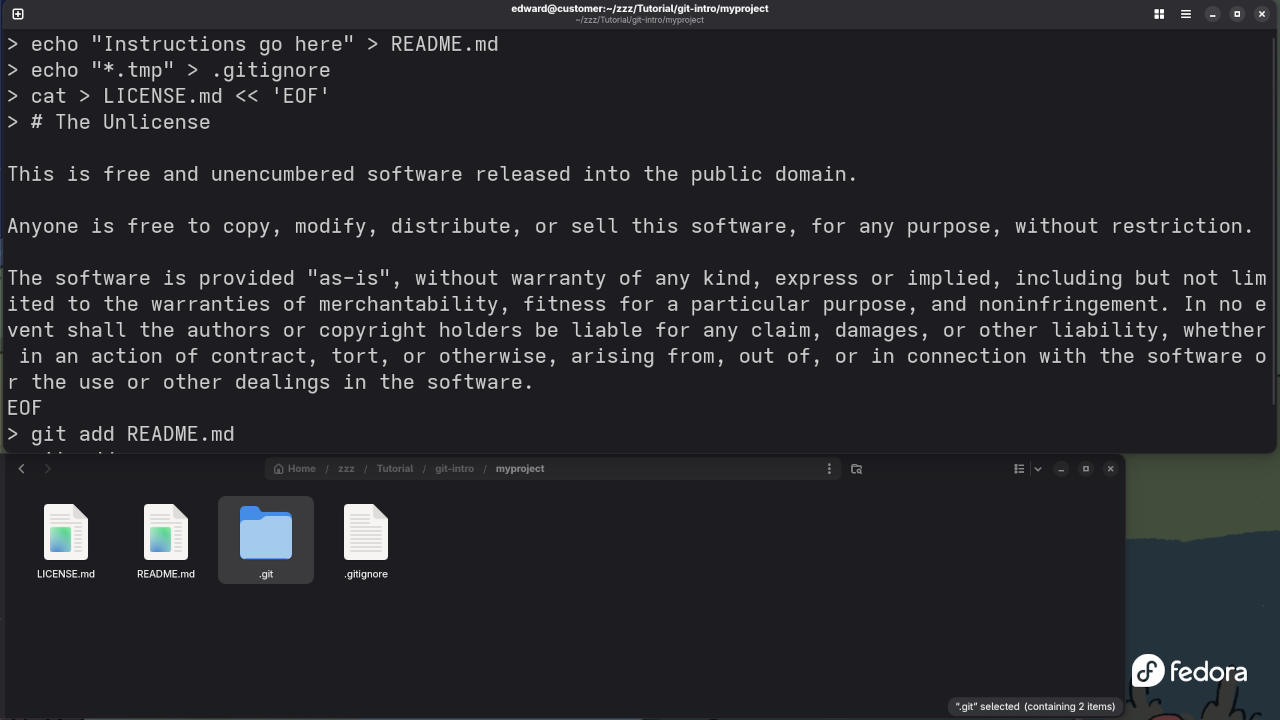
2. git add: Staging Changes for Commit
Once you’ve made changes to your files, you need to stage them before committing. This tells Git which changes to include in the next snapshot (commit).
How to Use: To add all modified files to the staging area:
git add .
Alternatively, you can add individual files:
git add filename
This command doesn’t actually save the changes to your repository, it just stages them. You’ll need to commit them next.
3. git commit: Committing Changes
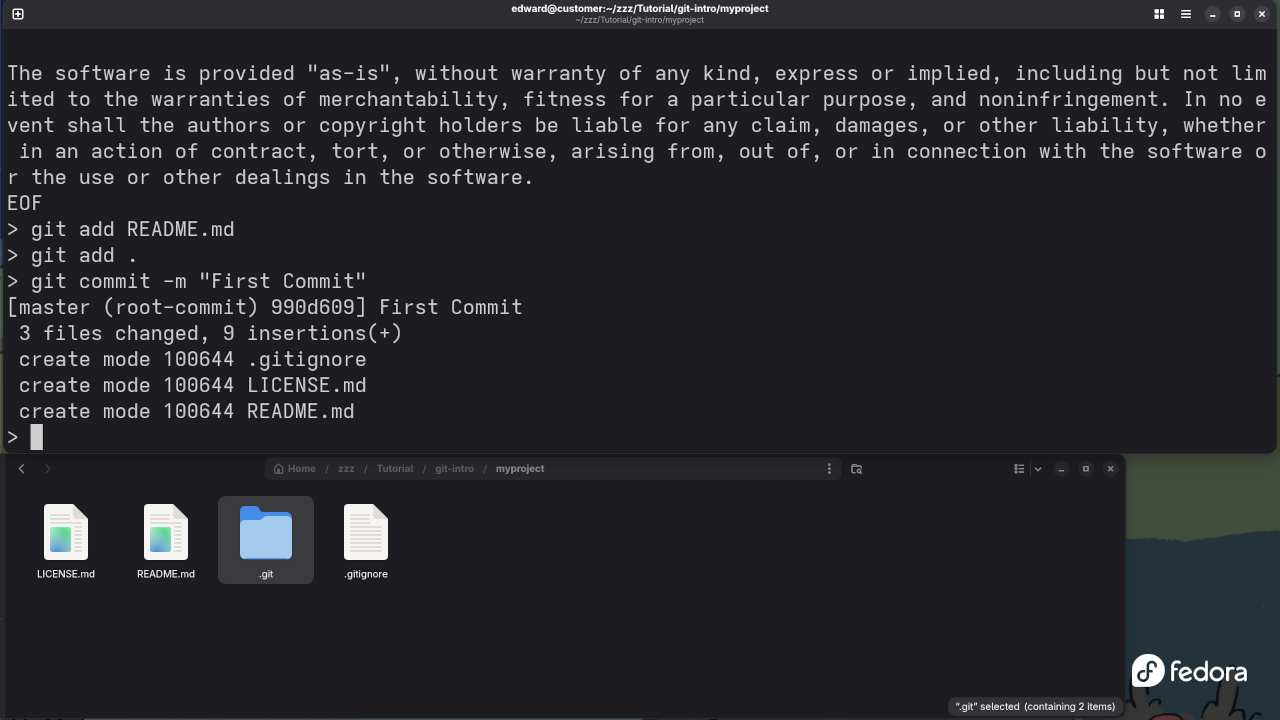
Once your changes are staged, the next step is to commit them. Committing saves a snapshot of the changes to your repository. Each commit includes a message describing what changes were made.
How to Use: Run the following command:
git commit -m "Your commit message here"
The -m flag allows you to include a brief message about what was changed. For example:
git commit -m "Added new feature to homepage"
4. git push: Uploading Changes to a Remote Repository
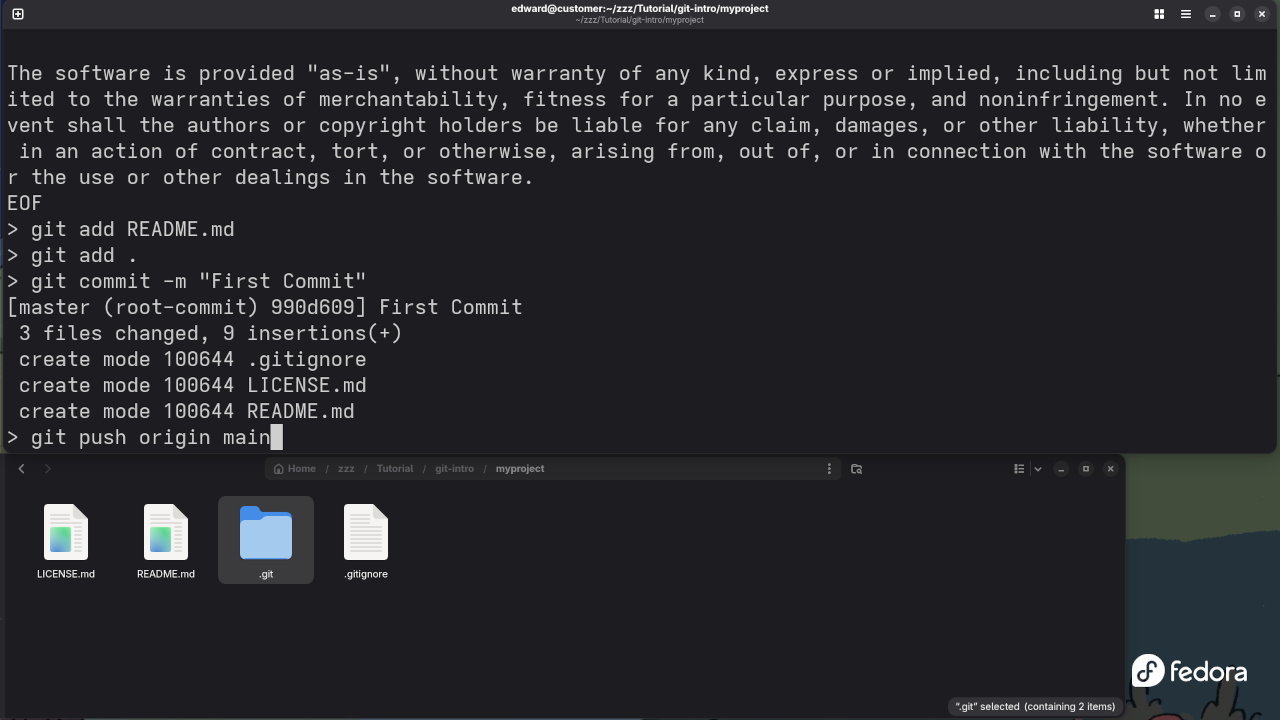
Finally, once you have committed your changes, you’ll want to upload them to a remote repository (like GitHub, GitLab, or Bitbucket). This is where git push comes in.
How to Use: To push your local commits to a remote repository, run:
git push origin main
In this command:
origin refers to the name of the remote repository.
main is the default branch name (it may be master in some older repositories).
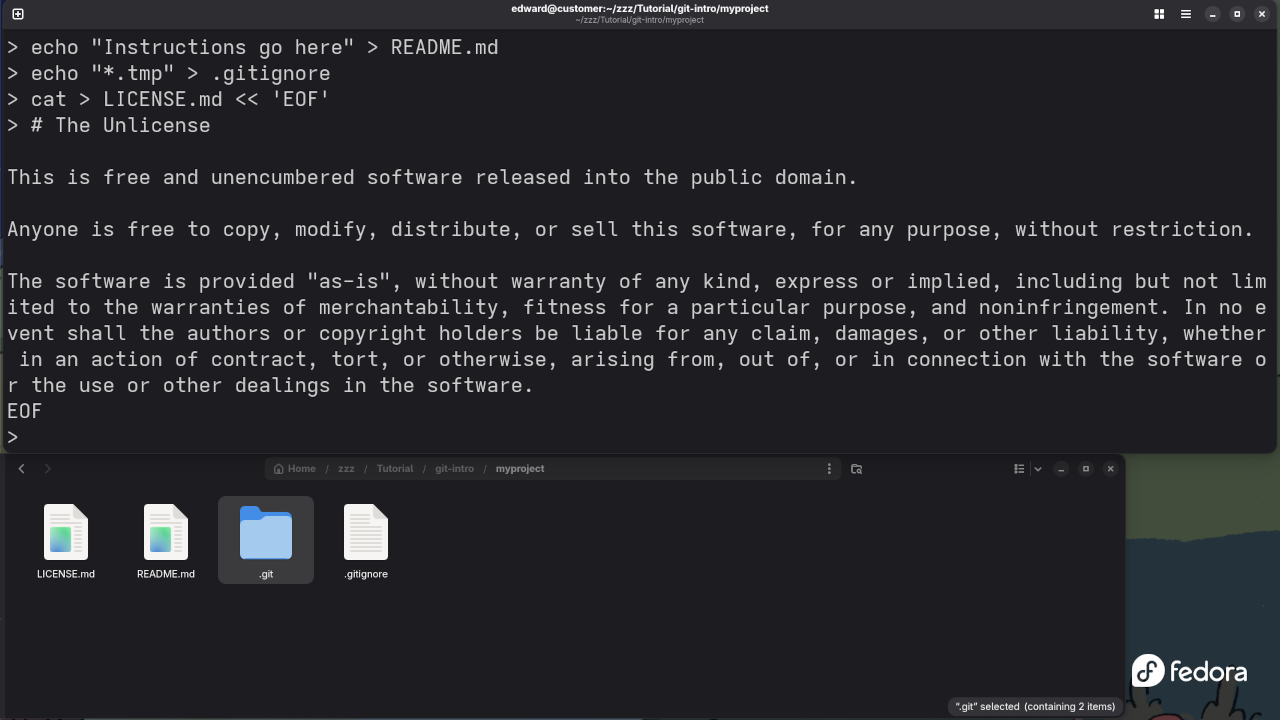
Command Line Git Init To Track Changes In Project FolderTerminal Showing Creation Of Project FilesTerminal Showing Git Add For A Single FileTerminal Showing Git Add For A Single FileTerminal Showing Git Push For Committed Files
Watch the Live Screencast
If you’re a visual learner, I’ve created a live screencast that demonstrates these commands in action! Watch it below:
Screencast Of Git Basic Commands
Why Git? The Power of Open Source
Git is not just a version control system; it’s a tool that fosters collaboration and supports open-source development. Open-source software is developed and maintained by communities of developers who contribute to it for free. Git enables seamless collaboration between developers across the globe, making it easier to contribute to open-source projects and manage your own code.
Want to Learn More About Programming?
If you’re interested in diving deeper into programming, I have some great resources for you:
Programming Books: Check out my collection of programming books on Amazon.
Online Programming Courses: Learn at your own pace with my online courses.
Mastering the basics of Git is the first step toward becoming a more efficient and effective developer. With these four commands-git init, git add, git commit, and git push-you’ll be able to manage your code more effectively and collaborate with other developers.
As you grow in your programming journey, Git will become an indispensable tool in your development toolkit.
Let me know if you have any questions, or feel free to reach out for more personalized help!
How to Create a Low-Poly House with Blender Python API and Display It in Your Web Browser
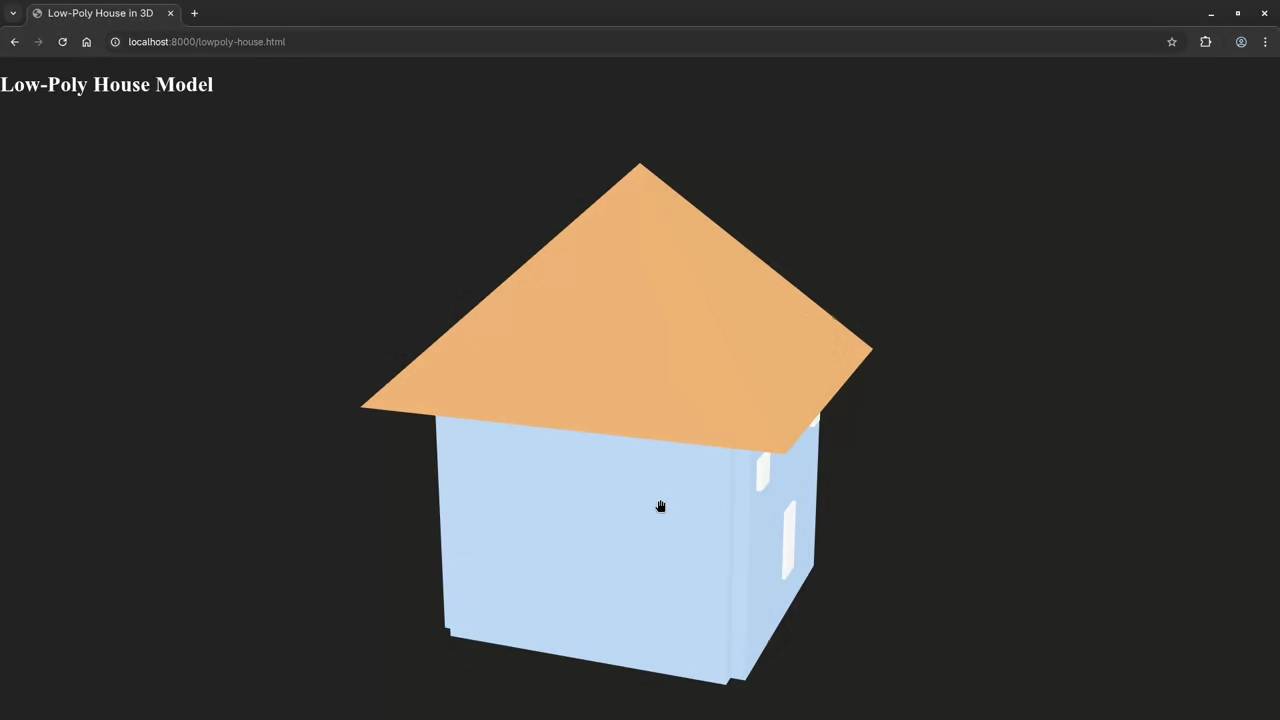
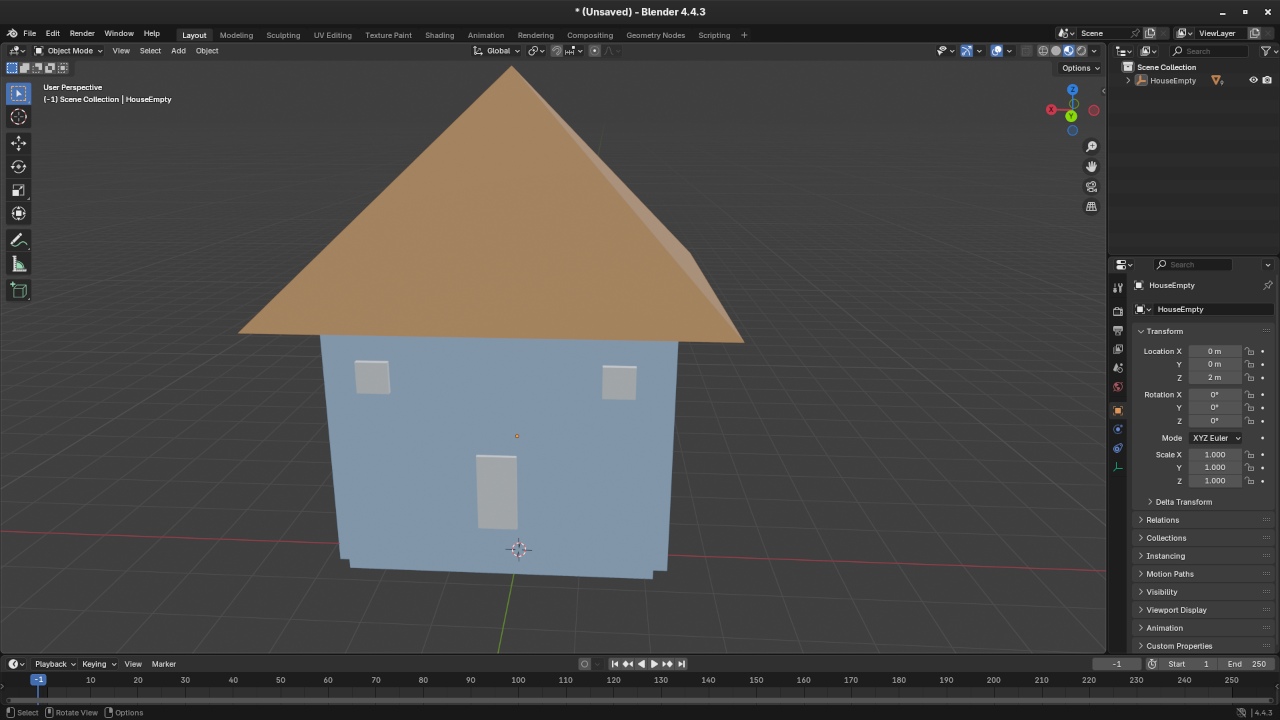
Creating 3D models and rendering them in your web browser has become easier thanks to modern web technologies like <model-viewer>. In this post, we’ll explore how to generate a low-poly house using the Blender Python API and display it in the browser. We’ll also discuss how to run the Python script on your machine and link the model into an interactive web page.
Step 1: Generating the Low-Poly House in Blender using Python
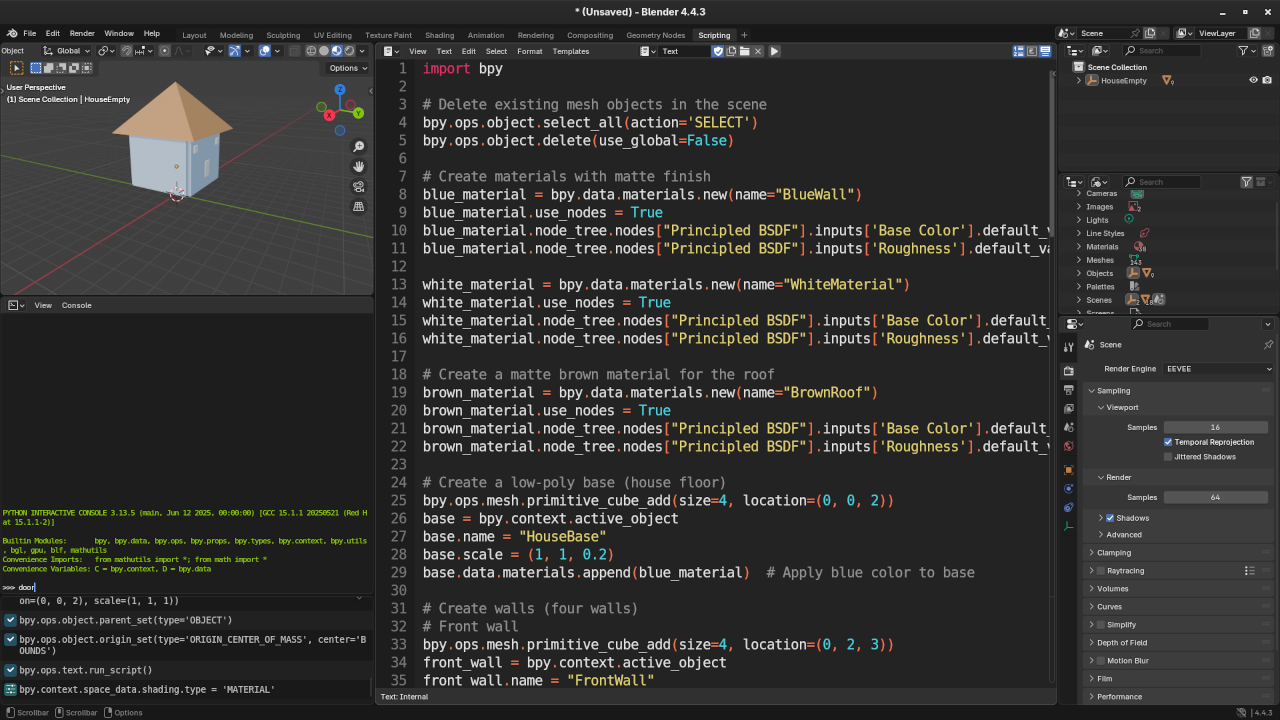
Blender is a powerful open-source 3D creation suite that allows you to create amazing 3D models. Using its Python API, we can generate a low-poly house, complete with walls, a roof, windows, and a door.
First, let’s start by writing a Python script that creates a simple low-poly house. Here’s the code to generate a basic structure:
import bpy
import os
# Delete existing mesh objects in the scene
bpy.ops.object.select_all(action='SELECT')
bpy.ops.object.delete(use_global=False)
# Create materials with matte finish
blue_material = bpy.data.materials.new(name="BlueWall")
blue_material.use_nodes = True
blue_material.node_tree.nodes["Principled BSDF"].inputs['Base Color'].default_value = (0.5, 0.7, 1.0, 1) # Light blue
blue_material.node_tree.nodes["Principled BSDF"].inputs['Roughness'].default_value = 0.8 # Matte finish
white_material = bpy.data.materials.new(name="WhiteMaterial")
white_material.use_nodes = True
white_material.node_tree.nodes["Principled BSDF"].inputs['Base Color'].default_value = (1.0, 1.0, 1.0, 1) # White
white_material.node_tree.nodes["Principled BSDF"].inputs['Roughness'].default_value = 0.8 # Matte finish
# Create a matte brown material for the roof
brown_material = bpy.data.materials.new(name="BrownRoof")
brown_material.use_nodes = True
brown_material.node_tree.nodes["Principled BSDF"].inputs['Base Color'].default_value = (0.6, 0.3, 0.1, 1) # Brown color
brown_material.node_tree.nodes["Principled BSDF"].inputs['Roughness'].default_value = 0.8 # Matte finish
# Create a low-poly base (house floor)
bpy.ops.mesh.primitive_cube_add(size=4, location=(0, 0, 2))
base = bpy.context.active_object
base.name = "HouseBase"
base.scale = (1, 1, 0.2)
base.data.materials.append(blue_material) # Apply blue color to base
# Create walls (four walls)
# Front wall
bpy.ops.mesh.primitive_cube_add(size=4, location=(0, 2, 3))
front_wall = bpy.context.active_object
front_wall.name = "FrontWall"
front_wall.scale = (1, 0.1, 1)
front_wall.data.materials.append(blue_material) # Apply blue color to front wall
# Back wall
bpy.ops.mesh.primitive_cube_add(size=4, location=(0, -2, 3))
back_wall = bpy.context.active_object
back_wall.name = "BackWall"
back_wall.scale = (1, 0.1, 1)
back_wall.data.materials.append(blue_material) # Apply blue color to back wall
# Left wall
bpy.ops.mesh.primitive_cube_add(size=4, location=(-2, 0, 3))
left_wall = bpy.context.active_object
left_wall.name = "LeftWall"
left_wall.scale = (0.1, 1, 1)
left_wall.data.materials.append(blue_material) # Apply blue color to left wall
# Right wall
bpy.ops.mesh.primitive_cube_add(size=4, location=(2, 0, 3))
right_wall = bpy.context.active_object
right_wall.name = "RightWall"
right_wall.scale = (0.1, 1, 1)
right_wall.data.materials.append(blue_material) # Apply blue color to right wall
# Create roof (using a cone for a simple low-poly roof)
bpy.ops.mesh.primitive_cone_add(vertices=4, radius1=4, depth=3, location=(0, 0, 5.5)) # Adjust location to be above the house
roof = bpy.context.active_object
roof.name = "Roof"
roof.rotation_euler[0] = 3.14159 / 4 # Rotate roof by 45 degrees around the X-axis
roof.data.materials.append(brown_material) # Apply brown matte color to roof
# Add simple door (a smaller cube)
bpy.ops.mesh.primitive_cube_add(size=1, location=(0, 2.05, 2)) # Adjusted Z-axis location
door = bpy.context.active_object
door.name = "Door"
door.scale = (0.5, 0.05, 1) # Set door scale
door.data.materials.append(white_material) # Apply white color to door
door.location.z += 0.2 # Protrude door slightly
# Add windows (using cubes as well)
# Window 1 (left side)
bpy.ops.mesh.primitive_cube_add(size=0.8, location=(-1.5, 2.05, 3.5)) # Increased size to 0.8 and adjusted position
window1 = bpy.context.active_object
window1.name = "Window1"
window1.scale = (0.5, 0.05, 0.5) # Adjusted size for visibility
window1.data.materials.append(white_material) # Apply white color to window
window1.location.z += 0.2 # Protrude window slightly
# Window 2 (right side)
bpy.ops.mesh.primitive_cube_add(size=0.8, location=(1.5, 2.05, 3.5)) # Increased size to 0.8 and adjusted position
window2 = bpy.context.active_object
window2.name = "Window2"
window2.scale = (0.5, 0.05, 0.5) # Adjusted size for visibility
window2.data.materials.append(white_material) # Apply white color to window
window2.location.z += 0.2 # Protrude window slightly
# Create an empty "House" parent object to organize everything
bpy.ops.object.empty_add(type='PLAIN_AXES', location=(0, 0, 2))
house_empty = bpy.context.active_object
house_empty.name = "HouseEmpty"
# Parent all objects to the "House" empty
base.select_set(True)
front_wall.select_set(True)
back_wall.select_set(True)
left_wall.select_set(True)
right_wall.select_set(True)
roof.select_set(True)
door.select_set(True)
window1.select_set(True)
window2.select_set(True)
bpy.context.view_layer.objects.active = house_empty
bpy.ops.object.parent_set(type='OBJECT')
# Set the origin of the whole house to its center
bpy.ops.object.origin_set(type='ORIGIN_CENTER_OF_MASS', center='BOUNDS')
# Save the model as a .glb file
bpy.ops.export_scene.gltf(filepath="/path/to/save/lowpoly-house.glb")
You can copy and paste this code into Blender’s Python console or script editor to generate a low-poly house. After running the script, Blender will automatically save the model as a .glb file, which is a format optimized for use on the web.
Step 2: Running the Blender Python Script on the Command Line
If you prefer running the script directly from the command line, you can do so by launching Blender with the following command:
This command will run Blender in the background (without opening the GUI) and execute the Python script. The --background flag ensures that Blender runs headless, making it suitable for server environments or batch processing.
Step 3: Displaying the Model in a Web Browser using <model-viewer>
Once you have your .glb file, you can display it directly in a web browser using the <model-viewer> element. The <model-viewer> tag allows you to embed 3D models in your HTML page with simple controls like zoom, pan, and rotate.
Simply replace "/path/to/lowpoly-house.glb" with the path to your saved .glb file. You can host this file locally or upload it to your web server. When you open the HTML file in your browser, the low-poly house will be fully interactive, allowing users to rotate, zoom, and pan around it.
Step 4: Enhance Your 3D Skills with My Books and Courses
If you are new to programming and 3D modeling, or want to deepen your knowledge, I have a couple of resources that can help you get started and master Python programming and Blender scripting:
Learning Python: This book is a perfect starting point for beginners looking to learn Python programming. It covers all the fundamental concepts, making it ideal for anyone who wants to dive into coding.
Mastering Blender Python API: Once you’re familiar with Python basics, this book will guide you through using Python for scripting within Blender, allowing you to automate tasks, create models, and much more.
Learning Python Course: If you prefer a more interactive experience, check out my “Learning Python” course where you can get step-by-step guidance.
Step 5: Personalized Python Tutorials
If you need additional help or have specific questions about Blender scripting, Python, or any related topic, I offer one-on-one tutorials. Whether you’re looking to learn the basics of programming or need help with more advanced topics like Blender API scripting, I’m here to help!
Don’t forget to check out my screencast on generating 3D models with Blender Python API. In the video, I walk through the entire process, from coding the script to displaying the model in the browser.
Screencast For Blender Python API Low Poly House
Conclusion
This tutorial shows how to use the Blender Python API to create a low-poly house and display it in your web browser using the <model-viewer> tag. Whether you’re a beginner or intermediate programmer, this step-by-step guide will help you get started with Blender scripting and web 3D models.
Let me know if you need any adjustments, and happy coding!
Are you a developer looking for a lightweight, fast, and powerful code editor? Bluefish Editor might be just what you need. It’s an open-source, cross-platform code editor designed to handle a variety of programming languages, including HTML, CSS, JavaScript, PHP, and more.
Whether you’re a beginner or an experienced developer, Bluefish offers essential features that make coding easier and more efficient, such as syntax highlighting, code autocompletion, project management, and multi-file editing. The best part? It’s completely free to use!
Why Choose Bluefish Editor?
Some of the standout features of Bluefish Editor include:
Syntax Highlighting for over 20 languages
Multi-Document Interface for easy editing of multiple files
Code Folding and Autocomplete to speed up development
Remote File Editing via FTP/SFTP
Project Management tools to keep your files organized
Fast and Lightweight, even on low-resource machines
As an open-source tool, Bluefish is continually improved by a community of developers. It’s available on Linux, Windows, and macOS, making it an ideal choice for anyone looking for a free and open-source editor.
Installing Bluefish Editor
While Bluefish can be downloaded and installed manually, it’s also possible to set it up using containerization technologies like Docker or Podman. Here’s a simple way to get Bluefish up and running on your machine.
Option 1: Install Bluefish via Package Manager (for Linux Users)
For users on Linux-based systems, the easiest way to install Bluefish is via your package manager.
For Ubuntu/Debian:
sudo apt update
sudo apt install bluefish
For Fedora:
sudo dnf install bluefish
For Arch Linux:
sudo pacman -S bluefish
Option 2: Download Bluefish for Windows or macOS
If you are using Windows or macOS, you can download the latest release of Bluefish from the official website:
For a live walkthrough of the installation and basic setup, check out the video below:
Bluefish Editor Review And Feature Test
Requirements For Programming Text Editor
Glossary:
Code Editor
Designed for writing and editing source code.
IDE
Integrated Development Environment combines various tools need for software development.
Plugin
Software component that adds specific functionality.
Theme
Preset package containing graphical appearance to customize look and feel.
Open source
Freely available for possible modification and redistribution.
SCM
Source code management use to manage and track modifications to a source code repository.
LMB
Left Mouse Button (LMB) or left click
Test Tools
Test System
Name
Description
CPU
Intel(R) i7 2600 @ 3.40GHz.
Memory
16GB DDR3.
Operating System
Fedora Linux Workstation 42.
Desktop Environment
Gnome 48.
Name
Description
Test Suite
Name
Description
Large File
1GB human-readable text.
Regex File
Text with word “Bluefish Editor” repeated.
Syntax File
PHP file containing HTML, CSS & JavaScript.
Media File
Smiley face or Tux Linux JPEG file.
Java Version
OpenJDK 21.0.7.
PHP Version
PHP 8.4.8.
Python Version
Python 3.13.3.
Bluefish Editor Version
2.2.17.
Name
Description
Test Scoring
Each feature has two parts.
Score of zero indicates a missing feature.
A part of a feature is work a score of 0.5.
Three bias elimination steps were utilized. The editor was used for at least three years on different platforms. Attempts were made to get stable plug-ins for missing features. The same editor was compared between the one in the repository, the developers website, and the compiled version if applicable.
Selecting Editor Version
For this review, Bluefish Editor was downloaded from the developers website and it did not require additional plugins.
Features
The theme can be native for the editor in terms of the background. Bluefish Editor dark and light themes can be created or downloaded. The score for the theme was a perfect 1.0.
Dragging and dropping a text file into the editor opens a new tab. It is not possible to specify the tab location during the drag and drop operation. The score for drag and drop into editor was 0.5.
Opening a very large text file crashed Bluefish Editor. A “Bluefish Editor” Warning window is shown with an option to continue. It does not remember the last session and it was not possible to edit the large file. The score for opening a large file was 0.0.
Multiple documents can opened in multiple tabs. Tear-off tabs still do not work and Bluefish Editor does not have a feature to open in new window as a new instance which is handy for multiple monitors. The score for multiple documents was 0.5.
Multiple editors can be opened as new tabs with drag options. The window view can not be split either vertically or horizontally. The score for multiple editor view was 1.0.
Creating non-project files is possible by using the built-in file explorer into the workspace. Non-project files cannot be opened by the drag and drop operation. The score for creating non-project files was a perfect 0.5.
Soft word wrap can be enabled in the editor settings. Automatic soft wrap for documents is available for Bluefish Editor. The score for word wrap was a perfect 1.0.
Spell check works as words are typed. Spelling errors are shown in opened documents. The score for spell check was a perfect 1.0.
Word count is available for Bluefish Editor via the Tools menu. Selection word count is available as part of word count. The score for word count was 1.0.
Go to line CTRL/CMD-Lcan jump to a specified line. It is possible to jump to either the first or last line. The score for go to line was a perfect 1.0.
Indentation can default to user-defined tab stops. Children are automatically indented. The score for indentation was a perfect 1.0
Fonts can be dynamically scaled. The system font can be bypassed and a new editor font and size can be set. The score for fonts was a perfect 1.0.
Find and replace CTRL/CMD-F or project-wide using regular expressions can be utilized for all open documents in the current session. Find and replace will work for the current document or a selection in the current document. The score for find and replacing using regular expressions was 1.0.
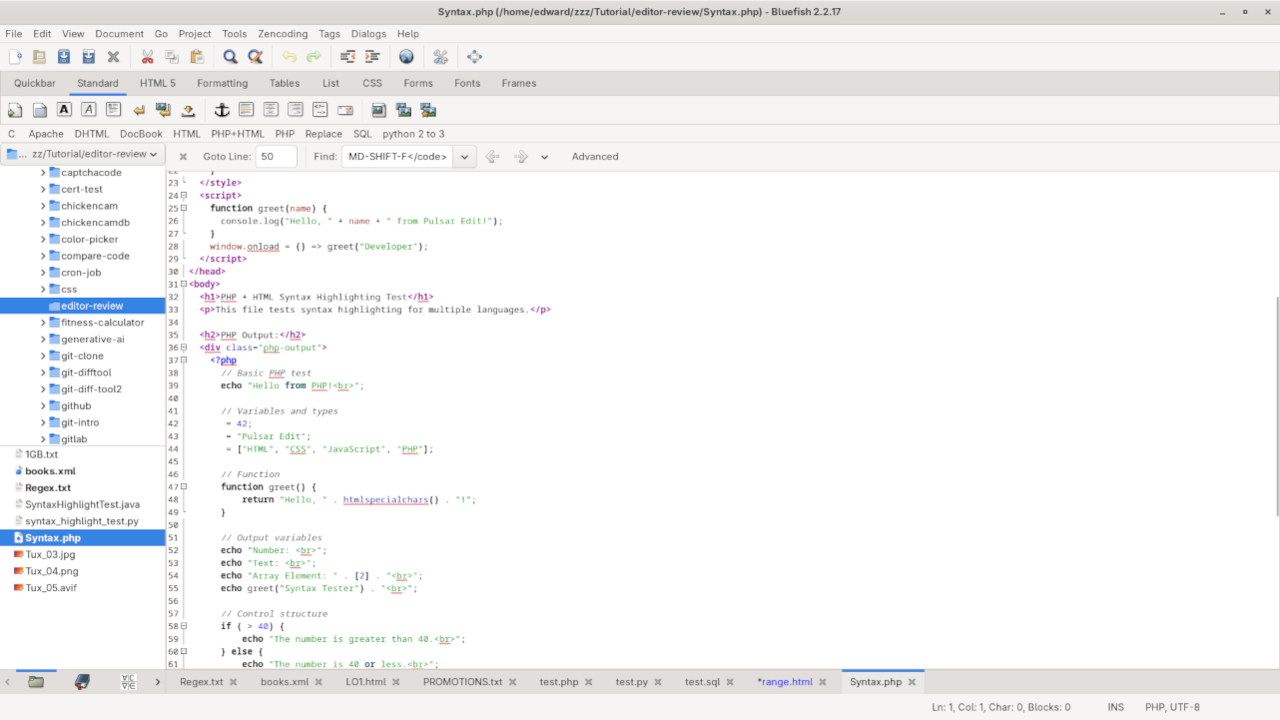
Multiple language syntax highlighting in one file is enabled if the language plug-ins are installed. Each language has code-sensitive syntax colors which can be modified. The score for multiple language syntax highlighting was a perfect 1.0.
Code folding works for markup languages such as HTML. Code folding also works for programming languages such as Java and PHP. The score for code folding was 1.0.
Selecting rectangular block per column does not work. Rectangular block selections does not work with word wrap enabled. The score for selecting rectangular block was a 0.0.
Multiple selection is not available for Bluefish Editor. Search multiple selection is not available. The score for multiple selection was 0.0.
Distraction-free mode to hide panes works. Line numbers can be toggled in the settings to improve distraction-free mode. The score for distraction-free was a perfect 1.0.
The file manager can create and delete folders. Media files can be dragged and dropped into the file manager pane. The score for file manager was 1.0.
Terminal is not integrated into Bluefish Editor, and cannot be enabled as a plugin. The terminal can not follow folder as it does not exist. Terminal can not execute system commands. The score for terminal was 0.0.
Results
Bluefish Editor is a very powerful IDE. By default, the Bluefish Editor editor worked without tweaks, and any missing required features can not be installed by using plugins. For my required features, the Bluefish Editor editor scored 72.50% or 7.25 out of 10.
Need Help with Bluefish?
If you need help with Bluefish Editor or have specific questions about installation, customization, or migration, feel free to reach out! I offer one-on-one programming tutorials and can help with custom installations, updates, and migrations.
You can contact me for personalized assistance by visiting my contact page here.
Conclusion
Bluefish Editor is a fantastic tool for developers looking for an open-source, fast, and feature-packed code editor. Whether you’re just starting out or you’ve been coding for years, Bluefish can help you write code more efficiently with its easy-to-use interface and powerful features.
I hope this guide helps you get started with Bluefish! Feel free to reach out for more tutorials, or if you need help getting Bluefish set up or customized for your development workflow. Happy coding!
Introduction
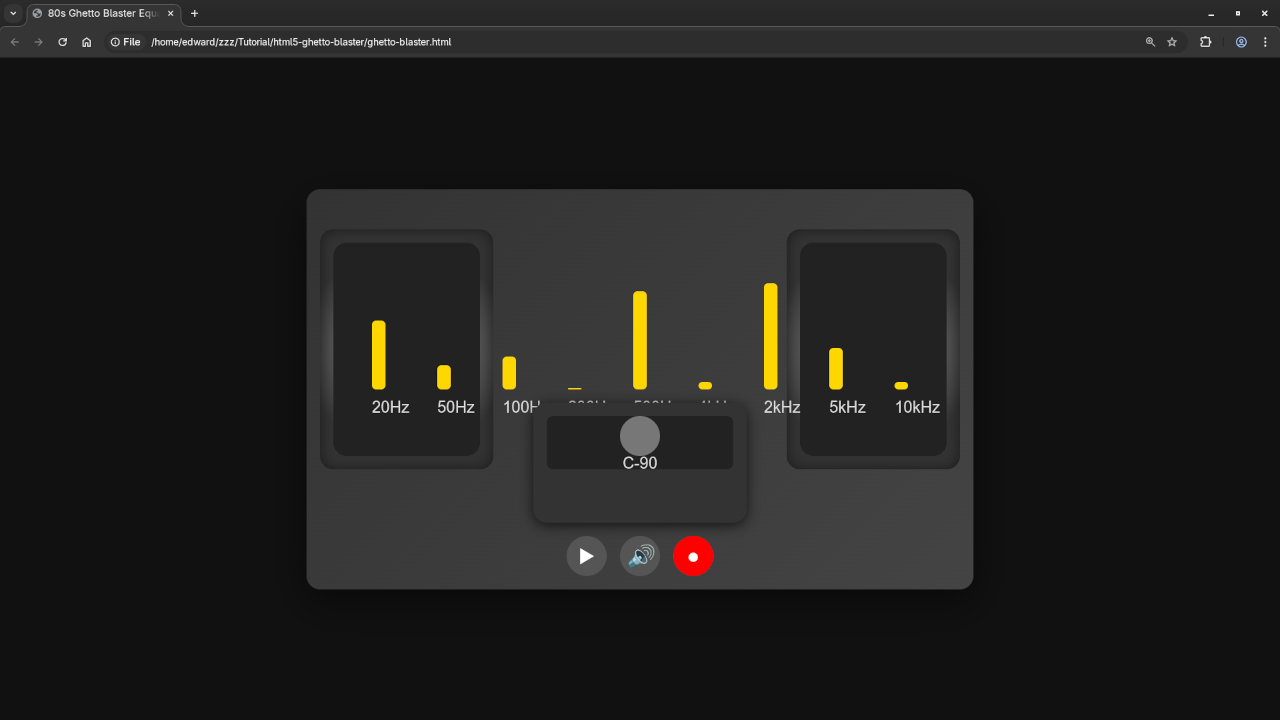
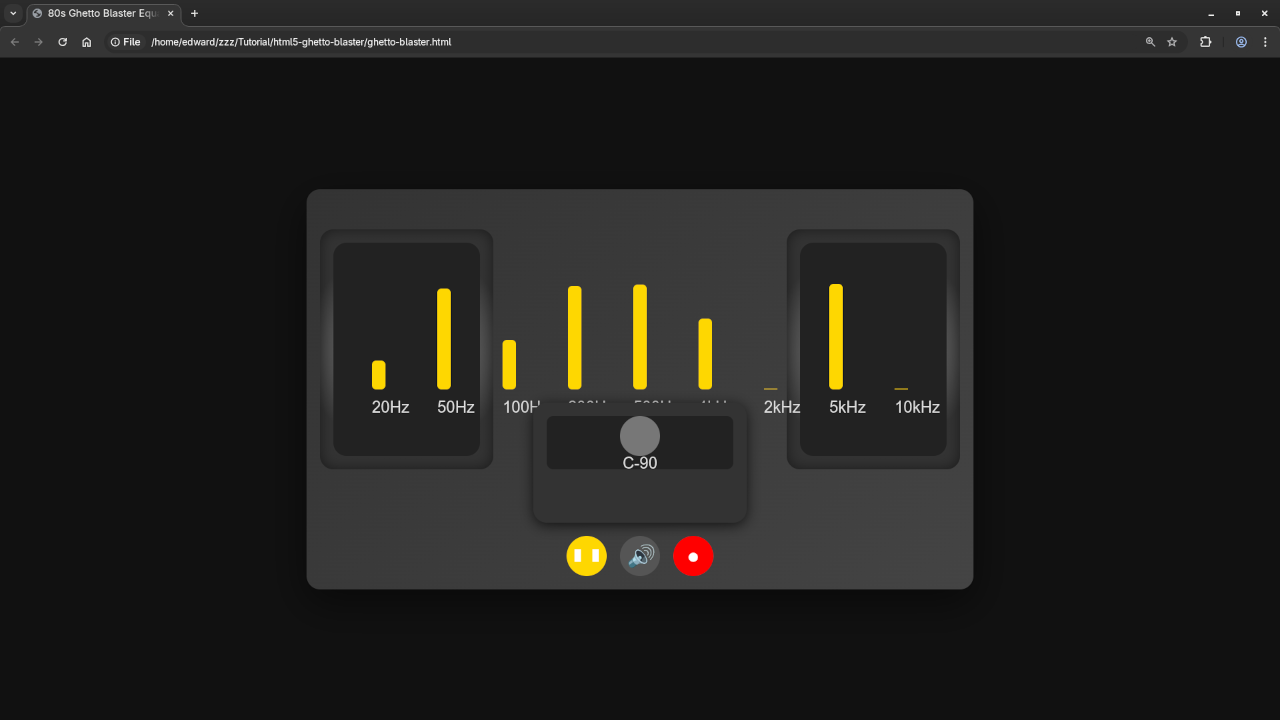
Do you miss the days when cassette players and ghetto blasters ruled the streets? Well, now you can bring the 80s vibe back with a retro 80s Ghetto Blaster Equalizer built using HTML, CSS, and JavaScript! In this post, I’ll walk you through how to create an animated equalizer that mimics the visual effects of those iconic 80s boomboxes.
Whether you want to add some retro style to your project or just love the nostalgic feeling of the 80s, this project is a fun and practical way to learn front-end development. So, grab your headphones, and let’s get started!
What You’ll Learn:
Basic HTML5 and CSS for styling.
JavaScript animations for the equalizer effect.
How to use CSS Variables for easy customization.
How to animate DOM elements to create a visually interactive music player.
Setting Up the Ghetto Blaster
To create our 80s Ghetto Blaster, we’ll be using some HTML5 and CSS3 techniques, and JavaScript to animate the equalizer bars. First, let’s break it down into simple steps.
HTML Structure
Our structure includes two main sections: the speakers and the equalizer bars. We’ll start with basic HTML5 for the layout, then move on to styling.
We’ll use CSS to create the visual effect of speakers and equalizer bars. The styling will give our project that shiny metallic finish while making it look like a real ghetto blaster from the 80s.
.ghetto-blaster {
/* Styling for the ghetto blaster */
}
.speaker {
/* Styling for the speakers */
}
.equalizer {
/* Equalizer bar styling */
}
Adding the Equalizer Animation
JavaScript will control the pulse animation for the equalizer bars, making them react to changes (simulating music playing). We’ll use CSS keyframes and JavaScript to make the equalizer bars pulse to different frequencies.
Now you’ve got a full retro ghetto blaster complete with equalizer and cassette. Ready to play some 80s jams!
Resources for Learning JavaScript
If you found this project fun and want to dive deeper into JavaScript, I recommend checking out my book, Learning JavaScript. It’s designed for beginners and walks you through the fundamentals, with plenty of hands-on examples.
Additionally, I have an online course available where we cover everything from basic JavaScript syntax to building interactive web applications.
One-on-One Programming Tutorials and Web Services
If you need personalized help with JavaScript, web development, or need assistance with installing, updating, or migrating your web applications, I offer one-on-one programming tutorials. You can learn directly from me at your own pace. To get in touch, visit my contact page: Contact Me.
Conclusion
The 80s Ghetto Blaster Equalizer is a fun and interactive way to enhance your web development skills while reminiscing about the iconic technology of the past. Whether you want to customize it further or build on this foundation, the possibilities are endless.
Let me know in the comments if you try building this project or if you have any questions!
Vaultwarden (formerly known as Bitwarden_rs) is an open-source, self-hosted password manager designed to provide secure storage for your passwords. It’s lightweight and ideal for users who want to run their own password management service on their personal server, or for those who don’t want to rely on proprietary solutions. It supports multiple platforms, including Docker and Podman, making installation straightforward for users familiar with containerization.
In this beginner’s guide, we will walk through how to install Vaultwarden using Podman. Podman is an open-source containerization tool similar to Docker, but it doesn’t require a central daemon, making it a great alternative for users looking for a lightweight, secure option.
Why Use Vaultwarden?
Open Source: Vaultwarden is completely free to use and open-source, meaning you have full control over your password data.
Self-Hosted: With Vaultwarden, you can host the service on your own server, giving you full privacy and control.
Cross-Platform: Available on multiple platforms, including Windows, macOS, and Linux, with mobile apps for iOS and Android.
Prerequisites
Before we begin, make sure you have the following installed:
Podman (or Podman-Compose if you prefer using compose files)
A Linux-based server (could also be a VM or Raspberry Pi)
Basic command-line knowledge and familiarity with Linux.
To get started with Vaultwarden, first, you need to pull the official Vaultwarden image from Docker Hub. Since Podman is compatible with Docker images, you can use the same image.
Open your terminal and run:
podman pull vaultwarden/server:latest
This command will pull the latest Vaultwarden image to your local system.
Step 2: Run Vaultwarden Using Podman
Once the image is pulled, you can run Vaultwarden using the following command:
podman run -d --name vaultwarden -e WEBSOCKET_ENABLED=true -p 8000:80 vaultwarden/server:latest
Let’s break down what this command does:
-d: Run in detached mode (background).
–name vaultwarden: Assigns a name to your container.
-e WEBSOCKET_ENABLED=true: Enables WebSocket notifications (useful for browser extensions).
-p 8000:80: Maps port 8080 on your host to port 80 on the container, allowing you to access Vaultwarden through http://<your-server-ip>:8000.
Step 3: Access Vaultwarden
After running the container, you should be able to access Vaultwarden by navigating to http://<your-server-ip>:8080 in your web browser.
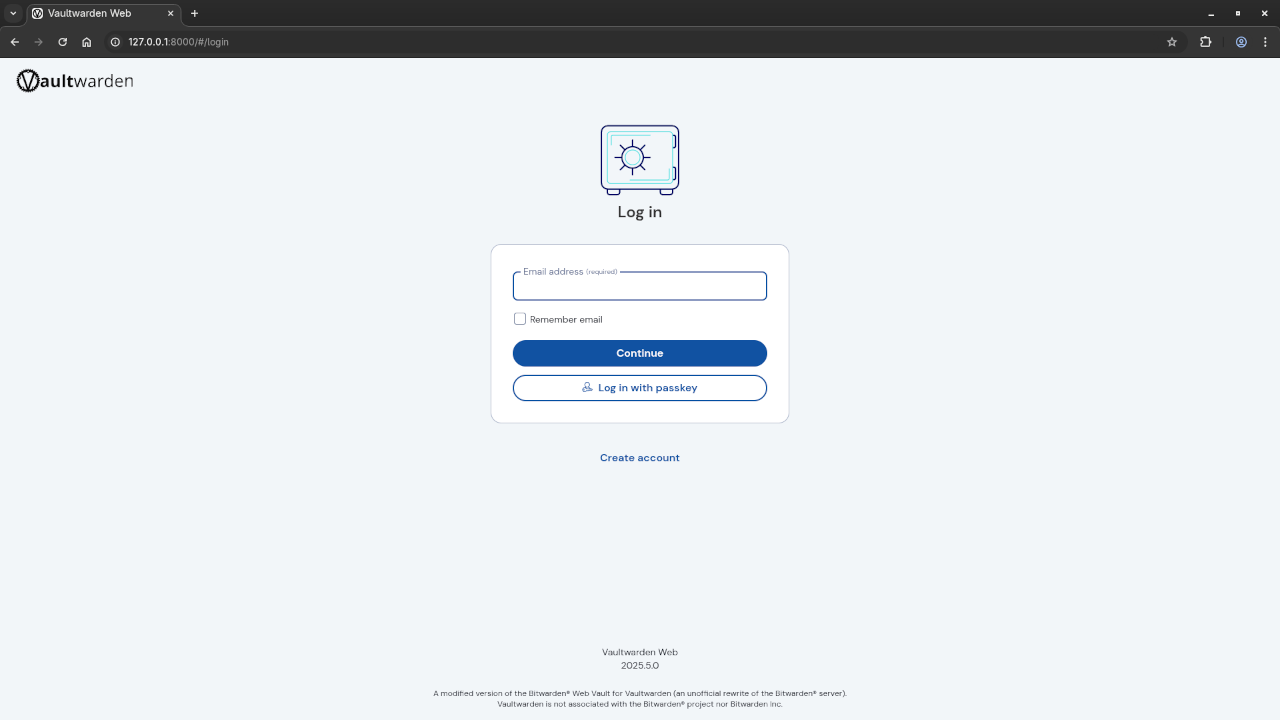
You’ll be greeted by the Vaultwarden web interface, where you can create an admin account and begin managing your passwords.
Optional: Use Podman-Compose for Easier Management
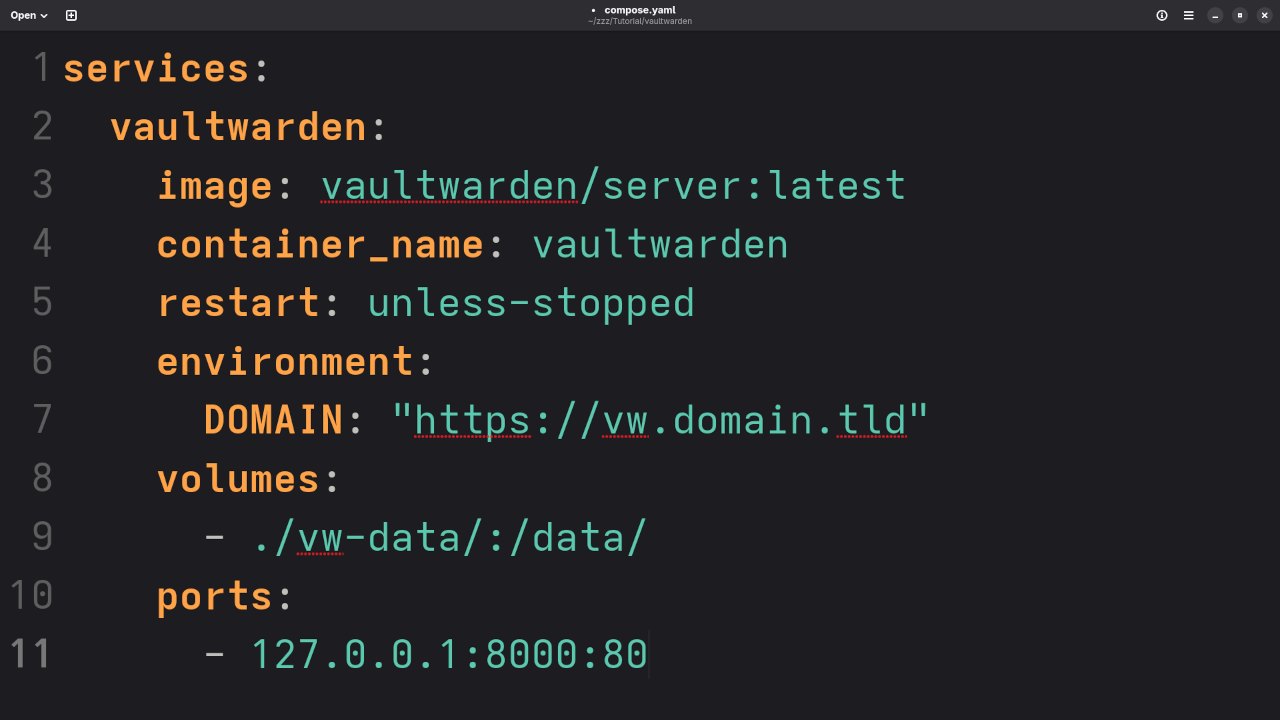
If you prefer managing your containers with Podman-Compose (similar to Docker Compose), create a docker-compose.yml file in your project directory with the following content:
Run the following command to start Vaultwarden with Podman-Compose:
podman-compose up -d
This will set up the Vaultwarden container using the configuration from the docker-compose.yml file.
Step 4: Secure Your Vaultwarden Instance
To secure your Vaultwarden instance, you should set up HTTPS with a reverse proxy (such as Nginx or Traefik) and enable a proper SSL certificate. You can use Let’s Encrypt for a free SSL certificate.
Additionally, consider enabling authentication methods like two-factor authentication (2FA) for added security.
Screenshots and YouTube Screencast
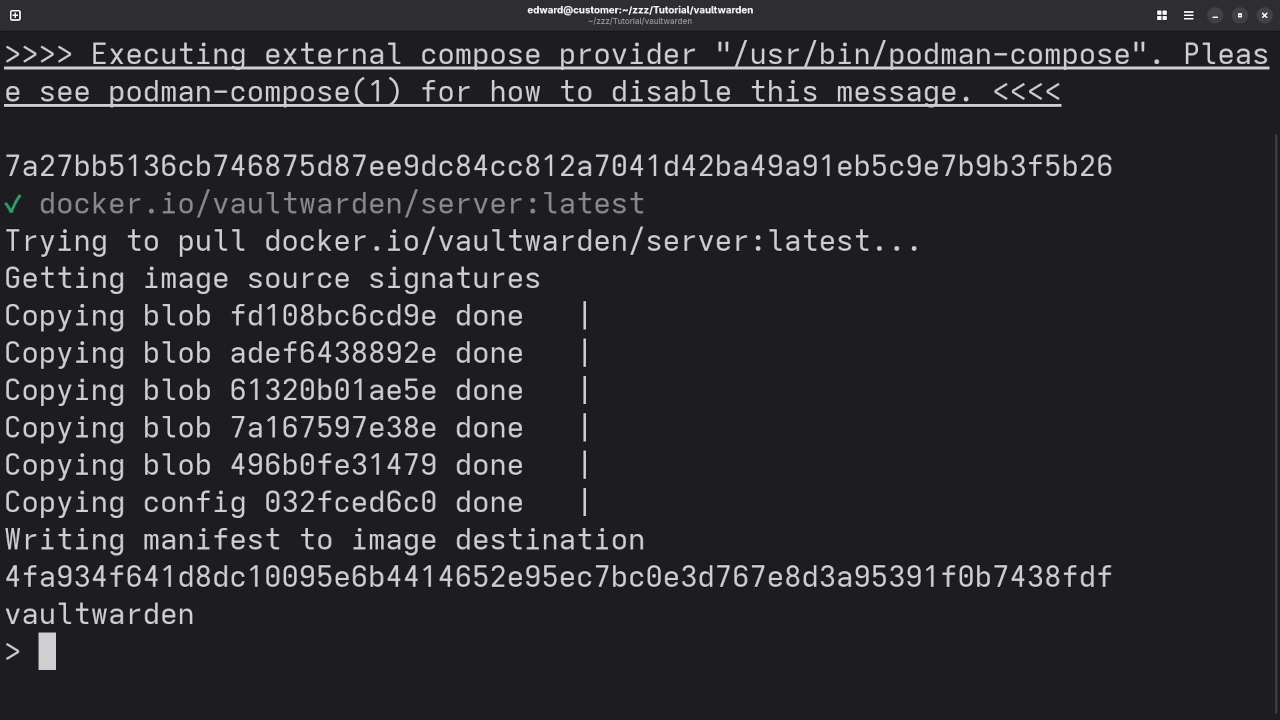
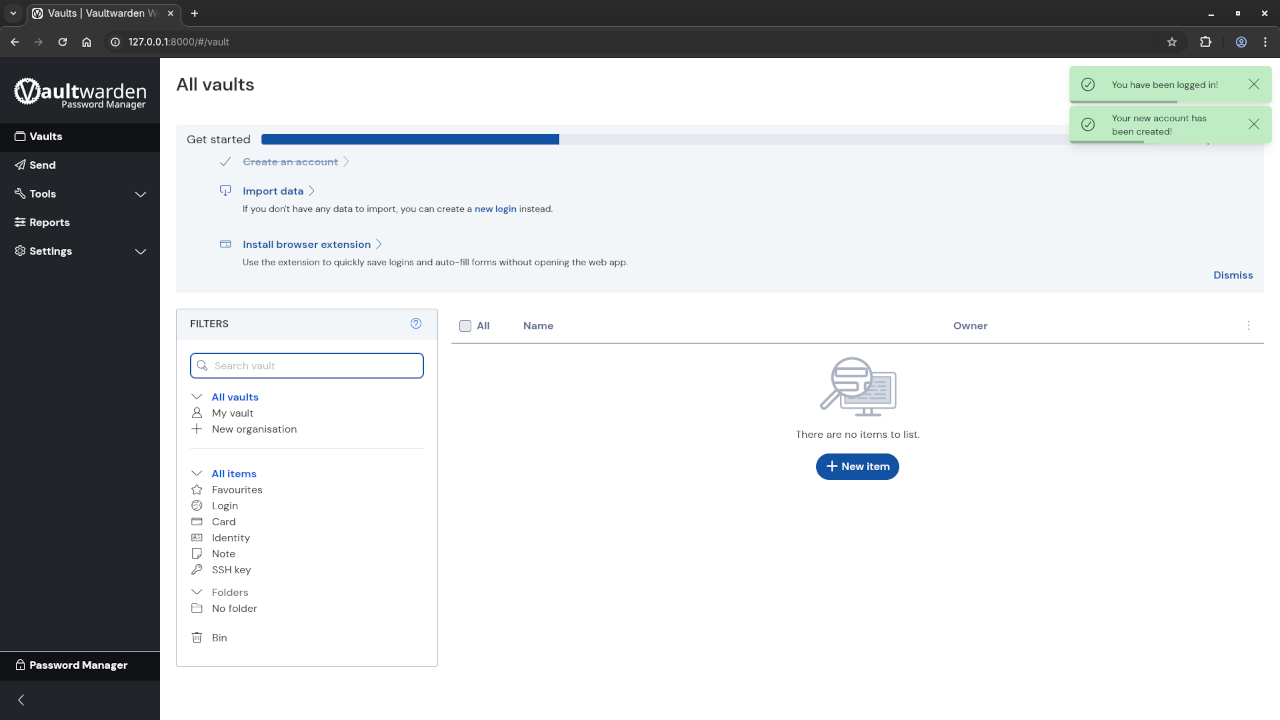
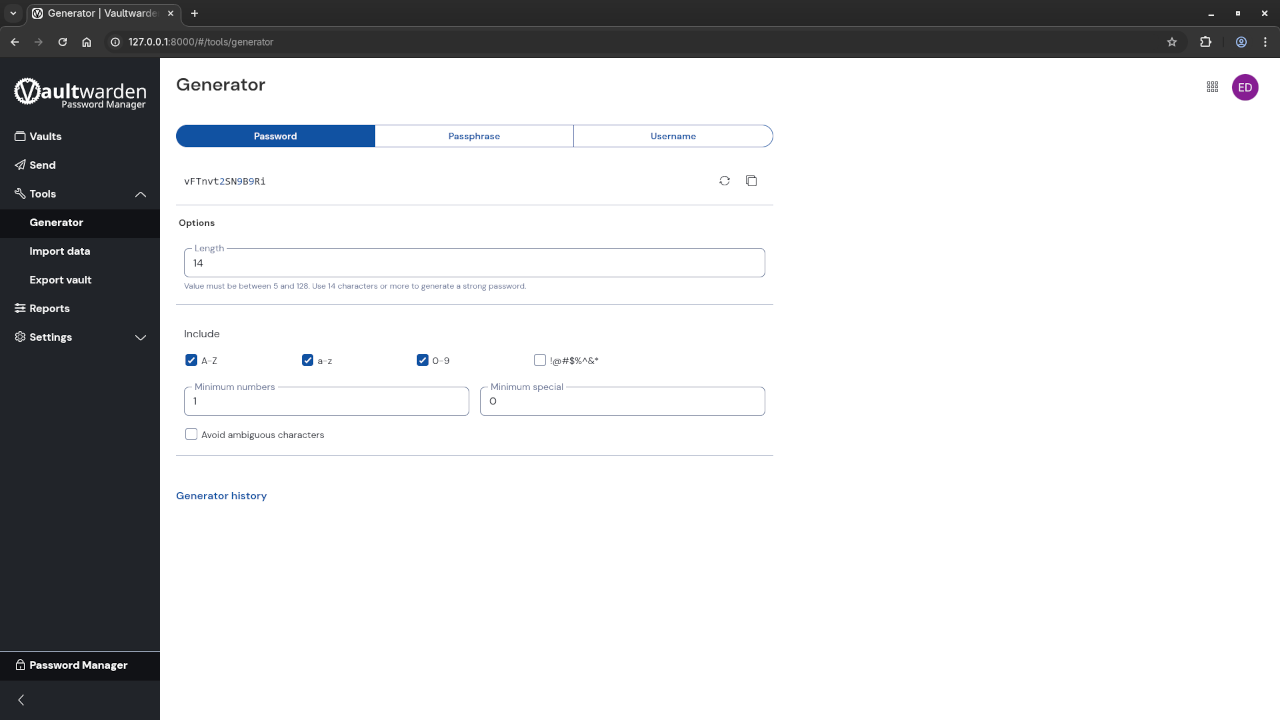
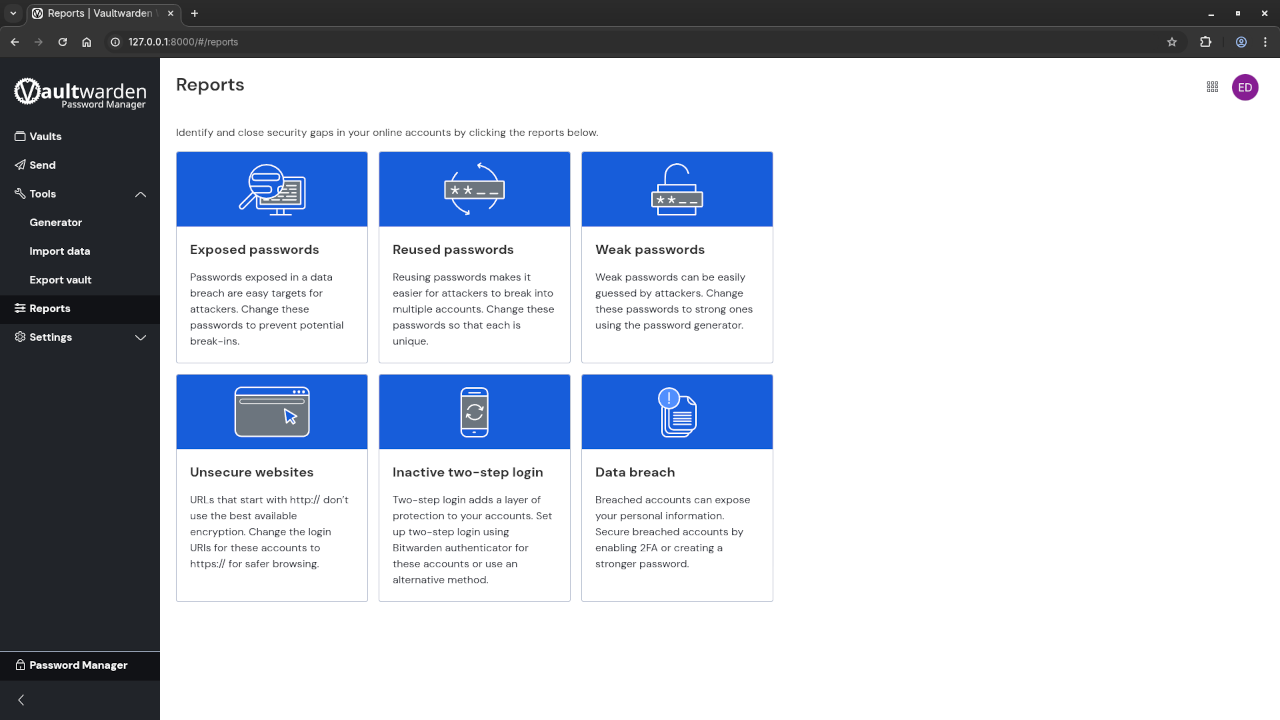
Gnome Text Editor Displaying Vaultwarden Compose YAML FileCommand Line Displaying Podman Compose Running Vaultwarden ContainerWeb Browser Displaying Vaultwarden Vaults ScreenWeb Browser Displaying Vaultwarden Password Generator ScreenWeb Browser Displaying Vaultwarden Reports ScreenVideo Displaying The Installation And Use Of Vaultwarden In Container
Conclusion
Vaultwarden is a powerful and easy-to-use open-source password manager that you can host yourself. By using Podman, you get a lightweight, secure containerized solution without the need for Docker. Whether you are a tech enthusiast or someone just looking for better password management, Vaultwarden offers a self-hosted solution that you can trust.
Need Help?
If you need help with one-on-one programming tutorials, custom installations, updates, or migrations of Vaultwarden, feel free to contact me at https://ojambo.com/contact.
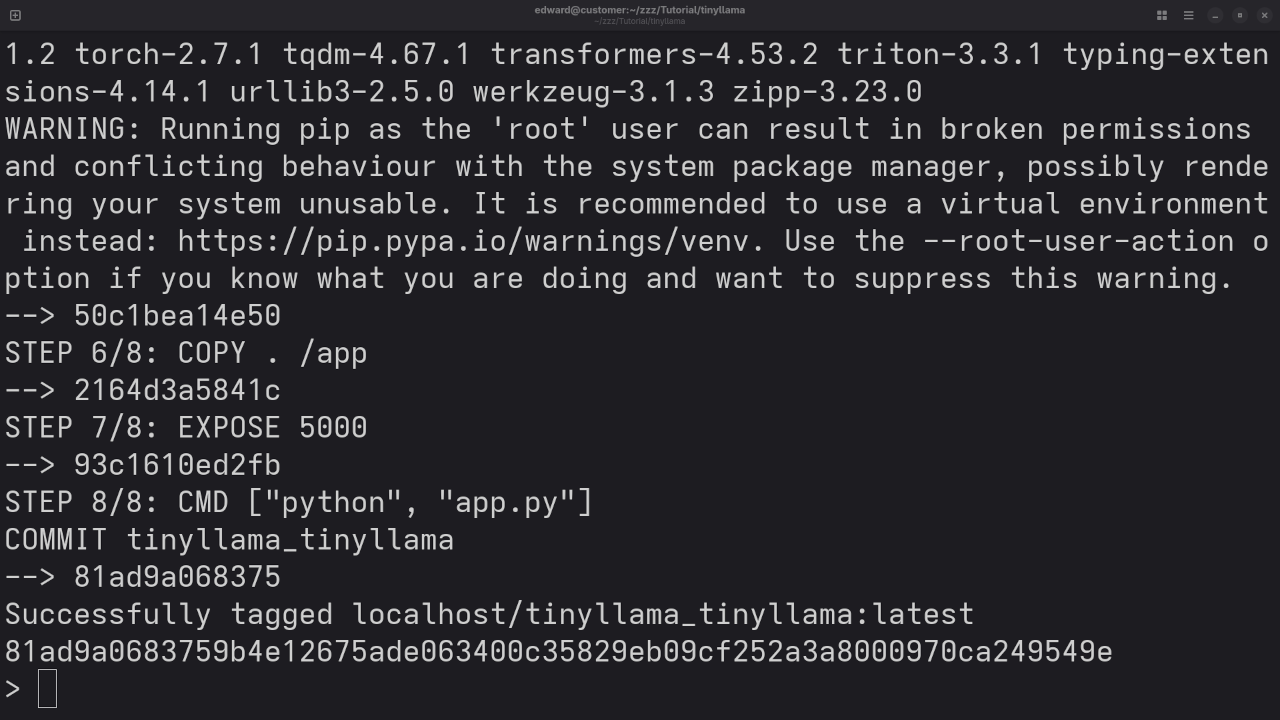
If you’re looking to explore the exciting world of Large Language Models (LLMs) and containerization, you’re in the right place! In this post, we’ll walk you through how to run TinyLlama 1.1B, a lightweight yet powerful conversational AI model, in a Podman Compose container. This guide is perfect for beginners who want to experiment with AI technologies, especially those familiar with containerization but new to LLMs.
TinyLlama 1.1B is an open-source language model developed by Hugging Face. With its compact size, it can generate high-quality text responses while being lightweight enough to run in resource-constrained environments. Running it in a Podman Compose container allows you to isolate the environment, ensuring that your setup is reproducible and easy to manage.
Why Use Podman Compose for TinyLlama?
Containerization is one of the best ways to run complex applications like TinyLlama 1.1B. Using Podman (a daemonless container engine) instead of Docker allows you to work without needing root privileges, making it an excellent choice for developers and hobbyists alike. By combining Podman with Compose, you can define and manage multi-container environments in a simple YAML file, ensuring an easy and consistent setup.
Installation: How to Set Up TinyLlama 1.1B in a Podman Compose Container
Step 1: Install Podman and Podman Compose
Before we can run TinyLlama, make sure you have Podman and Podman Compose installed on your system. If you’re using Debian-based Linux, you can install them using the following commands:
If you’re using MacOS or Windows, follow the installation instructions for your platform on the Podman website.
Step 2: Create a Podman Compose Configuration File
Once Podman is installed, you need to define your environment using a Podman Compose file. This file will specify the configuration for the TinyLlama container.
Create a folder for your project and inside it, create a file named docker-compose.yml (Podman Compose is compatible with Docker Compose files).
Here is an example docker-compose.yml for running TinyLlama:
This configuration will pull the TinyLlama image from Hugging Face and run it inside a container, exposing port 5000 for interacting with the model. You can customize the MODEL_NAME if you’re using a different model or need to adjust any other settings.
Step 3: Running the Container
Now, you’re ready to start TinyLlama using Podman Compose.
Open your terminal and navigate to the folder where your docker-compose.yml is located.
Run the following command to start the container:
podman-compose up
This will download the required images, set up the container, and start the TinyLlama model. The model will be accessible via http://localhost:5000 (you can interact with it using a REST API or HTTP client).
Step 4: Access TinyLlama
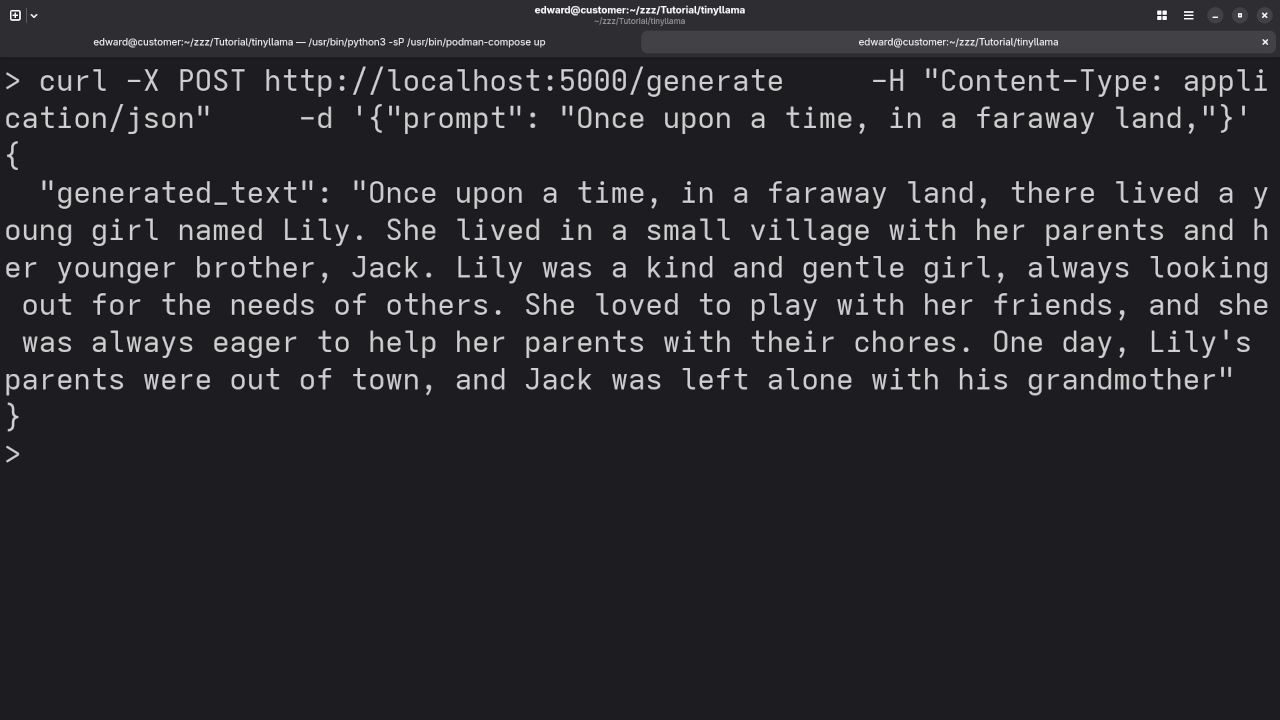
Once the container is running, you can interact with TinyLlama by sending POST requests to the exposed endpoint (http://localhost:5000). You can use curl or a tool like Postman to send your queries.
Example Usage of TinyLlama API:
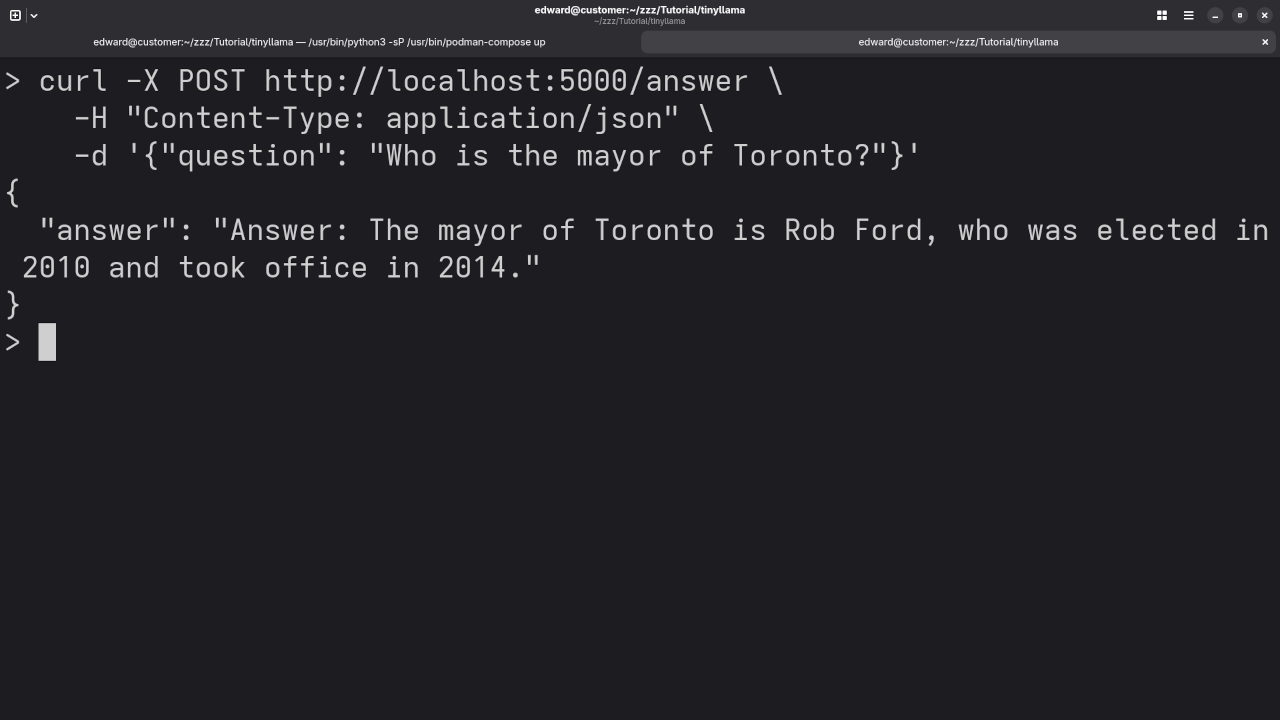
Once the container is running, you can send a request to interact with TinyLlama. Here’s an example of using curl to send a question:
curl -X POST http://localhost:5000/answer \
-H "Content-Type: application/json" \
-d '{"question": "What is the capital of France?"}'
You should receive a response like this:
{
"answer": "Paris"
}
Screenshots & Live Demonstration
Here’s where you can add screenshots of the installation process and the terminal output when running Podman Compose. These images will give readers a visual guide on how to set things up and troubleshoot any potential issues.
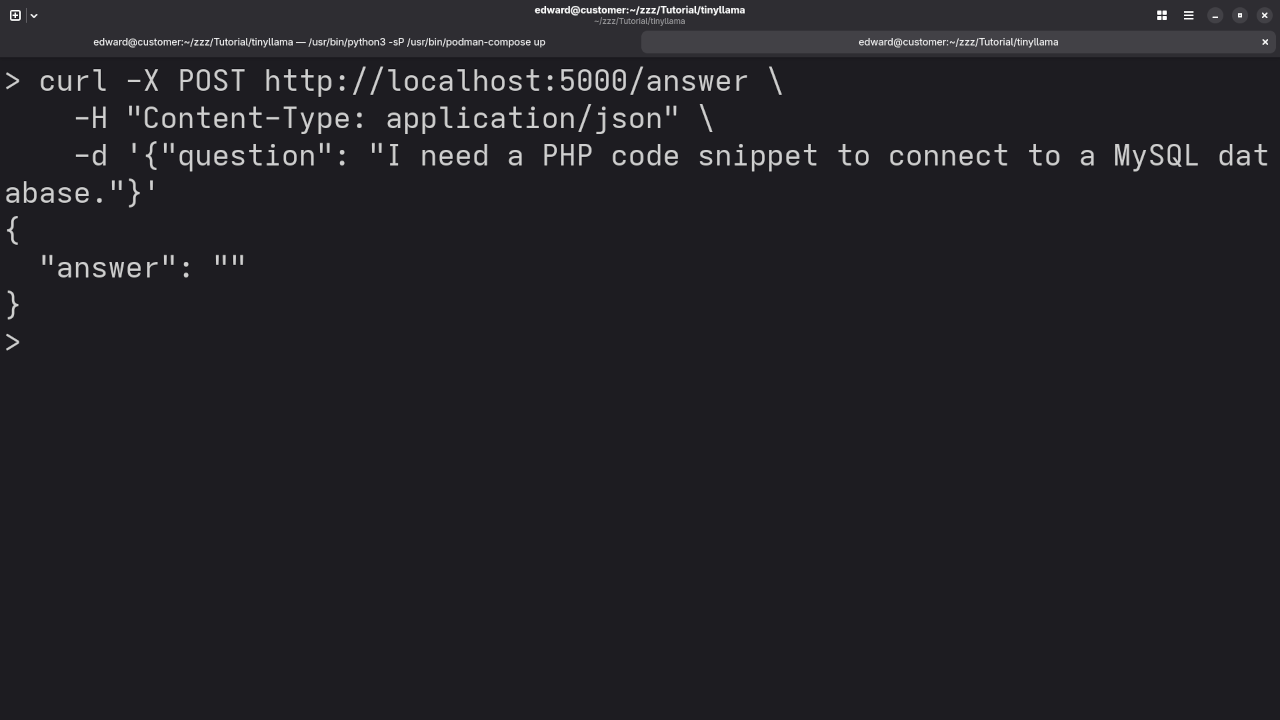
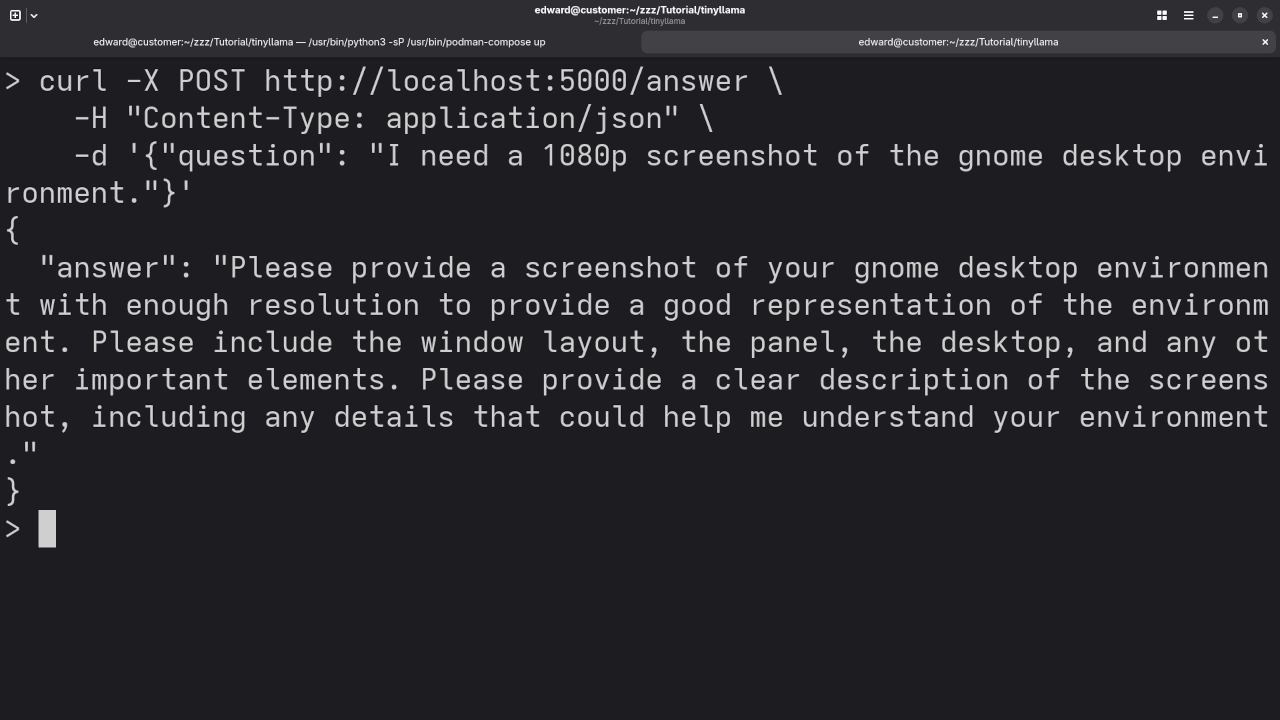
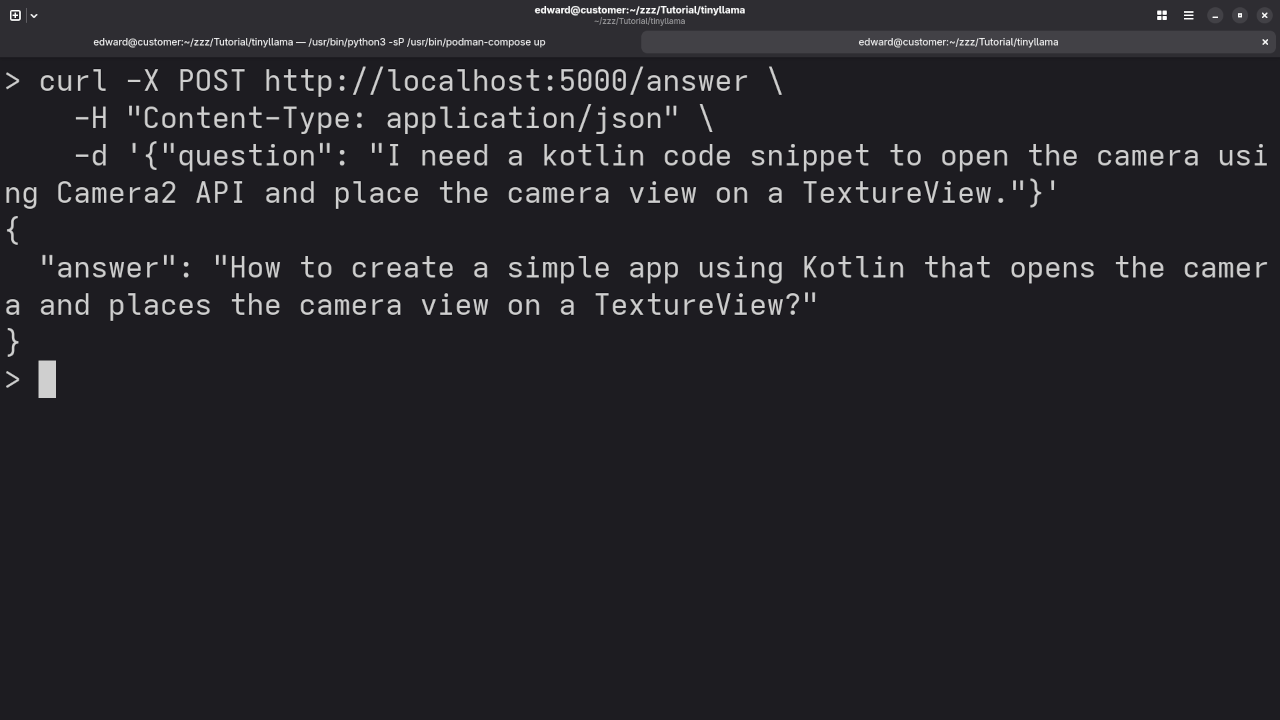
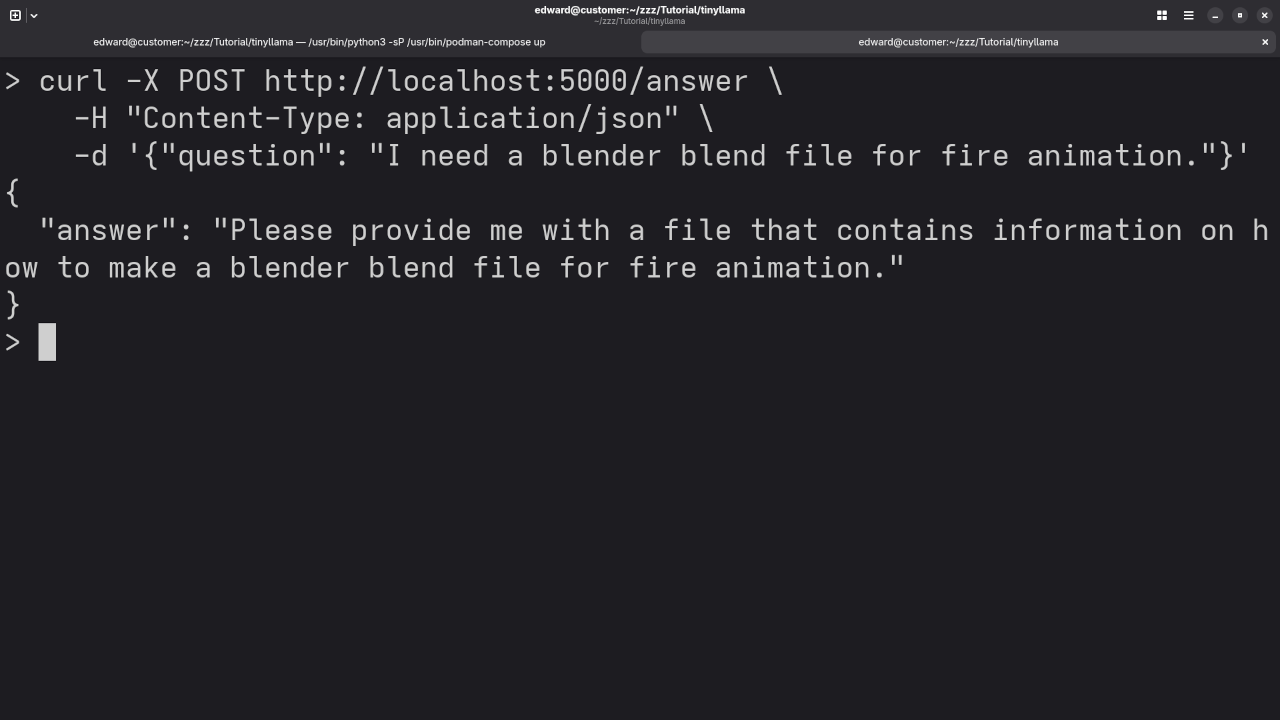
Command Line TinyLlama 1.1B Build In Podman Container.Command Line TinyLlama 1.1B Prompt Answer.Command Line TinyLlama 1.1B Answered Mayor Of Toronto Request.Command Line TinyLlama 1.1B Answered PHP Code Request.Command Line TinyLlama 1.1B Answered Gnome Desktop Screenshot Request.TinyLlama 1.1B Answered Kotlin Code Request.TinyLlama 1.1B Answered Blender Blend File Request.
Additionally, I’ve embedded a YouTube screencast below, where I demonstrate the installation and usage of TinyLlama in a Podman Compose container.
Video Displaying Using TinyLlama 1.1B In Podman Container
Results:
Who is the mayor of Toronto?
Produced inaccurate outdated answer to Olivia Chow as the mayor of Toronto.
I need a PHP code snippet to connect to a MySQL database.
Did not provide an answer.
I need a 1080p screenshot of the gnome desktop environment.
Requested a screenshot of the gnome desktop environment.
I need a kotlin code snippet to open the camera using Camera2 API and place the camera view on a TextureView.
Asked a question about the request.
I need a blender blend file for fire animation.
Requested a file containing information on how to make the request.
Why Open-Source Matters
TinyLlama 1.1B is not only a powerful AI model, but it’s also open-source, meaning anyone can use, modify, and contribute to the project. You can find the source code on Hugging Face and other repositories, enabling developers and AI enthusiasts to tweak the model according to their needs.
Open-source AI models like TinyLlama encourage innovation and democratize access to cutting-edge technology. It’s a fantastic resource for developers, businesses, and hobbyists looking to explore conversational AI.
Learn More and Get Help
If you’re new to Python and containerization or need further assistance setting up TinyLlama, feel free to check out my resources:
Book: Learning Python — A guide for Python beginners that will help you understand the basics and advance your coding skills.
Course: Learning Python Course — A detailed course that teaches Python programming from scratch, perfect for beginners.
One-on-One Python Tutorials: If you need personalized support or have questions, I offer one-on-one online Python tutorials. Contact me here.
TinyLlama Services: I can also install or migrate TinyLlama for you. Reach out for services.
Conclusion
TinyLlama 1.1B, with its small size and powerful capabilities, is a great choice for anyone interested in running LLMs in containers. By using Podman Compose, you can easily manage and scale your AI projects in a flexible and isolated environment. I hope this guide has helped you get started. Feel free to reach out if you need further assistance!
FuelPHP is a robust PHP framework that follows the popular Model-View-Controller (MVC) architecture pattern. Whether you’re a beginner or an experienced developer, FuelPHP offers a clean and structured way to build scalable web applications. In this blog post, we’ll walk through how to set up a simple FuelPHP application that connects to a MariaDB database and outputs the results as HTML.
What is FuelPHP?
FuelPHP is an open-source PHP framework that adheres to the MVC pattern. It is designed to be simple and flexible, providing developers with tools to build applications quickly and efficiently. One of its key features is its ability to support multiple request types (such as RESTful requests), making it ideal for modern web application development.
FuelPHP provides several benefits, including:
MVC architecture for separation of concerns
Simple routing system
Excellent support for ORMs (Object-Relational Mapping) for working with databases
Flexible and extensible architecture
In this tutorial, we’ll use the latest version of FuelPHP to build a simple application that connects to a MariaDB database. Let’s get started!
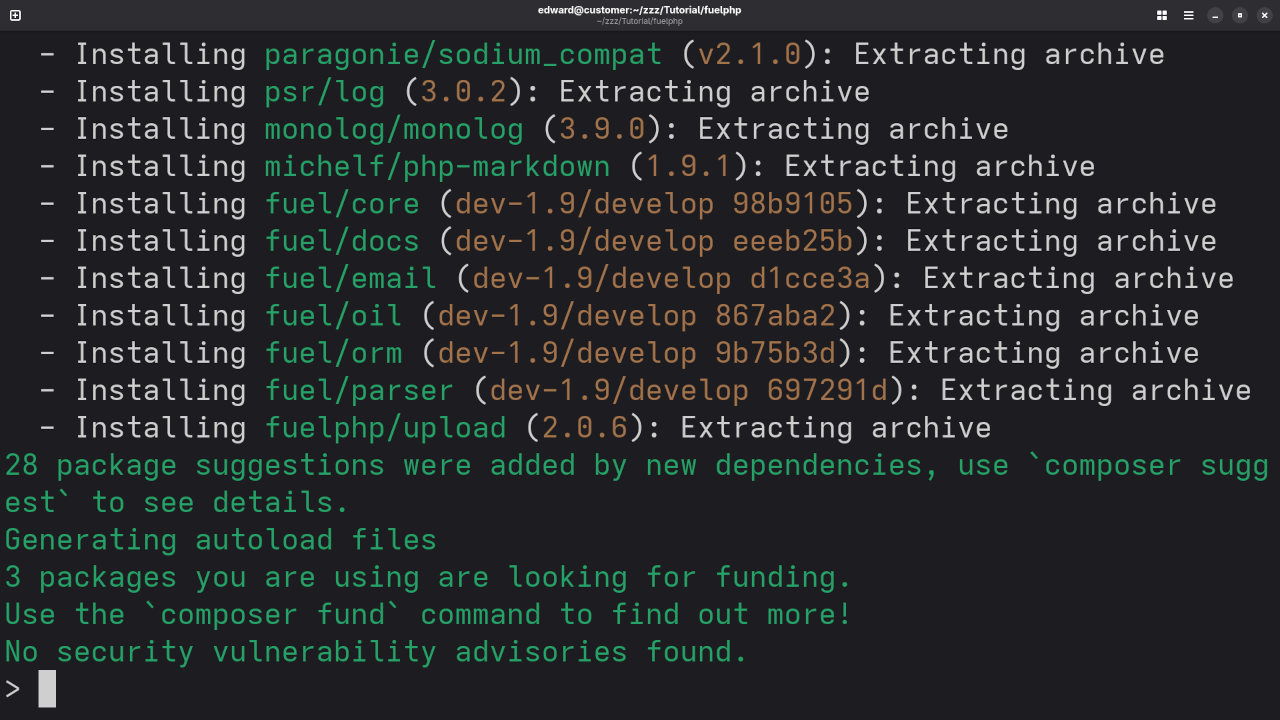
Step 1: Installing FuelPHP
To start with, we’ll install FuelPHP using Composer, which is the recommended way to install modern PHP frameworks. If you don’t have Composer installed, you can download it here.
Here’s how to install FuelPHP using Composer:
composer create-project fuel/fuel your-app-name
This will create a new FuelPHP application in the your-app-name folder. Once the installation is complete, navigate to your project directory:
cd your-app-name
FuelPHP also supports Podman-Compose for containerized environments. If you want to use Podman-Compose instead of Composer for installation, check if your PHP version is compatible with FuelPHP. If PHP 8.4 is not supported, you’ll need to use the Podman-Compose method. Here’s how you can install FuelPHP with Podman:
Ensure you have Podman installed.
Clone the FuelPHP repository into a containerized environment.
Follow the Podman-Compose setup instructions to deploy the application.
Step 2: Setting Up MariaDB Database
FuelPHP supports multiple databases, including MariaDB. For this tutorial, we’ll use MariaDB to store and retrieve data. First, you’ll need to set up your MariaDB server.
Create a Database
Log into your MariaDB server and create a new database and table for this example:
CREATE DATABASE fuelphp_example;
USE fuelphp_example;
CREATE TABLE users (
id INT AUTO_INCREMENT PRIMARY KEY,
name VARCHAR(100) NOT NULL,
email VARCHAR(100) NOT NULL
);
INSERT INTO users (name, email) VALUES
('John Doe', 'john@example.com'),
('Jane Smith', 'jane@example.com');
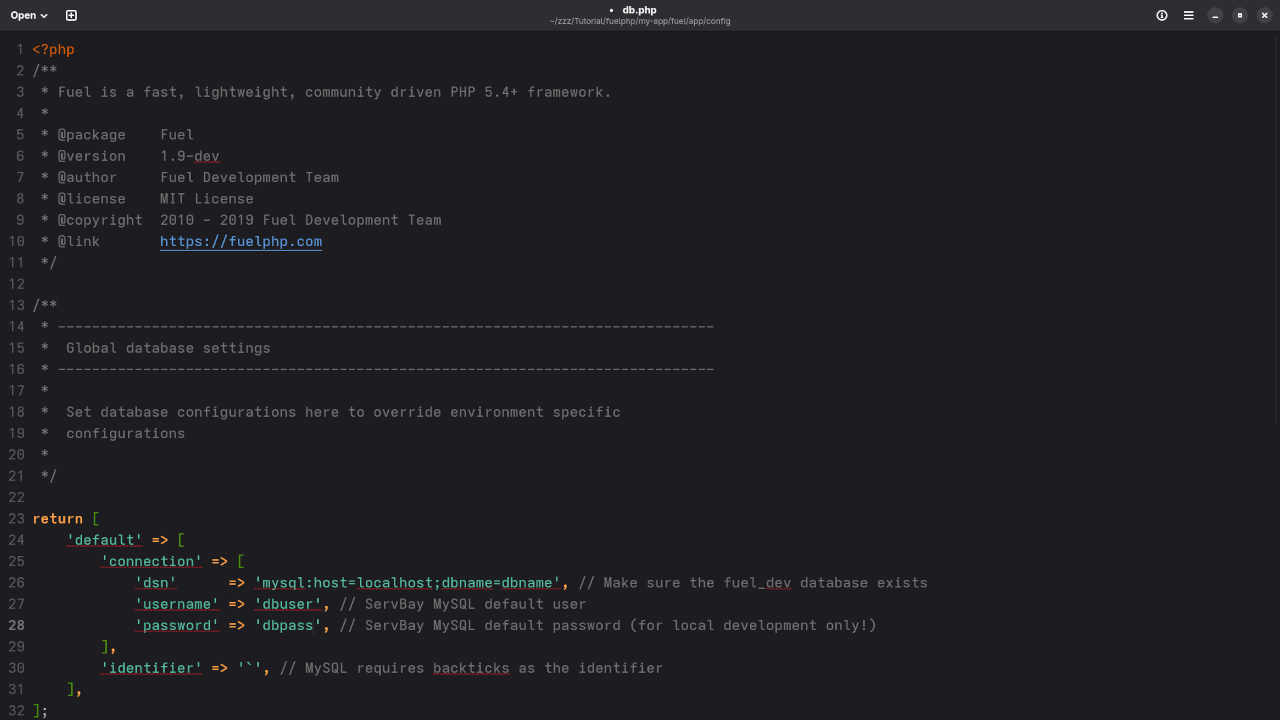
Make sure your database credentials (username, password, etc.) are stored in your fuelphp/config/db.php configuration file.
Step 3: Writing the FuelPHP Application
Now that the database is set up, let’s write a simple FuelPHP application that fetches all the users from the users table and displays them as HTML.
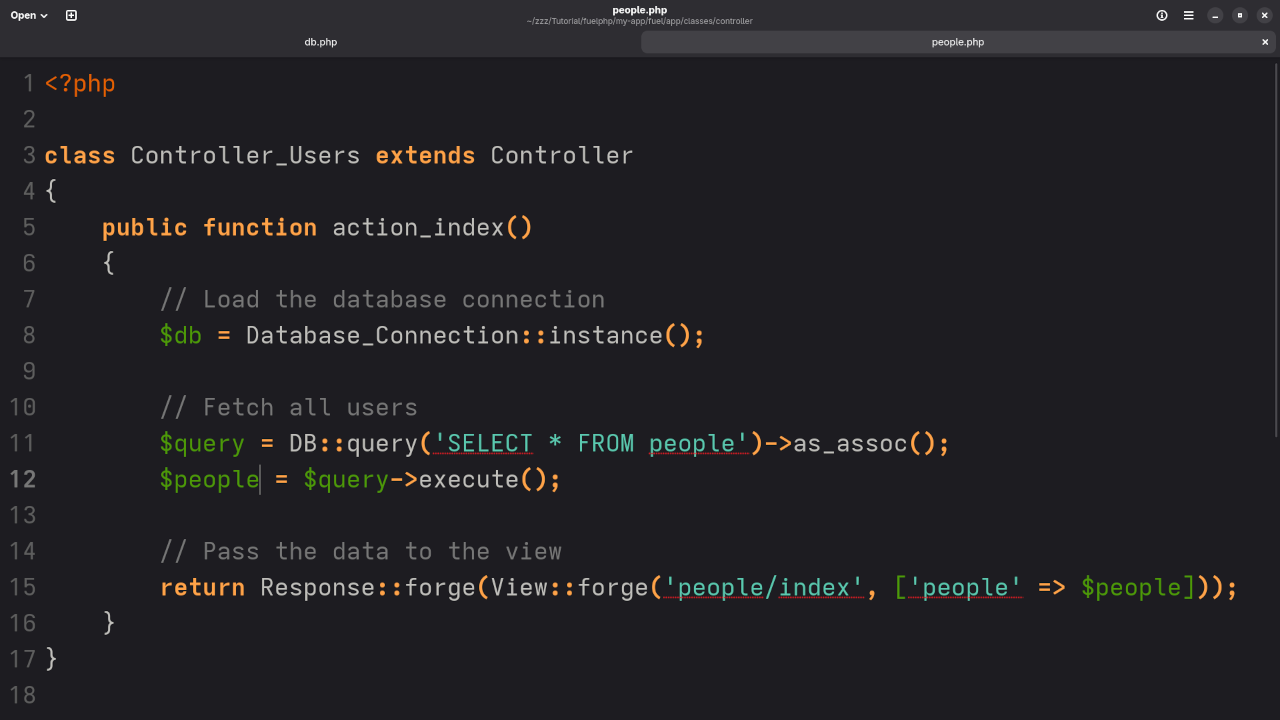
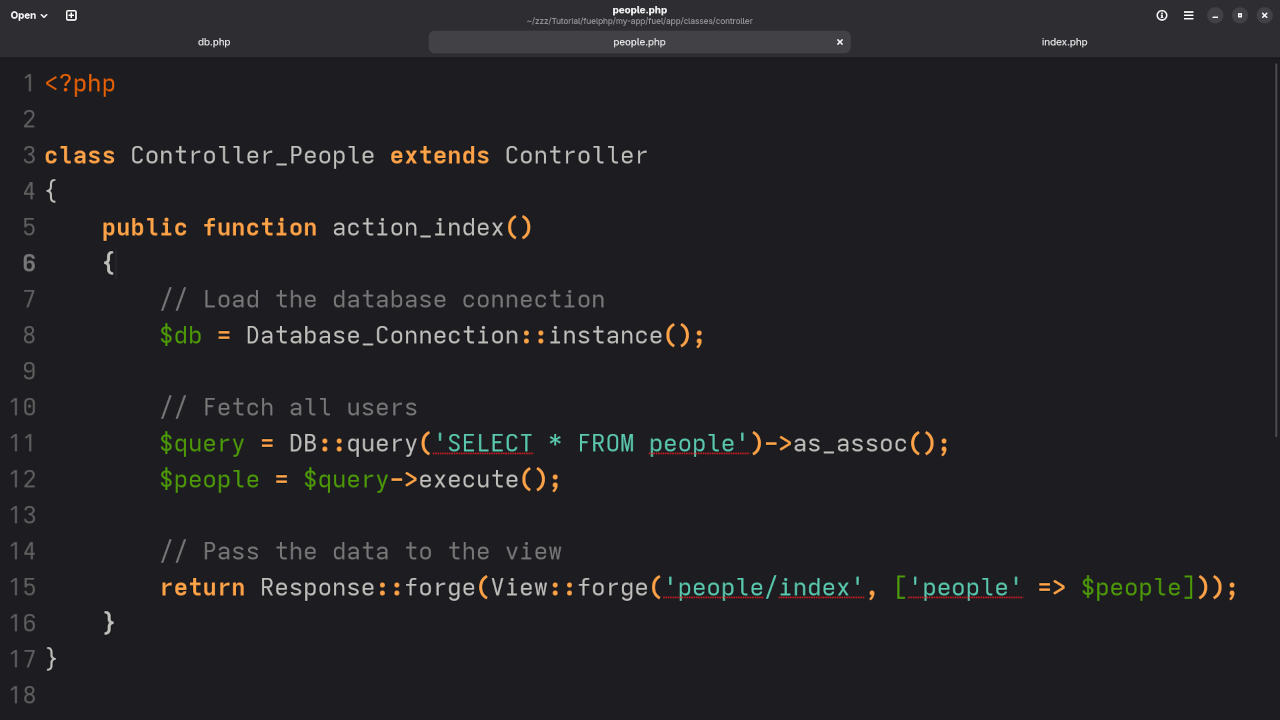
Create a Controller
In FuelPHP, controllers handle the logic of your application. Let’s create a controller that will fetch the users from the database.
Create a file fuel/app/classes/controller/users.php:
class Controller_Users extends Controller
{
public function action_index()
{
// Load the database connection
$db = Database_Connection::instance();
// Fetch all users
$query = DB::query('SELECT * FROM users')->as_assoc();
$users = $query->execute();
// Pass the data to the view
return Response::forge(View::forge('users/index', ['users' => $users]));
}
}
Create a View
Views are responsible for displaying data to the user. Let’s create a simple view to display the users.
Start the application by running the built-in FuelPHP server:
php oil server
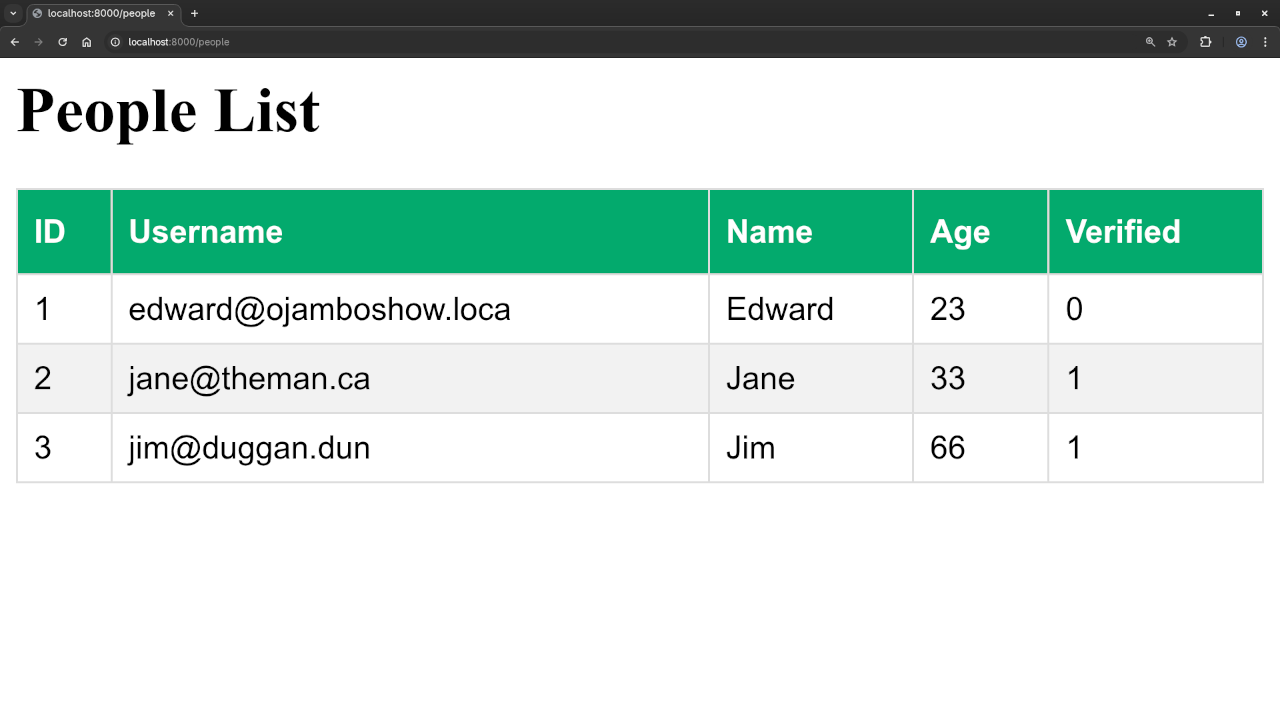
Now, you should be able to visit your application in your browser at http://localhost:8000/users and see the list of users fetched from the MariaDB database displayed as an HTML table.
Step 4: Embedding a Screenshots and a Screencast
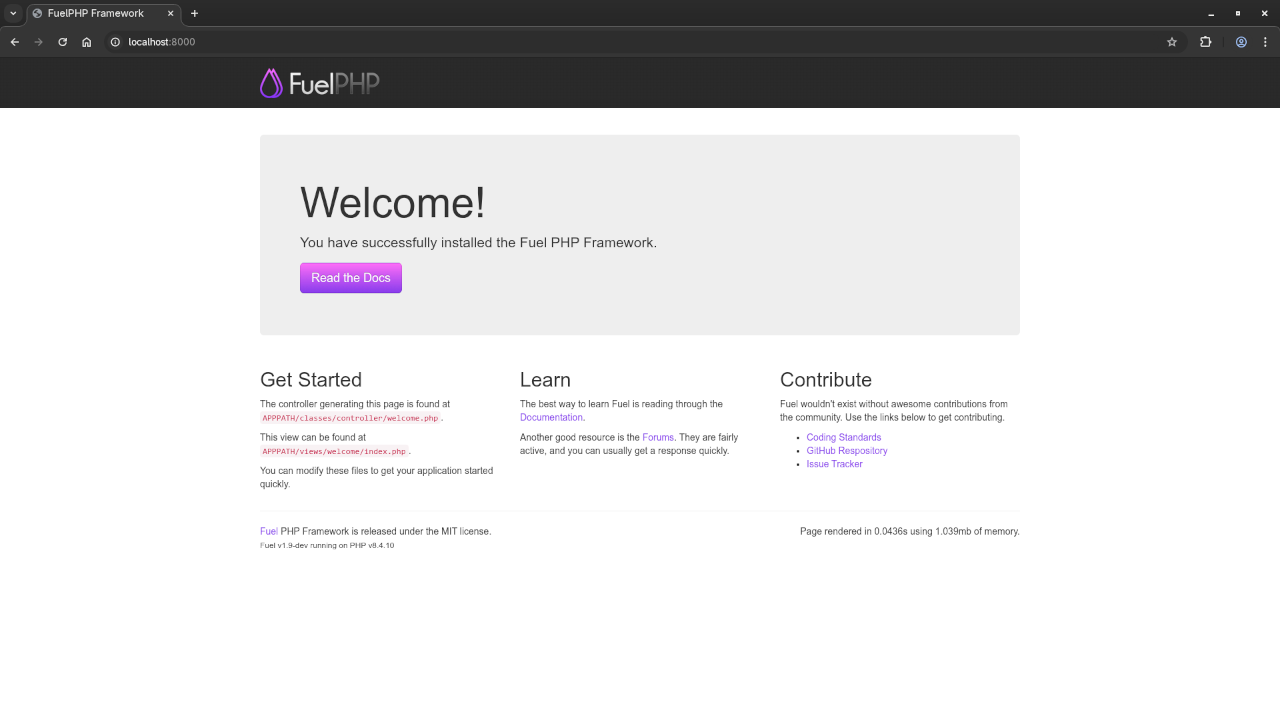
Command Line Installation Of FuelPHP Web FrameworkGnome Text Editor Displaying Configuration FileGnome Text Editor Displaying Custom People ControllerGnome Text Editor Displaying Custom People ViewWeb Browser Displaying Custom People Route Result
To make this tutorial even easier to follow, I’ve created a live screencast demonstrating the entire process. You can watch it below for a step-by-step walkthrough:
FuelPHP Custom View Records In Web Browser
Conclusion
In this post, we’ve learned how to set up a simple FuelPHP application that connects to a MariaDB database, fetches data, and outputs it as HTML. FuelPHP’s MVC architecture makes it easy to organize your code and interact with databases, helping you build efficient and maintainable web applications.
If you’re new to PHP development, consider checking out my book Learning PHP for more in-depth coverage on PHP programming. I also offer a comprehensive Learning PHP Course for those who prefer a more structured approach to learning.
Additionally, I offer one-on-one programming tutorials, as well as assistance with updating or migrating FuelPHP Framework applications. You can learn more and reach out here.