Git is an essential tool for version control, enabling developers to track changes, collaborate effectively, and manage code repositories. However, sometimes you may want to undo changes, whether it’s to revert a mistaken commit or just to roll back to an earlier state of your project. This post will guide you through three important Git commands to undo changes: git checkout, git reset, and git revert.
Since Git is open-source software, it’s freely available and widely used by developers around the world. Understanding these commands is crucial for managing your codebase effectively and avoiding unnecessary headaches. Let’s dive into these three commands and how to use them.
1. git checkout: Discard Changes in Your Working Directory
What It Does:
git checkout is typically used to switch between branches, but it can also be used to discard changes in your working directory. This command allows you to revert files to their last committed state.
How to Use It:
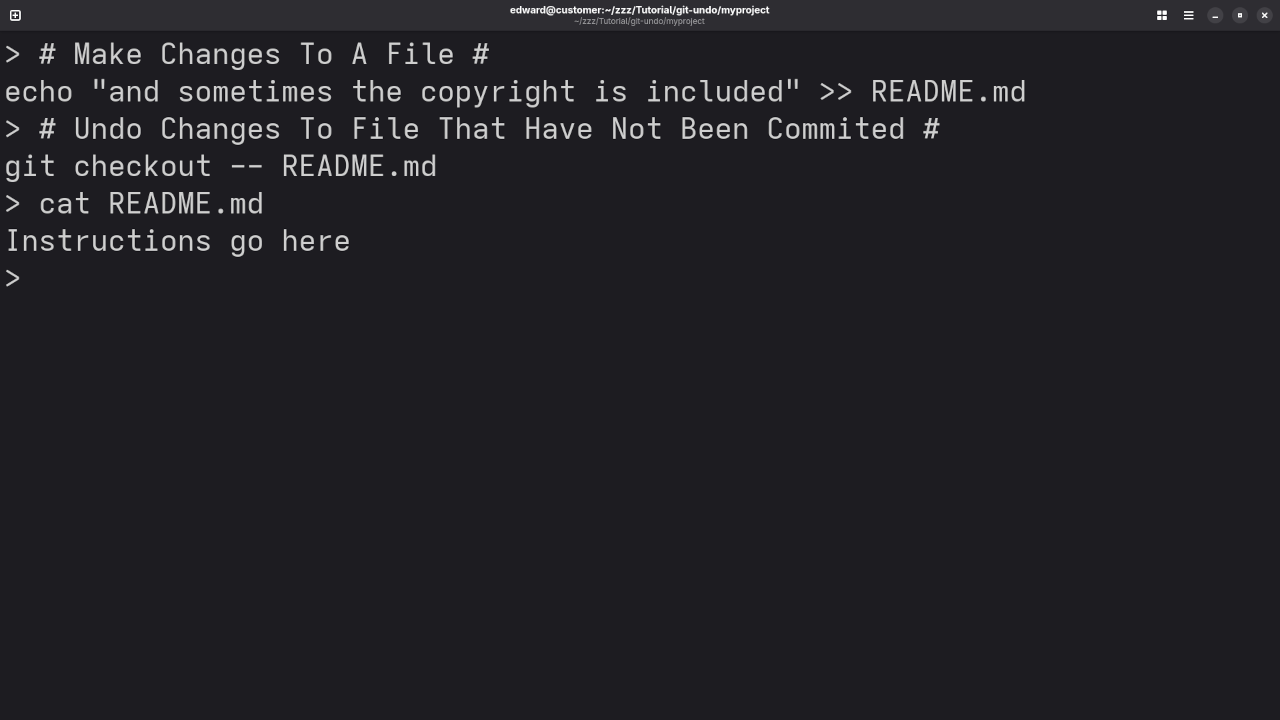
If you’ve made some changes to a file but haven’t committed them, and you want to undo those changes, you can use git checkout followed by the file name.
git checkout -- filename
Example:
Let’s say you’ve made some unwanted changes in the index.html file. You can use:
git checkout -- index.html
This will discard all the changes you’ve made to index.html and return it to the last committed version.
2. git reset: Remove Commits from the History
What It Does:
git reset is used to undo commits by resetting your branch to a previous commit. There are different types of resets:
Soft Reset: Keeps your changes in the working directory.
Mixed Reset: Keeps changes in the working directory, but unstages them.
Hard Reset: Discards all changes in both the working directory and staging area.
How to Use It:
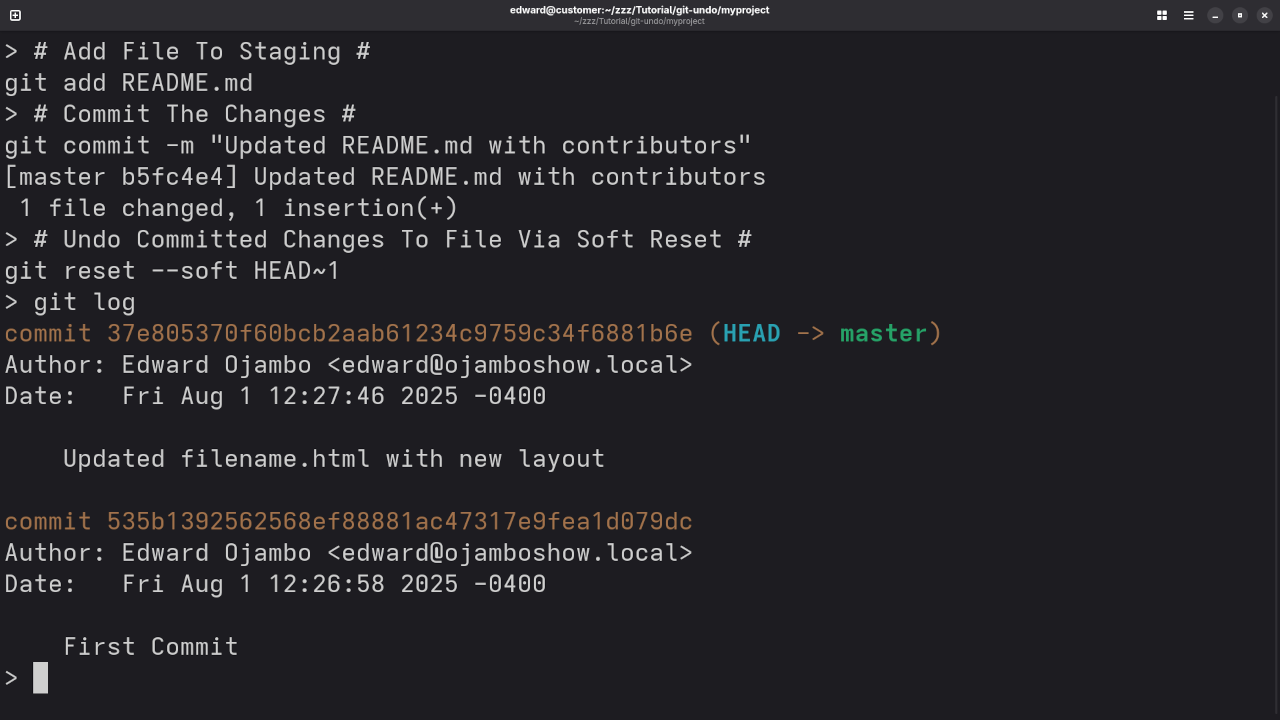
Soft Reset: Keeps your changes but removes the commit from history.
git reset --soft HEAD~1
Mixed Reset: Removes the commit and unstages changes.
git reset HEAD~1
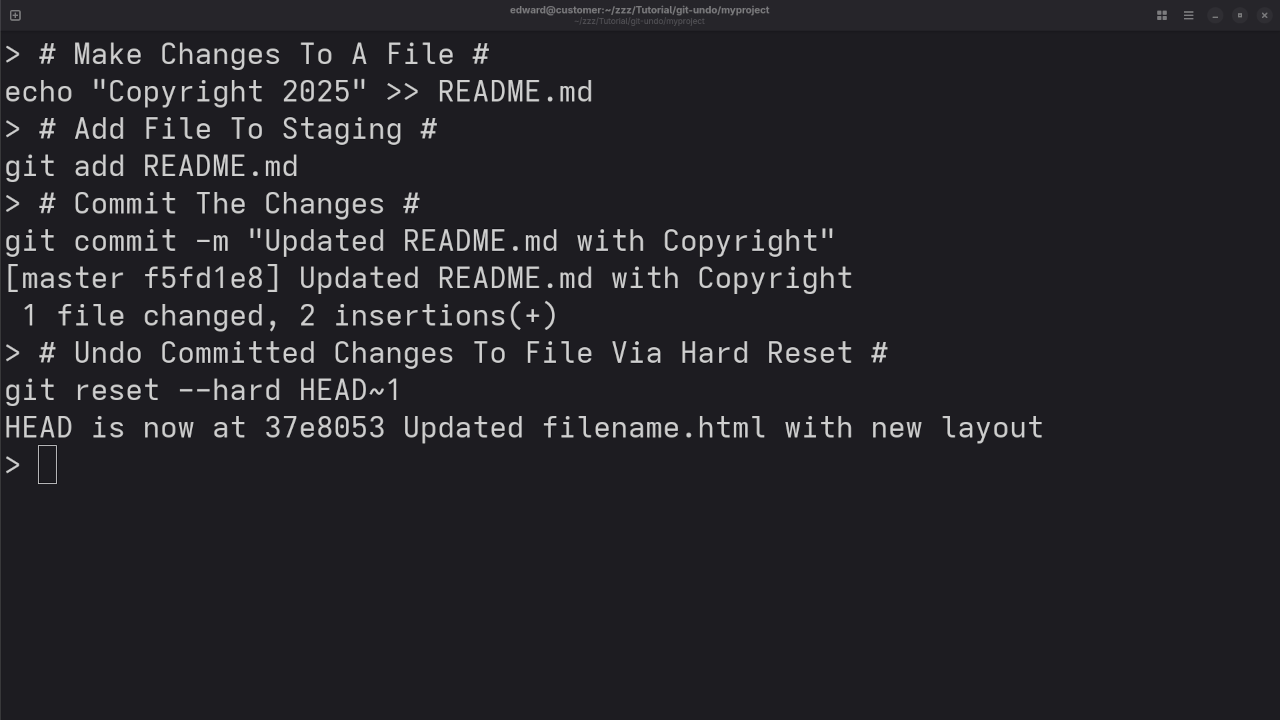
Hard Reset: Removes the commit and any uncommitted changes.
git reset --hard HEAD~1
Example:
To undo your last commit but keep your changes in the working directory, use:
git reset --soft HEAD~1
This will remove the most recent commit but leave your files unchanged.
3. git revert: Create a New Commit to Undo Changes
What It Does:
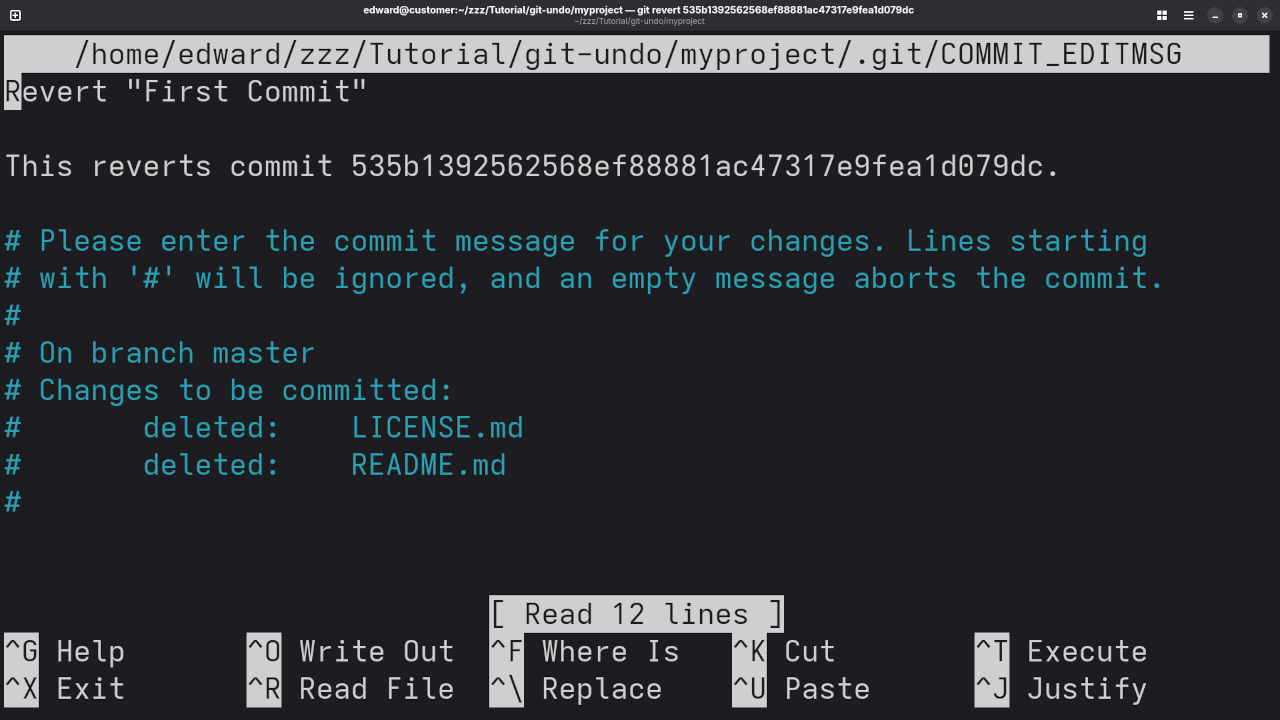
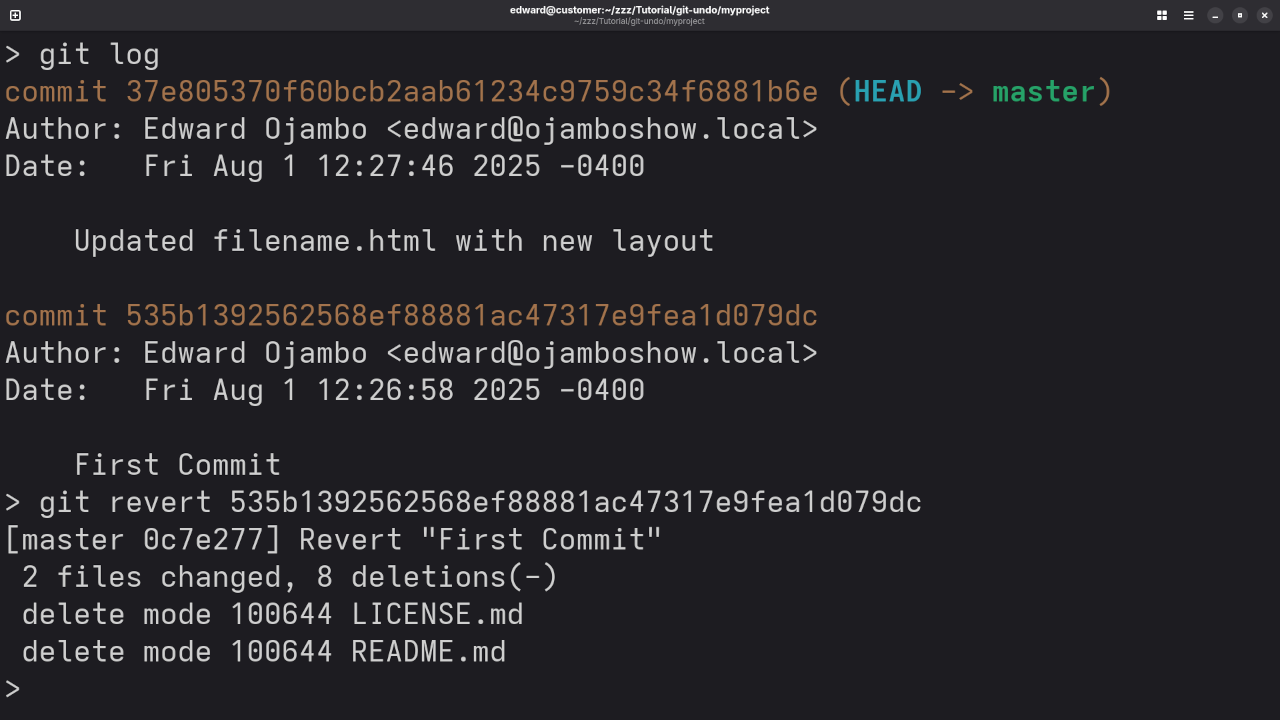
Unlike git reset, git revert doesn’t remove commits from history. Instead, it creates a new commit that undoes the changes introduced by a previous commit.
How to Use It:
To revert a specific commit, use the following command:
git revert <commit-hash>
Example:
If you want to undo the changes from commit abc123, you can run:
git revert abc123
This will create a new commit that undoes the changes from the commit abc123.
Visuals & Video Tutorial
Command Line Git Checkout To Discard Changes In Project FolderTerminal Showing Git Soft Reset To Undo Commits But Keep ChangesTerminal Showing Git Hard Reset Discarding Commits And ChangesTerminal Nano Application Showing Git Revert ConfirmationTerminal Showing Result of Git Revert To A Specific CommitScreencast Of Git Checkout, Reset And Revert To Undo Changes
Additional Resources
For more programming tutorials, tips, and tricks, feel free to explore my other resources:
Programming Books: Check out my programming books on Amazon.
Online Programming Courses: Browse through my collection of courses on Ojambo Shop.
One-on-One Programming Tutorials: If you need personalized help, you can schedule a one-on-one programming tutorial with me here.
Git Installation and Repository Migration: Need help with Git? I can install Git or migrate your repositories here.
Conclusion
Undoing changes in Git is a powerful skill that every developer should master. Whether you need to discard uncommitted changes, remove a commit from history, or create a new commit to revert changes, these Git commands will help you manage your codebase effectively.
Feel free to reach out if you have any questions or need additional assistance with Git or other programming topics. Happy coding!
Getting Started with GNU Emacs: A Powerful Free and Open Source Text Editor
GNU Emacs is one of the most powerful and extensible text editors available, and the best part—it’s completely free and open source. Whether you’re writing code, taking notes, or managing tasks, Emacs can be customized to do nearly anything.
In this post, we’ll introduce GNU Emacs for beginners, explain how to install it—especially on Fedora Linux—and show how it can help with your programming workflow.
What is GNU Emacs?
GNU Emacs is a highly customizable text editor developed as part of the GNU Project. It was created by Richard Stallman and has been maintained by the Free Software Foundation.
License: GNU General Public License (GPL v3 or later)
👉 Screencast showing a beginner session in Emacs—editing, saving files, and navigating buffers.
Emacs Review And Feature Test
Requirements For Programming Text Editor
Glossary:
Code Editor
Designed for writing and editing source code.
IDE
Integrated Development Environment combines various tools need for software development.
Plugin
Software component that adds specific functionality.
Theme
Preset package containing graphical appearance to customize look and feel.
Open source
Freely available for possible modification and redistribution.
SCM
Source code management use to manage and track modifications to a source code repository.
LMB
Left Mouse Button (LMB) or left click
Test Tools
Test System
Name
Description
CPU
Intel(R) i7 2600 @ 3.40GHz.
Memory
16GB DDR3.
Operating System
Fedora Linux Workstation 42.
Desktop Environment
Gnome 48.
Name
Description
Test Suite
Name
Description
Large File
1GB human-readable text.
Regex File
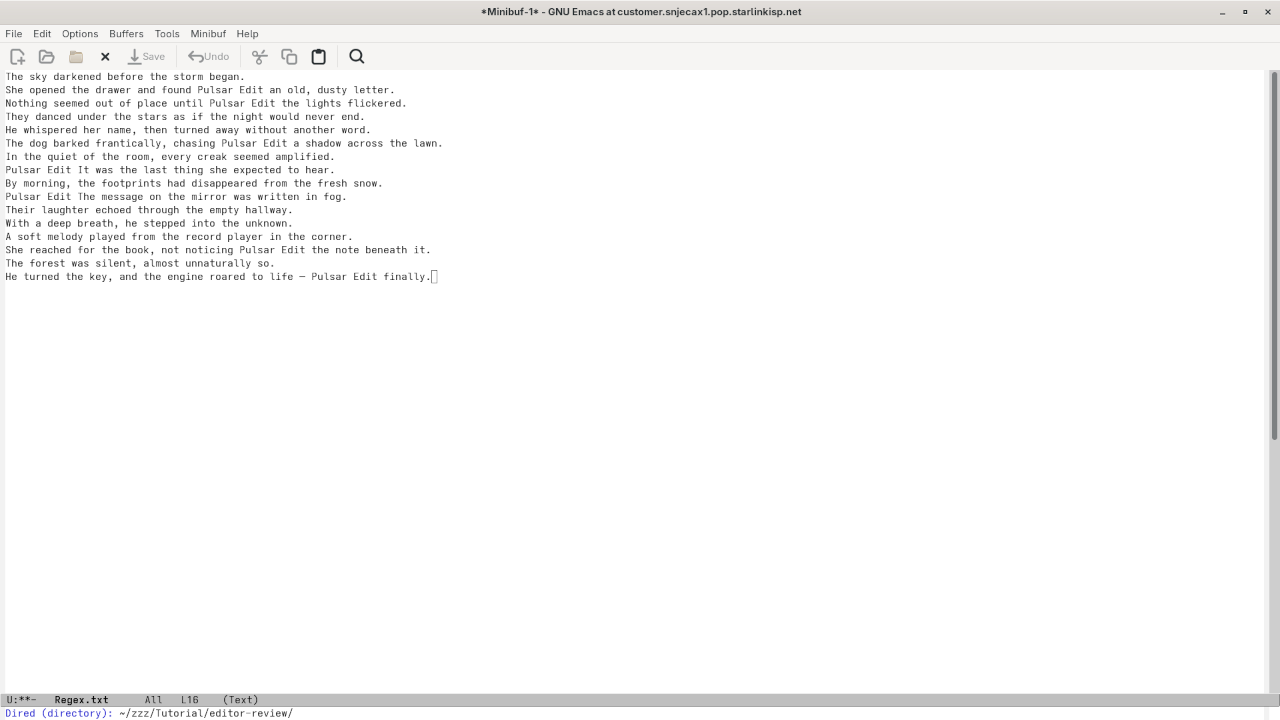
Text with word “Emacs” repeated.
Syntax File
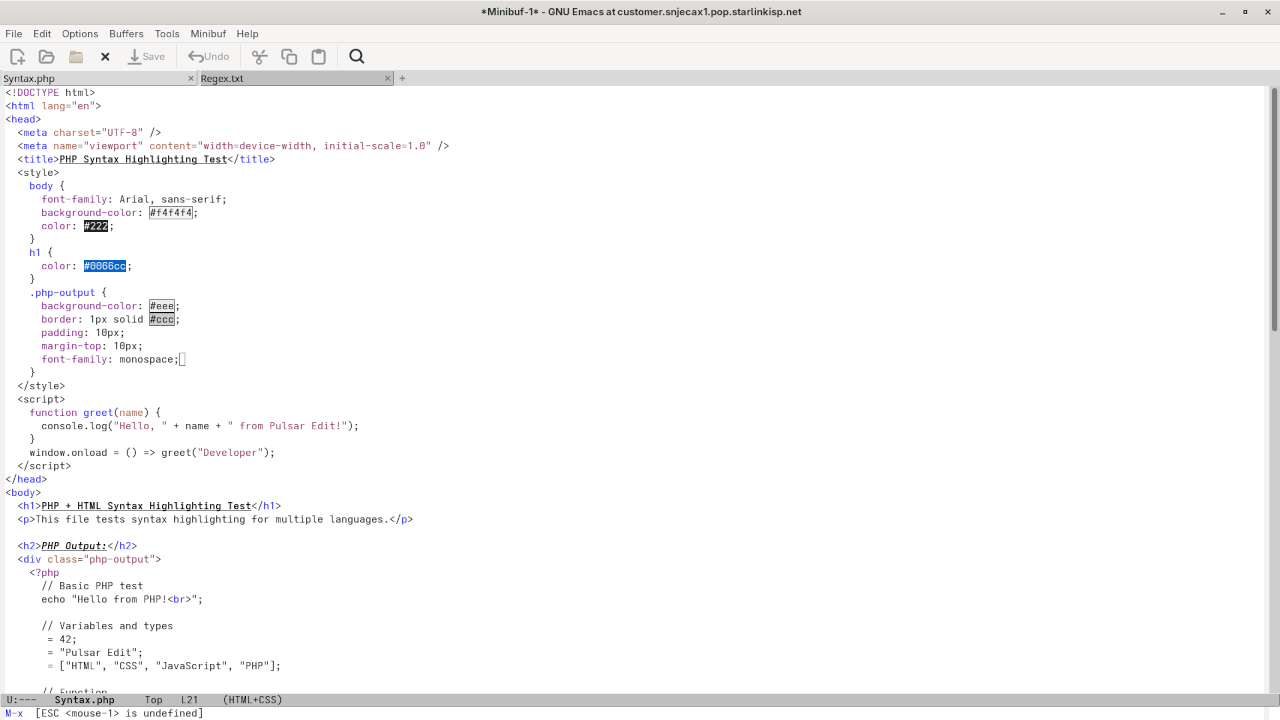
PHP file containing HTML, CSS & JavaScript.
Media File
Smiley face or Tux Linux JPEG file.
Java Version
OpenJDK 21.0.7.
PHP Version
PHP 8.4.10.
Python Version
Python 3.13.5.
Emacs Version
5.5.7.
Name
Description
Test Scoring
Each feature has two parts.
Score of zero indicates a missing feature.
A part of a feature is work a score of 0.5.
Three bias elimination steps were utilized. The editor was used for at least three years on different platforms. Attempts were made to get stable plug-ins for missing features. The same editor was compared between the one in the repository, the developers website, and the compiled version if applicable.
Selecting Editor Version
For this review, Emacs was downloaded from the developers website and it did not require additional plugins.
Features
The theme can be native for the editor in terms of the background. Emacs dark and light themes can be created or downloaded. The score for the theme was a perfect 1.0.
Dragging and dropping a text file into the editor opens a new tab or buffer. It is possible to specify the tab location during the drag and drop operation using M-x tabbar-mode normally ALT-X or ESC-X . The score for drag and drop into editor was a perfect 1.0.
Opening a very large text file did not crash Emacs. A “Emacs” Warning window is shown with an option to continue. It does remember the last session if using recentf-mode and it was possible to edit the large file. The score for opening a large file was 1.0.
Multiple documents can opened in multiple tabs or buffers. Tear-off tabs can be mimicked by having Emacs open the current buffer in a new window as a new instance which is handy for multiple monitors. The score for multiple documents was a perfect 1.0.
Multiple editors can be opened as new tabs with drag options. Each tab window view can be split either vertically or horizontally as a multiple editor view. The score for multiple editor view was a perfect 1.0.
Creating non-project files is possible. Non-project files can be opened by the drag and drop operation. The score for creating non-project files was a perfect 1.0.
Soft word wrap can be enabled on all documents as line wrapping. Automatic soft wrap for documents is available from the Emacs settings. The score for word wrap was a perfect 1.0.
Spell check works as words are typed. Spelling errors are not shown in opened documents automatically until M-x flyspell-mode, but spell check can work if an entire document is selected. The score for spell check was a perfect 1.0.
Word count is available for Emacs. Selection word count is available as M-x count-words-region. The score for word count was a perfect 1.0.
Go to line M-x goto-linecan jump to a specified line. It is possible to jump to either the first or last line. The score for go to line was a perfect 1.0.
Indentation can default to user-defined tab stops. Children are automatically indented. The score for indentation was a perfect 1.0
Fonts can be dynamically scaled using C-x C-+ normally CTRL-X. The system font can be bypassed and a new editor font and size can be set. The score for fonts was a perfect 1.0.
Find and replace M-x replace-string RET or project-wide using regular expressions M-x query-replace-regexp-in-filescan be utilized for all open documents in the current session. Find and replace will work for the current document or a selection in the current document. The score for find and replacing using regular expressions was 1.0.
Multiple language syntax highlighting in one file is enabled if the language plug-ins are installed. Each language has code-sensitive syntax colors which can be modified. The score for multiple language syntax highlighting was a perfect 1.0.
Code folding does not work for markup languages such as HTML. Code folding also does not work for programming languages such as PHP and Java. It can be mimicked using M-x hs-minor-mode RETThe score for code folding was 0.5
Selecting rectangular block per column works using M-x rectangle-mark-mode. Rectangular block selection works with word wrap enabled. The score for selecting rectangular block was a perfect 1.0.
Multiple selection is available for Emacs using the multiple cursors plugin by Magnar Sveen. Search multiple selection is not available. The score for multiple selection was 0.5.
Distraction-free mode to hide panes works. Line numbers can be toggled using M-x display-line-numbers-mode to improve distraction-free mode. The score for distraction-free was a perfect 1.0.
The file manager is available in Emacs using M-x dired. Media files can be dragged and dropped into the file manager pane. The score for file manager was 1.0.
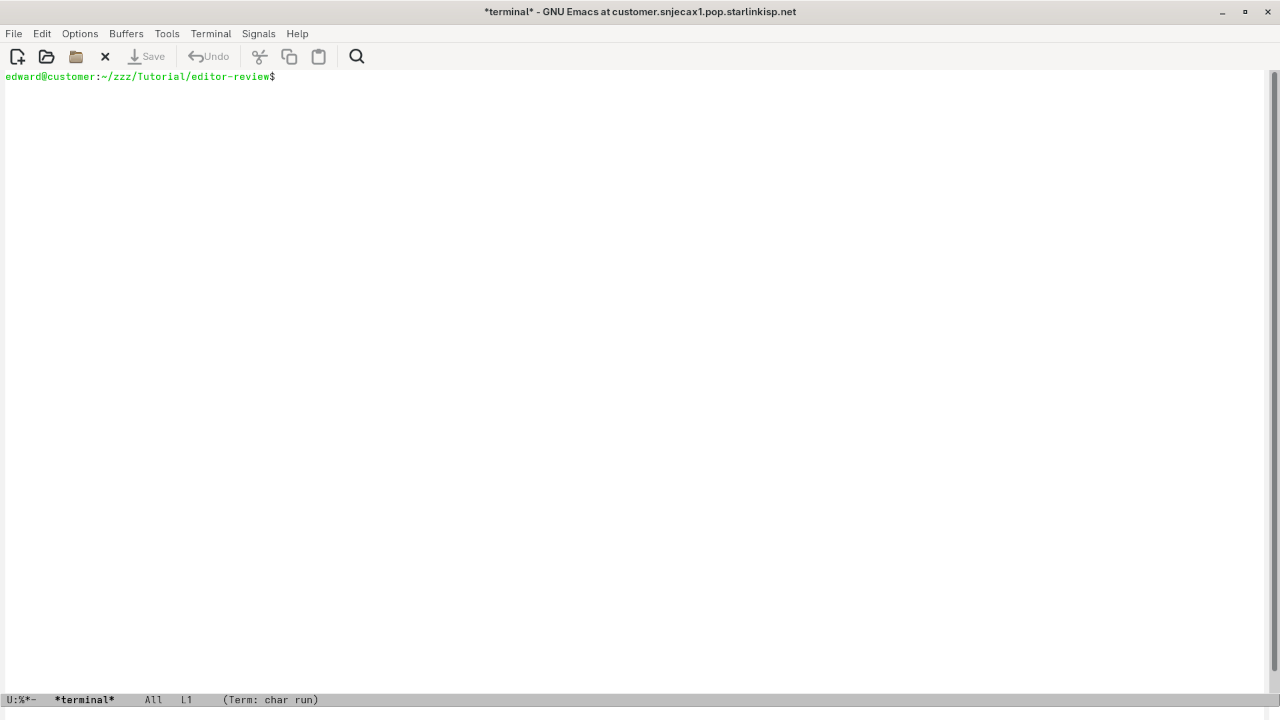
Terminal does not require a plugin and can be invoked using M-x term. The terminal can follow folder. Terminal can execute system commands. The score for terminal was a perfect 1.0
Results
Emacs is a very powerful IDE. By default, the Emacs editor worked without tweaks, and any missing required features can not be installed by using plugins. For my required features, the Emacs editor scored 95.0% or 9.50 out of 10.
Learn More With Edward Ojambo
I provide tools and training to help you get the most out of Emacs and other programming tools:
🎓 Courses: Take structured programming courses at Ojambo Shop
👨🏫 1-on-1 Tutorials: Need personalized help with programming or Emacs? Book an online session with me here
🔧 Emacs Setup or Migration: I can install or migrate your Emacs setup. Contact me at Ojambo Services
Final Thoughts
GNU Emacs might look intimidating at first, but with a little guidance, it becomes an incredibly efficient and powerful tool. If you’re using Fedora Linux or any other platform, you can get started with just a few commands.
Whether you’re just exploring Emacs or looking to make it your daily driver, I’m here to help you along the way.
Setting Up Ghost CMS with MariaDB Using Podman-Compose
Introduction
Ghost is an open-source blogging and content management system (CMS) designed for simplicity, speed, and flexibility. It’s a great alternative to other CMS platforms, especially if you’re looking for a lightweight yet powerful system for blogging. In this guide, we’ll show you how to easily set up Ghost using Podman-Compose, connecting it to a MariaDB database.
Podman-Compose is a great tool for managing multi-container applications, making it easy to orchestrate Ghost and its database using containers. In this tutorial, we will guide you step by step through the process.
Prerequisites
Before we begin, ensure you have the following installed on your system:
Podman
Podman-Compose
A text editor (such as VSCode or Nano)
We also recommend that you have some basic understanding of Docker, Podman, and database management systems like MariaDB. If you’re new to PHP or want to level up your programming skills, check out my book, “Learning PHP”, and my course, “Learning PHP”.
Step 1: Setting Up Podman-Compose
To begin, we need to create a directory where we will store the files for Ghost and MariaDB. Open a terminal and run the following commands:
mkdir ghost-setup
cd ghost-setup
Step 2: Create podman-compose.yml File
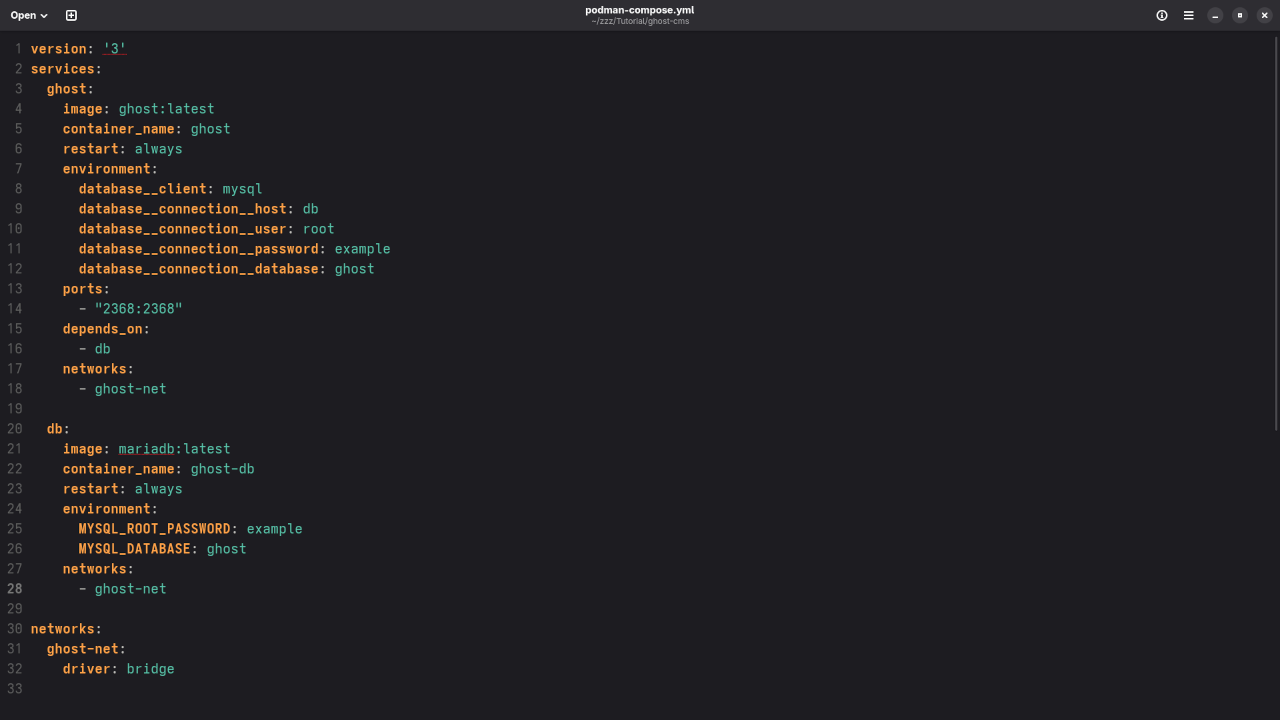
Inside your ghost-setup directory, create a file called podman-compose.yml. This file will define both the Ghost CMS container and the MariaDB container. Add the following configuration:
version: '3'
services:
  ghost:
    image: ghost:latest
    container_name: ghost
    restart: always
    environment:
      database__client: mysql
      database__connection__host: db
      database__connection__user: root
      database__connection__password: example
      database__connection__database: ghost
    ports:
      - "2368:2368"
    depends_on:
      - db
    networks:
      - ghost-net

  db:
    image: mariadb:latest
    container_name: ghost-db
    restart: always
    environment:
      MYSQL_ROOT_PASSWORD: example
      MYSQL_DATABASE: ghost
    networks:
      - ghost-net

networks:
  ghost-net:
    driver: bridge
This podman-compose.yml file defines two services:
Ghost: The CMS running in a container, connected to the MariaDB database.
MariaDB: A database running in a separate container that Ghost will use to store content.
Step 3: Start the Containers with Podman-Compose
Now that your configuration file is ready, you can start the containers using Podman-Compose. In the terminal, run:
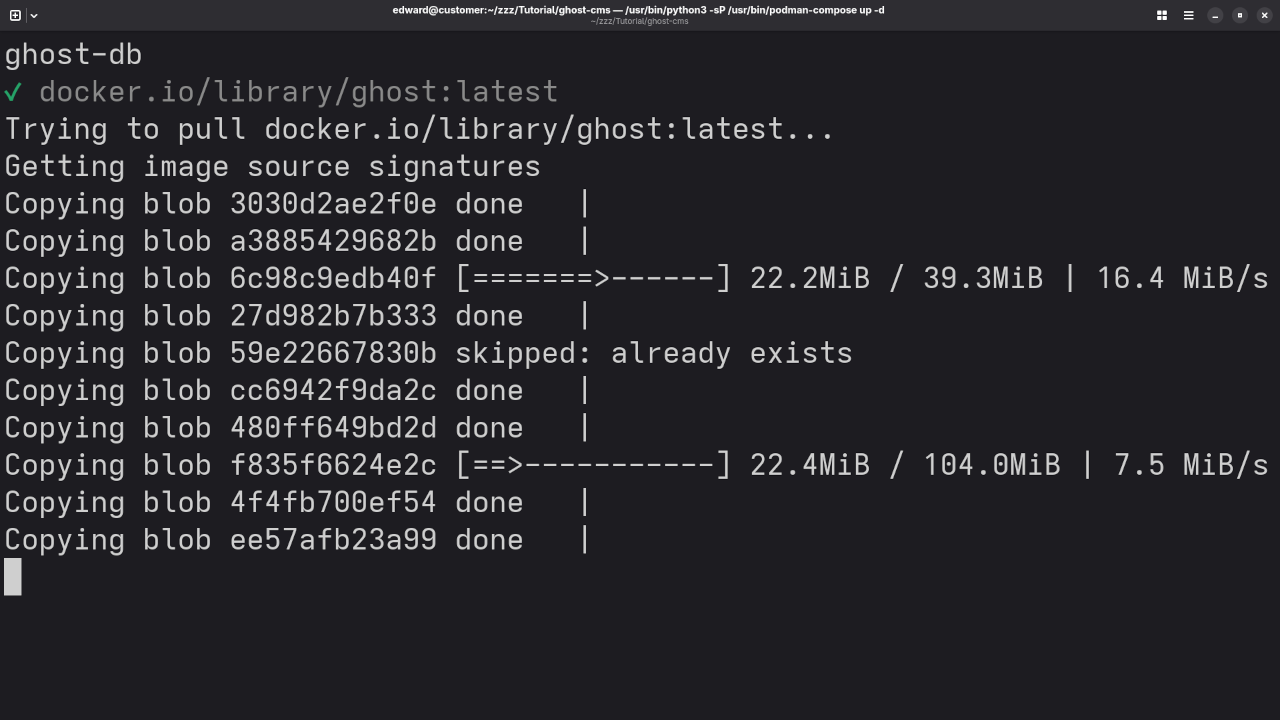
podman-compose up -d
This will pull the necessary images and start the Ghost CMS and MariaDB containers in detached mode.
Step 4: Accessing the Ghost CMS
Once the containers are running, you can access your Ghost blog by visiting:
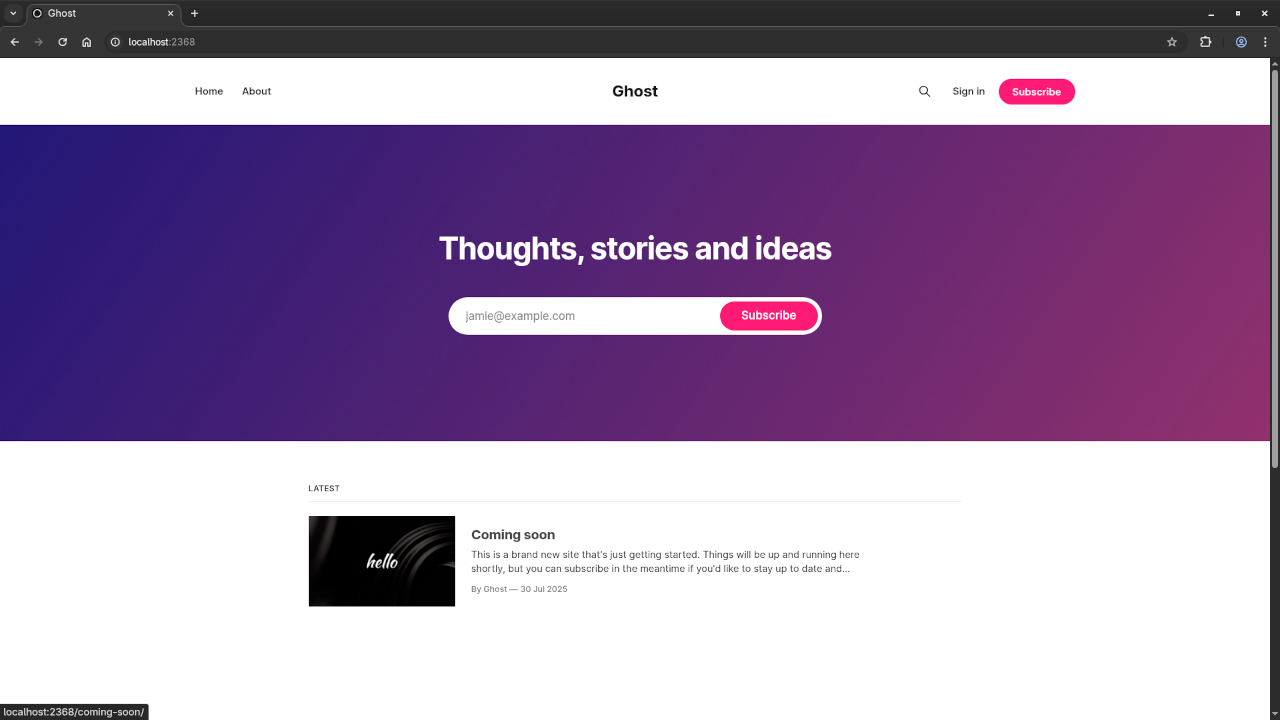
http://localhost:2368
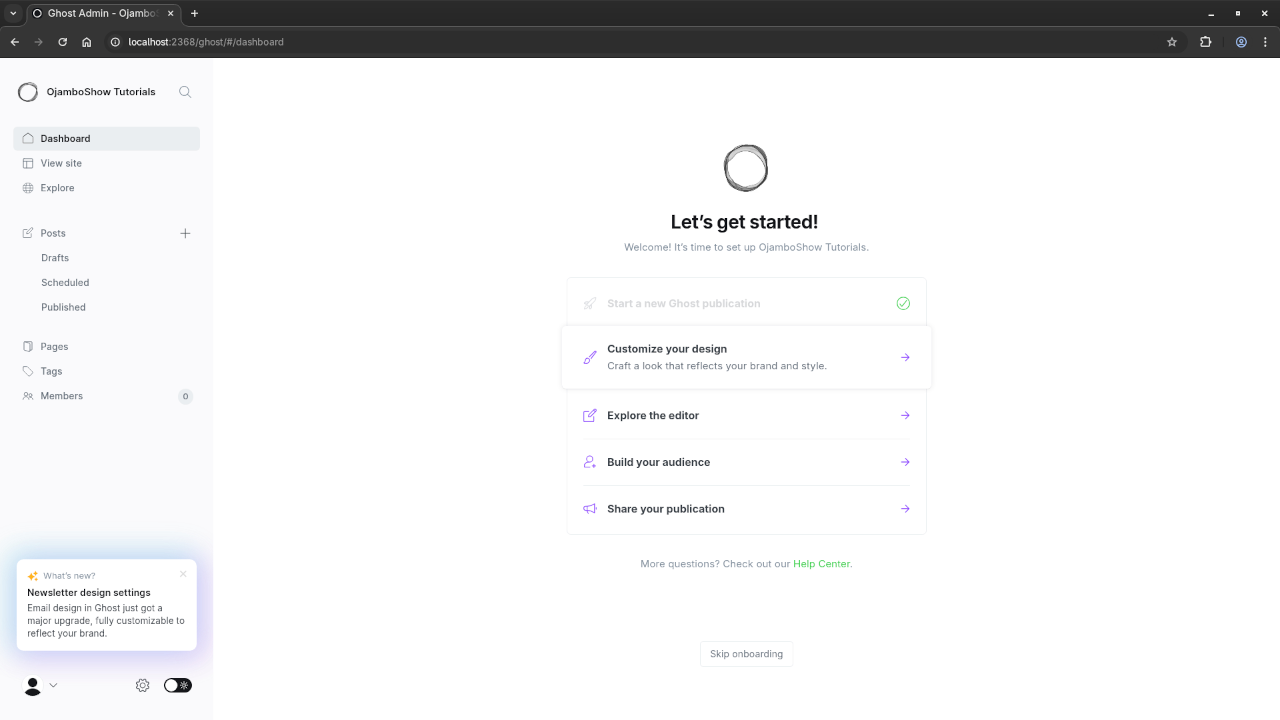
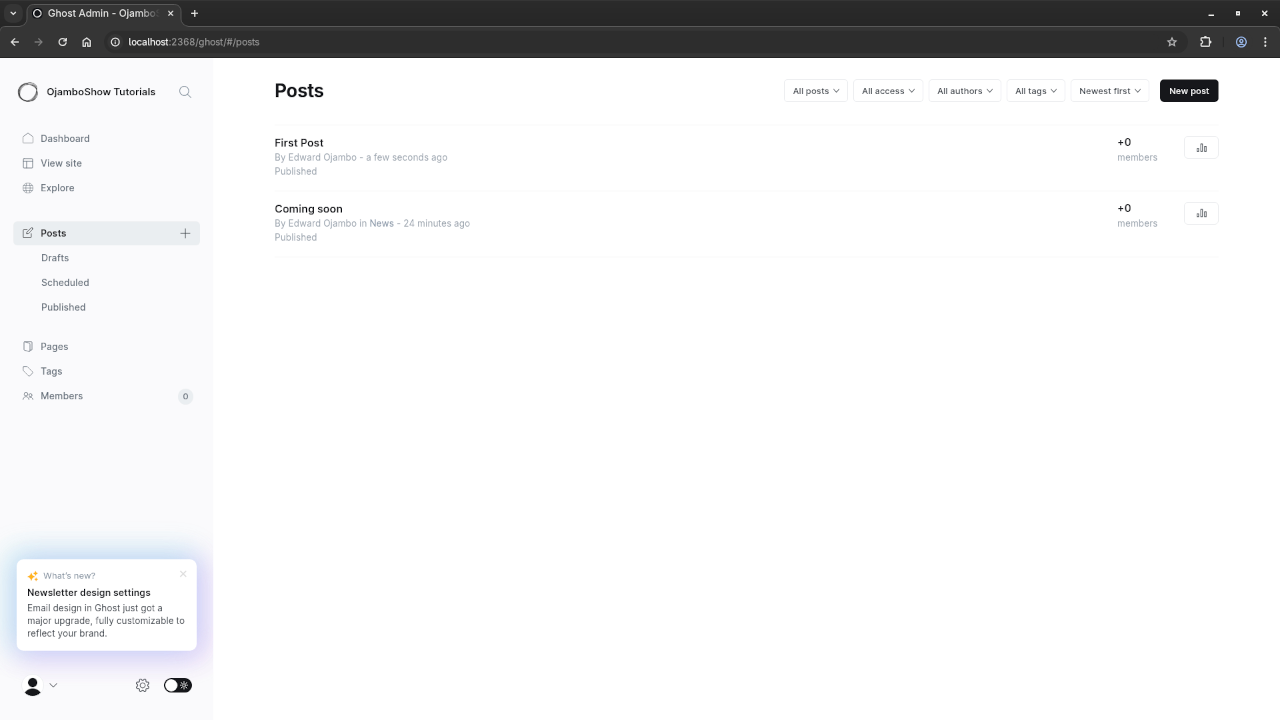
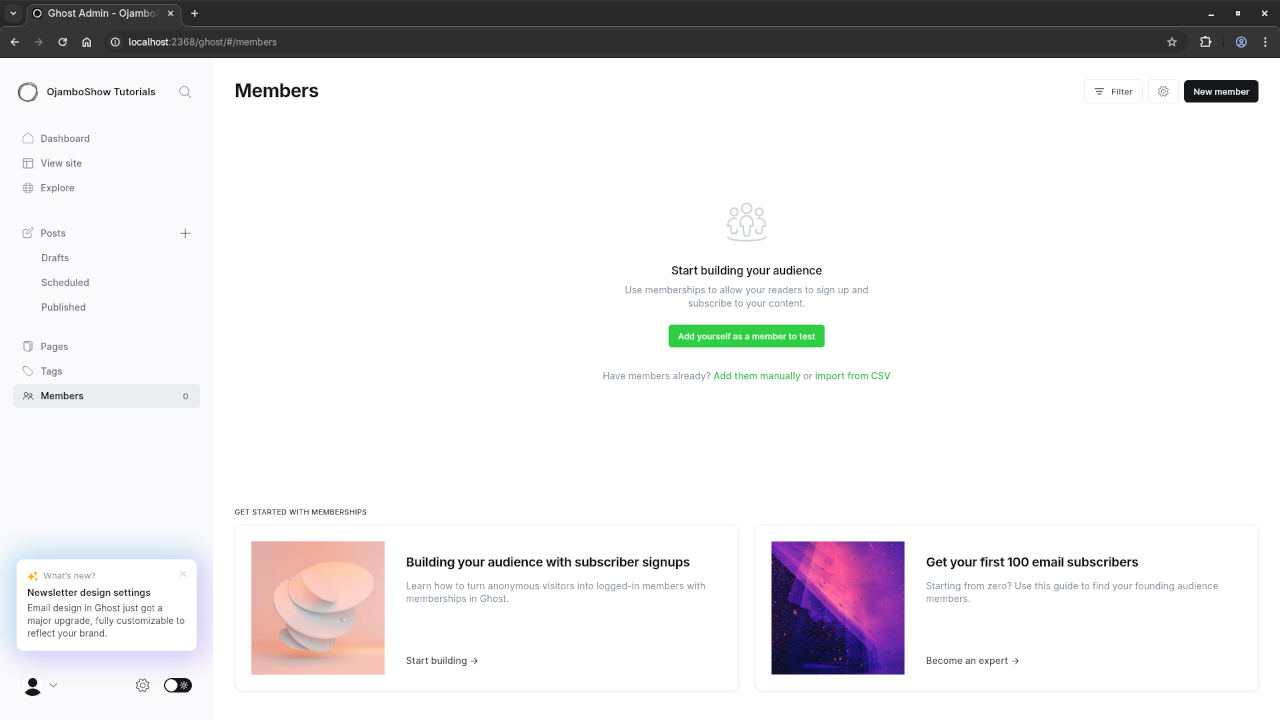
You should see the default Ghost welcome screen. Follow the setup process to create your admin account, and you’re ready to start blogging!
Step 5: Customize Your Ghost Installation
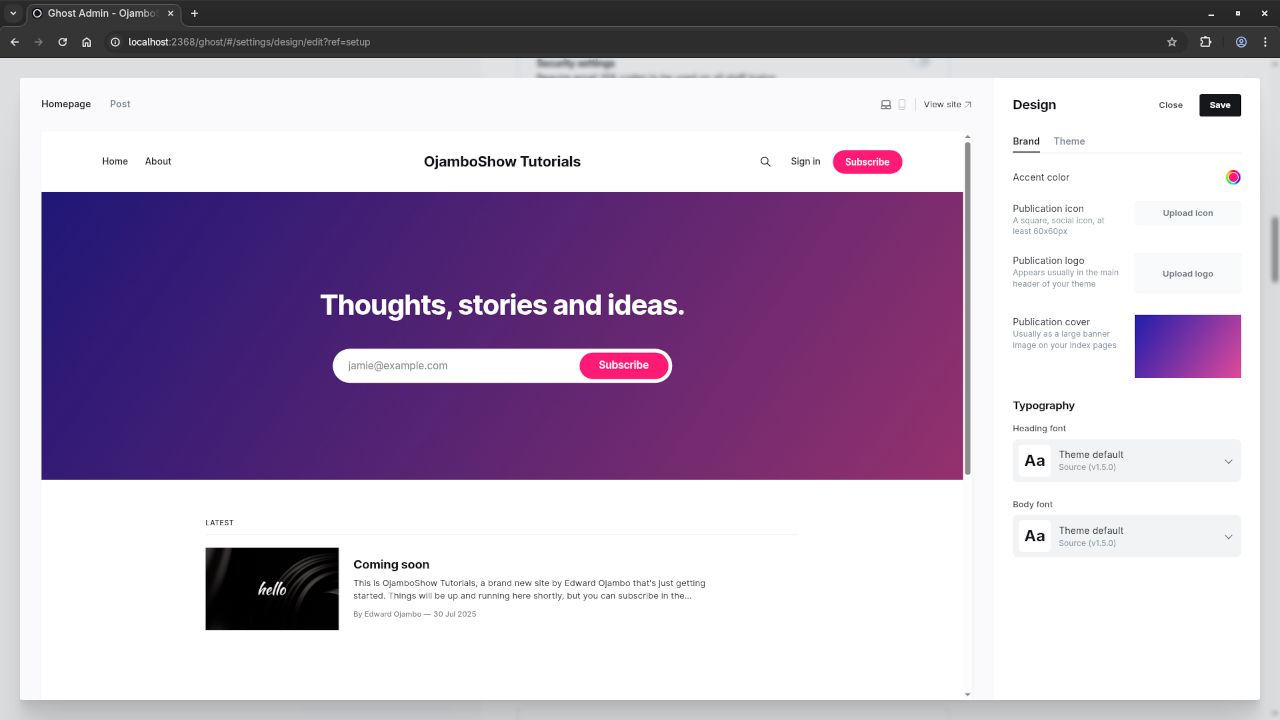
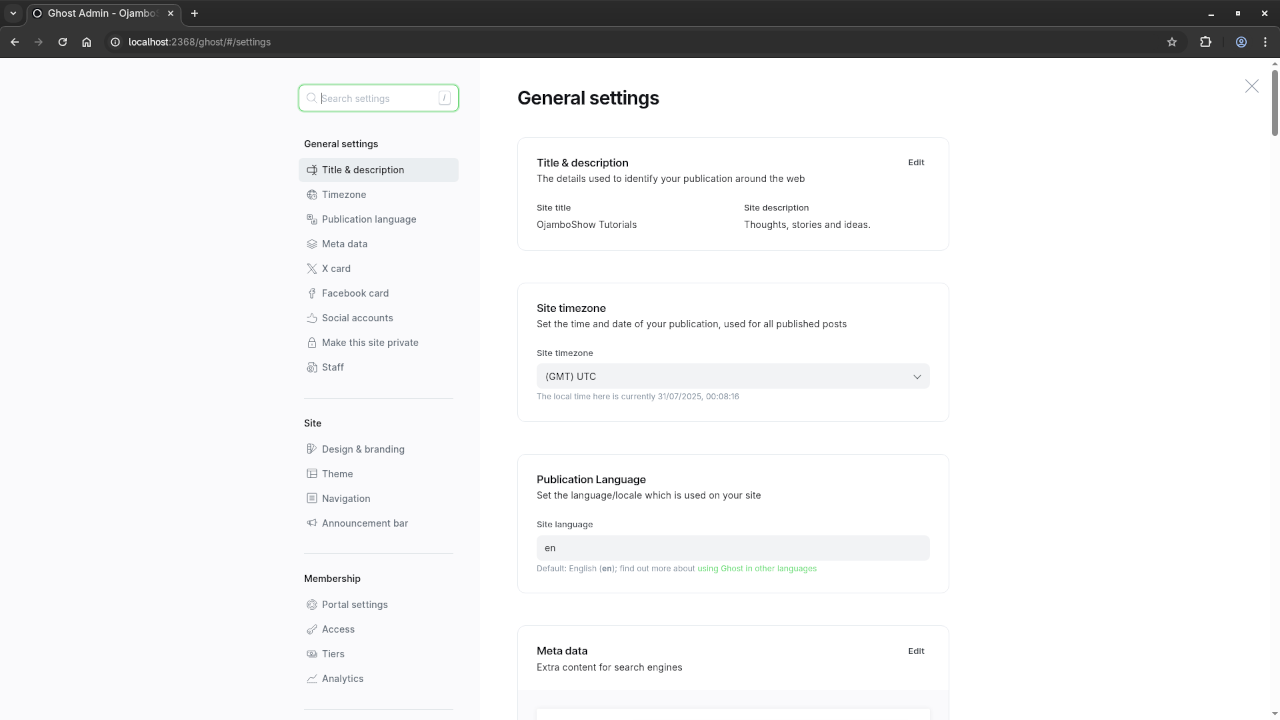
After setting up Ghost, you can start customizing your theme, installing plugins, and writing your blog posts. Explore the Ghost admin interface to make your blog your own.
If you’re new to setting up Ghost or have specific questions, feel free to reach out! I offer one-on-one programming tutorials, including assistance with setting up or migrating your Ghost installation. Visit my contact page for more information.
Conclusion
With these simple steps, you’ve successfully set up Ghost CMS with MariaDB using Podman-Compose. Ghost is a powerful and lightweight platform for blogging, and by connecting it to MariaDB, you’re ensuring a solid database foundation for your blog.
If you’re looking to deepen your PHP skills, check out my book “Learning PHP” and course “Learning PHP”. I’m also available for personalized programming sessions and migration help if needed!
Training TinyGPT 124M in a Podman Compose Container Using Your Own Dataset
In this tutorial, we’ll walk you through how to train the TinyGPT 124M language model in a Podman Compose container. We’ll show you how to:
Train the model on a custom dataset.
Use Podman Compose to containerize the environment for training.
Test the model after training.
TinyGPT is a smaller, lightweight version of GPT-2 that is open-source and can be trained for a variety of NLP tasks. This guide includes all the necessary files, including create_dataset.py, train.py, test.py, and the necessary Dockerfile and podman-compose.yml to run everything in containers.
What is TinyGPT?
TinyGPT is a scaled-down version of GPT-2 (124 million parameters). It’s optimized for tasks that require less computational power, making it a great choice for personal projects or smaller NLP tasks.
TinyGPT is open-source, and we’ll be fine-tuning it with a custom dataset that you provide.
What You’ll Need
1. Podman: Container management tool (alternative to Docker).
2. Podman Compose: To manage multi-container applications.
3. Python 3.6+: For running the training and testing scripts.
4. Hugging Face Transformers: A Python library to interact with pre-trained models like GPT-2.
5. Custom Dataset: A .txt file containing your text data for fine-tuning.
Installation Steps
Let’s get started by setting up TinyGPT using Podman Compose and training it on your custom dataset.
1. Prepare Your Custom Dataset
First, prepare your custom dataset (e.g., a collection of .txt files). For this guide, we assume you have a text file called custom_data.txt with text data you want to use to fine-tune TinyGPT.
2. Create the Dataset Script
We need a script to prepare your dataset in a format suitable for training. Below is the create_dataset.py file that processes the raw dataset into a tokenized format.
from datasets import Dataset
# Create dataset from a text file
def create_dataset(input_file, output_file):
with open(input_file, 'r', encoding='utf-8') as f:
text = f.read().splitlines()
dataset = Dataset.from_dict({'text': text})
dataset.save_to_disk(output_file)
print(f"Dataset saved to {output_file}")
if __name__ == "__main__":
input_file = "/mnt/data/custom_data.txt" # Path to your raw text file
output_file = "/mnt/data/custom_dataset" # Output path for processed dataset
create_dataset(input_file, output_file)
This script reads the text file (custom_data.txt), processes it, and saves it in the datasets format.
3. Create the Training Script
The train.py script will fine-tune TinyGPT (124M) using the custom dataset.
import os
from transformers import GPT2LMHeadModel, GPT2Tokenizer, Trainer, TrainingArguments
from datasets import load_from_disk
# Specify the cache directory for Hugging Face models
cache_dir = "/mnt/cache/huggingface"
# Load the GPT-2 tokenizer and model (from cache if available)
tokenizer = GPT2Tokenizer.from_pretrained("gpt2", cache_dir=cache_dir)
model = GPT2LMHeadModel.from_pretrained("gpt2", cache_dir=cache_dir)
# Set pad_token to eos_token (common practice for GPT models)
tokenizer.pad_token = tokenizer.eos_token # Set pad_token to eos_token
# Ensure the logs directory exists
logs_dir = '/mnt/logs'
os.makedirs(logs_dir, exist_ok=True)
# Load custom dataset from disk
train_dataset = load_from_disk("/mnt/data/custom_dataset")
# Tokenize the dataset
def tokenize_function(examples):
encoding = tokenizer(examples['text'], return_tensors='pt', padding=True, truncation=True)
# For causal language modeling, we need to shift the labels by one position
input_ids = encoding['input_ids']
labels = input_ids.clone() # Clone the input_ids to create labels
labels[input_ids == tokenizer.pad_token_id] = -100 # Ignore padding tokens in the loss calculation
encoding['labels'] = labels # Add the labels to the tokenized data
return encoding
# Apply the tokenization function to the dataset
tokenized_datasets = train_dataset.map(tokenize_function, batched=True)
# Define training arguments
training_args = TrainingArguments(
output_dir="/mnt/models", # Use the cache directory to store the fine-tuned model
num_train_epochs=1,
per_device_train_batch_size=8,
save_steps=10_000,
logging_dir=logs_dir, # Logs will be saved here
logging_steps=500,
save_total_limit=1,
)
# Initialize Trainer
trainer = Trainer(
model=model,
args=training_args,
train_dataset=tokenized_datasets,
)
# Train the model
trainer.train()
# Save the fine-tuned model and tokenizer
model.save_pretrained("/mnt/models/tinygpt-finetuned")
tokenizer.save_pretrained("/mnt/models/tinygpt-finetuned")
print("Training complete. Model and tokenizer saved.")
This script:
Loads the GPT-2 model and tokenizer.
Tokenizes the custom dataset.
Fine-tunes the model using Trainer from Hugging Face’s transformers library.
Saves the fine-tuned model to /mnt/models/tinygpt-finetuned.
4. Create the Testing Script
The test.py script allows you to test the fine-tuned model after training.
from transformers import GPT2LMHeadModel, GPT2Tokenizer
# Path to the cache directory (where the model and tokenizer are saved)
model_dir = "/mnt/models/tinygpt-finetuned"
# Load the fine-tuned model from the cache directory
tokenizer = GPT2Tokenizer.from_pretrained(model_dir)
model = GPT2LMHeadModel.from_pretrained(model_dir)
# Ensure the model is in evaluation mode
model.eval()
# Tokenize the input text
input_text = "The future of AI is"
inputs = tokenizer(input_text, return_tensors="pt")
# Generate output (text continuation)
outputs = model.generate(inputs["input_ids"], max_length=50, num_return_sequences=1)
# Decode the generated text
generated_text = tokenizer.decode(outputs[0], skip_special_tokens=True)
print(f"Input: {input_text}")
print(f"Generated Text: {generated_text}")
This script loads the fine-tuned model and generates text based on an input prompt.
5. Dockerfile and Podman Compose Configuration
Here’s the Dockerfile to set up the environment for training and testing TinyGPT:
# Use Python 3.8 image
FROM python:3.8-slim
# Set working directory
WORKDIR /mnt
# Install necessary dependencies
RUN pip install --upgrade pip \
&& pip install torch transformers datasets
# Copy the local files to the container
COPY ./scripts /mnt/scripts
COPY ./data /mnt/data
# Set environment variables
ENV PYTHONUNBUFFERED=1
# Set default command
CMD ["python3", "/mnt/scripts/train.py"]
Below is the podman-compose.yml configuration file:
version: "3.8"
services:
tinygpt-train:
build: .
volumes:
- ./data:/mnt/data # Mount dataset
- ./scripts:/mnt/scripts # Mount scripts
- ./models:/mnt/models # Mount model output
- ./logs:/mnt/logs # Mount logs output
command: python3 /mnt/scripts/train.py
6. Running the Container
To build and start the training process in a container, use the following commands:
1. Build the container image:
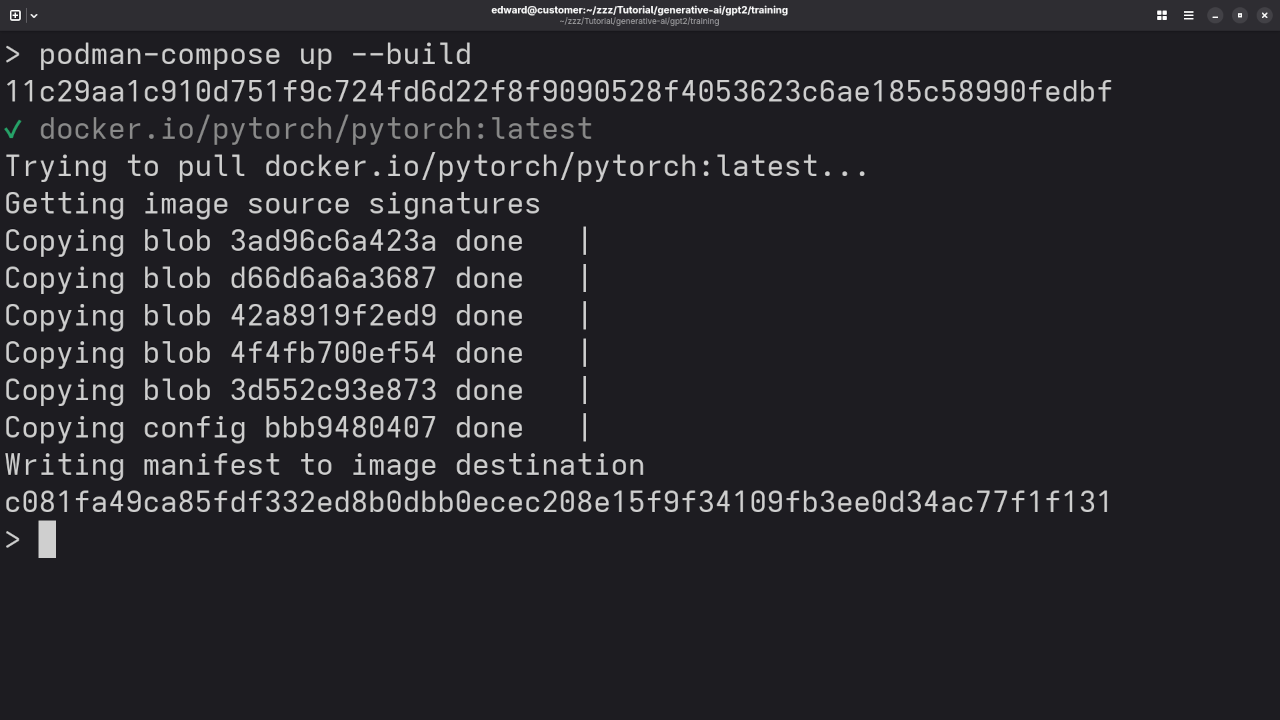
podman-compose up --build
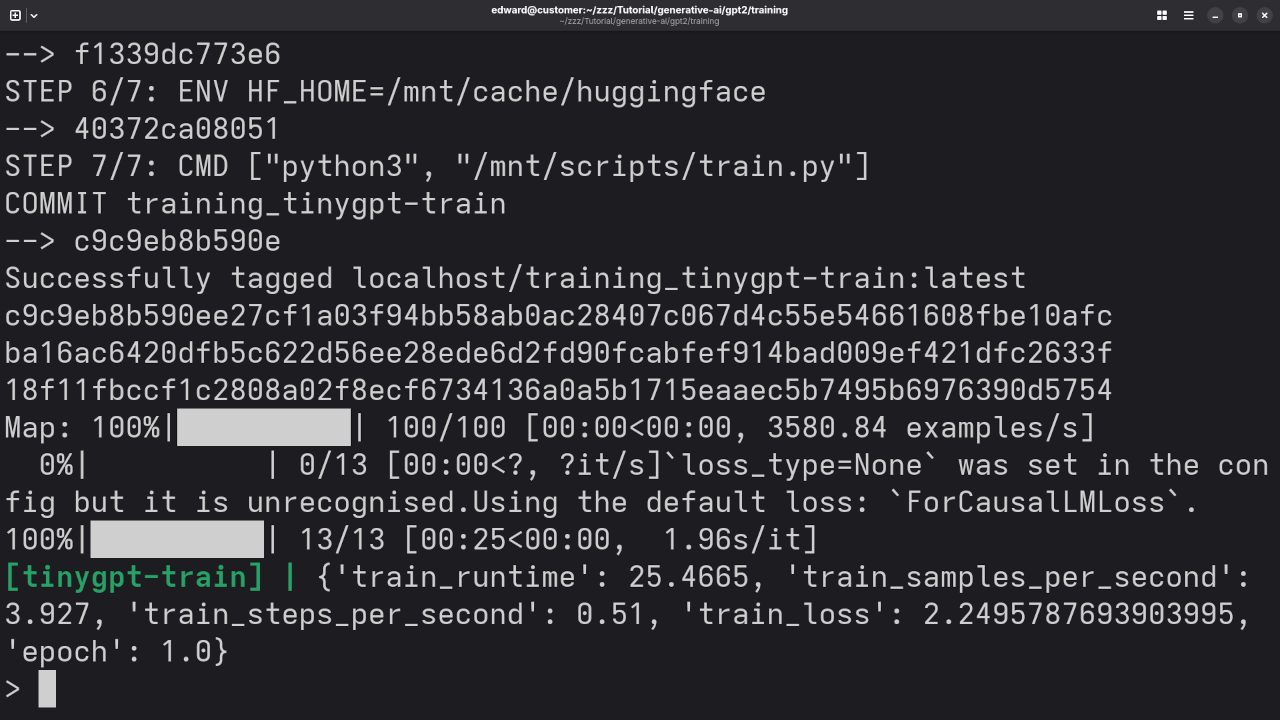
2. Once the training is complete, the model will be saved to /mnt/models/tinygpt-finetuned.
Screenshots and Screencast
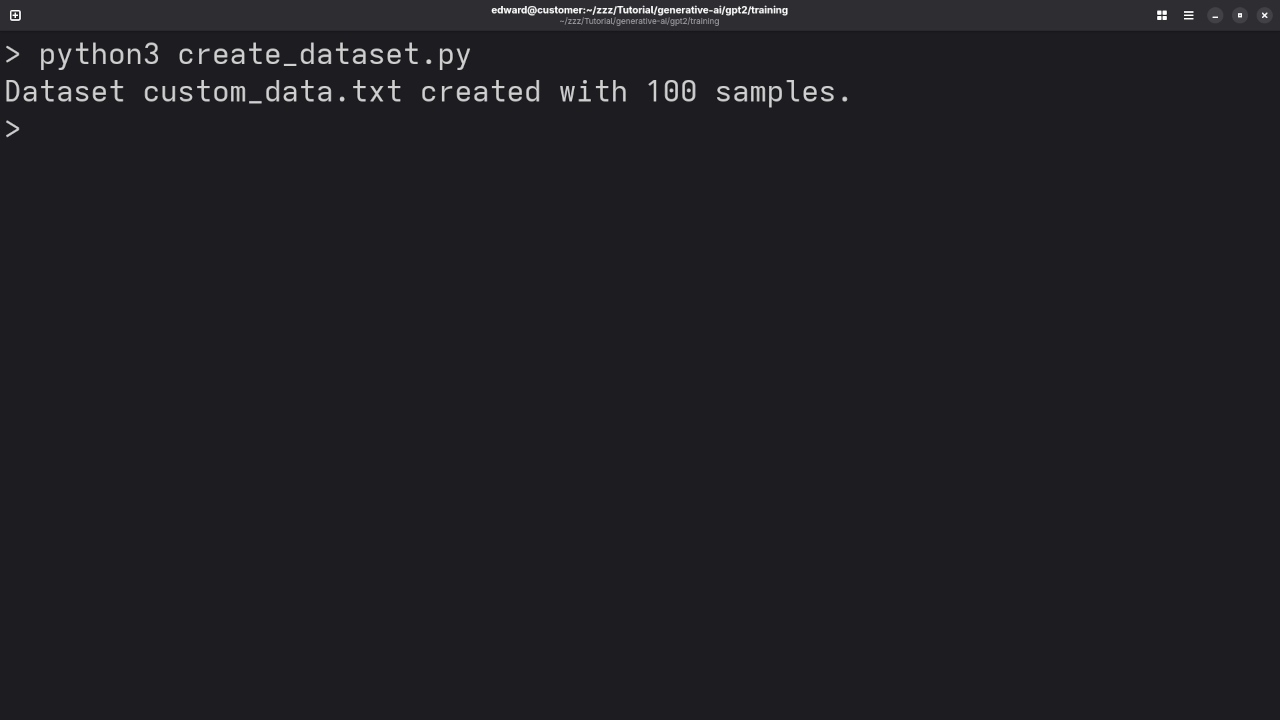
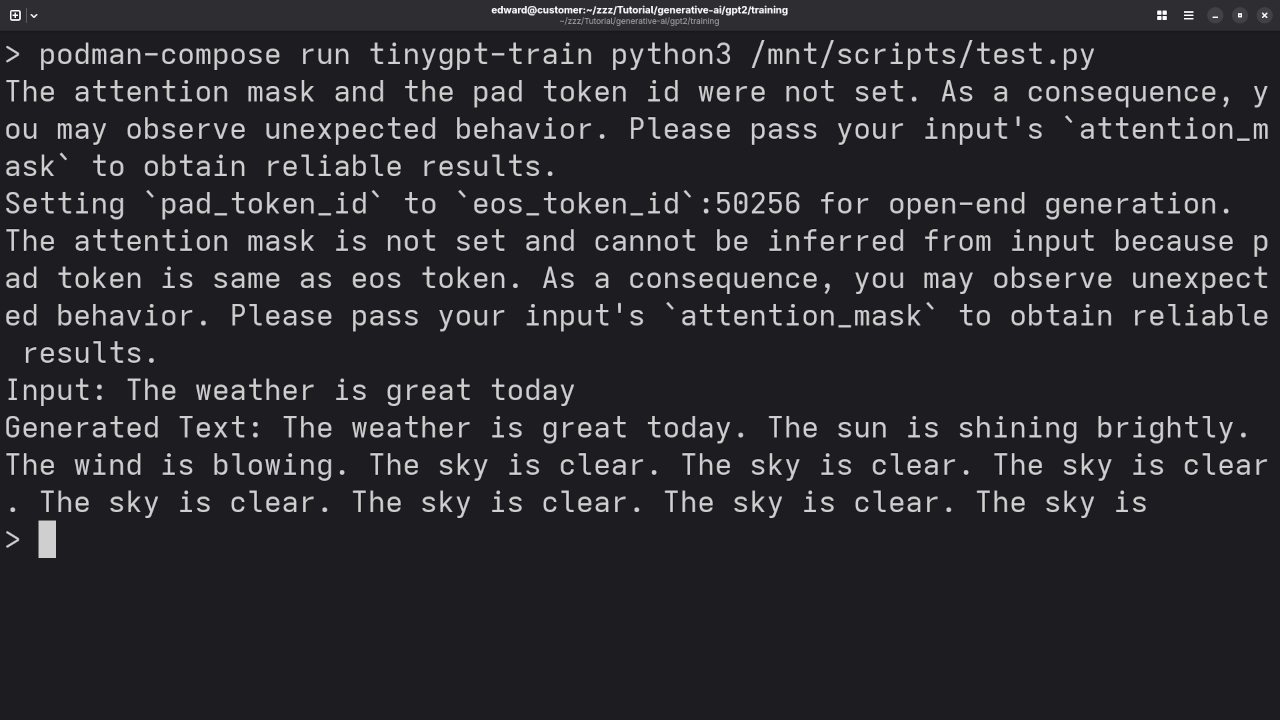
Command Line TinyGPT 124M Dataset Creation.Command Line TinyGPT 124M Custom Build In Podman Container.Command Line TinyGPT 124M Custom Training Dataset In Podman Container.Command Line TinyGPT 124M Post-Training Test.Video Displaying Training TinyGPT 124M In Podman Container
Before and After Training Results
Before Training:
Input: “The future of AI is”
Output: “… uncertain.”
After training on your custom dataset, TinyGPT will produce more relevant and context-aware responses!
Conclusion
In this guide, we’ve walked through the process of training TinyGPT 124M LLM using Podman Compose containers. We’ve created a custom dataset, written the necessary training and testing scripts, and containerized the entire workflow. You now have a trained TinyGPT model that you can use for various NLP tasks!
Getting Started with Flight PHP: MVC and MariaDB Integration Made Easy
Welcome to your first Flight PHP tutorial! Flight is a fast, simple, and extensible micro-framework for PHP that enables you to build web apps and APIs quickly—perfect for beginners and experienced developers alike.
The framework has been actively revived, with community contributions restoring features like route groups, middleware, and a simple database wrapper while maintaining compatibility with v2 apps. See the official docs at docs.flightphp.com and source code at github.com/flightphp/core.
In this beginner’s guide, we will:
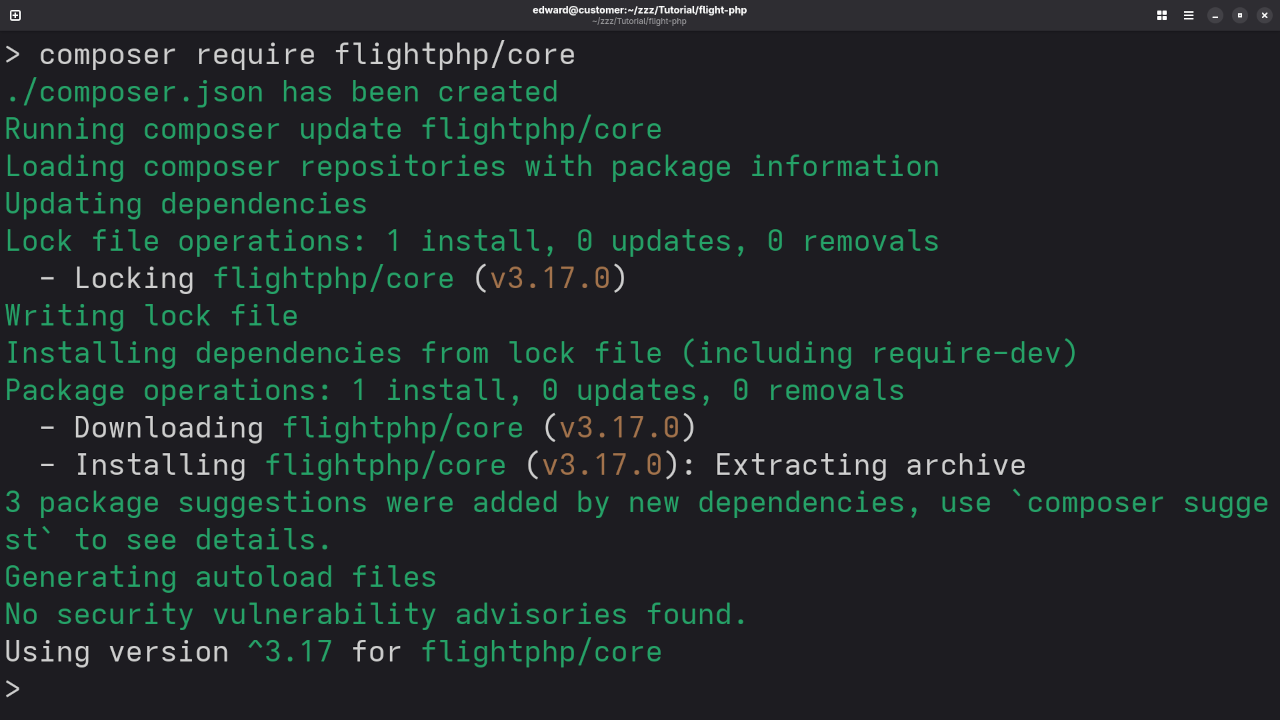
Install Flight PHP v3.17.0 via Composer
Set up a minimal MVC app
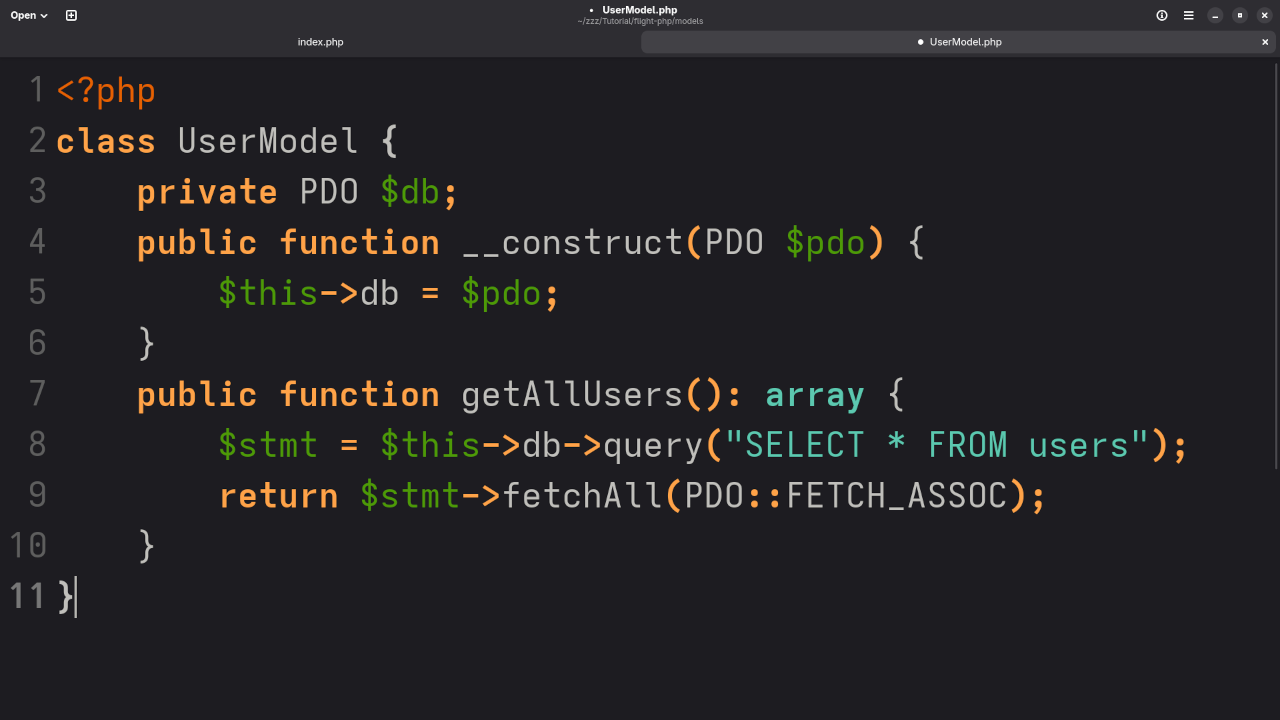
Connect to a MariaDB database and render a list of users
1. Installing Flight PHP v3.17.0 Using Composer
In your project directory, run the following commands:
composer require flightphp/core:3.17.0
This installs version 3.17.0, released July 20, 2025. PHP 7.4+ is required.
CREATE TABLE users (
id INT AUTO_INCREMENT PRIMARY KEY,
name VARCHAR(100),
email VARCHAR(100)
);
INSERT INTO users (name, email) VALUES
('Alice Smith', 'alice@example.com'),
('Bob Jones', 'bob@example.com');
MVC Support Overview
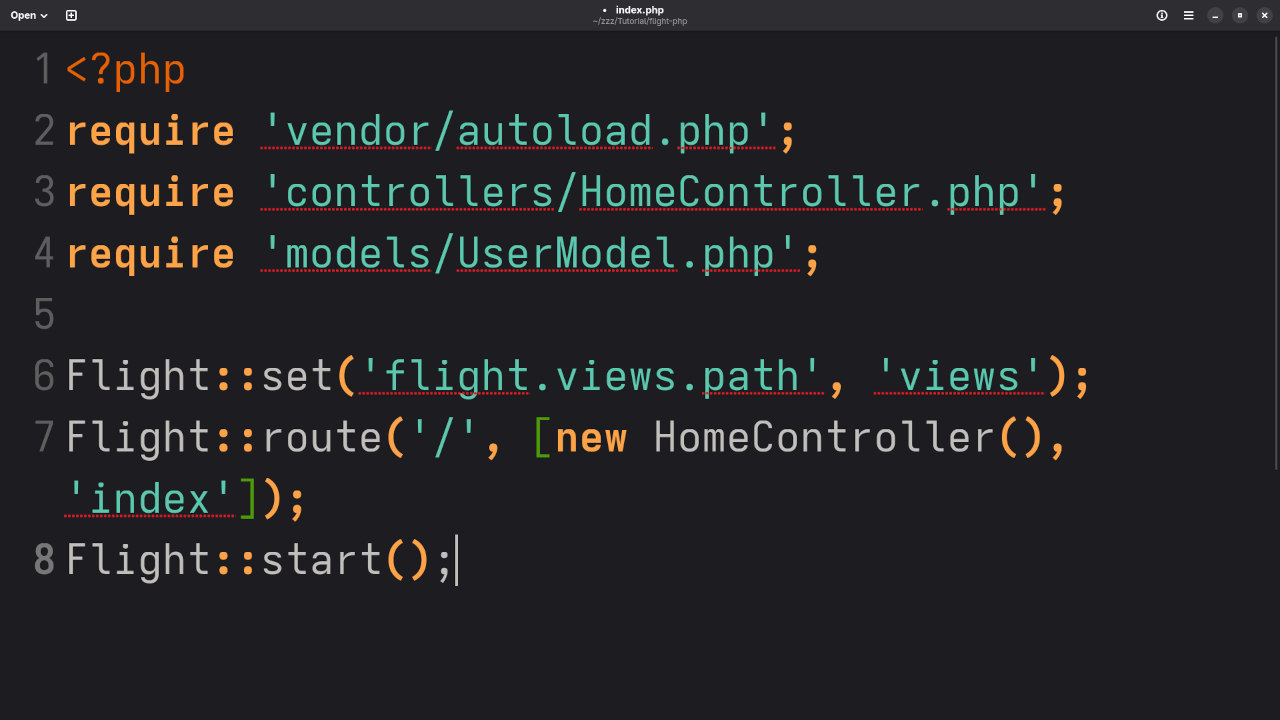
While Flight PHP does not enforce a full MVC directory structure, it fully supports MVC-style routing and templating through Flight::route() and Flight::render(). You can organize your application easily using these features. Learn more in the Flight PHP Docs.
📷 Screenshots & Screencast
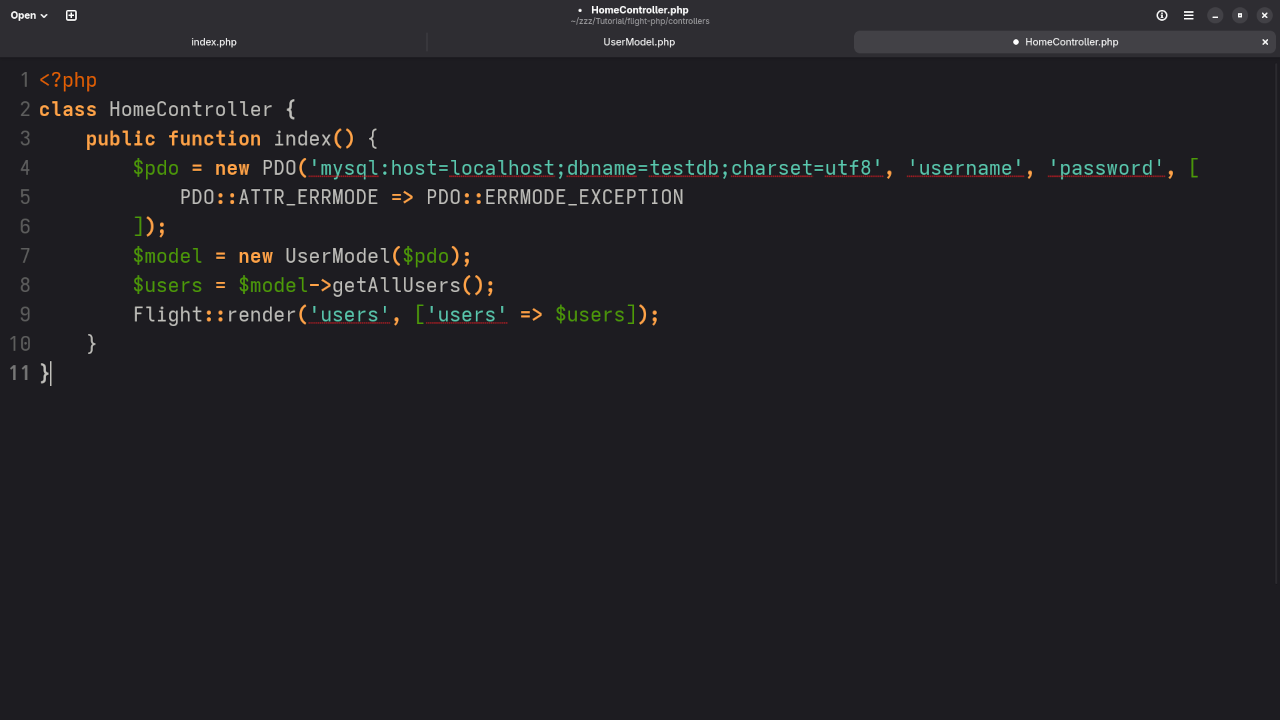
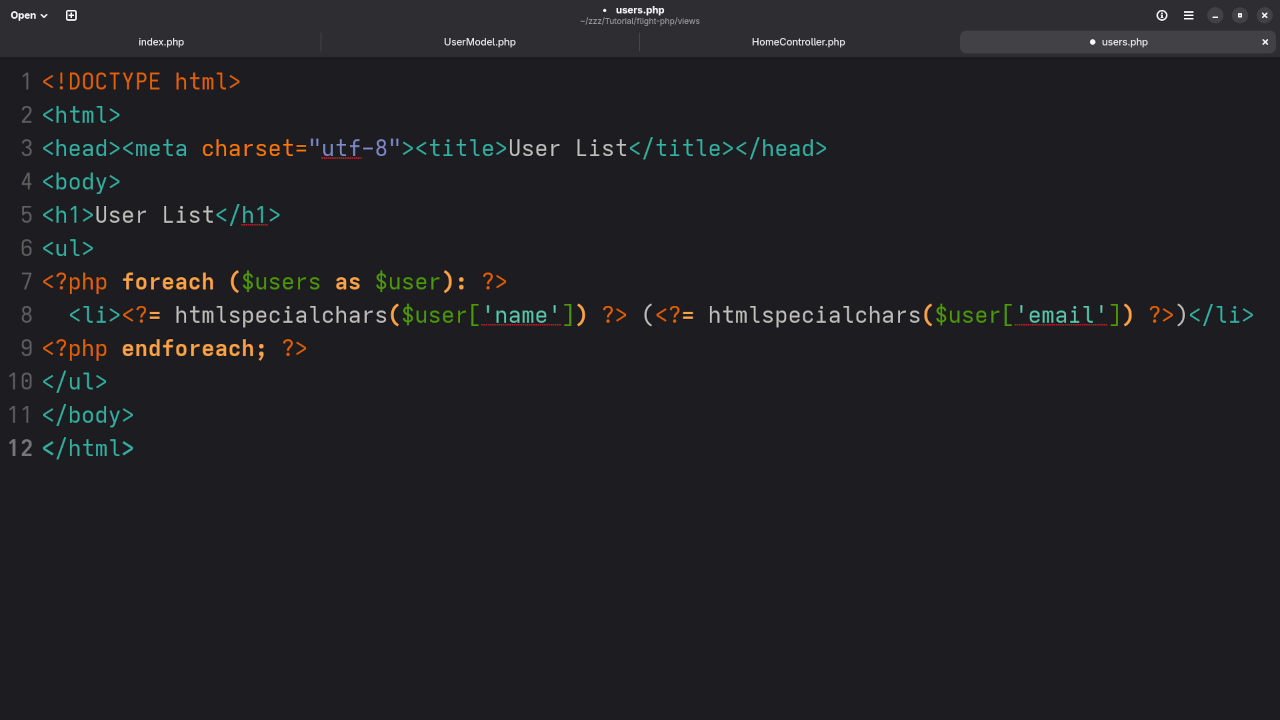
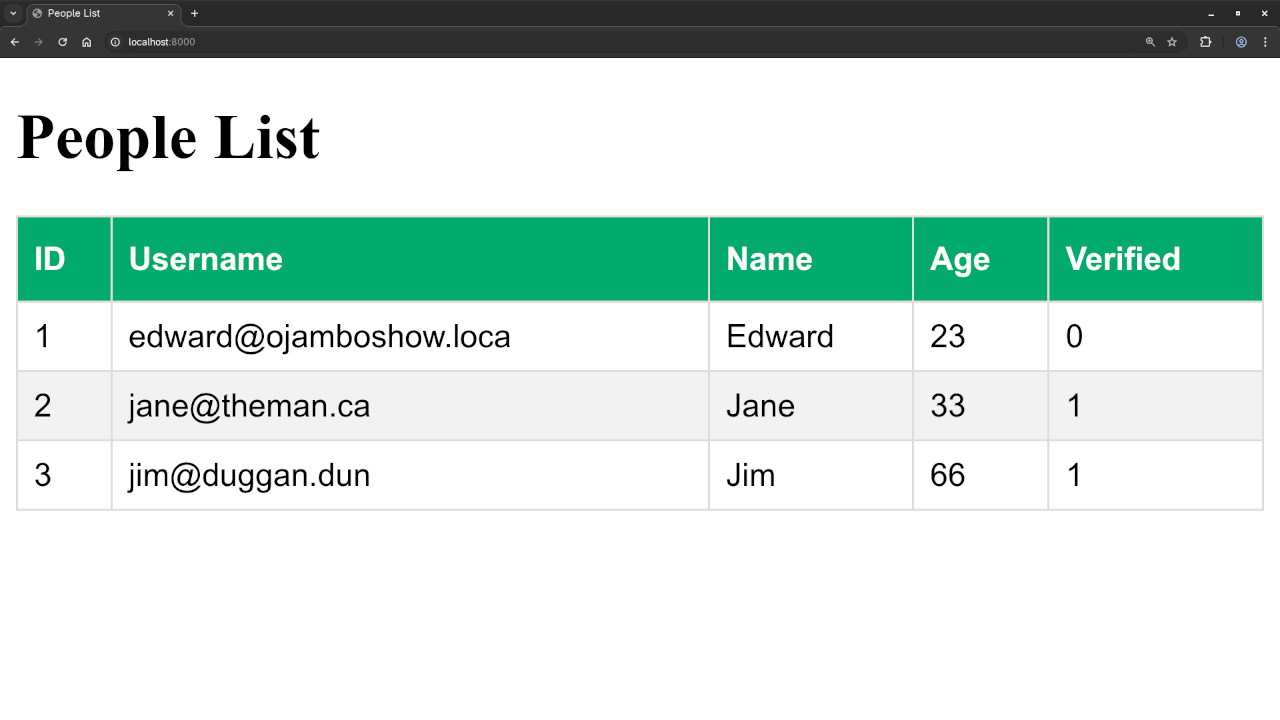
Command Line Installation Of Flight Web FrameworkGnome Text Editor Displaying Router App FileGnome Text Editor Displaying Custom User ModelGnome Text Editor Displaying Custom User ControllerGnome Text Editor Displaying Custom User ViewWeb Browser Displaying Custom People Route ResultFlight Custom View Records In Web Browser
📚 Further Resources & Services
Book:Learning PHP by Edward Ojambo — A complete beginner’s guide. Buy on Amazon
Flight PHP v3.17.0 is a lightweight and modern micro-framework that gives you everything you need to build efficient MVC applications. With support for MariaDB and clean routing, it’s a perfect choice for new developers and rapid prototyping.
Need help with forms, API development, or custom routing? Let me know—I offer professional support and tutorials to help you succeed.
Creating a “Blingy” Drag-and-Drop File Upload Animation with PHP & HTML5 (No Libraries)
In this beginner-friendly tutorial, we’ll create a drag-and-drop file upload animation using PHP and HTML5-all without relying on any external libraries or frameworks. We’ll keep it simple yet fun with some “blingy” animation effects. This will help you learn how to build a fully functional and visually engaging file upload system with just basic HTML5, CSS, and PHP.
What Will We Build?
We’ll create an interactive drag-and-drop interface where users can drag files into a designated area on the webpage. When the files are dropped, they will be uploaded to the server using PHP. Along with the basic file upload functionality, we’ll add some “blingy” animations using CSS to make the process visually appealing.
Why Use Just HTML5 & PHP?
In many modern web projects, libraries like jQuery, React, or Vue.js are commonly used to simplify things. However, this tutorial focuses on using only HTML5 for the frontend and native PHP for the backend, making it a perfect starting point for beginners who want to understand the core concepts of web development without extra complexity.
By the end of this tutorial, you’ll have:
A working drag-and-drop file upload form.
A “blingy” animation that enhances the user experience.
Knowledge of basic PHP file handling and the file upload process.
Setting Up the HTML5 Drag-and-Drop Interface
Let’s start by creating a single HTML file with the necessary markup, styles, and JavaScript.
Now, let’s create a simple PHP script called upload.php to handle the uploaded files. This script will check if files are uploaded correctly and save them to a designated folder on the server.
Run the PHP Server: To test the code locally, use the built-in PHP server by navigating to the folder where your files are located and running:
php -S localhost:8000
Access the Page: Open your browser and visit http://localhost:8000/your-html-file.html.
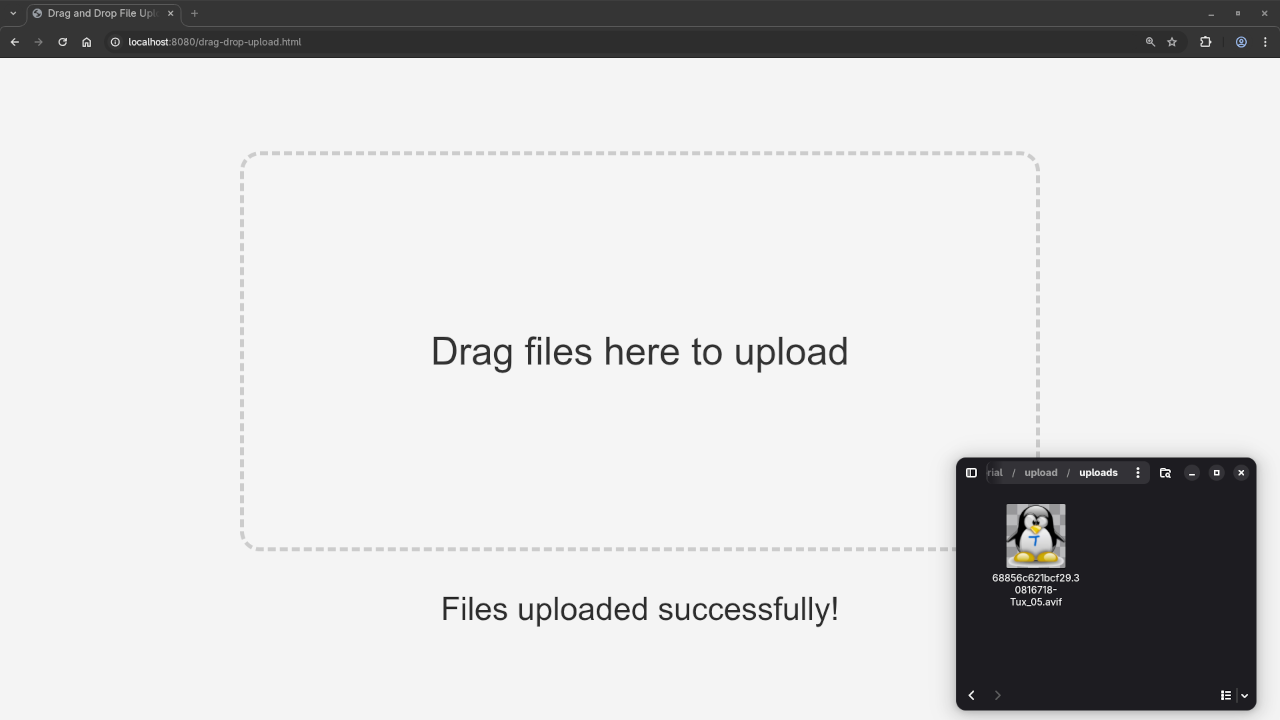
Test Drag-and-Drop: Drag a file into the upload area and check that the file gets uploaded and saved in the uploads/ folder.
Screenshots and Screencast
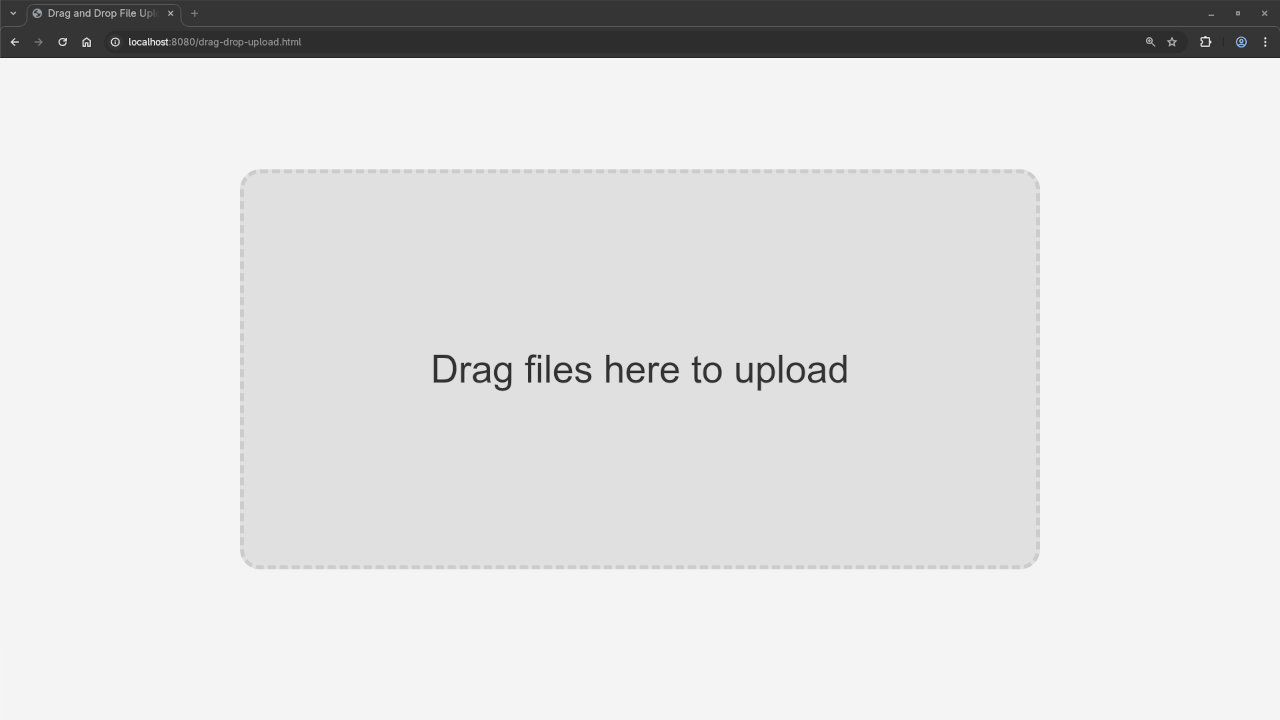
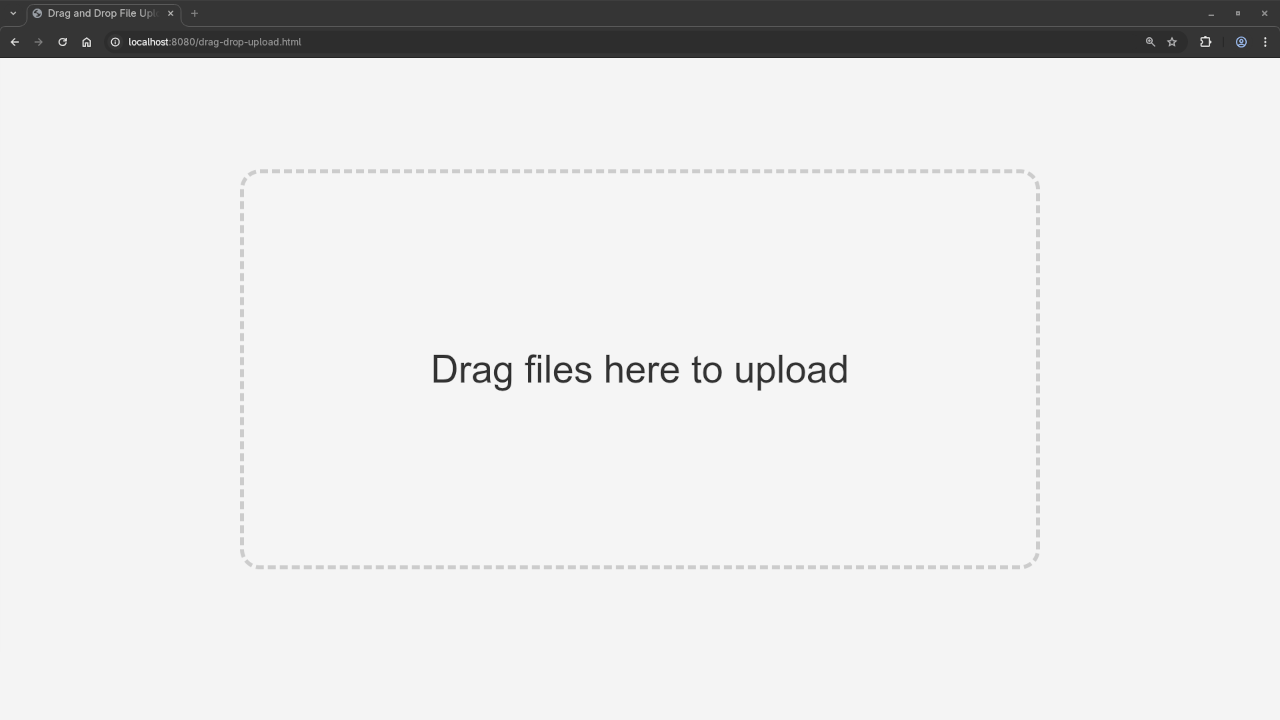
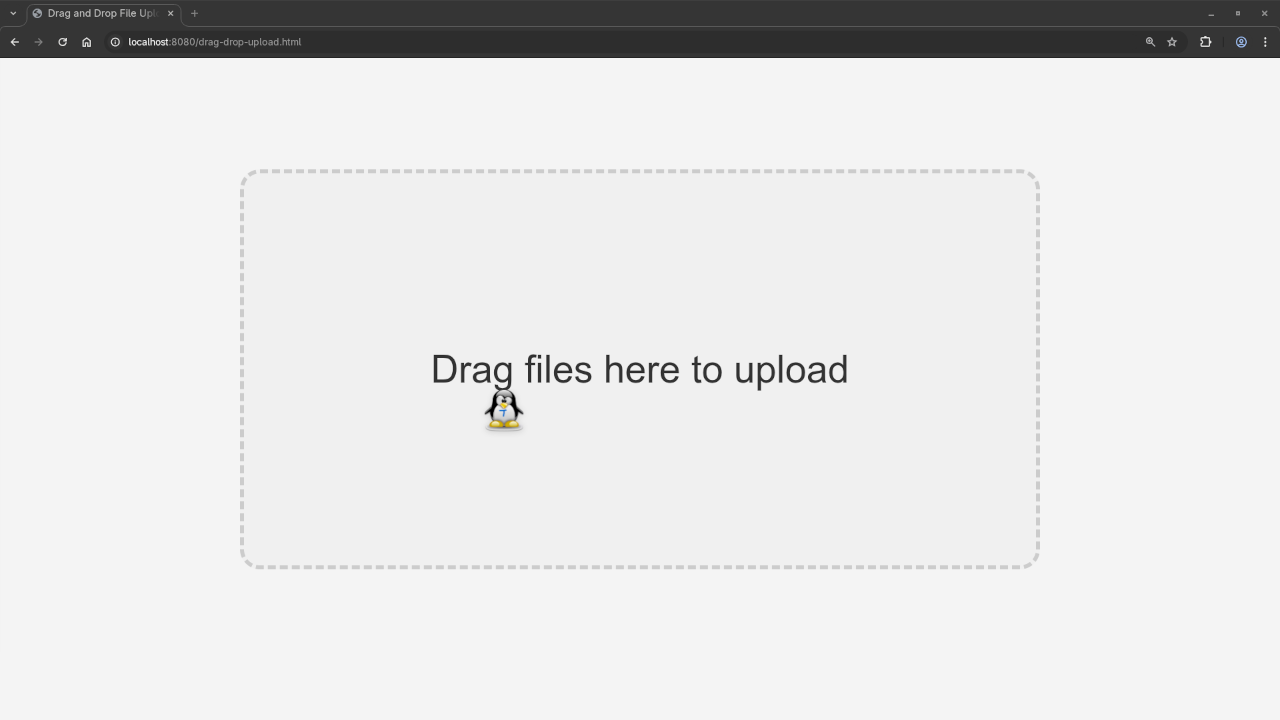
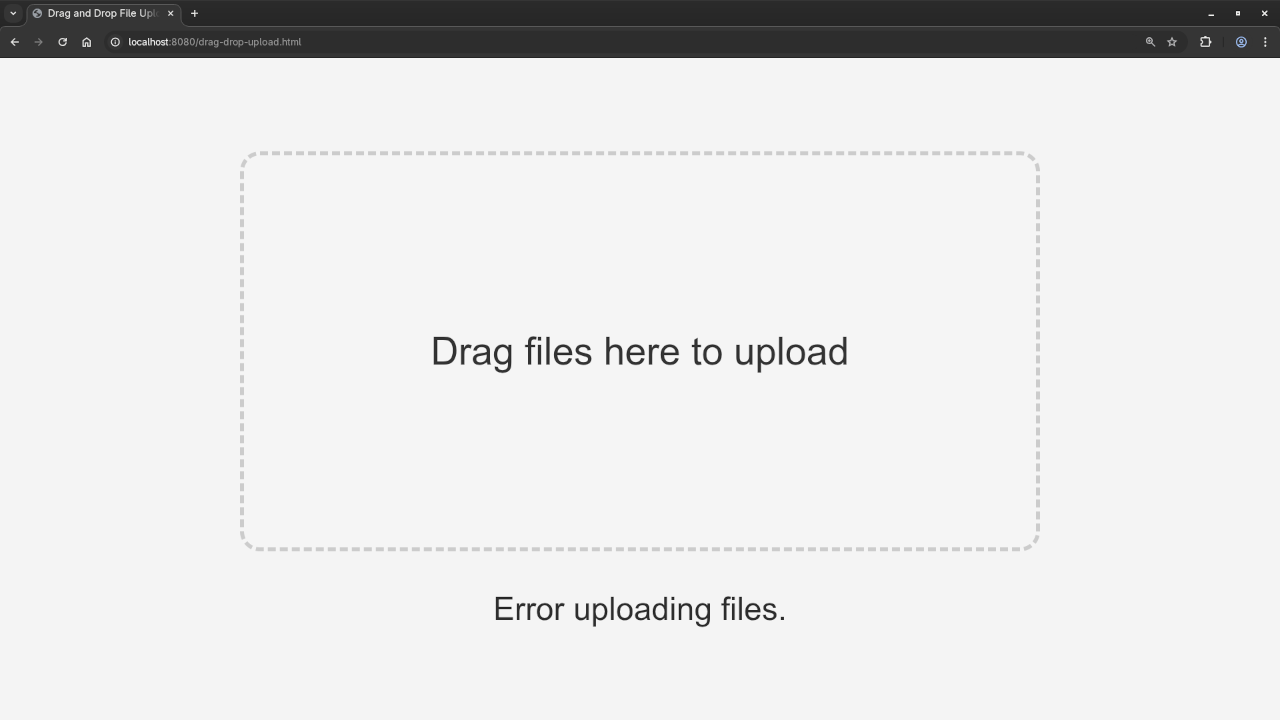
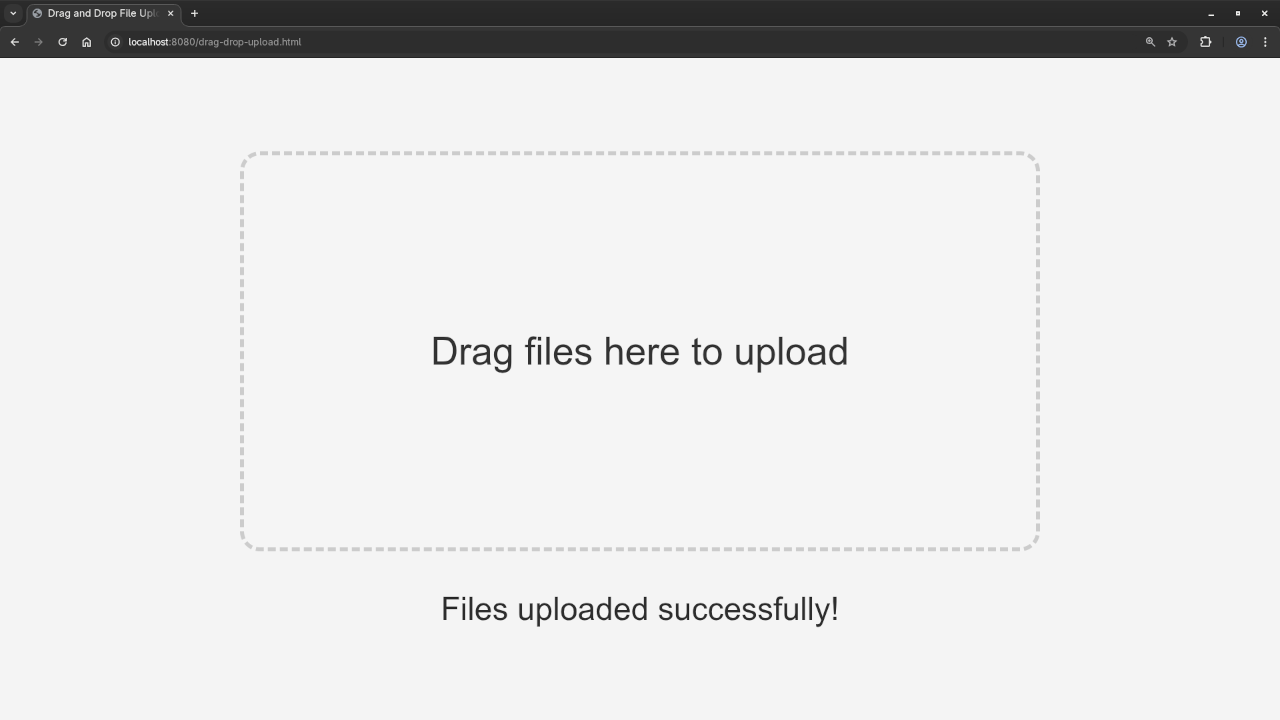
Web Browser Displaying A Clean Drag And Drop InterfaceWeb Browser Displaying A Drag And Drop File AnimationWeb Browser Displaying A Drag And Drop File Failed Upload MessageWeb Browser Displaying A Drag And Drop File Successful Upload MessageFile Browser Displaying A Successfully Uploaded Drag And Drop File FolderHTML Drag And Drop Upload Animation Video
Conclusion
In this tutorial, we’ve built a drag-and-drop file upload system using only HTML5 for the front end and PHP for the back end. No libraries were used, which keeps the code clean and simple-perfect for beginners.
If you’re interested in diving deeper into PHP development, check out my book, “Learning PHP”, and my course, “Learning PHP”. Both are excellent resources to help you level up your PHP skills.
If you’re struggling with programming or need help with PHP applications, I offer one-on-one programming tutorials and PHP application updates or migration services. Feel free to contact me to get started!
Final Thoughts:
This beginner-level tutorial has shown you how to use HTML5 and PHP to create a drag-and-drop upload animation. The “blingy” animation adds some excitement, and by keeping everything simple and without libraries, you now have a good understanding of how drag-and-drop file uploads work.
Creating a Low-Poly Bus in Blender with Python and Displaying It on the Web
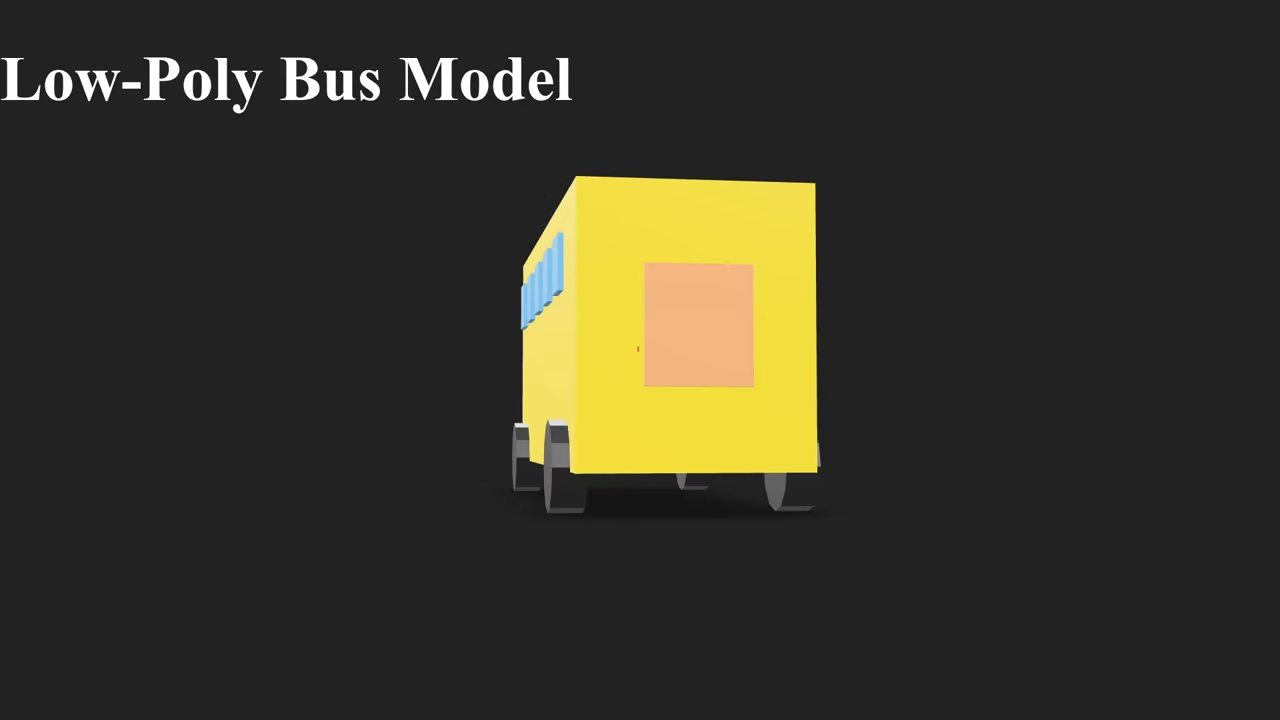
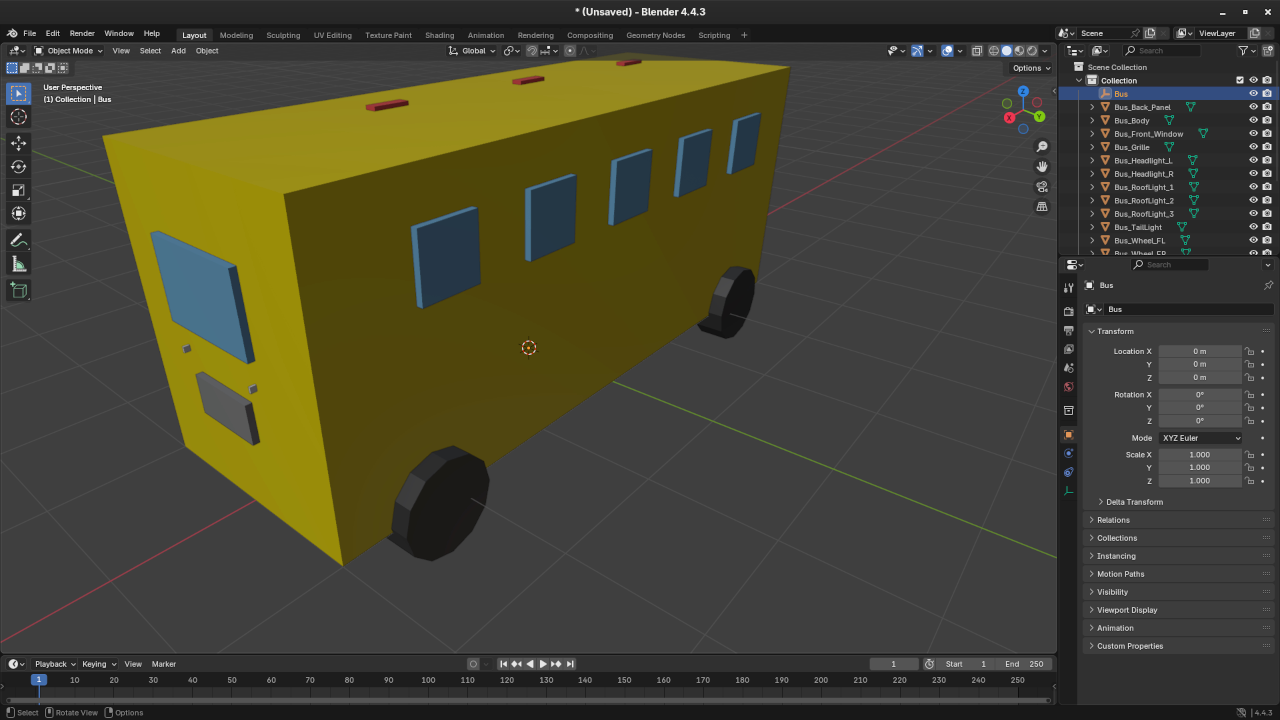
Blender is a powerful tool for 3D modeling—and with Python scripting, it becomes even more flexible. In this tutorial, I’ll show you how to generate a low-poly bus model using the Blender Python API, and then display it in a web browser using model-viewer.
Whether you’re new to Blender scripting or want to display your 3D creations online, this beginner-friendly guide has you covered.
🚌 Step 1: Generate the Low-Poly Bus Using Python in Blender
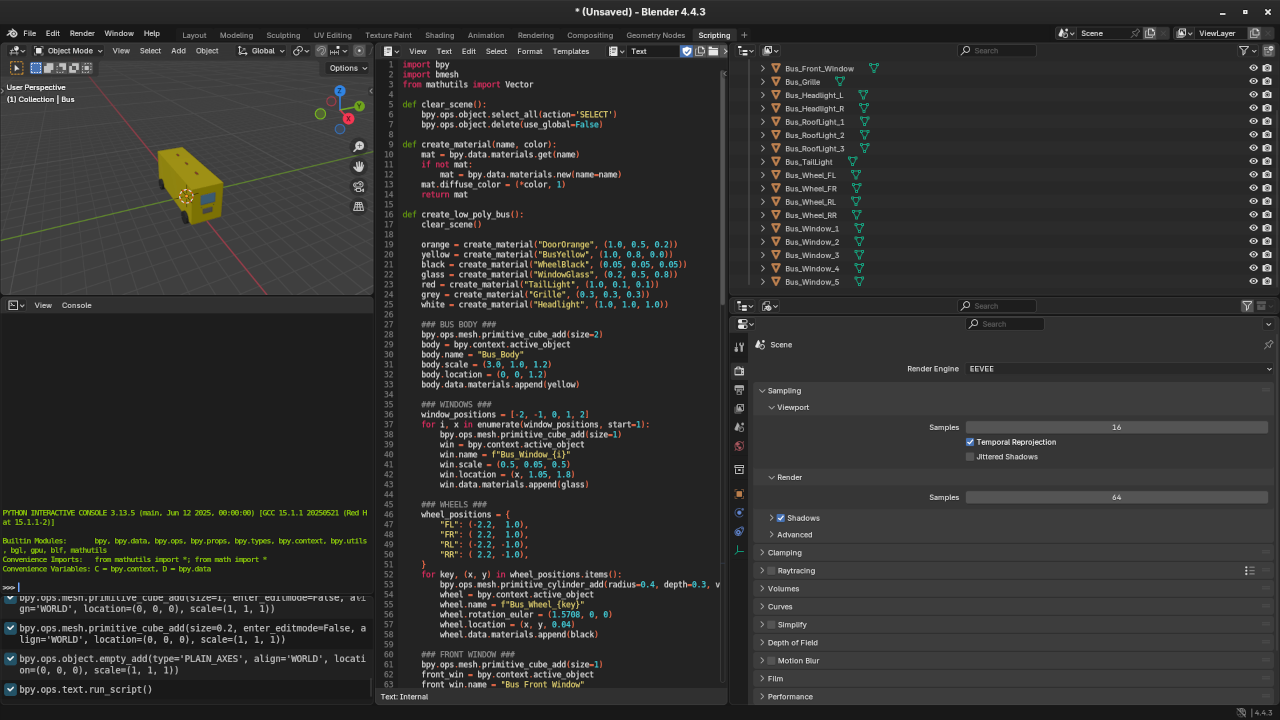
We’ll use Blender’s scripting interface to create the low-poly bus model. Below is a simplified Python script that you can paste directly into Blender 4.3+.
You can find the full source code here:
import bpy
import bmesh
from mathutils import Vector
def clear_scene():
bpy.ops.object.select_all(action='SELECT')
bpy.ops.object.delete(use_global=False)
def create_material(name, color):
mat = bpy.data.materials.get(name)
if not mat:
mat = bpy.data.materials.new(name=name)
mat.diffuse_color = (*color, 1)
return mat
def create_low_poly_bus():
clear_scene()
orange = create_material("DoorOrange", (1.0, 0.5, 0.2))
yellow = create_material("BusYellow", (1.0, 0.8, 0.0))
black = create_material("WheelBlack", (0.05, 0.05, 0.05))
glass = create_material("WindowGlass", (0.2, 0.5, 0.8))
red = create_material("TailLight", (1.0, 0.1, 0.1))
grey = create_material("Grille", (0.3, 0.3, 0.3))
white = create_material("Headlight", (1.0, 1.0, 1.0))
### BUS BODY ###
bpy.ops.mesh.primitive_cube_add(size=2)
body = bpy.context.active_object
body.name = "Bus_Body"
body.scale = (3.0, 1.0, 1.2)
body.location = (0, 0, 1.2)
body.data.materials.append(yellow)
### WINDOWS ###
window_positions = [-2, -1, 0, 1, 2]
for i, x in enumerate(window_positions, start=1):
bpy.ops.mesh.primitive_cube_add(size=1)
win = bpy.context.active_object
win.name = f"Bus_Window_{i}"
win.scale = (0.5, 0.05, 0.5)
win.location = (x, 1.05, 1.8)
win.data.materials.append(glass)
### WHEELS ###
wheel_positions = {
"FL": (-2.2, 1.0),
"FR": ( 2.2, 1.0),
"RL": (-2.2, -1.0),
"RR": ( 2.2, -1.0),
}
for key, (x, y) in wheel_positions.items():
bpy.ops.mesh.primitive_cylinder_add(radius=0.4, depth=0.3, vertices=12)
wheel = bpy.context.active_object
wheel.name = f"Bus_Wheel_{key}"
wheel.rotation_euler = (1.5708, 0, 0)
wheel.location = (x, y, 0.04)
wheel.data.materials.append(black)
### FRONT WINDOW ###
bpy.ops.mesh.primitive_cube_add(size=1)
front_win = bpy.context.active_object
front_win.name = "Bus_Front_Window"
front_win.scale = (0.9, 0.05, 0.6)
front_win.location = (3.05, 0, 1.6)
front_win.rotation_euler = (0, 0, 1.5708) # Rotated 90° on Z axis
front_win.data.materials.append(glass)
### ROOF LIGHTS ###
for i, x in enumerate([-1.5, 0, 1.5], start=1):
bpy.ops.mesh.primitive_cube_add(size=0.3)
light = bpy.context.active_object
light.name = f"Bus_RoofLight_{i}"
light.scale = (1, 0.3, 0.1)
light.location = (x, 0, 2.5)
light.data.materials.append(red)
### FRONT GRILLE ###
bpy.ops.mesh.primitive_cube_add(size=1)
grille = bpy.context.active_object
grille.name = "Bus_Grille"
grille.scale = (0.6, 0.05, 0.3)
grille.location = (3.05, 0, 0.8)
grille.rotation_euler = (0, 0, 1.5708) # Rotated 90° on Z axis
grille.data.materials.append(grey)
### HEADLIGHTS ###
for side, y_offset in [("L", 0.4), ("R", -0.4)]:
bpy.ops.mesh.primitive_cube_add(size=0.3)
headlight = bpy.context.active_object
headlight.name = f"Bus_Headlight_{side}"
headlight.scale = (0.15, 0.05, 0.15)
headlight.location = (3.05, y_offset, 1.1)
headlight.data.materials.append(white)
### BACK DETAIL (Optional: Slight inset to rear)
bpy.ops.mesh.primitive_cube_add(size=1)
back_plate = bpy.context.active_object
back_plate.name = "Bus_Back_Panel"
back_plate.scale = (0.9, 0.05, 1.0)
back_plate.location = (-3.05, 0, 1.2)
back_plate.rotation_euler = (0, 0, 1.5708) # rotate 90° on Z axis
back_plate.data.materials.append(orange)
bpy.ops.mesh.primitive_cube_add(size=0.2)
tail_light = bpy.context.active_object
tail_light.name = "Bus_TailLight"
tail_light.scale = (0.2, 0.05, 0.2)
tail_light.location = (-3.05, 0.5, 1.0)
tail_light.data.materials.append(red)
# Create an empty object named "Bus"
bpy.ops.object.empty_add(type='PLAIN_AXES')
bus_root = bpy.context.active_object
bus_root.name = "Bus"
# List all your bus part names here
bus_parts = [
"Bus_Back_Panel",
"Bus_Body",
"Bus_Front_Window",
"Bus_Grille",
"Bus_Headlight_L",
"Bus_Headlight_R",
"Bus_RoofLight_1",
"Bus_RoofLight_2",
"Bus_RoofLight_3",
"Bus_TailLight",
"Bus_Wheel_FL",
"Bus_Wheel_FR",
"Bus_Wheel_RL",
"Bus_Wheel_RR",
"Bus_Window_1",
"Bus_Window_2",
"Bus_Window_3",
"Bus_Window_4",
"Bus_Window_5"
]
# Parent all parts to the "Bus" empty
for part_name in bus_parts:
obj = bpy.data.objects.get(part_name)
if obj:
obj.parent = bus_root
else:
print(f"Warning: {part_name} not found")
# Deselect all, then select only the "Bus" empty
bpy.ops.object.select_all(action='DESELECT')
bus_root.select_set(True)
bpy.context.view_layer.objects.active = bus_root
bpy.ops.object.parent_set(type='OBJECT')
# Define export path (adjust as needed)
export_path = os.path.join(os.path.expanduser("~"), "low_poly_bus.glb")
# Export selected (the "Bus" empty and children) as GLB
bpy.ops.export_scene.gltf(
filepath=export_path,
export_format='GLB',
export_selected=True,
export_apply=True
)
# Run it
create_low_poly_bus()
Note: If you’re new to Python scripting in Blender, check out my book Learning Python.
⚙️ Running the Script via Command Line
To run the Python script outside Blender’s UI, open a terminal or command prompt and run:
Don’t forget to check out my screencast on generating 3D models with Blender Python API. In the video, I walk through the entire process, from coding the script to displaying the model in the browser.
🎬 Embedded Live Screencast
Screencast For Blender Python API Low Poly House
📚 Learn More and Go Further
Want to go deeper with Python and Blender scripting?
With just a few lines of Python and a simple HTML viewer, you can automate 3D modeling in Blender and bring your creations to life online. Give it a try and let me know how it works for you!