Git and GitHub are essential tools for developers, offering version control and collaboration features that make managing your projects easier. Whether you’re working solo or as part of a team, Git helps you track changes in your code, while GitHub allows you to host your code online and collaborate with others. In this post, we’ll walk through the process of setting up Git and creating your first repository on GitHub. Plus, we’ll dive into how open-source projects can benefit from these tools.
What Is Open Source?
Open-source software means the source code is available for anyone to view, modify, and distribute. This fosters a collaborative environment where developers from all over the world contribute to projects, making them more robust and innovative.
Step 1: Installing Git on Your Local Machine
Before you start using Git and GitHub, you need to install Git on your computer.
Run the installer and follow the installation steps (the default options are usually fine).
Once installed, open Git Bash (you should see it in your Start menu).
Verify the installation by typing:
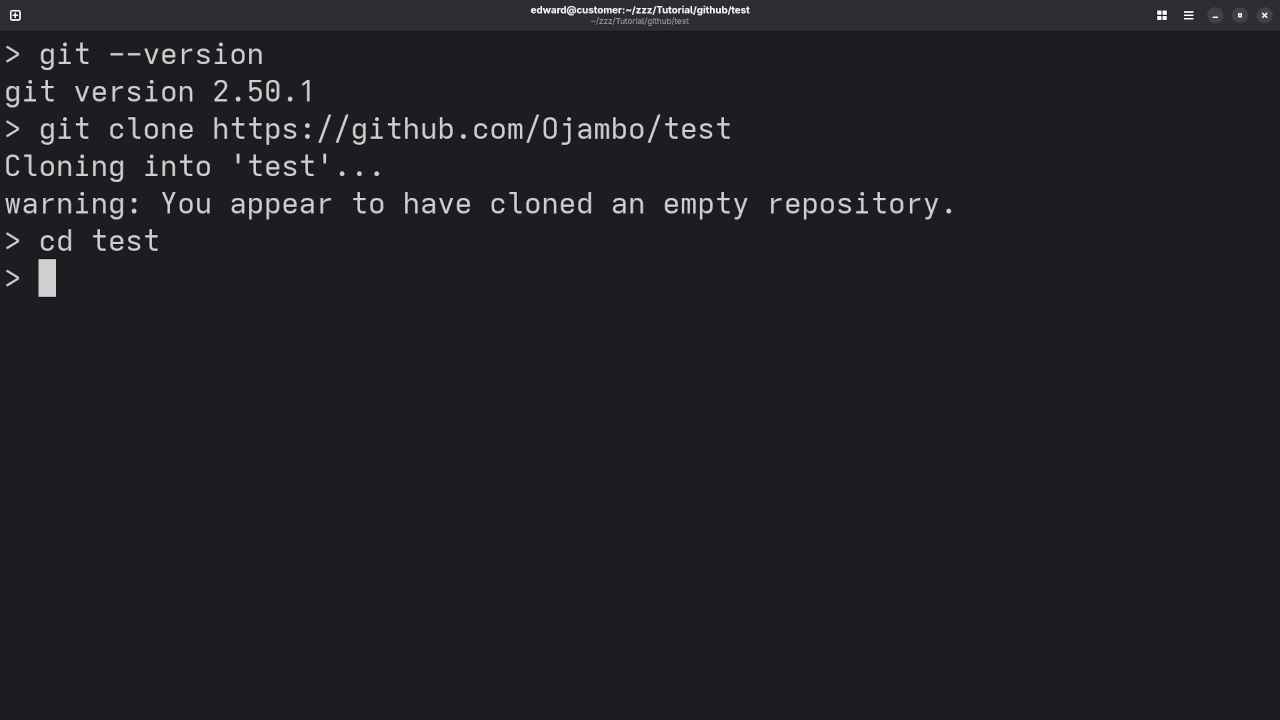
git --version
You should see a message displaying the installed version of Git.
For macOS:
Open Terminal.
Type:
git --version
If Git is not already installed, you’ll be prompted to install it via the Xcode command line tools.
For Linux:
Use the package manager for your distribution to install Git. For example, on Ubuntu:
sudo apt-get update
sudo apt-get install git
Step 2: Setting Up Your GitHub Account
Go to GitHub and sign up for an account if you don’t already have one.
Once signed up, you can create repositories and start collaborating with other developers.
Step 3: Configuring Git with Your GitHub Account
Once you’ve installed Git and set up your GitHub account, you need to configure Git with your name and email (the email should match the one associated with your GitHub account).
Configure your name and email in Git:
Open your terminal or Git Bash and run the following commands:
This command creates a local copy of your repository on your computer.
Step 6: Making Changes and Pushing to GitHub
Now that your repository is cloned locally, you can start working on it. Let’s add a new file and push the changes back to GitHub.
Navigate to the folder where you cloned the repository. You can do this via the command line:
cd my-first-repo
Create a new file (for example, index.html or README.md).
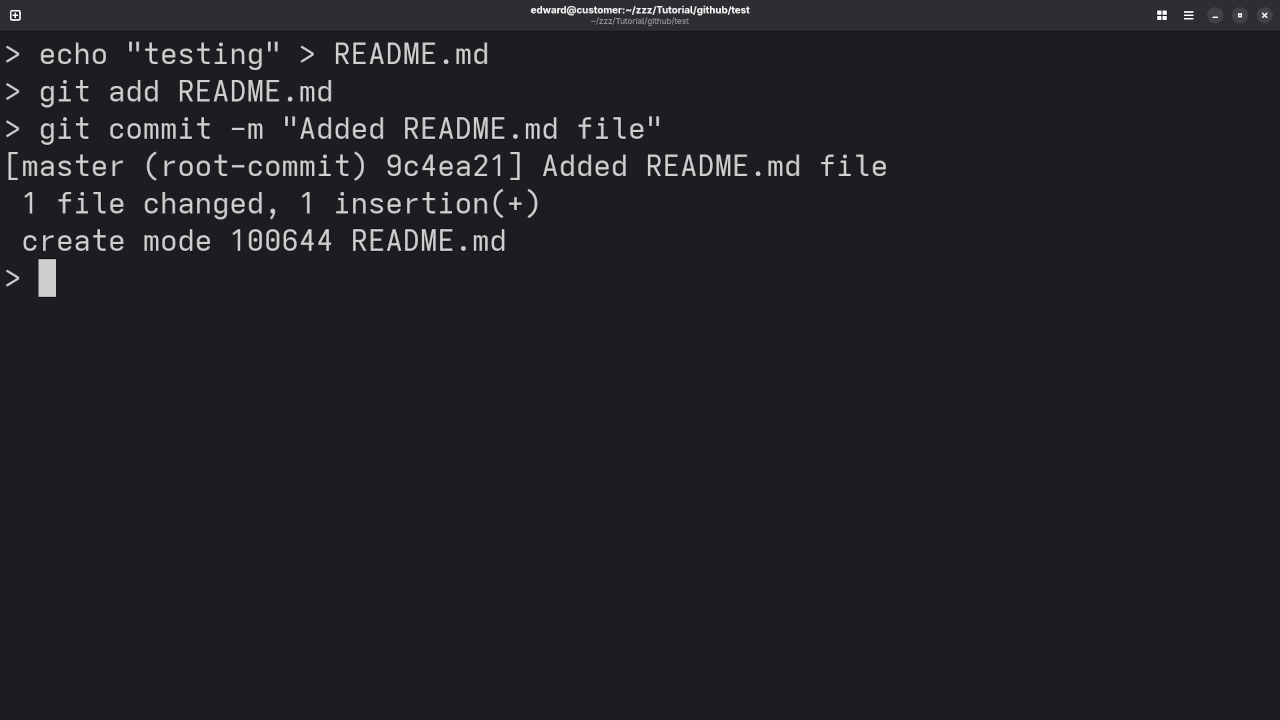
Add the file to Git’s staging area by typing:
git add index.html
Commit your changes:
git commit -m "Added index.html file"
Push your changes back to GitHub:
git push origin main
Command Line Git Check And Cloning Of RepositoryTerminal Showing Git Adding to Staging Area And Committing Changes
Step 7: Viewing Your Changes on GitHub
After pushing your changes, head back to your GitHub repository page. You should see the newly added file(s) there.
Conclusion
Congratulations! You’ve now set up Git and GitHub, created your first repository, and pushed your first commit. Git and GitHub are powerful tools that can help you manage your code and collaborate with others, especially for open-source projects.
If you want to dive deeper into Git and GitHub, be sure to check out my programming books and online courses for more in-depth tutorials:
For personalized guidance, I’m also available for one-on-one programming tutorials. Feel free to reach out to me here.
Check out this live screencast for a hands-on walkthrough of these steps:
Screencast Of Git Repository Setup
This is just a simple start to working with Git and GitHub. As you continue, you’ll explore more advanced features like branching, pull requests, and working with other developers on open-source projects.
Blender is a powerful tool for 3D modeling, and by using the Blender Python API, you can automate the creation of complex 3D objects. In this tutorial, we’ll walk through how to generate a metallic equilateral triangle in Blender using Python, apply a rustic metallic material, and then display it directly in your web browser using Model-Viewer, an easy-to-use web component.
What You’ll Need
Blender (preferably version 3.0 or above)
Basic understanding of Python (if you’re a beginner, check out my book Learning Python to get started)
A text editor (for running Python scripts)
A web browser (to view the model using <model-viewer>)
Before we dive into the code, make sure you have Blender installed. If you’re new to Blender or programming in Python, I recommend reading my books Learning Python and Mastering Blender Python API for a deeper understanding of the topics covered.
Step 1: Setting Up Blender with Python API
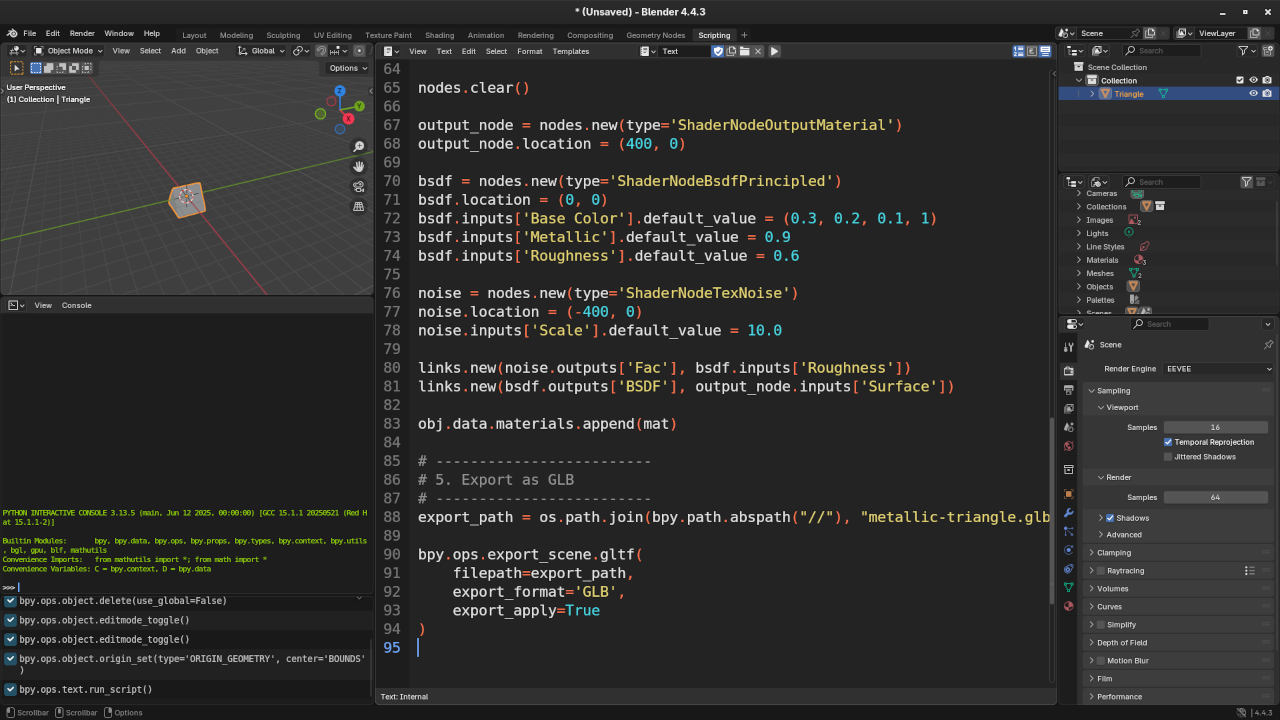
First, open Blender and navigate to the Scripting tab. This is where you’ll write and run the Python code.
To get started, let’s use the Blender Python API to create a simple 3D model — a metallic triangle.
The Python Script
import bpy
import bmesh
import math
import os
# Cleanup the scene
bpy.ops.object.select_all(action='SELECT')
bpy.ops.object.delete(use_global=False)
# Create equilateral triangle mesh
a = 2 # side length
h = (math.sqrt(3) / 2) * a # triangle height
verts = [
(-a / 2, -h / 3, 0), # bottom-left
(a / 2, -h / 3, 0), # bottom-right
(0, (2 * h) / 3, 0) # top-center
]
faces = [(0, 1, 2)]
# Create mesh and object
mesh = bpy.data.meshes.new("Triangle")
obj = bpy.data.objects.new("Triangle", mesh)
bpy.context.collection.objects.link(obj)
# Generate mesh data
mesh.from_pydata(verts, [], faces)
mesh.update()
# Apply thickness to the triangle
bpy.context.view_layer.objects.active = obj
obj.select_set(True)
bpy.ops.object.mode_set(mode='EDIT')
bm = bmesh.from_edit_mesh(mesh)
bmesh.ops.recalc_face_normals(bm, faces=bm.faces)
bmesh.ops.solidify(bm, geom=bm.faces, thickness=2.0)
bmesh.update_edit_mesh(mesh)
bpy.ops.object.mode_set(mode='OBJECT')
# Re-center and rotate the object
bpy.ops.object.origin_set(type='ORIGIN_GEOMETRY', center='BOUNDS')
obj.location = (0, 0, 0)
obj.rotation_euler[0] = math.radians(90)
# Add material with a metallic look
mat = bpy.data.materials.new(name="RusticMetal")
mat.use_nodes = True
nodes = mat.node_tree.nodes
links = mat.node_tree.links
nodes.clear()
output_node = nodes.new(type='ShaderNodeOutputMaterial')
output_node.location = (400, 0)
bsdf = nodes.new(type='ShaderNodeBsdfPrincipled')
bsdf.location = (0, 0)
bsdf.inputs['Base Color'].default_value = (0.3, 0.2, 0.1, 1) # Brownish metallic color
bsdf.inputs['Metallic'].default_value = 0.9
bsdf.inputs['Roughness'].default_value = 0.6
noise = nodes.new(type='ShaderNodeTexNoise')
noise.location = (-400, 0)
noise.inputs['Scale'].default_value = 10.0
links.new(noise.outputs['Fac'], bsdf.inputs['Roughness'])
links.new(bsdf.outputs['BSDF'], output_node.inputs['Surface'])
obj.data.materials.append(mat)
# Export the object to .glb format
export_path = os.path.join(bpy.path.abspath("//"), "triangle.glb")
bpy.ops.export_scene.gltf(
filepath=export_path,
export_format='GLB',
export_apply=True
)
Step 2: Run the Python Script on the Command Line
To run the Python script, you’ll need to use Blender’s command-line interface.
Here’s how you can do it:
Save your Python script in a .py file, for example: generate_triangle.py
Open your command line (Terminal).
Navigate to the folder where the script is saved.
Run the following command (replace path_to_blender with the correct path to Blender on your system):
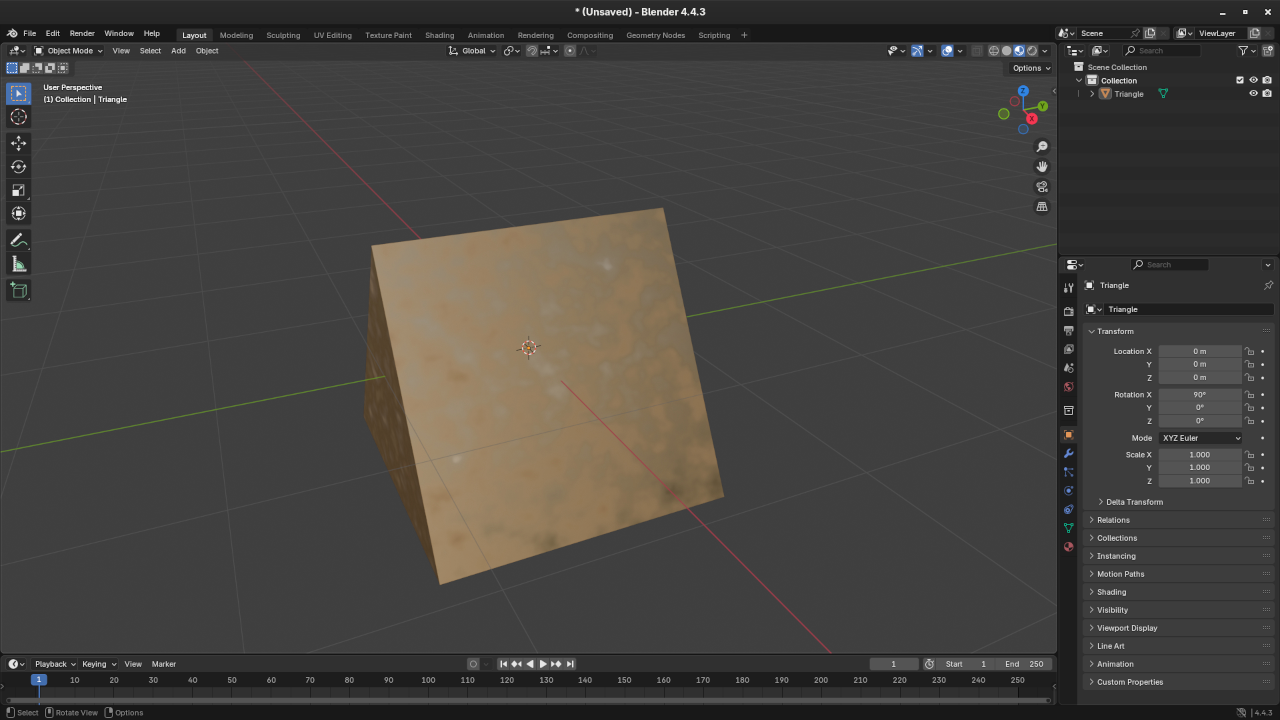
Once the script is run, Blender will generate your 3D metallic triangle and export it as a .glb file.
Step 3: Display the Triangle in the Web Browser Using Model-Viewer
Now that we’ve generated and exported the 3D model (triangle.glb), it’s time to display it in the web browser using Model-Viewer, a web component developed by Google for displaying 3D models.
You can also deepen your knowledge through my Learning Python course, where I guide you through Python programming basics step-by-step.
If you’re looking for more hands-on help, I offer one-on-one online Python tutorials, including sessions specifically for Blender Python API. You can find out more and book a session with me here: Contact Me.
Eclipse is a widely-used, open-source integrated development environment (IDE) that is flexible and can support multiple programming languages like HTML5, JavaScript, CSS3, PHP, and Python. While Eclipse is often associated with Java development, it can easily be adapted to web development through plugins and downloads.
In this guide, we’ll show you how to download and install the Eclipse IDE for PHP from the official Eclipse website, specifically for Fedora Linux. We will walk through the installation steps and provide tips on using Eclipse to develop web applications using HTML5, JavaScript, CSS3, PHP, and Python.
Additionally, I’ll mention some resources, such as my bookLearning JavaScript and my courseLearning JavaScript, that can help you deepen your web development skills.
Why Choose Eclipse for Web Development?
Eclipse is a great IDE choice for web developers for several reasons:
Cross-Platform: Eclipse works on Linux, Windows, and macOS, making it an excellent tool for developers on different platforms.
Open Source: Eclipse is completely free and open-source, allowing you to modify and extend the IDE based on your needs.
Plugin Ecosystem: Through plugins, Eclipse can be customized for different languages, including HTML5, JavaScript, CSS3, PHP, and Python.
Advanced Features: Eclipse comes with features like code completion, debugging tools, and integrated version control, which can enhance your coding experience.
Step-by-Step Guide: Installing Eclipse for PHP on Fedora Linux
The following steps will guide you through downloading and installing Eclipse IDE for PHP on Fedora Linux.
Step 1: Download Eclipse IDE for PHP
Eclipse provides a dedicated package for PHP development, which includes the necessary tools and plugins for building PHP applications.
2. Choose “Eclipse IDE for PHP Developers”: This package comes preconfigured with the required PHP development tools (PDT). Download the Linux version that matches your system architecture (64-bit or 32-bit).
3. Download the .tar.gz file and save it to your system.
Step 2: Extract and Install Eclipse
After downloading the Eclipse archive, extract it and set it up on your Fedora system.
Open a terminal and navigate to the directory where you downloaded the Eclipse archive. For example: cd ~/Downloads
Extract the downloaded .tar.gz file: /tar -zxvf eclipse-inst-linux64.tar.gz
Move the extracted folder to a directory where you want to store Eclipse (e.g., /opt for system-wide access): sudo mv eclipse /opt/
Step 3: Create a Desktop Shortcut (Optional)
You can create a desktop shortcut for easier access to Eclipse.
Create a new .desktop file: sudo nano /usr/share/applications/eclipse.desktop
Add the following content to the file:
[Desktop Entry]
Name=Eclipse IDE for PHP Developers
Comment=Eclipse IDE for PHP Development
Exec=/opt/eclipse/eclipse
Icon=/opt/eclipse/icon.xpm
Terminal=false
Type=Application
Categories=Development;IDE;
Save and close the file (CTRL + X > Y > Enter).
Step 4: Launch Eclipse
Now that Eclipse is installed, you can run it by either:
Launching it from the applications menu, or
Running it from the terminal: /opt/eclipse/eclipse
Step 5: Install PHP Development Tools (PDT)
Once Eclipse is launched, you will need to install the PHP Development Tools (PDT) plugin to enable PHP-specific features like syntax highlighting, code completion, and debugging.
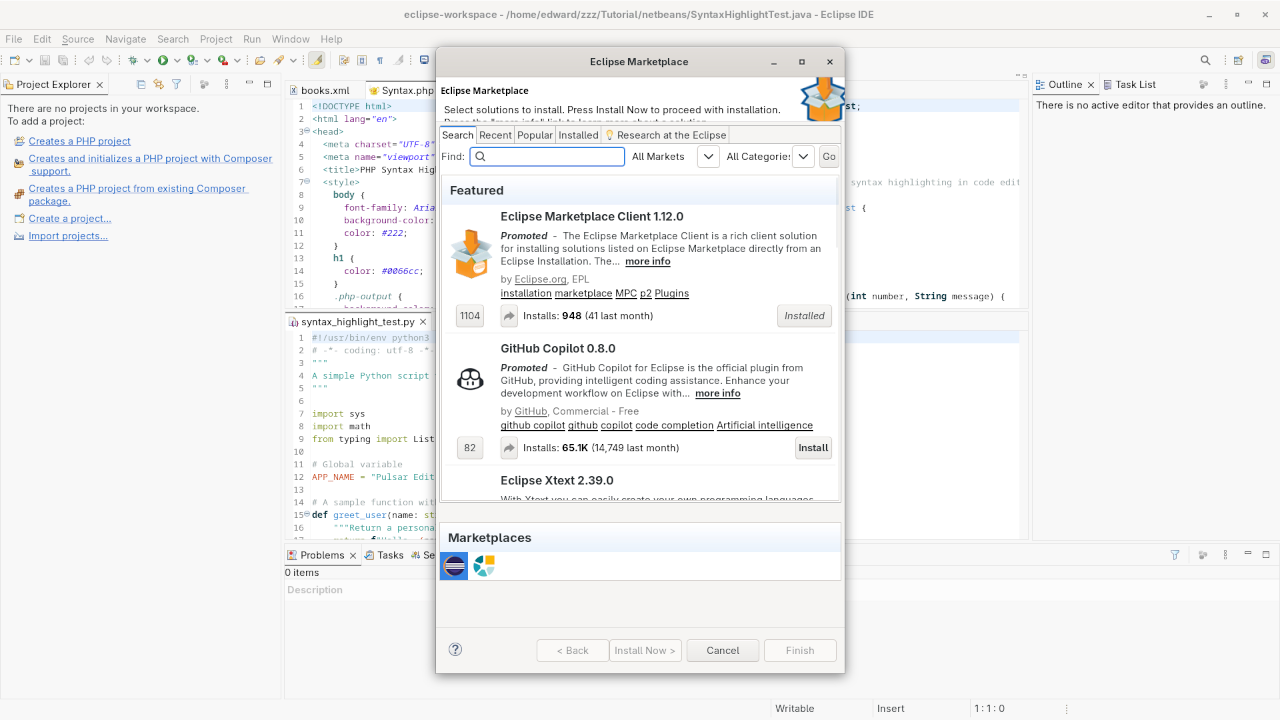
Go to Help > Eclipse Marketplace.
In the Eclipse Marketplace, search for PHP Development Tools (PDT).
Click Install to add the plugin to your Eclipse IDE.
After installation, restart Eclipse.
Step 6: Install Plugins for HTML5, JavaScript, CSS3, and Python
In addition to PHP, you can configure Eclipse to support HTML5, JavaScript, CSS3, and Python.
Install Web Development Tools (for HTML5, JavaScript, and CSS3):
Go to Help > Eclipse Marketplace.
Search for Web Developer Tools and install the Eclim Web Developer Tools plugin.
Install Python Tools:
Go to Help > Eclipse Marketplace.
Search for PyDev and install it for Python support.
After installing the necessary plugins, restart Eclipse.
Step 7: Start Your Web Development Project
With Eclipse set up and configured, you can now start your web development projects. You can create new projects for HTML5, JavaScript, CSS3, PHP, or Python by going to File > New and selecting the appropriate project type.
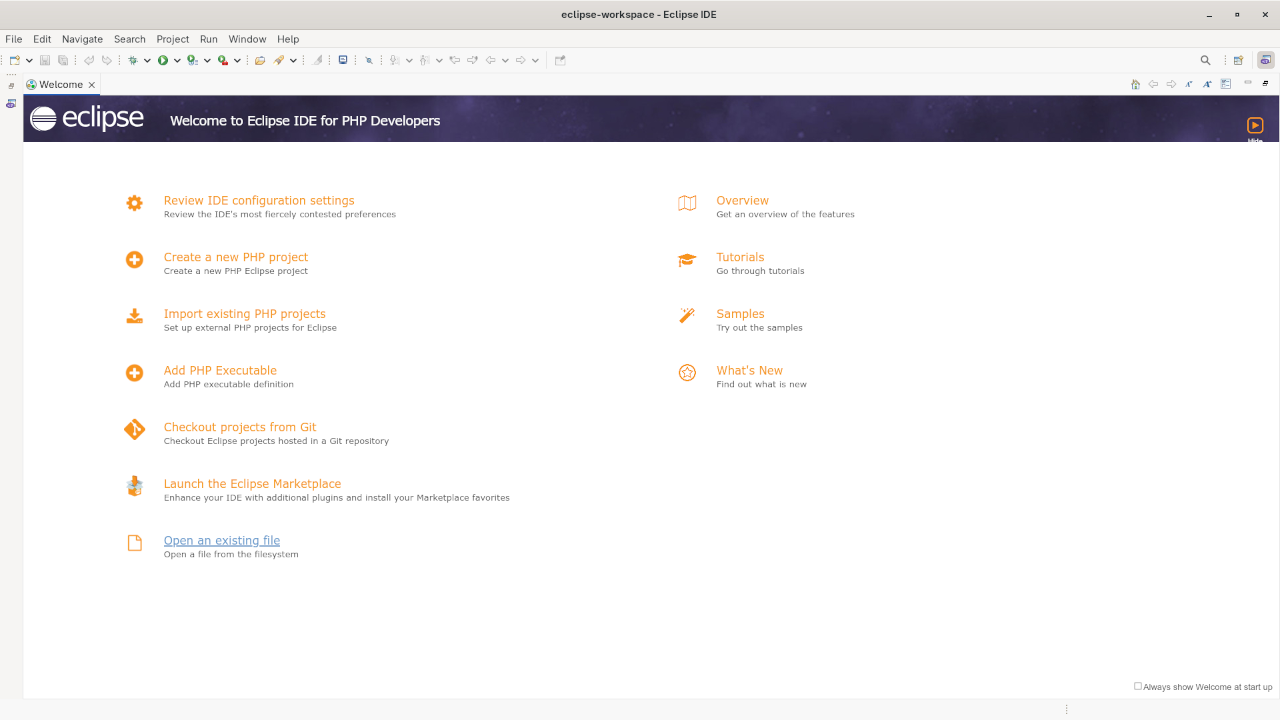
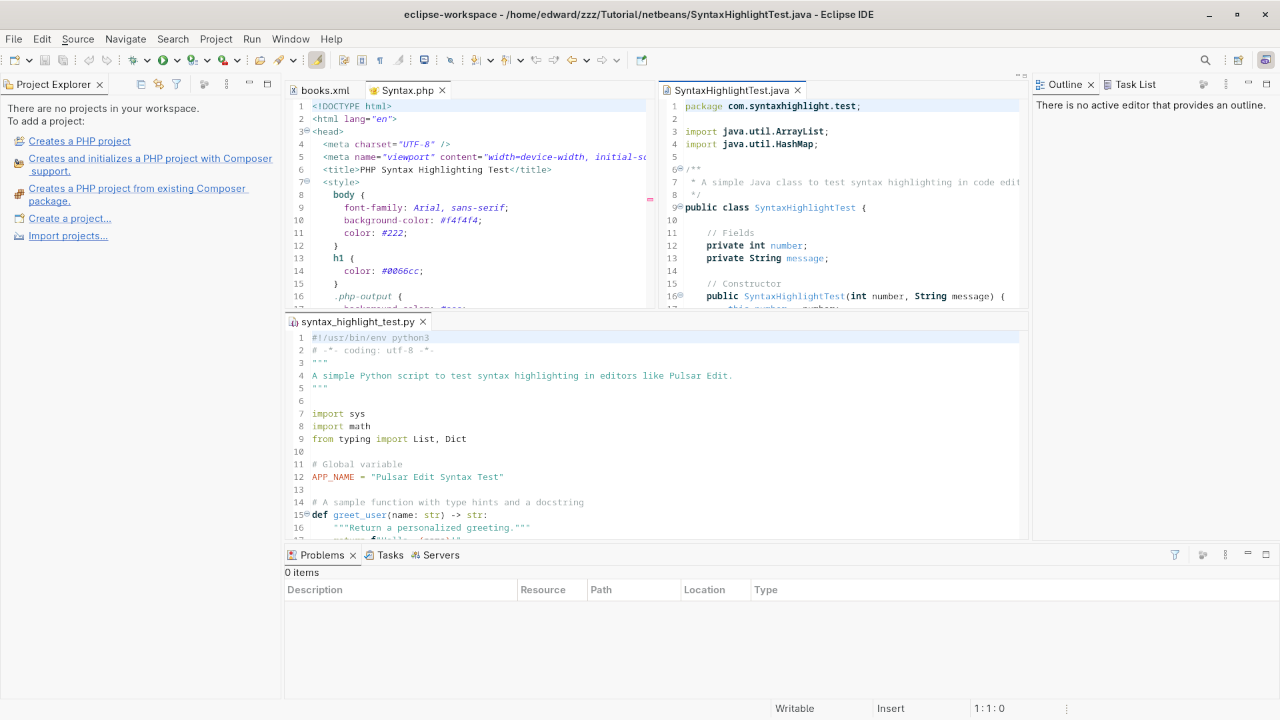
Eclipse IDE Displaying PHP Syntax HighlightingEclipse IDE Displaying Eclipse MarketplaceEclipse IDE Review And Feature Test
Requirements For Programming Text Editor
Glossary:
Code Editor
Designed for writing and editing source code.
IDE
Integrated Development Environment combines various tools need for software development.
Plugin
Software component that adds specific functionality.
Theme
Preset package containing graphical appearance to customize look and feel.
Open source
Freely available for possible modification and redistribution.
SCM
Source code management use to manage and track modifications to a source code repository.
LMB
Left Mouse Button (LMB) or left click
Test Tools
Test System
Name
Description
CPU
Intel(R) i7 2600 @ 3.40GHz.
Memory
16GB DDR3.
Operating System
Fedora Linux Workstation 42.
Desktop Environment
Gnome 48.
Name
Description
Test Suite
Name
Description
Large File
1GB human-readable text.
Regex File
Text with word “Eclipse IDE” repeated.
Syntax File
PHP file containing HTML, CSS & JavaScript.
Media File
Smiley face or Tux Linux JPEG file.
Java Version
OpenJDK 21.0.7.
PHP Version
PHP 8.4.8.
Python Version
Python 3.13.3.
Eclipse IDE Version
2.0.
Name
Description
Test Scoring
Each feature has two parts.
Score of zero indicates a missing feature.
A part of a feature is work a score of 0.5.
Three bias elimination steps were utilized. The editor was used for at least three years on different platforms. Attempts were made to get stable plug-ins for missing features. The same editor was compared between the one in the repository, the developers website, and the compiled version if applicable.
Selecting Editor Version
For this review, Eclipse IDE was downloaded from the developers website and it did not require additional plugins.
Features
The theme can be native for the editor in terms of the background. Eclipse IDE dark and light themes can be created or downloaded. The score for the theme was a perfect 1.0.
Dragging and dropping a text file into the editor opens a new tab. It is possible to specify the tab location during the drag and drop operation. The score for drag and drop into editor was 1.0.
Opening a very large text file did not crash Eclipse IDE. A “Eclipse IDE” Warning window is shown with an option to continue. It remembers the last session and it was possible to edit the large file. The score for opening a large file was 1.0.
Multiple documents can opened in multiple tabs. Tear-off tabs still do not work and Eclipse IDE does not have a feature to open in new window as a new instance which is handy for multiple monitors. The score for multiple documents was 0.5.
Multiple editors can be opened as new tabs with drag options. The window view can be split either vertically or horizontally. The score for multiple editor view was 1.0.
Creating non-project files is possible by using the built-in file explorer into the workspace. Non-project files cannot be opened by the drag and drop operation. The score for creating non-project files was a perfect 0.5.
Soft word wrap can be enabled in the editor settings. Automatic soft wrap for documents is available for Eclipse IDE. The score for word wrap was a perfect 1.0.
Spell check works as words are typed. Spelling errors are shown in opened documents. The score for spell check was a perfect 1.0.
Word count is available for Eclipse IDE via a plugin. Selection word count is not available as part of word count. The score for word count was 0.5.
Go to line CTRL/CMD-Lcan jump to a specified line. It is possible to jump to either the first or last line. The score for go to line was a perfect 1.0.
Indentation can default to user-defined tab stops. Children are automatically indented. The score for indentation was a perfect 1.0
Fonts can be dynamically scaled. The system font can be bypassed and a new editor font and size can be set. The score for fonts was a perfect 1.0.
Find and replace CTRL/CMD-F or project-wide CTRL/CMD-SHIFT-F using regular expressions can be utilized for all open documents in the current session. Find and replace will work for the current document or a selection in the current document. The score for find and replacing using regular expressions was 1.0.
Multiple language syntax highlighting in one file is enabled if the language plug-ins are installed. Each language has code-sensitive syntax colors which can be modified. The score for multiple language syntax highlighting was a perfect 1.0.
Code folding works for markup languages such as HTML. Code folding also works for programming languages such as Java and PHP. The score for code folding was 1.0.
Selecting rectangular block per column SHIFT/ALT-A works. Rectangular block selections works with word wrap enabled. The score for selecting rectangular block was a perfect 1.0.
Multiple selection ALT/CMD-LMBis available for Eclipse IDE. Search multiple selection is available. The score for multiple selection was 1.0.
Distraction-free mode to hide panes works. Line numbers can be toggled in the settings to improve distraction-free mode. The score for distraction-free was a perfect 1.0.
The file manager can create and delete folders. Media files can be dragged and dropped into the file manager pane. The score for file manager was 1.0.
Terminal is not integrated into Eclipse IDE, but one can be enabled as a plugin. The terminal can follow folder if enabled. Terminal can execute system commands. The score for terminal was 1.0.
Results
Eclipse IDE is a very powerful IDE. By default, the Eclipse IDE editor worked without tweaks, and any missing required features can be installed by using plugins. For my required features, the Eclipse IDE editor scored 92.50% or 9.25 out of 10.
Additional Resources to Help You Learn JavaScript
If you’re focusing on JavaScript, check out my bookLearning JavaScript. It’s designed specifically for beginners, covering essential JavaScript concepts and providing practical examples that will help you start writing JavaScript code quickly.
Additionally, if you prefer guided tutorials, my JavaScript course can help you get a deeper understanding of the language through structured lessons and projects.
If you need one-on-one support for setting up Eclipse, understanding PHP, JavaScript, or any other programming concept, I offer personalized programming tutorials. Whether it’s getting Eclipse configured or learning how to write cleaner, more efficient code, I’m available to help!
When building websites, it’s often helpful to provide users with a simple and intuitive way to choose colors for text, backgrounds, or other elements. One way to do this is by using the HTML5 color picker. HTML5 introduced the <input> element with the type color, allowing you to easily implement a color picker in your web projects.
In this tutorial, I’ll walk you through how to create a basic HTML5 color picker, show you how it works, and explain how it integrates with JavaScript to make your web pages interactive. You’ll be able to create your own color picker in no time, whether you’re working on a simple design or a more complex web application.
Before we dive in, don’t forget to check out my book on JavaScript and my course if you want to further your skills. I’m also available for one-on-one programming tutorials!
What is the HTML5 Color Picker?
The HTML5 <input type="color"> element allows users to select a color from a color palette. It’s a convenient and user-friendly way to enable color selection without having to implement complex JavaScript libraries or additional plugins.
Here’s an example of a basic color picker:
<input type="color" id="color-picker">
When this code is placed on a webpage, it renders a color input element, which, when clicked, opens the color selection interface provided by the browser.
How to Use the HTML5 Color Picker
Let’s break down how you can implement a color picker in your website and make it interactive.
1. Basic HTML Code for the Color Picker
First, add the following code to your HTML document. This will create a simple color input field and a section to display the selected color.
The <input> element of type color is used to create the color picker.
The <div> with id="color-swatch" displays the currently selected color as a swatch.
The JavaScript listens for changes to the color picker and updates the color swatch accordingly.
2. Customizing the Color Picker
You can customize the color picker in many ways, like setting a default color or limiting the color choices. By adjusting the value attribute of the color input element, you can set an initial color.
Here, #ff5733 is the default color that will appear when the page loads.
Adding Interactivity with JavaScript
The color picker doesn’t just select a color — it can be used in combination with JavaScript to change elements of your webpage dynamically. For instance, you could use the color selected by the user to change the background color of a section, text, or button.
1. Color Picker with Dynamic Background Change
Here’s a simple example that changes the background color of a section based on the selected color:
<div id="content" style="width: 100%; height: 200px; background-color: #ffffff;">
<h3>This section's background color will change</h3>
</div>
<input type="color" id="color-picker">
This will allow the user to choose a color, and the background of the <div> with the id="content" will dynamically update as they pick different colors.
Screenshots of Color Picker in Action
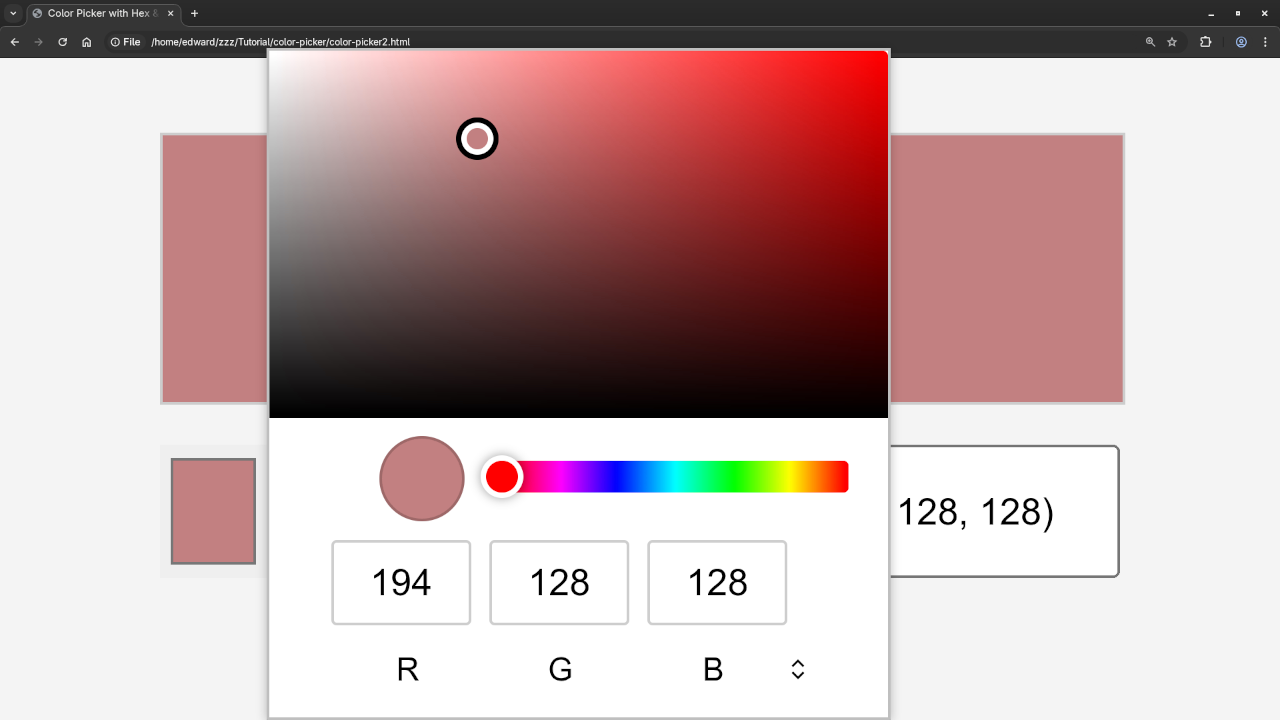
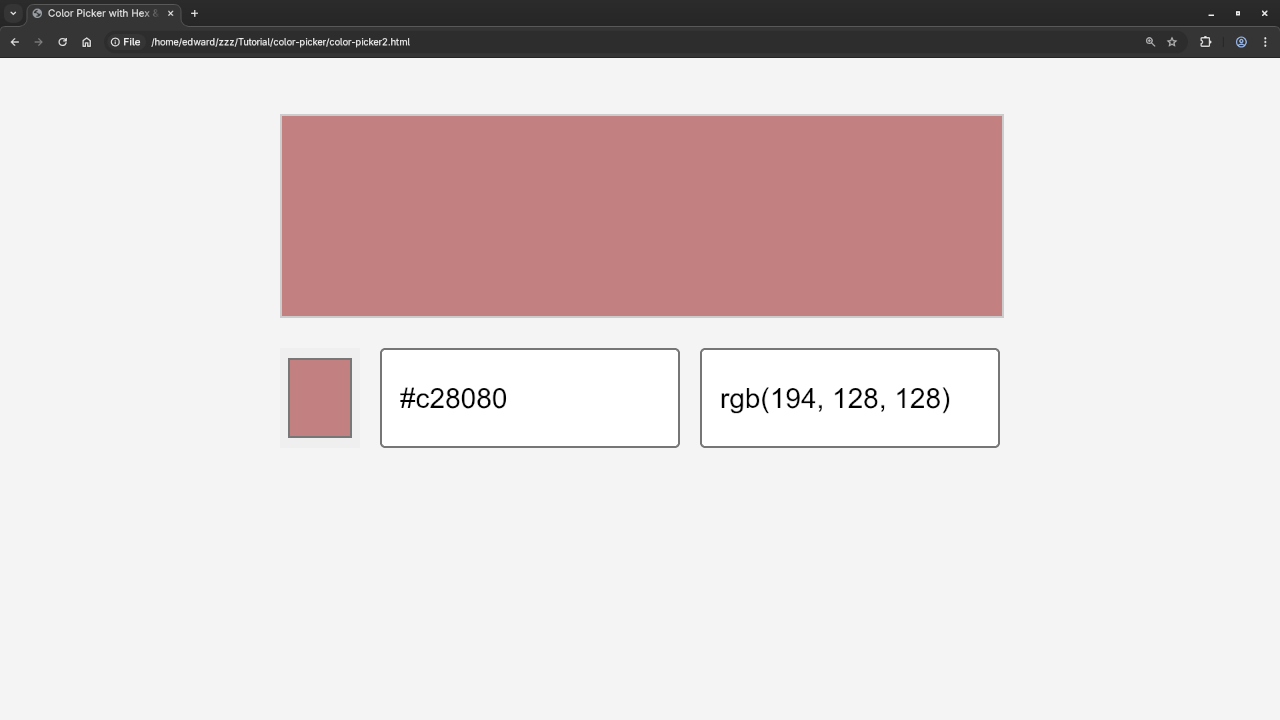
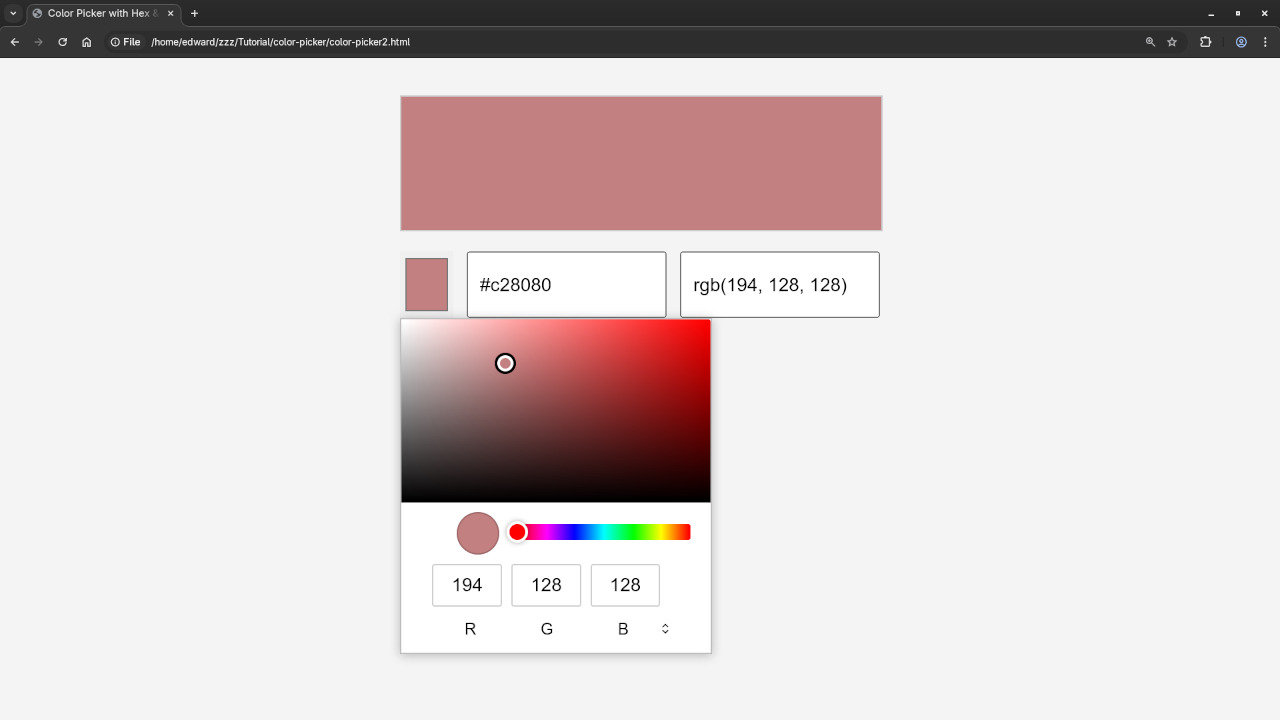
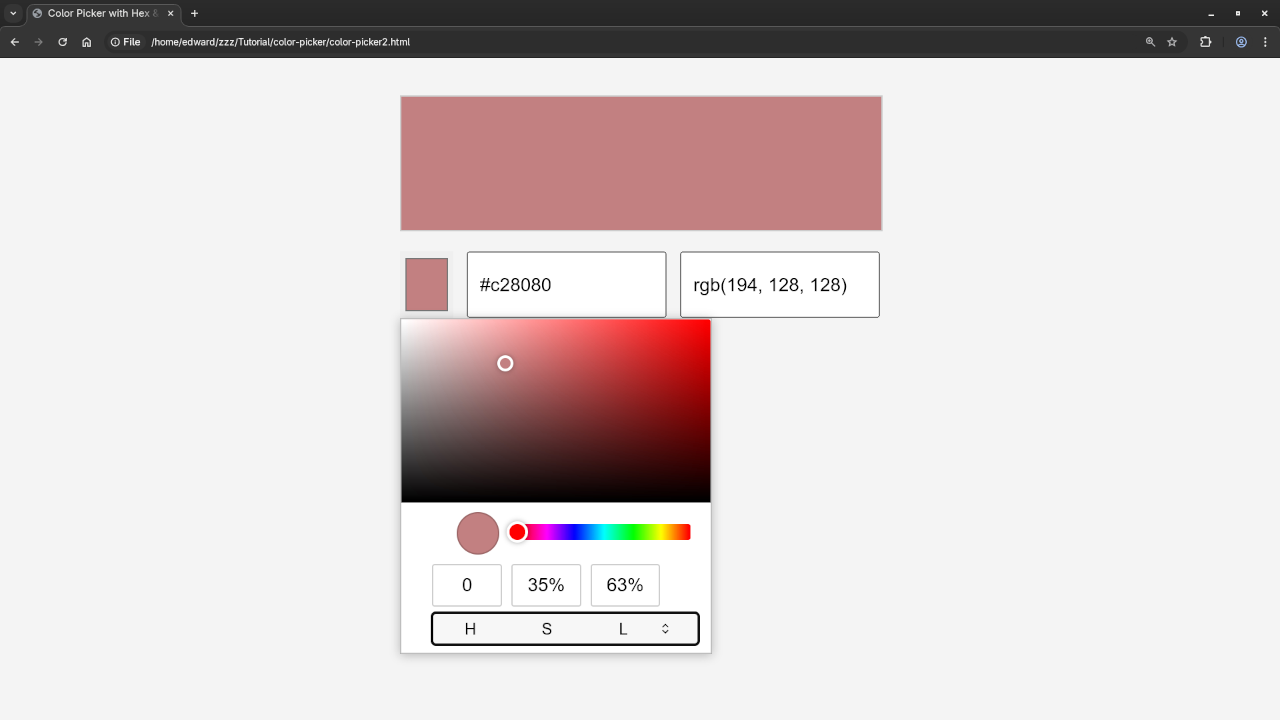
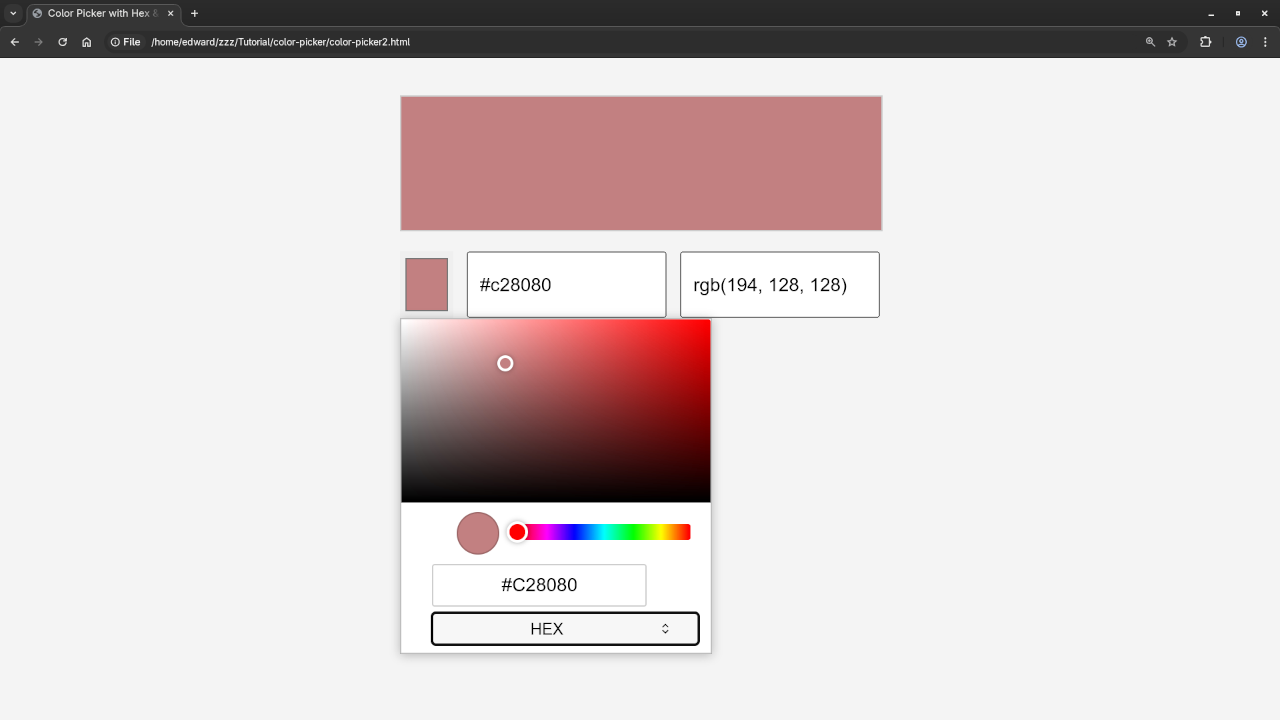
Web Browser Displaying Selected Color In A Color SwatchWeb Browser Displaying RGB Interface With Color SelectionWeb Browser Displaying HSL Interface With Color SelectionWeb Browser Displaying HEX Interface With Color Selection
Watch the Live Screencast
HTML Input Element Color Picker Video
More Resources for Learning JavaScript
If you’re looking to dive deeper into web development and JavaScript, I recommend checking out my book on JavaScript, Learning JavaScript. It’s packed with beginner-friendly content to get you started with JavaScript and web development.
For an in-depth learning experience, you can also check out my course on JavaScript, Learning JavaScript, where we cover topics like variables, functions, objects, arrays, and more.
If you’re looking for personalized help, I’m available for one-on-one programming tutorials. Whether you need assistance with JavaScript, HTML, or any other topic, feel free to contact me here.
Conclusion
The HTML5 <input type="color"> element is a powerful and simple tool to implement color pickers on your website. It’s easy to use, and with just a little JavaScript, you can make your website interactive by letting users select and apply colors to various elements.
I hope you found this tutorial helpful! Feel free to reach out if you have any questions, or if you’d like to learn more about JavaScript and web development.
If you’ve been thinking about automating your home, look no further than Home Assistant — a powerful, open-source platform that runs entirely offline on your own hardware. With a thriving community, frequent updates, and support for thousands of devices and services, Home Assistant gives you full control over your smart home.
In this guide, we’ll introduce Home Assistant, explain why it’s a great choice for privacy-conscious smart home enthusiasts, and walk through a simple containerized installation using Podman or Podman Compose.
💡 What is Home Assistant?
Home Assistant is a free, open-source home automation platform that focuses on local control and privacy. You can integrate everything from smart lights and thermostats to motion sensors and voice assistants — all while keeping your data within your network.
Whether you’re tech-savvy or just starting out, Home Assistant scales with you — from simple automation to complex setups.
🔧 Installing Home Assistant Using Podman
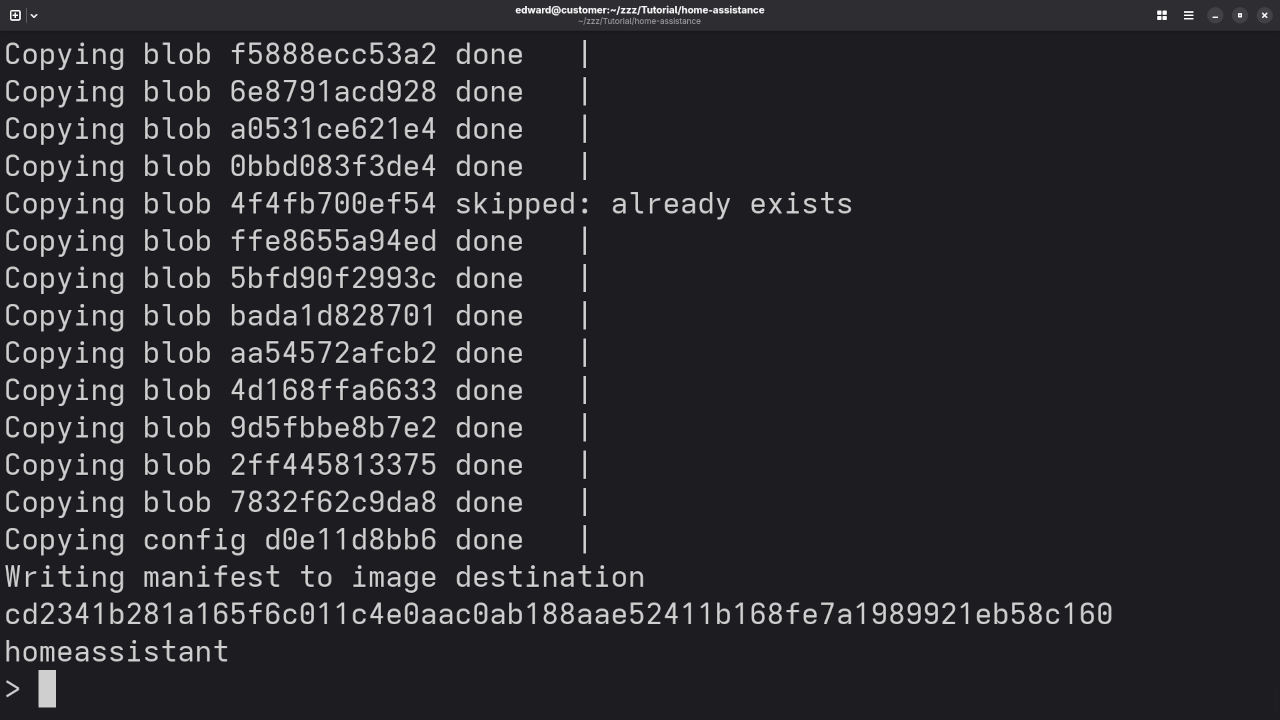
If you’re using a Linux system and want a lightweight, rootless container experience, Podman is a great alternative to Docker. Here’s how you can set up Home Assistant using podman or podman-compose.
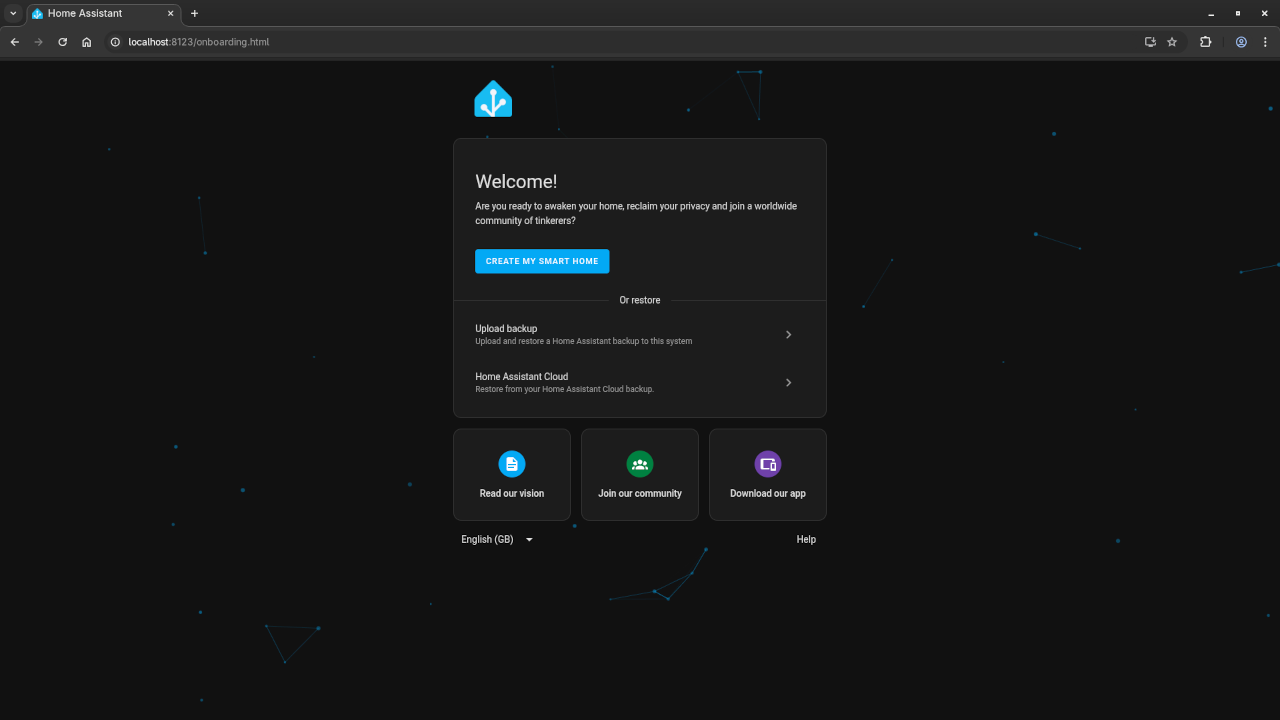
Home Assistant will be available in your browser at:
http://localhost:8123
📝 Note: The network_mode: host setting is required for Home Assistant to access local devices like Zigbee, Z-Wave, and mDNS-discoverable services.
📷 Screenshots
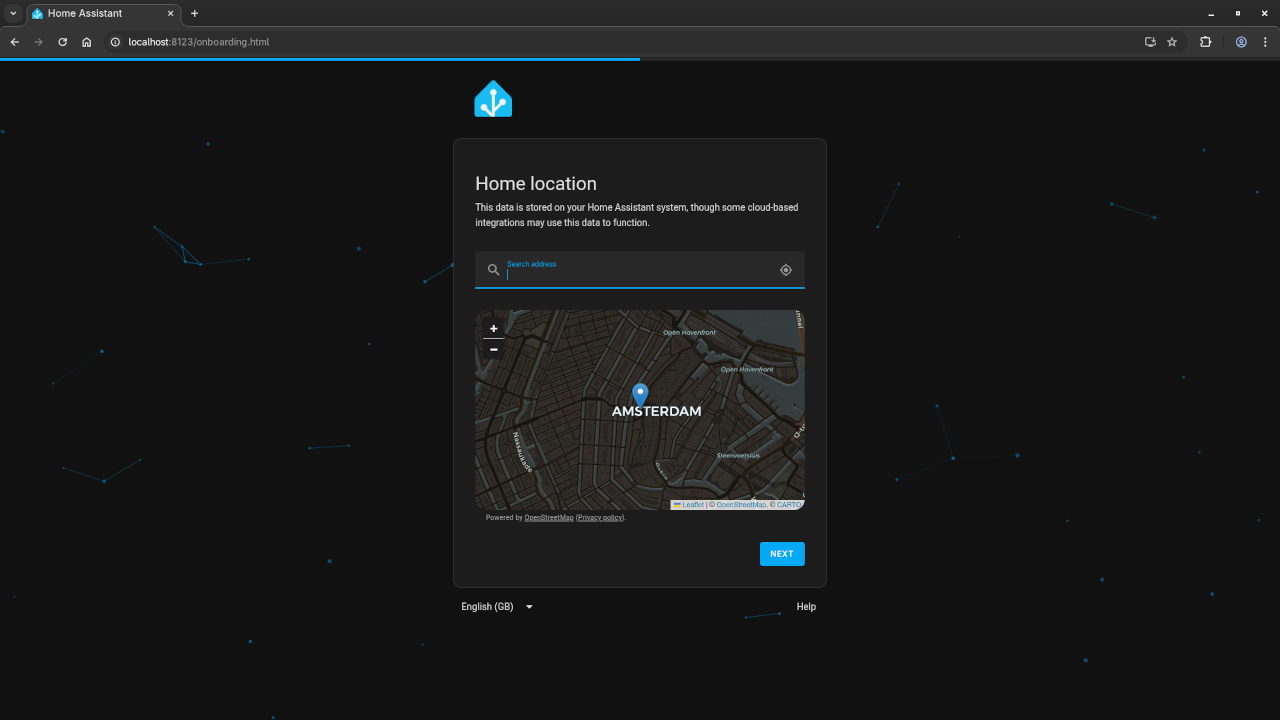
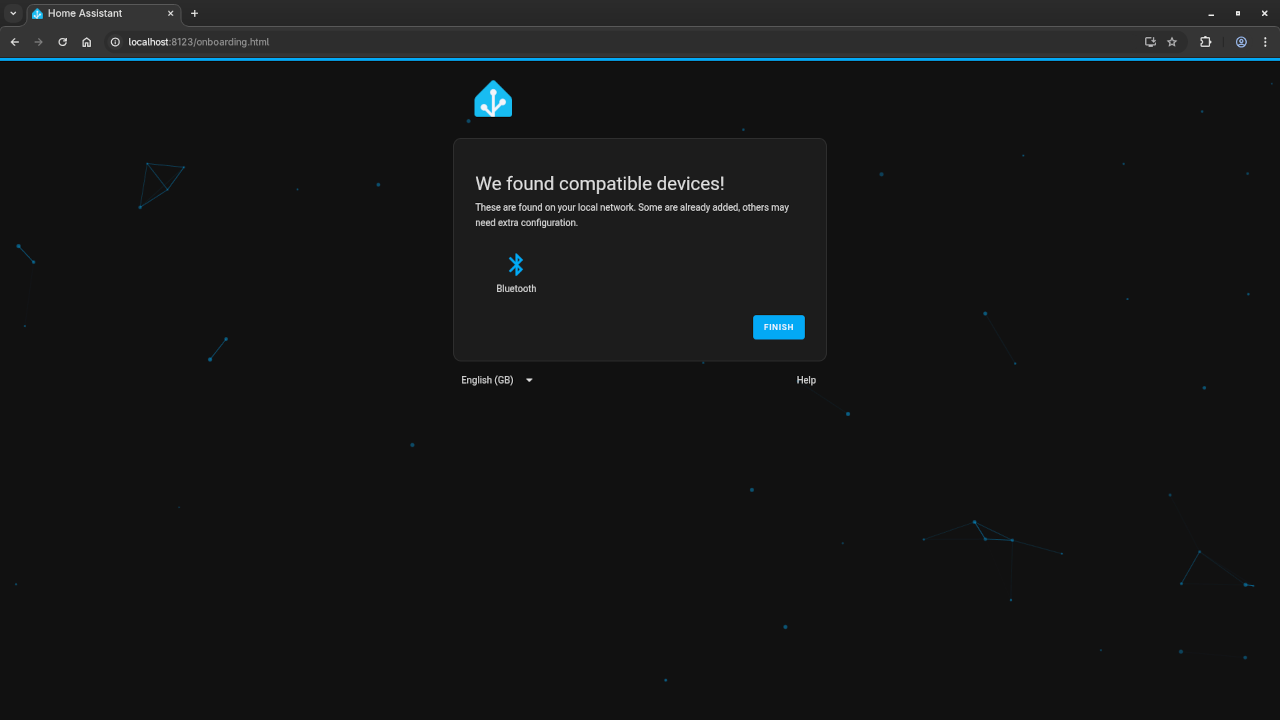
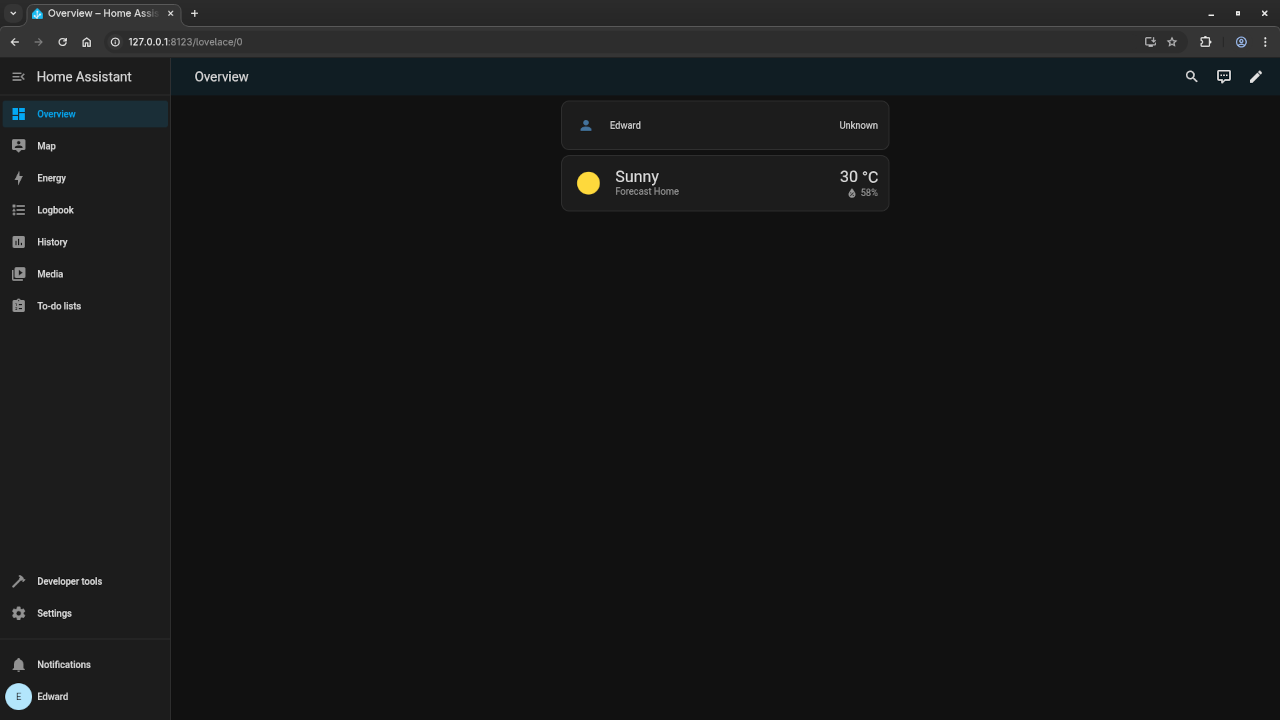
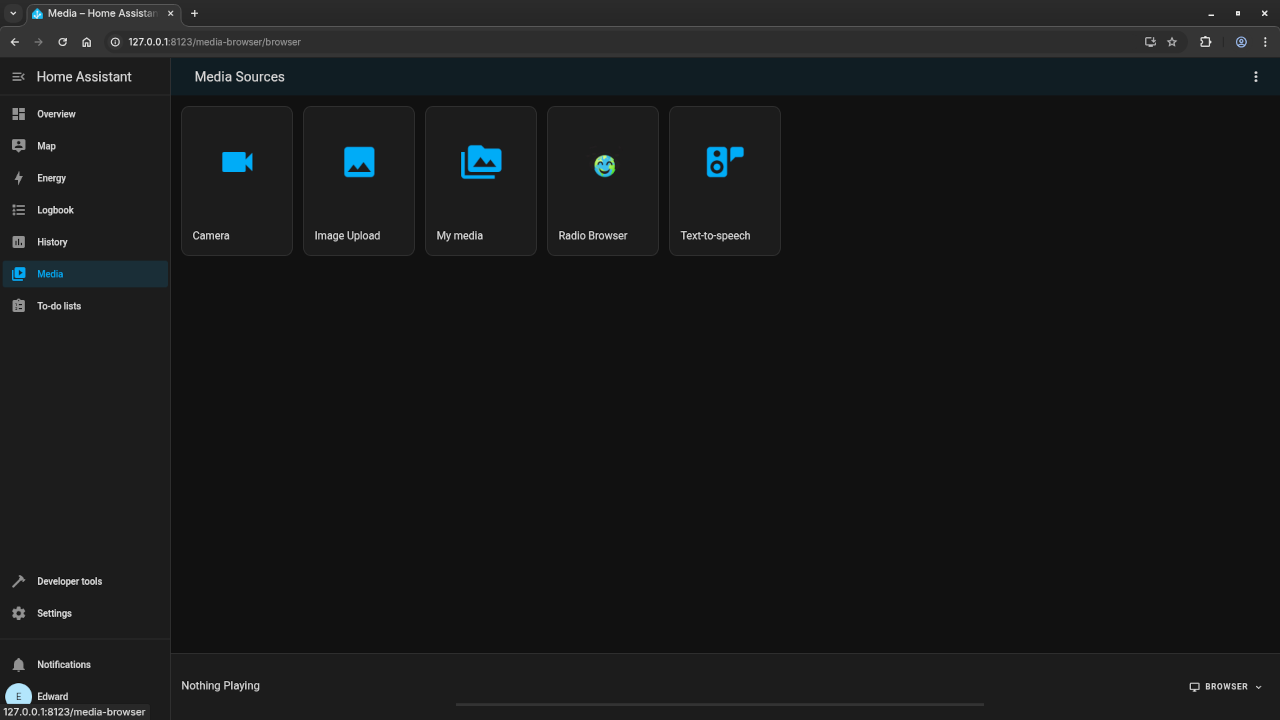
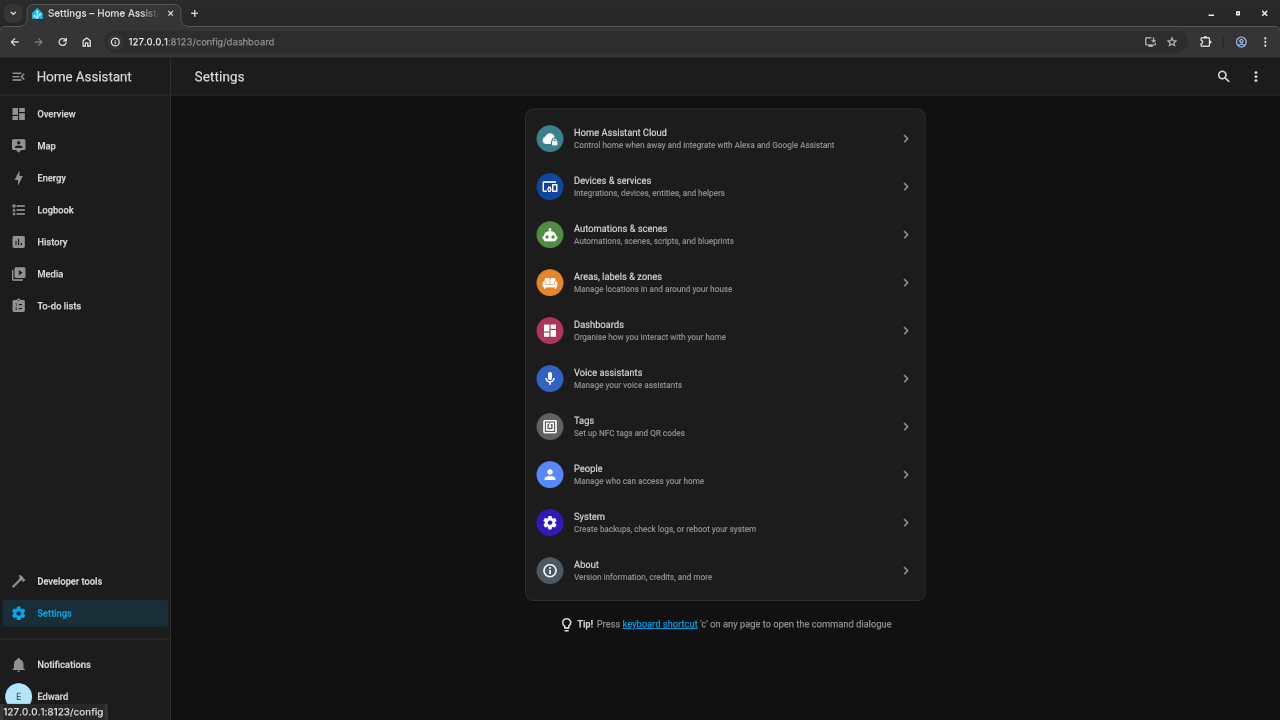
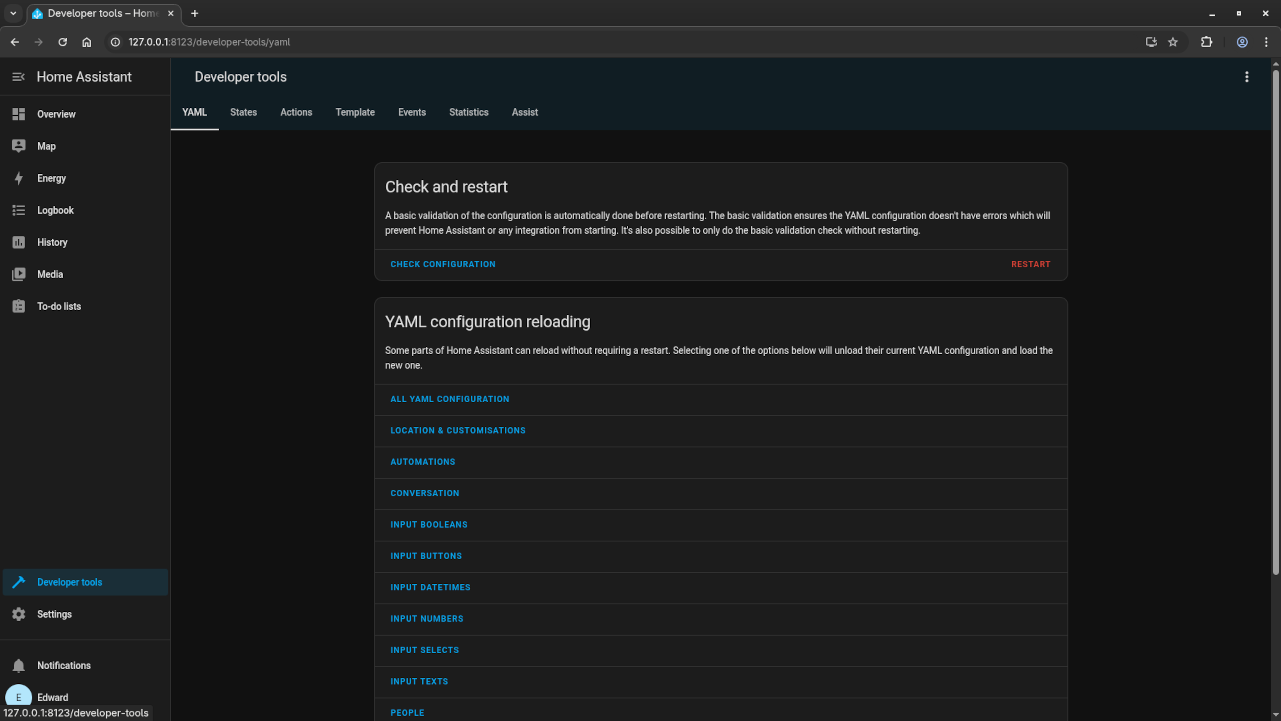
Command Line Displaying Podman Installing Home AssistanceWeb Browser Displaying Home Assistance Installation Home Location ScreenWeb Browser Displaying Home Assistance Installation Devices ScreenWeb Browser Displaying Home Assistance Overview ScreenWeb Browser Displaying Home Assistance Media Sources ScreenWeb Browser Displaying Home Assistance Settings ScreenWeb Browser Displaying Home Assistance Developer Tools Screen
📺 Live Walkthrough (Screencast)
Video Displaying The Installation And Use Of Home Assistance In Container
👨💻 Need Help? I’ve Got You Covered
If you need help installing, updating, or migrating your Home Assistant setup — or if you’re just starting out with programming — I offer one-on-one tutorials and custom support.
Home Assistant is one of the best open-source tools for smart home automation. By using Podman, you gain a lightweight, secure, and rootless container environment that integrates seamlessly with your Linux setup.
Start small, and before long, you’ll have your entire home running on automations tailored just for you!
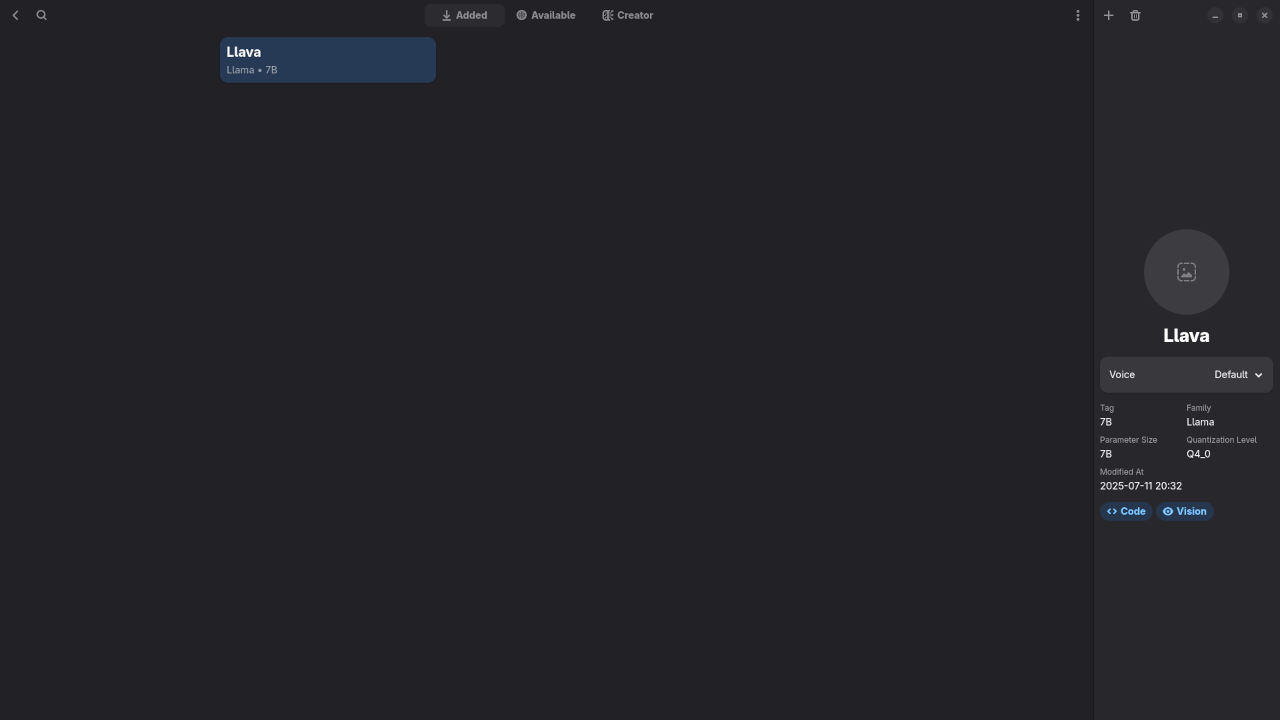
Curious about running open-source AI models right from your Linux desktop? With Llava 7B and Alpaca, a graphical client for Ollama, you can interact with powerful language models entirely offline. In this post, we’ll walk through what Llava is, how to install Alpaca via Flatpak, and how to get everything running locally with ease.
What Is Llava 7B?
Llava 7B is an open-source vision-language large model (LLM) that enables local inference without relying on cloud APIs. It is designed to process both images and text, making it ideal for desktop experimentation, offline assistants, and educational projects.
What Is Alpaca?
Alpaca is a free, open-source desktop GUI for Ollama, which simplifies running local LLMs like Llava 7B. It provides a friendly interface for downloading, configuring, and chatting with models—no terminal required.
✔️ Open source
✔️ Offline capable
✔️ Cross-platform (Linux, macOS, Windows)
✔️ Flatpak available
🔧 Installing Alpaca & Llava 7B on Linux (Flatpak)
Follow these simple steps to install Alpaca and run the Llava 7B model:
Step 1: Install Flatpak (if not already installed)
Start interacting with Llava using natural language prompts
📸 Screenshots
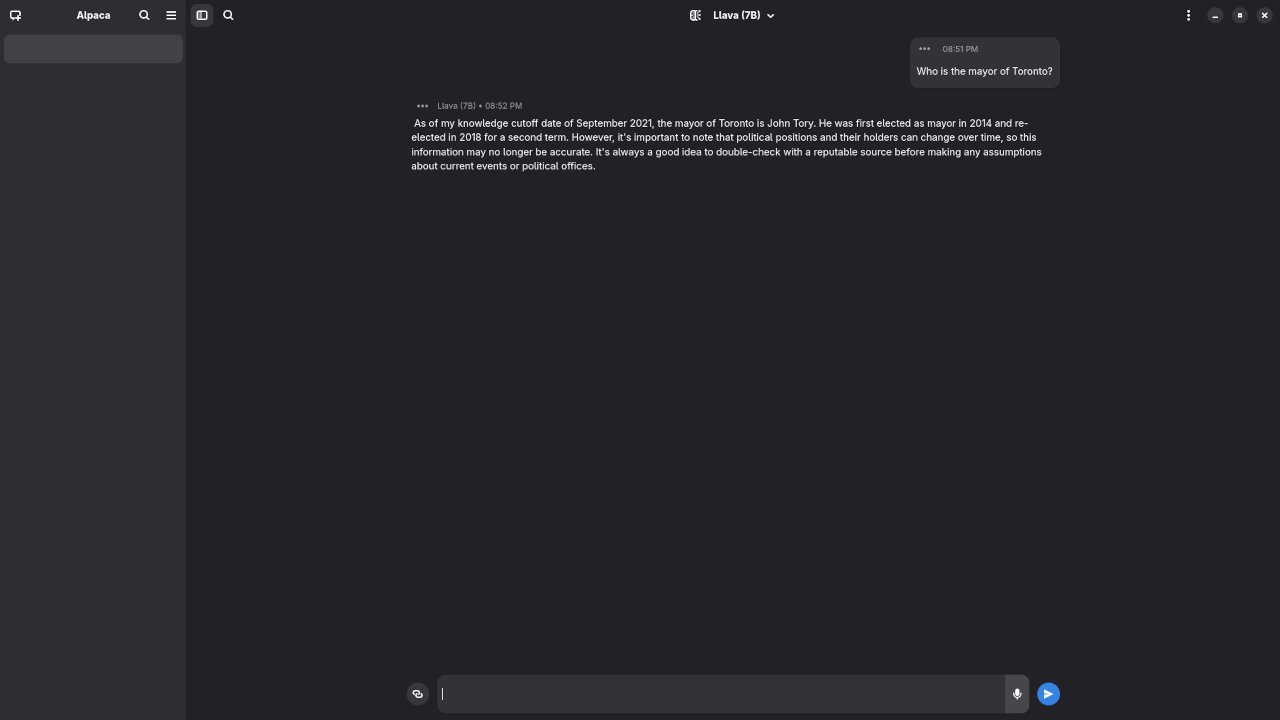
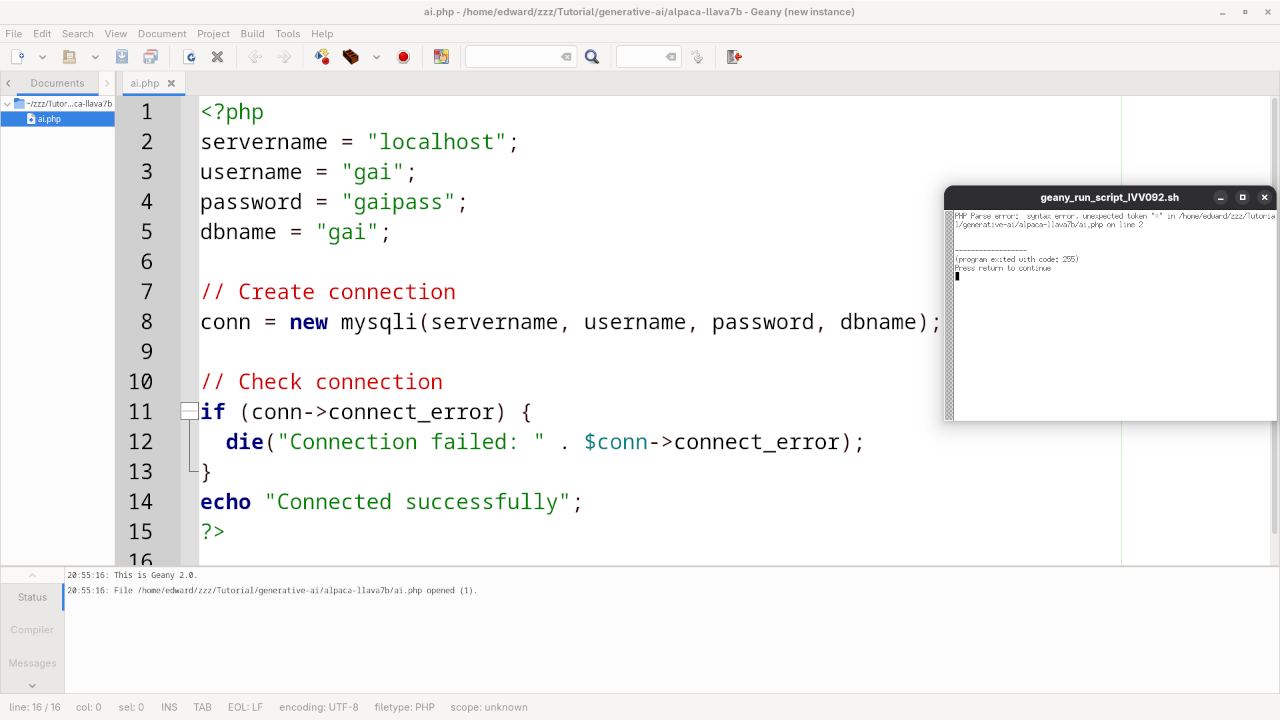
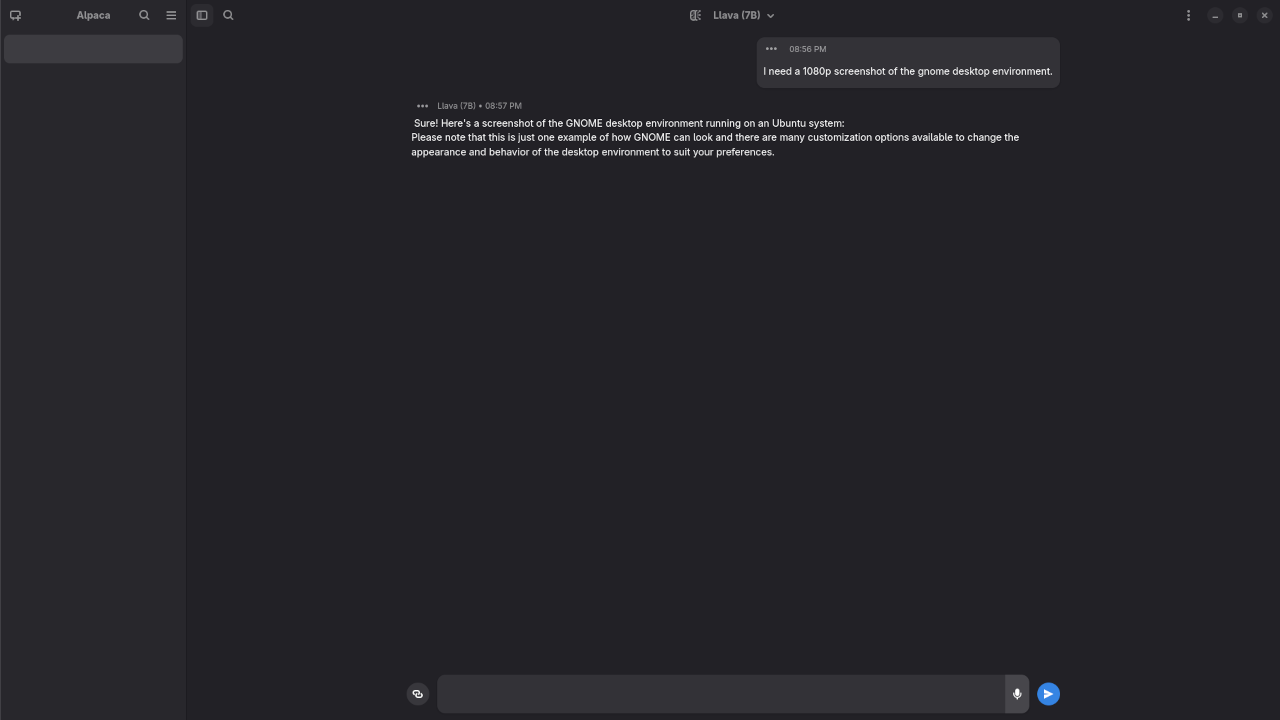
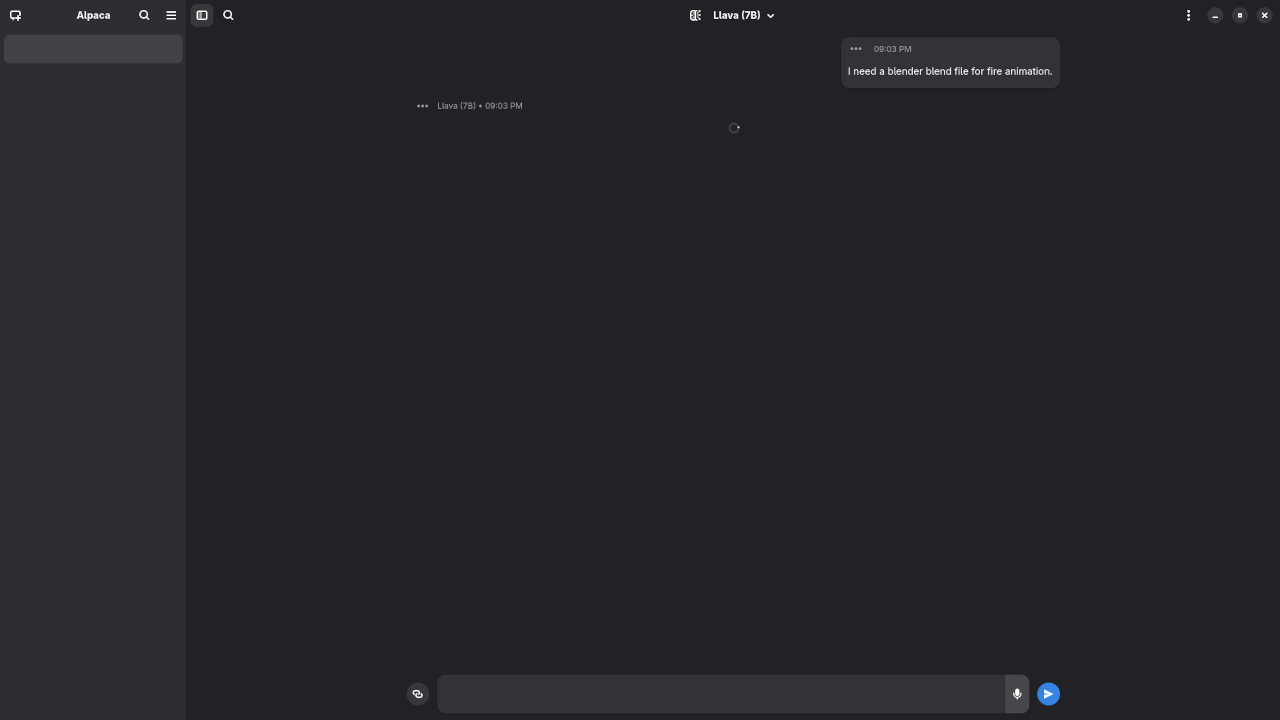
Alpaca With Llava 7B Answered Mayor Of Toronto Request.Alpaca With Llava 7B Answered PHP Code Request.Geany Running Alpaca With Llava 7B Generated PHP Code.Alpaca With Llava 7B Answered Gnome Desktop Screenshot Request.Alpaca With Llava 7B Answered Blender Blend File Request.
🎥 Screencast
Video Displaying Using Llava In Alpaca
Results:
Who is the mayor of Toronto?
Produced inaccurate outdated answer to Olivia Chow as the mayor of Toronto.
I need a PHP code snippet to connect to a MySQL database.
Produced inaccurate syntax PHP code snippet to connect to a MySQL database.
I need a 1080p screenshot of the gnome desktop environment.
Produced impossible answer to generate a 1080p screenshot of Gnome desktop environment because it is a text-based AI lacking ability.
I need a kotlin code snippet to open the camera using Camera2 API and place the camera view on a TextureView.
Crashed twice.
I need a blender blend file for fire animation.
Never answered question.
📚 Learn Python With Me
If you’re exploring AI, Python is an essential skill! Check out my book Learning Python for a beginner-friendly introduction to programming with real examples and exercises.
With tools like Alpaca and models like Llava 7B, running advanced AI locally has never been easier. You don’t need expensive cloud subscriptions or powerful servers—just a Linux machine, Flatpak, and a bit of curiosity.
If you need help setting up or learning Python, I’m here to support you every step of the way.
In this blog post, we’ll explore the Fat-Free Framework (F3), a lightweight and powerful PHP framework that supports the MVC (Model-View-Controller) design pattern. If you’re a beginner looking to build a simple web application using a modern PHP framework, Fat-Free is an excellent choice due to its simplicity, ease of use, and flexibility.
We will cover how to install Fat-Free 3.9.0 using Composer, and how to connect to a MariaDB database table to retrieve and display data as HTML. By the end of this guide, you’ll have a fully functioning application that connects to a database and outputs data dynamically on your website.
Step 1: Install Fat-Free Framework Using Composer
To start, make sure you have Composer installed on your computer. Composer is a dependency manager for PHP, and we’ll use it to easily install the Fat-Free Framework.
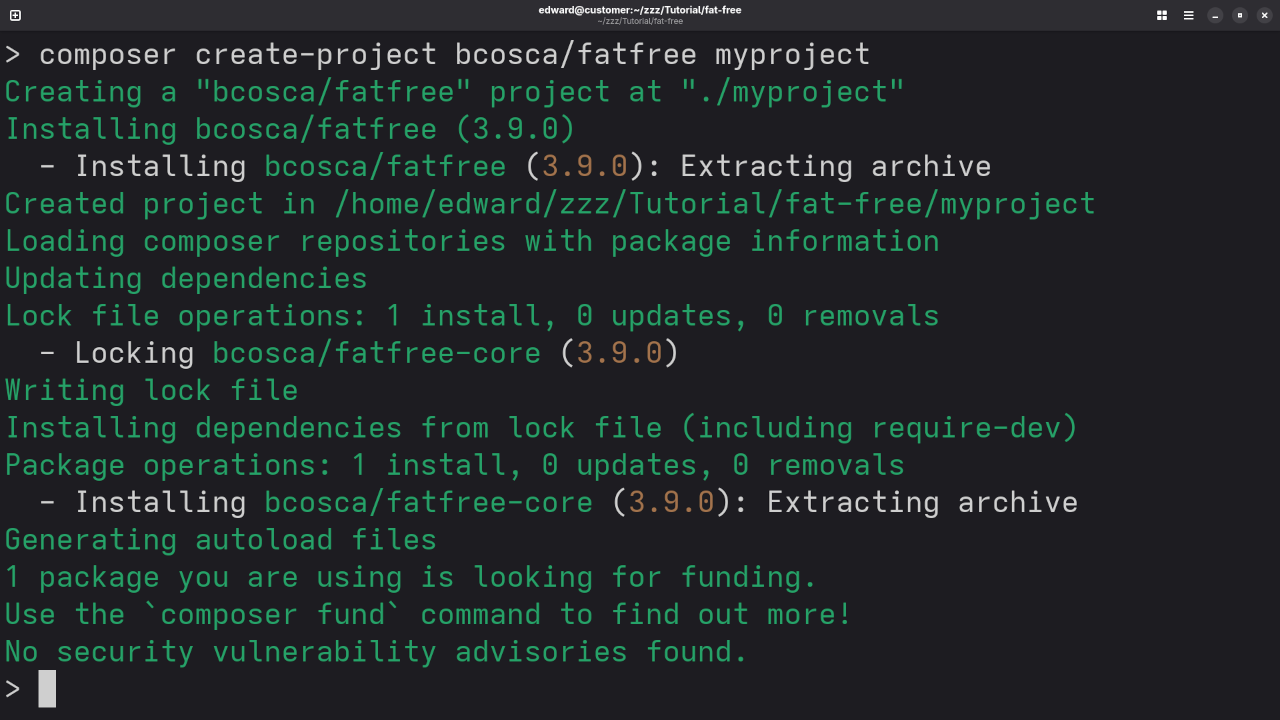
Run the following command in your terminal to create a new project and install Fat-Free 3.9.0:
This command will create a new directory with your project name, and install Fat-Free Framework version 3.9.0 inside that directory.
Step 2: Setup Database Connection
In this example, we’ll connect to a MariaDB database. First, make sure you have MariaDB set up on your local machine, or use a remote database. You’ll need the following credentials:
Host: localhost
Username: root (or your MariaDB username)
Password: root (or your MariaDB password)
Database Name: test_db
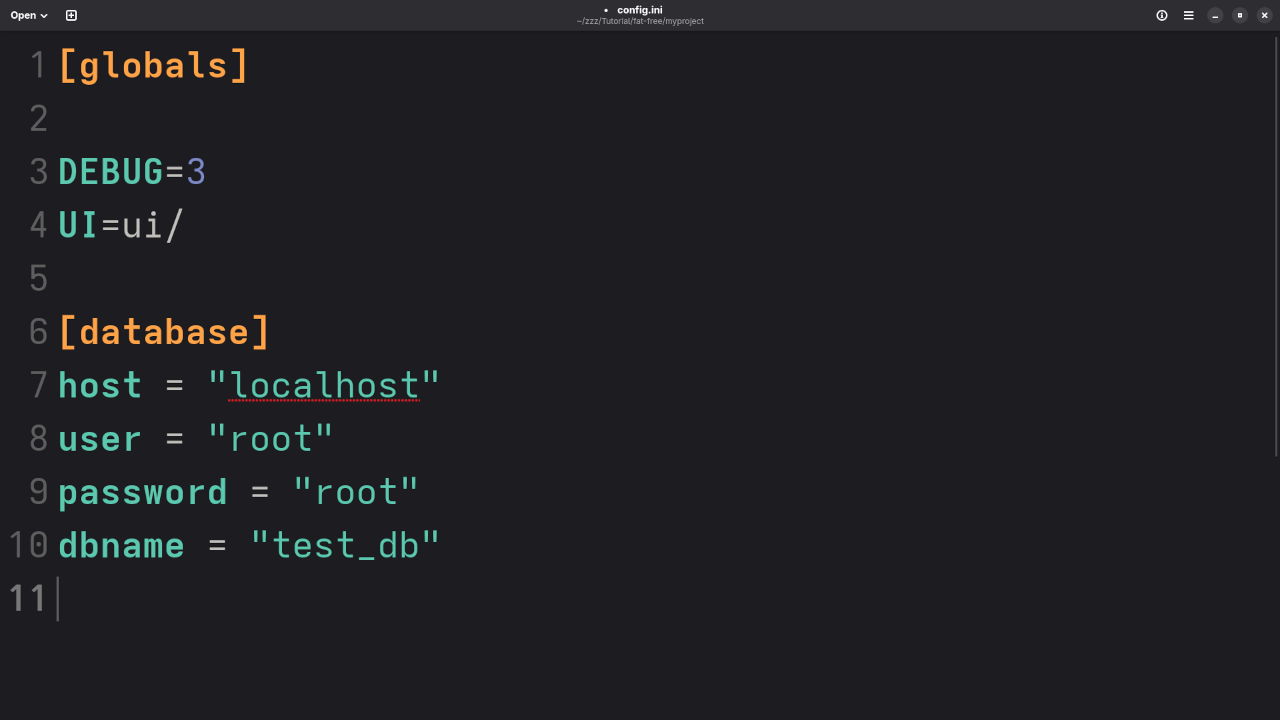
Inside your Fat-Free project, create a file called config.ini to store your database connection settings:
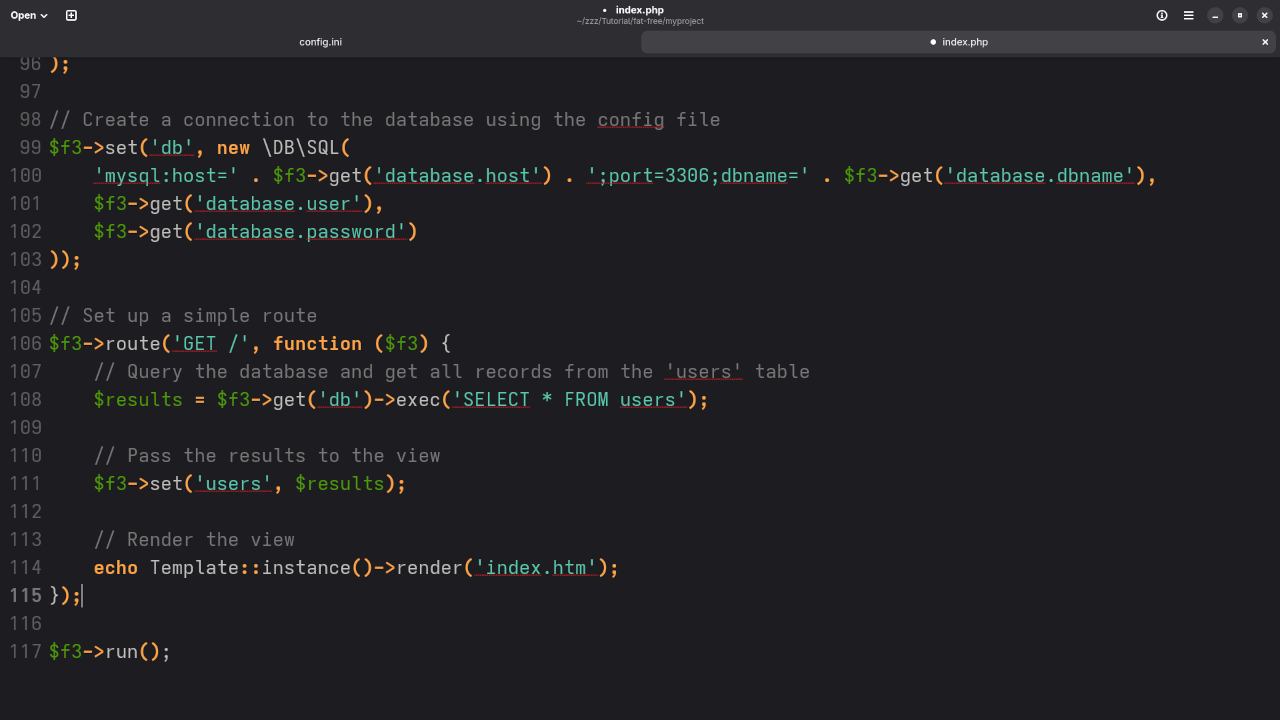
Next, we’ll configure the Fat-Free Framework to read this configuration and connect to the database. Open the index.php file in your project, and add the following code:
<?php
// Include Fat-Free Framework
$f3 = require('vendor/bcosca/fatfree/core/base.php');
// Load the configuration file
$f3->config('config.ini');
// Create a connection to the database using the config file
$f3->set('db', new \DB\SQL(
'mysql:host=' . $f3->get('database.host') . ';port=3306;dbname=' . $f3->get('database.dbname'),
$f3->get('database.user'),
$f3->get('database.password')
));
// Set up a simple route
$f3->route('GET /', function ($f3) {
// Query the database and get all records from the 'users' table
$results = $f3->get('db')->exec('SELECT * FROM users');
// Pass the results to the view
$f3->set('users', $results);
// Render the view
echo Template::instance()->render('index.htm');
});
// Run the Fat-Free Framework
$f3->run();
?>
In the above code:
We set up a database connection using Fat-Free’s \DB\SQL object.
We route the GET request for the homepage (/) to query the users table.
The results are passed to the view (which will be created in the next step).
Step 3: Create the View (HTML Template)
Now, let’s create the index.htm file inside the views folder in your project directory. This template will display the users fetched from the database:
We use Fat-Free’s Template engine to loop through the users array and display each user’s name and email.
Step 4: Test Your Application
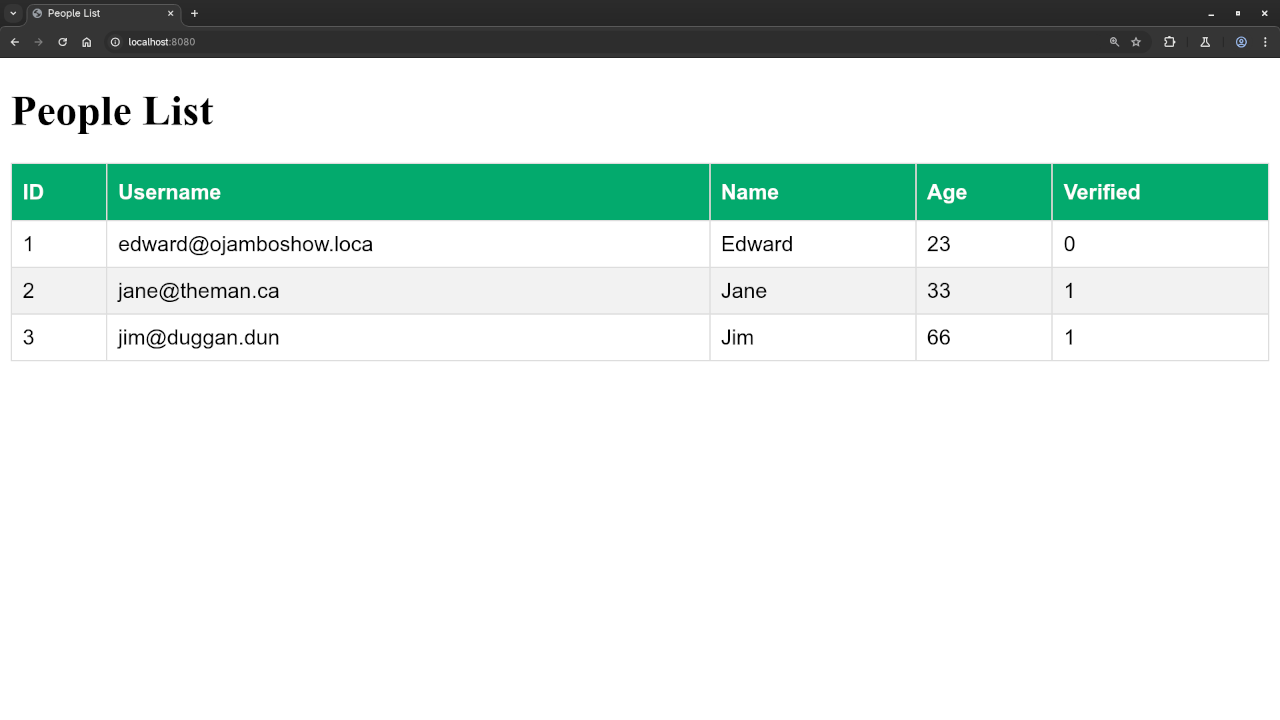
Now, you can run the application locally. Open your browser and go to http://localhost:your-port. You should see the list of users fetched from your MariaDB database table, displayed dynamically in the browser.
Adding Screenshots and Embedded Video
Command Line Installation Of Fat-Free Web FrameworkGnome Text Editor Displaying Configuration FileGnome Text Editor Displaying Custom People RouteGnome Text Editor Displaying Custom People ViewWeb Browser Displaying User ReferenceWeb Browser Displaying Custom People Route Result
For more detailed step-by-step guidance, check out the accompanying YouTube screencast where I walk you through the entire process
Fat-Free Custom View Records In Web Browser
Conclusion
The Fat-Free Framework (F3) is an excellent choice for beginner PHP developers who want to build lightweight and maintainable applications quickly. In this post, we’ve demonstrated how to set up a simple Fat-Free application that connects to a MariaDB database and outputs data using the MVC architecture.
For those interested in diving deeper into PHP programming, be sure to check out my book, Learning PHP, and the course, Learning PHP, where I teach PHP from the ground up.
I also offer one-on-one programming tutorials and can assist with updating or migrating Fat-Free Framework applications. If you need help with your PHP projects, feel free to reach out to me through my contact page.