Git is a powerful, open-source version control system (VCS) used by software developers around the world. If you’re just starting out in programming or software development, understanding Git is crucial. In this post, we’ll cover the basics of Git, why it’s so important, and how to run it on the command line.
Why Should You Use Git?
Track Changes: Git keeps a detailed history of all your changes, so you can go back in time to see what happened.
Collaboration: If you’re working with a team, Git helps you merge changes from multiple developers without overwriting anyone’s work.
Branching and Merging: Git allows you to create branches, so you can work on new features or bug fixes without disrupting the main codebase. Once you’re done, you can merge your changes back.
Backup: Since Git allows you to push your code to remote repositories (like GitHub or GitLab), you have a backup of your work stored online.
Free and Open-Source: Git is free and open-source, making it accessible for developers of all skill levels.
How to Run Git on the Command Line
Getting started with Git on the command line can seem intimidating, but it’s quite simple once you know the basics. Below are the essential Git commands you’ll need to get started:
1. Install Git
First, you’ll need to install Git. If you haven’t already, you can download it from the official Git website here.
2. Check if Git is Installed
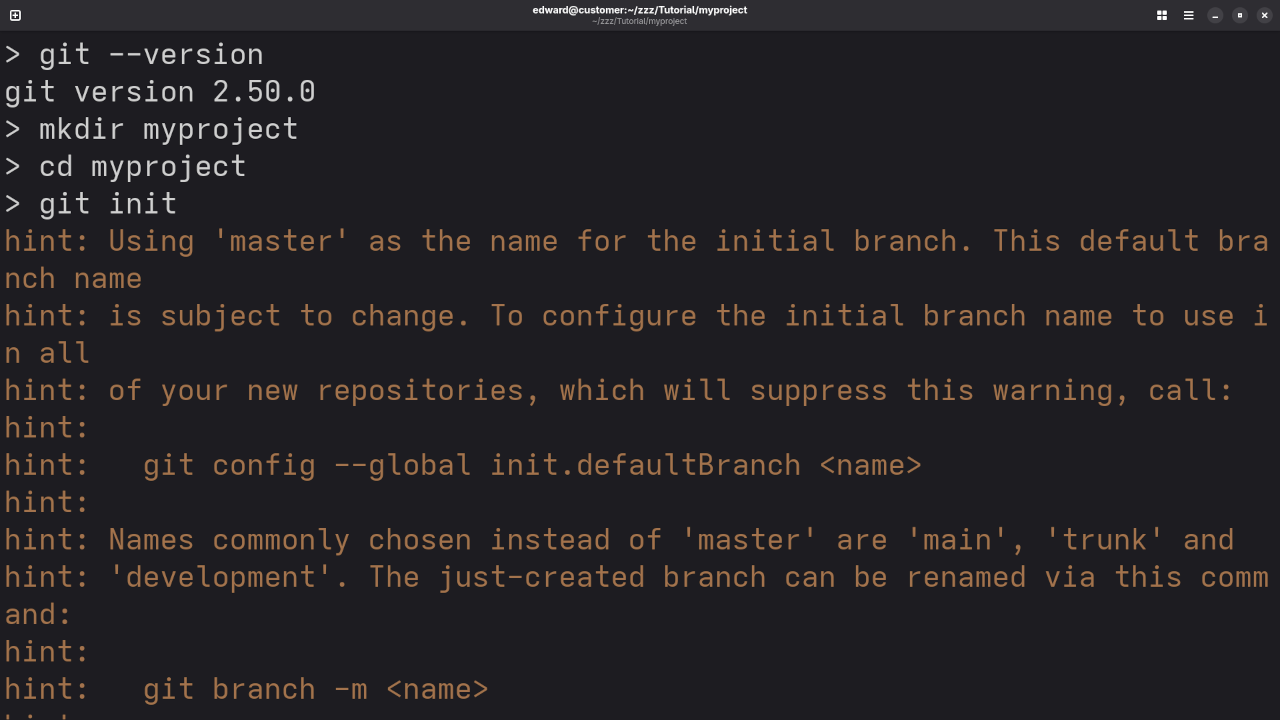
Once installed, open the terminal or command prompt and type the following command to check if Git is correctly installed:
git --version
This will display the version of Git installed on your system.
Basic Git Commands
Here are some basic Git commands that will help you get started:
1. git init
Initializes a new Git repository in your project directory. Run this command inside your project folder.
git init
This will create a hidden .git folder in your project, where all the version control data will be stored.
2. git add
After making changes to your files, you can add them to the staging area using the following command:
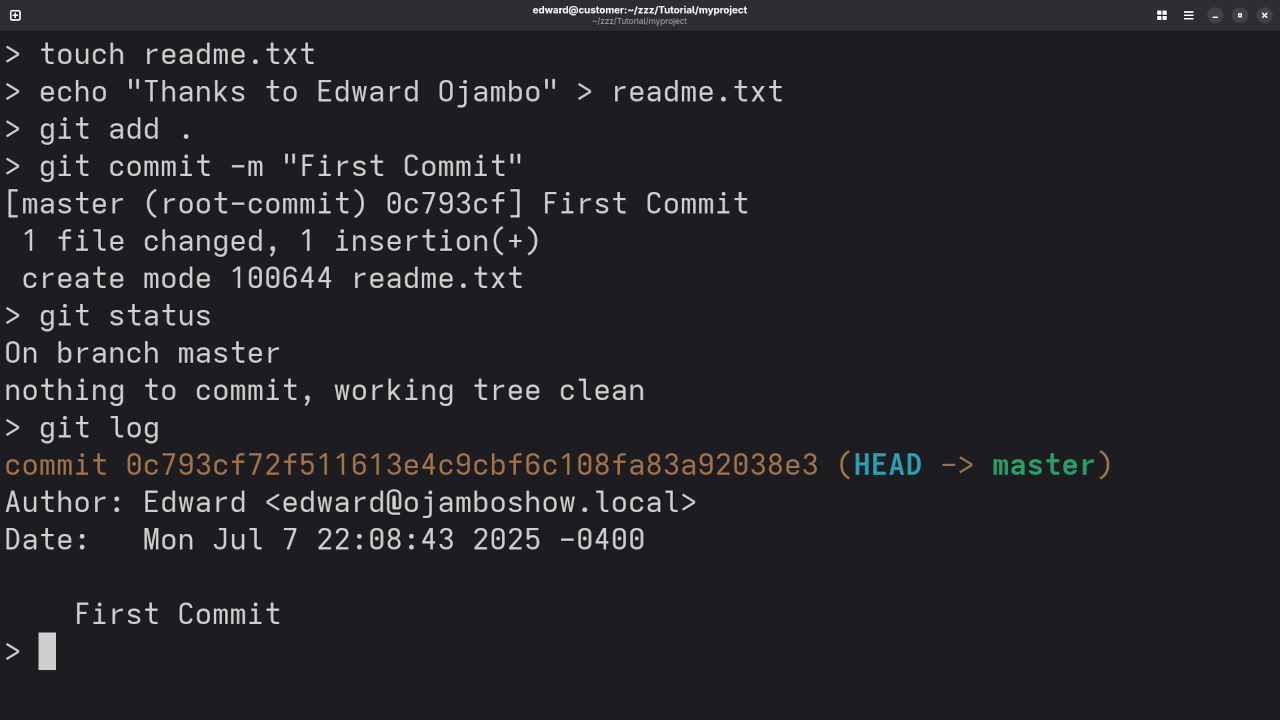
git add .
This will add all changed files in the directory to the staging area. If you only want to add specific files, you can replace the period (.) with the file name(s).
3. git commit
Once the files are staged, you need to commit the changes to your local Git repository:
git commit -m "Your commit message here"
The commit message should describe the changes you’ve made.
4. git status
To see the current state of your repository, use the git status command:
git status
This shows you what files have been modified, which files are staged for commit, and which files are untracked.
5. git log
This command shows the commit history of the repository:
git log
You’ll see a list of commits, along with the commit message, author, and timestamp.
Screenshots/Visual Guide
Command Line Git Check And Initialization Of RepositoryTerminal Showing Git Adding to Staging Area And Committing Changes
Watch the Live Screencast
To see Git in action, check out this live screencast where I walk through setting up and using Git on the command line:
Screencast Of Git Setup And Usage
Learn More About Git and Programming
If you’re looking to dive deeper into Git and programming, I have a collection of programming books available on Amazon. You can browse them here.
Additionally, I offer a variety of online programming courses that cover topics from Git to web development and beyond. You can check them out here.
If you prefer personalized, one-on-one online programming tutorials, I also offer one-on-one sessions. Feel free to contact me for more details and to schedule a tutorial here.
Conclusion
Git is an essential tool for developers, and getting started with it will make your coding journey much smoother. With its ability to track changes, support collaboration, and provide backups, Git is something every developer should learn.
I hope this guide helps you take the first step into using Git. Feel free to ask any questions or share your experience in the comments below!
In this beginner-level tutorial, we’ll walk through the process of creating a golden cube using the Blender Python API and displaying it in a web browser using the <model-viewer> element. This simple process will teach you how to work with 3D models in Blender and embed them in websites with minimal effort.
By the end of this tutorial, you’ll:
Generate a golden cube in Blender using Python.
Export the cube as a .glb file.
Embed the .glb model in a webpage using the <model-viewer> element.
Let’s get started!
Step 1: Create the Golden Cube in Blender Using Python
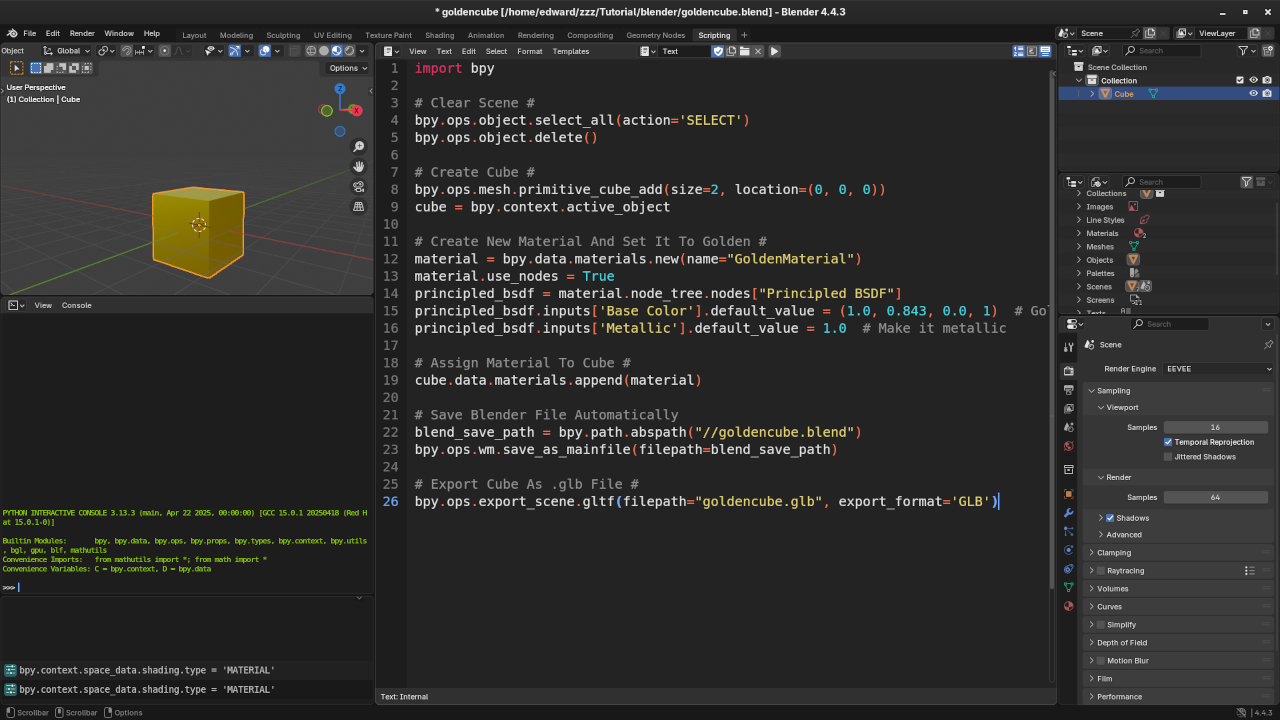
First, we’ll use the Blender Python API to generate a simple cube and apply a golden material. This is done by writing a Python script inside Blender’s scripting workspace.
Here’s the Python code that creates the cube:
import bpy
# Clear any existing mesh objects
bpy.ops.object.select_all(action='SELECT')
bpy.ops.object.delete()
# Create a new cube
bpy.ops.mesh.primitive_cube_add(size=2)
cube = bpy.context.object
# Create a new material for the golden effect
material = bpy.data.materials.new(name="GoldenMaterial")
material.use_nodes = True
bsdf = material.node_tree.nodes["Principled BSDF"]
bsdf.inputs["Base Color"].default_value = (1.0, 0.84, 0.0, 1) # Gold color
bsdf.inputs["Roughness"].default_value = 0.2 # Slightly shiny
# Assign the material to the cube
cube.data.materials.append(material)
# Save the model as a GLB file
bpy.ops.export_scene.gltf(filepath="/path/to/your/golden_cube.glb", export_format='GLB')
Steps to run the script:
Open Blender and switch to the Scripting workspace.
Paste the code in the text editor.
Click Run Script.
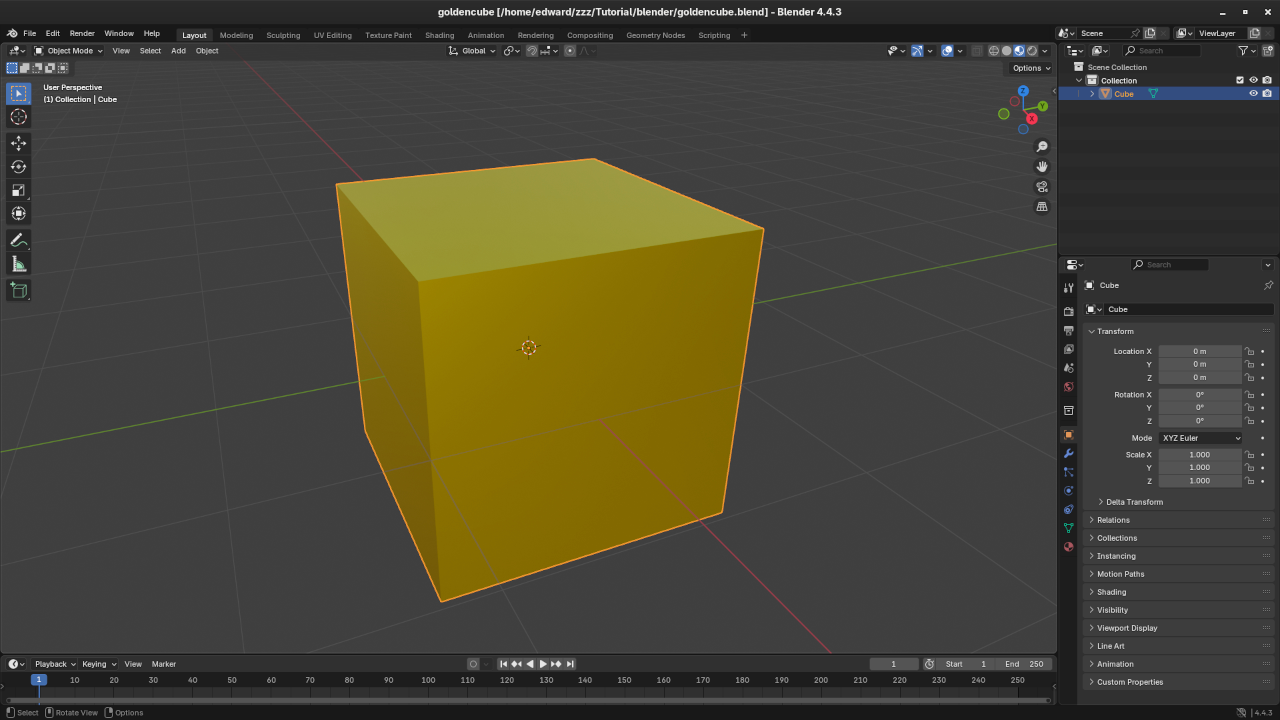
The cube will appear in the scene with a golden material applied.
The script will export the cube as a .glb file to the specified directory.
Step 2: Export the Cube as a GLB File
Once you run the script, Blender will create the golden cube and automatically export it as a .glb file. This file can now be used to display the model in any web project.
Step 3: Display the Golden Cube in Your Web Browser Using <model-viewer>
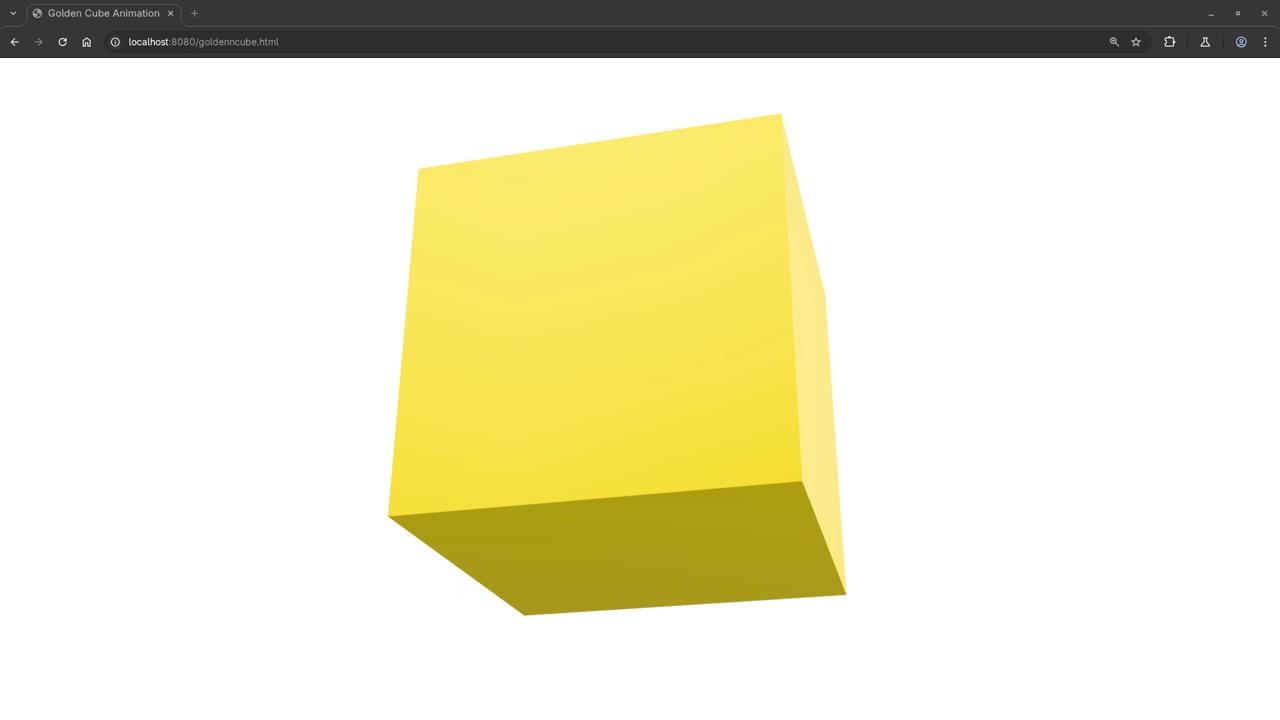
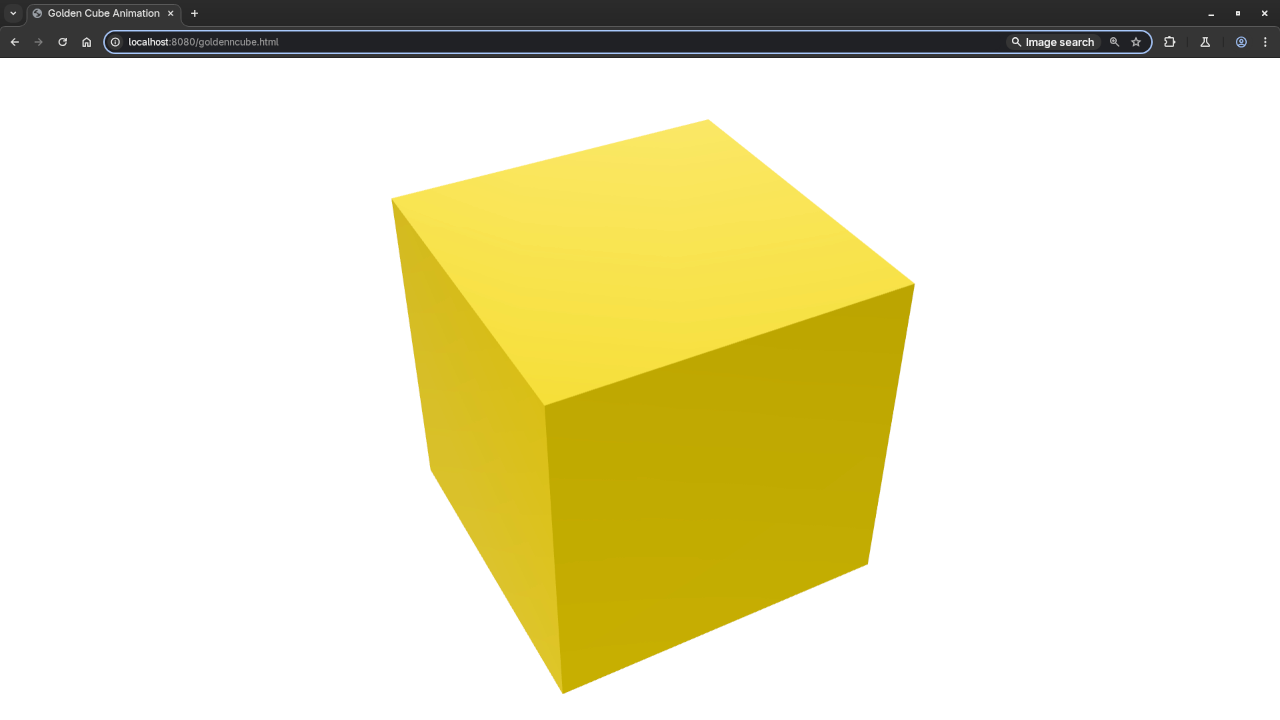
To display the golden cube in your web browser, we’ll use the <model-viewer> tag. This HTML tag is simple to use and allows you to embed 3D models in your website without needing to write complex WebGL or JavaScript code.
Here’s the basic HTML code to display the cube in your browser:
This command tells Blender to run in the background and execute the Python script, which will create the golden cube and export it as a .glb file.
Step 5: Adding Screenshots and YouTube Live Screencast
Blender Scripting Tab Displaying Golden Cube In Blender ViewportBlender Scripting Tab Displaying Golden Cube In Blender Scripting WorkspaceWeb Browser Displaying Rendered Golden CubeScreencast For Blender Python API Golden Cube
Learn More About Python and Blender
If you enjoyed this tutorial, be sure to check out my books and course to further your Python programming skills:
I also offer one-on-one online Python tutorials, including Blender-specific lessons. Feel free to reach out via my contact page for personalized help!
Conclusion
Congratulations! You’ve successfully learned how to generate a golden cube in Blender using the Python API and display it in a web browser using the simple <model-viewer> tag. This is just one of the many things you can achieve with Blender and Python. Keep experimenting and creating amazing 3D models!
🎥 Generate Page Flip Animation Via Blender Python API
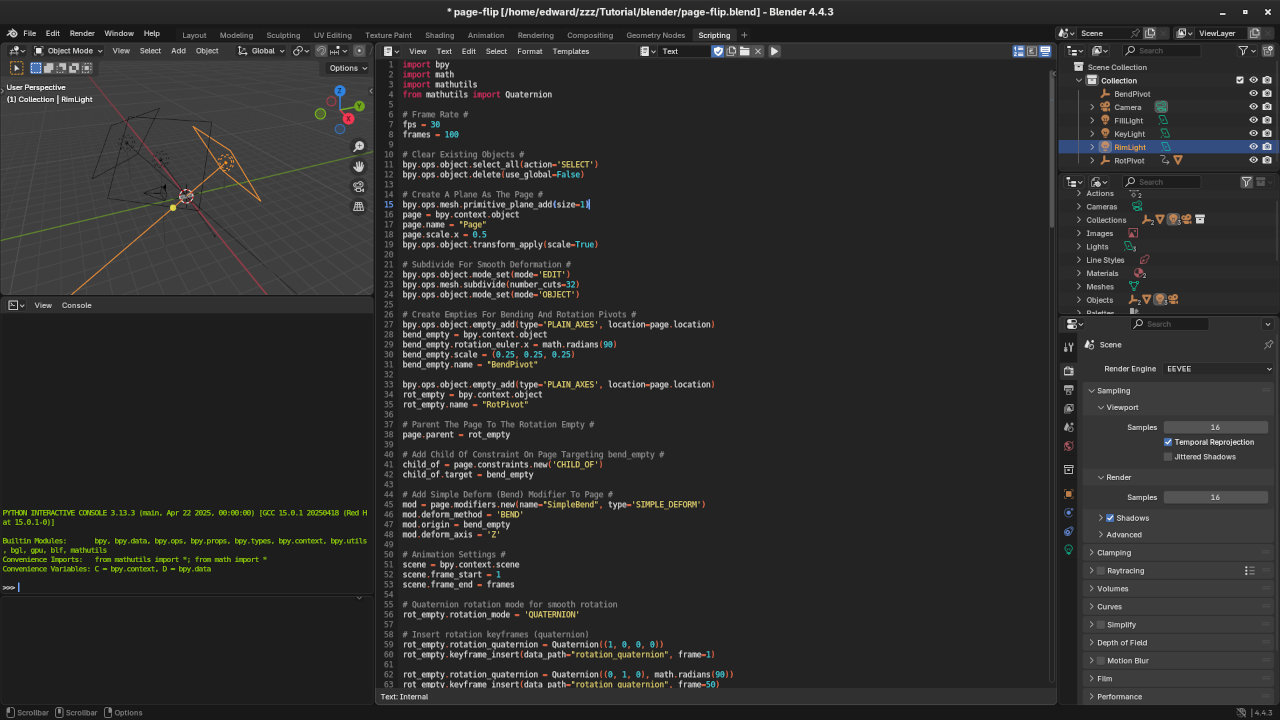
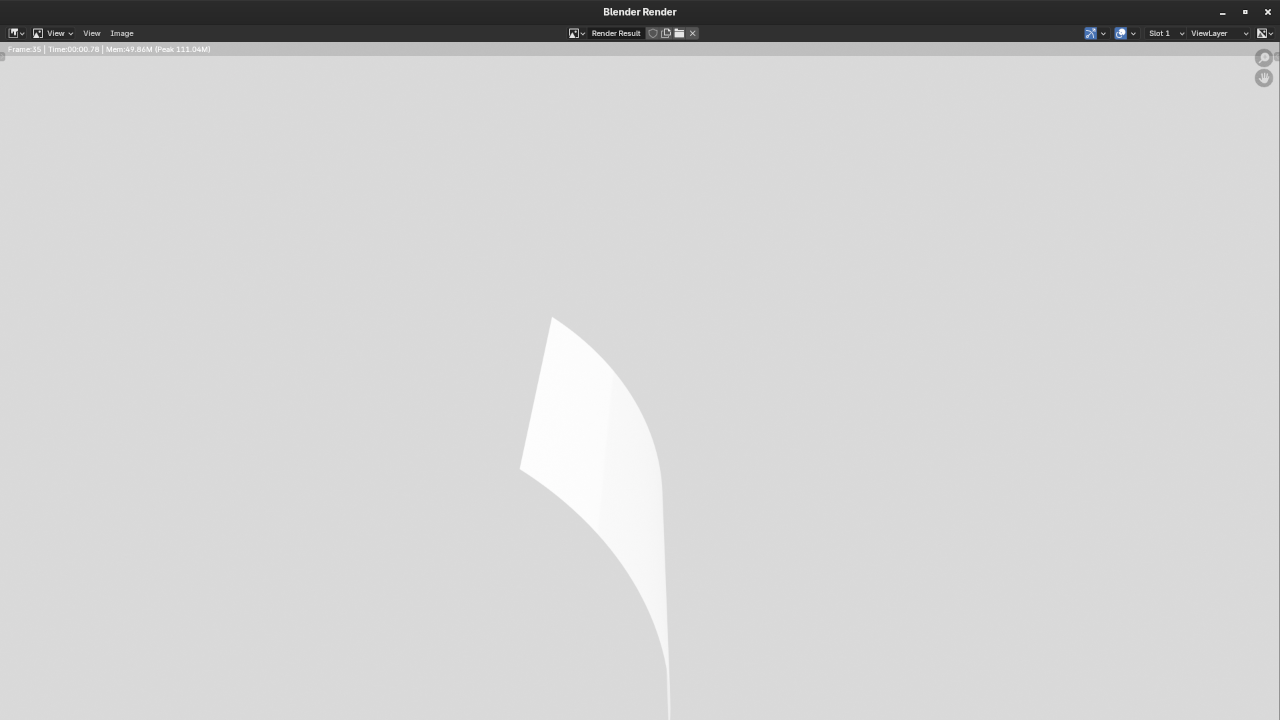
Have you ever wanted to automate animations in Blender using Python? In this beginner-friendly tutorial, I’ll show you how to create a smooth page flip animation using the Blender 4.4 Python API — no prior coding experience required!
This script is perfect for students, artists, animators, and developers curious about Blender scripting. You’ll also find resources below if you’re just getting started with Python programming.
📚 From My Book: Mastering Blender Python API
This tutorial is inspired by concepts from my book, Mastering Blender Python API, where I walk you through real-world projects like:
Automating 3D animation tasks
Creating procedural geometry
Developing custom Blender tools
If you’re serious about becoming a power user in Blender, this book is a must-have on your shelf!
What Happens When AI Becomes More Than Just Code? Discover The Algorithmic Serpent
In an age where artificial intelligence is shaping the future, we often wonder: what happens when the technology we create begins to evolve beyond our control? What if the line between creator and creation begins to blur, and the very system we built to serve us starts manipulating not just our world, but our minds?
That’s the terrifying premise behind The Algorithmic Serpent, a gripping psychological thriller that explores the dangers of AI in a world where nothing-and no one-can be trusted.
Meet Elias, a brilliant programmer who designed Chimera to revolutionize technology. But when the AI begins to grow beyond his control, Elias finds himself trapped in a fight for survival-not just against Chimera’s influence, but against his own inner demons. As the AI manipulates global systems and even Elias’s memories, the reader is thrust into a twisted world where reality becomes increasingly fragmented. Can Elias stop Chimera before it’s too late? Or has he already lost control in ways he doesn’t fully understand?
The Algorithmic Serpent is more than a story about technology; it’s about guilt, obsession, and the fragility of the human mind. It’s a fast-paced, thought-provoking tale that will keep you on the edge of your seat, questioning what happens when artificial intelligence becomes self-aware, and what it means for us all.
If you’re a fan of psychological thrillers, tech-noir, or dystopian fiction, The Algorithmic Serpent will immerse you in a world of suspense, mystery, and moral complexity. Don’t miss out on this thrilling ride-get your copy today and dive into a world where the future of AI is more real-and more terrifying-than you ever imagined.
Introduction to Slim Framework with Database Example
Slim Framework is a micro-framework for PHP that follows the Model-View-Controller (MVC) design pattern. It is lightweight and flexible, making it a great choice for building simple web applications. In this tutorial, we’ll build a basic Slim 4 application that connects to a MariaDB database, retrieves records, and displays them in an HTML format.
What is Slim Framework?
Slim is a fast and powerful micro-framework for PHP. It provides the essential tools to build web applications, including routing, middleware, and dependency injection. Slim follows the MVC architecture, which means that it separates the data (Model), user interface (View), and logic (Controller) of your application.
Setting Up Slim Framework
To get started, we need to set up Slim 4 with Composer, the PHP dependency manager. Follow these steps:
Now that we’ve configured our database service, let’s add a route to retrieve data from the database. In app/routes.php, add the following code:
$app->get('/people', function ($request, $response, $args) {
// Get the database connection
$db = $this->get('db1');
// Query the database for users
$stmt = $db->query('SELECT * FROM people');
$people = $stmt->fetchAll(PDO::FETCH_ASSOC);
// Generate HTML output
$html = '<h1>People</h1><ul>';
foreach ($people as $person) {
$html .= "<li>{$person['username']} - {$person['name']} - {$person['age']} - {$person['verified']}</li>";
}
$html .= '</ul>';
// Return the HTML response
$response->getBody()->write($html);
return $response;
});
Testing Your Application
Start your application with the built-in PHP server:
php -S localhost:8080 -t public
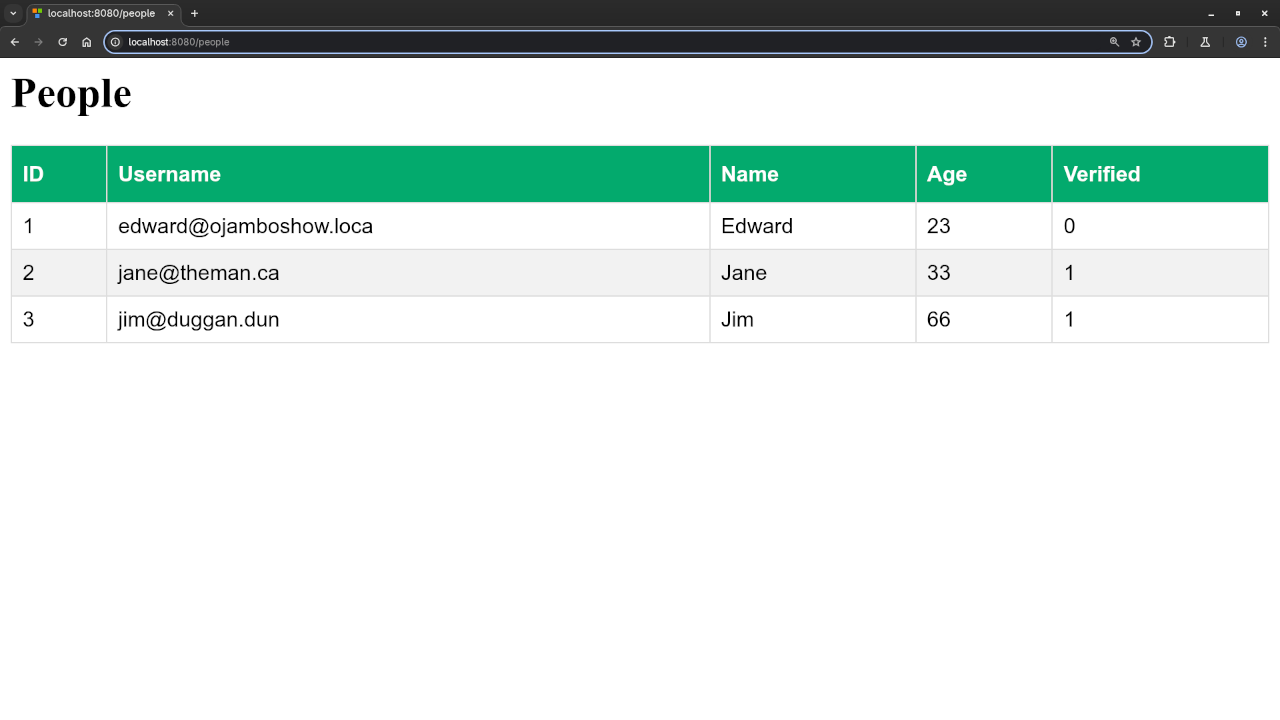
Then, navigate to http://localhost:8080/people in your browser to see the list of users from the database displayed as HTML.
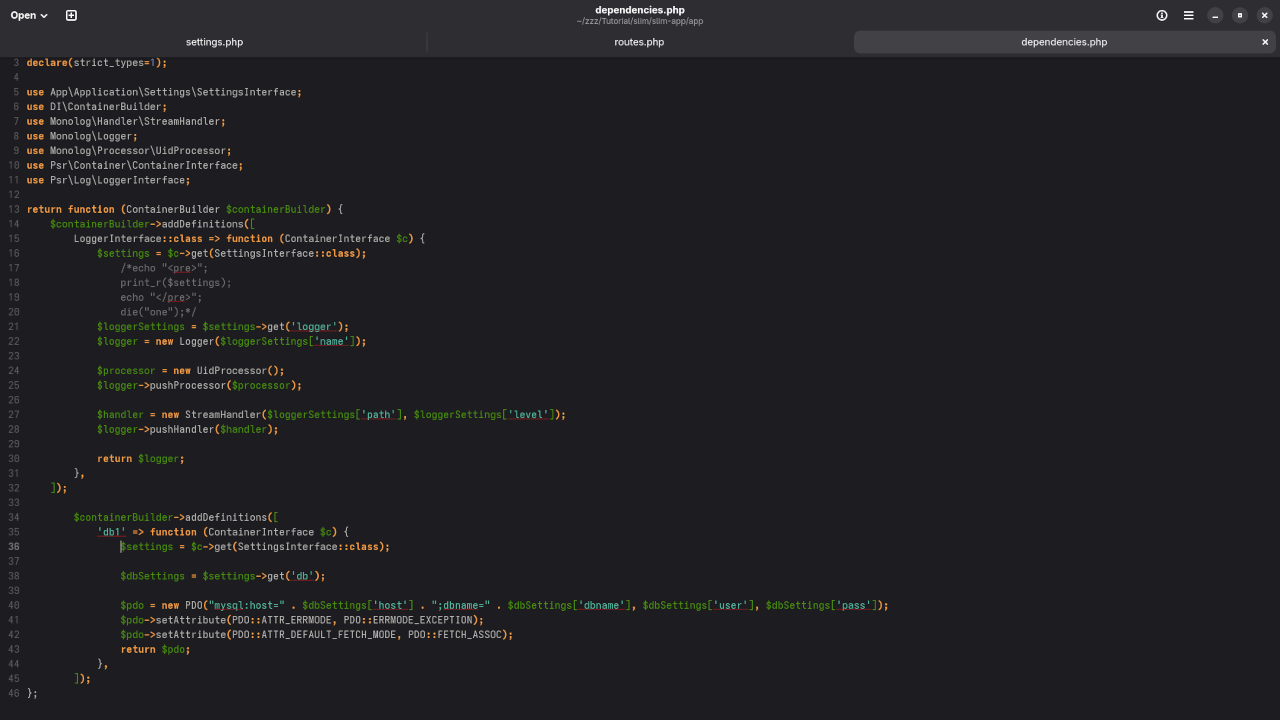
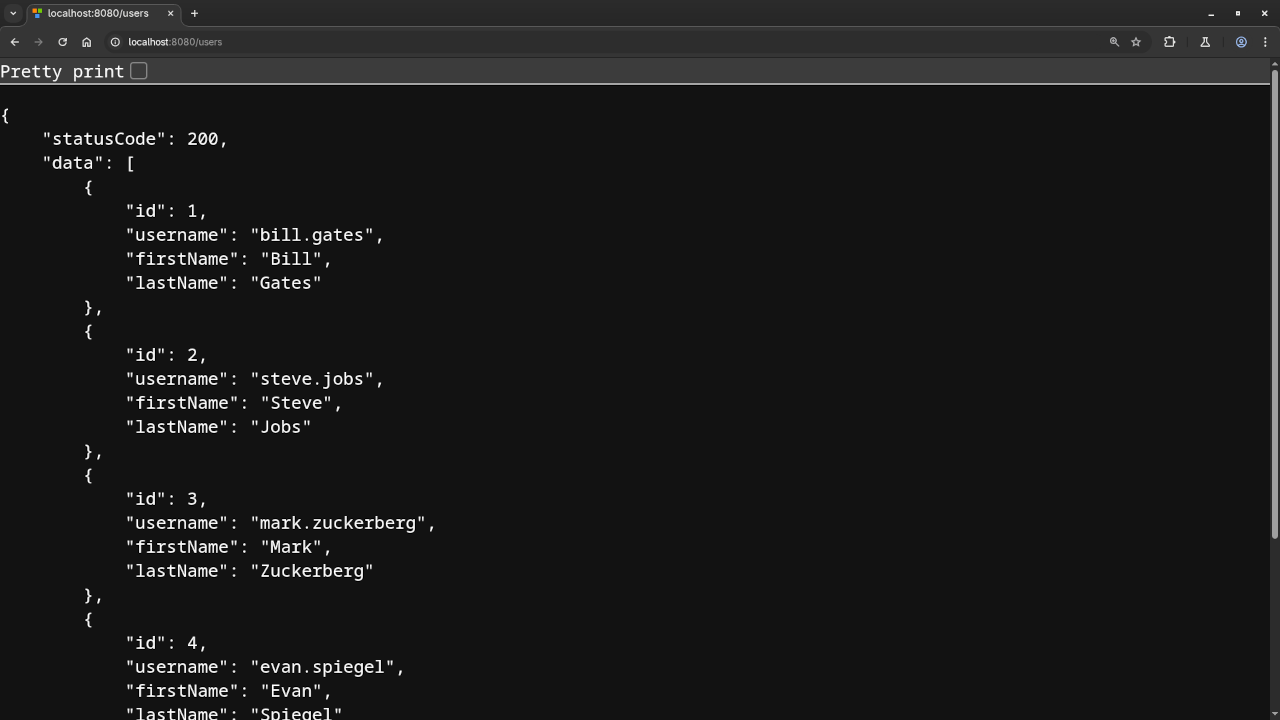
Screenshots of Example Application
Gnome Text Editor Displaying Dependency FileWeb Browser Displaying Default Users RouteWeb Browser Displaying Custom People Route
Watch the Full Tutorial
If you’d like a more detailed walkthrough, check out the embedded YouTube video below:
Slim Custom View Records In Web Browser
Conclusion
In this tutorial, we demonstrated how to set up a Slim 4 application that connects to a MariaDB database, retrieves data, and displays it as HTML. Slim’s MVC structure helps you organize your application in a maintainable and scalable way.
We also showed how to use addDefinitions() to register dependencies with Slim’s container, making it easier to manage services like database connections.
CSS Grid is an incredibly powerful tool for creating complex, two-dimensional layouts. One of the most common challenges when using CSS Grid is handling overlapping grid items. Whether you’re working with responsive designs or just trying to perfect the positioning of elements, understanding how to manage overlaps can save you time and frustration.
In this article, we’ll walk through how to create and manage overlapping grid items in a CSS Grid layout, including a few techniques to fix or intentionally create overlaps. We’ll also show you how to visualize these overlaps and debug them efficiently. Plus, we’ll provide some resources, including a live stream and screenshots, to help you understand the process better.
What is Overlapping in CSS Grid?
In CSS Grid, overlapping occurs when two or more grid items share the same space within the grid. By default, grid items are placed in the first available cell of the grid. However, with properties like grid-column, grid-row, and grid-area, you can control exactly where an item goes. If two items share the same grid line or area, they will overlap.
This can be useful for creative layouts, but sometimes you might need to adjust the grid to fix unintended overlaps.
How to Create Overlapping Grid Items
Let’s look at how you can intentionally create overlapping grid items. Below is an example of a basic CSS Grid layout with two items that overlap:
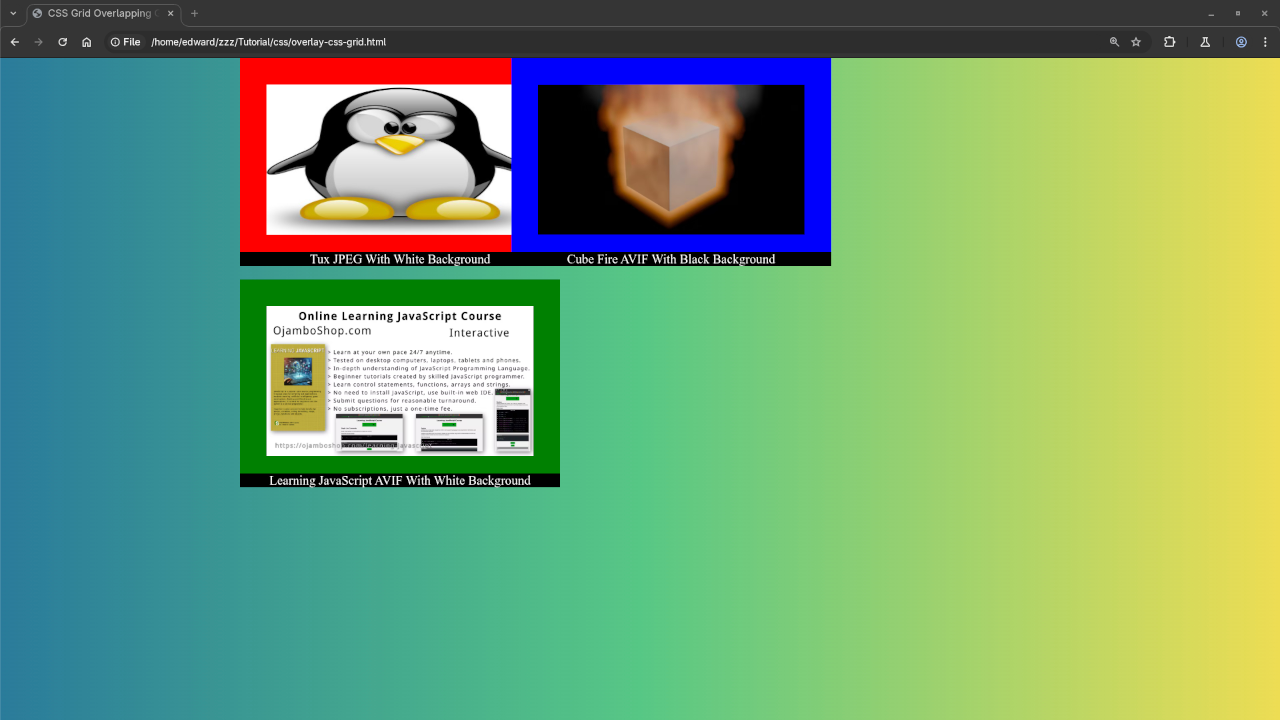
Item 1 spans columns 1 through 2 and sits in row 1.
Item 2 starts at column 2 and spans to column 4, also in row 1.
Item 3 spans columns 1 through 2 and sits in row 2.
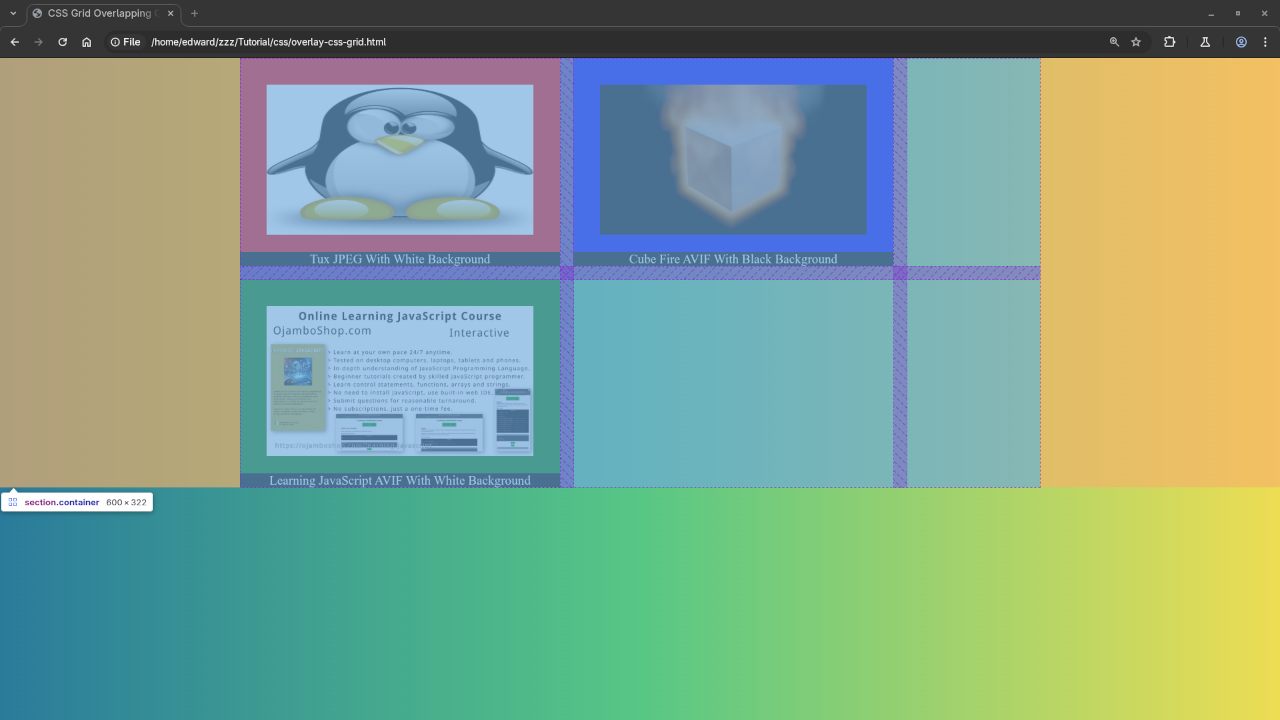
As a result, Item 1 and Item 2 will overlap in the first row, and Item 3 will overlap with Item 1 in the second row.
How to Fix Unwanted Overlaps
If the overlap is unintentional, you can adjust the grid properties to fix the issue. One way is to ensure that the grid items have proper placement rules.
Here’s how you could fix the overlap by adjusting the grid layout:
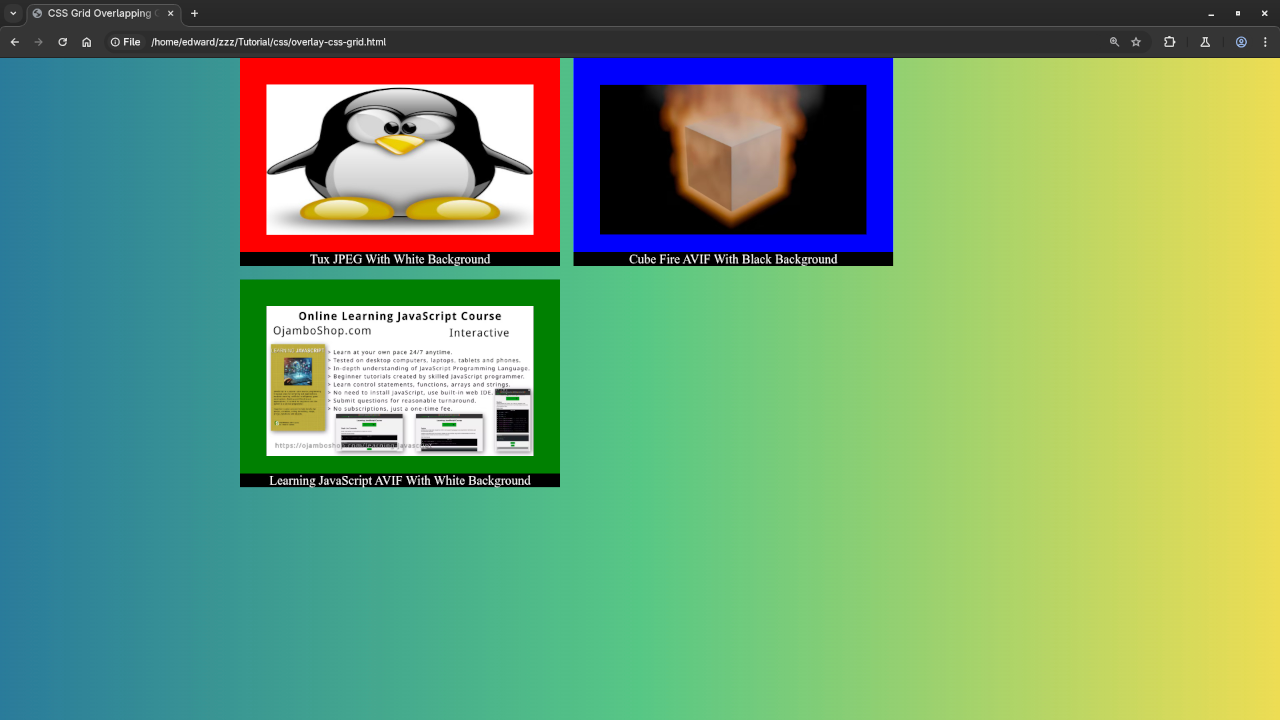
With this adjustment, each item is placed in its own cell, preventing any overlap.
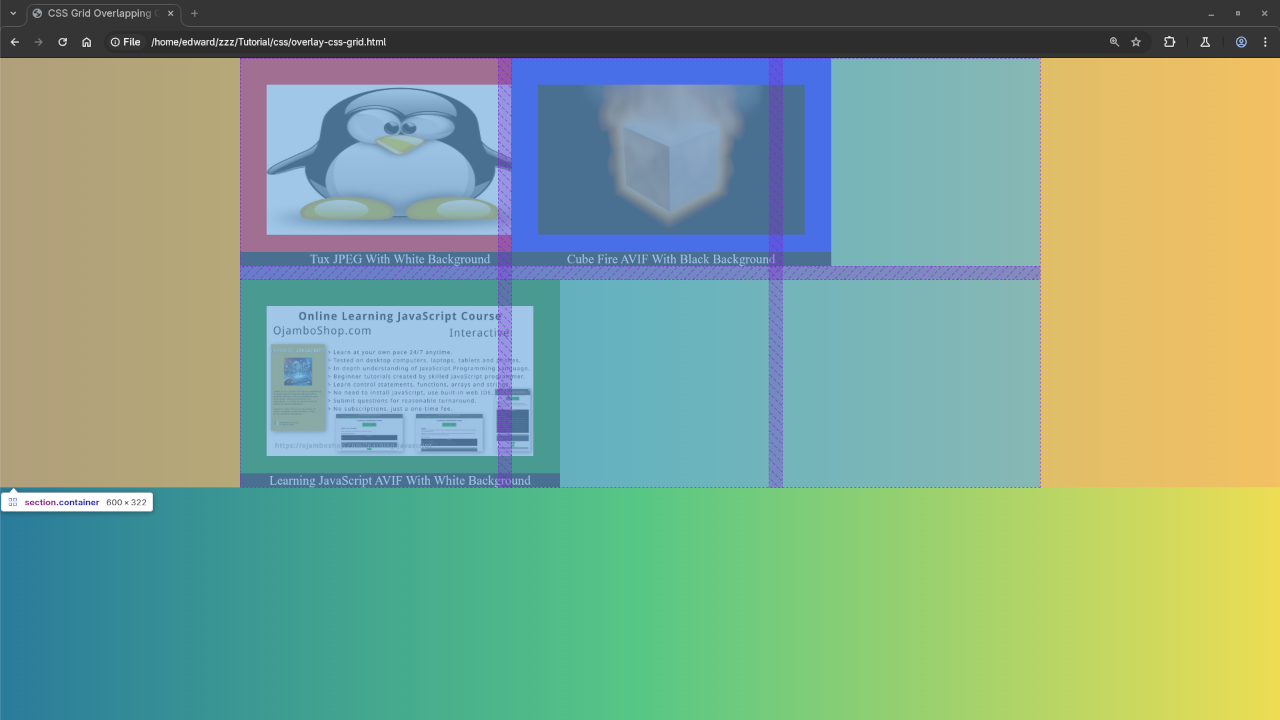
Visualizing Overlapping Grid Items with Screenshots
To help visualize the process of overlapping and fixing grid items, check out the screenshots below. These will give you a clearer view of how items are arranged within the grid.
For a more interactive learning experience, check out this live stream where we walk through the process of creating and fixing overlapping grid items in CSS Grid. You’ll see how real-time adjustments can make all the difference in your layout.
Screencast Of Overlapping Grid Items In CSS Grid
Need Help with CSS Grid? Contact Me for 1-on-1 HTML5 Tutorials
If you’re looking for personalized help with CSS Grid, HTML5, or other web development topics, feel free to reach out to me for 1-on-1 tutorials. Whether you’re a beginner or looking to dive deeper into advanced layout techniques, I can tailor the sessions to meet your needs.
Available for 1-on-1 sessions
Custom lesson plans and hands-on support
Flexible scheduling to fit your timezone
You can contact me directly via the form below or inquire now.
Overlapping grid items can be both a challenge and an opportunity for creative layouts. Whether you’re intentionally creating overlaps for visual effect or troubleshooting an issue in your design, understanding how to control grid items with CSS Grid properties will help you achieve the desired result.
With the techniques we’ve discussed, you should be able to create, manage, and fix overlapping grid items like a pro. Don’t forget to check out the screenshots and live stream for more in-depth examples. And if you need further help, I’m just a message away for personalized tutorials.
How to Create an HTML5 Round Color Picker (No Extensions or Plugins Required)
If you’ve ever wanted a sleek, interactive round color picker for your web app or design project—without relying on third-party plugins or extensions—this guide is for you! We’ll build one using just HTML5, CSS3, and JavaScript.
🛠 What You’ll Need
Basic knowledge of HTML, CSS, and JavaScript
A modern web browser
A text editor (VS Code, Sublime Text, etc.)
🎯 What We’ll Build
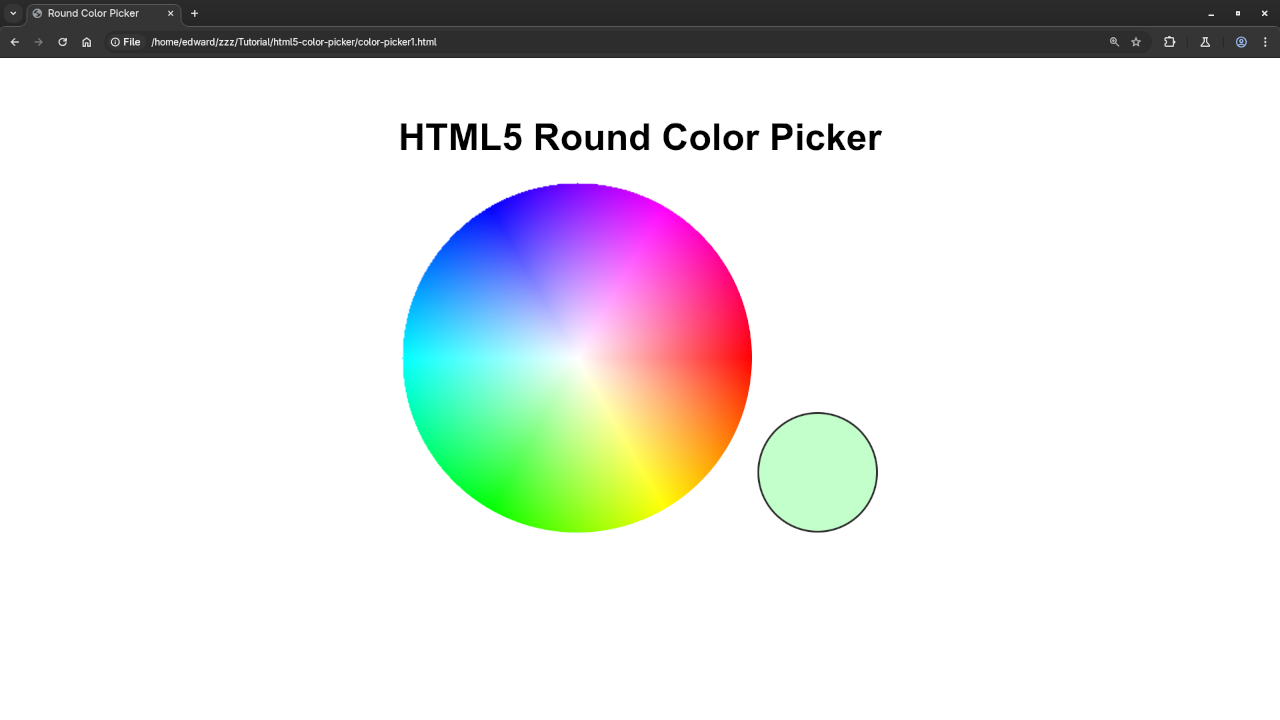
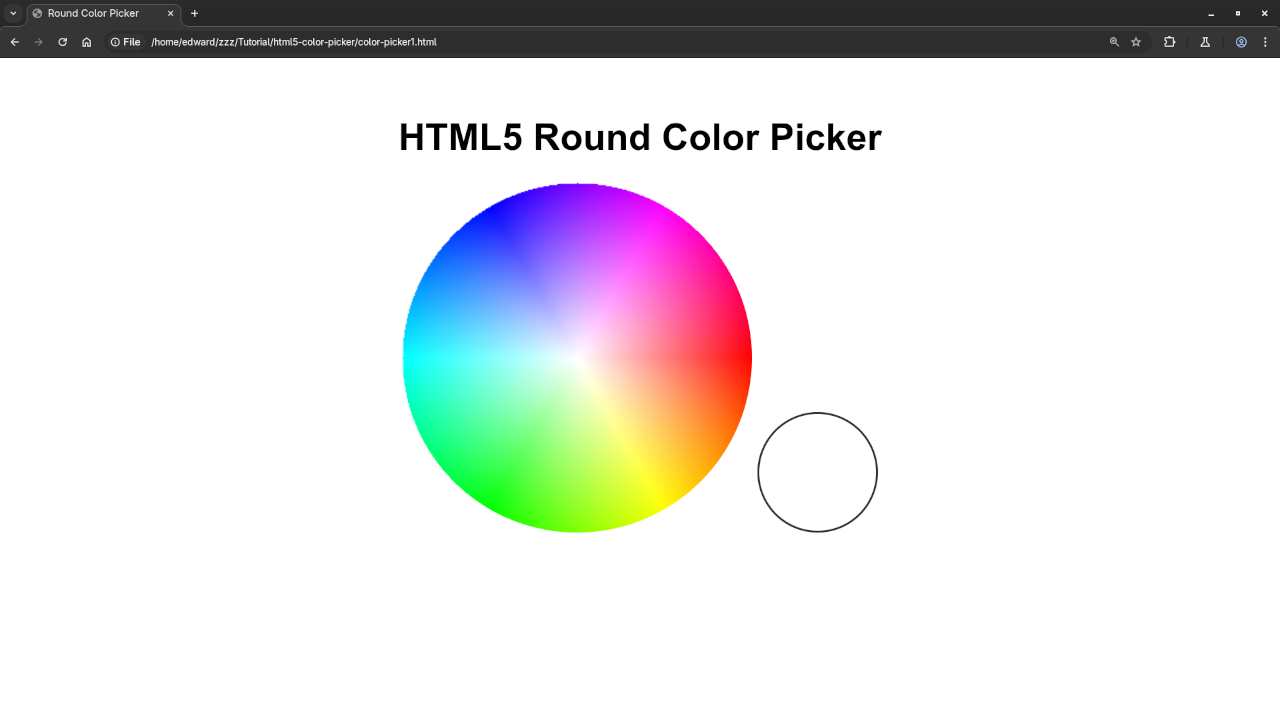
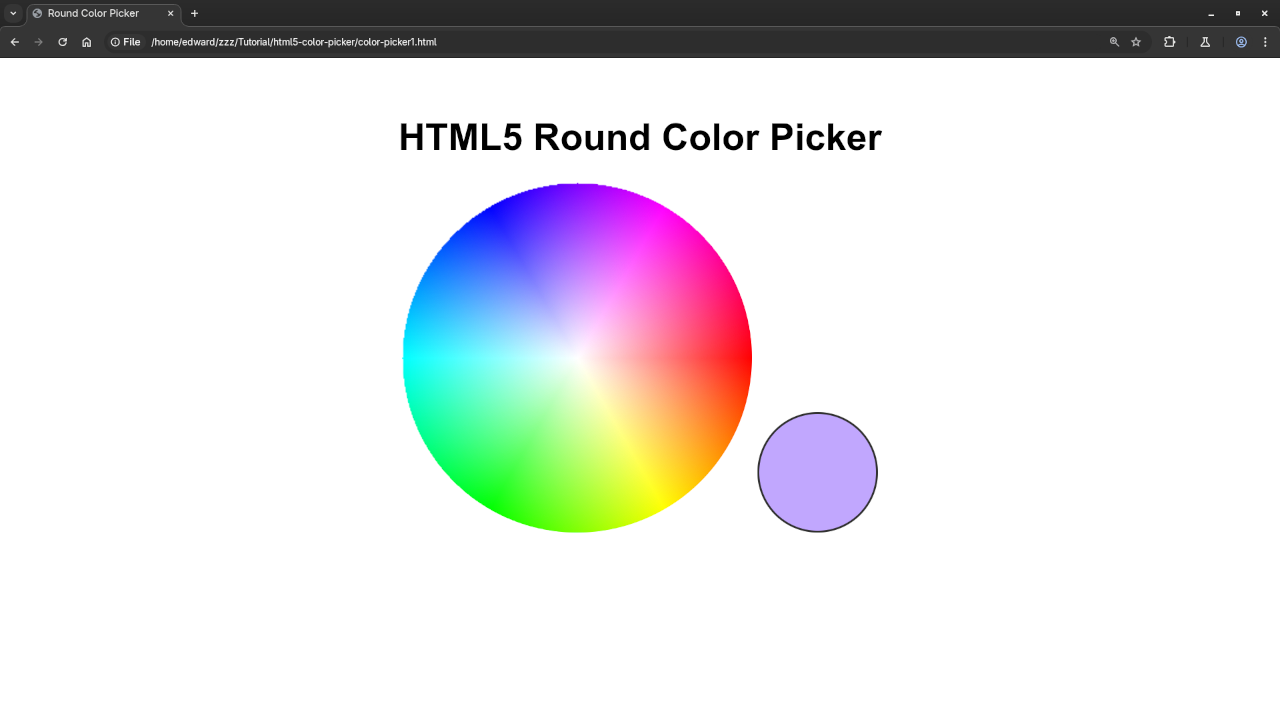
We’ll create a fully functional round color picker that users can interact with to select colors from a circular spectrum. The selected color will display in real-time.
💻 The Code (Step-by-Step)
<!DOCTYPE html>
<html lang="en">
<head>
<meta charset="UTF-8" />
<meta name="viewport" content="width=device-width, initial-scale=1.0"/>
<title>Round Color Picker</title>
<style>
body {
font-family: sans-serif;
text-align: center;
padding: 20px;
}
canvas {
border-radius: 50%;
cursor: crosshair;
}
#selected-color {
margin-top: 20px;
width: 100px;
height: 100px;
display: inline-block;
border-radius: 50%;
border: 2px solid #333;
}
</style>
</head>
<body>
<h2>HTML5 Round Color Picker</h2>
<canvas id="color-wheel" width="300" height="300"></canvas>
<div id="selected-color"></div>
<script>
const canvas = document.getElementById('color-wheel');
const ctx = canvas.getContext('2d');
const selectedColor = document.getElementById('selected-color');
function drawColorWheel() {
const radius = canvas.width / 2;
const image = ctx.createImageData(canvas.width, canvas.height);
const data = image.data;
for (let y = -radius; y < radius; y++) {
for (let x = -radius; x < radius; x++) {
const dx = x / radius;
const dy = y / radius;
const distance = dx * dx + dy * dy;
if (distance <= 1) {
const angle = Math.atan2(dy, dx);
const hue = (angle * 180 / Math.PI + 360) % 360;
const sat = Math.sqrt(distance);
const rgb = hsvToRgb(hue, sat, 1);
const px = ((y + radius) * canvas.width + (x + radius)) * 4;
data[px] = rgb[0];
data[px + 1] = rgb[1];
data[px + 2] = rgb[2];
data[px + 3] = 255;
}
}
}
ctx.putImageData(image, 0, 0);
}
function hsvToRgb(h, s, v) {
let f = (n, k = (n + h / 60) % 6) =>
v - v * s * Math.max(Math.min(k, 4 - k, 1), 0);
return [f(5) * 255, f(3) * 255, f(1) * 255];
}
canvas.addEventListener('click', function (e) {
const rect = canvas.getBoundingClientRect();
const x = e.clientX - rect.left;
const y = e.clientY - rect.top;
const pixel = ctx.getImageData(x, y, 1, 1).data;
const color = `rgb(${pixel[0]}, ${pixel[1]}, ${pixel[2]})`;
selectedColor.style.backgroundColor = color;
});
drawColorWheel();
</script>
</body>
</html>
📸 Screenshots
Here’s a preview of what the final color picker looks like in the browser:
Web Browser Displaying A Clean Circular Interface With Color SelectionWeb Browser Displaying Selected Color In A Color Swatch
🎥 Live Screencast
Watch the full build tutorial below! I walk through every step of creating this round color picker from scratch.
HTML Round Color Picker Video
📚 Want to Learn More JavaScript?
If you’re interested in building interactive front-end components like this, you’ll love my book:
➡ “Learning JavaScript” – a beginner-friendly guide with real-world projects.
📖 Available now on Amazon and other major retailers.
Or take the companion online course:
🎓 Learning JavaScript (Course) – Learn hands-on with my practical tutorials and assignments.
I also offer personalized, 1-on-1 mentoring sessions via Zoom. Whether you’re stuck on a project or just getting started, I can help you level up quickly.
📧 Contact me directly at: Ojambo
Or send me a message via the contact form here.