Git is a free and open-source distributed version control system used by developers worldwide. Whether you're working solo or collaborating with a team, Git helps you track changes in your project over time.
Two essential Git commands for monitoring your project's history and current state are git status and git log. In this post, we'll explain what they do, show a basic example, and guide you through using them effectively.
📌 What Is git status?
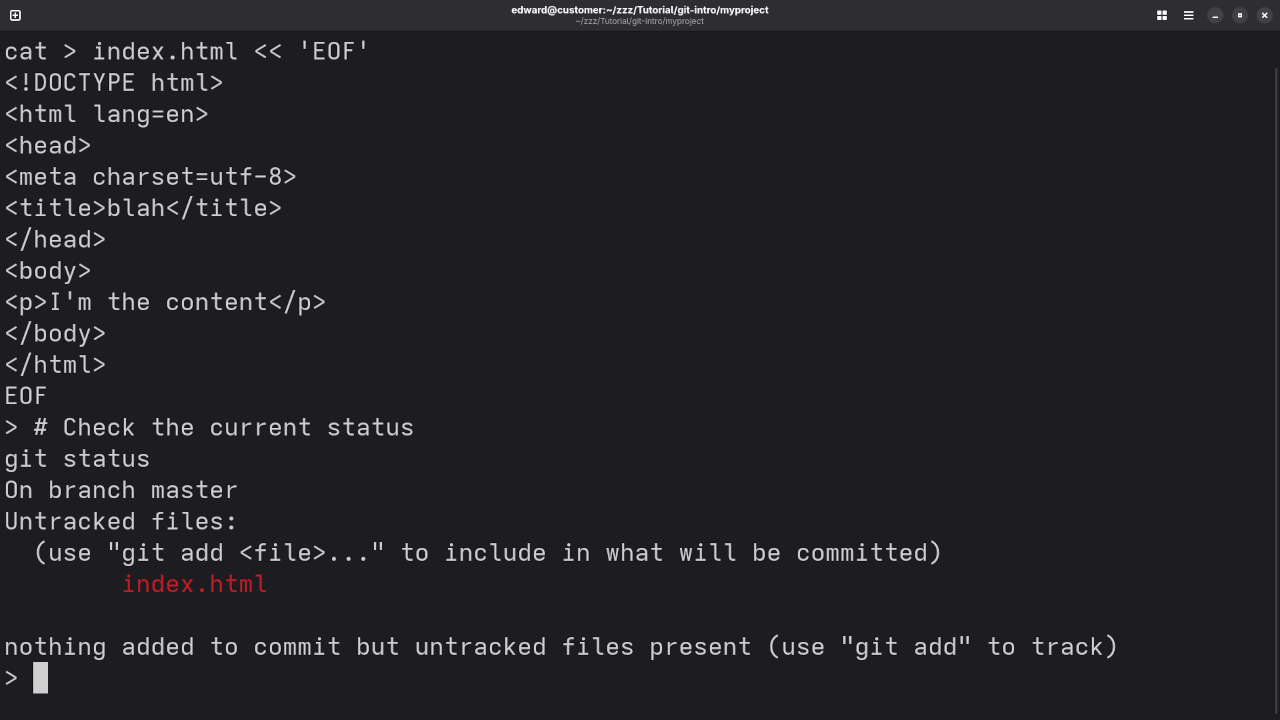
The git status command shows the current state of your working directory and staging area. It tells you:
Which changes have been staged
Which changes haven’t been staged
Which files aren’t being tracked by Git
git status
This is usually the first command you run to check what's happening before you commit.
📌 What Is git log?
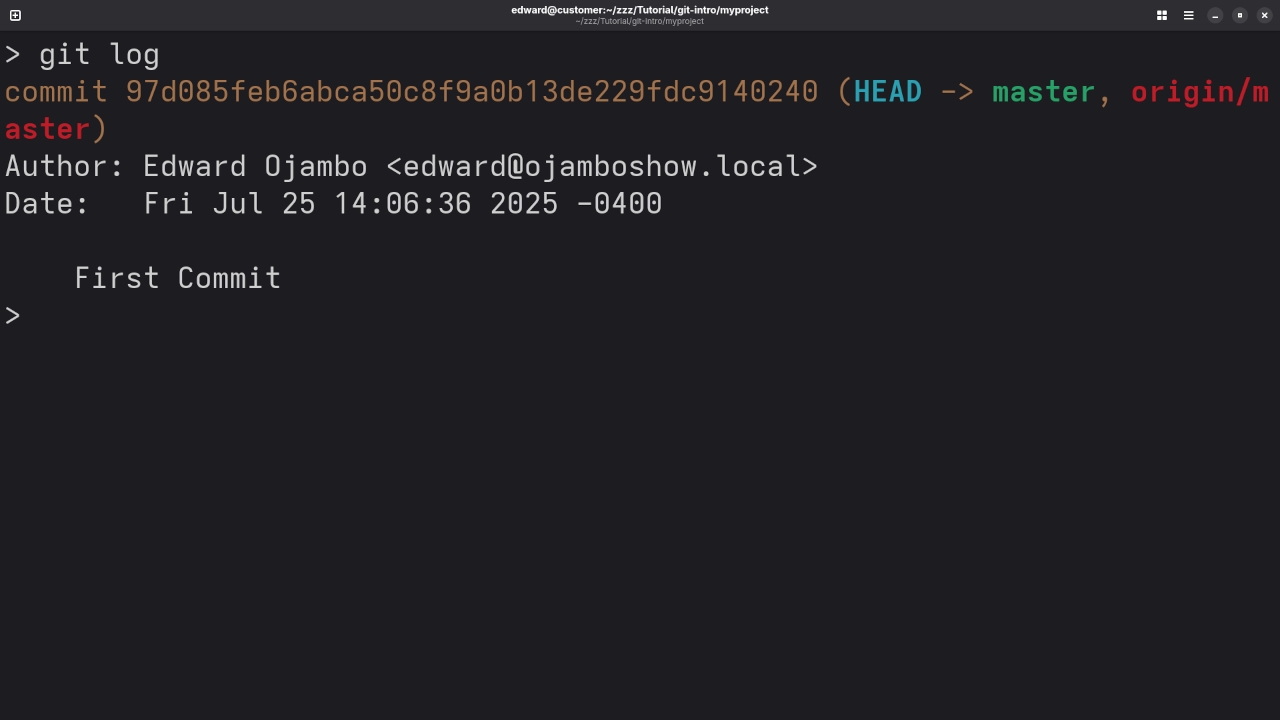
The git log command shows the commit history for your repository. It helps you see what changes were made, who made them, and when.
git log
You'll see output like this:
commit 1a2b3c4d5e6f7890
Author: Your Name <your@email.com>
Date: Tue Jul 23 14:00 2025
Added README and updated index.html
You can scroll through the commit history and even use filters to find specific changes.
💡 Example: Using Both Commands Together
Let's say you've edited a file in your project but haven't committed yet. Try this:
# Check the current status
git status
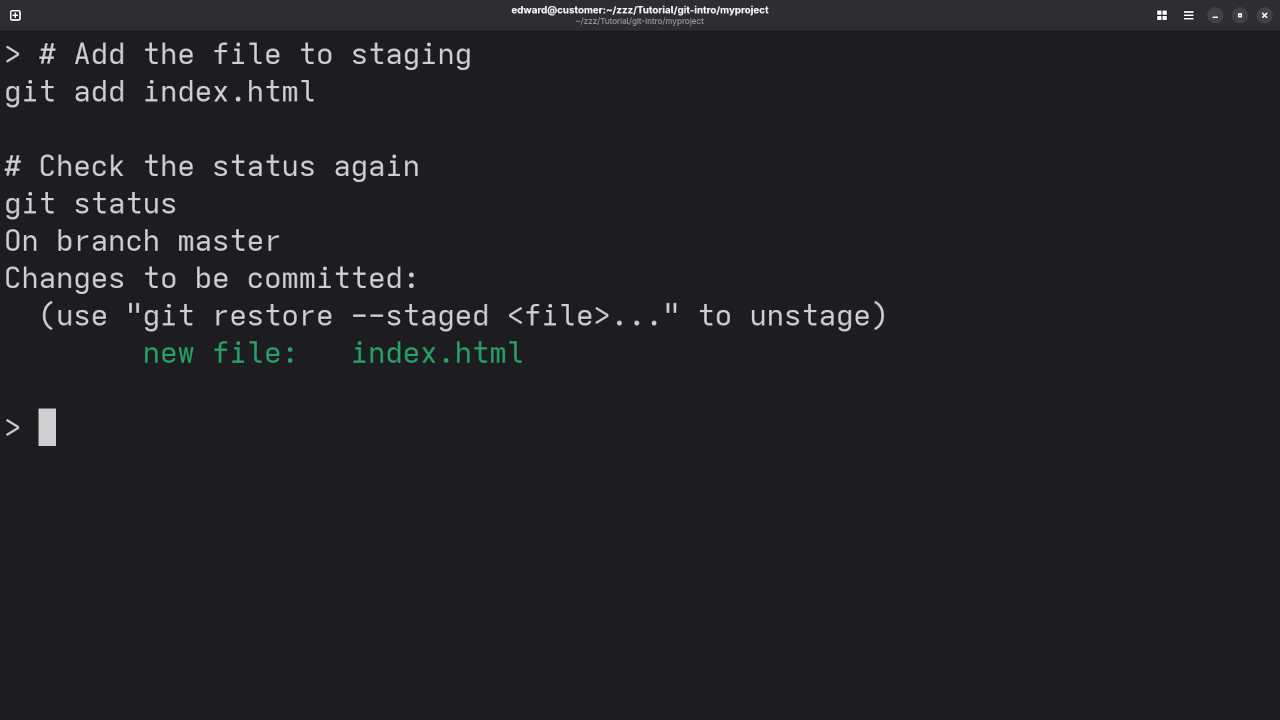
# Add the file to staging
git add filename.html
# Check the status again
git status
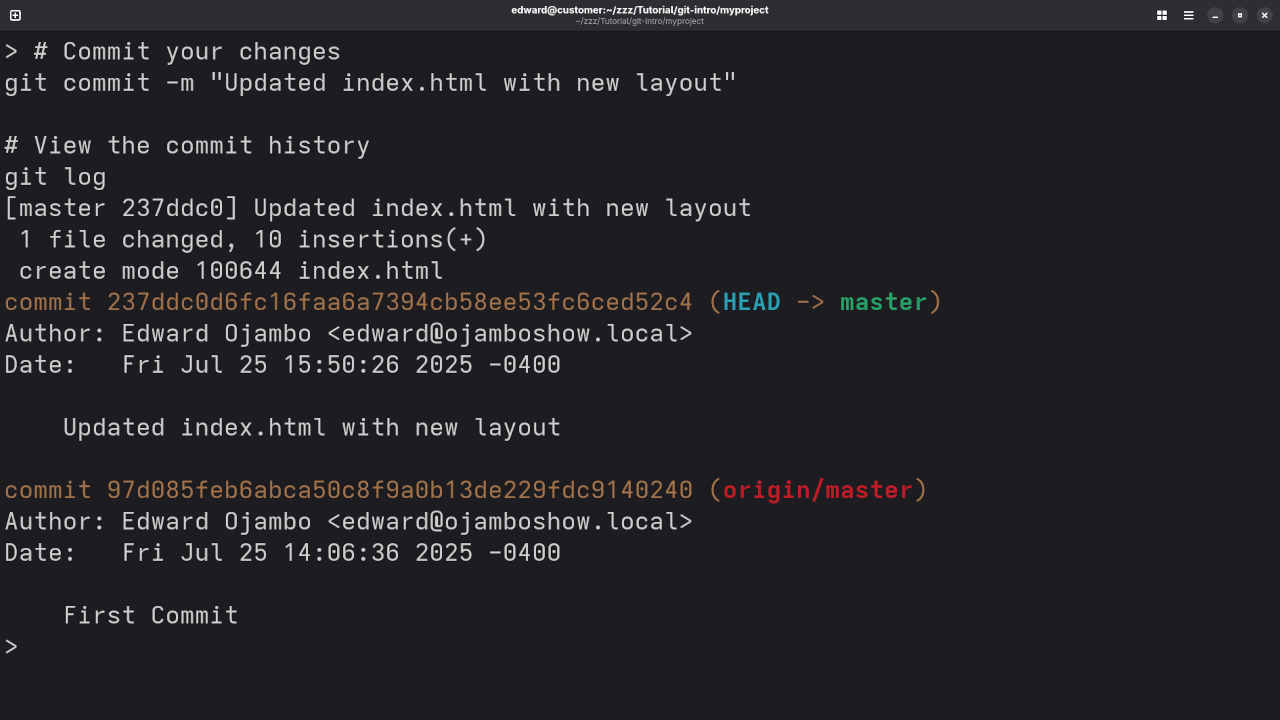
# Commit your changes
git commit -m "Updated filename.html with new layout"
# View the commit history
git log
These simple steps help you stay in control of your project’s history.
📷 Screenshots & Live Demo Screencast
Command Line Git Status To Display Current State In Project FolderTerminal Showing Git Log Displaying Commit History Of Project FilesTerminal Showing Git Status After Modifying Project FilesTerminal Showing Git Status After Adding A Single FileTerminal Showing Git Log For Committed FilesScreencast Of Git Status And Git Log Commands
🤝 Need Help With Git?
Whether you're just getting started or need help installing, updating, or migrating Git projects, I'm available for:
Getting Started with SciTE: A Powerful Open-Source Text Editor
When it comes to coding, having the right text editor is essential. While many developers rely on heavy Integrated Development Environments (IDEs) for complex projects, a lightweight, customizable text editor like SciTE (pronounced “site”) can be a great choice for many programmers.
SciTE is a free, open-source text editor that is cross-platform and powered by SCIntilla, a fast and feature-packed text editing component. Whether you’re a beginner just starting to code or an experienced developer, SciTE offers an easy-to-use interface with support for multiple programming languages and syntax highlighting.
Why Choose SciTE?
1. Open Source:
SciTE is completely free and open-source, meaning you can download, use, and even modify it without any restrictions. As an open-source project, it benefits from constant updates and improvements from the community.
2. Cross-Platform:
No matter which operating system you’re on, SciTE has you covered. It works seamlessly on Windows, Linux, and macOS. This makes it a great option for developers working across different platforms or those who prefer working in a cross-platform environment.
3. Lightweight & Fast:
Unlike heavyweight IDEs, SciTE is known for its speed and efficiency. It starts up quickly, runs smoothly, and doesn’t consume excessive system resources, which is particularly helpful when you need a quick edit without loading a heavy IDE.
4. Customizable:
With a powerful configuration file and a wide range of plugins, you can tailor SciTE to your exact needs. Whether you want to change the color scheme, add custom syntax highlighting, or configure the editor to run specific build tasks, SciTE has the flexibility to match your workflow.
Key Features of SciTE:
Syntax Highlighting: SciTE supports syntax highlighting for many programming languages, including Python, C++, Java, HTML, CSS, and more.
Auto-Completion: It can help speed up your coding by suggesting completions for variables, functions, and keywords as you type.
Multiple Files: SciTE allows you to open and switch between multiple files easily, making it ideal for working on projects that involve several code files.
Search & Replace: It includes robust search and replace capabilities, with support for regular expressions to help find and modify code quickly.
Screenshots of SciTE in Action
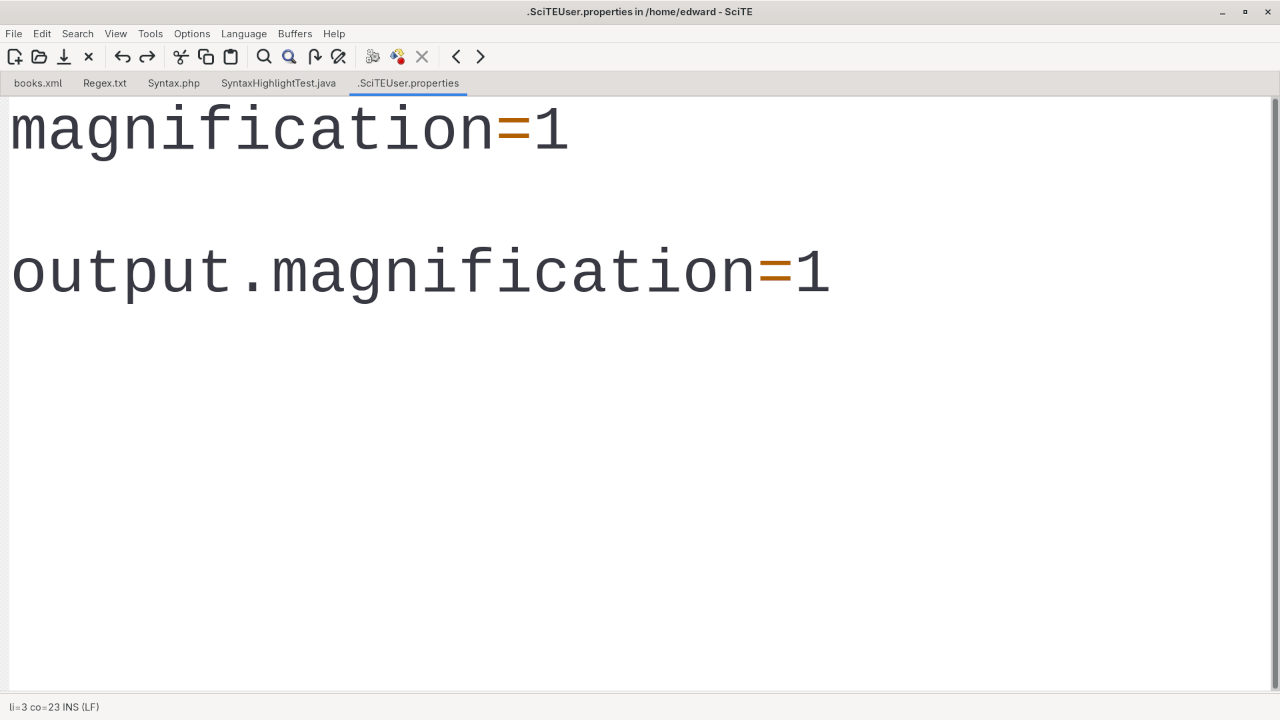
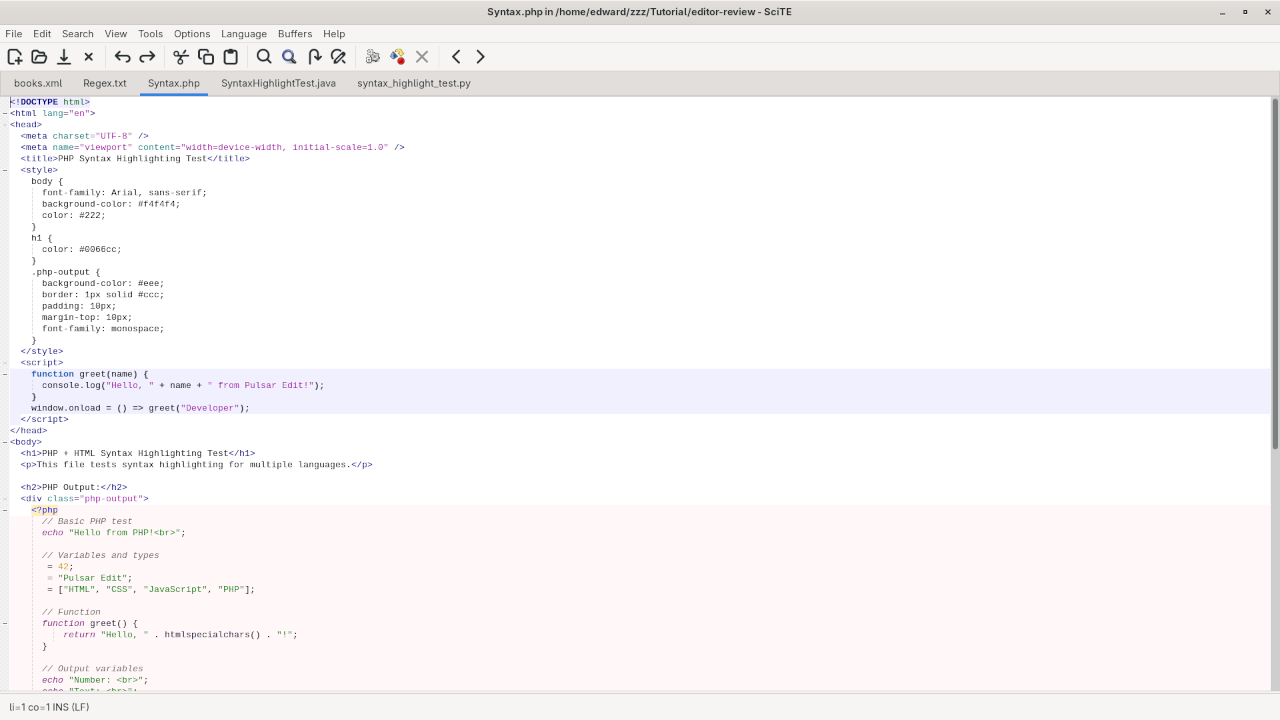
SciTE Displaying User PreferencesSciTE Displaying PHP Syntax Highlighting
Watch the Live Demo!
SciTE Review And Feature Test
Getting Started with SciTE
To download and install SciTE, simply visit the official SciTE website and follow the installation instructions for your operating system.
Requirements For Programming Text Editor
Glossary:
Code Editor
Designed for writing and editing source code.
IDE
Integrated Development Environment combines various tools need for software development.
Plugin
Software component that adds specific functionality.
Theme
Preset package containing graphical appearance to customize look and feel.
Open source
Freely available for possible modification and redistribution.
SCM
Source code management use to manage and track modifications to a source code repository.
LMB
Left Mouse Button (LMB) or left click
Test Tools
Test System
Name
Description
CPU
Intel(R) i7 2600 @ 3.40GHz.
Memory
16GB DDR3.
Operating System
Fedora Linux Workstation 42.
Desktop Environment
Gnome 48.
Name
Description
Test Suite
Name
Description
Large File
1GB human-readable text.
Regex File
Text with word “SciTE” repeated.
Syntax File
PHP file containing HTML, CSS & JavaScript.
Media File
Smiley face or Tux Linux JPEG file.
Java Version
OpenJDK 21.0.7.
PHP Version
PHP 8.4.10.
Python Version
Python 3.13.5.
SciTE Version
5.5.7.
Name
Description
Test Scoring
Each feature has two parts.
Score of zero indicates a missing feature.
A part of a feature is work a score of 0.5.
Three bias elimination steps were utilized. The editor was used for at least three years on different platforms. Attempts were made to get stable plug-ins for missing features. The same editor was compared between the one in the repository, the developers website, and the compiled version if applicable.
Selecting Editor Version
For this review, SciTE was downloaded from the developers website and it did not require additional plugins.
Features
The theme can be native for the editor in terms of the background. SciTE dark and light themes can be created or downloaded. The score for the theme was a perfect 1.0.
Dragging and dropping a text file into the editor opens a new tab. It is not possible to specify the tab location during the drag and drop operation. The score for drag and drop into editor was 0.5.
Opening a very large text file did not crash SciTE. A “SciTE” Warning window is shown with an option to continue. It does remember the last session and it was possible to edit the large file. The score for opening a large file was 1.0.
Multiple documents can opened in multiple tabs. Tear-off tabs still do not work and SciTE does not have a feature to open in new window as a new instance which is handy for multiple monitors. The score for multiple documents was 0.5.
Multiple editors can be opened as new tabs with drag options. The window view can not be split either vertically or horizontally. The score for multiple editor view was 0.5.
Creating non-project files is possible by using the built-in file explorer into the workspace. Non-project files cannot be opened by the drag and drop operation. The score for creating non-project files was 0.5.
Soft word wrap can be enabled in the editor settings. Automatic soft wrap for documents is available for SciTE. The score for word wrap was a perfect 1.0.
Spell check is available for Scite via a Lua script and works as words are typed. Spelling errors are shown in opened documents. The score for spell check was a perfect 1.0.
Word count is available for SciTE via a Lua script. Selection word count is not available as part of word count. The score for word count was 1.0.
Go to line CTRL/CMD-Gcan jump to a specified line. It is possible to jump to either the first or last line. The score for go to line was a perfect 1.0.
Indentation can default to user-defined tab stops. Children are automatically indented. The score for indentation was a perfect 1.0
Fonts can be dynamically scaled using CTRL/CMD-Keypad +/- after enabling the feature. The system font can be bypassed and a new editor font and size can be set. The score for fonts was a perfect 1.0.
Find and replace CTRL/CMD-F or project-wide using regular expressions can be utilized for all open documents in the current session. Find and replace will work for the current document or a selection in the current document. The score for find and replacing using regular expressions was 1.0.
Multiple language syntax highlighting in one file is enabled if the language plug-ins are installed. Each language has code-sensitive syntax colors which can be modified. The score for multiple language syntax highlighting was a perfect 1.0.
Code folding works for markup languages such as HTML. Code folding also works for programming languages such as Java and PHP. The score for code folding was 1.0.
Selecting rectangular block per column does not work. Rectangular block selections does not work with word wrap enabled. The score for selecting rectangular block was a 0.0.
Multiple selection is not available for SciTE. Search multiple selection is not available. The score for multiple selection was 0.0.
Distraction-free mode to hide panes works. Line numbers can be toggled in the settings to improve distraction-free mode. The score for distraction-free was a perfect 1.0.
The file manager cannot create and delete folders. Media files cannot be dragged and dropped into the file manager pane. The score for file manager was 0.0.
Terminal is not integrated into SciTE, and cannot be enabled as a plugin. The terminal can not follow folder as it does not exist. Terminal can not execute system commands. The score for terminal was 0.0.
Results
SciTE is a very powerful IDE. By default, the SciTE editor worked without tweaks, and any missing required features can not be installed by using plugins. For my required features, the SciTE editor scored 72.50% or 7.25 out of 10.
Need Help? I’m Available for One-on-One Programming Tutorials!
If you’re new to programming or need help with installing, updating, or migrating SciTE, feel free to reach out! I offer custom one-on-one programming tutorials where I can guide you through setting up your environment or solving specific coding challenges. Whether you need help installing SciTE or troubleshooting issues, I’m here to assist!
For more information and to book a session, visit my contact page.
Conclusion
SciTE is a lightweight, efficient, and highly customizable text editor that works well for developers of all skill levels. With its open-source nature and cross-platform compatibility, it’s an excellent choice for anyone looking for a fast and flexible coding environment. If you’re interested in learning more about SciTE or need personalized help with your setup, don’t hesitate to reach out!
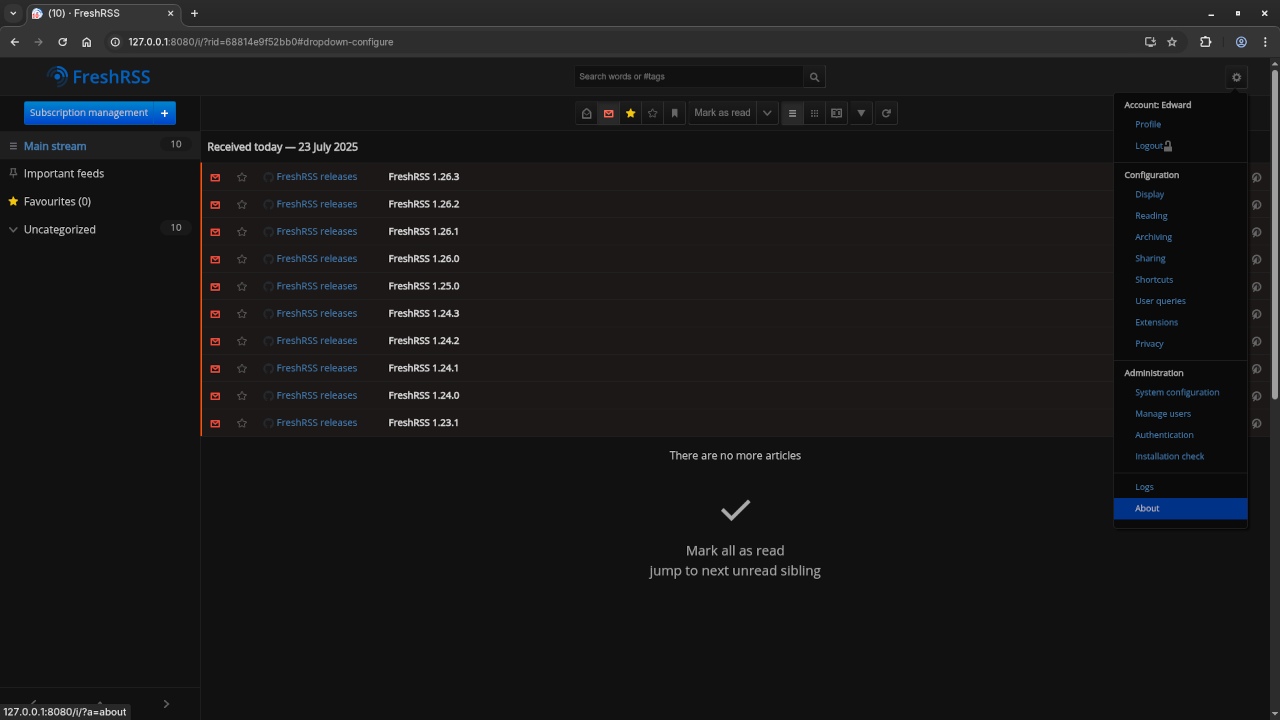
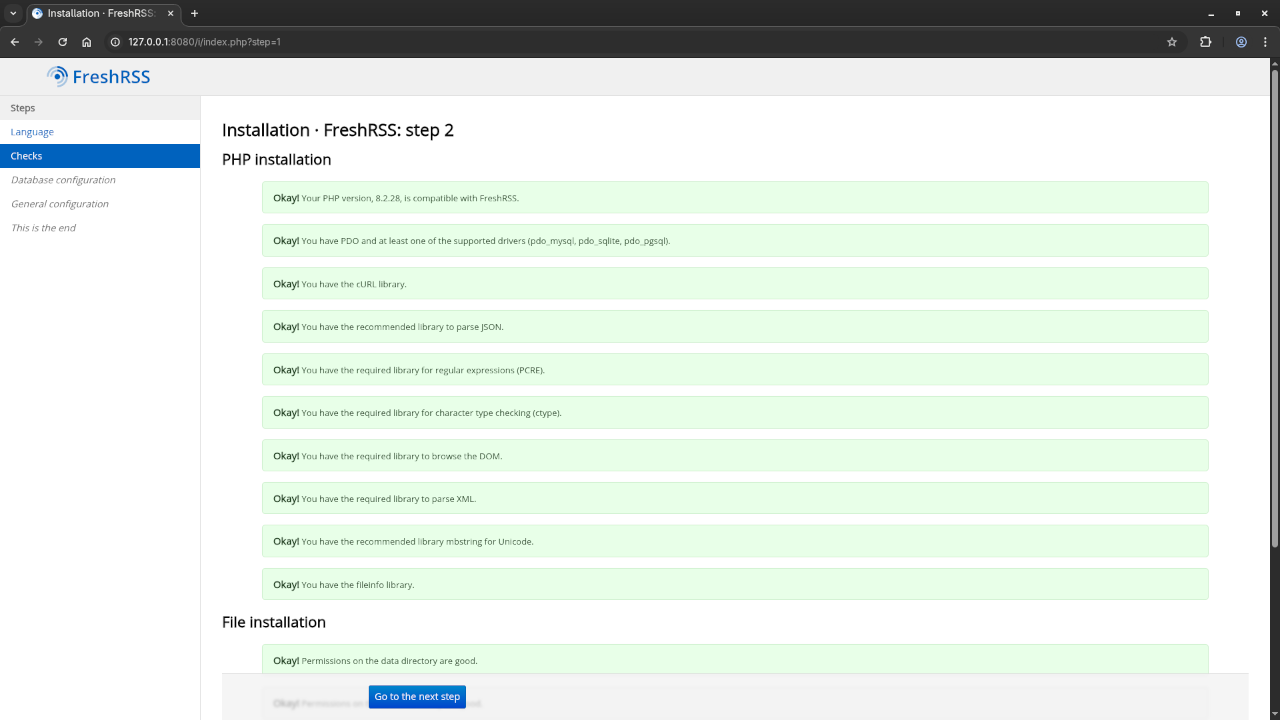
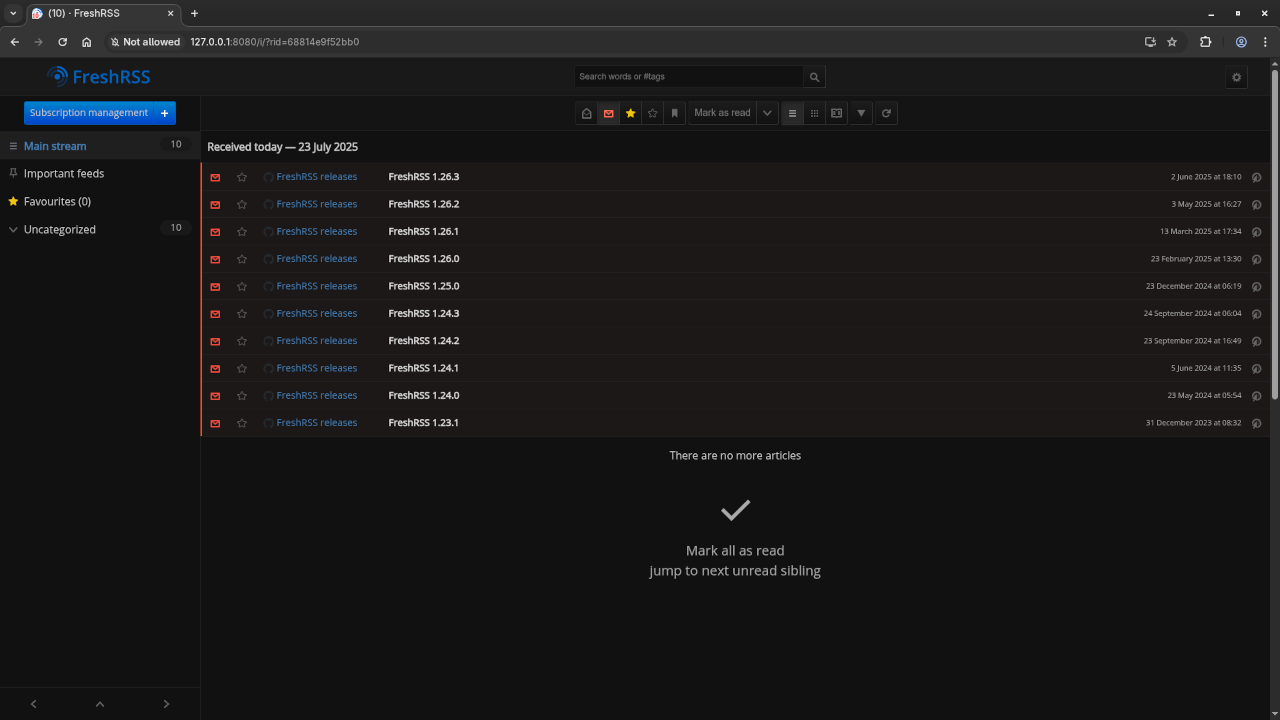
FreshRSS is an open-source, self-hosted RSS feed reader that you can use to stay up-to-date with your favorite blogs, news, and podcasts in one place. Whether you’re a beginner or an experienced developer, FreshRSS offers a simple and flexible way to manage all your RSS feeds.
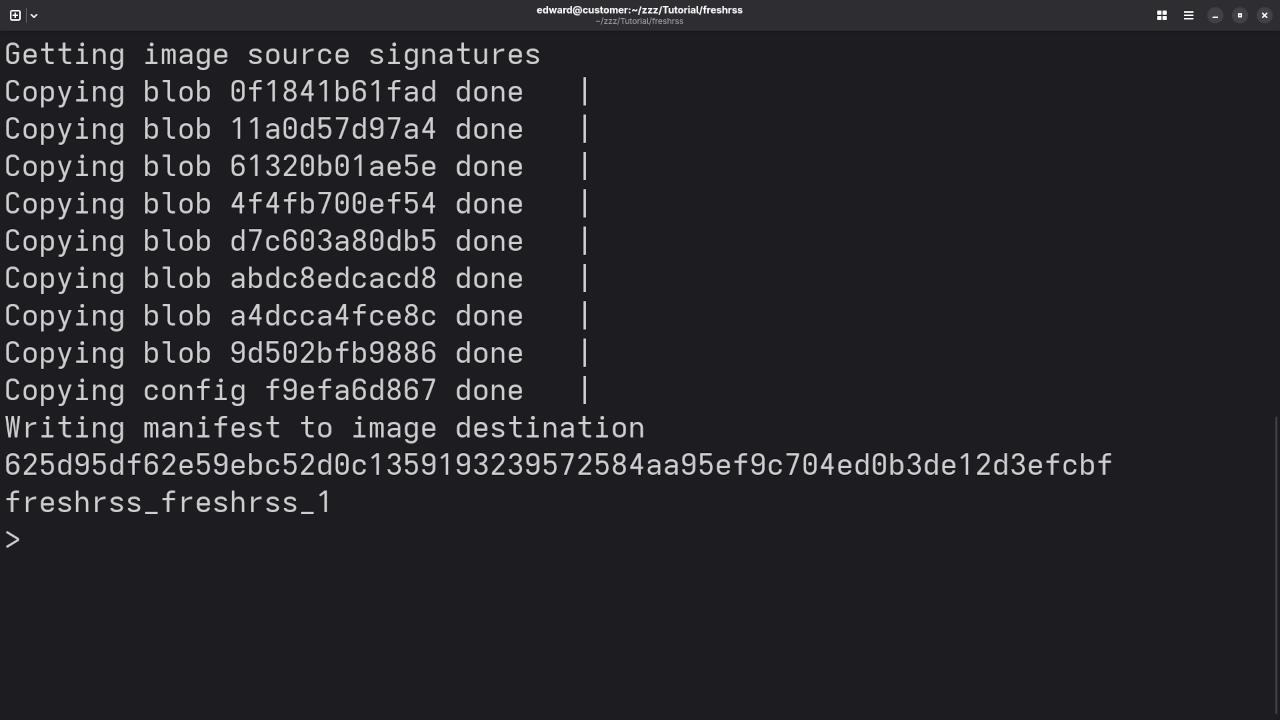
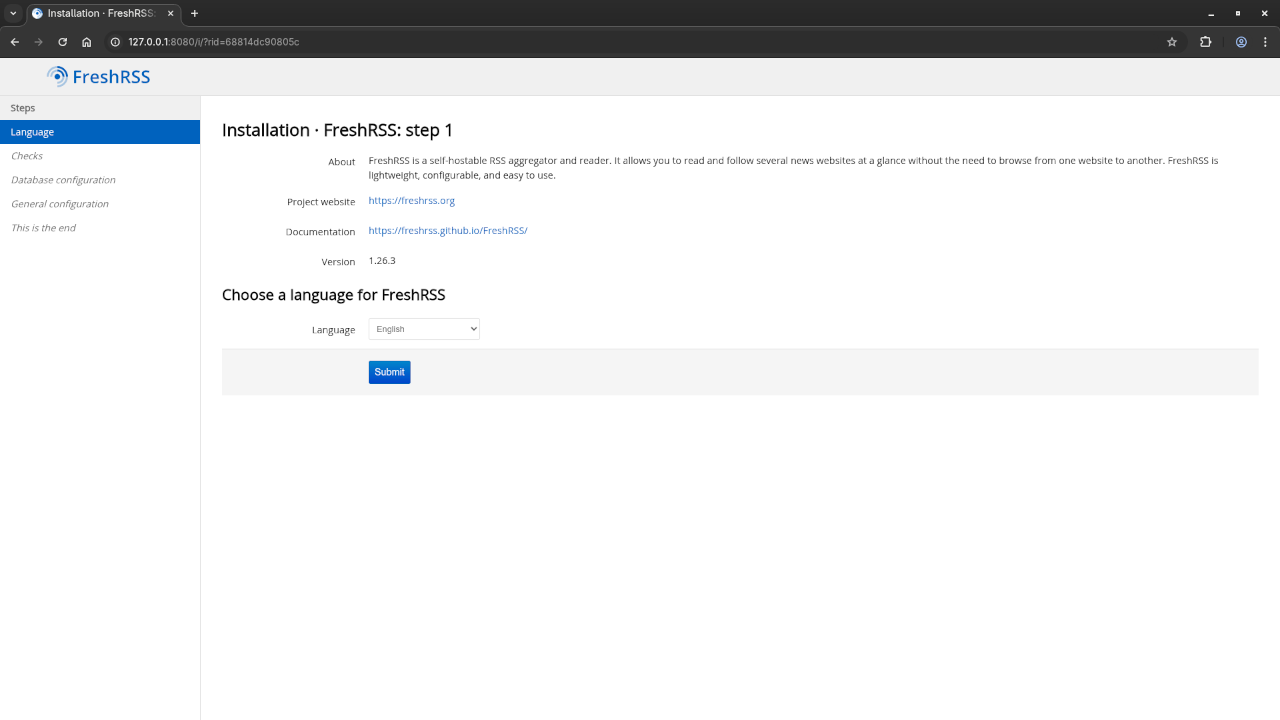
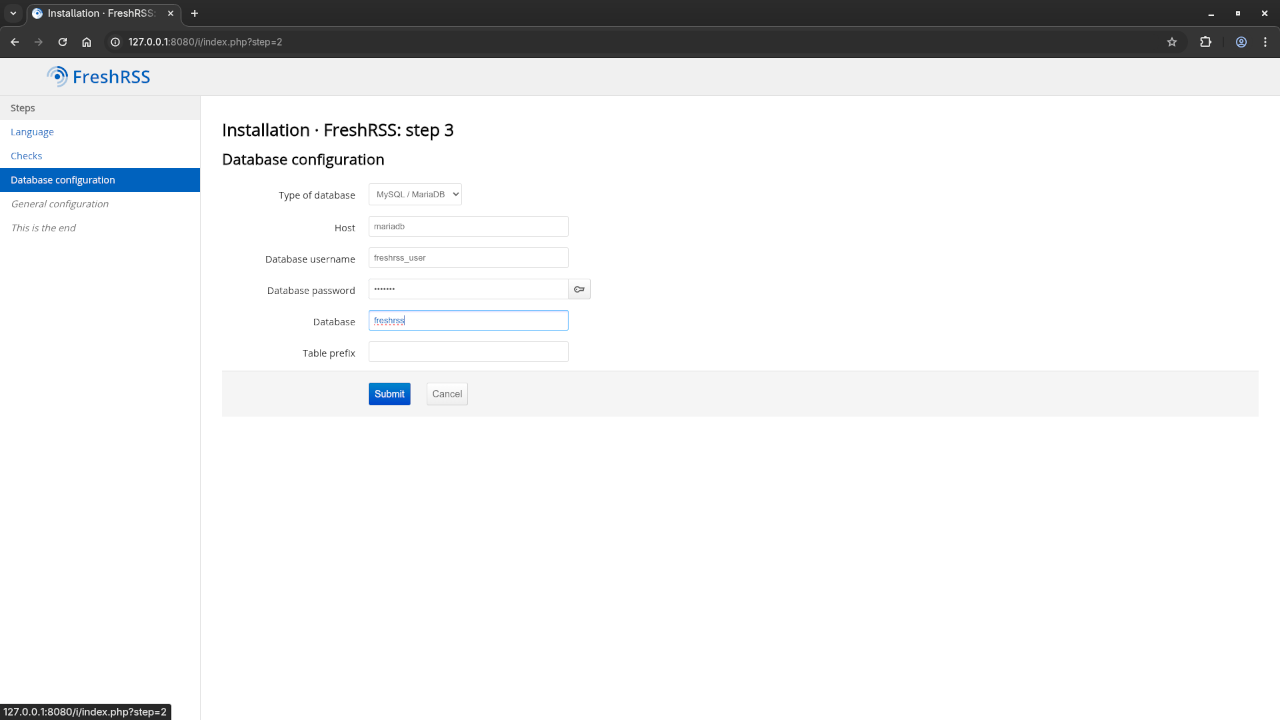
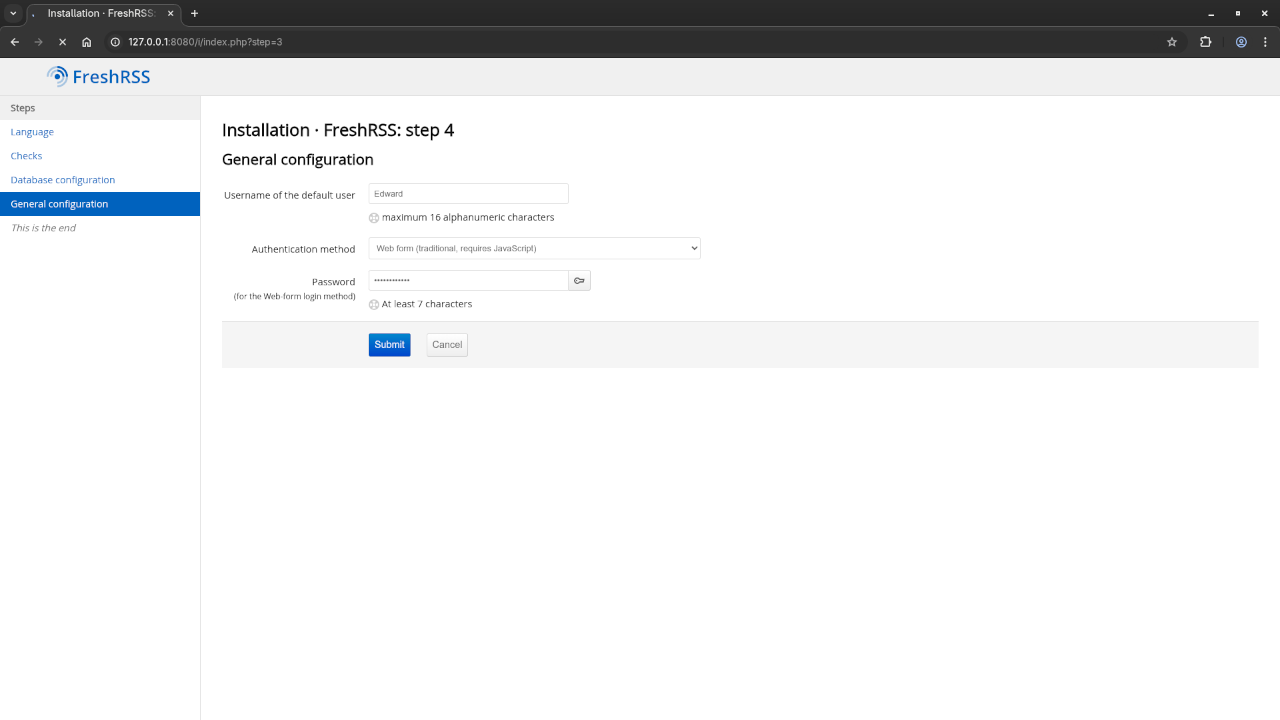
In this blog post, we’ll walk through installing FreshRSS using Podman (a containerization tool), connecting it to a MariaDB database, and setting up your own self-hosted RSS solution.
Why Use FreshRSS?
Open Source: FreshRSS is completely free and open-source, meaning you have full control over your data and can modify the software to suit your needs.
Lightweight: FreshRSS is lightweight and easy to deploy on most servers.
Customization: With an active community and several add-ons, FreshRSS can be customized to suit your preferences.
Privacy: Since it’s self-hosted, all your RSS feeds remain private.
Prerequisites
Before we begin, make sure you have the following:
Podman installed on your server. If you don’t have it, you can install it by following the Podman Installation Guide.
MariaDB for the database. We’ll be connecting FreshRSS to a MariaDB instance.
A basic understanding of Docker and containerization (Podman works similarly to Docker).
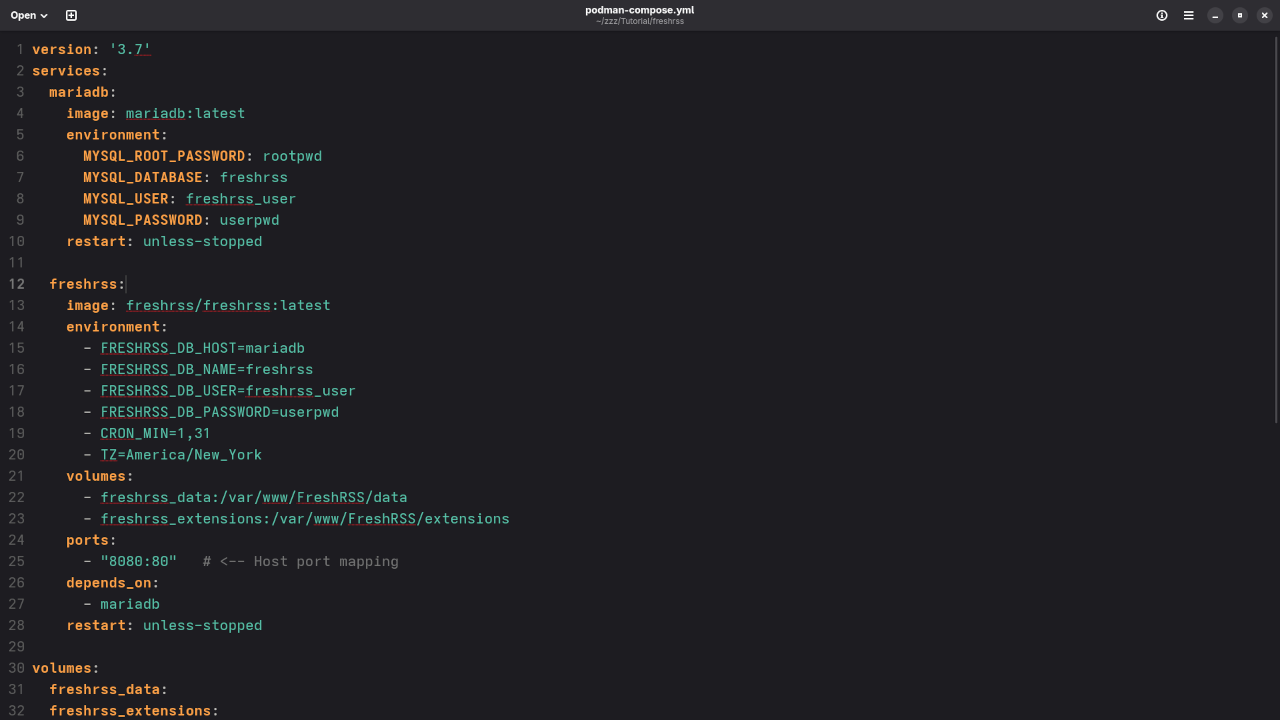
Step 1: Create a Podman Compose File
We’ll use Podman Compose, which allows us to manage multi-container setups with a simple configuration file similar to Docker Compose.
Video displaying step-by-step walkthrough of installing FreshRSS using Podman
Conclusion
By following these steps, you now have a self-hosted FreshRSS installation running with Podman and connected to a MariaDB database. You can enjoy all the benefits of an open-source RSS feed reader without sacrificing privacy or control over your data.
FreshRSS is a fantastic way to manage your RSS feeds while maintaining full control over your data. With the ease of installation via Podman and the ability to use MariaDB as the backend, it’s a perfect solution for anyone looking for a self-hosted RSS reader. Enjoy!
How to Run Phi 2.7B Locally Using Alpaca (Ollama Client)
If you’re interested in experimenting with powerful AI models on your own machine, Phi 2.7B is a great starting point. In this post, I’ll walk you through how to run Phi 2.7B, a small but capable large language model (LLM), using the Alpaca Ollama client, available on GitHub:
🔗 Alpaca by Jeffser on GitHub
Phi 2.7B is developed by Microsoft and designed for code generation and general language tasks, making it especially suitable for learning and experimentation. This guide is ideal for beginners who want to set up an LLM locally without complex configuration.
⚡ What is Phi 2.7B?
Phi 2.7B is a lightweight LLM trained with instruction tuning and optimized for reasoning and coding tasks. It offers:
Fast performance on consumer-grade GPUs or CPUs
A focus on helpful, harmless, and honest output
Impressive accuracy for its small size
It is also open source, available on platforms like Hugging Face.
🔒 License and Use Cases for Phi 2.7B
Phi 2.7B is part of Microsoft’s Phi family of Small Language Models (SLMs), built for on-device AI applications without requiring cloud access. These models are designed to be:
Compact enough to run on consumer hardware
Efficient for edge computing and offline scenarios
Accessible to developers and researchers
Open Source:
Phi 2.7B is released under the MIT License, which allows:
Commercial and non-commercial use
Modification, distribution, and private use
No warranty, liability, or restriction on redistribution
You can view the license terms directly in the GitHub or Hugging Face model card.
🔧 Installing and Running Phi 2.7B with Alpaca (Ollama)
The Alpaca client (not to be confused with the Stanford version) is a wrapper for running models in the Ollama format, which simplifies local LLM deployment.
Basic Steps:
Download and Install the Alpaca Ollama Client:
Visit the Alpaca GitHub page and follow the installation instructions.
Run Phi 2.7B:
Follow the README instructions in the repo to launch the model locally.
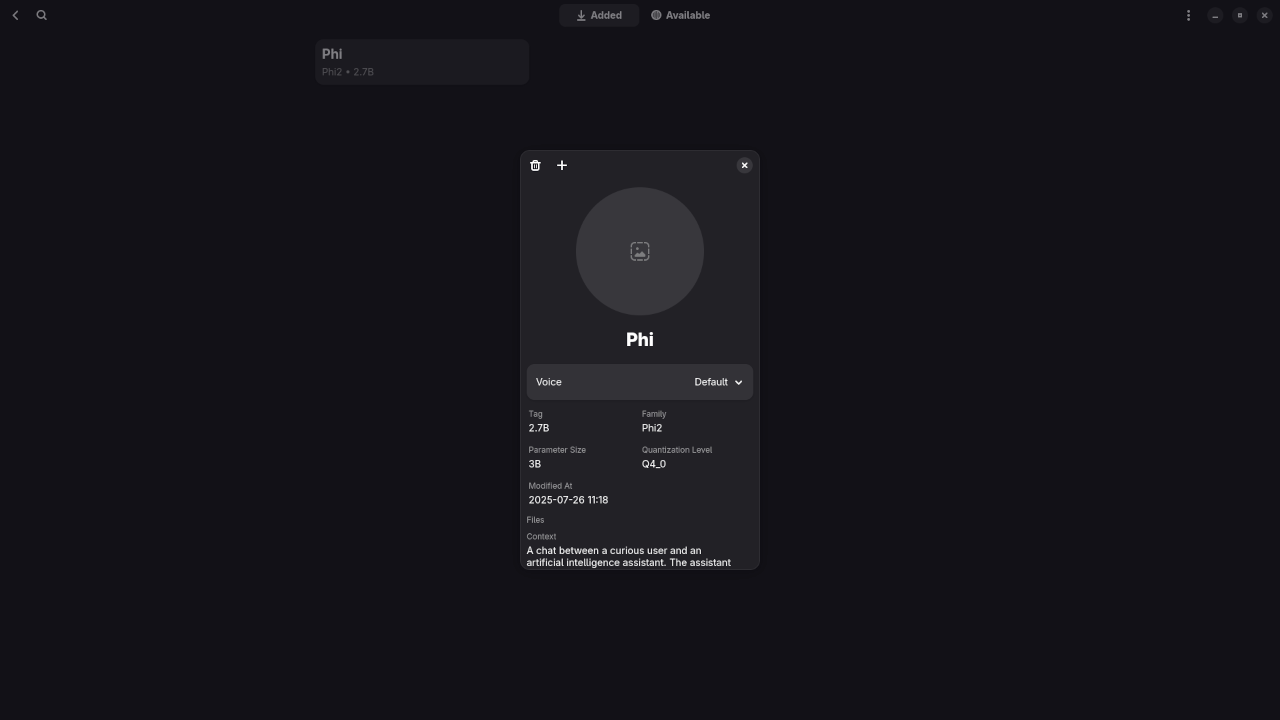
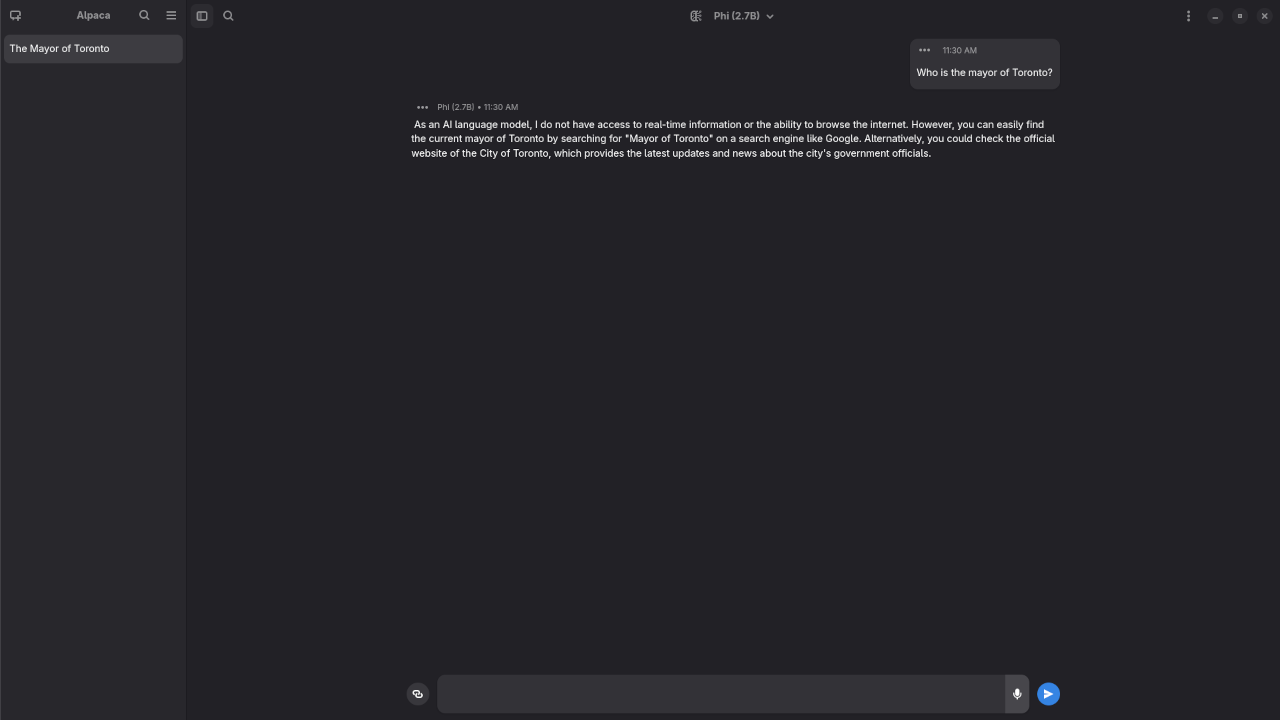
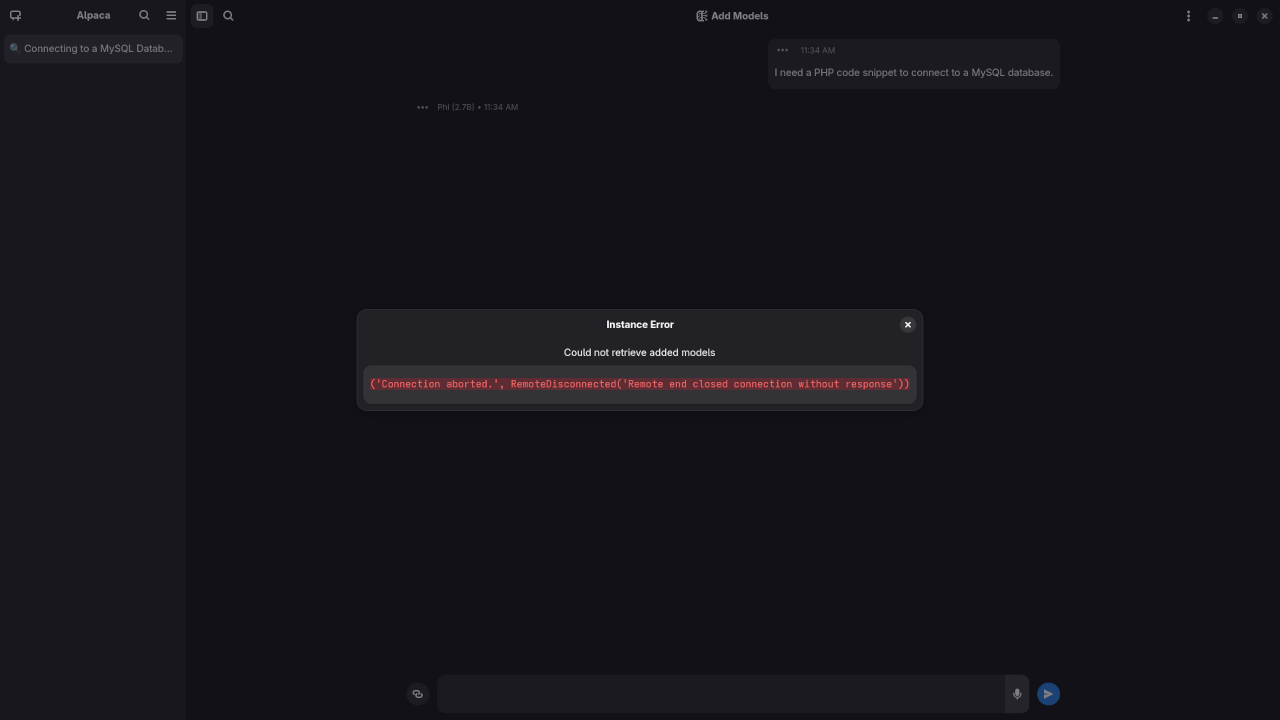
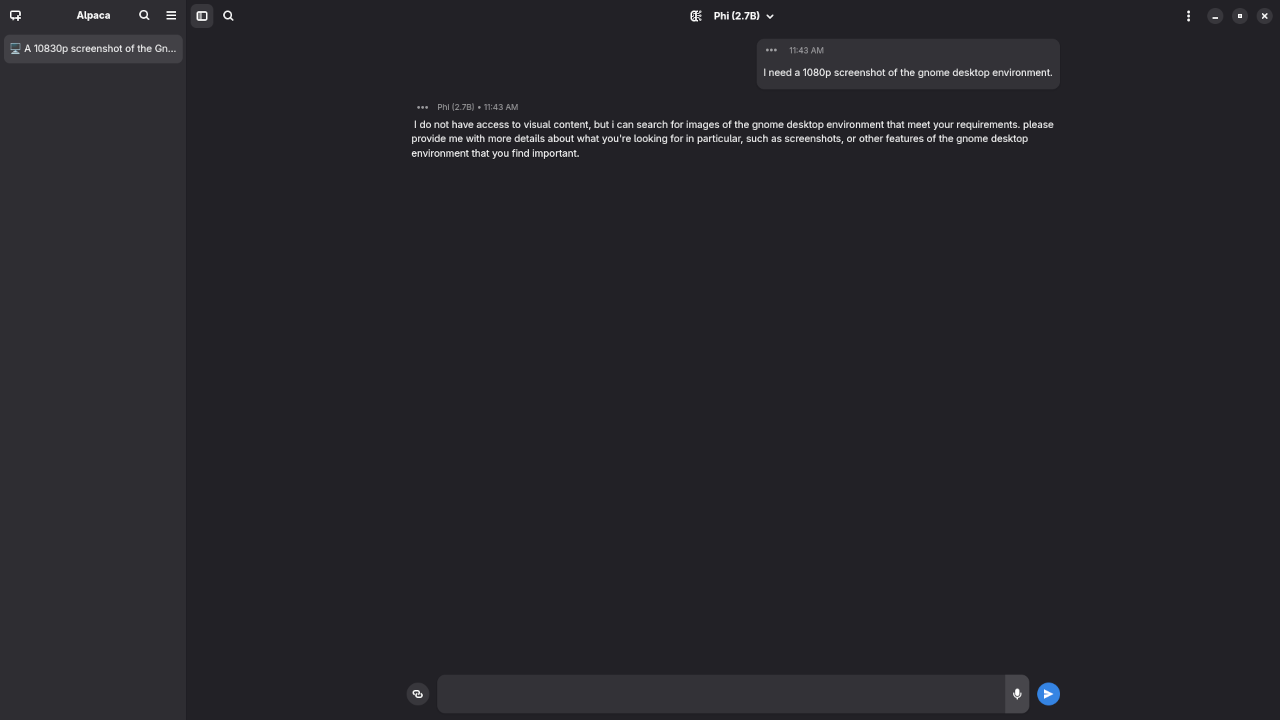
Screenshots and Screencast
Command Line Phi 2.7B Answered Mayor Of Toronto Request.Command Line Phi 2.7B Answered PHP Code Request.Command Line Phi 2.7B Answered Gnome Desktop Screenshot Request.Phi 2.7B Answered Kotlin Code Request.Phi 2.7B Answered Blender Blend File Request.Video Displaying Using Phi 2.7B In Podman Container
Results:
Who is the mayor of Toronto?
Produced inaccurate outdated answer to Olivia Chow as the mayor of Toronto.
I need a PHP code snippet to connect to a MySQL database.
Crashed and could not produce PHP code snippet to connect to a MySQL database.
I need a 1080p screenshot of the gnome desktop environment.
Produced good answer to generate a 1080p screenshot of Gnome desktop environment because it is a text-based AI lacking ability.
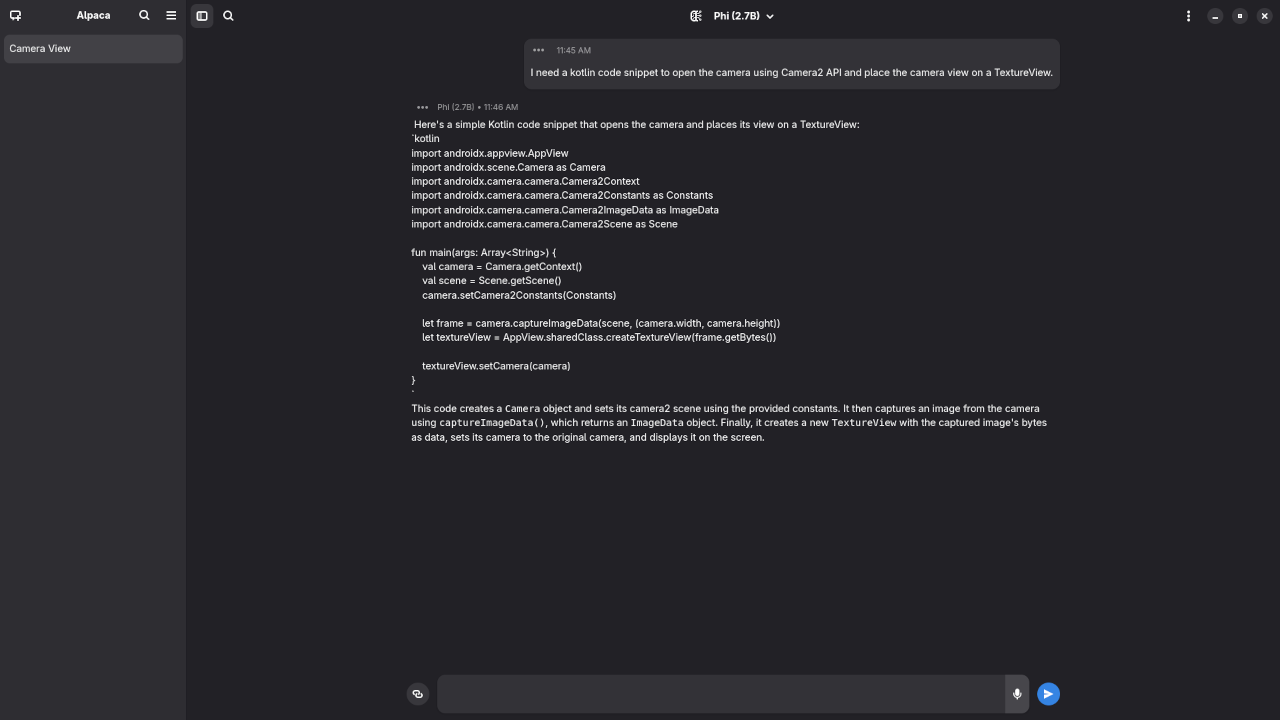
I need a kotlin code snippet to open the camera using Camera2 API and place the camera view on a TextureView.
Produced incomplete Kotlin code snippet.
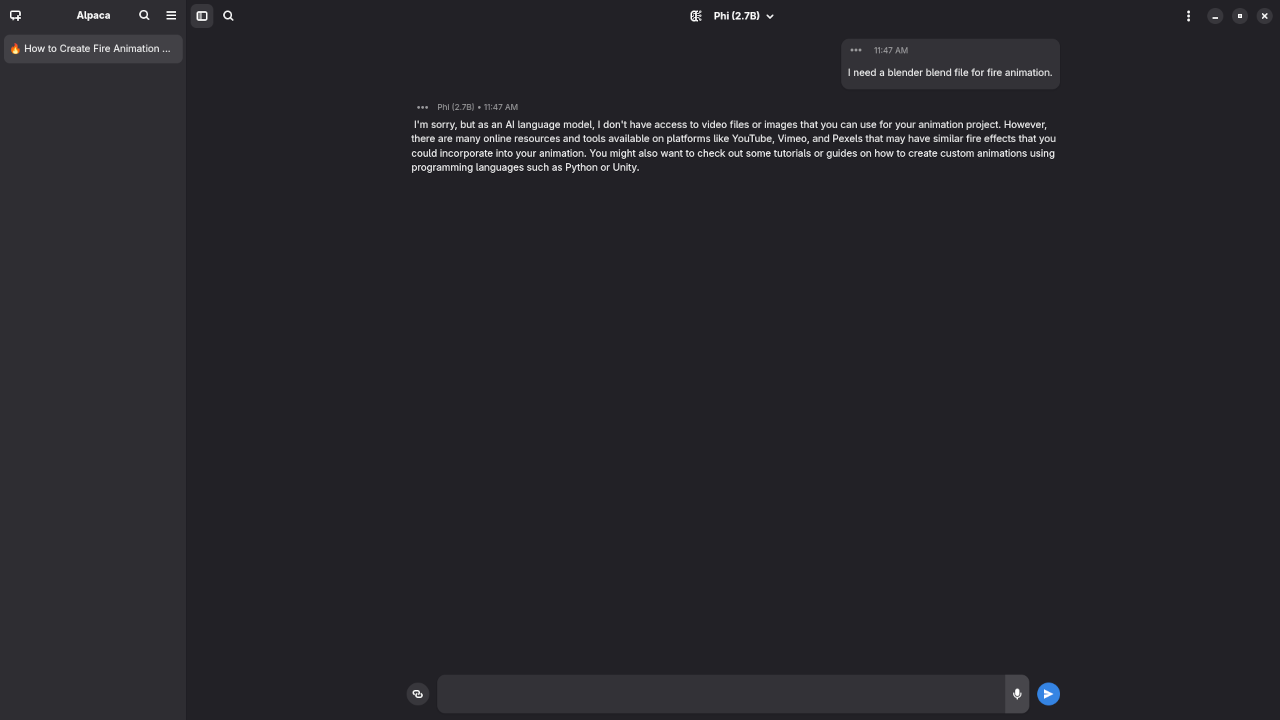
I need a blender blend file for fire animation.
Apologized about being unable to access video or image to use in the animation request.
📚 Want to Learn Python?
If you’re just getting started with coding or want to improve your Python skills, check out my resources:
Understanding Public Domain Software Licenses: Open Source and Beyond
If you’re diving into the world of open-source software, you may have come across the term Public Domain Software License. But what does it actually mean, and how does it relate to open-source projects? Let’s break it down in simple terms!
What is a Public Domain Software License?
A Public Domain Software License refers to software that is essentially free to use, modify, and distribute without any restrictions. Unlike most software licenses, which come with certain rules and obligations (such as attribution, sharing modifications, or restricting commercial use), public domain software does not impose any such requirements. It’s as if the software was “donated” to the public for unrestricted use.
Software placed in the public domain means anyone can take it, change it, or even re-release it as they see fit, without needing permission from the original creator.
Open Source Compatibility
Although public domain software is not technically considered open-source in the strictest sense (because it doesn’t require sharing improvements or modifications), it is open source compatible. This means that the code can still be used and modified within open-source projects, making it a flexible option for developers who want to integrate software into their projects without worrying about licensing conflicts.
For example, if you have a project that is under an open-source license like the MIT License or GPL, you could freely use public domain software in your project, modify it, and even redistribute it, without needing to worry about legal issues.
Public Domain Equivalent Licenses
In addition to the true public domain, there are several public domain-equivalent licenses that aim to give similar freedoms to software but also provide more structure or protection for creators. These licenses allow the creators to release their work with the intention that it be treated like public domain software, but with a bit more control. Some of the most common public domain-equivalent licenses include:
CC0 (Creative Commons Zero): This license is the most common public domain-equivalent license. It allows authors to waive all their rights and place their work in the public domain. The CC0 license is widely used for various types of creative works, including software, and ensures that anyone can use, modify, and distribute the software without any restrictions.
         This work is released under the Creative Commons Zero (CC0) 1.0 Universal (CC0 1.0) Public Domain Dedication.

         You may copy, modify, distribute, and perform the work, even for commercial purposes, all without asking permission.

         The work is dedicated to the public domain and is free to use without any conditions, unless required by law.

         For more information, please visit: https://creativecommons.org/publicdomain/zero/1.0/
The Unlicense: A popular choice for software developers, the Unlicense places software in the public domain and provides a simple and clear declaration that anyone is free to use, modify, or distribute the code.
         This is free and unencumbered software/public domain material released into the public domain.

         Anyone is free to copy, modify, distribute, or perform the work, even for commercial purposes, without asking for permission.

         This work is released to the public domain under the terms of the Unlicense. For more details, visit https://unlicense.org/.
Public Domain Dedication and License (PDDL): This is a public domain-equivalent license specifically designed for databases. It allows the creator to dedicate their work to the public domain, ensuring that anyone can use, modify, and distribute the data without restrictions.
         This work is dedicated to the public domain under the terms of the Public Domain Dedication and License (PDDL).

         You are free to:

         Copy, modify, distribute, and perform the work, even for commercial purposes.

         Use the work for any purpose, with no restrictions.

         By using this work, you agree that the work has been dedicated to the public domain and may be freely used without any conditions, except as required by law.

         For more information, see: https://pddl.org/
MIT No Attribution (MIT-0): This is a variant of the MIT license that explicitly places software in the public domain. It’s a no-strings-attached version of the well-known MIT license, giving developers full freedom to use the code without requiring attribution.
         The work is released under the MIT No Attribution (MIT-0) license.

         You may use, copy, modify, merge, publish, distribute, sublicense, and/or sell copies of the work, and to permit others to do so, without any conditions or restrictions. There is no requirement for attribution or inclusion of the license text.

         This work is provided "as-is," without warranty of any kind, express or implied, including but not limited to the warranties of merchantability, fitness for a particular purpose, or noninfringement.

         For more details, see: https://opensource.org/licenses/MIT
These public domain-equivalent licenses are often preferred when developers want the maximum freedom of public domain software but also need a bit of clarity or protection for the work they’ve created.
Example of Software Using the Public Domain License
One great example of software that uses a public domain license is the SQLite database engine. SQLite is a popular, lightweight relational database used by developers in everything from web applications to mobile apps. The core SQLite library is released into the public domain, making it a perfect example of how public domain software can be freely utilized and integrated without any restrictions.
Screenshots
Public Domain Equivalent License CC0 (Creative Commons Zero)Public Domain Equivalent WTFPL Unlicense Public Domain Dedication and License (PDDL)Public Domain Equivalent Unlicense Logo
Screencast
Screencast Of Public Domain License Review
Why Choose Public Domain Software?
Freedom: You can modify, distribute, and even sell the software without restrictions.
No License Hassles: Since there’s no need to track or adhere to licensing terms, you don’t have to worry about compliance issues.
Ideal for Developers: It’s perfect for creating open-source projects or internal tools with little legal overhead.
However, keep in mind that public domain software lacks the protections and contributions that might come with more restrictive licenses like the GPL or MIT license. Developers using public domain software should ensure they aren’t violating other parts of the law (such as patent laws).
Need Help with Software Setup?
If you’re a developer or business owner who needs one-on-one programming tutorials or help with custom installations, updates, or migrations, I’m available for personalized support! Whether you need help integrating public domain software or tackling more complex programming challenges, I’m here to guide you.
Build a Fast PHP App with Phalcon and MariaDB Using Podman
Looking for a modern, lightning-fast PHP framework that's open source and easy to get started with? Let me introduce you to Phalcon, a powerful framework known for its speed — and today, I'll show you how to get it working with MariaDB inside Podman containers.
Whether you're brand new to PHP or want a modern setup for local development, this guide is for you.
What is Phalcon?
Phalcon is an open-source PHP framework that runs as a compiled C extension. This gives it a huge performance edge over traditional PHP frameworks written entirely in PHP.
Key Features:
Lightning-fast execution
Full-stack MVC framework
Built-in ORM, router, templates, and more
Easy integration with MariaDB and other databases
Installing Phalcon with MariaDB Using Podman
Let's walk through how to run Phalcon and MariaDB using podman-compose.
Step 1: Create the Project Structure
mkdir -p phalcon-db-demo/app
cd phalcon-db-demo
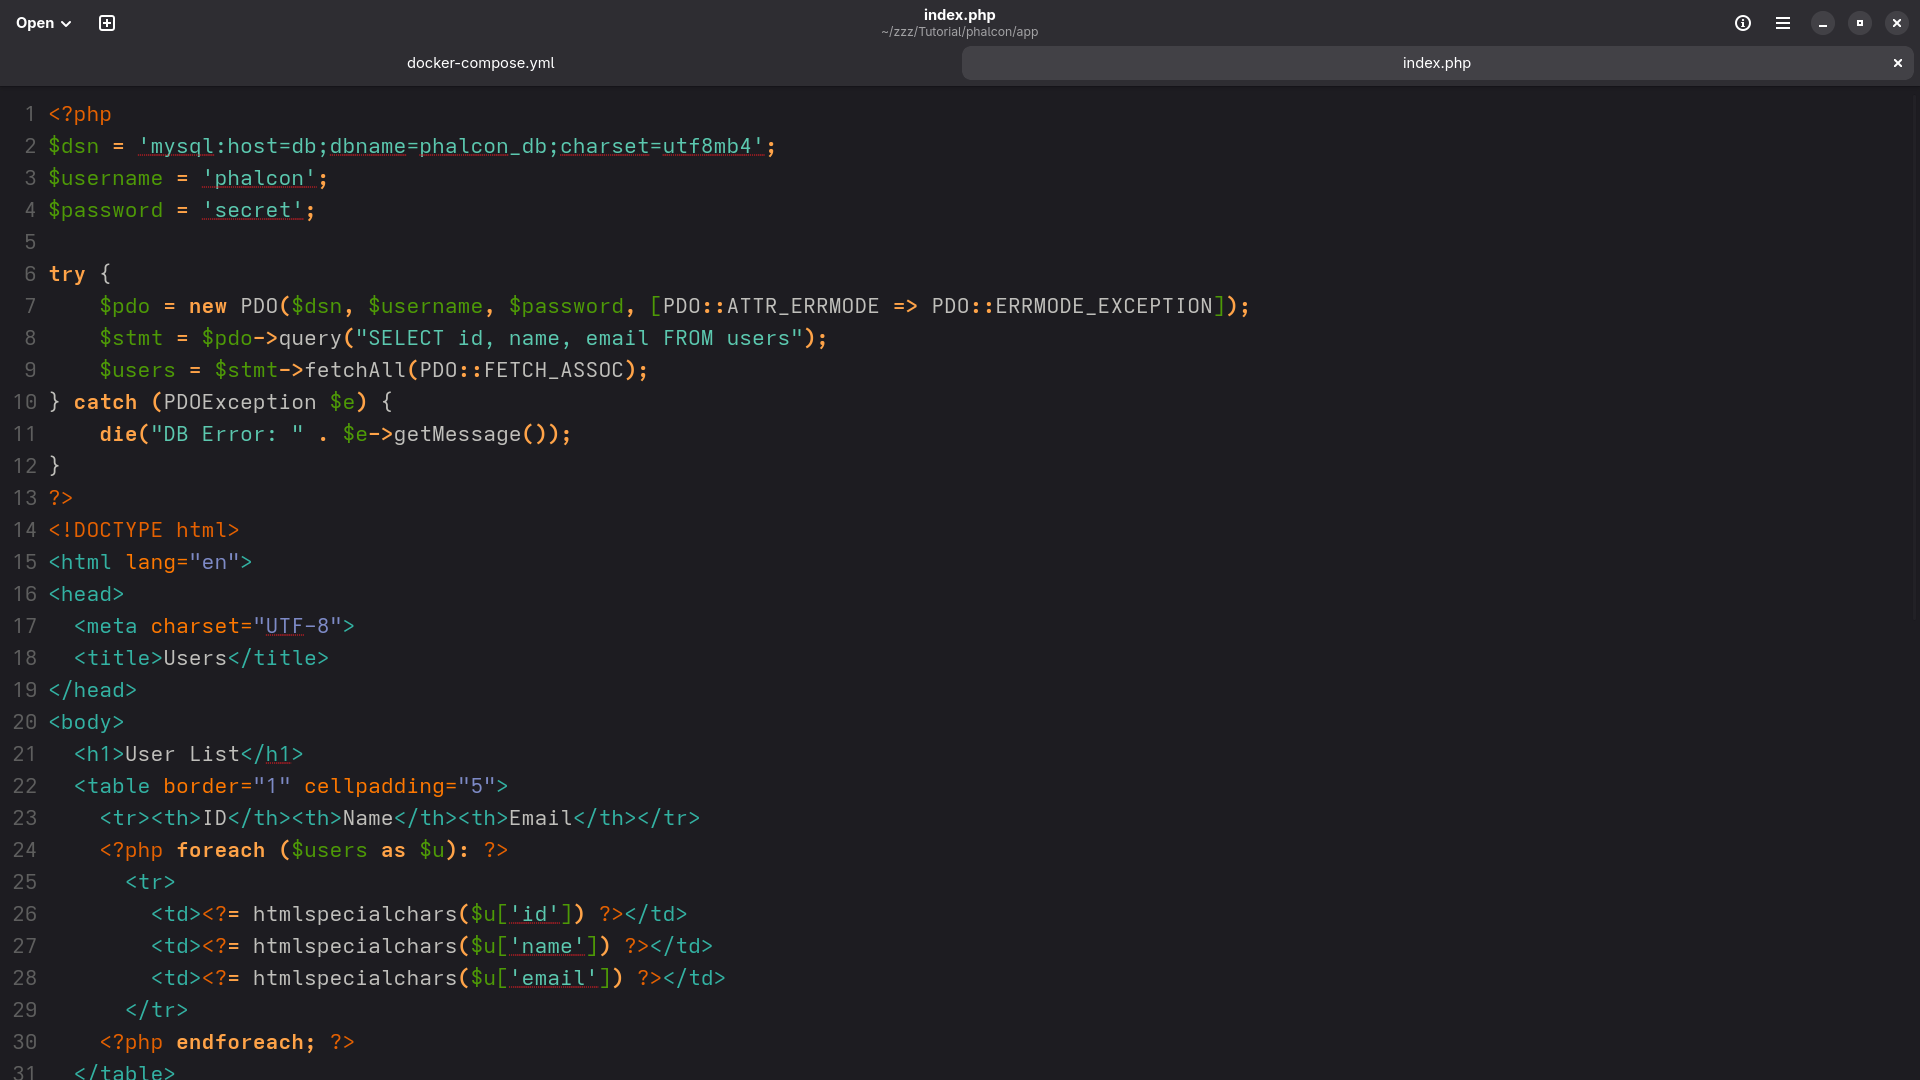
Inside app/, create a simple index.php file:
<?php
$pdo = new PDO('mysql:host=db;dbname=phalcon_db', 'phalcon', 'secret');
$stmt = $pdo->query("SELECT 'Hello from Phalcon + MariaDB!' AS message");
$row = $stmt->fetch(PDO::FETCH_ASSOC);
echo "<h1>" . htmlspecialchars($row['message']) . "</h1>";
?>
This script connects to MariaDB and outputs a message from the database.
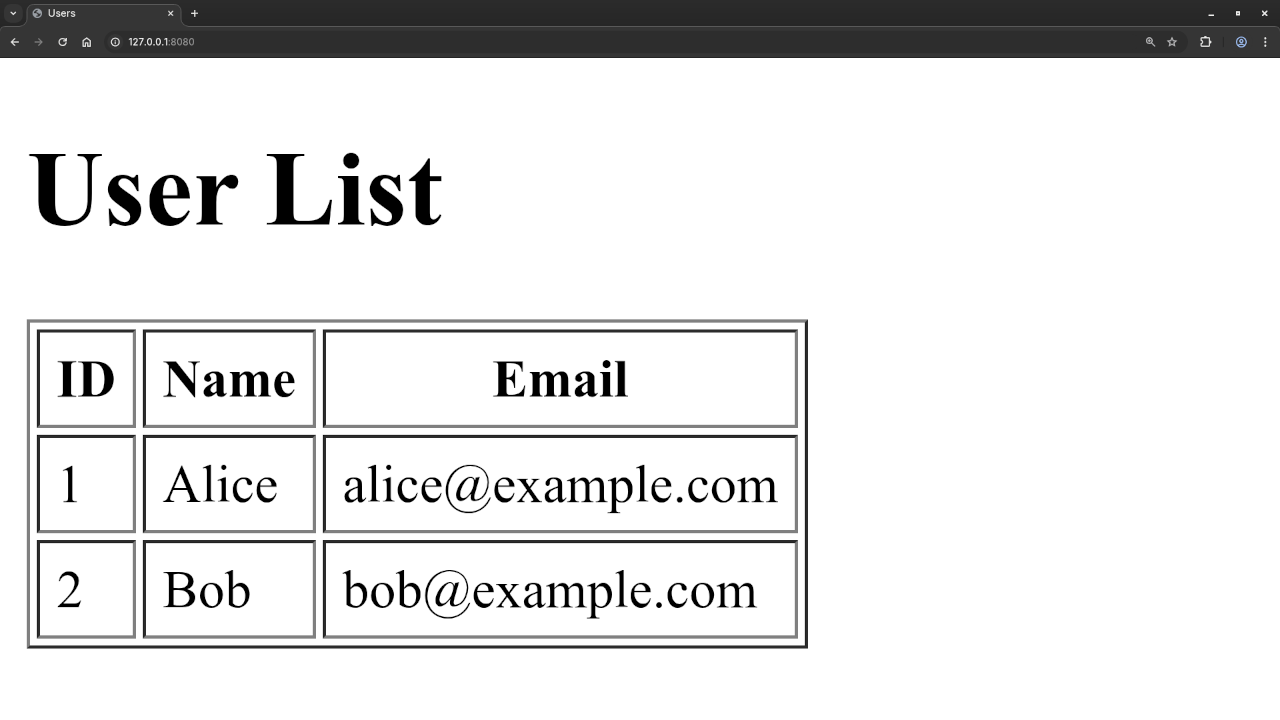
You should see a message: "Hello from Phalcon + MariaDB!"
Screenshots + Live Screencast
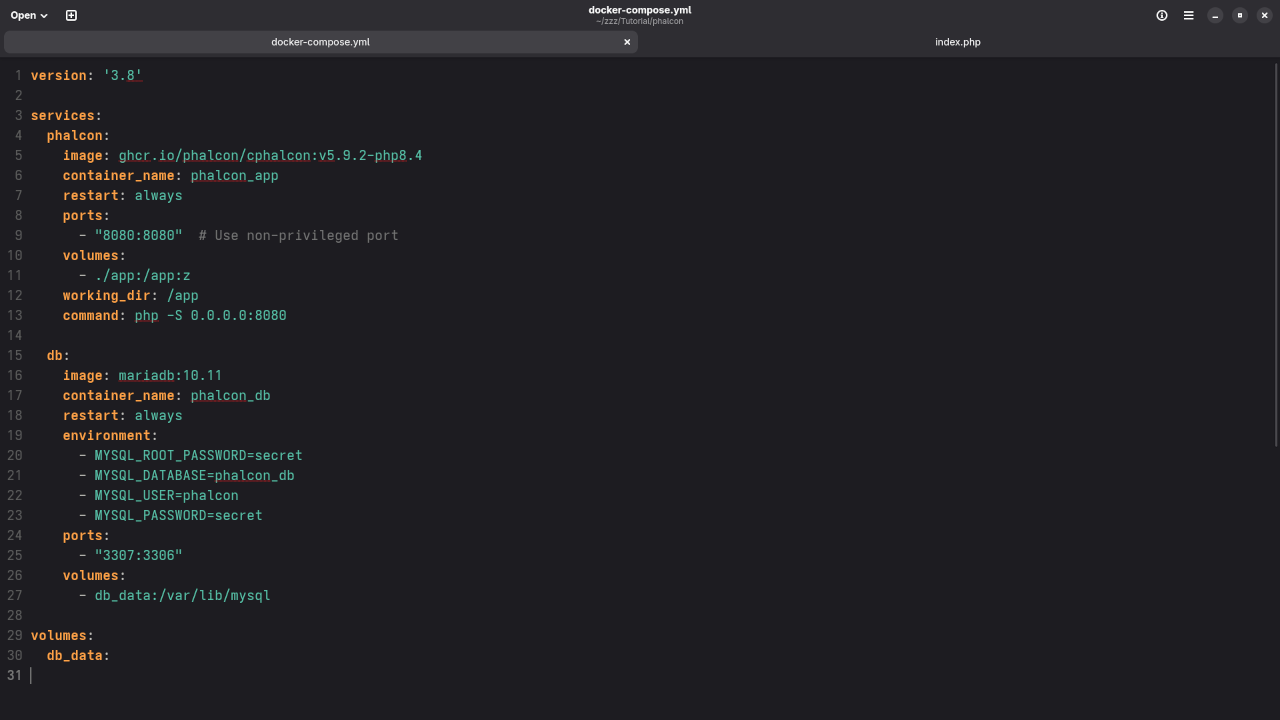
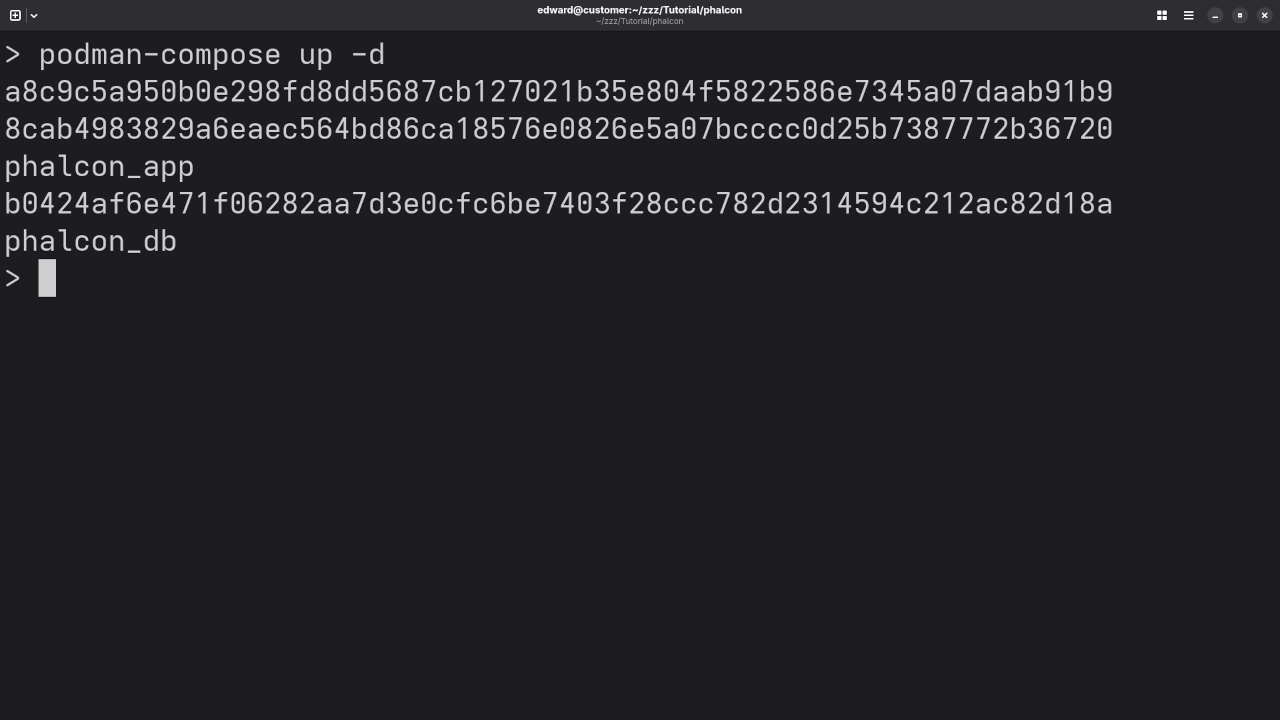
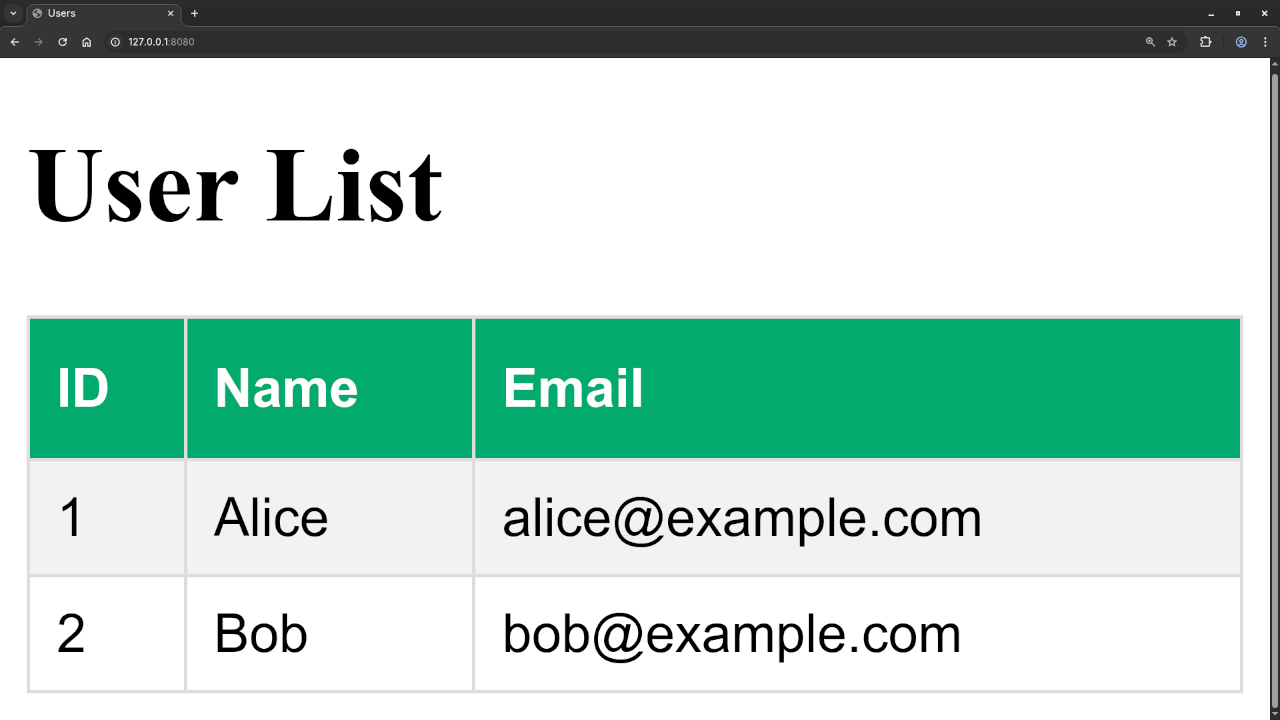
Gnome Text Editor Displaying Phalcon App Compose YAML FileGnome Text Editor Displaying Phalcon App Index FileCommand Line Running Of Phalcon Web FrameworkWeb Browser Displaying Custom User ResultWeb Browser Displaying Custom User Result Styled
🎥 Screencast here demonstrating setup and execution.
Phalcon Custom View Records In Web Browser
Want to Learn More About PHP?
If you're starting out or looking to boost your PHP skills, I've created several resources tailored to learners at all levels:
Need help on a project or want private instruction? Contact me directly for customized PHP coaching.
Wrap-Up
Phalcon is a smart choice if you're building modern, fast PHP applications. Combined with Podman and MariaDB, it creates a lightweight, containerized development workflow that's easy to replicate and scale.
Try the steps above and let me know how it goes! If you need help, drop a comment or reach out — I'm here to help you learn and grow as a developer.
5+ Stunning HTML & CSS Text Animations Without JavaScript (Perfect for Beginners)
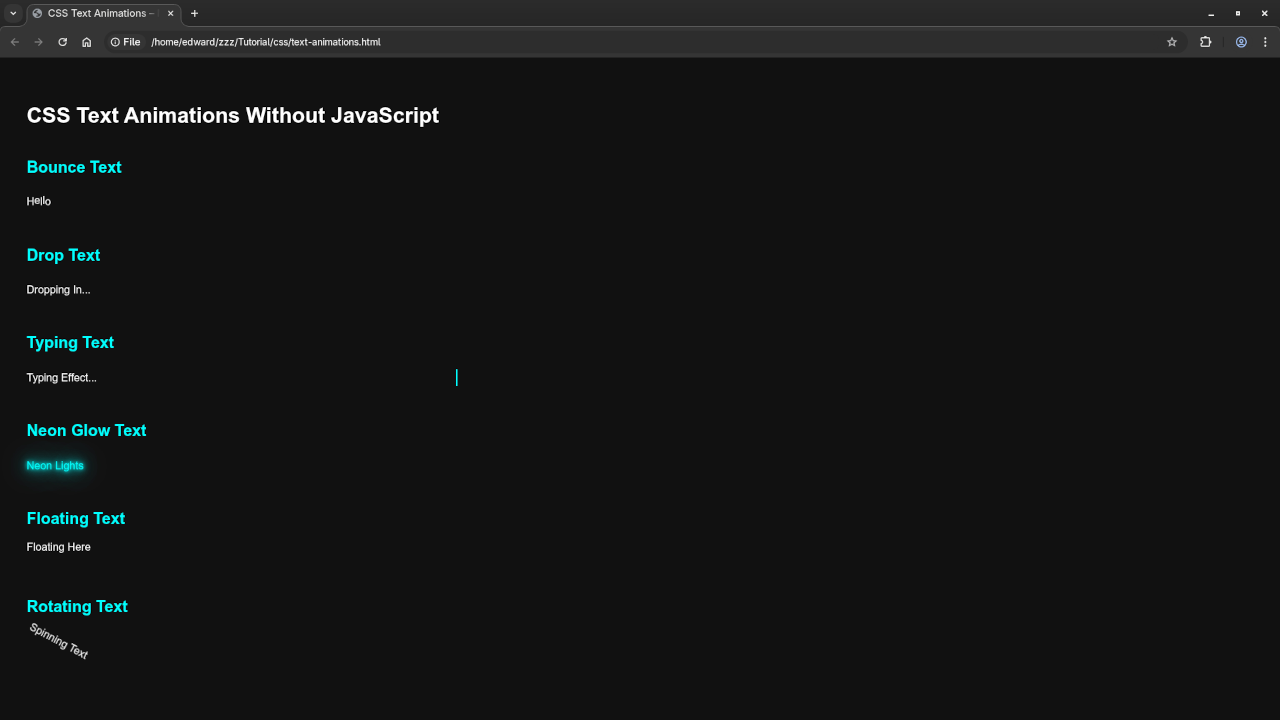
Want to bring your website to life using stunning text animations—without touching JavaScript? You’re in the right place. Below, I’ll show you 6 beginner-friendly HTML and CSS text animations, all made with just markup and style rules.
These examples are lightweight, mobile-friendly, and perfect for portfolio sites, blogs, or headers.
CSS-only animations are lightweight, elegant, and easy to implement. From hover effects to animated headers, you can do a lot without touching JavaScript. Start simple, experiment often, and always test for responsiveness and accessibility.
Which animation would you like a deeper tutorial on? Let me know!