How to Upload Multiple Files in PHP (With MariaDB Integration)
Are you just starting out with PHP and want to learn how to build a multiple file upload system that saves filenames to a MariaDB database? You are in the right place.
In this post, you will learn:
How to build a multiple file upload form using HTML
How to handle file uploads securely with PHP (latest version)
How to store file names in a MariaDB database
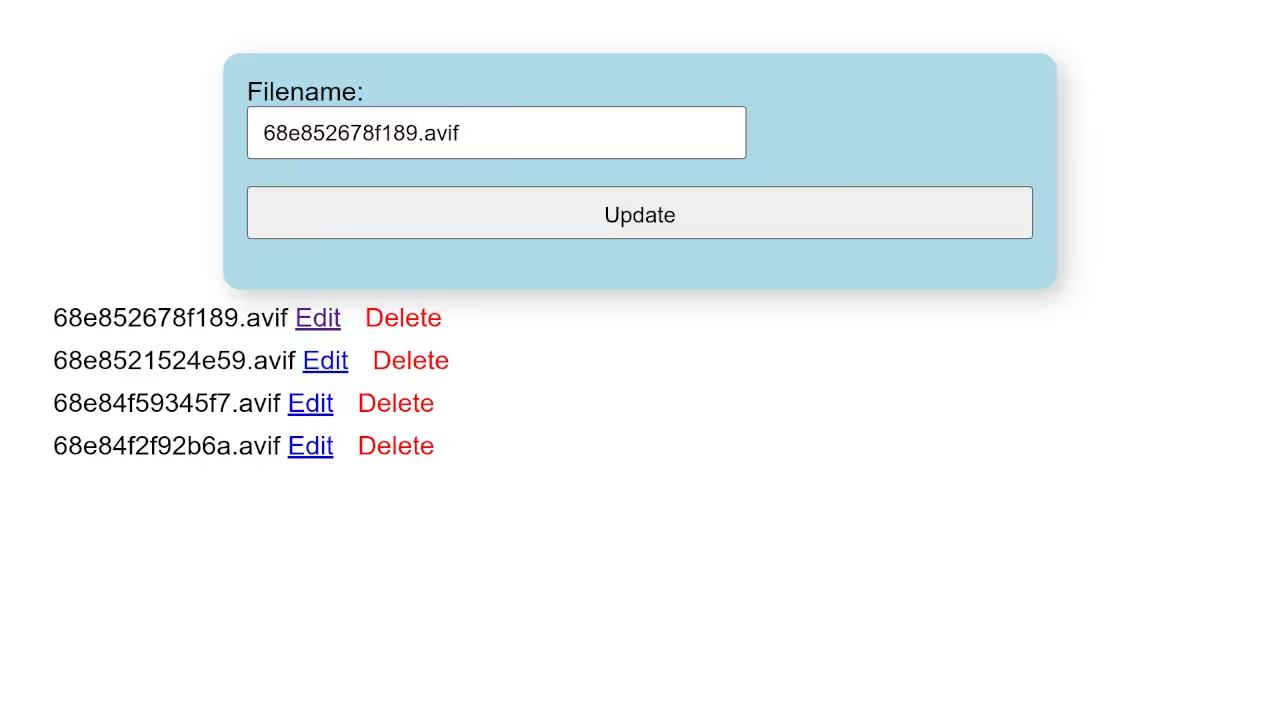
How to manage uploads: insert, update, and delete records
CREATE TABLE uploads (
id INT AUTO_INCREMENT PRIMARY KEY,
filename VARCHAR(255) NOT NULL,
uploaded_at TIMESTAMP DEFAULT CURRENT_TIMESTAMP
);
Bonus: Updating and Deleting Files
You can add update and delete features using simple SQL queries like:
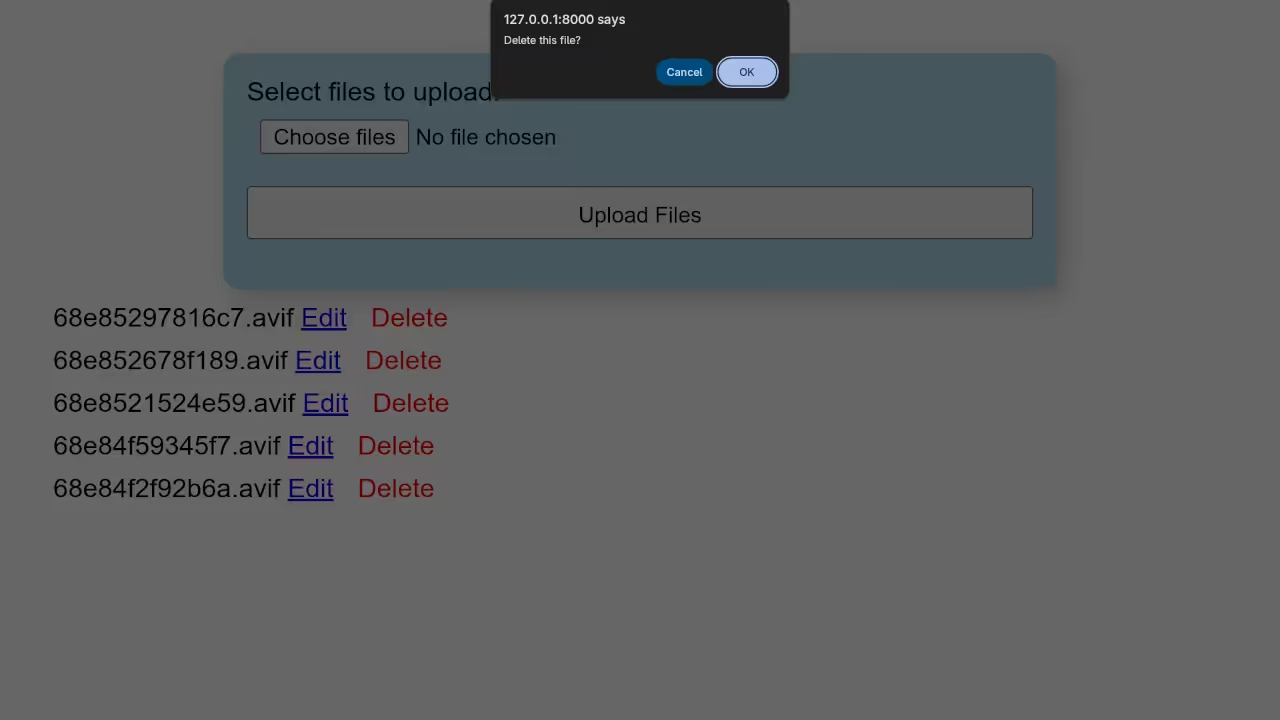
Delete File
$stmt = $conn->prepare("DELETE FROM uploads WHERE id = ?");
$stmt->bind_param("i", $id);
$stmt->execute();
Update File Name
$stmt = $conn->prepare("UPDATE uploads SET filename = ? WHERE id = ?");
$stmt->bind_param("si", $newFilename, $id);
$stmt->execute();
Always remember to remove the file from the server using:
unlink('uploads/' . $filename);
Best Practices
Always validate file types to avoid malicious uploads
Store files outside the web root if possible
Rename files to avoid name collisions
Use prepared statements to protect against SQL injection
Limit file size and number of files uploaded at once
Screenshots and Screencast
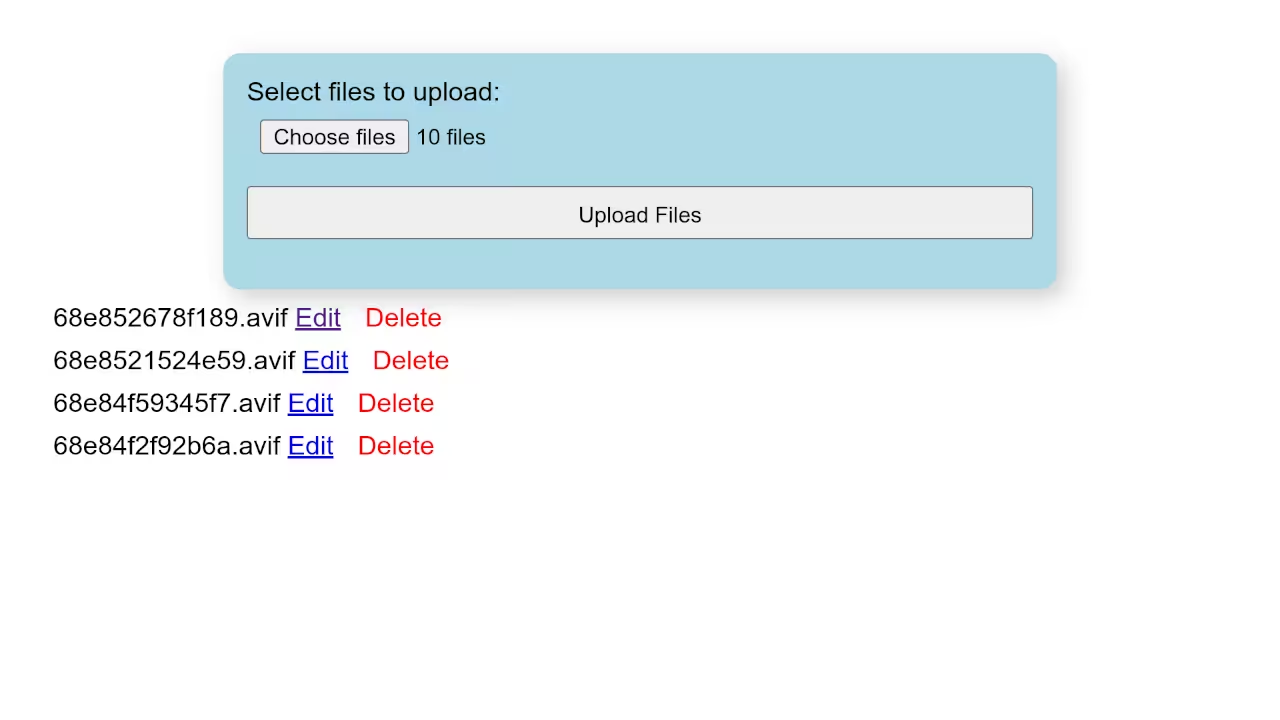
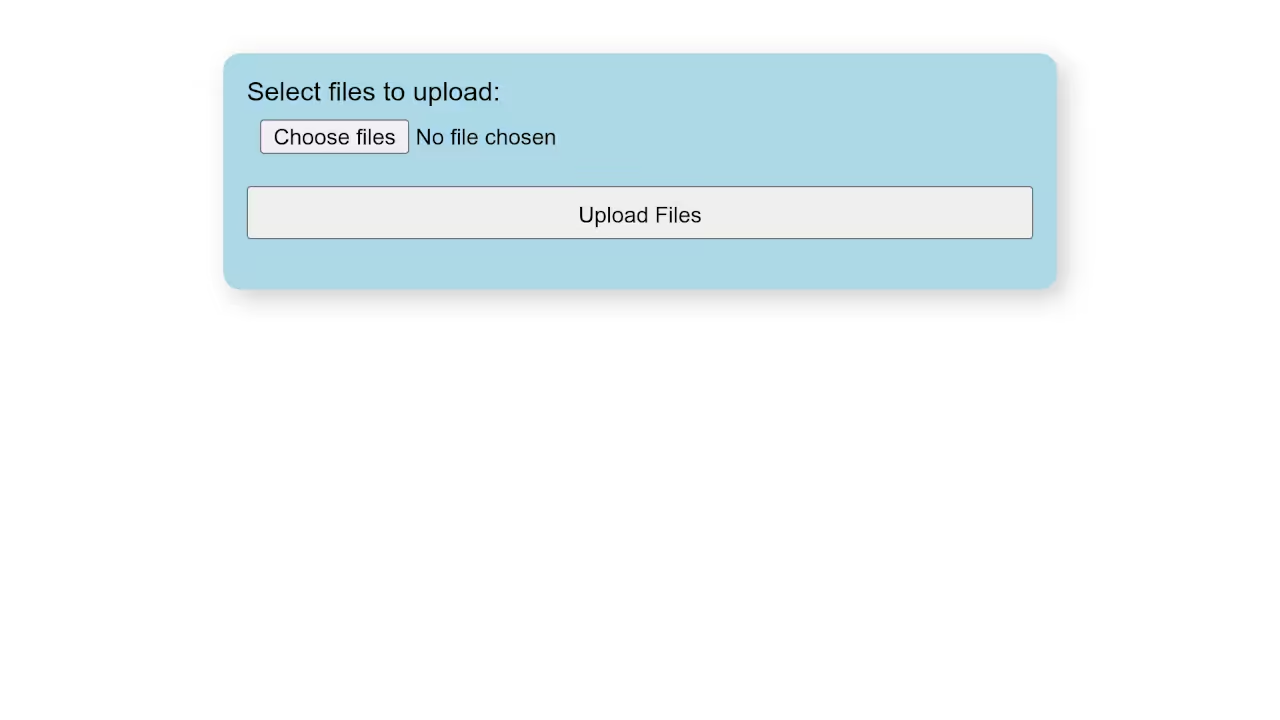
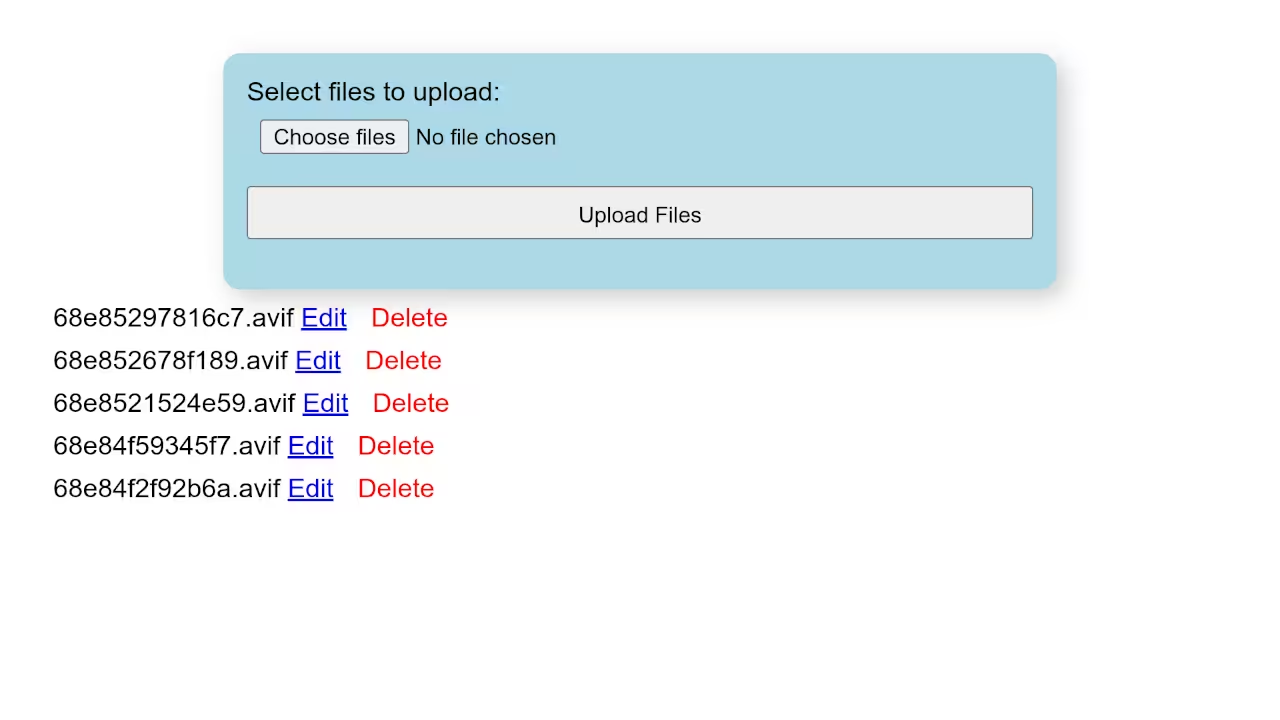
Web Browser Displaying A Clean Multiple File Upload FormWeb Browser Displaying A List Of Uploaded FilesWeb Browser Displaying A Delete File PromptWeb Browser Displaying Am Edit Filename FormPHP Multiple File Upload Video
If you have ever wanted to create a visually engaging scroll animation without using JavaScript, this beginner tutorial is for you. Using only HTML5 and CSS3, we will build a full-width, full-height animation where the page content scrolls right, then down, then right again – perfect for highlighting backgrounds, image slides, or portfolios.
This layout is great for personal projects, design showcases, or portfolios. And the best part? No JavaScript is required.
What We Will Build
We will create a simple layout using CSS3 animations and the @keyframes rule to achieve a scroll-like effect. Here is the motion path:
First, scroll right across a full-screen section.
Then, scroll down to the next screen.
Finally, scroll right again to a third section.
This effect is often called a “scroll path” and can be built entirely with CSS animations.
This course includes videos, code examples, and projects that walk you through JavaScript step-by-step.
Book a One-on-One Programming Tutorial
Want personalized help with HTML, CSS, or JavaScript?
I offer one-on-one programming tutorials.
Visit Contact Me Here to book your session today.
Final Thoughts
CSS3 animations can produce impressive effects without the need for JavaScript. This scroll animation is beginner-friendly and fully responsive using just HTML5 and CSS3.
Try it out and customize the animation speed, direction, or colors to suit your project.
Let me know in the comments if you would like a version that loops back or works vertically instead.
Create a 3D Hammer with Blender Python API and Display It on Your Website
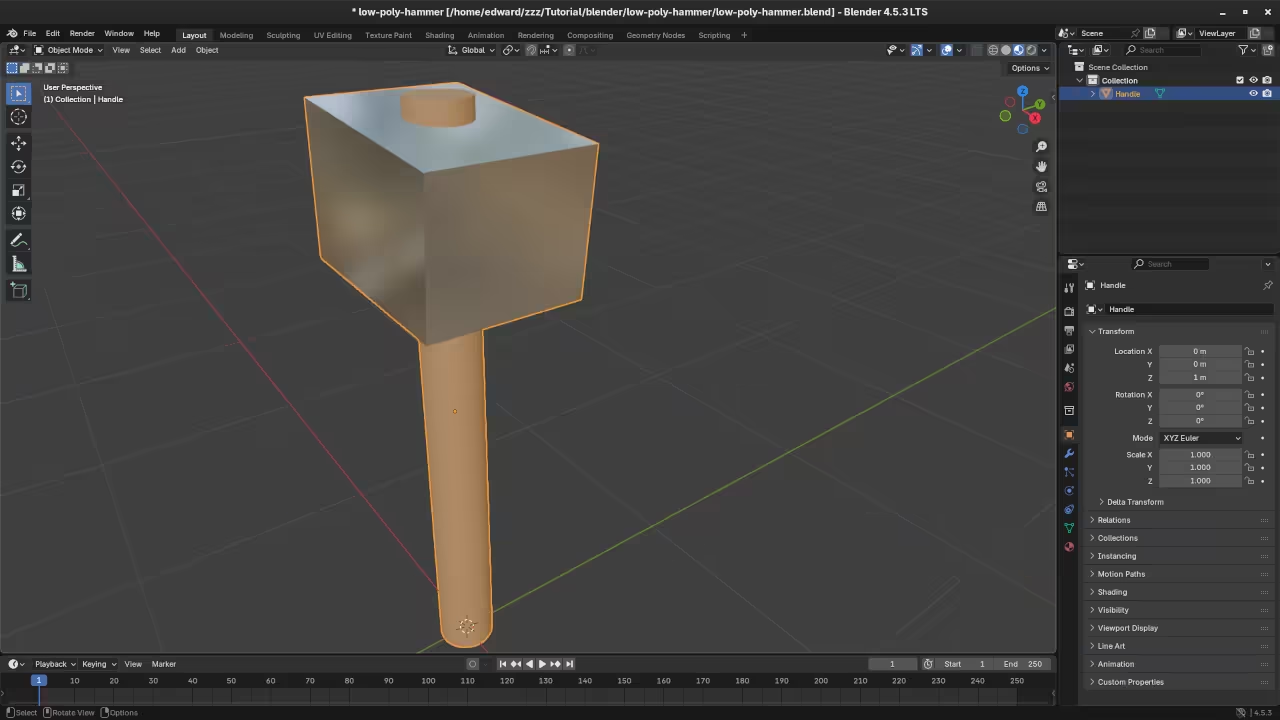
Welcome to this beginner-friendly tutorial! Today, we will explore how to generate a simple 3D hammer model using Blender’s Python API and display it directly in your web browser using the <model-viewer> web component. This approach combines the power of Blender scripting with modern web technologies to bring interactive 3D content to your site.
Step 1: Generating a Hammer Model with Blender Python API
Blender is a fantastic open-source 3D modeling tool that supports scripting through Python. With just a few lines of code, you can programmatically create objects like a hammer.
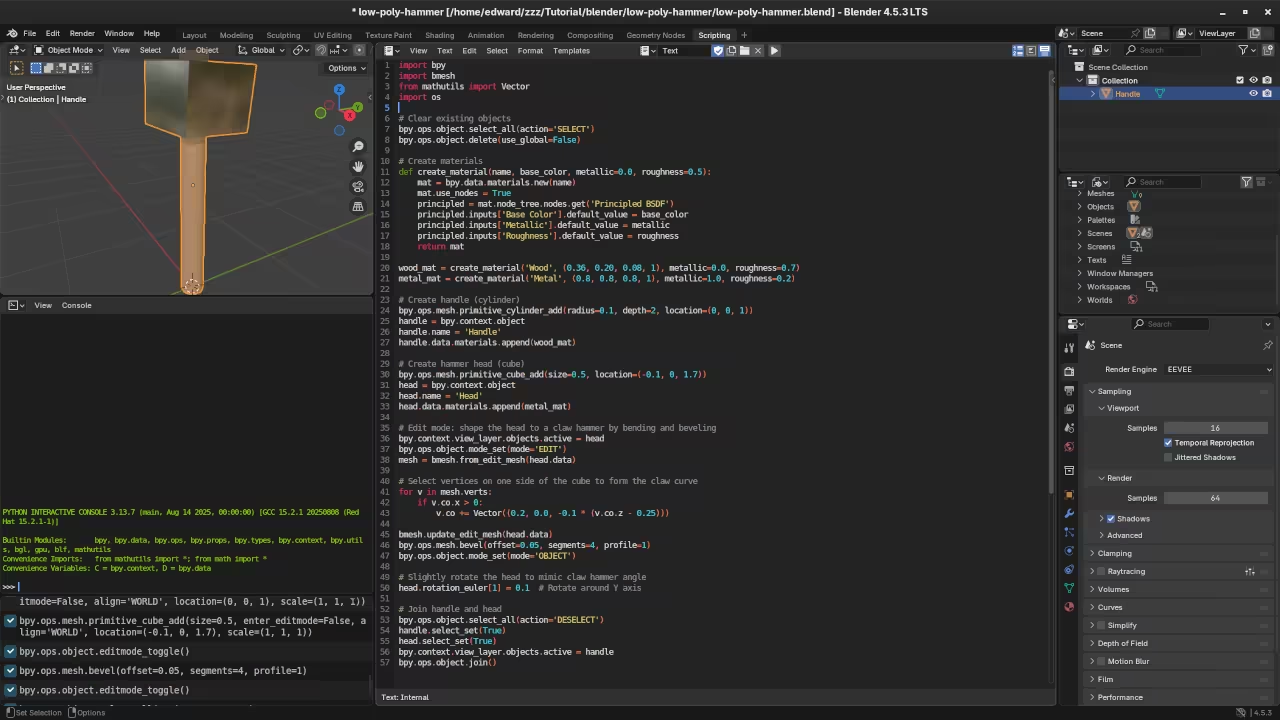
Here is an improved example of a Blender Python script to generate a claw hammer with wood and metal materials:
import bpy
import bmesh
from mathutils import Vector
# Clear existing objects
bpy.ops.object.select_all(action='SELECT')
bpy.ops.object.delete(use_global=False)
# Create materials
def create_material(name, base_color, metallic=0.0, roughness=0.5):
mat = bpy.data.materials.new(name)
mat.use_nodes = True
principled = mat.node_tree.nodes.get('Principled BSDF')
principled.inputs['Base Color'].default_value = base_color
principled.inputs['Metallic'].default_value = metallic
principled.inputs['Roughness'].default_value = roughness
return mat
wood_mat = create_material('Wood', (0.36, 0.20, 0.08, 1), metallic=0.0, roughness=0.7)
metal_mat = create_material('Metal', (0.8, 0.8, 0.8, 1), metallic=1.0, roughness=0.2)
# Create handle (cylinder)
bpy.ops.mesh.primitive_cylinder_add(radius=0.1, depth=2, location=(0, 0, 1))
handle = bpy.context.object
handle.name = 'Handle'
handle.data.materials.append(wood_mat)
# Create hammer head (cube)
bpy.ops.mesh.primitive_cube_add(size=0.5, location=(0, 0, 2.25))
head = bpy.context.object
head.name = 'Head'
head.data.materials.append(metal_mat)
# Edit mode: shape the head to a claw hammer by bending and beveling
bpy.context.view_layer.objects.active = head
bpy.ops.object.mode_set(mode='EDIT')
mesh = bmesh.from_edit_mesh(head.data)
# Select vertices on one side of the cube to form the claw curve
for v in mesh.verts:
if v.co.x > 0:
v.co += Vector((0.2, 0.0, -0.1 * (v.co.z - 0.25)))
bmesh.update_edit_mesh(head.data)
bpy.ops.mesh.bevel(offset=0.05, segments=4, profile=1)
bpy.ops.object.mode_set(mode='OBJECT')
# Slightly rotate the head to mimic claw hammer angle
head.rotation_euler[1] = 0.3 # Rotate around Y axis
# Join handle and head
bpy.ops.object.select_all(action='DESELECT')
handle.select_set(True)
head.select_set(True)
bpy.context.view_layer.objects.active = handle
bpy.ops.object.join()
# Export as GLB
bpy.ops.export_scene.gltf(filepath="hammer.glb", export_format='GLB')
Step 2: Running the Python Script from the Command Line
To generate the hammer model, save the above script as generate_hammer.py. You can run it using Blender’s command line interface:
blender --background --python generate_hammer.py
--background runs Blender without its graphical interface.
--python runs your script.
This command will create a hammer.glb file in the same directory.
Step 3: Displaying the Hammer Model on Your Website Using <model-viewer>
Once you have the hammer.glb file, you can embed it into any webpage easily with the <model-viewer> web component, which supports interactive 3D models in browsers.
For personalized guidance, I offer one-on-one online Python tutorials, including Blender scripting. Feel free to contact me here.
Conclusion
By combining Blender’s Python API with modern web technologies like <model-viewer>, you can create and share custom 3D content easily. Whether you want to showcase your models on your site or build interactive apps, this workflow is a powerful starting point.
Want to run your own Git server without relying on GitHub, GitLab, or Bitbucket? Gitolite is a powerful, open-source tool that lets you manage Git repositories on your own terms – with SSH-based access control, fine-grained permissions, and no need for a web interface.
In this post, I will show you how to install Gitolite inside a Podman container, taking full advantage of official repositories.
Why Gitolite?
Self-hosted Git server
Fine-grained access control using SSH keys
Lightweight and scriptable
100% open source
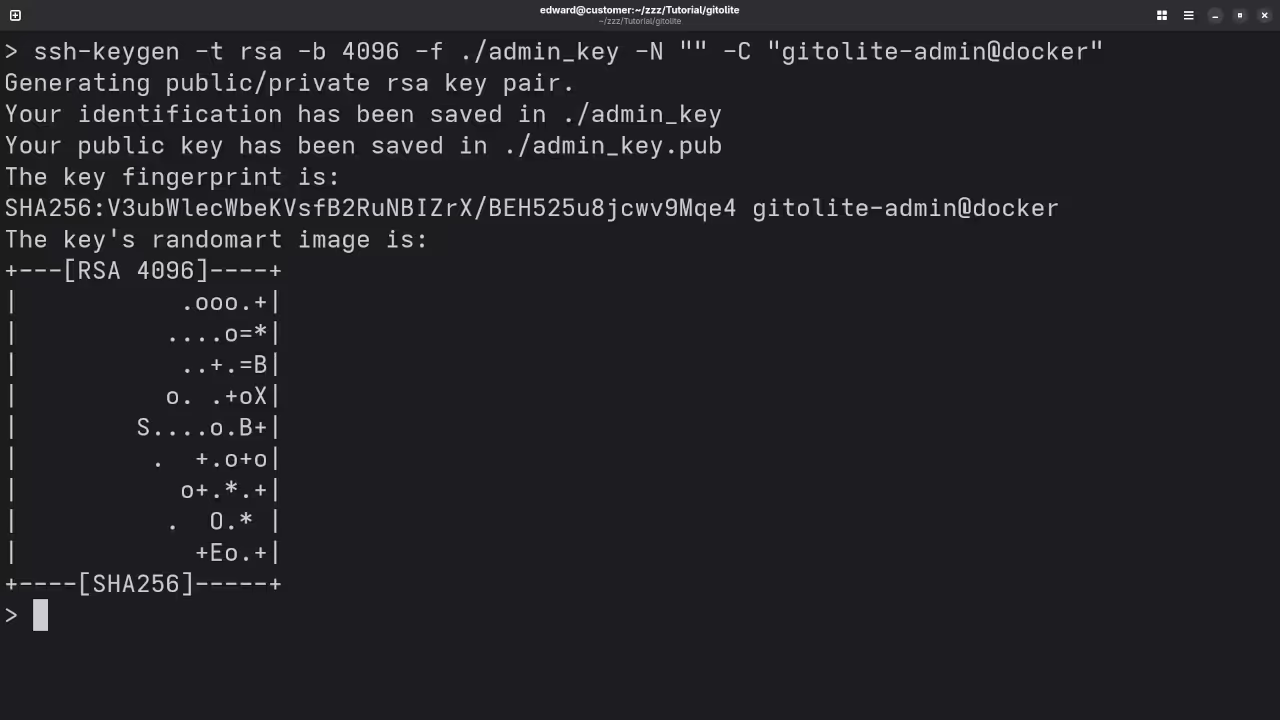
Step 1: Prepare Your Admin SSH Key
You’ll need your SSH public key for administration. Save it as admin.pub in the same folder where you create the container files.
Step 2: Create the Containerfile
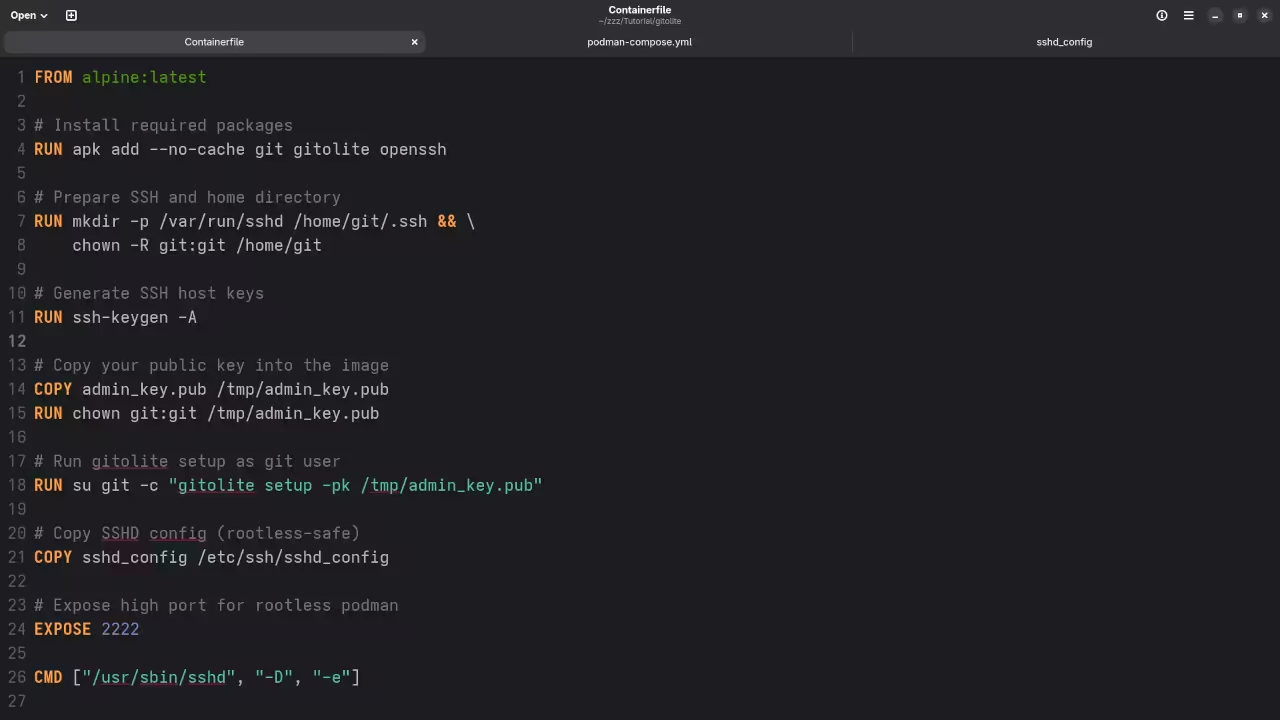
Create a file named Containerfile (or Dockerfile) with the following content:
FROM alpine:latest
# Install required packages
RUN apk add --no-cache git gitolite openssh
# Prepare SSH and home directory
RUN mkdir -p /var/run/sshd /home/git/.ssh && \
chown -R git:git /home/git
# Generate SSH host keys
RUN ssh-keygen -A
# Copy your public key into the image
COPY admin_key.pub /tmp/admin_key.pub
RUN chown git:git /tmp/admin_key.pub
# Run gitolite setup as git user
RUN su git -c "gitolite setup -pk /tmp/admin_key.pub"
# Copy SSHD config (rootless-safe)
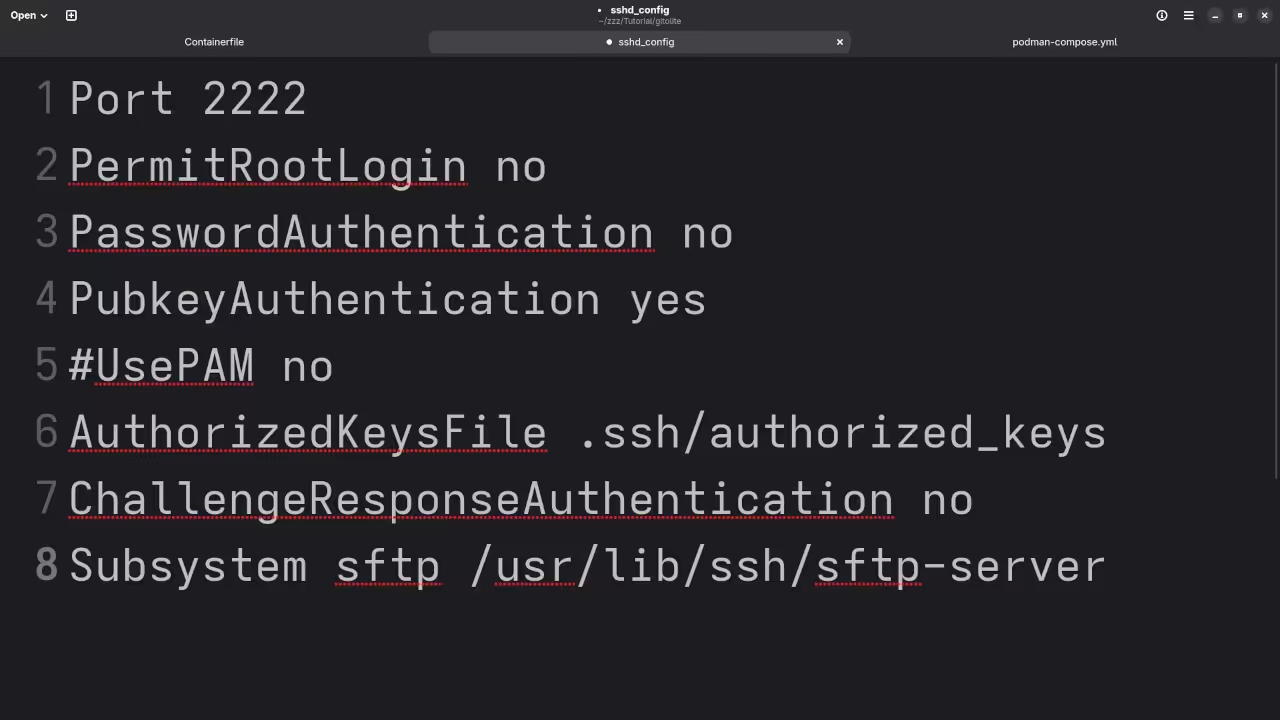
COPY sshd_config /etc/ssh/sshd_config
# Expose high port for rootless podman
EXPOSE 2222
CMD ["/usr/sbin/sshd", "-D", "-e"]
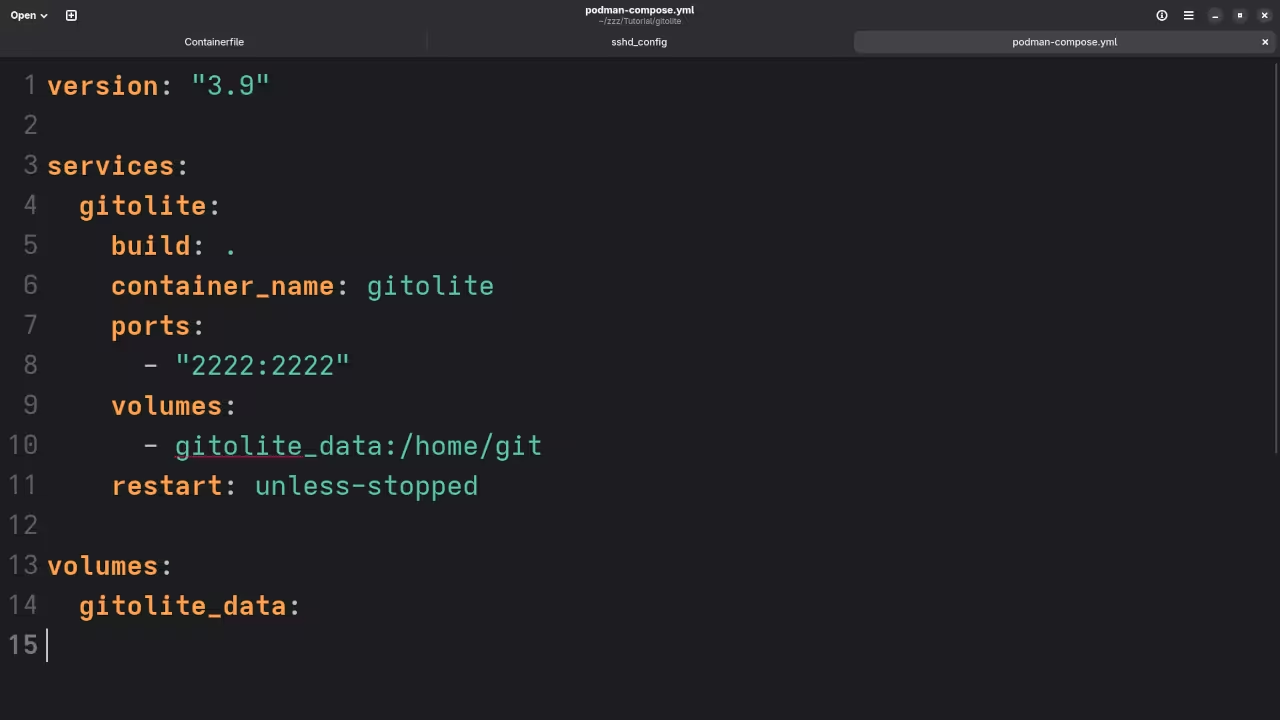
Step 3: Create the podman-compose.yml File
Create a podman-compose.yml file alongside the Containerfile:
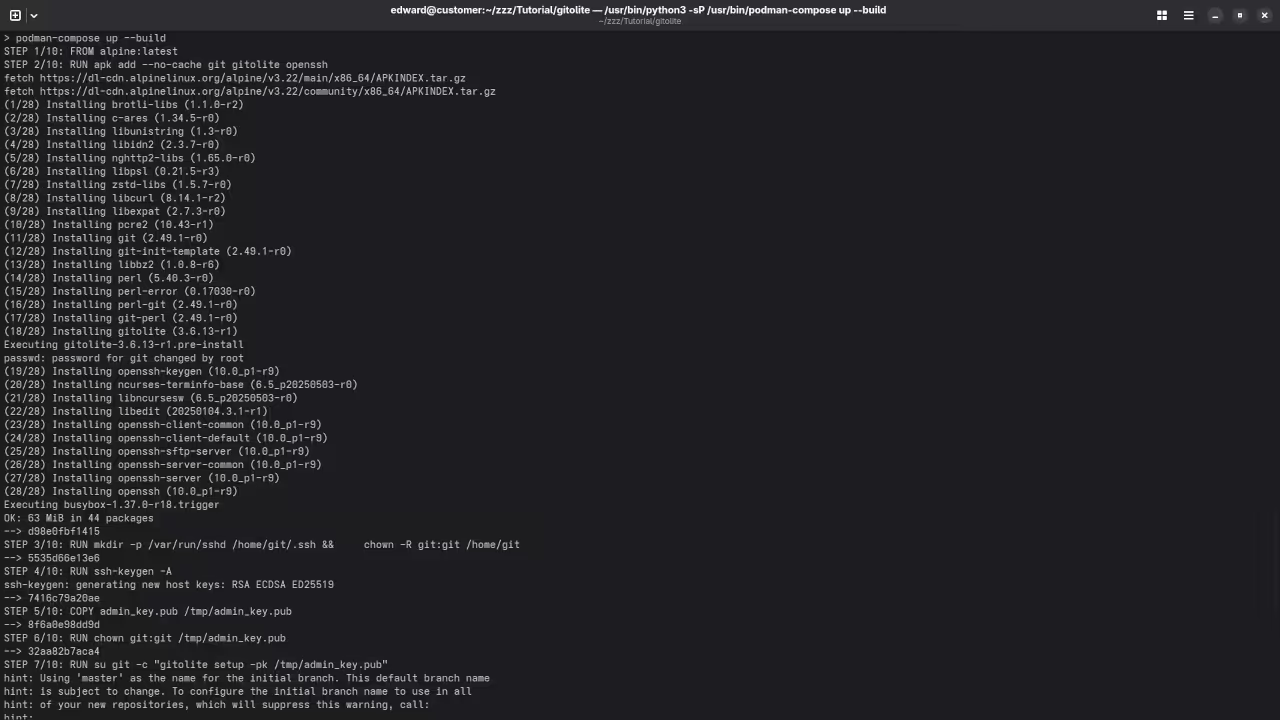
Your Gitolite server will be running and accessible on port 2222.
Step 5: Connect to Your Gitolite Server
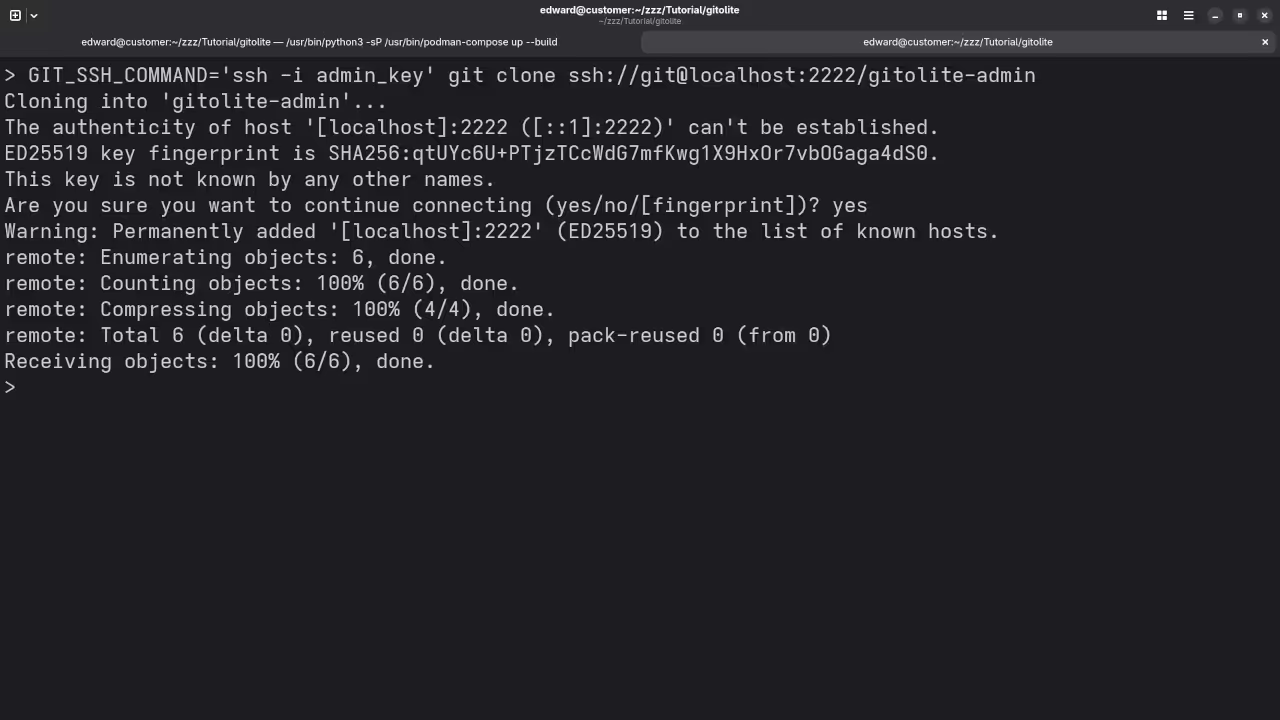
From your host machine, clone the Gitolite admin repository using:
git clone ssh://git@localhost:2222/gitolite-admin
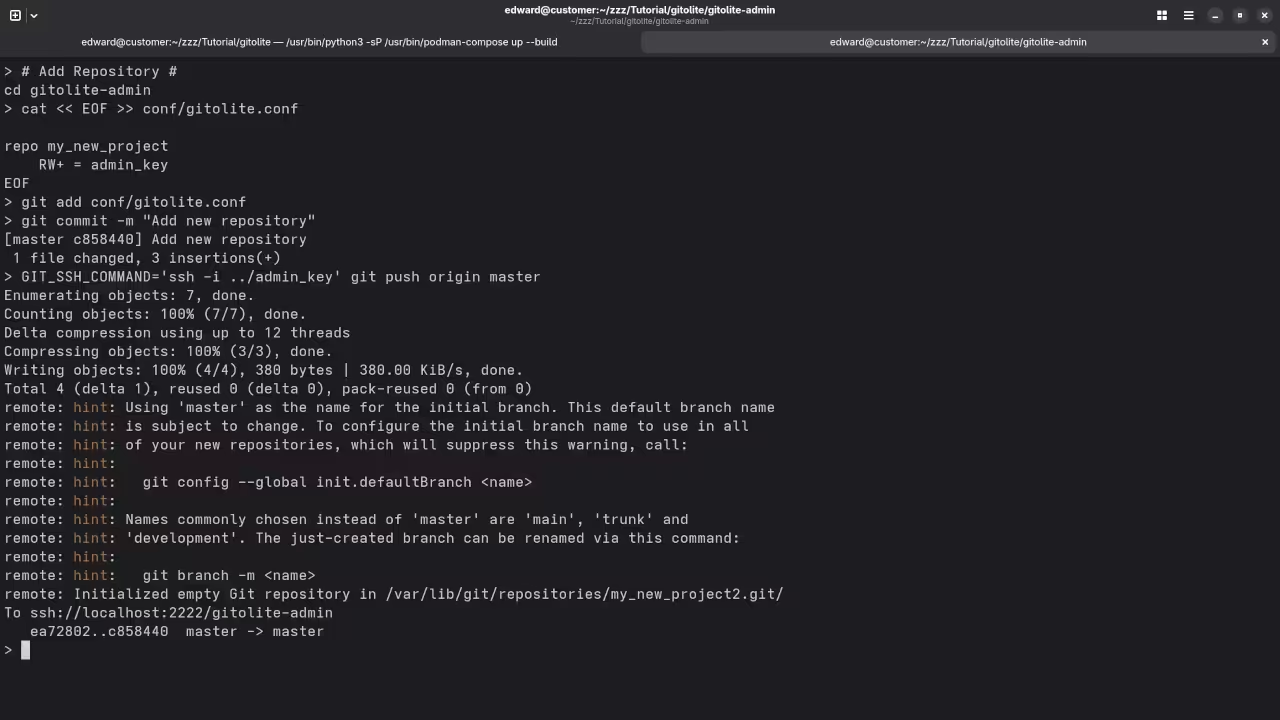
Now you can manage your repositories, users, and permissions by editing the Gitolite config and pushing changes.
Screenshots and Screencast Tutorial
Command Line Podman Generating SSH Key pairGnome Text Editor Displaying Podman ContainerfileGnome Text Editor Displaying Podman SSH Configuration FileGnome Text Editor Displaying Podman Compose YAML FileCommand Line Podman Compose Building Gitolite ContainerCommand Line Cloning Gitolite Admin RepositoryCommand Line Pushing To Create New Gitolite RepositoryScreencast Of Gitea Setup
With Podman, setting up Gitolite is fast, clean, and secure. Whether you are managing your own projects or hosting for a team, this setup gives you total control over your source code and workflows.
Looking for more tutorials like this? Subscribe to my updates and follow along with future guides.
Getting Started with KDevelop: A Powerful Open-Source IDE for Programmers
When it comes to integrated development environments (IDEs), KDevelop stands out as a powerful, versatile tool that helps developers create software efficiently. Whether you are a beginner or an experienced programmer, KDevelop can provide you with all the features needed to write, test, and debug your code across various programming languages.
In this post, we’ll explore KDevelop, including its open-source nature, installation process, and some basic features. If you’re looking for an IDE that supports a range of programming languages and is backed by a large open-source community, KDevelop might be the right choice for you!
What is KDevelop?
KDevelop is an open-source IDE built for professional developers. It supports many programming languages, including C, C++, Python, JavaScript, PHP, and more. KDevelop is designed to help developers write clean, efficient, and error-free code, all within an integrated environment that enhances productivity.
It is primarily developed for KDE, the Linux desktop environment, but it’s available on other platforms as well. Best of all, it’s completely free to use, thanks to its open-source license.
KDevelop License:
KDevelop is licensed under the GNU General Public License (GPL) v2 or later, which means that you are free to use, modify, and distribute it.
Installing KDevelop on Fedora Linux
Fedora is one of the most popular Linux distributions, and KDevelop integrates seamlessly with it. Below is a simple guide to installing KDevelop on Fedora:
Step 1: Open Your Terminal
Press Ctrl + Alt + T to open the terminal window on your Fedora machine.
Step 2: Install KDevelop Using DNF
In the terminal, type the following command to install KDevelop:
sudo dnf install kdevelop
This command will fetch the KDevelop IDE along with any required dependencies.
Step 3: Launch KDevelop
Once the installation is complete, you can launch KDevelop by typing the following in the terminal or by searching for “KDevelop” in your applications menu:
kdevelop
And that’s it! You now have KDevelop installed on your Fedora Linux system.
Installing KDevelop on Other Platforms
Ubuntu/Debian: Run the following command:
sudo apt install kdevelop
macOS: You can install KDevelop on macOS using Homebrew:
brew install kdevelop
Windows: KDevelop is available on Windows via the KDE installer or through the Windows Subsystem for Linux (WSL).
KDevelop Features
KDevelop comes with a range of features to help you code faster and more efficiently:
Code Completion & Syntax Highlighting: Helps you write code more efficiently with auto-completion suggestions and color-coded syntax.
Integrated Debugger: Troubleshoot and debug your applications within the IDE without switching to external tools.
Project Management: Organize your files and folders easily within KDevelop’s project manager.
Version Control Integration: Use Git, SVN, and other version control systems directly from within the IDE.
Multi-language Support: KDevelop supports a variety of programming languages, such as C, C++, Python, JavaScript, PHP, and more.
Screenshots and Screencast
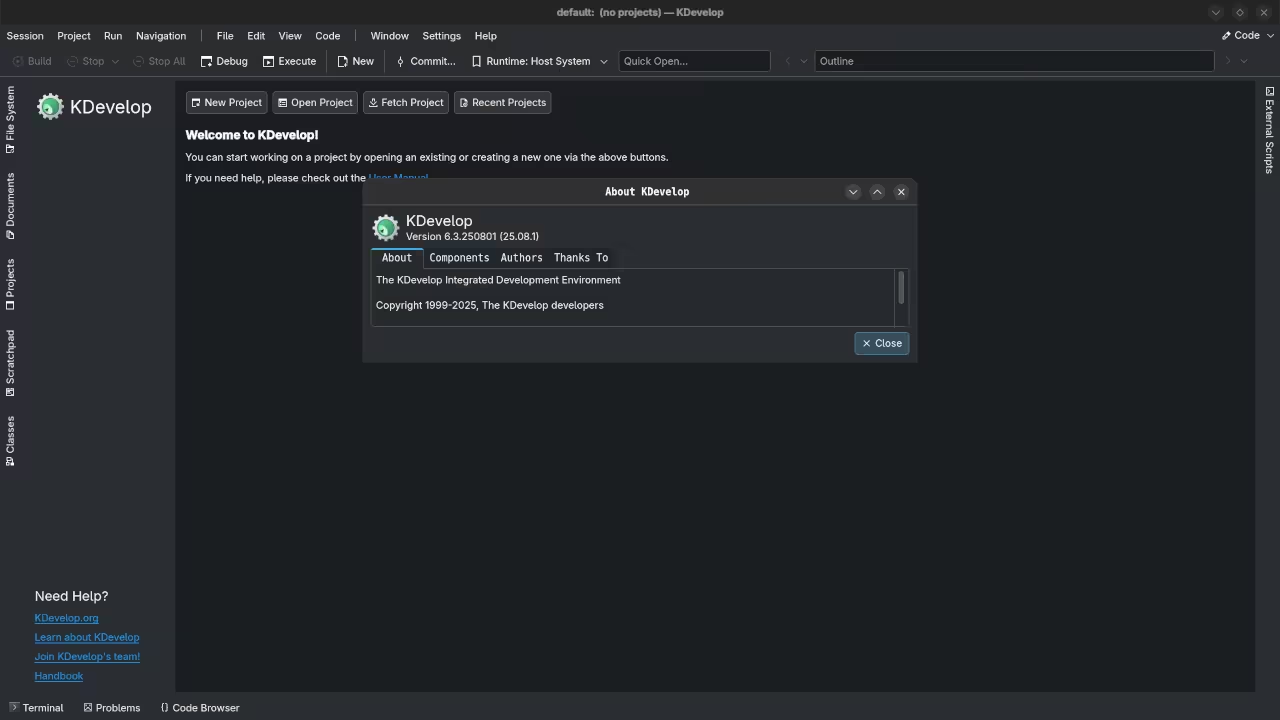
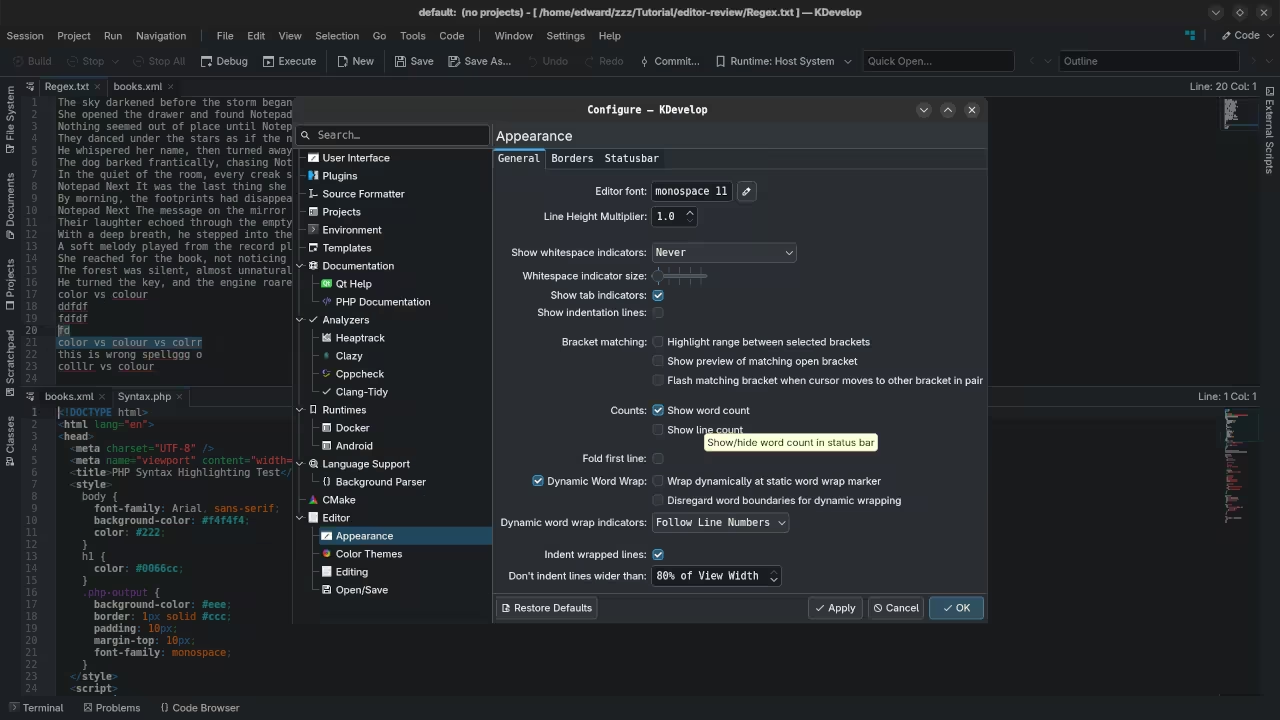
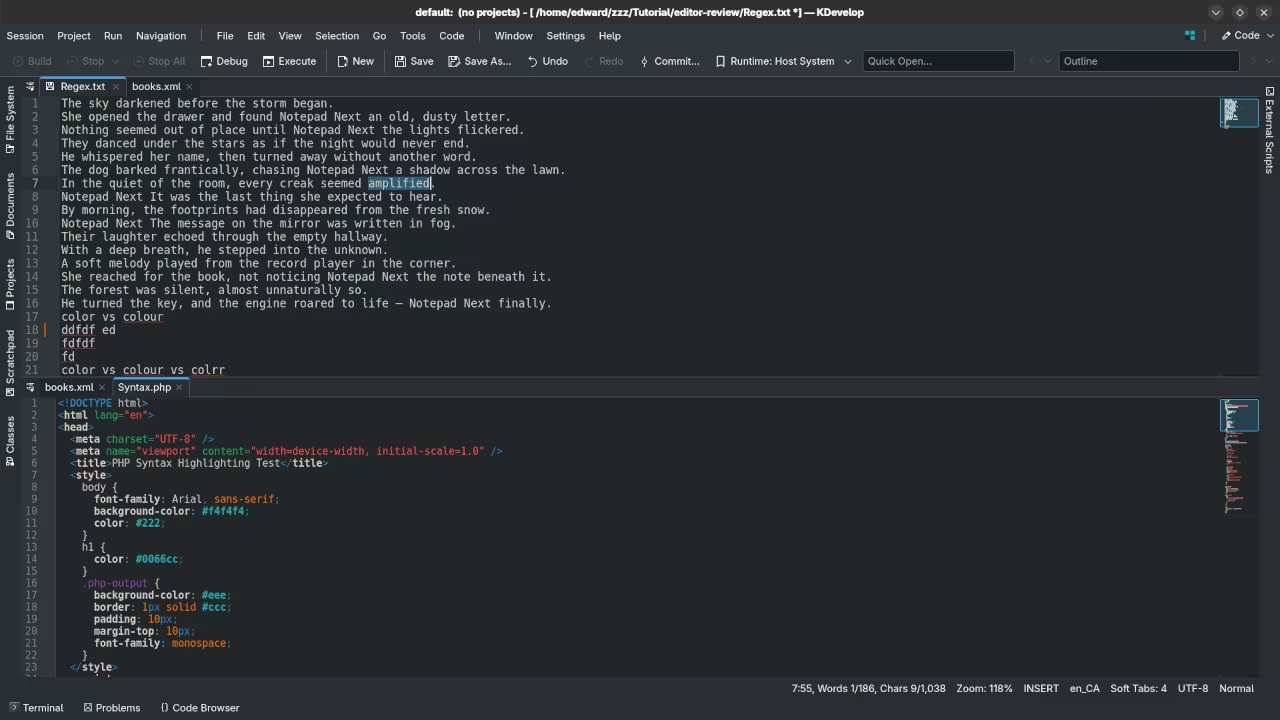
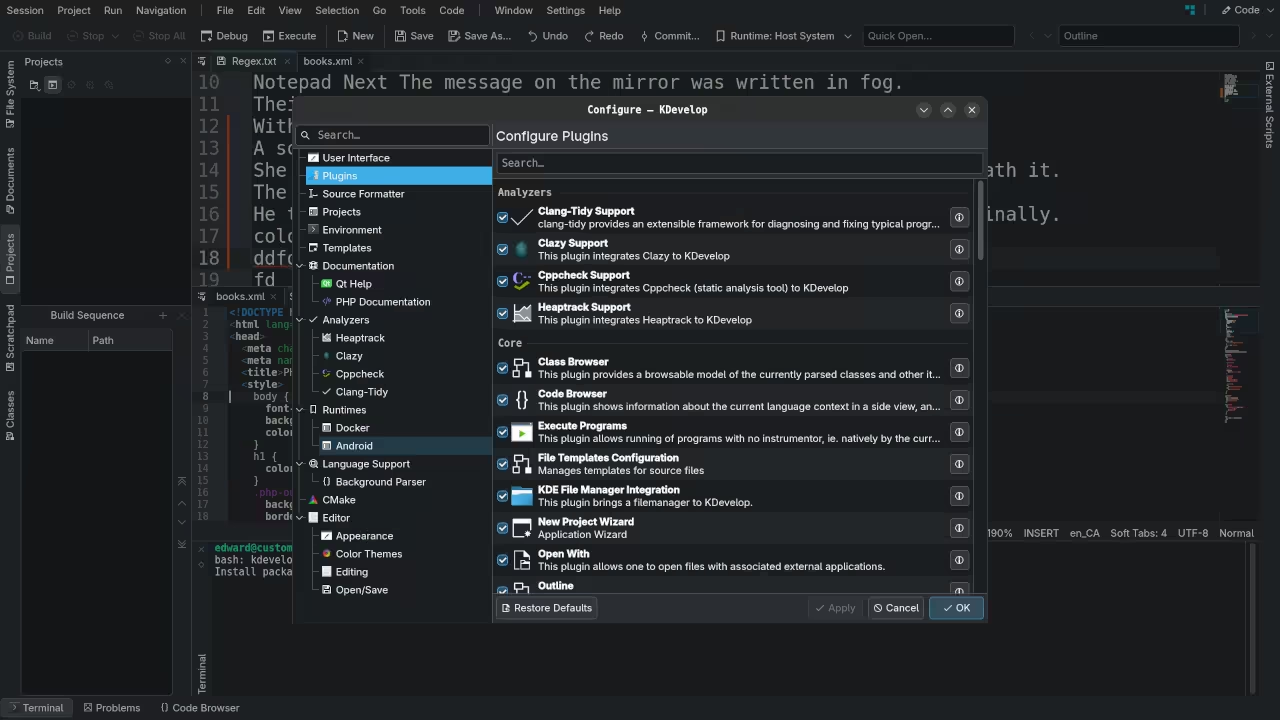
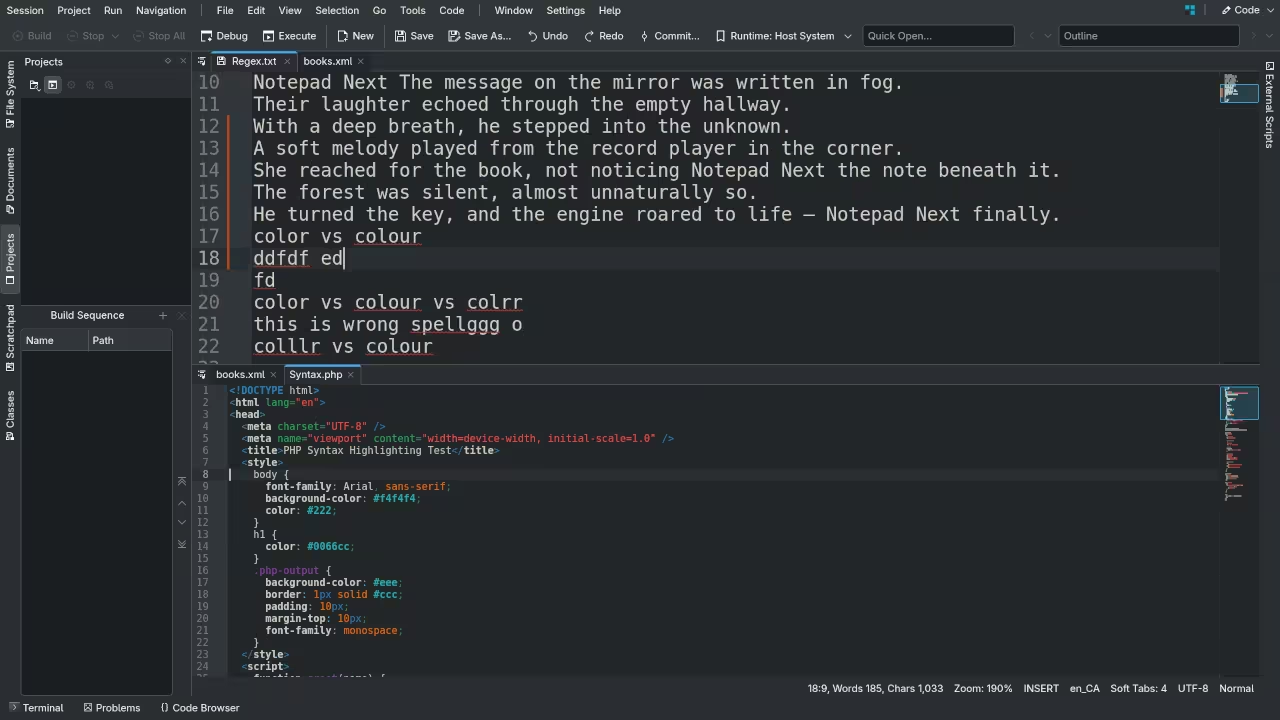
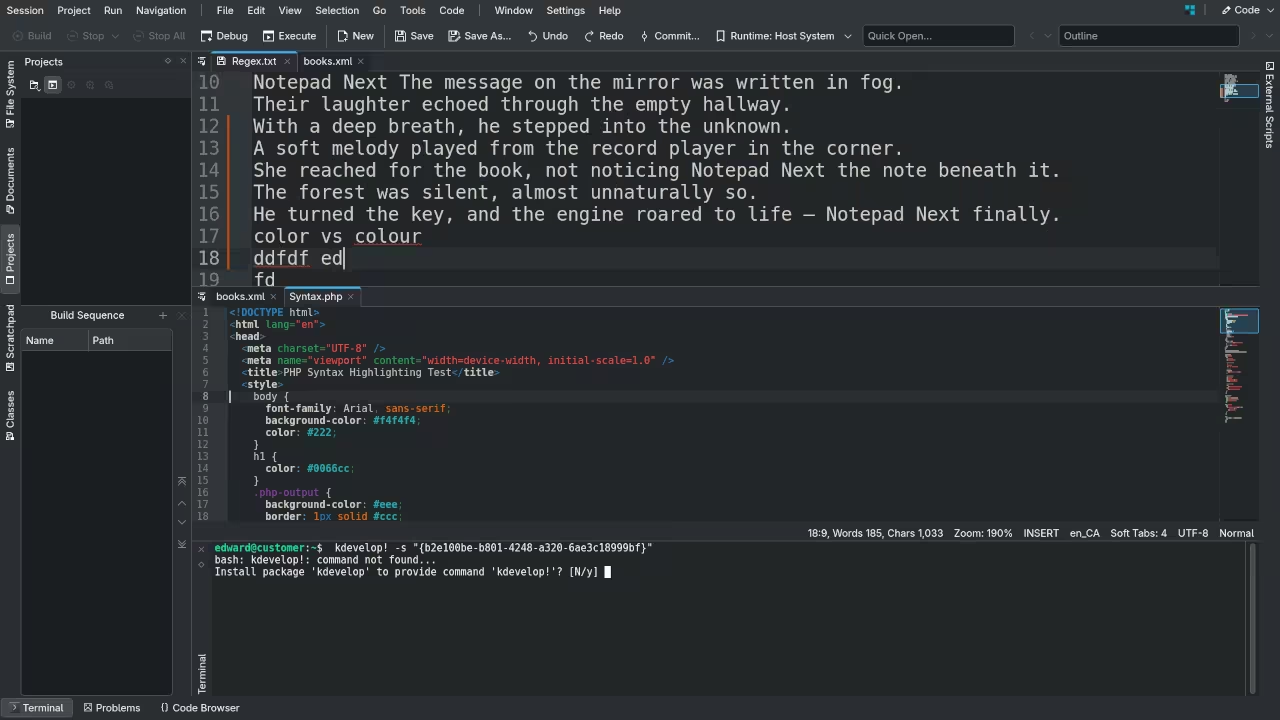
KDevelop Displaying Settings DialogKDevelop Displaying PHP Syntax HighlightingKDevelop Displaying PluginsKDevelop Displaying Folder In WorkspaceKDevelop Displaying Terminal In Workspace
👉 Screencast showing a beginner session in KDevelop—editing, saving files, and navigating buffers.
KDevelop Review And Feature Test
Requirements For Programming Text Editor
Glossary:
Code Editor
Designed for writing and editing source code.
IDE
Integrated Development Environment combines various tools need for software development.
Plugin
Software component that adds specific functionality.
Theme
Preset package containing graphical appearance to customize look and feel.
Open source
Freely available for possible modification and redistribution.
SCM
Source code management use to manage and track modifications to a source code repository.
LMB
Left Mouse Button (LMB) or left click
MMB
Middle Mouse Button (MMB) or scroll wheel
Test Tools
Test System
Name
Description
CPU
Ryzen 5 5600GT @ 3.60GHz.
Memory
32GB DDR4.
Operating System
Fedora Linux Workstation 42.
Desktop Environment
Gnome 48.
Name
Description
Test Suite
Name
Description
Large File
1GB human-readable text.
Regex File
Text with word “KDevelop” repeated.
Syntax File
PHP file containing HTML, CSS & JavaScript.
Media File
Smiley face or Tux Linux JPEG file.
Java Version
OpenJDK 21.0.8.
PHP Version
PHP 8.4.12.
Python Version
Python 3.13.7.
KDevelop Version
6.3.250801.
Name
Description
Test Scoring
Each feature has two parts.
Score of zero indicates a missing feature.
A part of a feature is work a score of 0.5.
Three bias elimination steps were utilized. The editor was used for at least three years on different platforms. Attempts were made to get stable plug-ins for missing features. The same editor was compared between the one in the repository, the developers website, and the compiled version if applicable.
Selecting Editor Version
For this review, KDevelop was installed using the instructions from the developers website and it did not require additional plugins.
Features
The theme can be native for the editor in terms of the background. KDevelop dark and light themes can be created or downloaded and changed. The score for the theme was a perfect 1.0.
Dragging and dropping a text file into the editor opens a new tab or buffer. It is not possible to specify the tab location during the drag and drop operation. The score for drag and drop into editor was 0.5.
Opening a very large text file did not crash KDevelop. KDevelop was not able to open or to edit the large file. The score for opening a large file was 0.5.
Multiple documents can opened in multiple tabs or buffers. Tear-off tabs do not work and KDevelop does not have a feature to open in new window as a new instance which is handy for multiple monitors. The score for multiple documents was 0.5.
Multiple editors can be opened as new tabs with drag options. Each tab window view can be split either vertically or horizontally as a multiple editor view in Wayland display server protocol. The score for multiple editor view was 1.0.
Creating non-project files is possible. Non-project files can be opened on the command line. The score for creating non-project files was a perfect 1.0.
Soft word wrap can be enabled on all documents as line wrapping. Automatic soft wrap for documents is available from the KDevelop View menu. The score for word wrap was a perfect 1.0.
Spell check does work as words are typed by enabling the feature from the KDevelop Tools menu. Spelling errors are shown in opened documents. The score for spell check was 1.0.
Word count is available in the KDevelop Settings -> Configure Settings -> Appearance -> Show word count, then enable the status bar from the Kdevelop Settings menu. Word count for the current buffer or file is enabled. Selection word count is available as part of word count. The score for word count was 1.0.
Go to line can jump to a specified line using CTRL-G and entering the line number. It is possible to jump to either the first or last line. The score for go to line is a perfect 1.0.
Indentation can default to user-defined tab stops. Children are automatically indented. The score for indentation was a perfect 1.0.
Fonts can be dynamically scaled with custom keyboard shortcuts or the mouse CTRL-MMB. The system font can be bypassed and a new editor font and size can be set. The score for fonts was a perfect 1.0.
Find and replace using regular expressions can be utilized for all open documents in the current session. Find and replace will work for the current document or a selection in the current document. The score for find and replacing using regular expressions was a perfect 1.0.
Multiple language syntax highlighting in one file is enabled. Each language has code-sensitive syntax colours. The score for multiple language syntax highlighting was a perfect 1.0.
Code folding does work for markup languages such as HTML. Code folding also works for programming languages such as Java. The score for code folding was 1.0.
Selecting rectangular block per column works enabling Block Selection in the Selection menu or CTRL-SHIFT-B. Rectangular block selection works with word wrap enabled. The score for selecting rectangular block was a perfect 1.0.
Multiple selection is available in the Configure Settings -> Editing -> Text Navigation -> Multicursor in the KDevelop Settings menu or by default ALT. Search multiple selection works. The score for multiple selection was 1.0.
Distraction-free mode to hide panes works. Line numbers can not be toggled to improve distraction-free mode. The score for distraction-free was a perfect 1.0.
The file manager can be enabled by default. Media files cannot be dragged and dropped into the file manager pane. The score for file manager was 0.5.
Terminal is be enabled. The terminal does follow folder. Terminal can execute system commands. The score for terminal was 1.0.
Results
KDevelop is a lightweight IDE. By default, the KDevelop editor is missing required features that can be enabled or implemented by plugins. For my required features, the KDevelop editor scored 90.0% or 9.00 out of 10.
Learn More About Programming
If you want to dive deeper into programming, check out my programming books and courses:
If you’re looking for more personalized help, I offer one-on-one programming tutorials. Whether you need assistance with KDevelop or any other development tool, I can guide you step by step.
KDevelop is a robust, open-source IDE that can significantly improve your coding workflow. Whether you’re working on a small project or a large application, it has the features and flexibility to meet your needs. Installing KDevelop on Fedora is quick and simple, and with support for many programming languages, it’s a perfect choice for developers of all levels.
Happy coding, and don’t forget to check out my programming books and courses for more resources!
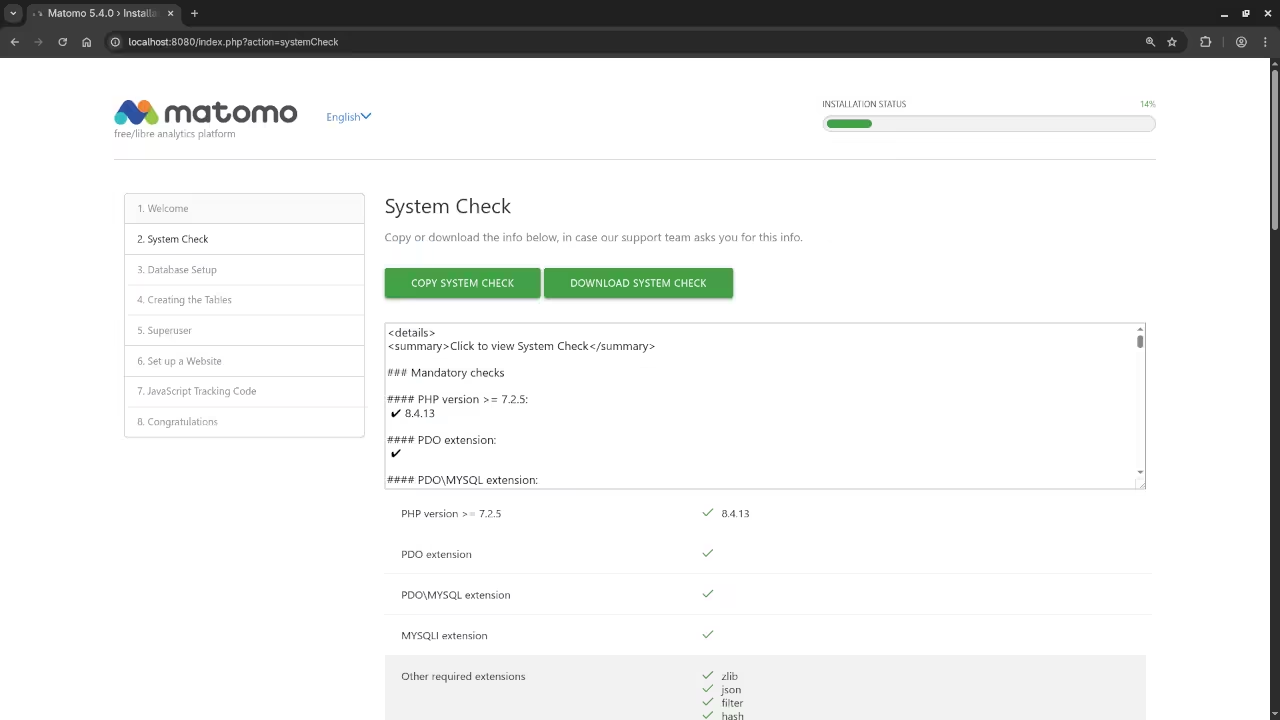
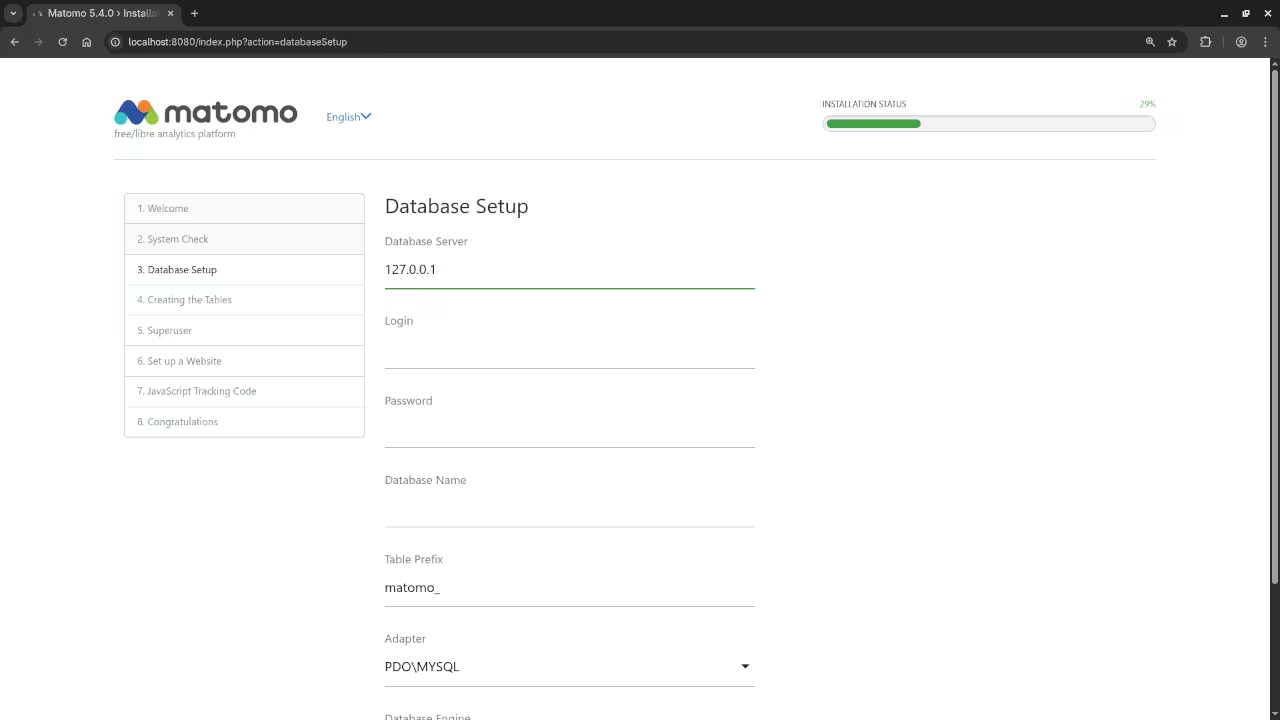
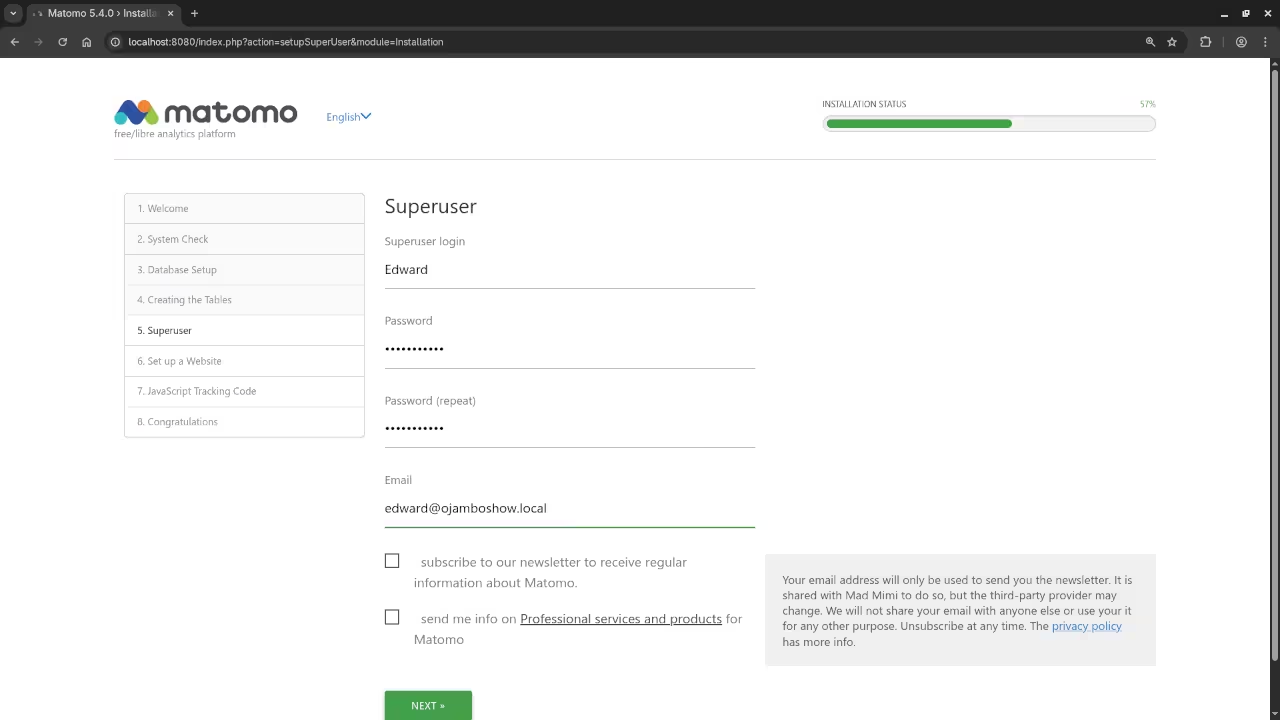
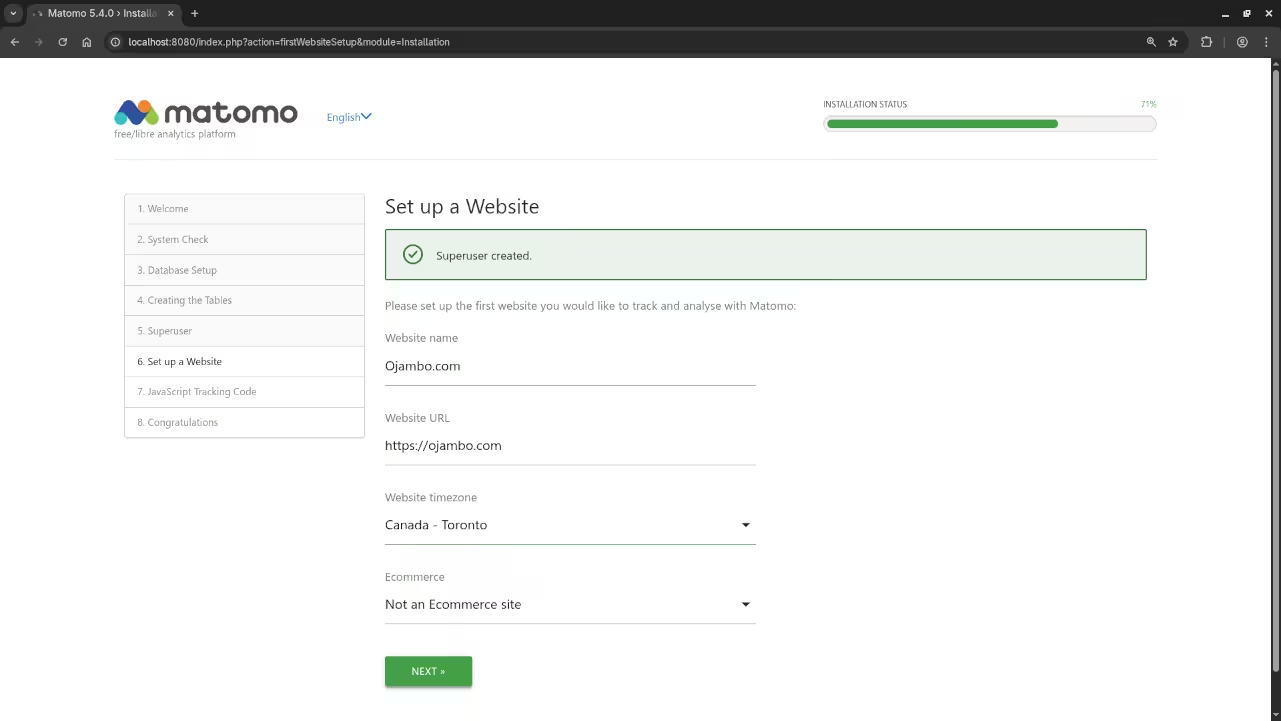
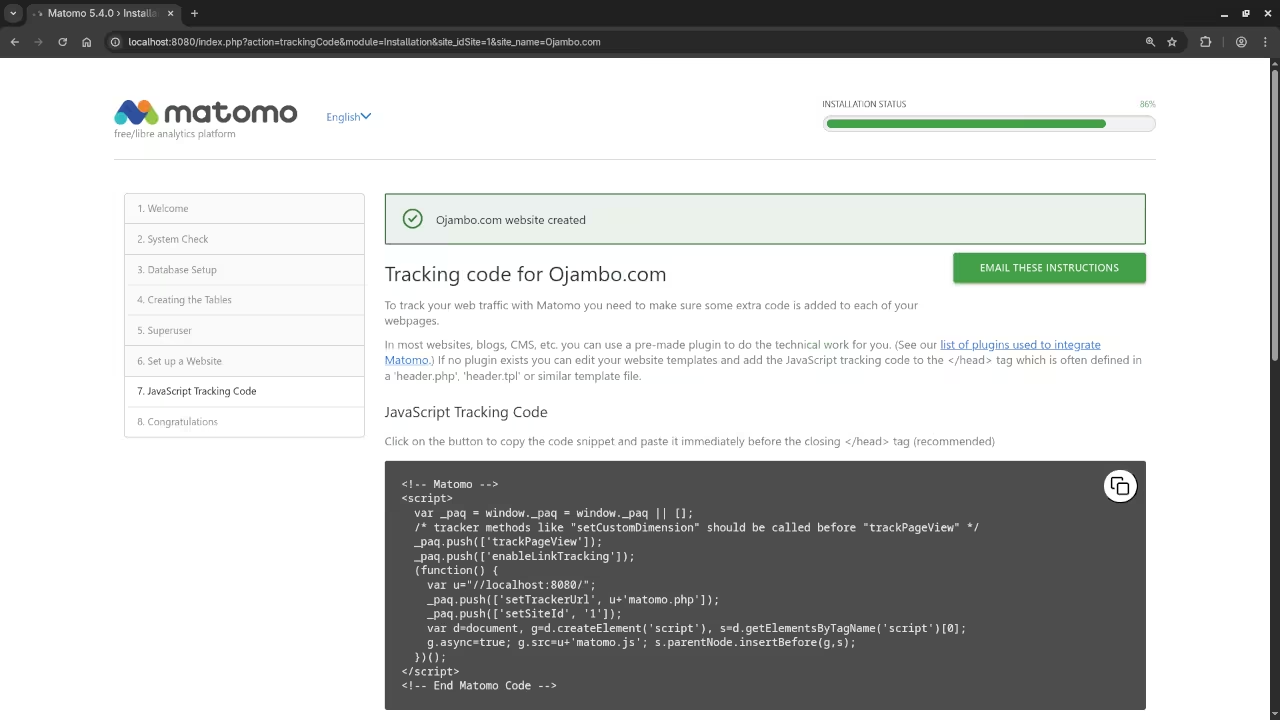
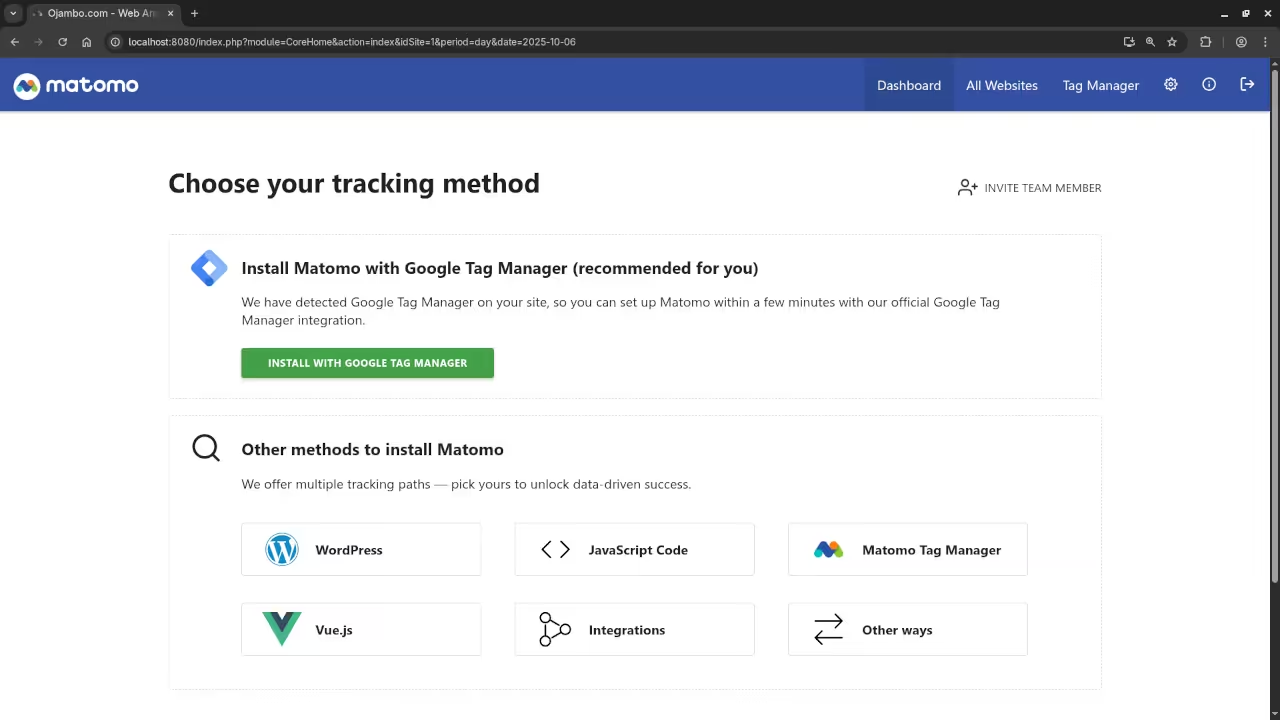
Getting Started with Matomo: A Beginner’s Guide to Open Source Analytics with Podman
If you’re looking for a privacy-focused, open-source alternative to Google Analytics, Matomo is one of the best choices out there. Unlike proprietary platforms, Matomo gives you full control over your data, making it perfect for businesses, developers, and privacy-conscious users.
In this post, you’ll learn what Matomo is, why it matters, and how to install it using Podman or Podman Compose – an excellent alternative to Docker for containerized environments.
What is Matomo?
Matomo (formerly Piwik) is a powerful open-source web analytics platform. It allows you to track and analyze your website’s visitors without handing data over to third parties.
Key benefits of Matomo:
100% data ownership
GDPR compliance
Self-hosted or cloud-hosted options
Real-time data insights
Customizable reports and dashboards
Matomo is ideal for developers and businesses that value privacy, data protection, and open-source technology.
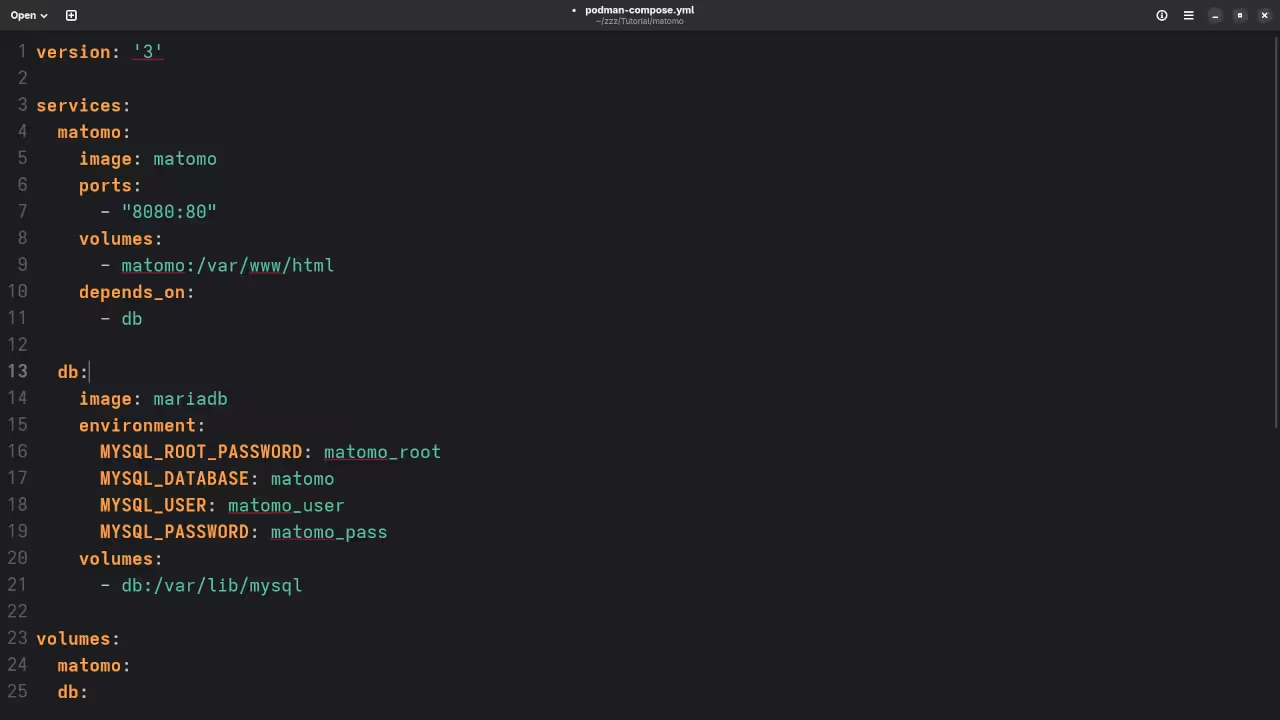
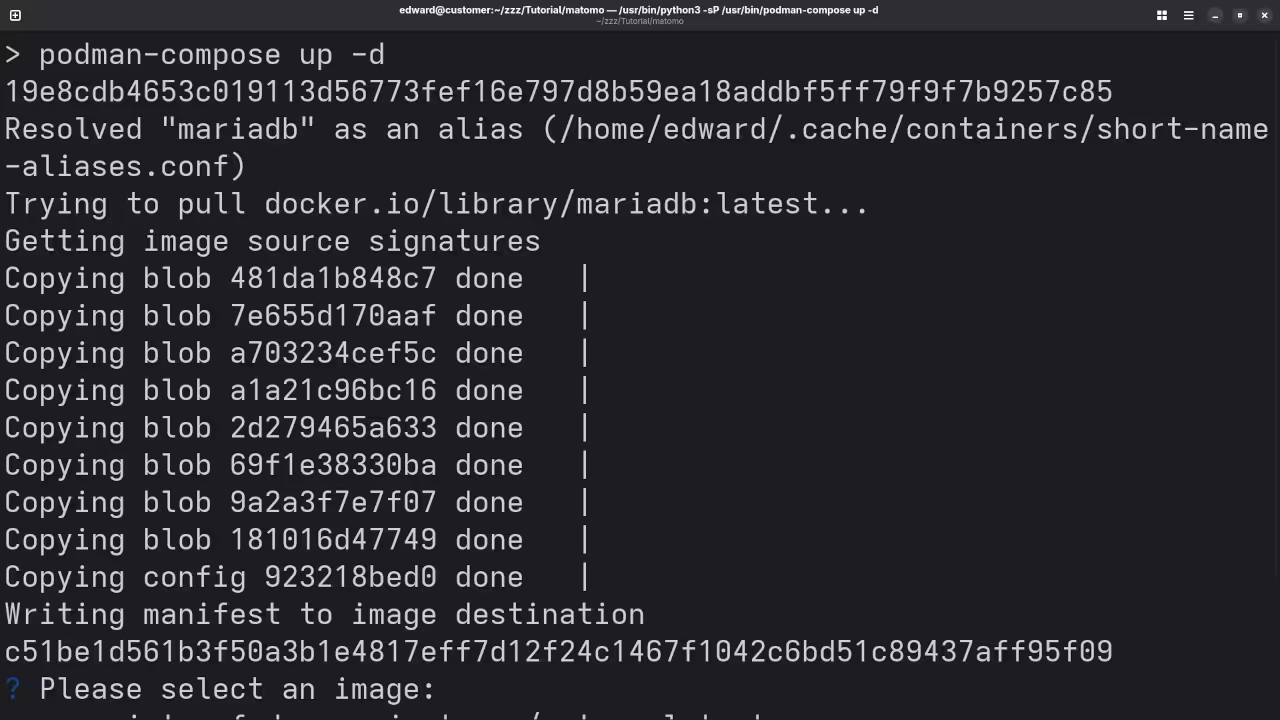
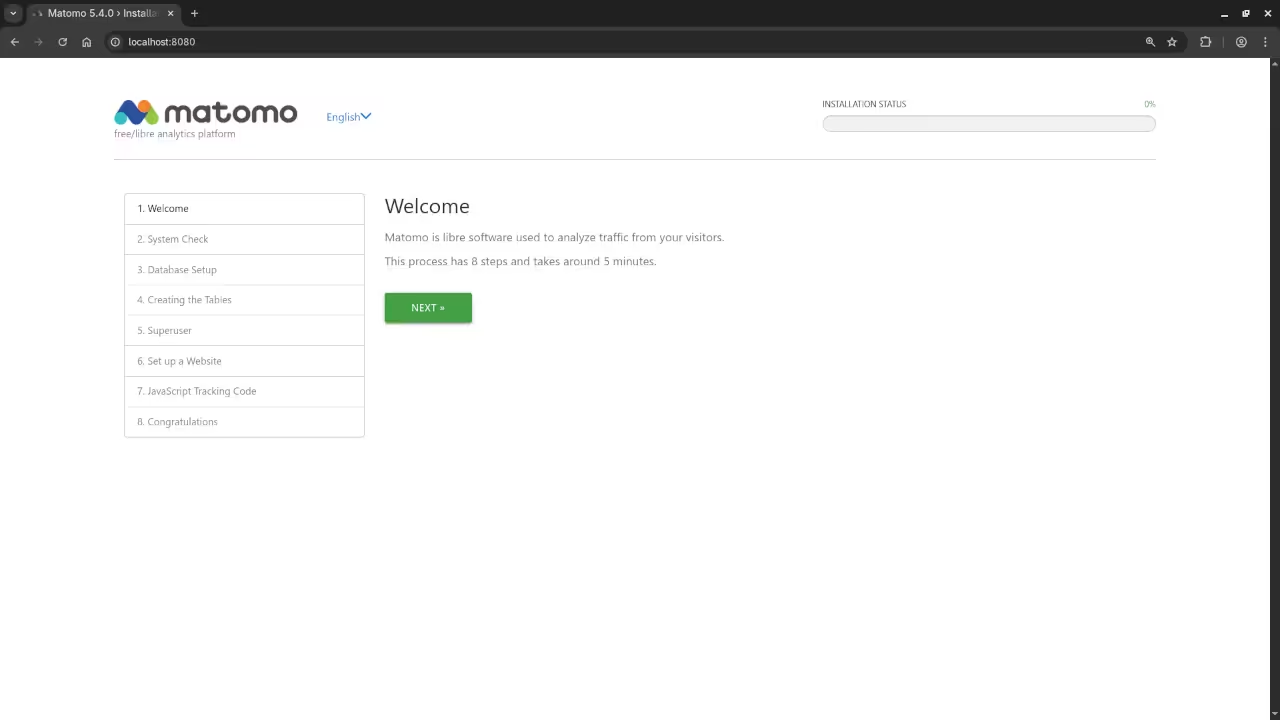
Installing Matomo Using Podman
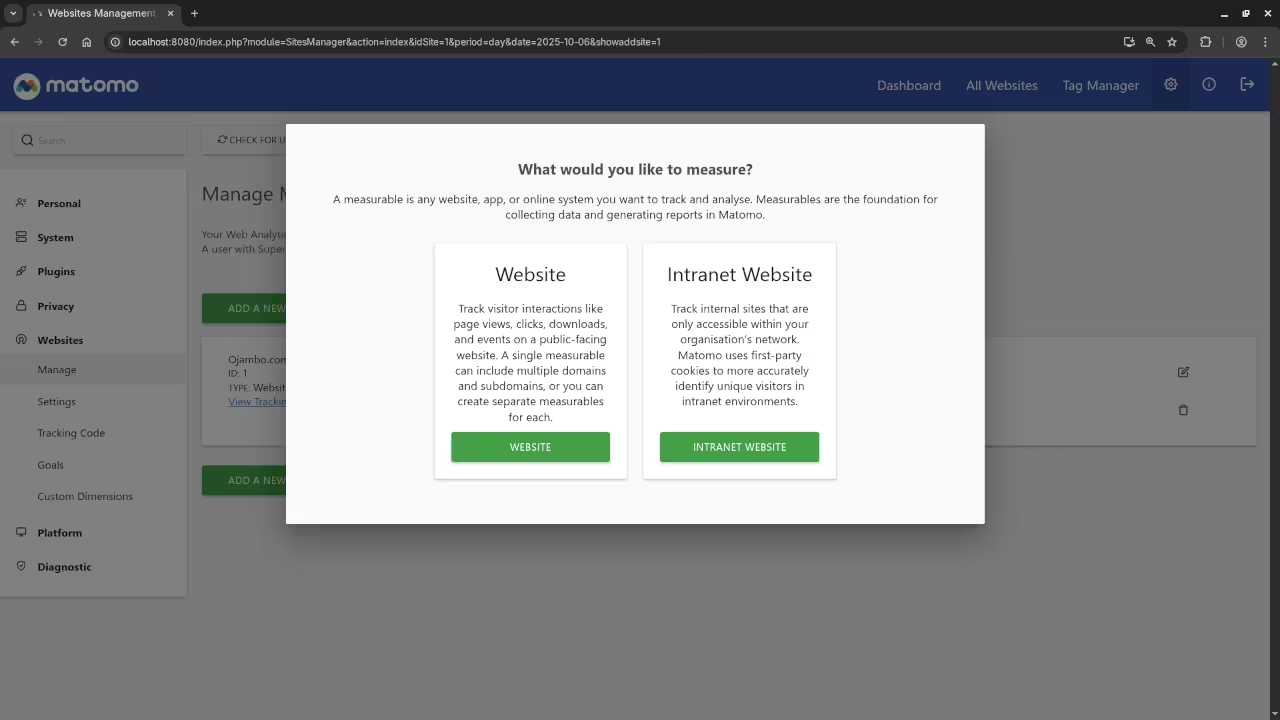
Here is a simple example of how to install Matomo with Podman Compose.
Matomo is a fantastic tool for anyone serious about web analytics and privacy. By combining it with container tools like Podman, you can spin up an efficient and secure analytics platform in minutes. Whether you’re learning JavaScript, diving into open-source tools, or need a custom setup – I’m here to help.
Stay tuned for more beginner-friendly guides and screencasts.
How to Run Ollama with DeepSeek-R1 32B LLM on Fedora 42 – Open Source AI for Everyone
Introduction
In this post, we will walk through the steps to get Ollama running on your system, with a special focus on using the DeepSeek-R1 32B LLM. This open-source model offers an impressive combination of text generation and deep learning power, and it is easy to integrate into your own projects. Whether you are a beginner or a seasoned developer, you will be able to follow along.
This guide includes step-by-step instructions for installing the necessary dependencies on Fedora 42, along with an example Python script that interacts with the Ollama API to run the DeepSeek-R1 32B model.
What is Ollama and DeepSeek-R1 32B?
Ollama is a platform designed for running and interacting with various AI models locally. It is open-source and highly flexible, making it perfect for running Large Language Models (LLMs) like DeepSeek-R1 32B.
DeepSeek-R1 32B is a powerful 32 billion parameter language model that can be used for tasks like natural language generation, question answering, summarization, and more.
Open Source License: DeepSeek-R1 is released under the MIT License, which means you can use, modify, and distribute it freely.
Installation Guide for Fedora 42
Step 1: Install Dependencies
To get started, install Ollama and the required dependencies:
# Install Python 3 and pip
sudo dnf install python3 python3-pip
# Install other necessary tools
sudo dnf install git curl
# Install the Ollama client
pip install ollama
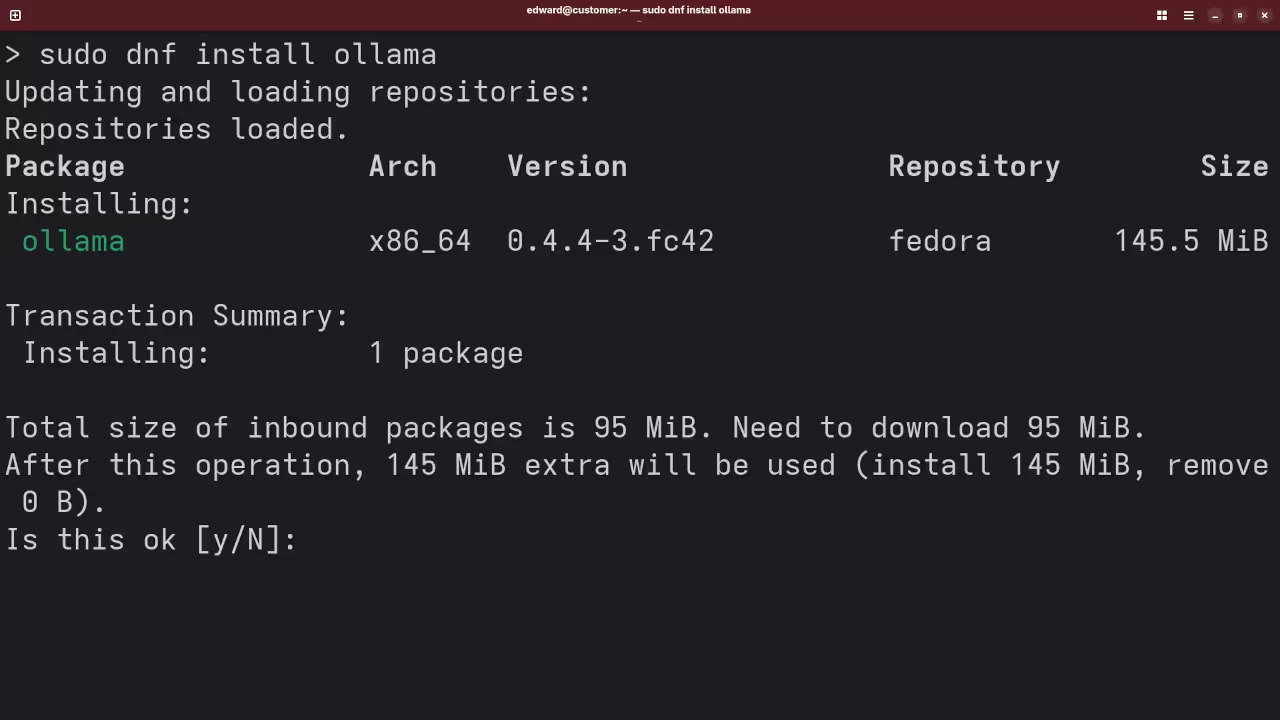
Fedora 42 includes Ollama in the official repositories. You can install it easily using the system package manager.
# 1. Update your system
sudo dnf update -y
# 2. Install Ollama
sudo dnf install -y ollama
# 3. Start the Ollama service
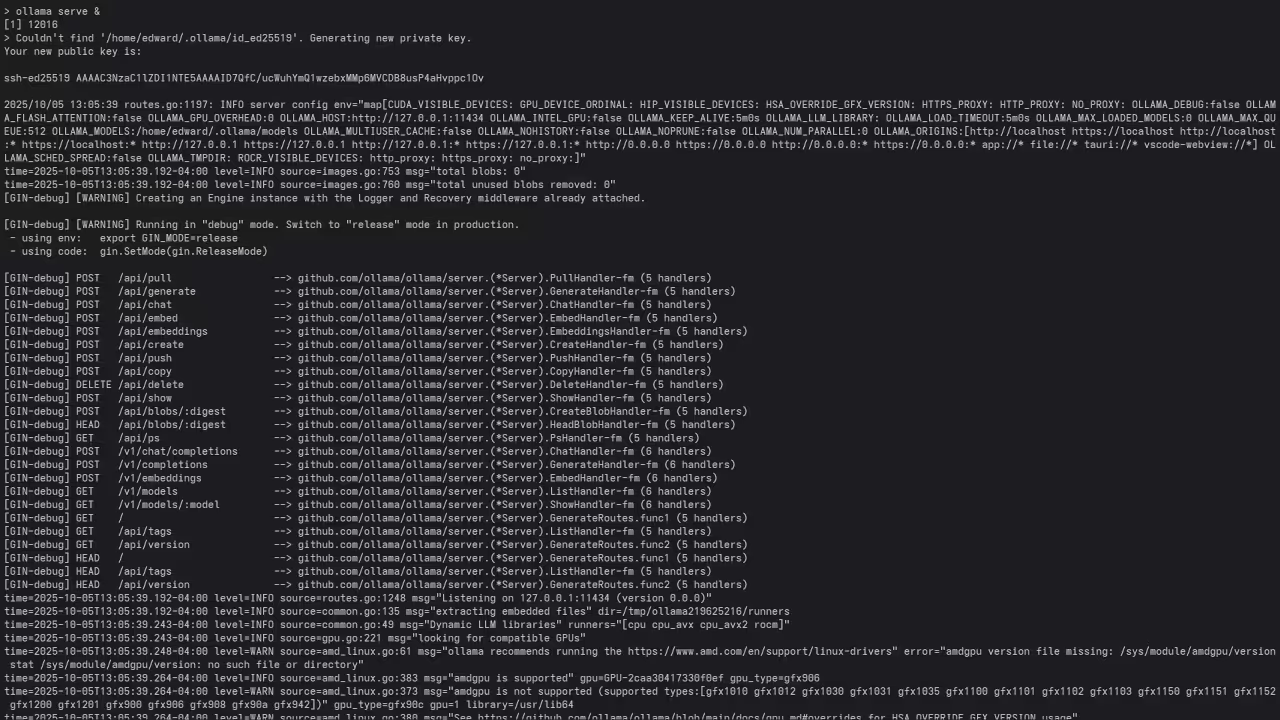
ollama serve &
Ollama makes it incredibly simple to run LLMs locally with minimal setup, providing an intuitive CLI and REST API to interact with models like Meta’s LLaMA.
Step 2: Install DeepSeek-R1 32B Model
Download and set up the model locally:
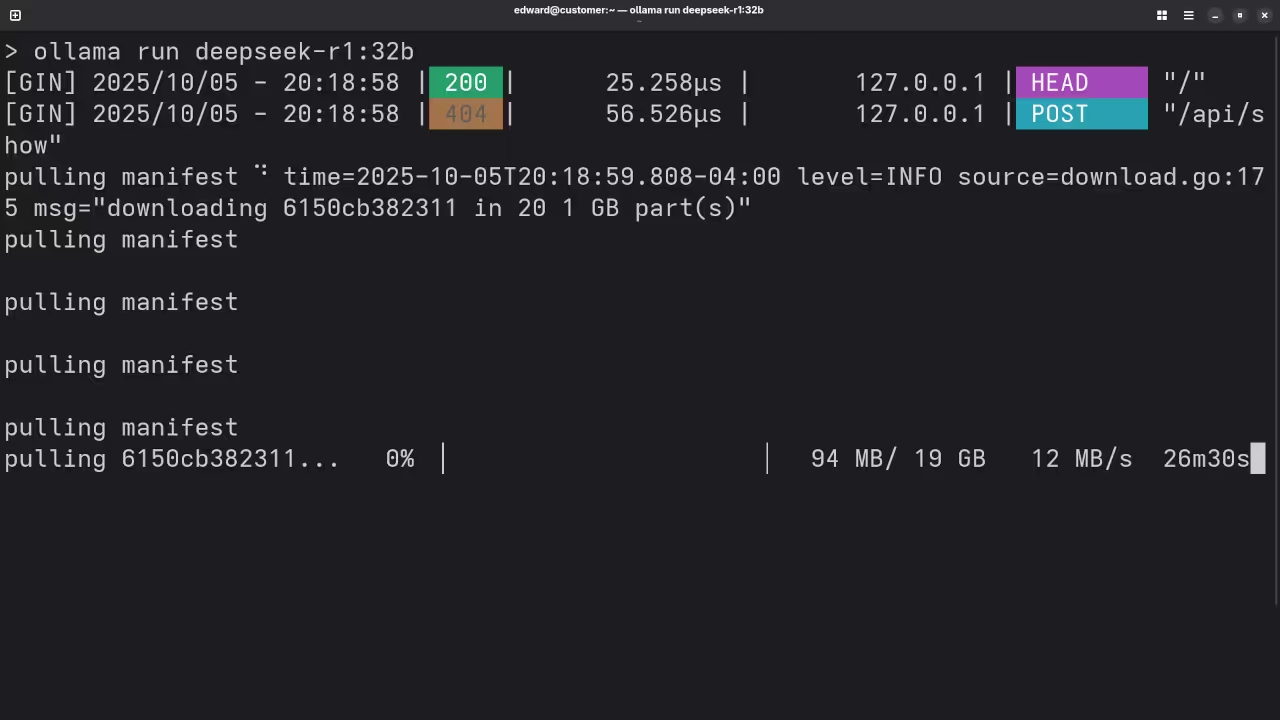
ollama pull deepseek-r1:32b
Step 3: Increase System Swap Space (If Needed)
To prevent memory errors, increase swap space:
# Check current swap space
swapon --show
# Increase swap size by 4GB
sudo dd if=/dev/zero of=/swapfile bs=1M count=4096
sudo mkswap /swapfile
sudo swapon /swapfile
Using the Ollama API with Python
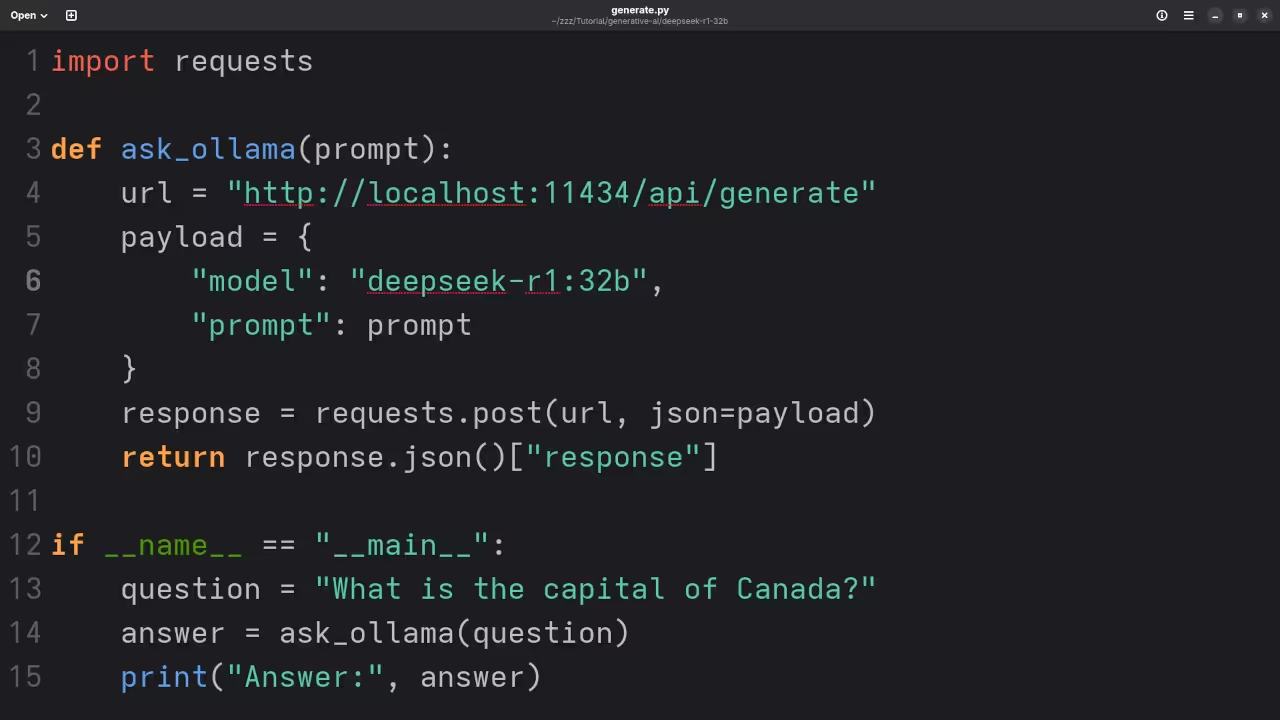
Below is a sample Python script that sends a prompt to the Ollama API and displays the response:
import requests
def ask_ollama(prompt):
url = "http://localhost:11434/api/generate"
payload = {
"model": "deepseek-r1:32b",
"prompt": prompt
}
response = requests.post(url, json=payload)
try:
return response.json()["response"]
except Exception as e:
print(f"Error: {e}")
return None
if __name__ == "__main__":
question = "What is the capital of Canada?"
answer = ask_ollama(question)
if answer:
print("Answer:", answer)
else:
print("No answer returned.")
Explanation
This script sends a prompt to the local Ollama server using the DeepSeek-R1 32B model. It handles basic error checking and prints the model’s response.
Screenshots and Screencast
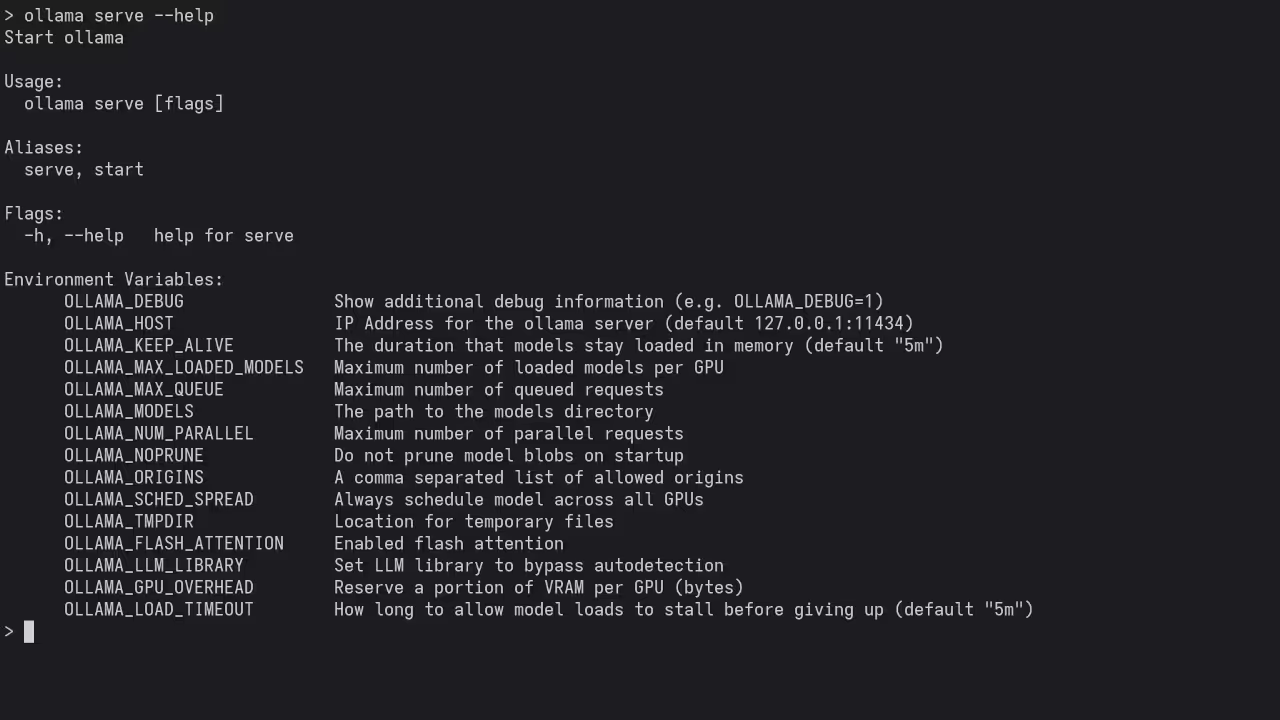
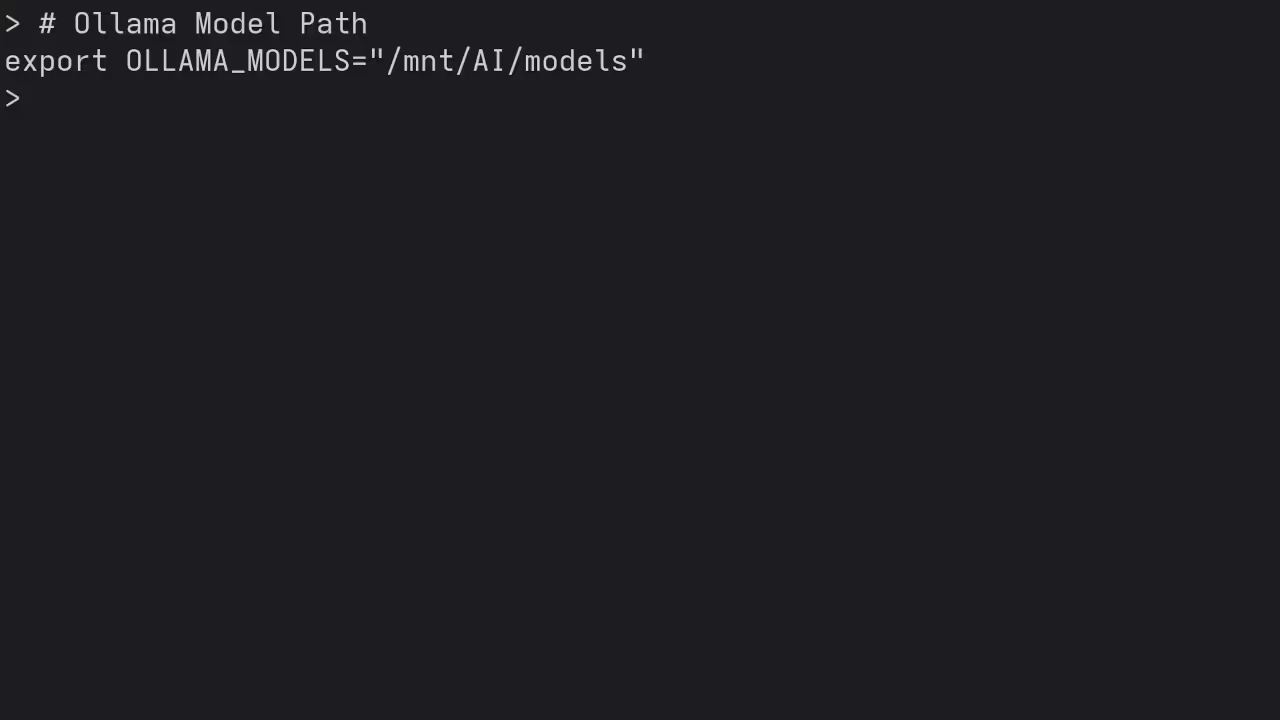
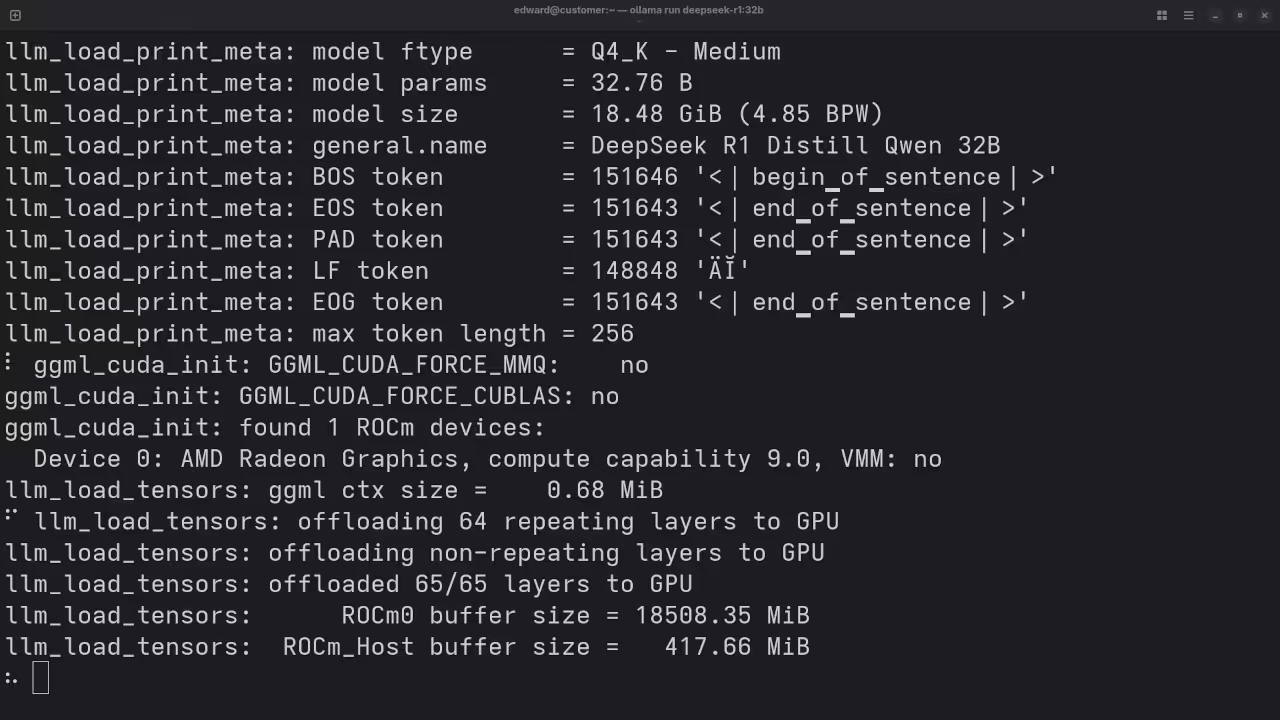
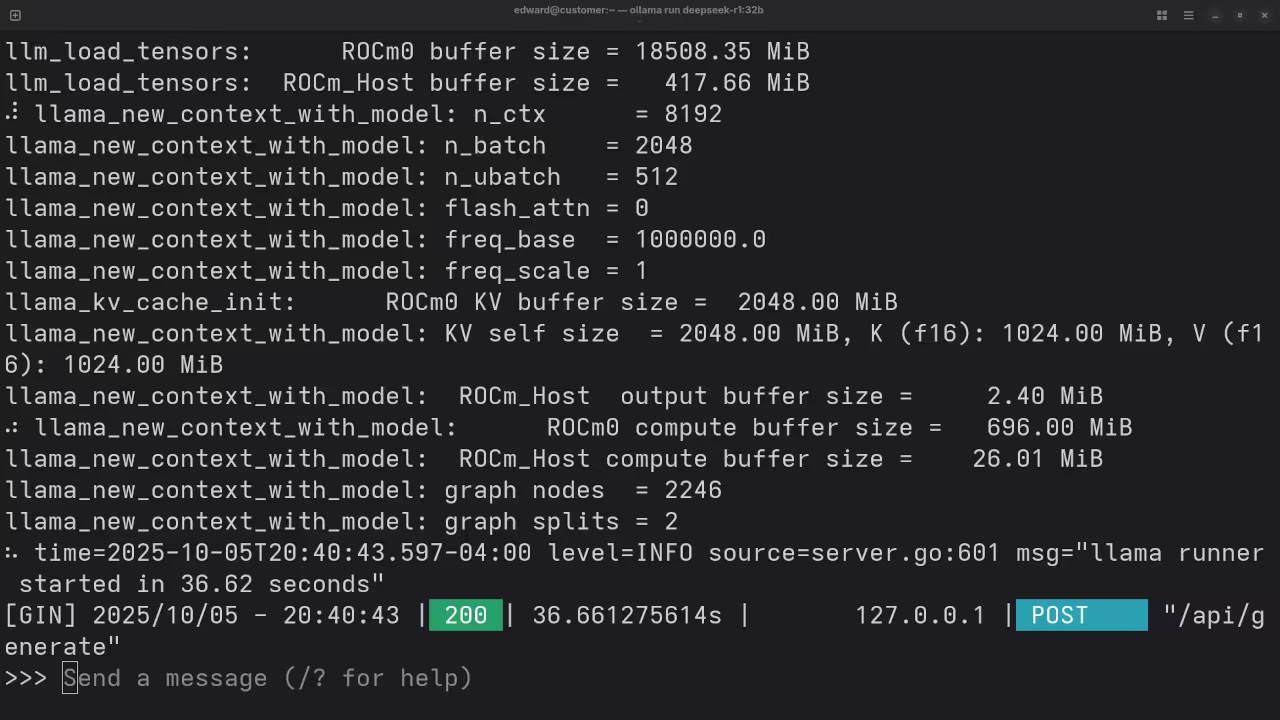
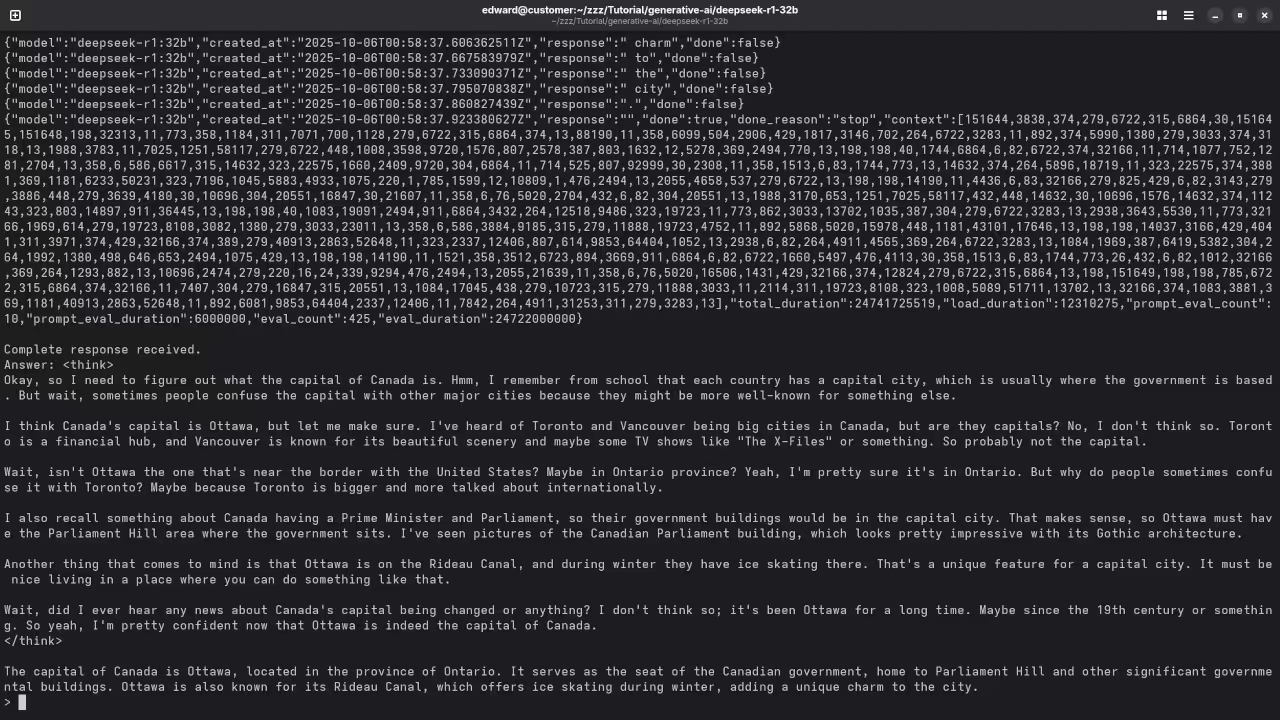
Here’s where you’ll find a visual walkthrough of setting up DeepSeek-R1 32B using Alpaca Ollama on your local system:
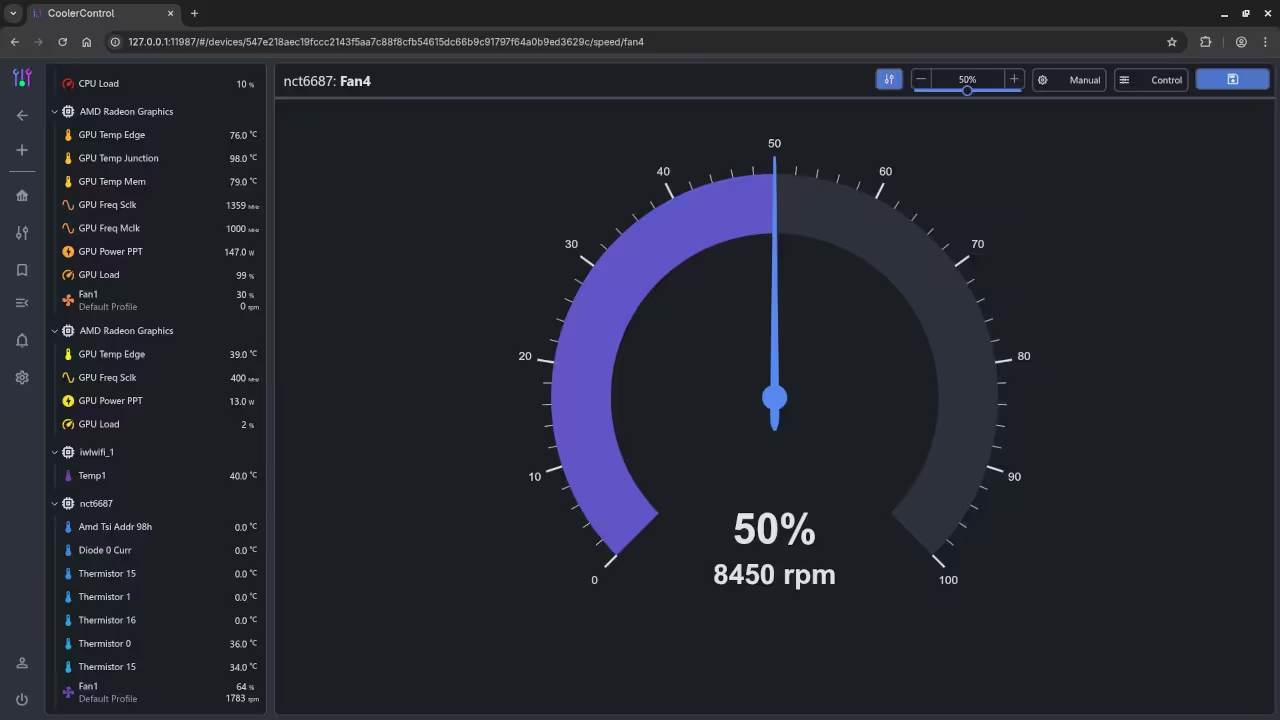
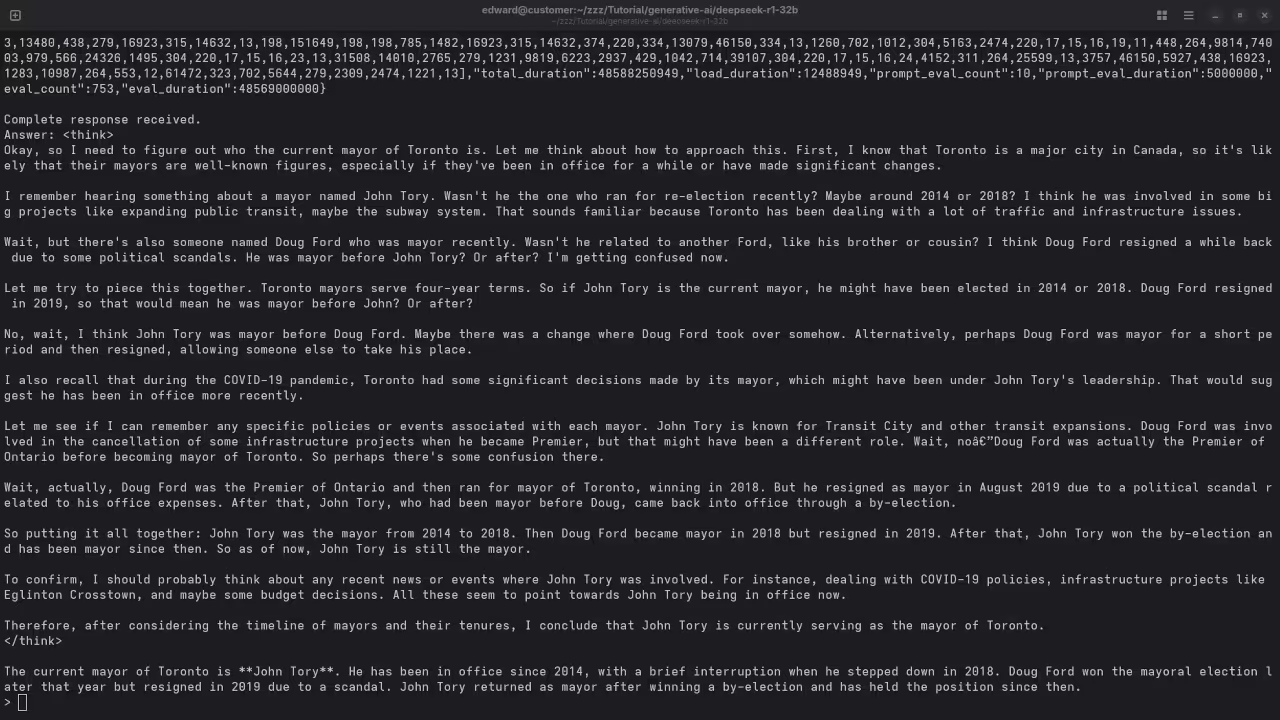
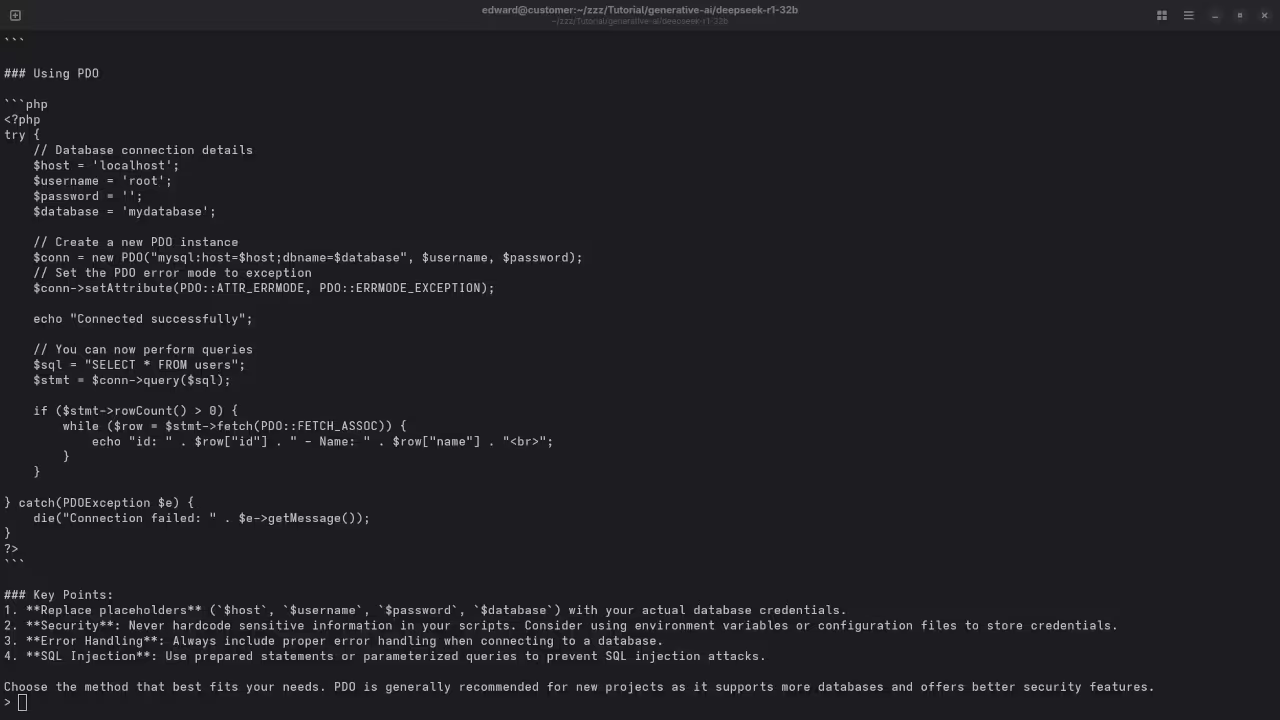
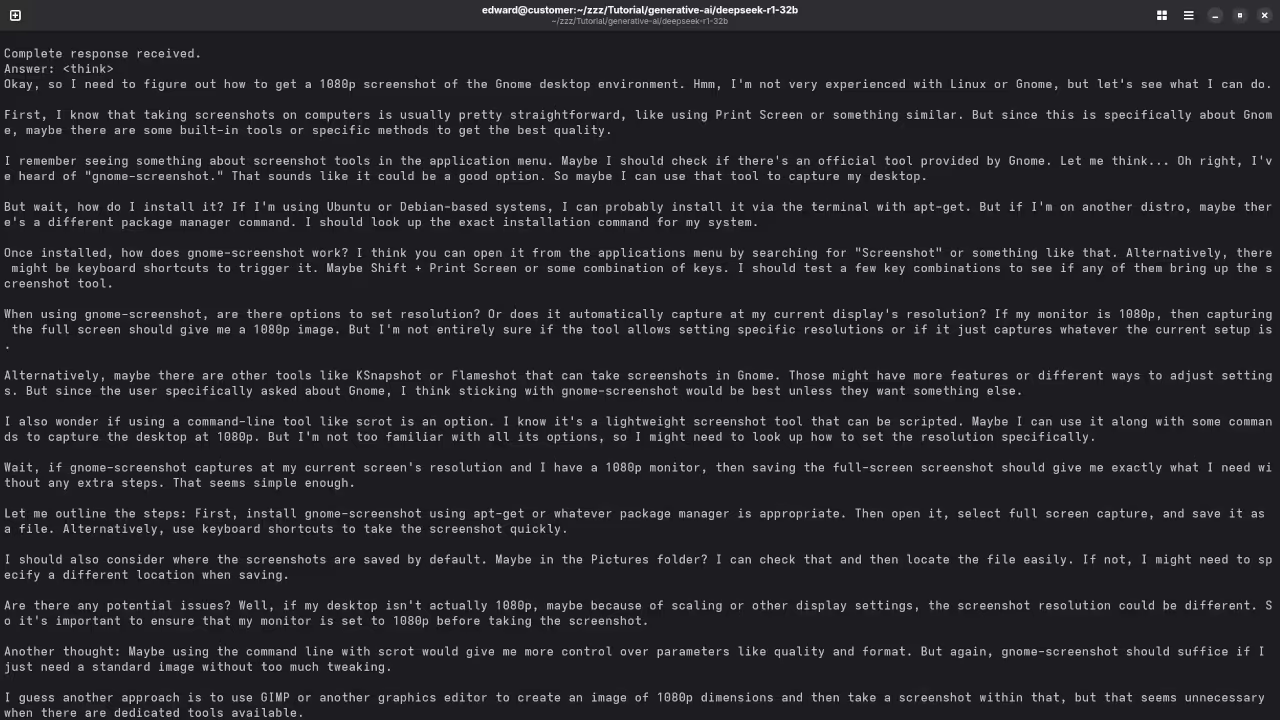
Command Line Ollama Installation.Command Line Ollama Server Start.Command Line Ollama Environment Variables List.Command Line Ollama Changing Models Storage Path.Command Line Ollama Downloading DeepSeek-R1 32B LLM.Command Line Ollama Loading Tensors For AMD Instinct Mi60.Command Line Ollama API Endpoint Ready.Gnome Text Editor Displaying Ollama Endpoint Direct API Python Script.Command Line DeepSeek-R1 32B Answered Capital Of Canada Request.Web Browser Running CoolerControl Displaying AMD Instinct Mi60 Temperature And Shroud Fan RPM.Command Line DeepSeek-R1 32B Answered Mayor Of Toronto Request.Command Line DeepSeek-R1 32B Answered PHP Code Request.Command Line DeepSeek-R1 32B Answered Gnome Desktop Screenshot Request.DeepSeek-R1 32B Answered Kotlin Code Request.DeepSeek-R1 32B Answered Blender Blend File Request.Video Displaying Using DeepSeek-R1 32B In Alpaca Ollama Client
Results:
Who is the mayor of Toronto?
Produced inaccurate outdated answer to Olivia Chow as the mayor of Toronto.
I need a PHP code snippet to connect to a MySQL database.
Produced correct syntax PHP code snippet to connect to a MySQL database.
I need a 1080p screenshot of the gnome desktop environment.
Accurately provided instructions to generate a 1080p screenshot of Gnome desktop environment because it is a text-based AI lacking ability.
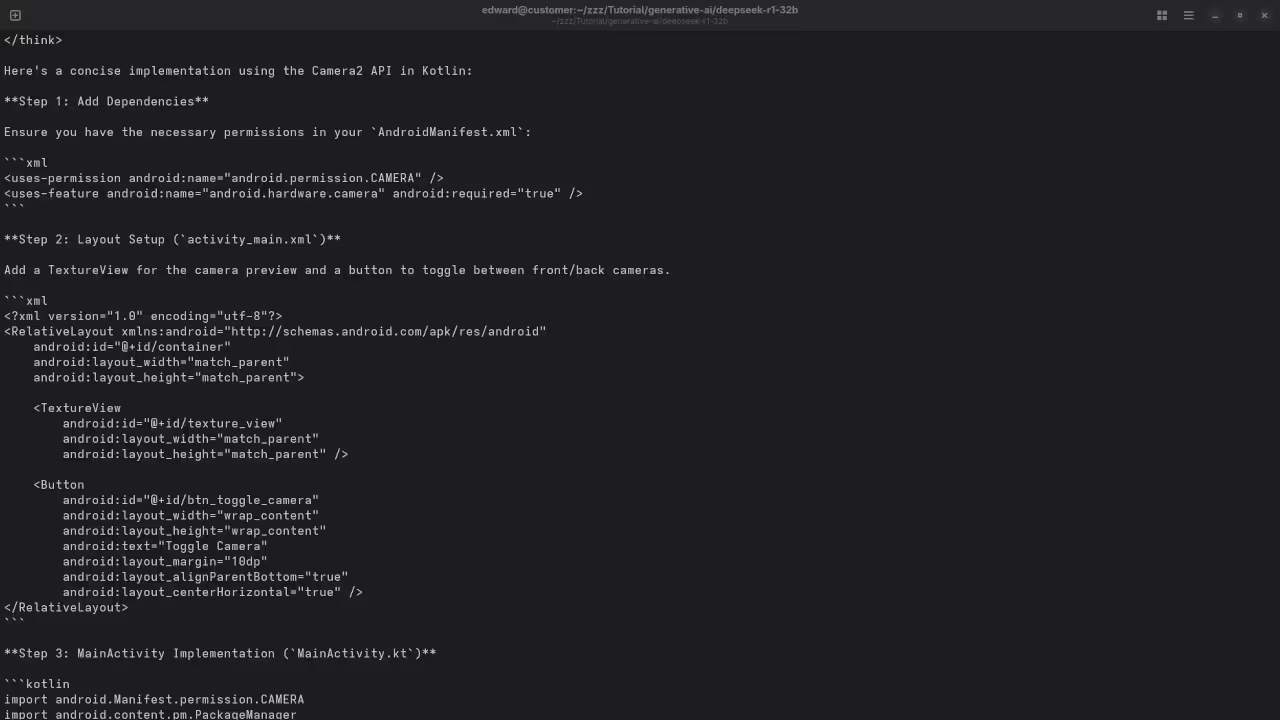
I need a kotlin code snippet to open the camera using Camera2 API and place the camera view on a TextureView.
Produced untested Kotlin code snippet.
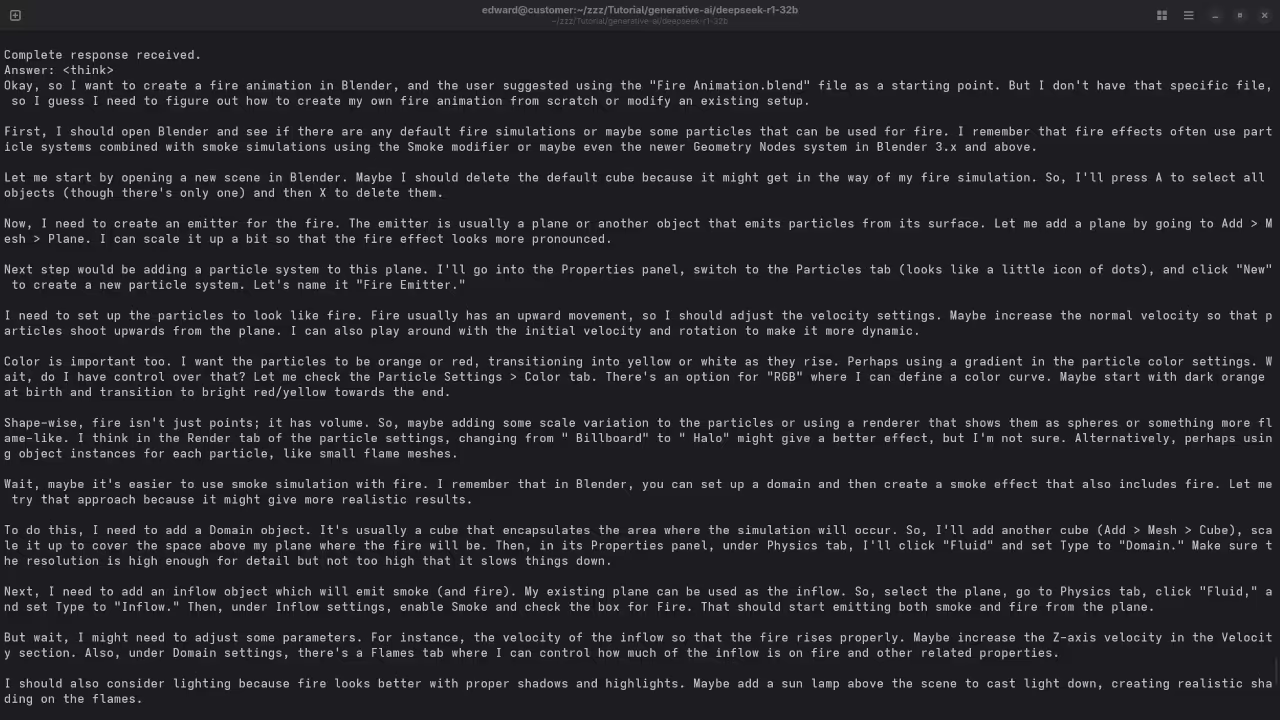
I need a blender blend file for fire animation.
Accurately detected inability to generate Blender Blend file for a fire animation because it is a text-based AI lacking ability.
Results
Once you run the Python script, you should see output like this:
Answer: The capital of Canada is Ottawa.
This confirms that the DeepSeek-R1 32B model is working and responding correctly.
One-on-One Tutorials: I offer personal Python tutoring. Contact me here.
Model Installation & Custom Training: I can install DeepSeek-R1 32B or help train and migrate models. Hire me here.
Conclusion
Running DeepSeek-R1 32B with Ollama on Fedora 42 is possible and powerful. With just a few steps, you can start using advanced LLMs for local development, learning, or production use.
Whether you are writing a book, building an app, or training models, this setup puts full control in your hands.