
Host Your Own Git Server with Gitolite and Podman
Want to run your own Git server without relying on GitHub, GitLab, or Bitbucket? Gitolite is a powerful, open-source tool that lets you manage Git repositories on your own terms – with SSH-based access control, fine-grained permissions, and no need for a web interface.
In this post, I will show you how to install Gitolite inside a Podman container, taking full advantage of official repositories.
Why Gitolite?
- Self-hosted Git server
- Fine-grained access control using SSH keys
- Lightweight and scriptable
- 100% open source
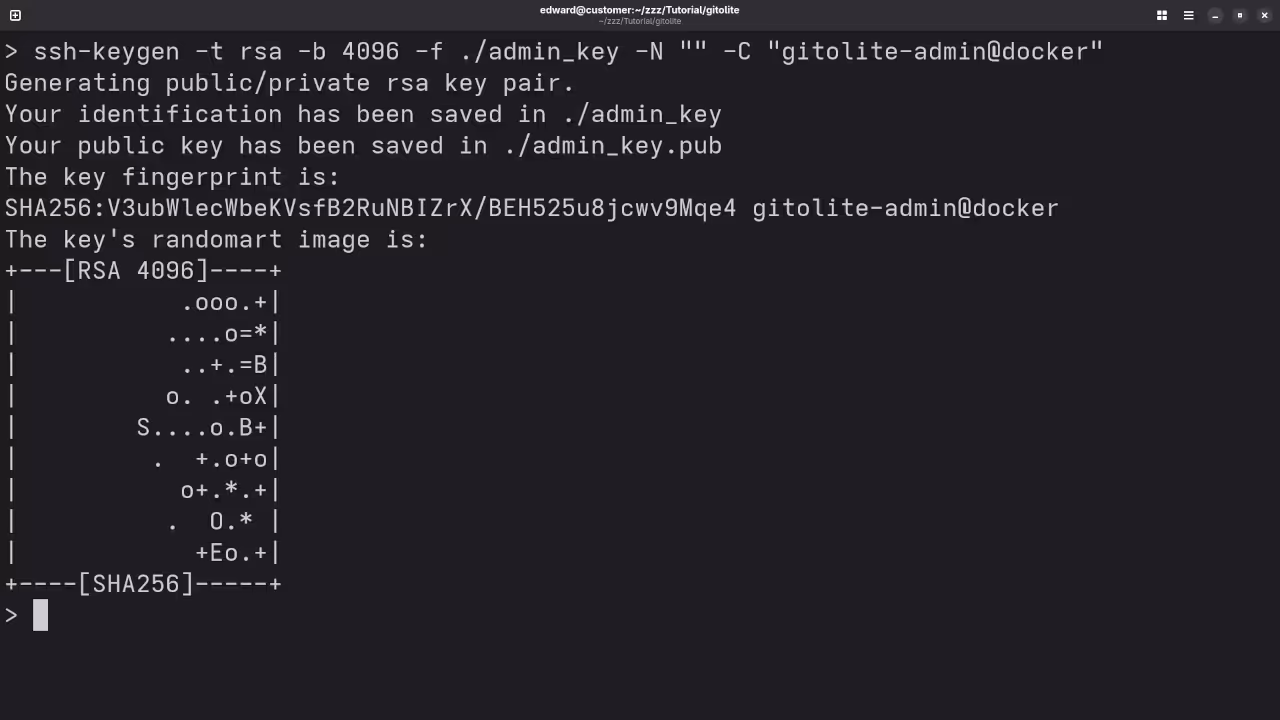
Step 1: Prepare Your Admin SSH Key
You’ll need your SSH public key for administration. Save it as admin.pub in the same folder where you create the container files.
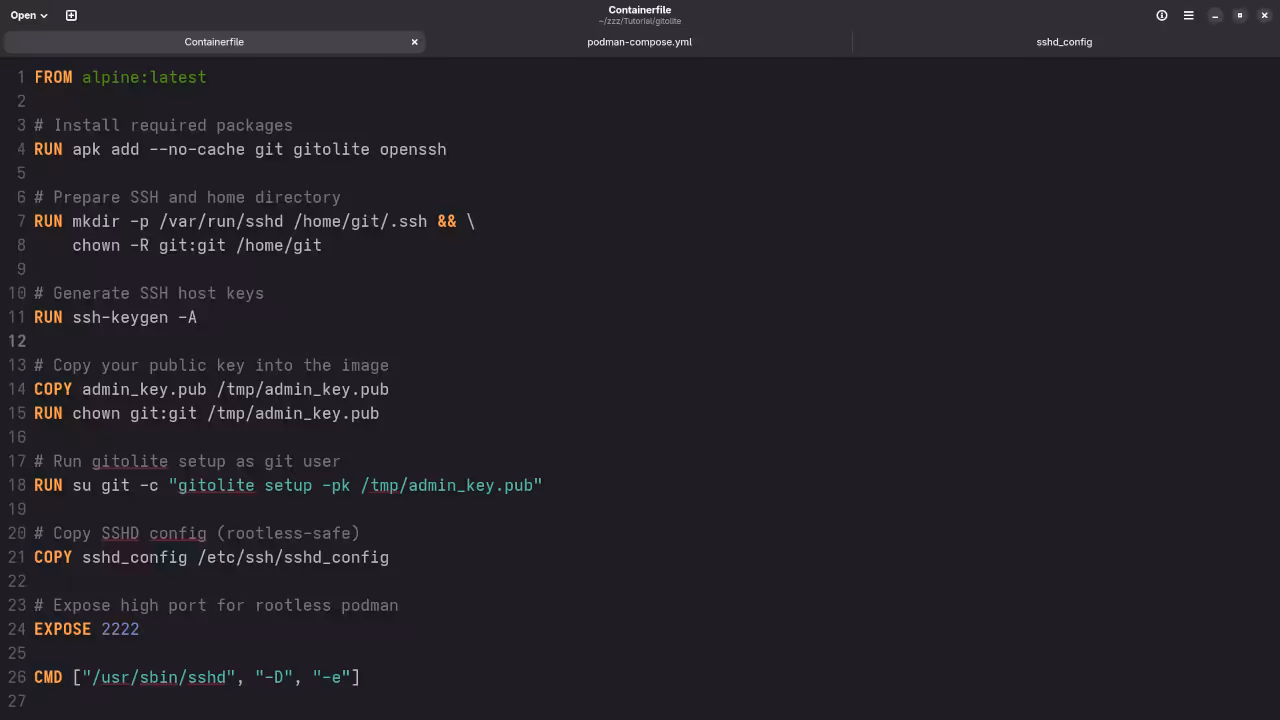
Step 2: Create the Containerfile
Create a file named Containerfile (or Dockerfile) with the following content:
FROM alpine:latest
# Install required packages
RUN apk add --no-cache git gitolite openssh
# Prepare SSH and home directory
RUN mkdir -p /var/run/sshd /home/git/.ssh && \
chown -R git:git /home/git
# Generate SSH host keys
RUN ssh-keygen -A
# Copy your public key into the image
COPY admin_key.pub /tmp/admin_key.pub
RUN chown git:git /tmp/admin_key.pub
# Run gitolite setup as git user
RUN su git -c "gitolite setup -pk /tmp/admin_key.pub"
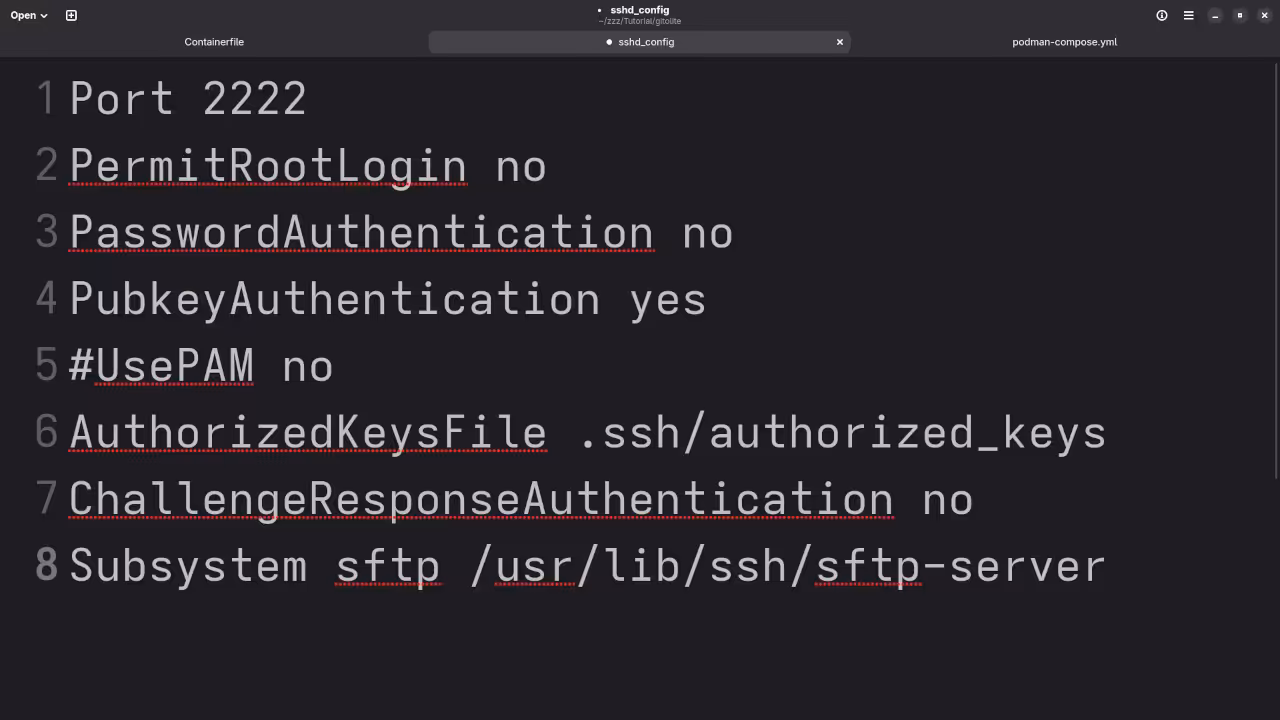
# Copy SSHD config (rootless-safe)
COPY sshd_config /etc/ssh/sshd_config
# Expose high port for rootless podman
EXPOSE 2222
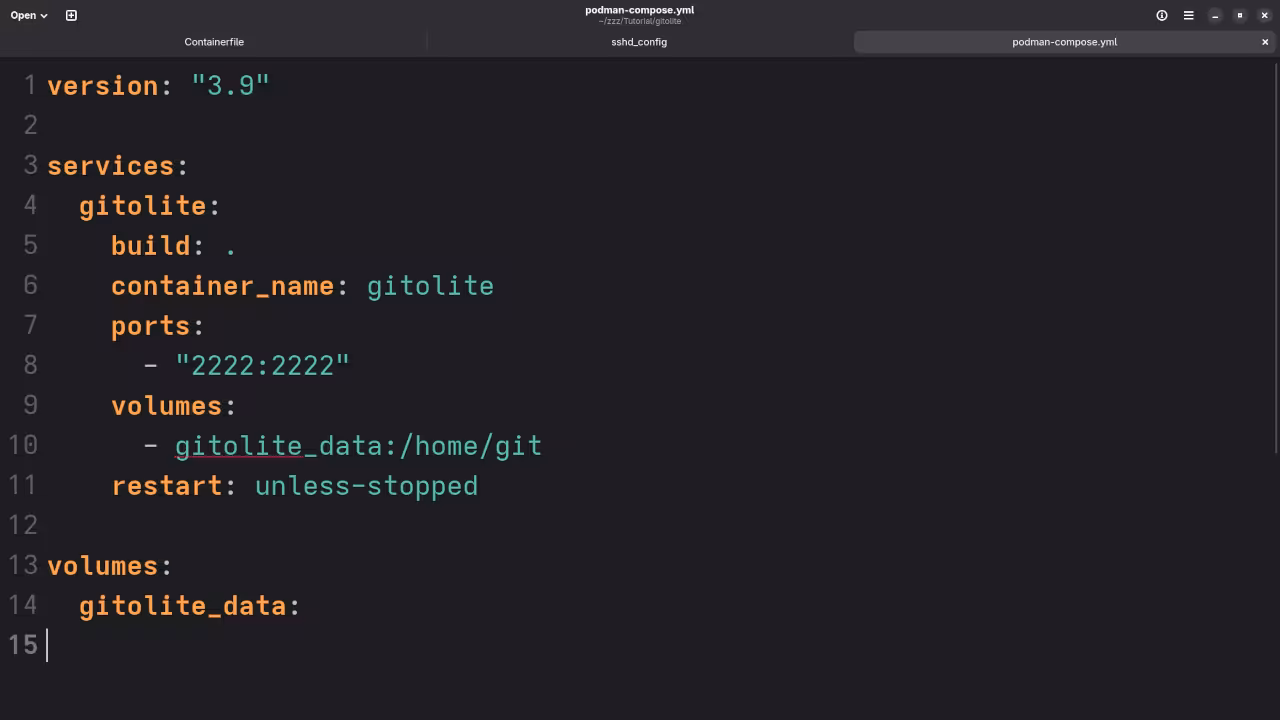
CMD ["/usr/sbin/sshd", "-D", "-e"] Step 3: Create the podman-compose.yml File
Create a podman-compose.yml file alongside the Containerfile:
version: "3.9"
services:
gitolite:
build: .
container_name: gitolite
ports:
- "2222:2222"
volumes:
- gitolite_data:/home/git
restart: unless-stopped
volumes:
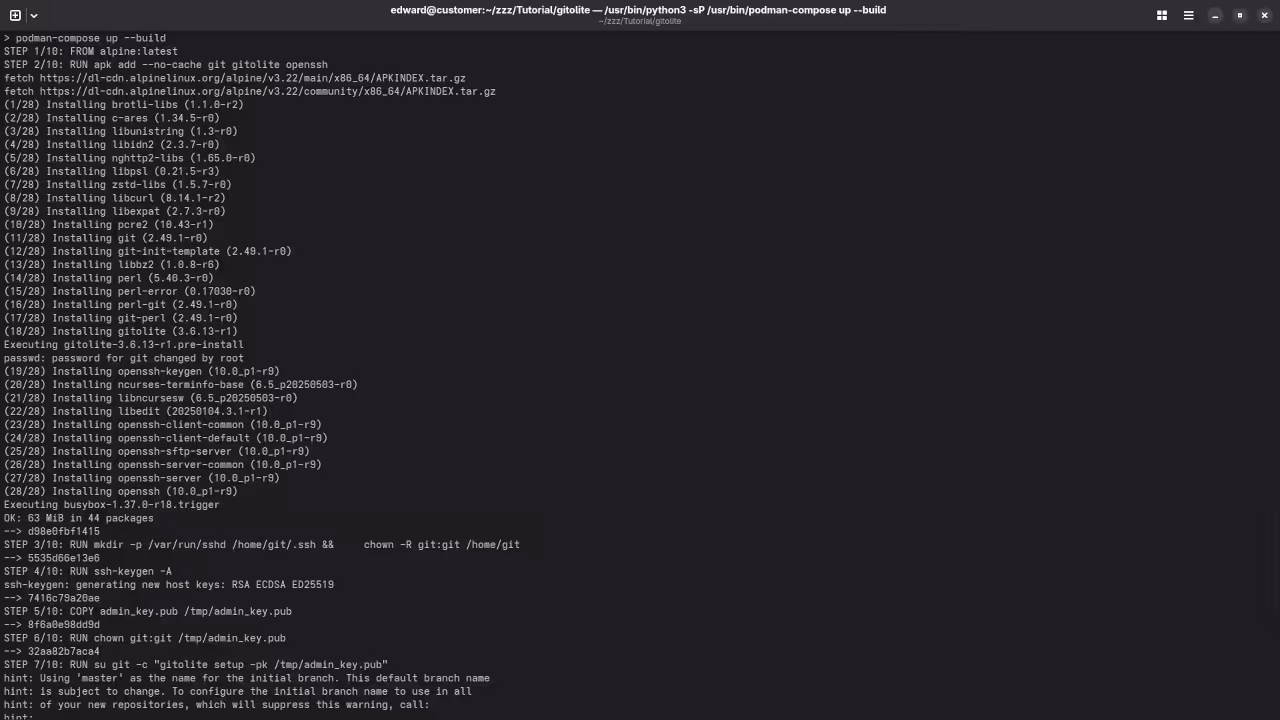
gitolite_data: Step 4: Build and Run Your Gitolite Container
- Build the container image:
podman-compose build - Start the container:
podman-compose up -d - Your Gitolite server will be running and accessible on port
2222.
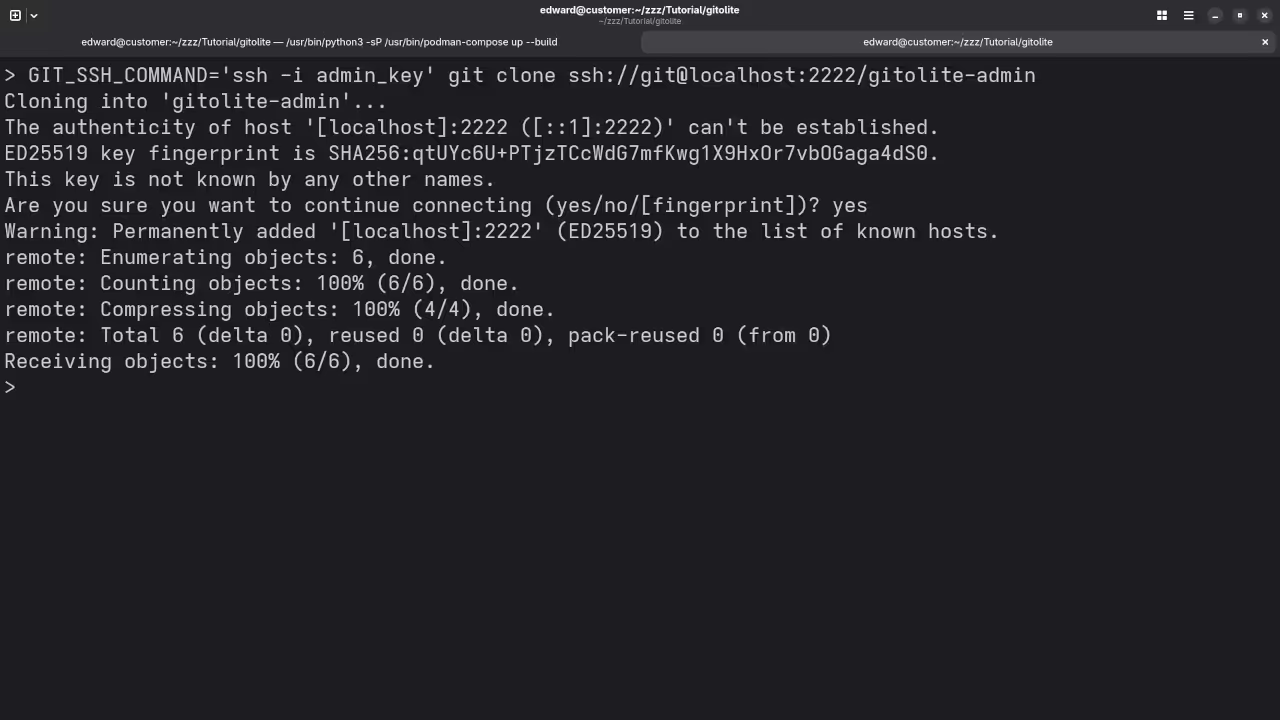
Step 5: Connect to Your Gitolite Server
From your host machine, clone the Gitolite admin repository using:
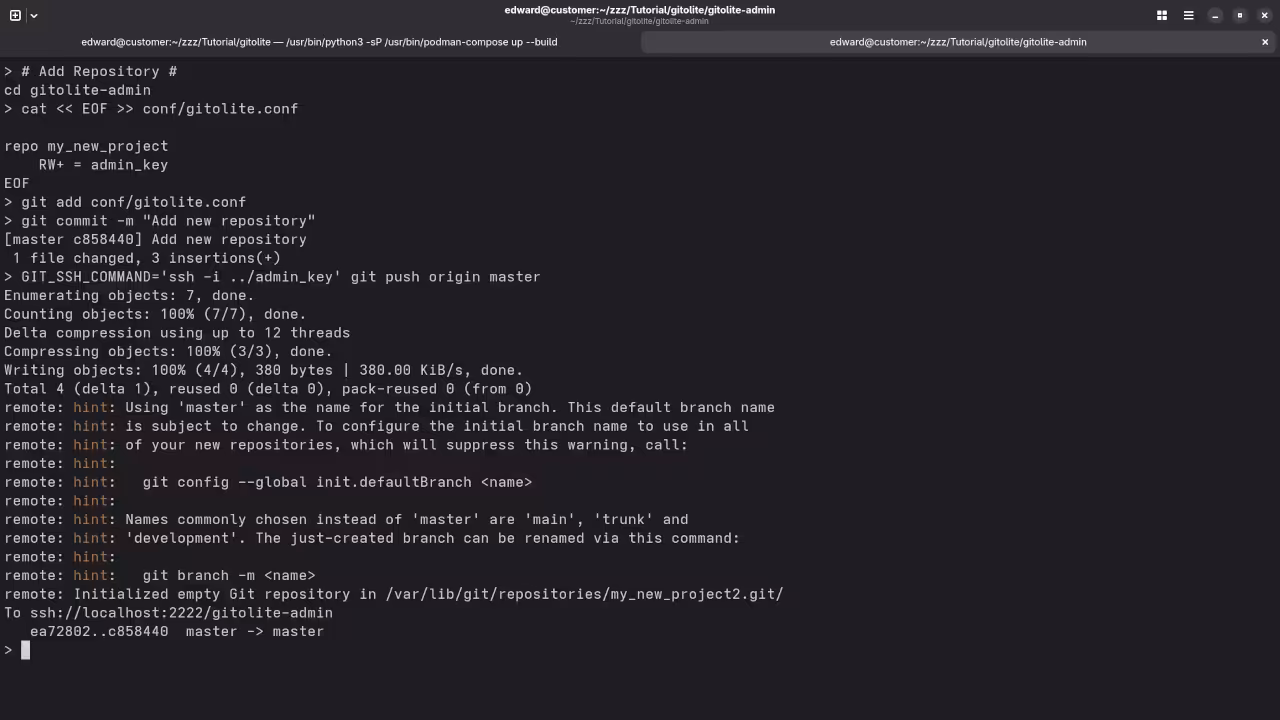
git clone ssh://git@localhost:2222/gitolite-admin Now you can manage your repositories, users, and permissions by editing the Gitolite config and pushing changes.
Screenshots and Screencast Tutorial
Learn More with My Books and Courses
Need Help?
Conclusion
With Podman, setting up Gitolite is fast, clean, and secure. Whether you are managing your own projects or hosting for a team, this setup gives you total control over your source code and workflows.
Looking for more tutorials like this? Subscribe to my updates and follow along with future guides.
🚀 Recommended Resources
Disclosure: Some of the links above are referral links. I may earn a commission if you make a purchase at no extra cost to you.