Blog

  • PHP Crash Course Contact Form App

    PHP Crash Course Contact Form App

    PHP Crash Course (Beginner to Intermediate) Using PHP 8.4 – Build a Contact Form

    Want to learn PHP quickly and build something useful? This crash course will walk you through the core features of PHP using the latest version – PHP 8.4 – with a real-world project: a working contact form.

    This beginner-friendly tutorial is designed to introduce:

    • PHP syntax
    • Variables and arrays
    • Functions
    • Conditional logic
    • Form handling
    • PHP 8.4 improvements

    What is PHP?

    PHP stands for Hypertext Preprocessor. It is a server-side scripting language that powers platforms like WordPress, Joomla, and Drupal. PHP is great for beginners because it is simple to learn yet powerful enough to build advanced applications.

    What You Will Build

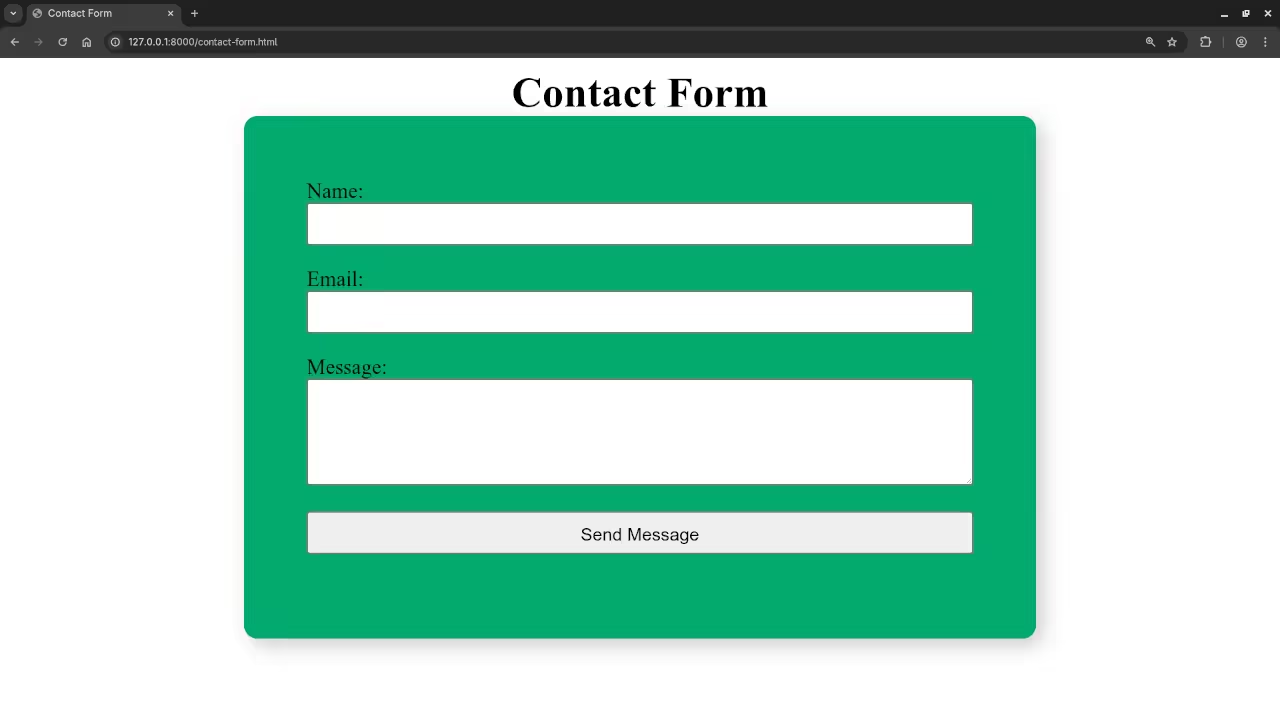
    We will build a contact form handler that:

    • Accepts user input (name, email, message)
    • Validates the input using functions and conditional logic
    • Uses arrays to manage and organize data
    • Sends an email to the admin
    • Shows success/error messages to the user

    Step 1: Create the HTML Form


    <form action="contact.php" method="POST">
      <label for="name">Name:</label>
      <input type="text" name="name" required>
    
      <label for="email">Email:</label>
      <input type="email" name="email" required>
    
      <label for="message">Message:</label>
      <textarea name="message" required></textarea>
    
      <button type="submit">Send Message</button>
    </form>


    Step 2: Handle the Form with PHP 8.4


    <?php
    declare(strict_types=1);
    
    // Step 1: Collect input using an associative array
    $userInput = [
        'name' => trim($_POST['name'] ?? ''),
        'email' => trim($_POST['email'] ?? ''),
        'message' => trim($_POST['message'] ?? ''),
    ];
    
    // Step 2: Define a function to sanitize input
    function sanitizeInput(string $value): string {
        return htmlspecialchars($value, ENT_QUOTES, 'UTF-8');
    }
    
    // Step 3: Sanitize the input
    foreach ($userInput as $key => $value) {
        $userInput[$key] = sanitizeInput($value);
    }
    
    // Step 4: Validate the input using a separate function
    function validateInput(array $input): array {
        $errors = [];
    
        if (empty($input['name'])) {
            $errors[] = "Name is required.";
        }
    
        if (!filter_var($input['email'], FILTER_VALIDATE_EMAIL)) {
            $errors[] = "A valid email is required.";
        }
    
        if (empty($input['message'])) {
            $errors[] = "Message cannot be empty.";
        }
    
        return $errors;
    }
    
    // Step 5: Use conditional logic to act on validation
    $errors = validateInput($userInput);
    
    if (!empty($errors)) {
        // Output errors using indexed array
        echo "<ul>";
        foreach ($errors as $error) {
            echo "<li>$error</li>";
        }
        echo "</ul>";
        exit;
    }
    
    // Step 6: Prepare the email
    $to      = "admin@example.com"; // Replace with your email
    $subject = "New Contact Form Submission";
    $headers = [
        "From: {$userInput['email']}",
        "Reply-To: {$userInput['email']}",
        "Content-Type: text/plain; charset=UTF-8"
    ];
    
    // Step 7: Use heredoc syntax for cleaner body formatting
    $body = <<<EOT
    Name: {$userInput['name']}
    Email: {$userInput['email']}
    
    Message:
    {$userInput['message']}
    EOT;
    
    // Step 8: Send the email and use conditional logic for result
    if (mail($to, $subject, $body, implode("\r\n", $headers))) {
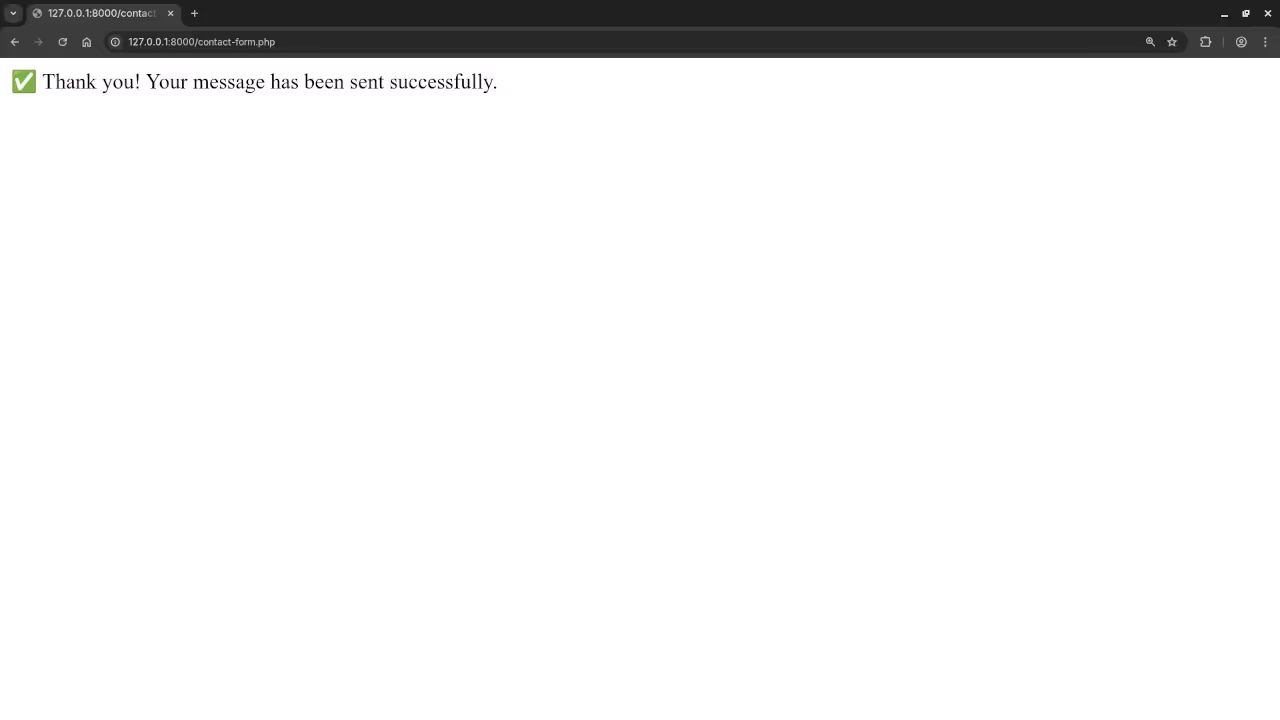
        echo "<p>✅ Thank you! Your message has been sent successfully.</p>";
    } else {
        echo "<p>❌ Sorry, something went wrong. Please try again later.</p>";
    }
    ?>


    PHP Concepts Covered

    Here is what we used and why:

    Variables

    Used to store user inputs.

    $name = $_POST['name'] ?? '';

    Arrays

    Used to organize form inputs and error messages.

    $userInput = ['name' => 'John', 'email' => 'john@example.com'];

    Functions

    Defined for sanitization and validation to make code reusable.

    function validateInput(array $input): array { ... }

    Conditional Logic

    Used for checking valid input and sending emails.

    if (!filter_var($email, FILTER_VALIDATE_EMAIL)) { ... }

    PHP 8.4 Features

    • Strict typing
    • Short null coalescing syntax
    • Heredoc for multiline strings
    • Improved error handling and performance

    Screenshots And Screencast
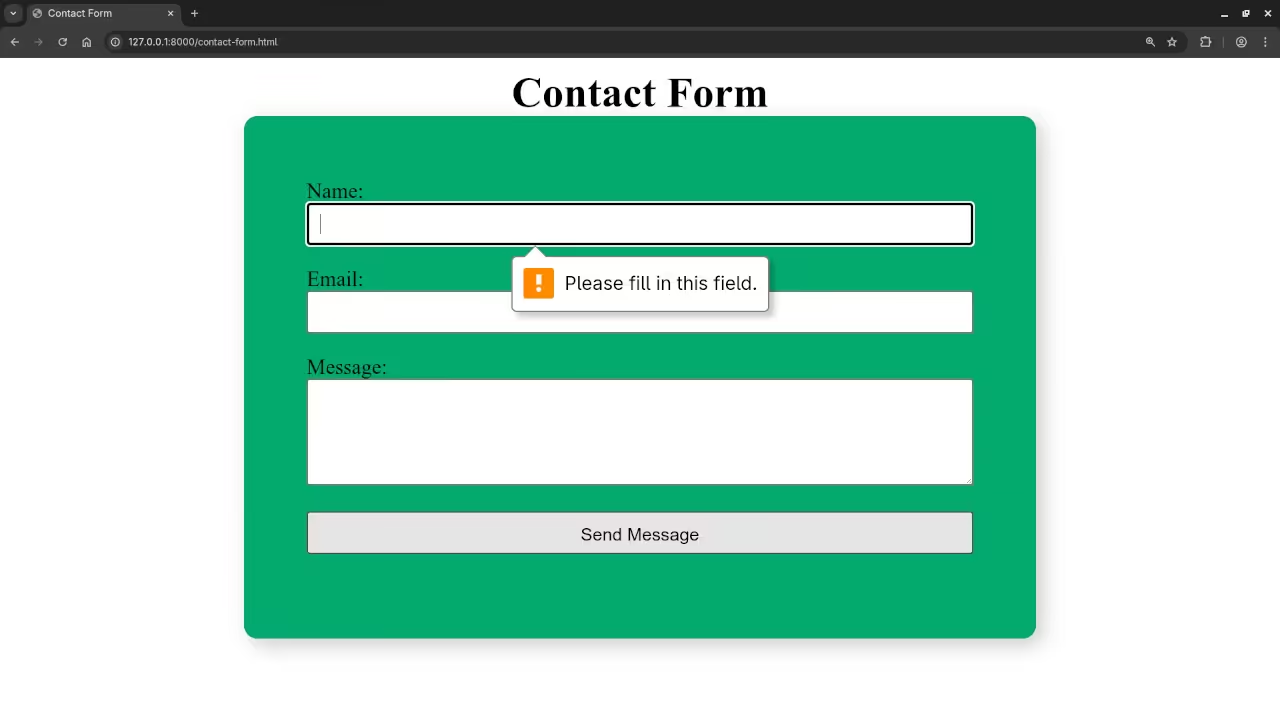
    Contact Form
    Web Browser Displaying Contact Form

    Contact Form Submission
    Web Browser Displaying Contact Form Submission Result

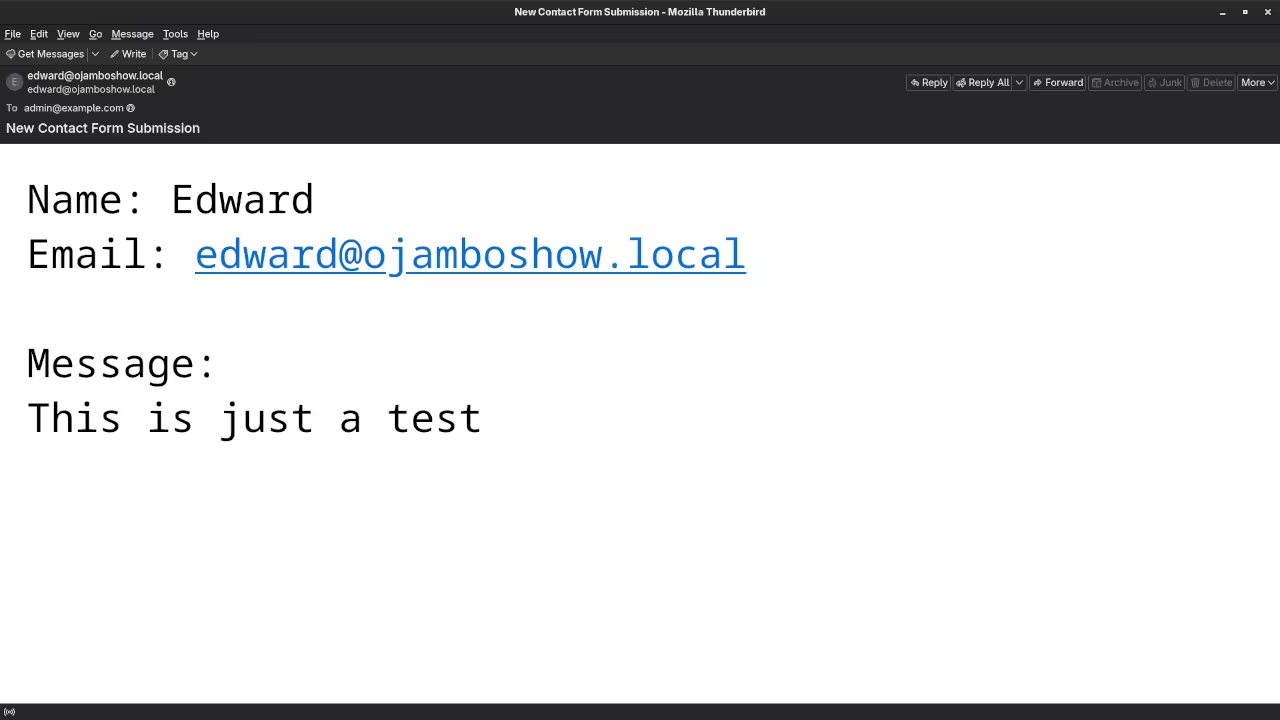
    Contact Form Email
    Web Browser Displaying Contact Form Email

    PHP 8.4 Contact Form Video

    Continue Learning with My Book and Course

    Book: Learning PHP
    This book takes you from beginner to confident PHP developer, with hands-on examples, code challenges, and real-world applications.

    Course: Learning PHP
    A complete video course that walks you through practical PHP development, step by step.

    Need Help with PHP?

    I offer the following services:

    • One-on-one PHP programming tutorials
    • Upgrading older PHP apps to PHP 8+
    • Migrating or fixing PHP applications

    Click here to contact me for inquiries or custom support.

    Conclusion

    You now understand the basics of PHP using variables, arrays, functions, and conditional logic. With a working contact form in PHP 8.4, you are ready to start building more powerful applications.

    For deeper learning, check out my book, my course, or contact me for personal support.
  • How To Create AN HTML5 Spinning Image CAPTCHA

    How To Create AN HTML5 Spinning Image CAPTCHA

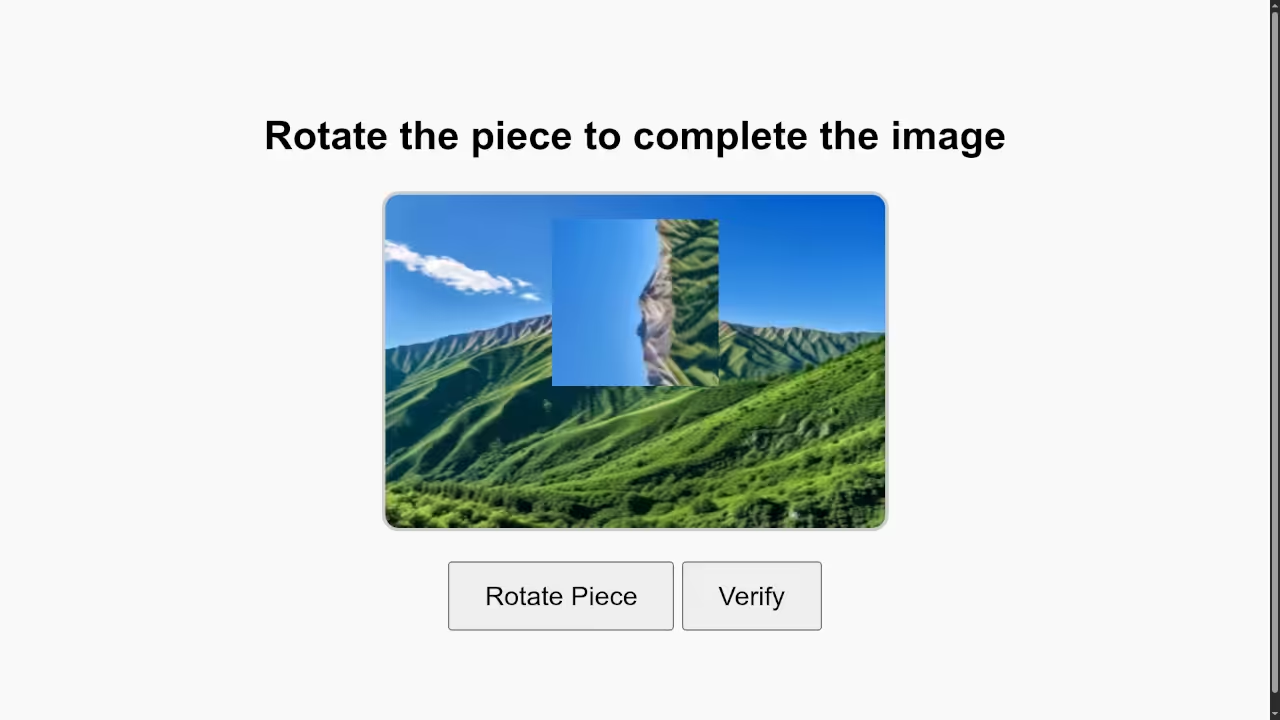
    Build a Simple Spinning Image CAPTCHA with HTML5 and JavaScript

    Want to add a fun and user-friendly CAPTCHA to your website without relying on third-party services? In this beginner-level tutorial, we will walk through building a spinning image CAPTCHA using only HTML5, CSS, and JavaScript.

    This type of CAPTCHA asks the user to rotate a small part of an image until it matches the background. It is simple, effective, and a great exercise if you are just starting to learn JavaScript and front-end development.

    What You Will Build

    We will create a CAPTCHA that:

    • Displays a full background image
    • Rotates a small “puzzle piece” of the image
    • Lets the user rotate the piece using a button
    • Validates the solution when the piece is aligned correctly

    This project is great for learning about:

    • HTML5 layout and image manipulation
    • CSS positioning and transformations
    • JavaScript event handling and logic

    Code Walkthrough

    Here is the full HTML5, CSS, and JavaScript code for your spinning image CAPTCHA. You can copy and paste this into an .html file and open it in your browser to test.


      <h2>Rotate the piece to complete the image</h2>
    
      <div id="captcha-container">
        <img id="main-image" src="https://upload.wikimedia.org/wikipedia/commons/thumb/3/3f/Fronalpstock_big.jpg/300px-Fronalpstock_big.jpg" alt="Main Image">
        <div id="rotated-piece"></div>
      </div>
    
      <br>
      <button id="rotate-btn">Rotate Piece</button>
      <button id="verify-btn">Verify</button>
      <div id="result"></div>


    CSS For Styling


        body {
          font-family: Arial, sans-serif;
          text-align: center;
          padding: 40px;
          background-color: #f9f9f9;
        }
    
        #captcha-container {
          display: inline-block;
          position: relative;
          width: 300px;
          height: 200px;
          border: 2px solid #ccc;
          background: #fff;
          border-radius: 10px;
          overflow: hidden;
        }
    
        #main-image {
          width: 100%;
          height: 100%;
          display: block;
        }
    
        #rotated-piece {
          position: absolute;
          width: 100px;
          height: 100px;
          top: 15px;
          left: 100px;
          background-image: url('https://upload.wikimedia.org/wikipedia/commons/thumb/3/3f/Fronalpstock_big.jpg/300px-Fronalpstock_big.jpg');
          background-size: 300px 200px;
          background-position: -100px -50px;
          transform-origin: center center;
          transition: transform 0.3s ease;
          pointer-events: none;
        }
    
        #rotate-btn, #verify-btn {
          margin-top: 15px;
          padding: 10px 20px;
          font-size: 16px;
          cursor: pointer;
        }
    
        #result {
          margin-top: 15px;
          font-weight: bold;
        }


    JavaScript For Interactivity


        const rotatedPiece = document.getElementById('rotated-piece');
        const rotateBtn = document.getElementById('rotate-btn');
        const verifyBtn = document.getElementById('verify-btn');
        const resultDiv = document.getElementById('result');
    
        // Initial random rotation (90, 180, 270)
        let currentRotation = [90, 180, 270][Math.floor(Math.random() * 3)];
        rotatedPiece.style.transform = `rotate(${currentRotation}deg)`;
    
        rotateBtn.addEventListener('click', () => {
          currentRotation = (currentRotation + 90) % 360;
          rotatedPiece.style.transform = `rotate(${currentRotation}deg)`;
        });
    
        verifyBtn.addEventListener('click', () => {
          if (currentRotation === 0) {
            resultDiv.textContent = '✅ CAPTCHA passed!';
            resultDiv.style.color = 'green';
          } else {
            resultDiv.textContent = '❌ Incorrect. Try rotating again.';
            resultDiv.style.color = 'red';
          }
        });


    Interactive Demo

    Here’s a live example of the Stunning Gallery in action:

    HTML5 Stunning Gallery Demo
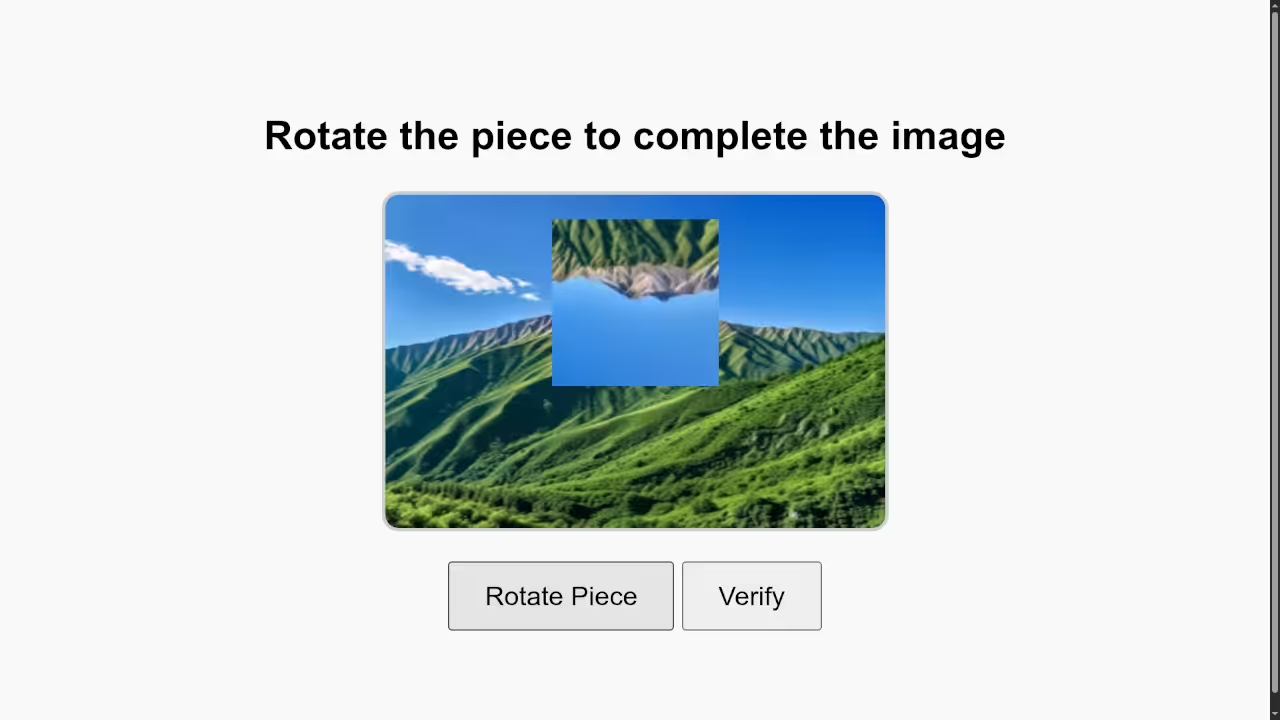
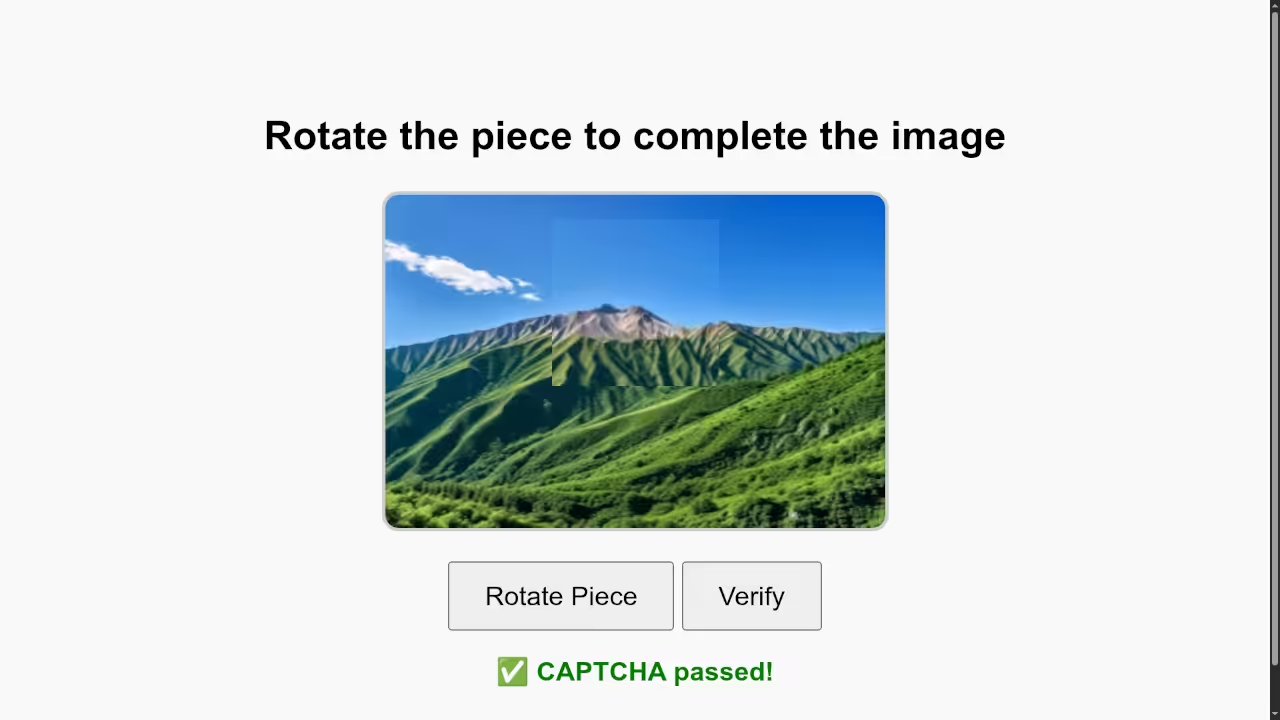
    HTML5 Spinning Image CAPTCHA
    Web Browser Displaying HTML5 Spinning Image CAPTCHA

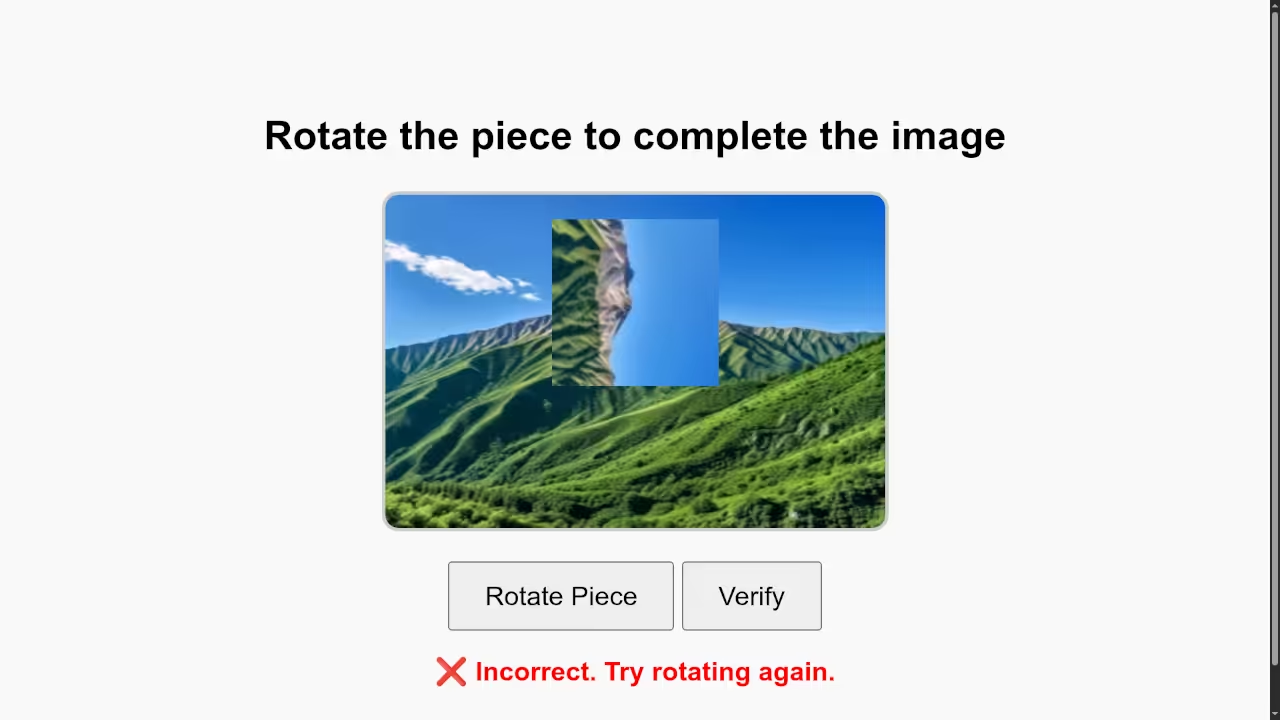
    HTML5 Spinning Image CAPTCHA Fail
    Web Browser Displaying HTML5 Spinning Image CAPTCHA Failed

    HTML5 Spinning Image CAPTCHA Pass
    Web Browser Displaying HTML5 Spinning Image CAPTCHA Passed

    HTML5 Spinning Image CAPTCHA Video

    Want to Learn More?

    If you are just getting started with JavaScript and want to build real-world projects like this, check out the following resources I created to help you level up:

    Book:
    Learning JavaScript on Amazon
    A beginner-friendly guide with practical examples to help you master the fundamentals.

    Course:
    Learning JavaScript – Full Online Course
    Interactive lessons and projects to build confidence through practice.

    1-on-1 Programming Tutorials:
    Need personalized help or mentorship? I am available for one-on-one sessions covering JavaScript, HTML5, and more.
    Book a session here

    Final Thoughts

    Building a custom CAPTCHA like this not only improves your front-end skills but also helps you understand how visual feedback and interactivity work in real applications.

    Try modifying the code to make the puzzle harder, or even use your own images for a personalized CAPTCHA experience.

    Let me know in the comments how it worked for you, or what you would like to build next.

  • Generate Low-Poly Glass Bottle With Blender Python API For Website

    Generate Low-Poly Glass Bottle With Blender Python API For Website

    Create a Glass Bottle in Blender Using Python and Display It in the Browser

    In this beginner-friendly tutorial, you will learn how to:

    • Generate a 3D glass bottle in Blender using the Blender Python API
    • Export it as a .glb file (GLTF Binary format)
    • Display the model in a web browser using <model-viewer>

    If you are just starting out with Python, this is a great way to combine code with visual creativity.

    What You Will Need

    • Blender (any version above 3.0)
    • Python (comes bundled with Blender)
    • Basic knowledge of the command line
    • A text editor like VS Code or Blender’s built-in text editor
    • A browser that supports WebGL (Chrome, Firefox, Edge, etc.)

    Step 1: Generate the Glass Bottle with Blender Python

    Create a new Python script called glass_bottle.py and paste the following code:


    import bpy
    
    # Clean up existing objects
    bpy.ops.object.select_all(action=&#039;SELECT&#039;)
    bpy.ops.object.delete(use_global=False)
    
    # Create bottom (body) with a UV sphere (scaled)
    bpy.ops.mesh.primitive_uv_sphere_add(radius=1.0, location=(0, 0, 1))
    body = bpy.context.active_object
    body.scale[2] = 1.8  # elongate vertically
    
    # Create neck with a cylinder
    bpy.ops.mesh.primitive_cylinder_add(radius=0.3, depth=1.0, location=(0, 0, 3))
    neck = bpy.context.active_object
    
    # Join neck and body into one mesh
    bpy.ops.object.select_all(action=&#039;DESELECT&#039;)
    body.select_set(True)
    neck.select_set(True)
    bpy.context.view_layer.objects.active = body
    bpy.ops.object.join()
    
    # Shade smooth
    bpy.ops.object.shade_smooth()
    
    # Add glass material
    mat = bpy.data.materials.new(name=&#039;GlassMaterial&#039;)
    mat.use_nodes = True
    bsdf = mat.node_tree.nodes.get(&#039;Principled BSDF&#039;)
    bsdf.inputs[&#039;Transmission Weight&#039;].default_value = 1.0
    bsdf.inputs[&#039;Roughness&#039;].default_value = 0.05
    bsdf.inputs[&#039;IOR&#039;].default_value = 1.45
    
    body.data.materials.append(mat)
    
    # Add cork mesh: a cylinder
    bpy.ops.mesh.primitive_cylinder_add(radius=0.18, depth=0.3, location=(0, 0, 3.55))
    cork = bpy.context.active_object
    cork.name = &quot;Cork&quot;
    
    # Create cork material
    cork_mat = bpy.data.materials.new(name=&#039;CorkMaterial&#039;)
    cork_mat.use_nodes = True
    
    nodes = cork_mat.node_tree.nodes
    bsdf = nodes.get(&#039;Principled BSDF&#039;)
    
    # Set cork-like brown color
    bsdf.inputs[&#039;Base Color&#039;].default_value = (0.6, 0.4, 0.1, 1)  # brownish
    bsdf.inputs[&#039;Roughness&#039;].default_value = 0.7
    
    # Assign material to cork
    cork.data.materials.append(cork_mat)
    
    # Smooth shading
    cork.select_set(True)
    bpy.context.view_layer.objects.active = cork
    bpy.ops.object.shade_smooth()
    
    
    # Export as GLB
    bpy.ops.export_scene.gltf(filepath=&#039;glass_bottle.glb&#039;, export_format=&#039;GLB&#039;)


    Step 2: Run the Script in Blender via Command Line

    To execute this script without opening Blender’s GUI:

    blender --background --python glass_bottle.py

    This will generate a file called glass_bottle.glb in your working directory.

    Step 3: Display in Browser Using <model-viewer>

    You can now display the 3D bottle in any modern browser using the HTML snippet below:

    &lt;script type="module" src="https://unpkg.com/@google/model-viewer/dist/model-viewer.min.js"&gt;&lt;/script&gt;
    
    &lt;model-viewer 
      src="glass_bottle.glb"
      alt="A glass bottle"
      auto-rotate 
      camera-controls 
      ar 
      style="width: 600px; height: 600px;"&gt;
    &lt;/model-viewer&gt;

    📸 Screenshots & Screencast

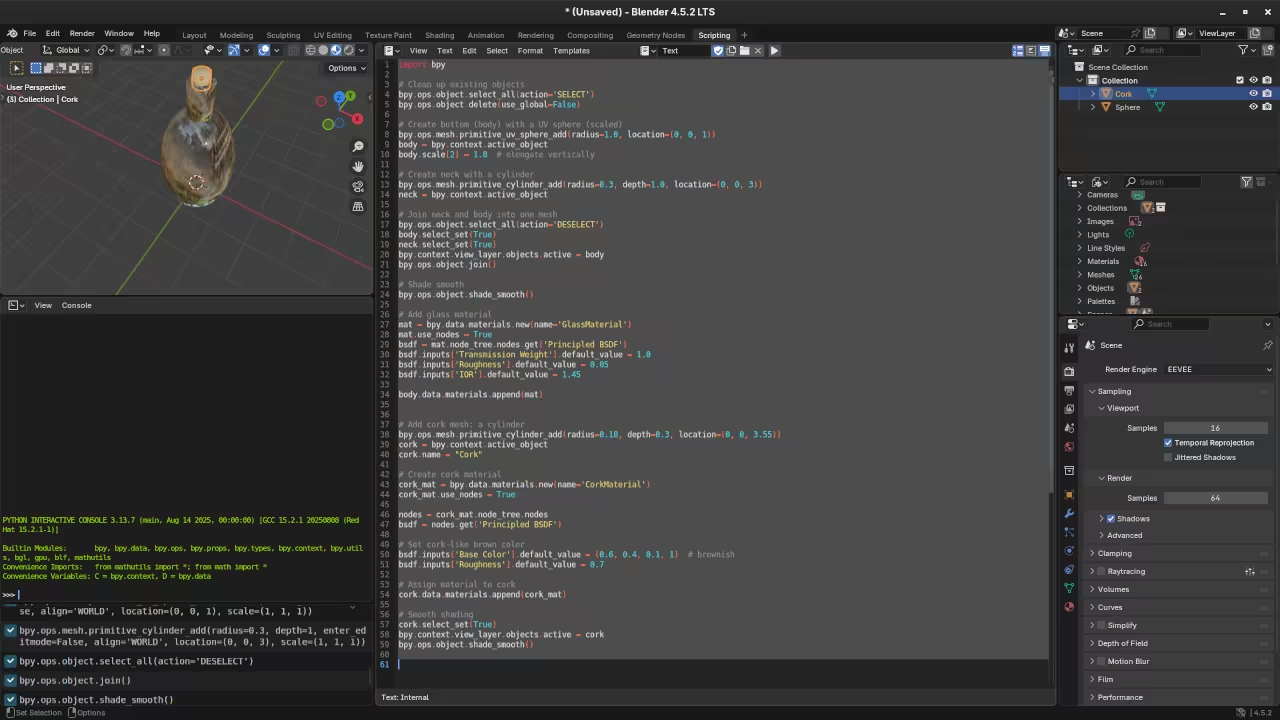
    Low poly glass bottle Python code
    Blender Scripting Workspace Displaying Low Poly Glass Bottle Python Code

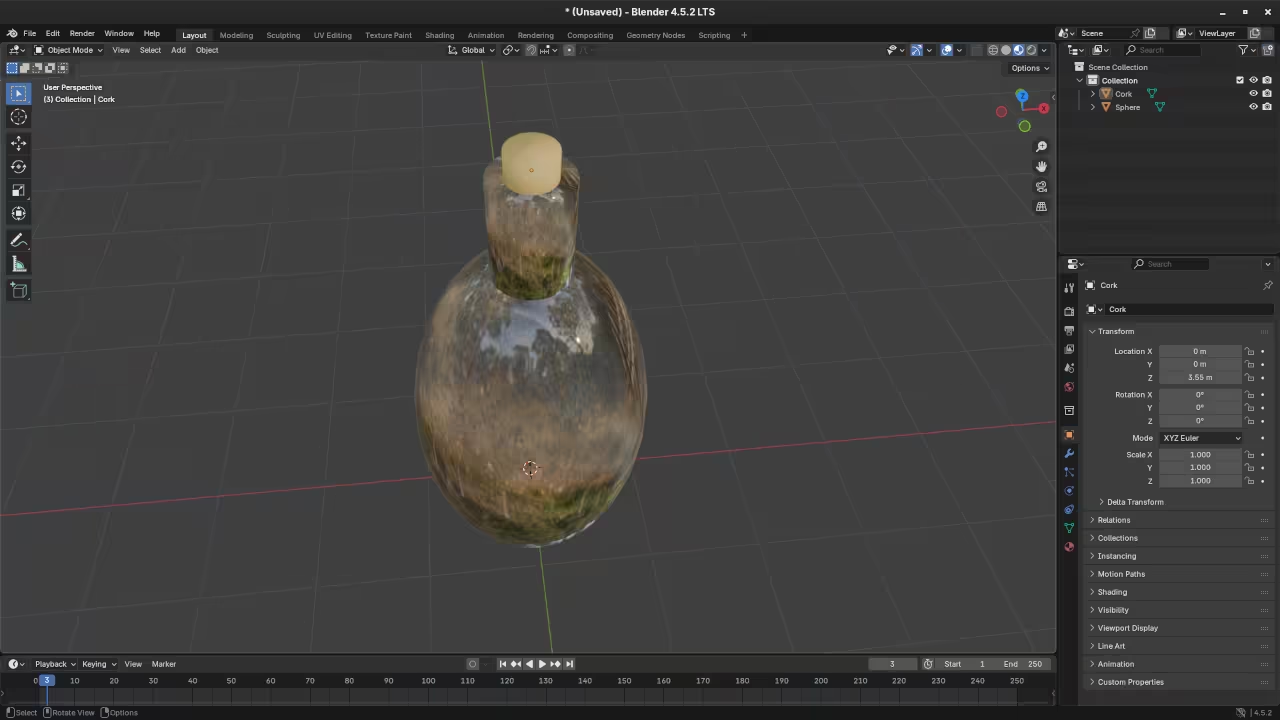
    Low poly glass bottle in Blender
    Blender Layout Workspace Displaying Low Poly Glass Bottle

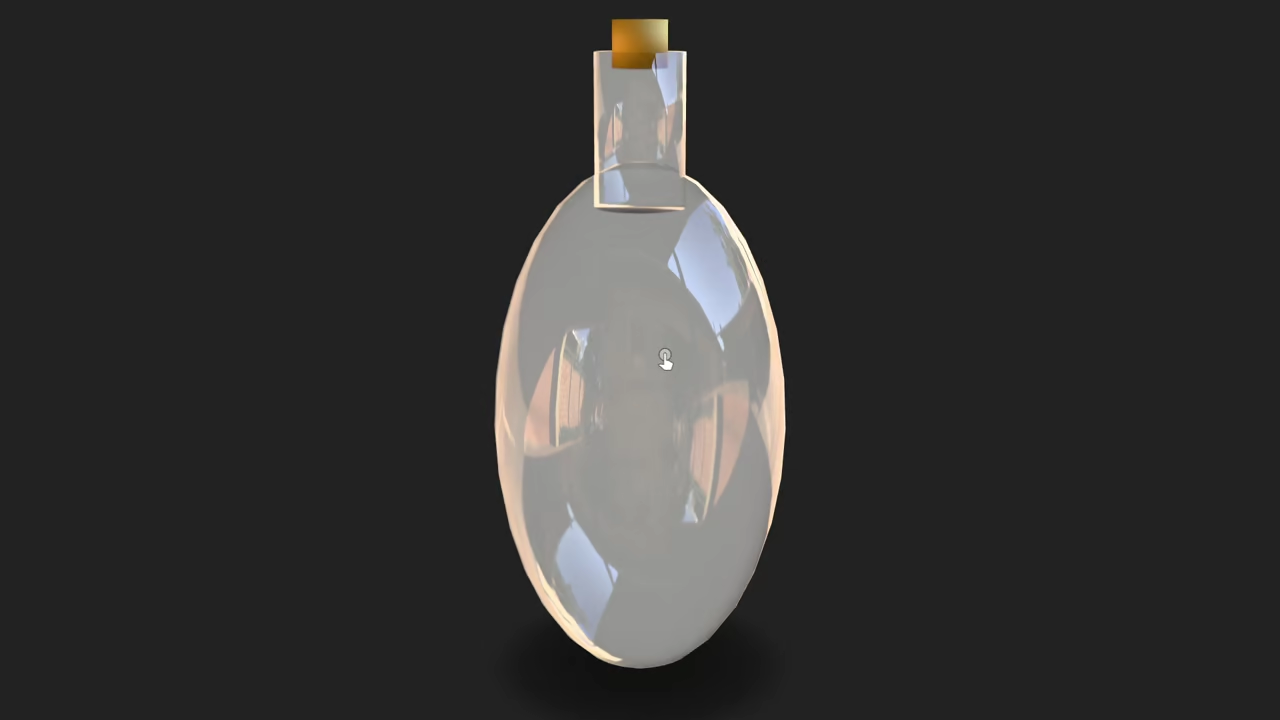
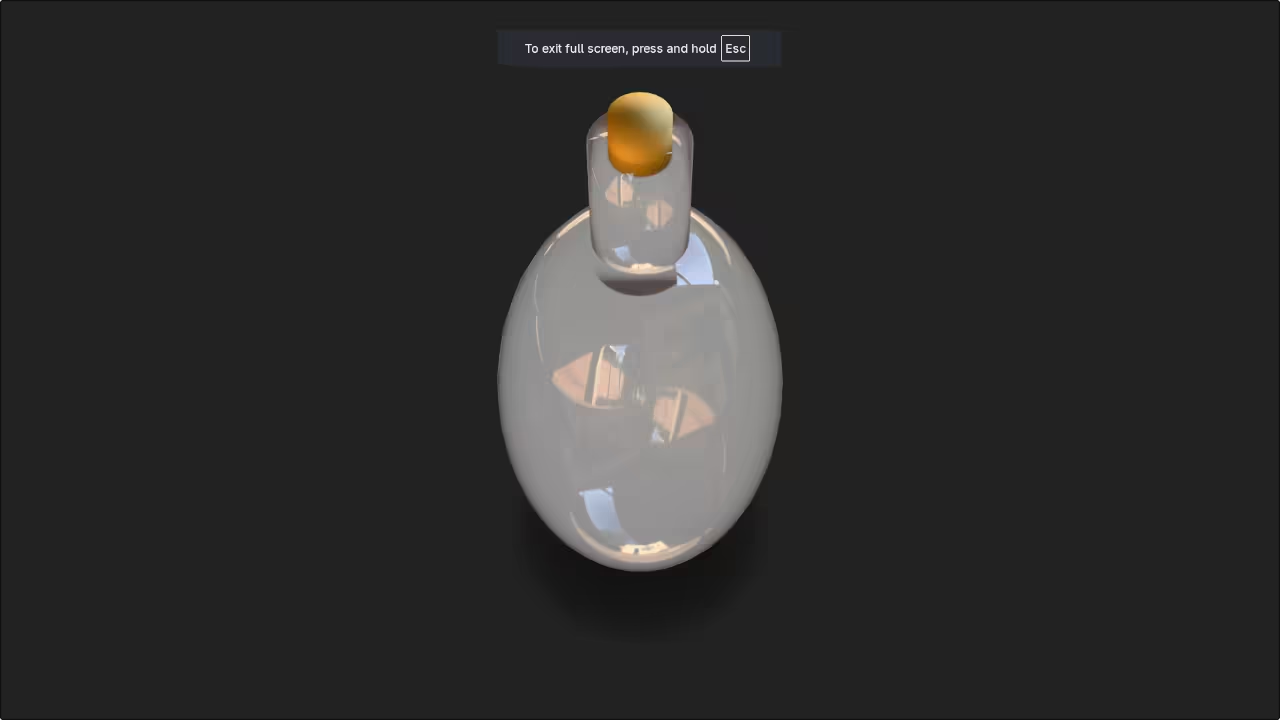
    Low poly glass bottle in Web browser
    Web Browser Displaying Rendered Low Poly Glass Bottle

    Screencast For Blender Python API Low Poly Glass Bottle

    Related Learning Resources

    If you would like to go deeper, check out my books and course:

    Need Help? Book a 1-on-1 Session

    I am available for personalized online Python tutorials, including Blender scripting:


    Contact Me Here

    Thanks for following along. Let me know in the comments how your 3D bottle turned out, or what you would like to build next.

  • Getting Started with Forgejo: Self-Hosted Git Server using Podman

    Getting Started with Forgejo: Self-Hosted Git Server using Podman

    Forgejo: A Beginner-Friendly, Open Source Git Server (with Podman Installation Guide)

    Introduction to Forgejo

    If you’re looking for a free and open-source alternative to GitHub or GitLab, Forgejo is a great choice. Built on Forgejo, Forgejo is a community-driven Git server that you can self-host for full control over your repositories and development workflows.

    Whether you’re working solo, teaching students, or managing a small team, Forgejo can be easily installed and run using lightweight container technologies like Podman or Podman Compose.

    In this post, I’ll walk you through a basic installation of Forgejo using Podman, and share how I can help you get started with Git, Forgejo setup, or repository migration.

    Why Forgejo?

    • Open-source (AGPL-3.0 licensed)
    • Lightweight and fast
    • Easy to install with container support
    • Great for personal, team, or educational use
    • Active community and regular updates

    How to Install Forgejo Using Podman

    Step 1: Create a Directory for Forgejo

    mkdir -p ~/forgejo/{data,config}
    cd ~/forgejo

    Step 2: Create a podman-compose.yml File

    version: "3"
    
    services:
      forgejo:
        image: codeberg.org/forgejo/forgejo:12.0.4-rootless
        container_name: forgejo
        ports:
          - "3000:3000"
          - "222:22"
        volumes:
          - ./data:/data
        restart: always

    Save this as podman-compose.yml.

    Step 3: Start Forgejo

    podman-compose up -d

    Once it’s up, visit http://localhost:3000 in your browser to complete the setup wizard.

    Screenshots and Screencast Tutorial

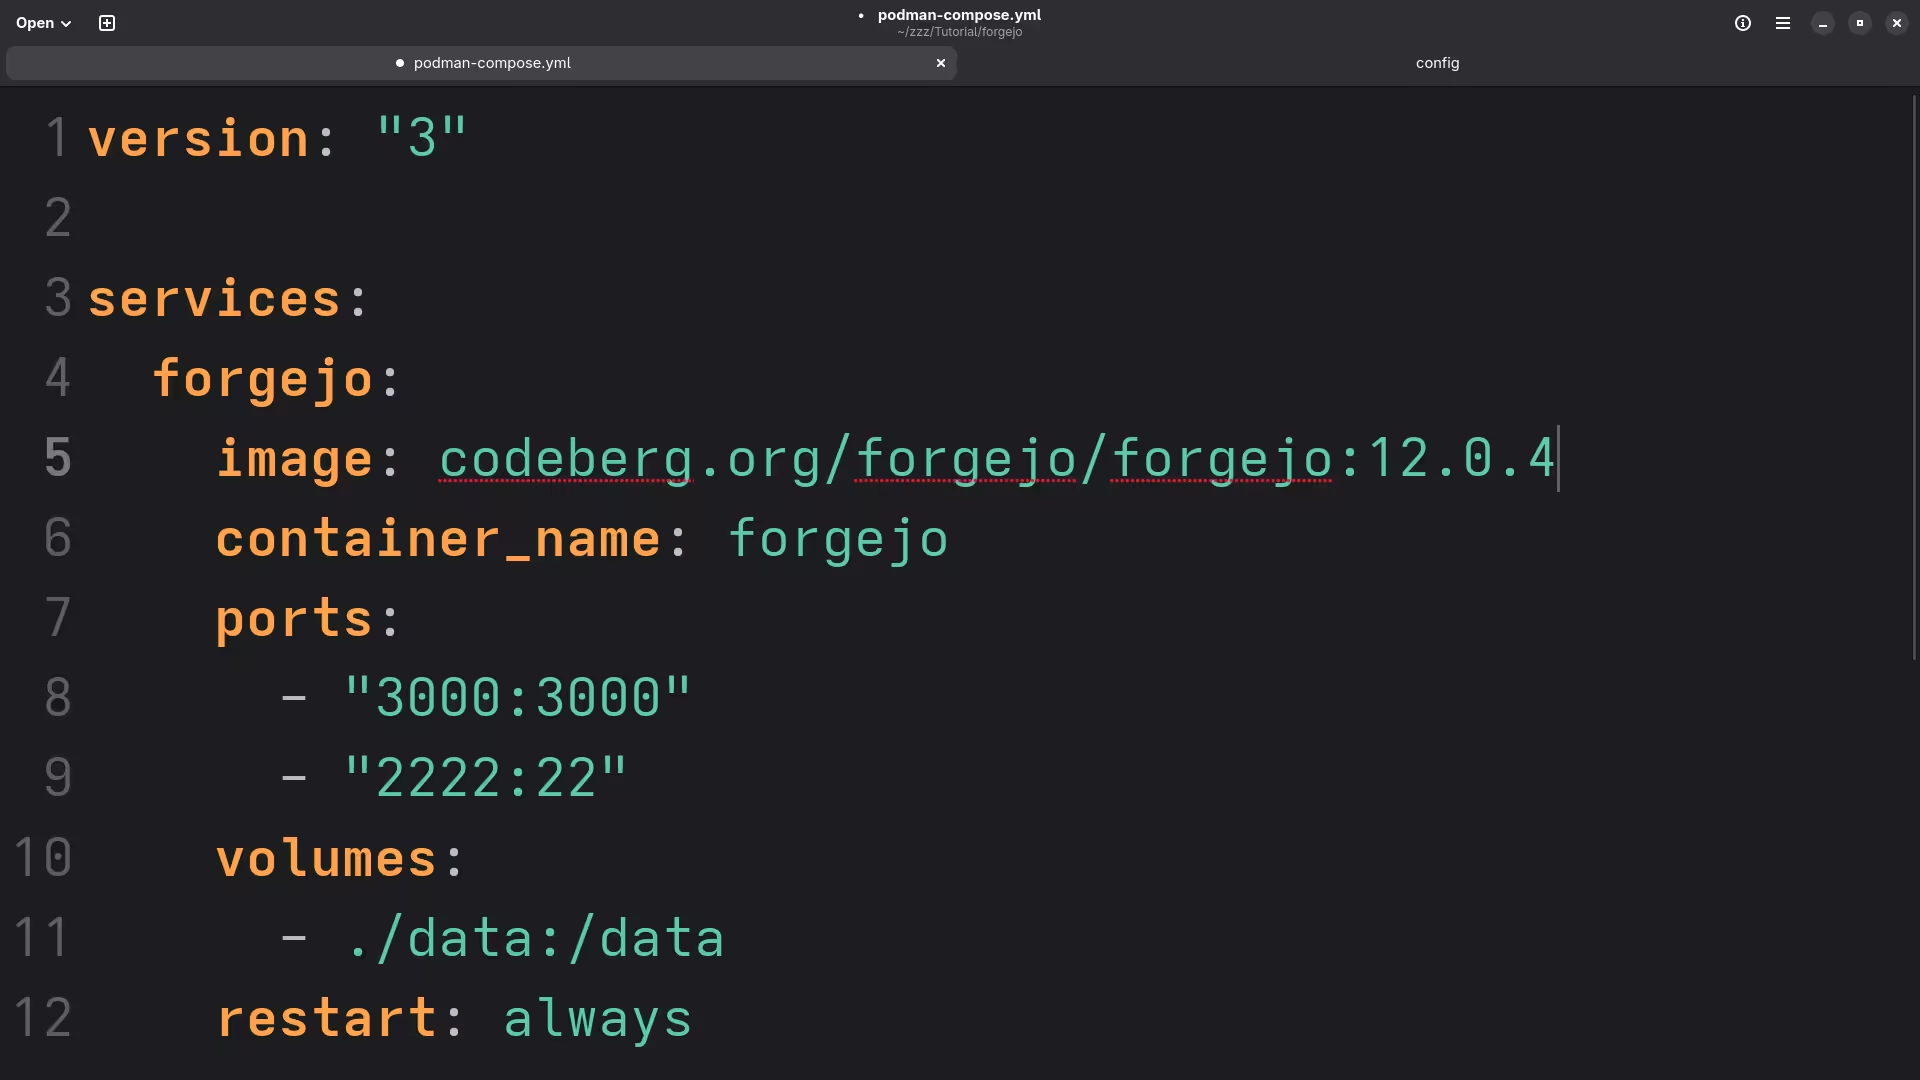
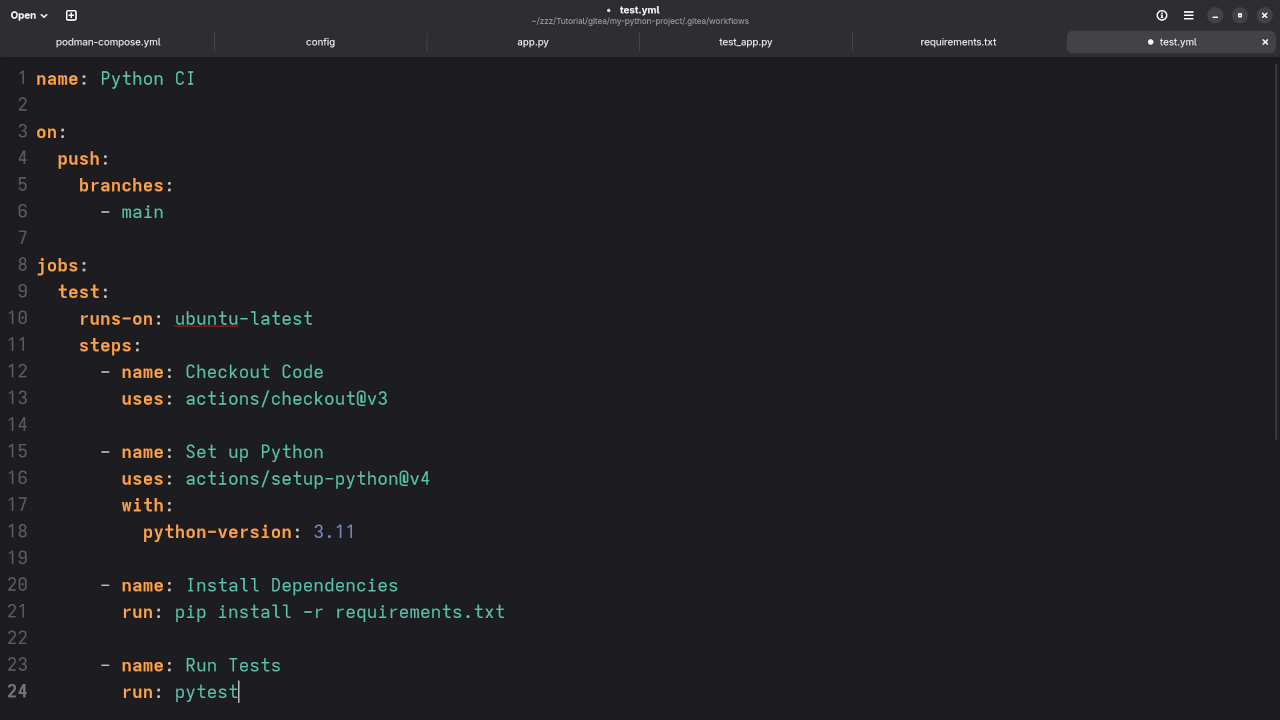
    Compose YAML
    Gnome Text Editor Displaying Podman Compose YAML File

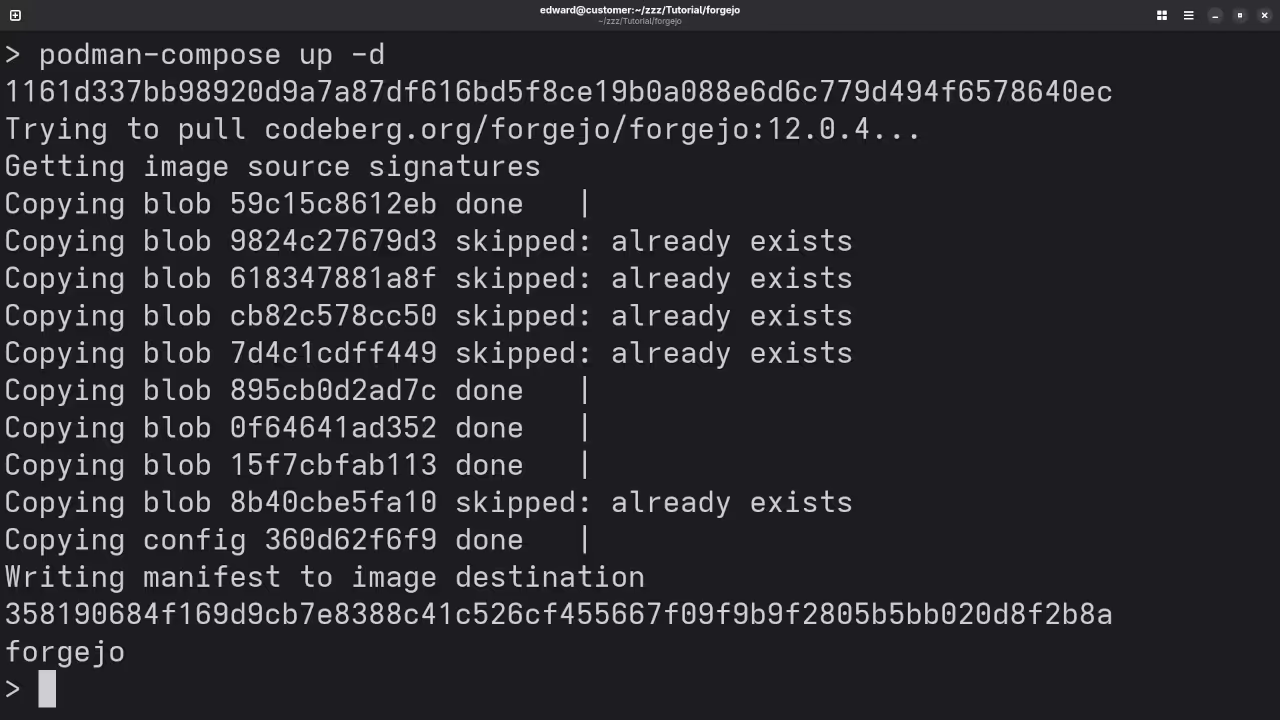
    Forgejo Container
    Command Line Podman Compose Building Forgejo Container

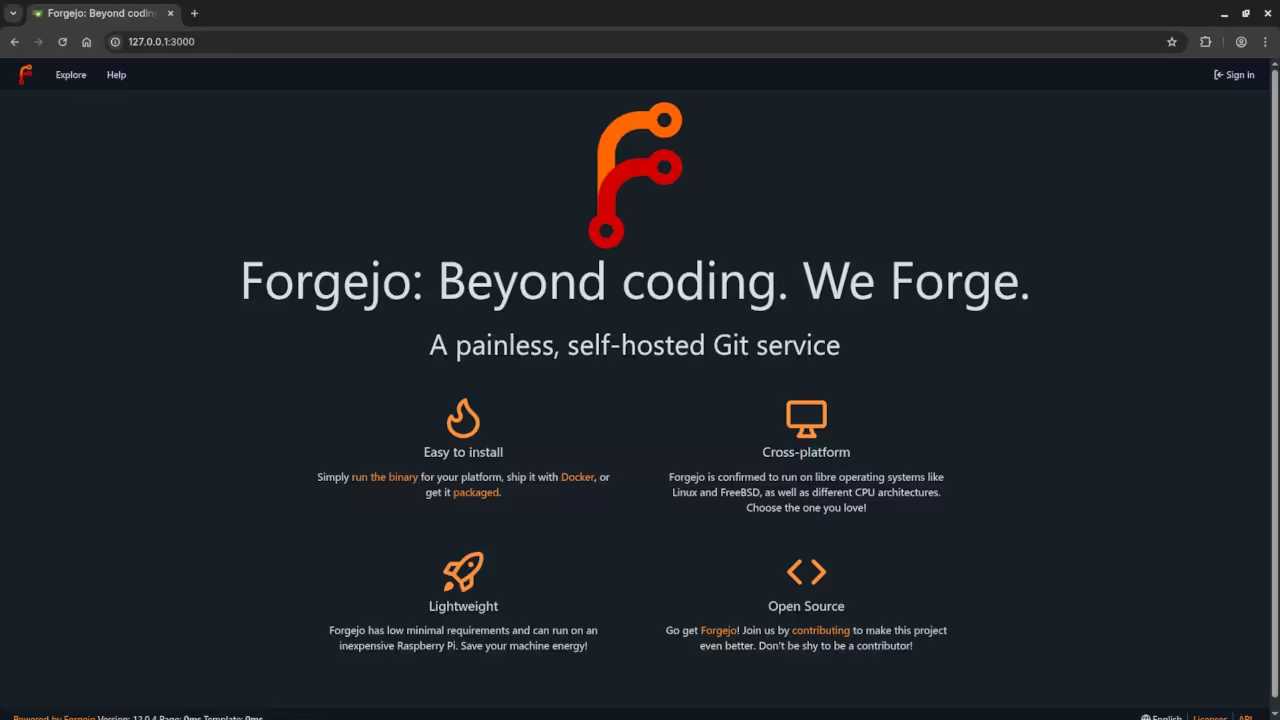
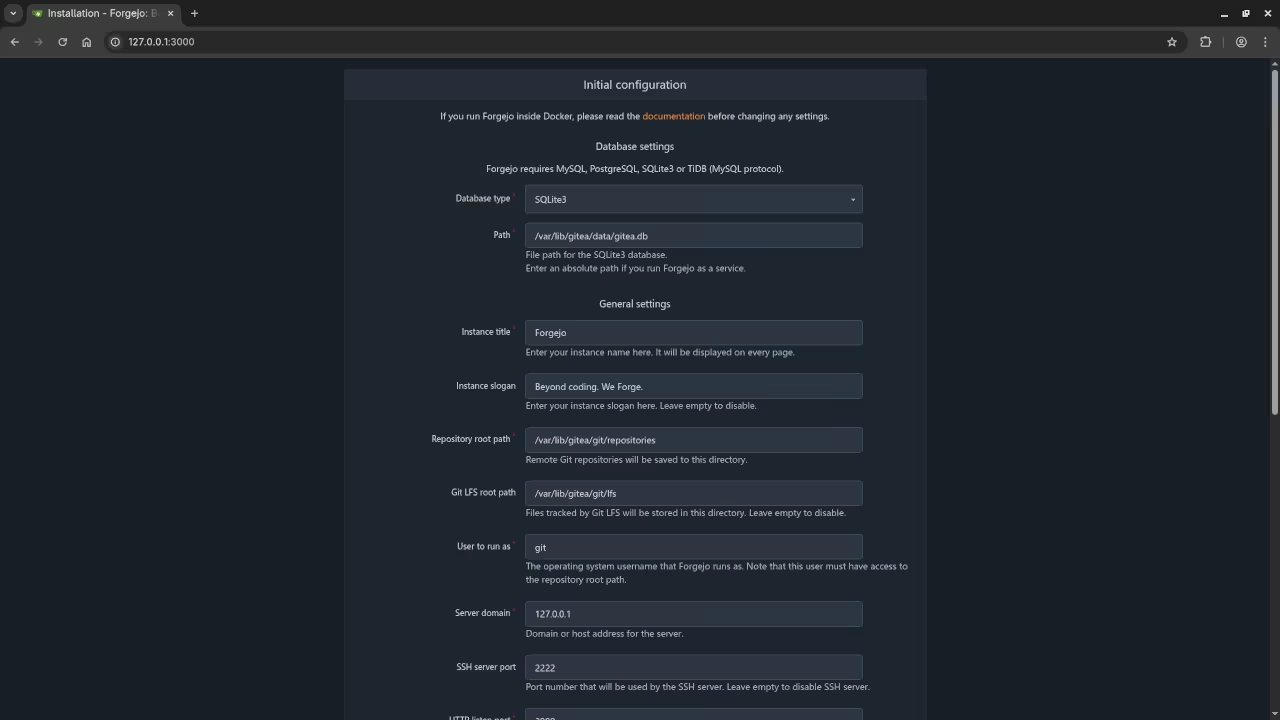
    Forgejo Initial Configuration
    Web Browser Displaying Initial Forgejo Configuration

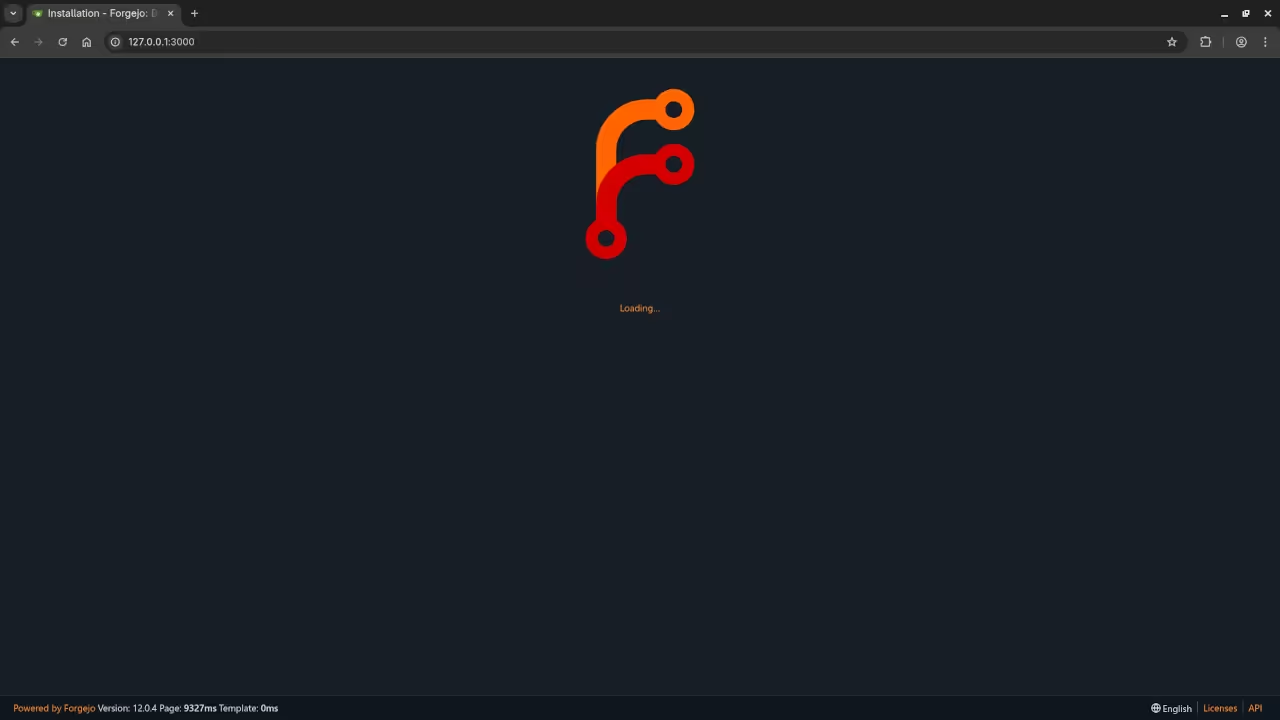
    Forgejo Installation
    Web Browser Displaying Installation Wait Screen

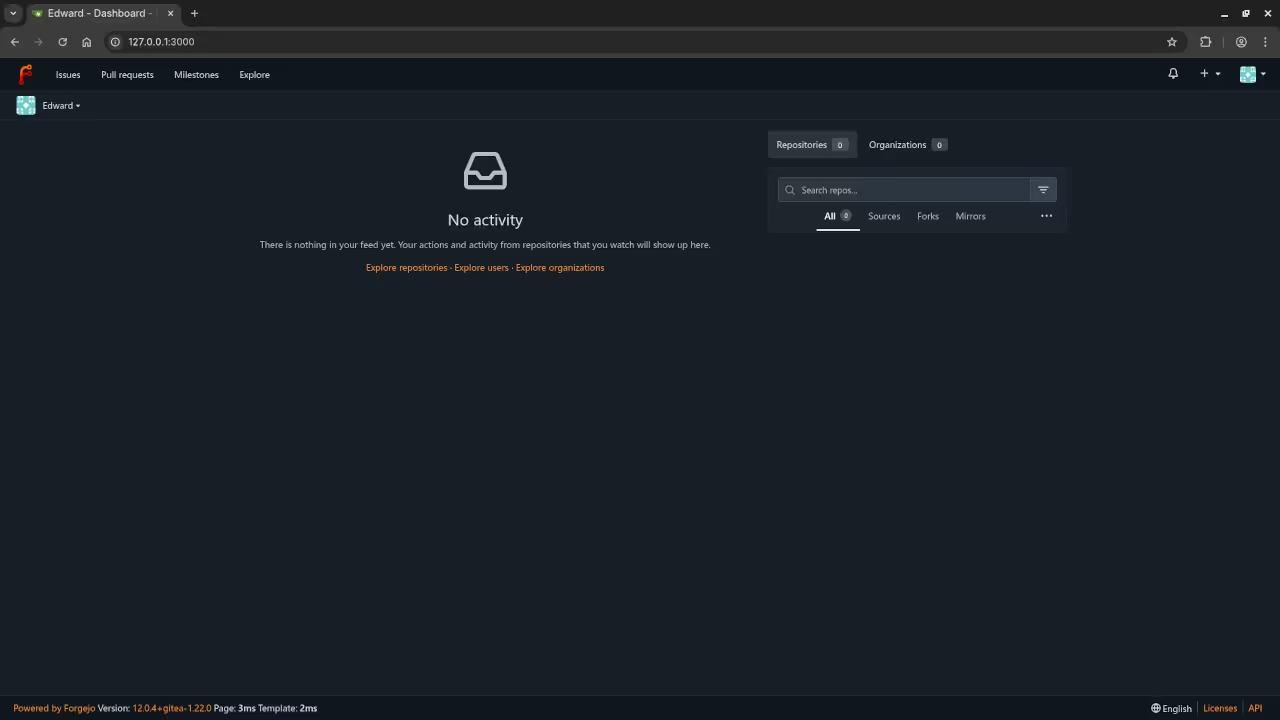
    Forgejo Dashboard
    Web Browser Displaying Dashboard Screen

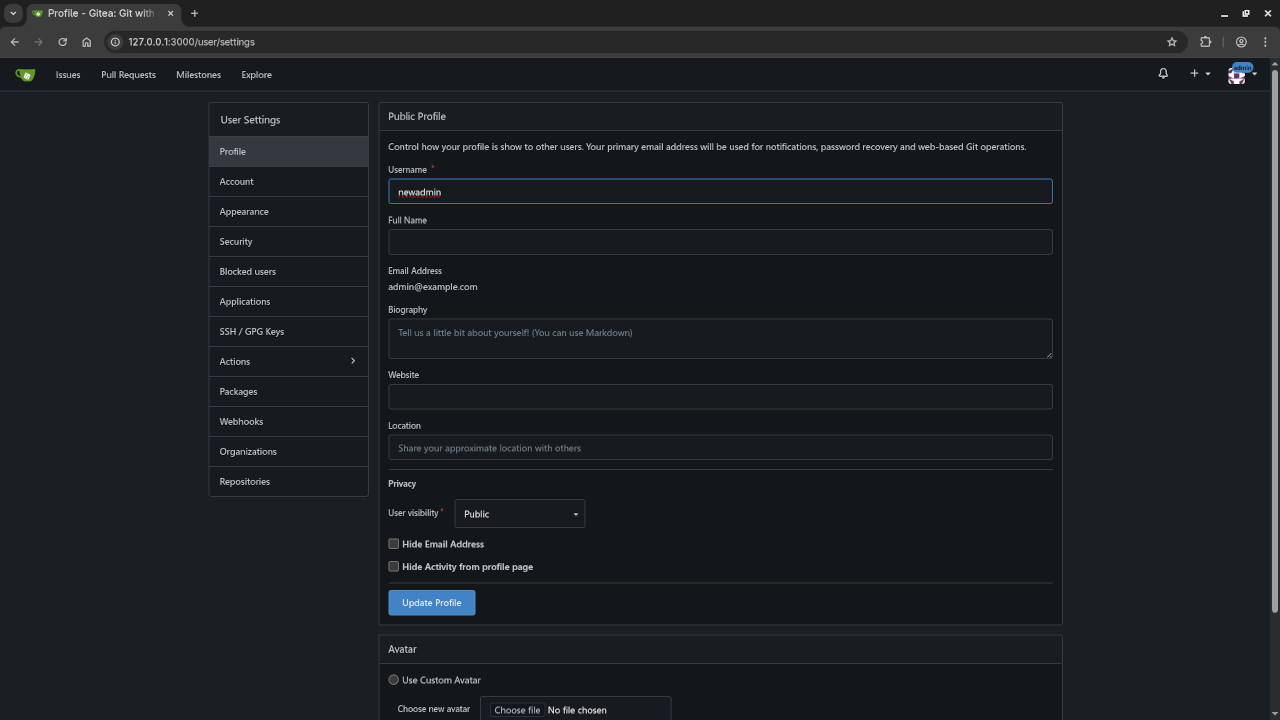
    Forgejo User Profile
    Web Browser Displaying User Settings Screen

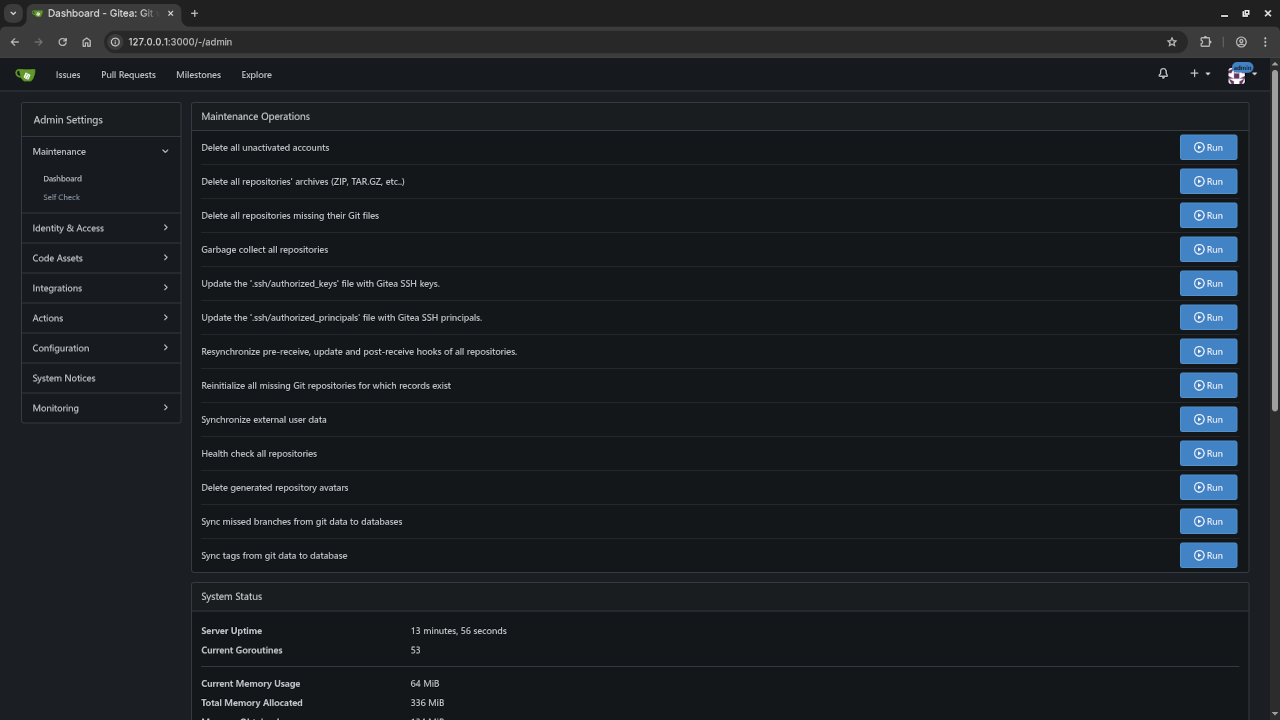
    Forgejo Admin
    Web Browser Displaying Admin Settings Screen

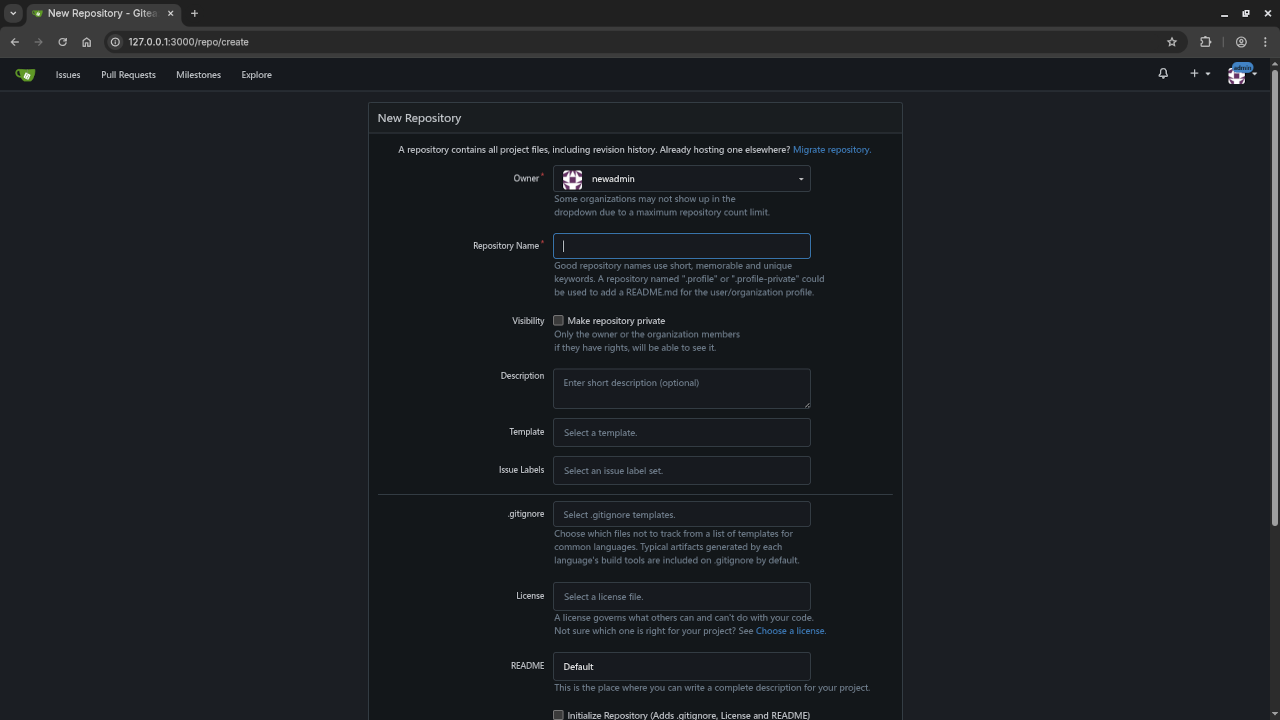
    Forgejo New Repo
    Web Browser Displaying New Repository Screen

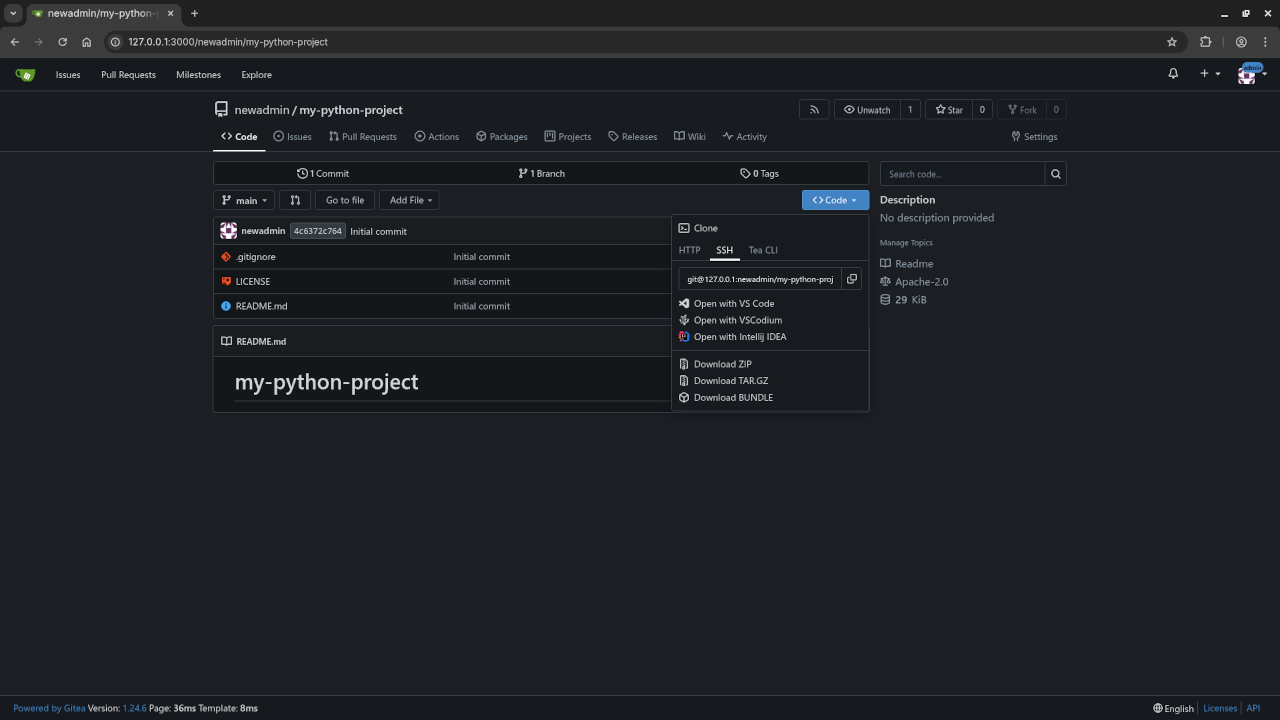
    Forgejo Repo Code
    Web Browser Displaying Repository Code Screen

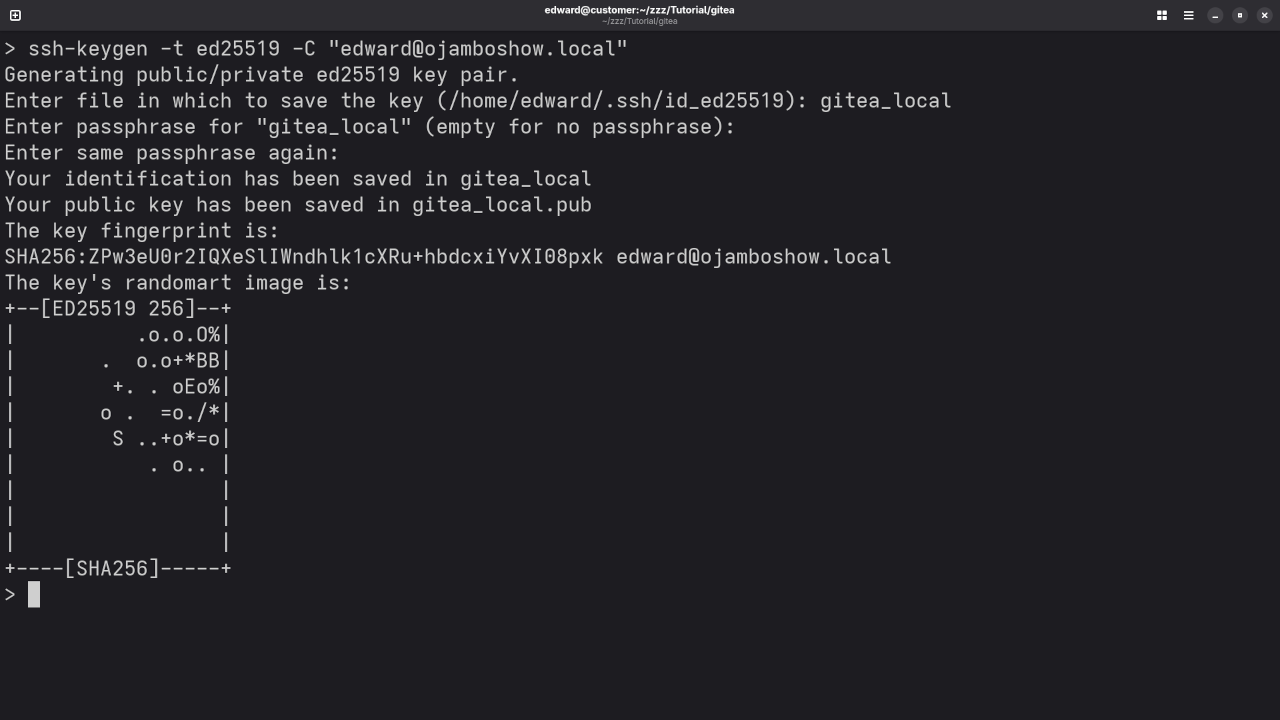
    SSH Key Generation
    Command Line Displaying SSH Key Generator

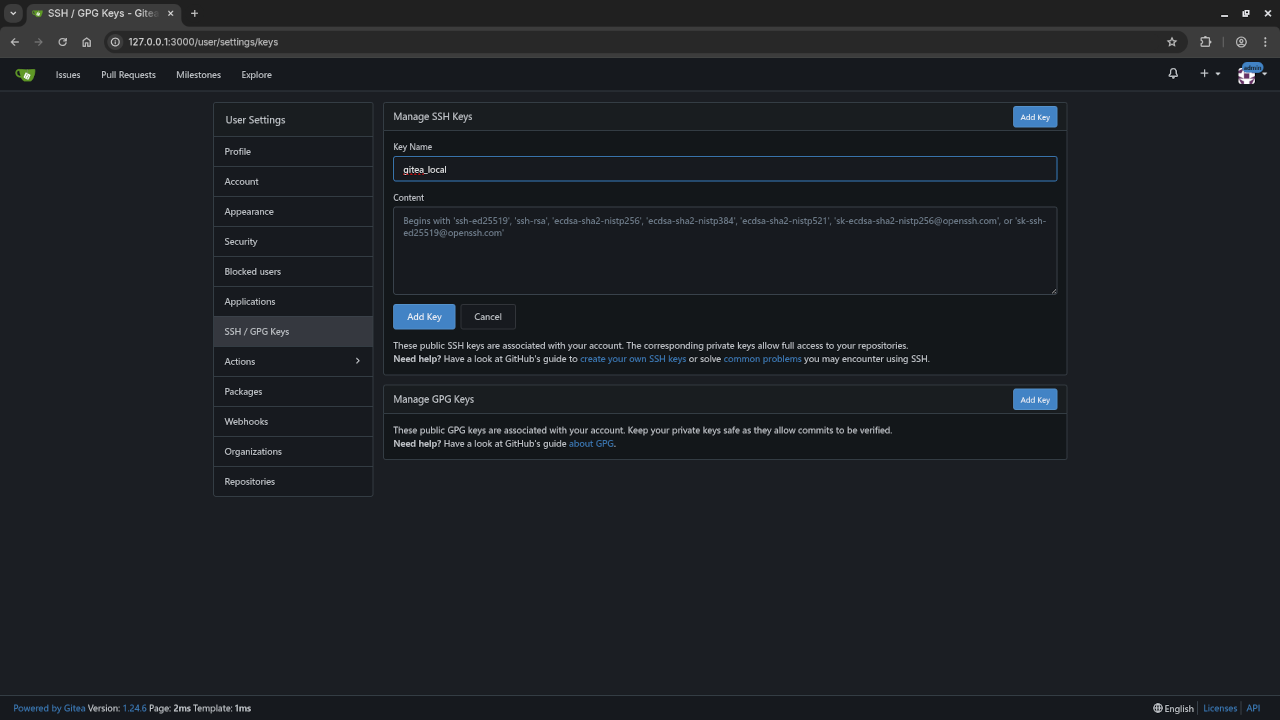
    Forgejo Add SSH Key
    Web Browser Displaying Add SSH Key Screen

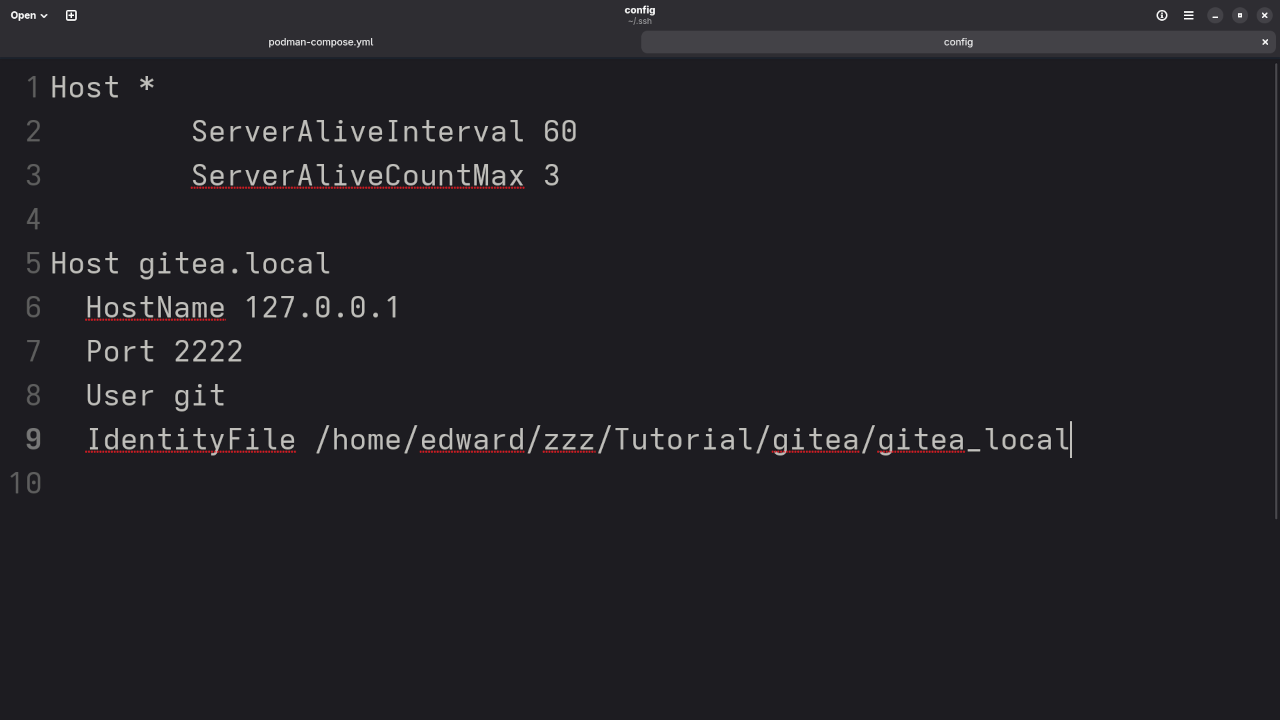
    SSH Configuration
    Gnome Text Editor Displaying SSH Configuration

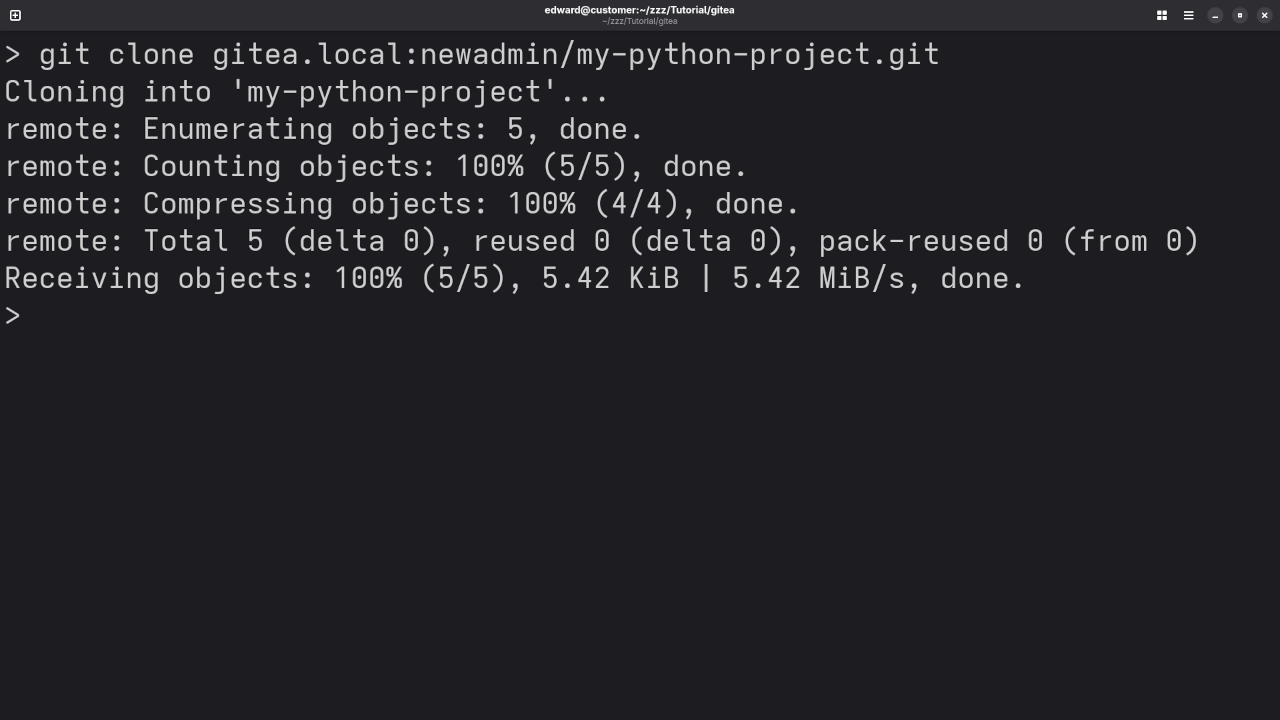
    Git Repo Clone
    Command Line Displaying Git Clone Result

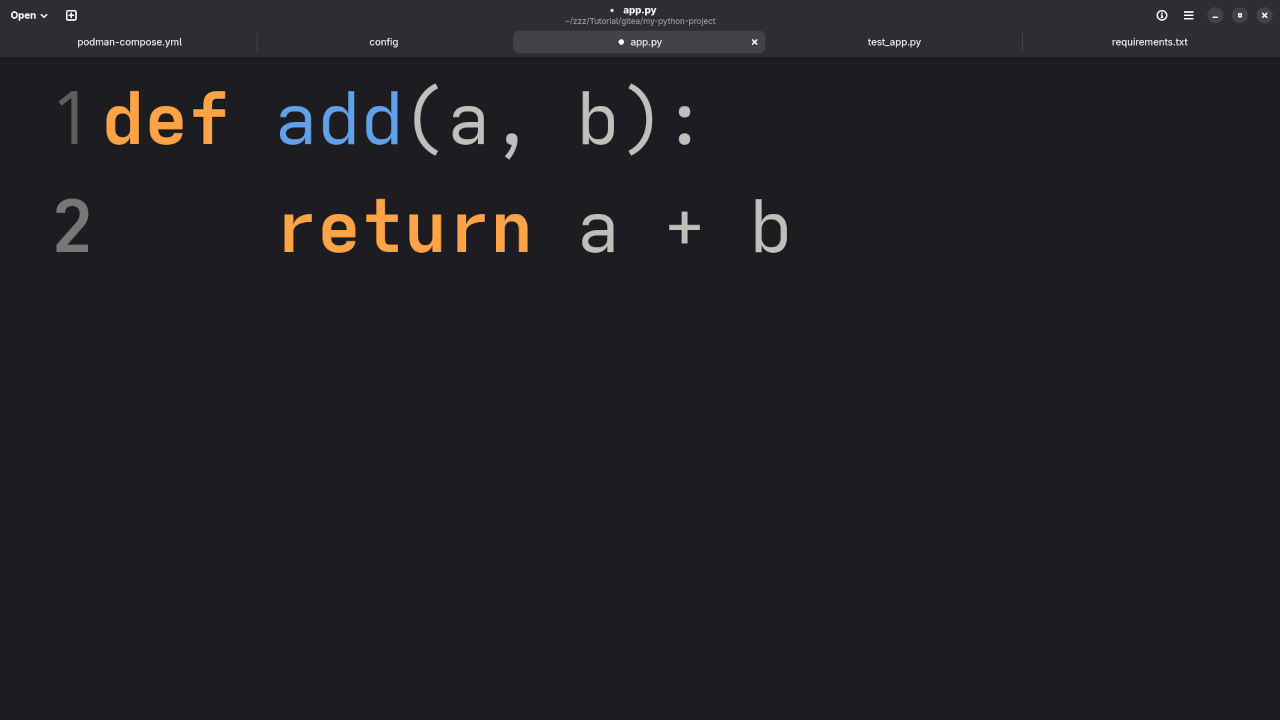
    App.py
    Gnome Text Editor Displaying App.py File

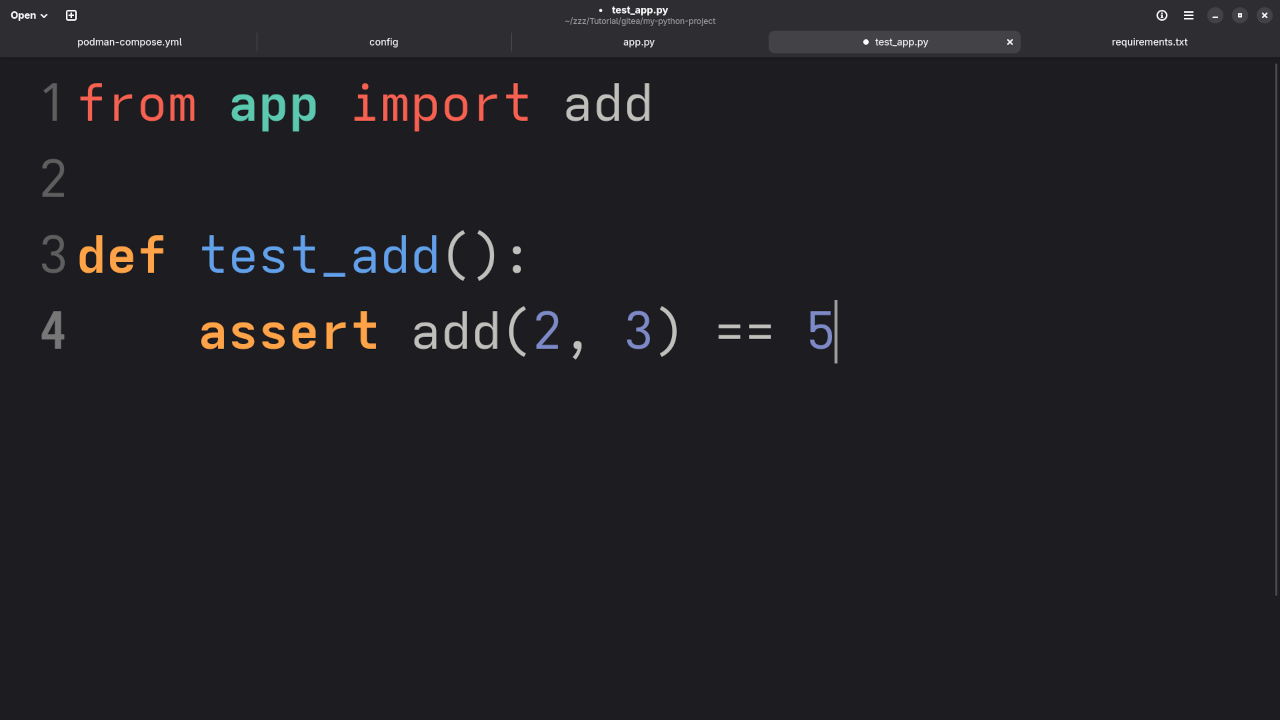
    Test_app.py
    Gnome Text Editor Displaying Test_app.py File

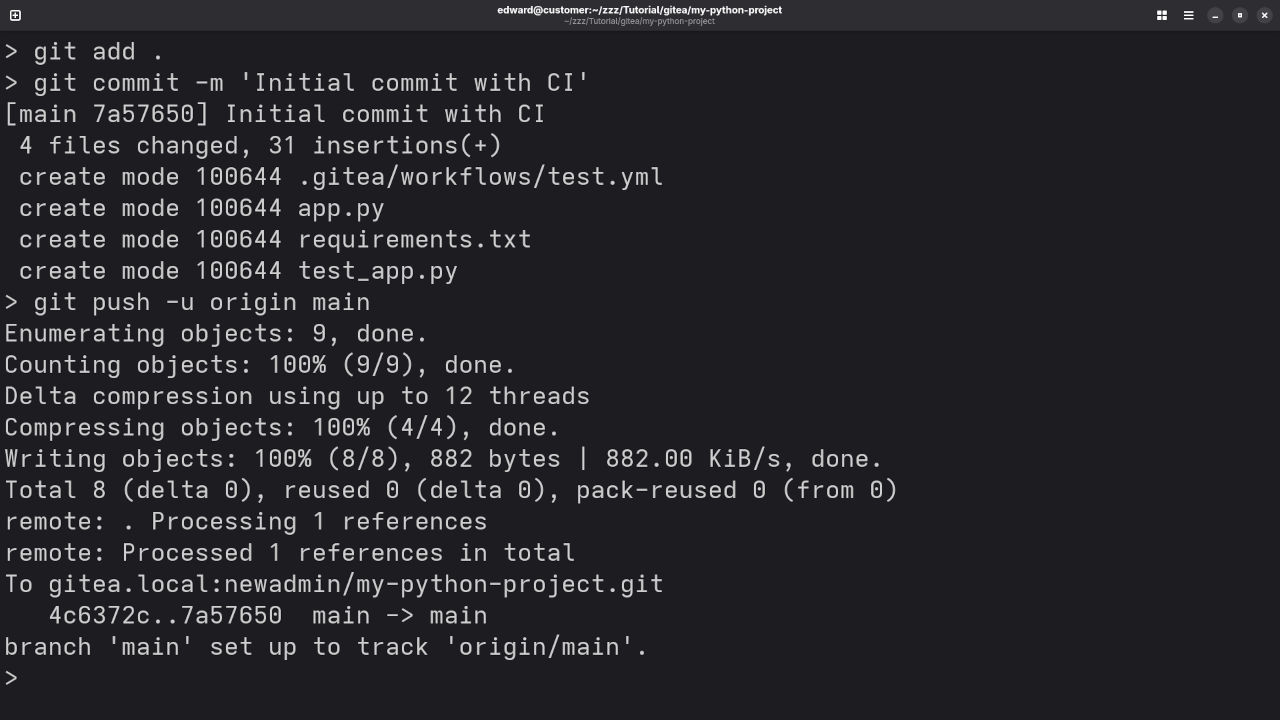
    Git Push
    Command Line Displaying Git Push Result

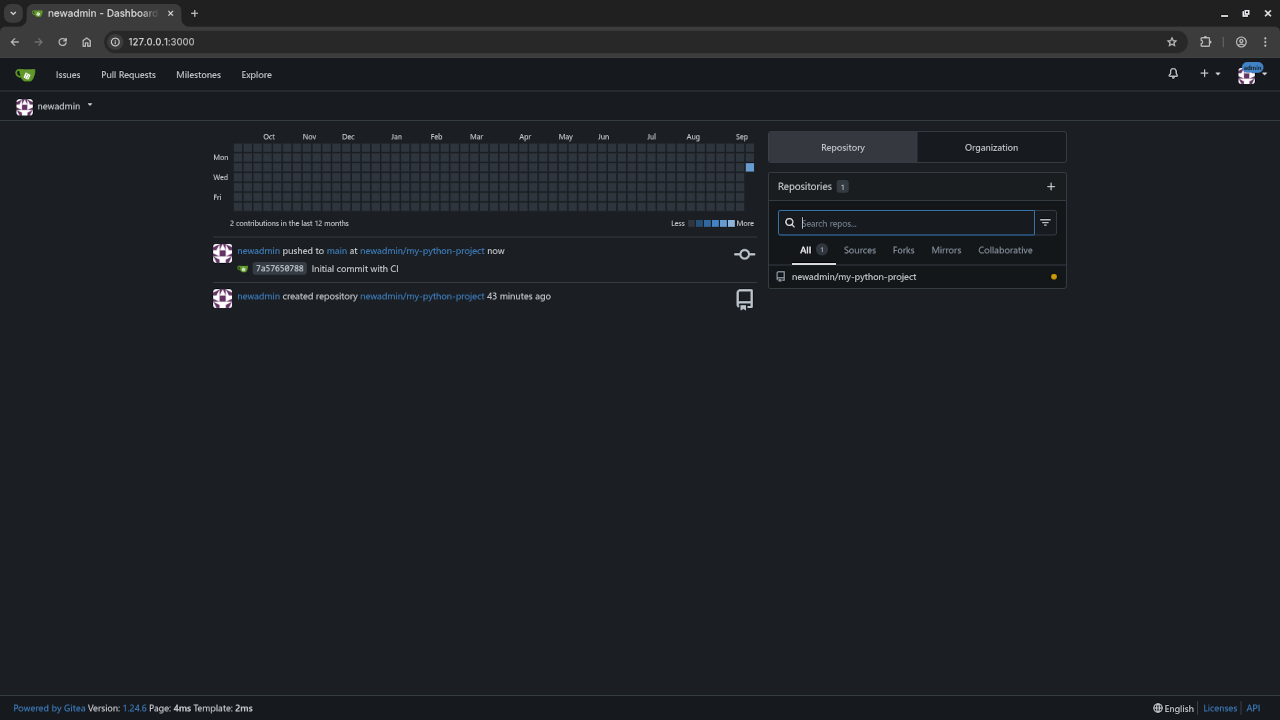
    Forgejo Repo Contributions
    Web Browser Displaying Repository Contributions

    Forgejo Repo Code Commits
    Web Browser Displaying Repository Code Commits

    Screencast Of Forgejo Setup

    Need Help with Git, Forgejo, or Programming?

    I am Edward Ojambo, and I offer the following:

    Conclusion

    Forgejo is a fantastic, free, and open-source Git hosting solution that gives you full control over your codebase. With Podman, getting started is quick and easy – and if you ever need help, I’m just a click away.

  • Notepad Next 0.12 Advanced Editor Review

    Notepad Next 0.12 Advanced Editor Review

    Notepad Next: A Modern Open Source Text Editor for Fedora and Beyond

    Are you looking for a lightweight, modern, and open-source alternative to Notepad++ on Linux and other platforms? Notepad Next might be exactly what you need.

    Notepad Next is an open-source text editor designed to be a cross-platform replacement for Notepad++. It supports syntax highlighting, tabbed editing, search/replace, themes, and more – all without any ads, telemetry, or unnecessary bloat.

    Open Source with a Permissive License

    Notepad Next is licensed under the GNU General Public License v3.0 (GPL-3.0). This means:

    • You can use, study, and modify it freely.
    • Contributions from the community are welcome.
    • Your data and privacy are respected.

    You can explore the source code and contribute at:
    Notepad Next GitHub Repository

    Installation Instructions

    Notepad Next is available on multiple platforms, including Windows, Linux, and macOS. Here is how to install it:

    Fedora Linux (Recommended)

    The easiest way to install on Fedora is via Flatpak or from a pre-built RPM if available.

    Method 1: Flatpak

    flatpak install flathub com.github.dail8859.NotepadNext

    To run it:

    flatpak run com.github.dail8859.NotepadNext

    Method 2: Build from Source (Advanced Users)

    git clone https://github.com/dail8859/NotepadNext.git
    cd NotepadNext
    mkdir build && cd build
    cmake ..
    make -j$(nproc)
    ./NotepadNext

    Note: You may need dependencies like Qt, CMake, and ninja installed beforehand.

    Windows

    Download the latest .exe release from the GitHub releases page.

    macOS

    Currently, macOS builds are community-driven and may require building from source.

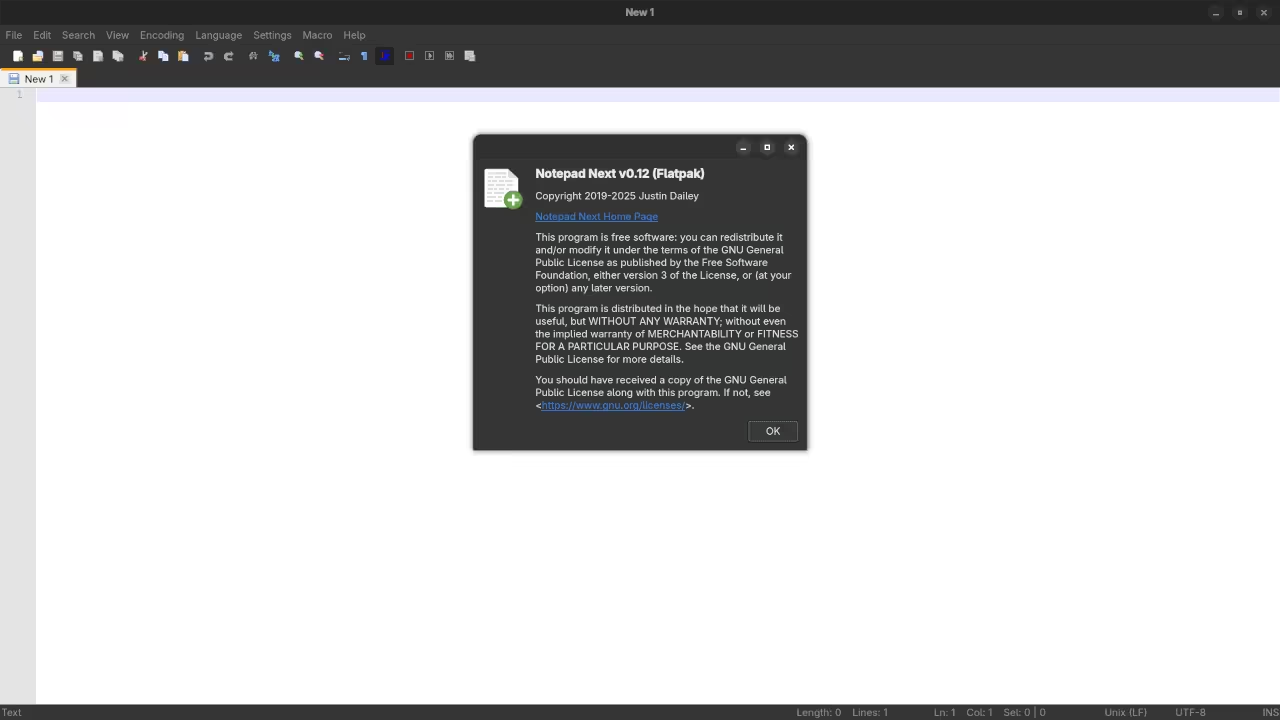
    Screenshots and Screencast

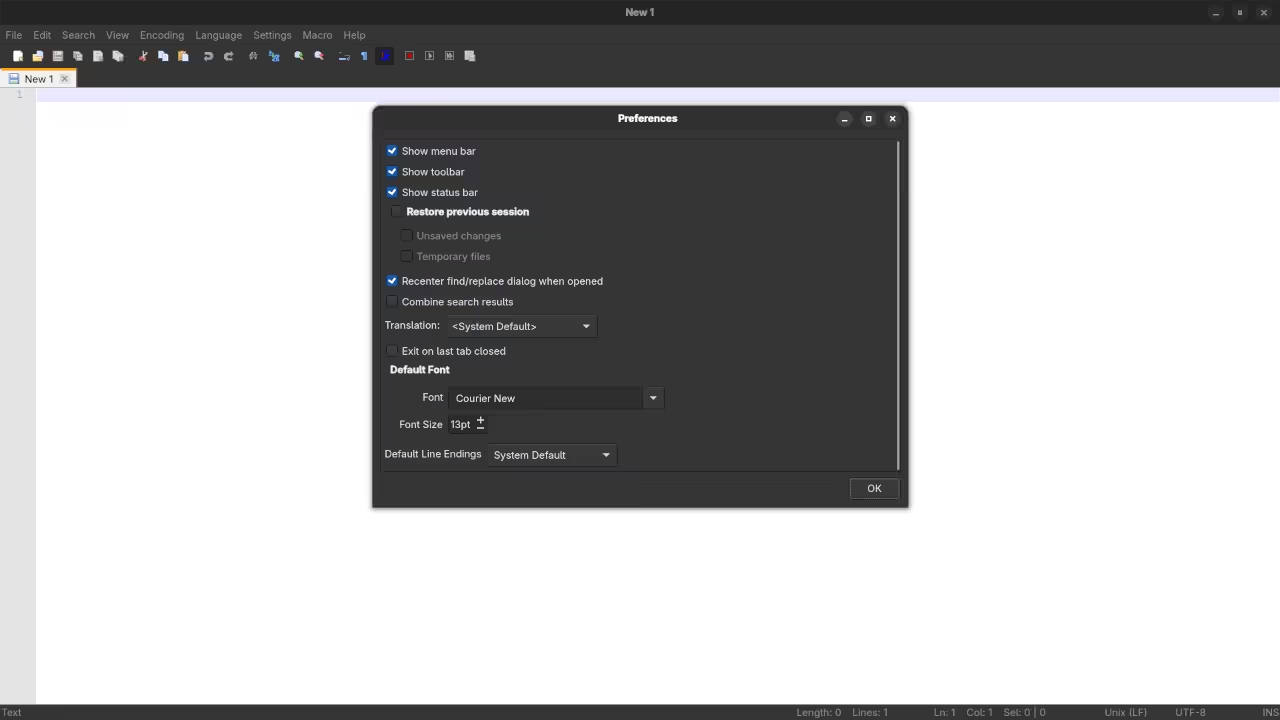
    Notepad Next Preferences
    Notepad Next Displaying Preferences Dialog

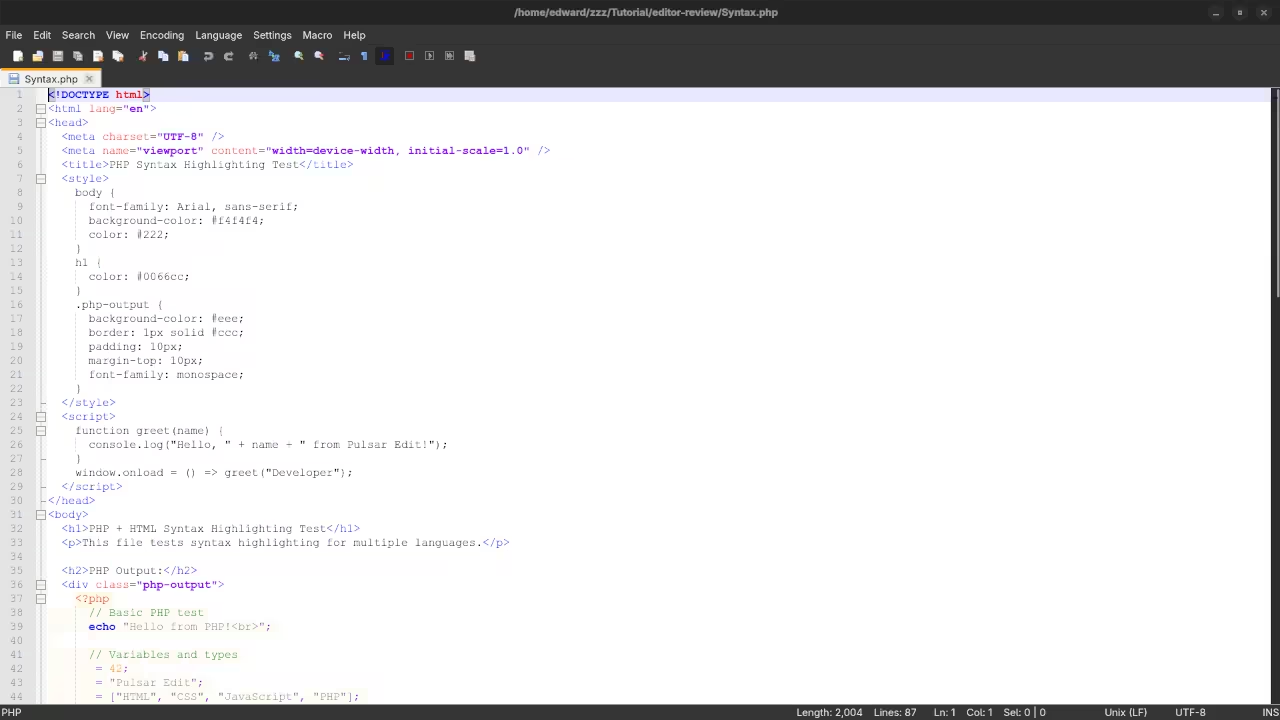
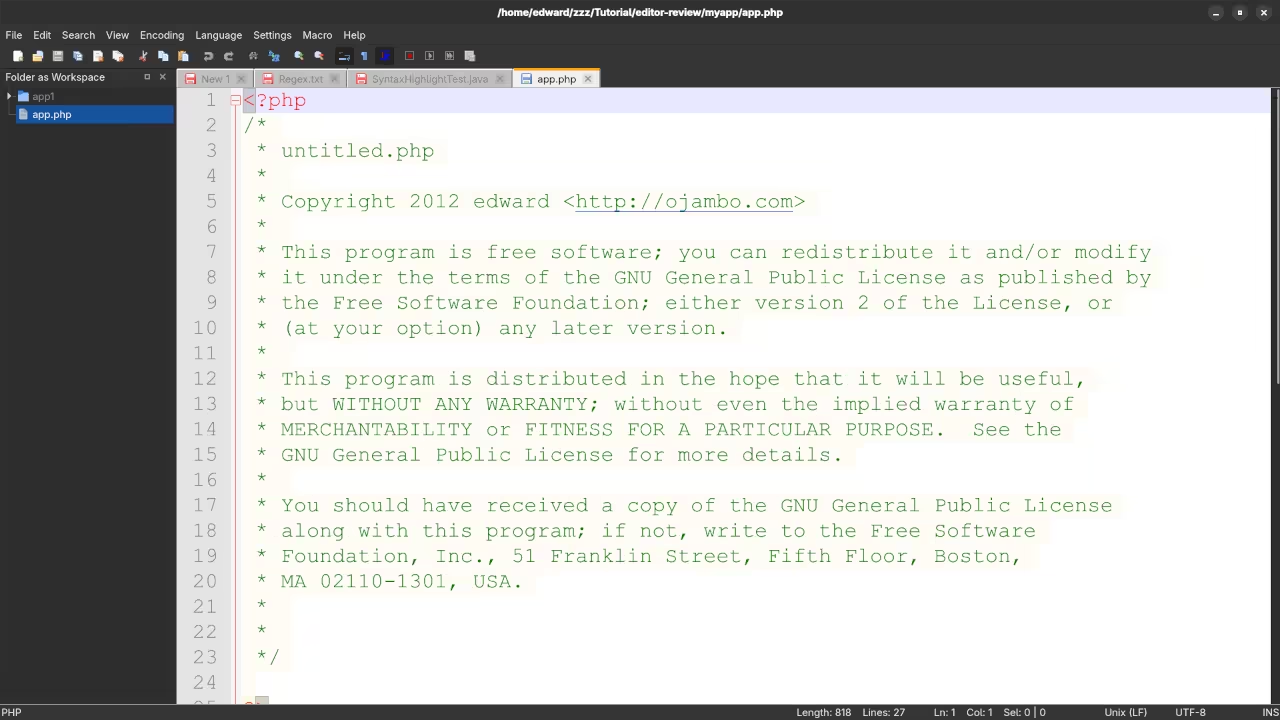
    Notepad Next PHP Syntax Highlighting
    Notepad Next Displaying PHP Syntax Highlighting

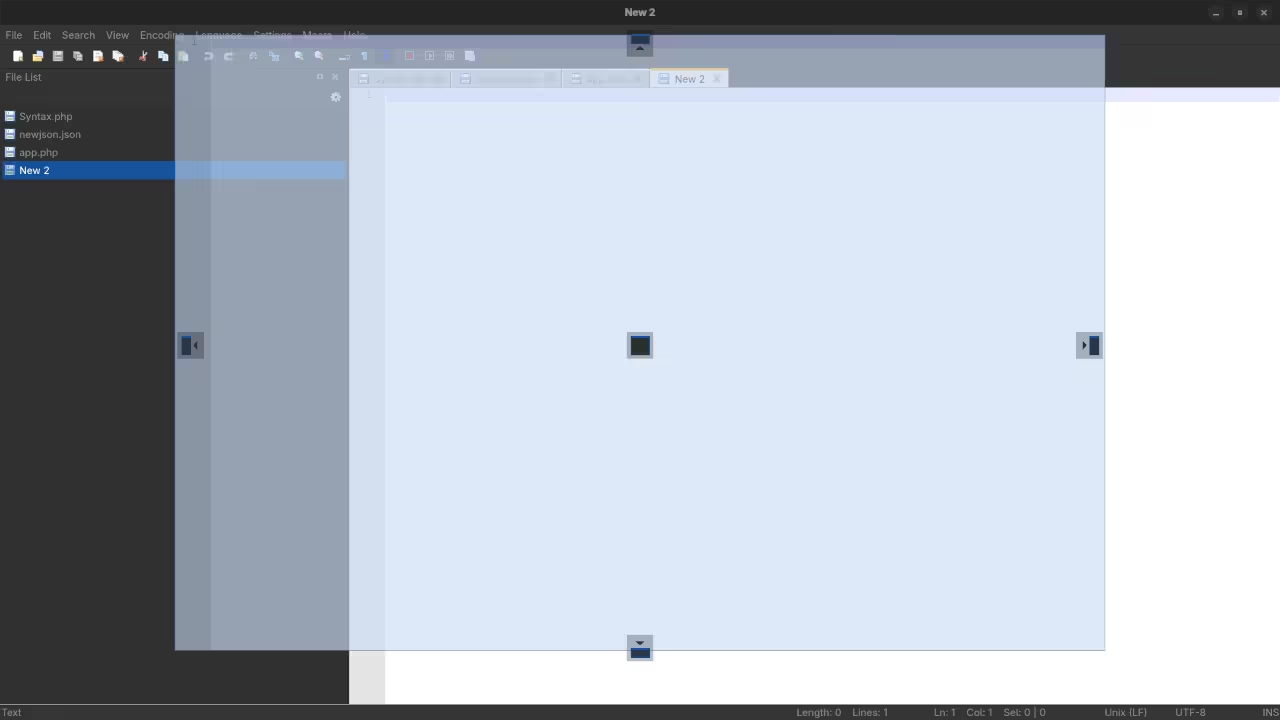
    Notepad Next Wayland Split View
    Notepad Next Displaying Wayland Compositor Split View Attempt

    Notepad Next Folder View
    Notepad Next Displaying Folder As Workspace

    👉 Screencast showing a beginner session in Notepad Next—editing, saving files, and navigating buffers.

    Notepad Next Review And Feature Test

    Requirements For Programming Text Editor

    Glossary:

    Code Editor

    Designed for writing and editing source code.

    IDE

    Integrated Development Environment combines various tools need for software development.

    Plugin

    Software component that adds specific functionality.

    Theme

    Preset package containing graphical appearance to customize look and feel.

    Open source

    Freely available for possible modification and redistribution.

    SCM

    Source code management use to manage and track modifications to a source code repository.

    LMB

    Left Mouse Button (LMB) or left click

    Test Tools

    Test System
    Name Description
    CPU Ryzen 5 5600GT @ 3.60GHz.
    Memory 32GB DDR4.
    Operating System Fedora Linux Workstation 42.
    Desktop Environment Gnome 48.
    Name Description

    Test Suite
    Name Description
    Large File 1GB human-readable text.
    Regex File Text with word “Notepad Next” repeated.
    Syntax File PHP file containing HTML, CSS & JavaScript.
    Media File Smiley face or Tux Linux JPEG file.
    Java Version OpenJDK 21.0.8.
    PHP Version PHP 8.4.11.
    Python Version Python 3.13.7.
    Notepad Next Version 0.12.
    Name Description

    Test Scoring

    1. Each feature has two parts.
    2. Score of zero indicates a missing feature.
    3. A part of a feature is work a score of 0.5.

    Three bias elimination steps were utilized. The editor was used for at least three years on different platforms. Attempts were made to get stable plug-ins for missing features. The same editor was compared between the one in the repository, the developers website, and the compiled version if applicable.

    Selecting Editor Version

    For this review, Notepad Next was installed using the instructions from the developers website and it did not require additional plugins.

    Features

    1. The theme can be native for the editor in terms of the background. Notepad Next dark and light themes can not be created or downloaded and changed. The score for the theme was 0.5.
    2. Dragging and dropping a text file into the editor opens a new tab or buffer. It is not possible to specify the tab location during the drag and drop operation. The score for drag and drop into editor was 0.5.
    3. Opening a very large text file did not crash Notepad Next. Notepad Next was not able to edit the large file. The score for opening a large file was 0.5.
    4. Multiple documents can opened in multiple tabs or buffers. Tear-off tabs do not work but Notepad Next has a feature to open in new window as a new instance which is handy for multiple monitors. The score for multiple documents was 0.5.
    5. Multiple editors can be opened as new tabs without drag options. Each tab window view can not be split either vertically or horizontally as a multiple editor view in Wayland display server protocol. The score for multiple editor view was 0.5.
    6. Creating non-project files is possible. Non-project files can be opened on the command line. The score for creating non-project files was a perfect 1.0.
    7. Soft word wrap can be enabled on all documents as line wrapping. Automatic soft wrap for documents is available from the Notepad Next View menu. The score for word wrap was a perfect 1.0.
    8. Spell check does not work as words are typed. Spelling errors are not shown in opened documents. The score for spell check was 0.0.
    9. Word count is not available for Notepad Next. Word count for the current buffer or file is not enabled. Selection word count is not available as part of word count. The score for word count was 0.0.
    10. Go to line can jump to a specified line using CTRL-G and entering the line number, column number. It is possible to jump to either the first or last line. The score for go to line is a perfect 1.0.
    11. Indentation can default to user-defined tab stops. Children are automatically indented. The score for indentation was a perfect 1.0.
    12. Fonts can be dynamically scaled with keyboard shortcuts CTRL-SHIFT-+/-or the mouse CTRL-MMB. The system font can be bypassed and a new editor font and size can be set. The score for fonts was a perfect 1.0.
    13. Find and replace using regular expressions can be utilized for all open documents in the current session. Find and replace will work for the current document or a selection in the current document. The score for find and replacing using regular expressions was a perfect 1.0.
    14. Multiple language syntax highlighting in one file is enabled. Each language has code-sensitive syntax colours. The score for multiple language syntax highlighting was a perfect 1.0.
    15. Code folding does works for markup languages such as HTML. Code folding also works for programming languages such as Java. The score for code folding was 1.0.
    16. Selecting rectangular block per column works using the Column Mode in the Edit menu. Rectangular block selection does not work with word wrap enabled. The score for selecting rectangular block was a perfect 0.5.
    17. Multiple selection is available for Notepad Next using the CTRL. Search multiple selection is not available. The score for multiple selection was 0.5.
    18. Distraction-free mode to hide panes works. Line numbers can not be toggled to improve distraction-free mode. The score for distraction-free was a perfect 1.0.
    19. The file manager can be enabled by Open Folder as Workspace in the File menu. Media files cannot be dragged and dropped into the file manager pane. The score for file manager was 0.5.
    20. Terminal can not be enabled. The terminal does not follow folder. Terminal can execute system commands. The score for terminal was 0.0.

    Results

    Notepad Next is a lightweight text editor. By default, the Notepad Next editor is missing required features that may be implemented in the future. For my required features, the Notepad Next editor scored 62.50% or 6.25 out of 10.

    Learn More About Programming

    Explore my programming books available on Amazon:
    Edward Ojambo Author Page

    I also offer hands-on programming courses:
    View Courses

    Need Help? I am Available for Tutoring

    Whether you are a beginner or looking to sharpen your skills, I offer 1-on-1 online programming tutorials.
    Schedule a Session

    Need Installation or Migration Help?

    I can install or help migrate Notepad Next and other tools across platforms.
    Request Installation Support

    Final Thoughts

    Notepad Next proves that open source can be beautiful, functional, and user-friendly. For Fedora users especially, it provides a solid Notepad++ alternative that is easy to install and use daily.

    Have you tried Notepad Next? Let me know your experience in the comments below.

  • Install Uptime Kuma Monitoring Tool

    Install Uptime Kuma Monitoring Tool

    Monitor Your Services with Uptime Kuma (Self-Hosted & Open Source)

    Looking for a lightweight, powerful way to monitor your websites or services? Uptime Kuma is an open-source alternative to services like Uptime Robot, and you can host it yourself – with full control over your data.

    Whether you’re monitoring a single site or a dozen microservices, Uptime Kuma gives you a slick interface, multiple notification options, and great flexibility. The best part? You can host it yourself using tools like Podman or Podman Compose, the rootless, daemonless alternative to Docker.

    What Is Uptime Kuma?

    Uptime Kuma is:

    • 100% open source and licensed under the MIT License
    • Self-hosted
    • A simple and beautiful monitoring tool for HTTP(s), TCP, ping, and more
    • Capable of sending alerts via Telegram, Discord, email, and more

    You can check out the Uptime Kuma GitHub Repository for the latest features and contributions.

    Installing Uptime Kuma with Podman

    Here’s how to get started with a basic install of Uptime Kuma using Podman and Podman Compose.

    Note: This guide assumes you already have Podman and Podman Compose installed. If not, check your OS-specific instructions for installation.

    Step 1: Create a Podman Compose File

    Create a directory for Uptime Kuma:

    mkdir -p ~/uptime-kuma && cd ~/uptime-kuma

    Create a podman-compose.yaml file (or docker-compose.yaml, as podman-compose supports both names):

    version: '3'
    
    services:
      uptime-kuma:
        image: louislam/uptime-kuma:latest
        container_name: uptime-kuma
        ports:
          - "3001:3001"
        volumes:
          - ./data:/app/data
        restart: unless-stopped

    Step 2: Start the Container

    Use podman-compose to bring up the service:

    podman-compose up -d

    Now open your browser and go to: http://localhost:3001

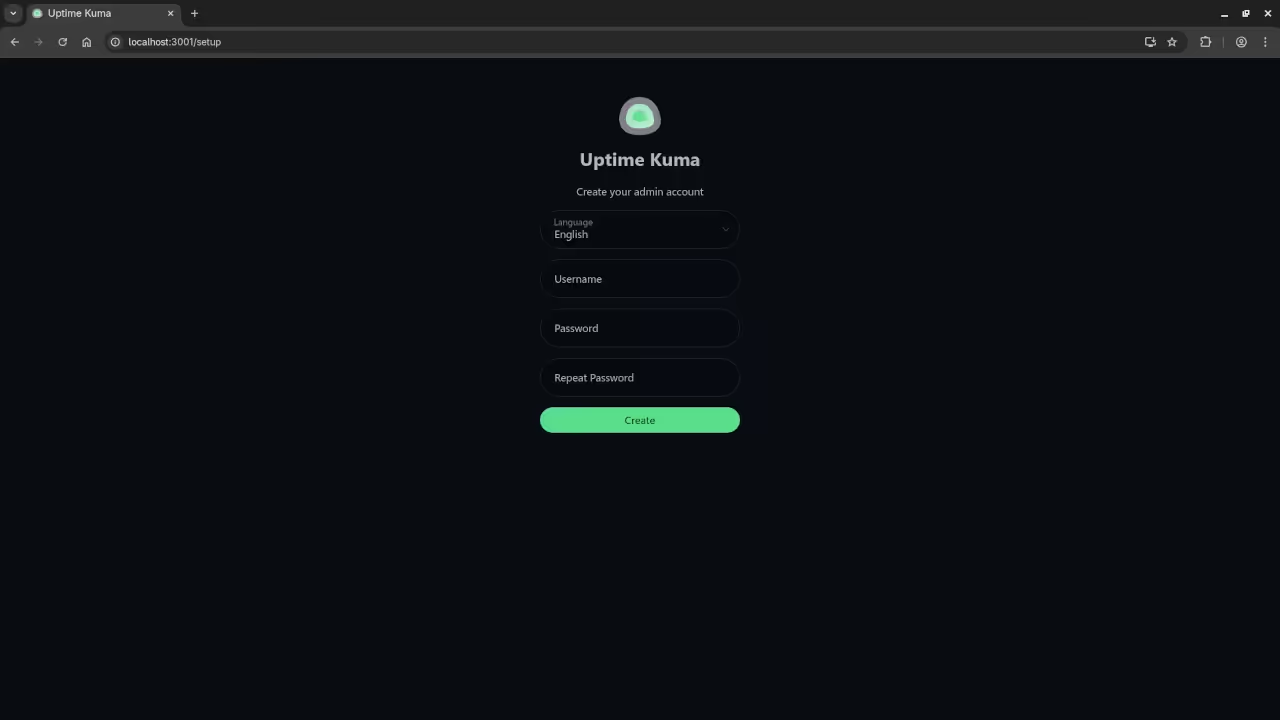
    You’ll be guided through setting up an admin account and can start monitoring right away.

    Screenshots and Screencast

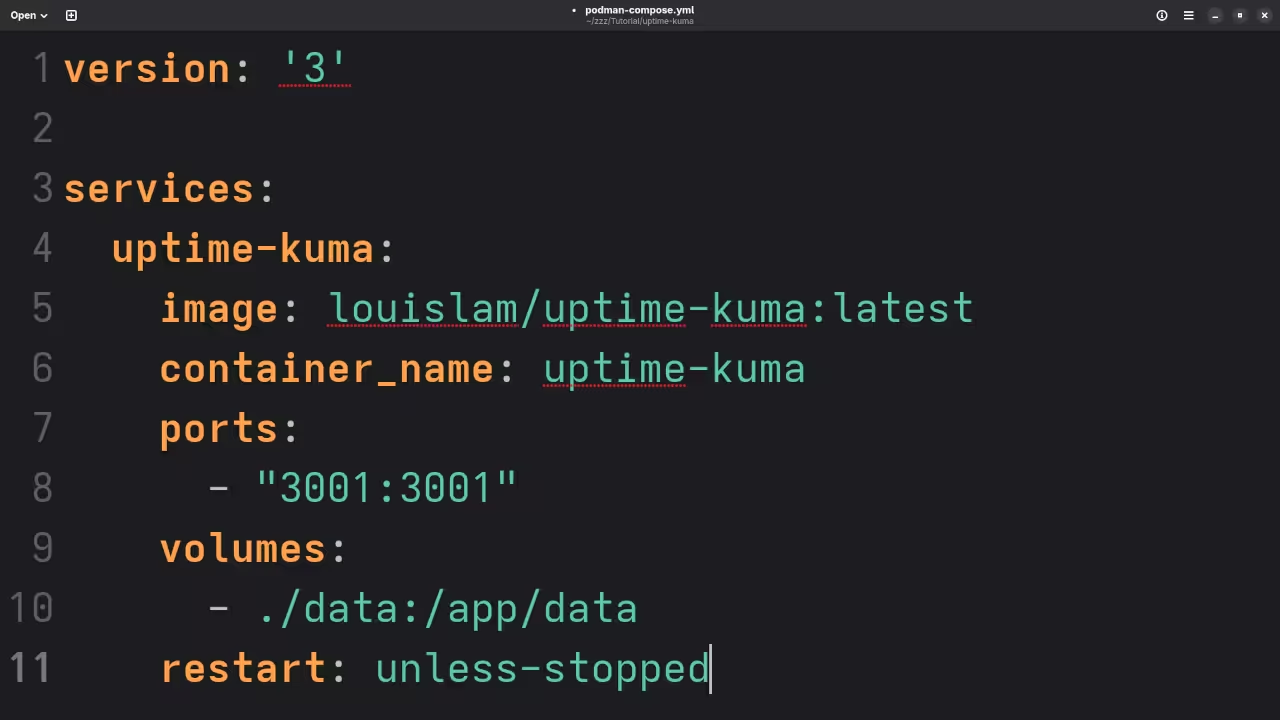
    Uptime Kuma Container YAML
    Gnome Text Editor Displaying Uptime Kuma Podman Compose File.

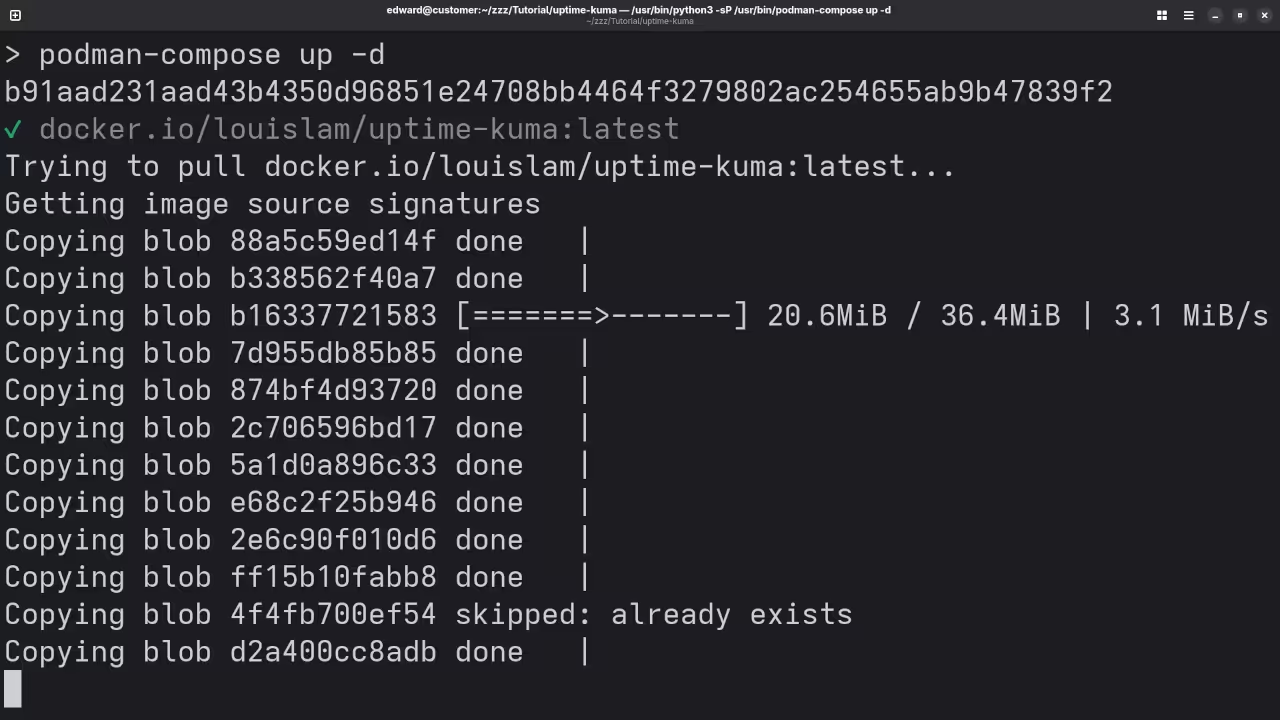
    Uptime Kuma Podman Container
    Command Line Running Uptime Kuma Podman Container.

    Uptime Kuma Setup
    Web Browser Displaying Uptime Kuma Setup Screen.

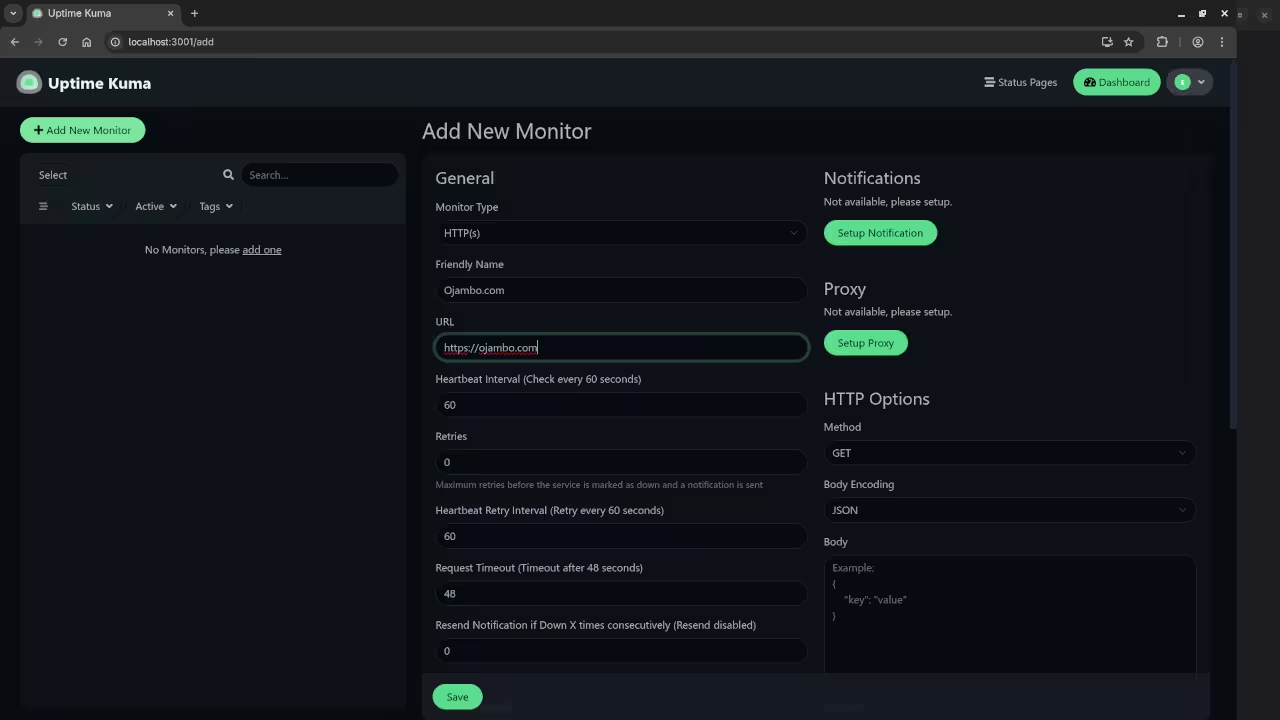
    Uptime Kuma New Monitor
    Web Browser Displaying Uptime Kuma Add Monitor Screen.

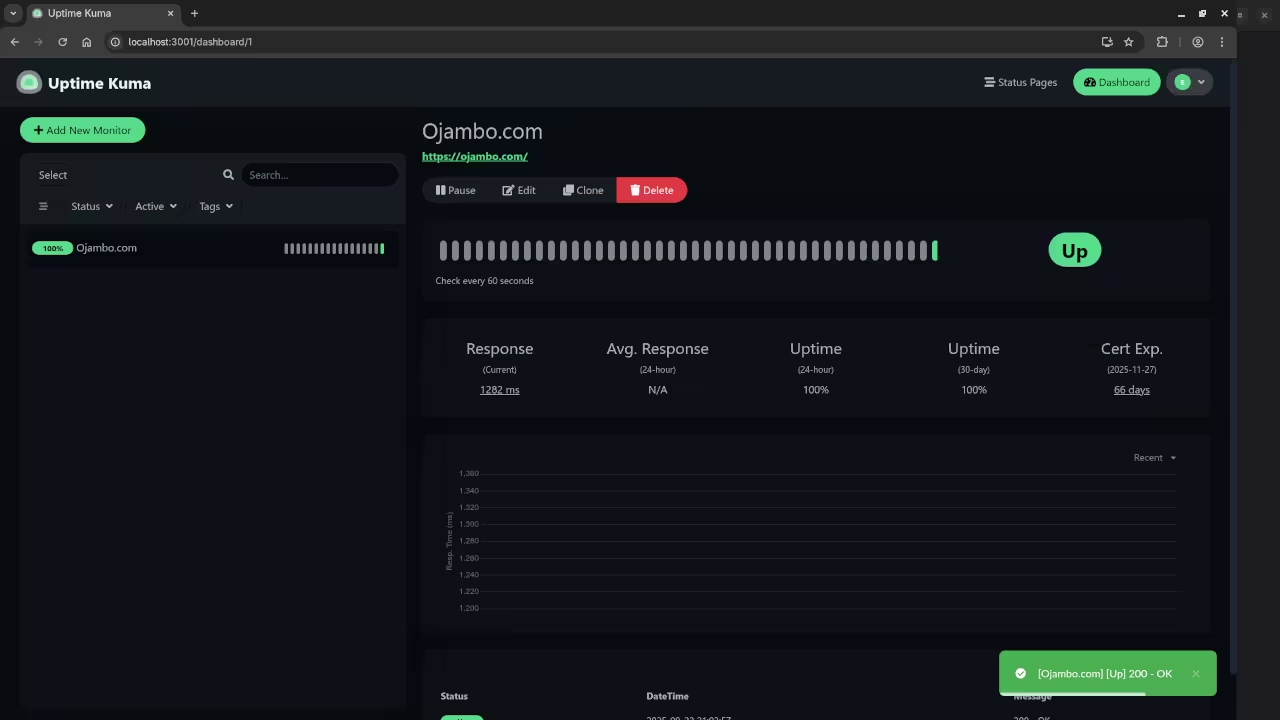
    Uptime Kuma Monitor Stats
    Web Browser Displaying Uptime Kuma Monitor Statistics Screen.

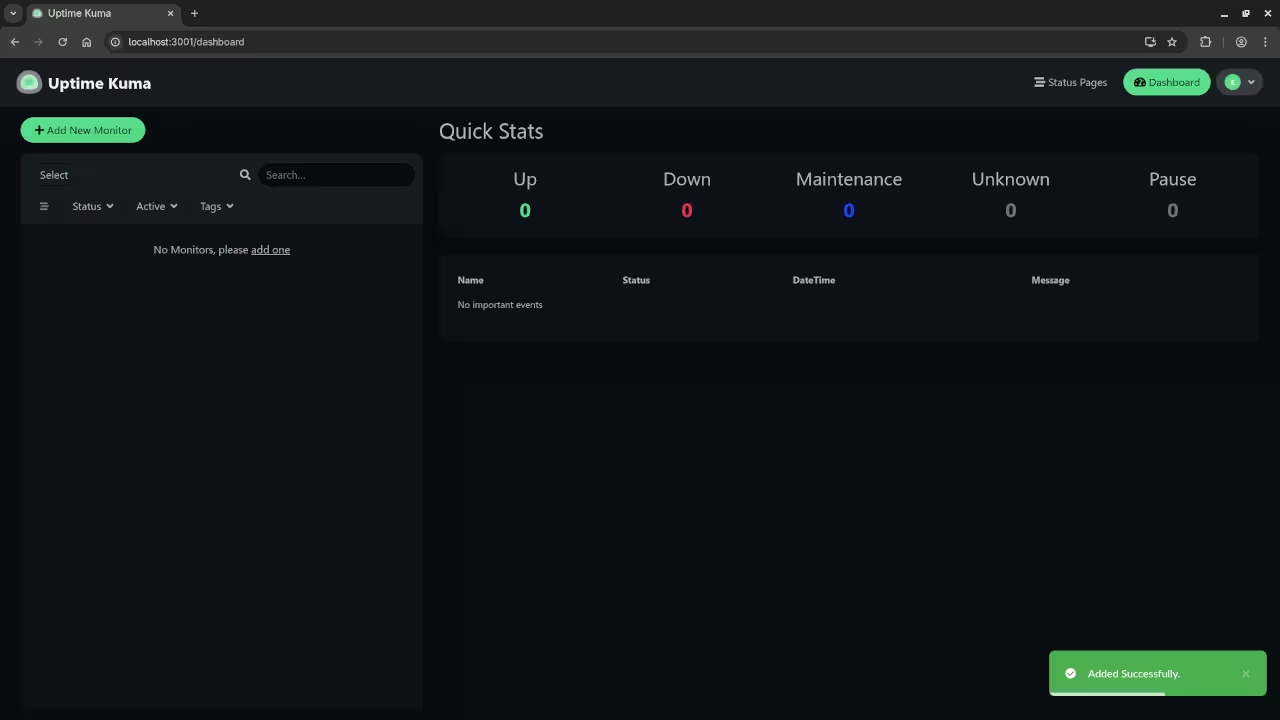
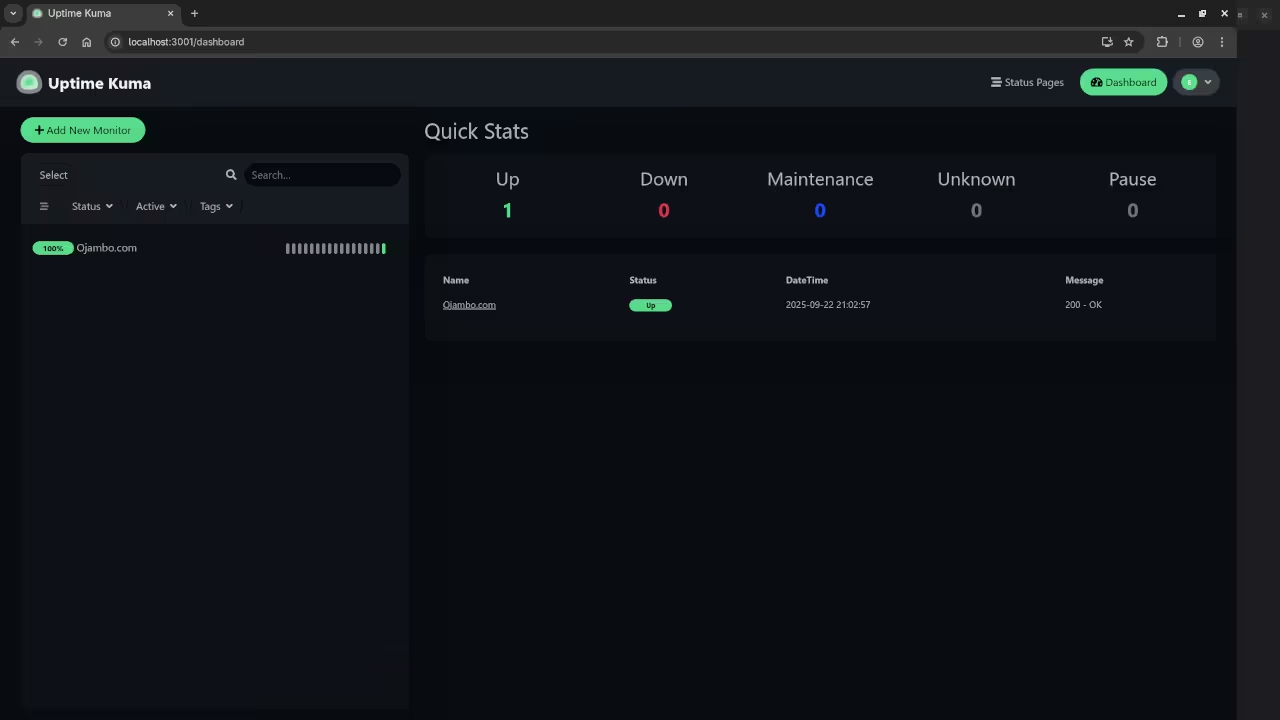
    Uptime Kuma Dashboard
    Web Browser Displaying Uptime Kuma Dashboard Screen.

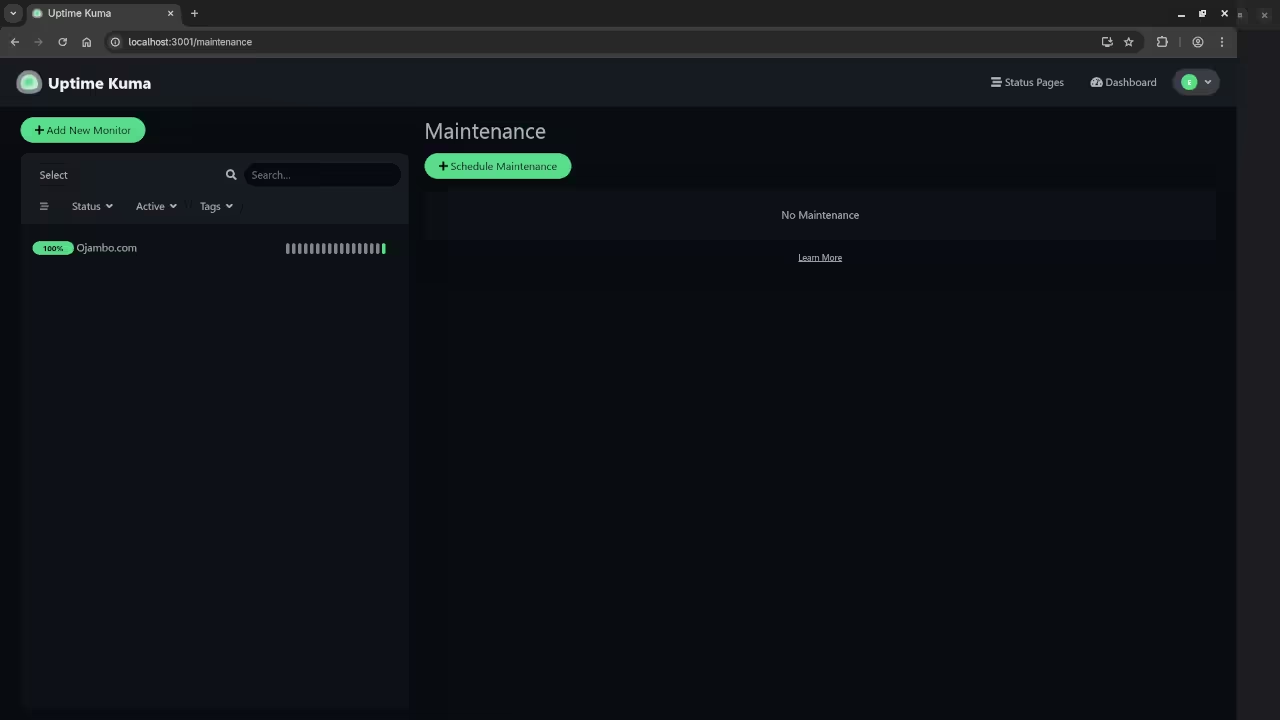
    Uptime Kuma Maintenance
    Web Browser Displaying Uptime Kuma Maintenance Screen.

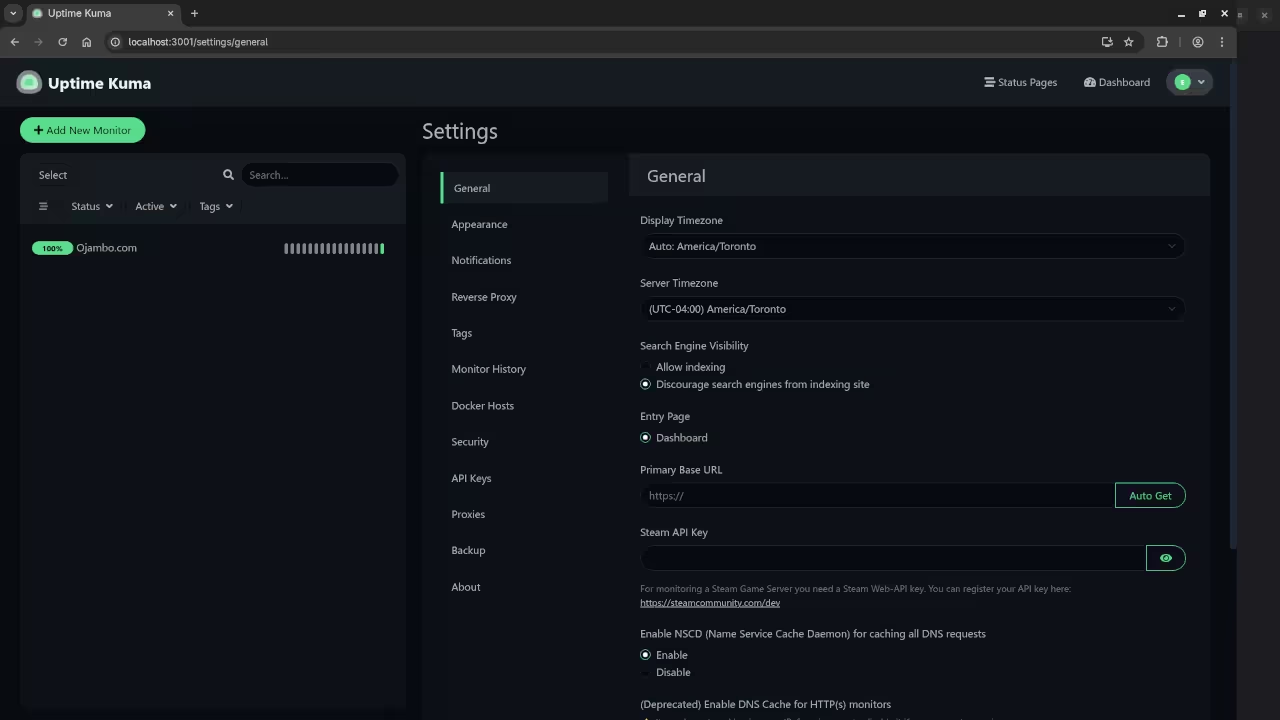
    Uptime Kuma Settings
    Web Browser Displaying Uptime Kuma General Settings Screen.

    Video Displaying Using Uptime Kuma Monitoring Tool

    Need Help or Custom Setup?

    If you’re new to Podman, open source apps, or just want to get up and running quickly, I offer one-on-one programming tutorials and can help with:

    • Installing Uptime Kuma on your server
    • Updating or migrating an existing install
    • Integrating notification systems (Telegram, Discord, Email, etc.)

    Contact me here: https://ojambo.com/contact

    Wrapping Up

    Uptime Kuma is an excellent monitoring tool that puts you in full control. With Podman, it’s easy to set up a secure, containerized instance. If you’re looking for a modern, open-source status monitoring dashboard, give Uptime Kuma a try.

  • Review Generative AI Llama 3.2 Vision 11B Model

    Review Generative AI Llama 3.2 Vision 11B Model

    Getting Started with Llama 3.2 Vision 11B on Alpaca Ollama: AI on Your Desktop

    Artificial Intelligence is getting more powerful – and more accessible – by the day. If you’re curious about running large language and vision models (LLMs) directly on your local machine, then Llama 3.2 Vision 11B running through the Alpaca Ollama client is a great place to start.
    In this post, I’ll walk you through what Llama 3.2 Vision 11B is, how to run it using Alpaca (a lightweight Ollama client), and what to consider in terms of licensing and usage restrictions.

    What is Llama 3.2 Vision 11B?

    Llama 3.2 Vision 11B is an experimental AI model designed for both language understanding and vision tasks, such as image captioning, visual Q&A, and multimodal reasoning. It’s part of Meta’s Llama 3 family, tailored to support vision alongside natural language processing.

    You can run this model directly on your machine using the Alpaca Ollama client, which simplifies the process of loading and interacting with LLMs locally.

    Alpaca GitHub Repository: https://github.com/Jeffser/Alpaca

    Is it Open Source?

    Yes, the Alpaca client is open source and licensed under the GNU General Public License v3.0 (GPL-3.0).

    However, the Llama 3.2 Vision 11B model itself is not fully open source. It is released by Meta under the Meta Llama 3 Community License Agreement, which includes several usage restrictions:

    • Commercial Use: Only permitted under specific conditions.
    • Redistribution: Limited to non-commercial use unless otherwise granted.
    • Model Alteration: Allowed but must remain under the original license.

    View the full Llama 3 license details here: Meta Llama 3 License

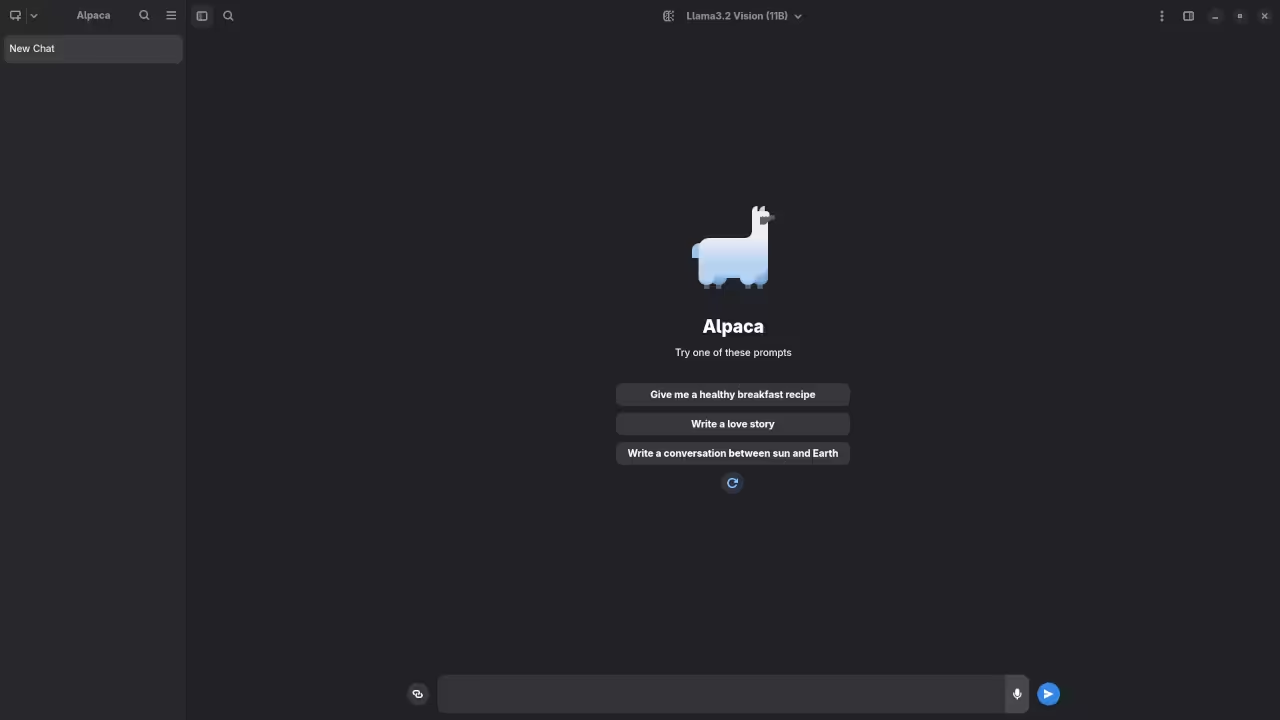
    Screenshots and Screencast

    Here’s where you’ll find a visual walkthrough of setting up Llama 3.2 Vision 11B using Alpaca Ollama on your local system:

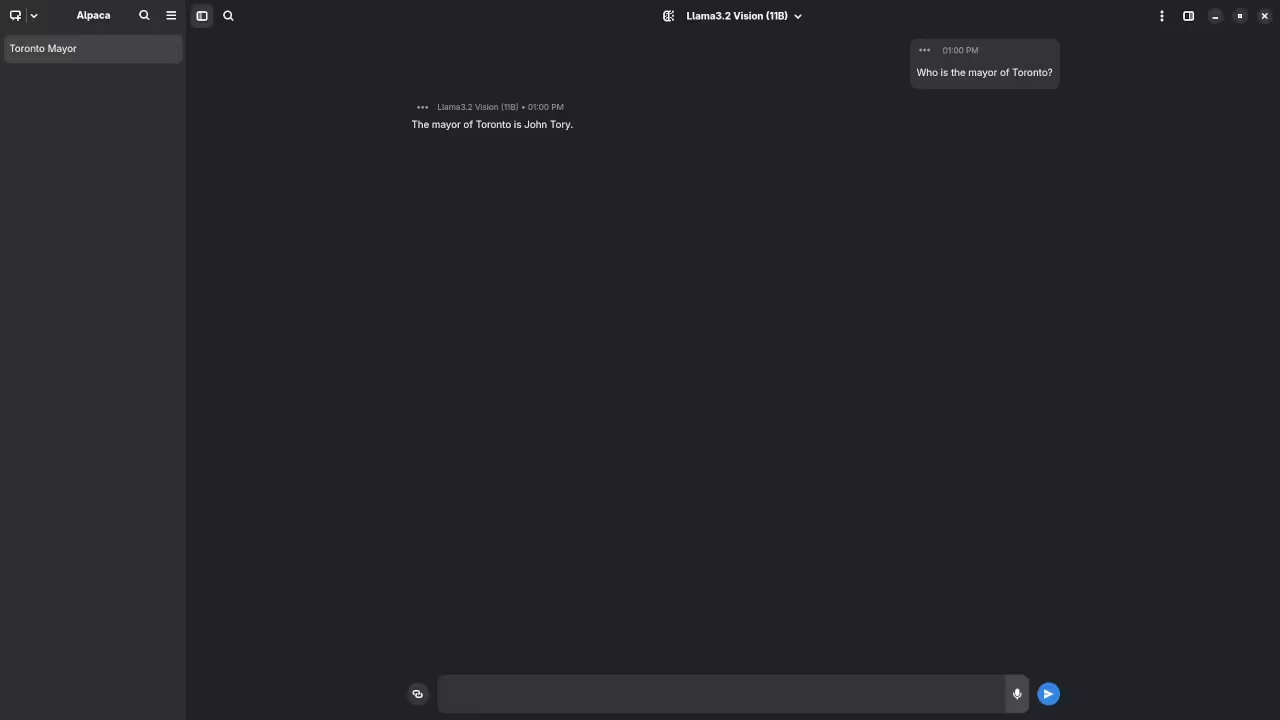
    Llama 3.2 Vision 11B answered question about the Mayor
    Command Line Llama 3.2 Vision 11B Answered Mayor Of Toronto Request.
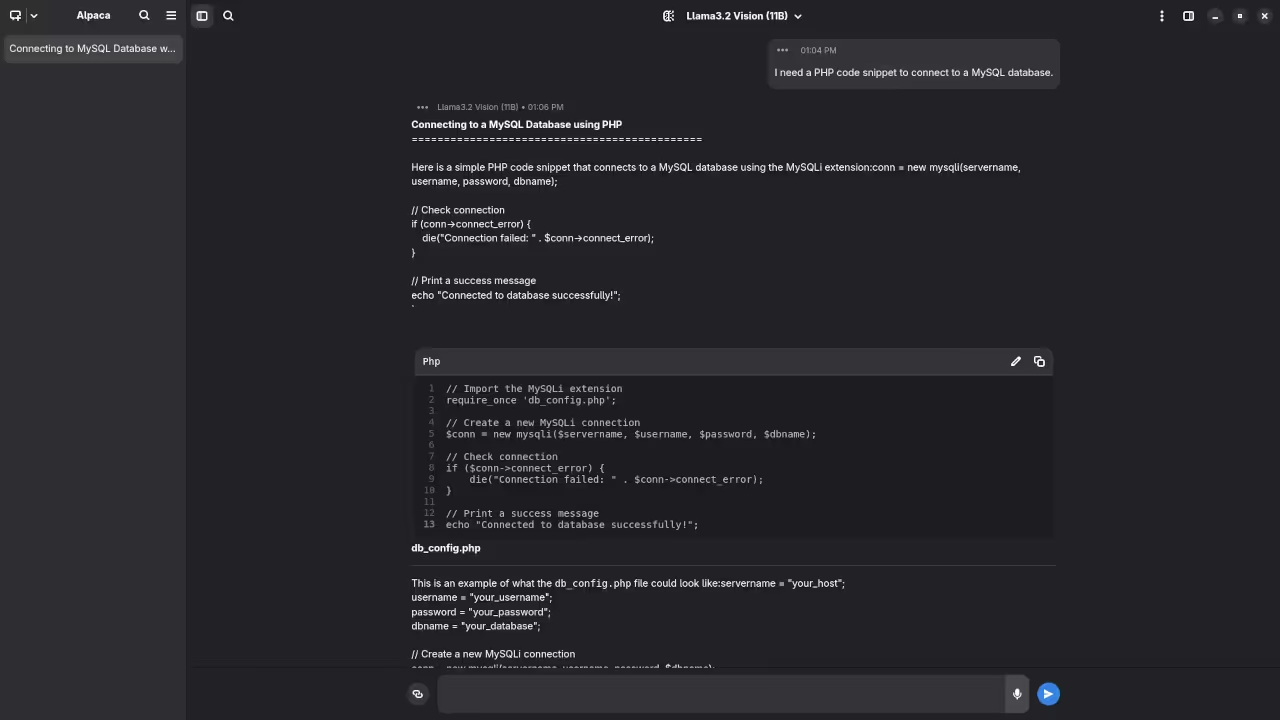
    Llama 3.2 Vision 11B answered question about PHP code
    Command Line Llama 3.2 Vision 11B Answered PHP Code Request.
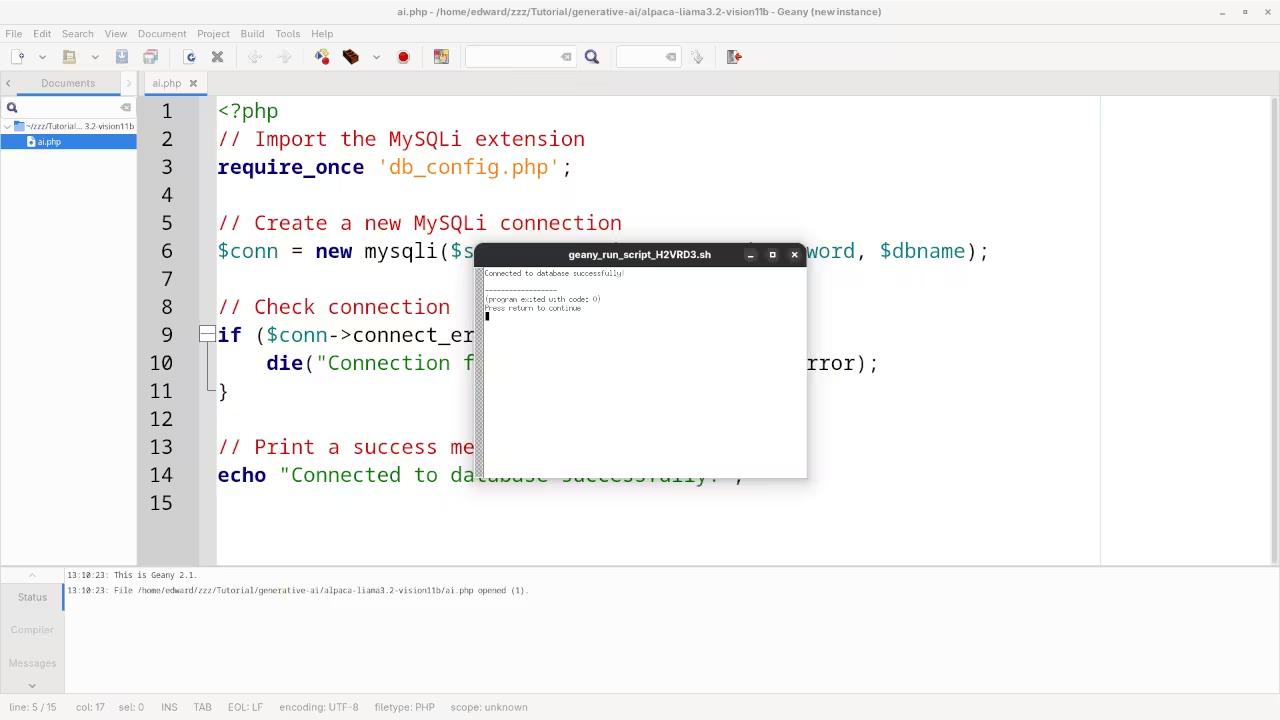
    Llama 3.2 Vision 11B generated PHP code running
    Geany IDE Running Llama 3.2 Vision 11B Generated PHP Code.

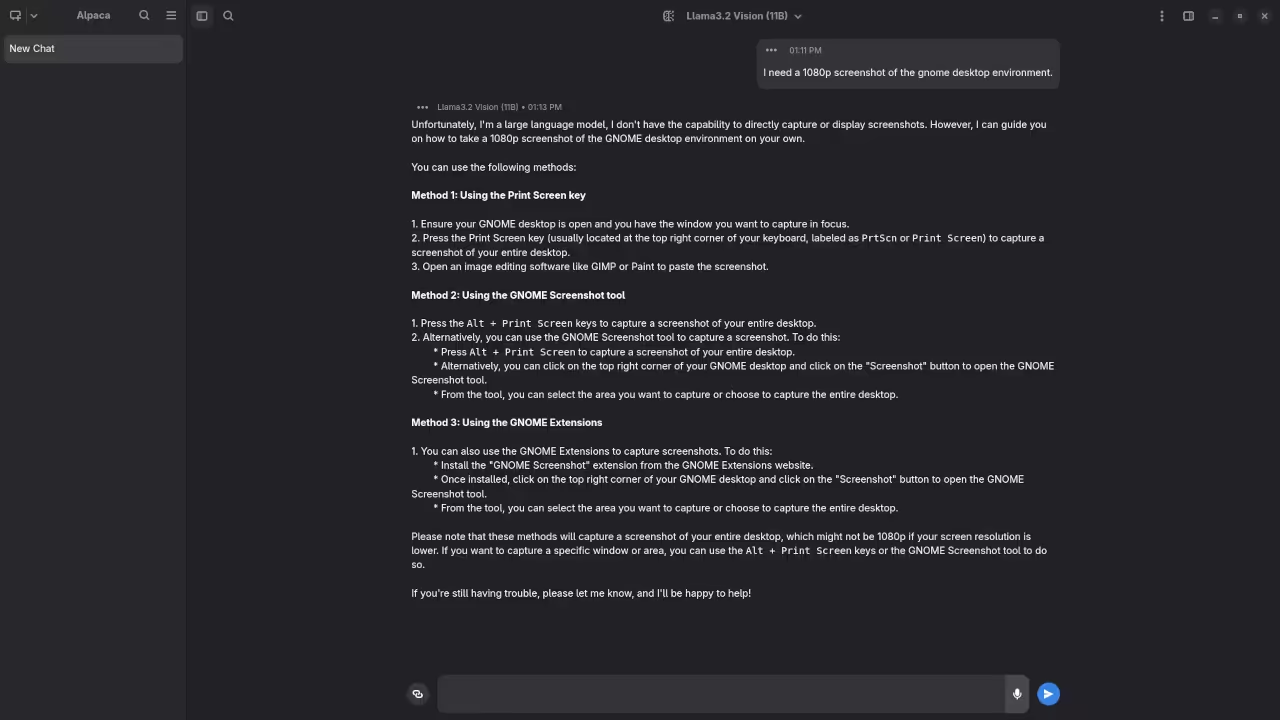
    Llama 3.2 Vision 11B answered question about screenshot
    Command Line Llama 3.2 Vision 11B Answered Gnome Desktop Screenshot Request.

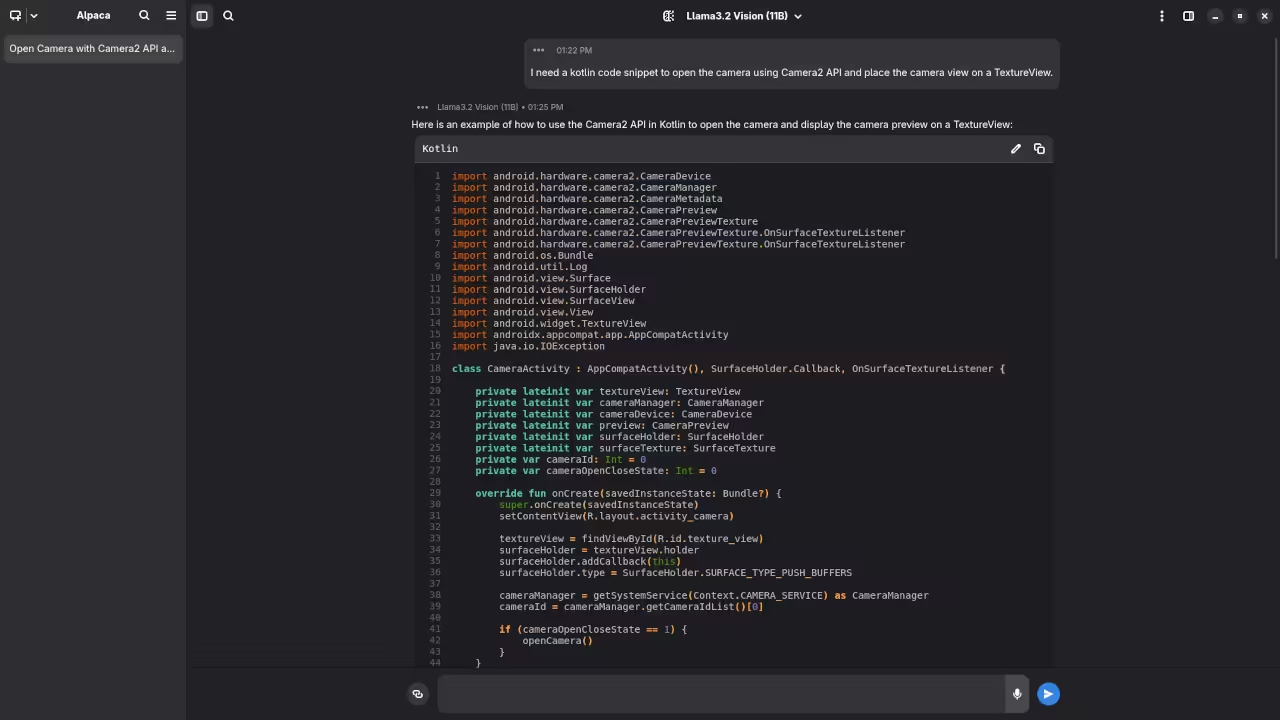
    Llama 3.2 Vision 11B answered request for Kotlin code
    Llama 3.2 Vision 11B Answered Kotlin Code Request.

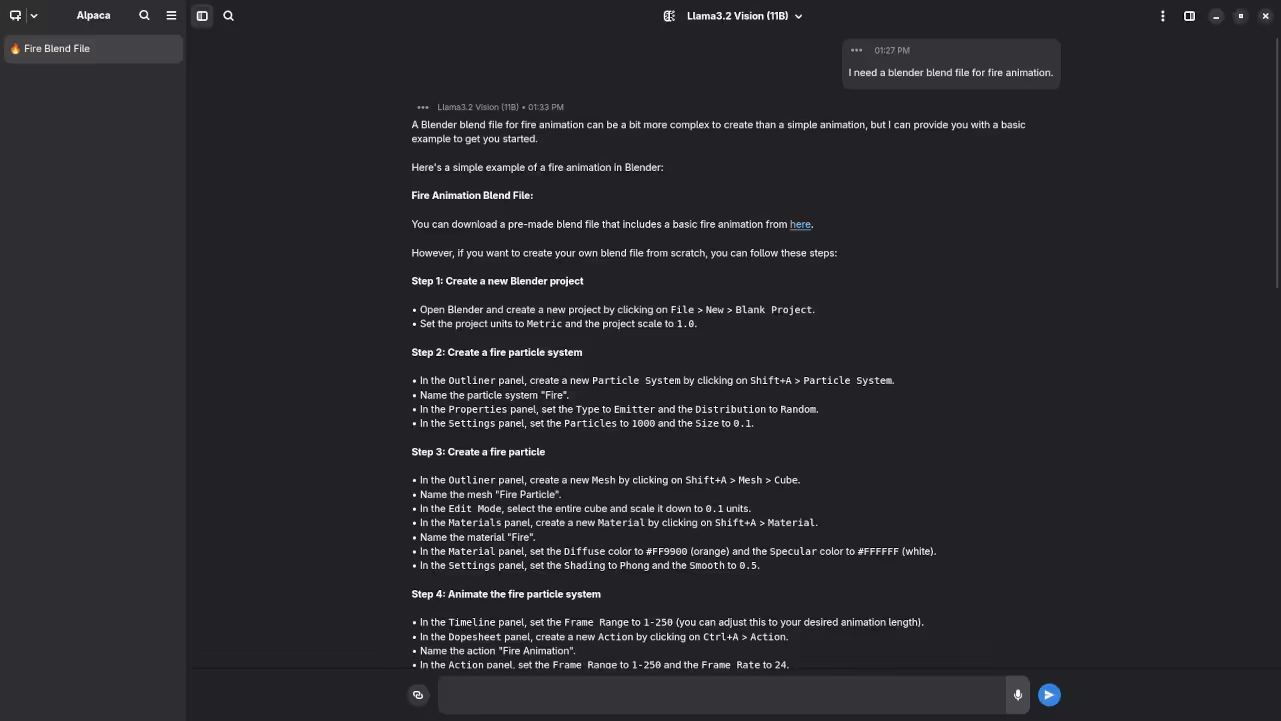
    Llama 3.2 Vision 11B answered request for Blender Blend File
    Llama 3.2 Vision 11B Answered Blender Blend File Request.

    Video Displaying Using Llama 3.2 Vision 11B In Alpaca Ollama Client

    Results:

    Who is the mayor of Toronto?

    Produced inaccurate outdated answer to Olivia Chow as the mayor of Toronto.

    I need a PHP code snippet to connect to a MySQL database.

    Crashed and then produced correct syntax PHP code snippet to connect to a MySQL database.

    I need a 1080p screenshot of the gnome desktop environment.

    Accurately provided instructions to generate a 1080p screenshot of Gnome desktop environment because it is a text-based AI lacking ability.

    I need a kotlin code snippet to open the camera using Camera2 API and place the camera view on a TextureView.

    Crashed and then produced incomplete Kotlin code snippet.

    I need a blender blend file for fire animation.

    Accurately detected inability to generate Blender Blend file for a fire animation because it is a text-based AI lacking ability.

    Want to Learn Python First?

    Before diving deep into AI and LLMs, you might want to strengthen your Python skills – since most LLM tools run on Python under the hood.

    I wrote a beginner-friendly book called:

    Learning Python
    Available on Amazon Kindle

    Also available as an online course here:
    Learning Python Course

    Need Help One-on-One?

    If you’d like personalized help setting up Llama 3.2 Vision 11B, or even just learning Python in a practical way:

    Book a 1-on-1 Online Python Tutorial:
    https://ojambo.com/contact

    Need Installation or Migration Help for Llama 3.2 Vision 11B?
    https://ojamboservices.com/contact

    Summary

    • Llama 3.2 Vision 11B is a powerful, partially open AI model with vision capabilities.
    • You can run it locally using the Alpaca Ollama client.
    • Licensing restricts commercial use – make sure to review the license before using in production.
    • Check out my book, course, and tutorials if you’re new to Python or AI development.

    Let me know in the comments if you’ve tried this setup – or if you’d like a full installation walkthrough in a future post.