
Create a 3D Hammer with Blender Python API and Display It on Your Website
Welcome to this beginner-friendly tutorial! Today, we will explore how to generate a simple 3D hammer model using Blender’s Python API and display it directly in your web browser using the <model-viewer> web component. This approach combines the power of Blender scripting with modern web technologies to bring interactive 3D content to your site.
Step 1: Generating a Hammer Model with Blender Python API
Blender is a fantastic open-source 3D modeling tool that supports scripting through Python. With just a few lines of code, you can programmatically create objects like a hammer.
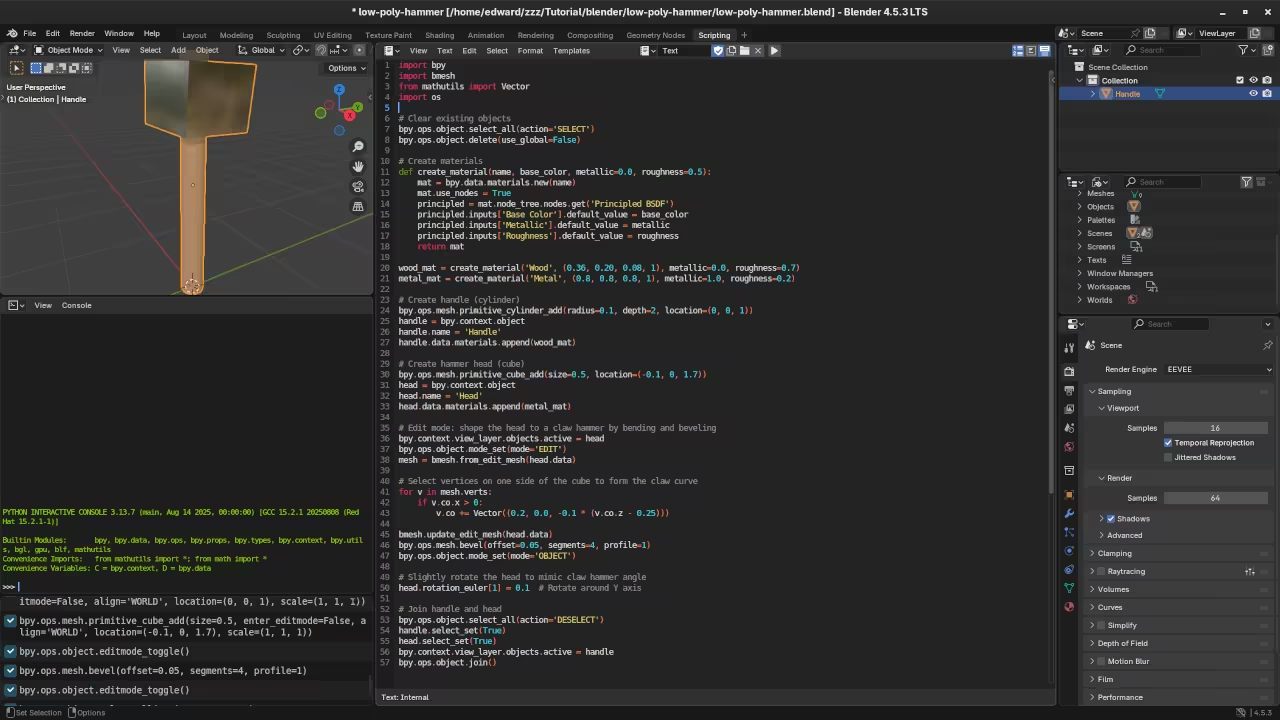
Here is an improved example of a Blender Python script to generate a claw hammer with wood and metal materials:
import bpy
import bmesh
from mathutils import Vector
# Clear existing objects
bpy.ops.object.select_all(action='SELECT')
bpy.ops.object.delete(use_global=False)
# Create materials
def create_material(name, base_color, metallic=0.0, roughness=0.5):
mat = bpy.data.materials.new(name)
mat.use_nodes = True
principled = mat.node_tree.nodes.get('Principled BSDF')
principled.inputs['Base Color'].default_value = base_color
principled.inputs['Metallic'].default_value = metallic
principled.inputs['Roughness'].default_value = roughness
return mat
wood_mat = create_material('Wood', (0.36, 0.20, 0.08, 1), metallic=0.0, roughness=0.7)
metal_mat = create_material('Metal', (0.8, 0.8, 0.8, 1), metallic=1.0, roughness=0.2)
# Create handle (cylinder)
bpy.ops.mesh.primitive_cylinder_add(radius=0.1, depth=2, location=(0, 0, 1))
handle = bpy.context.object
handle.name = 'Handle'
handle.data.materials.append(wood_mat)
# Create hammer head (cube)
bpy.ops.mesh.primitive_cube_add(size=0.5, location=(0, 0, 2.25))
head = bpy.context.object
head.name = 'Head'
head.data.materials.append(metal_mat)
# Edit mode: shape the head to a claw hammer by bending and beveling
bpy.context.view_layer.objects.active = head
bpy.ops.object.mode_set(mode='EDIT')
mesh = bmesh.from_edit_mesh(head.data)
# Select vertices on one side of the cube to form the claw curve
for v in mesh.verts:
if v.co.x > 0:
v.co += Vector((0.2, 0.0, -0.1 * (v.co.z - 0.25)))
bmesh.update_edit_mesh(head.data)
bpy.ops.mesh.bevel(offset=0.05, segments=4, profile=1)
bpy.ops.object.mode_set(mode='OBJECT')
# Slightly rotate the head to mimic claw hammer angle
head.rotation_euler[1] = 0.3 # Rotate around Y axis
# Join handle and head
bpy.ops.object.select_all(action='DESELECT')
handle.select_set(True)
head.select_set(True)
bpy.context.view_layer.objects.active = handle
bpy.ops.object.join()
# Export as GLB
bpy.ops.export_scene.gltf(filepath="hammer.glb", export_format='GLB')
Step 2: Running the Python Script from the Command Line
To generate the hammer model, save the above script as generate_hammer.py. You can run it using Blender’s command line interface:
blender --background --python generate_hammer.py -
--backgroundruns Blender without its graphical interface. -
--pythonruns your script.
This command will create a hammer.glb file in the same directory.
Step 3: Displaying the Hammer Model on Your Website Using <model-viewer>
Once you have the hammer.glb file, you can embed it into any webpage easily with the <model-viewer> web component, which supports interactive 3D models in browsers.
Here is an example HTML snippet:
<script type="module" src="https://unpkg.com/@google/model-viewer/dist/model-viewer.min.js"></script>
<model-viewer src="hammer.glb" alt="3D Hammer Model" auto-rotate camera-controls background-color="#FFFFFF" style="width: 400px; height: 400px;"></model-viewer> Simply place the hammer.glb file on your web server alongside this HTML file, and visitors will see your interactive 3D hammer right in their browser!
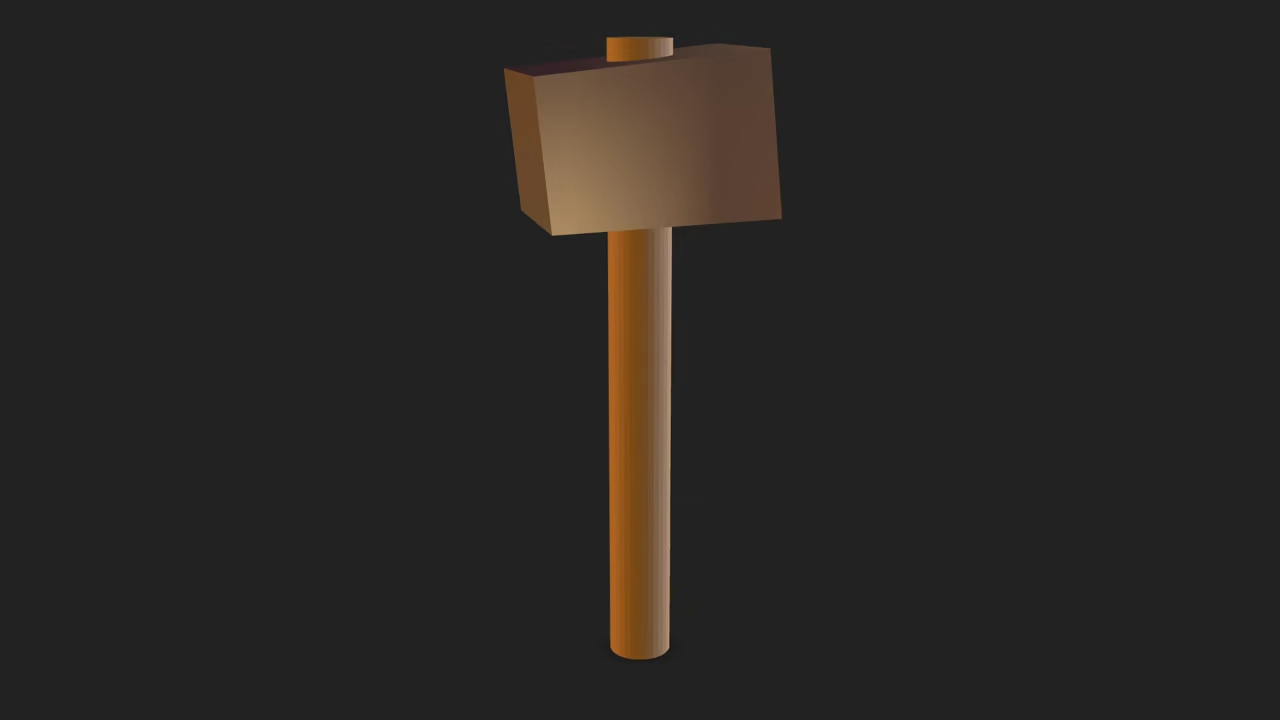
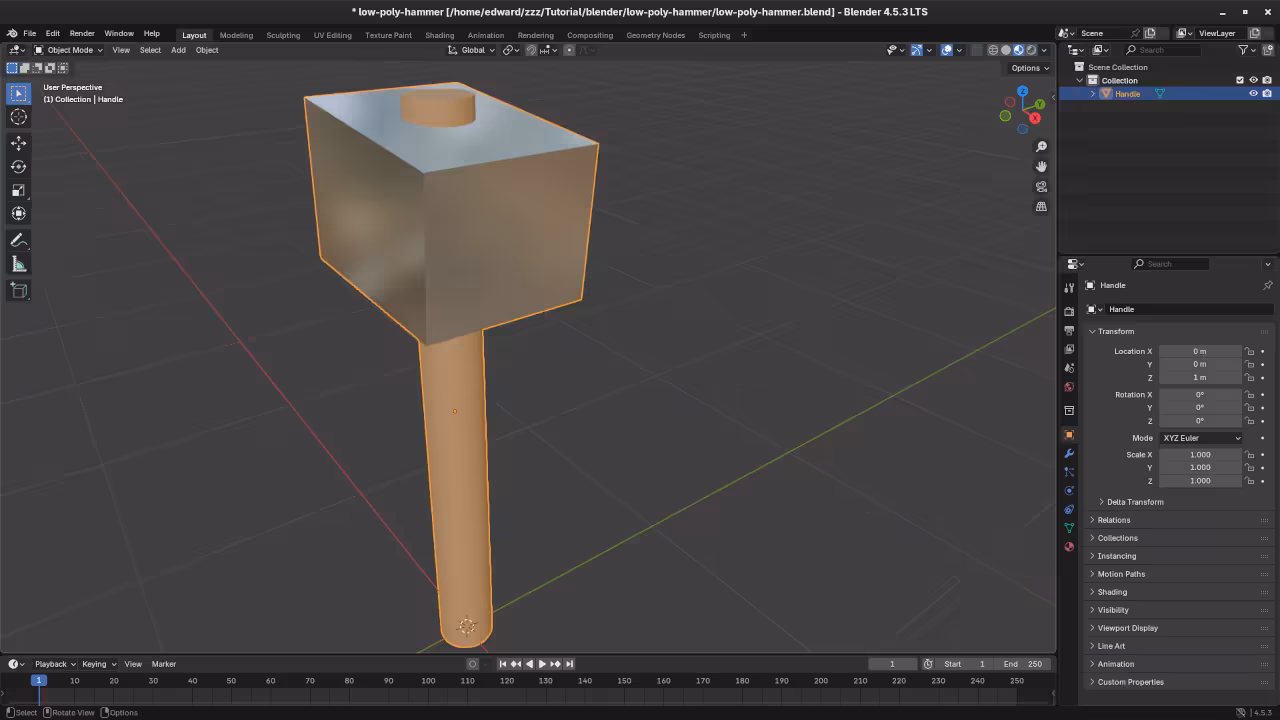
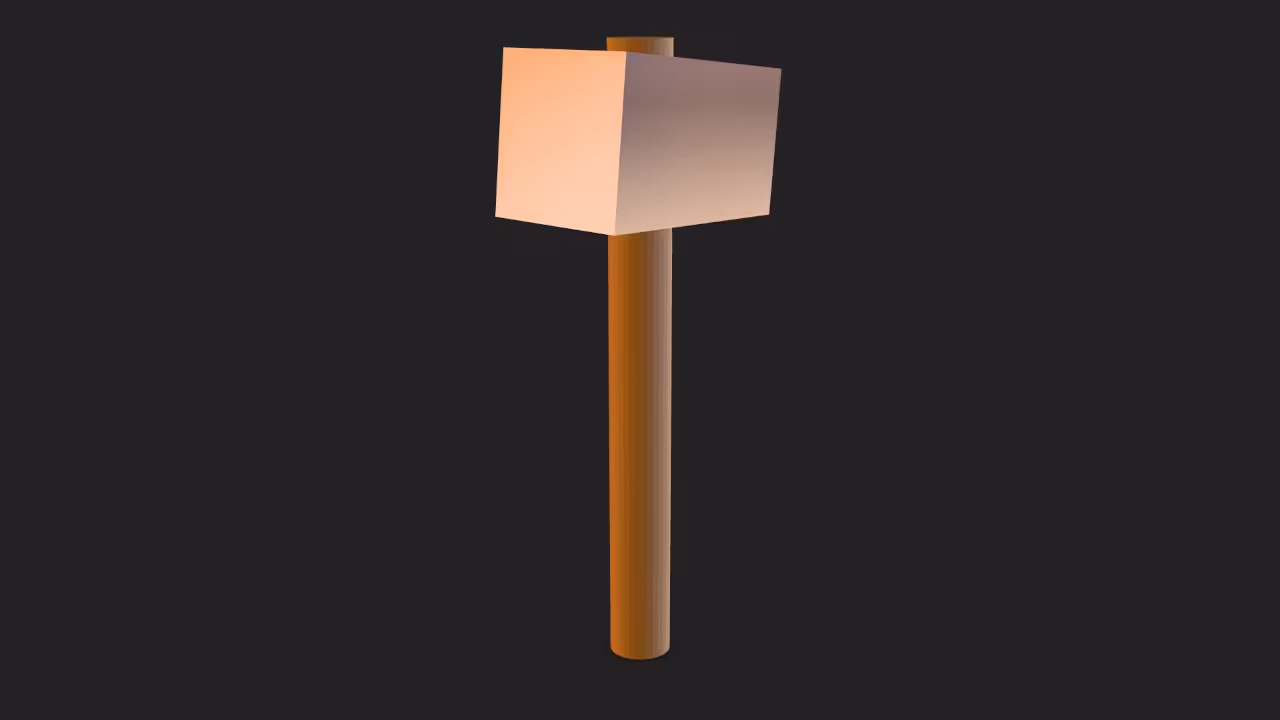
📸 Screenshots & Screencast
Additional Resources & Learning
If you are excited to learn more, I have authored two books that can help you deepen your Python and Blender scripting skills:
- Learning Python – A comprehensive beginner’s guide to Python programming.
- Mastering Blender Python API – A deep dive into scripting Blender with Python.
Also, check out my Learning Python course for interactive lessons.
For personalized guidance, I offer one-on-one online Python tutorials, including Blender scripting. Feel free to contact me here.
Conclusion
By combining Blender’s Python API with modern web technologies like <model-viewer>, you can create and share custom 3D content easily. Whether you want to showcase your models on your site or build interactive apps, this workflow is a powerful starting point.
Happy modeling and coding!
🚀 Recommended Resources
Disclosure: Some of the links above are referral links. I may earn a commission if you make a purchase at no extra cost to you.