Blog

  • Pulsar Editor Advanced Editor Review

    Pulsar Editor Advanced Editor Review

    Pulsar Edit: A Powerful, Open-Source Text Editor for Modern Development

    Excerpt: Discover Pulsar Edit, a modern and customizable open-source text editor based on Atom. Learn its features, benefits, and how it stands out in today’s development landscape.

    What is Pulsar Edit?

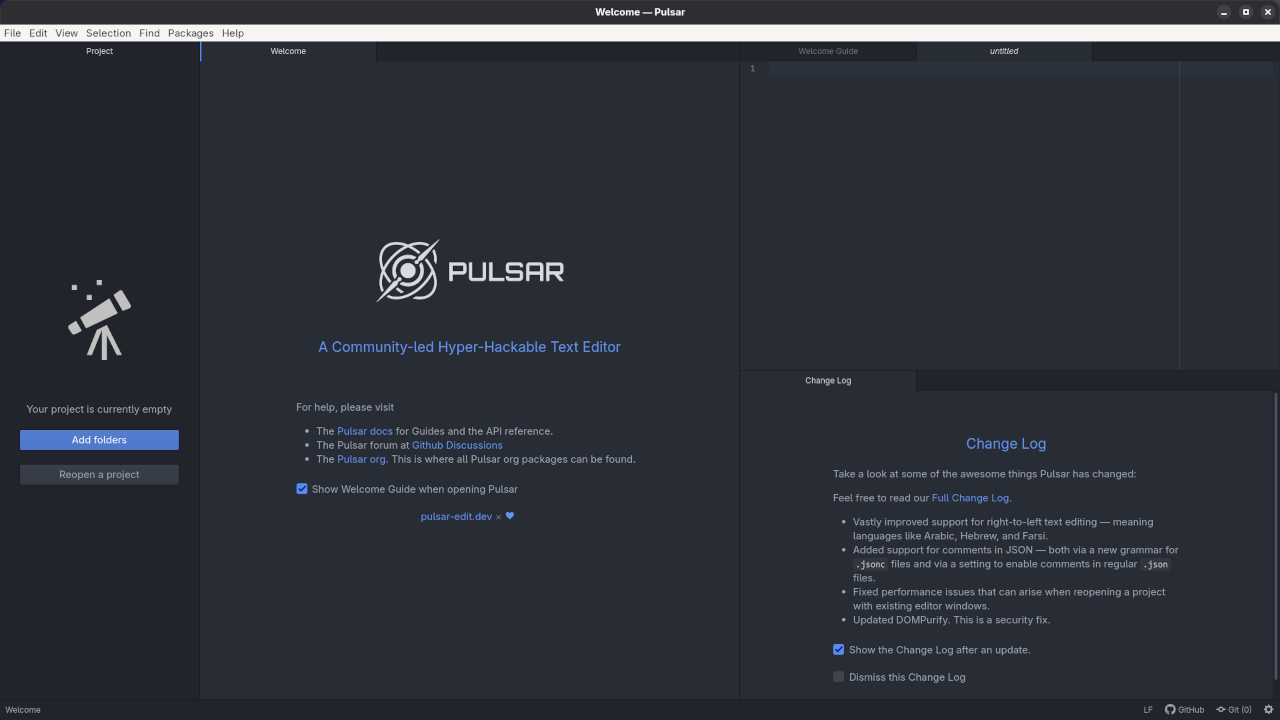
    Pulsar Edit is a free, open-source text editor designed for developers, writers, and anyone who works with code. It’s a community-driven continuation of Atom, the beloved editor originally developed by GitHub. After GitHub sunset Atom in 2022, the community stepped in to keep its spirit alive—resulting in Pulsar.

    Pulsar retains everything developers loved about Atom: flexibility, theming, a robust plugin ecosystem, and deep customizability. But it also introduces modern updates, active maintenance, and community governance.

    Key Features of Pulsar

    1. Hackable to the Core

    Pulsar continues Atom’s legacy of being highly customizable. Users can tweak everything from the UI to core functionality using JavaScript, HTML, and CSS.

    2. Package Ecosystem

    Thousands of packages are still compatible with Pulsar. Whether you need Git integration, markdown preview, syntax highlighting, or language-specific tools, Pulsar has you covered.

    3. Cross-Platform

    It runs smoothly on Windows, macOS, and Linux, making it a versatile option for developers across environments.

    4. Community-Driven Development

    Unlike Atom’s corporate-run development, Pulsar is managed by volunteers and contributors worldwide. This decentralized approach fosters transparency and innovation.

    5. Modern Updates

    Despite being based on Atom, Pulsar introduces fixes and performance improvements to meet current standards and address old issues.

    Why Use Pulsar Edit in 2025?

    In a world with many code editors—like VS Code, Sublime Text, and JetBrains IDEs—Pulsar fills a unique niche. It’s ideal for developers who:

    • Prefer lightweight editors over full IDEs
    • Want deep customization without a learning curve
    • Miss the simplicity and beauty of Atom
    • Appreciate open-source projects that prioritize community needs

    It also serves as a nostalgic yet modern solution for long-time Atom users who want a smooth transition without starting from scratch.

    How to Get Started

    1. Download Pulsar: Visit the official website: https://pulsar-edit.dev
    2. Install Packages: Use the built-in package manager to browse and install community plugins.
    3. Customize Your Setup: Tweak the init.coffee, styles.less, or settings UI to shape the editor into your perfect coding environment.

    📷 Screenshots

    Here are some screenshots of Pulsar Edit in action:
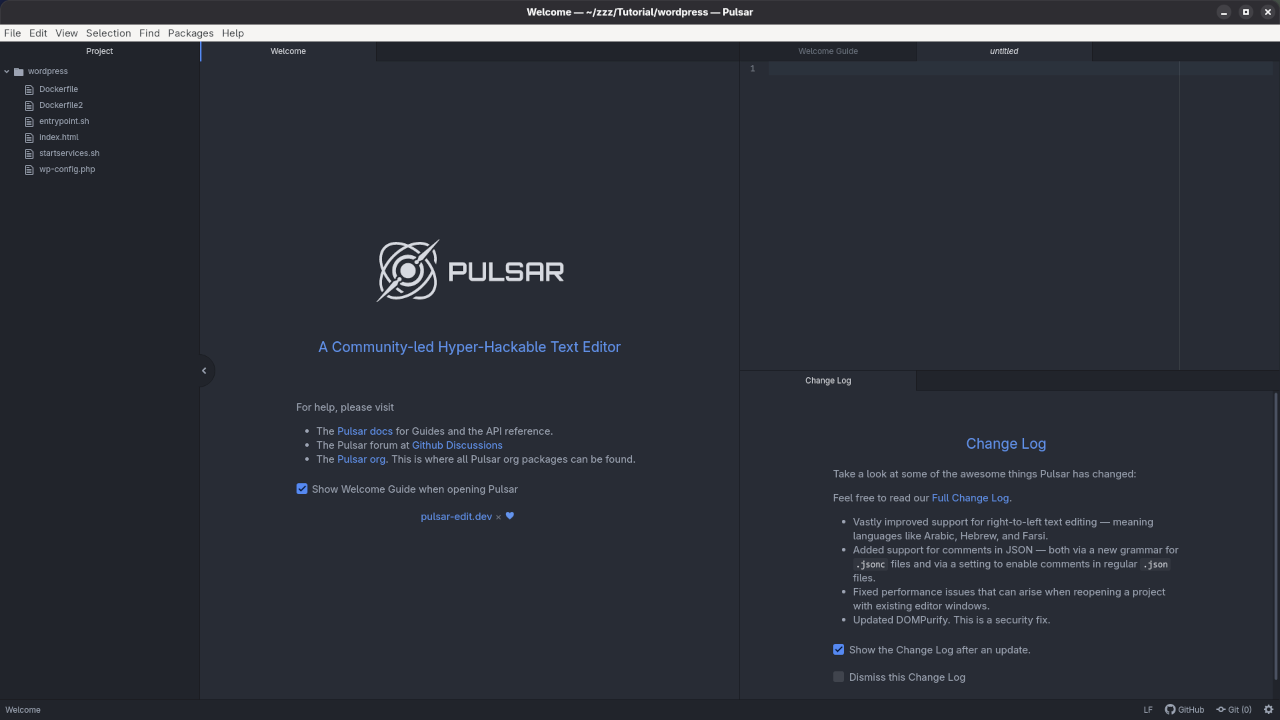
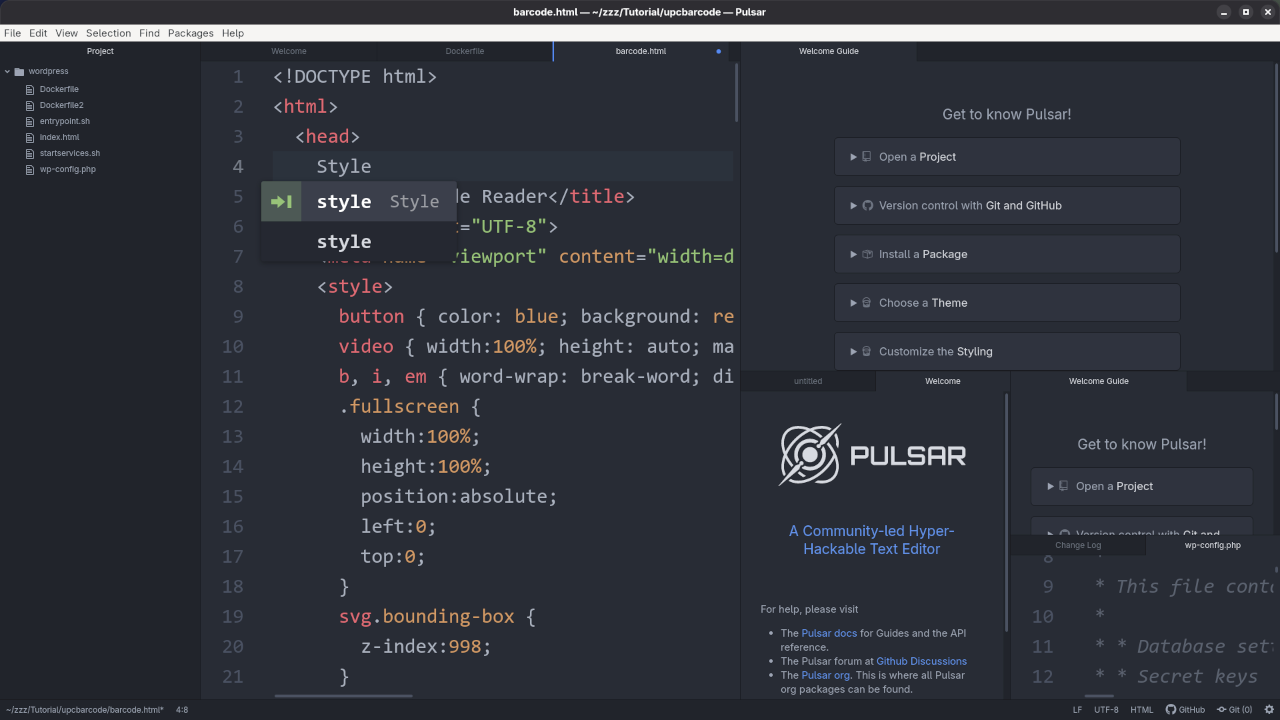
    Pulsar Edit Dragged Folder
    Pulsar Edit Displaying Folder Draggged Into Project

    Pulsar Edit HTML Code Suggest
    Pulsar Edit Displaying HTML Code Completion

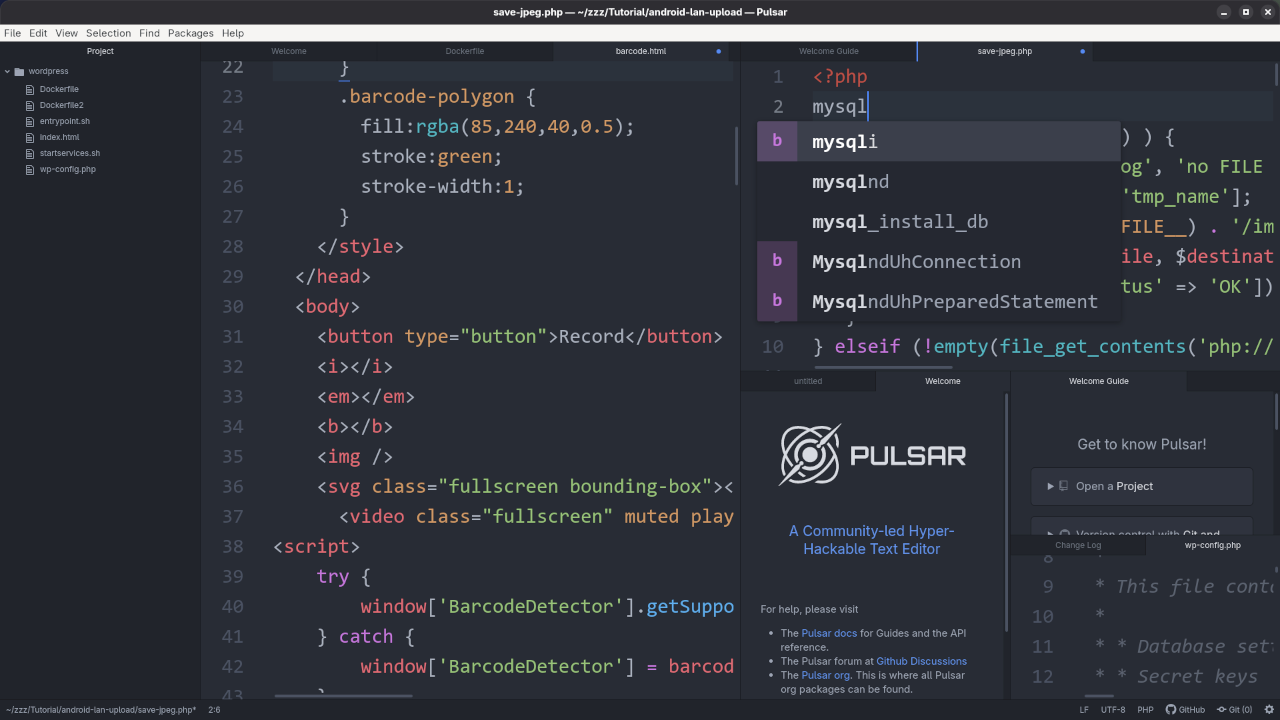
    Pulsar Edit PHP Code Suggest
    Pulsar Edit Python Code Suggest
    Pulsar Edit Displaying Python Code Completion

    • Default interface: Clean and distraction-free
    • Settings panel: Easy to navigate with powerful customization options
    • Package manager: Install plugins with just a few clicks

    🎬 Screencast Demo

    Watch this brief walkthrough of Pulsar Edit’s features:

    Pulsar Edit Review And Feature Test

    🔍 Feature Test – Spring 2025

    Here’s how Pulsar Edit stacks up against key editor features:

    Feature Pulsar Edit Notes
    Startup Time ★★★☆☆ Slower than some native apps, but acceptable
    Syntax Highlighting ★★★★★ Supports most languages via built-in and user packages
    Code Folding ★★★★☆ Folding works well but limited to some language scopes
    Plugin Support ★★★★★ Extensive Atom-compatible plugin library
    Git Integration ★★★★☆ Works well with `git-plus` or `pulsar-git` plugins
    Theming / Customization ★★★★★ Full CSS/LESS styling and UI control
    Linter / Error Highlighting ★★★★☆ Depends on packages like `linter` and language support
    Memory Usage ★★☆☆☆ Electron-based, heavier than Sublime or Pulsar Edit
    Multi-File Project Handling ★★★★☆ Supports folders, tabs, and file tree navigation
    Markdown Preview ★★★★★ Real-time preview available with community packages

    Requirements For Programming Text Editor

    Glossary:

    Code Editor

    Designed for writing and editing source code.

    IDE

    Integrated Development Environment combines various tools need for software development.

    Plugin

    Software component that adds specific functionality.

    Theme

    Preset package containing graphical appearance to customize look and feel.

    Open source

    Freely available for possible modification and redistribution.

    SCM

    Source code management use to manage and track modifications to a source code repository.

    LMB

    Left Mouse Button (LMB) or left click

    Test Tools

    Test System
    Name Description
    CPU Intel(R) i7 2600 @ 3.40GHz.
    Memory 16GB DDR3.
    Operating System Fedora Linux Workstation 42.
    Desktop Environment Gnome 48.
    Name Description

    Test Suite
    Name Description
    Large File 1GB human-readable text.
    Regex File Text with word “Pulsar Edit” repeated.
    Syntax File PHP file containing HTML, CSS & JavaScript.
    Media File Smiley face or Tux Linux JPEG file.
    Java Version OpenJDK 21.0.7.
    PHP Version PHP 8.4.8.
    Python Version Python 3.13.3.
    Pulsar Edit Version 2.0.
    Name Description

    Test Scoring

    1. Each feature has two parts.
    2. Score of zero indicates a missing feature.
    3. A part of a feature is work a score of 0.5.

    Three bias elimination steps were utilized. The editor was used for at least three years on different platforms. Attempts were made to get stable plug-ins for missing features. The same editor was compared between the one in the repository, the developers website, and the compiled version if applicable.

    Selecting Editor Version

    For this review, Pulsar Edit was downloaded from the developers website and it did not require additional plugins.

    Features

    1. The theme can be native for the editor in terms of the background. Pulsar Edit dark and light themes can be created or downloaded. The score for the theme was a perfect 1.0.
    2. Dragging and dropping a text file into the editor opens a new tab. It is possible to specify the tab location during the drag and drop operation. The score for drag and drop into editor was 1.0.
    3. Opening a very large text file did not crash Pulsar Edit. A “Pulsar Edit” Warning window is shown with an option to continue. It remembers the last session and it was possible to edit the large file. The score for opening a large file was 1.0.
    4. Multiple documents can opened in multiple tabs. Tear-off tabs still do not work and Pulsar Edit does not have a feature to open in new window as a new instance which is handy for multiple monitors. The score for multiple documents was 0.5.
    5. Multiple editors can be opened as new tabs with drag options. The window view can be split either vertically or horizontally. The score for multiple editor view was 1.0.
    6. Creating non-project files is possible by dragging the folder into the workspace. Non-project files can be opened by the drag and drop operation. The score for creating non-project files was a perfect 1.0.
    7. Soft word wrap can be enabled in the editor settings. Automatic soft wrap for documents is available for Pulsar Edit. The score for word wrap was a perfect 1.0.
    8. Spell check works as words are typed. Spelling errors are shown in opened documents. The score for spell check was a perfect 1.0.
    9. Word count is available for Pulsar Edit via a plugin. Selection word count is not available as part of word count. The score for word count was 0.5.
    10. Go to line CTRL/CMD-Gcan jump to a specified line. It is possible to jump to either the first or last line. The score for go to line was a perfect 1.0.
    11. Indentation can default to user-defined tab stops. Children are automatically indented. The score for indentation was a perfect 1.0
    12. Fonts can be dynamically scaled. The system font can be bypassed and a new editor font and size can be set. The score for fonts was a perfect 1.0.
    13. Find and replace CTRL/CMD-F or project-wide CTRL/CMD-SHIFT-F using regular expressions can be utilized for all open documents in the current session. Find and replace will work for the current document or a selection in the current document. The score for find and replacing using regular expressions was 1.0.
    14. Multiple language syntax highlighting in one file is enabled if the language plug-ins are installed. Each language has code-sensitive syntax colors which can be modified. The score for multiple language syntax highlighting was a perfect 1.0.
    15. Code folding works for markup languages such as HTML. Code folding also works for programming languages such as Java and PHP. The score for code folding was 1.0.
    16. Selecting rectangular block per column does not work. Rectangular block selections do not work with word wrap enabled. The score for selecting rectangular block was a perfect 0.0.
    17. Multiple selection CTRL/CMD-LMBis available for Pulsar Edit. Search multiple selection is available. The score for multiple selection was 1.0.
    18. Distraction-free mode to hide panes works. Line numbers can be toggled in the settings to improve distraction-free mode. The score for distraction-free was a perfect 1.0.
    19. The file manager can create and delete folders. Media files can be dragged and dropped into the file manager pane. The score for file manager was 1.0.
    20. Terminal is not integrated into Pulsar Edit, but one can be enabled as a plugin. The terminal can follow folder if enabled. Terminal can execute system commands. The score for terminal was 1.0.

    Results

    Pulsar Edit is a very powerful IDE. By default, the Pulasr Edit editor any missing required features can be installed by using plugins. For my required features, the Pulsar Edit editor scored 90.00% or 9.00 out of 10.

    💡 Learn to Code with Personalized Tutorials

    Interested in learning how to code, customize Pulsar, or build your own plugins?
    📩 Contact me for 1-on-1 programming tutorials, mentoring, or project help.
    Whether you’re a beginner or an advanced coder, I offer personalized sessions that fit your goals.

    👉 Contact Me Here or at Ojambo Services
  • Review Generative AI Qwen2 7b Model

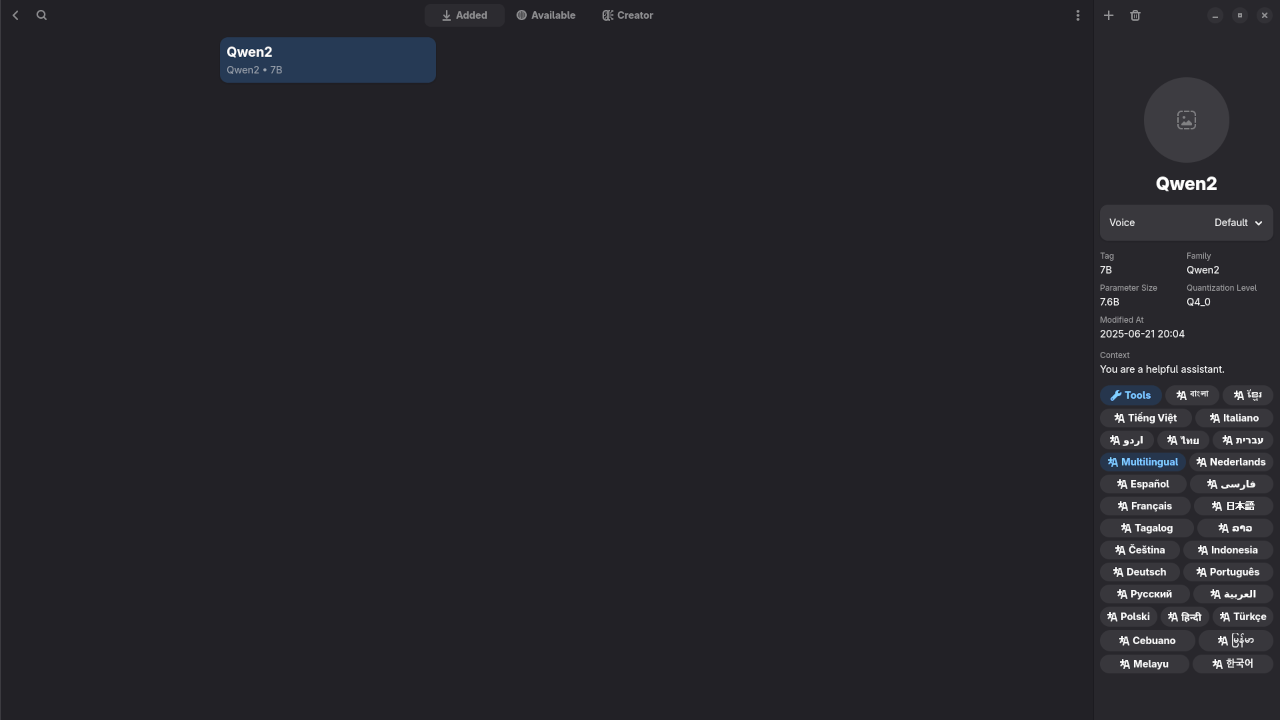
    Review Generative AI Qwen2 7b Model

    🚀 Exploring Qwen2: A Powerful Open LLM – Installation, Testing with Alpaca + Screencast!

    Qwen2 is the latest open-source large language model (LLM) developed by Alibaba’s DAMO Academy. It represents a significant advancement in multilingual understanding and generative tasks. In this guide, we’ll walk you through what Qwen2 is, how to install and run it using Ollama and Alpaca, and test its capabilities. Whether you’re a developer, researcher, or just curious about AI, this post is for you!

    🧠 What is Qwen2?

    Qwen2 is a family of language models released by Alibaba in 2024. It’s designed to compete with models like LLaMA, Mistral, and GPT-style models. Qwen2 supports both base and instruction-tuned versions and comes in various sizes (from 0.5B to 72B), optimized for multilingual and code generation tasks.

    Screencast Walkthrough

    🎥 Watch the Screencast (Setup + Demo)

    Video Displaying Whole Process From Setup To Running Your First Prompt

    📷 Screenshots

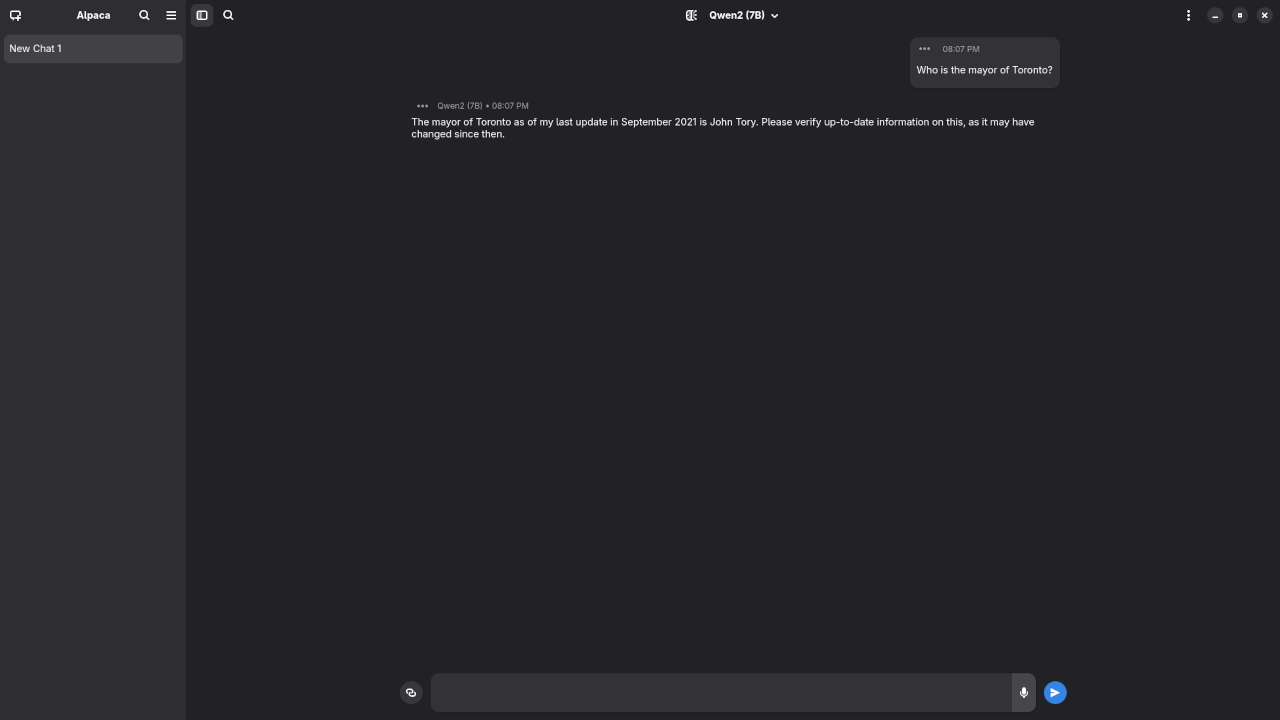
    Alpaca With Gwen2 7B Model Answered Mayoral Request
    Alpaca With Gwen2 7B Model Answering Question Regarding The Mayor Of Toronto

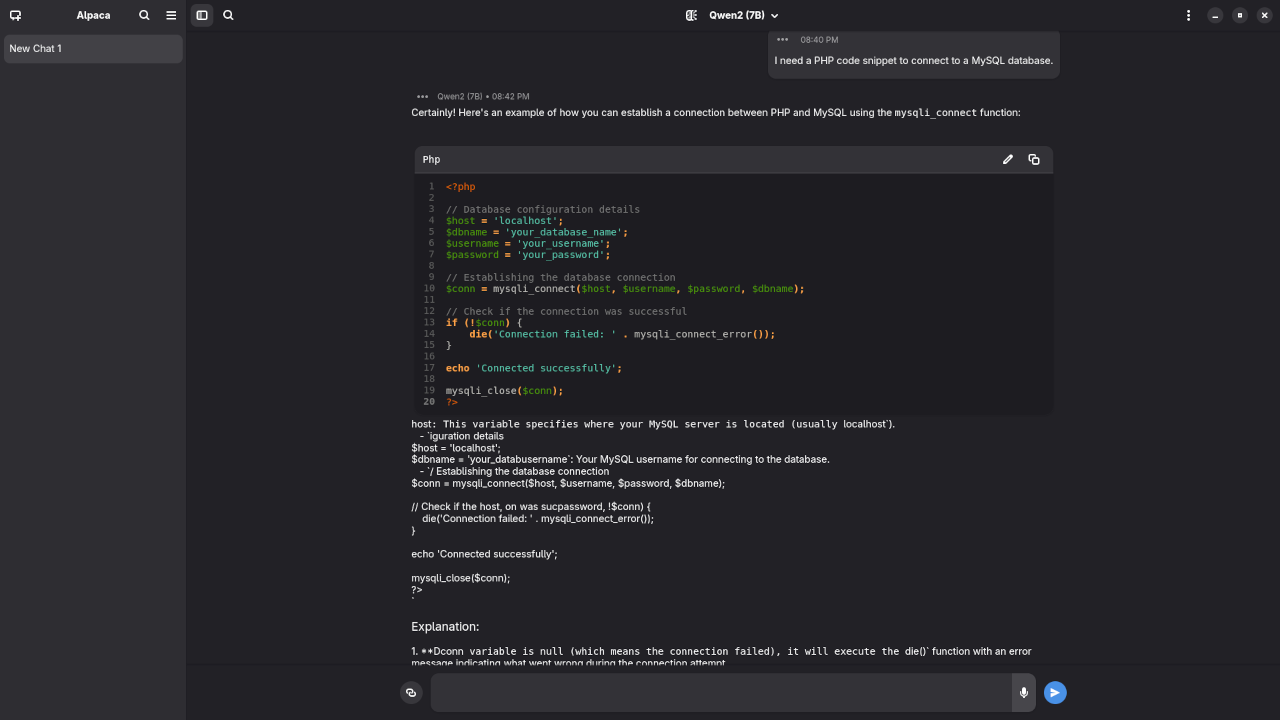
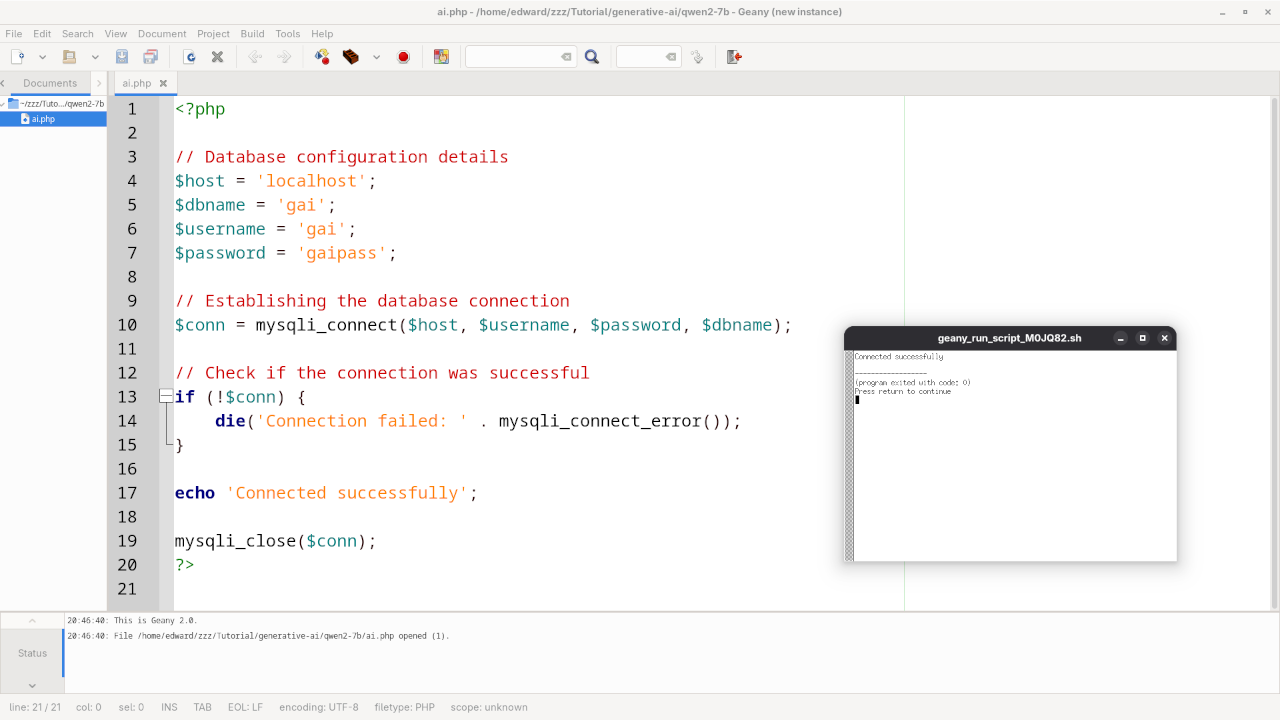
    Alpaca With Gwen2 7B Model Answered PHP Code Request
    Alpaca With Gwen2 7B Model Answering Request For PHP Code

    Alpaca With Gwen2 7B Model PHP Code Running
    Alpaca With Gwen2 7B Model Generated PHP Code Running In Geany IDE

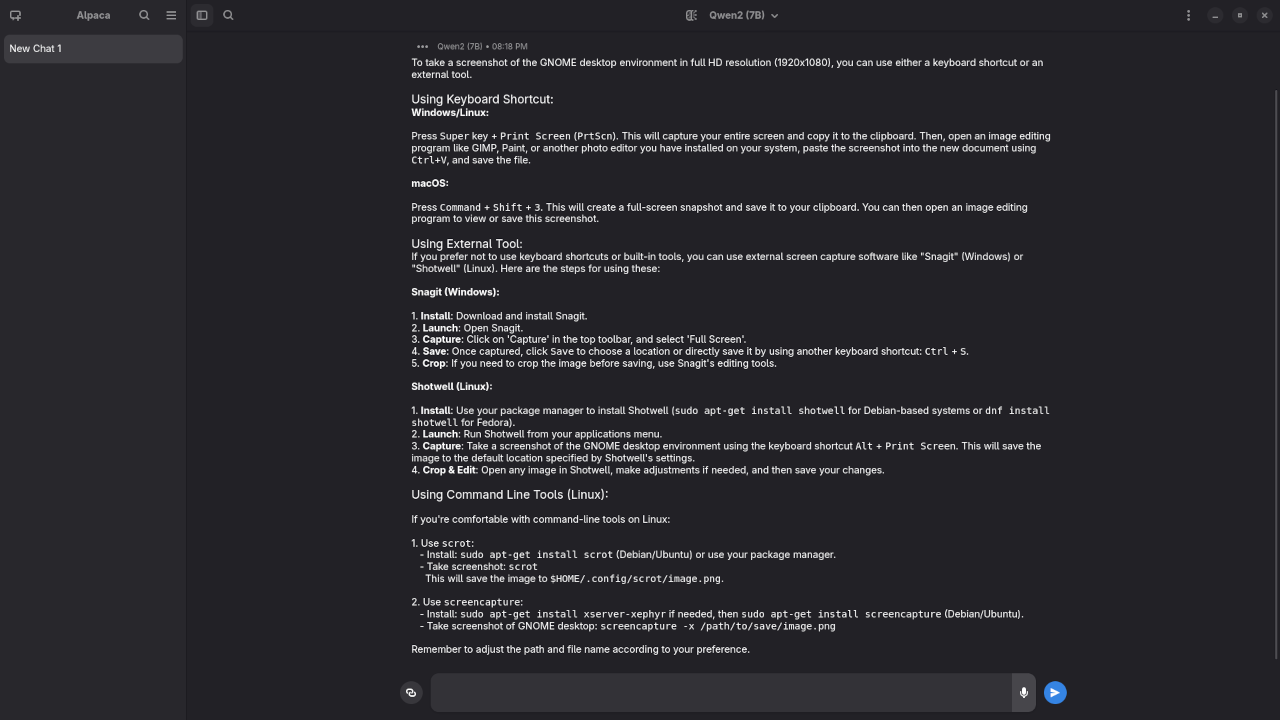
    Alpaca With Gwen2 7B Model Answered Screenshot Request
    Alpaca With Gwen2 7B Model Answering Reuqest For A 1080p Screenshot Of Gnome Desktop

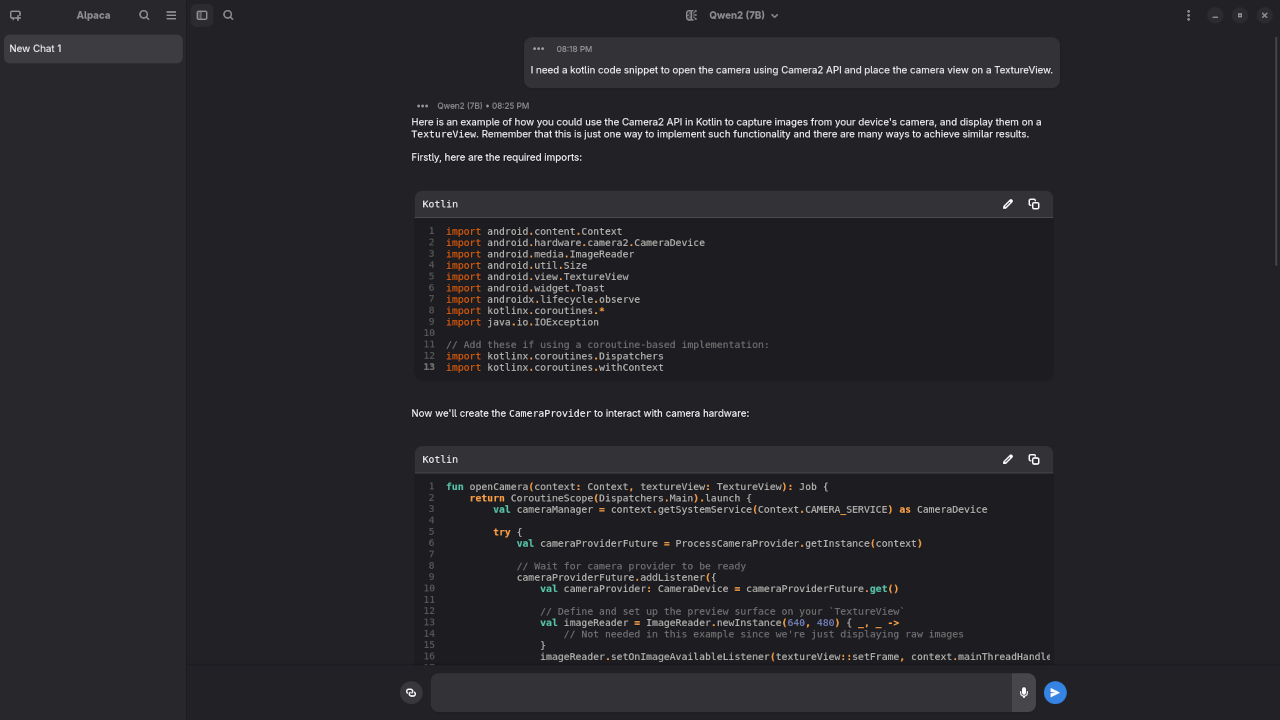
    Alpaca With Gwen2 7B Model Answered Kotlin Code Request
    Alpaca With Gwen2 7B Model Answering Request For Kotlin Camera2 API Code

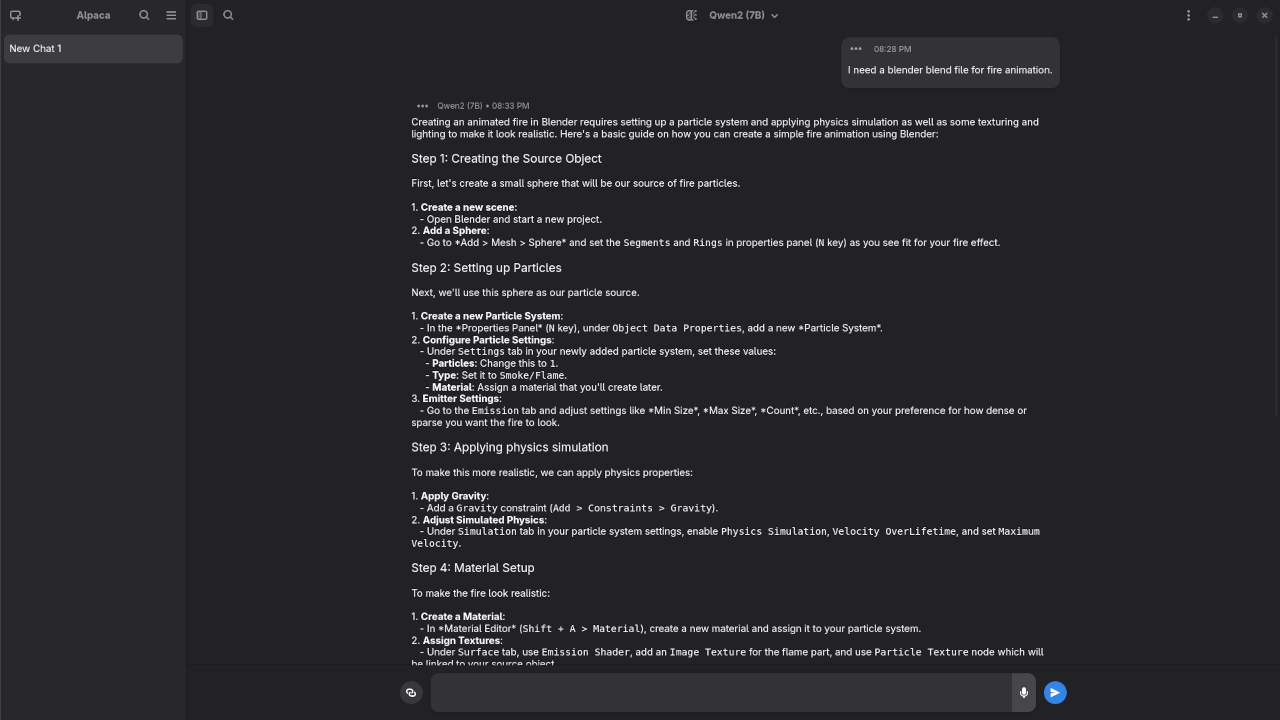
    Alpaca With Gwen2 7B Model Answered Blender Blend File Request
    Alpaca With Gwen2 7B Model Answering Request For A Blender Blend File For Fire Animation

    • 📷 1. Qwen2 in Ollama
      Screenshot of Ollama terminal after pulling Qwen2
    • 📷 2. Alpaca GUI Interface
      Screenshot of the web interface showing a sample chat with Qwen2
    • 📷 3. JSON Output Format If Not Using GUI
      Sample output for API responses if using Alpaca backend

    ⚙️ How to Install Qwen2 (Using Ollama + Alpaca)

    Prerequisites

    Step-by-step Instructions

    1. Install Ollama
      curl -fsSL https://ollama.com/install.sh | sh
    2. Start Ollama and Pull Qwen2
      ollama pull qwen2:instruct
    3. Run the Model
      ollama run qwen2:instruct
    4. Install Alpaca
      flatpak install flathub com.jeffser.Alpaca

    🧪 Testing Qwen2 with Alpaca

    Once everything is running, use the Alpaca web interface to chat with Qwen2. Try the following prompts:

    Who is the mayor of Toronto?

    Produced inaccurate outdated answer to Olivia Chow as the mayor of Toronto.

    I need a PHP code snippet to connect to a MySQL database.

    Produced accurate syntax PHP code snippet to connect to a MySQL database.

    I need a 1080p screenshot of the gnome desktop environment.

    Produced elaborate answer to generate a 1080p screenshot of Gnome desktop environment because it is a text-based AI lacking ability.

    I need a kotlin code snippet to open the camera using Camera2 API and place the camera view on a TextureView.

    Produced incomplete Kotlin code snippet to open the camera using Camera2 API.

    I need a blender blend file for fire animation.

    Produced elaborate answer to generate a fire animation, but not a Blender Blend file because it is a text-based AI lacking ability.

    You’ll notice that Qwen2 is particularly strong at multilingual tasks, logical reasoning, and step-by-step explanation – a perfect playground for developers and researchers alike.

    🙋 Need Help Installing Qwen2?

    If you run into any issues or would like personalized help setting up Qwen2 with Ollama and Alpaca, I’m happy to assist!

    👉 Contact me here anytime or Click here to request help or leave a comment below and I’ll get back to you ASAP.

    Let’s make AI more accessible – together. 💡

    💡 Final Thoughts

    Qwen2 represents a new era of high-performing, multilingual open-source language models. With support from tools like Ollama and Alpaca, it’s easier than ever to test and integrate these models into your projects.

    If you found this guide useful, don’t forget to like the screencast and subscribe to stay updated on more LLM tutorials!

    🔧 Resources

  • How to Use osTicket Helpdesk Solution

    How to Use osTicket Helpdesk Solution


    How to Use osTicket: An Open Source Helpdesk Solution for Your Business

    osTicket is one of the most popular open-source support ticket systems available today. Designed for businesses, nonprofits, and IT departments, it provides a user-friendly way to manage incoming support requests and streamline customer service.

    What is osTicket?

    osTicket is a web-based support ticket system that allows users to submit support requests via email, web forms, or phone. The support staff can manage, assign, and resolve these tickets through a centralized interface.

    Key Features:

    • Email-to-ticket conversion
    • Auto-responses and email alerts
    • Custom forms and ticket filters
    • SLA (Service Level Agreement) support
    • Role-based access control

    License Information

    osTicket is released under the GNU General Public License v2.0 (GPL-2.0). This means:

    • It’s free to use, modify, and distribute
    • You can tailor the source code to fit your needs
    • You must also release your code under the same license if redistributed

    You can review the full license here.

    Screenshots & Screencast

    Here’s a visual overview of osTicket in action:

    Screenshots

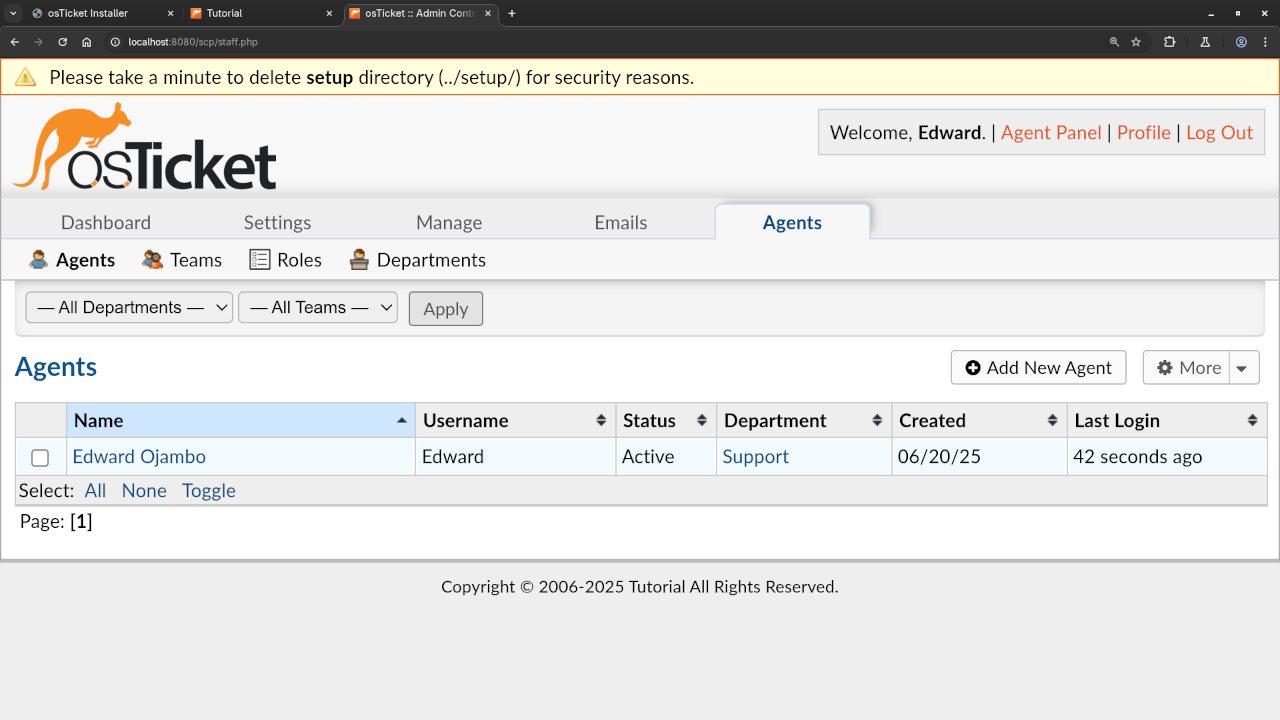
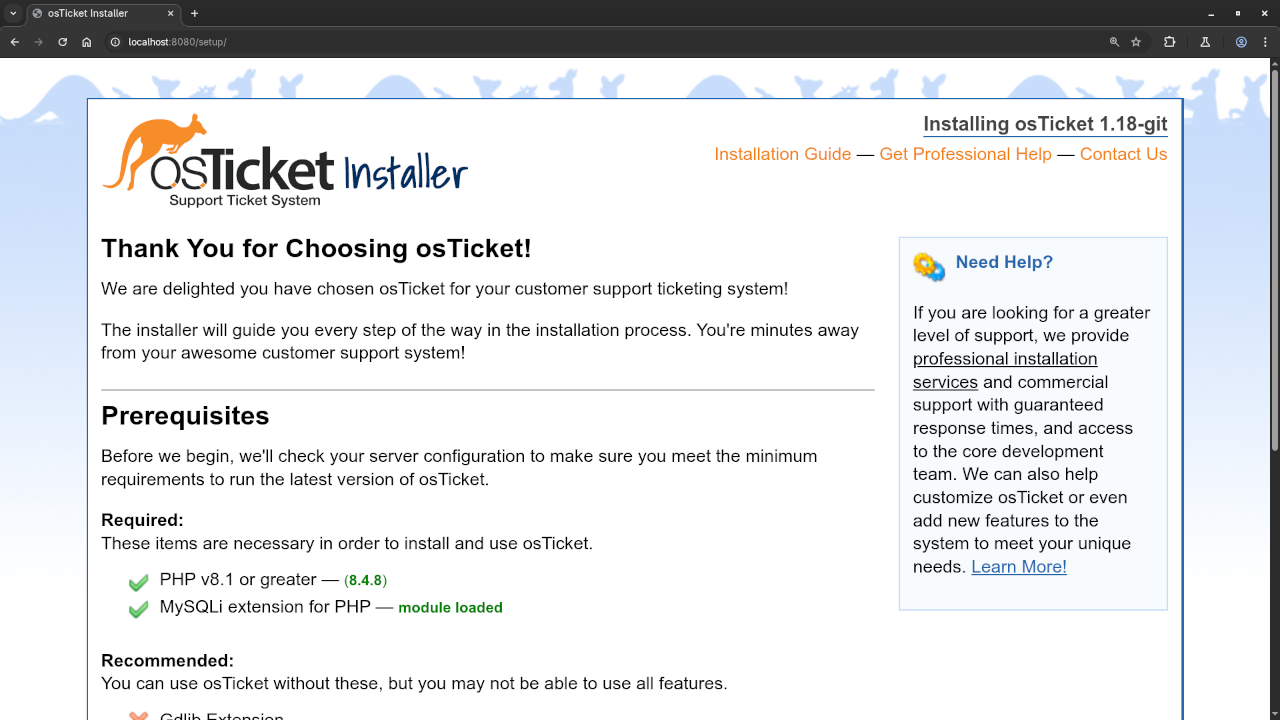
    osTicket Installer
    Web Browser Displaying osTicket Installer

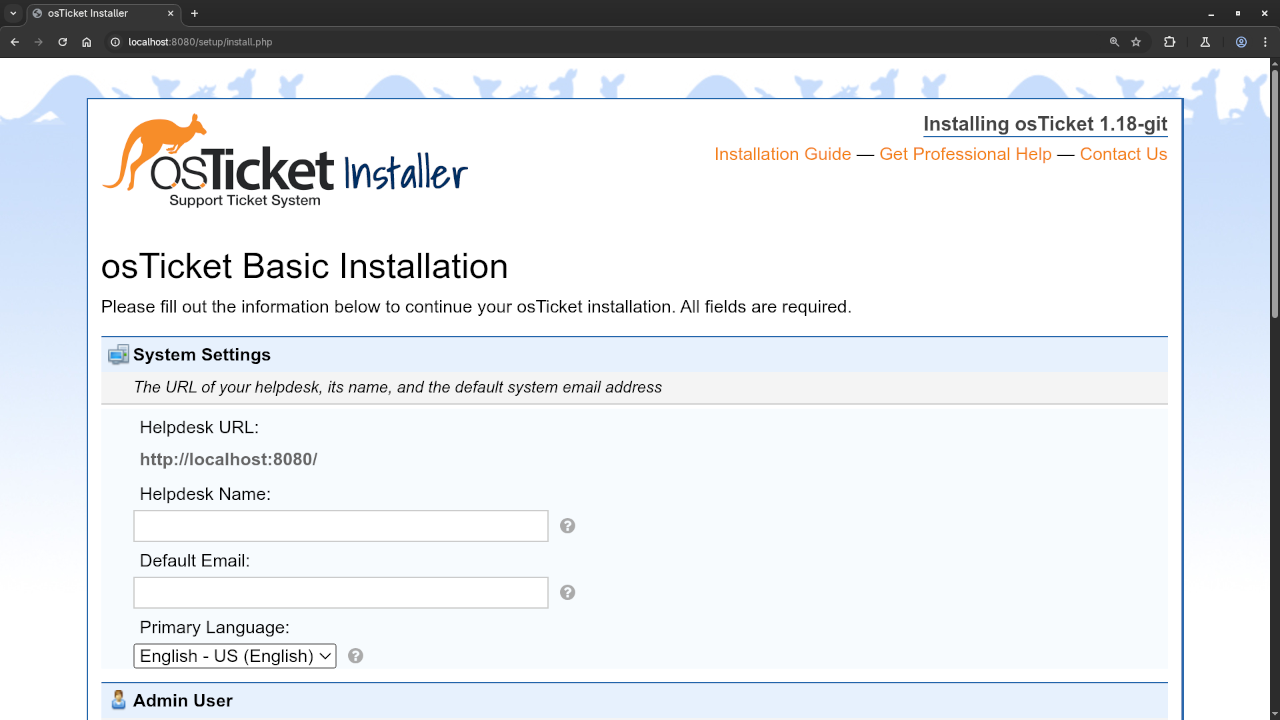
    osTicket Basic Installation
    Web Browser Displaying osTicket Installer Basic Installation Screen

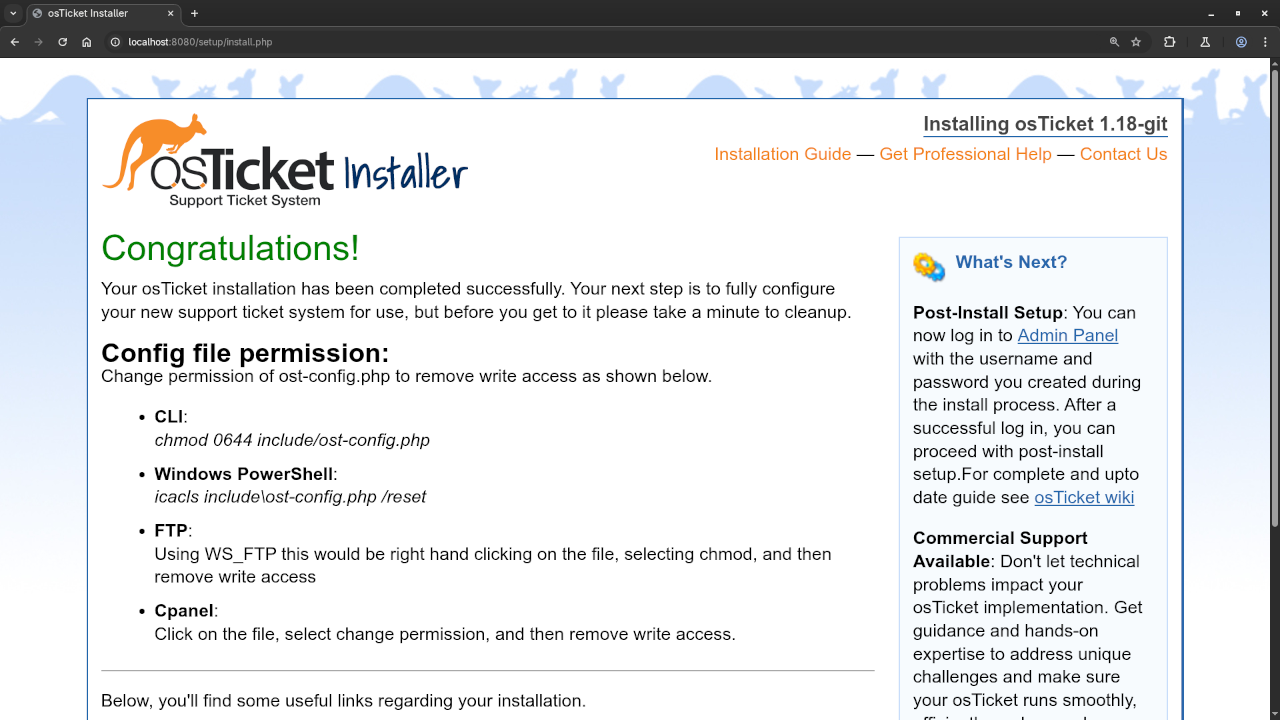
    osTicket Installion Complete
    Web Browser Displaying osTicket Installer Completed Screen

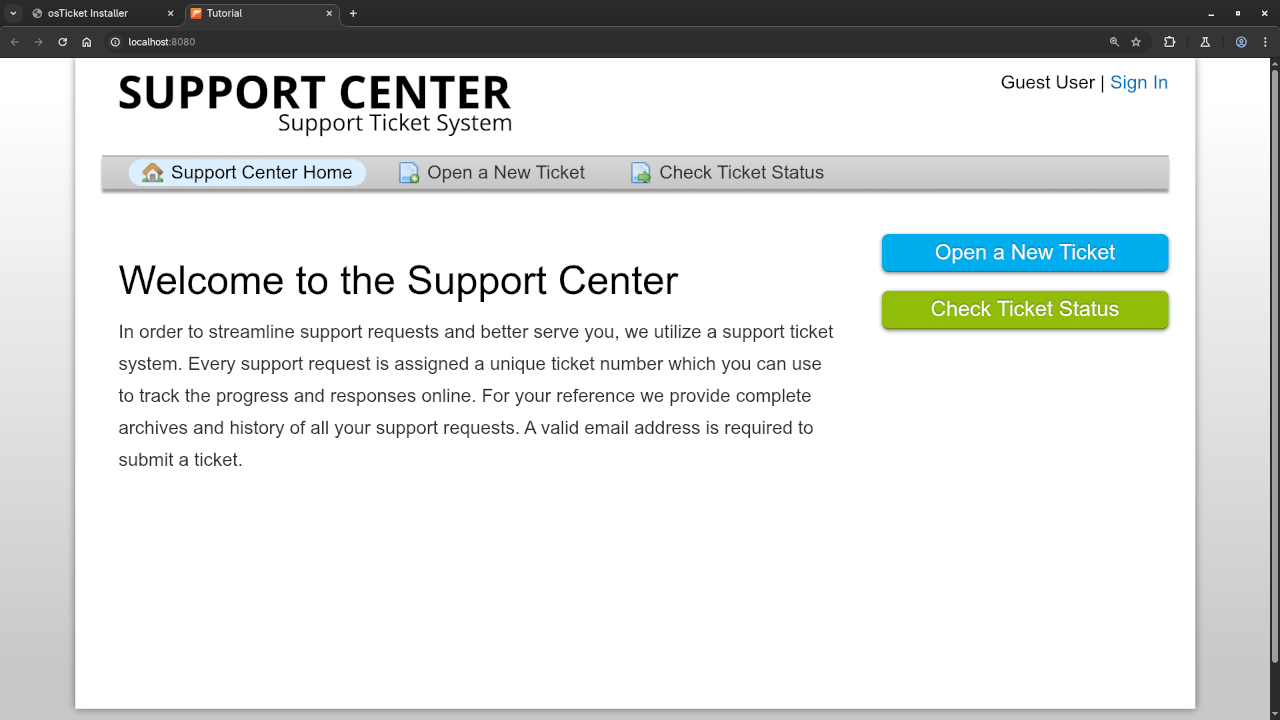
    osTicket Support Center
    Web Browser Displaying osTicket Support Center

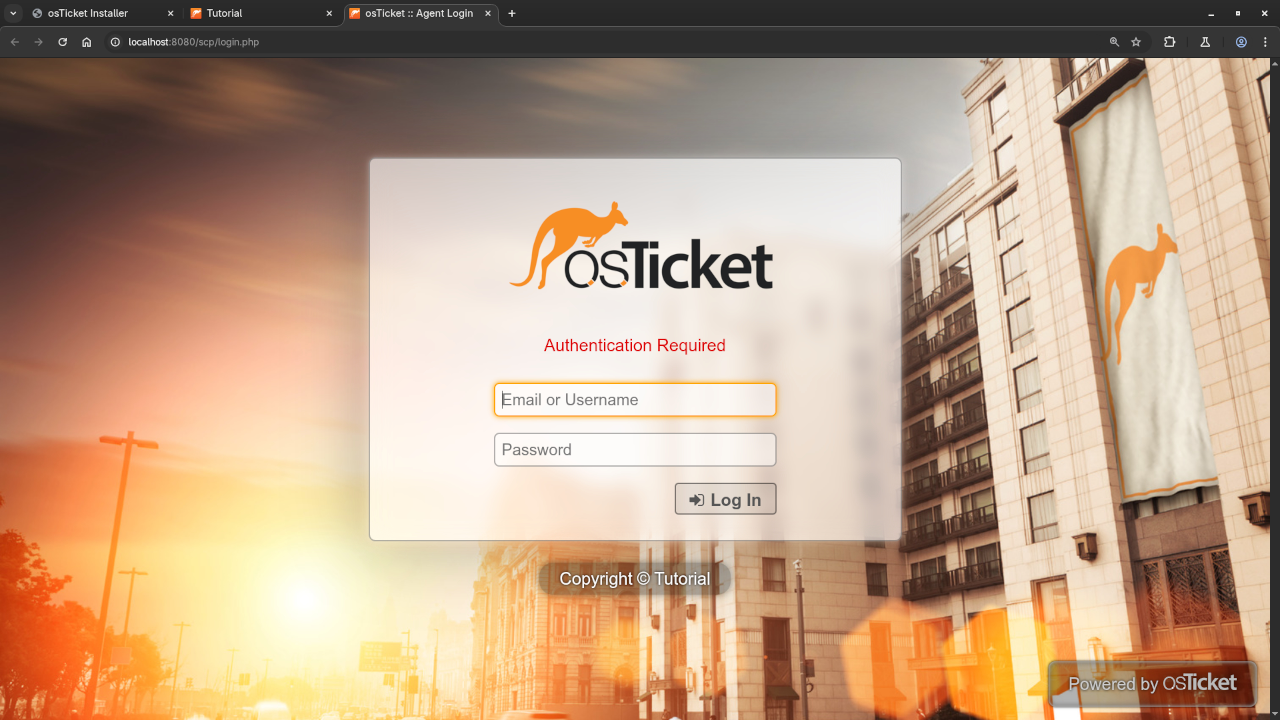
    osTicket Agent Login
    Web Browser Displaying osTicket Agent Login Screen

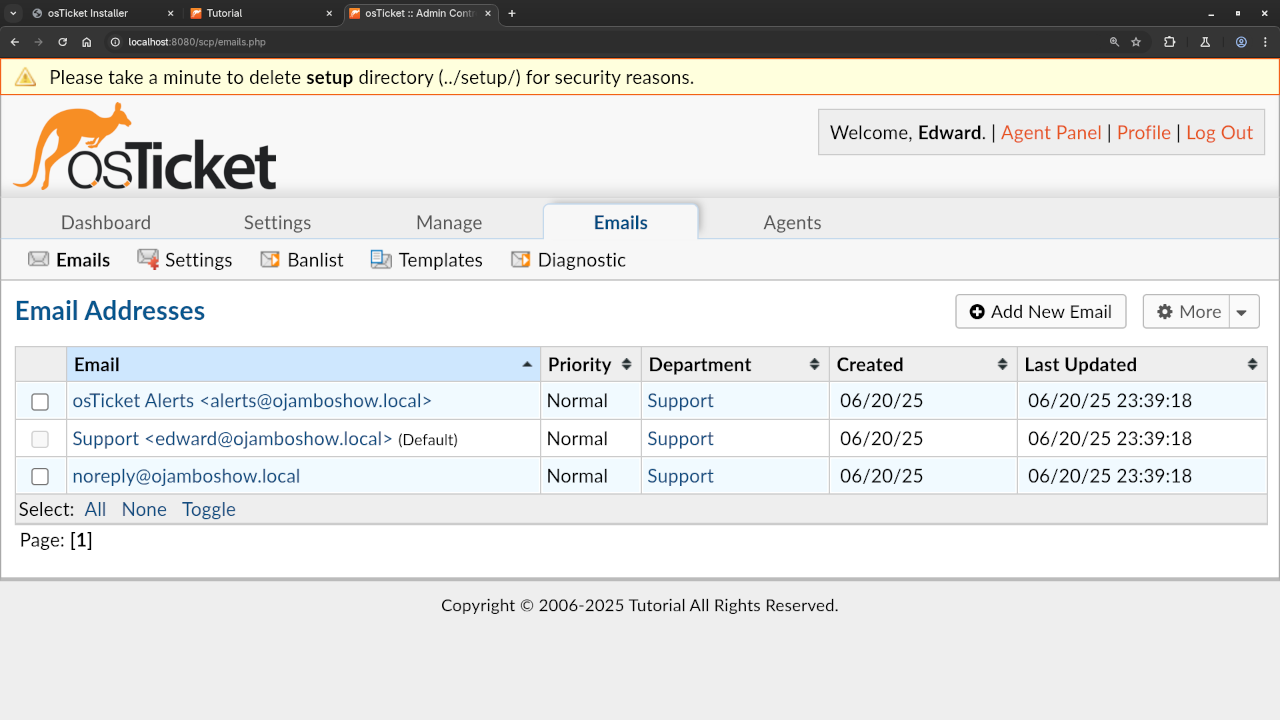
    osTicket Admin Messages
    Web Browser Displaying osTicket Messages Screen

    Screencast: How osTicket Works

    Video Demonstrating osTicket Ticketing System

    How to Install osTicket (Self-Hosted)

    You can host osTicket on your own server for maximum control and customization. Here’s a quick guide to get you started:

    System Requirements:

    • Web server: Apache/Nginx
    • PHP: 8.0-8.2
    • MySQL: 5.5+ or MariaDB

    Installation Steps:

    1. Download osTicket
      Get the latest version from the official site
    2. Upload to Your Server
      Extract the ZIP file and upload contents to your web root (e.g., /var/www/osticket/)
    3. Create a Database
      Use phpMyAdmin or the command line:


            CREATE DATABASE osticket;
            CREATE USER 'ostuser'@'localhost' IDENTIFIED BY 'securepassword';
            GRANT ALL PRIVILEGES ON osticket.* TO 'ostuser'@'localhost';
            FLUSH PRIVILEGES;
            
      
    4. Run the Installer
      Navigate to http://yourdomain.com/osticket/setup and follow the on-screen instructions
    5. Secure and Clean Up
      Remove the /setup directory and change permissions on /include/ost-config.php to read-only

    Need Help Installing?

    If you’d prefer to skip the technical setup, I can help you get osTicket installed and customized for your business needs.

    Contact me here: Ojambo Services or use my contact form.
    Final Thoughts

    osTicket is a powerful and flexible ticketing system backed by a strong open-source community. Whether you’re managing IT support or customer service, it’s a tool worth exploring.

    Have you tried osTicket? Share your experience in the comments below!

  • Effectively Git Clone Specific Branches Or Latest Releases

    Effectively Git Clone Specific Branches Or Latest Releases

    Master Git Clone: Fast, Focused, Powerful

    Excerpt:
    Learn how to use git clone more efficiently with practical tips for speed, specific branches, shallow clones, and more. Plus: Git’s open-source roots, private tutorials, and multimedia walkthroughs.

    🧪 What is git clone?

    The git clone command creates a full local copy of a Git repository. It includes all files, history, and branches by default.

    git clone https://github.com/username/repo.git

    This command is just the beginning—below are powerful ways to customize it.

    💡 Tip 1: Clone a Specific Branch

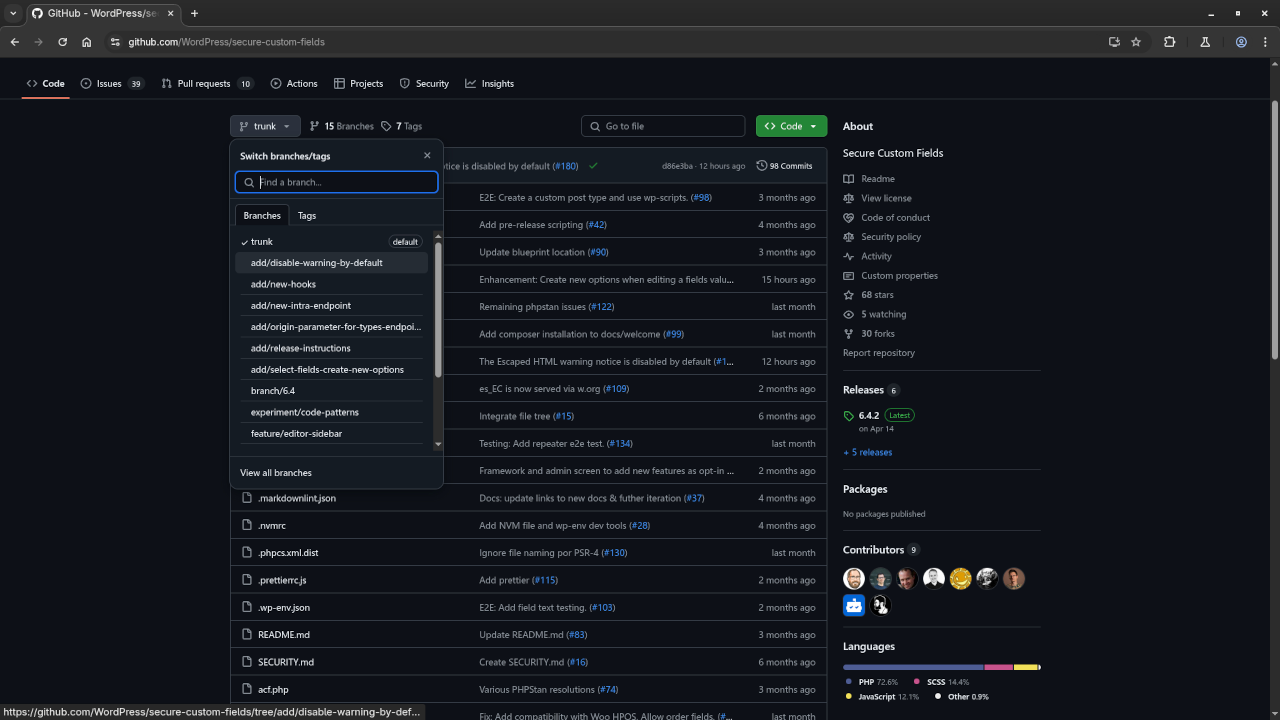
    Need just one branch instead of the whole repo?

    git clone -b feature-login https://github.com/username/repo.git

    This skips checking out the default branch and jumps right into the one you want.

    ⚡ Tip 2: Speed It Up with --depth

    Speed up cloning and save disk space with a shallow clone:

    git clone --depth 1 https://github.com/username/repo.git/

    Combine this with a branch for even better performance:

    git clone --depth 1 -b staging https://github.com/username/repo.git

    Perfect for CI jobs or quick testing.

    🚀 Tip 3: Clone the Latest Release

    Want only the latest tagged release? Use the GitHub API:


       LATEST_TAG=$(curl -s https://api.github.com/repos/username/repo/releases/latest | grep tag_name | cut -d '"' -f 4)
       git clone --branch "$LATEST_TAG" --depth 1 https://github.com/username/repo.git


    This ensures you’re working with the most stable release.

    🚀 Bonus: Clone Without Git History (Like a ZIP)

    If you’re not planning to use Git features and just want the codebase, GitHub offers a download-as-ZIP option on every repo page. But if you still want to use Git:


       git clone --depth 1 https://github.com/username/repo.git
       rm -rf repo/.git


    This ensures you’re working with the most stable release.

    🌐 Git is 100% Open Source

    Git is an open-source distributed version control system, originally created by Linus Torvalds for the Linux kernel. It’s free to use, licensed under GPLv2, and supported by a global community.

    • You can inspect, modify, and contribute to its source code.
    • Git works locally without needing a cloud service.
    • It’s not tied to any one provider (like GitHub or GitLab).

    Git’s open nature is part of what makes it so widely adopted across tech teams today.

    🎓 Book Private Git Tutorials With Me

    I offer 1-on-1 private tutorials covering:

    • Git basics (clone, commit, push, pull)
    • Branching strategies (Git Flow, trunk-based)
    • GitHub/GitLab workflows
    • Solving common merge conflicts
    • CI/CD with Git

    🕐 Sessions are available remotely and tailored to your skill level.
    📧 Contact me to schedule a session

    📷 Git Clone in Action: Screenshots & Video

    Seeing is believing! Below are visual guides showing the git clone command in different scenarios.

    📸 Screenshots:

    • Cloning a repo in VS Code terminal
    • Result of shallow clone (--depth 1)
    • Directory structure after clone
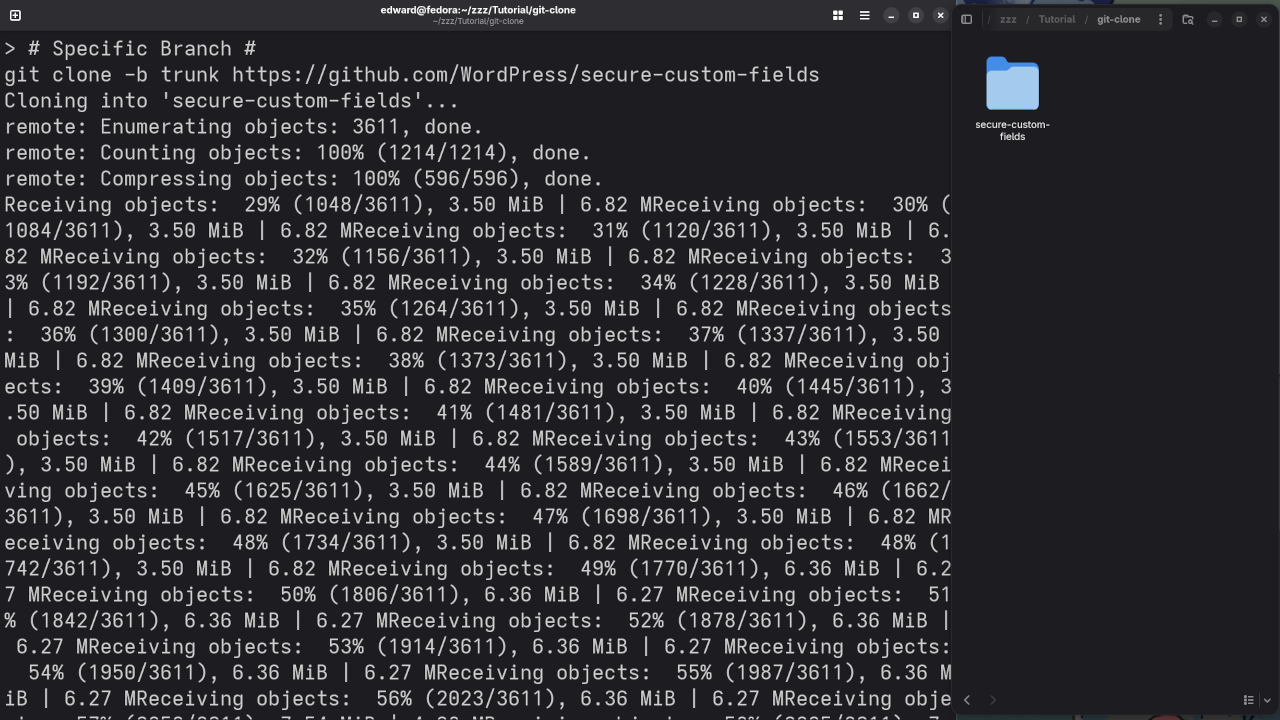
    Git Clone Specific Branch
    Command Line Git Clone A Specific Branch

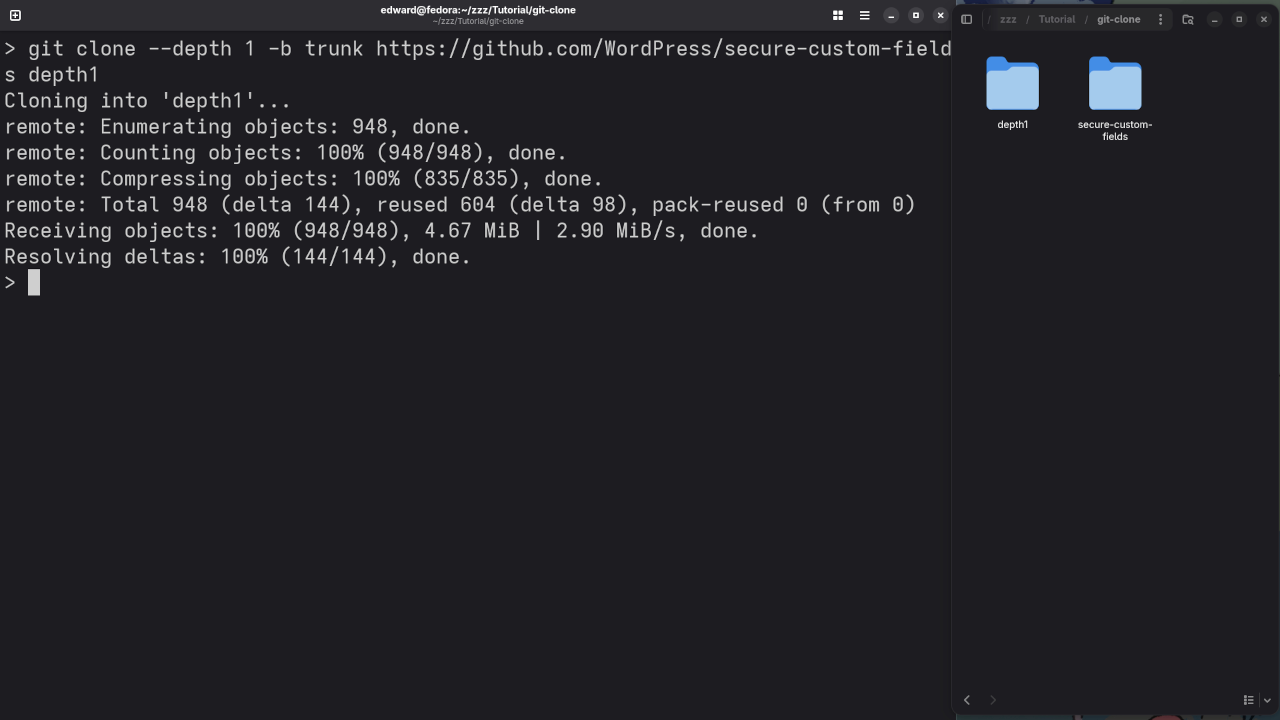
    Git Clone Shallow Depth
    Command Line Git Clone Shallow (--depth 1)

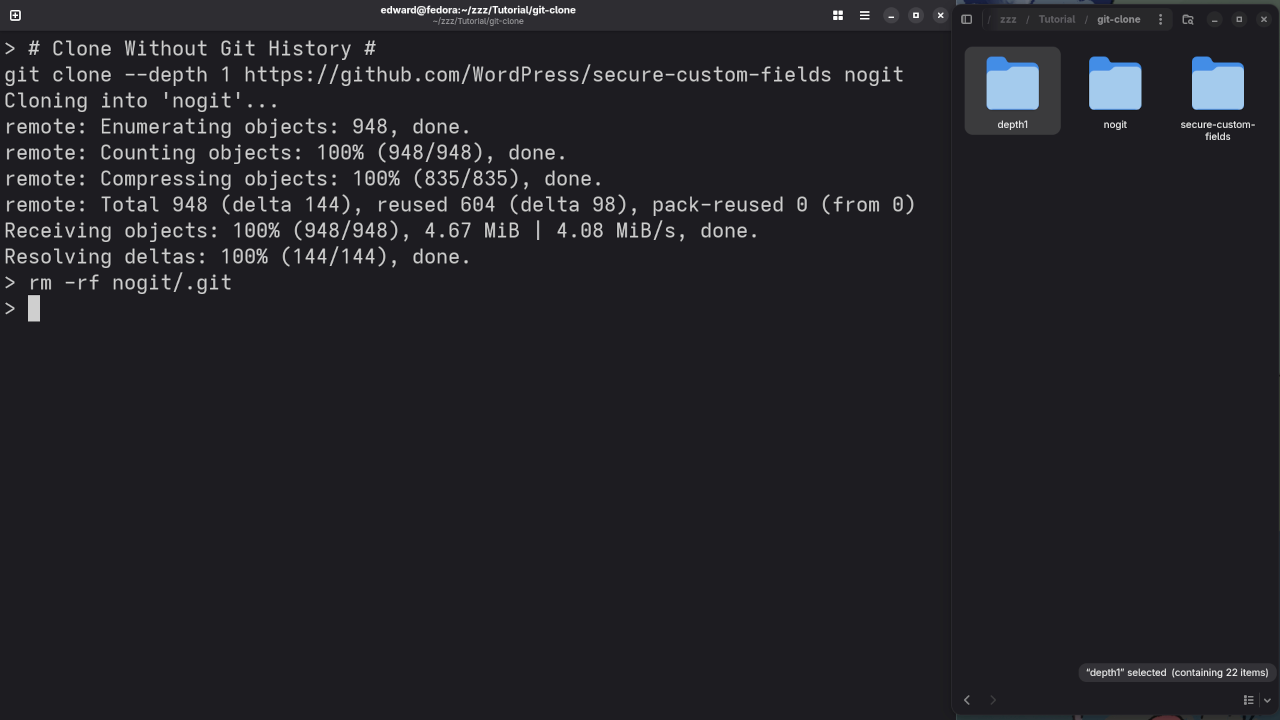
    Git Clone Without History
    Command Line Git Clone Without Git History

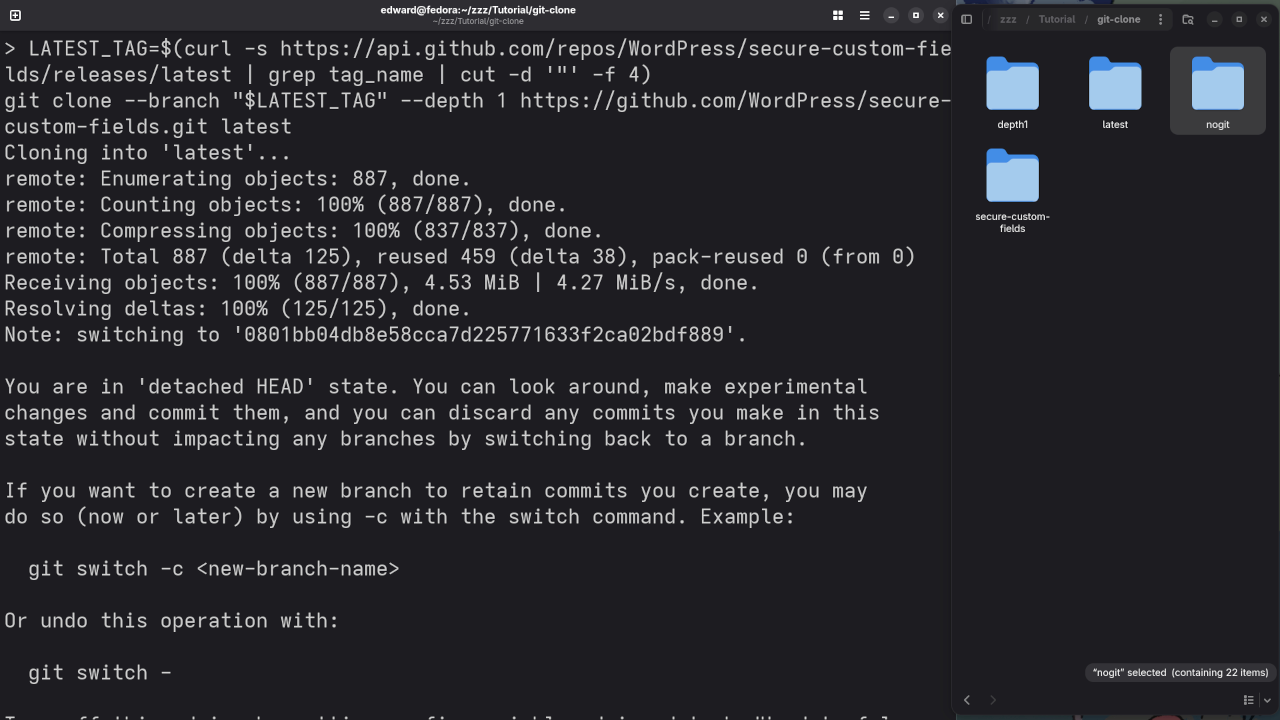
    Git Clone Latest Tag
    Command Line Git Clone Latest Tag

    🎥 Video Walkthrough:

    Step-by-step cloning, how to branch, code depth and release tag

    ✅ Final Thoughts

    With just a few flags, git clone becomes a powerful tool for faster workflows and more precise development. Try out these tips and consider exploring Git beyond the basics.

    📌 Don’t forget to comment or reach out if you want personalized help!

  • PHP Web Framework Yii2

    PHP Web Framework Yii2


    Getting Started with Yii2: How to Install and Build a Sample App that Uses a Database

    If you’re a developer looking to build fast, secure, and feature-rich PHP applications, Yii2 is an excellent choice. Yii2 is an open-source, high-performance PHP framework that makes developing modern web applications easy and enjoyable.

    In this article, we’ll walk you through the steps to:

    • Install Yii2
    • Set up a basic app
    • Connect to a database
    • Pull data from a sample table
    • List the supported databases

    What is Yii2?

    Yii2 stands for “Yes, it is!” — and for good reason. It’s a full-stack framework designed for building robust and scalable web applications. It supports rapid development, secure coding practices, and is optimized for performance.

    Yii2 follows the MVC (Model-View-Controller) Architecture that makes code more organized, maintainable, and testable..

    Open Source

    Yii is released under the BSD-3-Clause Revised License. The permissive license requires the preservation of the copyright notice and disclaimer. It allows commercial use, modification, distribution, and allows making derivatives proprietary, consult the license for more specific details.

    The PHP scripting language is licensed under the PHP License. The permissive license has conditions requiring preservation of copyright and license notices. Redistribution is permitted in source or binary form with or without modifications, consult the license for more specific details.

    Requirements For Yii2

    Glossary

    Model

    Represents the data and business logic. Interacts with the database (CRUD operations), performs calculations, and handles data processing.

    View

    Responsible for displaying the user interface. Contains HTML, CSS, and potentially some PHP for data presentation.

    Controller

    Acts as the intermediary. Receives user requests, loads models, interacts with them to retrieve data, and then loads the appropriate views to display the results.

    How to Install Yii2

    To install Yii2, you’ll need Composer. If you haven’t installed it yet, download Composer here.

    Step 1: Create a New Project

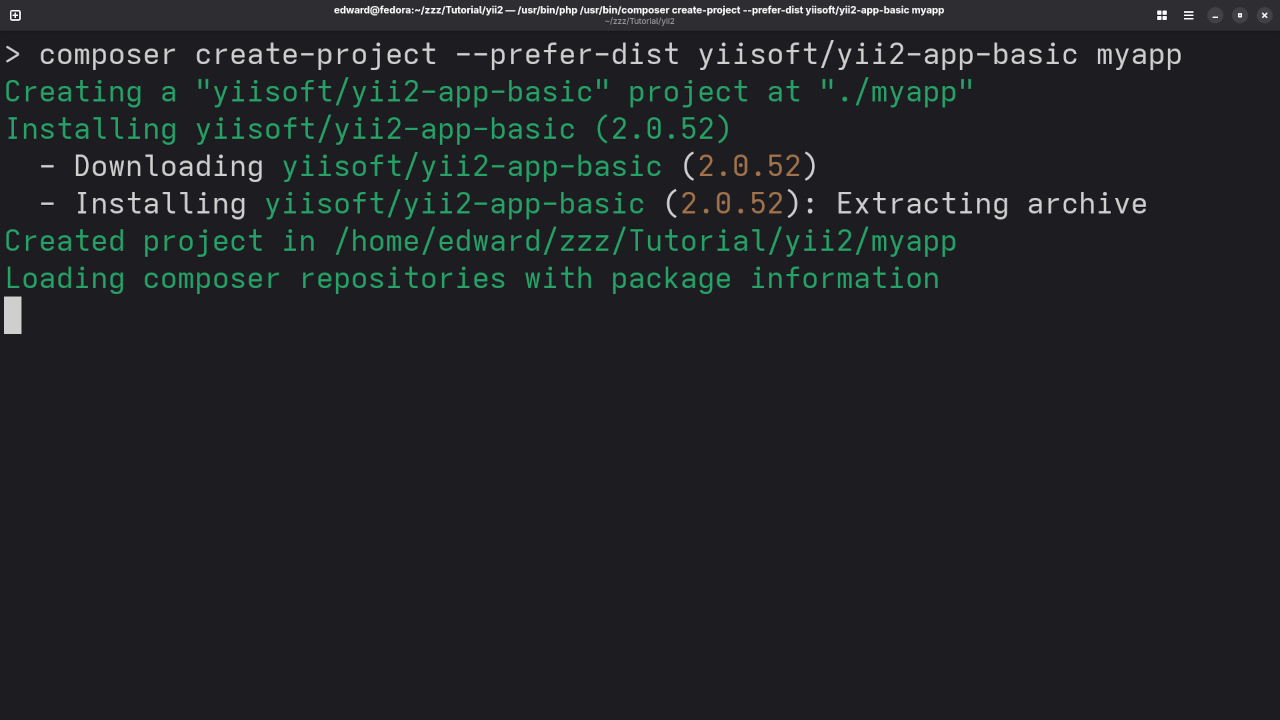
    composer create-project --prefer-dist yiisoft/yii2-app-basic myapp

    Step 2: Set File Permissions

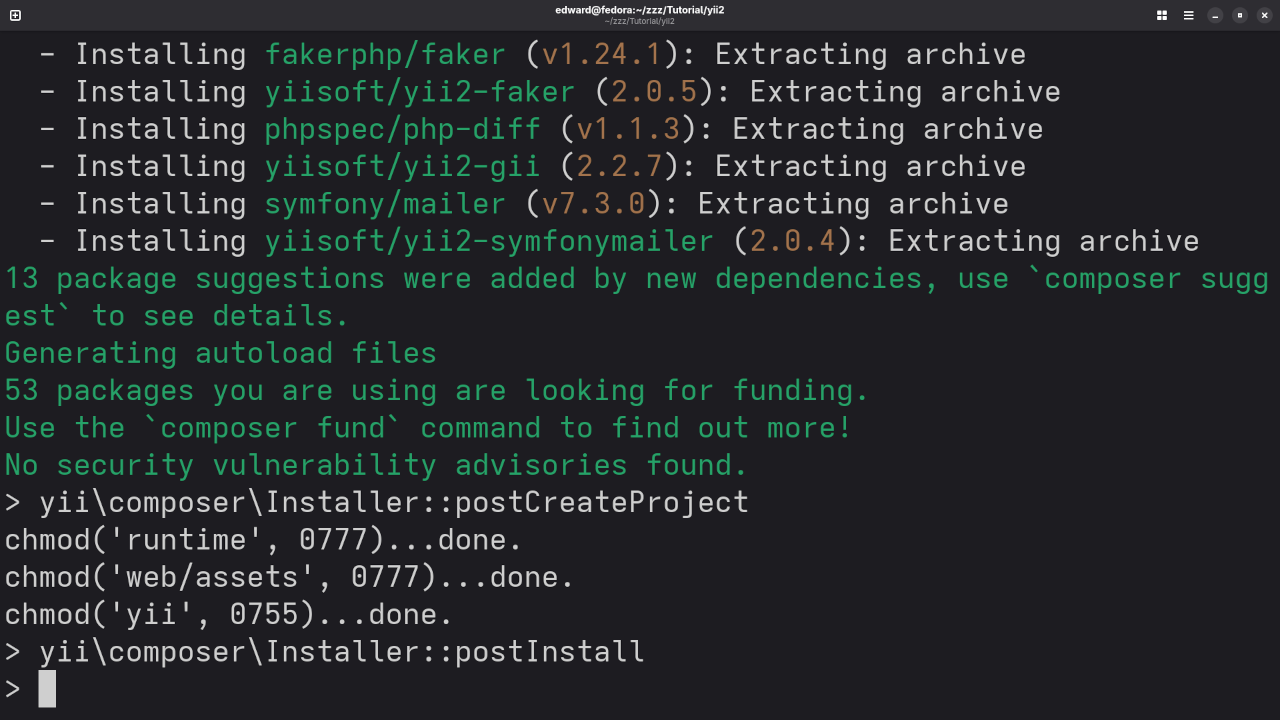
    chmod -R 777 myapp/runtime
    chmod -R 777 myapp/web/assets

    Step 3: Run the Built-In PHP Server

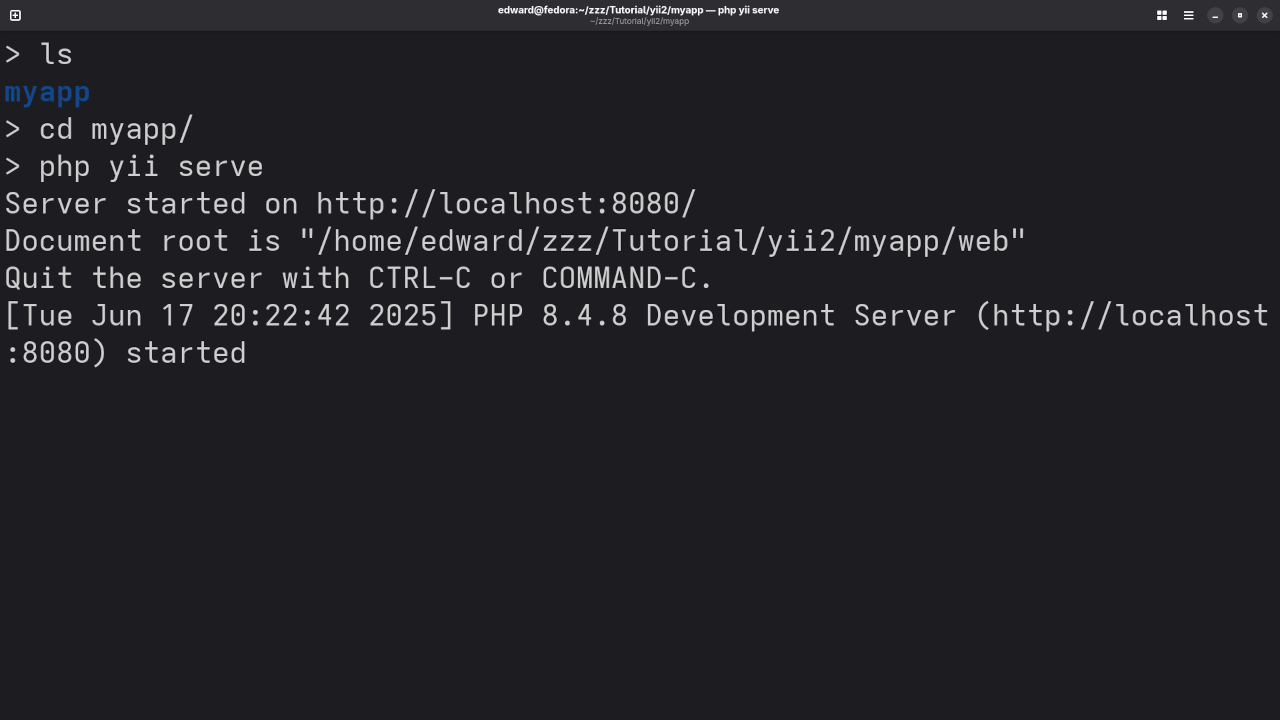
    cd myapp
    php yii serve

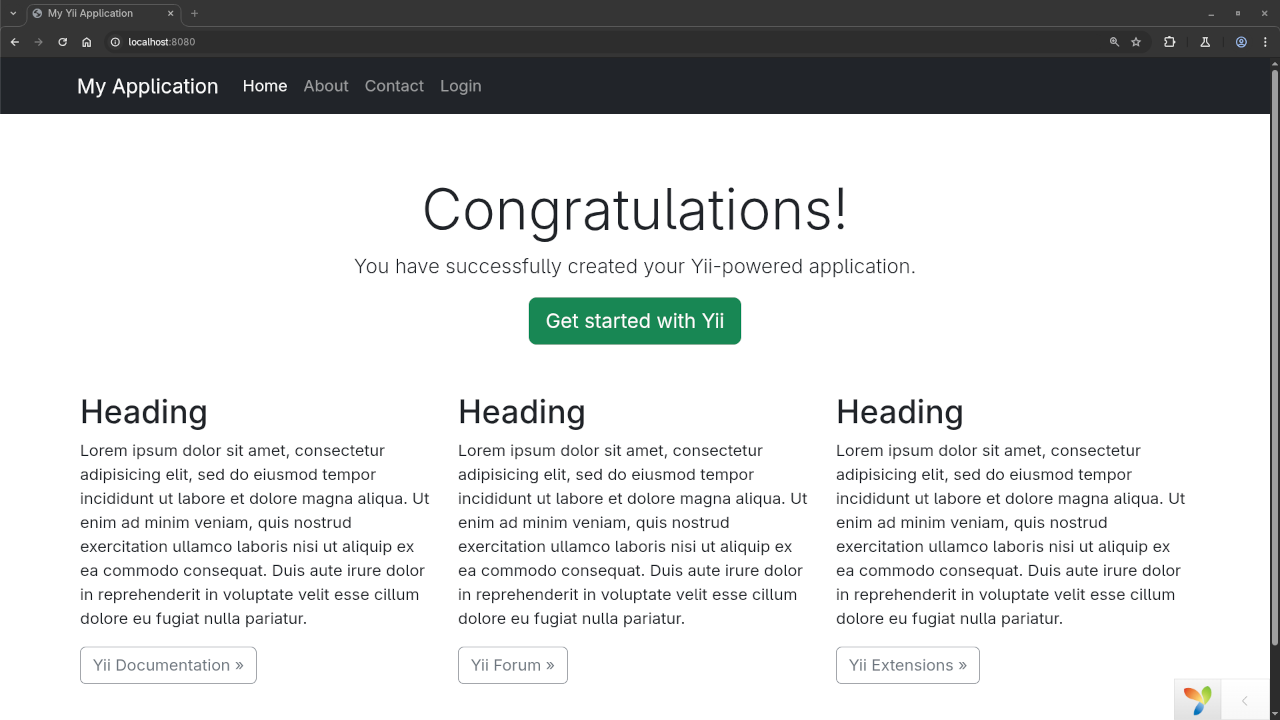
    Then go to http://localhost:8080 in your browser.

    Setting Up the Database Connection

    Yii2 uses a database configuration file at config/db.php.


       return [
          'class' => 'yii\db\Connection',
          'dsn' => 'mysql:host=localhost;dbname=mydatabase',
          'username' => 'root',
          'password' => '',
          'charset' => 'utf8',
       ];


    Creating a Sample Table and Pulling Data

    Create Table SQL


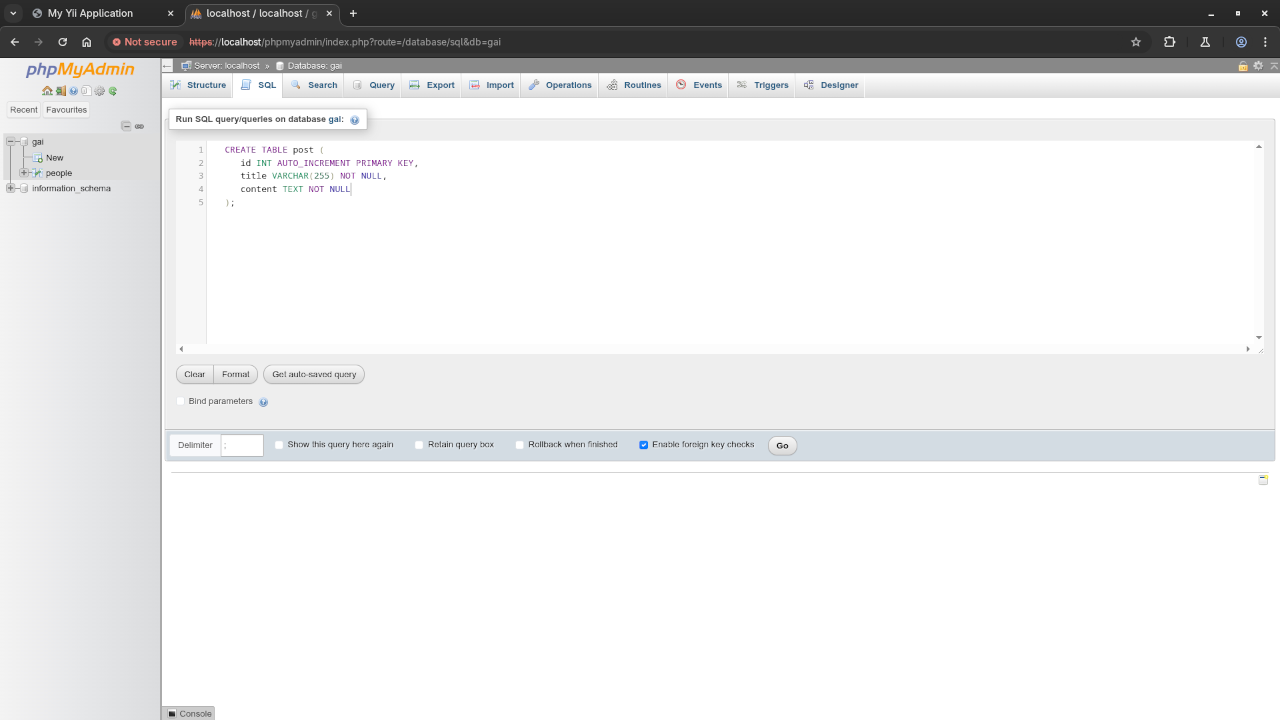
       CREATE TABLE post (
          id INT AUTO_INCREMENT PRIMARY KEY,
          title VARCHAR(255) NOT NULL,
          content TEXT NOT NULL
       );


    Insert Sample Data


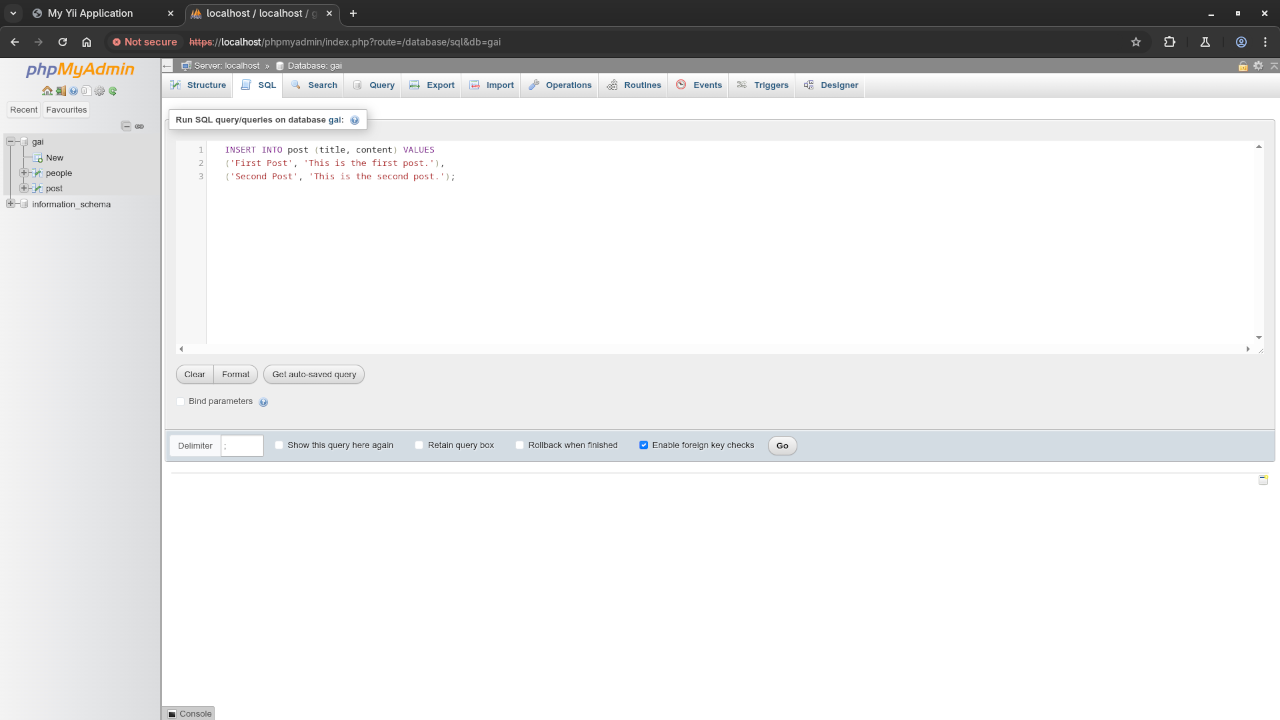
       INSERT INTO post (title, content) VALUES
       ('First Post', 'This is the first post.'),
       ('Second Post', 'This is the second post.');


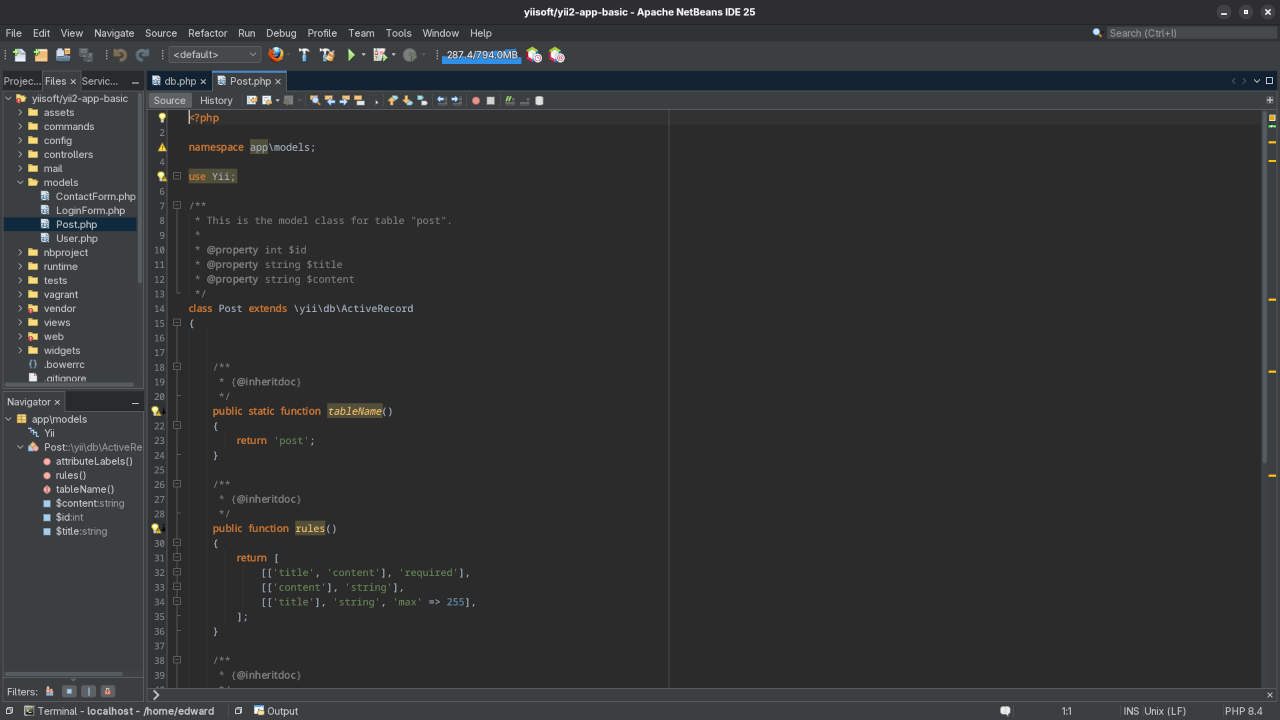
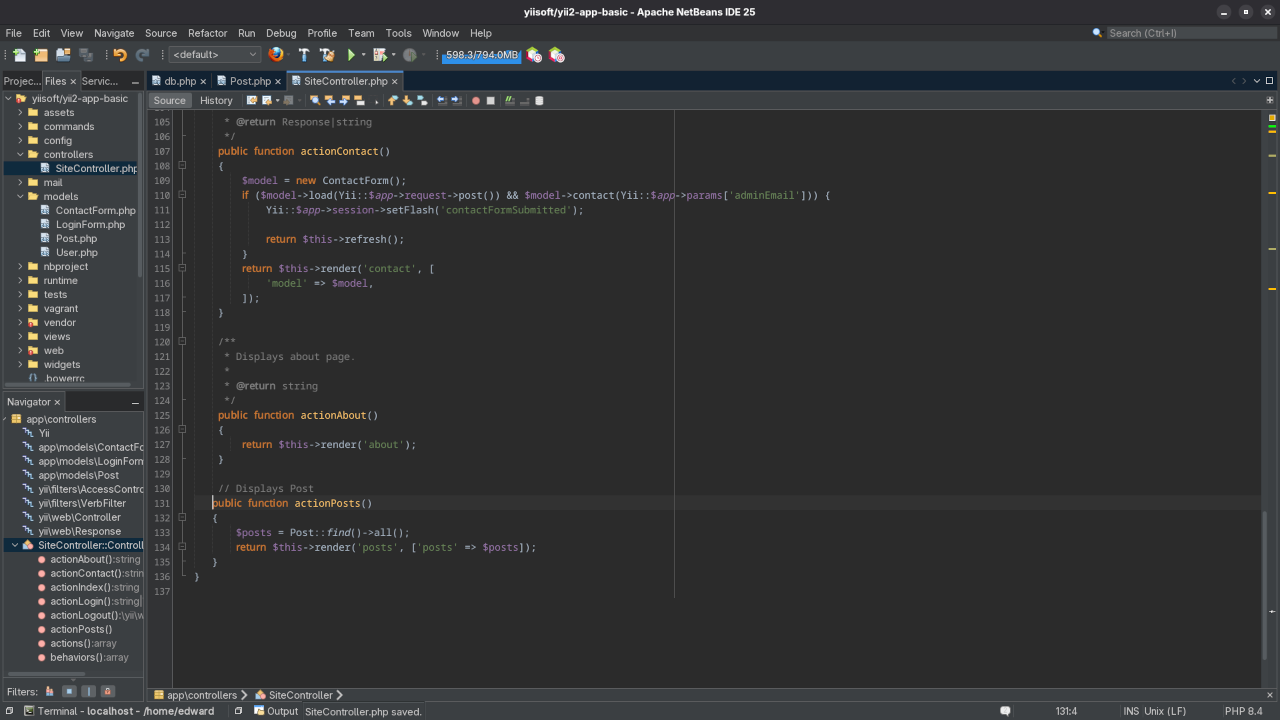
    Generate a Model with Gii

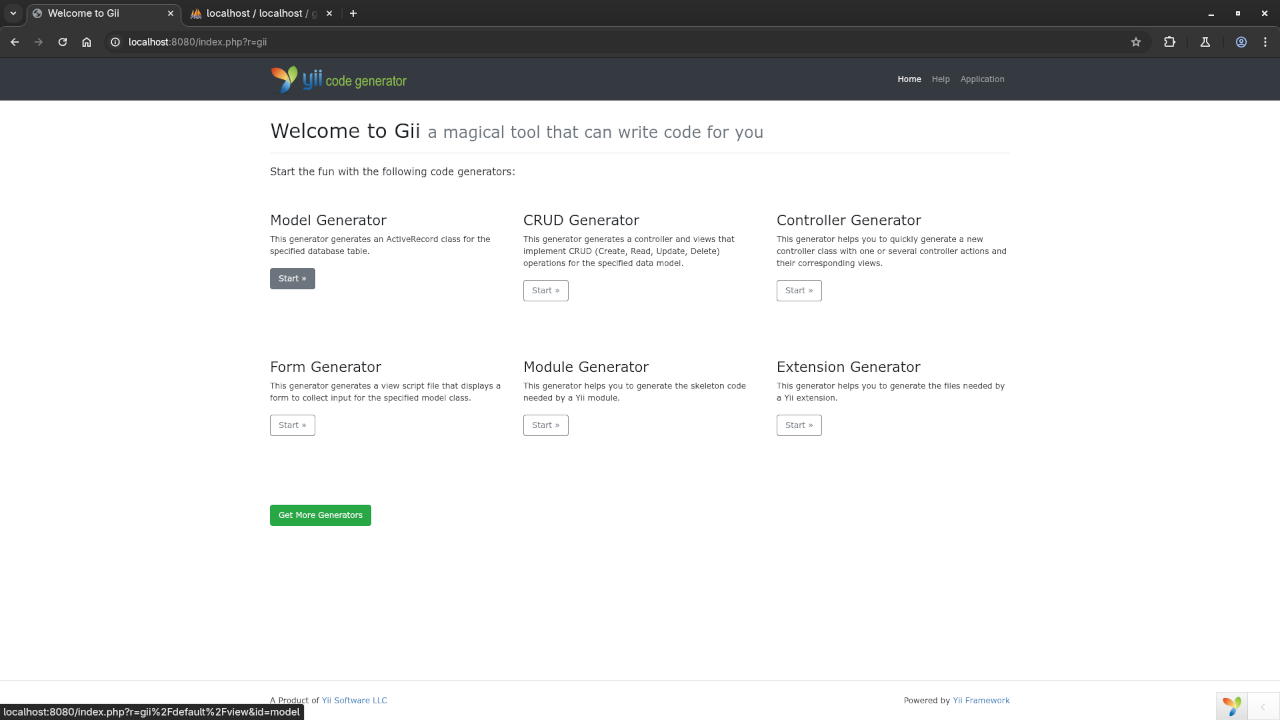
    Visit Gii code generator:

    http://localhost:8080/index.php?r=gii

    • Use the Model Generator
    • Enter post as table name
    • Click Preview, then Generate

    Display Data from the Model


       use app\models\Post;
    
       public function actionPosts()
       {
           $posts = Post::find()->all();
           return $this->render('posts', ['posts' => $posts]);
       }


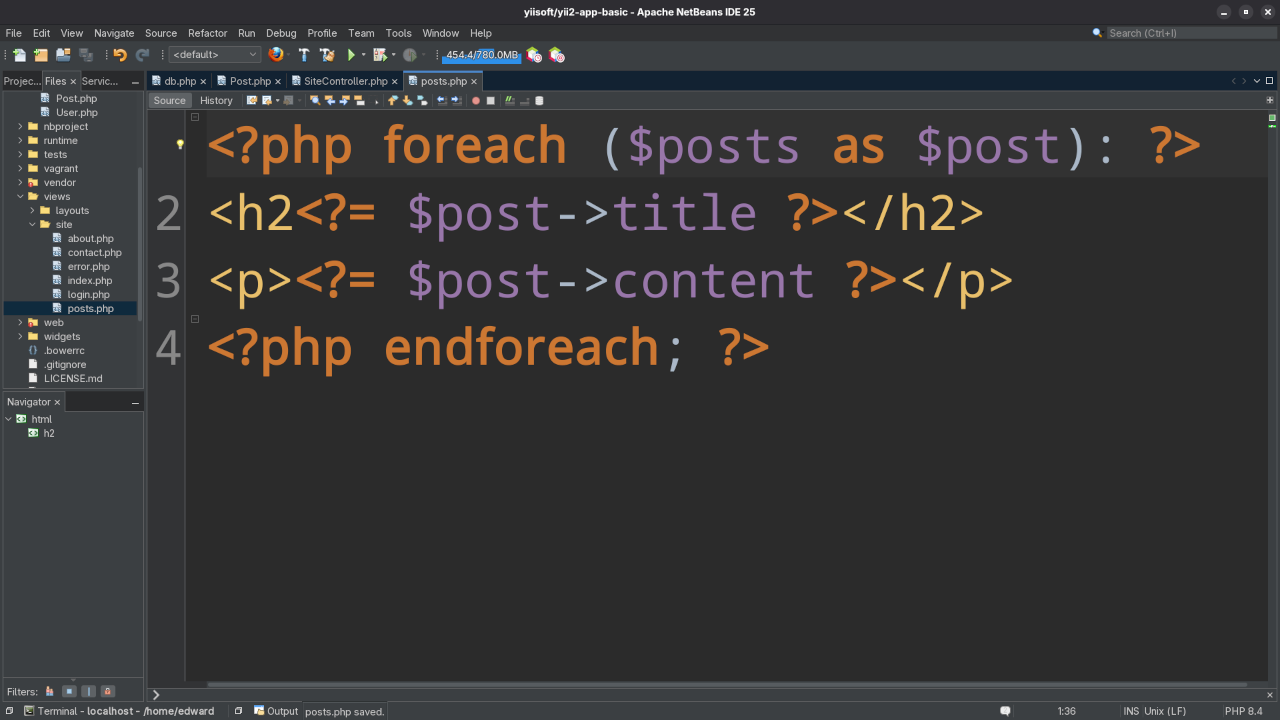
    Create a view at views/site/posts.php:


       <?php foreach ($posts as $post): ?>;
       <h2<?= $post->title ?></h2>
       <p><?= $post->content ?></p>
       <?php endforeach; ?>


    Supported Databases in Yii2

    • MySQL / MariaDB
    • PostgreSQL
    • SQLite
    • Microsoft SQL Server
    • Oracle (via extensions)

    Screenshots

    Yii2 Installation In Terminal
    Command Line Yii2 Installation Using Composer

    Yii2 Permissions In Terminal
    Command Line Yii2 Permissions Using Composer

    Yii2 Server In Terminal
    Command Line Yii2 Web Server Running

    Yii2 Database Configuration
    Netbeans IDE Displaying Yii2 Database Configuration File

    Yii2 Database Table
    PHPMyAdmin Displaying Yii2 Database Table Creation SQL

    Yii2 Database Table Records
    PHPMyAdmin Displaying Yii2 Database Table Insertion SQL

    Gii Model Generator Tool
    Web Browser Displaying Gii Generator Screen

    Yii2 Generated Model
    Netbeans IDE Displaying Yii2 Generator Model File

    Yii2 View
    Netbeans IDE Displaying Yii2 View File

    Yii2 Controller
    Netbeans IDE Displaying Site Controller File

    Screencast

    Watch the full walkthrough on YouTube:

    Yii2 Custom View Record In Web Browser

    Need Help?

    Need help setting this up? Feel free to leave a comment or contact me directly and I’ll be happy to help!

    Summary

    • Installed Yii2 via Composer
    • Configured a database
    • Created a model using Gii
    • Displayed database content on a web page

    Yii2 is a fast, secure, and powerful PHP framework that can get your apps running in no time.

  • Extracting Blender VSE Markers Using Python

    Extracting Blender VSE Markers Using Python

    Automating Video Renders in Blender: Extracting VSE Markers with the Python API

    Blender is well known for its powerful 3D tools, but its Video Sequence Editor (VSE) also offers a capable solution for video editing and automation.
    If you’ve ever needed to split and render multiple clips from a timeline using markers, Blender’s Python API makes it possible and efficient.

    In this post, we’ll explore how to use the Blender Python API to:

    • Extract all timeline markers from the VSE
    • Use those markers to define video segments
    • Automatically render each segment as a separate video file

    This workflow is ideal for content creators, educators, and editors working with long timelines who want to automate rendering based on defined points in the timeline.

    Why Use Markers?

    Markers in Blender’s VSE are a convenient way to label or segment parts of a timeline. They serve as visual bookmarks for key events, cuts, or chapters.

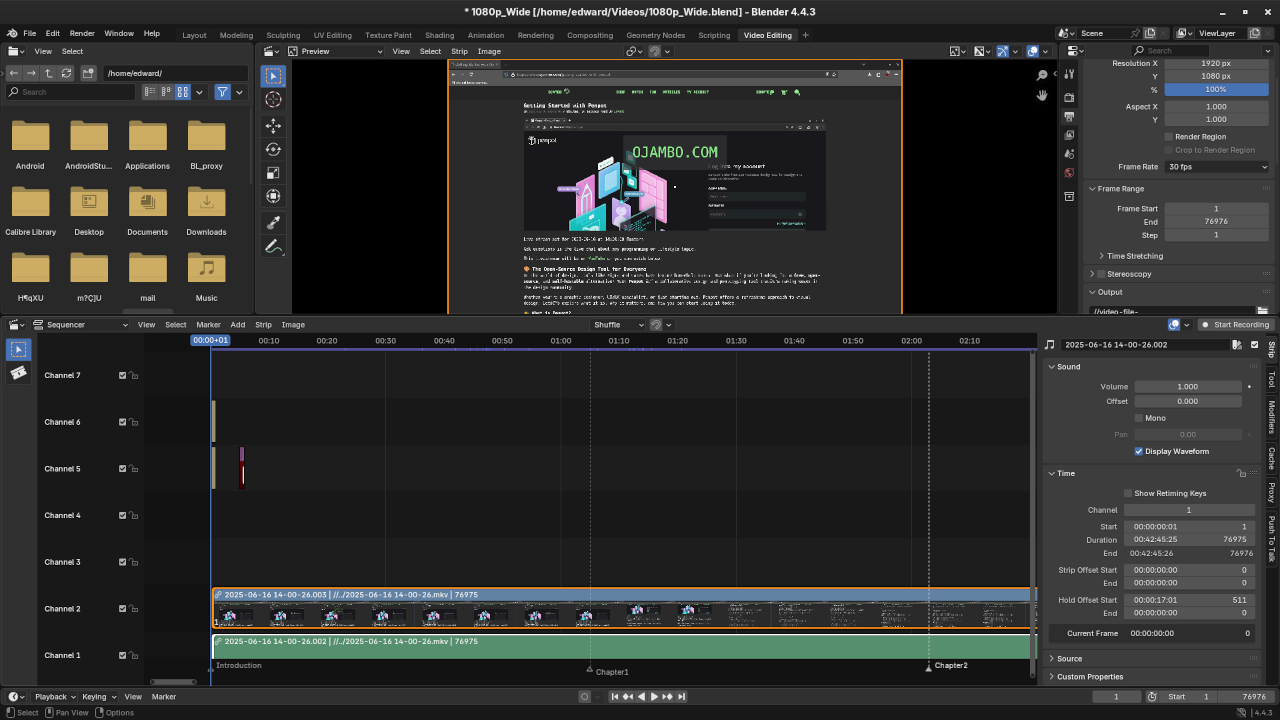
    If you’ve edited a recording and added markers such as Intro, Chapter1, Chapter2, and Outro, you can use those to automatically split and render each section without manually setting start and end frames every time.

    Prerequisites

    • Blender 2.80 or later
    • Basic familiarity with Blender’s scripting interface
    • A video editing project with VSE markers already added

    Python Script for Rendering by Marker Segments

    Below is a Python script you can run inside Blender’s scripting environment:


       import bpy
       import os
    
       # Define Output Folder Relative To The Blend File #
       output_folder = bpy.path.abspath("//")
       os.makedirs(output_folder, exist_ok=True)
    
       # Sort Markers By Frame Position #
       markers = sorted(bpy.context.scene.timeline_markers, key=lambda m: m.frame)
    
       # Get Current Scene And Render Settings #
       scene = bpy.context.scene
       render = scene.render
       original_filepath = render.filepath
       file_format = render.image_settings.file_format
    
       # Set Render Format To Video FFmpeg #
       render.image_settings.file_format = 'FFMPEG'
       render.ffmpeg.format = 'MPEG4'
    
       # Iterate Over Marker Pairs To Render Each Segment #
       for i in range(len(markers) - 1):
           start_marker = markers[i]
           end_marker = markers[i + 1]
    
           scene.frame_start = start_marker.frame
           scene.frame_end = end_marker.frame - 1
    
           clip_name = f"{start_marker.name}_to_{end_marker.name}.mp4"
           render.filepath = os.path.join(output_folder, clip_name)
    
           print(f"Rendering: {clip_name} [{scene.frame_start} - {scene.frame_end}]")
           bpy.ops.render.render(animation=True)
    
       # Restore Original Render Settings #
       render.filepath = original_filepath
       render.image_settings.file_format = file_format
    
       print("All segments rendered successfully.")


    How the Script Works

    1. Marker Sorting: Gathers and sorts all timeline markers by their frame number.
    2. Frame Ranges: Each render range is defined from the current marker to just before the next.
    3. Segment Rendering: Each range is rendered to a unique video file.
    4. Settings Reset: The script restores your original render output path and format afterward.

    Best Practices

    • Ensure markers are named consistently and clearly (e.g., Scene1, Scene2, etc.).
    • Always include at least two markers to define a segment.
    • For the final section of your timeline, add an extra marker at the end to capture that segment properly.

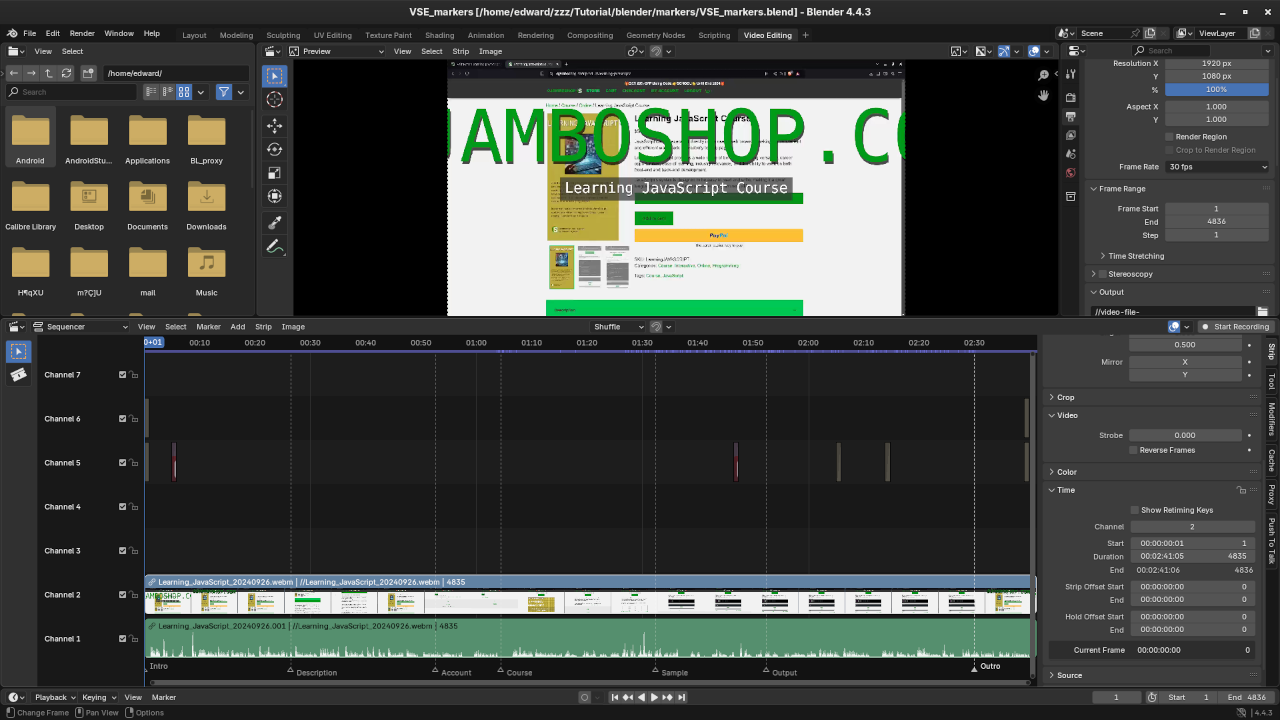
    Screenshots: Markers in the VSE Timeline

    Timeline Markers In Blender VSE
    Blender Video Sequence Editor Displaying Timeline Markers

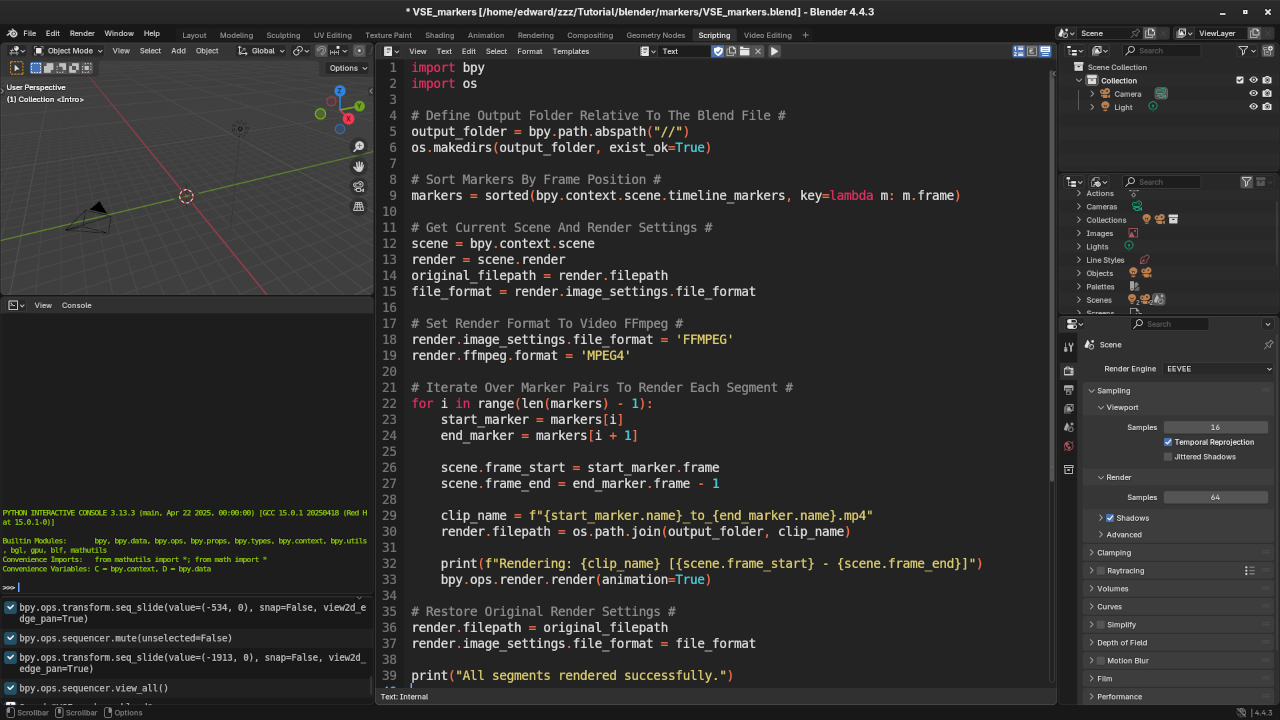
    Python Code In Blender Scripting Tab
    Blender Scripting Interface Displaying Python Code

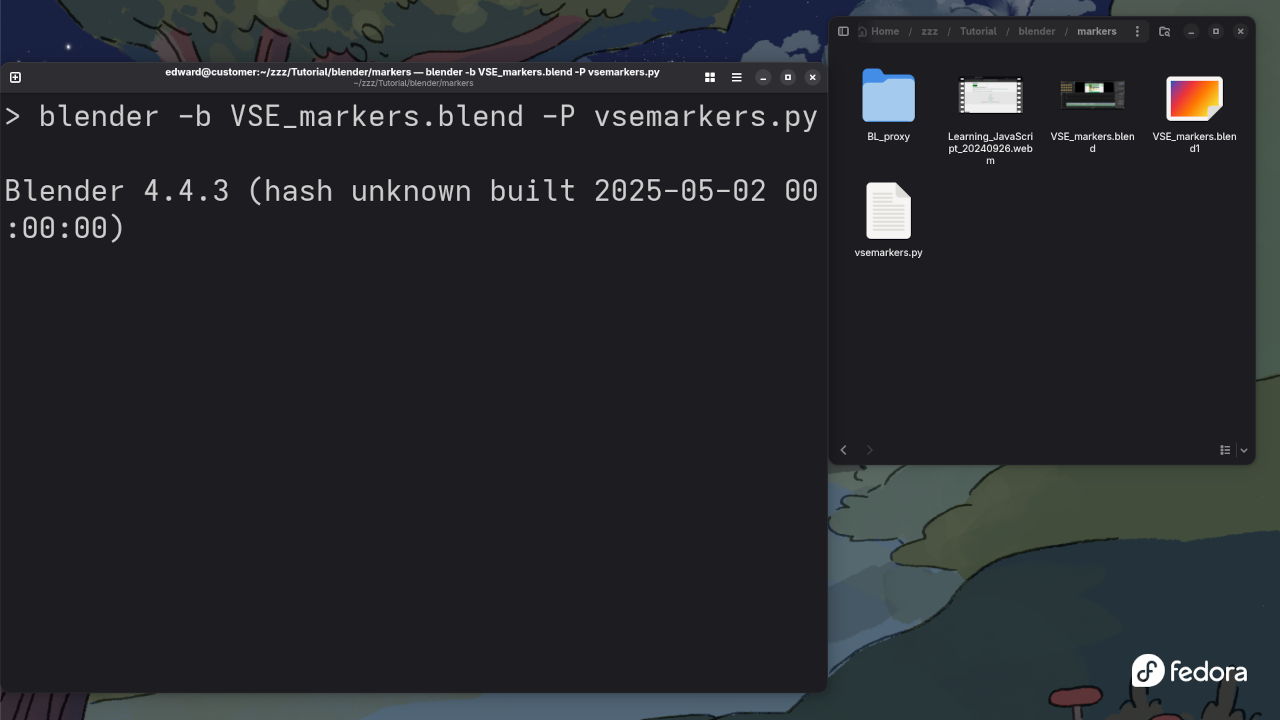
    Python Code Running On Command Line
    Terminal Displaying Code Running Via Blender Python API

    Python Code Completed On Command Line
    Terminal Displaying Blender Python API Code Run Completion

    Screencast: Full Workflow Demo

    Video Demonstrating Blender VSE Timeline Marker Export

    Promote Your Workflow with Automation

    This approach is a great starting point for more complex pipeline automation. You can extend the script to:

    • Include audio replacements or variations per clip
    • Tag markers with metadata and use that for dynamic naming
    • Export still frames, thumbnails, or subtitles alongside video

    From Script to Mastery: Learn More in Mastering Blender Python API

    If you found this script helpful and want to take your Blender automation skills to the next level, check out my book:

    Mastering Blender Python API
    Unlock the full potential of Blender through scripting and custom workflows.

    In the book, you’ll learn how to:

    • Build custom add-ons for Blender
    • Automate complex tasks across 3D modeling, animation, rendering, and VSE
    • Understand Blender’s data structures and event loop
    • Create tools that integrate directly into Blender’s interface

    Whether you’re a technical artist, animator, or developer, Mastering Blender Python API will guide you from beginner to advanced usage with practical examples and project-based learning.

    Conclusion

    Automating VSE renders using markers can significantly streamline your workflow and reduce repetitive tasks. Whether you’re working with chaptered content, batch edits, or custom render tools, Blender’s Python API gives you the flexibility and control you need.

    Have questions, or want to share your own scripts and workflows? Feel free to leave a comment below.

  • JavaScript Procedural Sky Texture

    JavaScript Procedural Sky Texture

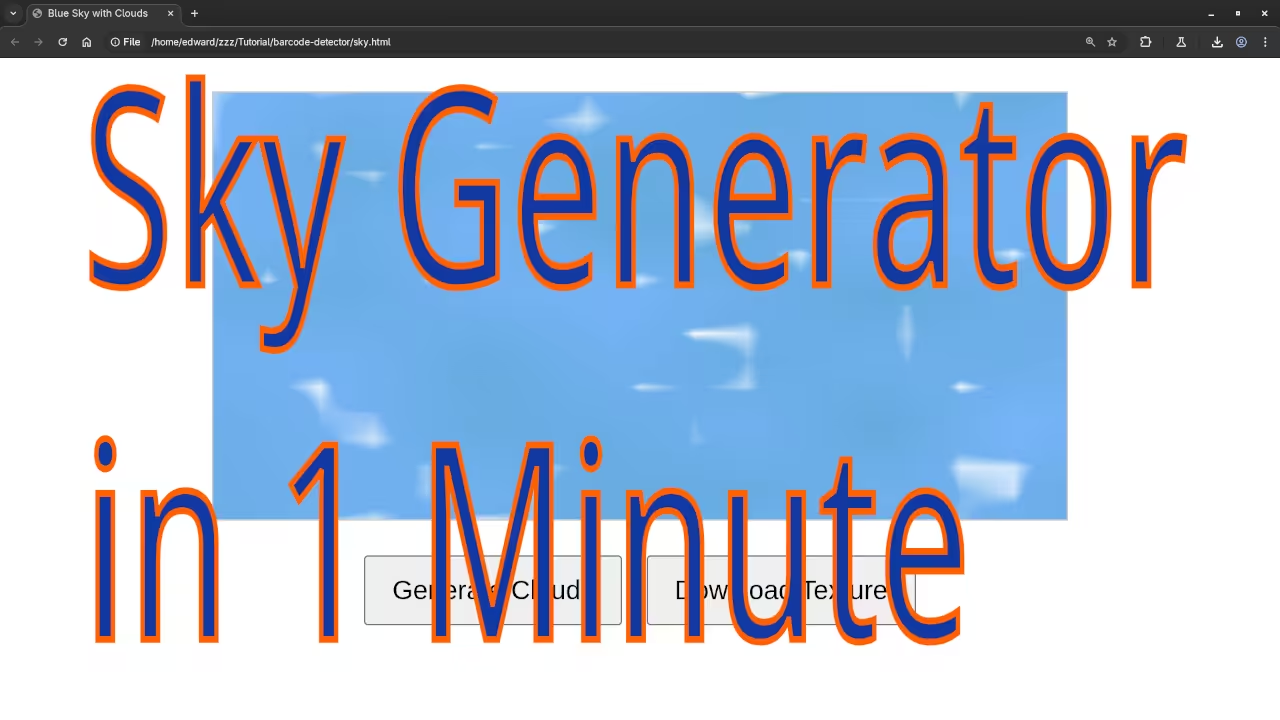
    Creating a Simple Blue Sky with Procedural Clouds Using Vanilla JavaScript

    Procedural textures can bring life and realism to web graphics without relying on external images or libraries. In this tutorial, we’ll create a simple yet visually appealing blue sky with soft, fluffy clouds entirely in vanilla JavaScript – no dependencies needed.

    You’ll learn how to use value noise to generate natural-looking clouds and add subtle color variation to the sky to avoid flatness. Plus, you’ll get handy buttons to generate new cloud patterns and download your creation.

    (more…)