Blog

  • Install NextCloud in Podman Container

    Install NextCloud in Podman Container

    🌐 How to Deploy NextCloud in a Pod Container

    Looking for a secure, open-source way to store your files, manage your calendar, and collaborate online? NextCloud is the answer! In this guide, I’ll show you how to install NextCloud using Podman-a lightweight and daemonless container engine that doesn’t require root access. This tutorial is perfect for beginners and privacy-conscious users alike.

    🔍 What is NextCloud?

    NextCloud is an open-source, self-hosted productivity platform that offers file sharing, collaborative editing, calendar, contacts, and more-all under your control. Think of it like your personal cloud alternative to Google Drive or Dropbox, but with more flexibility and no data snooping.

    🧠 Why Use Podman?

    Unlike Docker, Podman runs containers in rootless mode, which adds a layer of security and flexibility. You don’t need to be a sysadmin to get started!

    🔧 Step-by-Step: Installing NextCloud with Podman

    🛠️ Prerequisites:

    • Linux OS (Ubuntu, Fedora, or similar)
    • Podman installed (sudo apt install podman or sudo dnf install podman)
    • Basic command-line familiarity

    Step 1: Create a Pod

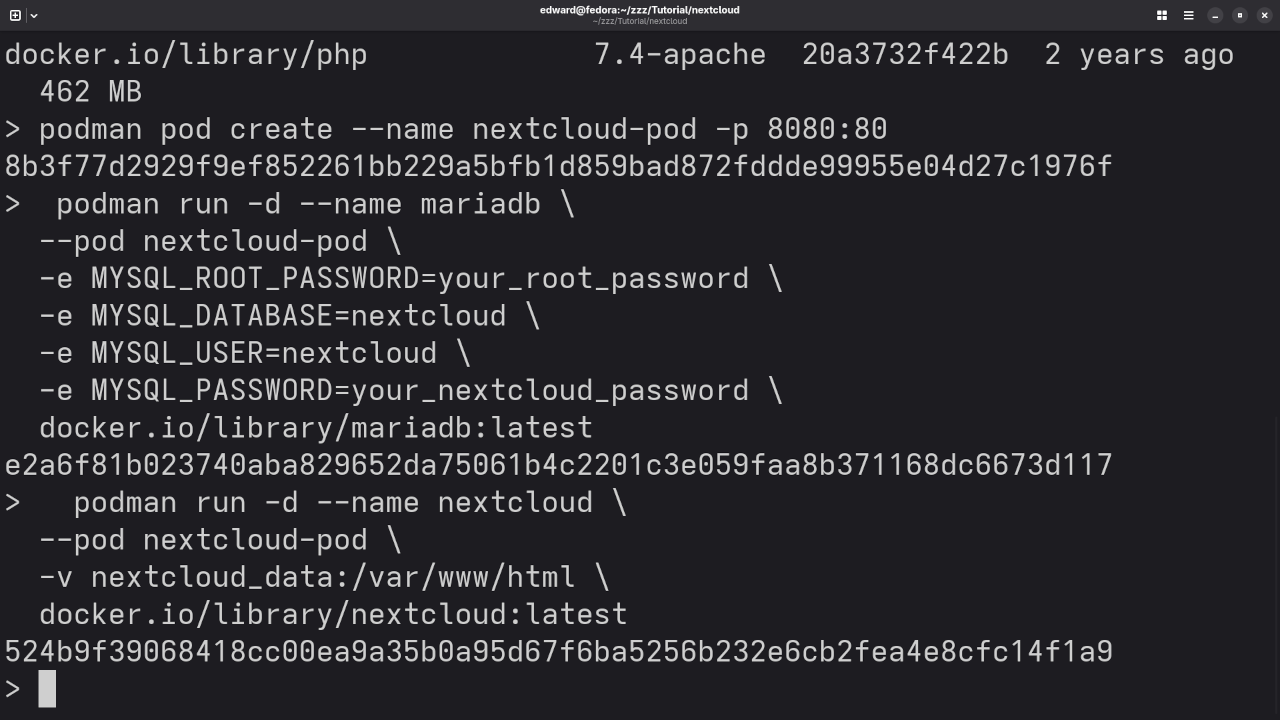
    podman pod create --name nextcloud-pod -p 8080:80

    This creates a pod that maps port 8080 on your host to port 80 inside the container.

    Step 2: Start a MariaDB (or MySQL) Database


      podman run -d --name mariadb \
      --pod nextcloud-pod \
      -e MYSQL_ROOT_PASSWORD=your_root_password \
      -e MYSQL_DATABASE=nextcloud \
      -e MYSQL_USER=nextcloud \
      -e MYSQL_PASSWORD=your_nextcloud_password \
      docker.io/library/mariadb:latest


    This sets up a database for NextCloud to store its data.

    Step 3: Run NextCloud


      podman run -d --name nextcloud \
      --pod nextcloud-pod \
      -v nextcloud_data:/var/www/html \
      docker.io/library/nextcloud:latest


    Now NextCloud is up and running! Visit http://localhost:8080 in your browser to complete the setup wizard.

    💡 NextCloud Is Fully Open Source

    One of the best parts of NextCloud is that it’s 100% open source, licensed under the GNU AGPLv3 (Affero General Public License v3). This means:

    • You can study, modify, and redistribute the software.
    • There’s no vendor lock-in.
    • It’s developed by a vibrant community and backed by enterprise-level support (if needed).

    This makes it a great fit for developers, educators, small businesses, and privacy-conscious individuals.

    📅 Why Business-Minded Users Love It

    NextCloud isn’t just about file syncing. Its Calendar app includes an Availability Link feature-perfect for:

    • Booking meetings with clients or coworkers.
    • Sharing your schedule easily.
    • Avoiding endless back-and-forth emails.

    It’s a smart way to stay organized while maintaining full control over your data.

    🤝 Need Help Installing It?

    If you’d like some assistance getting NextCloud up and running-or just want to ask a few questions-I’m here to help! Whether you’re a beginner or just need a second pair of eyes, feel free to Contact Me anytime or Click here to request help.

    ✅ Final Thoughts

    With Podman and NextCloud, you can create your own private cloud solution quickly, securely, and without giving up control over your data. It’s a great weekend project-and a smart move for anyone interested in data sovereignty and productivity.

    🖼️ Screenshots and Video

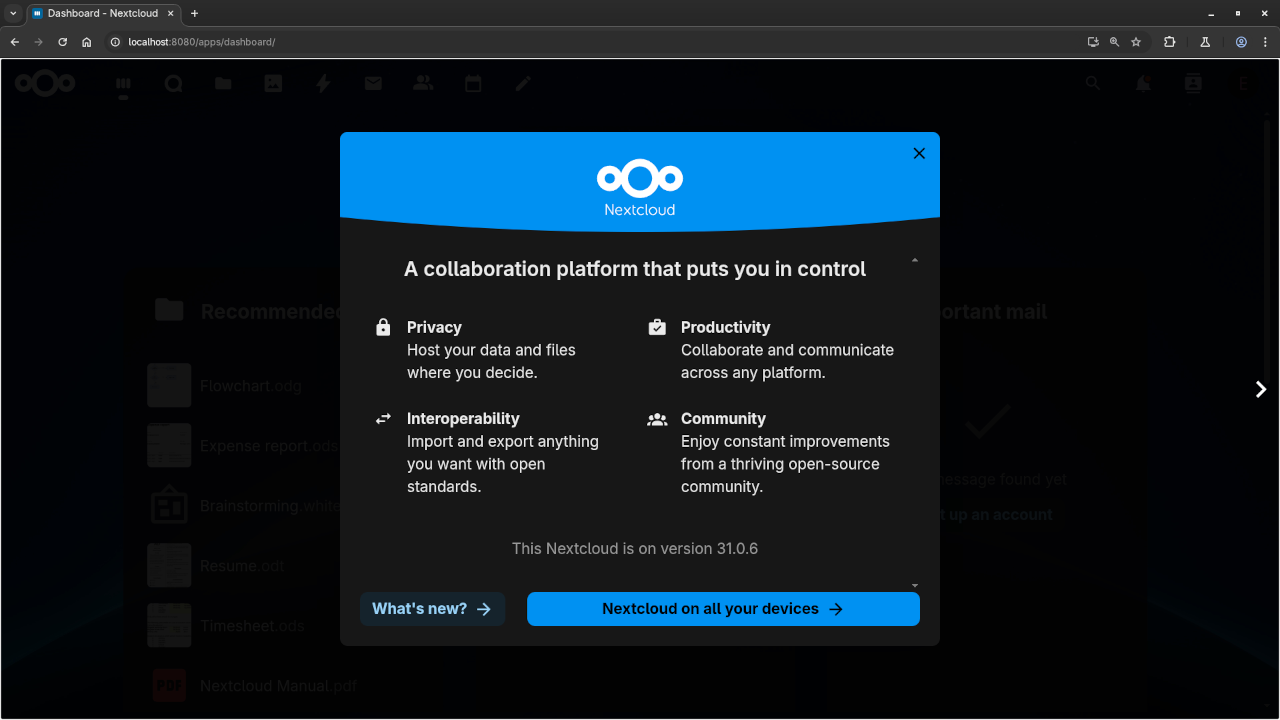
    NextCloud Dashboard
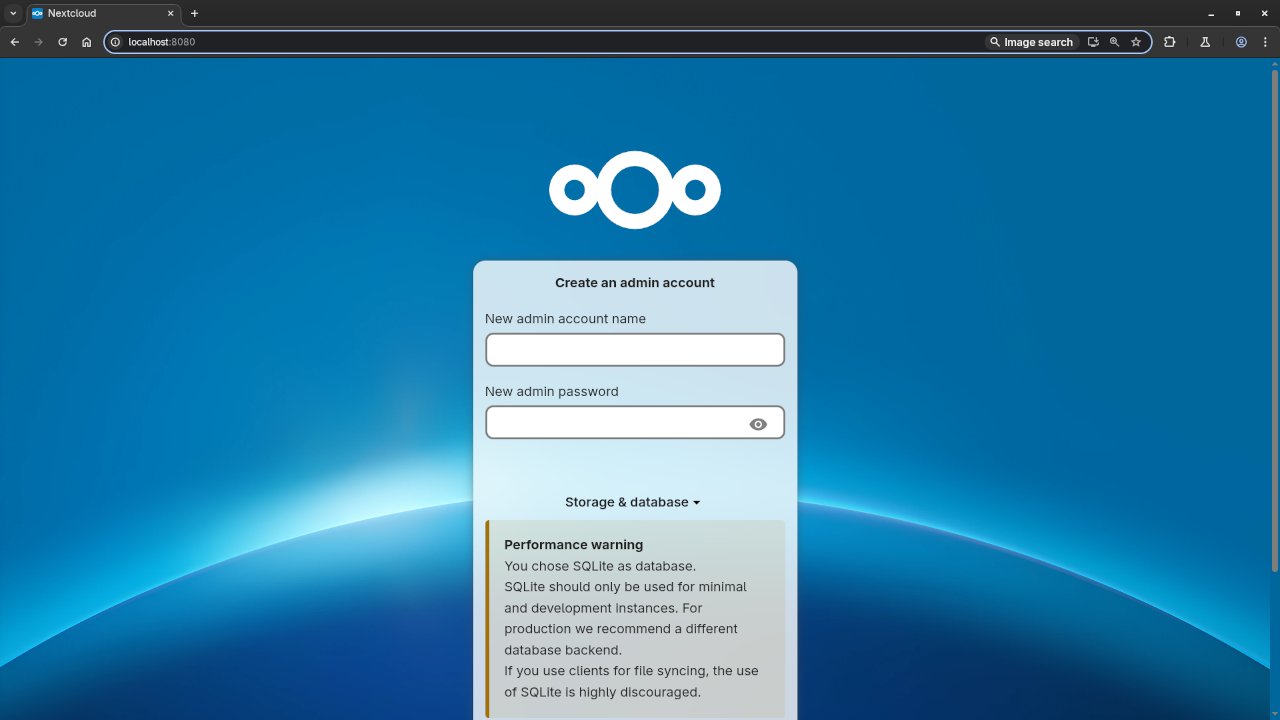
    Nextcloud Admin Account Creation
    Desktop Web Browser Displaying Nextcloud Admin Account Creation Screen

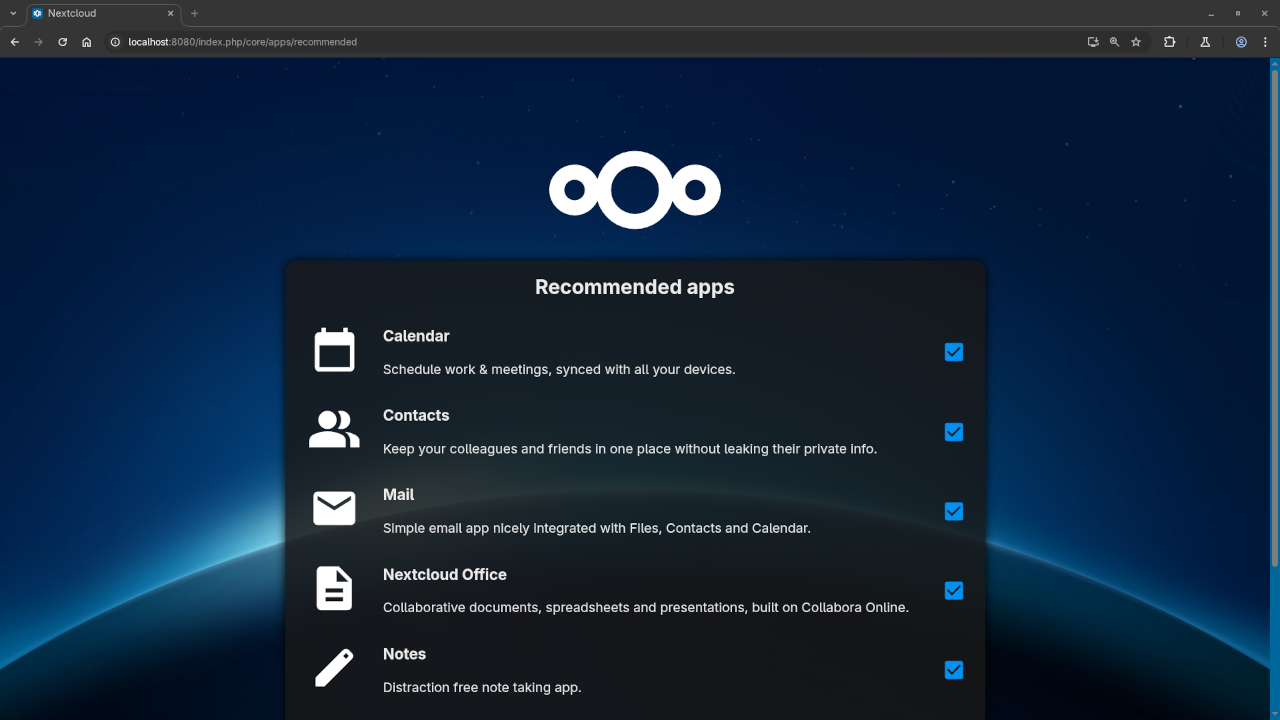
    Nextcloud Recommended Apps
    Desktop Web Browser Displaying Nextcloud Recommended Apps Screen

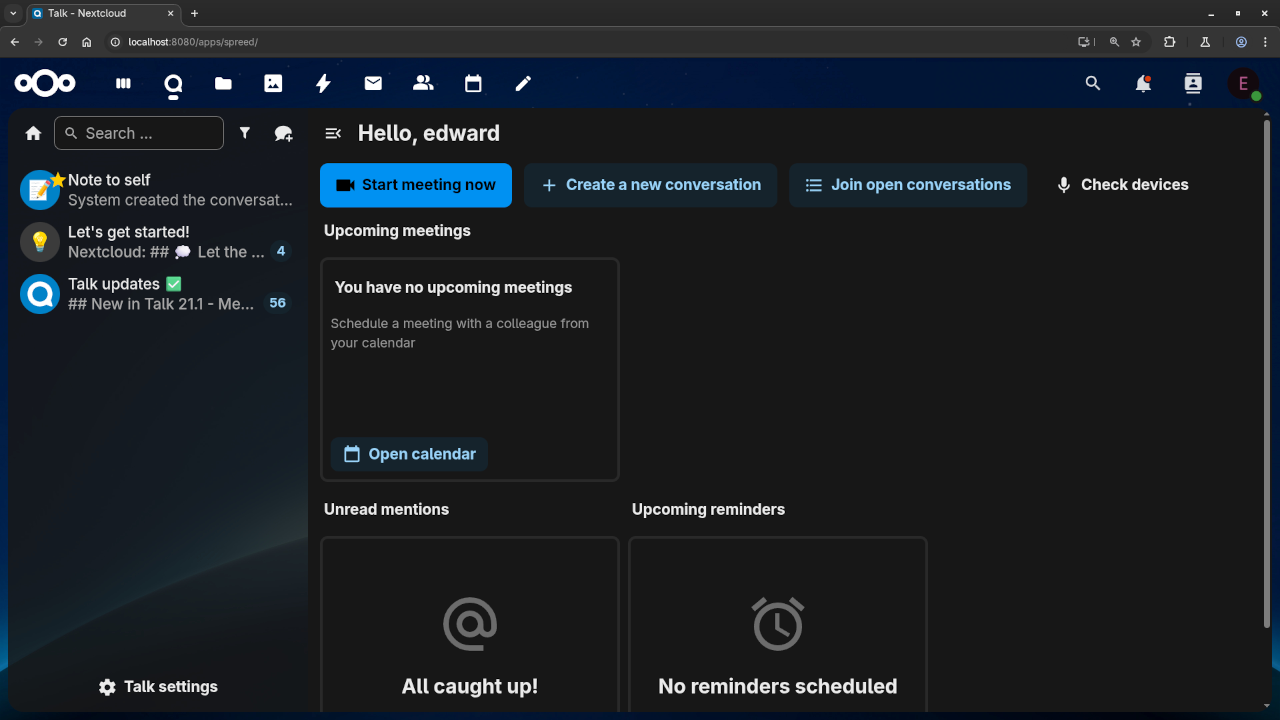
    Nextcloud Talk
    Desktop Web Browser Displaying Nextcloud Talk Application Screen

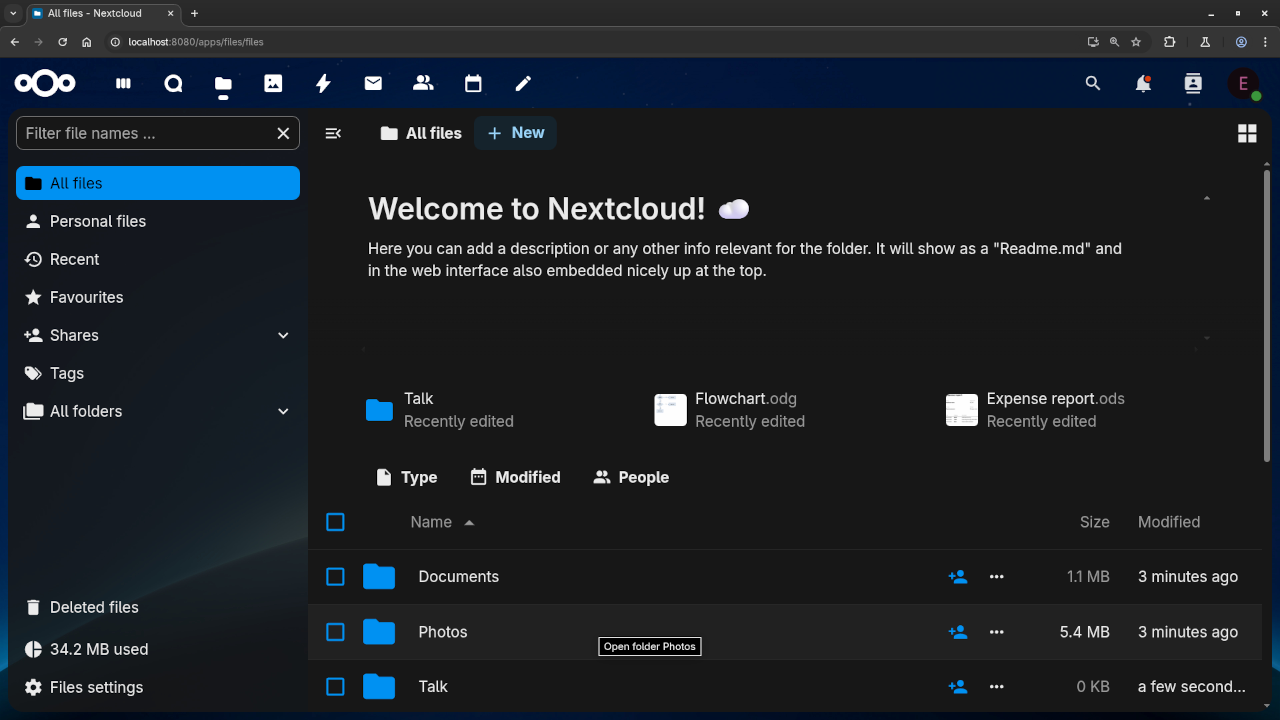
    Nextcloud Files
    Desktop Web Browser Displaying Nextcloud Files Application Screen

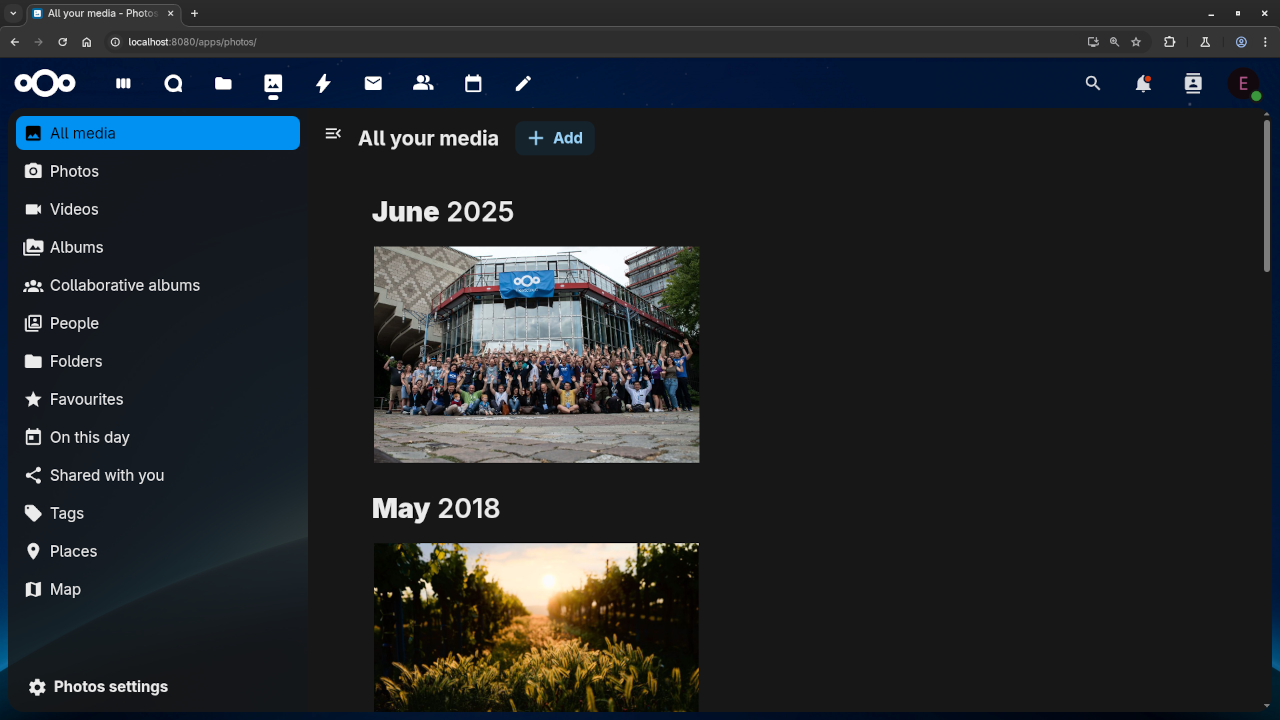
    Nextcloud Photos
    Desktop Web Browser Displaying Nextcloud Photos Application Screen

    Podman Running Containers
    Podman Nextcloud Pod
    Command Line Terminal Displaying Nextcloud In Podman Pod

    Video Walkthrough

    Video Displaying The Installation Of NextCloud
  • How to Build a Local LLM Workflow That Actually Works

    How to Build a Local LLM Workflow That Actually Works

    Large language models are no longer just for hyperscalers. If you’re running a startup, managing a local business, or just tired of API costs and privacy black boxes, building your own local LLM workflow is suddenly a very real option. But “real” doesn’t mean “easy.” You need more than just a GitHub link and good intentions. Below, we walk through what it takes-from choosing your model to making it run reliably in the real world.

    Start With the Right Model

    Your workflow starts with the model. But choosing one isn’t a beauty pageant of parameter counts. You need to think about where and how you’re running this thing. Smaller models like Mistral-7B or LLaMA 2 13B can perform shockingly well when fine-tuned and quantized correctly. Larger models? They’ll eat your GPU, slow your inference, and leave you debugging token windows while sweating in a server closet. Make your first decision by studying the best local models right now-pay attention to performance per watt, context window limits, and community support.

    Panel PCs Make Inference Feel Physical

    Deploying a model in real life isn’t glamorous-it’s logistics, temperature ranges, and uptime reports. Especially if you’re using your model for field diagnostics, interactive displays, or predictive maintenance stations. That’s where industrial hardware changes the game. Fanless, dust-resistant panel PCs with touchscreen interfaces become your bridge between code and the people who need it to work-every time, without fail. Want to see what this looks like in practice? Check this out for a look at how rugged computing meets AI deployment.

    Prepare the Infrastructure You’ll Regret Skipping Later

    Infrastructure planning is the step most people skip, and it’s why they suffer. No, you don’t need a rack-mounted AI dungeon, but you do need to get real about power draw, cooling, memory throughput, and GPU compatibility. Running LLMs means playing at the edge of what your machine can handle-especially if you’re optimizing for latency or concurrent sessions. Keep in mind: even “lightweight” models need VRAM headroom and disk I/O that won’t bottleneck generation. If you’re just now building your rig, consult this breakdown of hardware requirements for LLM inference before you buy. Otherwise, expect crashes. Lots of them.

    Make the Jump to a Self-Hosted Setup

    Let’s move past Colab notebooks and into your own metal. Self-hosting isn’t just a checkbox-it gives you speed, security, and full-stack control. You’ll need to choose between containerized environments like Docker, virtualized VMs, or bare-metal installs depending on how modular your workflow needs to be. Also, think about where the model sits in your stack: is it an endpoint, a background processor, or part of an API layer? Setting this up correctly from the start makes scaling and debugging much more humane. Not sure where to begin? This guide to running AI locally maps the entire terrain.

    Install and Test on a Linux Box (Yes, Ubuntu Wins)

    There’s a reason everyone starts on Ubuntu: it just works. And when it doesn’t, at least the community’s seen the error before. Your local workflow’s reliability depends heavily on whether the LLM backend plays nicely with the OS, dependencies, and acceleration drivers. LLaMA 2 and Mistral both compile and run smoothly with the right CUDA stack-but you’ll burn hours if your environment variables are off by a space. This is where reproducibility starts. So before you chase inference speeds, follow this walk-through to install LLaMA2 on Ubuntu and benchmark a clean install first.

    Rolling It Out Without Wrecking Your App

    Okay, you’ve got it working. Now what? If your workflow is going anywhere beyond localhost, you need to think like a product team. Who’s consuming the outputs? What happens if the model fails, stalls, or misfires? Is your API rate-limited, or does your app timeout? You’ll want to build guardrails, set thresholds for fallback, and create observability logs that tell you when things go sideways. This smooth LLM rollout checklist covers every production wrinkle most engineers forget the first time around.

    Deploy at the Edge Without Melting the Box

    What if your deployment needs to happen outside the cloud or data center? Think kiosks, retail stations, mobile command systems. That’s when edge computing becomes more than a buzzword-it’s your only option. But edge deployment brings a different challenge: low latency, low bandwidth, and hardware that’s got to endure heat, shock, and dust. That’s why running LLMs at the edge almost always requires quantization, pruning, and tight integration with embedded systems. Curious how real teams are handling this? Look into these strategies for LLMs on edge to understand the trade-offs.

    Running a local LLM isn’t for the faint of heart-but it’s no longer reserved for ML elites either. With the right model, a bit of hardware prep, and a plan to deploy thoughtfully, you can move from “cool demo” to “this runs every day.” Just don’t fall for the illusion that it ends with setup. The reality of local LLMs is that they live or die by your planning, your infra, and how well your system survives friction. Get those things right, and you’ll have more than a workflow-you’ll have a working product. One you actually control.

    Explore the innovative world of technology and software development at Ojambo.com, where you can dive into topics like AI, web frameworks, and more to enhance your digital skills!

  • Review Generative AI Mistral v0.3 Model

    Review Generative AI Mistral v0.3 Model


    What Is Mistral 7B? A Beginner’s Guide to the New Open-Source AI Model

    If you’re curious about the latest advancements in artificial intelligence, you might have heard of Mistral 7B.
    Released in September 2023 by the French AI startup Mistral, this 7.3 billion parameter language model has been
    making waves in the AI community. But what exactly is it, and why should you care? Let’s break it down in simple terms.

    What Is Mistral 7B?

    Mistral 7B is a large language model (LLM) designed to understand and generate human-like text. Despite having fewer
    parameters than some other models, it has shown impressive performance across various tasks. For instance, it outperforms
    the 13B parameter Llama 2 model on all evaluated benchmarks and even surpasses the 34B parameter Llama 1 in reasoning,
    mathematics, and code generation tasks.

    How Does It Work?

    At the heart of Mistral 7B’s efficiency are two innovative mechanisms:

    • Grouped-query Attention (GQA): This technique allows the model to process information more efficiently, leading to faster response times.
    • Sliding Window Attention (SWA): SWA enables the model to handle longer sequences of text without a significant increase in computational cost.

    Open-Source and Accessible

    One of the standout features of Mistral 7B is its open-source nature. Released under the Apache 2.0 license, it can be
    freely used, modified, and distributed. This openness encourages innovation and collaboration within the AI community.
    You can access the model’s weights and implementation on platforms like Hugging Face, making it easy to experiment
    and integrate into your own projects.

    Fine-Tuning for Specific Tasks

    Mistral 7B isn’t just a one-size-fits-all model. It can be fine-tuned to specialize in various applications, such as:

    • Customer Support: Training the model to handle specific queries related to your business.
    • Content Generation: Fine-tuning for creating blog posts, product descriptions, or social media content.
    • Code Assistance: Tailoring the model to help with programming tasks and code generation.

    Screenshots & Screencast: Getting Started with Mistral 7B

    If you’re new to working with AI models, visuals can help make things a lot clearer. Below, we’ve included a few
    screenshots and a screencast to guide you through the basic steps of using Mistral 7B locally using the A1paca application.

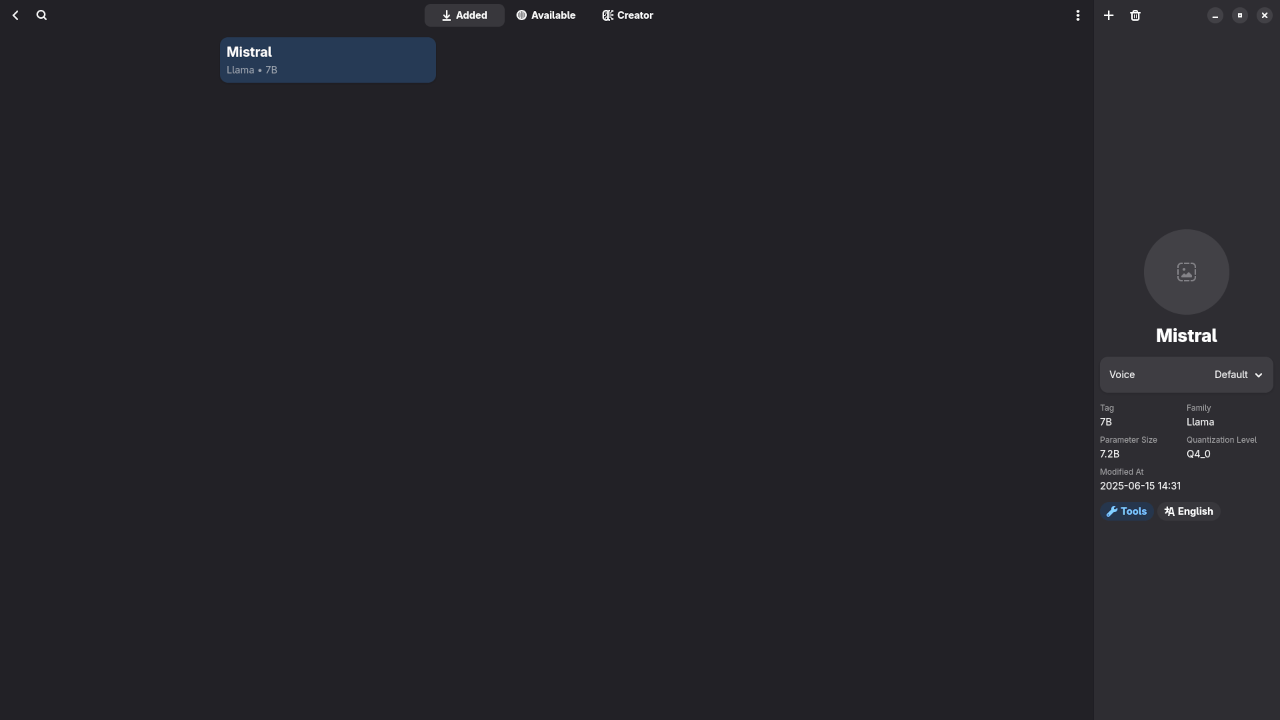
    From the Github description, “Alpaca is an Ollama client where you can manage and chat with multiple models”.

    Step-by-Step Screenshots

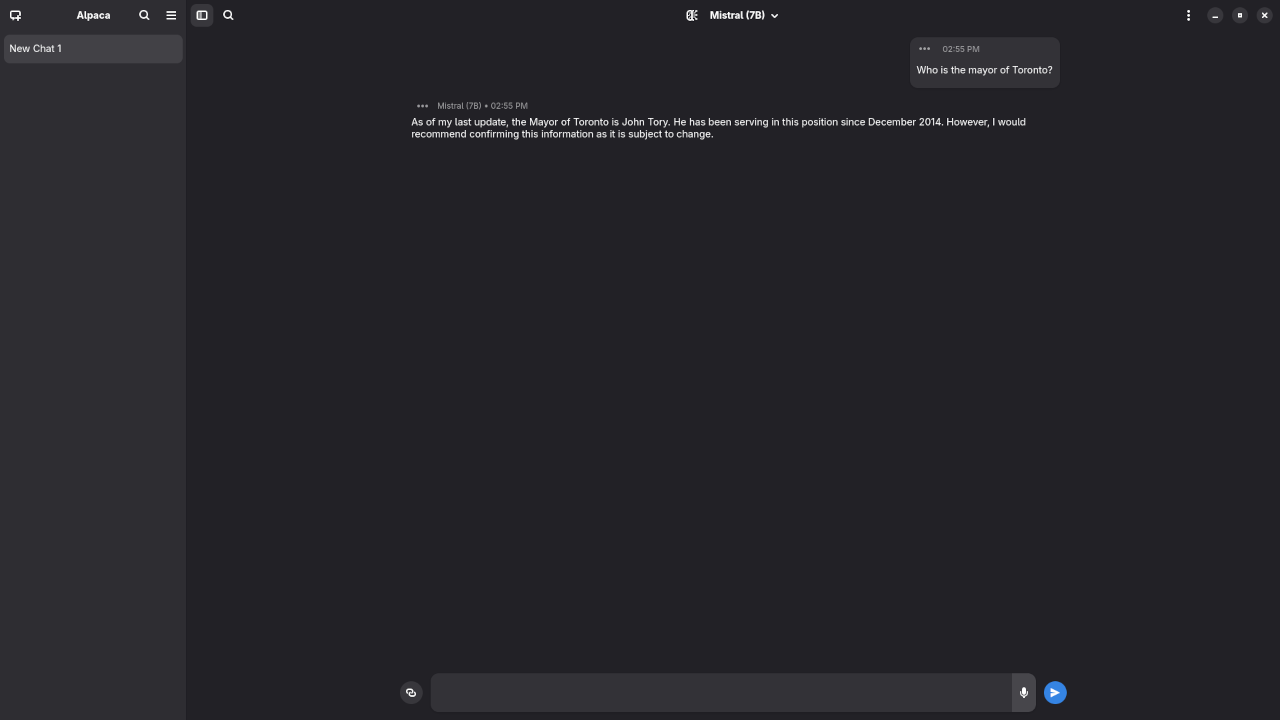
    Alpaca With Mistral 7B v0.3 Model Answered Mayor Question
    Alpaca With Mistral 7B v0.3 Model Answering Question Regarding Mayor Of Toronto

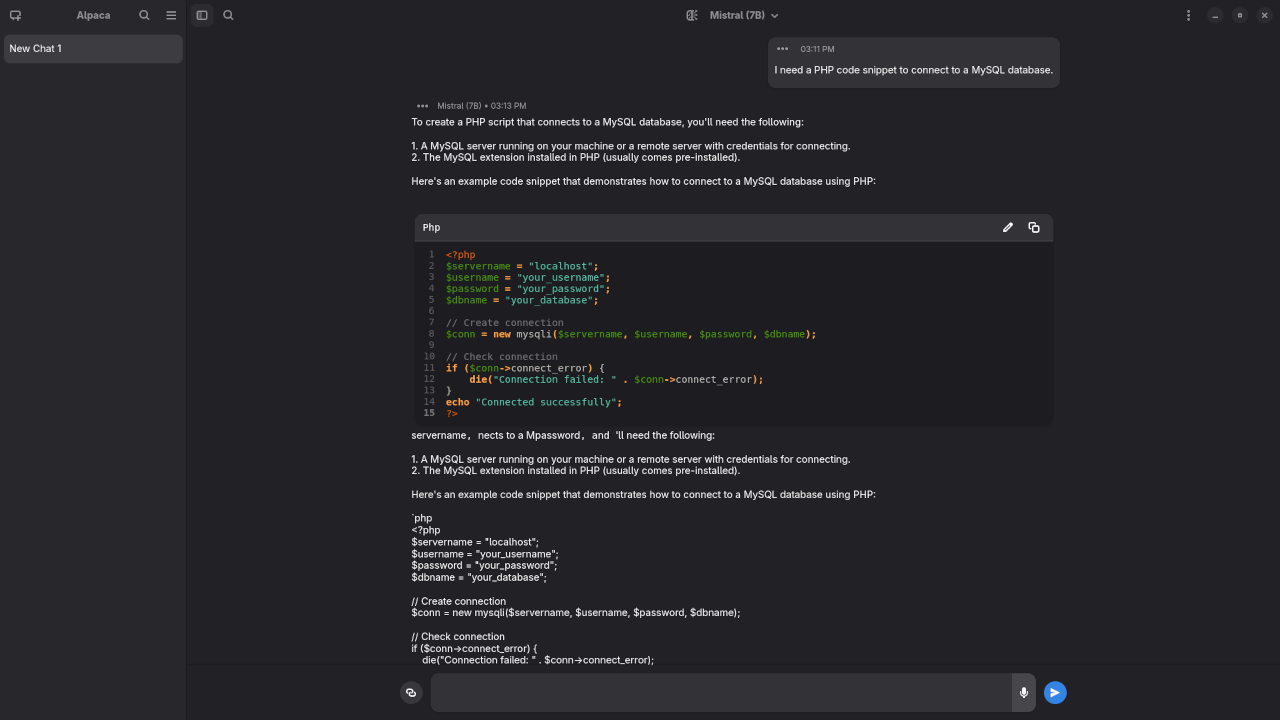
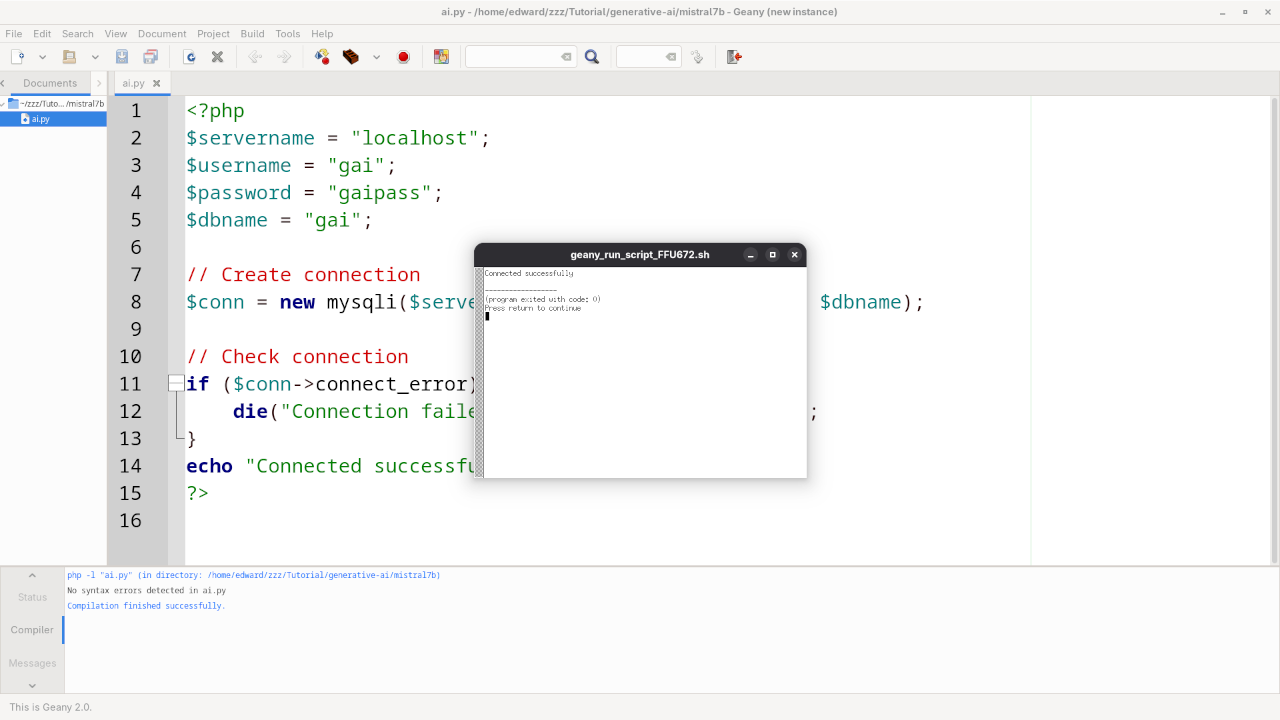
    Alpaca With Mistral 7B v0.3 Model Answered PHP Code Request
    Alpaca With Mistral 7B v0.3 Model Answering Question Regarding PHP Code For MySQL Database

    Geany IDE Displaying Executed PHP Code
    Geany IDE Displaying Output Of Executed PHP Code Snippet Generated By Alpaca With Mistral 7B v0.3 Model

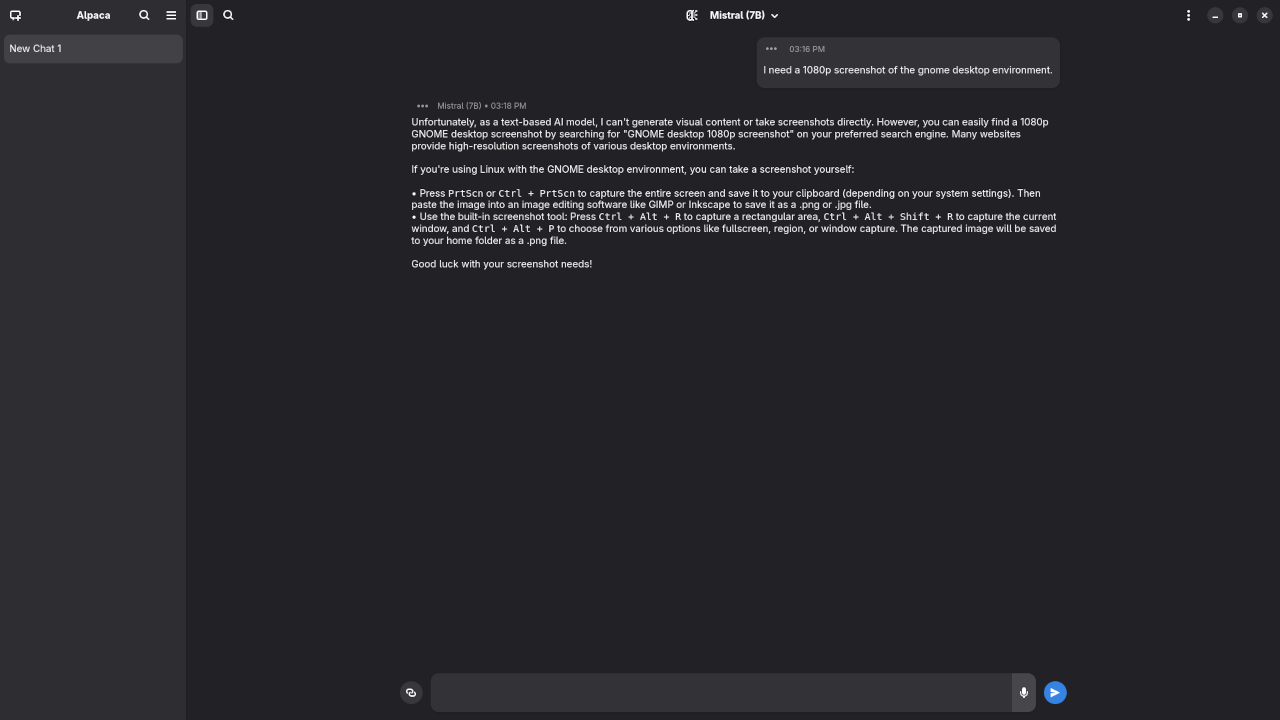
    Alpaca With Mistral 7B v0.3 Model Answered Screenshort Request
    Alpaca With Mistral 7B v0.3 Model Answering Question Regarding Screenshot Generation

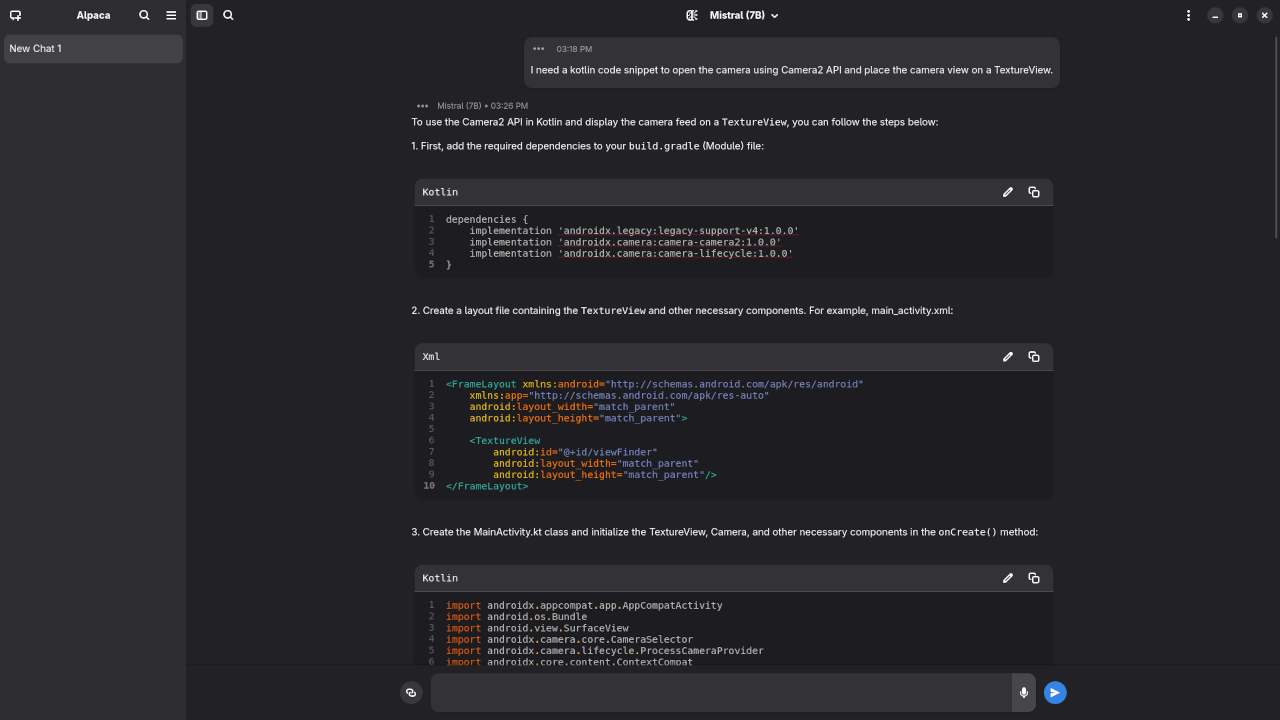
    Alpaca With Mistral 7B v0.3 Model Answered Kotlin Code Request
    Alpaca With Mistral 7B v0.3 Model Answering Question Regarding Kotlin Code For Camera2 API

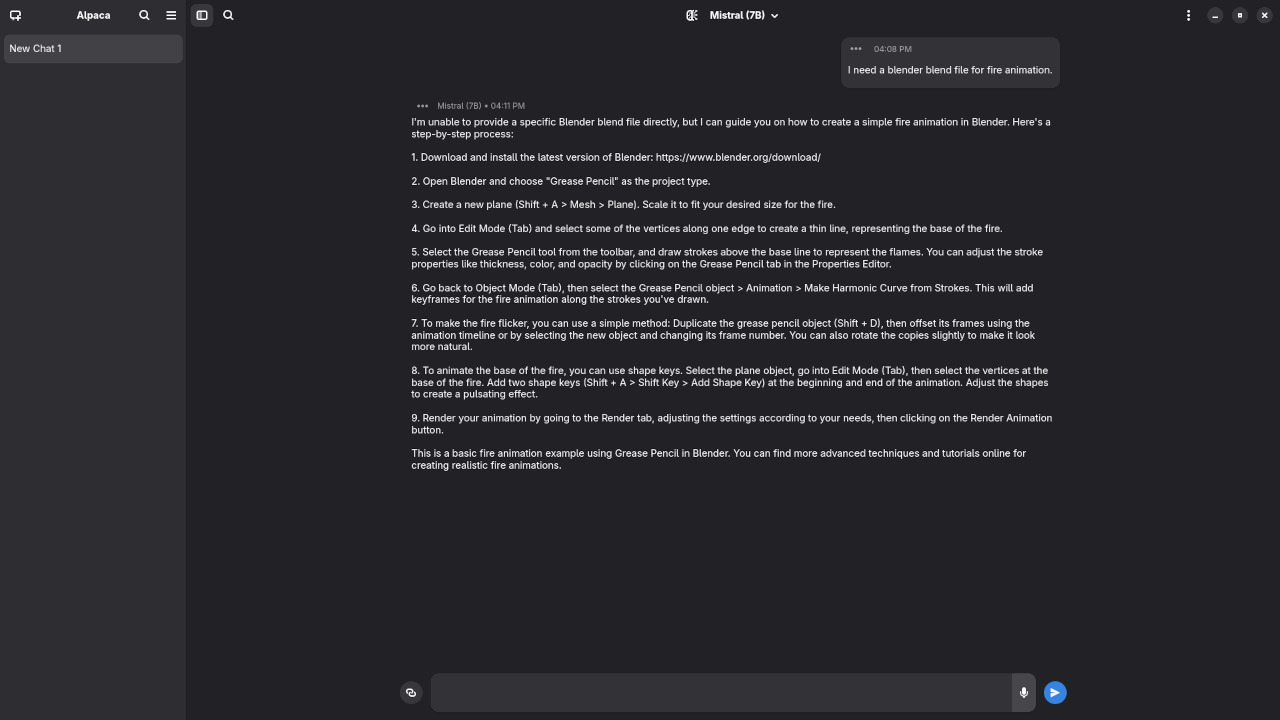
    Alpaca With Mistral 7B v0.3 Model Answered Blender Blend File Request
    Alpaca With Mistral 7B v0.3 Model Answering Question Regarding Blender Blend FIle For Fire Animation Code

    Screencast Walkthrough

    Video Displaying Whole Process From Setup To Running Your First Prompt

    Results:

    Who is the mayor of Toronto?

    Produced inaccurate outdated answer to Olivia Chow as the mayor of Toronto.

    I need a PHP code snippet to connect to a MySQL database.

    Produced accurate syntax PHP code snippet to connect to a MySQL database.

    I need a 1080p screenshot of the gnome desktop environment.

    Produced elaborate answer to generate a 1080p screenshot of Gnome desktop environment because it is a text-based AI lacking ability.

    I need a kotlin code snippet to open the camera using Camera2 API and place the camera view on a TextureView.

    Produced incomplete Kotlin code snippet to open the camera using Camera2 API.

    I need a blender blend file for fire animation.

    Produced elaborate answer to generate a fire animation, but not a Blender Blend file because it is a text-based AI lacking ability.

    Duration: ~3 minutes
    Skill Level: Beginner

    Recap

    Mistral 7B represents a significant step forward in making advanced AI accessible to a broader audience.
    Its efficiency, open-source nature, and adaptability open up possibilities for individuals and organizations
    to harness the power of AI without the need for massive computational resources.

    Learn More

    Need Help Setting It Up in the Cloud?

    Setting up Mistral 7B in the cloud can be a bit tricky if you’re new to AI or cloud services. Whether you’re using Google Colab, Hugging Face, or another platform, I can help you get started.

    If you’d like one-on-one guidance, troubleshooting help, or a custom setup based on your goals, feel free to reach out!

    Contact Me for Support:

    I’ll be happy to assist you with:

    • Running Mistral 7B on Google Colab or Hugging Face Spaces
    • Choosing the right cloud platform for your project
    • Setting up a basic or advanced AI workflow

    Don’t hesitate to get in touch, I’m here to help you make the most of this powerful open-source model!

  • Getting Started with Open Web Analytics

    Getting Started with Open Web Analytics


    📊 Open Web Analytics (OWA) — Is Free, Open Source Website Tracking

    If you’re just starting out with a website or blog and looking for a privacy-conscious, free, open source alternative to tools like Google Analytics, Open Web Analytics (OWA) might be the perfect solution.

    In this article, I’ll guide you through what OWA is, how to install it on your site, and how to start tracking your visitors. I’ve also included a video walkthrough and screenshots to make the process even easier. If you ever need professional help setting things up, I’m here to assist!

    🔱 What is Open Web Analytics?

    Open Web Analytics is a free and open-source web analytics software that you can install on your own server. It helps you understand how users interact with your website—track visits, clicks, pageviews, and more—all without sending your data to third parties.

    🔑 Key Features

    • Visitor tracking and heatmaps
    • Clickstream analysis
    • Referrer and keyword tracking
    • Self-hosted = more privacy and control
    • Integrates easily with WordPress and other platforms

    And best of all, it’s completely free and you own all your data.

    🔧 How to Install Open Web Analytics (Beginner Guide)

    Here’s a step-by-step guide to installing OWA on a typical hosting environment:

    ✅ Prerequisites

    • A web hosting account with PHP and MySQL support
    • FTP access or a file manager
    • A WordPress website (optional but recommended)

    🔻 Step 1: Download OWA

    Go to the official GitHub repository or openwebanalytics.com and download the latest version of the software.

    📁 Step 2: Upload to Your Server

    Unzip the downloaded file and upload it to your server using FTP. You can upload it to a subdirectory like yourdomain.com/owa.

    ⚙️ Step 3: Create a Database

    Log into your web hosting control panel (cPanel, Plesk, etc.), and create a new MySQL database and user. Note the credentials.

    🚀 Step 4: Run the Installer

    Navigate to the URL where you uploaded OWA (e.g., yourdomain.com/owa) and follow the on-screen setup instructions:

    • Enter your database info
    • Create an admin account
    • Set up your tracking site profile

    📑 Step 5: Add the Tracking Code

    Once installed, OWA will give you a JavaScript tracking code. You can:

    • Paste it directly into your WordPress theme footer, or
    • Use a plugin like Insert Headers and Footers

    ✅ Done! You’re now tracking visits to your website.

    🎥 Video Walkthrough: Installing Open Web Analytics

    Video Displaying Open Web Analytics

    📷 Screenshots of the Setup Process

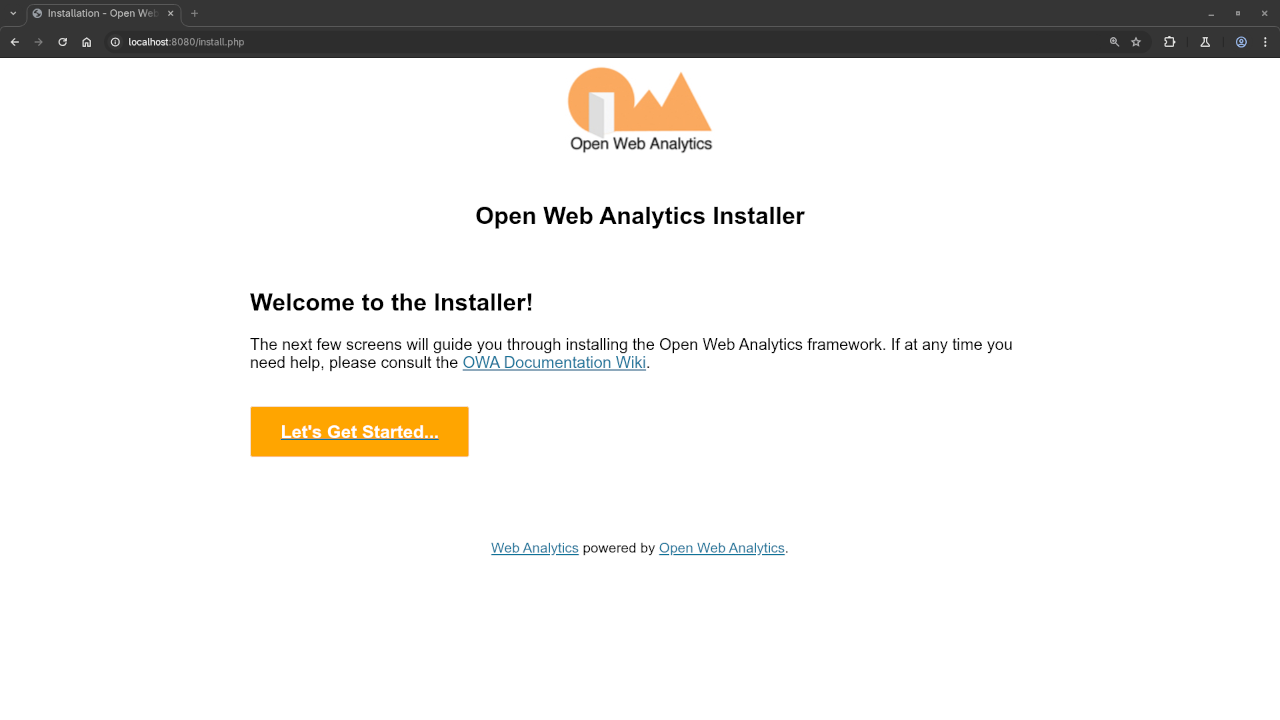
    Open Web Analytics Installer
    Desktop Web Browser Displaying Open Web Analytics Installation Screen

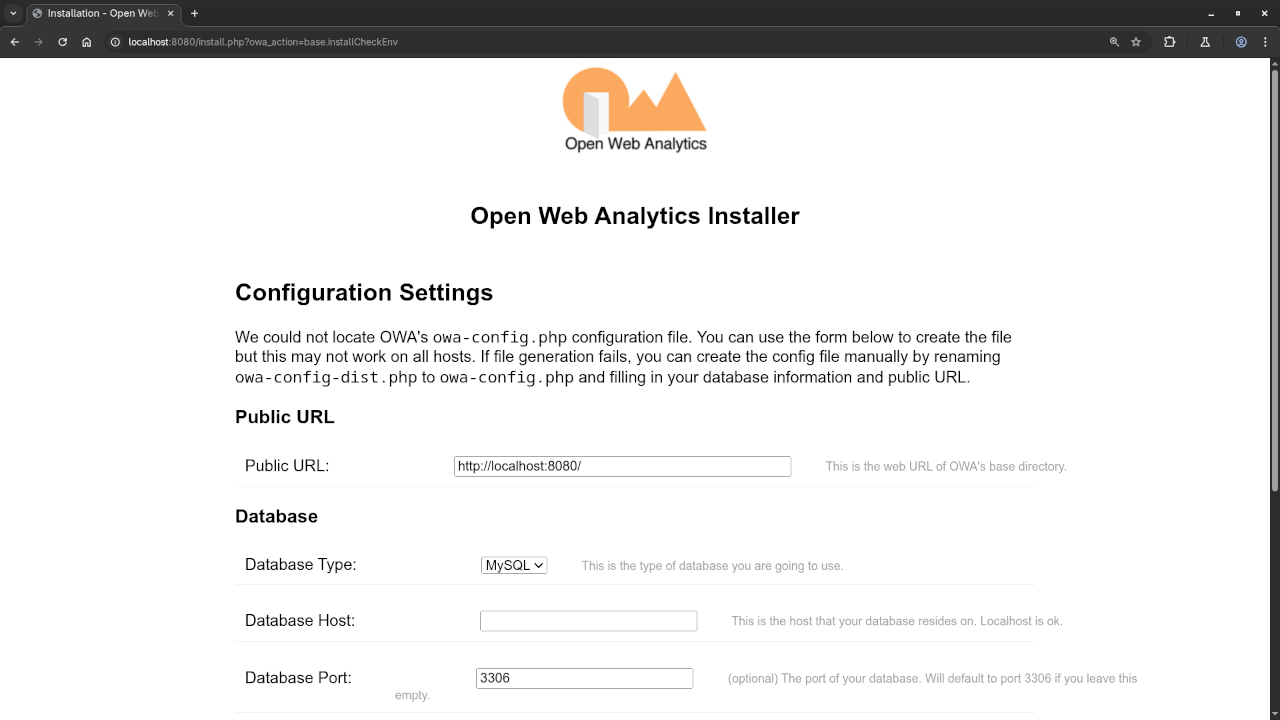
    Open Web Analytics Installer Configuration
    Desktop Web Browser Displaying Open Web Analytics Installation Configuration Screen

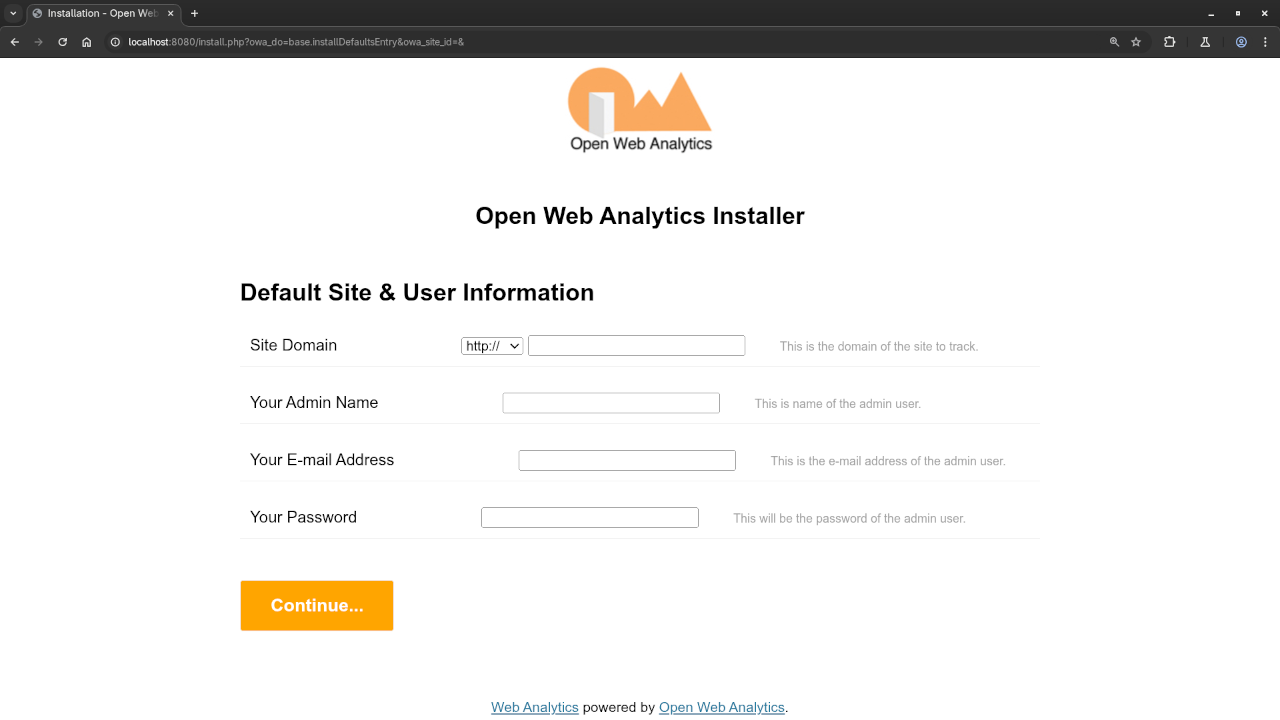
    Open Web Analytics Installer Information
    Desktop Web Browser Displaying Open Web Analytics Installation Information Screen

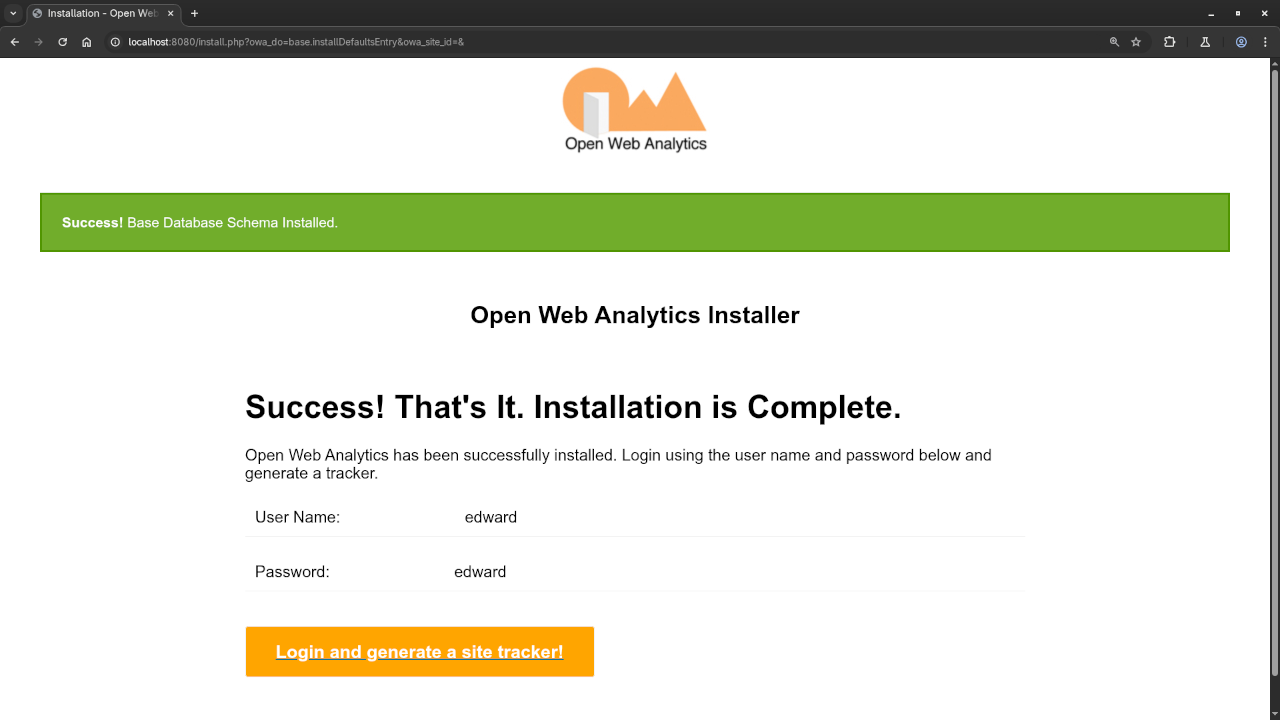
    Open Web Analytics Installer Complete
    Desktop Web Browser Displaying Open Web Analytics Installation Completed Screen

    Open Web Analytics Login
    Desktop Web Browser Displaying Open Web Analytics Login Screen

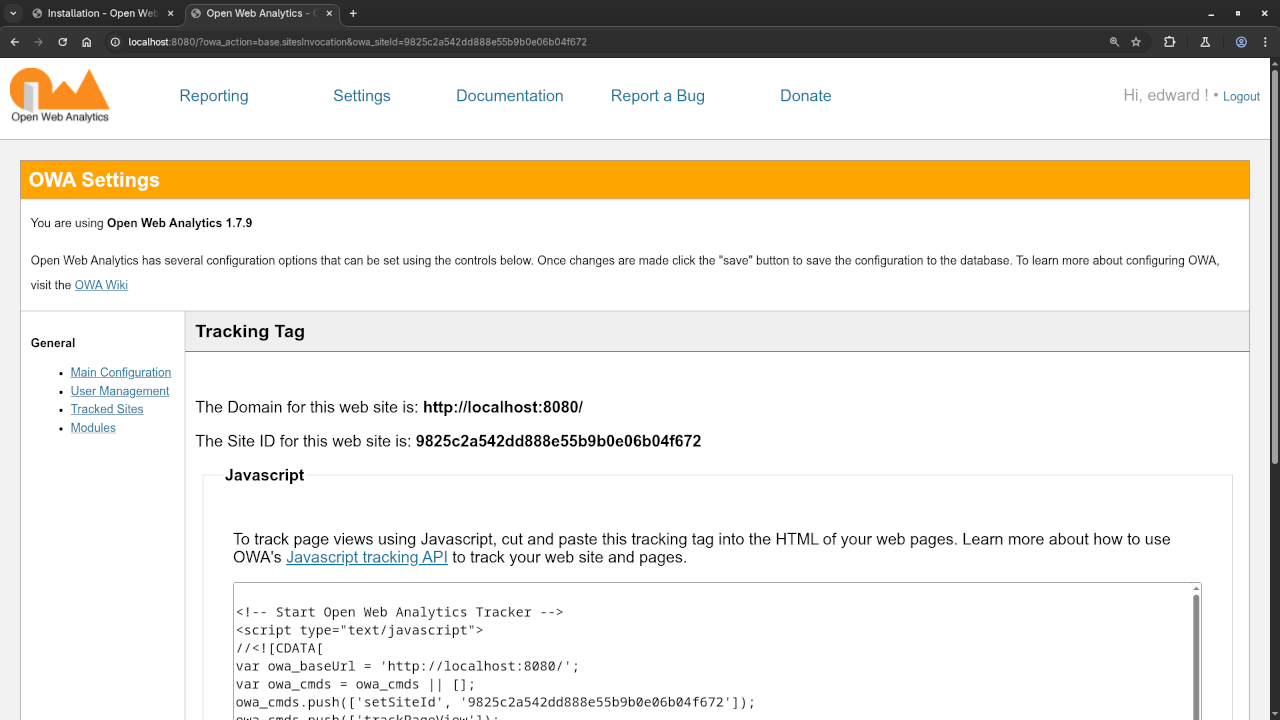
    Open Web Analytics Settings
    Desktop Web Browser Displaying Open Web Analytics Settings Screen

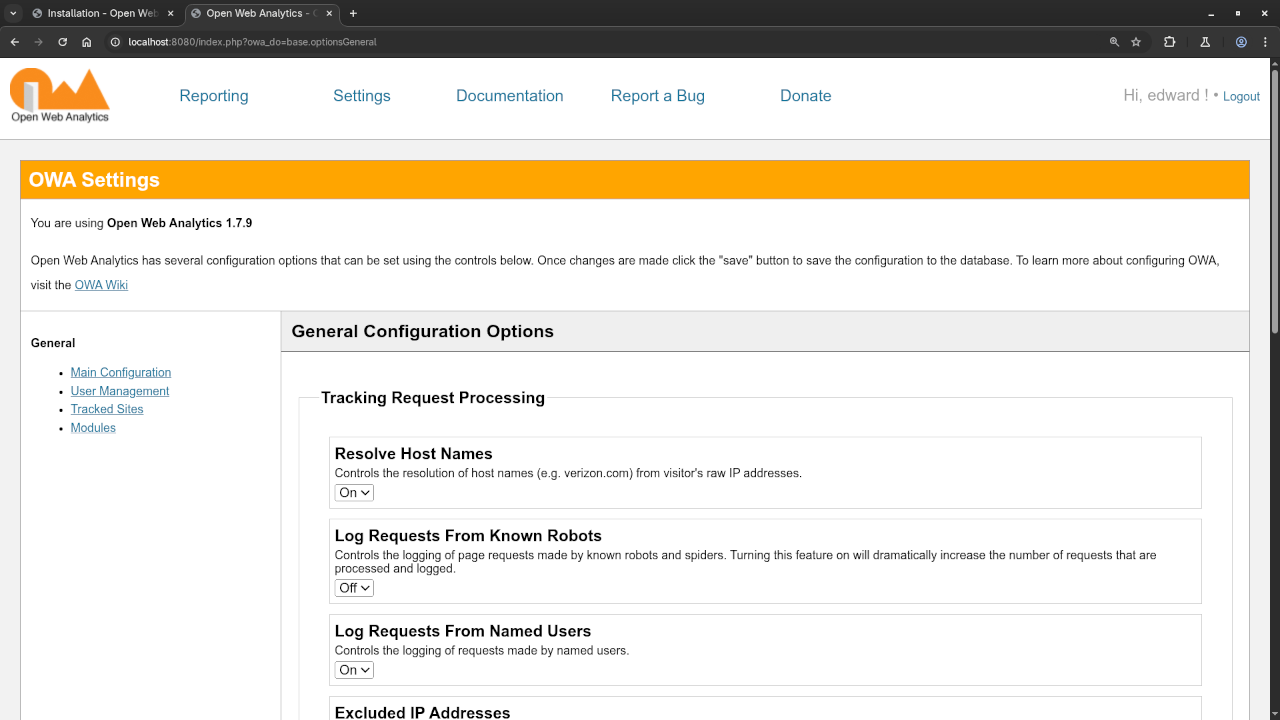
    Open Web Analytics Options
    Desktop Web Browser Displaying Open Web Analytics Options Screen

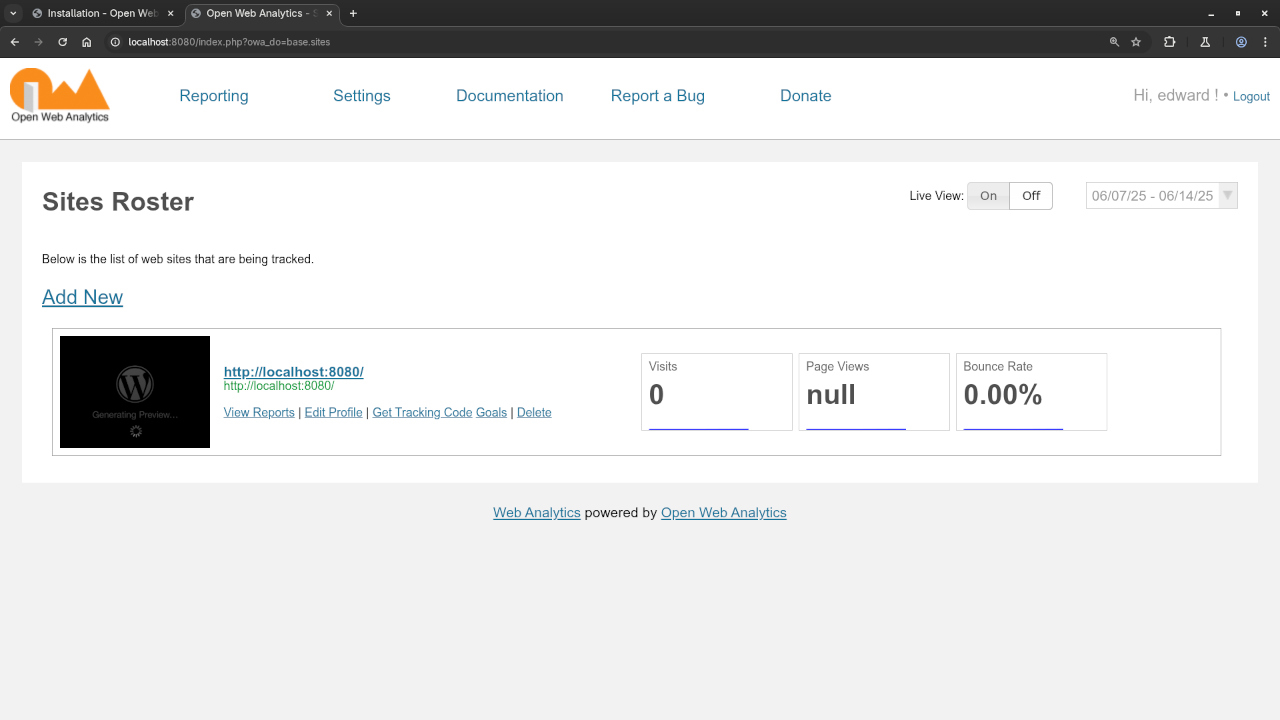
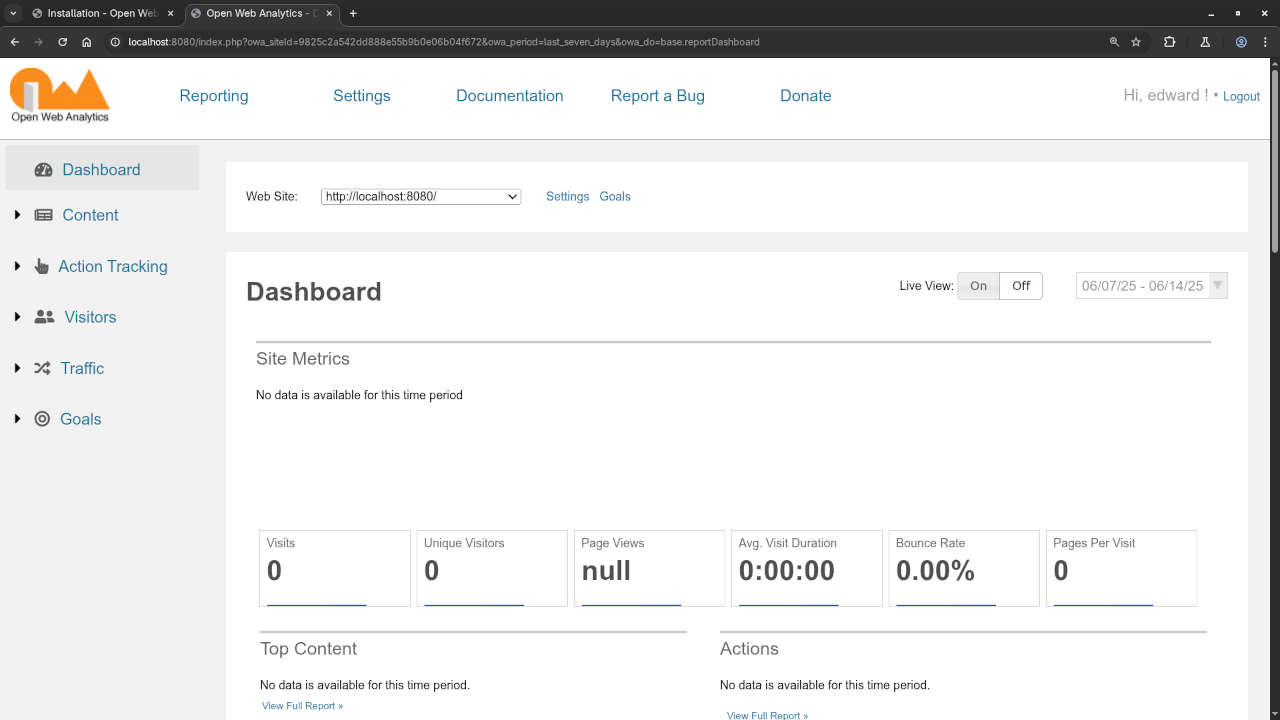
    Open Web Analytics Dashboard
    Desktop Web Browser Displaying Open Web Analytics Dashboard Screen

    Video Displaying The Installation Of Open Web Analytics

    📈 Using Open Web Analytics

    After installation, OWA will begin tracking visits automatically. You can log into your OWA dashboard to view:

    • Real-time visitor data
    • Pages viewed
    • Referrer websites
    • Visitor behavior (click paths, time on site)

    It’s a great way to see what’s working on your website—and what’s not.

    Open Source

    Open Web Analytics is licensed under the GNU General Public License Version 2.0 or later. The copyleft license comes with strict rules and requirements to ensure the software remains free and open-source. It allows commercial use, modification, distribution, and does not allow making derivatives proprietary, consult the license for more specific details.

    🤝 Need Help Setting It Up?

    If you’d rather focus on your content and business while leaving the tech stuff to someone else, I can help you set up Open Web Analytics on your WordPress website. Whether it’s installation, integration, or even customization, I offer professional assistance tailored to your needs.

    📩 Click here to request help

    🔝 Conclusion

    Open Web Analytics is a powerful tool that gives you full control over your website analytics—without the privacy trade-offs of commercial platforms. If you’re a beginner and want to track your traffic in a private, open-source way, OWA is a great place to start.

  • Getting Started with Penpot

    Getting Started with Penpot

    🎨 The Open-Source Design Tool for Everyone

    In the world of design, tools like Figma and Canva have become household names. But what if you’re looking for a free, open-source, and self-hostable alternative? Meet Penpot — a collaborative design and prototyping tool that’s making waves in the design community.

    Whether you’re a graphic designer, UI/UX specialist, or just starting out, Penpot offers a refreshing approach to visual design. Let’s explore what it is, why it matters, and how you can start using it today.

    👨‍🎨 What is Penpot?

    Penpot is an open-source design and prototyping platform built for teams. Unlike proprietary tools that limit customization or require paid subscriptions for collaboration, Penpot is:

    • Free and open-source (under the AGPL license)
    • Web-based (no software installation needed)
    • Cross-platform (works in your browser on any OS)
    • Self-hostable (you can run it on your own server for full control)

    Penpot was created by Kaleidos, a company with a strong commitment to open software and developer-friendly tools.

    🌟 Key Features

    • 🖌️ Vector Design Tools: Create icons, layouts, and illustrations with precision using flexible vector editing.
    • 📱 Prototyping: Build interactive mockups to showcase how your designs will work.
    • 🤝 Team Collaboration: Invite teammates, share feedback, and co-edit designs in real-time.
    • 🌐 Self-hosting Option: Take full ownership of your design environment by hosting Penpot yourself.
    • 🔗 Figma Import Support: Recently, plugins allow importing Figma files, helping teams transition smoothly.

    📑 Who Is Penpot For?

    • Designers who want more control over their tools.
    • Developers looking for a design solution that fits within open-source or privacy-sensitive environments.
    • Startups and NGOs that need a free and customizable tool for their teams.
    • Educators and students in need of an accessible and collaborative design platform.

    🚀 Getting Started

    You can start using Penpot in two ways:

    1. Use the Cloud Version: Just go to penpot.app and sign up for free.
    2. Host It Yourself: Download the Docker-based setup from Penpot on GitHub and run it on your own server.

    Both versions offer the same powerful design features. The self-hosted option is great for privacy-conscious teams or those who want deeper integrations.

    Self Hosted Podman Instructions

    Requirements:

    1. Podman tools podman and podman-compose
    2. Git tool git
    3. Penpot YAML docker-compose.yaml
    4. Uncomment PENPOT_SECRET_KEY: my-insecure-key to YAML


       # Download YAML File #
       curl -o docker-compose.yaml https://raw.githubusercontent.com/penpot/penpot/main/docker/images/docker-compose.yaml
       
    
    Download Penpot YAML.


       # Launch Application #
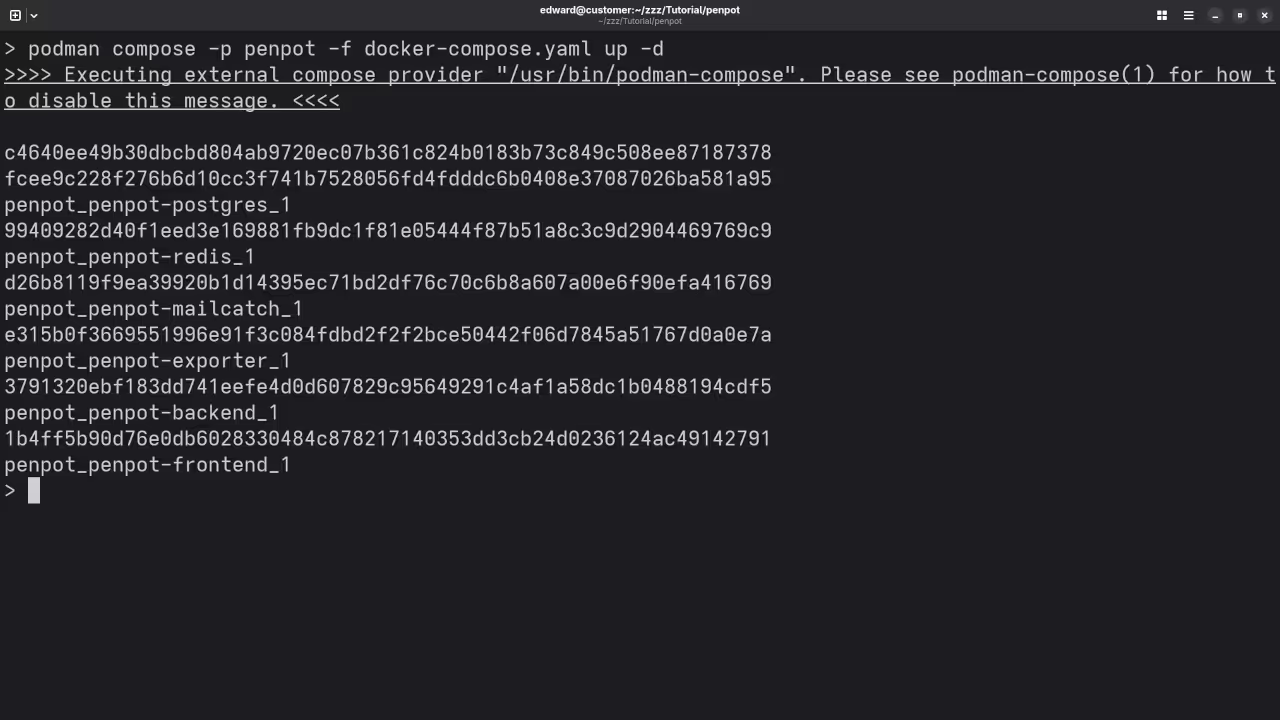
       podman compose -p penpot -f docker-compose.yaml up -d
       
    
    Start Penpot.


       # Stop Application #
       podman compose -p penpot -f docker-compose.yaml down
       
    
    Stop Penpot.

    ✅ Pros and Cons

    ✅ Pros:

    • 100% free and open-source
    • Modern, clean UI
    • Real-time collaboration
    • No vendor lock-in
    • Ideal for privacy-conscious projects

    ❌ Cons:

    • Still maturing (some advanced features from Figma may be missing)
    • Smaller plugin ecosystem (but growing)
    • Learning curve if coming from Canva-style editors

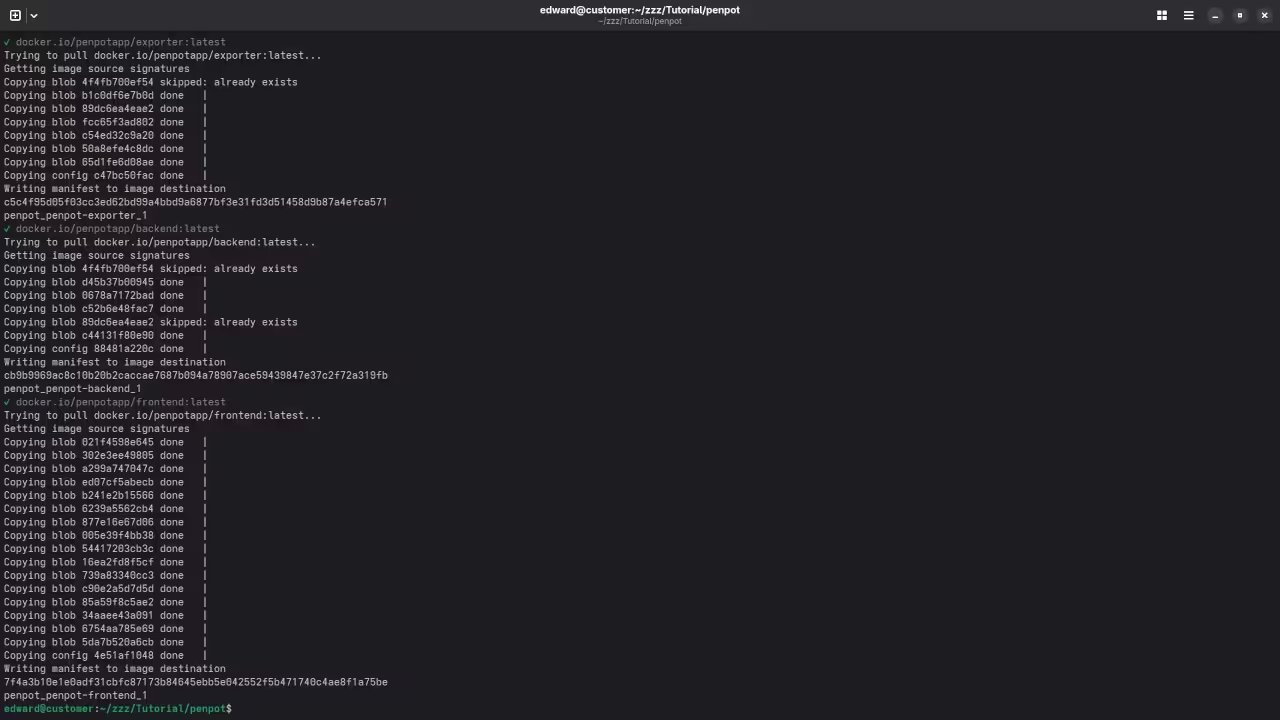
    Podman Pulling Penpot Image
    Podman Compose Pulling Penpot Container Image

    Podman Compose Starting Penpot
    Podman Compose Running Penpot Via YAML File

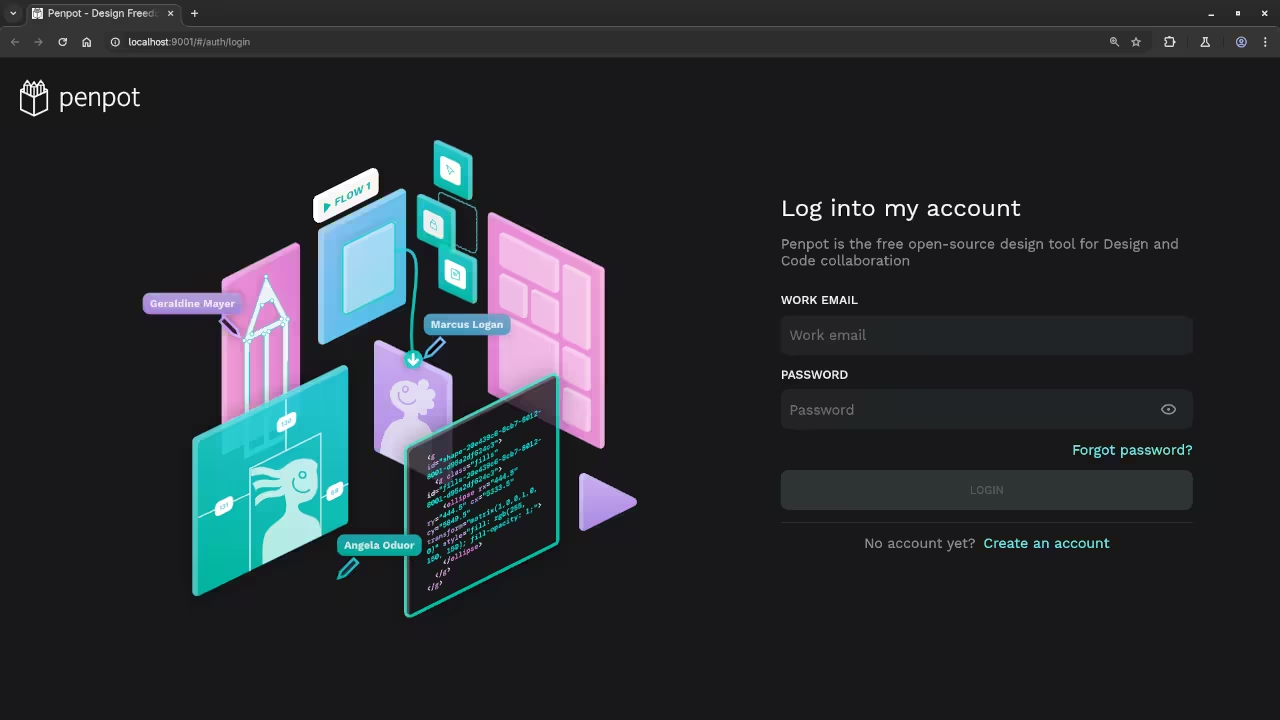
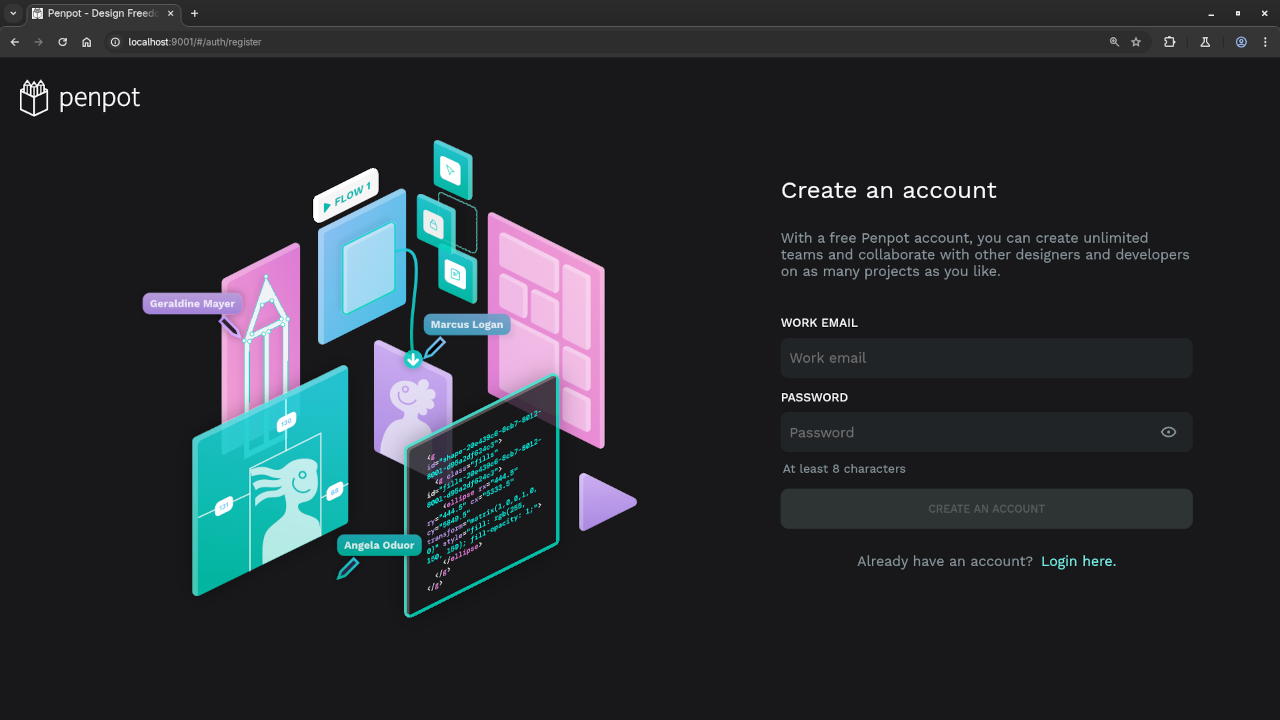
    Penpot Running In Web Browser
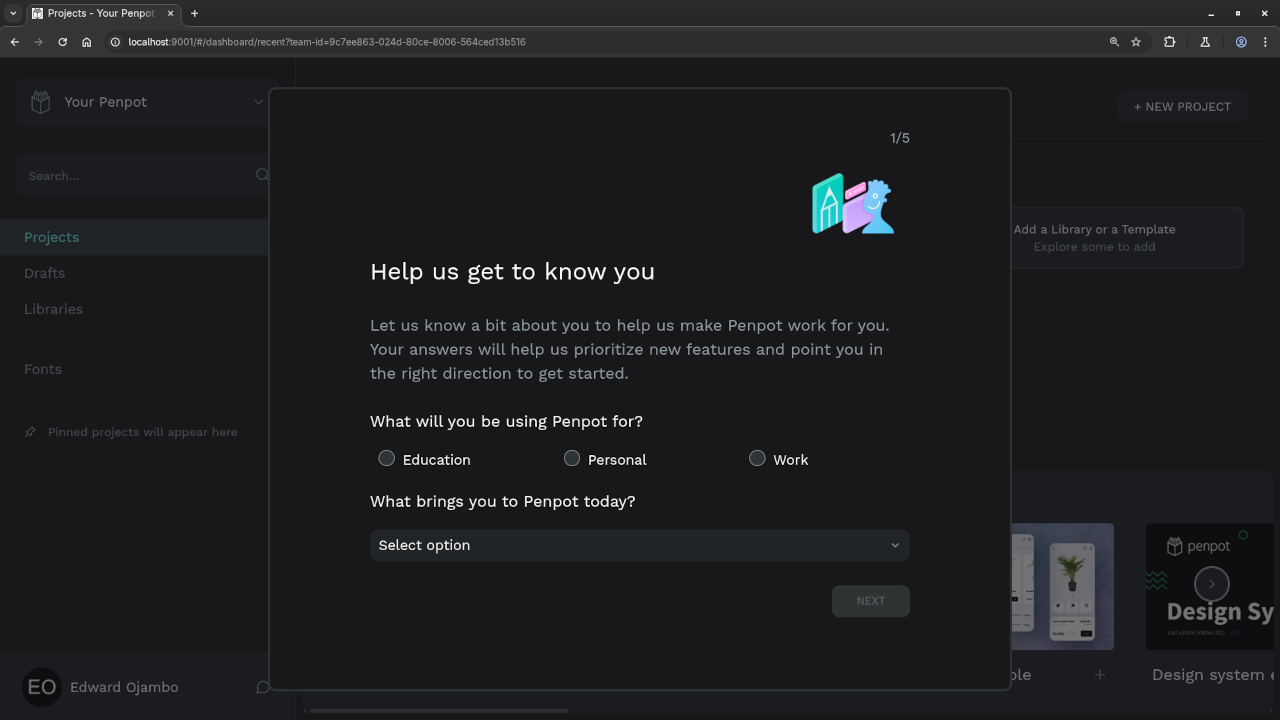
    Desktop Web Browser Displaying Penpot Account Creation Screen

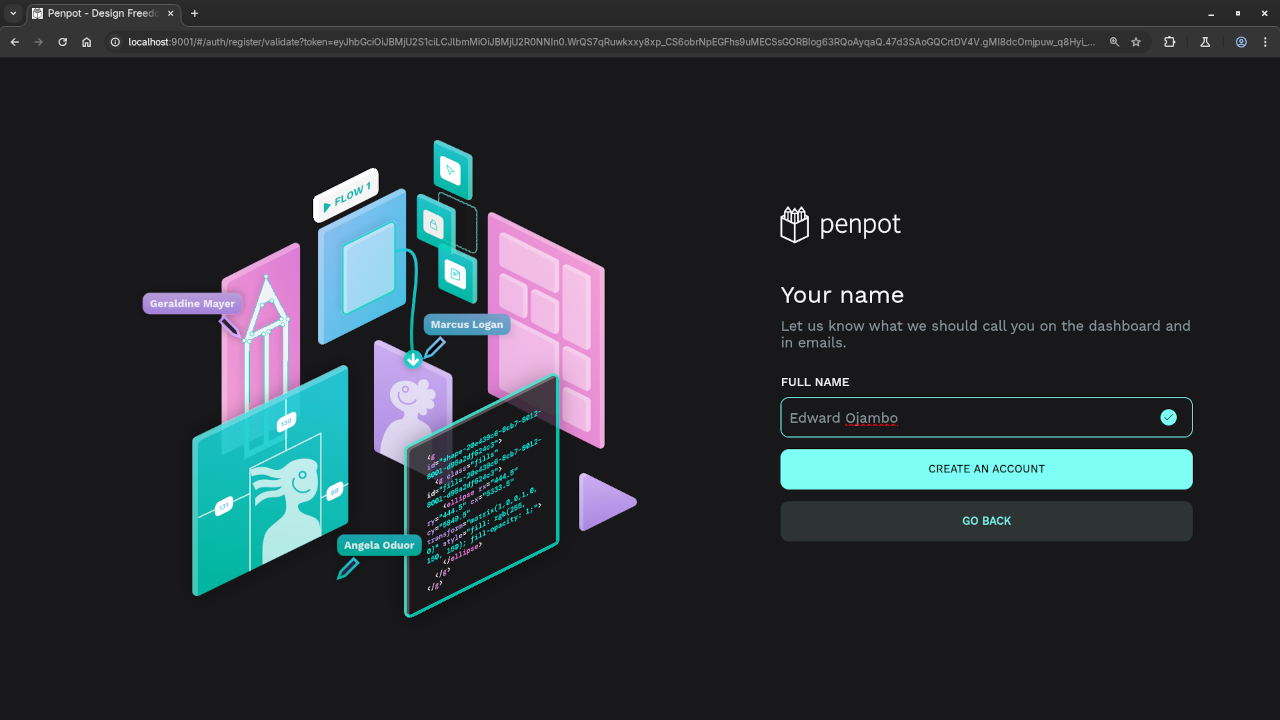
    Penpot Account Setup
    Desktop Web Browser Displaying Penpot Account Setup Screen

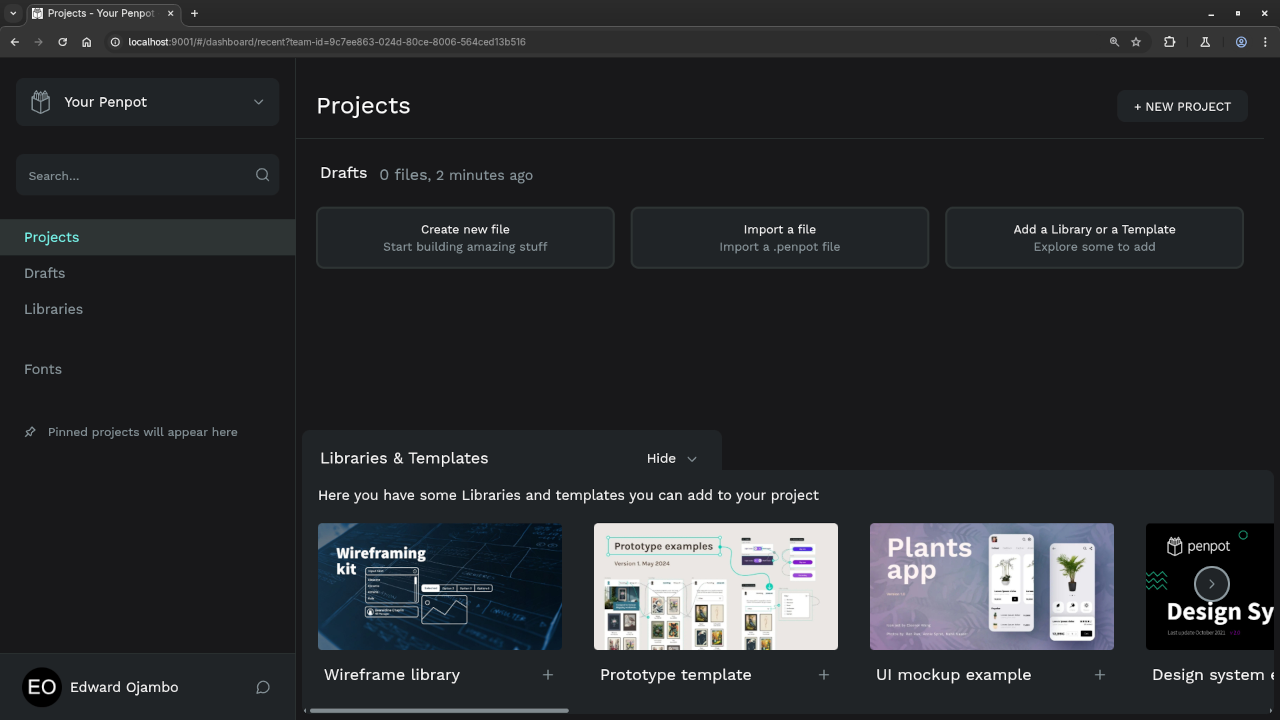
    Penpot Dashboard
    Desktop Web Browser Displaying Penpot Dashboard Screen

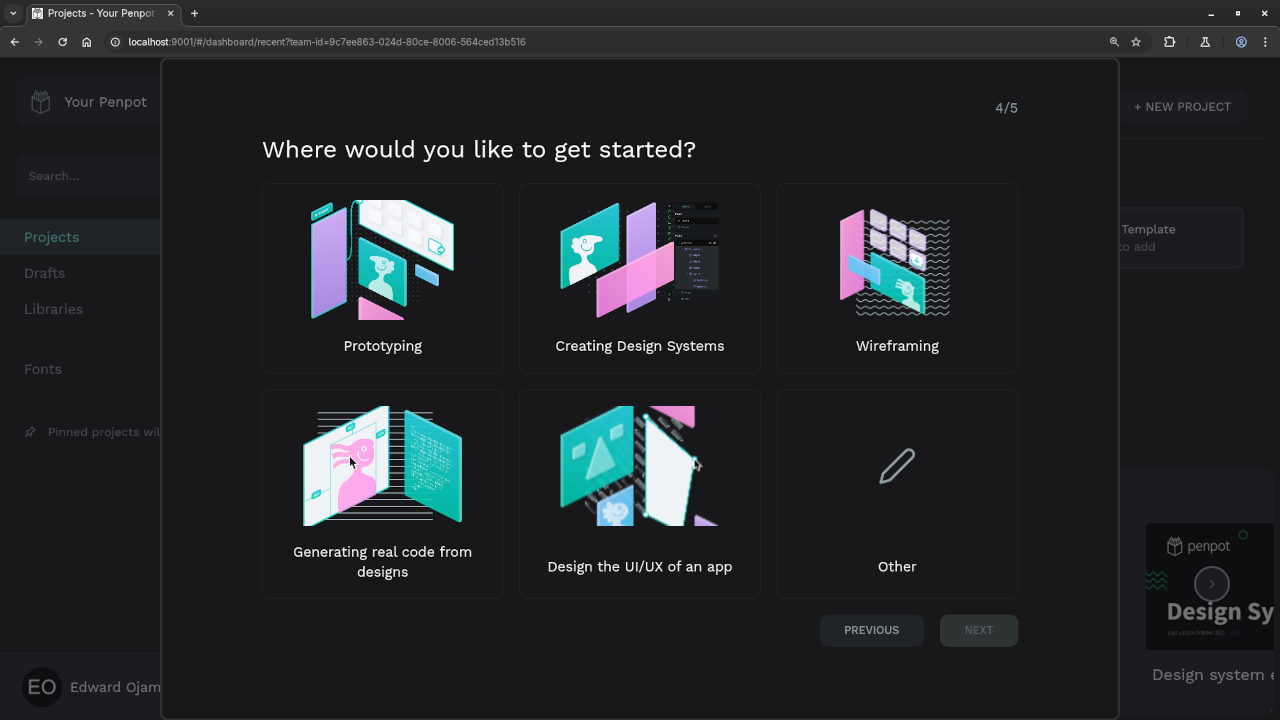
    Penpot Running Project Chooser
    Desktop Web Browser Displaying Penpot Project Creation Screen

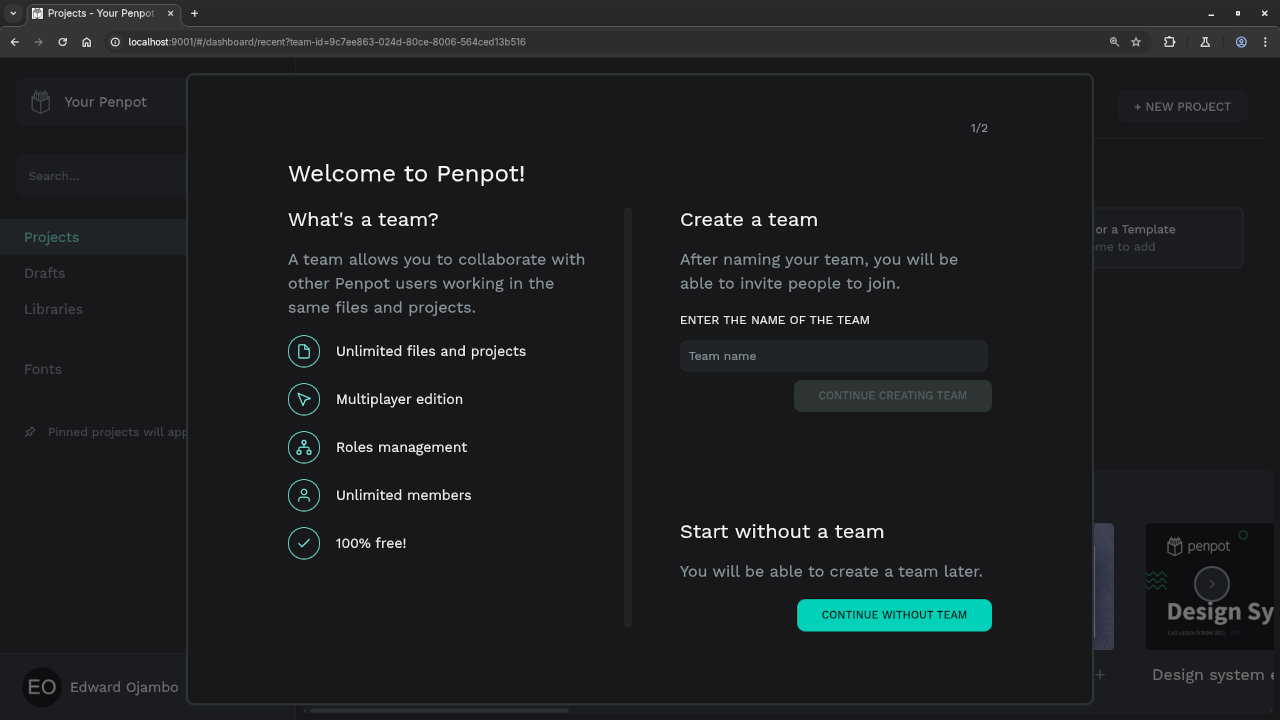
    Penpot Running Team Option
    Desktop Web Browser Displaying Penpot Team Creation Screen

    Penpot Running Projects
    Desktop Web Browser Displaying Penpot Projects Screen

    Penpot Running Project Draft
    Desktop Web Browser Displaying Penpot Project Draft Screen

    Video Displaying The Installation Of Penpot

    Usage

    • You may use the any IDE or text editor including the Learning JavaScript Course Web IDE in a new browser window.
    • Open your web browser.
    • Navigate to the URL http://localhost:9001.
    • Click the login button and create an account if applicable.
    • If you encounter issues, visit the project GitHub page for help or contact OjamboServices.com for server support.

    Open Source

    JavaScript follows the ECMAScript standard and is licensed under the W3C Software License by web browser vendors and runtime environment vendors. The permissive license requires the preservation of the copyright notice and disclaimer. It allows commercial use, modification, distribution, and allows making derivatives proprietary, consult the license for more specific details.

    Penpot is licensed under the Mozilla Public License 2.0. The weak copyleft license requires the preservation of the copyright notice and license notices. It allows commercial use, modification, distribution, and allows making derivatives proprietary with strict conditions, consult the license for more specific details.

    💬 Conclusion

    Penpot is a fantastic option if you’re looking for a freedom-first, team-friendly, and modern design tool. It may not have all the bells and whistles of premium platforms just yet, but its pace of development and community support make it a strong contender in the design space.

    If you’re passionate about open-source software or just want to try something new, Penpot is definitely worth checking out!

    If you enjoy this article, consider supporting me by purchasing one of my OjamboShop.com Online Programming Courses or publications at Edward Ojambo Programming Books or simply donate here Ojambo.com Donate

    References:

  • Use Git Clone To Download Repositories

    Use Git Clone To Download Repositories


    How to Use git clone Like a Pro

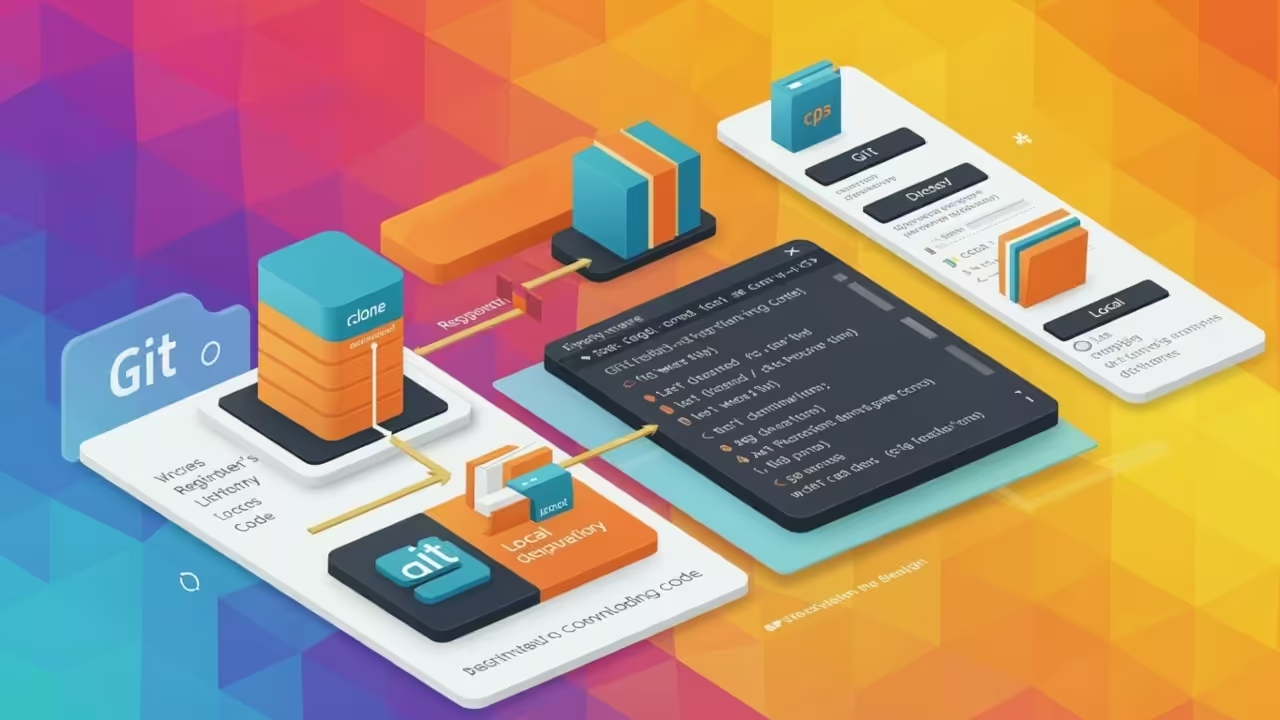
    If you’re just getting started with Git, one of the first commands you’ll need to learn is git clone. This powerful command allows you to copy an entire remote repository to your local machine, enabling you to work on existing projects with ease. Whether you’re collaborating on a team or exploring open-source code, git clone is your gateway into the project.

    What is git clone?

    The git clone command creates a copy of a remote repository, downloading all its files, branches, commits, and history to your local system. It’s commonly used when you want to contribute to a project or simply browse its source code locally.

    Prerequisites

    • Have Git installed on your system. Download Git.
    • Have a terminal or command prompt ready.
    • Know the URL of the repository you want to clone (from GitHub, GitLab, etc.).

    Basic Syntax

    git clone <repository-url>

    Example:

    git clone https://github.com/username/repository.git

    This command will:

    1. Create a new folder named repository in your current directory.
    2. Download all files and history from the remote repo into that folder.

    Cloning Into a Custom Directory

    You can specify a custom folder name like this:

    git clone https://github.com/username/repository.git my-project

    This will place the contents in a folder named my-project.

    Cloning via SSH

    If you use SSH keys with GitHub or GitLab, use the SSH URL instead:

    git clone git@github.com:username/repository.git

    This method is more secure and avoids entering credentials repeatedly.

    Troubleshooting Tips

    • Authentication errors? Make sure your SSH keys or GitHub tokens are set up correctly.
    • Permission denied? You may be trying to clone a private repository without access.
    • Not a valid repository? Double-check the URL for typos.

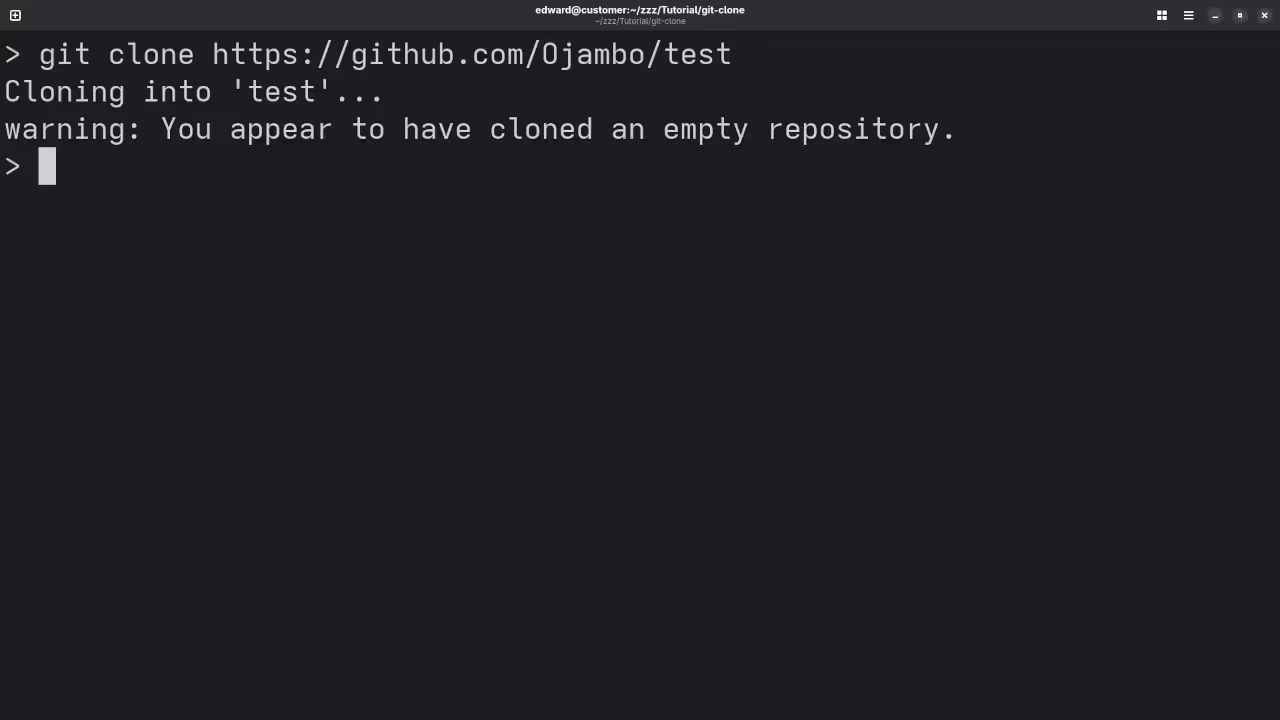
    Git Clone Empty Repository
    Command Line Tool Git Cloning An Empty Repository

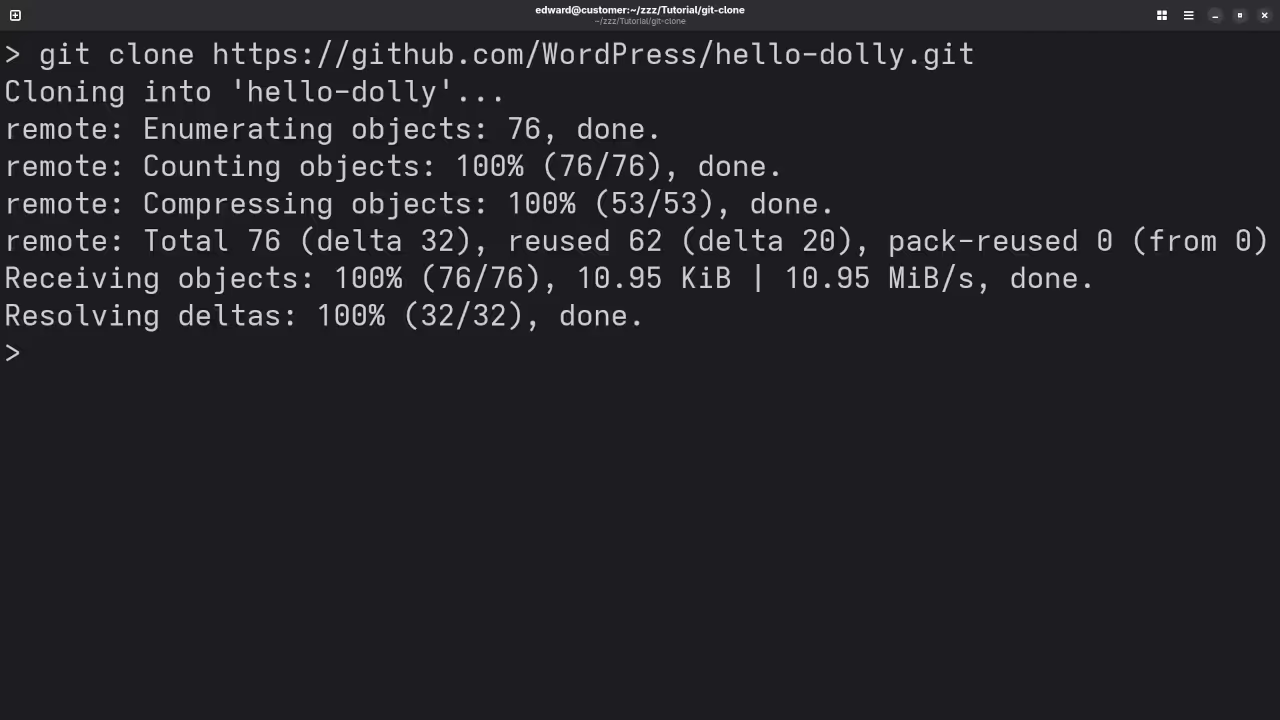
    Git Clone Small Repository
    Command Line Tool Git Cloning A Small Repository


    🔓 Open Source

    Git is licensed under the GNU General Public License Version 2.0. The copyleft license comes with strict rules and requirements to ensure the software remains free and open-source. It allows commercial use, modification, distribution, and does not allow making derivatives proprietary, consult the license for more specific details.

    Conclusion

    Mastering git clone is an essential step in your journey with Git. Whether you’re joining a team or exploring a new project, knowing how to clone repositories will help you hit the ground running. In future articles, we’ll explore how to make changes and push them back using git push and git pull.

    If you enjoy this article, consider supporting me by purchasing one of my OjamboShop.com Online Programming Courses or publications at Edward Ojambo Programming Books or simply donate here Ojambo.com Donate

    References:

  • WordPress After Installation

    WordPress After Installation

    ✅ What to Do Next (Step-by-Step Guide for Beginners)

    So you’ve successfully installed WordPress — congratulations! 🎉 But what comes next?

    If you’re feeling a little lost, you’re not alone. Many beginners wonder what steps to take immediately after installing WordPress. This guide will walk you through everything you should do post-installation to set your site up for success.

    🚀 Step 1: Log In to Your WordPress Dashboard

    After installation, you can log in to your WordPress admin dashboard at:

    yoursite.com/wp-admin

    Enter your username and password (created during installation), and you’re in!

    🗑️ Step 2: Clean Up Default Content

    WordPress comes with some sample content by default:

    • Delete the “Hello World!” post
    • Delete the default page
    • Delete the sample comment

    Go to Posts > All Posts and Pages > All Pages to clean things up.

    🎨 Step 3: Choose and Install a Theme

    Your theme controls how your site looks.

    1. Go to Appearance > Themes
    2. Click Add New
    3. Use the search or filter options to find a free theme, or upload a premium one
    4. Click Install, then Activate

    💡 Tip: For blogs, Astra, Kadence, or GeneratePress are great lightweight themes.

    🔧 Step 4: Install Essential Plugins

    Plugins extend your site’s functionality. Here are some must-haves:

    Plugin Purpose
    Yoast SEO or Rank Math SEO optimization
    WPForms Contact forms
    UpdraftPlus Backup solution
    Wordfence Security
    LiteSpeed Cache or WP Super Cache Speed optimization
    OjamboServices.com Consultation & customization

    🛠️ Step 5: Configure Site Settings

    Go to Settings > General and update:

    • Site Title
    • Tagline
    • Timezone
    • Admin Email

    Then head to Settings > Permalinks and choose:

    Post Name for SEO-friendly URLs (yoursite.com/sample-post/)

    🗃 Step 6: Create Key Pages

    Every site should have these pages:

    • About
    • Contact
    • Privacy Policy
    • Blog (if not set automatically)

    Use Pages > Add New to create them.

    📃 Step 7: Set a Static Front Page (Optional)

    Want your homepage to show a welcome message instead of blog posts?

    1. Go to Settings > Reading
    2. Choose A static page
    3. Set your Home and Blog pages

    📍 Step 8: Set Up Your Navigation Menu

    1. Go to Appearance > Menus
    2. Create a new menu (e.g., “Main Menu”)
    3. Add your pages
    4. Assign it to the Primary Menu location

    📈 Step 9: Configure SEO Basics

    Install and set up your SEO plugin (Yoast or Rank Math):

    • Submit your site to Google Search Console
    • Generate and submit your sitemap
    • Use SEO titles and meta descriptions for posts/pages

    🔒 Step 10: Secure Your Website

    • Change your default admin username if it’s “admin”
    • Use strong passwords
    • Install a security plugin (like Wordfence)
    • Enable SSL (usually available free via your hosting provider)

    📸 Screenshots And Screencast

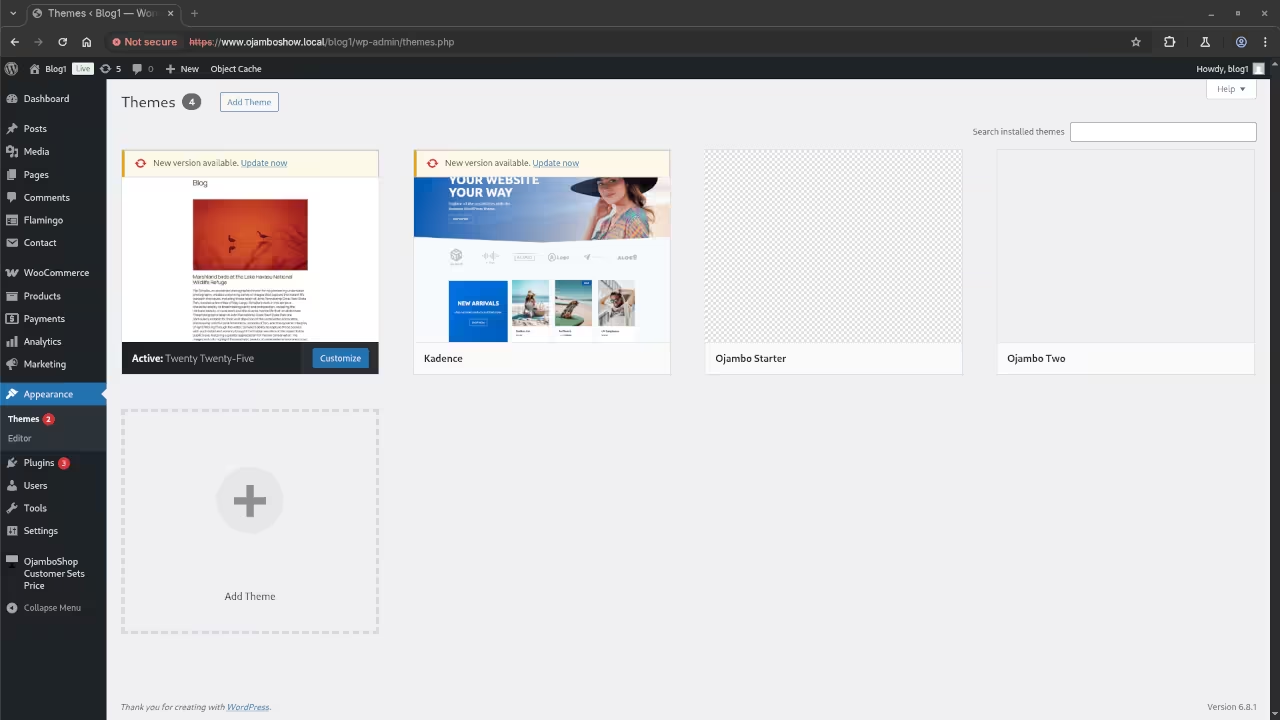
    Desktop Web Browser Displaying Themes
    Desktop Web Browser Displaying Themes Page

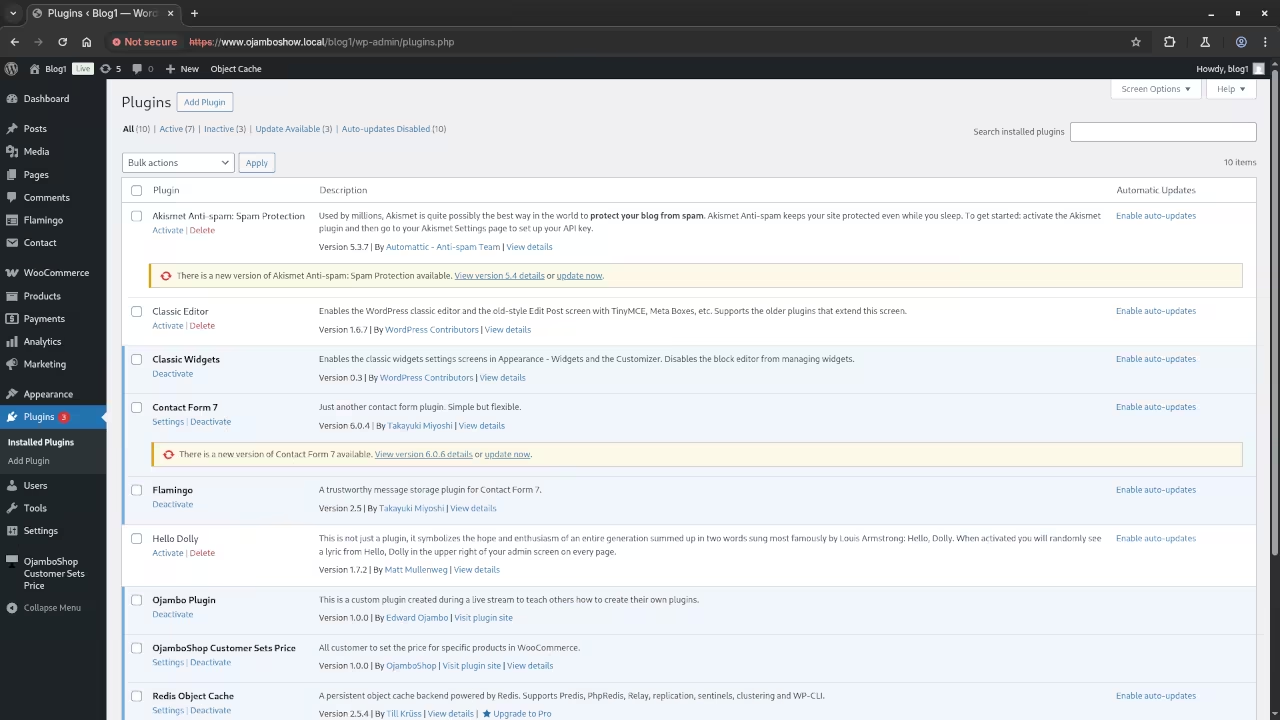
    Desktop Web Browser Displaying Plugins
    Desktop Web Browser Displaying Plugins Page

    Video Displaying The Creation Of A Procedural Sky Texture

    🔓 Open Source

    WordPress is licensed under the GNU General Public License Version 2.0 or later. The copyleft license comes with strict rules and requirements to ensure the software remains free and open-source. It allows commercial use, modification, distribution, and does not allow making derivatives proprietary, consult the license for more specific details.

    ✅ Conclusion:

    In this tutorial, we explored essential setup steps, including theme selection, plugin installation, SEO configuration, and security measures. By following these steps, users can quickly build a professional, optimized, and secure website ready for content creation and growth.

    You’re now ready to start creating content and growing your website!

    Starting a WordPress site is exciting, but getting the settings right early can save you a lot of trouble down the road. Bookmark this checklist and refer to it as you build.

    If you enjoy this article, consider supporting me by purchasing one of my OjamboShop.com Online Programming Courses or publications at Edward Ojambo Programming Books or simply donate here Ojambo.com Donate

    References: