Blog

  • PHP Web Framework Laravel Gitea Actions

    PHP Web Framework Laravel Gitea Actions

    Getting Started with Gitea Actions for Laravel CI/CD Using Podman and MariaDB

    If you are a developer looking for a simple, open-source way to automate testing and deployment of your Laravel applications, Gitea Actions combined with Podman and MariaDB might be just the right solution for you.

    In this post, I will walk you through the steps to set up a continuous integration and deployment (CI/CD) workflow for a Laravel app using Gitea Actions that runs tests inside Podman containers connected to a MariaDB database.

    What is Gitea and Gitea Actions?

    Gitea is a lightweight, self-hosted Git service that is fully open source. It is similar to GitHub but designed to be simple and easy to run on your own server. Gitea Actions is a built-in automation feature that lets you run workflows like tests and deployments triggered by Git events.

    Why Use Podman Instead of Docker?

    Podman is a container engine compatible with Docker images but runs without a root daemon. This makes it safer and easier to use on Linux distributions like Fedora. Podman can be used with podman-compose, which is similar to Docker Compose, to manage multi-container applications like Laravel plus MariaDB.

    Overview of the Setup

    This setup includes the following components:

    • Your Laravel application code hosted in Gitea
    • A podman-compose file defining Laravel app and MariaDB containers
    • A shell script to start containers, run Laravel tests, and stop containers
    • A Gitea Actions workflow that triggers the shell script on every push

    Step 1 – Repository Folder Structure

    Your Laravel project repository should include the following files and folders for CI/CD:

    laravel-app/
    ├── app/
    ├── bootstrap/
    ├── config/
    ├── database/
    ├── public/
    ├── routes/
    ├── tests/
    ├── .ci/
    │   └── run-tests.sh
    ├── .gitea/
    │   └── workflows/
    │       └── ci.yml
    ├── podman-compose.yml
    ├── artisan
    ├── composer.json
    └── ...

    The key additions are the .ci/run-tests.sh script, the .gitea/workflows/ci.yml workflow file, and the podman-compose.yml file.

    Step 2 – Create the Podman Compose File

    Create podman-compose.yml at the root of your repo to define Laravel and MariaDB containers:

    version: '3.8'
    
    services:
      app:
        image: php:8.4-fpm
        container_name: laravel-app
        working_dir: /var/www/html
        volumes:
          - ./:/var/www/html
        ports:
          - "9000:9000"
        depends_on:
          - db
        command: bash -c "composer install && php artisan migrate && php-fpm"
    
      db:
        image: mariadb:10.11
        container_name: mariadb
        environment:
          MYSQL_ROOT_PASSWORD: secret
          MYSQL_DATABASE: laravel
          MYSQL_USER: laraveluser
          MYSQL_PASSWORD: secret
        ports:
          - "3306:3306"
        volumes:
          - dbdata:/var/lib/mysql
    
    volumes:
      dbdata:

    This file will spin up a PHP-FPM container with your Laravel app and a MariaDB database container.

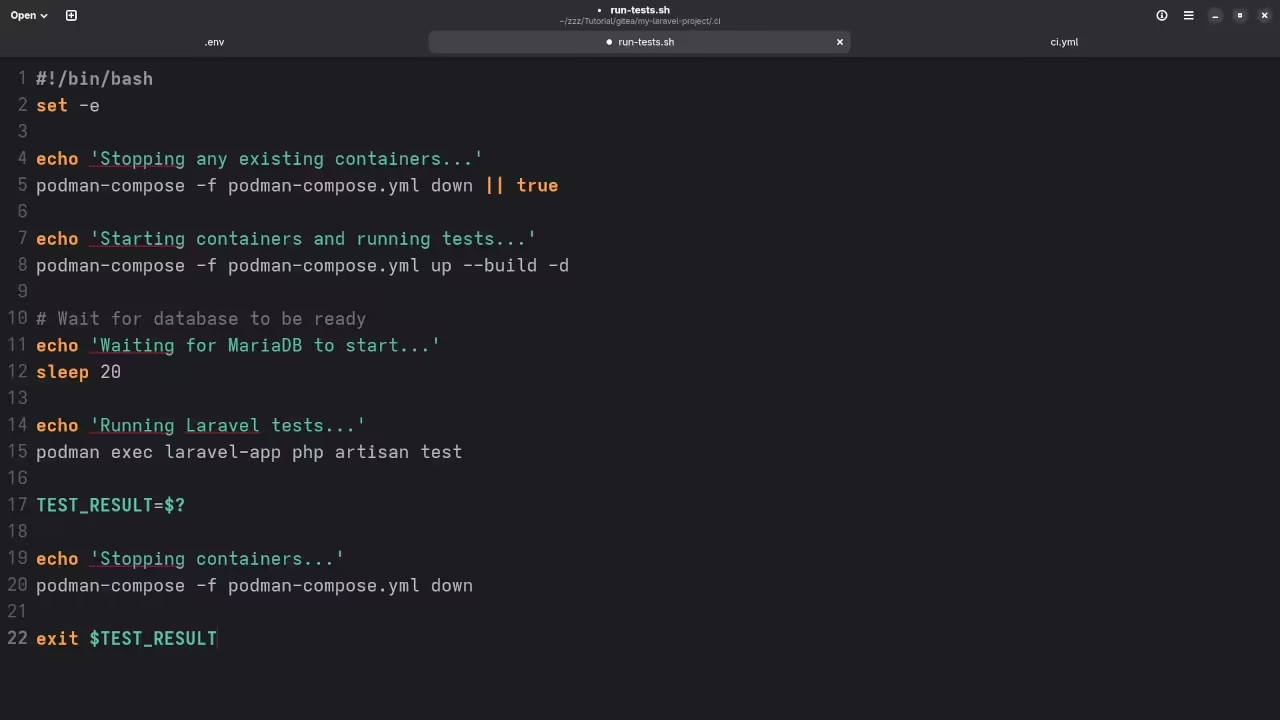
    Step 3 – Write the Test Runner Script

    Create .ci/run-tests.sh with the following content:

    #!/bin/bash
    set -e
    
    echo 'Stopping any existing containers...'
    podman-compose -f podman-compose.yml down || true
    
    echo 'Starting containers and running tests...'
    podman-compose -f podman-compose.yml up --build -d
    
    # Wait for database to be ready
    echo 'Waiting for MariaDB to start...'
    sleep 20
    
    echo 'Running Laravel tests...'
    podman exec laravel-app php artisan test
    
    TEST_RESULT=$?
    
    echo 'Stopping containers...'
    podman-compose -f podman-compose.yml down
    
    exit $TEST_RESULT

    Make the script executable:

    chmod +x .ci/run-tests.sh

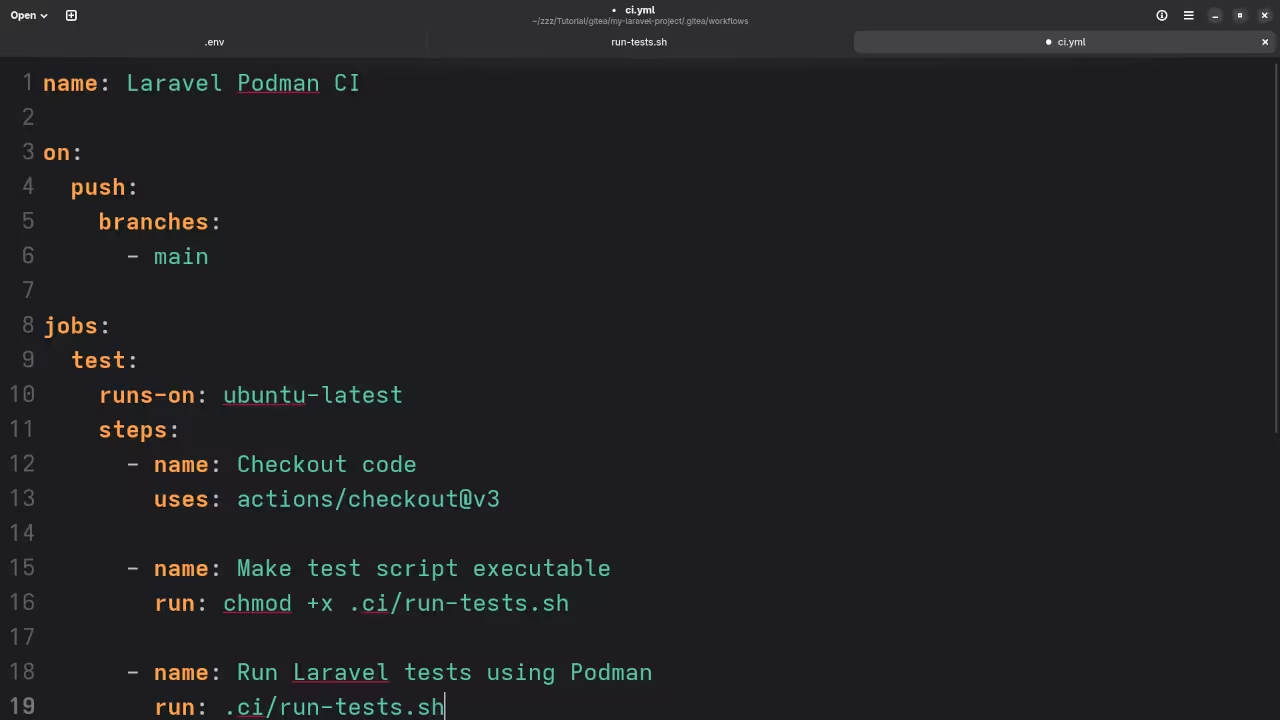
    Step 4 – Configure Gitea Actions Workflow

    Create .gitea/workflows/ci.yml to define the workflow triggered on every push to the main branch:

    name: Laravel Podman CI
    
    on:
      push:
        branches:
          - main
    
    jobs:
      test:
        runs-on: ubuntu-latest
        steps:
          - name: Checkout code
            uses: actions/checkout@v3
    
          - name: Make test script executable
            run: chmod +x .ci/run-tests.sh
    
          - name: Run Laravel tests using Podman
            run: .ci/run-tests.sh

    This workflow checks out your code, makes your test script executable, and runs it. The test script manages Podman containers and Laravel tests.

    Step 5 – Register and Run Gitea Actions Runner

    To run Gitea Actions workflows, you need to set up a runner (such as act_runner) on a Fedora 42 machine where Podman is installed. The runner will pick up workflow jobs and execute your scripts.

    Make sure Podman and podman-compose are installed on the runner machine, and your runner user has permissions to run Podman commands.

    Summary

    With this setup, every push to your Gitea repository triggers the Gitea Actions workflow, which runs your custom shell script. The script spins up Laravel and MariaDB containers inside Podman, runs your Laravel tests, then stops the containers. This creates a secure, open-source CI/CD pipeline without relying on Docker.

    Screenshots And Screencast
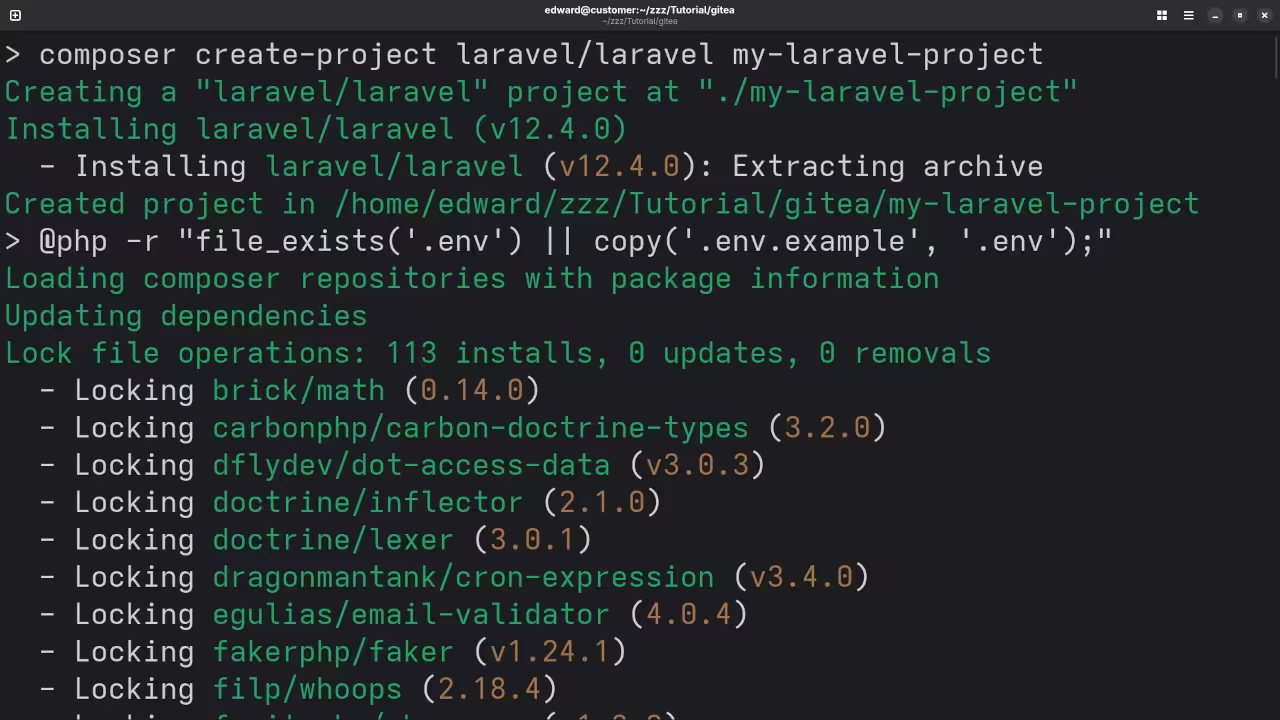
    Laravel Installation
    Command Line Displaying Laravel Core Installation

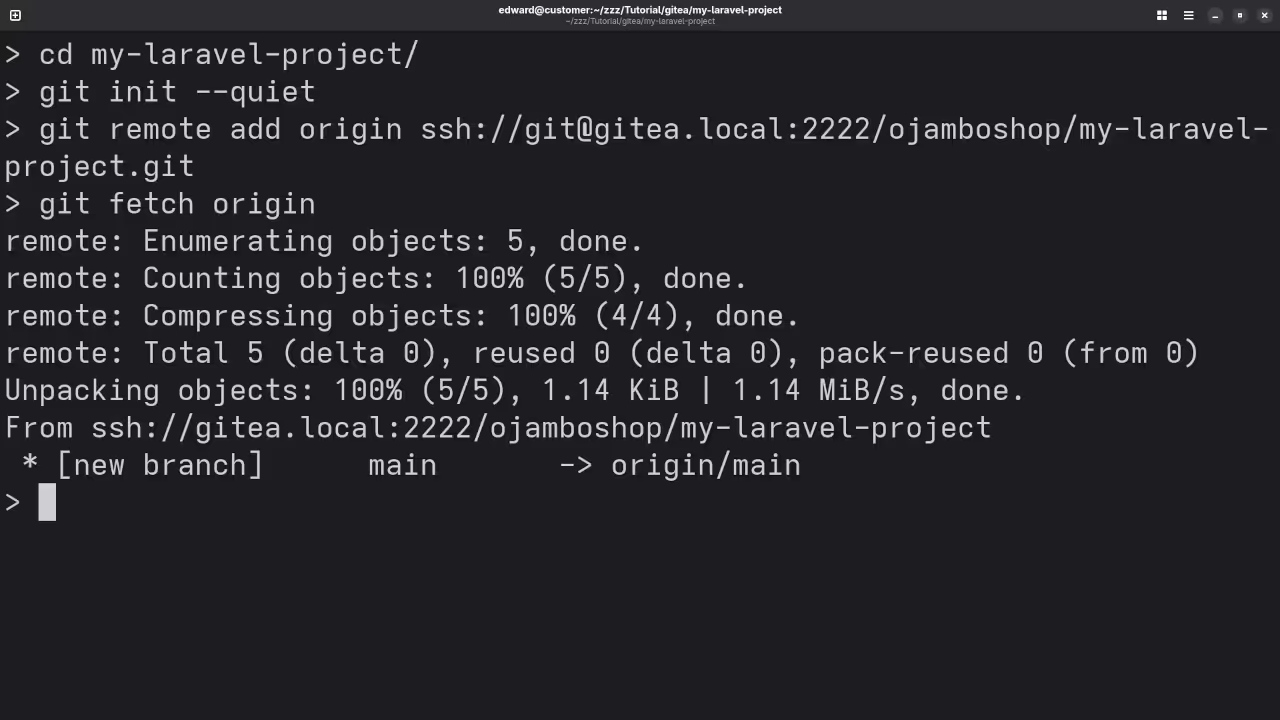
    Laravel Git Installation
    Command Line Displaying Laravel Git Setup

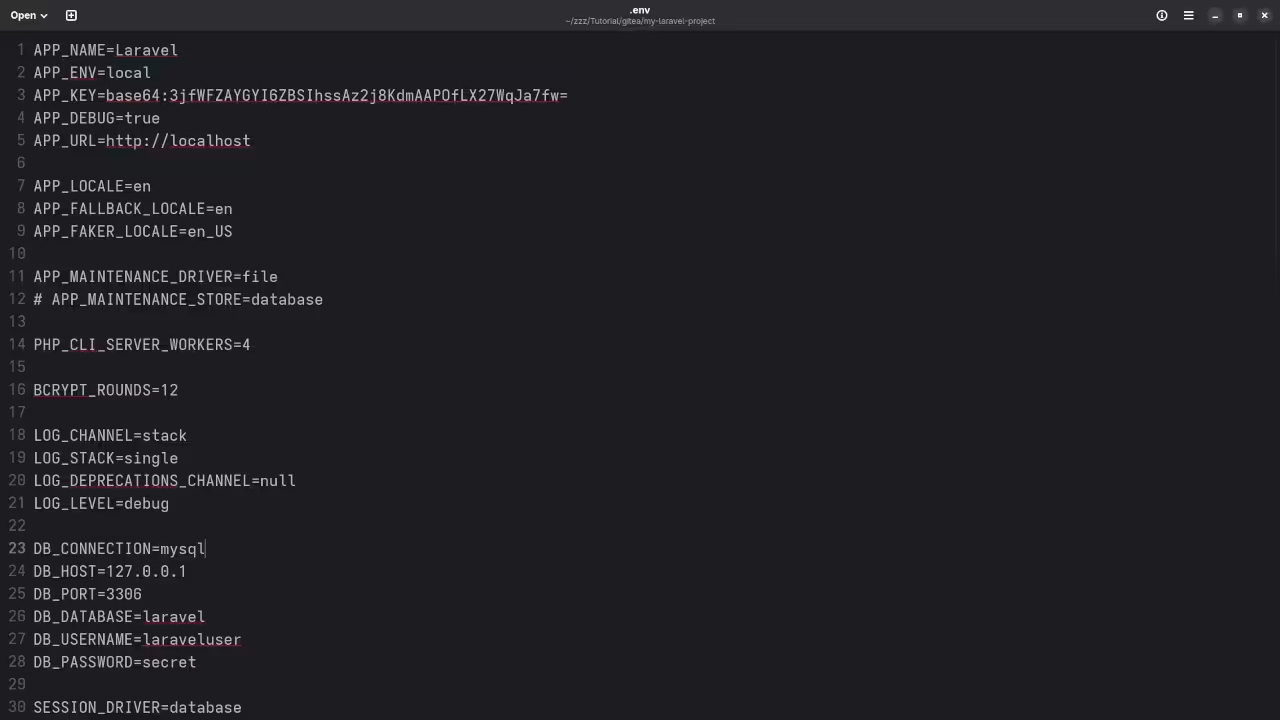
    Database Config
    Gnome Text Editor Displaying App Database Configuration File

    Runner Script
    Gnome Text Editor Displaying Runner Script

    Gitea Actions
    Gnome Text Editor Displaying Gitea Actions

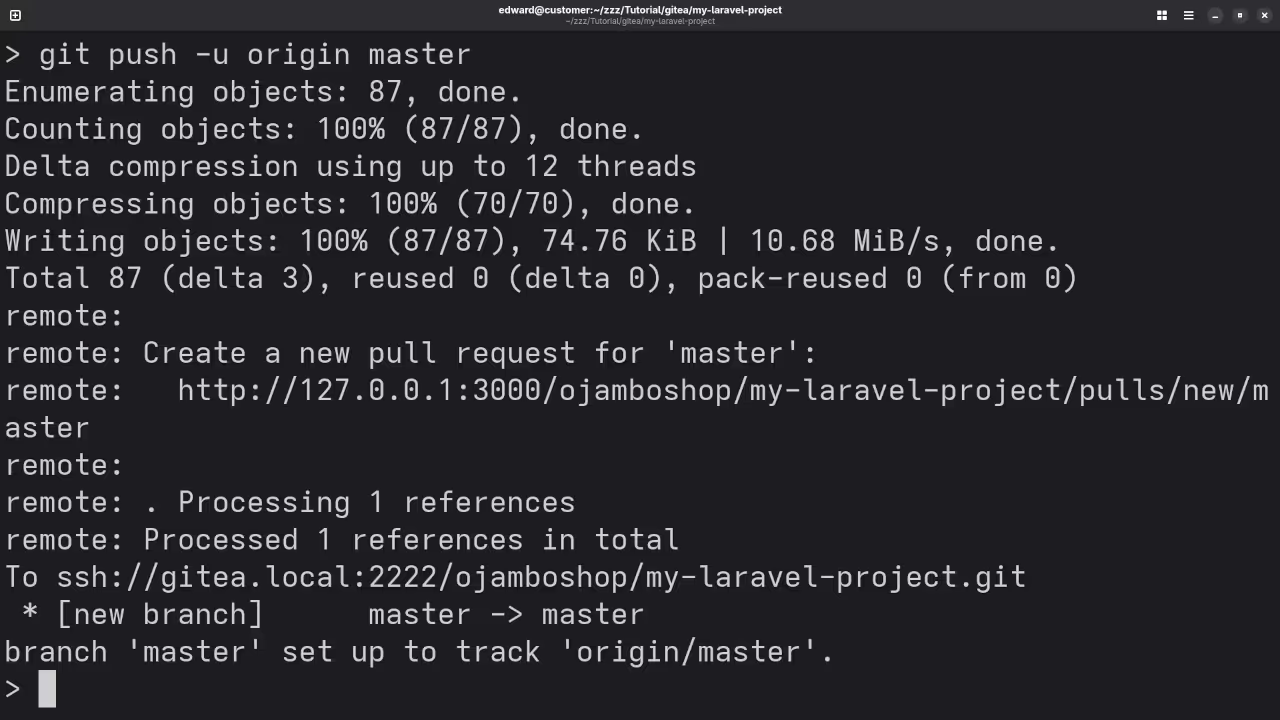
    Git Pull Request
    Command Line Git Push Generating A Pull Request

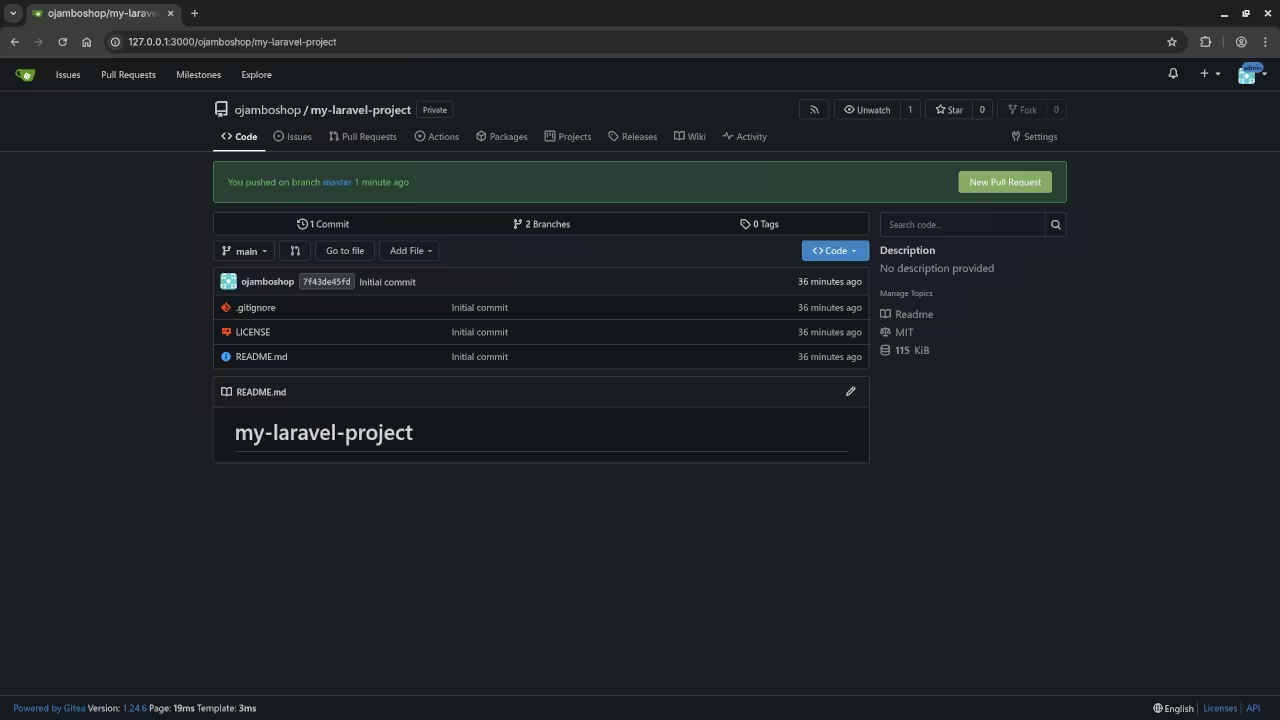
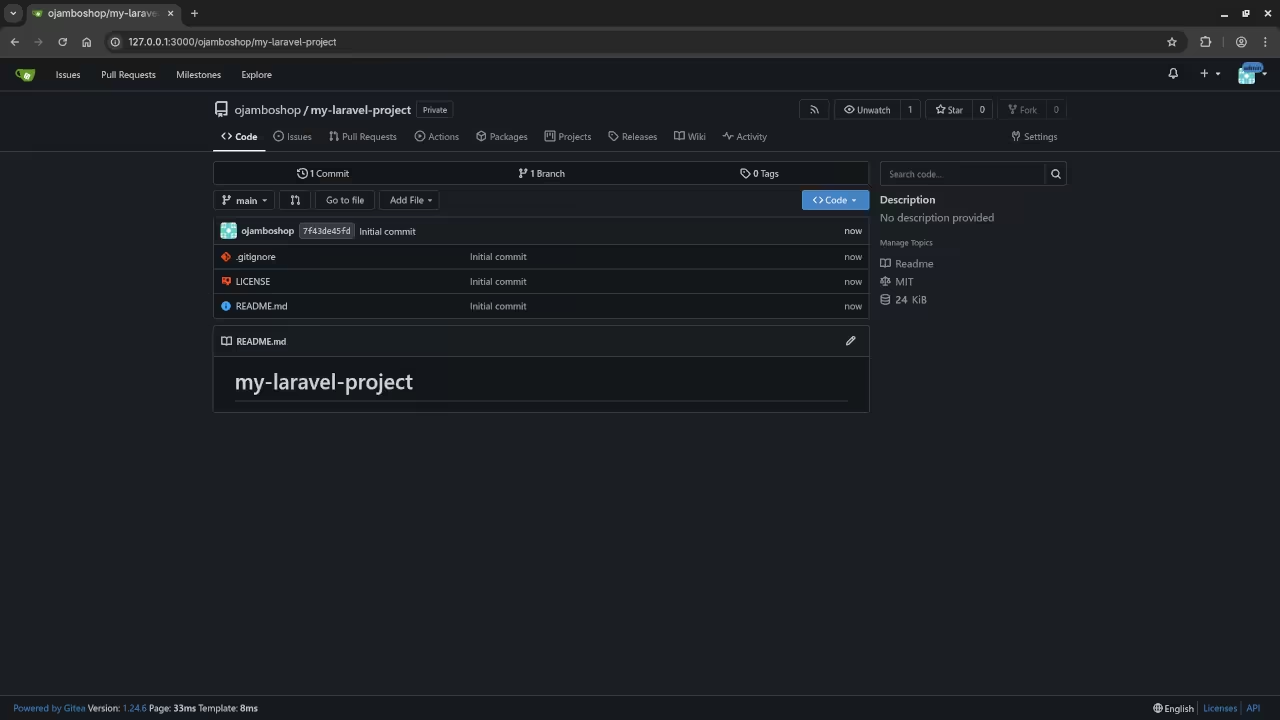
    Gitea Showing New Push
    Web Browser Displaying New Push Notification

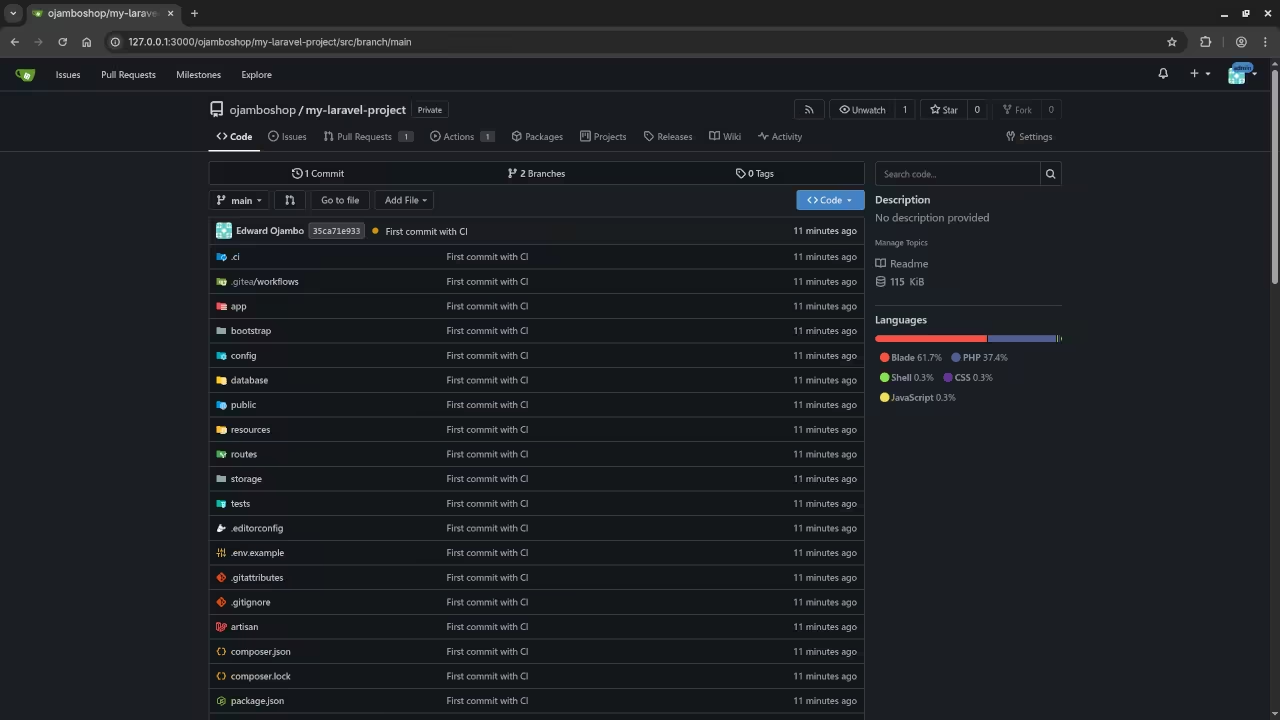
    Gitea Showing Updated Repo
    Web Browser Displaying Latest Repo Changes

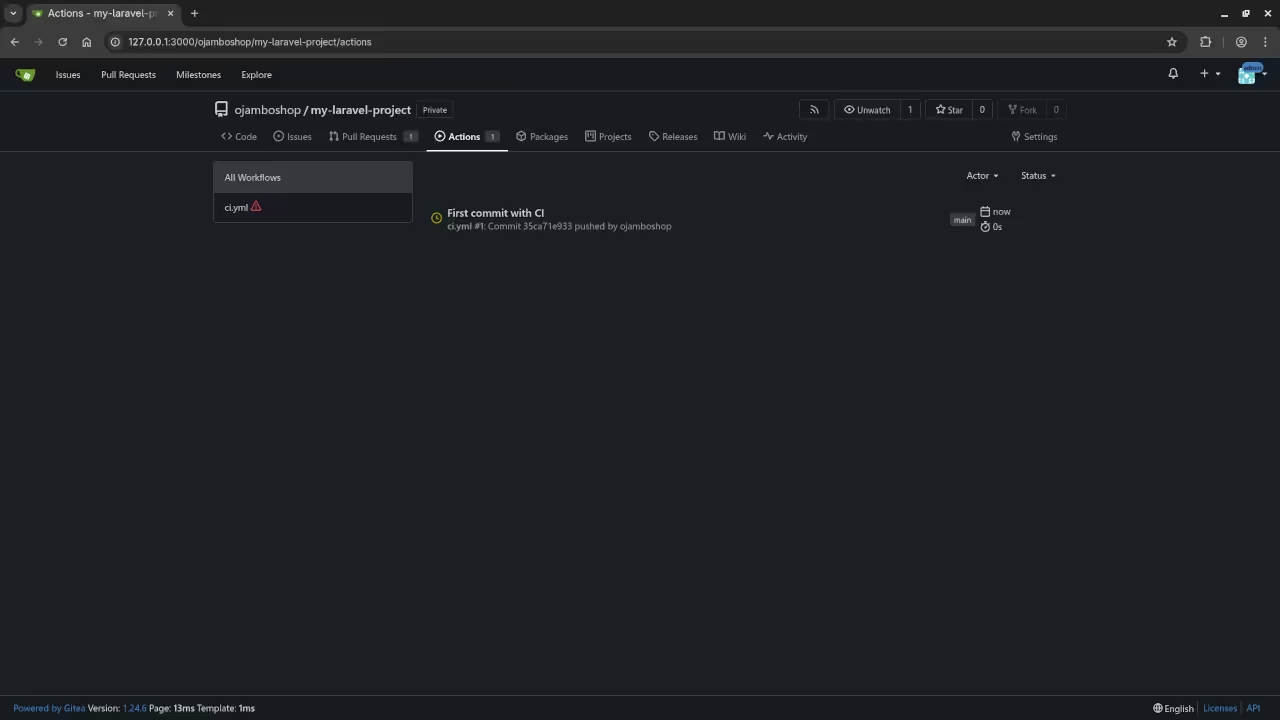
    Gitea Workflow Actions
    Web Browser Displaying Gitea Workflows For Repository

    Laravel Project Using Gitea Actions

    Learn More and Get Support

    I am Edward Ojambo, a software developer passionate about teaching others how to build and automate modern web applications.

    Conclusion

    Using Gitea Actions with Podman and MariaDB is a powerful, open-source way to manage continuous integration and deployment for your Laravel projects. It is flexible, secure, and designed to fit well into a Fedora or Podman-based environment.

    If you are ready to take your Laravel app automation to the next level, this setup is a fantastic starting point.

    If you want help generating full configuration files or scripts, just let me know.
  • How To Create AN HTML5 Stunning Image Gallery

    How To Create AN HTML5 Stunning Image Gallery


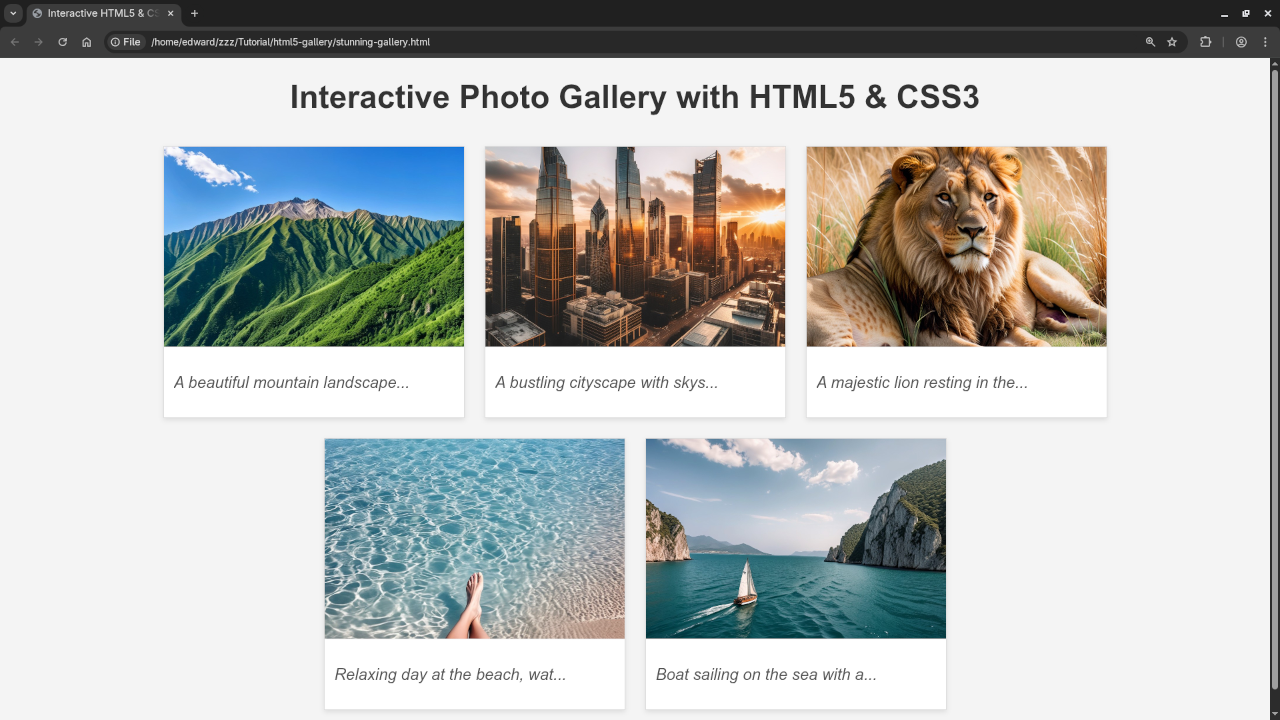
    HTML5 Image Gallery

    Hey there, web enthusiasts! Today, we are diving into the exciting world of HTML5 and CSS3 to build a beautiful and interactive image gallery – perfect for showcasing your photos, artwork, or any visual content. Do not worry, even if you are new to web development, you will be able to follow along! This tutorial will break down the code step-by-step, so you will understand how it works.

    What We will Build

    We will be creating an image gallery that is:

    • Visually Appealing With a clean design and subtle effects.
    • Responsive Looks great on all devices (desktops, tablets, and phones).
    • Interactive Features a neat hover effect to reveal image captions.

    Understanding the Basics: The Code

    Lets start by understanding the core of our HTML5 image gallery. Here is the code:


      <h1>Interactive Photo Gallery with HTML5 & CSS3</h1>
    
      <div class="gallery-container">
    
        <div class="gallery-item">
          <img src="https://picsum.photos/id/1015/300/200" alt="Landscape 1">
            <div class="caption-container">
              <p class="caption" data-original-caption="A beautiful mountain landscape with lush greenery and a clear blue sky.">Mountain Scene</p>
            </div>
        </div>
    
        <div class="gallery-item">
          <img src="https://picsum.photos/id/1020/300/200" alt="Cityscape">
          <div class="caption-container">
            <p class="caption" data-original-caption="A bustling cityscape with skyscrapers and modern architecture, bathed in the golden light of sunset.">City at Sunset</p>
          </div>
        </div>
    
        <div class="gallery-item">
          <img src="https://picsum.photos/id/1025/300/200" alt="Wildlife">
          <div class="caption-container">
            <p class="caption" data-original-caption="A majestic lion resting in the African savanna, surrounded by tall grasses.">King of the Jungle</p>
          </div>
        </div>
    
        <div class="gallery-item">
          <img src="https://picsum.photos/id/1019/300/200" alt="Beach">
           <div class="caption-container">
             <p class="caption" data-original-caption="Relaxing day at the beach, water is clear blue.">Beach Day</p>
           </div>
        </div>
    
        <div class="gallery-item">
          <img src="https://picsum.photos/id/1005/300/200" alt="Boat at sea">
           <div class="caption-container">
             <p class="caption" data-original-caption="Boat sailing on the sea with a great landscape">Sea Boat</p>
           </div>
        </div>
      </div>


    CSS For Styling


        /* Basic Styling */
        body {
          font-family: sans-serif;
          margin: 20px;
          background-color: #f4f4f4;
        }
    
        h1 {
          text-align: center;
          color: #333;
        }
    
        .gallery-container {
          display: flex;
          flex-wrap: wrap;
          justify-content: center; /* Centers the gallery */
        }
    
        .gallery-item {
          width: 300px;
          margin: 10px;
          border: 1px solid #ddd;
          overflow: hidden; /* Prevents content from overflowing */
          box-shadow: 0 2px 5px rgba(0, 0, 0, 0.1);
          transition: transform 0.3s ease-in-out;
        }
    
        .gallery-item:hover {
          transform: scale(1.05); /* Slight zoom on hover */
        }
    
    
        .gallery-item img {
          width: 100%;
          height: 200px; /* Fixed height for images */
          object-fit: cover;  /* Ensures images cover the area without distortion */
          display: block; /* Remove any default space below the images */
        }
    
        .caption-container {
            padding: 10px;
            background-color: #fff;
            border-top: 1px solid #eee;
        }
    
    
        .caption {
            font-style: italic;
            color: #555;
            overflow: hidden;
            text-overflow: ellipsis;
            white-space: nowrap; /* Prevents caption from wrapping */
        }
    
    
        /* Responsive Design (adjust for different screen sizes) */
        @media (max-width: 600px) {
          .gallery-item {
            width: 90%; /* Full width on smaller screens */
          }
        }


    JavaScript For Interactivity


        // JavaScript to add interactivity (optional) - for example, caption display on hover.
        const galleryItems = document.querySelectorAll('.gallery-item');
    
        galleryItems.forEach(item => {
          const captionElement = item.querySelector('.caption');
          const originalCaption = captionElement.getAttribute('data-original-caption');
    
          item.addEventListener('mouseenter', () => {
            // Optional:  Show full caption on hover (or other interactions)
            captionElement.textContent = originalCaption;
          });
    
          item.addEventListener('mouseleave', () => {
            // Restore short caption on mouseout
            captionElement.textContent = originalCaption.substring(0, 30) + "..."; // Or restore the ellipsis or original short caption.
          });
        });


    Let’s Break It Down

    Lets explore each piece:

    • HTML Structure:
      • <!DOCTYPE html>: Tells the browser this is HTML5.
      • <head>: Contains metadata about the page, such as the title and styles. The <meta> tags are very important for responsive design, making sure your website looks good on any device.
      • <body>: This is where all the visible content of your website lives.
      • <h1>: The main heading of our gallery.
      • <div class="gallery-container">: This is the container for our image items. We use display: flex in CSS to help us arrange our images nicely (more on that later!).
      • <div class="gallery-item">: Each individual image and its caption are inside a gallery-item.
      • <img src="..." alt="...">: This is the image element. The src attribute points to the images URL, and the alt attribute provides a description of the image (super important for accessibility and SEO!).
      • <div class="caption-container">: Wraps the caption.
      • <p class="caption">: This is where the images caption appears. Notice how we used data-original-caption to store the original caption.
    • CSS Styling:
      • The <style> block inside the <head> is where the magic of styling happens. CSS (Cascading Style Sheets) lets us control how our HTML elements look.
      • .gallery-container: Uses flexbox to arrange the gallery items. flex-wrap: wrap; ensures the images wrap onto the next line on smaller screens. justify-content: center; centers the items horizontally.
      • .gallery-item: Styles each image container: adds a border, shadow, and the all-important transform: scale(1.05); and transition for that zoom effect on hover.
      • .gallery-item img: Sets the image to cover the area and prevents distortion with object-fit: cover;.
      • .caption: Styles the captions (italic, and adds an ellipsis if the caption is too long).
      • @media (max-width: 600px): This is how we make our gallery responsive! It says, “When the screen is smaller than 600 pixels wide, change the width of the gallery items.” This makes the gallery adapt to smaller screens (like phones).

    Interactive Demo

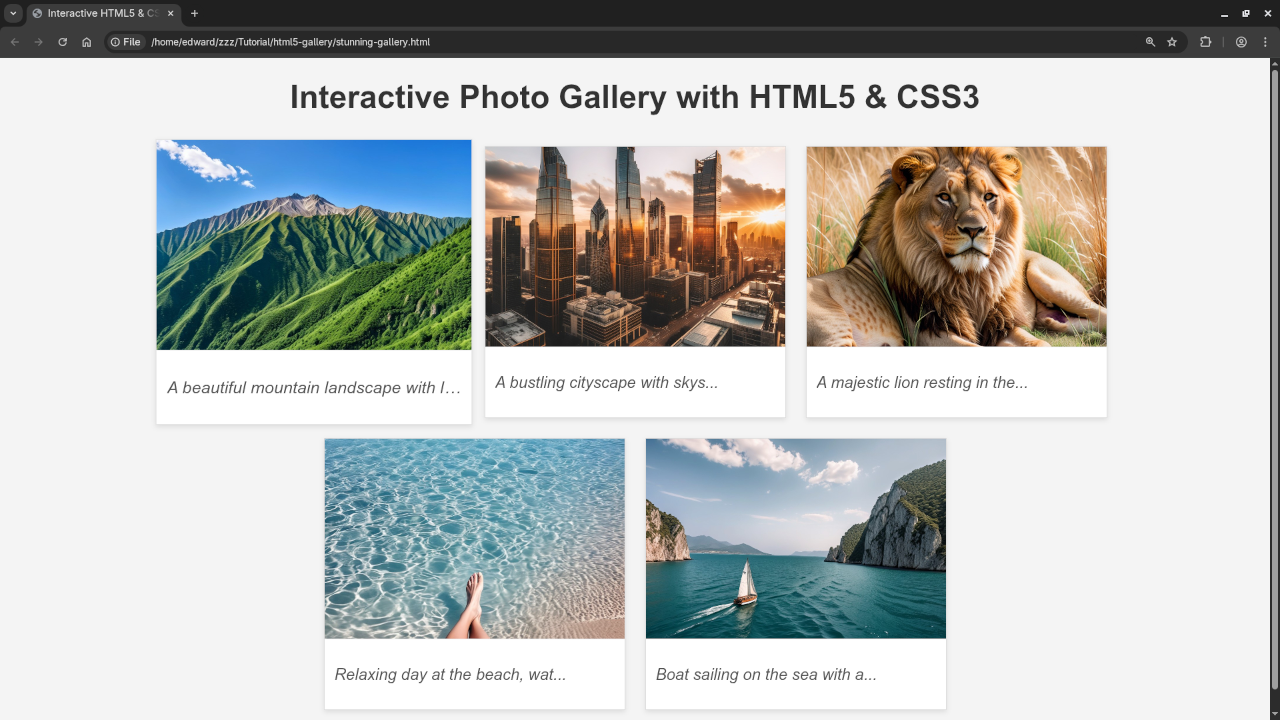
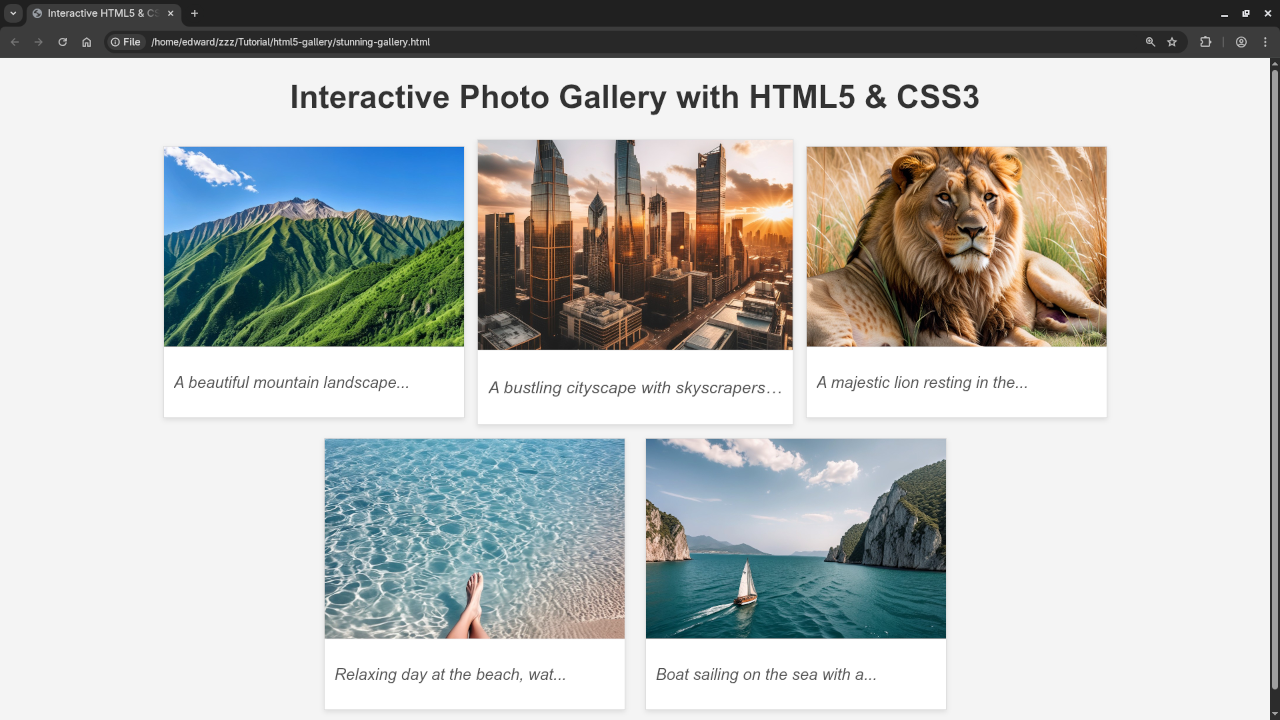
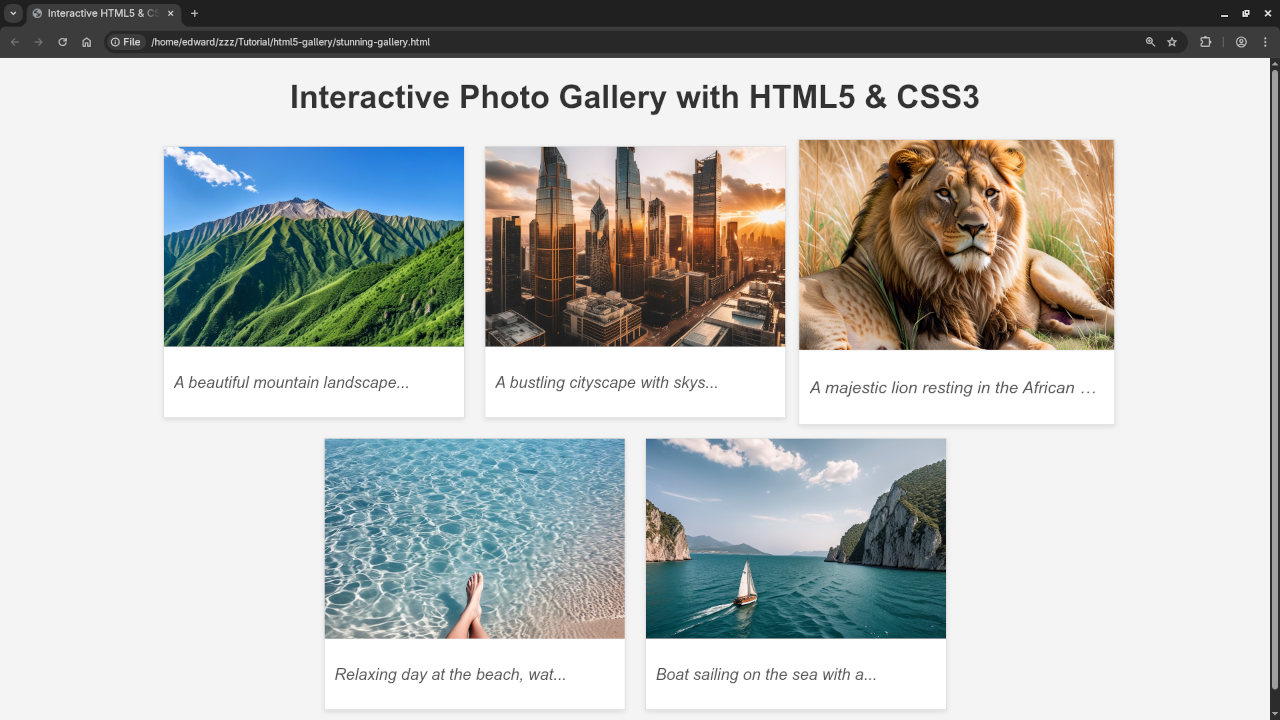
    Here’s a live example of the Stunning Gallery in action:

    HTML5 Stunning Gallery Demo
    HTML5 Image Gallery Mouseover
    Web Browser Displaying HTML5 Image Gallery Mouseover

    HTML5 Image Galley Hover
    Web Browser Displaying HTML5 Image Gallery Hover

    HTML5 Image Galley Cursor
    Web Browser Displaying HTML5 Image Gallery Cursor

    HTML5 Image Gallery Video

    Adding Interactivity (JavaScript – Optional)

    The <script> section contains a bit of JavaScript to add a simple hover effect. When you move your mouse over an image, the full caption appears!

    Want to learn more?

    This gallery is just the beginning! To truly master web development, you will want to understand the fundamentals of HTML, CSS, and JavaScript. I recommend checking out my resources:

    • "Learning JavaScript" Book: I wrote a beginner-friendly book, "Learning JavaScript" available on Amazon to help you understand JavaScript fundamentals. Link to your Amazon book:
    • "Learning JavaScript" Course: You can find a comprehensive course about JavaScript at Link to your course:

    Need One-on-One Help?

    I offer one-on-one programming tutorials, including JavaScript, to help you get personal guidance and take your skills to the next level. Contact me to schedule a session: Link to your contact page:

    Conclusion

    Congratulations! You have successfully built a basic image gallery using HTML5 and CSS3. You can now adapt and customize it to suit your needs. Keep experimenting, practicing, and learning! The world of web development is full of possibilities. Happy coding!

  • Generate Low-Poly Opening Box With Blender Python API For Website

    Generate Low-Poly Opening Box With Blender Python API For Website

    Create an Animated Opening Box with Blender Python API and Display It on the Web

    If you are new to Blender scripting or 3D web visualization, this post will guide you through generating a simple animated opening box using the Blender Python API. Then, I will show you how to export your model and display it in a web browser using the lightweight and popular <model-viewer> web component.

    What You Will Learn

    • How to write a Blender Python script that creates a box with a hinged lid that opens and closes.
    • How to animate the lid swinging upward.
    • How to export the model to GLTF/GLB format.
    • How to embed and display the model on your website using <model-viewer>.
    • How to run Blender Python scripts from the command line for automation.

    Step 1: Writing the Blender Python Script

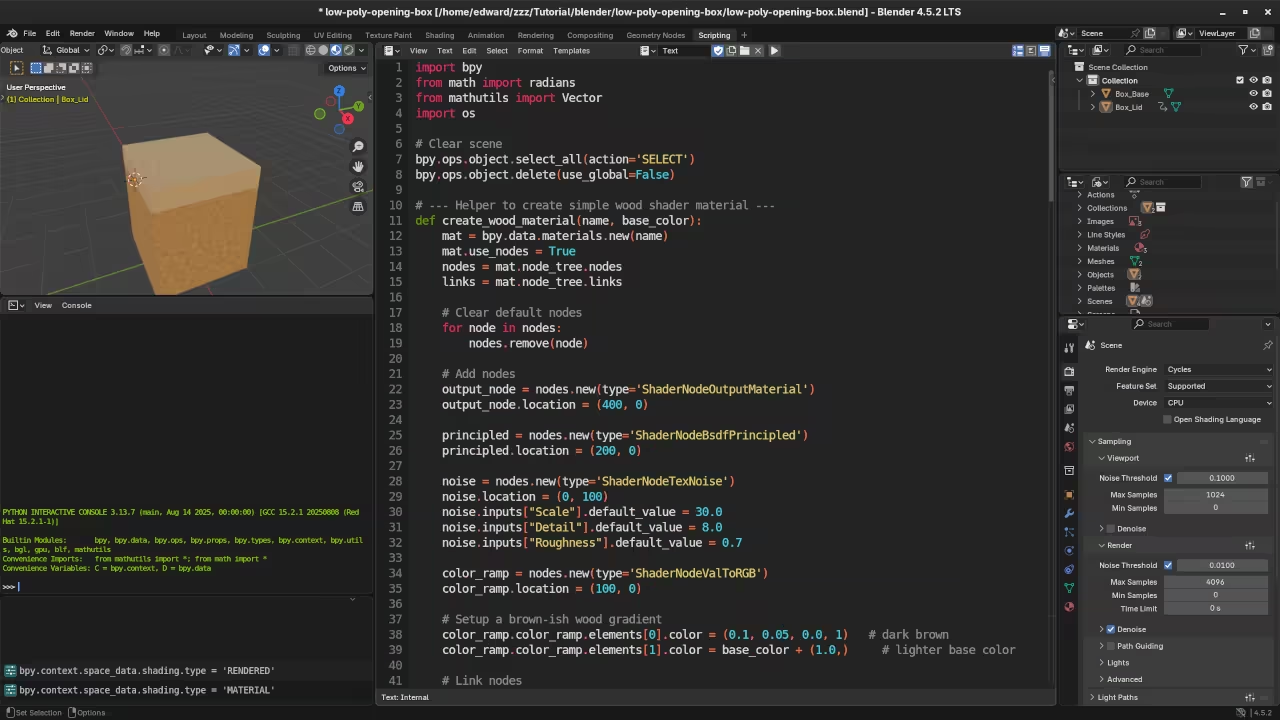
    Using Blender’s Python API, you can automate the creation of 3D models and animations. The code snippet below creates a box with a hole, adds a lid with the hinge on the back edge, and animates the lid opening upwards.


    import bpy
    from math import radians
    from mathutils import Vector
    
    # ---------------------------
    #  Step 1: Clear scene
    # ---------------------------
    bpy.ops.object.select_all(action=&#039;SELECT&#039;)
    bpy.ops.object.delete(use_global=False)
    
    # ---------------------------
    #  Step 2: Wood Material Generator (Procedural)
    # ---------------------------
    def create_wood_material(name, base_color):
        mat = bpy.data.materials.new(name)
        mat.use_nodes = True
        nodes = mat.node_tree.nodes
        links = mat.node_tree.links
        
        # Clear default nodes
        for node in nodes:
            nodes.remove(node)
        
        # Add nodes
        output_node = nodes.new(type=&#039;ShaderNodeOutputMaterial&#039;)
        output_node.location = (400, 0)
        
        principled = nodes.new(type=&#039;ShaderNodeBsdfPrincipled&#039;)
        principled.location = (200, 0)
        
        noise = nodes.new(type=&#039;ShaderNodeTexNoise&#039;)
        noise.location = (0, 100)
        noise.inputs[&quot;Scale&quot;].default_value = 30.0
        noise.inputs[&quot;Detail&quot;].default_value = 8.0
        noise.inputs[&quot;Roughness&quot;].default_value = 0.7
        
        color_ramp = nodes.new(type=&#039;ShaderNodeValToRGB&#039;)
        color_ramp.location = (100, 0)
        
        # Brown gradient
        color_ramp.color_ramp.elements[0].color = (0.1, 0.05, 0.0, 1)
        color_ramp.color_ramp.elements[1].color = base_color + (1.0,)
        
        # Links
        links.new(noise.outputs[&quot;Fac&quot;], color_ramp.inputs[&quot;Fac&quot;])
        links.new(color_ramp.outputs[&quot;Color&quot;], principled.inputs[&quot;Base Color&quot;])
        links.new(principled.outputs[&quot;BSDF&quot;], output_node.inputs[&quot;Surface&quot;])
        
        return mat
    
    # ---------------------------
    #  Step 3: Create Box &amp; Lid
    # ---------------------------
    
    # Base
    bpy.ops.mesh.primitive_cube_add(size=2, location=(0, 0, 1))
    base = bpy.context.object
    base.name = &quot;Box_Base&quot;
    
    # Cutter
    bpy.ops.mesh.primitive_cube_add(size=1.2, location=(0, 0, 1.9))
    hole_cube = bpy.context.object
    hole_cube.name = &quot;Hole_Cutter&quot;
    
    # Boolean
    bool_mod = base.modifiers.new(name=&quot;Hole&quot;, type=&#039;BOOLEAN&#039;)
    bool_mod.object = hole_cube
    bool_mod.operation = &#039;DIFFERENCE&#039;
    bpy.context.view_layer.objects.active = base
    bpy.ops.object.modifier_apply(modifier=bool_mod.name)
    bpy.data.objects.remove(hole_cube, do_unlink=True)
    
    # Lid
    bpy.ops.mesh.primitive_cube_add(size=2, location=(0, 0, 2.1))
    lid = bpy.context.object
    lid.name = &quot;Box_Lid&quot;
    lid.scale.z = 0.2
    bpy.context.view_layer.update()
    
    # Hinge origin
    hinge_pos = Vector((0, -1, 2.1))
    bpy.context.scene.cursor.location = hinge_pos
    bpy.ops.object.origin_set(type=&#039;ORIGIN_CURSOR&#039;)
    
    # ---------------------------
    #  Step 4: Apply Materials
    # ---------------------------
    base_wood = create_wood_material(&quot;Base_Wood&quot;, (0.6, 0.3, 0.1))
    lid_wood = create_wood_material(&quot;Lid_Wood&quot;, (0.8, 0.5, 0.2))
    
    base.data.materials.append(base_wood)
    lid.data.materials.append(lid_wood)
    
    # ---------------------------
    #  Step 5: Animate Lid
    # ---------------------------
    lid.rotation_euler = (radians(0), 0, 0)
    lid.keyframe_insert(data_path=&quot;rotation_euler&quot;, frame=1)
    
    lid.rotation_euler = (radians(-90), 0, 0)
    lid.keyframe_insert(data_path=&quot;rotation_euler&quot;, frame=30)
    
    lid.rotation_euler = (radians(0), 0, 0)
    lid.keyframe_insert(data_path=&quot;rotation_euler&quot;, frame=60)
    
    action = lid.animation_data.action
    for fcurve in action.fcurves:
        for kp in fcurve.keyframe_points:
            kp.interpolation = &#039;LINEAR&#039;
    
    bpy.context.scene.frame_start = 1
    bpy.context.scene.frame_end = 60
    bpy.context.scene.frame_set(1)
    
    # ---------------------------
    # ️ Step 6: Bake Procedural Materials to Images
    # ---------------------------
    
    def bake_material_to_image(obj, image_name, width=1024, height=1024):
        # Set render engine
        bpy.context.scene.render.engine = &#039;CYCLES&#039;
        bpy.context.scene.cycles.device = &#039;CPU&#039;
        
        # Create image
        img = bpy.data.images.new(image_name, width=width, height=height)
        
        # Create new image texture node and assign image
        mat = obj.active_material
        nodes = mat.node_tree.nodes
        links = mat.node_tree.links
        
        image_node = nodes.new(&#039;ShaderNodeTexImage&#039;)
        image_node.image = img
        mat.node_tree.nodes.active = image_node
        
        # Select object and bake
        bpy.ops.object.select_all(action=&#039;DESELECT&#039;)
        obj.select_set(True)
        bpy.context.view_layer.objects.active = obj
        
        bpy.ops.object.bake(type=&#039;DIFFUSE&#039;, use_clear=True, use_selected_to_active=False,
                            use_cage=False, cage_extrusion=0.1, pass_filter={&#039;COLOR&#039;})
        
        # Save baked image
        img.filepath_raw = f&quot;//{image_name}.png&quot;
        img.file_format = &#039;PNG&#039;
        img.save()
        
        # Reconnect to BSDF
        bsdf = next(n for n in nodes if n.type == &#039;BSDF_PRINCIPLED&#039;)
        links.new(image_node.outputs[&#039;Color&#039;], bsdf.inputs[&#039;Base Color&#039;])
    
    # Bake both objects
    bake_material_to_image(base, &quot;base_texture&quot;)
    bake_material_to_image(lid, &quot;lid_texture&quot;)
    
    # ---------------------------
    #  Step 7: Export GLB
    # ---------------------------
    output_path = bpy.path.abspath(&quot;//animated_box.glb&quot;)
    
    bpy.ops.export_scene.gltf(
        filepath=output_path,
        export_format=&#039;GLB&#039;,               # GLB binary format
        export_apply=True,                 # Apply modifiers
        export_materials=&#039;EXPORT&#039;,         # Export materials
        export_animations=True,            # Export animations
        export_texcoords=True,             # Export UVs (texture coordinates)
        export_image_format=&#039;AUTO&#039;,        # Image format: AUTO, PNG, JPEG, WEBP
        export_image_add_webp=True,        # Include WebP images as well (if possible)
        export_image_webp_fallback=True,   # Provide PNG fallback for WebP images
        export_jpeg_quality=90,             # JPEG image quality (1-100)
        export_image_quality=90             # General image quality (1-100)
    )


    Step 2: Running the Script

    You can run this script inside Blender’s Text Editor or automate it by running Blender from the command line. To run from the command line:

    blender --background --python your_script_name.py
    • --background runs Blender without opening the GUI.
    • --python executes the specified Python script.

    This is great for automating batch jobs or running scripts on servers.

    Step 3: Exporting the Model

    Once your model is ready and animated, export it as a GLTF or GLB file:

    • Go to File > Export > glTF 2.0 (.glb/.gltf).
    • Choose .glb (binary) for a single file.
    • Enable Include > Animation to keep the animation.
    • Export your file.

    Step 4: Displaying the Model on the Web

    Use the <model-viewer> web component to easily display your GLB model on any webpage.

    Here is an example HTML snippet:

    &lt;script type="module" src="https://unpkg.com/@google/model-viewer/dist/model-viewer.min.js"&gt;&lt;/script&gt;
    
    &lt;model-viewer src="path/to/your/box_model.glb" 
                  alt="Opening Box" 
                  auto-rotate 
                  camera-controls 
                  animation-name="YourAnimationName" 
                  autoplay&gt;
    &lt;/model-viewer&gt;

    Replace "path/to/your/animated_box.glb" with the actual path to your exported file.

    📸 Screenshots & Screencast

    Low poly opening box Python code
    Blender Scripting Workspace Displaying Low Poly Opening Box Python Code

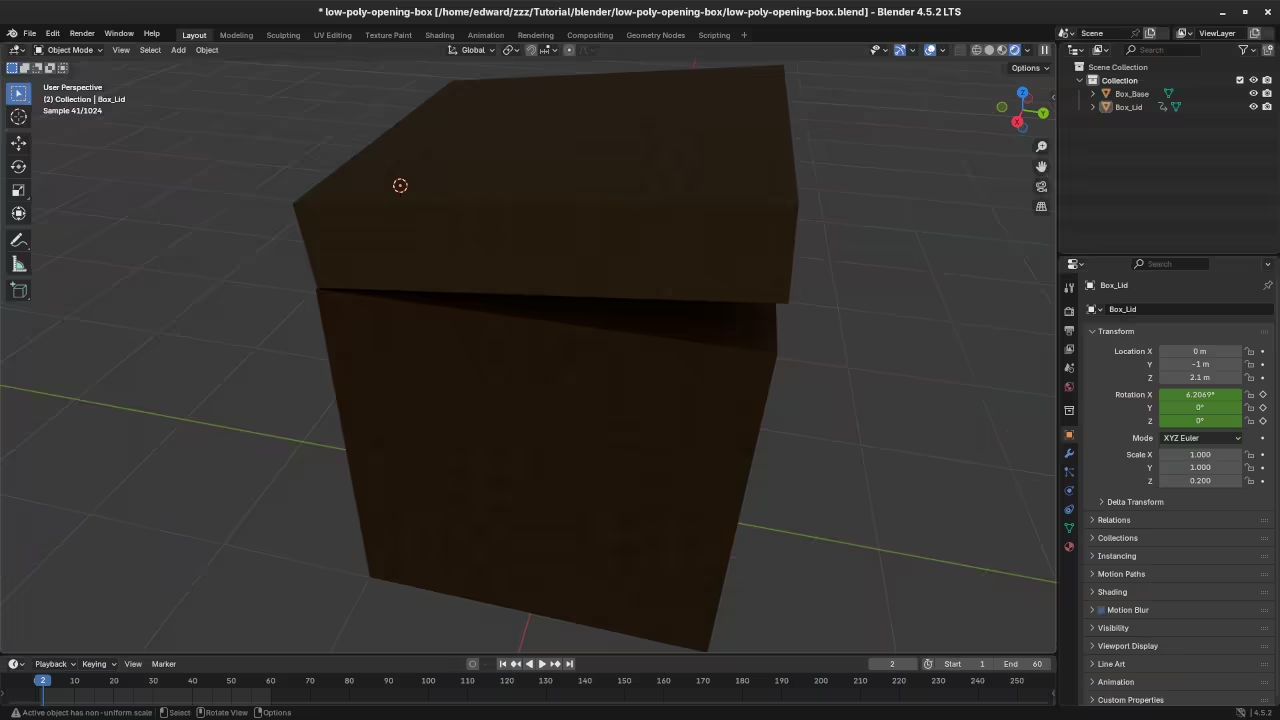
    Low poly opening box in Blender
    Blender Layout Workspace Displaying Low Poly Opening Box

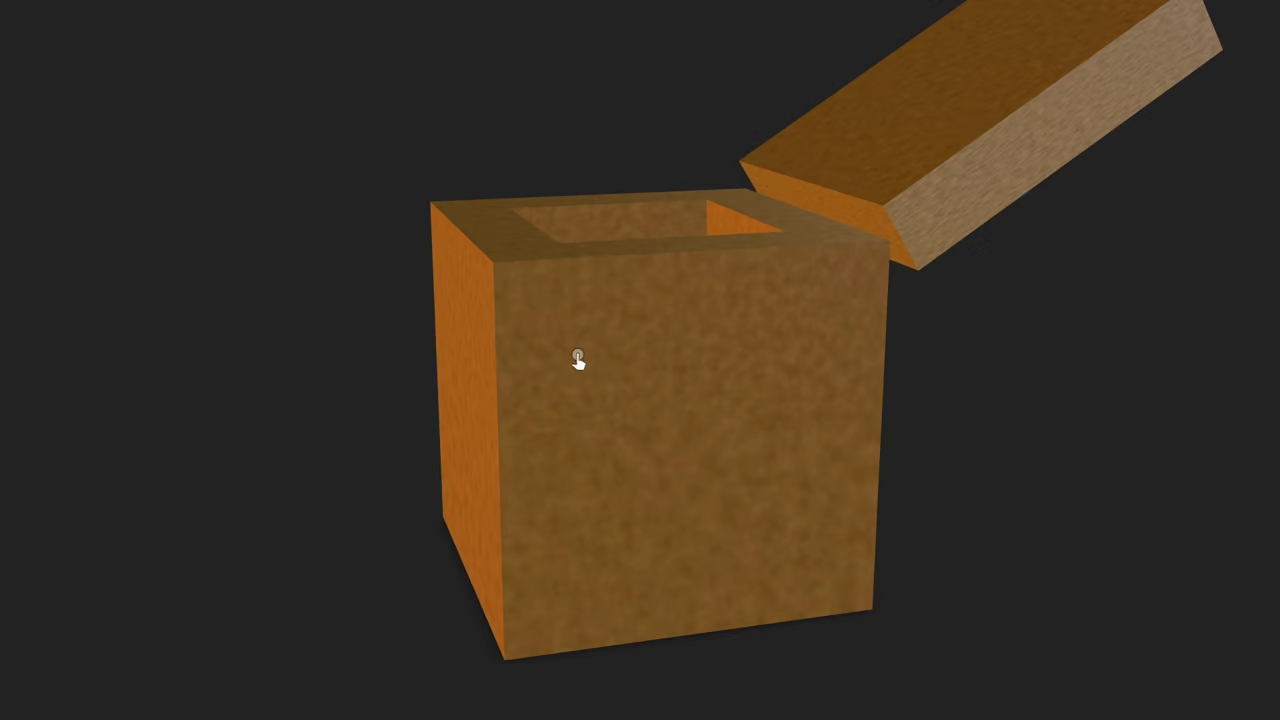
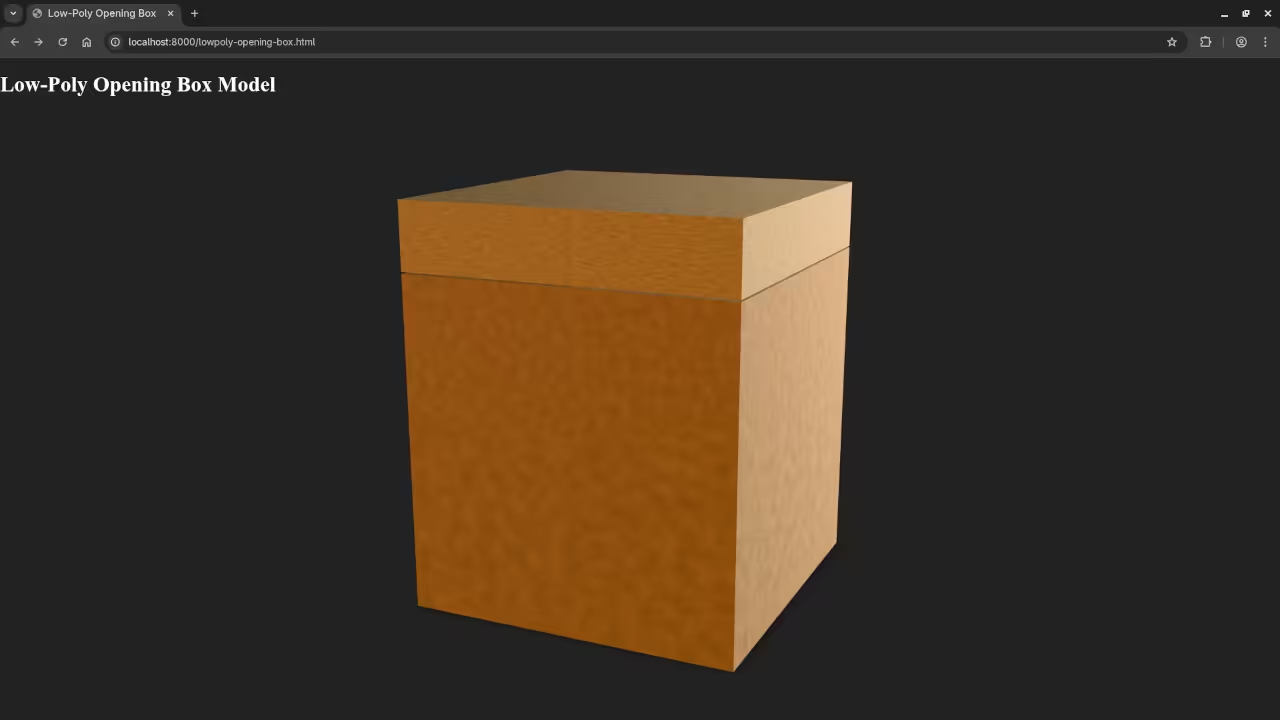
    Low poly opening box in Web browser
    Web Browser Displaying Rendered Low Poly Opening Box

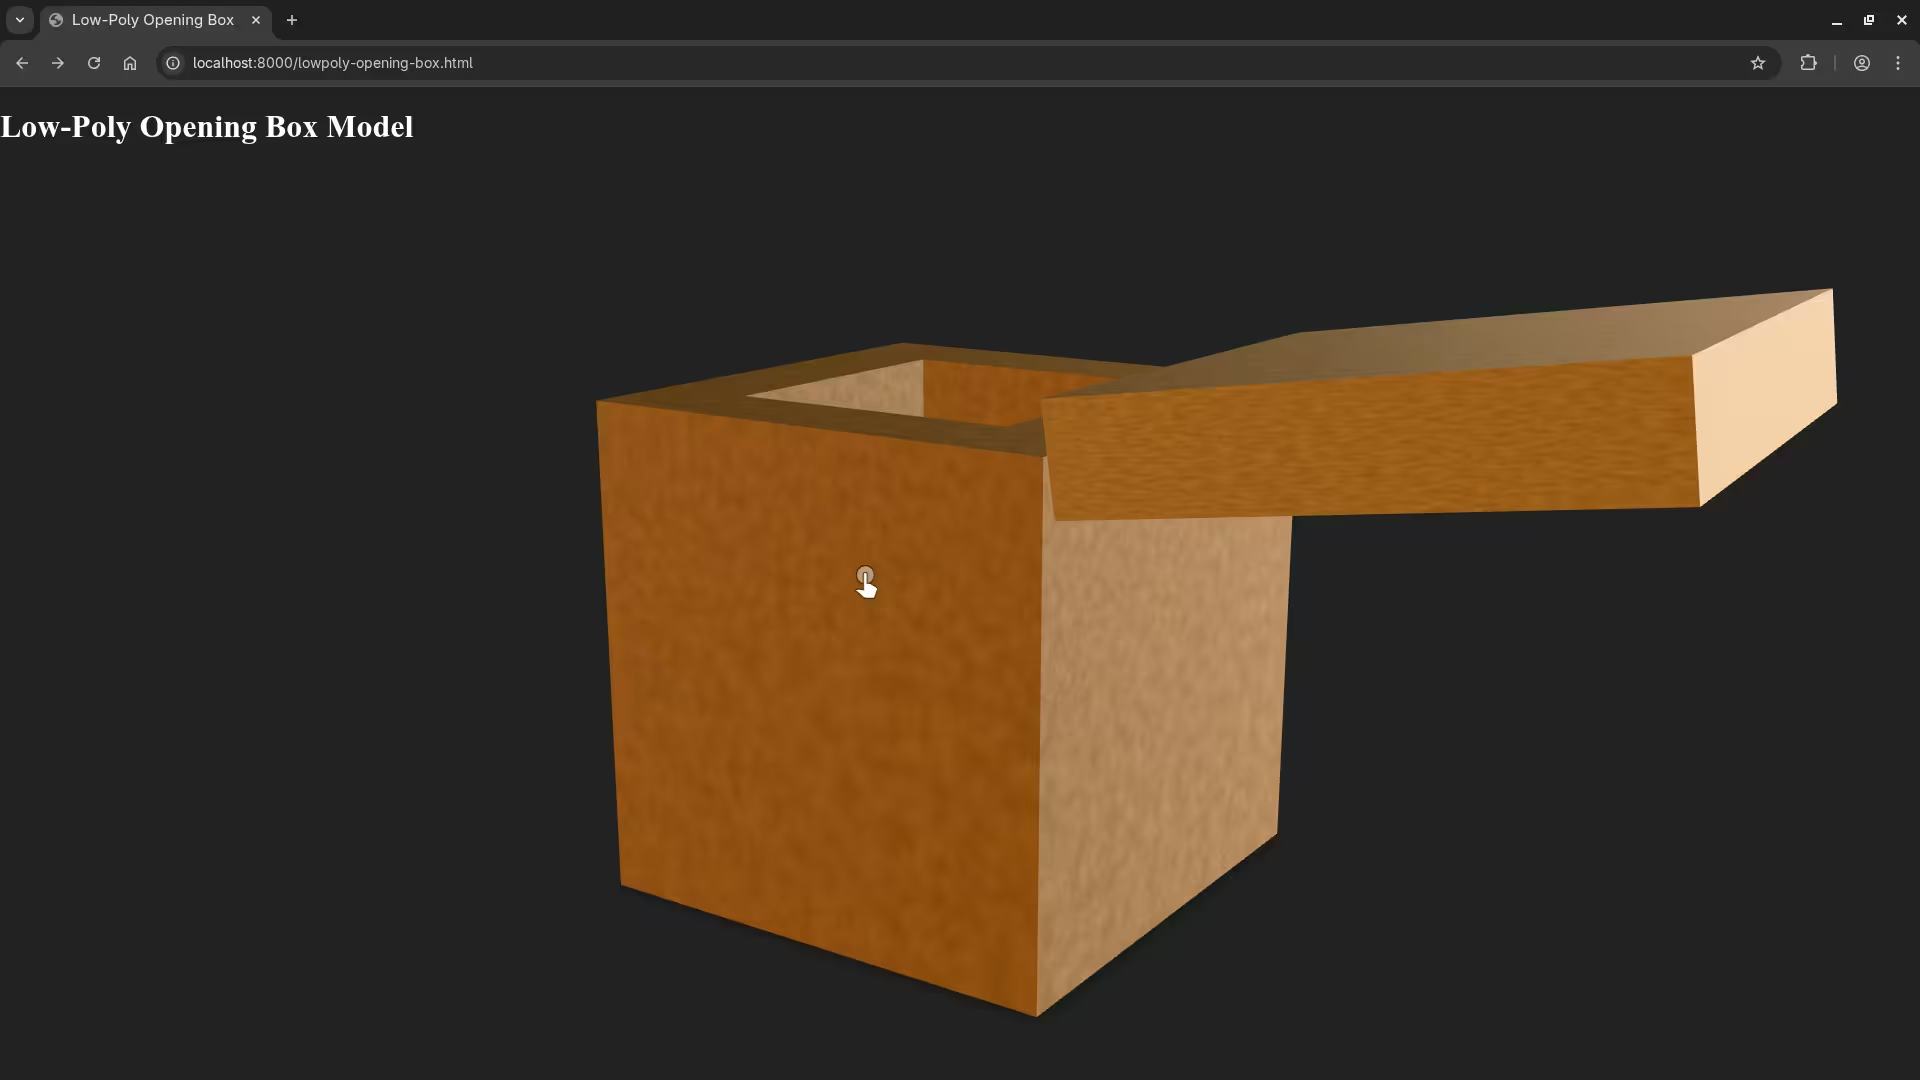
    Low poly opening box animation in Web browser
    Web Browser Displaying Rendered Low Poly Opening Box Animation

    Screencast For Blender Python API Low Poly Opening Box

    Further Learning Resources

    If you want to deepen your Python and Blender skills, check out these resources:

    Books:

    Course:

    • Learning Python – A practical online course tailored for new programmers.

    One-on-One Tutoring:

    I am available for personalized online Python tutorials, including Blender scripting. Feel free to contact me here to schedule a session.

    I hope this helps you get started with Blender Python scripting and web-based 3D model visualization. Feel free to leave comments or questions below.
    Happy coding and modeling!

  • Getting Started with Gitea: Self-Hosted Git with CI/CD using Podman

    Getting Started with Gitea: Self-Hosted Git with CI/CD using Podman

    Code hosting with Gitea: CI/CD with Gitea Actions

    Are you looking for a lightweight, self-hosted Git service that is easy to set up and comes with built-in CI/CD support? Let me introduce you to Gitea – an open-source alternative to platforms like GitHub and GitLab.

    In this post, we will explore what Gitea is, how you can install it using Podman (or Podman Compose), and how to use Gitea Actions for continuous integration. Whether you are a hobbyist, student, or seasoned developer, this guide is designed to help you get started.

    What is Gitea?

    Gitea is a community-managed lightweight code hosting solution written in Go. It is completely open-source and supports Git repository management, issue tracking, code review, and built-in CI/CD through Gitea Actions.

    It is ideal for:

    • Small teams or solo developers
    • Learning Git in a self-hosted environment
    • Testing out CI/CD pipelines without relying on external platforms

    Installing Gitea using Podman

    Here is how to set up Gitea using Podman and Podman Compose on your local machine or server.

    Prerequisites

    • Podman and Podman Compose installed
    • Root or sudo access

    Step-by-Step Installation

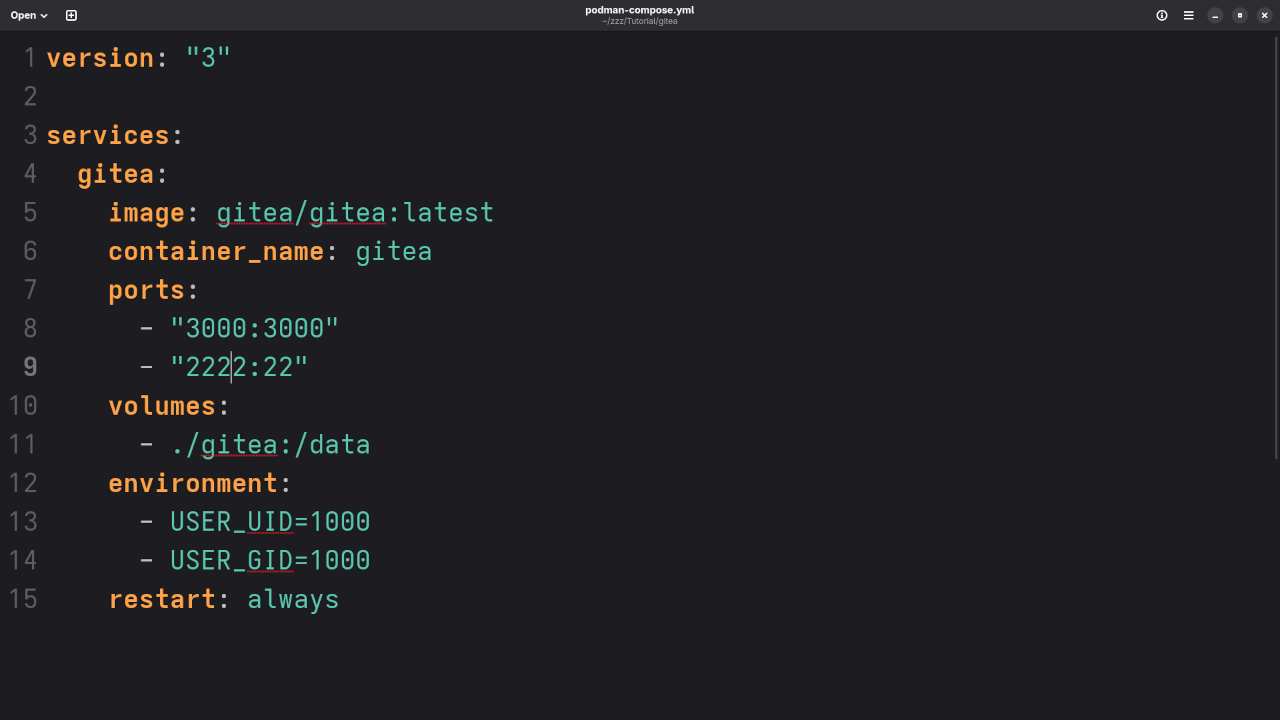
    Create a podman-compose.yml file:

    version: "3"
    
    services:
      gitea:
        image: gitea/gitea:latest
        container_name: gitea
        ports:
          - "3000:3000"
          - "2222:22"
        volumes:
          - ./gitea:/data
        environment:
          - USER_UID=1000
          - USER_GID=1000
        restart: always

    Then run the following command:

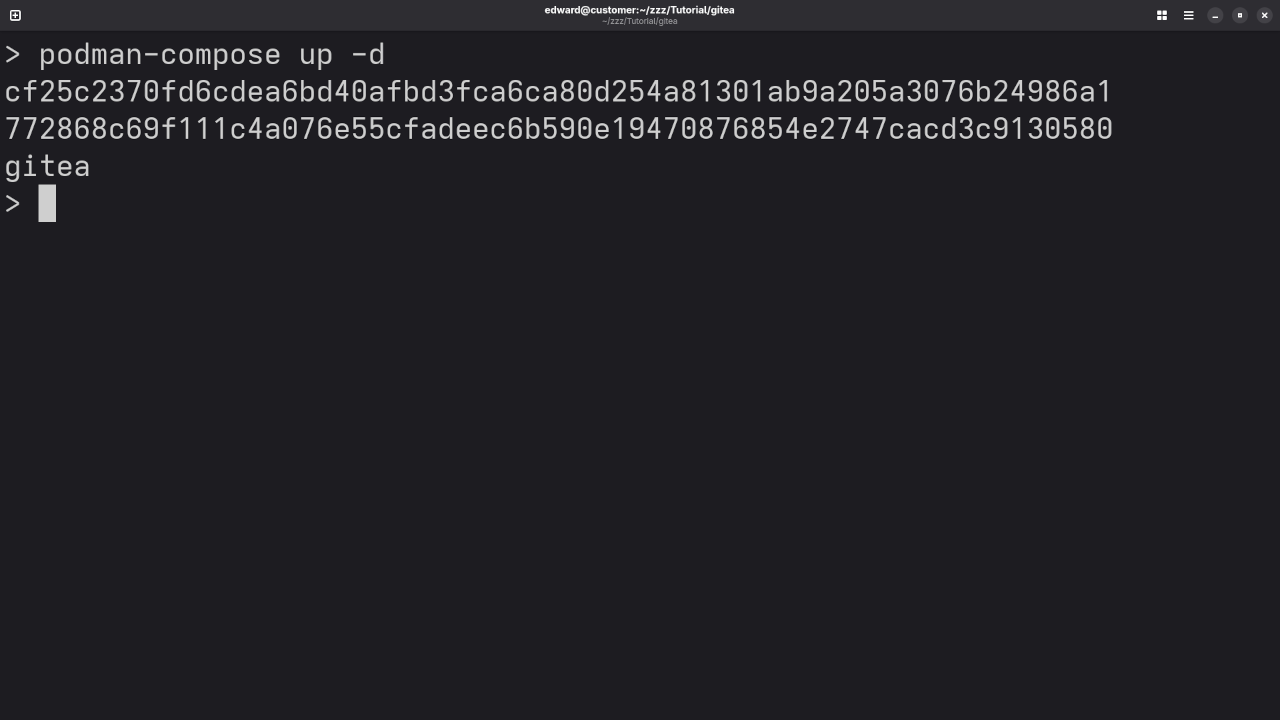
    podman-compose up -d

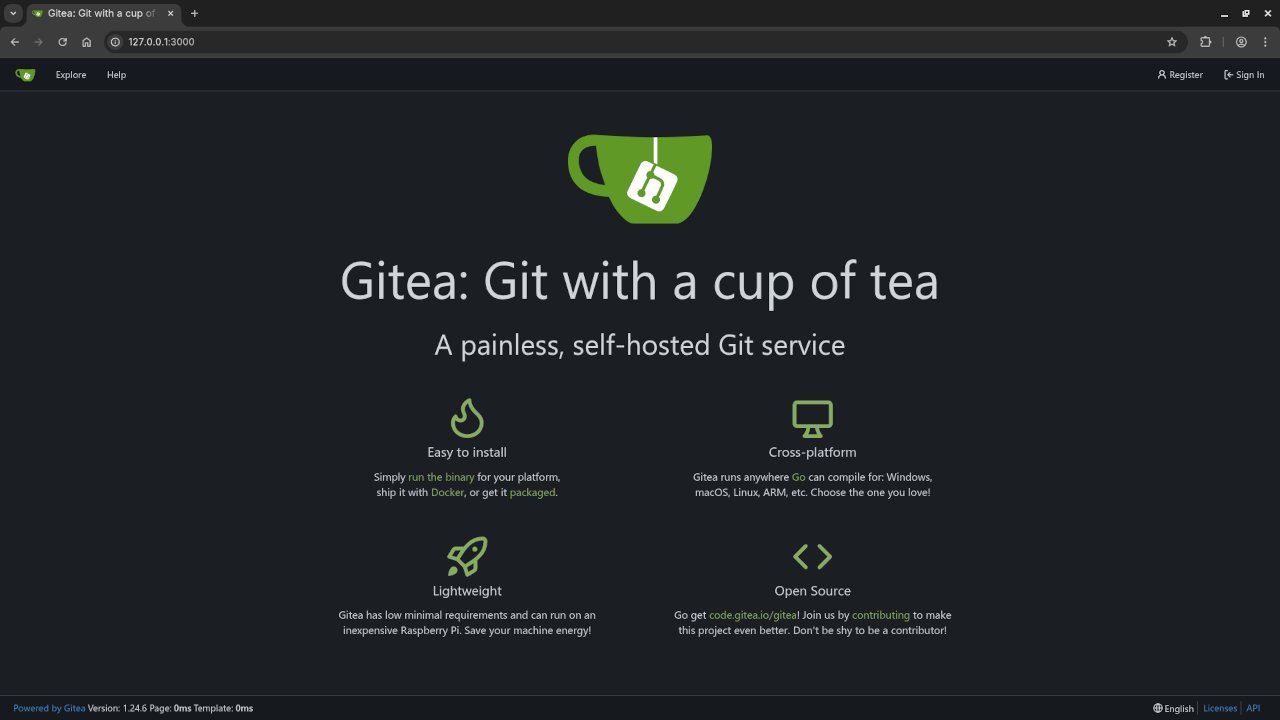
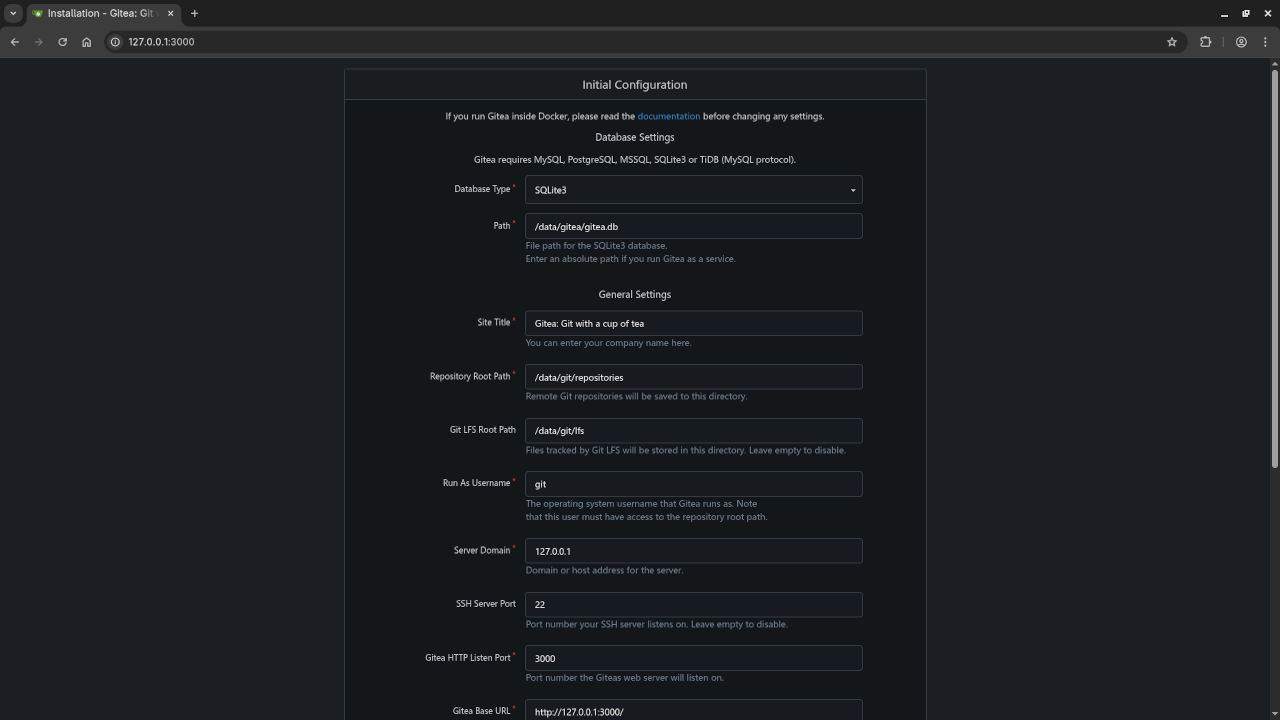
    Visit http://localhost:3000 in your browser to complete the setup using the web interface.

    Using Gitea Actions (CI/CD)

    Once your Gitea instance is running, you can set up CI/CD pipelines using Gitea Actions. Although still experimental, it is functional and improving rapidly.

    Example: Gitea Action Workflow for Python with requirements.txt

    Let us build a simple CI pipeline that runs Python tests every time you push code to your Gitea repository.

    1. Create a New Repository

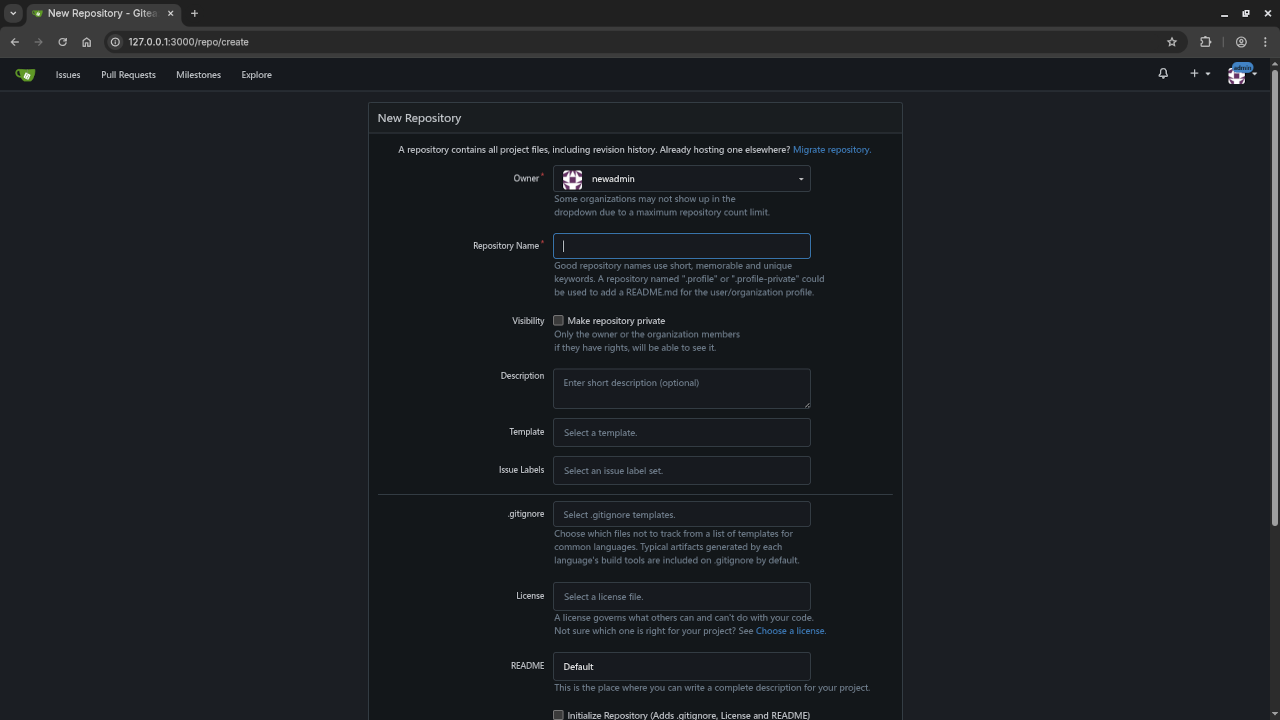
    In Gitea, click on New Repository, give it a name like my-python-project, and initialize it if you like.

    2. Add Python Files

    At minimum, create two files in your project:

    app.py
    test_app.py

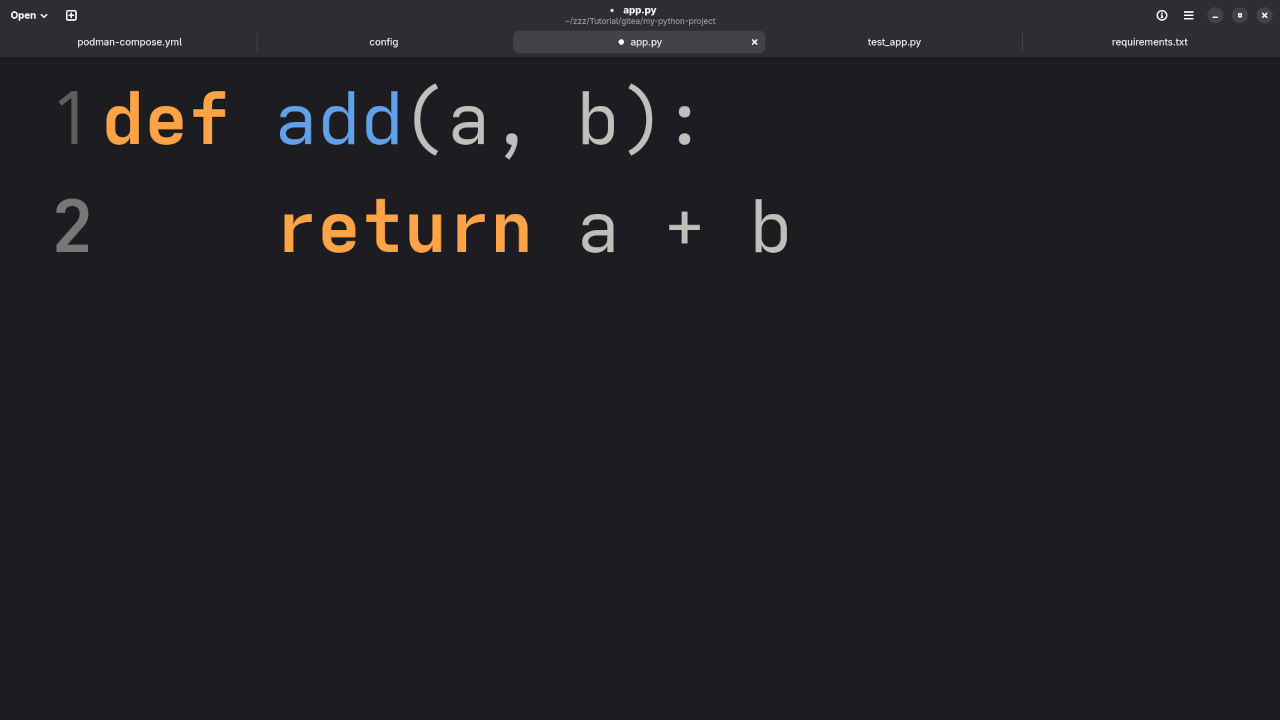
    app.py:

    def add(a, b):
        return a + b

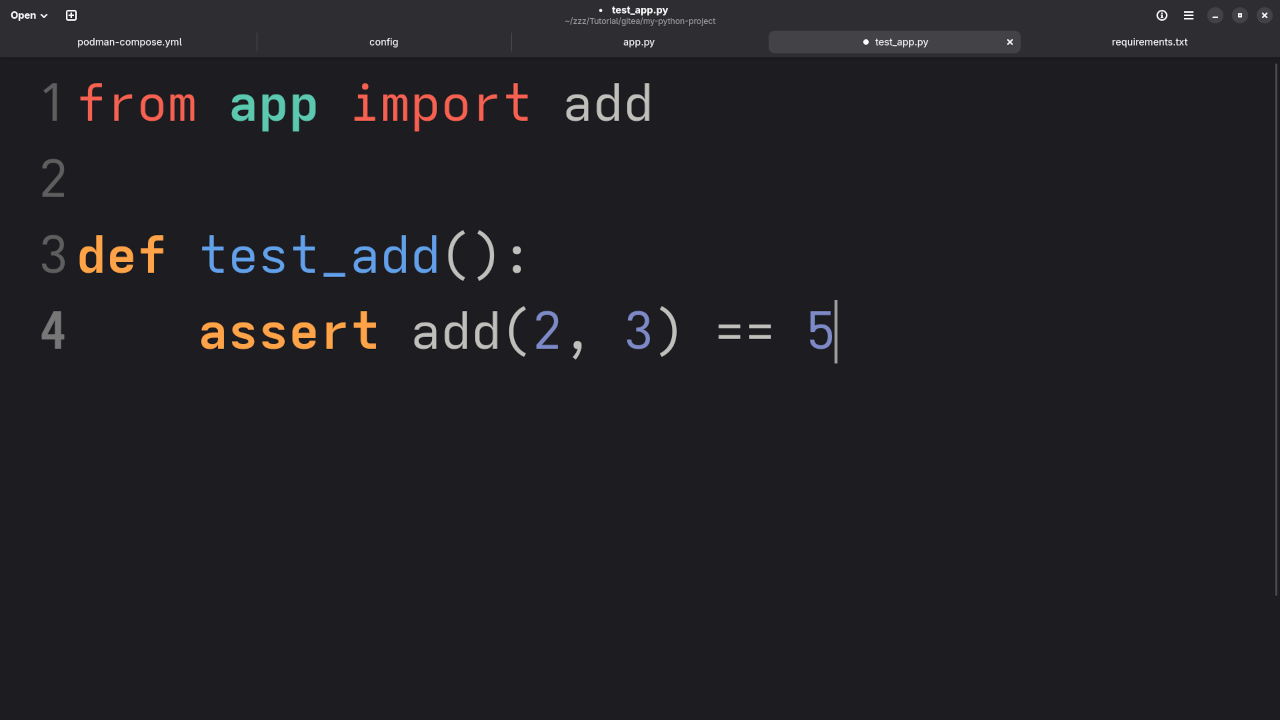
    test_app.py:

    from app import add
    
    def test_add():
        assert add(2, 3) == 5

    3. Create a requirements.txt File

    This file tells the CI system what packages to install.

    requirements.txt:

    pytest

    You can create this file manually, or generate it by running:

    pip freeze > requirements.txt

    In our case, we are just listing pytest to keep it simple.

    4. Add the Gitea Workflow File

    Inside your project folder, create the directory .gitea/workflows/ and inside that, create a file named test.yml.

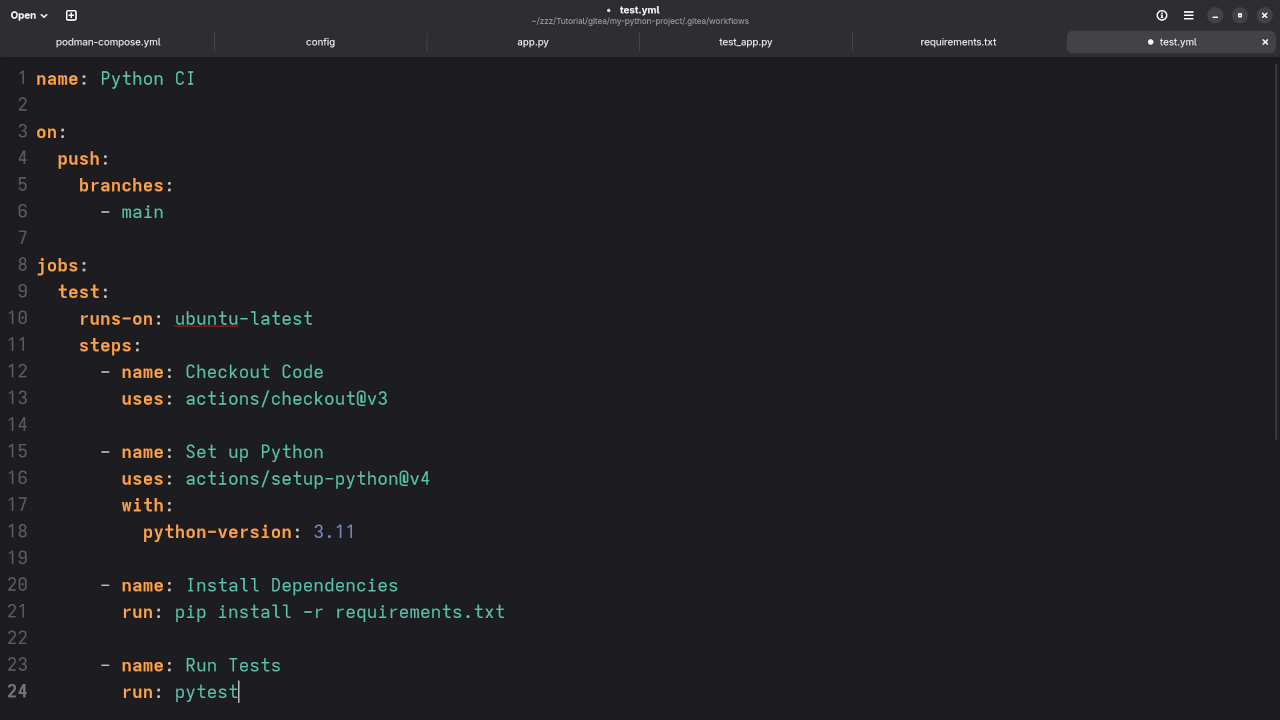
    .gitea/workflows/test.yml:

    name: Python CI
    
    on:
      push:
        branches:
          - main
    
    jobs:
      test:
        runs-on: ubuntu-latest
        steps:
          - name: Checkout Code
            uses: actions/checkout@v3
    
          - name: Set up Python
            uses: actions/setup-python@v4
            with:
              python-version: 3.11
    
          - name: Install Dependencies
            run: pip install -r requirements.txt
    
          - name: Run Tests
            run: pytest

    5. Push Your Code to Gitea

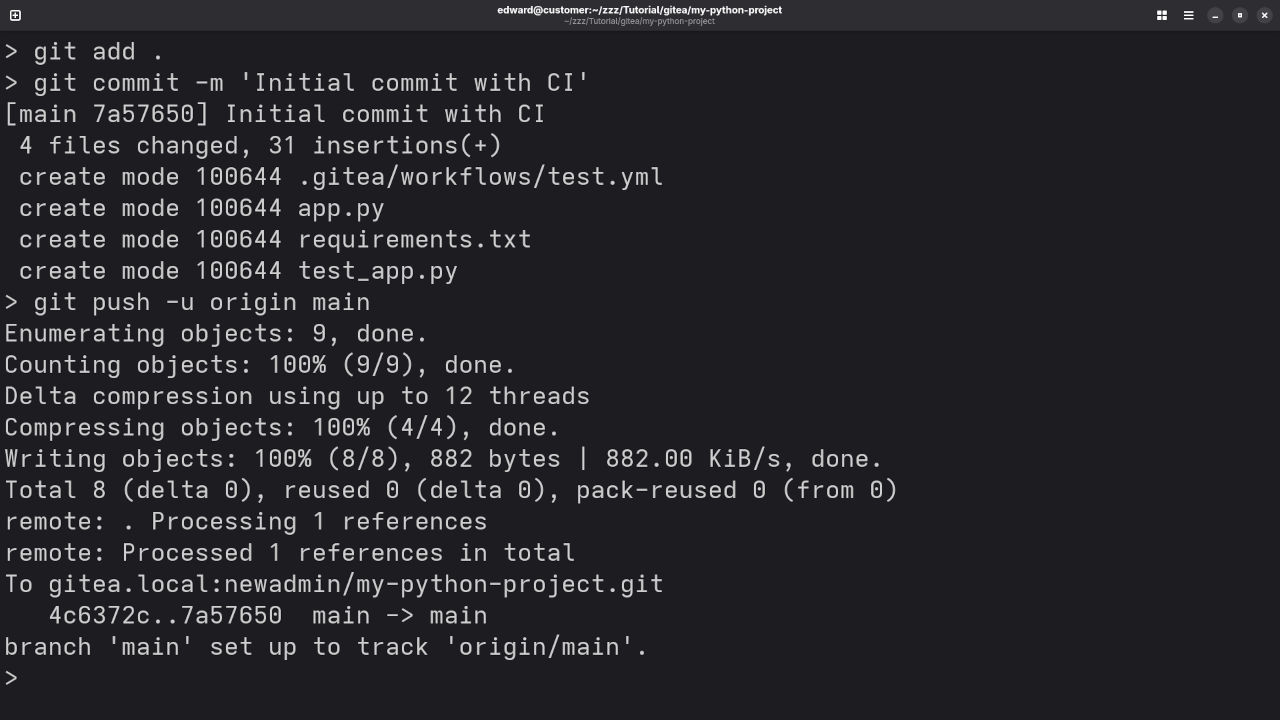
    Use the command line to push your files to the Gitea repository:

    git init
    git remote add origin ssh://gitea@your-gitea-server:2222/your-user/my-python-project.git
    git add .
    git commit -m 'Initial commit with CI'
    git push -u origin main

    Replace the remote URL with your actual Gitea instance and repository path.

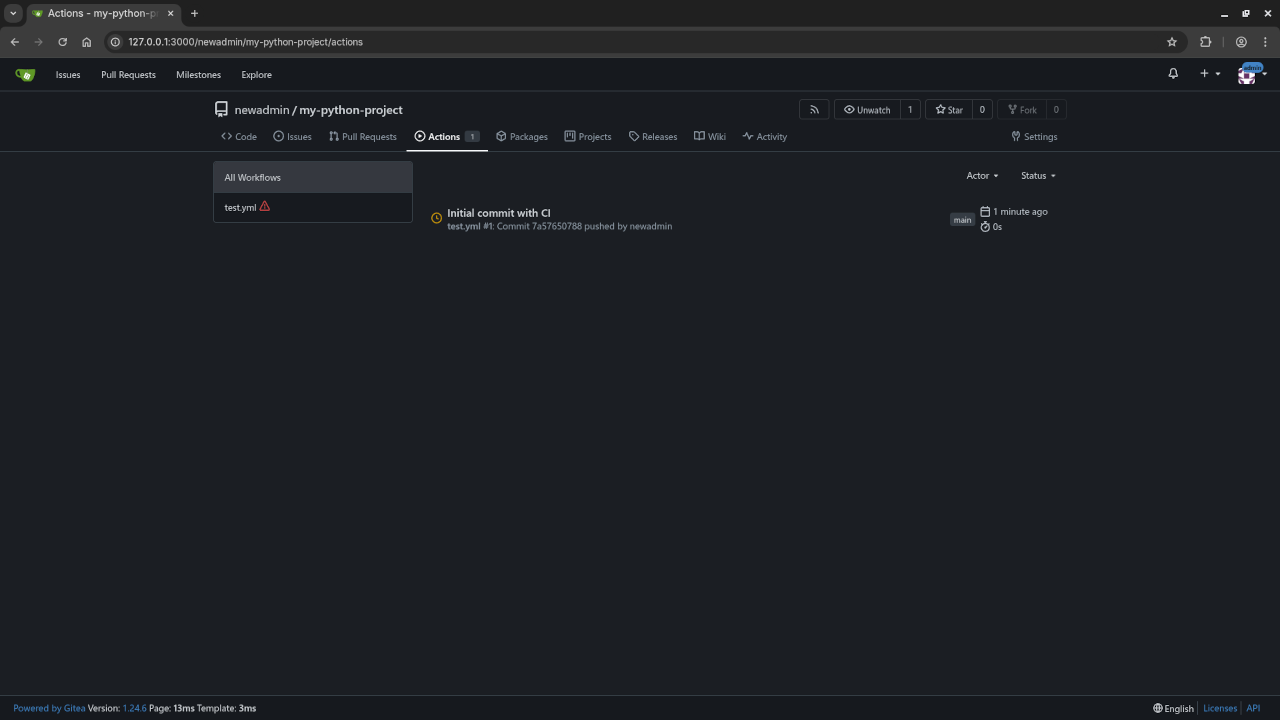
    6. View Workflow Results

    In Gitea, click on Actions to view the results. You can check logs, verify steps, and see test output.

    Folder Structure Recap

    Your project folder should look like this:

    my-python-project/
    &#9474;&#9472;&#9472; app.py
    &#9474;&#9472;&#9472; test_app.py
    &#9474;&#9472;&#9472; requirements.txt
    &#9492;&#9472;&#9472; .gitea/
    &nbsp;&nbsp;&nbsp;&nbsp;&#9492;&#9472;&#9472; workflows/
    &nbsp;&nbsp;&nbsp;&nbsp;&nbsp;&nbsp;&nbsp;&nbsp;&#9492;&#9472;&#9472; test.yml

    Screenshots and Screencast Tutorial

    Compose YAML
    Gnome Text Editor Displaying Podman Compose YAML File

    Gitea Container
    Command Line Podman Compose Building Gitea Container

    Gitea Initial Configuration
    Web Browser Displaying Initial Gitea Configuration

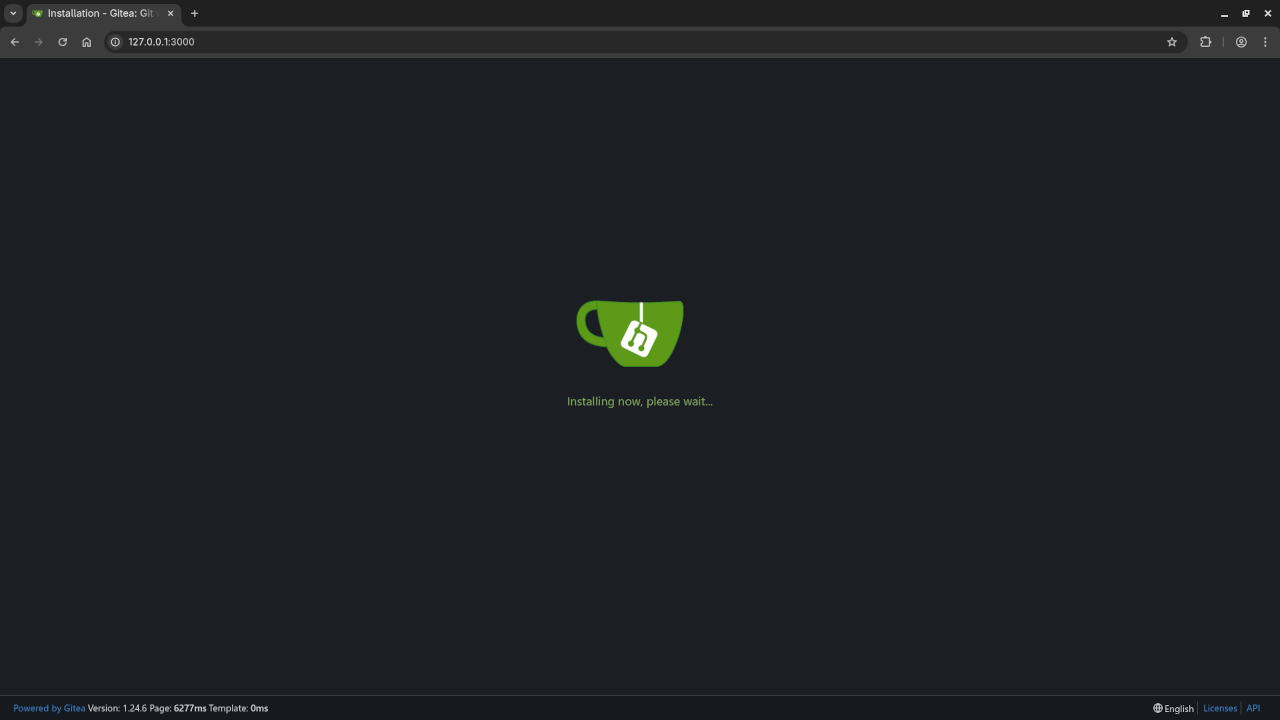
    Gitea Installation
    Web Browser Displaying Installation Wait Screen

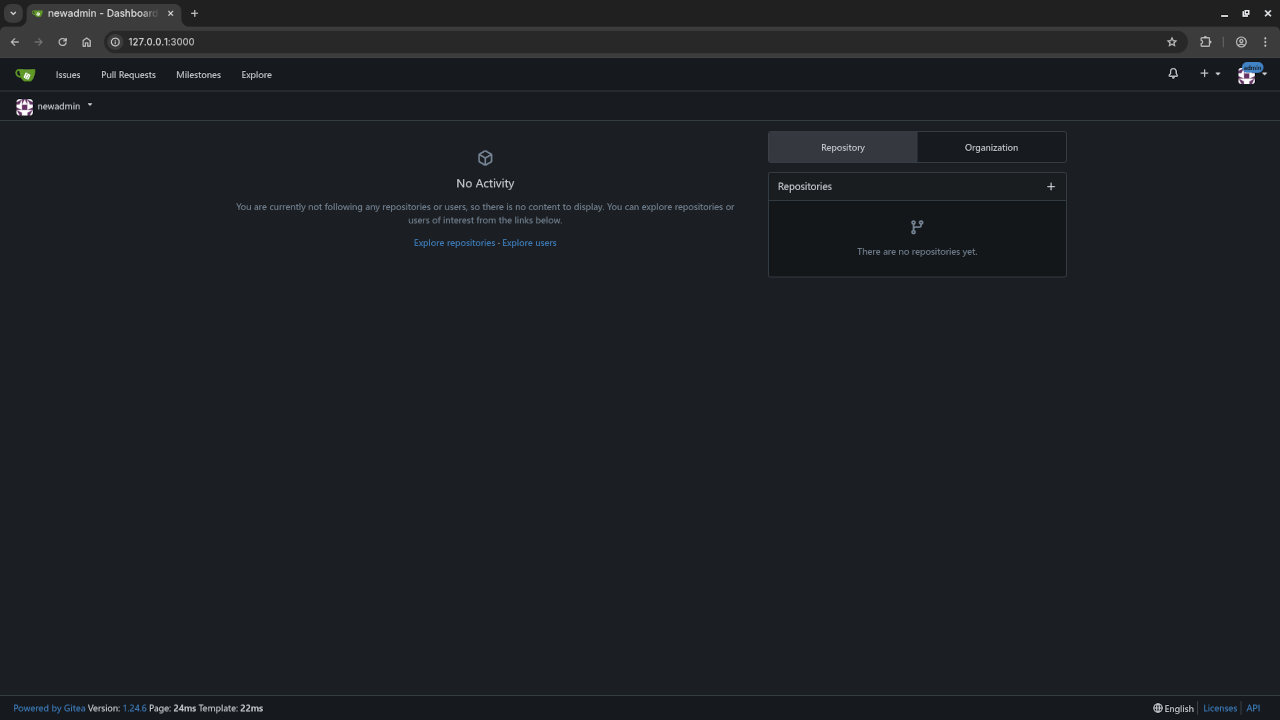
    Gitea Dashboard
    Web Browser Displaying Dashboard Screen

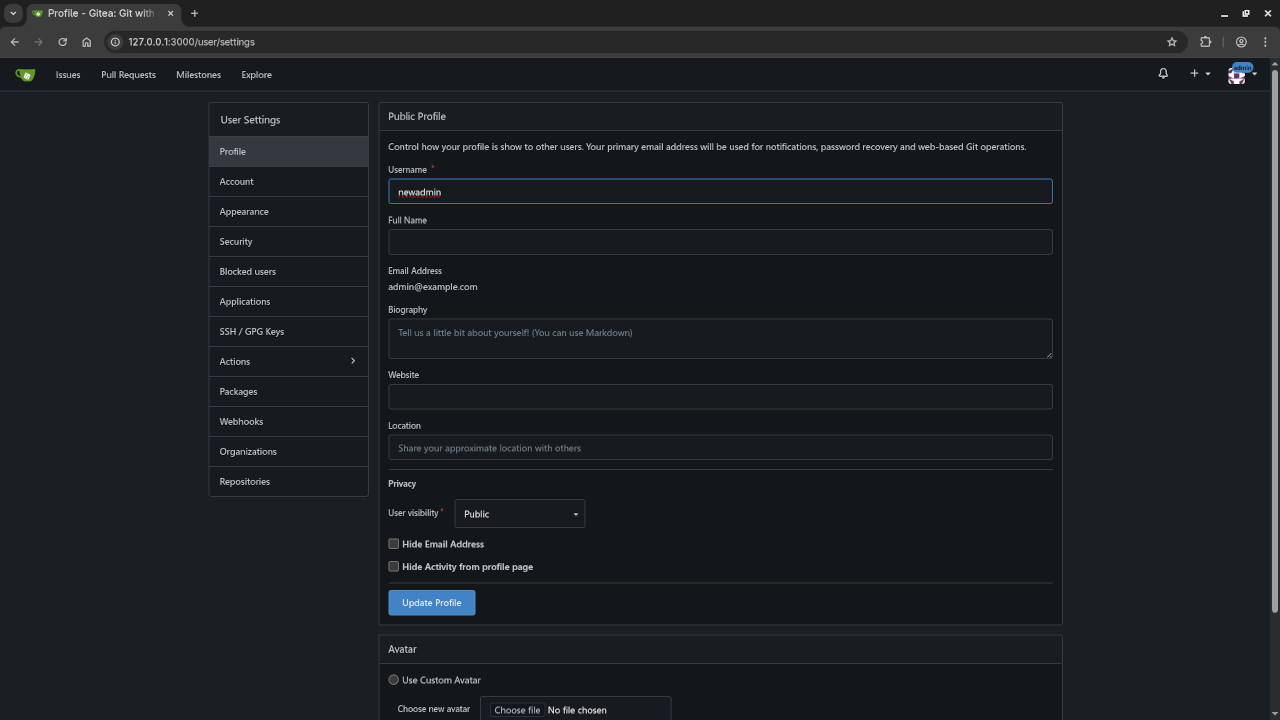
    Gitea User Profile
    Web Browser Displaying User Settings Screen

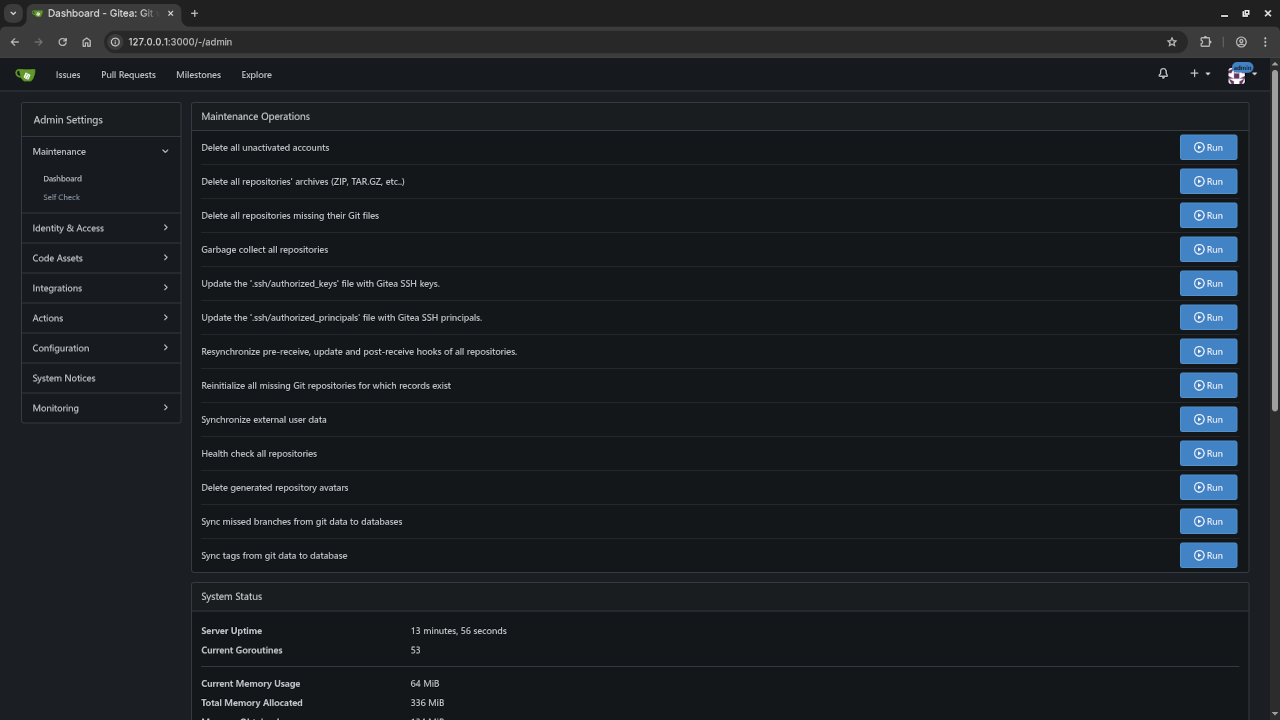
    Gitea Admin
    Web Browser Displaying Admin Settings Screen

    Gitea New Repo
    Web Browser Displaying New Repository Screen

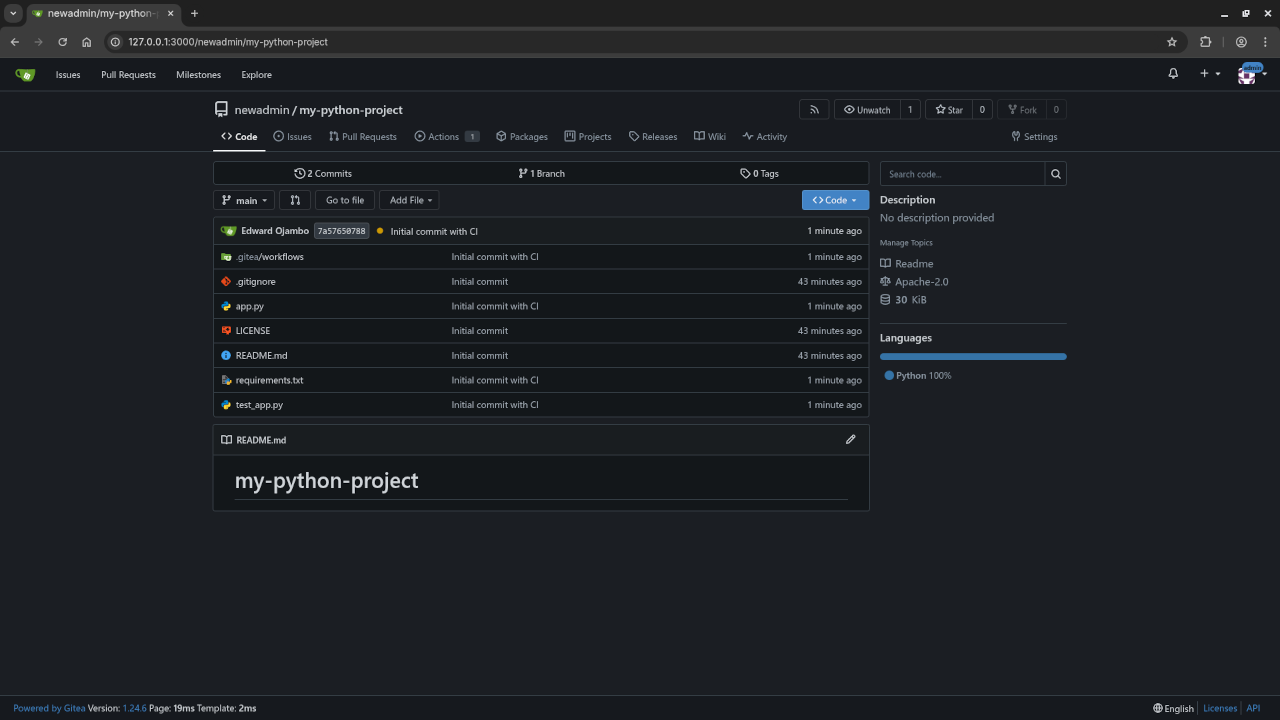
    Gitea Repo Code
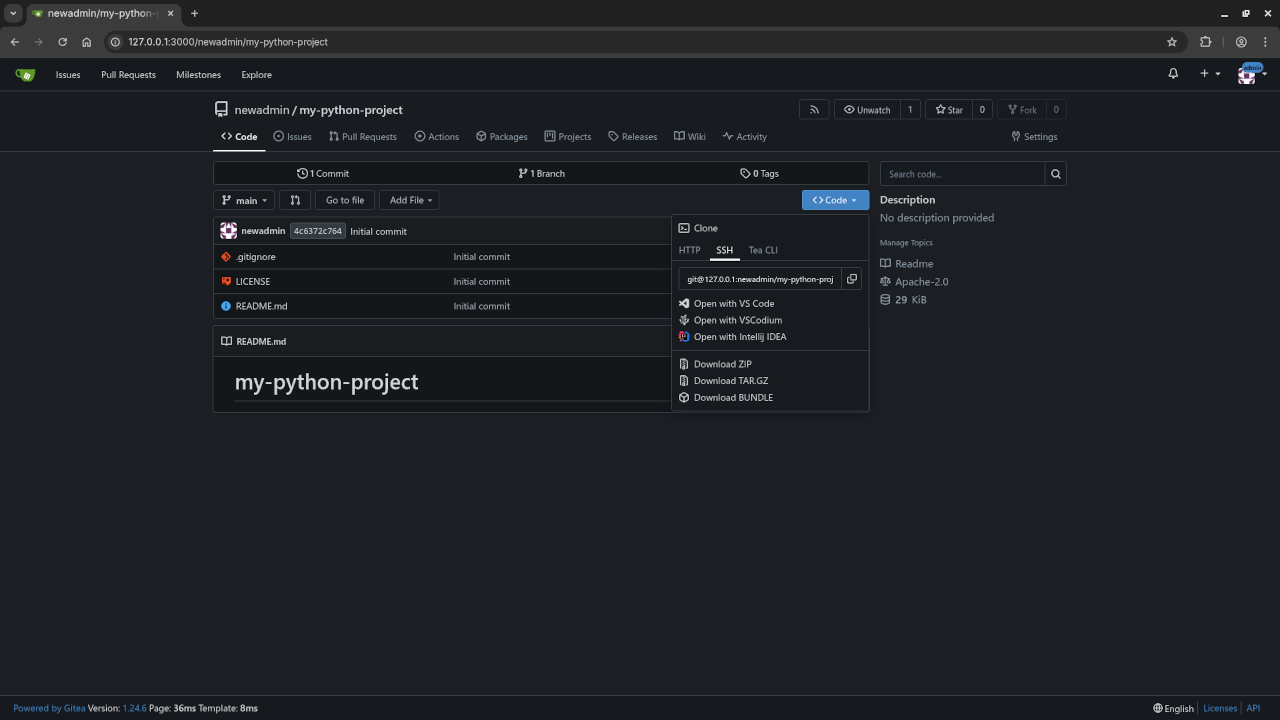
    Web Browser Displaying Repository Code Screen

    SSH Key Generation
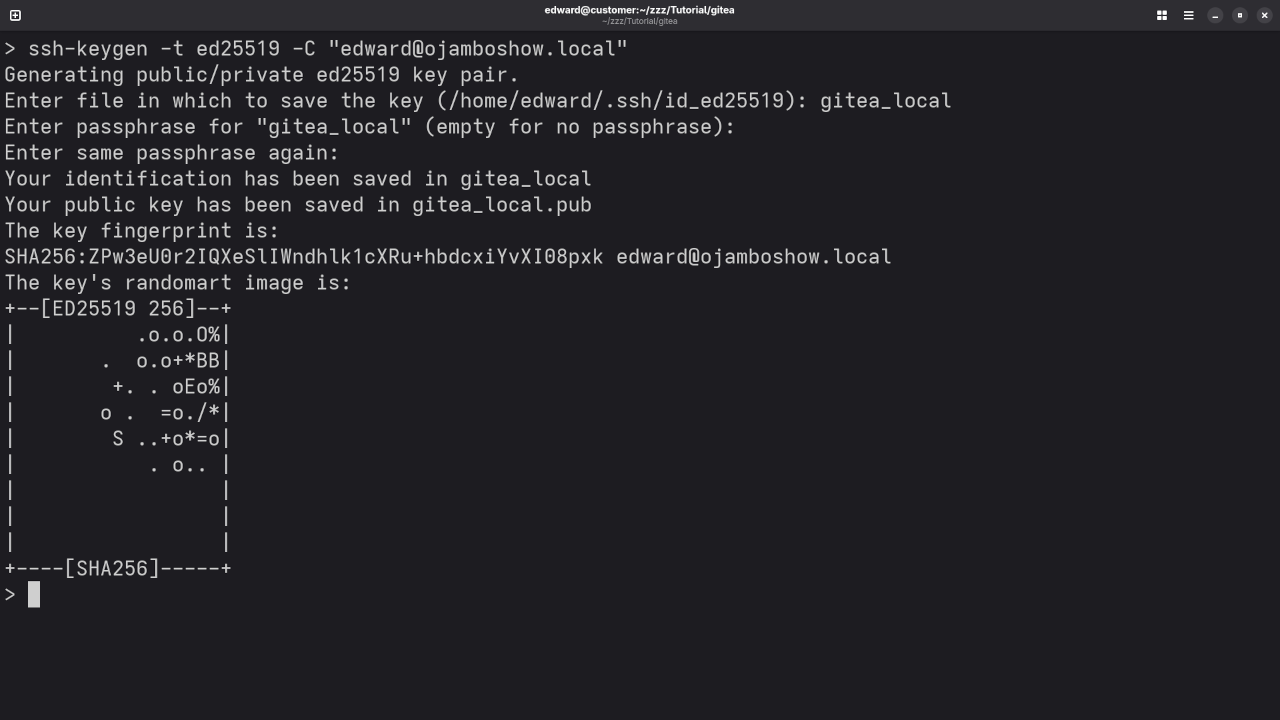
    Command Line Displaying SSH Key Generator

    Gitea Add SSH Key
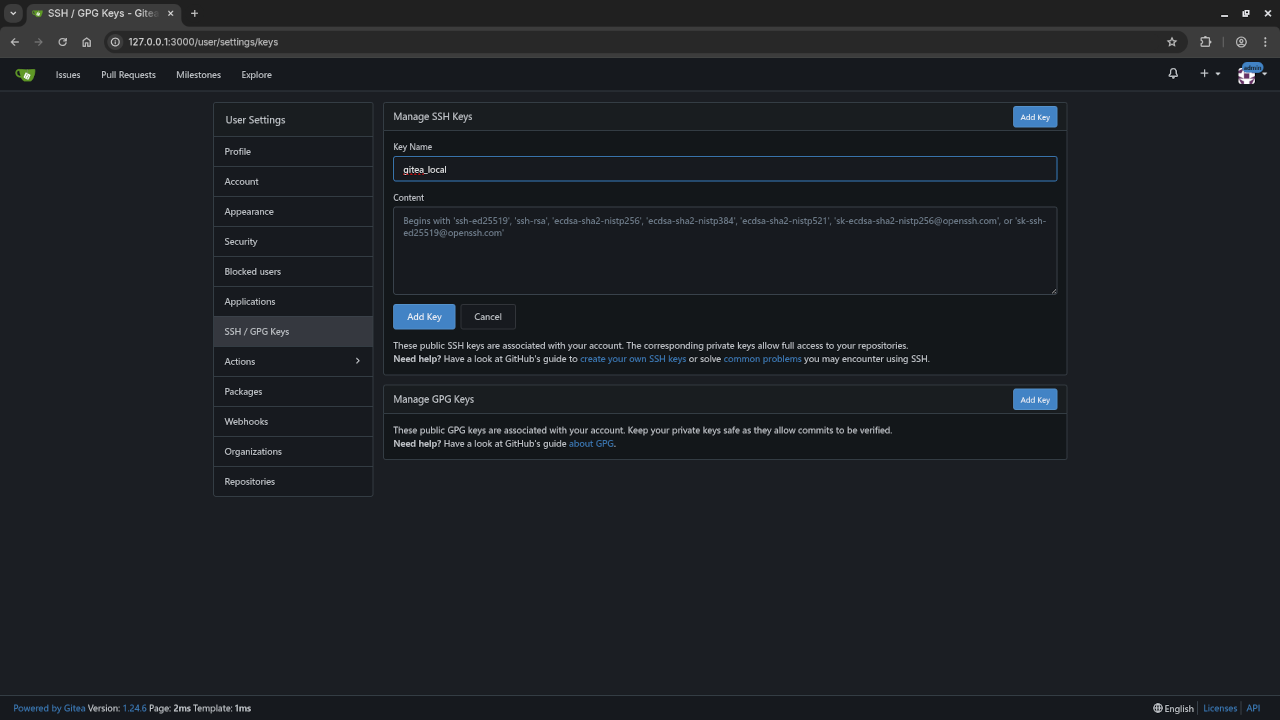
    Web Browser Displaying Add SSH Key Screen

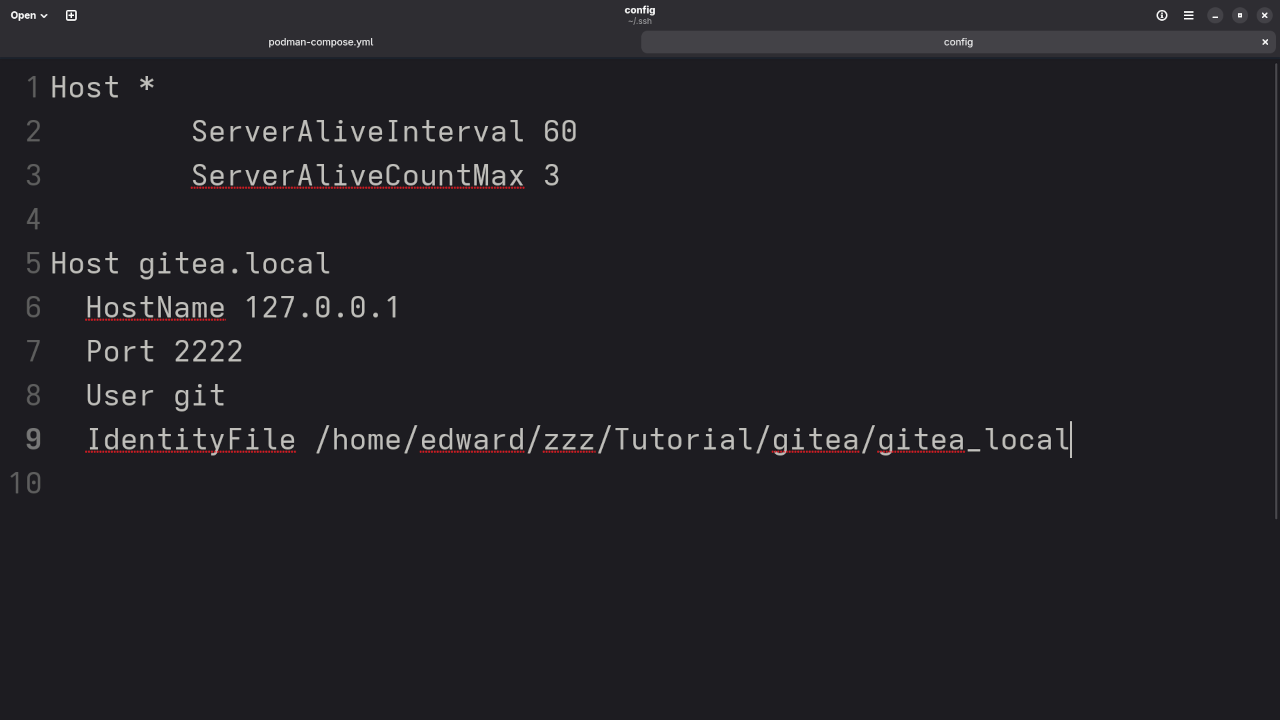
    SSH Configuration
    Gnome Text Editor Displaying SSH Configuration

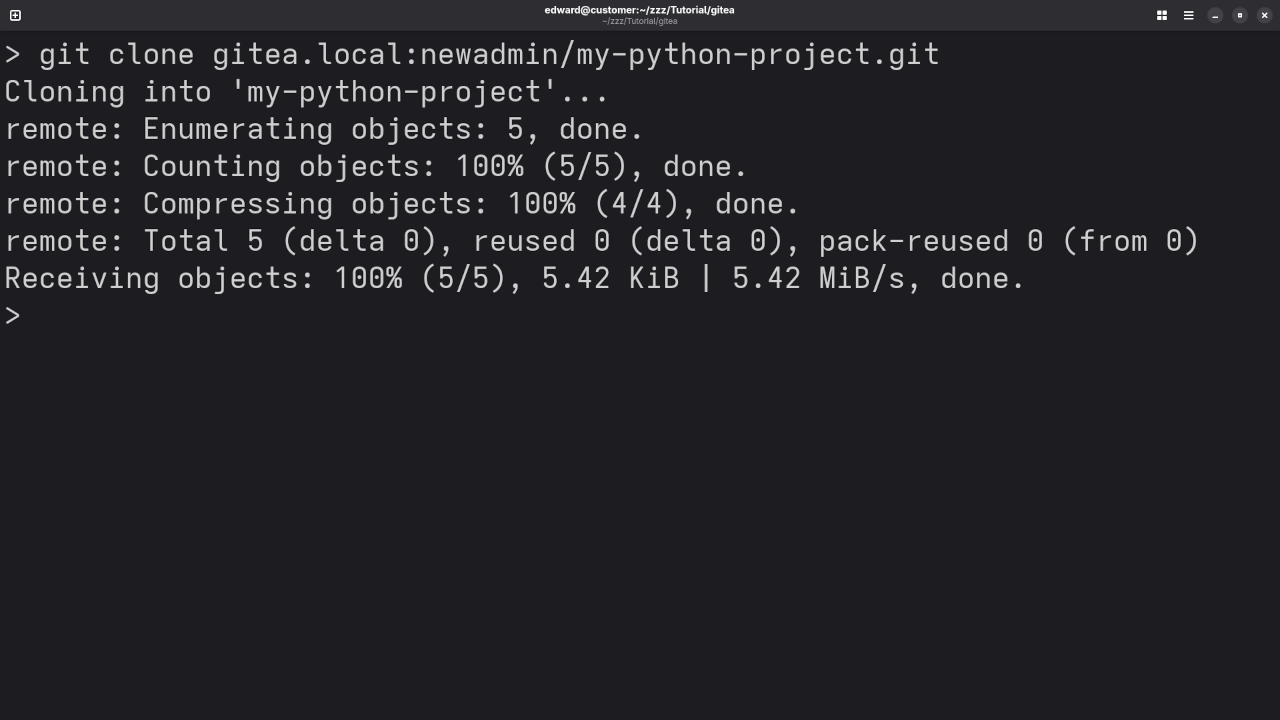
    Git Repo Clone
    Command Line Displaying Git Clone Result

    App.py
    Gnome Text Editor Displaying App.py File

    Test_app.py
    Gnome Text Editor Displaying Test_app.py File

    Test.yml
    Gnome Text Editor Displaying Test.yml File

    Git Push
    Command Line Displaying Git Push Result

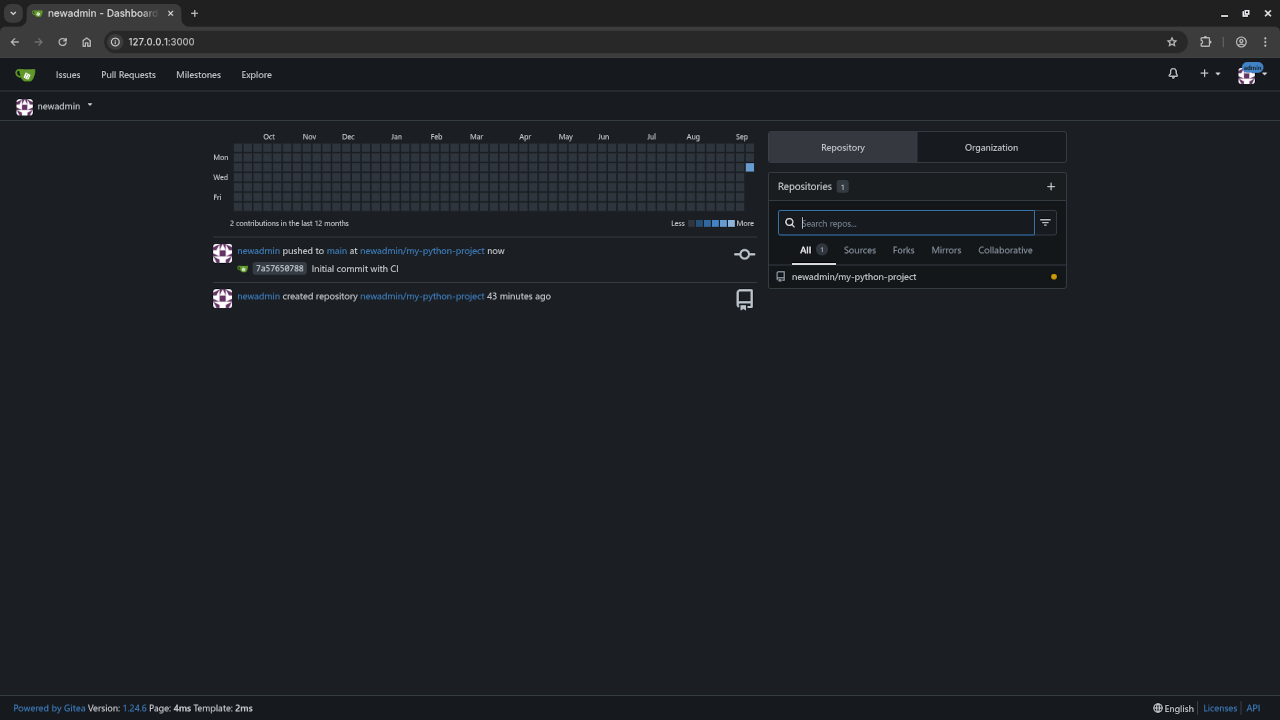
    Gitea Repo Contributions
    Web Browser Displaying Repository Contributions

    Gitea Repo Code Commits
    Web Browser Displaying Repository Code Commits

    Gitea Repo Actions
    Web Browser Displaying Repository Actions

    Screencast Of Gitea Setup

    Learning Resources

    If you are new to Git, CI/CD, or DevOps, here are some resources I offer to help you get started and improve your skills:

    Final Thoughts

    Gitea gives you full control over your Git repositories and offers a clean user interface with useful features for modern development workflows. By combining it with Podman and Gitea Actions, you get a powerful and free self-hosted development platform.

    If you have any questions or would like assistance setting up Gitea, feel free to get in touch.

    Happy coding!

  • NetBeans 27 Advanced Editor Review

    NetBeans 27 Advanced Editor Review

    Getting Started with Apache NetBeans 27: A Comprehensive Beginner’s Guide

    Introduction

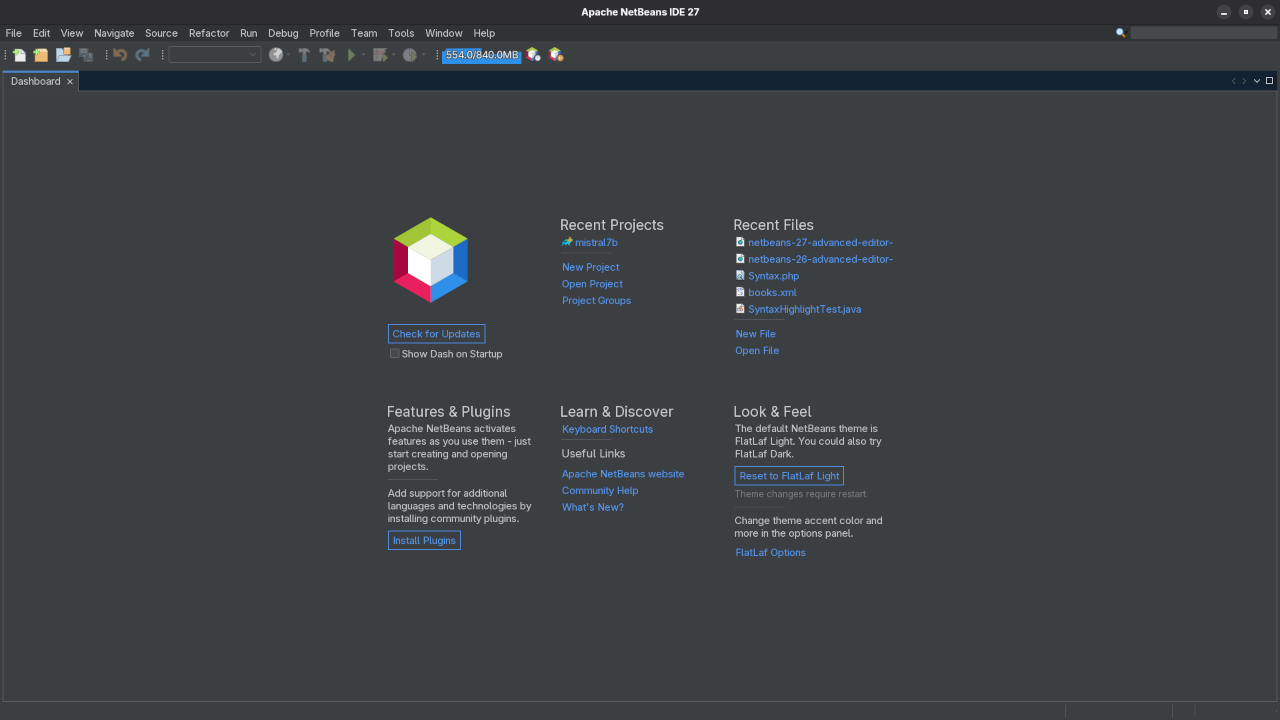
    Apache NetBeans 27 is the latest stable release of the popular open-source integrated development environment (IDE). If you’re a developer looking for an all-in-one tool for writing, debugging, and running your code, Apache NetBeans 27 offers just that! In this post, we’ll take a close look at what this release has to offer, how to install it (with a focus on Fedora Linux), and where to find additional resources to enhance your programming journey.

    What is Apache NetBeans?

    Apache NetBeans is an open-source IDE that provides developers with all the necessary tools to create Java applications, web applications, and more. NetBeans 27 comes with several enhancements that make development easier, faster, and more efficient. This release includes new features for editors, support for additional languages, and better integration with the latest libraries and frameworks.

    Apache NetBeans is licensed under the Apache License 2.0, ensuring that it remains free and open for developers to use, modify, and distribute.

    Key Features of Apache NetBeans 27

    • Advanced Code Editor: NetBeans 27 continues to improve its code editor, offering features like syntax highlighting, auto-completion, and smart refactoring. These enhancements provide a smoother programming experience, whether you’re working with Java, HTML, or PHP.
    • Support for Multiple Programming Languages: Apache NetBeans supports many languages out-of-the-box, including Java, JavaScript, PHP, and C/C++. New integrations also make it easier to work with web frameworks like Angular and React.
    • Updated Git Support: Version control is essential in modern software development, and NetBeans 27 comes with enhanced Git support, making it easier to track changes and collaborate with other developers.
    • Profiler Tools: These tools help identify bottlenecks in your code, making it easier to optimize and speed up your applications.
    • Cross-Platform Support: Apache NetBeans runs on Windows, macOS, and Linux, ensuring that you can develop your applications on the platform you’re most comfortable with.

    How to Install Apache NetBeans 27 on Fedora Linux

    Installing Apache NetBeans 27 on Fedora Linux is a simple process. Follow the steps below:

    Step 1: Download Apache NetBeans 27

    Head over to the official Apache NetBeans website and download the Fedora-compatible version of NetBeans 27 from here.

    Step 2: Install Java Development Kit (JDK)

    Apache NetBeans requires the Java Development Kit (JDK) to run. You can install it on Fedora using the following command:

    sudo dnf install java-11-openjdk-devel

    You can verify your installation by running:

    java -version

    Step 3: Install Apache NetBeans 27

    Once you have the JDK installed, navigate to the folder where you downloaded the NetBeans installer. Open a terminal in that directory and run the following command:

    chmod +x Apache-NetBeans-27-linux-x64.sh

    Then run the installer script:

    ./Apache-NetBeans-27-linux-x64.sh

    Follow the on-screen instructions to complete the installation.

    Installation on Other Platforms

    • Windows: Simply download the Windows installer and follow the setup instructions.
    • macOS: Download the macOS DMG package and drag NetBeans into the Applications folder.

    Requirements For Programming Text Editor

    Glossary:

    Code Editor

    Designed for writing and editing source code.

    IDE

    Integrated Development Environment combines various tools need for software development.

    Plugin

    Software component that adds specific functionality.

    Theme

    Preset package containing graphical appearance to customize look and feel.

    Open source

    Freely available for possible modification and redistribution.

    SCM

    Source code management use to manage and track modifications to a source code repository.

    Test Tools

    Test System
    Name Description
    CPU Intel(R) i7 2600 @ 3.40GHz.
    Memory 16GB DDR3.
    Operating System Fedora Linux Workstation 42.
    Desktop Environment Gnome 48.
    Name Description

    Test Suite
    Name Description
    Large File 1GB human-readable text.
    Regex File Text with word “Netbeans” repeated..
    Syntax File PHP file containing HTML, CSS & JavaScript.
    Media File Smiley face or Tux Linux JPEG file.
    Java Version OpenJDK 21.0.8.
    PHP Version OpenJDK 8.4.12.
    Python Version OpenJDK 3.13.7.
    Netbeans Version 27.
    Name Description

    Test Scoring

    1. Each feature has two parts.
    2. Score of zero indicates a missing feature.
    3. A part of a feature is work a score of 0.5.

    Three bias elimination steps were utilized. The editor was used for at least three years on different platforms. Attempts were made to get stable plug-ins for missing features. The same editor was compared between the one in the repository, the developers website, and the compiled version if applicable.

    Selecting Editor Version

    For this review, Netbeans was downloaded from the developers website and it did not require additional plugins.

    Features

    1. The theme can be native for the editor in terms of the background, and the dark theme did not need tweaks for source code management. Netbeans comes with dark and light themes and others can be created or downloaded. The score for the theme was 1.0.
    2. Dragging and dropping a text file into the editor opens a new tab. It is still not possible to specify the tab location during the drag and drop operation. The score for drag and drop into editor was 0.5.
    3. Opening a very large text file did not crash Netbeans. An out of memory window was shown and it was not possible to edit the large file. The score for opening a large file was 0.5.
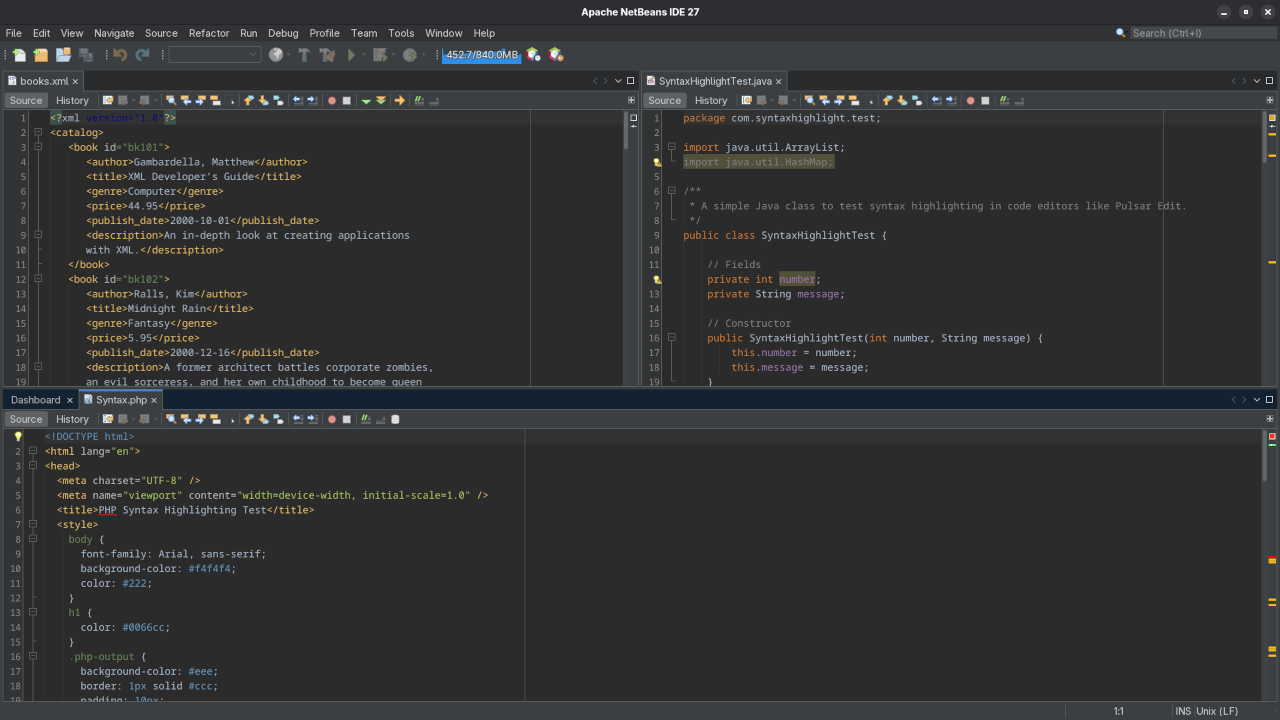
    4. Multiple documents can opened in multiple tabs. Tear-off tabs work by opening a new Netbeans editor instances which is handy for multiple monitors. The score for multiple documents was a perfect 1.0.
    5. Multiple editors can be opened as new tabs with drag options. Every new editor tab can be split vertically or horizontally. The score for multiple editor view was a perfect 1.0.
    6. Creating non-project files is possible by dragging the folder into the workspace. Non-project files can be opened by the drag and drop operation. The score for creating non-project files was a perfect 1.0.
    7. Soft word wrap can be enabled in the editor settings. Automatic soft wrap for documents is available for Netbeans. The score for word wrap was a perfect 1.0.
    8. Spell check works as words are typed. Spelling errors are shown in opened documents. The score for spell check was a perfect 1.0.
    9. Word count is not available for Netbeans. Selection word count is not available. The score for word count was 0.0.
    10. Go to line can jump to a specified line. It is possible to jump to either the first or last line. The score for go to line was a perfect 1.0.
    11. Indentation can default to user-defined tab stops. Children are automatically indented. The score for indentation was a perfect 1.0
    12. Fonts can be dynamically scaled. The system font can be bypassed and a new editor font and size can be set. The score for fonts was a perfect 1.0.
    13. Find and replace using regular expressions can be utilized for all open documents in the current session. Find and replace will work for the current document or a selection in the current document. The score for find and replacing using regular expressions was 1.0.
    14. Multiple language syntax highlighting in one file is enabled if the language plug-ins are installed. Each language has code-sensitive syntax colors which can be modified. The score for multiple language syntax highlighting was a perfect 1.0.
    15. Code folding works for markup languages such as HTML. Code folding also works for programming languages such as Java and PHP. The score for code folding was 1.0.
    16. Selecting rectangular block per column works via a toggle or CTRL-SHIFT-R on Linux. Rectangular block selections work with word wrap enabled. The score for selecting rectangular block was a perfect 1.0.
    17. Multiple selection works using the shortcut CTRL-SHIFT-LMB or CMD-SHIFT-LMB on Macs. Search multiple selection is not available. The score for multiple selection was 0.5.
    18. Distraction-free mode to hide panes works. Line numbers can be toggled to improve distraction-free mode. The score for distraction-free was a perfect 1.0.
    19. The file manager can create and delete folders. Media files can be dragged and dropped into the file manager pane. The score for file manager was a perfect 1.0.
    20. Terminal is integrated into Netbeans. The terminal can follow folder. Terminal can execute system commands. The score for terminal was 1.0.

    Results

    Netbeans is a very powerful IDE. By default, the Netbeans editor is no longer missing required features which can be installed by using extensions. For my required features, the Netbeans editor scored 87.5% or 8.75 out of 10.

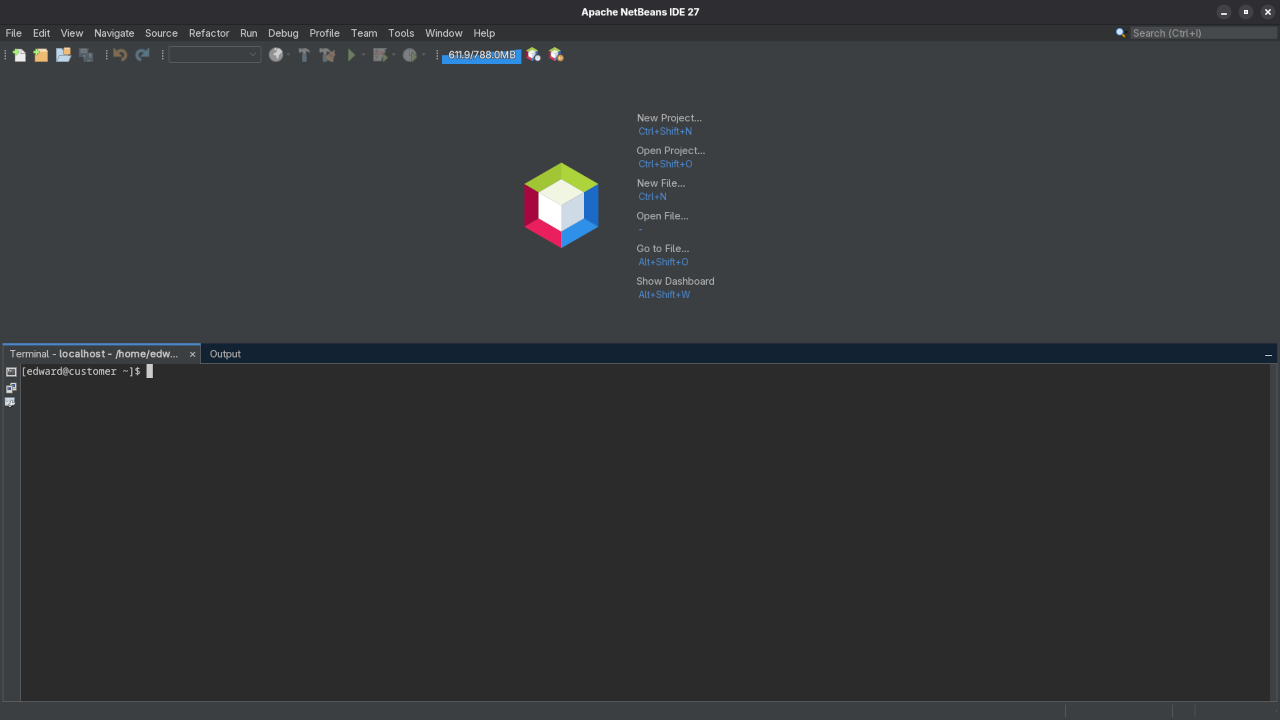
    Netbeans 27 Split View
    Apache Netbeans 27 Multiple Editor Split View

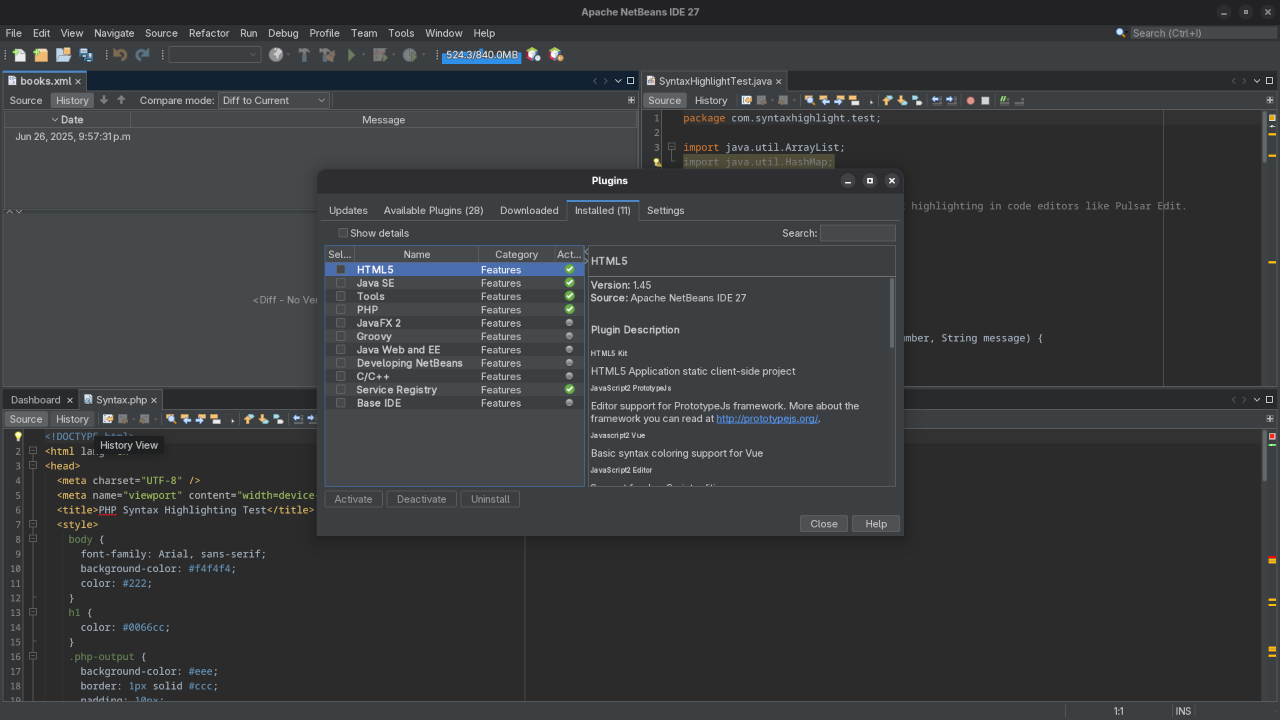
    Netbeans 27 Plugins View
    Apache Netbeans 27 Installed Plugins View

    Netbeans 27 Terminal View
    Apache Netbeans 27 Terminal View

    🎥 Screencast Tour

    Take a guided walk-through of some of NetBeans 27’s best new features—from database tools to testing frameworks:

    Apache Netbeans 27 Tour And Review

    Where to Go Next?

    If you’re looking to take your programming skills to the next level, you can explore the following resources:

    • Programming Books by Edward Ojambo: Browse through my selection of books on programming on Amazon. These books cover various programming languages and development topics.
    • Online Programming Courses: Interested in deepening your knowledge? Check out my courses on OjamboShop and take your skills to new heights.
    • One-on-One Programming Tutorials: If you’d like personalized help, I offer one-on-one programming tutorials. You can book a session with me at Ojambo Contact.
    • NetBeans Installation & Migration Services: Need assistance installing or migrating NetBeans on your system? I can help! Reach out to me for support at Ojambo Services Contact.

    Conclusion

    Apache NetBeans 27 is an excellent choice for developers looking for a free, open-source IDE that supports a wide variety of programming languages and frameworks. Whether you’re new to programming or a seasoned developer, NetBeans can provide you with the tools needed to write clean, efficient code. By following this guide, you’ll be up and running with NetBeans on Fedora Linux in no time!

    Happy coding!

  • How to Install JellyWatch: A Simple Jellyfin Monitoring Tool

    How to Install JellyWatch: A Simple Jellyfin Monitoring Tool

    Install JellyWatch to Monitor Jellyfin Sessions (With Podman)

    If you are using Jellyfin as your media server, you might want to monitor who is watching what, when, and how. That is where JellyWatch comes in – a clean, open source web app that shows active streaming sessions in real time.
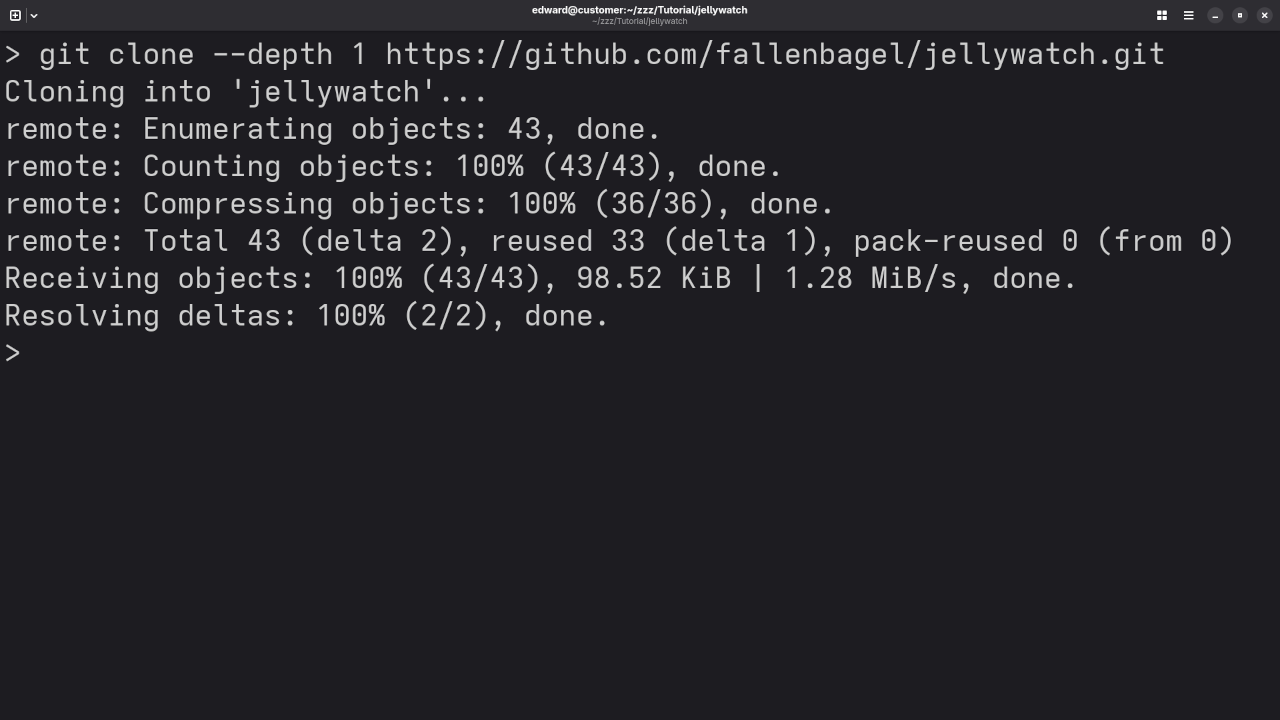
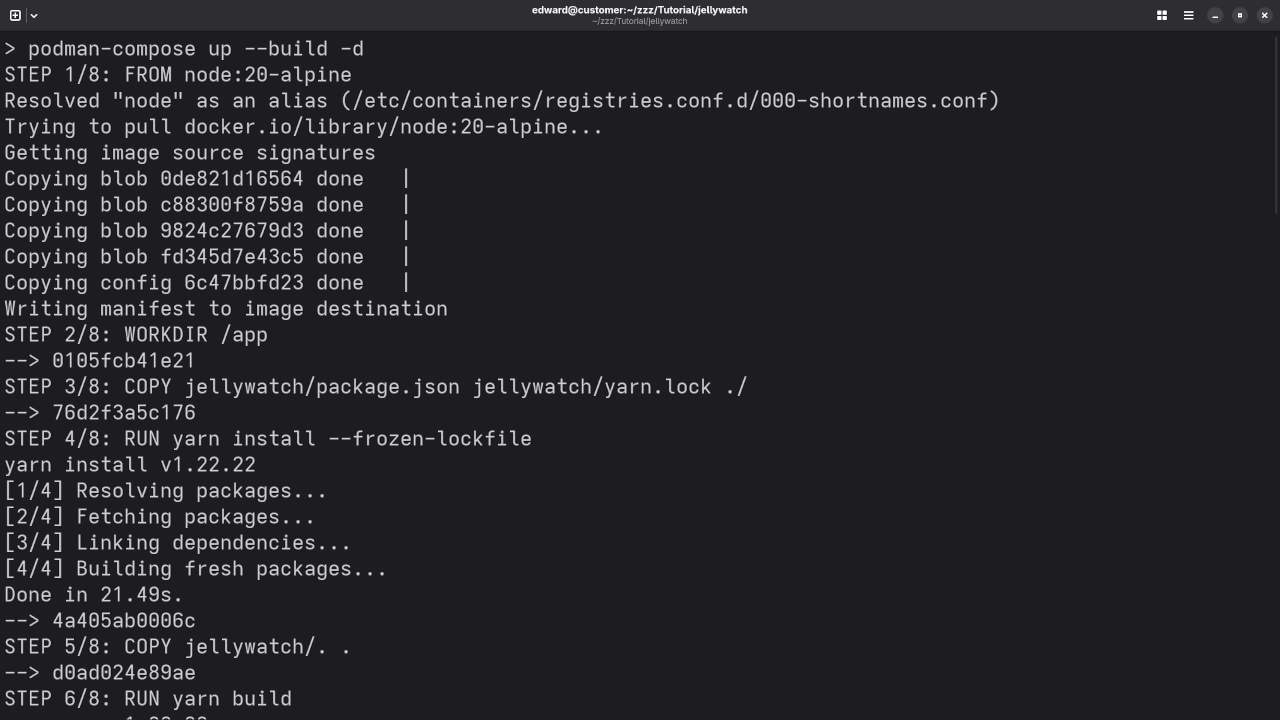
    In this beginner-friendly guide, we will walk you through how to install JellyWatch using Podman or Podman Compose, how to connect it to your Jellyfin server, and what to expect once it is up and running.

    What is JellyWatch?

    JellyWatch is an open source web dashboard for Jellyfin that displays:

    • Who is currently watching
    • What they are watching
    • The client or device they are using
    • Bitrate, transcoding status, and more

    It is lightweight, modern, and a great addition to any self-hosted media stack.

    How to Install JellyWatch with Podman Compose

    Do not worry – no Docker needed. Podman is a modern alternative that is rootless and secure.

    Prerequisites

    • Podman and Podman Compose installed
    • Jellyfin running (on same or separate server)
    • Access to your Jellyfin server URL and an API key

    Folder Setup

    jellywatch-setup/
      ├── Dockerfile
      ├── podman-compose.yaml
      └── jellywatch/   (we will clone the app here)
    

    Step 1: Clone JellyWatch

    git clone --depth 1 https://github.com/fallenbagel/jellywatch.git

    Move the cloned folder into jellywatch-setup/ if needed.

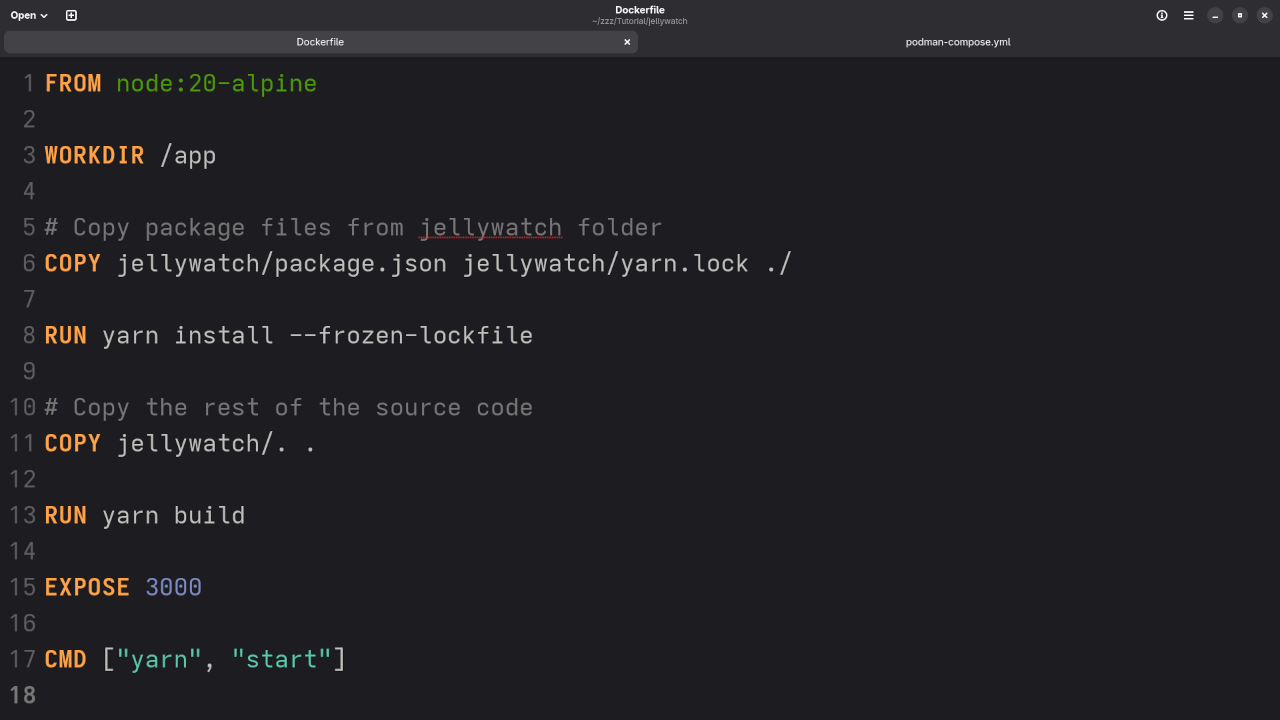
    Step 2: Dockerfile (Node 20)

    Create a file called Dockerfile in the root folder with this content:

    FROM node:20-alpine
    
    WORKDIR /app
    
    COPY jellywatch/package.json jellywatch/yarn.lock ./
    RUN yarn install --frozen-lockfile
    
    COPY jellywatch/. .
    
    RUN yarn build
    
    EXPOSE 3000
    
    CMD ["yarn", "start"]

    Step 3: podman-compose.yaml

    Create a podman-compose.yaml file:

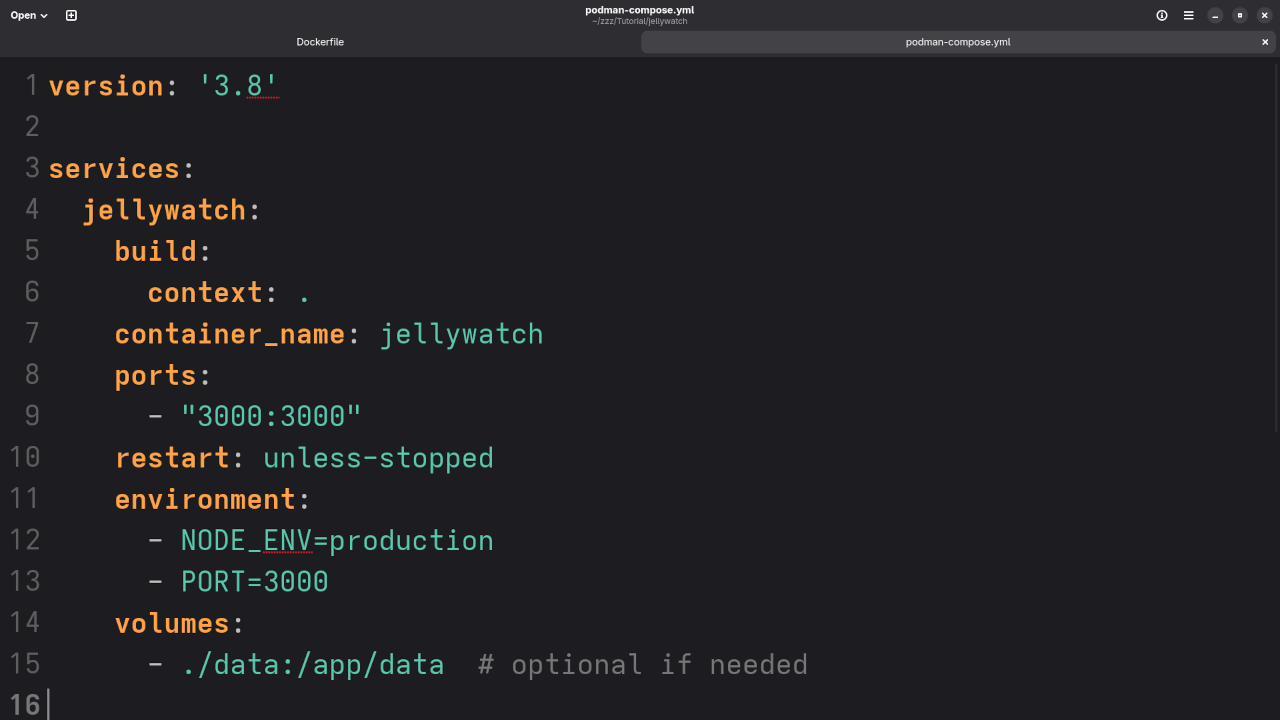
    version: '3.8'
    
    services:
      jellywatch:
        build:
          context: .
        container_name: jellywatch
        ports:
          - "3000:3000"
        restart: unless-stopped
        environment:
          - NODE_ENV=production
          - PORT=3000

    Step 4: Start the Container

    podman-compose up --build -d

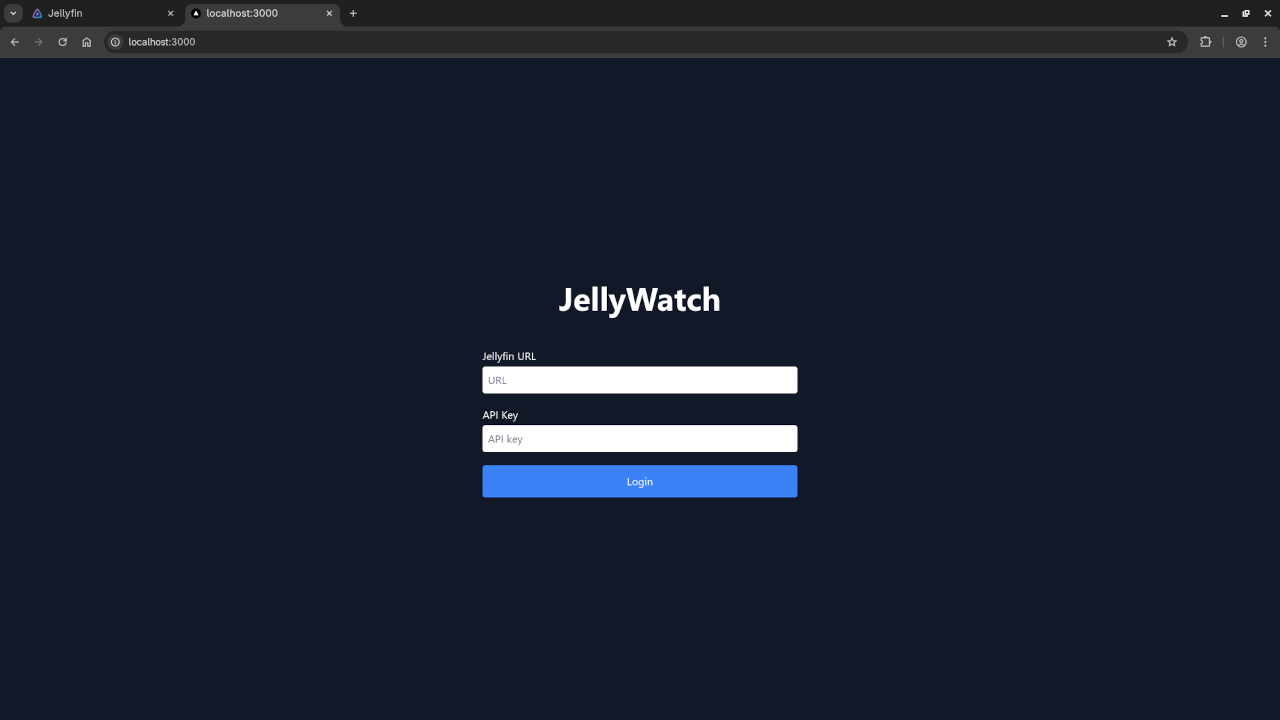
    Wait a moment, then open in your browser:

    http://localhost:3000

    Or use the server’s IP if hosted remotely.

    How to Get Your Jellyfin API Key

    To allow JellyWatch to connect to Jellyfin:

    1. Log into your Jellyfin dashboard.
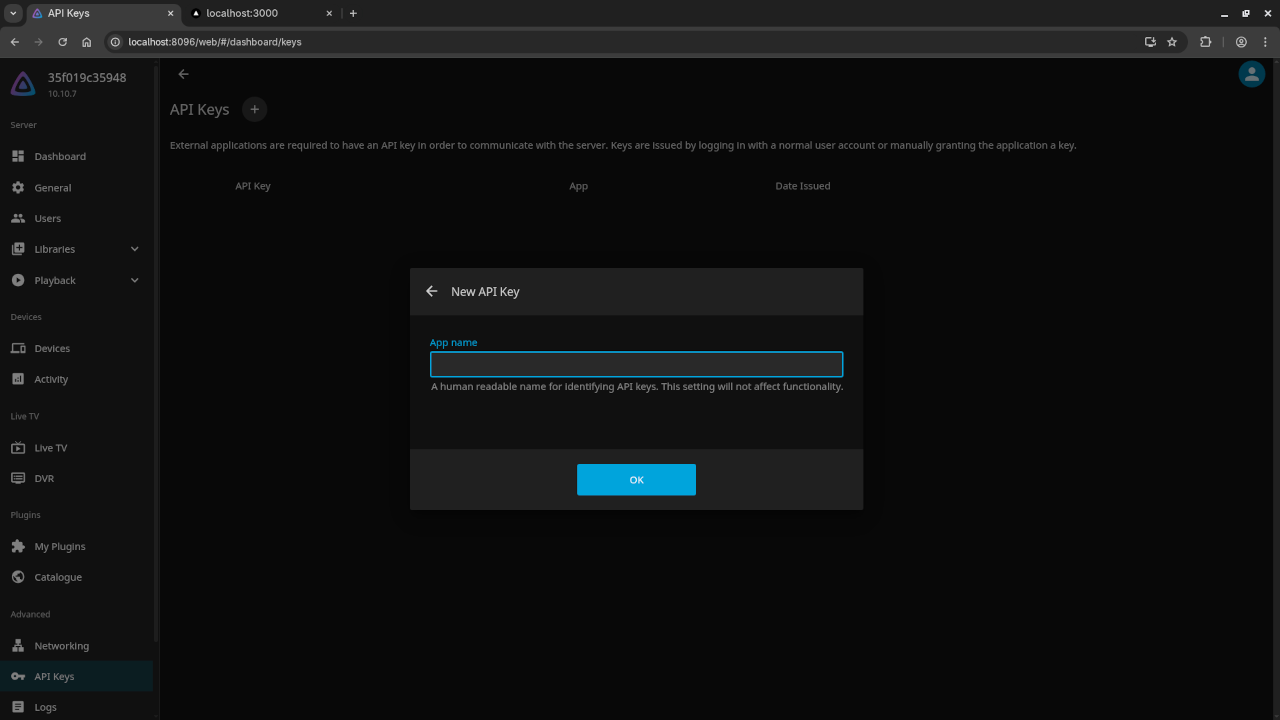
    2. Click your user icon and go to API Keys.
    3. Click Create API Key and name it, for example, jellywatch.
    4. Copy the token shown and save it.

    Paste this API key into JellyWatch when prompted.

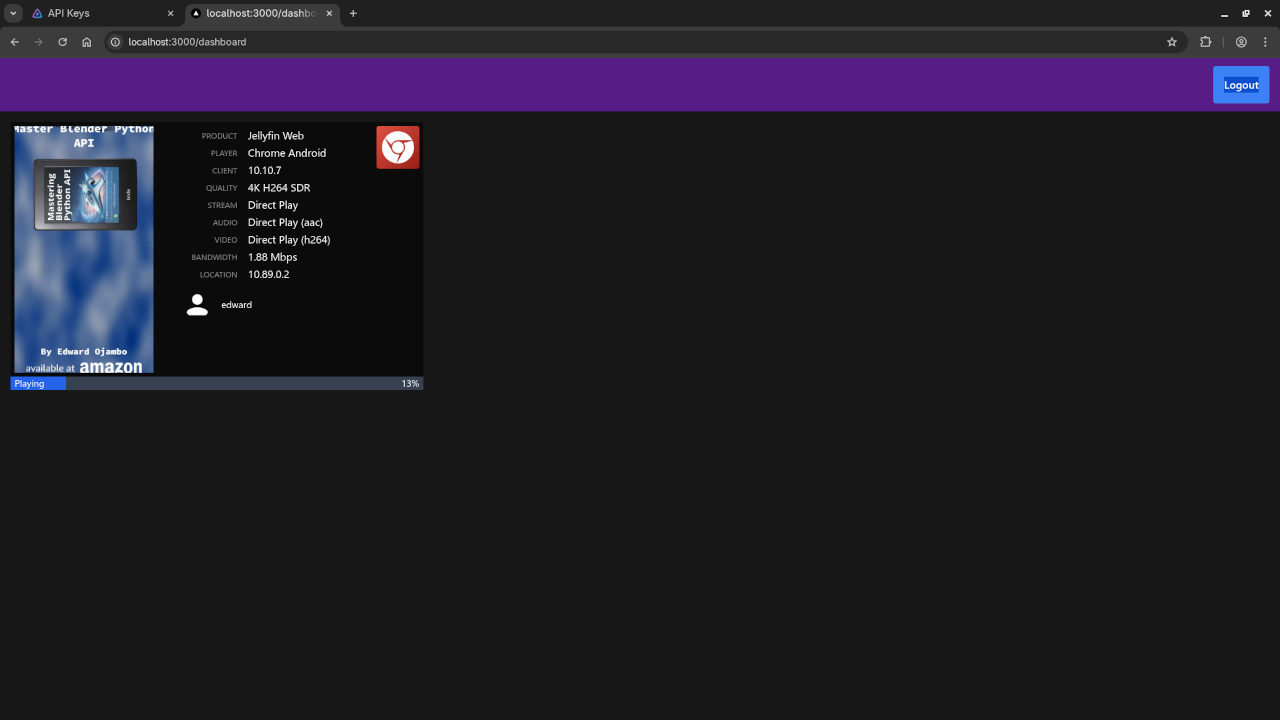
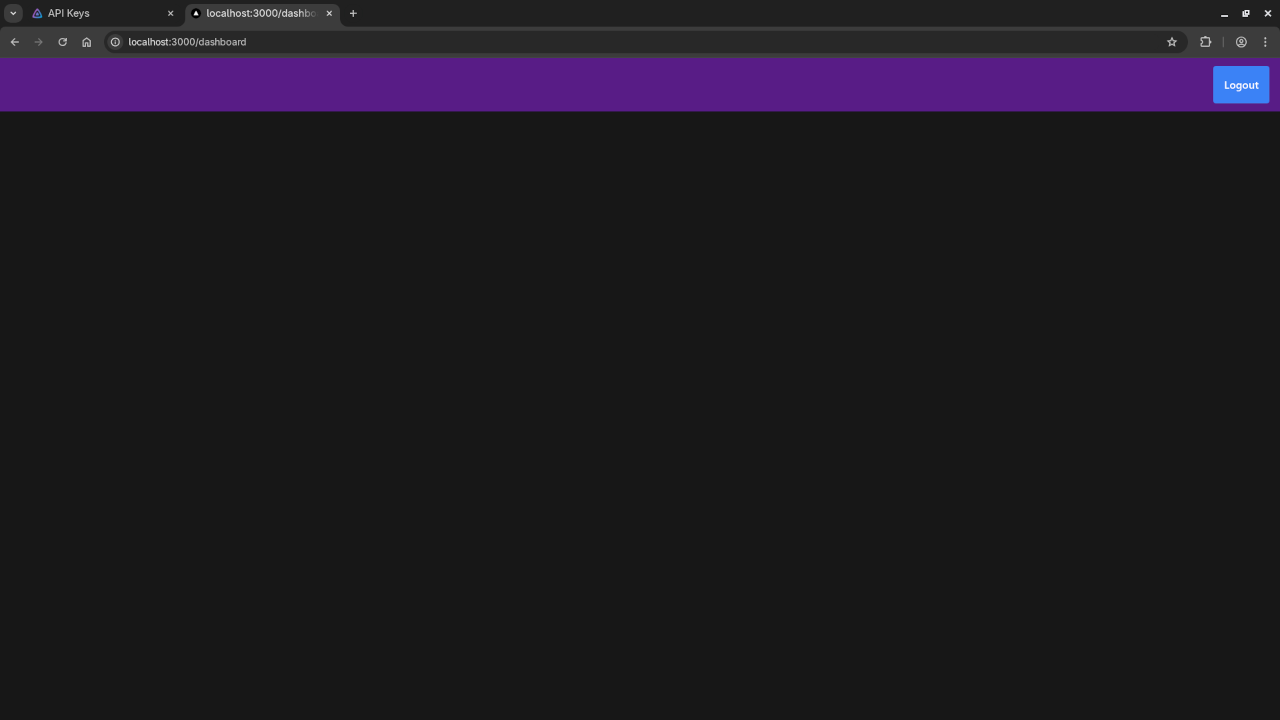
    Why Does JellyWatch Only Show a Logout Button?

    This is normal behavior if no one is actively watching anything.

    JellyWatch only shows live streaming sessions, so if no video is currently playing, the dashboard will be blank – showing only the logout button.

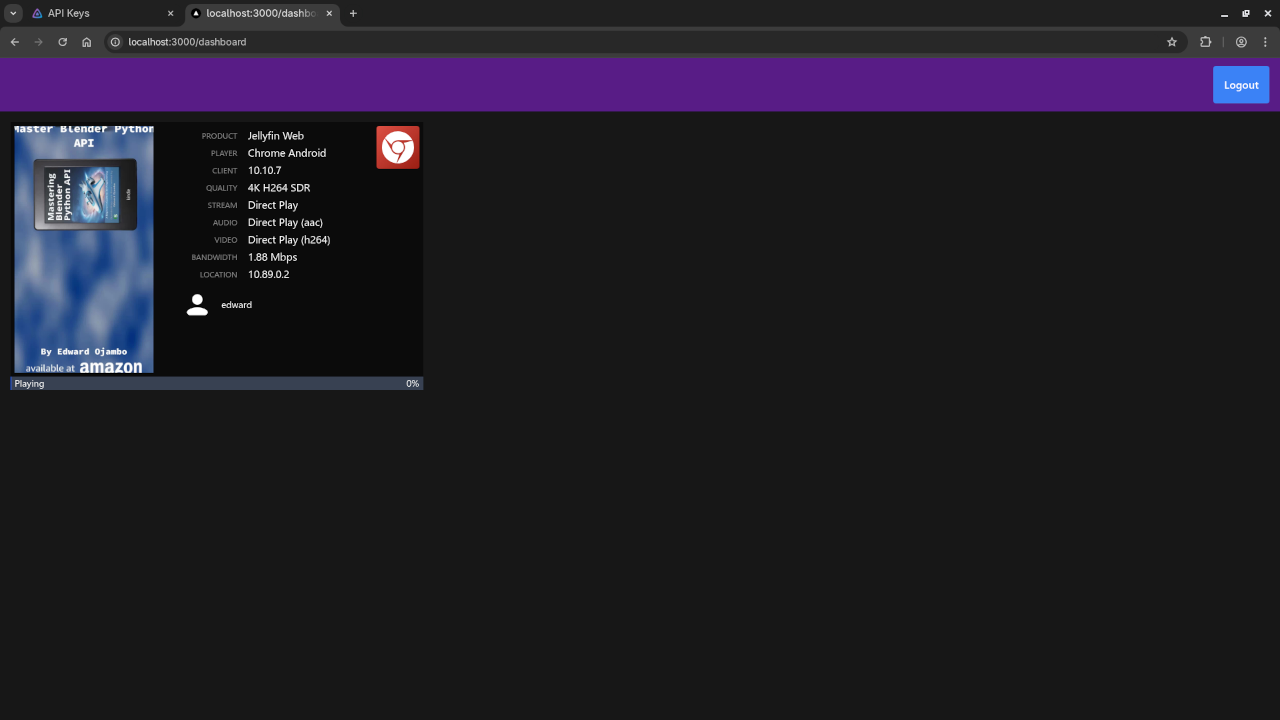
    Try this: Start playing a video on Jellyfin (any device), then refresh the JellyWatch page. You should see the session displayed.

    📷 Screenshots & 📽️ Screencast

    Jellywatch Dockerfile
    Gnome Text Editor Displaying Container Dockerfile

    Jellywatch Compose YAML File
    Gnome Text Editor Displaying Jellywatch Compose YAML File

    Jellywatch Git Clone
    Command Line Git Cloning Of Jellywatch

    Jellywatch Podman Compose Build
    Command Line Installation Of Jellywatch Via Podman Compose Build

    Jellywatch Login Screen
    Web Browser Displaying Jellywatch Login Screen

    Jellyfin API Keys Screen
    Web Browser Displaying Jellyfin API Keys Screen

    Jellywatch Dashboard Screen
    Web Browser Displaying Jellywatch Dashboard Screen

    Jellywatch Streaming Screen
    Web Browser Displaying Jellywatch Streaming Screen

    Jellywatch Installation And Setup Screencast

    Like This? Check Out “Learning JavaScript”

    I am the author of the book Learning JavaScript – a beginner’s guide to programming with JavaScript.

    It pairs well with web-based tools like JellyWatch, especially if you are interested in customizing or contributing to open source projects.

    Take the Full Course

    If you prefer video-based learning, check out my full course Learning JavaScript at:

    https://ojamboshop.com/product/learning-javascript

    Need Help? I Offer 1-on-1 Support

    I offer help with:

    • Custom installing or migrating Jellyfin
    • Setting up JellyWatch
    • Building Node.js web apps

    Contact me for programming tutorials or services:

    https://ojambo.com/contact

  • Getting Started with SD.Next on Fedora 42 Using AMD Instinct MI60

    Getting Started with SD.Next on Fedora 42 Using AMD Instinct MI60

    Introduction

    If you are curious about Stable Diffusion and want to run an open-source image generation web UI on your AMD hardware, you are in the right place.

    This guide walks you through installing SD.Next on Fedora 42, using the AMD Instinct MI60 GPU, and setting up everything cleanly on a separate partition (/AI). You will be running fully accelerated PyTorch with ROCm 6.3 and using a Python virtual environment to keep things isolated.

    No Docker needed – this is a local install for speed and simplicity.

    What is SD.Next?

    SD.Next is a fork of the popular Stable Diffusion Web UI, built for performance and flexibility. It supports AMD GPUs using ROCm and can be used for tasks like:

    • Text-to-image generation
    • Image enhancement
    • Inpainting
    • More use cases in deep learning

    The project is fully open-source and community-driven.

    System Requirements

    • Fedora 42 (or compatible distro with ROCm 6.3 support)
    • AMD Instinct MI60 (or compatible ROCm GPU)
    • At least 16GB RAM
    • 30GB+ of free space (we will use /AI for all files)

    Installation Guide

    1. Set up a dedicated directory on your separate partition:

    cd /AI
    mkdir sdnext
    cd sdnext

    2. Create and activate the virtual environment:

    python3 -m venv rocm-venv
    source rocm-venv/bin/activate

    3. Install PyTorch with ROCm 6.3:

    pip install --upgrade pip
    pip install torch torchvision --extra-index-url https://download.pytorch.org/whl/rocm6.3

    Verify ROCm is working:

    python -c "import torch; print(torch.version.hip); print(torch.cuda.is_available())"

    Expected Output:

    6.3.42131-fa1d09cbd
    True

    4. Install SD.Next and its dependencies:

    git clone https://github.com/vladmandic/sdnext.git
    cd sdnext
    pip install -r requirements.txt

    If there are version mismatch warnings (e.g., urllib3, Pillow, pydantic), resolve them using:

    pip install --upgrade package==required_version

    Launching SD.Next

    Each time you want to use SD.Next, run:

    cd AI/sdnext
    source ../rocm-venv/bin/activate
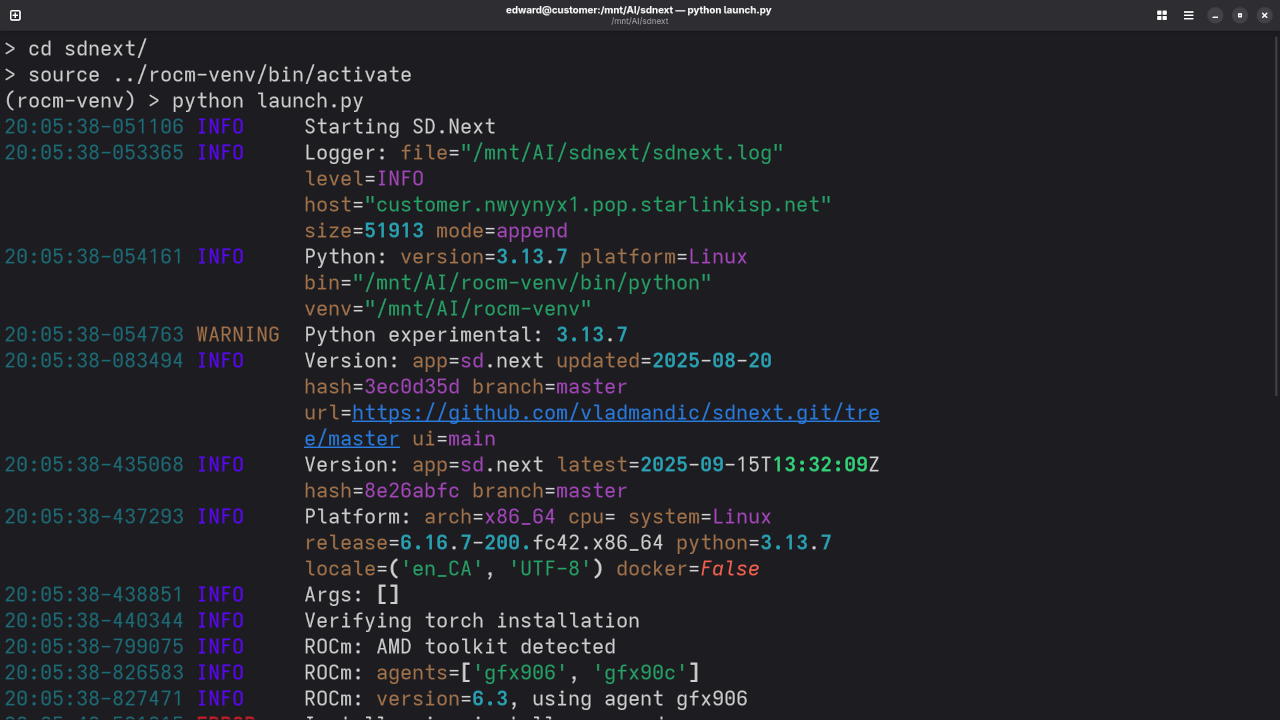
    python launch.py

    The web UI will be available at:
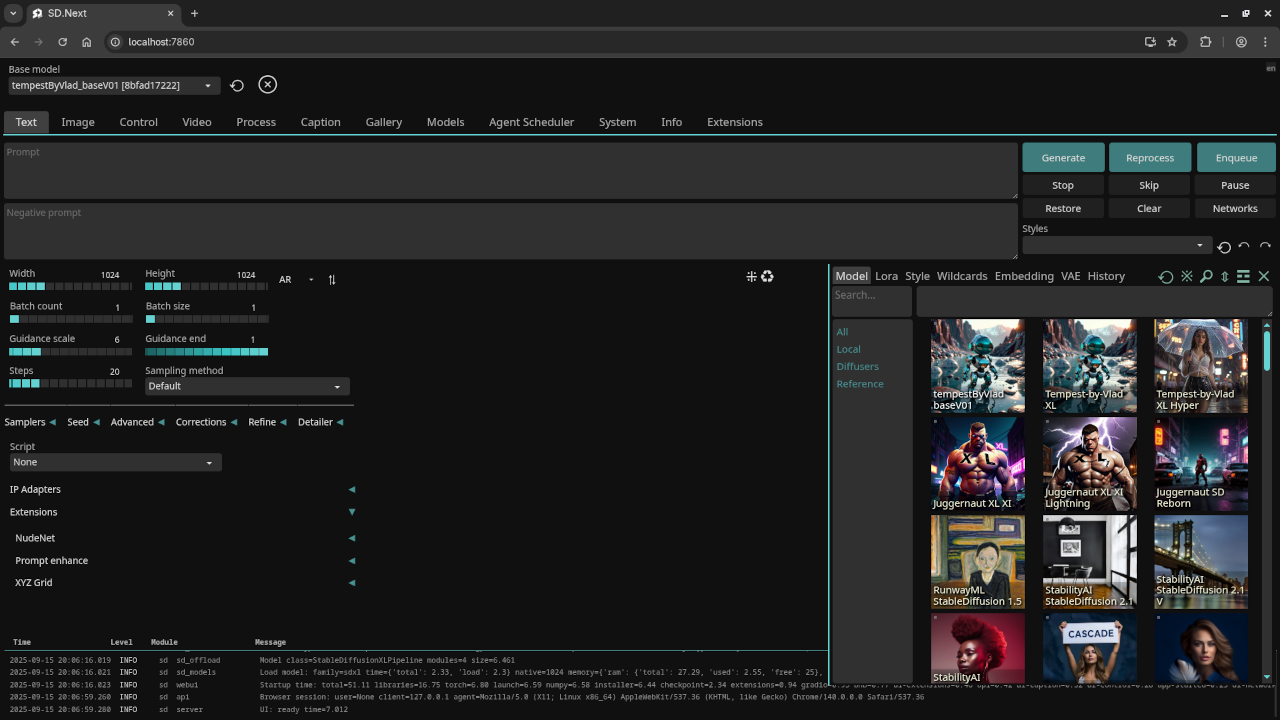
    http://localhost:7860

    Test Tools

    Test System
    Name Description
    CPU AMD Ryzen 5 5600GT (6C/12T, 3.6GHz).
    Memory 32GB DDR4.
    GPU AMD Instinct MI60 (32GB HBM2).
    Operating System Fedora Linux Workstation 42.
    Desktop Environment Gnome 48.
    Name Description

    🖼️ Screenshots and Screencast

    SD.Next ROCm Start
    Command Line SD.Next ROCm Launch.

    SD.Next base model
    Web Browser SD.Next base Model.

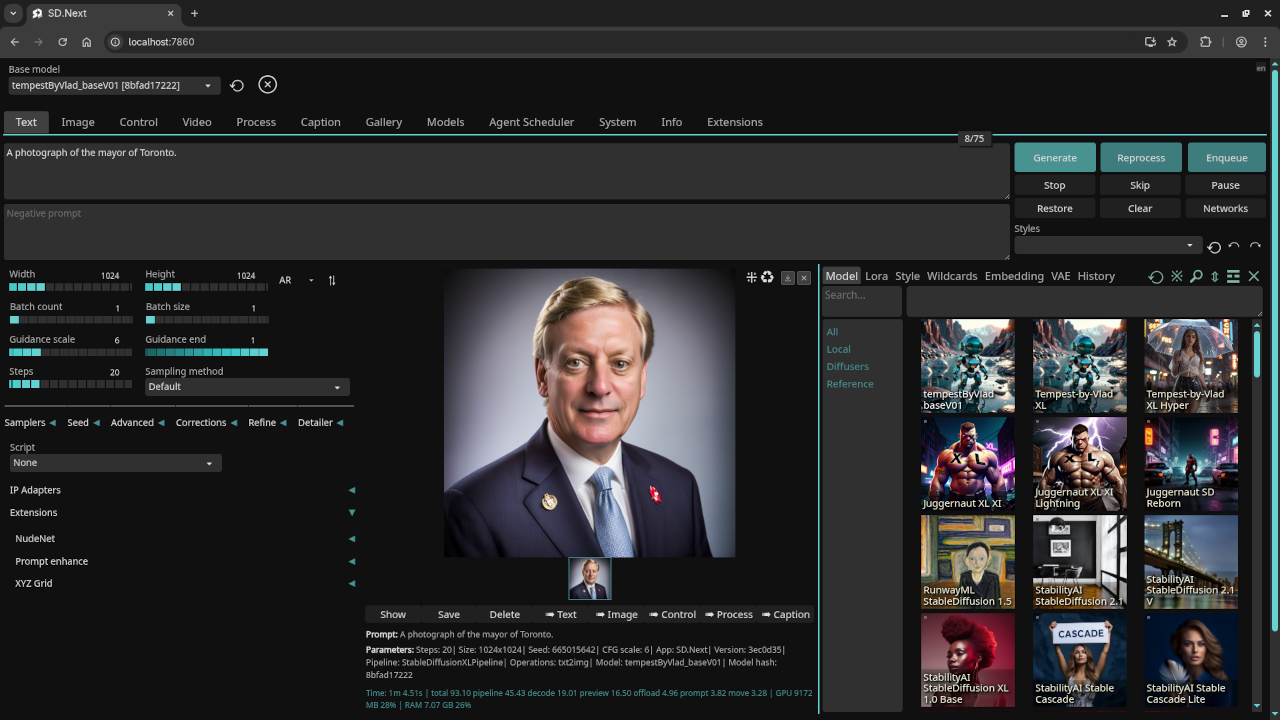
    SD.Next generated photo about the Mayor
    Web Browser SD.Next Mayor Of Toronto Photo Request.

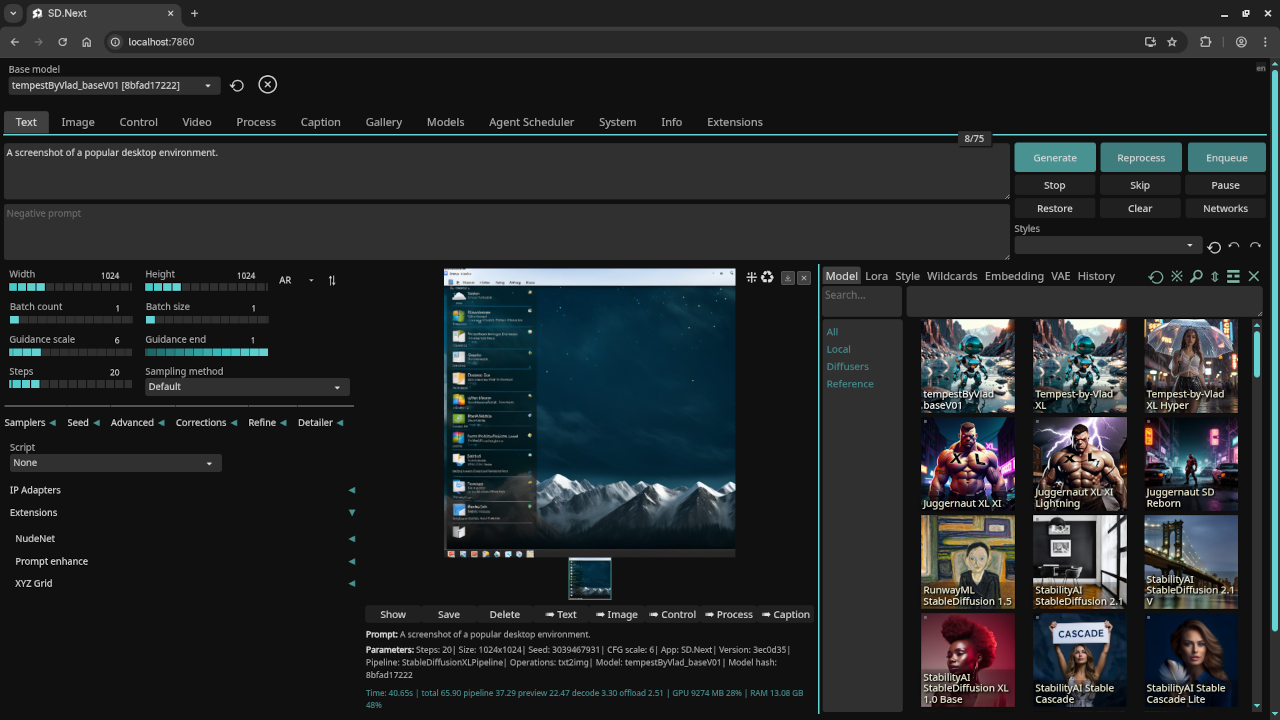
    SD.Next generated screenshot about the Desktop Environment
    Web Browser SD.Next Gnome Desktop Environment Screenshot Request.

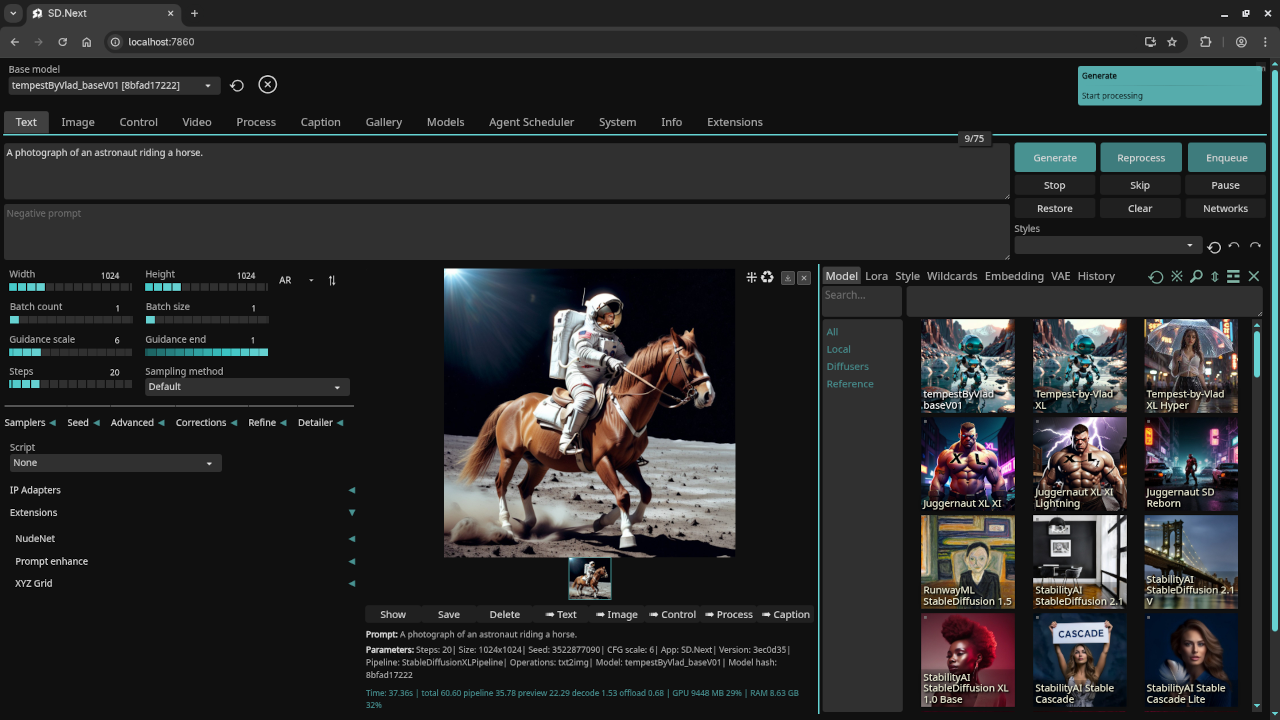
    SD.Next generated photo about the astronaut riding a horse
    Web Browser SD.Next Astronaut Riding A Horse Photo Request.

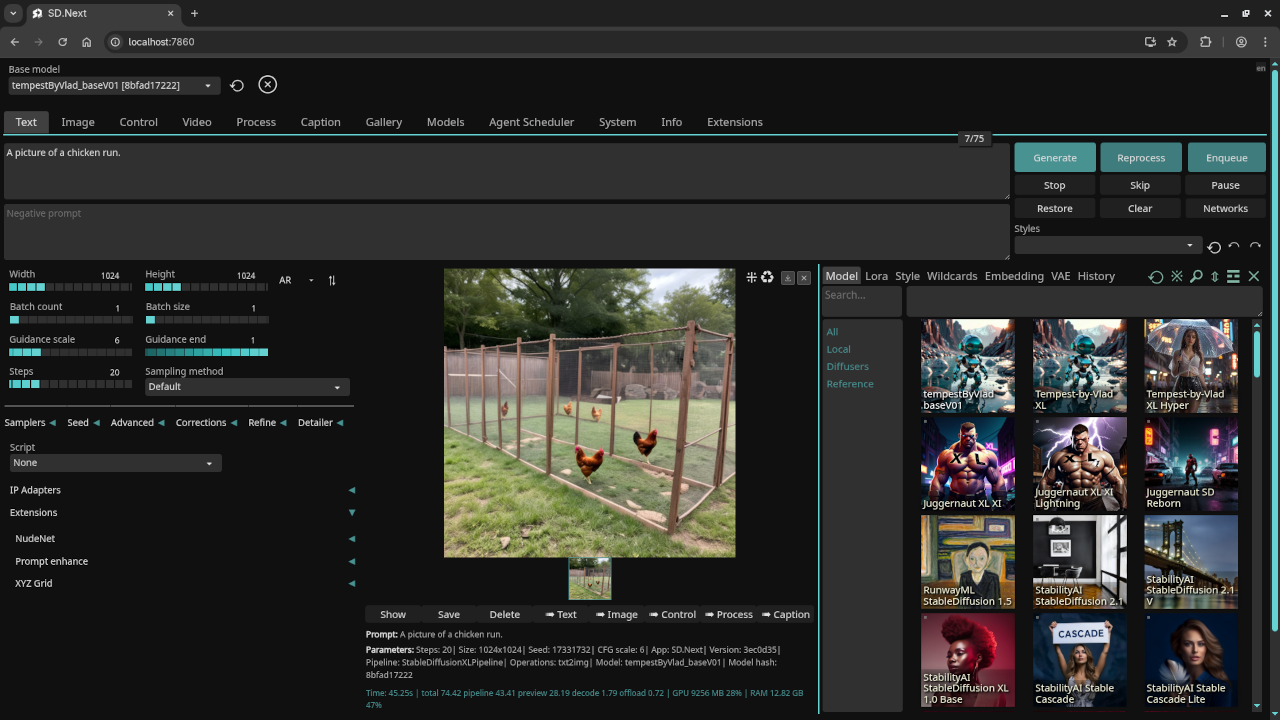
    SD.Next generated picture about the chicken run
    Web Browser SD.Next Chicken Run Picture Request.

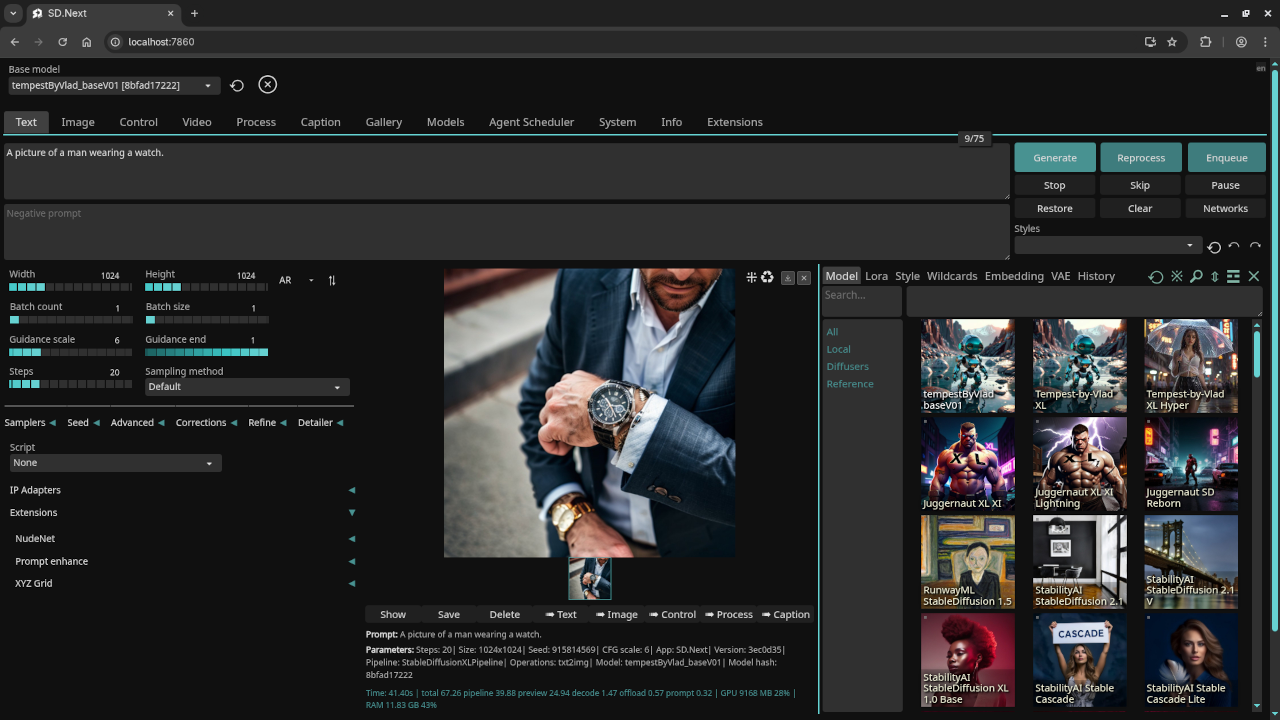
    SD.Next generated picture about the man wearing a watch
    Web Browser SD.Next Man Wearing A Watch Picture Request.

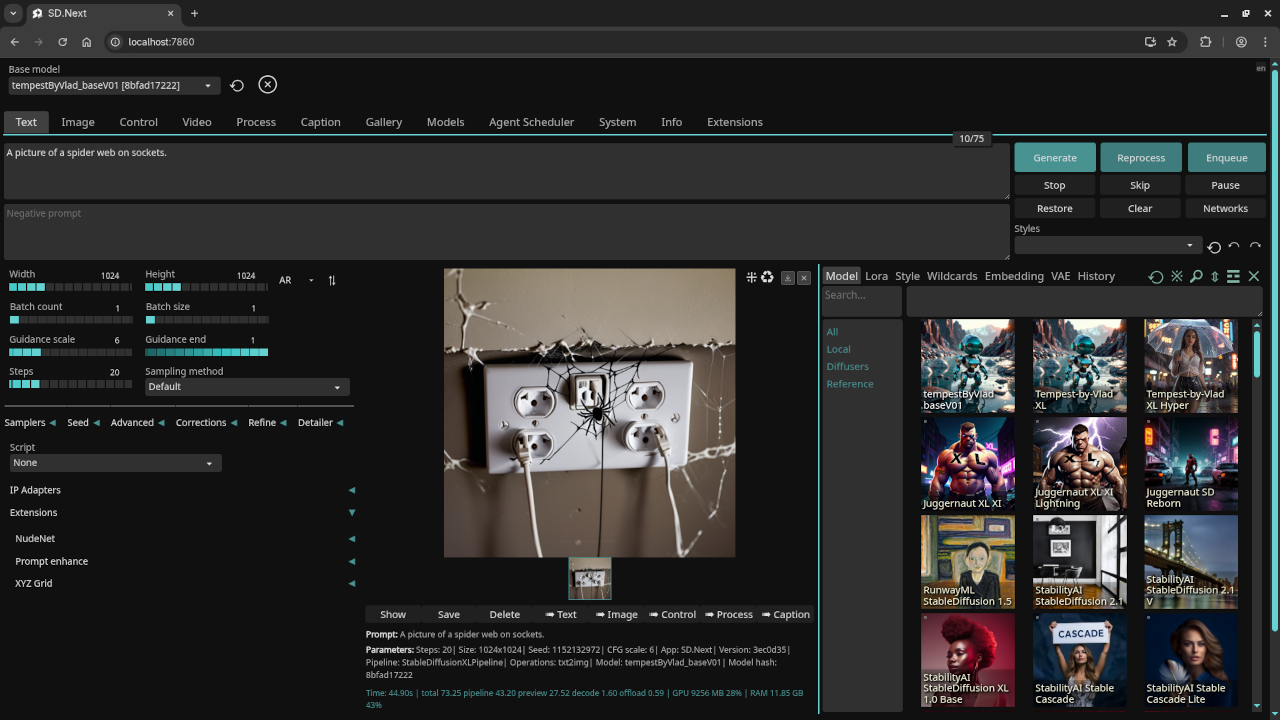
    SD.Next generated picture about the spider web on sockets
    Web Browser SD.Next Spider Web On Sockets Picture Request.

    Video Displaying Using SD.Next In Web Browser

    Before and After Training Results

    Type Example
    Pre-trained Add image of pre-trained generation
    Fine-tuned Add image of fine-tuned generation
    Model Used SD 1.5, custom model, or LoRA

    Results:

    A photograph of the mayor of Toronto

    Accurately drew a photograph of a past mayor of Toronto.

    A screenshot of the gnome desktop environment.

    Accurately drew a screenshot of an older version of the Gnome desktop environment.

    A photograph of an astronaut riding a horse.

    Accurately drew a photograph of an astronaut riding a horse.

    A picture of a chicken run.

    Accurately drew a picture of a chicken run.

    A picture of a man wearing a watch.

    Accurately drew a picture of a man wearing a watch.

    A picture of a spider web on sockets.

    Accurately drew a picture of a spider web on sockets.

    Further Learning

    Want to learn Python from scratch or improve your skills? Explore my beginner-friendly book and online course:

    One-on-One Python Tutoring and AI Installation Help

    I offer private online Python tutoring sessions and custom installation or migration of Stable Diffusion and SD.Next setups.

    Conclusion

    Running SD.Next on Fedora 42 with your AMD Instinct MI60 is both possible and efficient. By setting it up natively and using a dedicated partition, you maintain speed, flexibility, and control.

    Document your results, experiment with fine-tuning, and share your work with the community.

    Have questions or feedback? Leave a comment or reach out directly.