

Create an Animated Opening Box with Blender Python API and Display It on the Web
If you are new to Blender scripting or 3D web visualization, this post will guide you through generating a simple animated opening box using the Blender Python API. Then, I will show you how to export your model and display it in a web browser using the lightweight and popular <model-viewer> web component.
What You Will Learn
- How to write a Blender Python script that creates a box with a hinged lid that opens and closes.
- How to animate the lid swinging upward.
- How to export the model to GLTF/GLB format.
- How to embed and display the model on your website using
<model-viewer>. - How to run Blender Python scripts from the command line for automation.
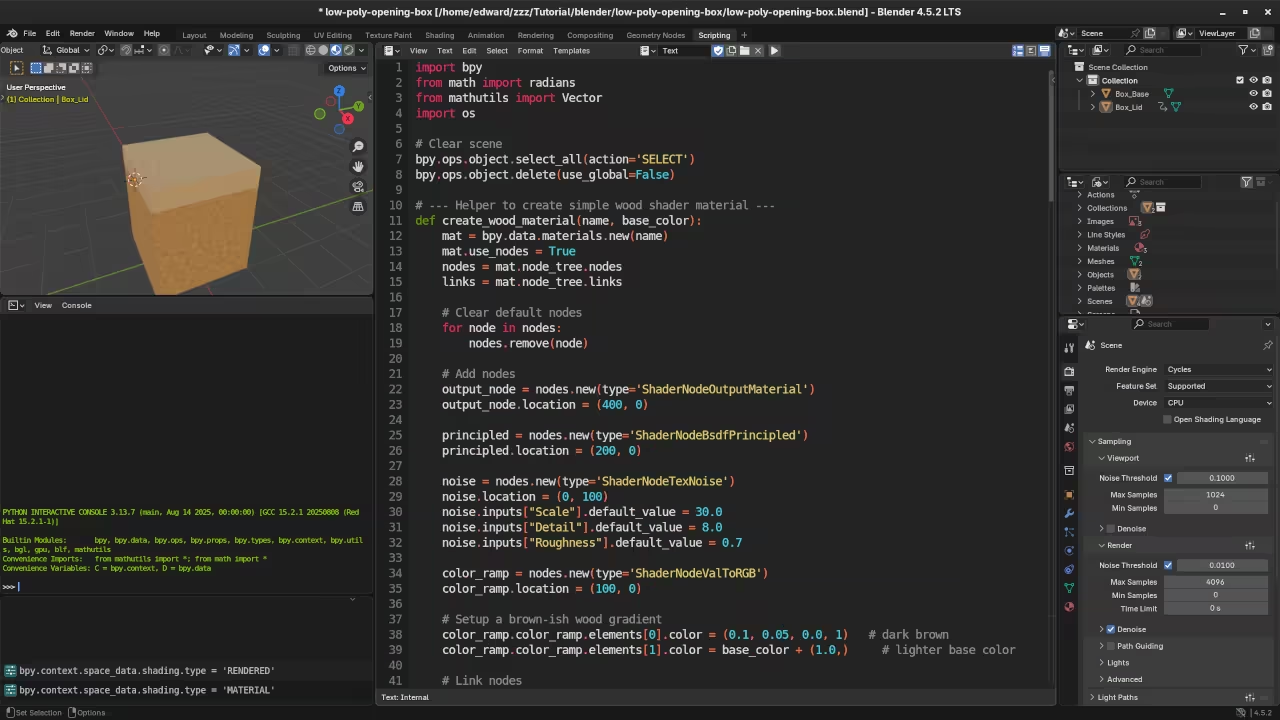
Step 1: Writing the Blender Python Script
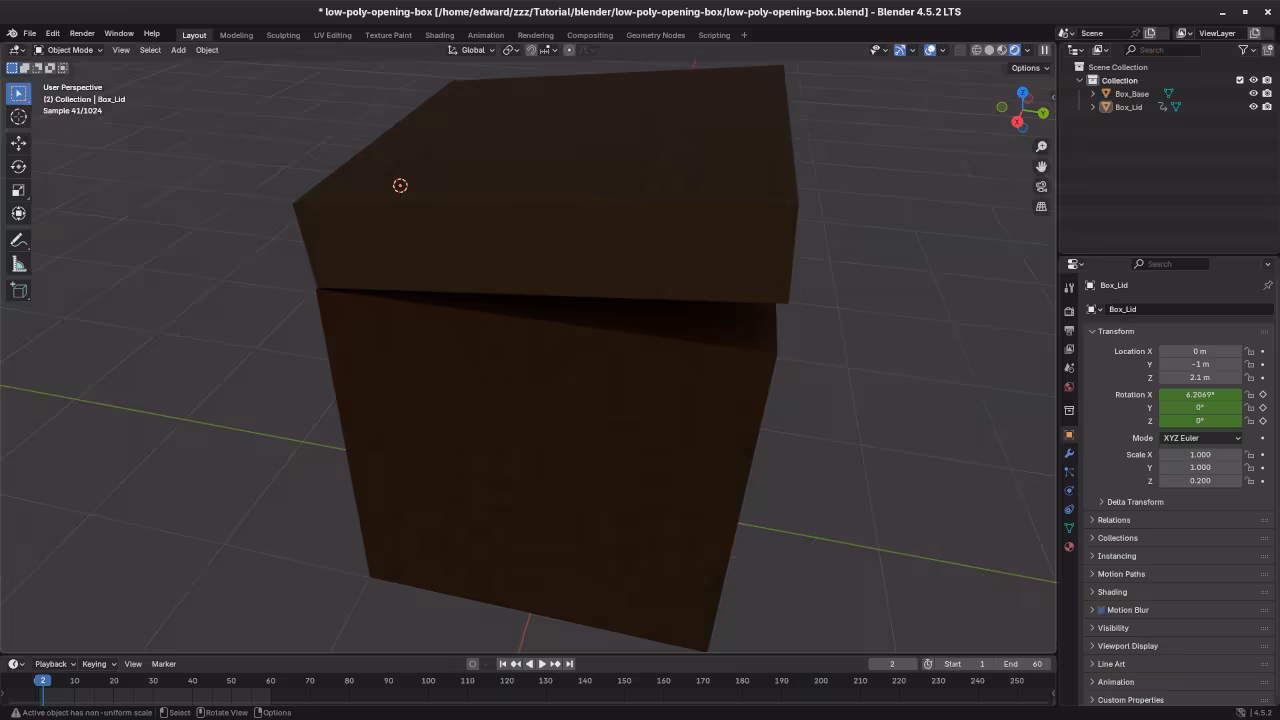
Using Blender’s Python API, you can automate the creation of 3D models and animations. The code snippet below creates a box with a hole, adds a lid with the hinge on the back edge, and animates the lid opening upwards.
import bpy
from math import radians
from mathutils import Vector
# ---------------------------
# Step 1: Clear scene
# ---------------------------
bpy.ops.object.select_all(action='SELECT')
bpy.ops.object.delete(use_global=False)
# ---------------------------
# Step 2: Wood Material Generator (Procedural)
# ---------------------------
def create_wood_material(name, base_color):
mat = bpy.data.materials.new(name)
mat.use_nodes = True
nodes = mat.node_tree.nodes
links = mat.node_tree.links
# Clear default nodes
for node in nodes:
nodes.remove(node)
# Add nodes
output_node = nodes.new(type='ShaderNodeOutputMaterial')
output_node.location = (400, 0)
principled = nodes.new(type='ShaderNodeBsdfPrincipled')
principled.location = (200, 0)
noise = nodes.new(type='ShaderNodeTexNoise')
noise.location = (0, 100)
noise.inputs["Scale"].default_value = 30.0
noise.inputs["Detail"].default_value = 8.0
noise.inputs["Roughness"].default_value = 0.7
color_ramp = nodes.new(type='ShaderNodeValToRGB')
color_ramp.location = (100, 0)
# Brown gradient
color_ramp.color_ramp.elements[0].color = (0.1, 0.05, 0.0, 1)
color_ramp.color_ramp.elements[1].color = base_color + (1.0,)
# Links
links.new(noise.outputs["Fac"], color_ramp.inputs["Fac"])
links.new(color_ramp.outputs["Color"], principled.inputs["Base Color"])
links.new(principled.outputs["BSDF"], output_node.inputs["Surface"])
return mat
# ---------------------------
# Step 3: Create Box & Lid
# ---------------------------
# Base
bpy.ops.mesh.primitive_cube_add(size=2, location=(0, 0, 1))
base = bpy.context.object
base.name = "Box_Base"
# Cutter
bpy.ops.mesh.primitive_cube_add(size=1.2, location=(0, 0, 1.9))
hole_cube = bpy.context.object
hole_cube.name = "Hole_Cutter"
# Boolean
bool_mod = base.modifiers.new(name="Hole", type='BOOLEAN')
bool_mod.object = hole_cube
bool_mod.operation = 'DIFFERENCE'
bpy.context.view_layer.objects.active = base
bpy.ops.object.modifier_apply(modifier=bool_mod.name)
bpy.data.objects.remove(hole_cube, do_unlink=True)
# Lid
bpy.ops.mesh.primitive_cube_add(size=2, location=(0, 0, 2.1))
lid = bpy.context.object
lid.name = "Box_Lid"
lid.scale.z = 0.2
bpy.context.view_layer.update()
# Hinge origin
hinge_pos = Vector((0, -1, 2.1))
bpy.context.scene.cursor.location = hinge_pos
bpy.ops.object.origin_set(type='ORIGIN_CURSOR')
# ---------------------------
# Step 4: Apply Materials
# ---------------------------
base_wood = create_wood_material("Base_Wood", (0.6, 0.3, 0.1))
lid_wood = create_wood_material("Lid_Wood", (0.8, 0.5, 0.2))
base.data.materials.append(base_wood)
lid.data.materials.append(lid_wood)
# ---------------------------
# Step 5: Animate Lid
# ---------------------------
lid.rotation_euler = (radians(0), 0, 0)
lid.keyframe_insert(data_path="rotation_euler", frame=1)
lid.rotation_euler = (radians(-90), 0, 0)
lid.keyframe_insert(data_path="rotation_euler", frame=30)
lid.rotation_euler = (radians(0), 0, 0)
lid.keyframe_insert(data_path="rotation_euler", frame=60)
action = lid.animation_data.action
for fcurve in action.fcurves:
for kp in fcurve.keyframe_points:
kp.interpolation = 'LINEAR'
bpy.context.scene.frame_start = 1
bpy.context.scene.frame_end = 60
bpy.context.scene.frame_set(1)
# ---------------------------
# ️ Step 6: Bake Procedural Materials to Images
# ---------------------------
def bake_material_to_image(obj, image_name, width=1024, height=1024):
# Set render engine
bpy.context.scene.render.engine = 'CYCLES'
bpy.context.scene.cycles.device = 'CPU'
# Create image
img = bpy.data.images.new(image_name, width=width, height=height)
# Create new image texture node and assign image
mat = obj.active_material
nodes = mat.node_tree.nodes
links = mat.node_tree.links
image_node = nodes.new('ShaderNodeTexImage')
image_node.image = img
mat.node_tree.nodes.active = image_node
# Select object and bake
bpy.ops.object.select_all(action='DESELECT')
obj.select_set(True)
bpy.context.view_layer.objects.active = obj
bpy.ops.object.bake(type='DIFFUSE', use_clear=True, use_selected_to_active=False,
use_cage=False, cage_extrusion=0.1, pass_filter={'COLOR'})
# Save baked image
img.filepath_raw = f"//{image_name}.png"
img.file_format = 'PNG'
img.save()
# Reconnect to BSDF
bsdf = next(n for n in nodes if n.type == 'BSDF_PRINCIPLED')
links.new(image_node.outputs['Color'], bsdf.inputs['Base Color'])
# Bake both objects
bake_material_to_image(base, "base_texture")
bake_material_to_image(lid, "lid_texture")
# ---------------------------
# Step 7: Export GLB
# ---------------------------
output_path = bpy.path.abspath("//animated_box.glb")
bpy.ops.export_scene.gltf(
filepath=output_path,
export_format='GLB', # GLB binary format
export_apply=True, # Apply modifiers
export_materials='EXPORT', # Export materials
export_animations=True, # Export animations
export_texcoords=True, # Export UVs (texture coordinates)
export_image_format='AUTO', # Image format: AUTO, PNG, JPEG, WEBP
export_image_add_webp=True, # Include WebP images as well (if possible)
export_image_webp_fallback=True, # Provide PNG fallback for WebP images
export_jpeg_quality=90, # JPEG image quality (1-100)
export_image_quality=90 # General image quality (1-100)
)
Step 2: Running the Script
You can run this script inside Blender’s Text Editor or automate it by running Blender from the command line. To run from the command line:
blender --background --python your_script_name.py --backgroundruns Blender without opening the GUI.--pythonexecutes the specified Python script.
This is great for automating batch jobs or running scripts on servers.
Step 3: Exporting the Model
Once your model is ready and animated, export it as a GLTF or GLB file:
- Go to File > Export > glTF 2.0 (.glb/.gltf).
- Choose
.glb(binary) for a single file. - Enable Include > Animation to keep the animation.
- Export your file.
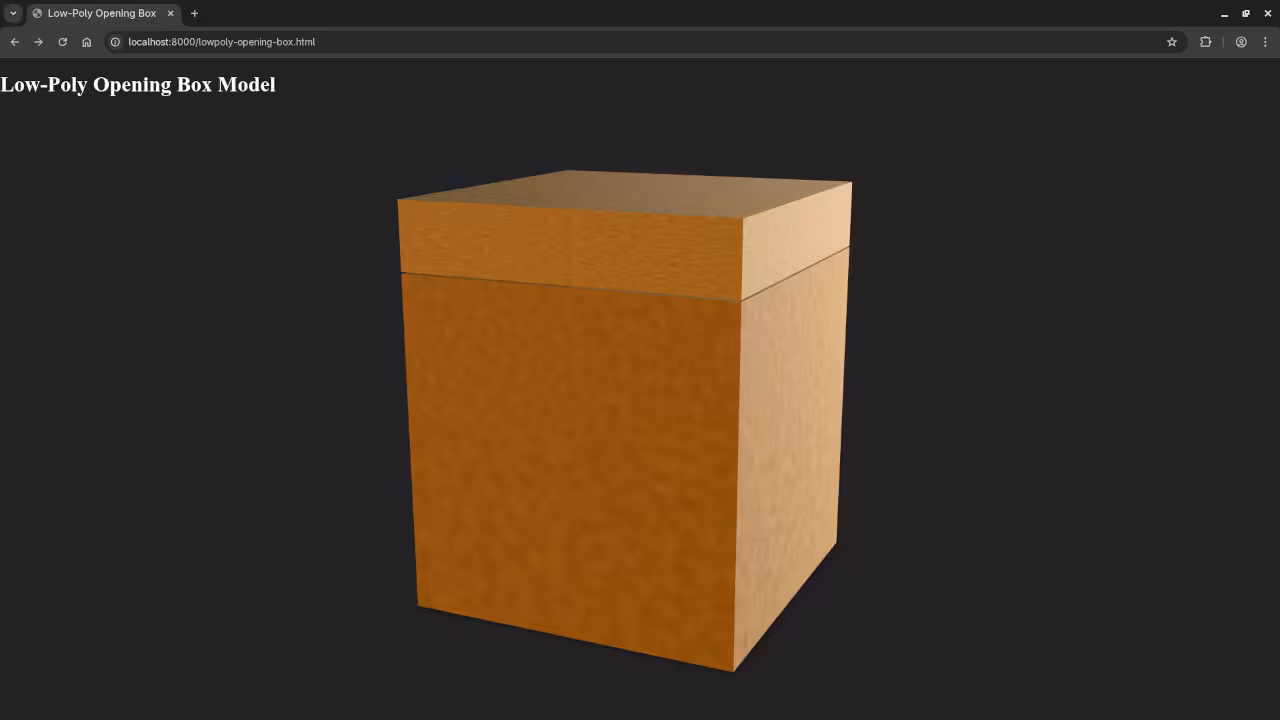
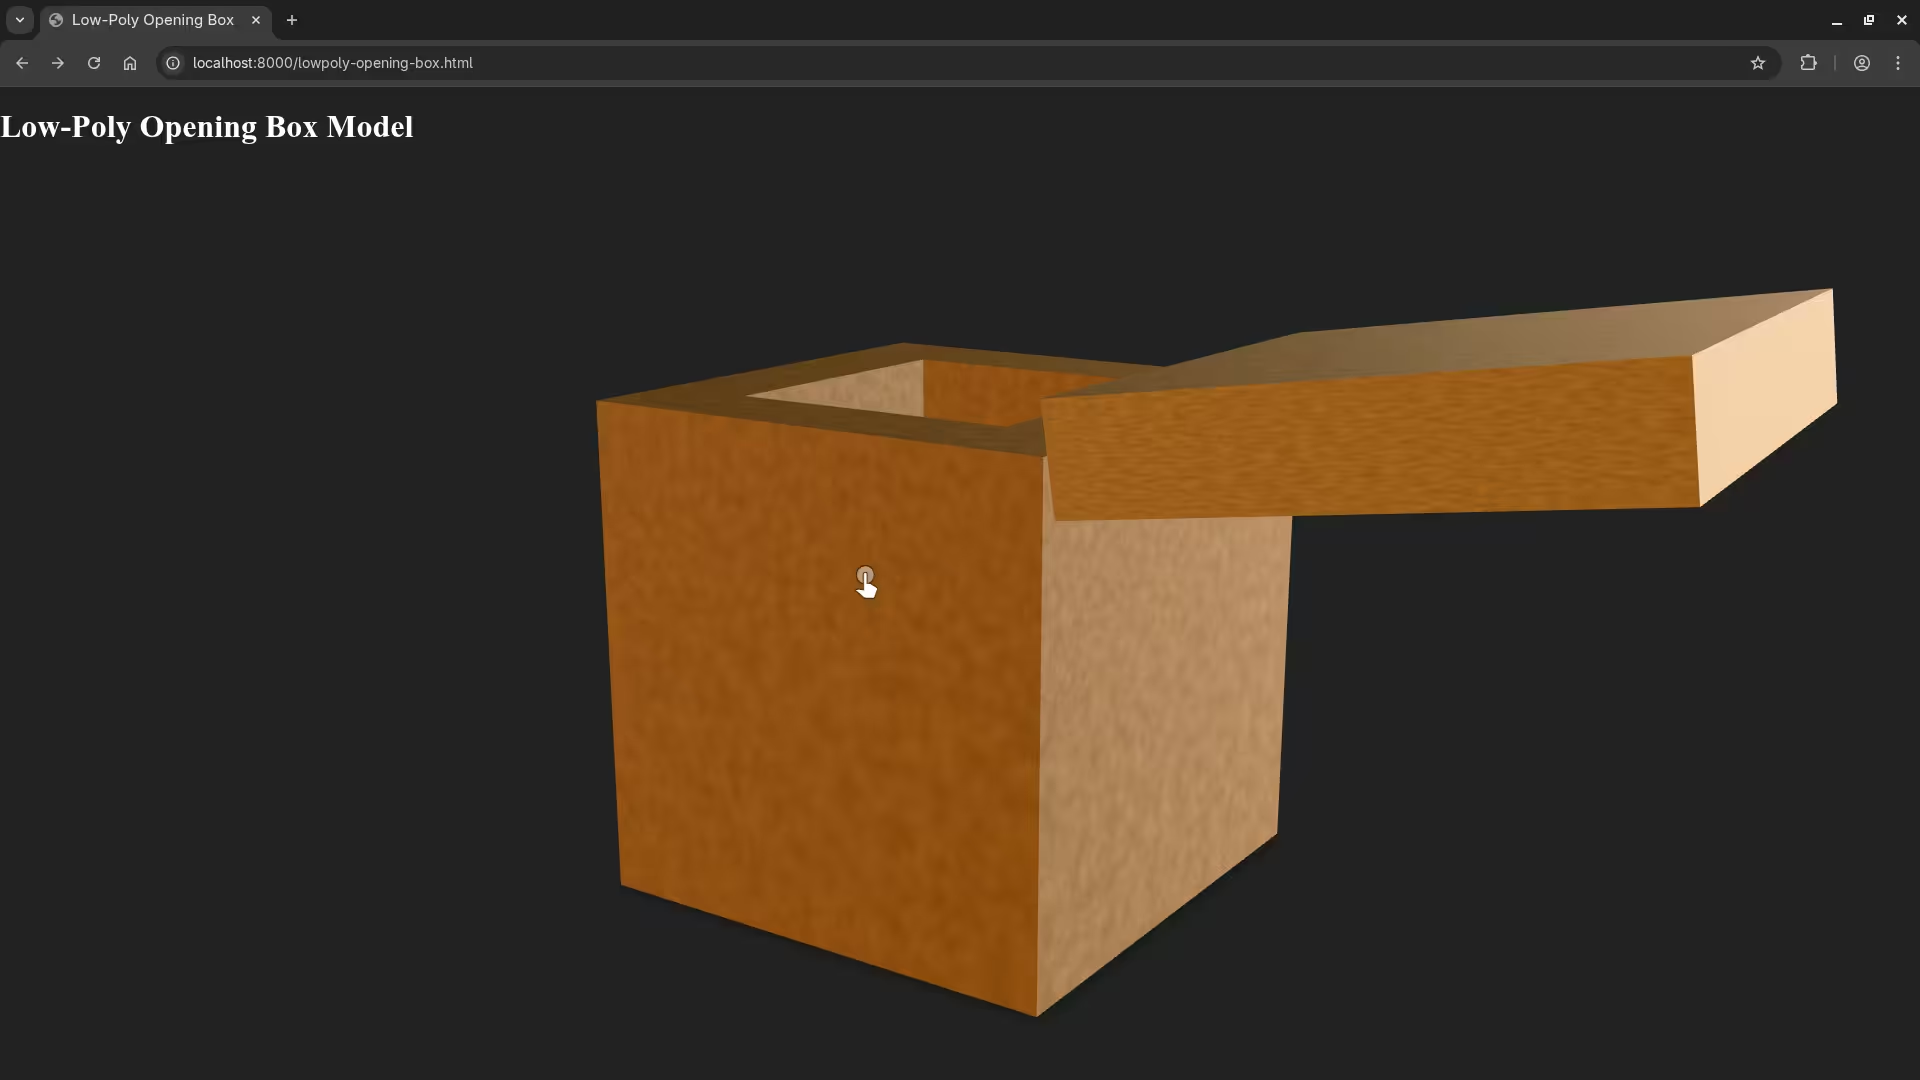
Step 4: Displaying the Model on the Web
Use the <model-viewer> web component to easily display your GLB model on any webpage.
Here is an example HTML snippet:
<script type="module" src="https://unpkg.com/@google/model-viewer/dist/model-viewer.min.js"></script>
<model-viewer src="path/to/your/box_model.glb"
alt="Opening Box"
auto-rotate
camera-controls
animation-name="YourAnimationName"
autoplay>
</model-viewer> Replace "path/to/your/animated_box.glb" with the actual path to your exported file.
📸 Screenshots & Screencast
Further Learning Resources
If you want to deepen your Python and Blender skills, check out these resources:
Books:
- Learning Python – Perfect for beginners diving into Python programming.
- Mastering Blender Python API – Learn advanced Blender scripting techniques.
Course:
- Learning Python – A practical online course tailored for new programmers.
One-on-One Tutoring:
I am available for personalized online Python tutorials, including Blender scripting. Feel free to contact me here to schedule a session.
I hope this helps you get started with Blender Python scripting and web-based 3D model visualization. Feel free to leave comments or questions below.
Happy coding and modeling!
🚀 Recommended Resources
Disclosure: Some of the links above are referral links. I may earn a commission if you make a purchase at no extra cost to you.