
Creating a Golden Potion Holder in Blender with Python and Displaying it in the Browser
In this tutorial, we will walk through creating a simple 3D potion holder in Blender using Python and displaying it in a web browser with the <model-viewer> tag. You’ll learn how to give the holder a golden color and add handles to it. The model will be lit with an HDR image of a courtyard in Blender 4.5 LTS. We’ll also explore which image formats are most compatible with web browsers for lighting and discuss the differences between HDR, EXR, KTX, and KTX2 formats.
This tutorial is beginner-friendly and assumes you have a basic understanding of Python and Blender. If you’re just starting out, be sure to check out my books Learning Python and Mastering Blender Python API for more in-depth tutorials!
What You’ll Need:
- Blender 4.5 LTS or later
- Python 3.x installed on your system
- Basic knowledge of Python and Blender
- Familiarity with HTML and web technologies like the <model-viewer> tag
Step 1: Setting Up Blender with Python
To start, let’s create a potion holder model in Blender using Python scripting. First, open Blender, go to the Scripting tab, and you’ll see a Python console and text editor where we can write and execute Python scripts to interact with Blender’s 3D objects.
Below is a Python script to create a simple potion holder and add handles to it:
import bpy
# Delete all objects in the scene
bpy.ops.object.select_all(action='SELECT')
bpy.ops.object.delete()
# Create the potion holder (a cylinder with a hollow interior)
bpy.ops.mesh.primitive_cylinder_add(vertices=32, radius=0.5, depth=1.5, location=(0, 0, 0))
potion_holder = bpy.context.object
# Scale it to resemble a potion holder
potion_holder.scale = (1, 1, 1.5)
# Create handles (toruses)
bpy.ops.mesh.primitive_torus_add(location=(0.6, 0, 0.75), rotation=(1.57, 0, 0), major_radius=0.2, minor_radius=0.05)
handle_1 = bpy.context.object
handle_1.scale = (1, 1, 0.5)
bpy.ops.mesh.primitive_torus_add(location=(-0.6, 0, 0.75), rotation=(1.57, 0, 0), major_radius=0.2, minor_radius=0.05)
handle_2 = bpy.context.object
handle_2.scale = (1, 1, 0.5)
# Apply a golden material to the potion holder
mat = bpy.data.materials.new(name="GoldenPotionMaterial")
mat.use_nodes = True
principled_shader = mat.node_tree.nodes["Principled BSDF"]
principled_shader.inputs["Base Color"].default_value = (1, 0.843, 0, 1) # Gold color
potion_holder.data.materials.append(mat)
# Optional: Add smooth shading
bpy.ops.object.shade_smooth()
# Add HDR lighting (courtyard HDRI)
bpy.context.scene.world.use_nodes = True
world_nodes = bpy.context.scene.world.node_tree.nodes
bg_node = world_nodes.get('Background')
env_texture = world_nodes.new('ShaderNodeTexEnvironment')
env_texture.image = bpy.data.images.load("path_to_your_courtyard_hdr_image.exr")
bg_node.inputs["Color"].connect(env_texture.outputs["Color"])
Step 2: Exporting the Model for the Web
Once the potion holder is created and you’ve applied the golden material, it’s time to export the model in a format suitable for web display. The most common format for 3D models on the web is glTF (.glb), which is compact and efficient for web rendering.
To export the model:
- Go to File > Export > Export As .glTF (.glb).
- Choose glTF Binary (.glb) to keep the file size smaller and ensure it includes all textures and materials.
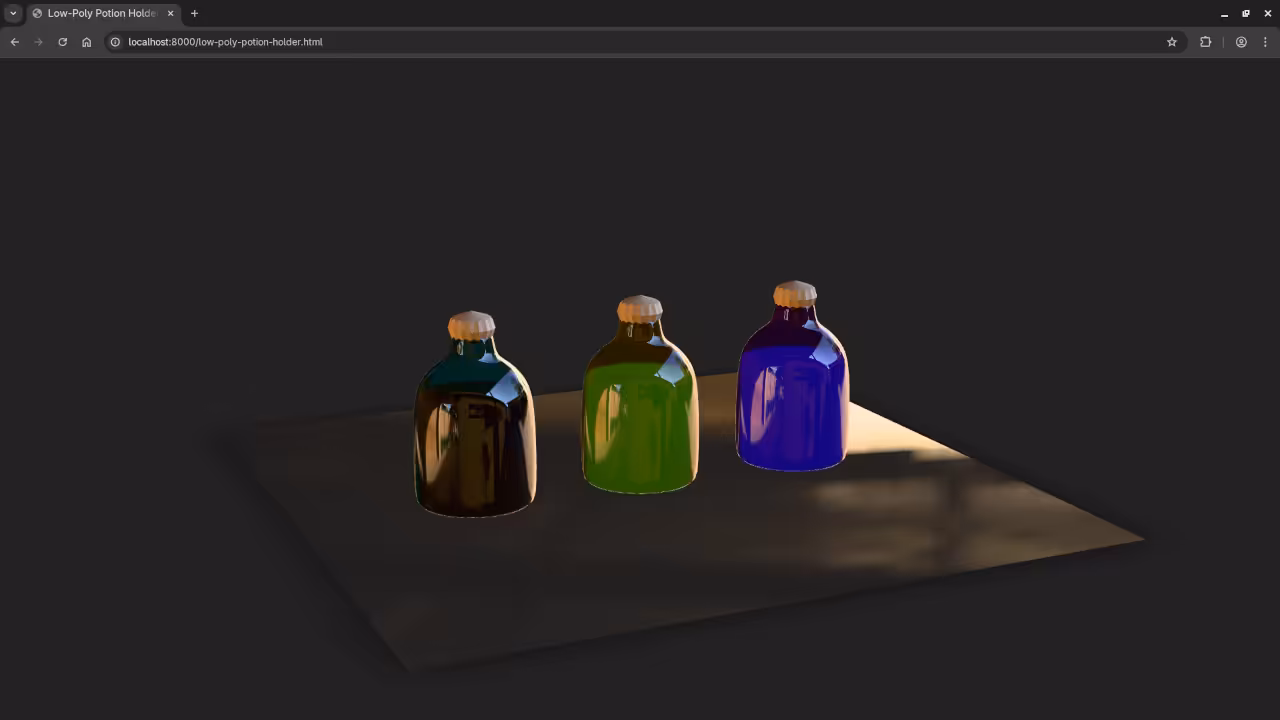
Step 3: Displaying the Model in the Browser
Now, let’s embed our 3D model into a web page using the <model-viewer> tag. This HTML tag makes it easy to showcase 3D models in any modern browser without needing complex frameworks.
Here’s the HTML code to display your potion holder model:
<h1>Golden Potion Holder</h1>
<model-viewer src="path_to_your_model.glb" alt="Potion Holder" auto-rotate camera-controls ar
shadow-intensity="1"
style="width: 100%; height: 500px;">
</model-viewer>
<script type="module" src="https://cdn.jsdelivr.net/npm/@google/model-viewer@2.5.0/dist/model-viewer.min.js"></script>
Replace path_to_your_model.glb with the actual path to your .glb file. This will allow your model to be interactively viewed in the browser with automatic rotation and camera controls.
Step 4: Lighting with HDR
For realistic lighting, we’ll use an HDR image in Blender. The .hdr and .exr formats are ideal for high-quality lighting, as they carry more dynamic range than standard image formats like PNG or JPG.
In Blender 4.5 LTS, there is a default courtyard.exr HDR image that works well. When rendering the scene, you can use this image to illuminate the model naturally.
Blender also supports the .ktx and .ktx2 formats, which are optimized for real-time applications and have better compression for large scenes. However, .hdr and .exr tend to have more robust support across applications like Blender and other rendering engines.
For web compatibility, .hdr and .exr are supported for high-quality scenes, but you may also consider converting HDR images to .ktx or .ktx2 for better performance in browsers.
Step 5: Running the Python Script on the Command Line
To run the Python script from the command line:
- Save the script as create_potion_holder.py.
- Open your terminal and navigate to the Blender directory (or ensure Blender is in your PATH).
- Run the script by executing the following command:
blender --background --python create_potion_holder.py This command will execute the Python script in the background and create the potion holder model.
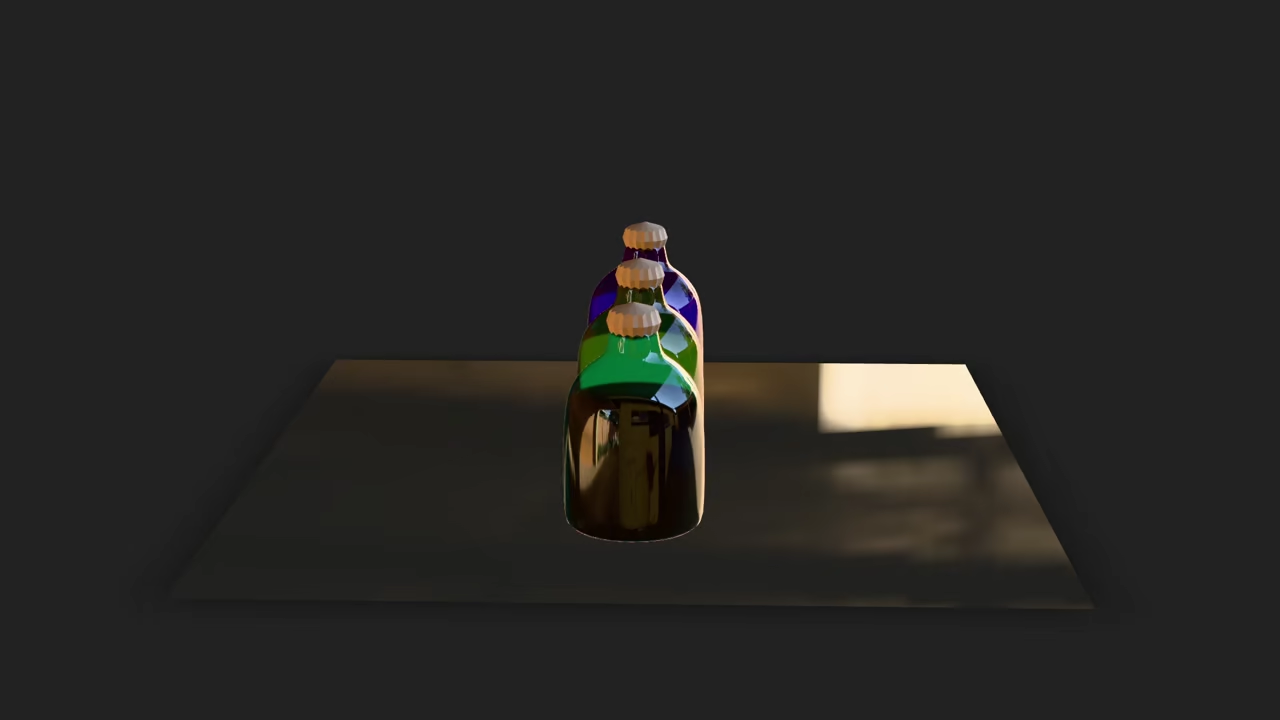
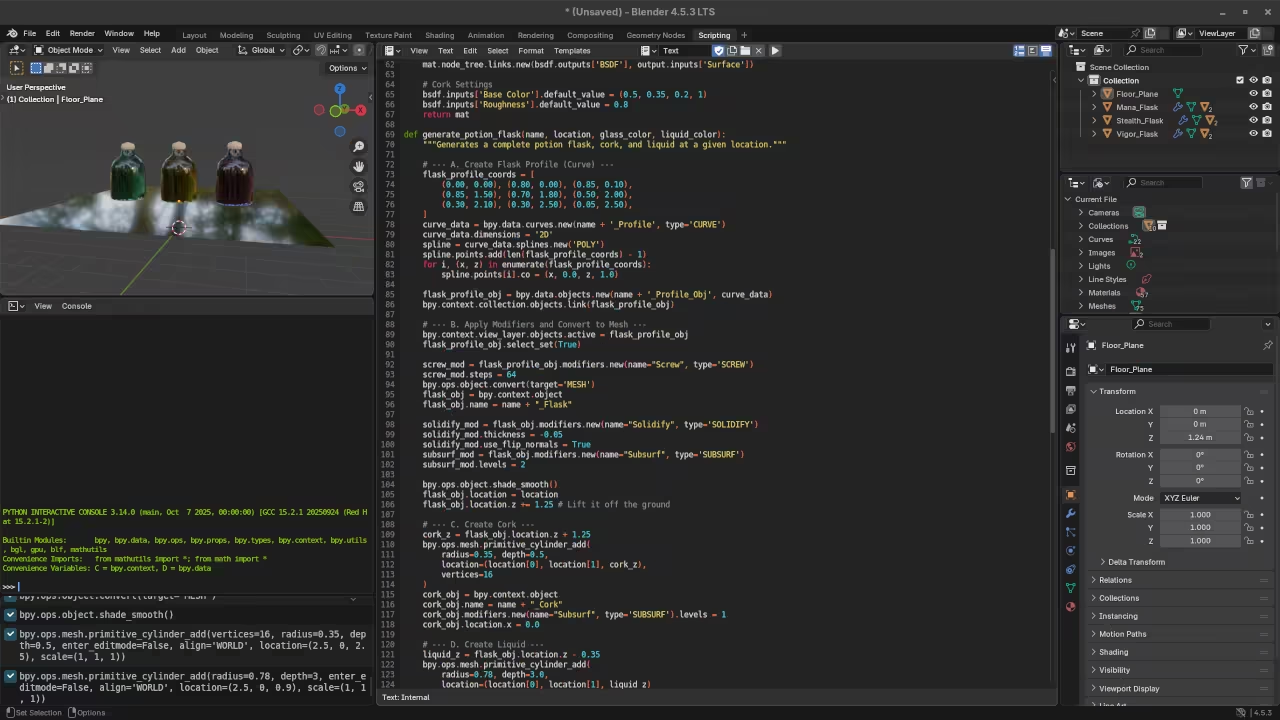
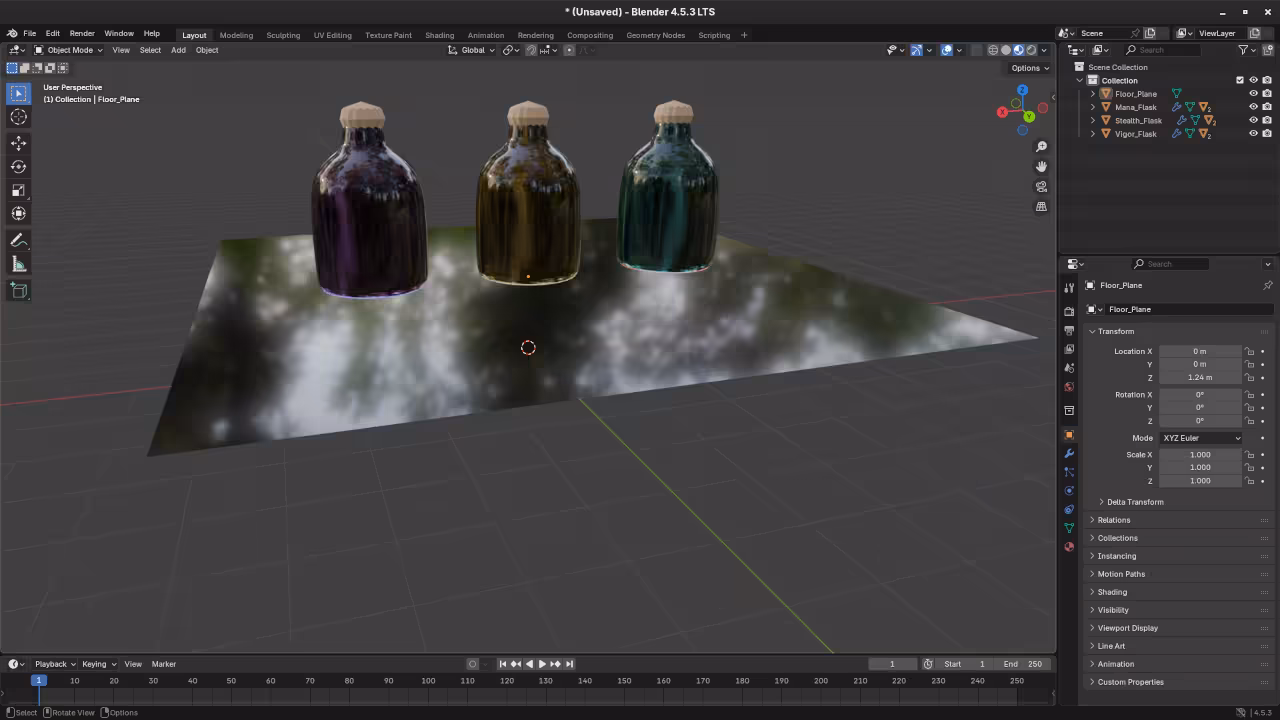
📸 Screenshots & Screencast
Conclusion
You’ve now learned how to create a 3D potion holder using Blender’s Python API, apply a golden material, light the scene with an HDR image, and display the model in a web browser using the <model-viewer> tag. This process gives you the foundation for integrating 3D models into web projects with Python and Blender.
For more in-depth tutorials, check out my books Learning Python and Mastering Blender Python API. If you’re interested in personalized learning, I offer one-on-one Python tutorials, including Blender, via my contact page.
Also, be sure to check out my course Learning Python for a hands-on, interactive experience!
Happy coding, and happy modeling!
🚀 Recommended Resources
Disclosure: Some of the links above are referral links. I may earn a commission if you make a purchase at no extra cost to you.