
What is Git?
Git is a powerful, open-source version control system (VCS) used by software developers around the world. If you’re just starting out in programming or software development, understanding Git is crucial. In this post, we’ll cover the basics of Git, why it’s so important, and how to run it on the command line.
Why Should You Use Git?
- Track Changes: Git keeps a detailed history of all your changes, so you can go back in time to see what happened.
- Collaboration: If you’re working with a team, Git helps you merge changes from multiple developers without overwriting anyone’s work.
- Branching and Merging: Git allows you to create branches, so you can work on new features or bug fixes without disrupting the main codebase. Once you’re done, you can merge your changes back.
- Backup: Since Git allows you to push your code to remote repositories (like GitHub or GitLab), you have a backup of your work stored online.
- Free and Open-Source: Git is free and open-source, making it accessible for developers of all skill levels.
How to Run Git on the Command Line
Getting started with Git on the command line can seem intimidating, but it’s quite simple once you know the basics. Below are the essential Git commands you’ll need to get started:
1. Install Git
First, you’ll need to install Git. If you haven’t already, you can download it from the official Git website here.
2. Check if Git is Installed
Once installed, open the terminal or command prompt and type the following command to check if Git is correctly installed:
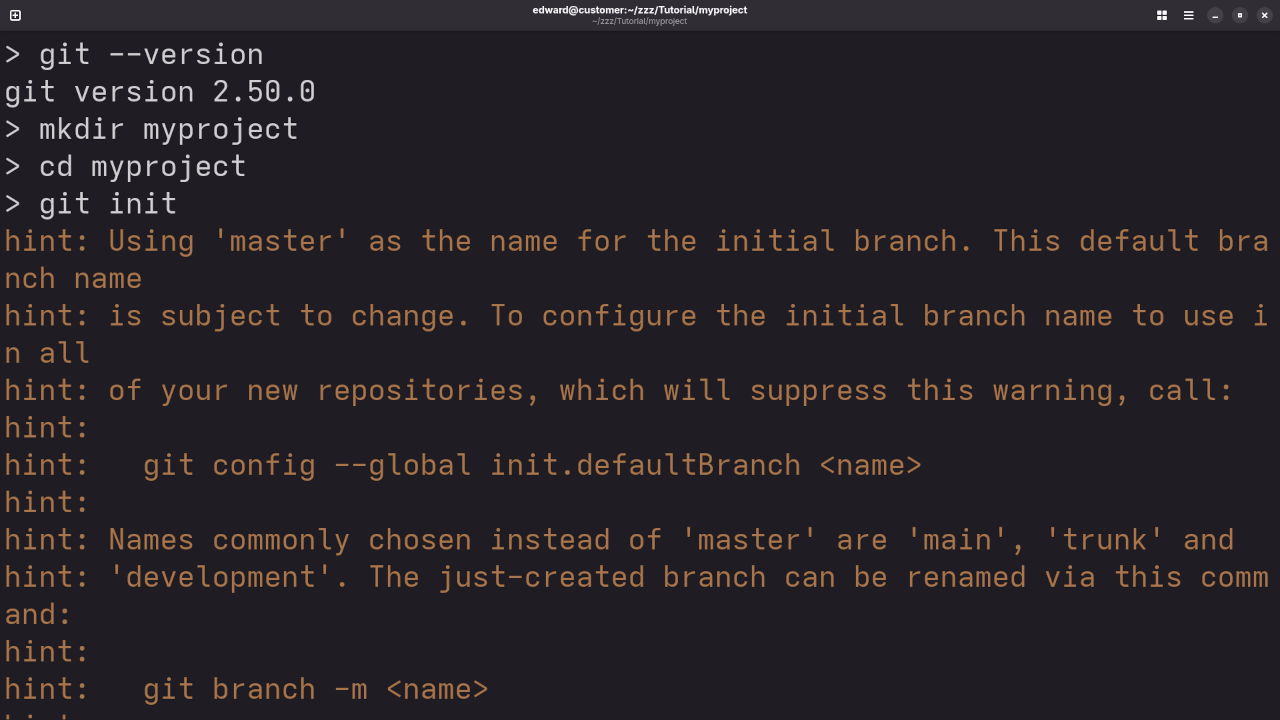
git --version This will display the version of Git installed on your system.
Basic Git Commands
Here are some basic Git commands that will help you get started:
1. git init
Initializes a new Git repository in your project directory. Run this command inside your project folder.
git init This will create a hidden .git folder in your project, where all the version control data will be stored.
2. git add
After making changes to your files, you can add them to the staging area using the following command:
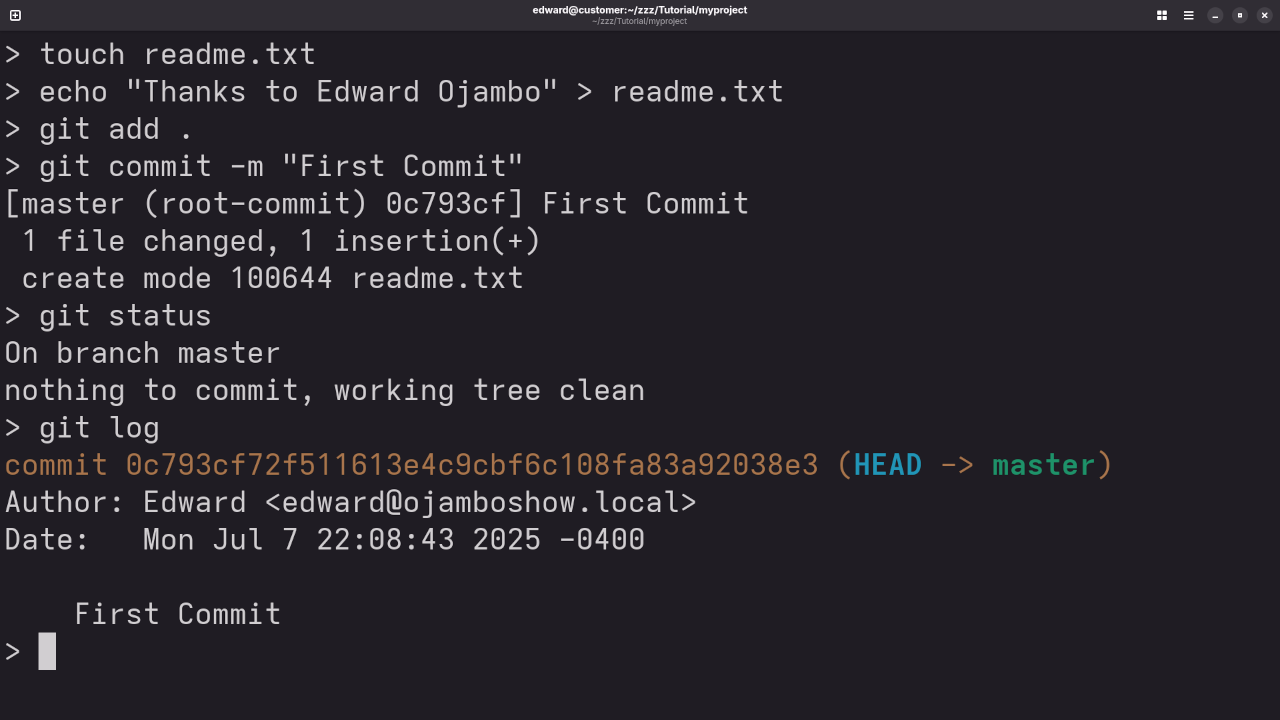
git add . This will add all changed files in the directory to the staging area. If you only want to add specific files, you can replace the period (.) with the file name(s).
3. git commit
Once the files are staged, you need to commit the changes to your local Git repository:
git commit -m "Your commit message here" The commit message should describe the changes you’ve made.
4. git status
To see the current state of your repository, use the git status command:
git status This shows you what files have been modified, which files are staged for commit, and which files are untracked.
5. git log
This command shows the commit history of the repository:
git log You’ll see a list of commits, along with the commit message, author, and timestamp.
Screenshots/Visual Guide
Watch the Live Screencast
To see Git in action, check out this live screencast where I walk through setting up and using Git on the command line:
Learn More About Git and Programming
If you’re looking to dive deeper into Git and programming, I have a collection of programming books available on Amazon. You can browse them here.
Additionally, I offer a variety of online programming courses that cover topics from Git to web development and beyond. You can check them out here.
If you prefer personalized, one-on-one online programming tutorials, I also offer one-on-one sessions. Feel free to contact me for more details and to schedule a tutorial here.
Conclusion
Git is an essential tool for developers, and getting started with it will make your coding journey much smoother. With its ability to track changes, support collaboration, and provide backups, Git is something every developer should learn.
I hope this guide helps you take the first step into using Git. Feel free to ask any questions or share your experience in the comments below!
🚀 Recommended Resources
Disclosure: Some of the links above are referral links. I may earn a commission if you make a purchase at no extra cost to you.