
Introduction
In this beginner-level tutorial, we’ll walk through the process of creating a golden cube using the Blender Python API and displaying it in a web browser using the <model-viewer> element. This simple process will teach you how to work with 3D models in Blender and embed them in websites with minimal effort.
By the end of this tutorial, you’ll:
- Generate a golden cube in Blender using Python.
- Export the cube as a .glb file.
- Embed the .glb model in a webpage using the <model-viewer> element.
Let’s get started!
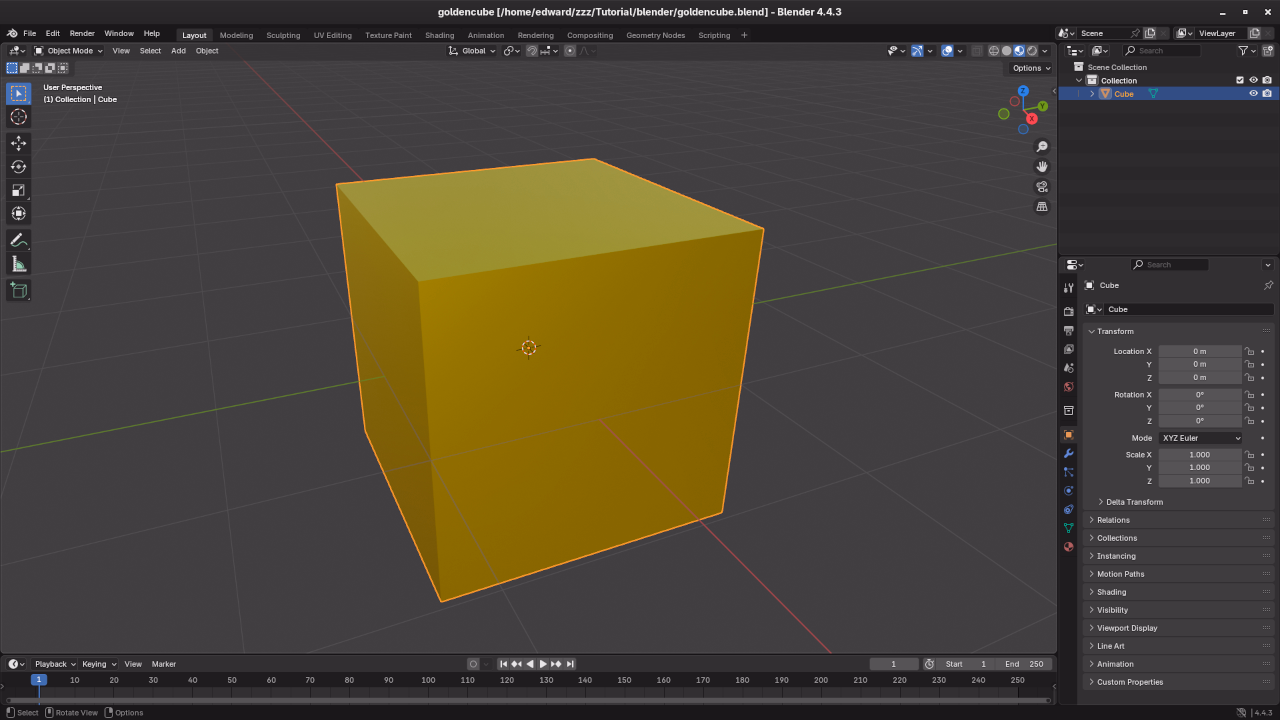
Step 1: Create the Golden Cube in Blender Using Python
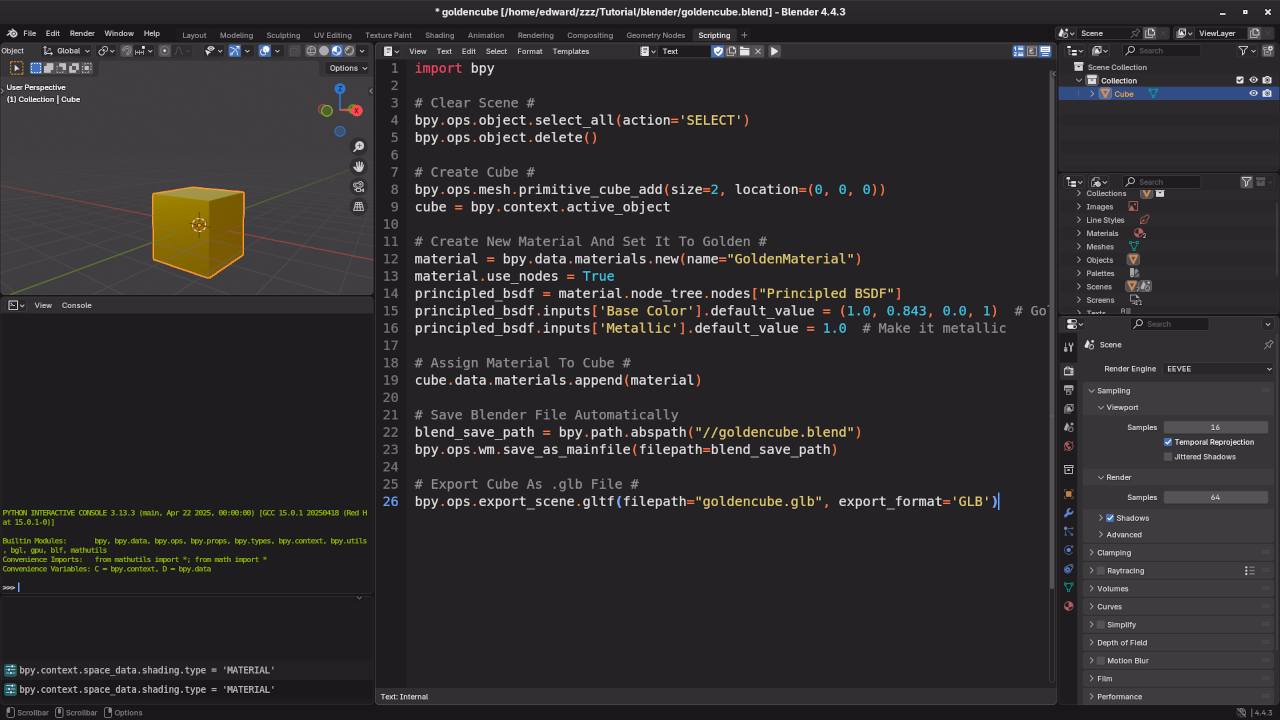
First, we’ll use the Blender Python API to generate a simple cube and apply a golden material. This is done by writing a Python script inside Blender’s scripting workspace.
Here’s the Python code that creates the cube:
import bpy
# Clear any existing mesh objects
bpy.ops.object.select_all(action='SELECT')
bpy.ops.object.delete()
# Create a new cube
bpy.ops.mesh.primitive_cube_add(size=2)
cube = bpy.context.object
# Create a new material for the golden effect
material = bpy.data.materials.new(name="GoldenMaterial")
material.use_nodes = True
bsdf = material.node_tree.nodes["Principled BSDF"]
bsdf.inputs["Base Color"].default_value = (1.0, 0.84, 0.0, 1) # Gold color
bsdf.inputs["Roughness"].default_value = 0.2 # Slightly shiny
# Assign the material to the cube
cube.data.materials.append(material)
# Save the model as a GLB file
bpy.ops.export_scene.gltf(filepath="/path/to/your/golden_cube.glb", export_format='GLB')
Steps to run the script:
- Open Blender and switch to the Scripting workspace.
- Paste the code in the text editor.
- Click Run Script.
- The cube will appear in the scene with a golden material applied.
- The script will export the cube as a .glb file to the specified directory.
Step 2: Export the Cube as a GLB File
Once you run the script, Blender will create the golden cube and automatically export it as a .glb file. This file can now be used to display the model in any web project.
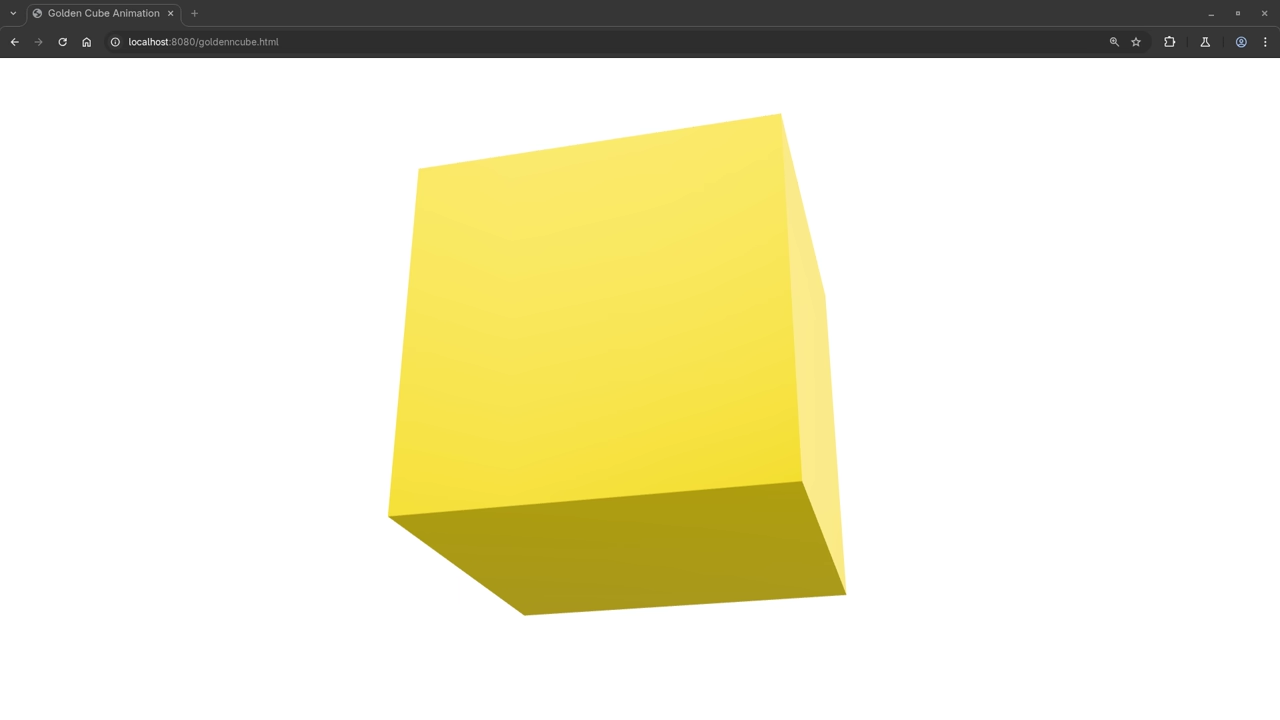
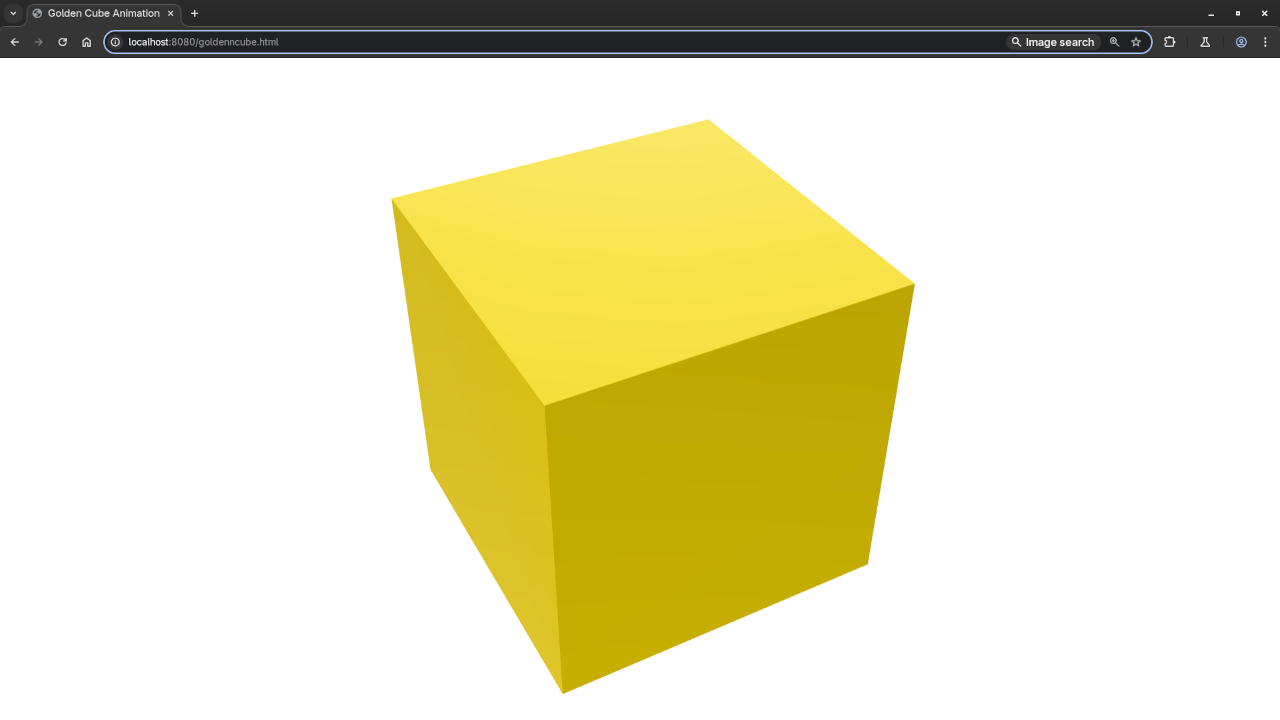
Step 3: Display the Golden Cube in Your Web Browser Using <model-viewer>
To display the golden cube in your web browser, we’ll use the <model-viewer> tag. This HTML tag is simple to use and allows you to embed 3D models in your website without needing to write complex WebGL or JavaScript code.
Here’s the basic HTML code to display the cube in your browser:
<!DOCTYPE html>
<html lang="en">
<head>
<meta charset="UTF-8">
<meta name="viewport" content="width=device-width, initial-scale=1.0">
<title>Golden Cube</title>
<script type="module">
import '@google/model-viewer';
</script>
<style>
body, html {
margin: 0;
padding: 0;
overflow: hidden;
height: 100%;
}
model-viewer {
width: 400px; /* Fixed size */
height: 400px; /* Fixed size */
display: block;
margin: 0 auto;
background-color: #f5f5f5;
border: 1px solid #ddd;
}
</style>
</head>
<body>
<model-viewer
src="path/to/your/golden_cube.glb"
alt="Golden Cube"
auto-rotate
camera-controls
disable-zoom>
</model-viewer>
</body>
</html>
Explanation:
- src=”path/to/your/golden_cube.glb”: Replace this with the path to your .glb file.
- auto-rotate: This will make the model rotate automatically.
- camera-controls: Allows users to interact with the model, rotate it, and zoom in and out.
- disable-zoom: This stops the model from zooming in and out when users scroll with the mouse.
Step 4: Running the Python Script from the Command Line
You can also run the Blender Python script from the command line to automate the process. Here’s how:
- Open your command-line interface (Terminal on macOS/Linux, Command Prompt on Windows).
- Navigate to your Blender directory.
- Run the following command to execute the script:
blender --background --python /path/to/your/script.py This command tells Blender to run in the background and execute the Python script, which will create the golden cube and export it as a .glb file.
Step 5: Adding Screenshots and YouTube Live Screencast
Learn More About Python and Blender
If you enjoyed this tutorial, be sure to check out my books and course to further your Python programming skills:
I also offer one-on-one online Python tutorials, including Blender-specific lessons. Feel free to reach out via my contact page for personalized help!
Conclusion
Congratulations! You’ve successfully learned how to generate a golden cube in Blender using the Python API and display it in a web browser using the simple <model-viewer> tag. This is just one of the many things you can achieve with Blender and Python. Keep experimenting and creating amazing 3D models!
🚀 Recommended Resources
Disclosure: Some of the links above are referral links. I may earn a commission if you make a purchase at no extra cost to you.