

How to Install Froxlor with Wildcard SSL Using Podman-Compose: A Simple Beginner’s Guide
Introduction:
In this guide, we’ll install Froxlor inside Podman containers using podman-compose for simplified management. We’ll walk through how to set up everything from Nginx and MariaDB to Wildcard SSL. The benefit of using podman-compose is that it automates the entire process, managing multiple containers seamlessly with a simple configuration file.
If you’ve ever used Docker Compose, this process will feel familiar but with Podman, a container engine that is completely compatible with Docker tools and syntax.
Let’s go ahead and set up Froxlor in Podman containers!
Prerequisites:
Make sure you have:
- Podman and podman-compose installed. You can install them using these commands:
On Ubuntu/Debian-based systems:
sudo apt update
sudo apt install -y podman podman-compose On CentOS/RHEL-based systems:
sudo dnf install -y podman podman-compose - Basic understanding of SSL certificates, containers, and command-line usage.
- Access to your server via SSH.
Step 1: Set Up the Podman-Compose Environment
1.1 Create a Working Directory for Your Setup
Let’s begin by creating a directory where we’ll store the podman-compose configuration files and any necessary assets.
mkdir -p ~/froxlor-container
cd ~/froxlor-container 1.2 Create the podman-compose.yml File
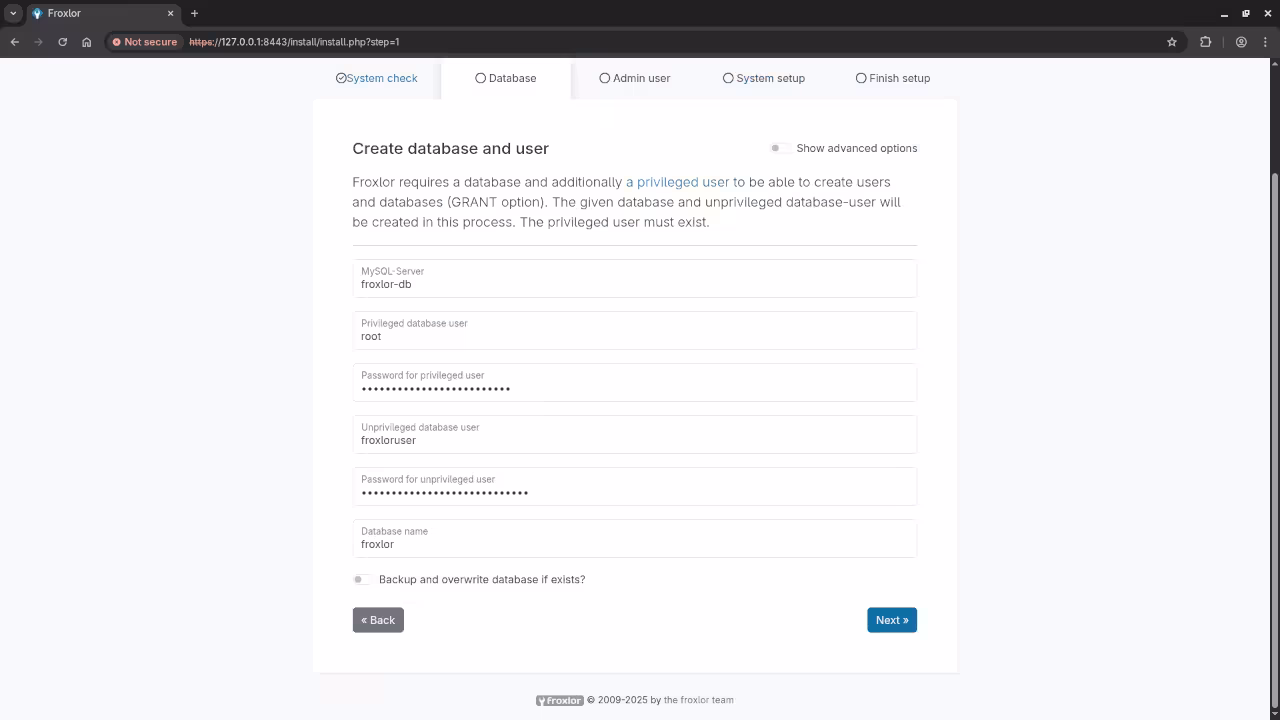
Now, let’s create a podman-compose.yml file that will define the Podman containers for MariaDB, Nginx, and Froxlor.
Create the podman-compose.yml file in your ~/froxlor-container directory:
version: '3'
services:
froxlor-db:
image: mariadb:latest
container_name: froxlor-db
environment:
MYSQL_ROOT_PASSWORD: rootpassword
MYSQL_DATABASE: froxlor
MYSQL_USER: froxloruser
MYSQL_PASSWORD: froxlorpassword
volumes:
- froxlor-db-data:/var/lib/mysql
restart: always
froxlor-web:
image: nginx:latest
container_name: froxlor-web
ports:
- "80:80"
- "443:443"
volumes:
- ./froxlor:/var/www/froxlor
- ./nginx:/etc/nginx/conf.d
- ./ssl:/etc/ssl
depends_on:
- froxlor-db
restart: always
volumes:
froxlor-db-data: Explanation:
- froxlor-db: This container runs the MariaDB database for Froxlor.
- froxlor-web: This container runs Nginx, which will serve Froxlor and handle HTTPS connections.
- Volumes: We are mounting local directories into the container for Froxlor files, Nginx configuration, and SSL certificates.
- depends_on ensures the database container is started before the web server.
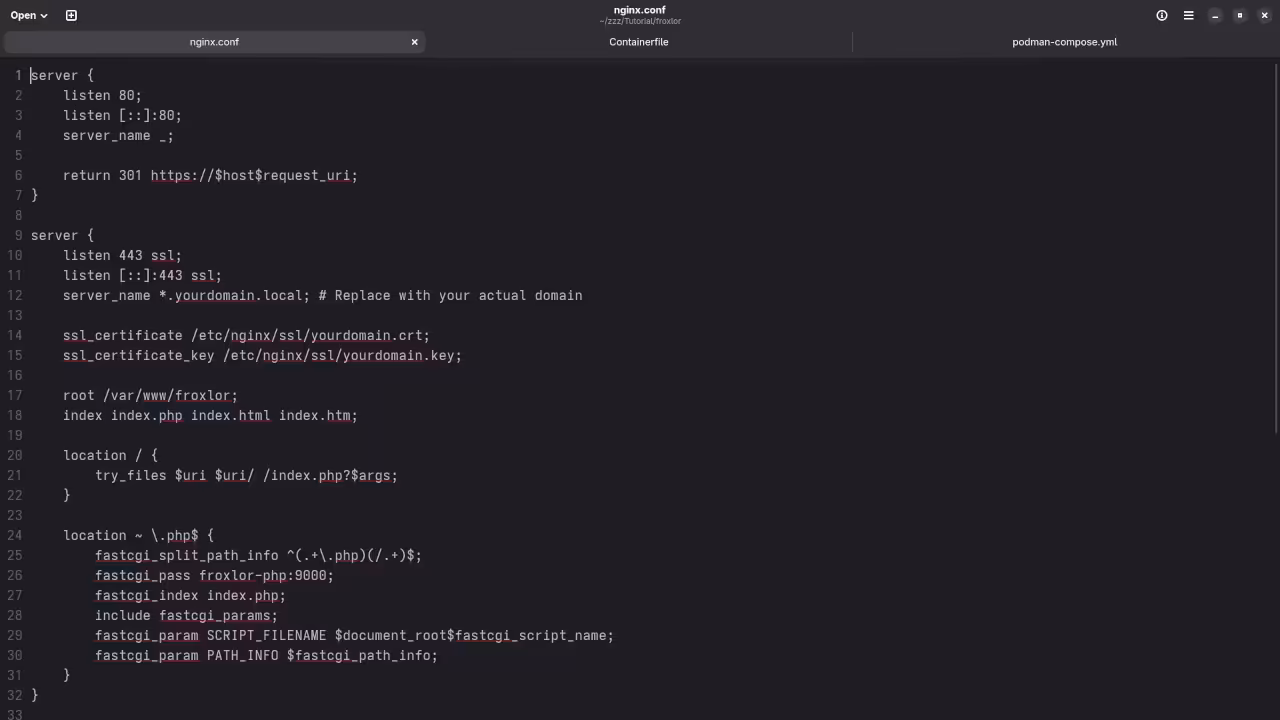
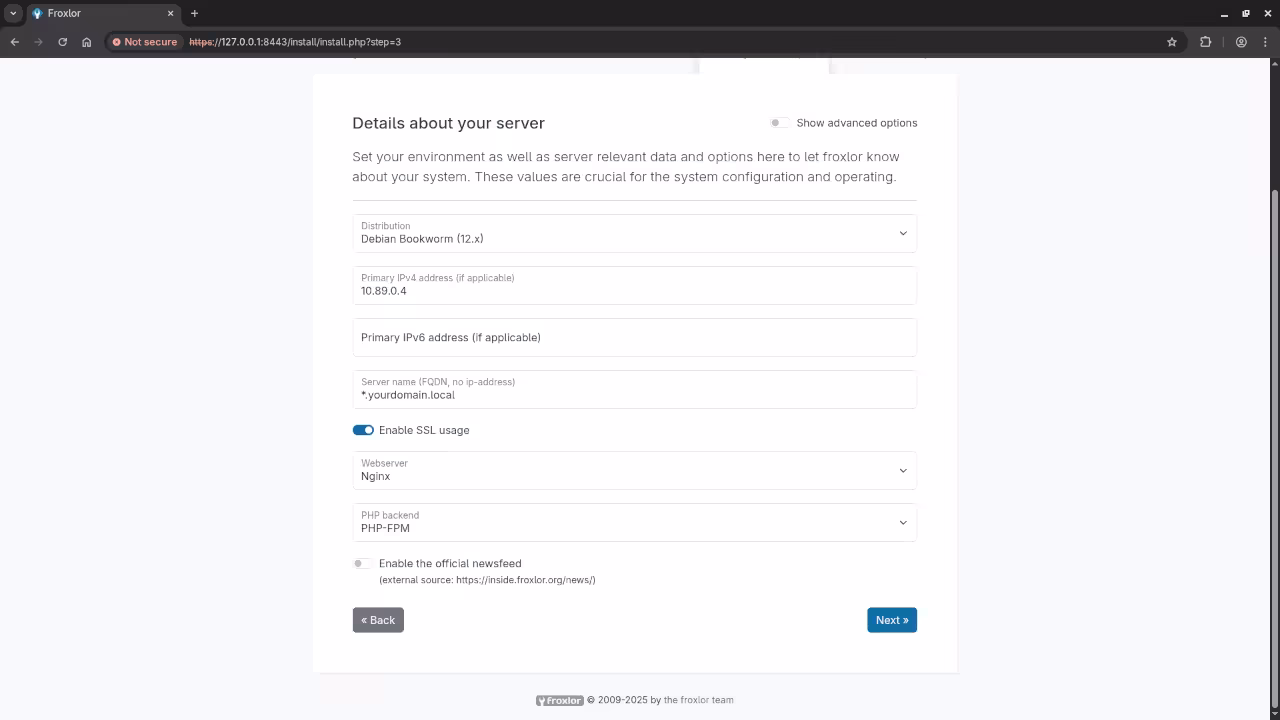
Step 2: Configure Nginx for Froxlor
Now, let’s set up the Nginx configuration so that it can serve Froxlor and handle the SSL certificates.
mkdir nginx Then create the default.conf file inside the nginx directory:
server {
listen 80;
server_name example.com *.example.com;
location / {
return 301 https://$host$request_uri;
}
}
server {
listen 443 ssl;
server_name example.com *.example.com;
ssl_certificate /etc/ssl/example.com.crt;
ssl_certificate_key /etc/ssl/example.com.key;
root /var/www/froxlor;
index index.php index.html;
location / {
try_files $uri $uri/ =404;
}
location ~ \.php$ {
fastcgi_pass php:9000;
fastcgi_index index.php;
fastcgi_param SCRIPT_FILENAME /var/www/froxlor$fastcgi_script_name;
include fastcgi_params;
}
} This configuration:
- Redirects HTTP traffic to HTTPS.
- Uses SSL certificates for secure HTTPS traffic.
- Serves Froxlor from
/var/www/froxlor.
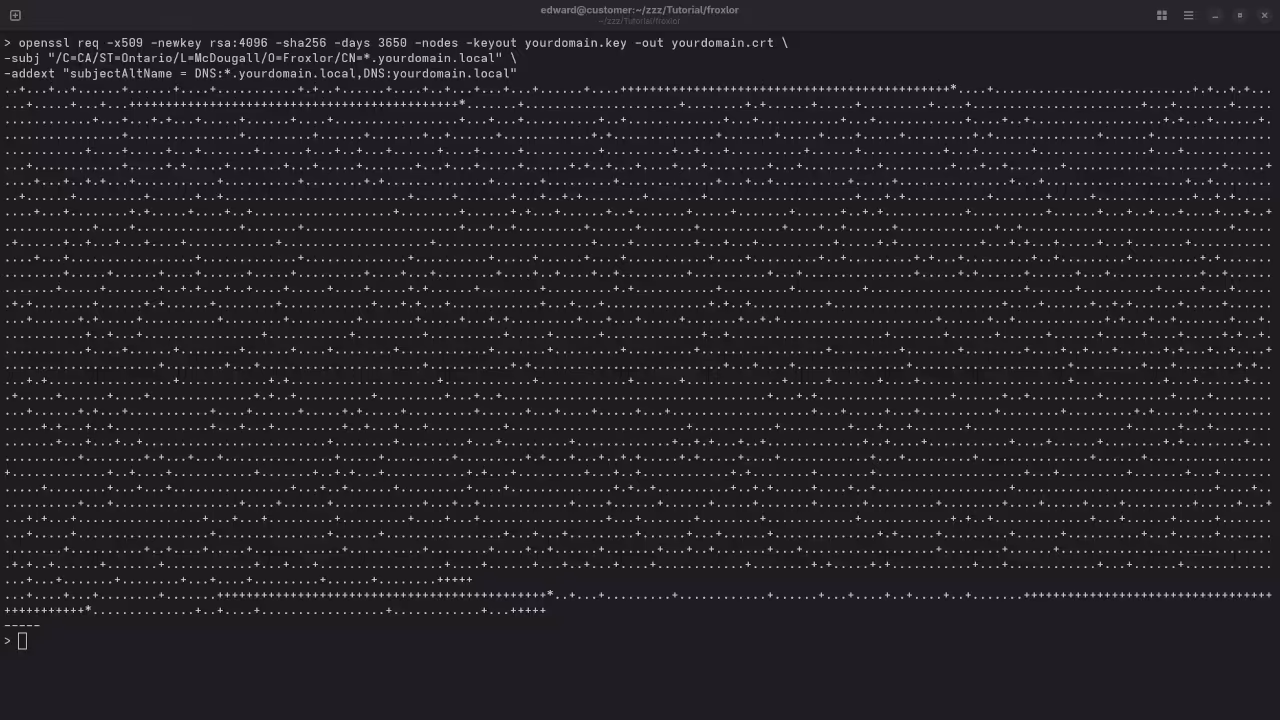
Step 3: Generate SSL Certificates
For this tutorial, we’ll generate a self-signed wildcard SSL certificate for testing. You can use your own wildcard SSL if you have one.
openssl genpkey -algorithm RSA -out ./ssl/example.com.key 2. Create the Certificate Signing Request (CSR):
openssl req -new -key ./ssl/example.com.key -out ./ssl/example.com.csr For Common Name (CN), enter *.example.com.
3. Generate the self-signed certificate:
openssl x509 -req -in ./ssl/example.com.csr -signkey ./ssl/example.com.key -out ./ssl/example.com.crt -days 365 Your SSL certificate and private key will be placed in the ssl/ directory.
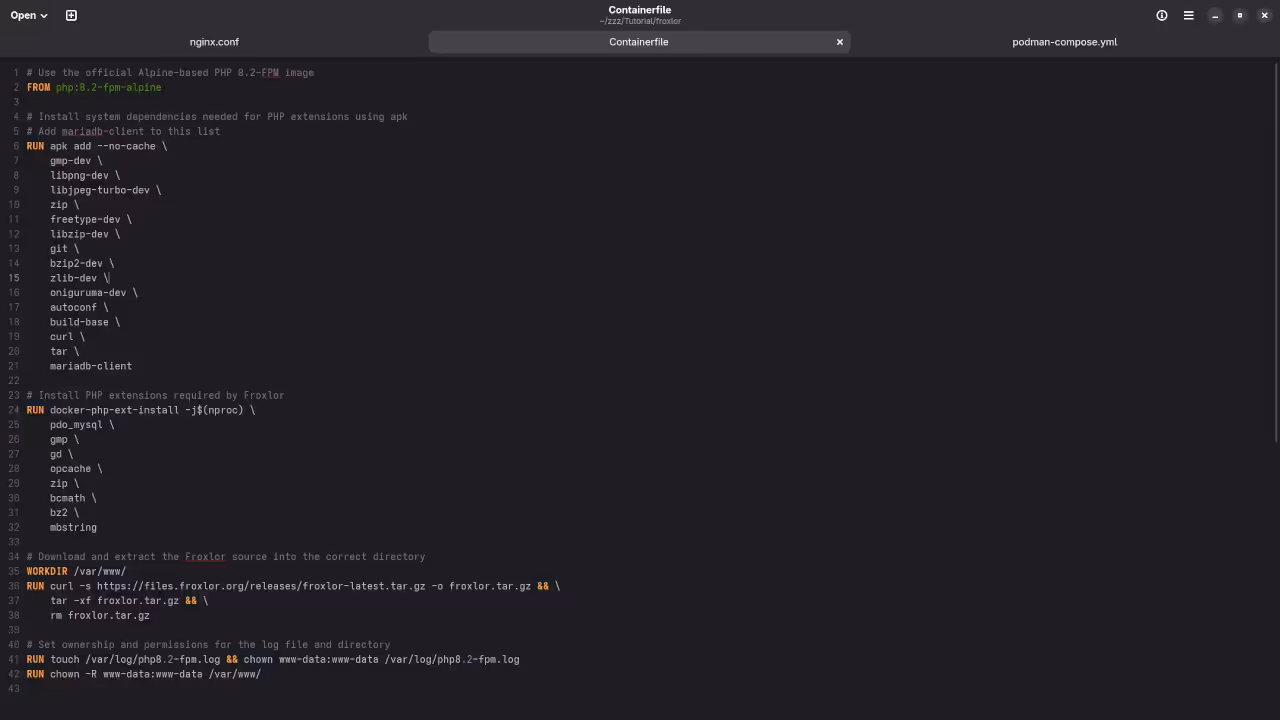
Step 4: Set Up Froxlor Files
Next, we’ll need to download and install Froxlor inside the container.
curl -s https://files.froxlor.org/releases/froxlor-latest.tar.gz -o froxlor.tar.gz
tar -xvzf froxlor.tar.gz Now, the Froxlor files will be available inside the container at /var/www/froxlor.
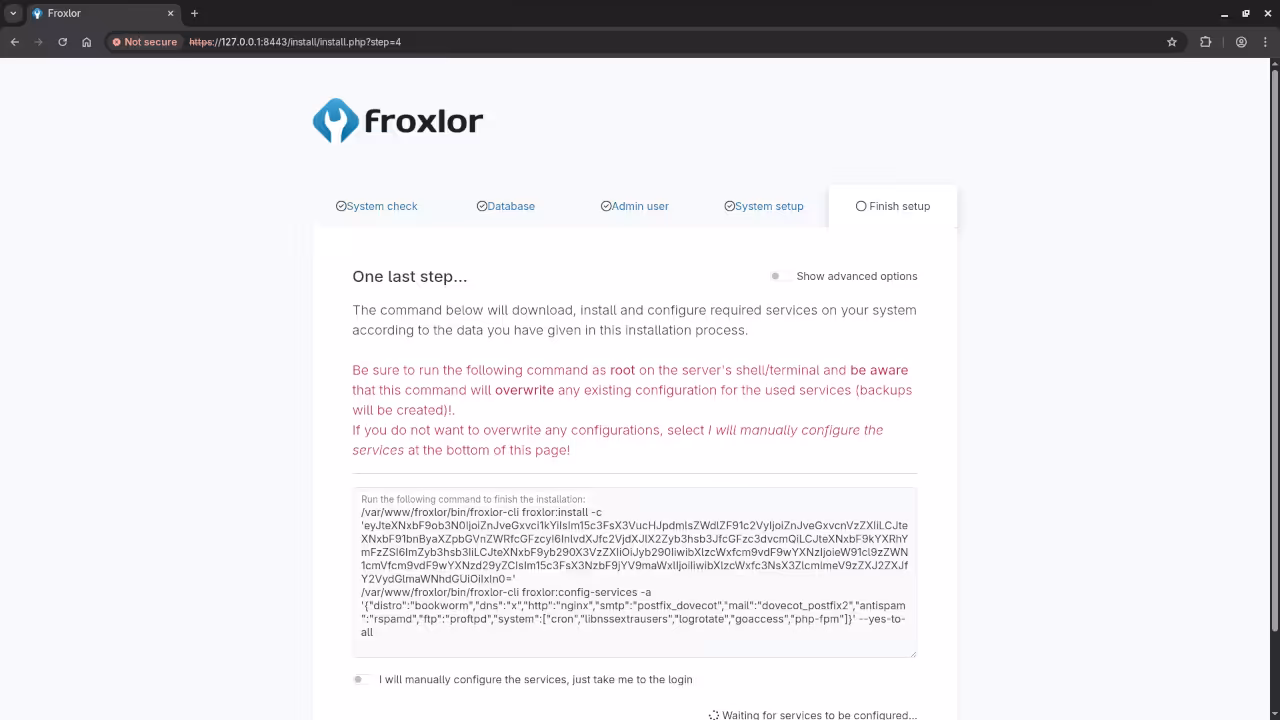
Step 5: Build and Run the Containers Using Podman-Compose
We’re almost there! Now that we have everything set up, let’s use podman-compose to bring up the containers.
1. Build and start the containers:
podman-compose up -d This command will:
- Build and start the MariaDB and Nginx containers.
- Automatically link the Froxlor web server with the MariaDB database.
- Set up the SSL certificates and Nginx configuration for HTTPS.
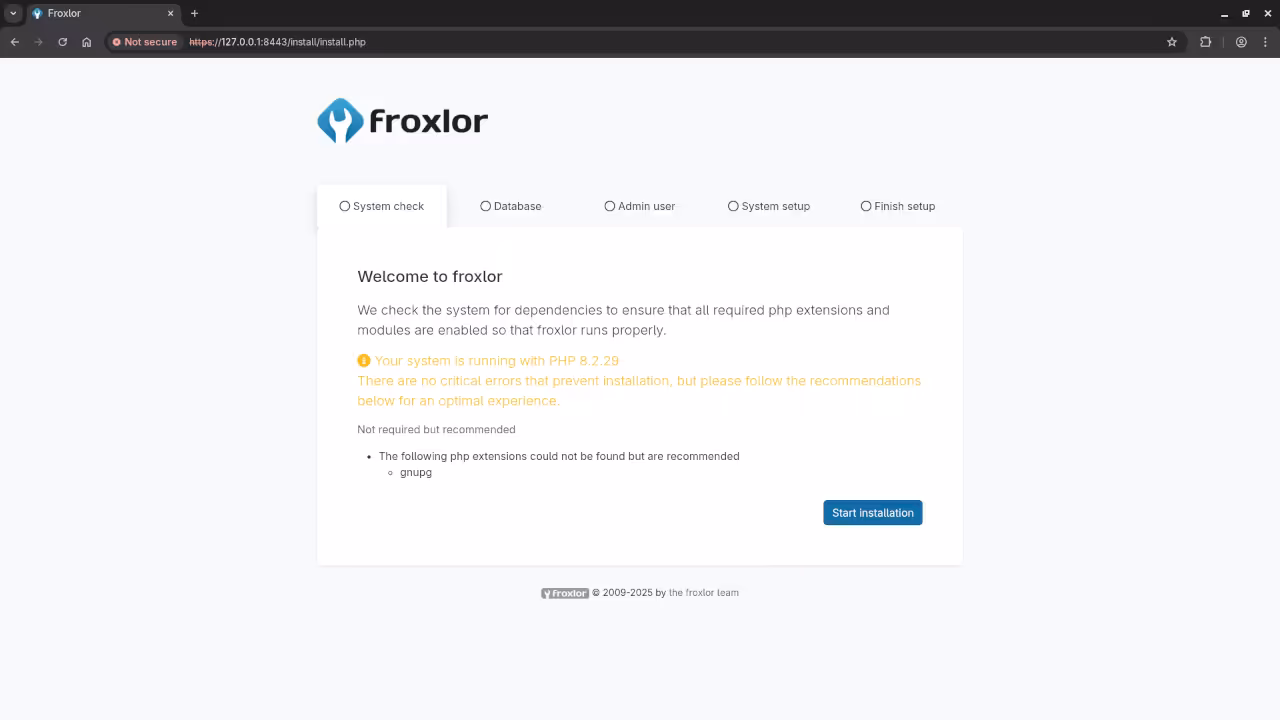
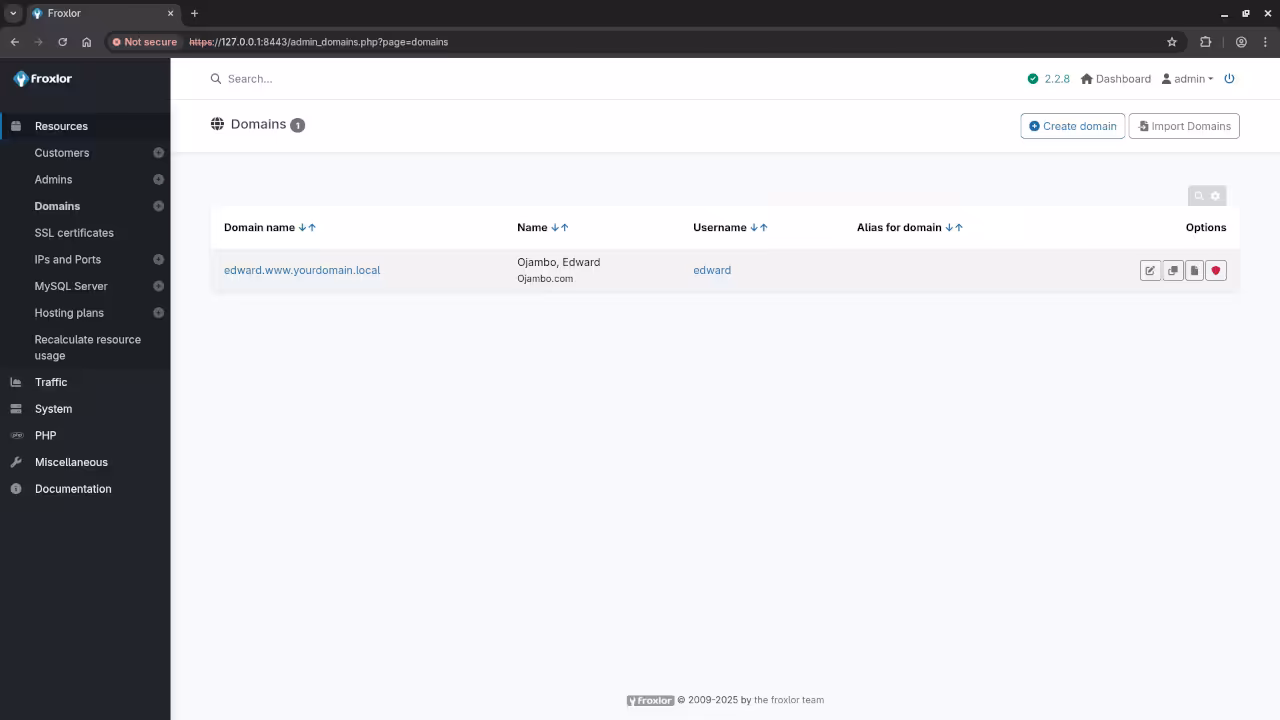
Step 6: Access Froxlor Admin Panel
Once the containers are running, navigate to the Froxlor admin panel in your browser:
https://example.com
- You should see the Froxlor login page.
- Verify the SSL certificate is active by checking for the padlock symbol in your browser.
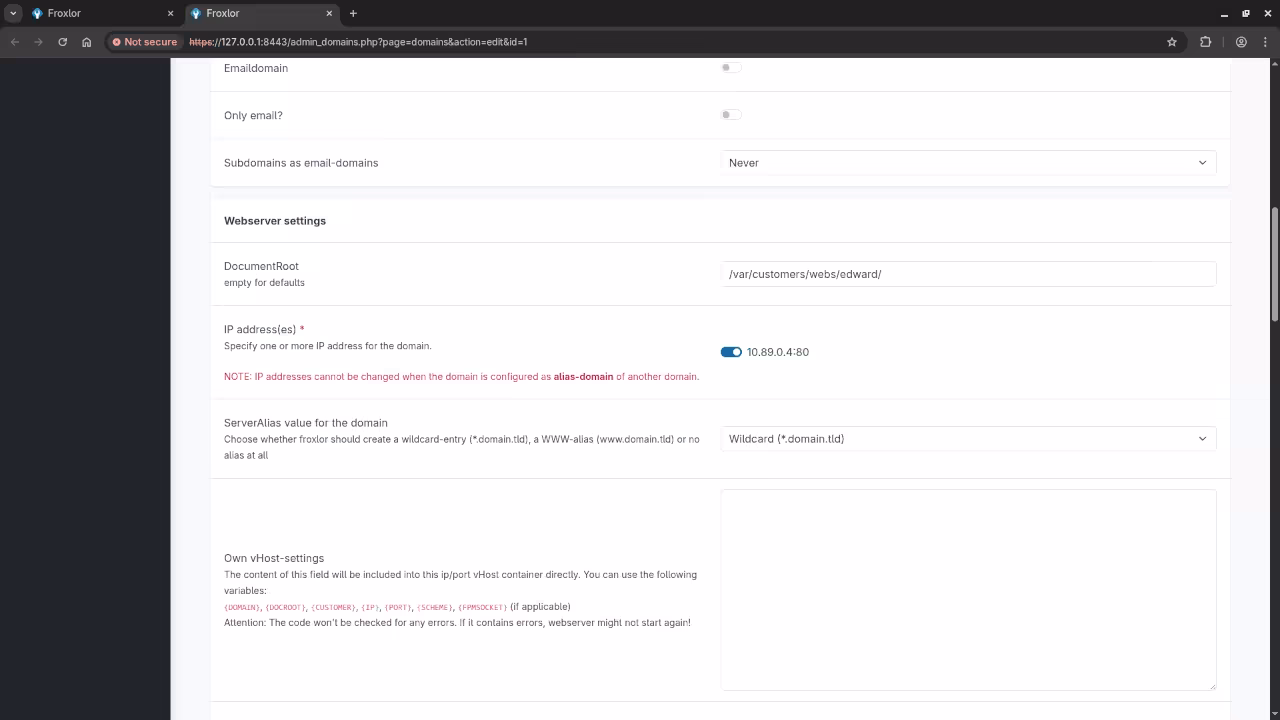
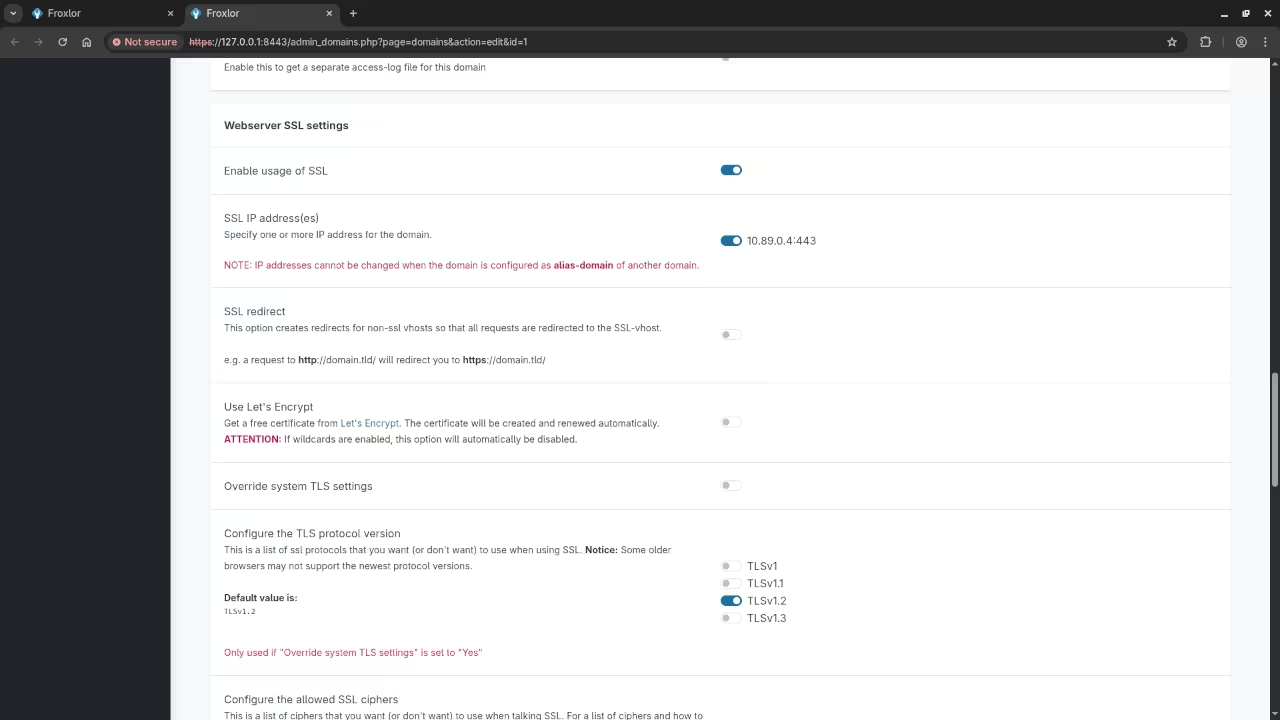
Step 7: Finalize SSL Settings in Froxlor
To ensure that Froxlor uses the SSL certificates correctly, go to the Froxlor admin panel and navigate to Configuration > SSL Settings.
Set the correct paths for your SSL certificate:
- SSL Certificate:
/etc/ssl/example.com.crt - Private Key:
/etc/ssl/example.com.key
Screenshots and Screencast


Conclusion
Using podman-compose made it super easy to set up Froxlor inside containers, with everything managed automatically. By defining everything in a single podman-compose.yml file, you can easily recreate or scale this setup on any machine.
Additional Resources
If you found this guide useful, check out my other resources:
- Learning JavaScript: A great resource to start learning JavaScript.
- Learning PHP: Learn PHP from the ground up.
- Contact me here: One-on-one programming tutorials and updating or migration of the Froxlor.
🚀 Recommended Resources
Disclosure: Some of the links above are referral links. I may earn a commission if you make a purchase at no extra cost to you.