
Creating a Street Lamp Model in Blender with Python and Displaying it on the Web with Model Viewer
Welcome to this beginner friendly tutorial on how to generate a simple street lamp model using Blender’s Python API and display it in your web browser. We will walk through the process step by step including creating the model preparing the environment for web display and understanding the best formats for browser support.
Generating the Street Lamp with Blender Python API
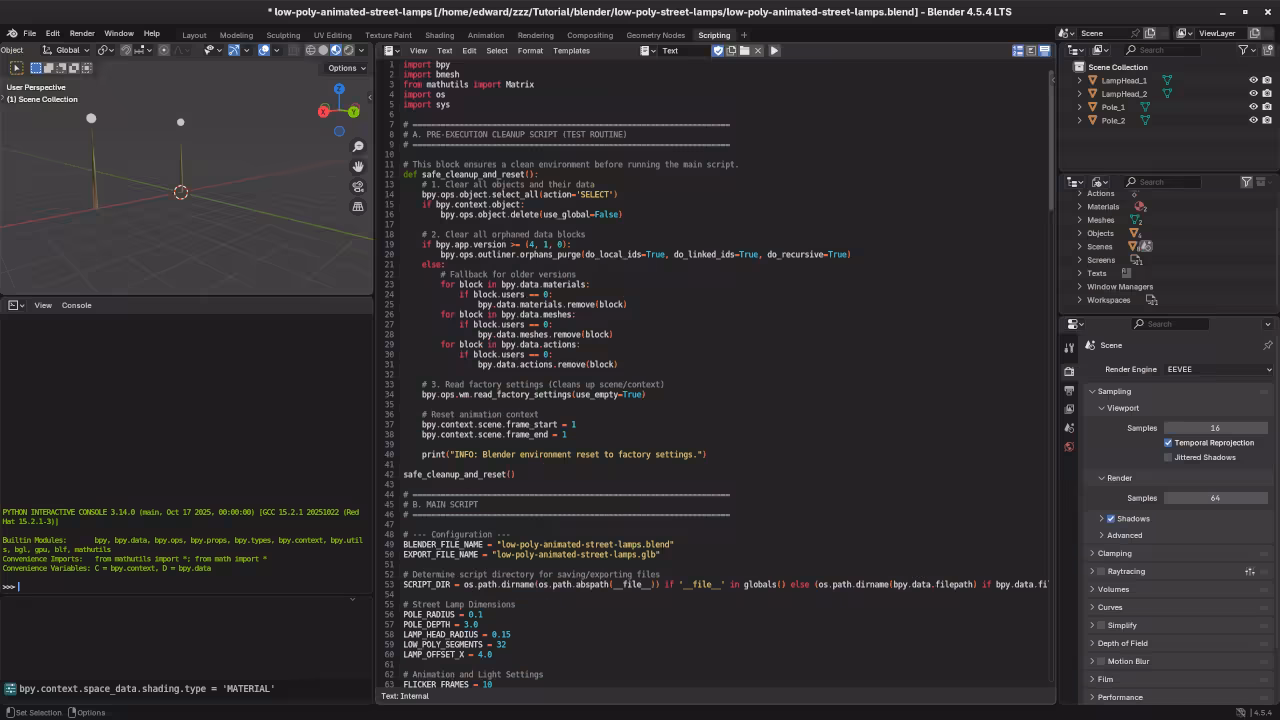
First we will use Blender’s Python scripting capabilities to create a basic street lamp model. Here is a sample script that generates a street lamp with a chrome color and animated lights:
import bpy
import bmesh
from mathutils import Matrix
import os
import sys
# --- 1. Scene Setup and Cleanup ---
bpy.ops.wm.read_factory_settings(use_empty=True)
# --- 2. Geometry Creation Helpers (Unchanged) ---
def create_cylinder_mesh(name, radius, depth, location):
"""Creates a cylinder using bmesh for robustness."""
bm = bmesh.new()
bmesh.ops.create_cone(
bm, cap_ends=True, segments=32, radius1=radius, depth=depth,
matrix=Matrix.Identity(4)
)
translation_matrix = Matrix.Translation((location[0], location[1], location[2]))
bmesh.ops.transform(bm, verts=bm.verts, matrix=translation_matrix)
mesh_data = bpy.data.meshes.new(name + "_Mesh")
bm.to_mesh(mesh_data)
bm.free()
obj = bpy.data.objects.new(name, mesh_data)
bpy.context.collection.objects.link(obj)
return obj
def create_sphere_mesh(name, radius, location):
"""Creates a sphere using bmesh for robustness."""
bm = bmesh.new()
bmesh.ops.create_uvsphere(
bm, u_segments=32, v_segments=16, radius=radius,
matrix=Matrix.Identity(4)
)
translation_matrix = Matrix.Translation(location)
bmesh.ops.transform(bm, verts=bm.verts, matrix=translation_matrix)
mesh_data = bpy.data.meshes.new(name + "_Mesh")
bm.to_mesh(mesh_data)
bm.free()
obj = bpy.data.objects.new(name, mesh_data)
bpy.context.collection.objects.link(obj)
return obj
def clone_lamp(original_pole, original_head, offset_x):
"""Clones the lamp geometry and links the new objects."""
# Clone the Pole
new_pole = original_pole.copy()
new_pole.data = original_pole.data # Link to the same mesh data
new_pole.name = f"{original_pole.name}_Clone"
new_pole.location.x += offset_x
bpy.context.collection.objects.link(new_pole)
# Clone the Lamp Head
new_head = original_head.copy()
new_head.data = original_head.data # Link to the same mesh data
new_head.name = f"{original_head.name}_Clone"
new_head.location.x += offset_x
bpy.context.collection.objects.link(new_head)
return new_pole, new_head
# --- 3. Create Materials (Moved to top for easy access during cloning) ---
# --- A. Chrome Material for Pole ---
chrome_mat_name = "ChromeMaterial"
chrome_mat = bpy.data.materials.get(chrome_mat_name) or bpy.data.materials.new(name=chrome_mat_name)
chrome_mat.use_nodes = True
p_bsdf = chrome_mat.node_tree.nodes.get("Principled BSDF")
if p_bsdf:
p_bsdf.inputs["Base Color"].default_value = (0.8, 0.8, 0.8, 1)
p_bsdf.inputs["Metallic"].default_value = 1.0
p_bsdf.inputs["Roughness"].default_value = 0.1
# --- B. Emission Material for Lamp Head ---
emit_mat_name = "EmissionMaterial"
emit_mat = bpy.data.materials.get(emit_mat_name) or bpy.data.materials.new(name=emit_mat_name)
emit_mat.use_nodes = True
e_bsdf = emit_mat.node_tree.nodes.get("Principled BSDF")
if e_bsdf:
e_bsdf.inputs["Base Color"].default_value = (0, 0, 0, 1)
e_bsdf.inputs["Emission Color"].default_value = (1.0, 1.0, 0.8, 1)
e_bsdf.inputs["Emission Strength"].default_value = 1.0
e_bsdf.inputs["Roughness"].default_value = 0.5
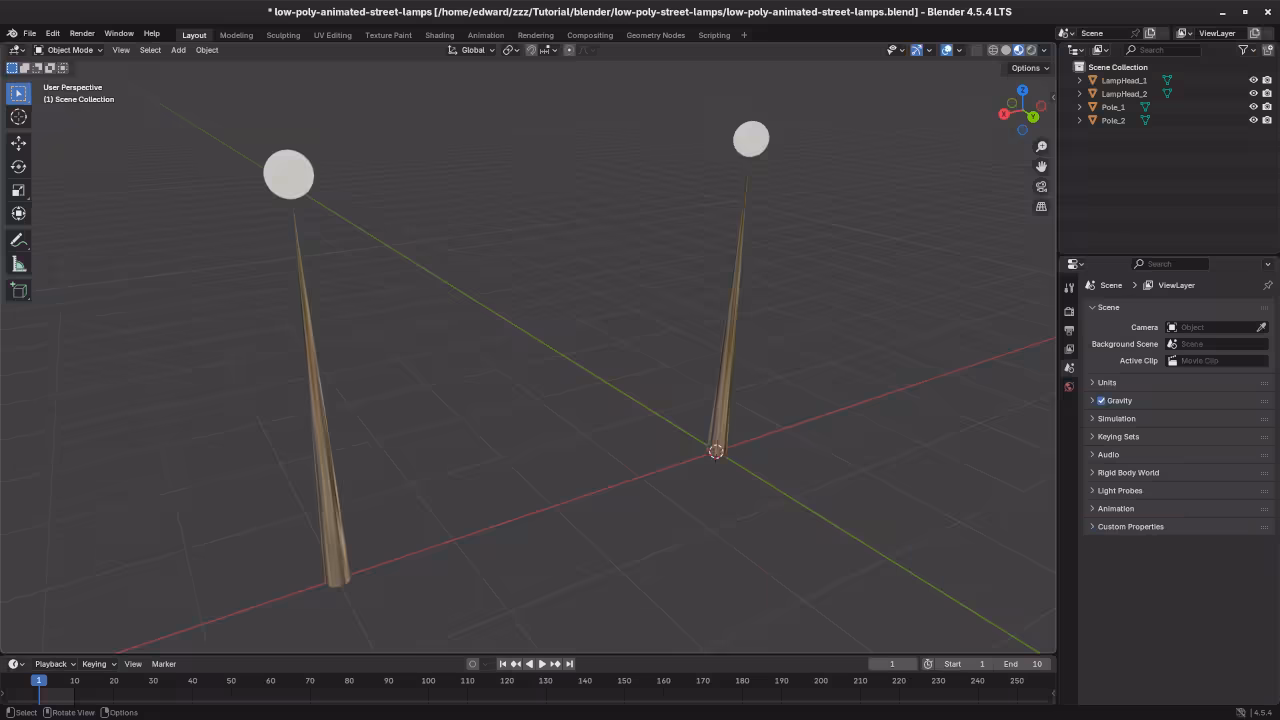
# --- 4. Create Geometry for LAMP 1 ---
pole_radius = 0.1
pole_depth = 3.0
pole_location = (0, 0, pole_depth / 2)
pole1 = create_cylinder_mesh(
"Pole_1", radius=pole_radius, depth=pole_depth, location=pole_location
)
lamp_location = (0, 0, pole_depth + 0.15)
head1 = create_sphere_mesh(
"LampHead_1", radius=0.15, location=lamp_location
)
# Assign Materials to Lamp 1
pole1.data.materials.append(chrome_mat)
head1.data.materials.append(emit_mat)
# --- 5. Clone and Position LAMP 2 ---
# Clone the first lamp and offset it by 4 units on the X-axis
OFFSET_X = 4.0
pole2, head2 = clone_lamp(pole1, head1, OFFSET_X)
# --- 6. Internal Light Source (For .blend flicker effect) ---
# --- A. Light 1 (Linked to Lamp 1) ---
light_data_1 = bpy.data.lights.new(name="StreetLightData_1", type='POINT')
light_data_1.energy = 50
light_data_1.temperature = 5500
light1 = bpy.data.objects.new(name="StreetLight_1", object_data=light_data_1)
bpy.context.collection.objects.link(light1)
light1.location = lamp_location # Location is (0, 0, 3.15)
# --- B. Light 2 (Linked to Lamp 2) ---
light_data_2 = bpy.data.lights.new(name="StreetLightData_2", type='POINT')
light_data_2.energy = 50
light_data_2.temperature = 5500
light2 = bpy.data.objects.new(name="StreetLight_2", object_data=light_data_2)
bpy.context.collection.objects.link(light2)
# Offset the light source to match the second lamp
light2.location.x += OFFSET_X
light2.location.z = lamp_location[2] # Location is (4.0, 0, 3.15)
# --- 7. Defined Flicker Animation using Keyframes & Cycles (Applied to BOTH lights) ---
lights_data = [light_data_1, light_data_2]
for ld in lights_data:
# Set a 20-frame flicker cycle (dim-off-on snap)
ld.energy = 100
ld.keyframe_insert(data_path="energy", frame=1)
ld.energy = 5
ld.keyframe_insert(data_path="energy", frame=5)
ld.energy = 80
ld.keyframe_insert(data_path="energy", frame=10)
ld.energy = 10
ld.keyframe_insert(data_path="energy", frame=15)
ld.energy = 100
ld.keyframe_insert(data_path="energy", frame=20)
fcurve = ld.animation_data.action.fcurves.find("energy")
if fcurve:
# Set interpolation mode to 'CONSTANT' for an instant on/off look
for kf in fcurve.keyframe_points:
kf.interpolation = 'CONSTANT'
# Add a Cycles Modifier to repeat the 1-20 frame flicker endlessly
modifier = fcurve.modifiers.new(type='CYCLES')
modifier.mode_before = 'REPEAT'
modifier.mode_after = 'REPEAT'
# --- 8. Final Scene Settings and GLB Export ---
# Set the scene's frame range to play a few seconds of the flicker
bpy.context.scene.frame_start = 1
bpy.context.scene.frame_end = 120
# Select all relevant objects for export
bpy.ops.object.select_all(action='SELECT')
# Define the output path for the GLB file
glb_output_path = os.path.expanduser("~/street_lamps_dual.glb")
print(f"\nExporting GLB to: {glb_output_path}")
# Run the GLTF export operator
bpy.ops.export_scene.gltf(
filepath=glb_output_path,
export_format='GLB', # Export as a single binary file
use_selection=True, # Only export selected objects
export_lights=False, # Dynamic lights are ignored by GLB
export_extras=True,
)
print("GLB export successful.")
# --- 9. Save the Resulting Blender File (for debugging/reference) ---
blend_output_path = os.path.expanduser("~/street_lamps_dual.blend")
bpy.ops.wm.save_as_mainfile(filepath=blend_output_path)
print(f"Blender file saved for reference: {blend_output_path}")
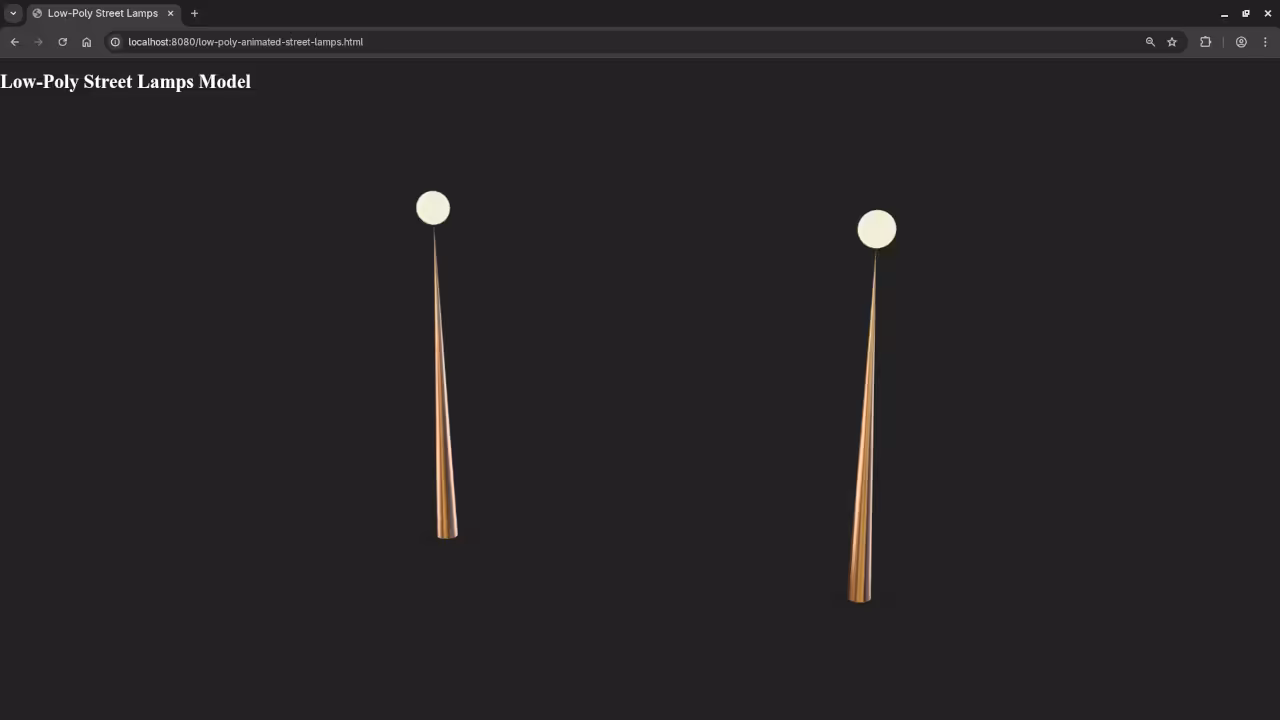
Displaying the Model in the Web Browser
To display this 3D model on your website we will use the model viewer web component which supports various 3D formats and is easy to embed.
Using HDR Images for Lighting
The street lamp will be lit using an HDR environment map in this case the courtyard EXR image found in Blender 45 LTS. HDR images provide realistic lighting and reflections making your model look more lifelike.
Supported File Formats in Web Browsers
- .hdr High Dynamic Range good support in browsers especially with model viewer
- .exr OpenEXR less support natively in browsers but possible with conversions
- .ktx / .ktx2 Khronos Texture modern formats with support in some browsers
Open source alternatives
- .png or .jpg for textures less dynamic range but widely supported
- glTF .gltf or .glb as a container format that supports embedded textures and is highly supported across browsers
Running the Python Script
To run the Python script open your terminal or command prompt navigate to your Blender installation directory and execute:
blender --background --python your_script.py Replace your_script.py with the filename of your script.
Exporting to GLTF for Browser Use
The GLTF (GL Transmission Format) is an open standard file format for 3D models that is widely supported across web applications. Once you’ve generated the model, export it in .glb format using the command provided in the Python script. The .glb format is great for web browsers since it is optimized for fast loading and can include textures, animations, and materials.
bpy.ops.export_scene.gltf(filepath='path/to/exported_model.glb') GLTF files can be viewed directly in the browser with <model-viewer>, an easy-to-use web component that supports various 3D formats, including .glb files.
Displaying the Model locally in the Web Browser with <model-viewer>
To display your model in a web browser, embed it using the <model-viewer> tag in an HTML document:
<h1>Street Lamp</h1>
<model-viewer src="path/to/exported_model.glb" alt="Street Lamp" auto-rotate camera-controls environment-image="courtyard.hdr" animation-name="Animation" autoplay></model-viewer>
Be sure to replace path/to/exported_model.glb with the actual path to your .glb file.
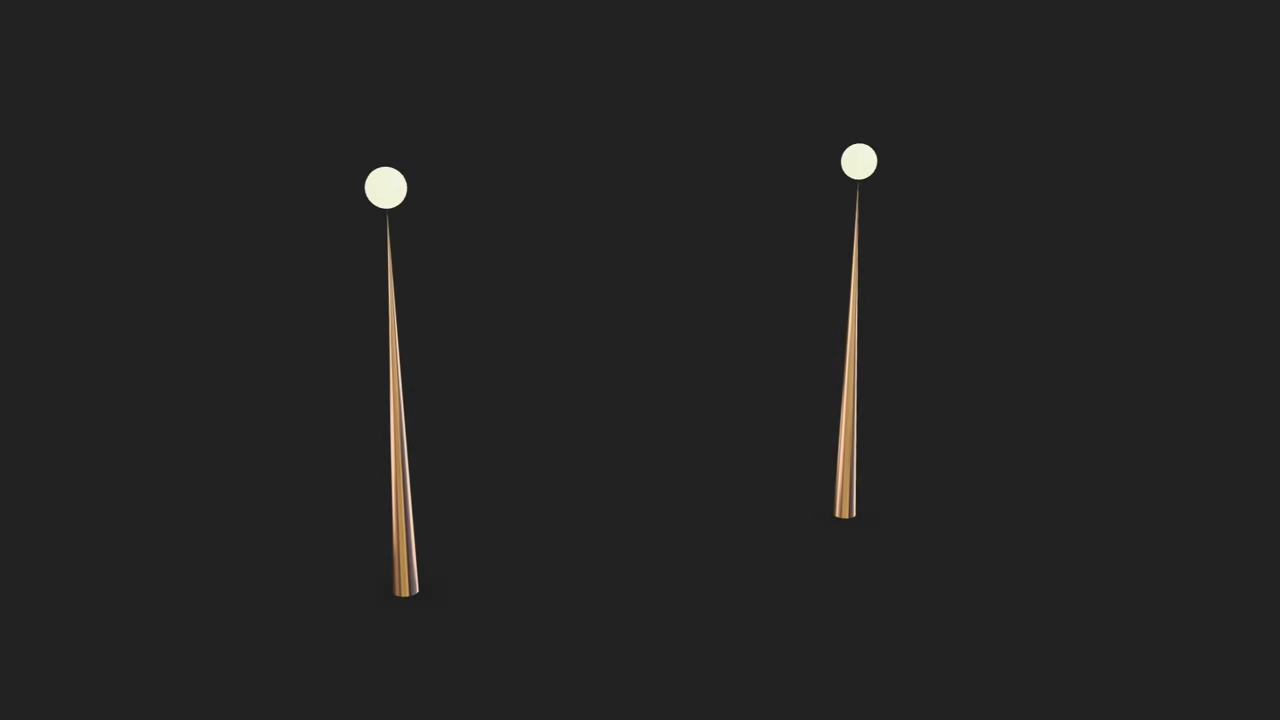
📸 Screenshots & Screencast
Resources and Further Reading
I have two books that might interest you:
You can also check out my course:
And I am available for one-on-one online Python tutorials including Blender. Contact me here:
🚀 Recommended Resources
Disclosure: Some of the links above are referral links. I may earn a commission if you make a purchase at no extra cost to you.