
How to Create a Procedural Textured Low Poly Table in Blender using Python and Display it in the Web Browser
In this beginner-friendly tutorial, we will walk through the steps of creating a procedural textured low-poly table using Blender’s Python API. You’ll learn how to generate the model, apply a wood texture, export it as a .glb file, and display it in a web browser using the <model-viewer> tag. This guide is perfect for those starting with 3D modeling in Blender and web development!
Step 1: Create the Low Poly Table in Blender using Python
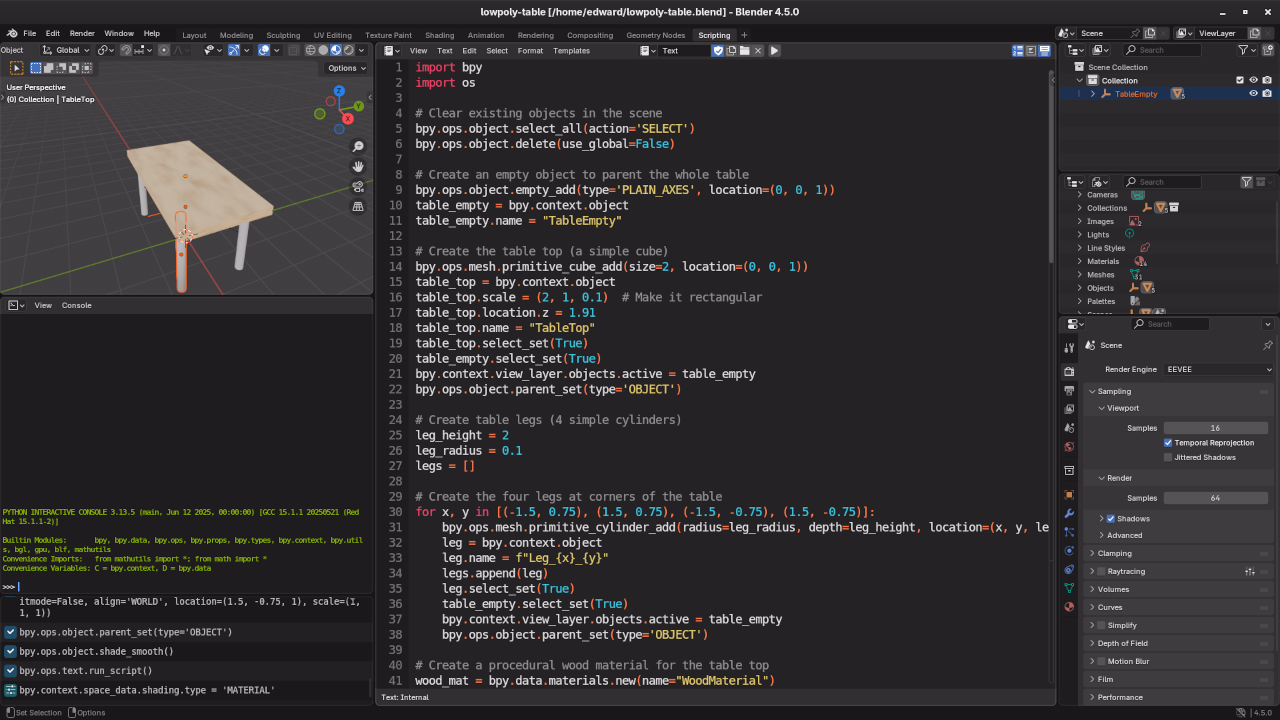
First, we will create a basic low-poly table using Python and Blender’s scripting interface. Open Blender, navigate to the Scripting tab, and copy-paste the following Python script:
import bpy
# Clear the scene
bpy.ops.object.select_all(action='SELECT')
bpy.ops.object.delete(use_global=False)
# Create the table top (a cube)
bpy.ops.mesh.primitive_cube_add(size=2, location=(0, 0, 1))
table_top = bpy.context.object
table_top.scale = (2, 1, 0.1) # Rectangular shape
table_top.name = "TableTop"
# Create the four table legs (cylinders)
leg_height = 2
leg_radius = 0.1
legs = []
for x, y in [(-1.5, 0.75), (1.5, 0.75), (-1.5, -0.75), (1.5, -0.75)]:
bpy.ops.mesh.primitive_cylinder_add(radius=leg_radius, depth=leg_height, location=(x, y, leg_height / 2))
leg = bpy.context.object
leg.name = f"Leg_{x}_{y}"
legs.append(leg)
# Create a procedural wood material for the table
wood_material = bpy.data.materials.new(name="WoodMaterial")
wood_material.use_nodes = True
nodes = wood_material.node_tree.nodes
links = wood_material.node_tree.links
# Clear default nodes and set up the texture
for node in nodes:
nodes.remove(node)
# Add a noise texture for wood grain
noise_texture = nodes.new(type='ShaderNodeTexNoise')
noise_texture.inputs['Scale'].default_value = 5
# Add a color ramp for the texture
color_ramp = nodes.new(type='ShaderNodeValToRGB')
links.new(noise_texture.outputs['Fac'], color_ramp.inputs['Fac'])
color_ramp.color_ramp.elements.new(0.7)
color_ramp.color_ramp.elements[0].color = (0.4, 0.2, 0.1, 1) # Dark brown
color_ramp.color_ramp.elements[1].color = (0.8, 0.6, 0.3, 1) # Lighter wood color
# Connect to the diffuse shader
diffuse_shader = nodes.new(type='ShaderNodeBsdfDiffuse')
links.new(color_ramp.outputs['Color'], diffuse_shader.inputs['Color'])
# Output the material
material_output = nodes.new(type='ShaderNodeOutputMaterial')
links.new(diffuse_shader.outputs['BSDF'], material_output.inputs['Surface'])
# Apply the material to the table top
table_top.data.materials.append(wood_material)
# Apply a simple gray material to the table legs
leg_material = bpy.data.materials.new(name="LegMaterial")
leg_material.use_nodes = True
nodes = leg_material.node_tree.nodes
links = leg_material.node_tree.links
for node in nodes:
nodes.remove(node)
diffuse_shader = nodes.new(type='ShaderNodeBsdfDiffuse')
diffuse_shader.inputs['Color'].default_value = (0.5, 0.5, 0.5, 1)
material_output = nodes.new(type='ShaderNodeOutputMaterial')
links.new(diffuse_shader.outputs['BSDF'], material_output.inputs['Surface'])
# Assign material to legs
for leg in legs:
leg.data.materials.append(leg_material)
# Apply smooth shading
bpy.ops.object.shade_smooth()
# Export the model as a .glb file
output_path = "/path/to/your/output/table_model.glb" # Replace with your desired path
bpy.ops.export_scene.gltf(filepath=output_path, export_format='GLB')
print(f"Procedural low-poly table exported to {output_path}")
Step 2: Export the Model as a .glb File
Once you run the script, Blender will automatically export the model as a .glb file. The .glb format is perfect for use on the web because it retains both the geometry and materials in a compact format.
To run the Python script:
- Open Blender and switch to the Scripting tab.
- Paste the script into the text editor.
- Click Run Script.
Make sure to replace "/path/to/your/output/table_model.glb" with the actual path where you want to save the .glb file.
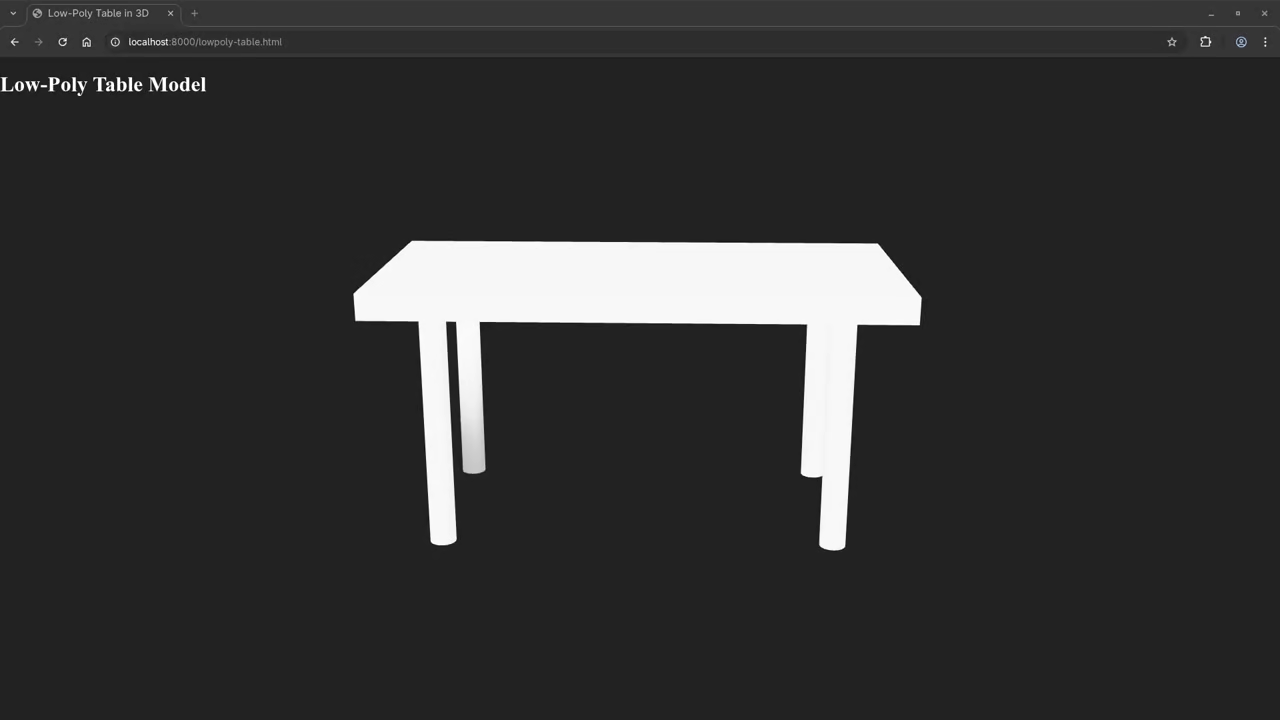
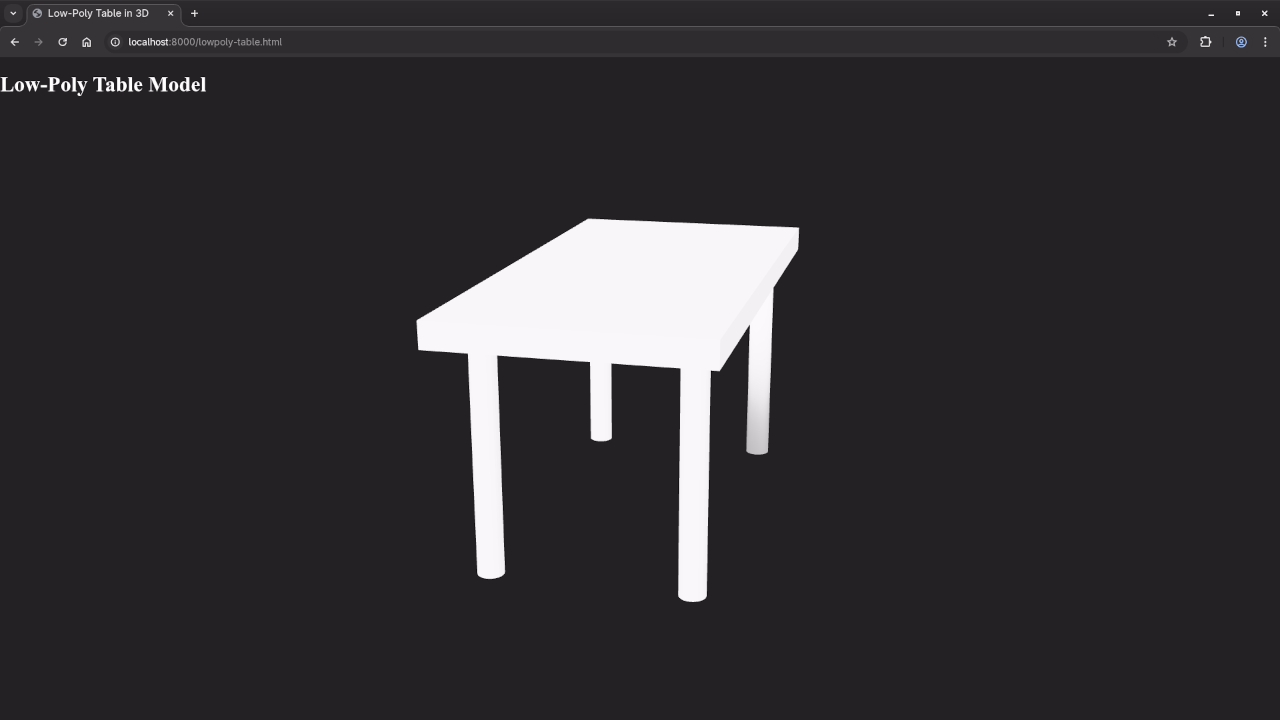
Step 3: Display the Model in a Web Browser Using the <model-viewer> Tag
Once you have your .glb file, it’s easy to display it on any webpage using the <model-viewer> tag. Here’s a simple HTML template that you can use:
<!DOCTYPE html>
<html lang="en">
<head>
<meta charset="UTF-8">
<meta name="viewport" content="width=device-width, initial-scale=1.0">
<title>3D Table Display</title>
<script type="module" src="https://cdn.skypack.dev/@google/model-viewer"></script>
</head>
<body>
<model-viewer src="path/to/your/model.glb" alt="Procedural low-poly table" auto-rotate camera-controls></model-viewer>
</body>
</html>
Make sure to replace path/to/your/model.glb with the actual location of your exported .glb file. When you open the HTML file in a browser, the 3D table will be displayed, and you can interact with it using the mouse.
Screenshots and Screencast
Resources
If you want to dive deeper into Python and Blender scripting, here are some great resources to check out:
- Learning Python – eBook for Beginners
- Mastering Blender Python API
- Learning Python – Online Course
- One-on-One Python Tutorials with Blender
Final Thoughts
Congratulations! You’ve successfully learned how to create a procedural low-poly table using Blender and Python. You’ve also learned how to export the model and display it in a web browser using the <model-viewer> tag. This is just the beginning of what you can create with Blender, Python, and web development. Keep experimenting, and stay tuned for more tutorials!
🚀 Recommended Resources
Disclosure: Some of the links above are referral links. I may earn a commission if you make a purchase at no extra cost to you.