

Download and place on a server
Zen Cart is a free open source shopping cart. The shopping cart will enable anyone to set up an online presence selling goods and services. The basic cart includes everything required to begin selling immediately.
Zen Cart rivals commercial offerings in the amount of options available. Contributions are available for download on the website. Modifications are possible for people with a decent command of PHP and HTML.
In this tutorial, Zen Cart will be installed on a linux server but the steps can be followed for other servers.
- Tools are required:
- Unzip to decompress the downloaded file.
- Text editor for creating and modifying configuration files.
- MySQL Database server.
- Web server.
- PHP.
- FTP, SSH or File Manager to upload and modify permissions for files.
- Knowledge of the files to be served.
Download Zen Cart
- Point your browser to zen-cart.com:
- Click the download button to obtain the latest release.
- Save the compressed file.
- Decompress the file by using unzip if appropriate.
- Move the created folder to your server location.
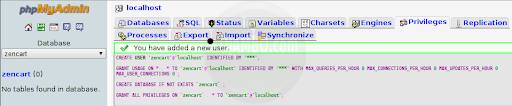
Create MySQL Database and User
- Point your browser to PhpMyAdmin:
- Click the Privileges Tab.
- Click the Add a new User link.
- Username=”zencart”, Host=”localhost”, Password=”zencartpw”.
- Click the create a database with the same name as user select box.

- Command Line Way:
- mysql -u root -p -h localhost.
- Create DATABASE zencart;.
- GRANT ALL ON zencart.* to ‘zencart’@’localhost’ identified by ‘zencartpw’.
- exit.
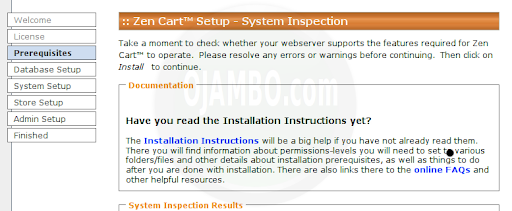
Install Zen Cart
- Point your browser to Zen Cart on your server:
- Select the install option.
- Click Continue on the Welcome screen.
- Read and Accept the GPL license.
- Address the warnings marked with an “X” on the System Inspection screen.
- Re-Check before selecting Install on the System Inspection screen.
System Setup from the Command Line
###
# system-setup.sh
#
# Copyright 2011 Edward <http://ojambo.com/contact>
#
###
## DATABASE INFORMATION ##
mysql -u root -p -h localhost
Create DATABASE zencart;
Create USER 'zencart'@'localhost' identified by 'zencartpw';
Grant ALL ON zencart.* to 'zencart'@'localhost';
exit
## EXPAND ZENCART ##
unzip zen-cart*.zip
## ENTER ZENCART FOLDER ##
cd zen-cart*
## CONFIGURATION FILES ##
mv includes/dist-configure.php includes/configure.php
mv admin/includes/dist-configure.php admin/includes/configure.php
## PERMISSIONS ##
chmod 777 includes/configure.php
chmod 777 admin/includes/configure.php
chmod -R 777 cache
chmod -R 777 pub
chmod -R 777 images
chmod -R 777 media
chmod -R 777 includes/languages/english/html_includes
chmod -R 777 admin/backups
chmod -R 777 admin/images/graphs
Enter Database Information and System Setup
- Database name and user:
- Database name = “zencart”.
- Database username = “zencart”.
- Database username password = “zencartpw”.
- Everything else can be left as default.
Enter Store Setup
- Store name and zone:
- Store Name = “Ojambo’s shop”.
- Store Zone = “Ontario”.
- Everything else can be left as default.

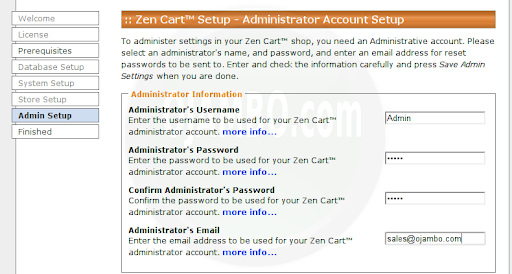
Enter Adminstrator Account Setup
- Adminstrator name and email:
- Adminstrator’s Username = “Admin”.
- Adminstrator’s email = “Sales AT Ojambo.com”.
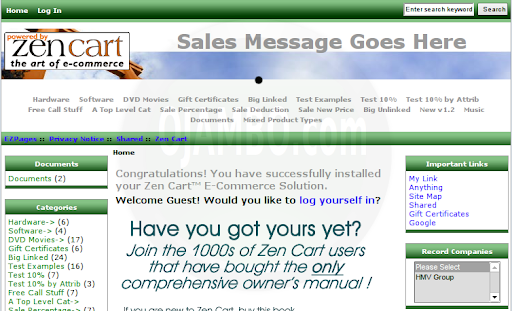
To generate catalogue of different types of products, select option to install the demo data.
Zen Cart is now installed, you are given the option to enter admin menu or the front page.
Important Security Procedure:
- Secure Zen Cart:
- Change permissions of the configuration files.
- Remove the Zen Cart Install Folder.
- Rename the Zen Cart Admin Folder.
- Update the Zen Cart Admin configuration file.
###
# system-setup2.sh
#
# Copyright 2011 Edward <http://ojambo.com/contact>
#
###
## AFTER INSTALLATION ##
chmod 644 includes/configure.php
chmod 644 admin/includes/configure.php
mv zc_install zc_install_done
mv admin myadmin
nano myadmin/includes/configure.php
- Recommendations:
- Use the Command Line, it is faster and helps with troubleshooting.
- Do not use weak passwords for the Database User and Administrator.
- Test the shopping cart before going live.
🚀 Recommended Resources
Disclosure: Some of the links above are referral links. I may earn a commission if you make a purchase at no extra cost to you.
Comments
One response to “Install Zen Cart Ecommerce”