
How to Create a Low-Poly House with Blender Python API and Display It in Your Web Browser
Creating 3D models and rendering them in your web browser has become easier thanks to modern web technologies like <model-viewer>. In this post, we’ll explore how to generate a low-poly house using the Blender Python API and display it in the browser. We’ll also discuss how to run the Python script on your machine and link the model into an interactive web page.
Step 1: Generating the Low-Poly House in Blender using Python
Blender is a powerful open-source 3D creation suite that allows you to create amazing 3D models. Using its Python API, we can generate a low-poly house, complete with walls, a roof, windows, and a door.
First, let’s start by writing a Python script that creates a simple low-poly house. Here’s the code to generate a basic structure:
import bpy
import os
# Delete existing mesh objects in the scene
bpy.ops.object.select_all(action='SELECT')
bpy.ops.object.delete(use_global=False)
# Create materials with matte finish
blue_material = bpy.data.materials.new(name="BlueWall")
blue_material.use_nodes = True
blue_material.node_tree.nodes["Principled BSDF"].inputs['Base Color'].default_value = (0.5, 0.7, 1.0, 1) # Light blue
blue_material.node_tree.nodes["Principled BSDF"].inputs['Roughness'].default_value = 0.8 # Matte finish
white_material = bpy.data.materials.new(name="WhiteMaterial")
white_material.use_nodes = True
white_material.node_tree.nodes["Principled BSDF"].inputs['Base Color'].default_value = (1.0, 1.0, 1.0, 1) # White
white_material.node_tree.nodes["Principled BSDF"].inputs['Roughness'].default_value = 0.8 # Matte finish
# Create a matte brown material for the roof
brown_material = bpy.data.materials.new(name="BrownRoof")
brown_material.use_nodes = True
brown_material.node_tree.nodes["Principled BSDF"].inputs['Base Color'].default_value = (0.6, 0.3, 0.1, 1) # Brown color
brown_material.node_tree.nodes["Principled BSDF"].inputs['Roughness'].default_value = 0.8 # Matte finish
# Create a low-poly base (house floor)
bpy.ops.mesh.primitive_cube_add(size=4, location=(0, 0, 2))
base = bpy.context.active_object
base.name = "HouseBase"
base.scale = (1, 1, 0.2)
base.data.materials.append(blue_material) # Apply blue color to base
# Create walls (four walls)
# Front wall
bpy.ops.mesh.primitive_cube_add(size=4, location=(0, 2, 3))
front_wall = bpy.context.active_object
front_wall.name = "FrontWall"
front_wall.scale = (1, 0.1, 1)
front_wall.data.materials.append(blue_material) # Apply blue color to front wall
# Back wall
bpy.ops.mesh.primitive_cube_add(size=4, location=(0, -2, 3))
back_wall = bpy.context.active_object
back_wall.name = "BackWall"
back_wall.scale = (1, 0.1, 1)
back_wall.data.materials.append(blue_material) # Apply blue color to back wall
# Left wall
bpy.ops.mesh.primitive_cube_add(size=4, location=(-2, 0, 3))
left_wall = bpy.context.active_object
left_wall.name = "LeftWall"
left_wall.scale = (0.1, 1, 1)
left_wall.data.materials.append(blue_material) # Apply blue color to left wall
# Right wall
bpy.ops.mesh.primitive_cube_add(size=4, location=(2, 0, 3))
right_wall = bpy.context.active_object
right_wall.name = "RightWall"
right_wall.scale = (0.1, 1, 1)
right_wall.data.materials.append(blue_material) # Apply blue color to right wall
# Create roof (using a cone for a simple low-poly roof)
bpy.ops.mesh.primitive_cone_add(vertices=4, radius1=4, depth=3, location=(0, 0, 5.5)) # Adjust location to be above the house
roof = bpy.context.active_object
roof.name = "Roof"
roof.rotation_euler[0] = 3.14159 / 4 # Rotate roof by 45 degrees around the X-axis
roof.data.materials.append(brown_material) # Apply brown matte color to roof
# Add simple door (a smaller cube)
bpy.ops.mesh.primitive_cube_add(size=1, location=(0, 2.05, 2)) # Adjusted Z-axis location
door = bpy.context.active_object
door.name = "Door"
door.scale = (0.5, 0.05, 1) # Set door scale
door.data.materials.append(white_material) # Apply white color to door
door.location.z += 0.2 # Protrude door slightly
# Add windows (using cubes as well)
# Window 1 (left side)
bpy.ops.mesh.primitive_cube_add(size=0.8, location=(-1.5, 2.05, 3.5)) # Increased size to 0.8 and adjusted position
window1 = bpy.context.active_object
window1.name = "Window1"
window1.scale = (0.5, 0.05, 0.5) # Adjusted size for visibility
window1.data.materials.append(white_material) # Apply white color to window
window1.location.z += 0.2 # Protrude window slightly
# Window 2 (right side)
bpy.ops.mesh.primitive_cube_add(size=0.8, location=(1.5, 2.05, 3.5)) # Increased size to 0.8 and adjusted position
window2 = bpy.context.active_object
window2.name = "Window2"
window2.scale = (0.5, 0.05, 0.5) # Adjusted size for visibility
window2.data.materials.append(white_material) # Apply white color to window
window2.location.z += 0.2 # Protrude window slightly
# Create an empty "House" parent object to organize everything
bpy.ops.object.empty_add(type='PLAIN_AXES', location=(0, 0, 2))
house_empty = bpy.context.active_object
house_empty.name = "HouseEmpty"
# Parent all objects to the "House" empty
base.select_set(True)
front_wall.select_set(True)
back_wall.select_set(True)
left_wall.select_set(True)
right_wall.select_set(True)
roof.select_set(True)
door.select_set(True)
window1.select_set(True)
window2.select_set(True)
bpy.context.view_layer.objects.active = house_empty
bpy.ops.object.parent_set(type='OBJECT')
# Set the origin of the whole house to its center
bpy.ops.object.origin_set(type='ORIGIN_CENTER_OF_MASS', center='BOUNDS')
# Save the model as a .glb file
bpy.ops.export_scene.gltf(filepath="/path/to/save/lowpoly-house.glb")
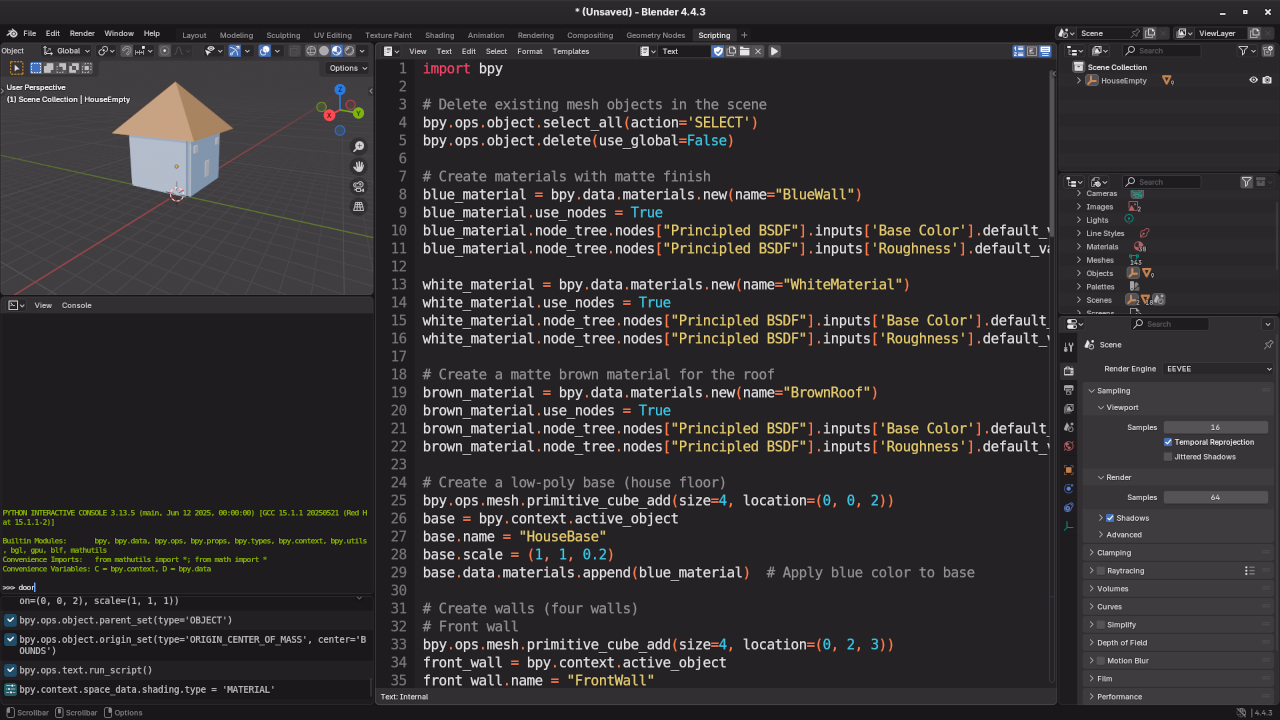
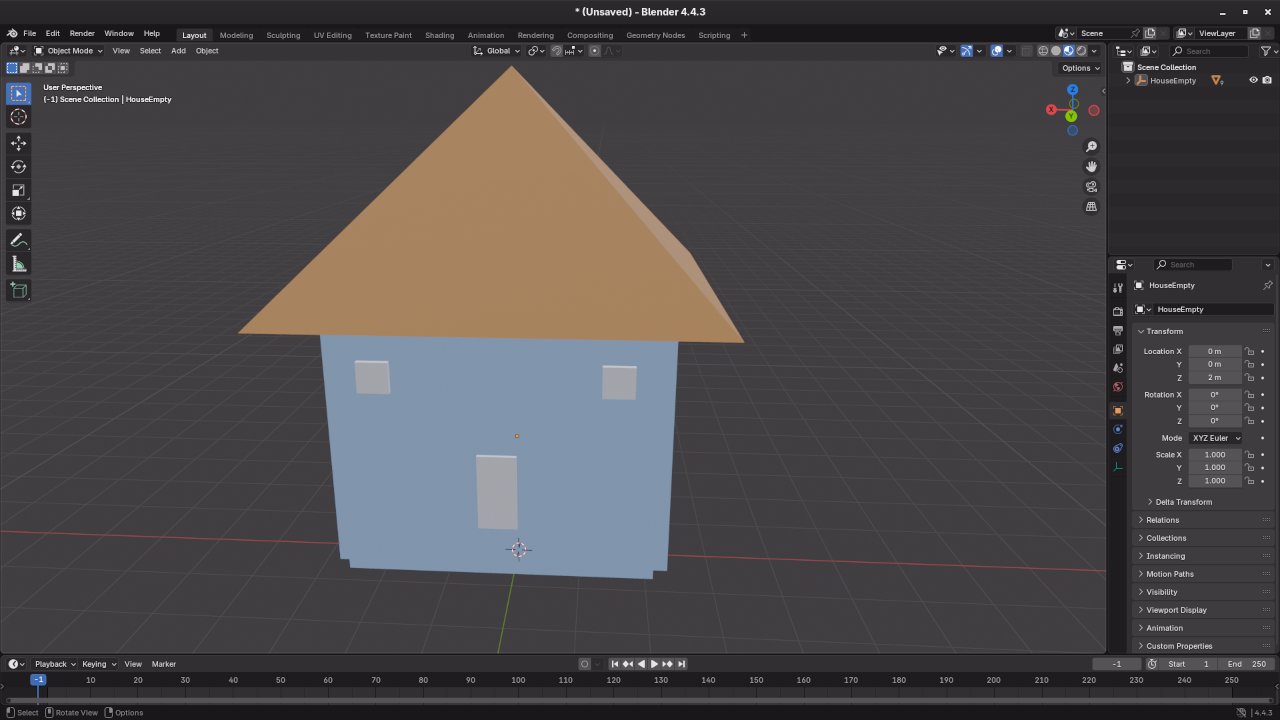
You can copy and paste this code into Blender’s Python console or script editor to generate a low-poly house. After running the script, Blender will automatically save the model as a .glb file, which is a format optimized for use on the web.
Step 2: Running the Blender Python Script on the Command Line
If you prefer running the script directly from the command line, you can do so by launching Blender with the following command:
blender --background --python /path/to/your/script.py This command will run Blender in the background (without opening the GUI) and execute the Python script. The --background flag ensures that Blender runs headless, making it suitable for server environments or batch processing.
Step 3: Displaying the Model in a Web Browser using <model-viewer>
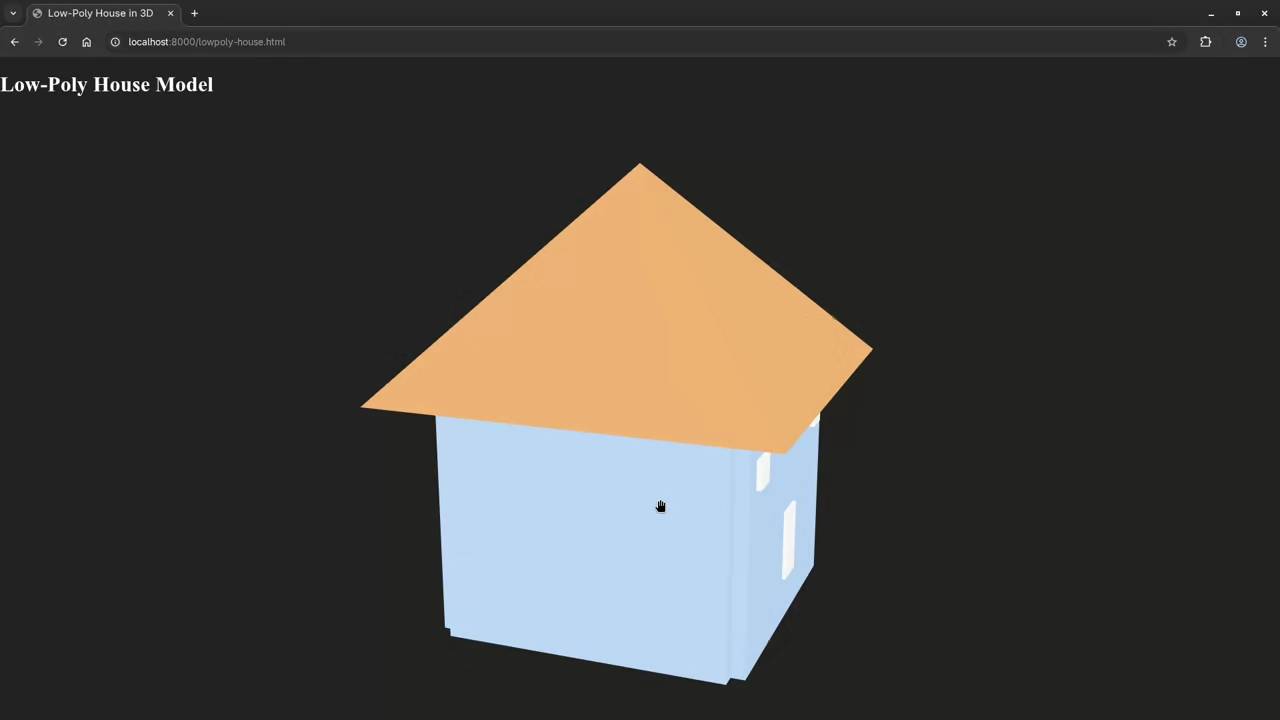
Once you have your .glb file, you can display it directly in a web browser using the <model-viewer> element. The <model-viewer> tag allows you to embed 3D models in your HTML page with simple controls like zoom, pan, and rotate.
Here’s a basic HTML example:
<!DOCTYPE html>
<html lang="en">
<head>
<meta charset="UTF-8">
<meta name="viewport" content="width=device-width, initial-scale=1.0">
<title>Low-Poly House in 3D</title>
<script type="module" src="https://unpkg.com/@google/model-viewer/dist/model-viewer.min.js"></script>
<style>
body {
margin: 0;
background: #222;
}
h1 { position: fixed; color: white; }
model-viewer {
width: 100vw;
height: 100vh;
}
</style>
</head>
<body>
<h1>Low-Poly House Model</h1>
<model-viewer src="lowpoly-house.glb" alt="Low Poly House" auto-rotate camera-controls></model-viewer>
</body>
</html>
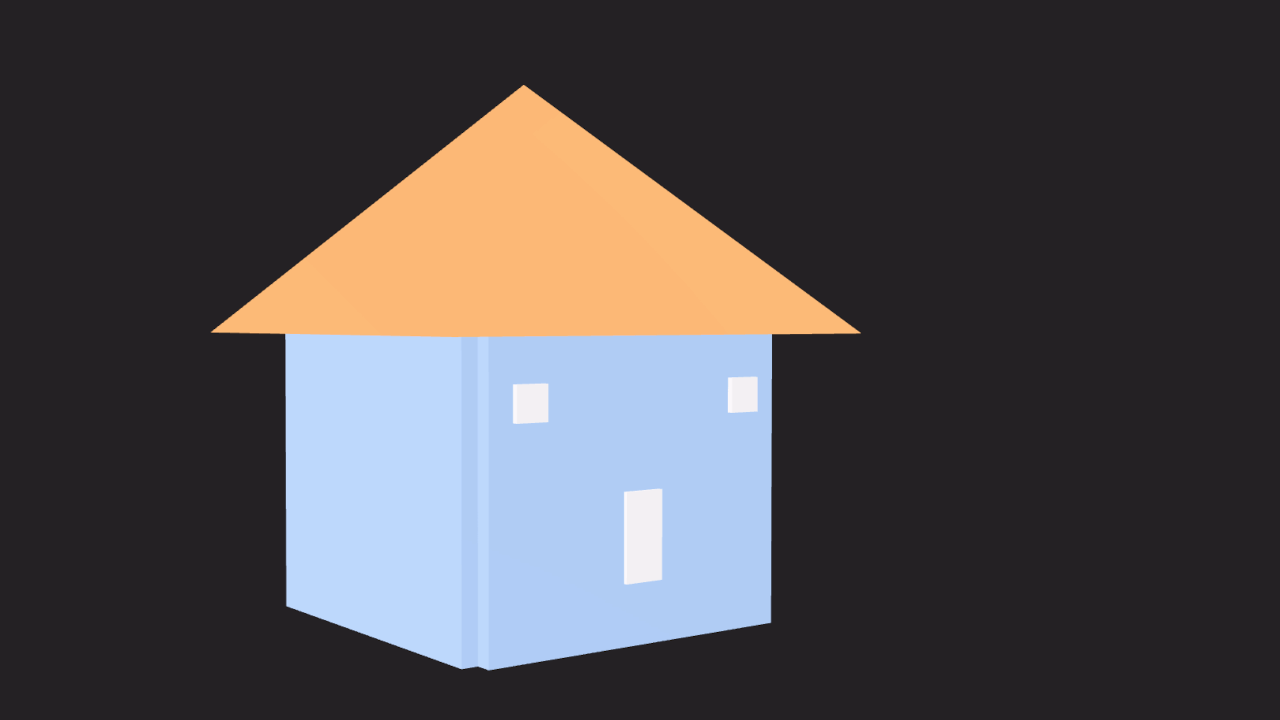
Simply replace "/path/to/lowpoly-house.glb" with the path to your saved .glb file. You can host this file locally or upload it to your web server. When you open the HTML file in your browser, the low-poly house will be fully interactive, allowing users to rotate, zoom, and pan around it.
Step 4: Enhance Your 3D Skills with My Books and Courses
If you are new to programming and 3D modeling, or want to deepen your knowledge, I have a couple of resources that can help you get started and master Python programming and Blender scripting:
- Learning Python: This book is a perfect starting point for beginners looking to learn Python programming. It covers all the fundamental concepts, making it ideal for anyone who wants to dive into coding.
- Mastering Blender Python API: Once you’re familiar with Python basics, this book will guide you through using Python for scripting within Blender, allowing you to automate tasks, create models, and much more.
- Learning Python Course: If you prefer a more interactive experience, check out my “Learning Python” course where you can get step-by-step guidance.
Step 5: Personalized Python Tutorials
If you need additional help or have specific questions about Blender scripting, Python, or any related topic, I offer one-on-one tutorials. Whether you’re looking to learn the basics of programming or need help with more advanced topics like Blender API scripting, I’m here to help!
Feel free to contact me for personalized Python tutorials.
Screenshots and Embedded Screencast
Don’t forget to check out my screencast on generating 3D models with Blender Python API. In the video, I walk through the entire process, from coding the script to displaying the model in the browser.
Conclusion
This tutorial shows how to use the Blender Python API to create a low-poly house and display it in your web browser using the <model-viewer> tag. Whether you’re a beginner or intermediate programmer, this step-by-step guide will help you get started with Blender scripting and web 3D models.
Let me know if you need any adjustments, and happy coding!
🚀 Recommended Resources
Disclosure: Some of the links above are referral links. I may earn a commission if you make a purchase at no extra cost to you.