
Generate Animated 3D Rings for the Web with Blender Python and model-viewer
Do you want to bring animated 3D models into your website without being a rendering expert? This post walks you through generating a stunning low poly animated ring model using **Blender’s Python API** and displaying it seamlessly on your blog using the Google **model-viewer** web component.
We will use a reliable complete Python script to automate the entire process overcoming common scripting hurdles in Blender’s background mode.
1. The Blender Python Script
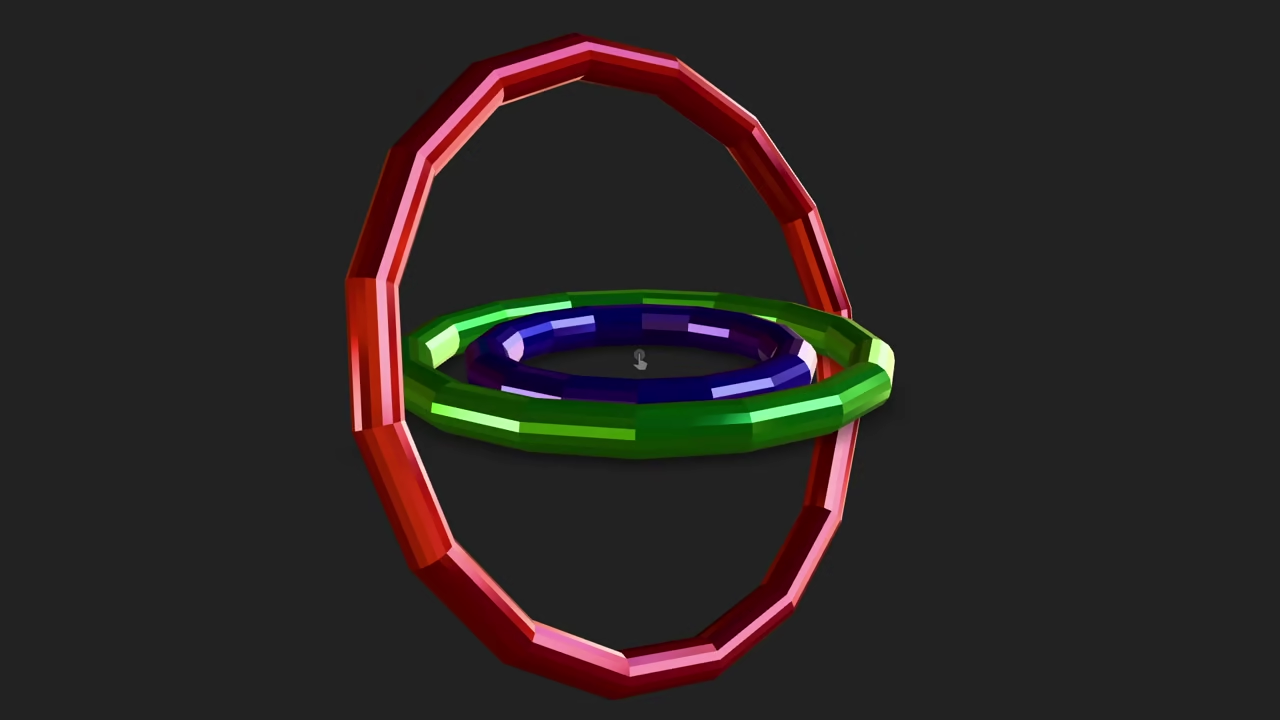
The following script automates the creation of three glossy animated rings sets up the camera and lighting and exports the final ready for web **GLB** file. We use simple keyframes for stability meaning the animation will loop although with a slight ease in/ease out effect Bezier interpolation due to a known Blender bug in this specific workflow.
import bpy
import math
import os
# --- Configuration ---
BLENDER_FILE_NAME = "low-poly-animated-rings.blend"
EXPORT_FILE_NAME = "low-poly-animated-rings.glb"
# Determine script directory for saving/exporting files
SCRIPT_DIR = os.path.dirname(os.path.abspath(__file__)) if '__file__' in globals() else (os.path.dirname(bpy.data.filepath) if bpy.data.filepath else os.getcwd())
# Geometry and Animation Settings
LOW_POLY_VERTICES = 16
RING_THICKNESS = 0.3
ANIMATION_FRAMES = 60
FULL_ROTATION = 2 * math.pi
# Ring Data: (Name, Major Radius, Material Color RGB, Axis)
rings_data = [
("Ring_Red", 4.0, (0.8, 0.1, 0.1), 'X'),
("Ring_Green", 3.0, (0.1, 0.8, 0.1), 'Y'),
("Ring_Blue", 2.0, (0.1, 0.1, 0.8), 'Z'),
]
# --- Utility Functions ---
def clear_scene():
"""Removes all objects from the current scene."""
bpy.ops.object.select_all(action='SELECT')
bpy.ops.object.delete(use_global=False)
def create_glossy_material(name, color_rgb):
"""Creates a glossy metallic material."""
if name in bpy.data.materials: return bpy.data.materials[name]
mat = bpy.data.materials.new(name=name)
mat.use_nodes = True
bsdf = mat.node_tree.nodes["Principled BSDF"]
bsdf.inputs['Base Color'].default_value = color_rgb + (1.0,)
bsdf.inputs['Roughness'].default_value = 0.1
bsdf.inputs['Metallic'].default_value = 0.8
return mat
def apply_material(obj, mat):
"""Applies a material to a given object."""
if obj.data.materials: obj.data.materials[0] = mat
else: obj.data.materials.append(mat)
# --- Main Generation Logic ---
def generate_animated_rings():
clear_scene()
ring_objects = []
# --- 1. Create Geometry and Materials ---
for name, radius, color_rgb, axis in rings_data:
mat = create_glossy_material(f"{name}_Mat", color_rgb)
bpy.ops.mesh.primitive_torus_add(
major_segments=LOW_POLY_VERTICES,
minor_segments=LOW_POLY_VERTICES,
major_radius=radius,
minor_radius=RING_THICKNESS,
align='WORLD',
location=(0, 0, 0)
)
ring = bpy.context.object
ring.name = name
apply_material(ring, mat)
ring_objects.append({'obj': ring, 'axis': axis})
# --- 2. Animate Rotation (Simple Keyframes Only) ---
bpy.context.scene.frame_start = 1
bpy.context.scene.frame_end = ANIMATION_FRAMES
for ring_info in ring_objects:
ring = ring_info['obj']
axis = ring_info['axis']
if not ring.animation_data:
ring.animation_data_create()
# Keyframe 1: Start rotation (Frame 1)
bpy.context.scene.frame_set(1)
ring.rotation_euler.x = 0
ring.rotation_euler.y = 0
ring.rotation_euler.z = 0
ring.keyframe_insert(data_path="rotation_euler", frame=1)
# Keyframe 2: Full rotation (Frame ANIMATION_FRAMES)
bpy.context.scene.frame_set(ANIMATION_FRAMES)
# Set rotation for the specific axis
if axis == 'X':
ring.rotation_euler.x = FULL_ROTATION
elif axis == 'Y':
ring.rotation_euler.y = FULL_ROTATION
else: # 'Z'
ring.rotation_euler.z = FULL_ROTATION
ring.keyframe_insert(data_path="rotation_euler", frame=ANIMATION_FRAMES)
# --- 3. Add Camera and Light ---
# Camera setup
bpy.ops.object.camera_add(location=(0, -8, 2), rotation=(math.radians(70), 0, 0))
bpy.context.scene.camera = bpy.context.object
# Light setup (Confirmed working fix)
bpy.ops.object.light_add(type='POINT', location=(5, -5, 5))
light_object = bpy.context.object
light_object.data.energy = 1000.0
# --- 4. Save and Export ---
blend_save_path = os.path.join(SCRIPT_DIR, BLENDER_FILE_NAME)
output_path = os.path.join(SCRIPT_DIR, EXPORT_FILE_NAME)
# Save .blend file
try:
bpy.ops.wm.save_as_mainfile(filepath=blend_save_path)
print(f"INFO: Successfully saved .blend file to: {blend_save_path}")
except RuntimeError as e:
print(f"WARNING: Failed to save .blend file. Reason: {e}")
# Export to GLB
bpy.ops.object.select_all(action='SELECT') # Select all objects for export
try:
bpy.ops.export_scene.gltf(
filepath=output_path,
export_format='GLB',
export_apply=True,
export_yup=True,
export_animations=True, # Exports the rotation animation
use_selection=True
)
print(f"INFO: Successfully exported GLB file to: {output_path}")
except RuntimeError as e:
print(f"ERROR: Failed to export GLB file. Reason: {e}")
# --- Execution ---
if __name__ == "__main__":
generate_animated_rings()
print(f"\n--- Animated Rings Generation Complete. \u2705 ---")
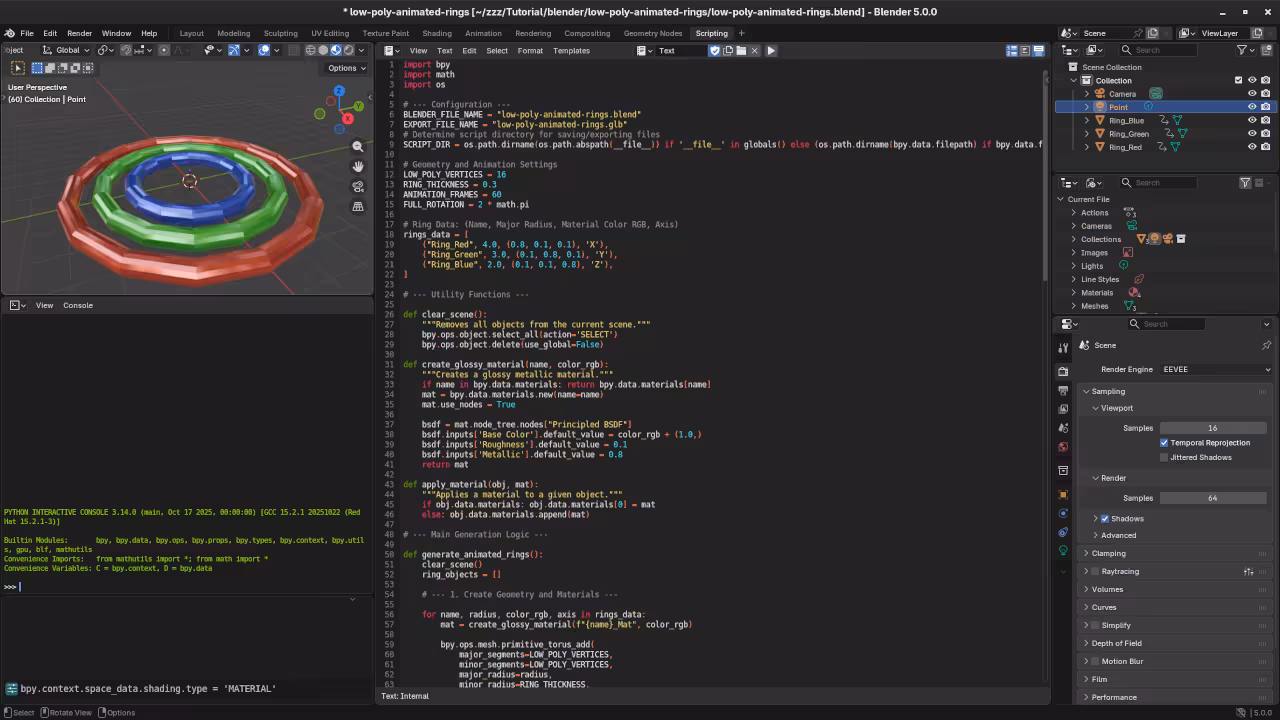
2. How to Run the Python Script
To execute this script you must run **Blender** from your computers command line Terminal on macOS/Linux or Command Prompt/PowerShell on Windows.
Running the Command
- Save the Code: Save the script above as a file named
low_poly_rings.py. - Open Terminal/Command Prompt.
- Run the command: Execute Blender in background mode (
-b) and tell it to run your script (-P). Replace the paths below with the actual location of your Blender executable and your script.
/path/to/blender -b -P /path/to/low_poly_rings.py Upon successful completion this command will save two files in the same directory as your script:
low-poly-animated-rings.blendlow-poly-animated-rings.glb(The file you will use on the web)
3. Lighting Your Scene with HDR Images
In 3D graphics especially for realistic rendering we use **Image Based Lighting IBL** to illuminate the scene using high dynamic range images. This allows shiny objects like our glossy rings to reflect the environment naturally.
Your rings are lit by the **Courtyard EXR** file which is a standard High Dynamic Range Imaging HDRI texture shipped with **Blender 5.0 LTS**. This image provides natural lighting and realistic reflections for the glossy materials defined in the script.
4. Web Browser Support for Image Formats
When deciding which HDRI or texture format to use on a website **browser support** is crucial. Here is a comparison of the mentioned formats and their web support:
| Format | Type | Web Browser Support | Open Source Alternative |
|---|---|---|---|
| .exr | HDR | Poor (Requires processing/conversion) | .hdr (Radiance) |
| .hdr | HDR | Poor (Requires processing/conversion) | .hdr (Radiance) |
| .ktx | Texture | Good (Supported via WebGL/WebGPU) | .ktx (Open Standard) |
| .ktx2 | Texture | Excellent (Modern Standard via WebGL 2/WebGPU) | .ktx2 (Open Standard) |
Conclusion: For maximum modern browser support of animated 3D models and textures **.glb** which includes textures is the best choice and textures within the .glb or for IBL should ideally use formats supported by **WebGPU/WebGL** like **.ktx2**. The **.exr** file must be processed server side or by the model-viewer component before display.
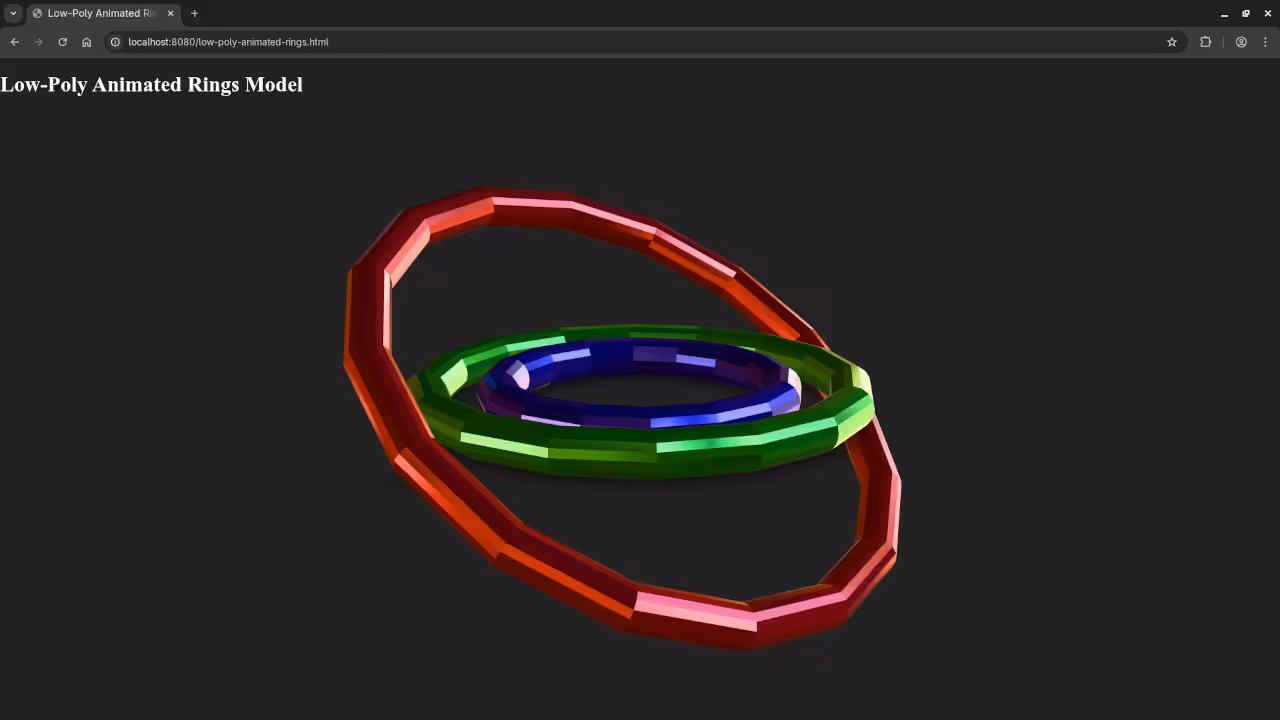
5. Displaying the Rings with model-viewer
The easiest way to embed your animated .glb file into a blog post is by using the **model-viewer** component. It handles lighting controls and animation automatically.
- Add the script tag to the head of your HTML or blog post template:
<script type="module" src="https://ajax.googleapis.com/ajax/libs/model-viewer/3.5.0/model-viewer.min.js"></script> - Insert the component: Use the tag pointing to your exported
.glbfile.<model-viewer src="/path/to/low-poly-animated-rings.glb" alt="Three animated low-poly rings" shadow-intensity="1" camera-controls auto-rotate exposure="1.5" animation-name="default" autoplay loop style="width: 100%; height: 500px;" > </model-viewer>
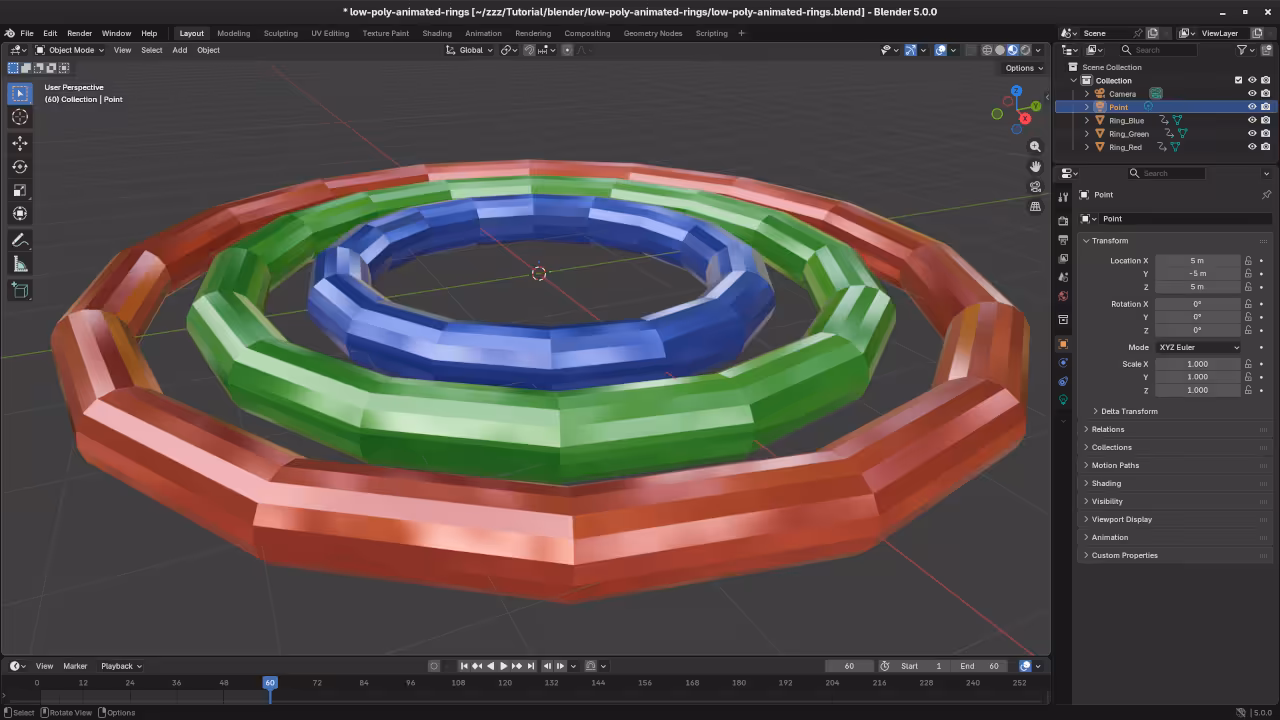
📸 Screenshots & Screencast
About the Author
If you are looking to deepen your Python and Blender skills check out my resources:
- Book: Learning Python
- Book: Mastering Blender Python API
- Course: Learning Python
- Tutorials: I am available for one on one online Python tutorials including Blender Contact Me
🚀 Recommended Resources
Disclosure: Some of the links above are referral links. I may earn a commission if you make a purchase at no extra cost to you.